Unveiling FinderOne136: A game-changing high-speed LCD 3D printer redefining precision, speed, and convenience in additive manufacturing.
The post Introducing FinderOne136: High-Speed LCD 3D Printing first appeared on Trendy Gadget.
Unveiling FinderOne136: A game-changing high-speed LCD 3D printer redefining precision, speed, and convenience in additive manufacturing.
The post Introducing FinderOne136: High-Speed LCD 3D Printing first appeared on Trendy Gadget.
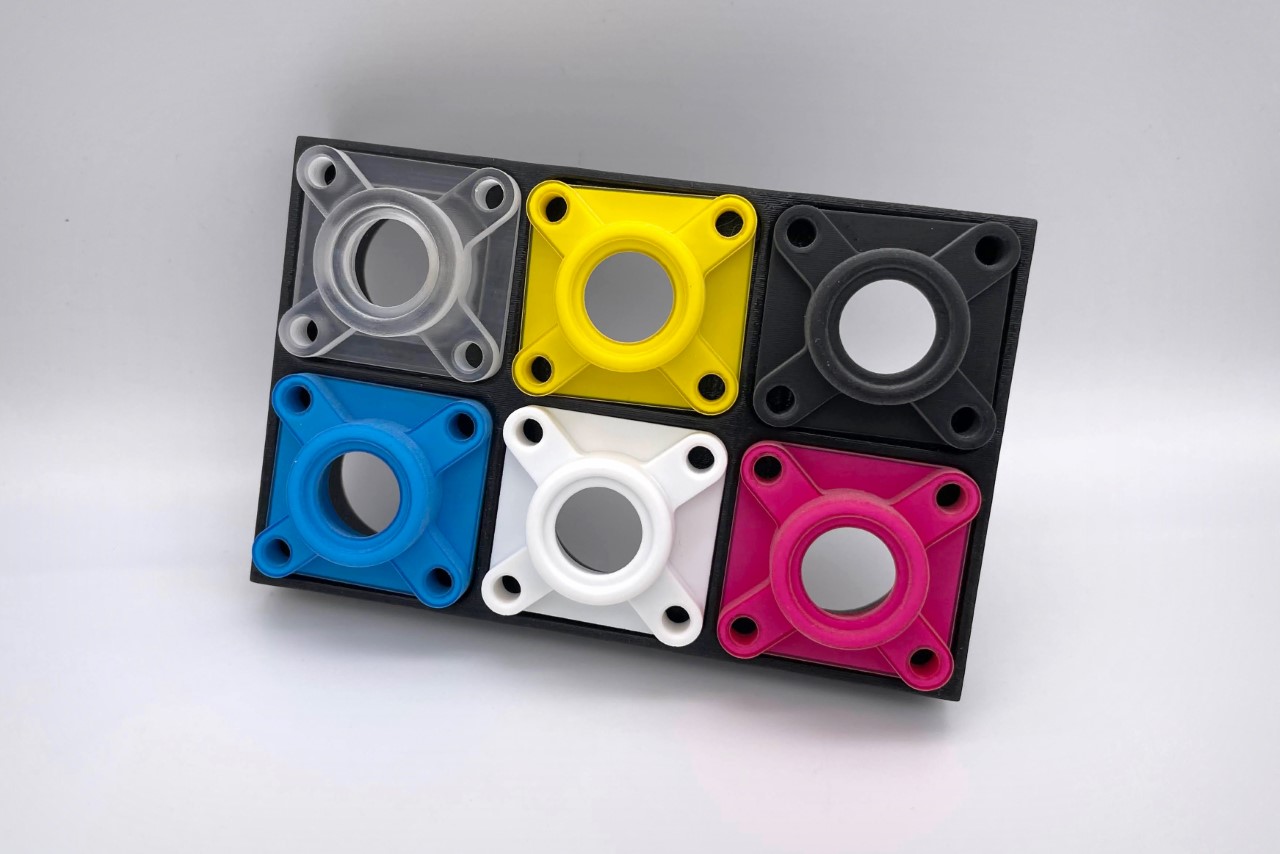
Haters will say this video is playing in reverse, but in fact, it’s a clever bit of scientific trickery that causes these dominoes to stand up when nudged. Convention (and gravity) dictates that dominoes must collapse when knocked over, creating a glorious chain reaction that’s fun to watch, but I’d argue that Yuichiro Morimoto’s dominoes are much more awe-inspiring.
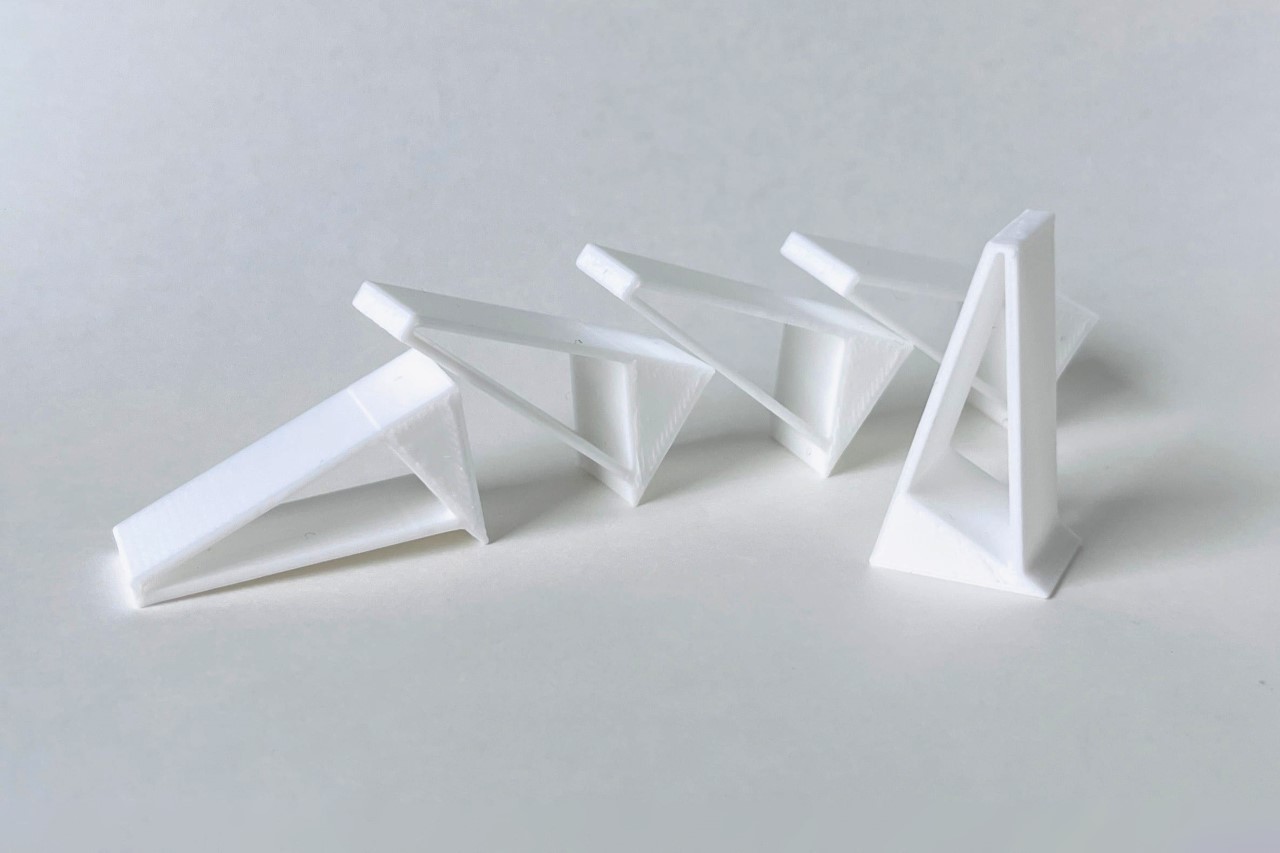
Rather amusingly called the NOMIDO (for its unique topsy-turvy reinterpretation of the domino), Morimoto’s toys stand up in a straight line when nudged. Unlike conventional dominoes, they don’t come with the slab-shaped appearance, but rather have a unique triangular side profile with a weighted bottom that helps them hold their vertical orientation with a fair amount of stability.
Designer: Yuichiro Morimoto
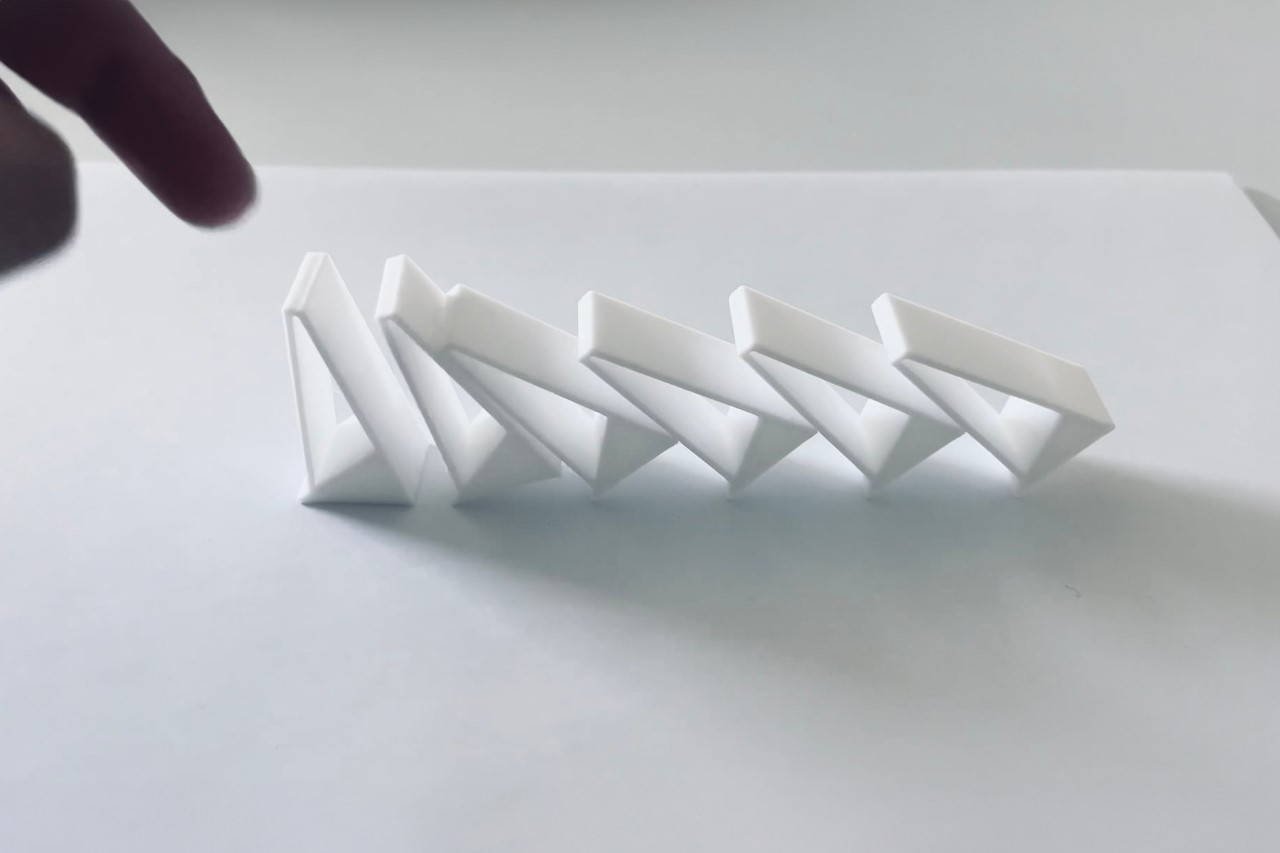
Designed as a fun fidget toy, the NOMIDO is a clever combination of art and science. The NOMIDO’s unique shape helps it achieve this unique feat, using a combination of geometry as well as a well-positioned center of gravity to create the illusion. Each NOMIDO is made to achieve stability when standing upright. The hollow design features a heavy-set base (along with a slightly protruding edge on one side), which gives it enough kinetic energy when knocked to end up standing upright. Stack multiple of them together and they’ll transfer the energy linearly, creating a chain reaction of dominos jumping up instead of falling down.
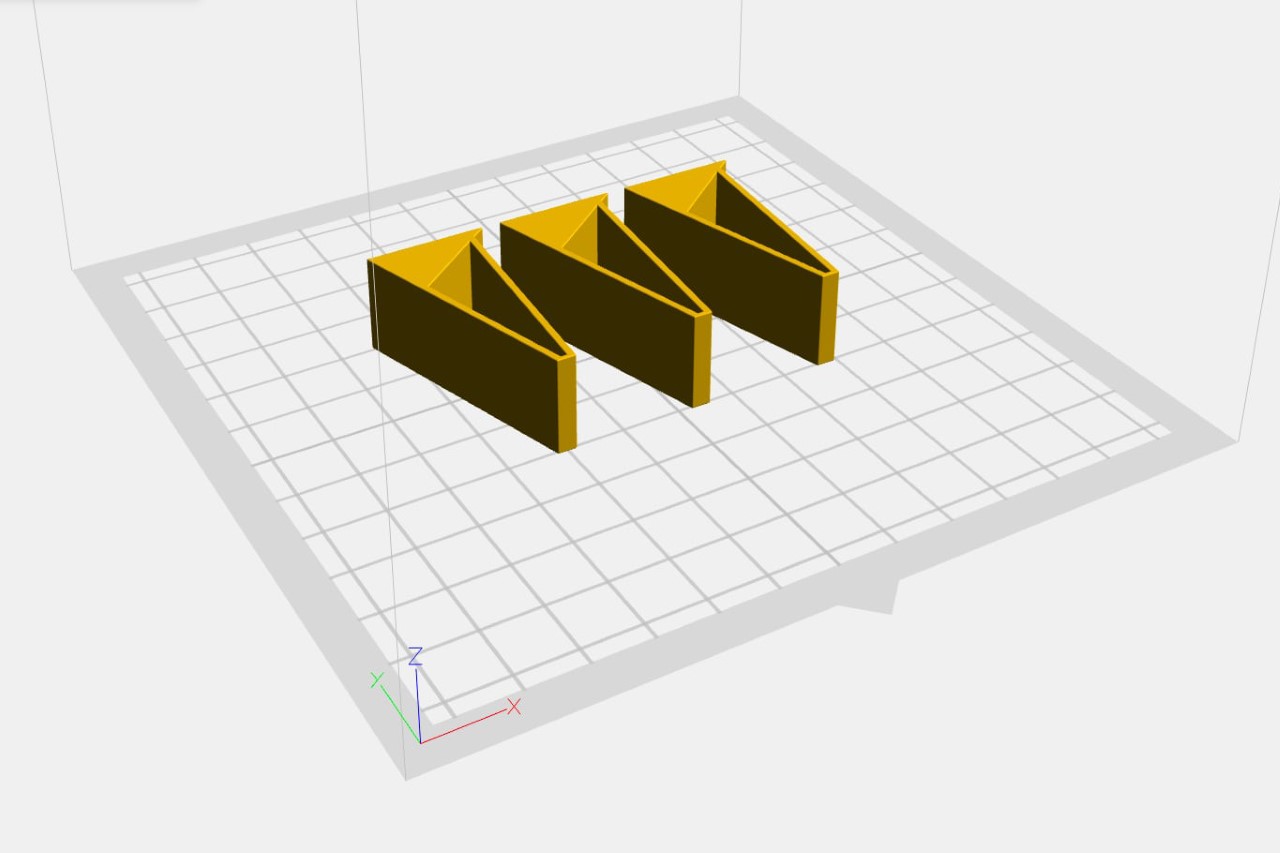
There’s beauty in watching the NOMIDOs in action, but Morimoto believes the experience is much more enjoyable when performed on your own. The 3D CAD file for the NOMIDO is available on Morimoto’s website for ¥3,000 (almost $21 USD), and anyone can buy the file and print out their own set of NOMIDOs to tinker and play with!
The post Watch How These Gravity-Defying 3D-Printed Dominoes Stand Up Instead Of Falling Over first appeared on Yanko Design.
If you flip your plastic bottle of Coca-Cola or Pepsi or Dasani over and look at the bottom, chances are you’ll see a triangle with the number ‘1’ inside it. This number corresponds with the recyclability code of PET or PolyEthylene Terephthalate, the plastic commonly used in bottles, jars, clear containers, and other food-holding devices. PET is known for its clear nature and food-safe properties, but it’s also the easiest to recycle plastic that’s commonly available… a feature the Polyformer uses to its advantage.
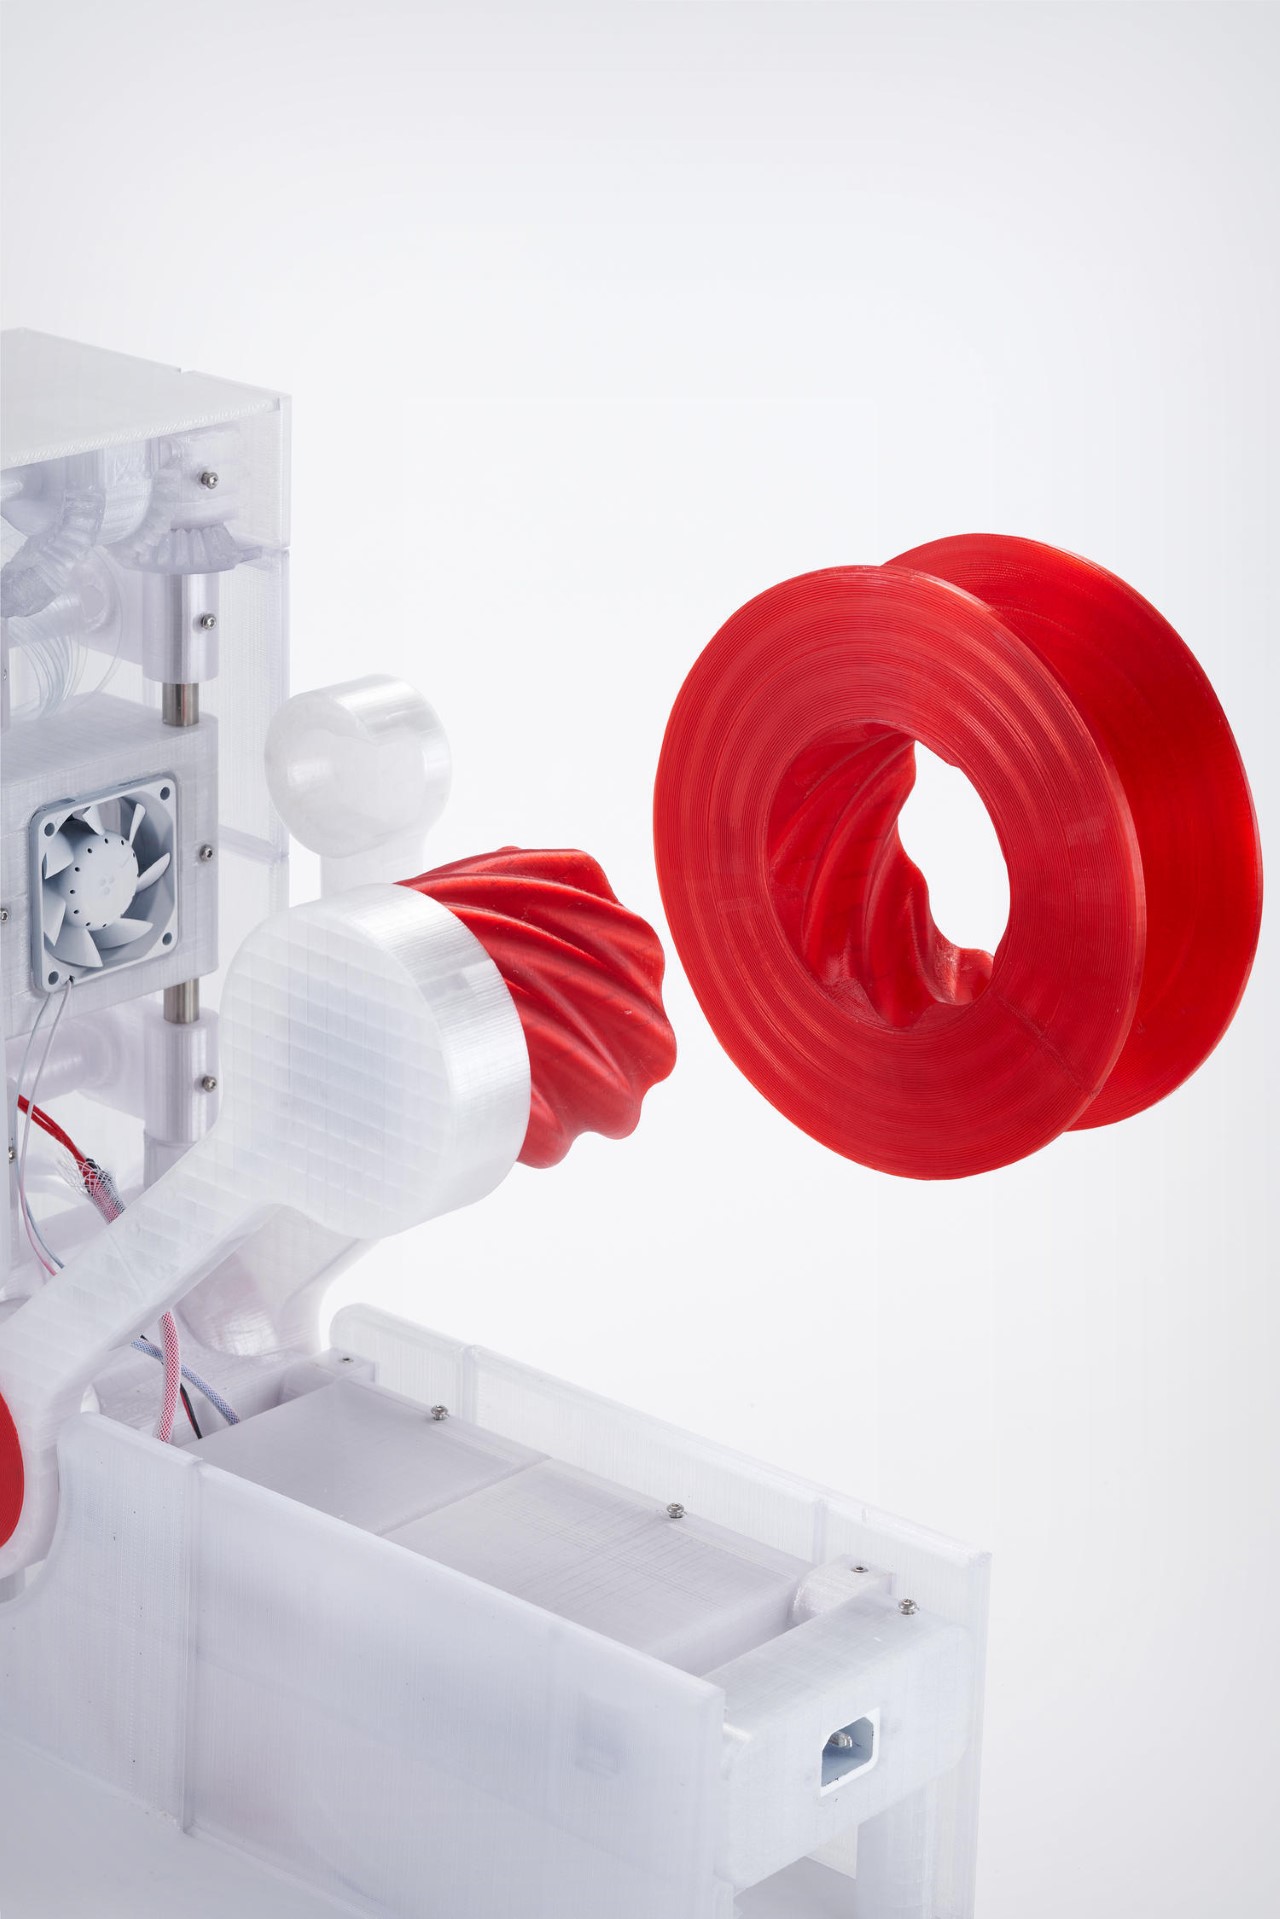
The Polyformer is a clever appliance that turns your waste plastic bottle into a clear 3D printing filament. It’s a cheap, compact, and open-source machine that cuts the bottle into a thin ribbon that gets melted and extruded into a filament. The filament is then wound around a spool, which can then be used by other 3D printers to print objects. The best part? A majority of the Polyformer’s design is made entirely from 3D printed parts too, acting like the perfect proof of concept!
Designer: Reiten Cheng
Click Here to view instructions on how to build your own Polyformer
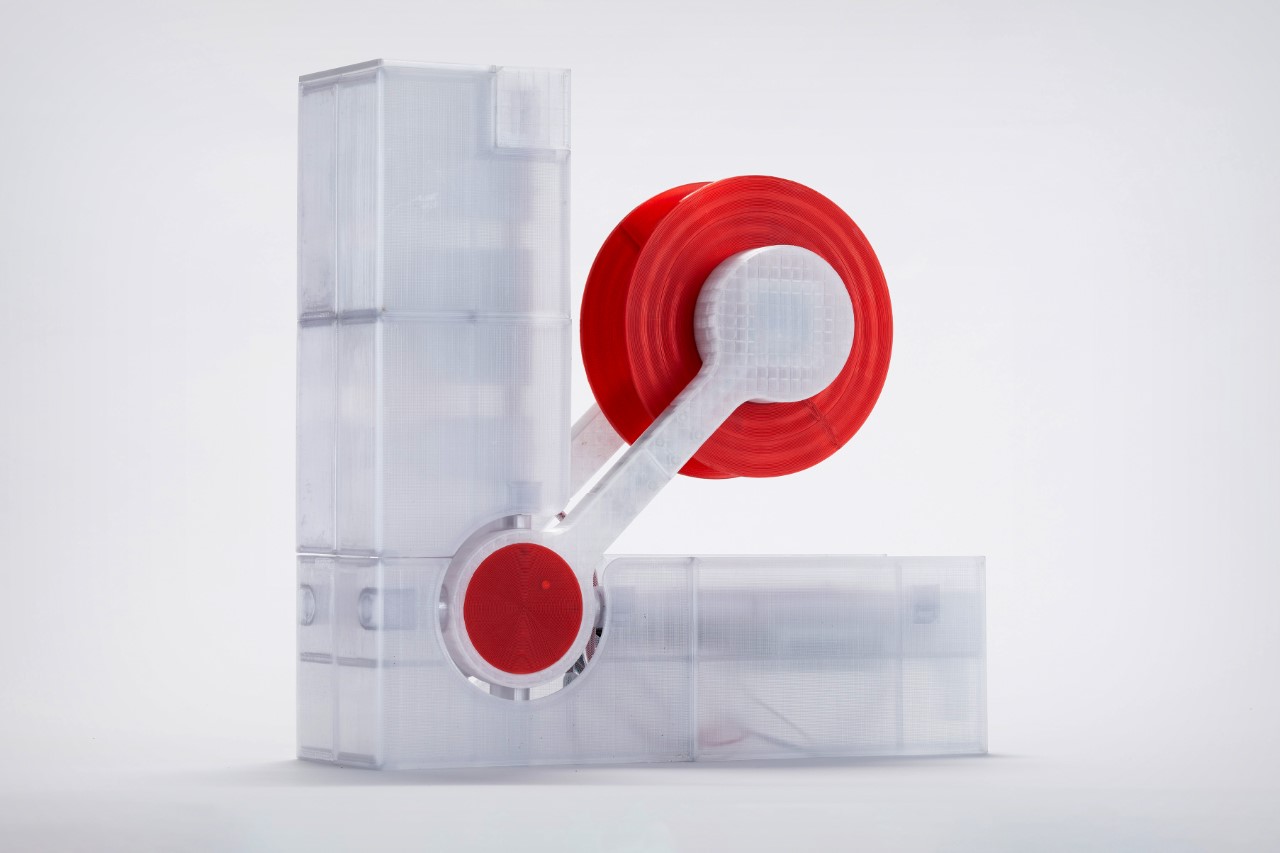

Designed by Reiten Cheng, a student at the ArtCenter College of Design in California, the Polyformer is a simple product that anyone can build on their own with a few store-bought parts and a 3D printer. “The modular architecture allows users to easily swap out parts and modify the machine to their liking,” Cheng says. “The unique vertical L shape allows the users to interact easily with the machine and also minimizes the amount of space that the machine takes.”
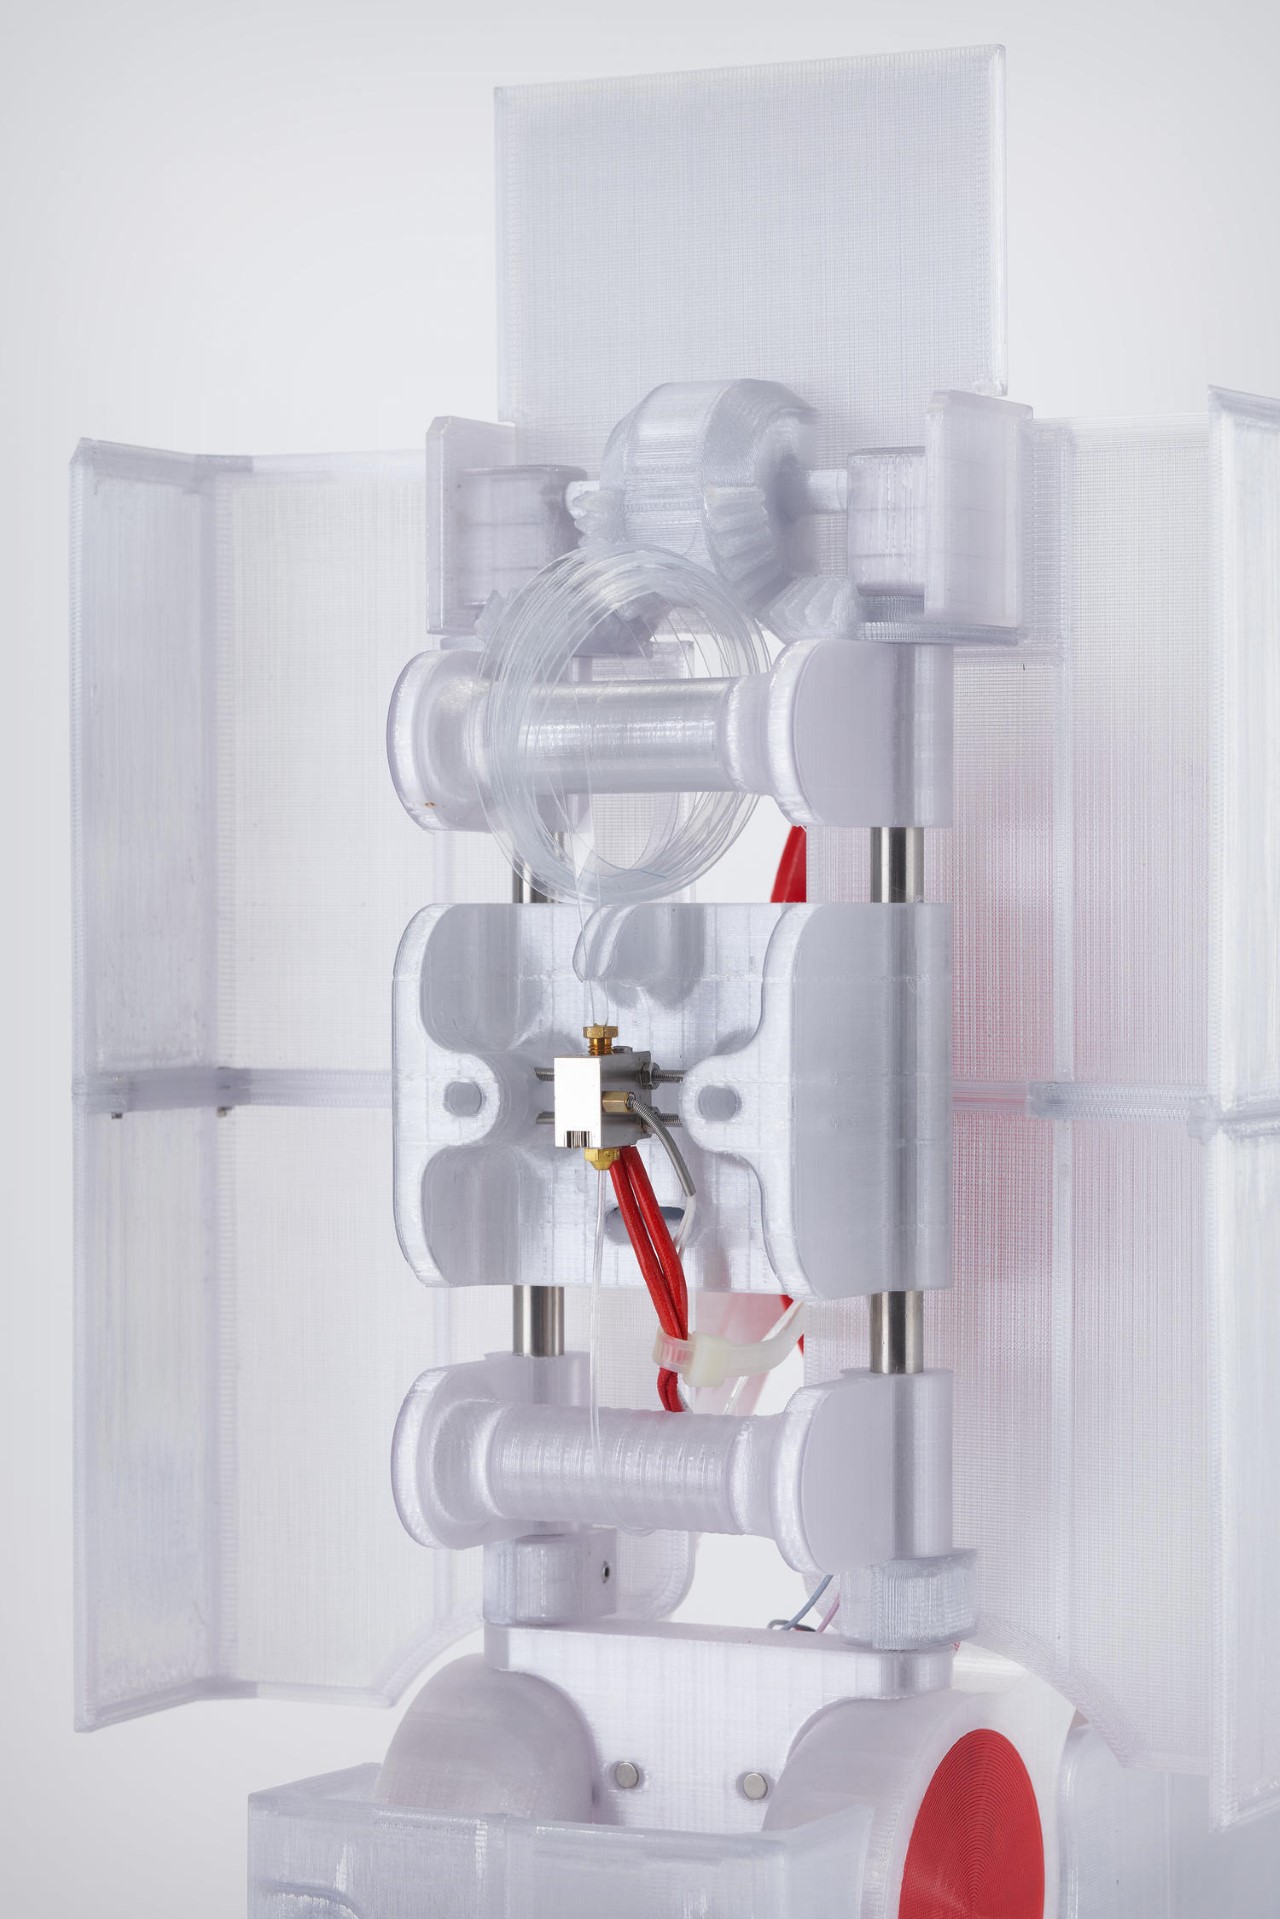
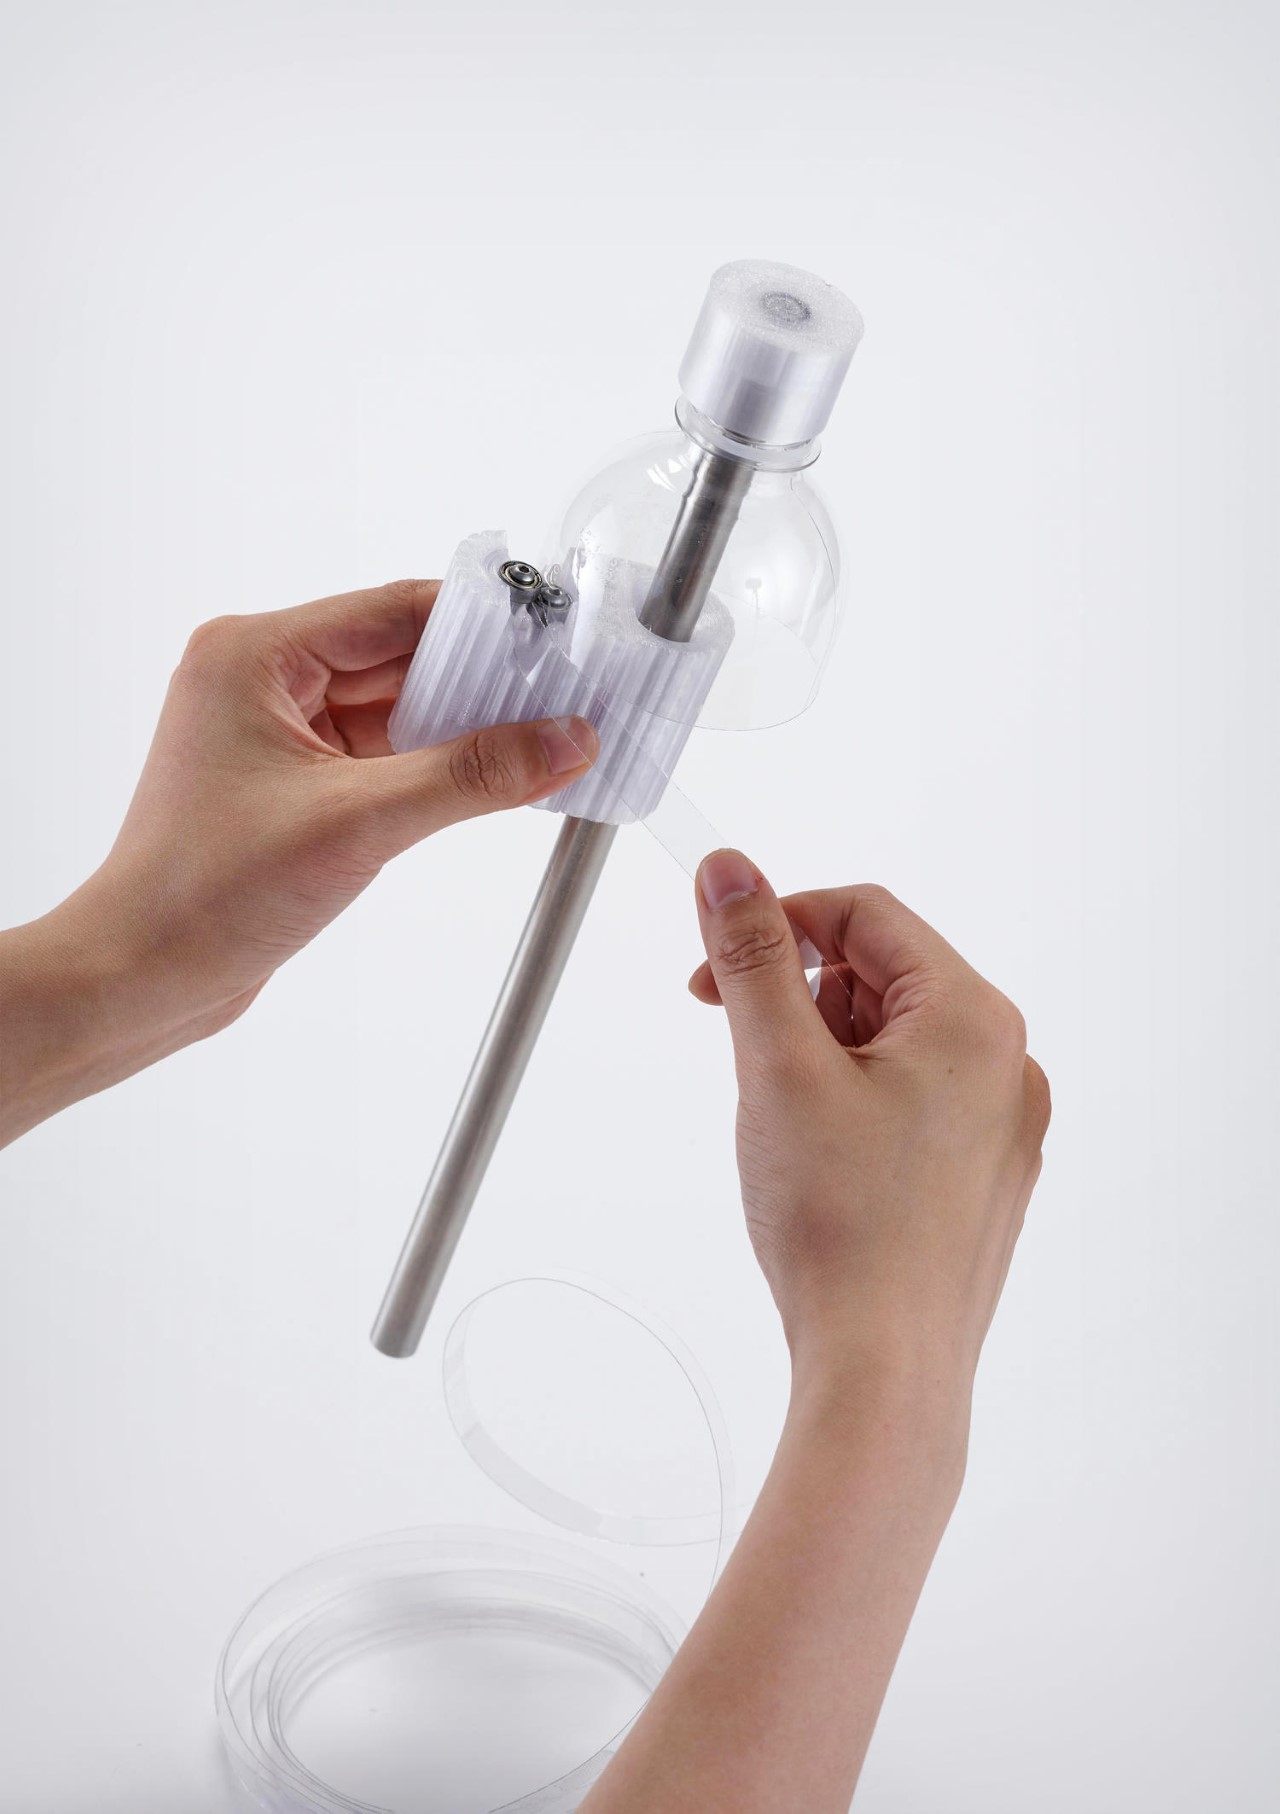
The Polyformer starts by stripping standard PET bottles into a uniform ribbon. Once the bottle’s been stripped away, the ribbon gets fed into a repurposed hot-end that uses a brass nozzle to extrude the melted plastic into a 1.75mm filament. The filament is then directed to the motorized spool, which rotates and collects it to be used later.
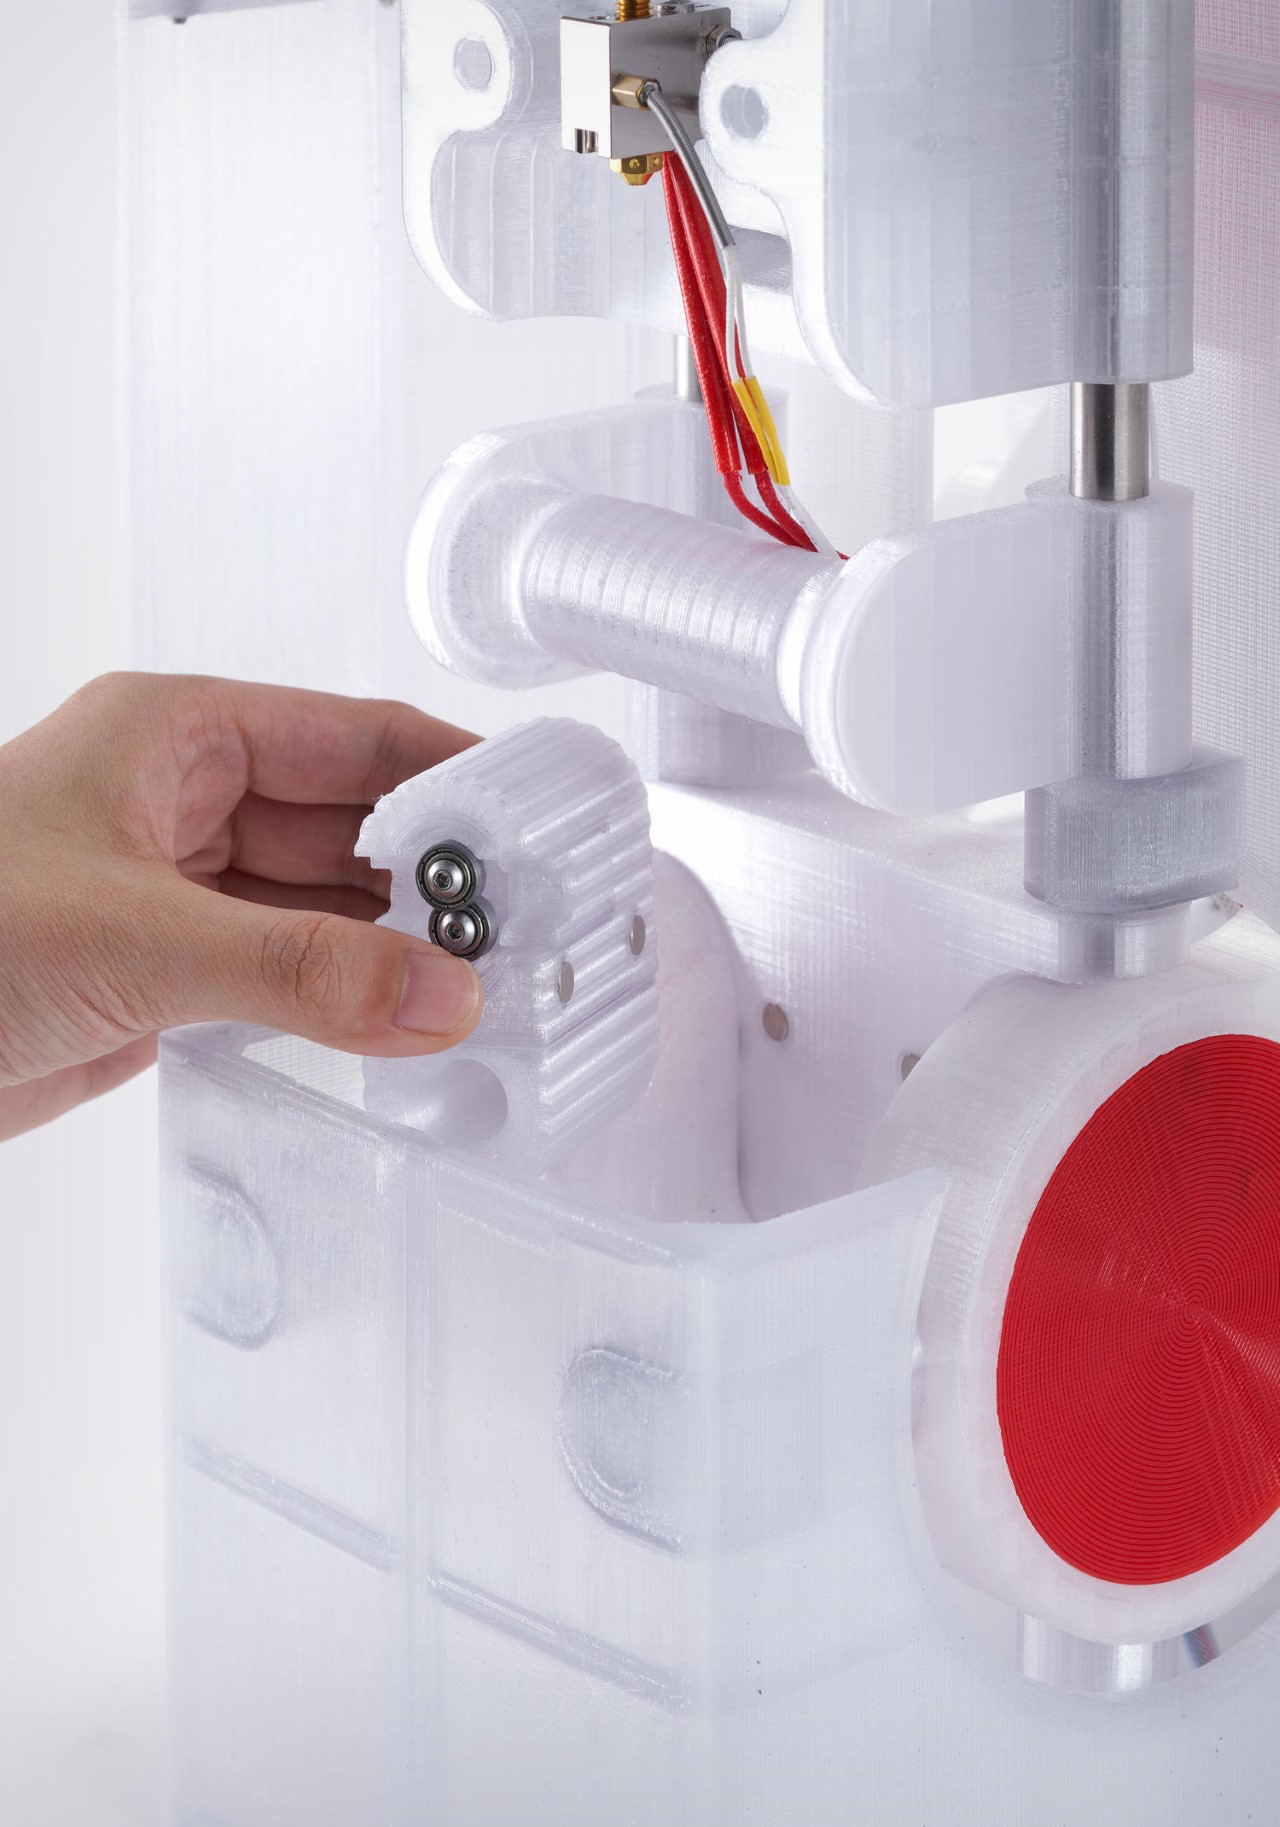
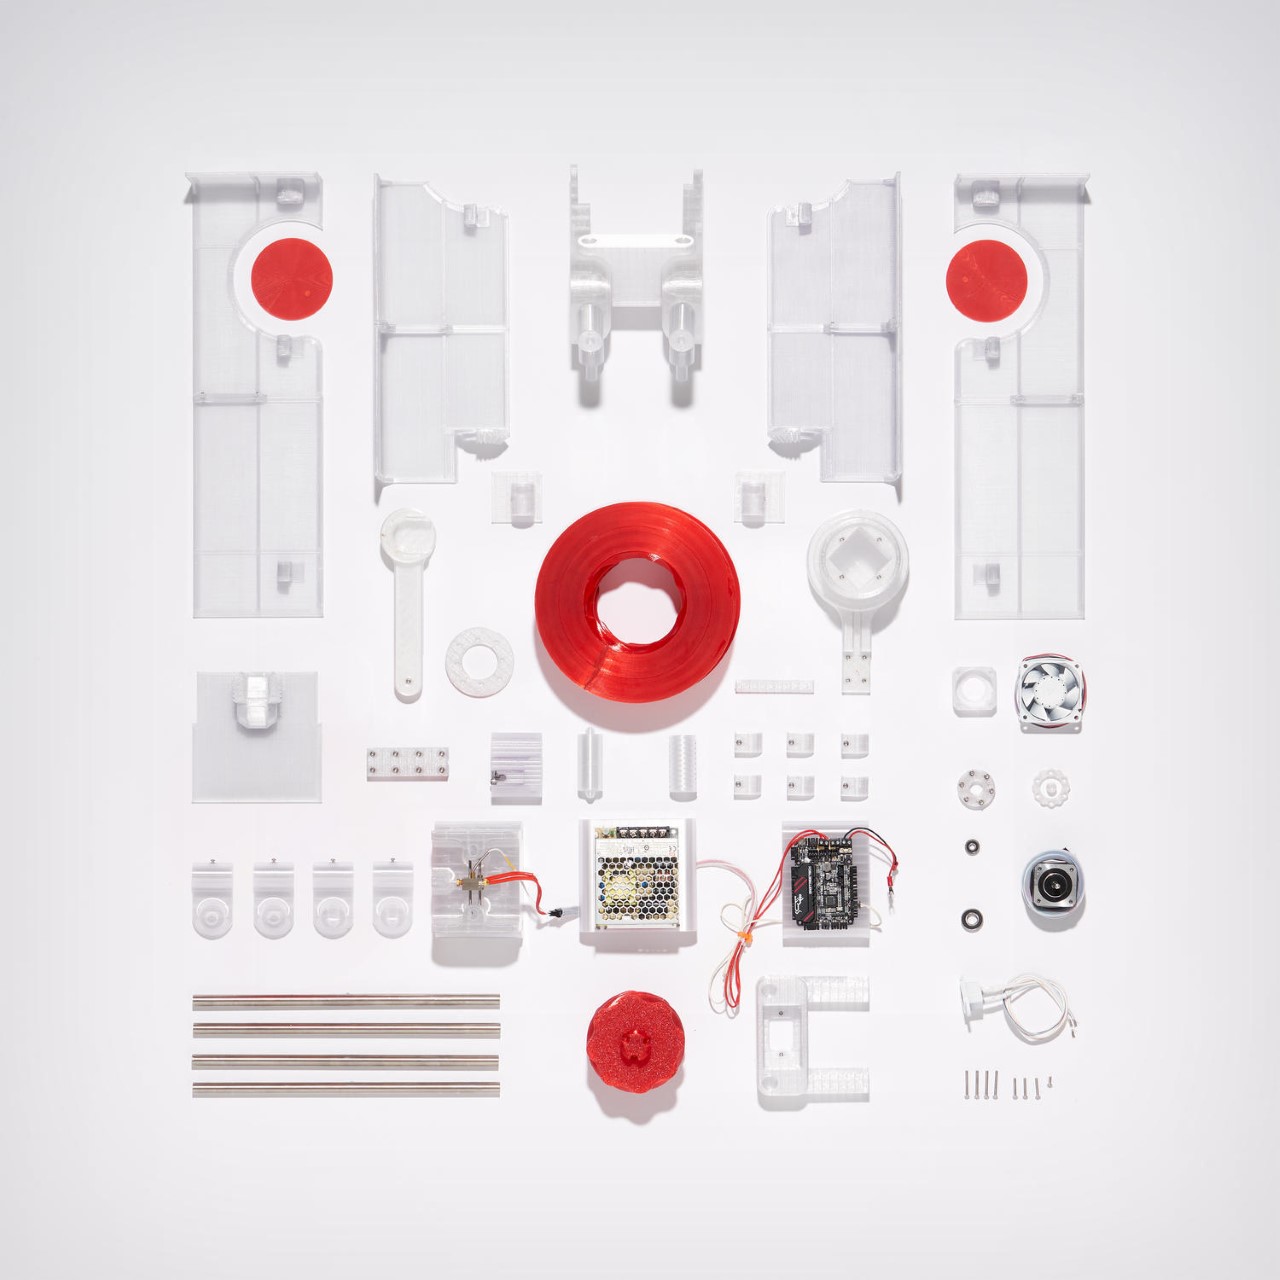
The entire product uses off-the-shelf parts and 3D-printed components. In fact, Cheng even open-sourced the Polyformer so that you can build your own. The files are available on the Polyformer GitHub page along with a detailed guide on how to assemble the device. Cheng’s website also mentions where you can buy off-the-shelf components like the aluminum heat block and the brass nozzle for the extrusion.
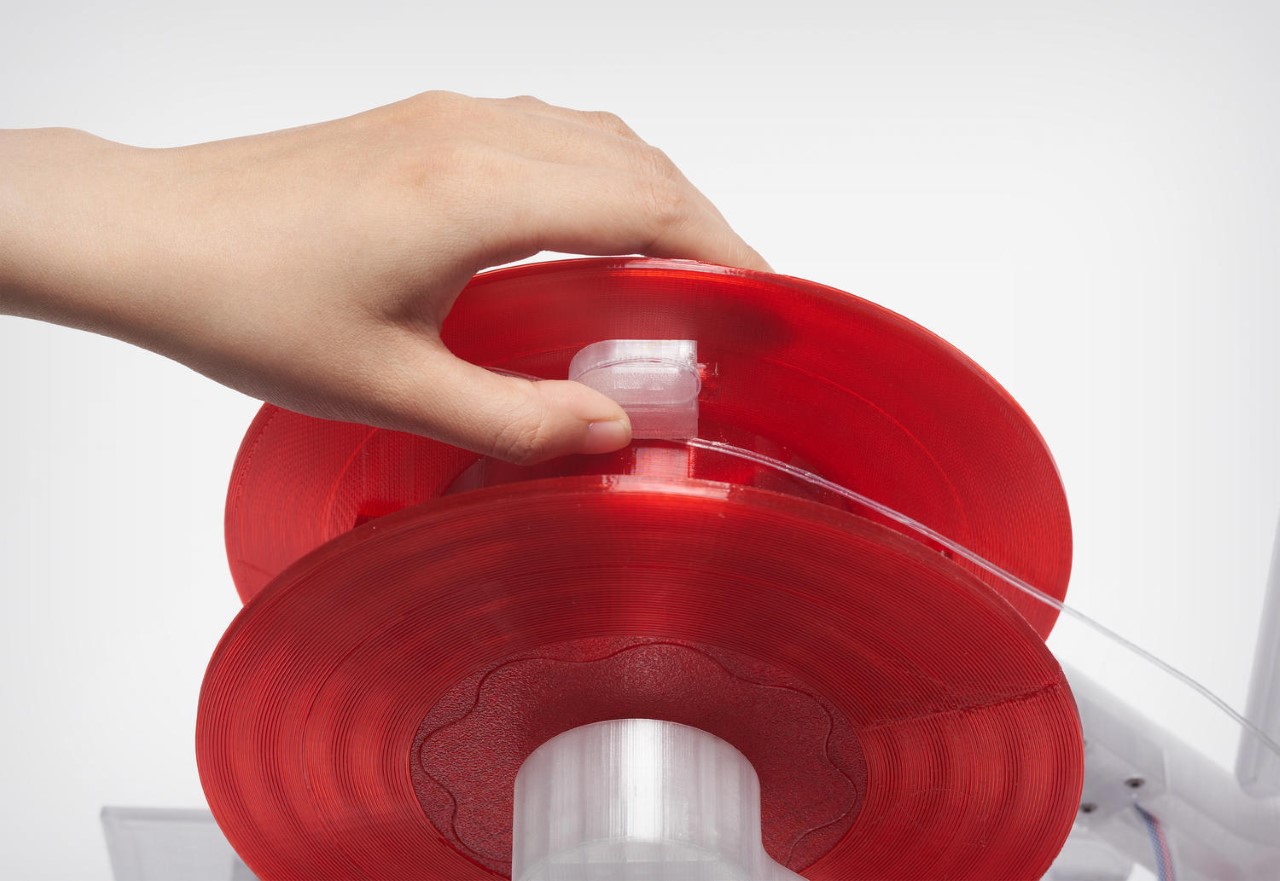
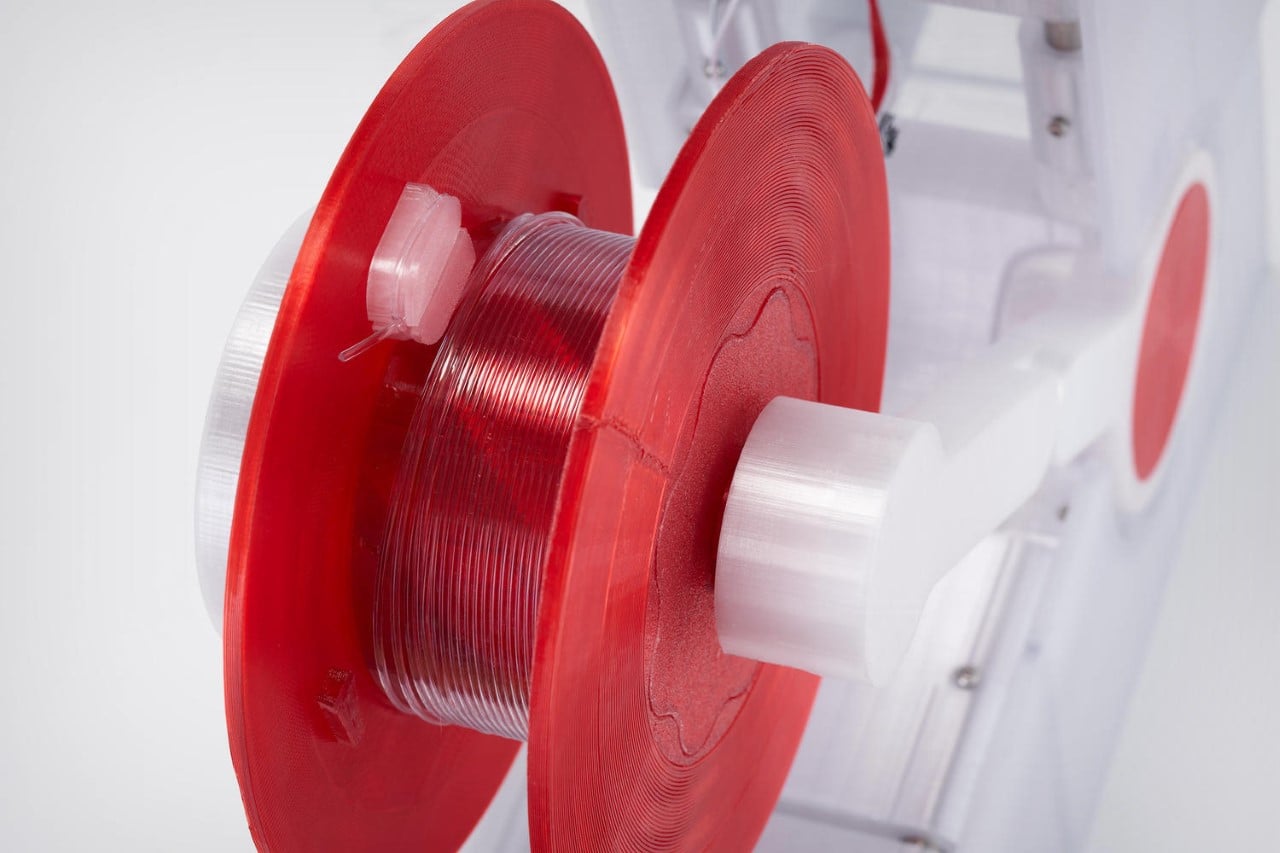
The Polyformer makes a unique pitch to help reduce plastic waste by practically giving plastic bottles a new life. This cradle-to-cradle approach is pretty much reinforced by the Polyformer itself, which Reiten printed out using 3D filament from recycled bottles, giving the entire appliance a beautiful translucent finish.
The Polyformer also went on to win multiple design awards like the James Dyson Award, the Core77 Award, and even secured 3rd place for the Hackaday Prize.
Click Here to view instructions on how to build your own Polyformer
The post Make Your Own 3D Printing Filament Using Recycled Plastic Bottles first appeared on Yanko Design.
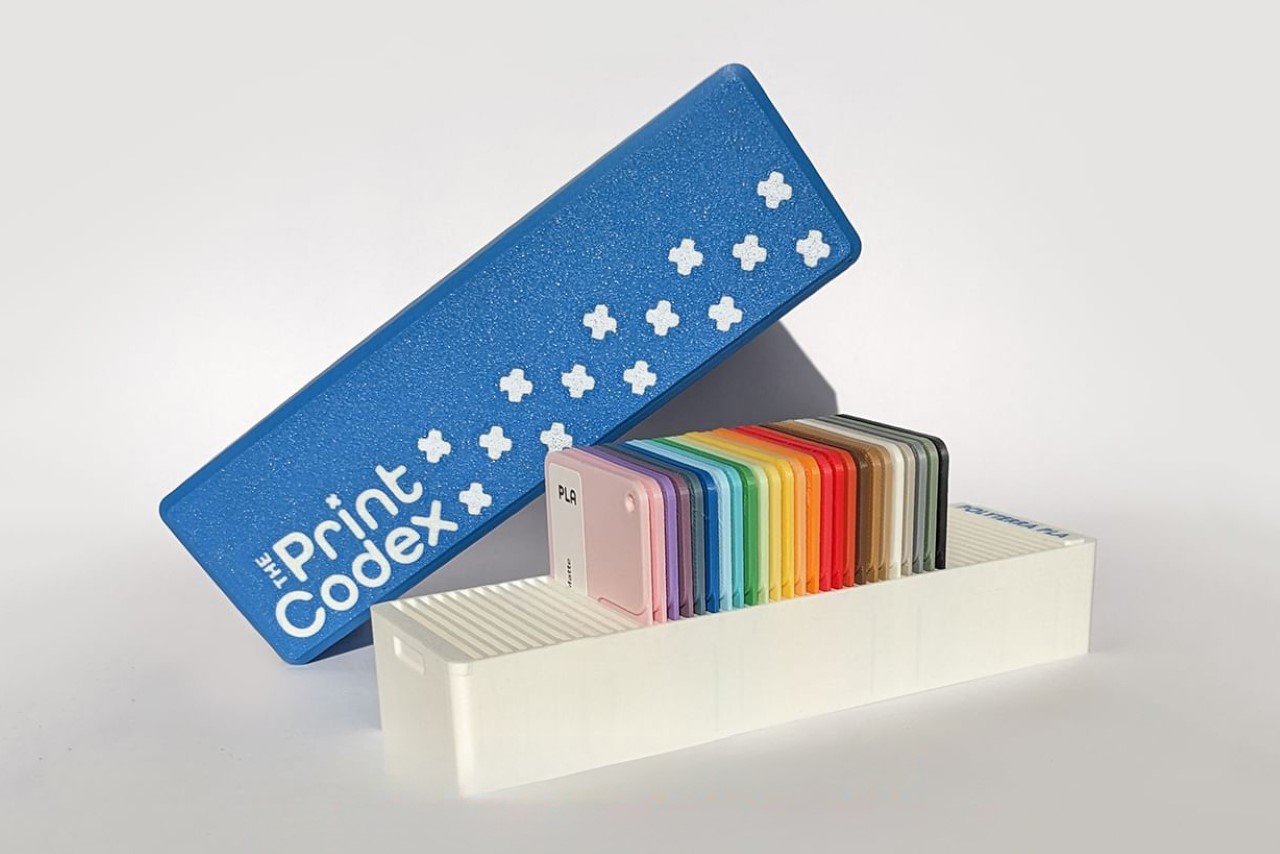
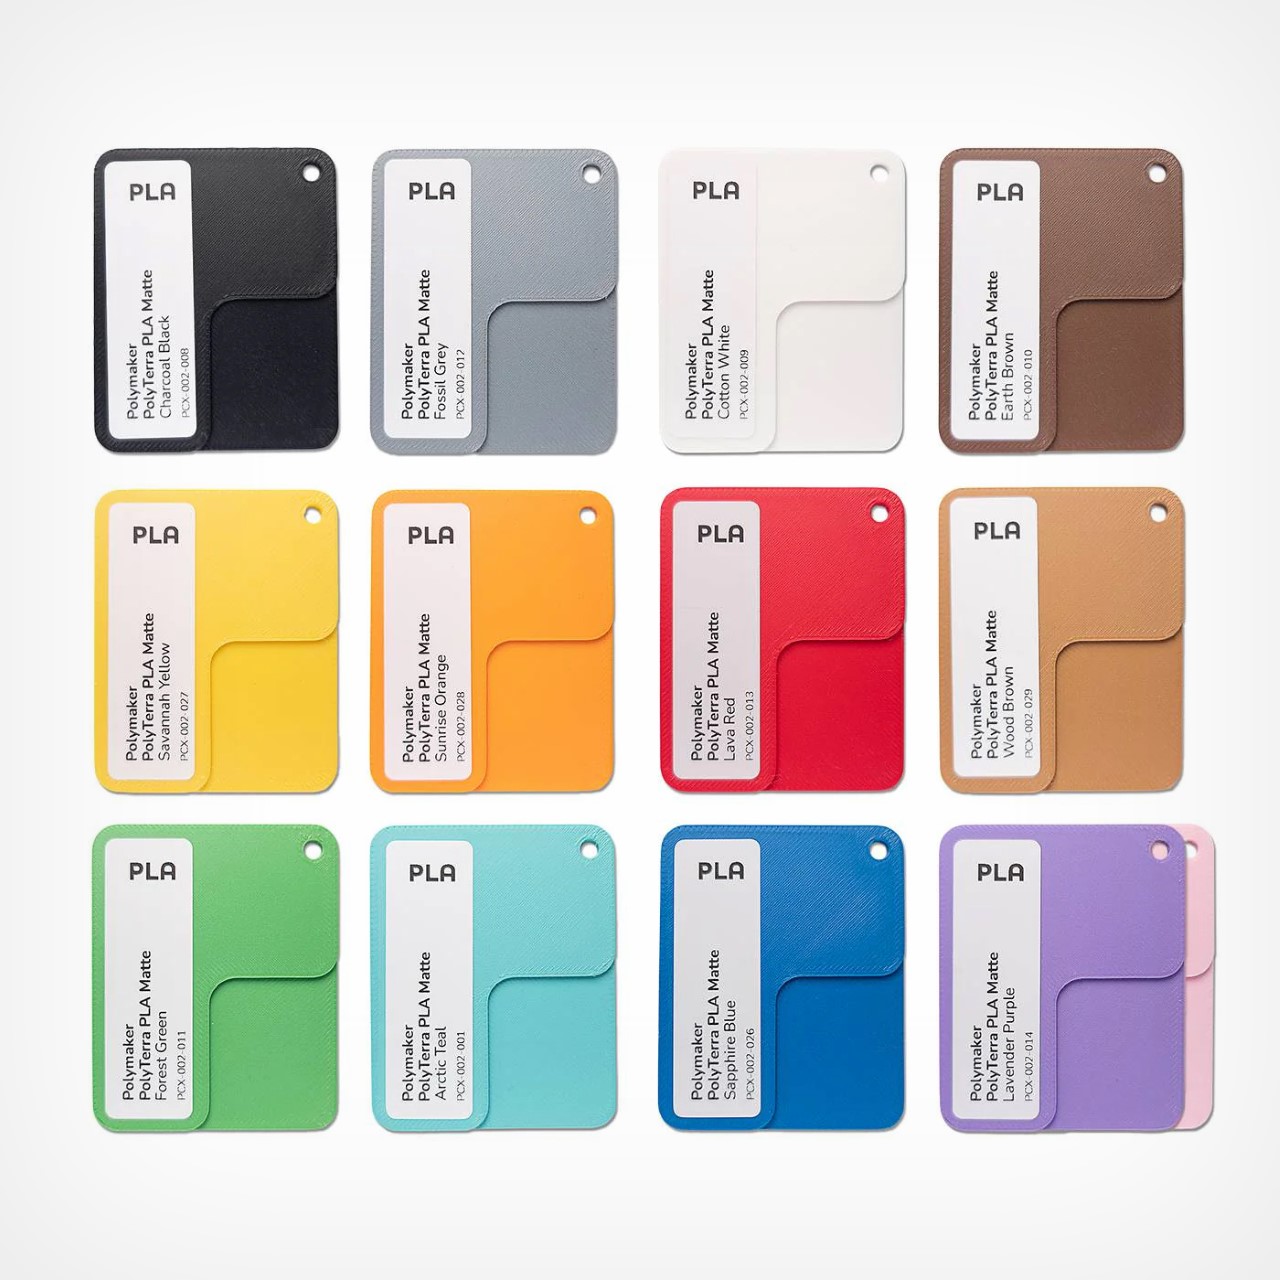
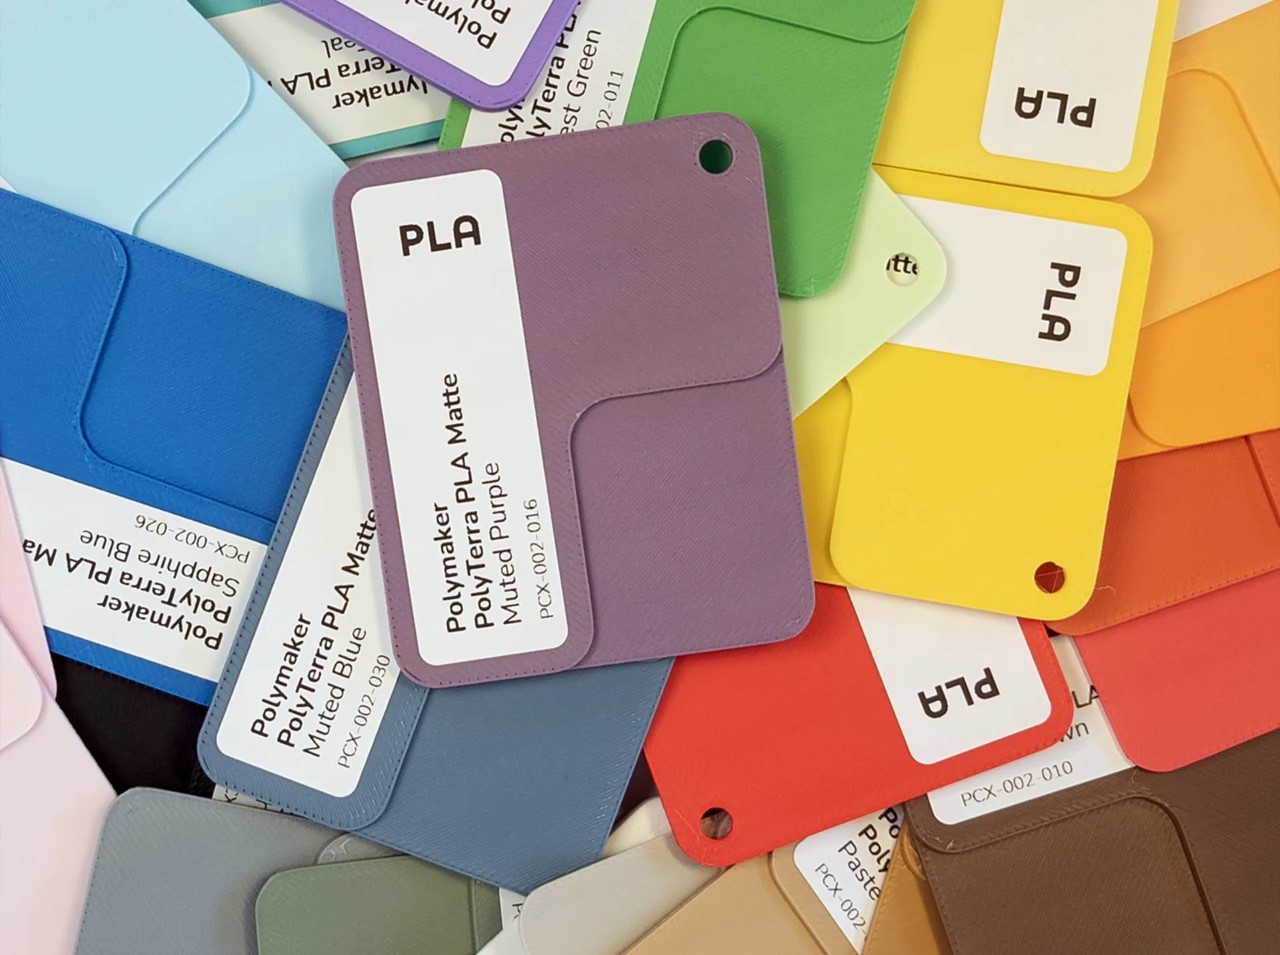
Designed and manufactured by 3D printing experts and husband-wife-duo James and Brie, The Print Codex is a definitive color guide for popular print filaments. Comparable to a Pantone Shade Card for 3D printing, The Print Codex acts as a reference bank for matching colors of printing filaments to real-world objects, so you always know which filament to use to get the right hue every time. Each box contains anywhere from 17 to 25 swatches, all meticulously labeled for your own convenience. When you find a color you like, refer to the details on the swatch and load that filament into your printer for perfect, color-matched results.
Designer: The Print Codex
Given how comparatively new 3D printing is to other forms of printing (paint, screen-printing, inkjet, laser-jet, etc.), it lacks a certain level of standardization. You don’t have precise color libraries for 3D printing yet, the way you’ve got Coloro, Pantone, and RAL libraries for other forms of color/paint application. The Print Codex is the first step to creating such a guide, with James and Brie planning on expanding the collection even further to make it the ultimate go-to resource for all 3D printers and hobbyists.
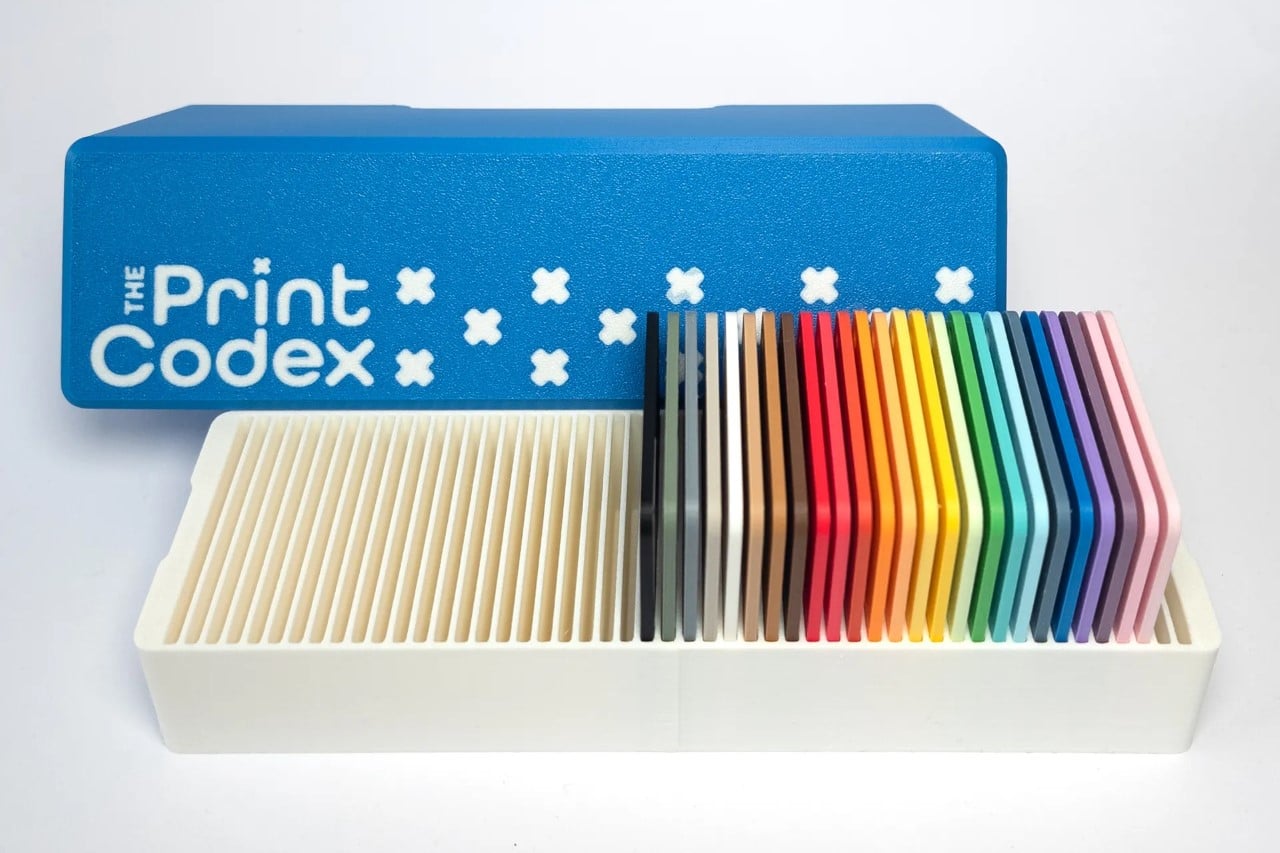

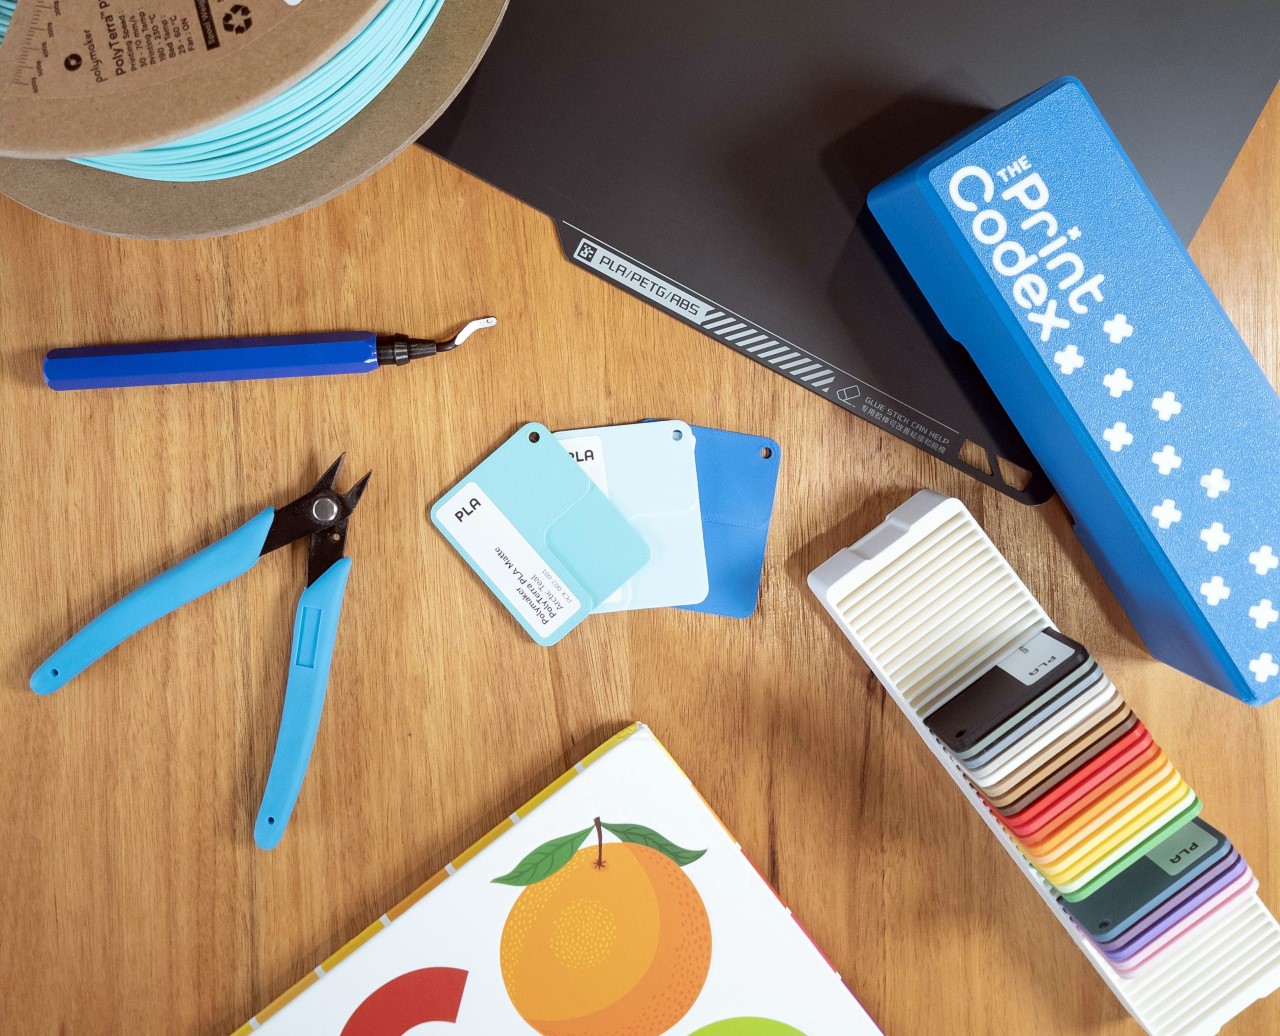
The swatches come in a nifty 3D-printed case that makes them easy to store and refer to whenever you need them.
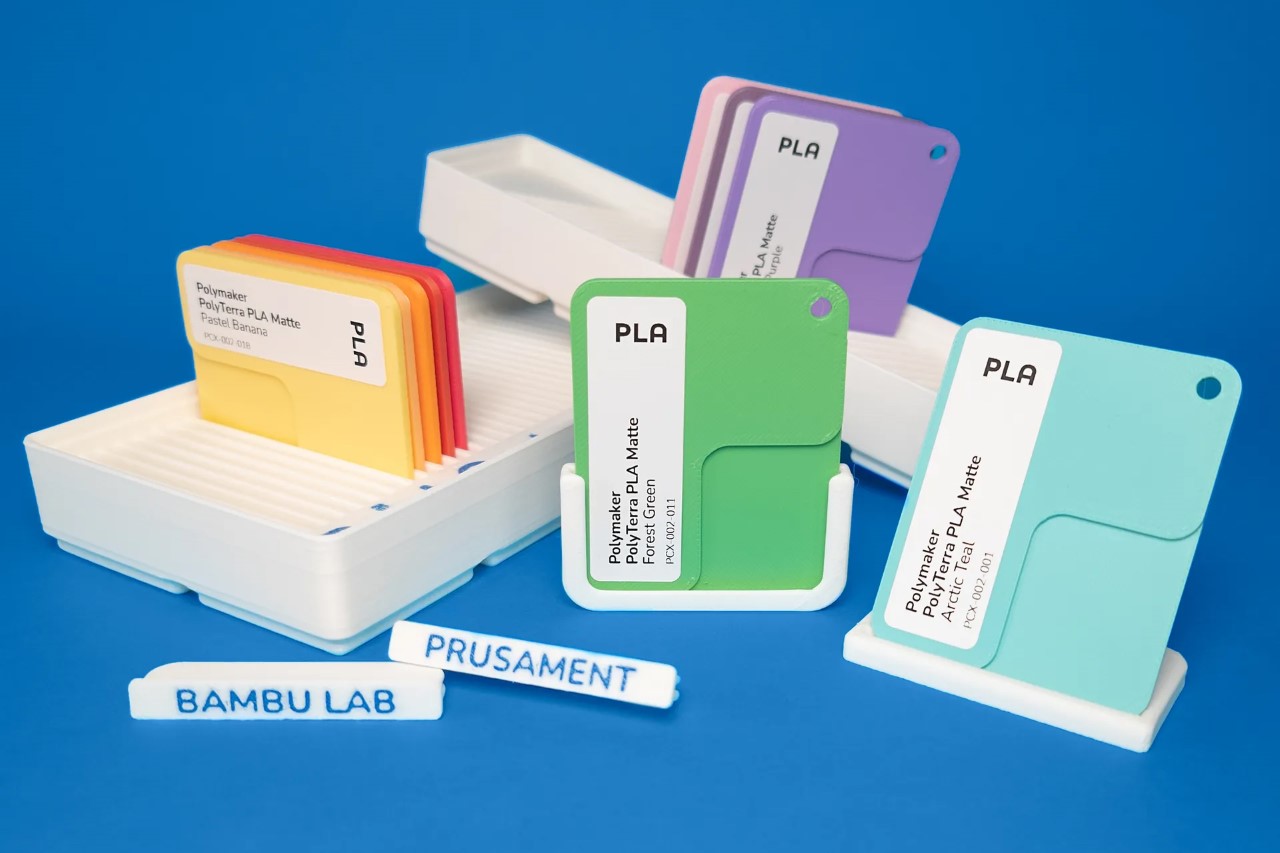
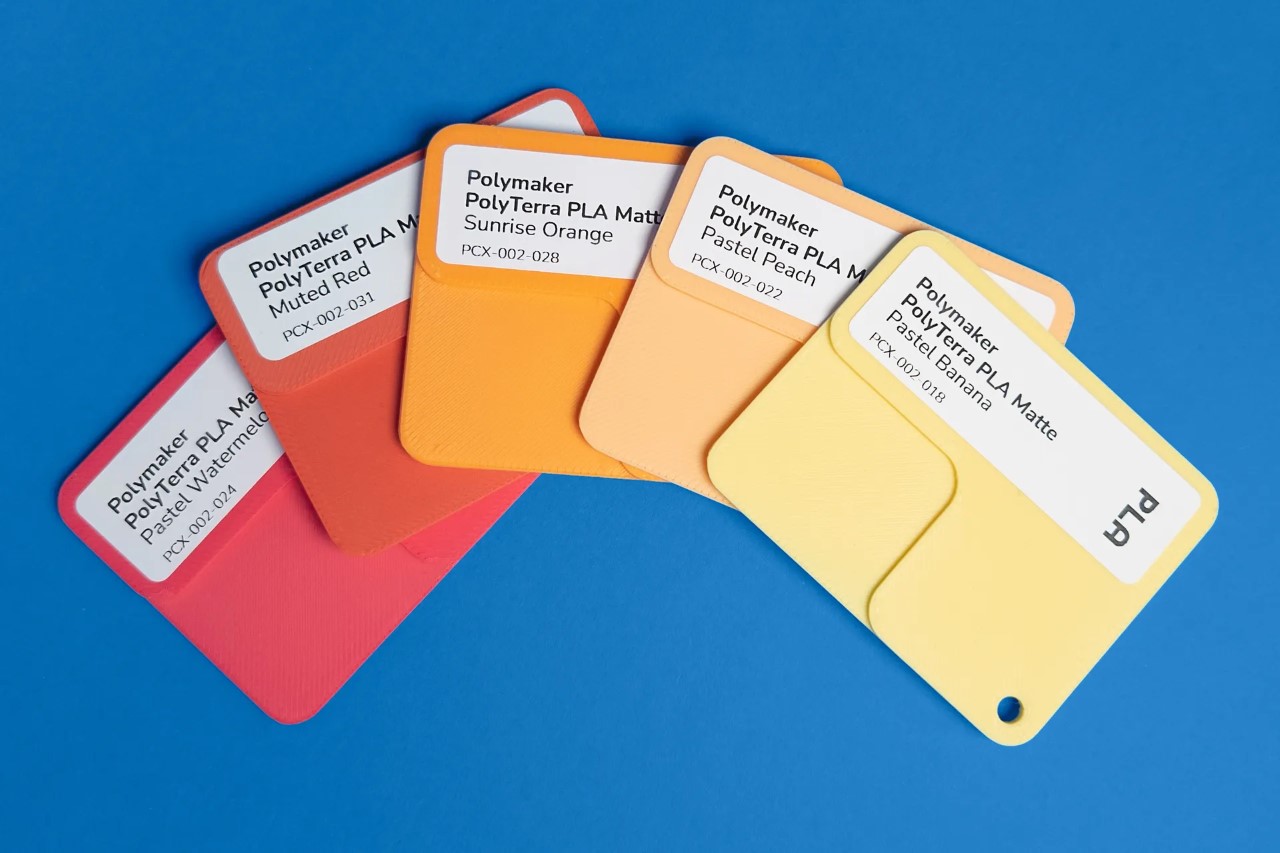
Realizing that they often ended up needing such a resource, James, the 3D printing expert, and Brie, the master of color got together to make the guide for themselves. The ever-expanding guide currently contains popular filament options from three filament makers – Prusament, Bambu Lab, and Polymaker. The filaments are sourced by The Print Codex, who then print swatches out for you to refer to. Each swatch comes with a unique design that highlights the filament’s color and finish, has two degrees of thickness (so you can see its opacity too), and has a label that details the maker, the range, the color name, and the identifying number on a label. Finally, a hole in the corner lets you attach the swatches to a keychain ring in case you want to ‘bind’ them the way Pantone binds their shade cards.

The Print Codex’s Kickstarter is now live, allowing you to purchase anywhere from 17 swatches to a total of 63 swatches across all three different brands. Each collection comes in its own 3D-printed box with slots to store your swatches in, as well as dividers that allow you to categorize swatches by brand name. If you want to print your own swatches too, The Print Codex has made the swatch 3D model available for download on Printables.
The post The Ultimate Color Reference Library for 3D Printing Helps You Choose The Right Filament For Each Project first appeared on Yanko Design.
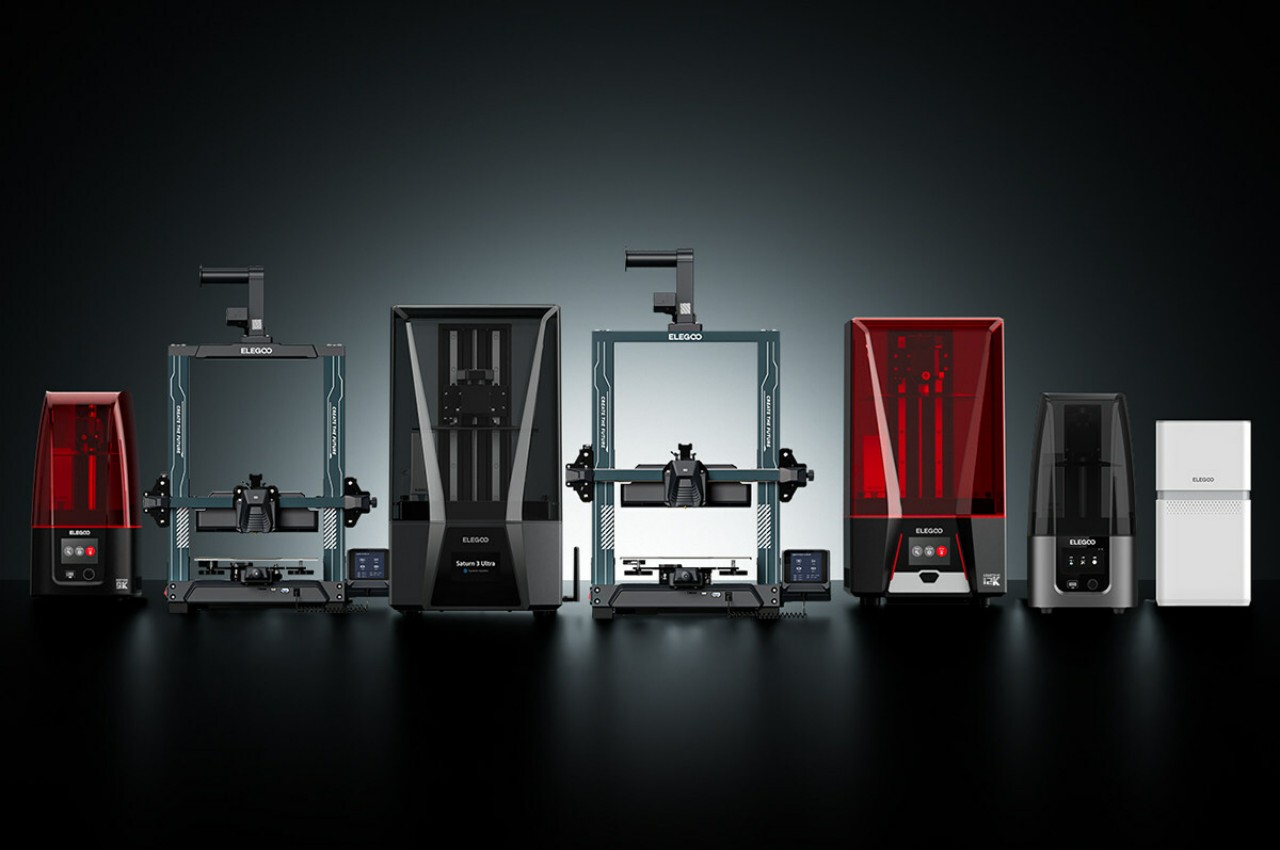
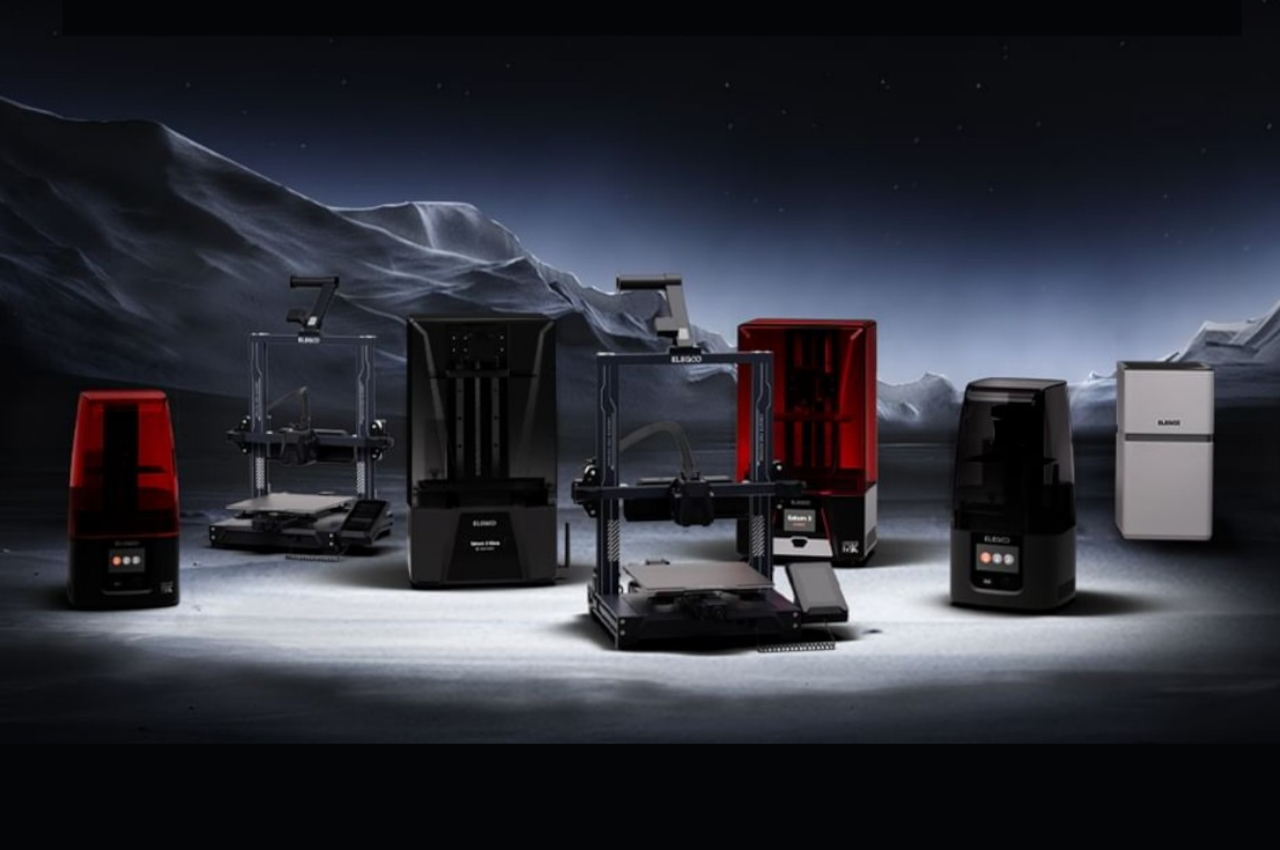
3D printing opened wide the floodgates of creativity, allowing anyone that can afford a 3D printer to give physical form to their dreams. This freedom and wide availability are critical for an industry that has been under the thumbs of large manufacturing plants. More than just the convenience they offer, 3D printers also deliver faster innovation, improving processes and materials more quickly in order to enable even more objects to be produced with more efficiency and economy. This is where ELEGOO comes in, one of the most prolific brands in the 3D printing market, showing off its expertise by launching not one, not even two, but six new 3D printers to meet the varied needs of designers and creators of every level.
Designer: ELEGOO
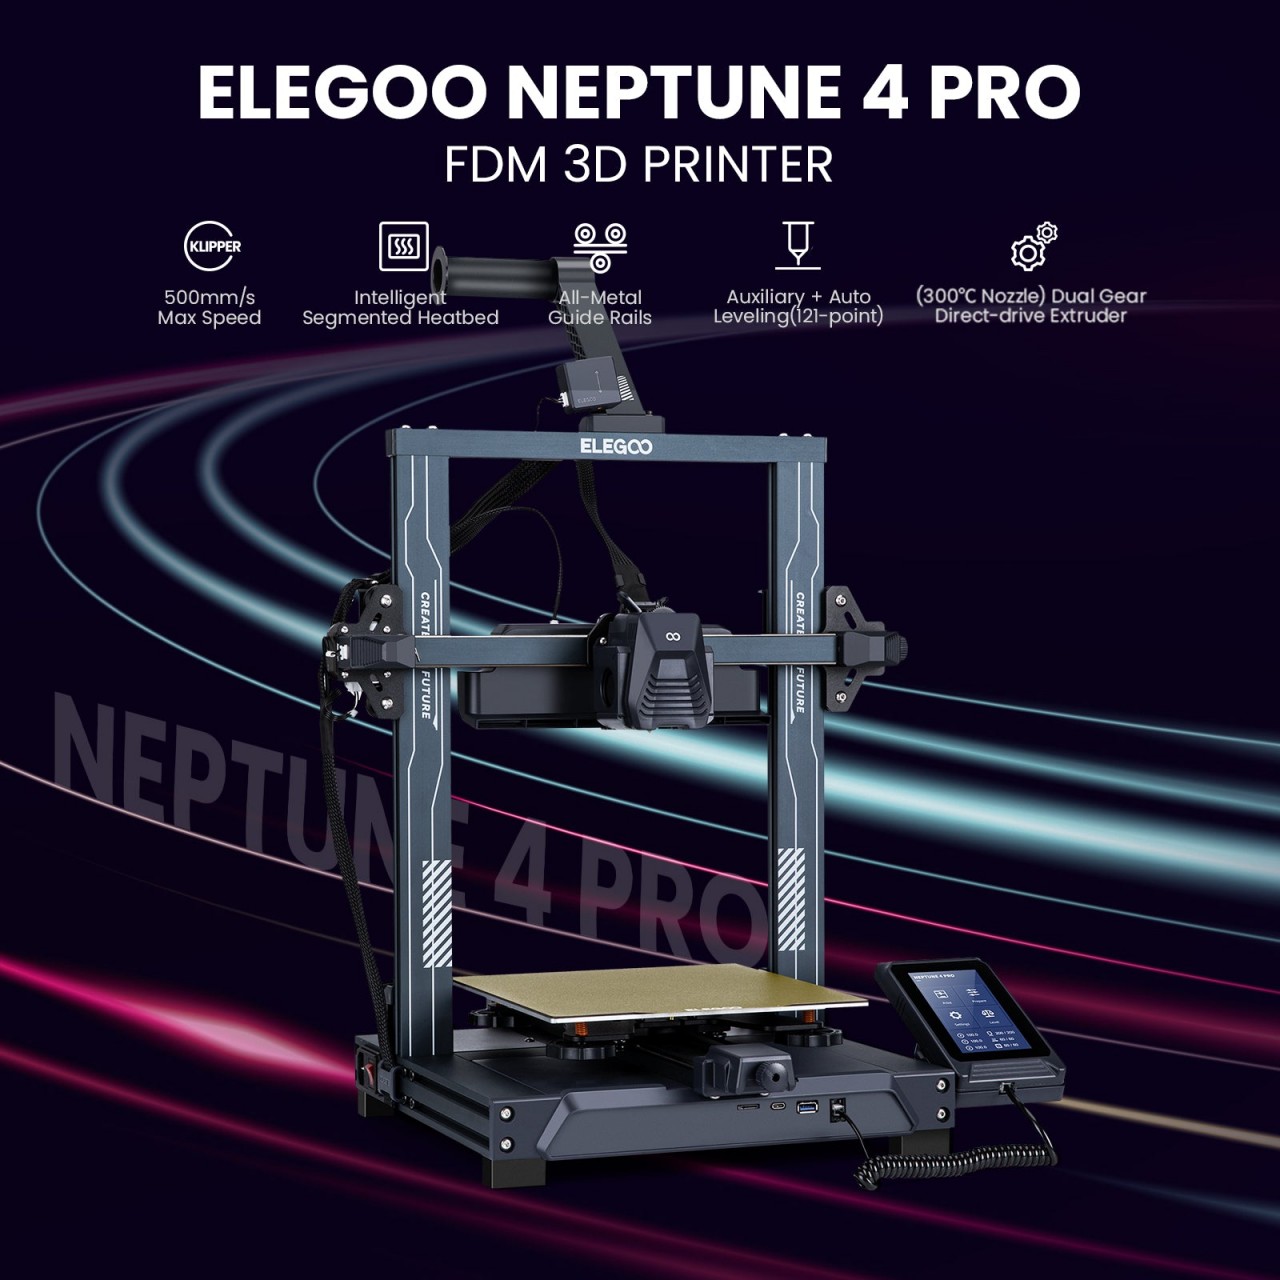
When talking about 3D printers, most will probably be familiar with the kind that pushes filaments of material out of heated nozzles. These FDM 3D printers are known to be fast and convenient, but there’s still plenty of room for improvement, improvements that the new ELEGOO Neptune 4 siblings bring in droves. Thanks to a quiet Klipper motherboard and a faster processor, the Neptune 4 and Neptune 4 Pro can reach speeds of up to 500mm/s, rated to be 10 times faster than most desktop 3D printers.
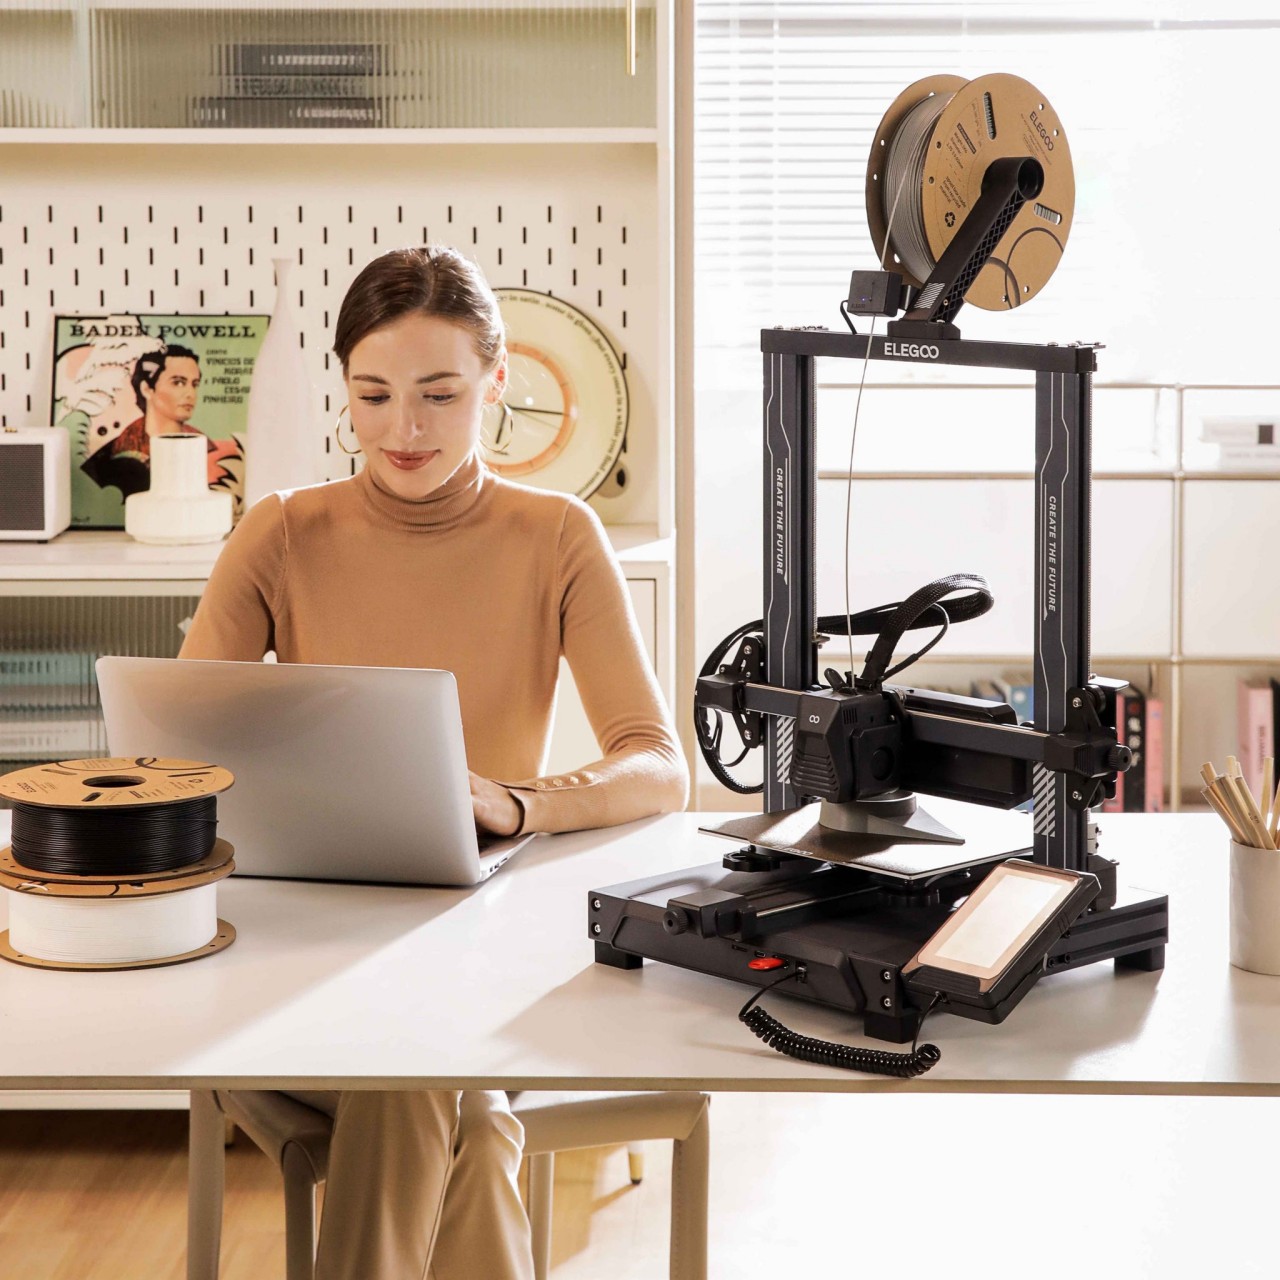
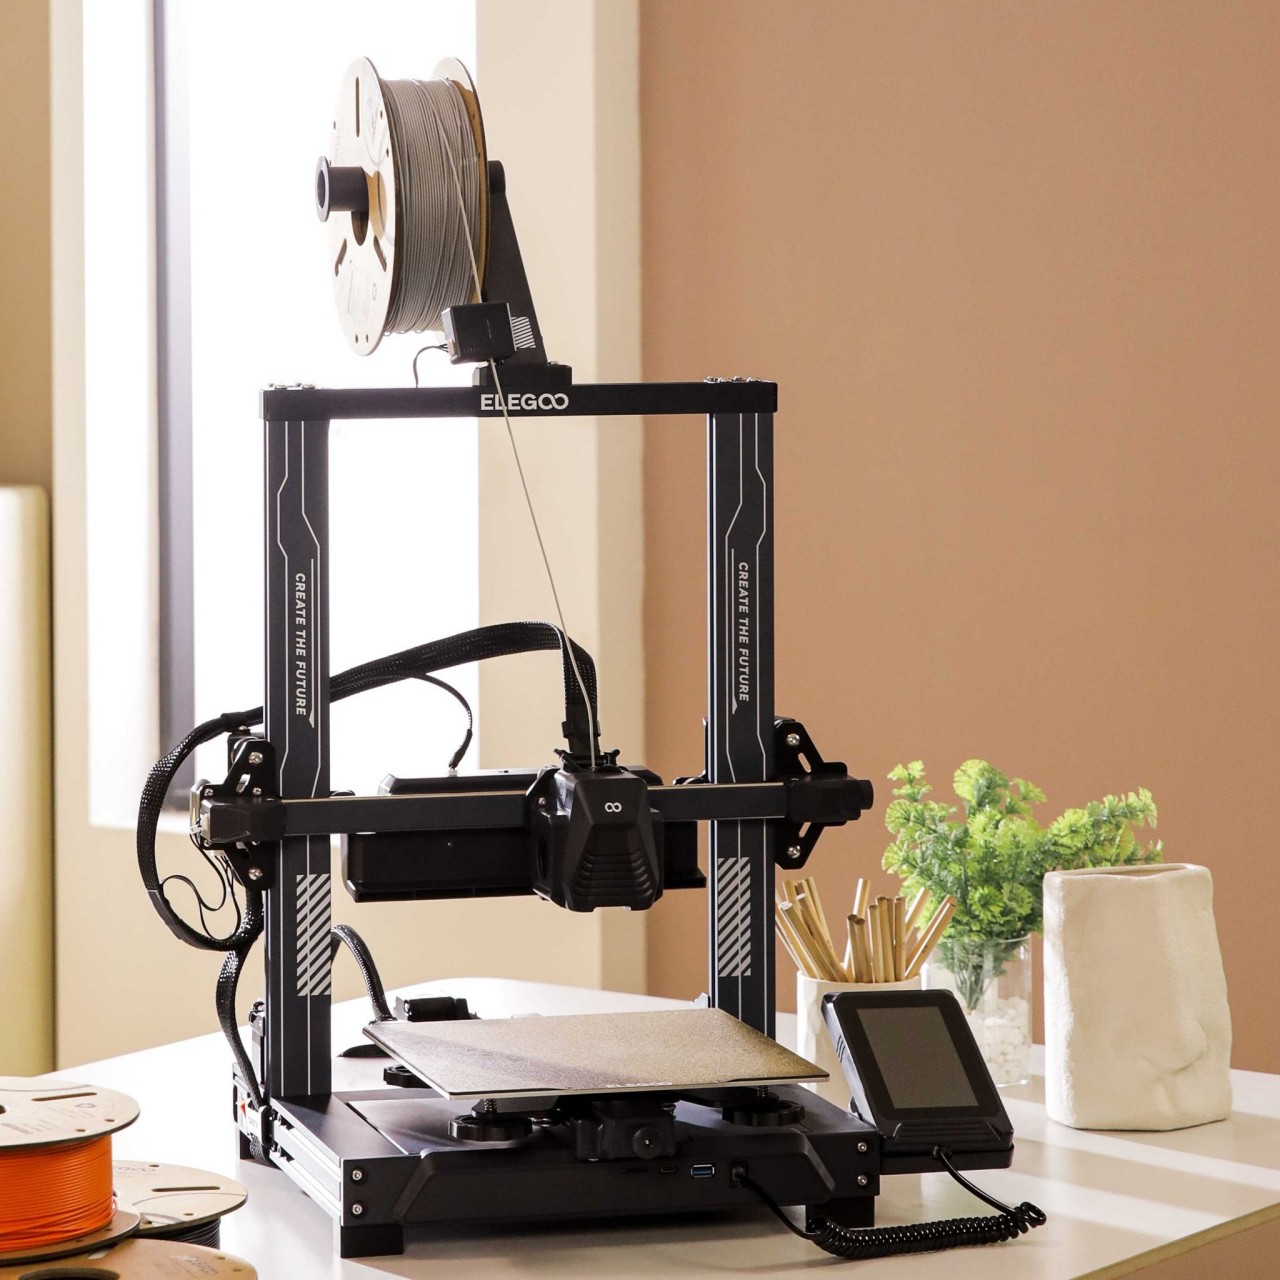
Despite the speed bump, the Neptune 4 also brings more stability and accuracy, thanks to tensioning adjustment devices on both X and Y axes as well a wider Y-axis. The Neptune 4 Pro takes these upgrades even further with a more intelligent segmented heatbed with better over-temperature protection, making sure that things don’t get too hot for the filament to bond properly.
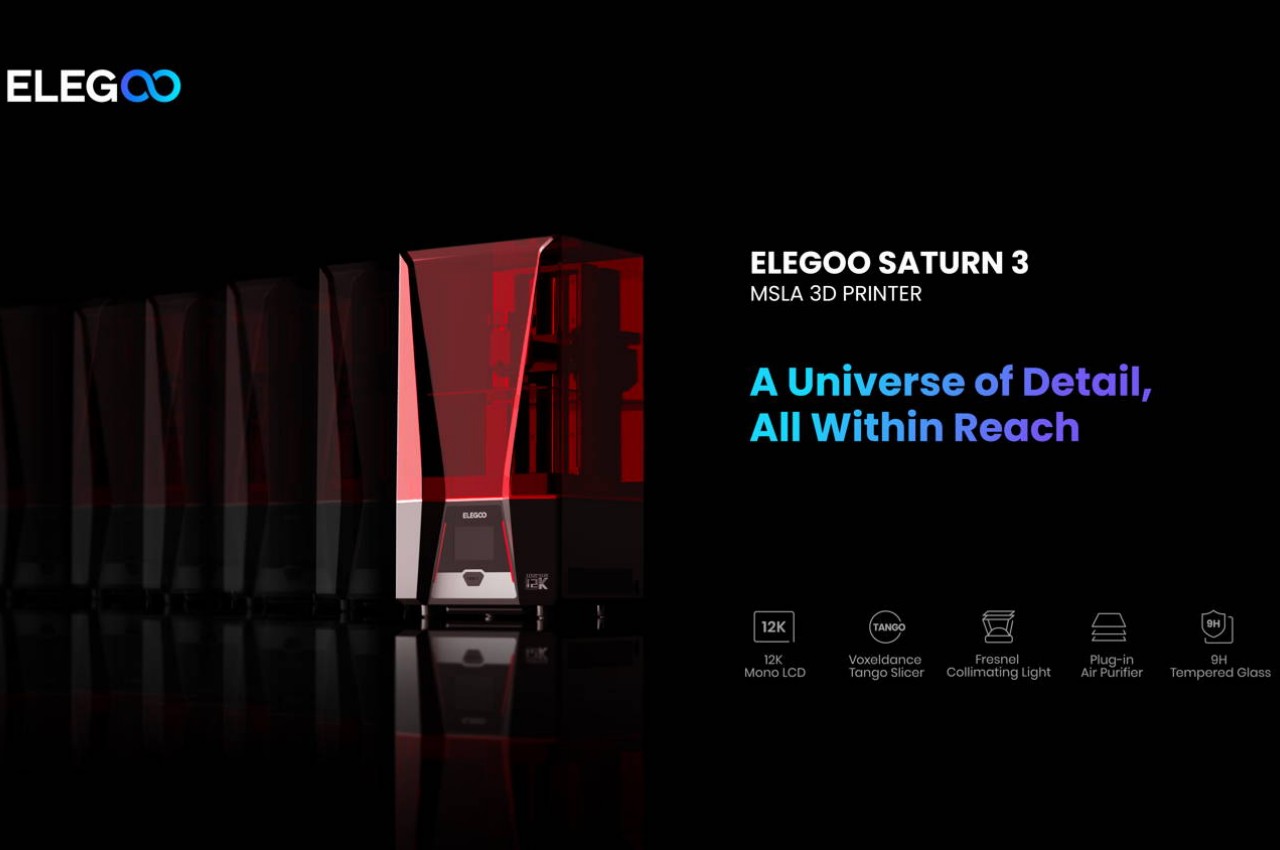
LCD 3D printers have the advantage of printing out finer details, but that also depends on the resolution of the monochrome LCD screen that guides the light that treats the resin in the vat. Both the ELEGOO Saturn 3 and Saturn 3 Ultra reach for the stars with a revolutionary 12k 11,520×5120 screen, allowing designers to create ultra-high quality and clearer pieces for projects such as jewelry or life-like models. With speeds reaching 150mm per hour, these two additions to LCD 3D printer lineup even one-up their predecessors, offering three times faster output.
Even better, the printers look stunning on your desk or worktable. With a sleek black metal base and red or black protective glass, the 3D printers scream futuristic technology, which is exactly what they bring to your creative endeavors.
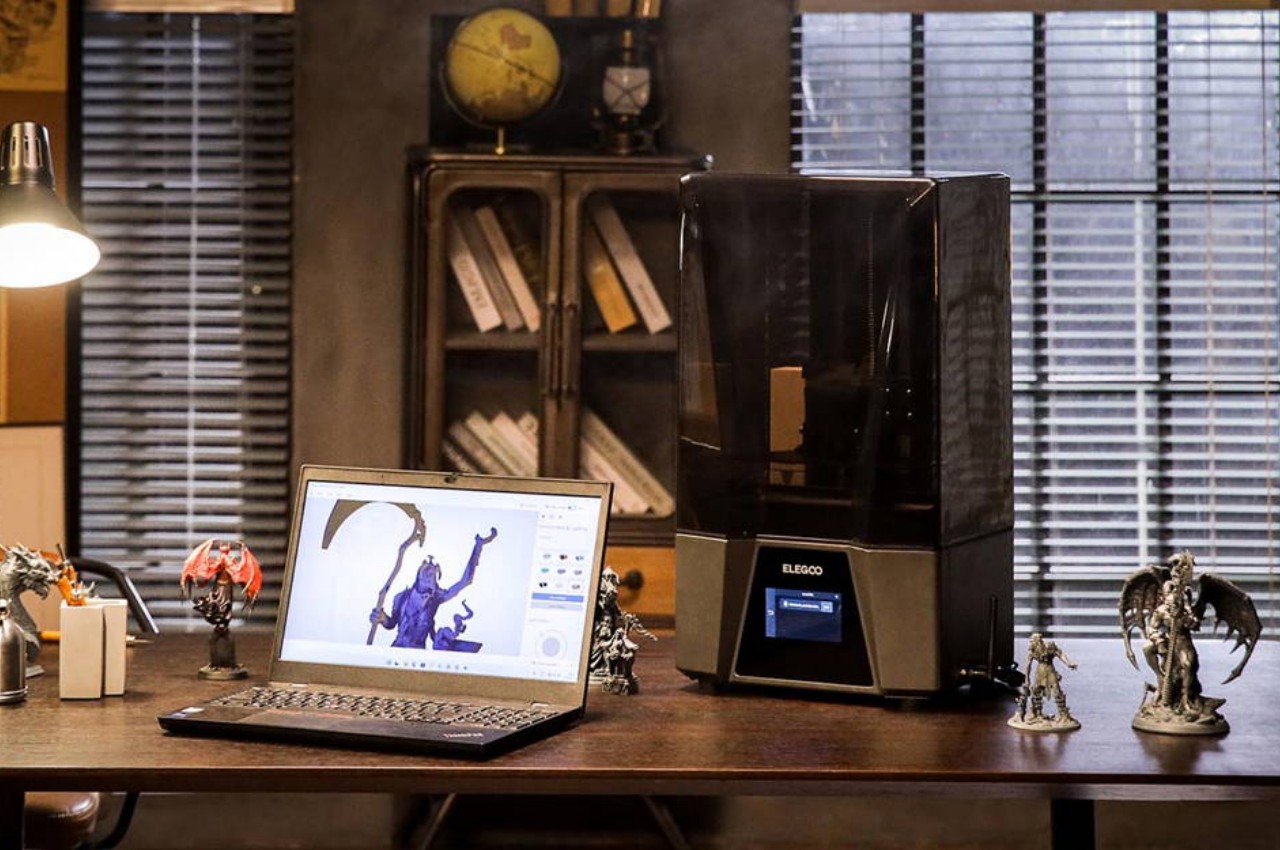
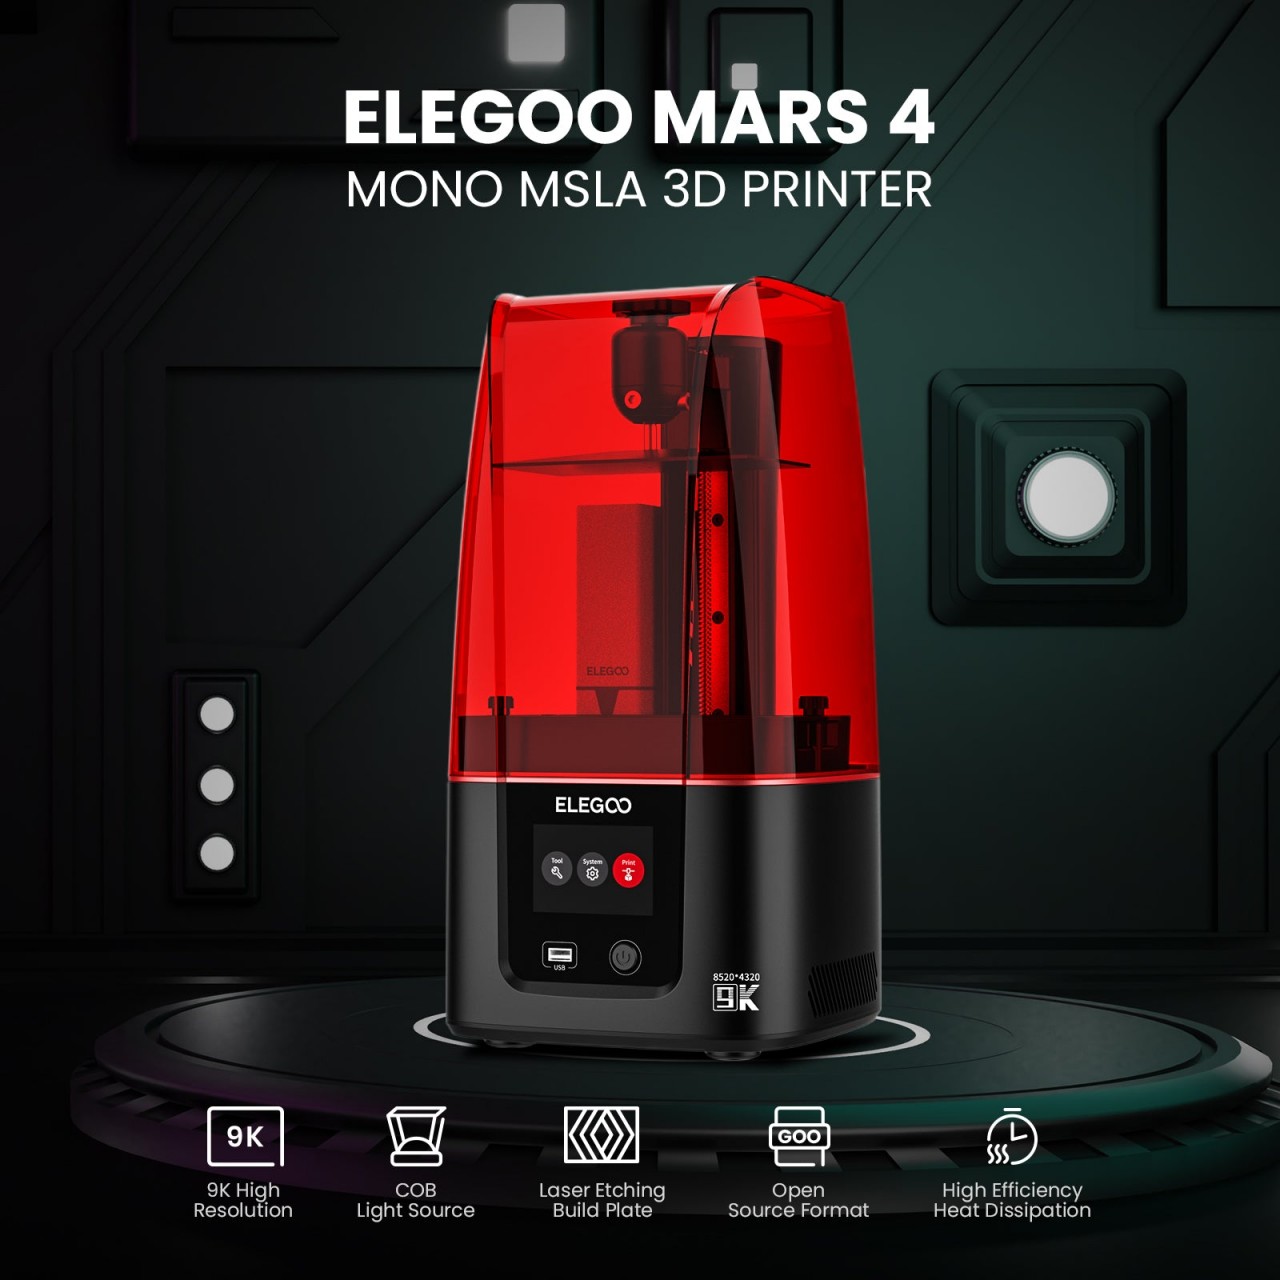
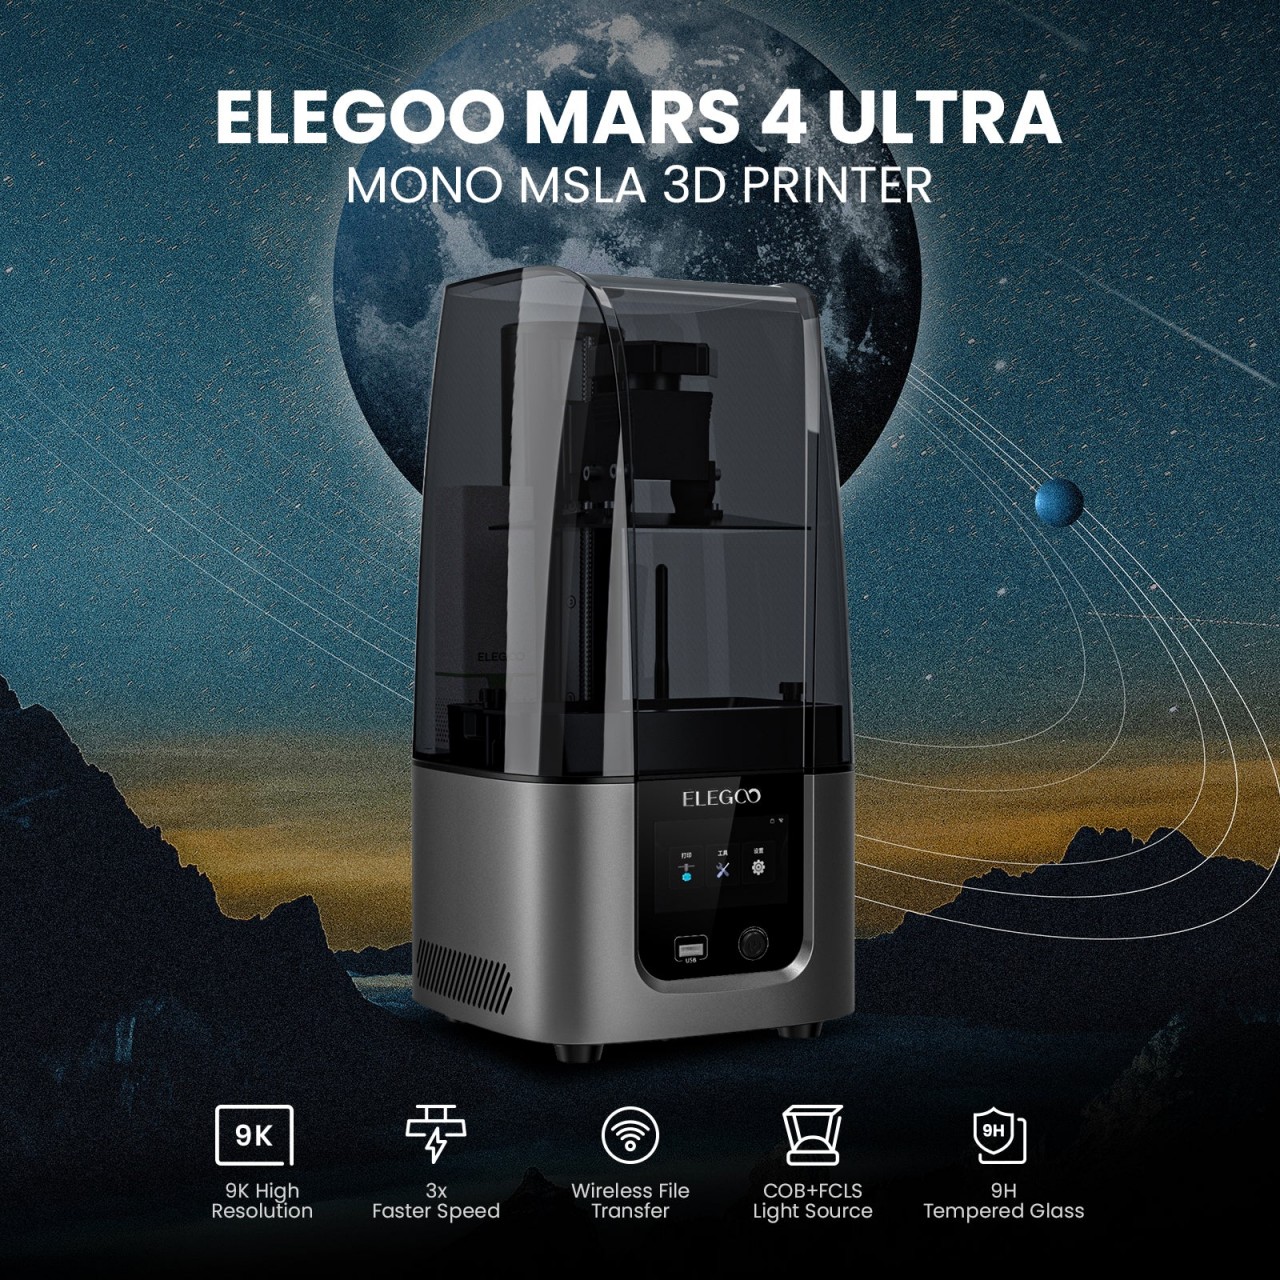
Not all creators might be able to afford all the bells and whistles, however, so the ELEGOO Mars 4 and Mars 4 Ultra bring no-compromise entry-level options to the market. That said, the 9K 8520×4320 LCD screen is no joke, delivering sufficient details to make gaming miniatures spring to life. A plug-in air purifier creates a healthier and more pleasant environment, making these stylish LCD 3D printers suitable for use in a wide range of fields, including STEM education.
Whatever the need or budget, ELEGOO’s new range of 3D printers has got you covered. Whether you’re making accessories, printing figures, assembling parts, or creating art, these 3D printers will deliver fast, stable, and safe printing experiences to let your creativity fly.
The post How ELEGOO’s new 3D printers let designers bring their creative ideas to life first appeared on Yanko Design.
It is, in fact, possible to download a car. Sterling Backus, enthusiastic father and physicist, literally downloaded and 3D printed an entire Lamborghini Aventador. Sterling started by first downloading a 1:10 scale model of the Aventador, scaling it up, separating the parts, and even adding a few signature modifications of his own, like making the car’s body wider. The process did take 5 whole years, but the results are so remarkable that even Lamborghini reached out to help in any ways that they could by donating parts like the Aventador’s headlights, which cost a whopping $5,000 a piece, and an original Lamborghini steering wheel, to replace the Audi steering wheel that Sterling had installed previously.
This video comes courtesy 3D Printing Nerd, a YouTuber who interviewed Sterling this month to track his 5-year journey. Sterling hopes to have the Aventador absolutely ready by August, where it’ll be on display at an auto-show.
Designer: Sterling Backus
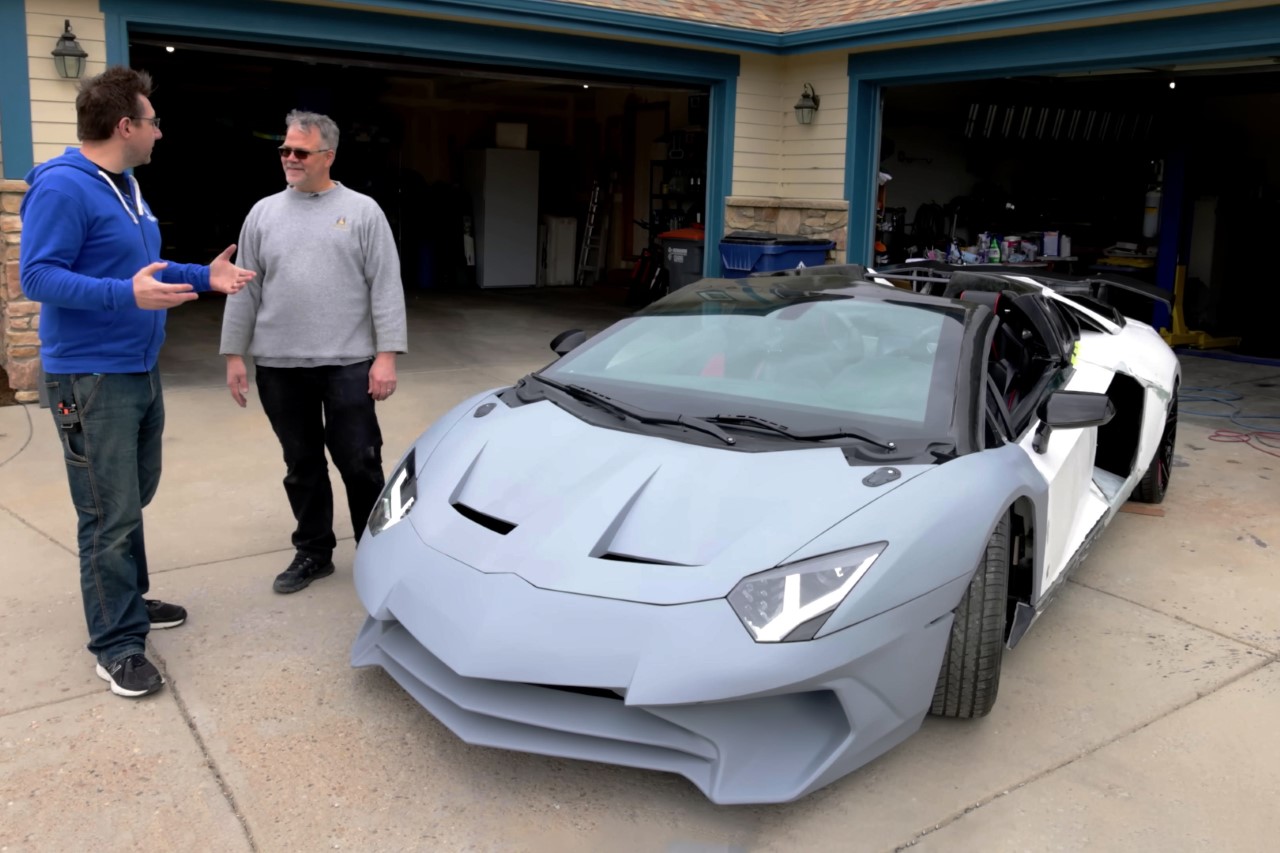
3D printing an entire car sounds somewhat plausible when you’ve got industrial-grade equipment at hand. Sterling had just a Creality Cr 10S, an incredibly bare-basic $350 printer used for hobby projects. To print the car, Sterling split up all the surfaces into small 1 square-foot parts that he printed and glued together using epoxy. Imagine building a car using jigsaw puzzle pieces – that’s pretty much what Sterling did. He pushed the printer to its absolute limit, running it continuously for 15 full months before the printer died on him. Luckily, he managed to print the entire outer body by then. However, there was a small problem…
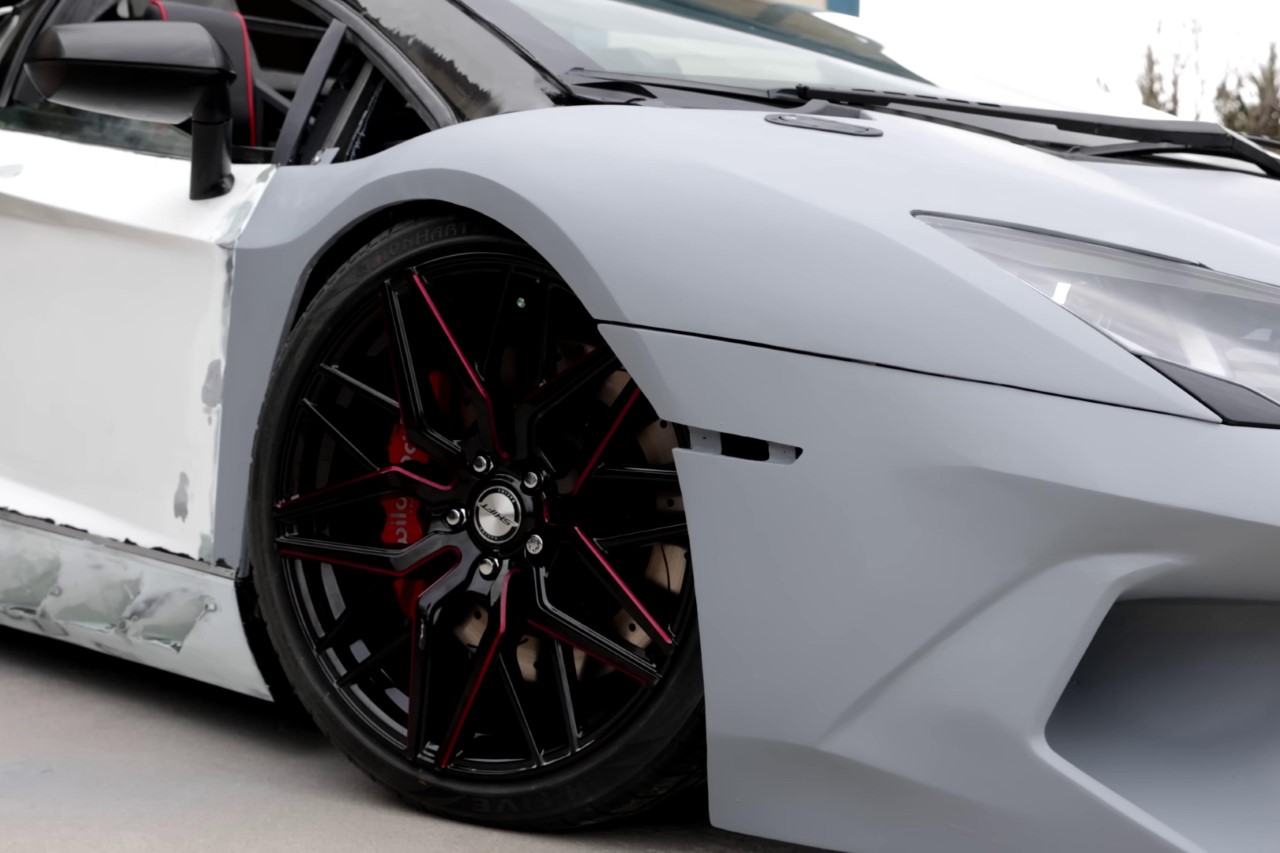
You see, the Cr 10S doesn’t print metal or carbon fiber. It prints with standard PLA filament, which is great for tiny toys… but not so much for large supercars. PLA has a glass transition temperature of 50-60°C (131-140°F), which means at those temperatures, it begins to go soft and start warping. That’s a problem when you’ve got outdoor temperatures that can sometimes touch 50°C and a V12 engine under the hood that definitely crosses those temperatures. To overcome this, Sterling coated each and every surface with 6 layers of carbon fiber sheet (3 on top, and 3 on the bottom), vacuum sealing the carbon fiber onto the panels to ensure there were no warps or bubbles. Once each panel was sandwiched with the carbon fiber, Sterling coated them with automotive primer and got to work sanding each piece to perfection with his son.
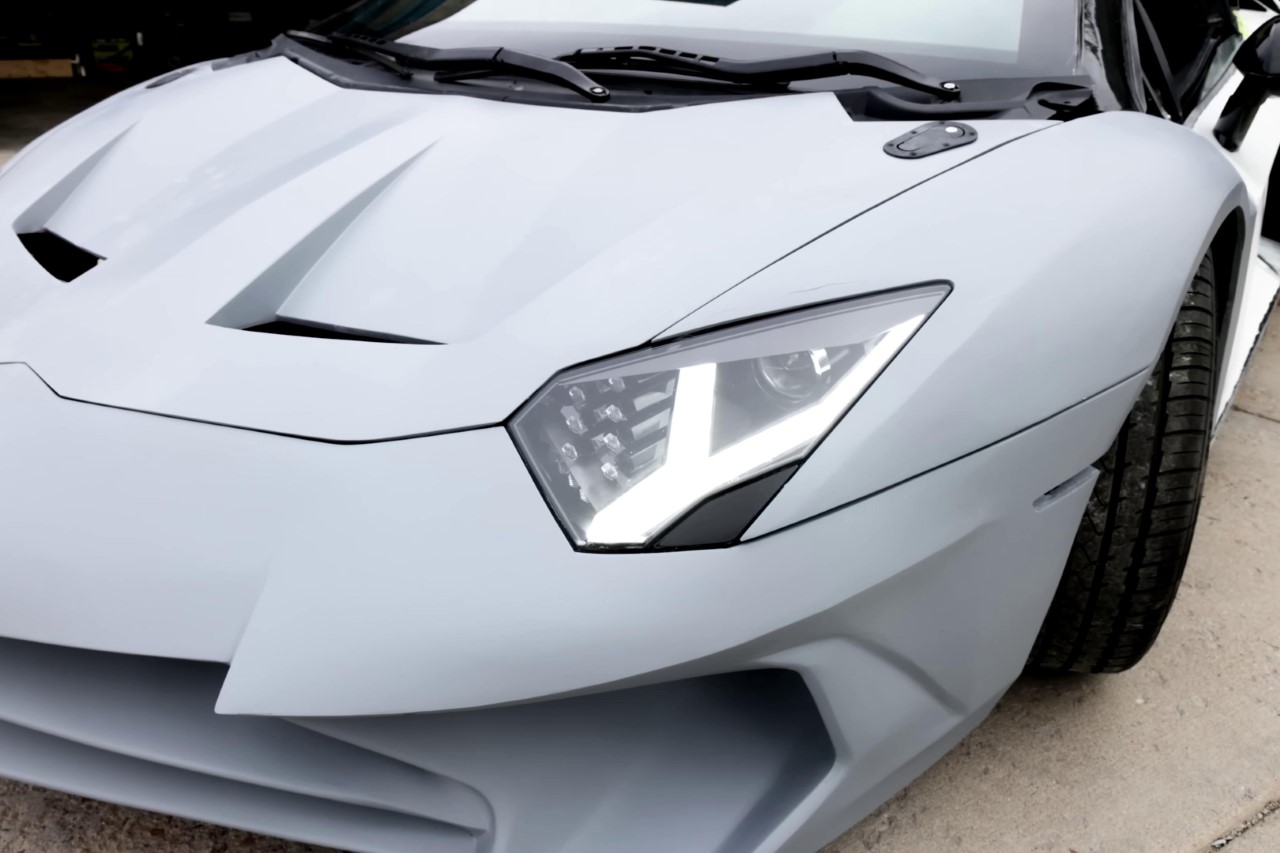
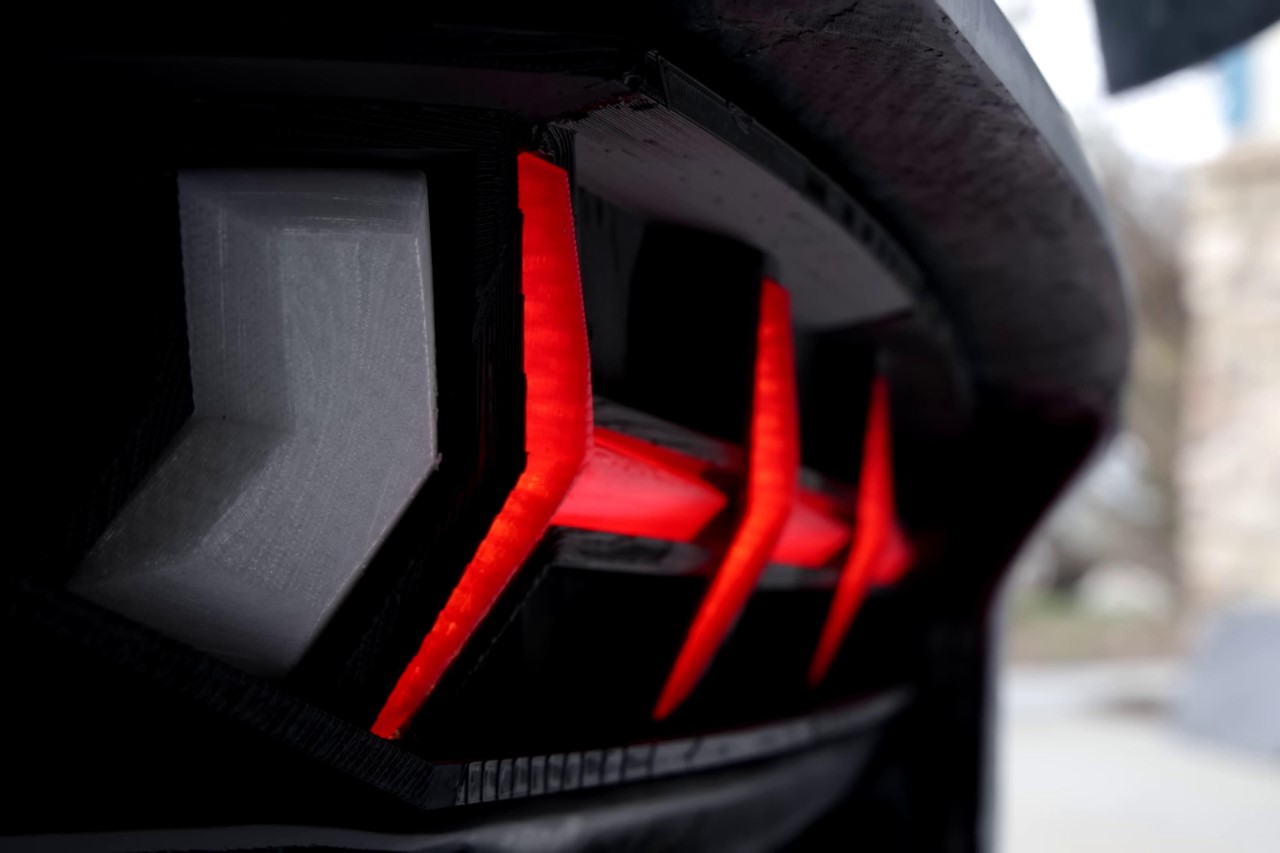
The highlight of the Aventador are those headlights, which apparently cost 5 grand apiece. However, when Sterling began his project, word got to the Lamborghini executives, who decided to give him two original Aventador headlights, sparing in $10K in expenses. The windshield on the original Aventador costs another $4,000, but Sterling made do with a windshield from a Pacifica minivan, which he had trimmed to size. The taillights, however, Sterling printed on his own, given that the wide-body build he was going for would not fit Lamborghini’s stock taillights.
Perhaps the most challenging part of the build was to get the Aventador’s signature scissor doors right. Even as a physicist, it’s something Sterling just couldn’t seem to nail… and Lamborghini’s door hinges cost a thousand dollars apiece. Luckily, Sterling wasn’t the only one 3D printing an Aventador at the same time. Another hobbyist who was building an Aventador of his own had some hinges to spare, which he gave to Sterling.

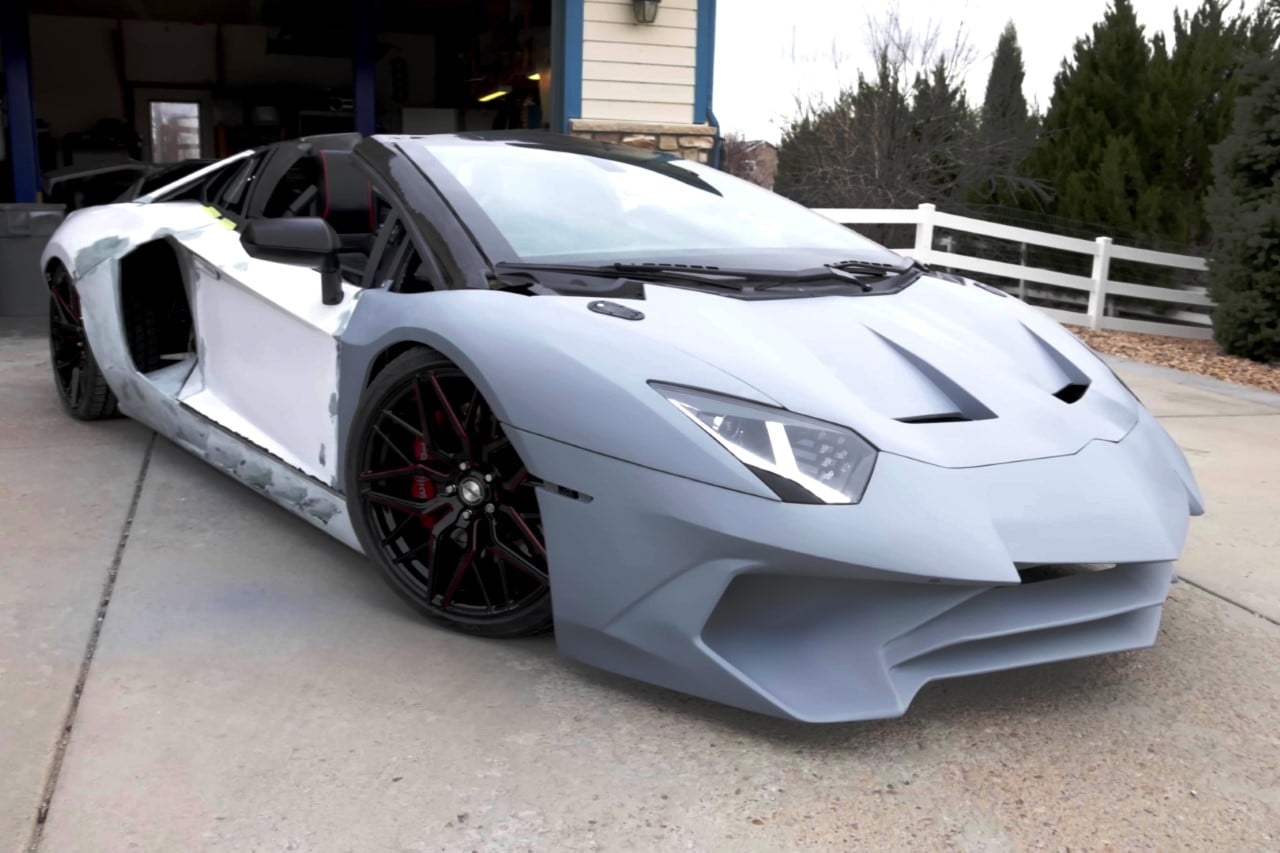
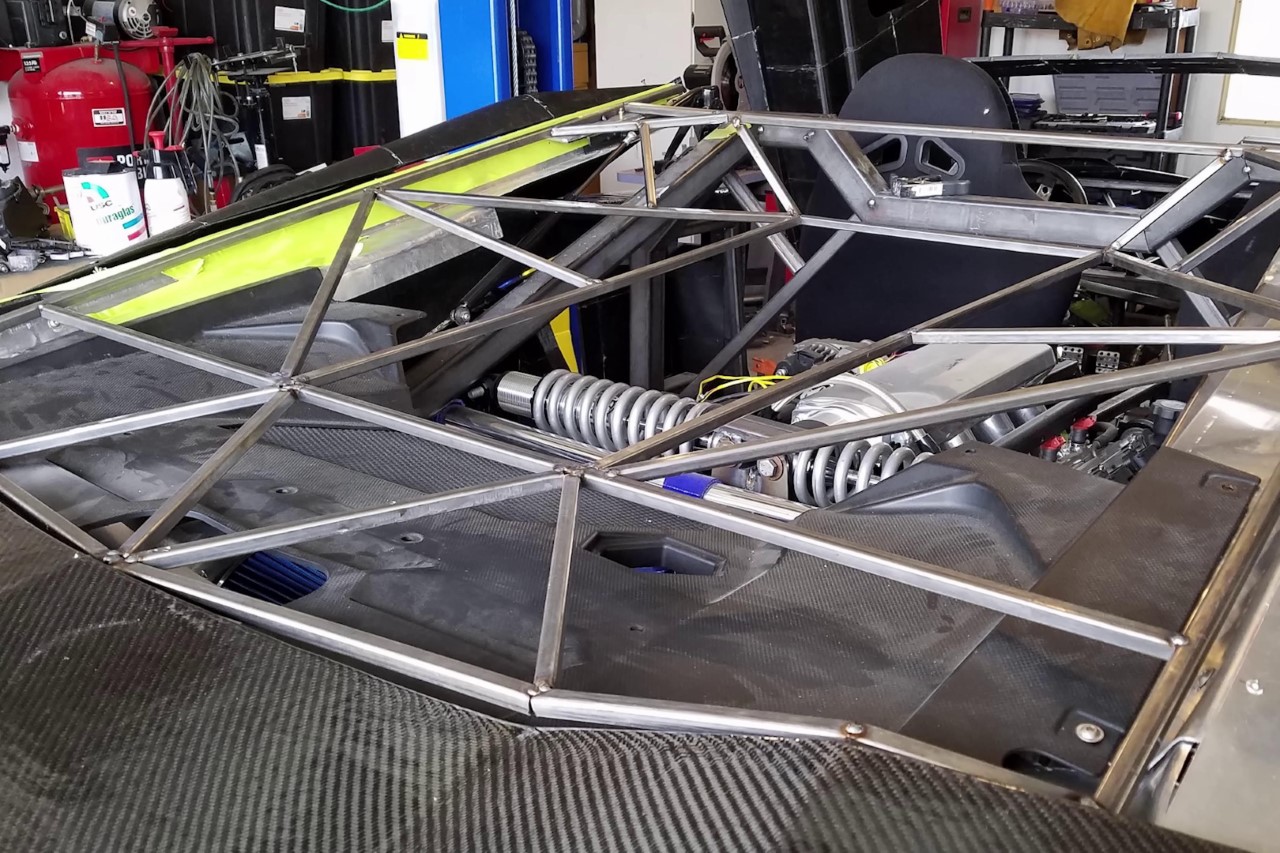
What’s the most impressive fact is that this entire car is built from scratch. Rather than stripping a junk car of its outer fairing and layering an Aventador’s pieces onto it, Sterling built his chassis manually, welding pieces of metal together to bring his car to life. The metal chassis would then hold each individual PLA and carbon fiber piece, creating the car’s aesthetic.
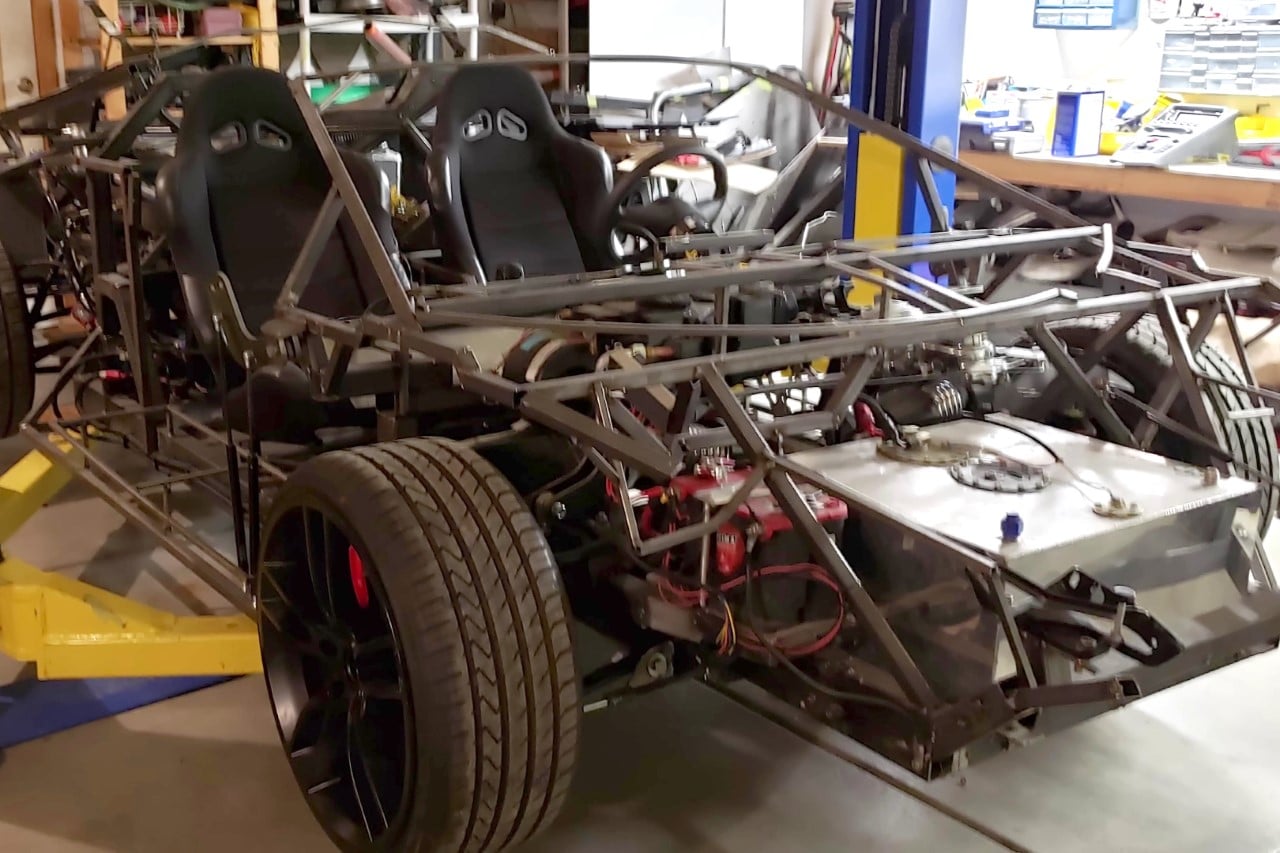
You’re probably wondering what Sterling did for the engine (it isn’t possible to 3D print those yet). Under the Aventador’s (rear) hood isn’t Lamborghini’s signature V12, but instead is an LS1, a V8 manufactured by GM and used in the Corvette. The transmission on the Aventador, funnily enough, isn’t a Lamborghini stock too but rather is taken from a Porsche 911.

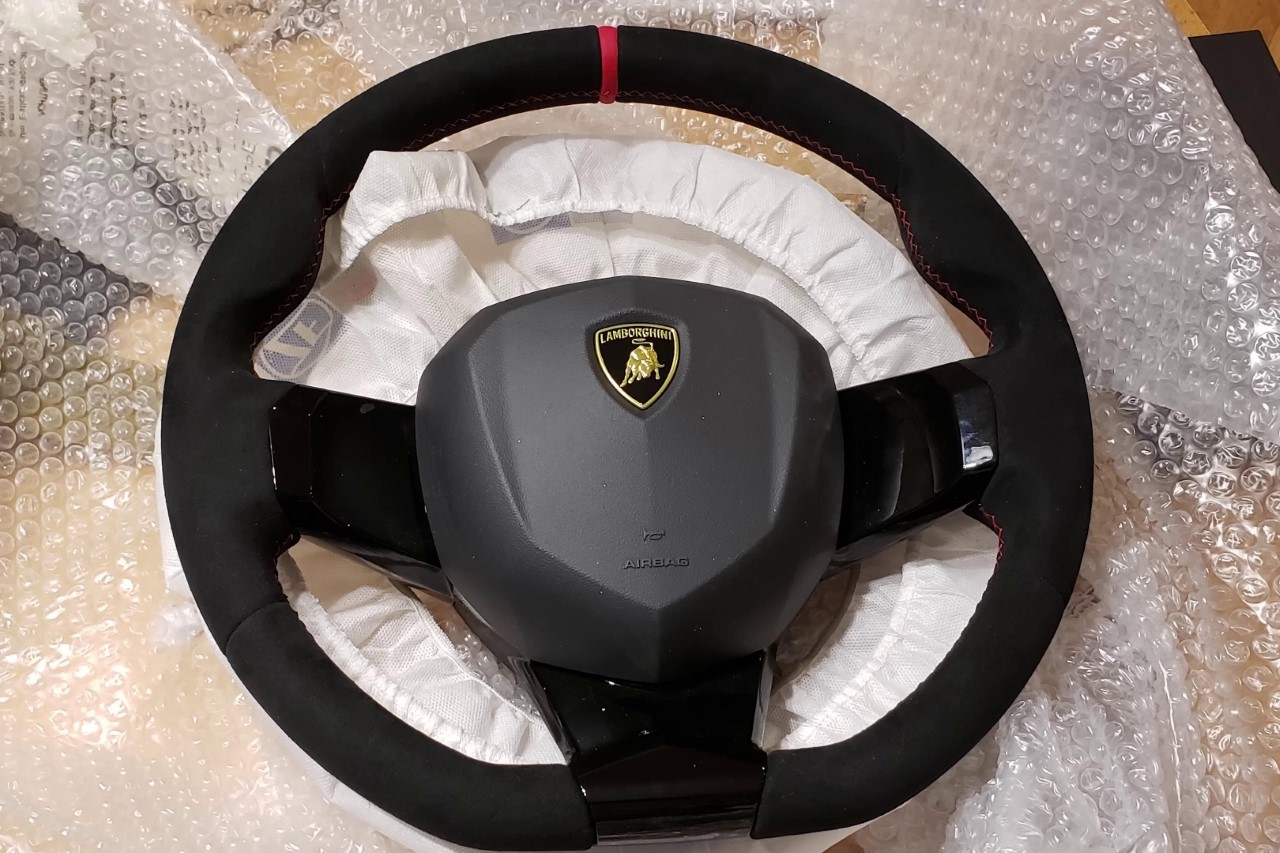
Once Sterling finished finalizing his build (and even making the interiors), Lamborghini’s director of marketing took a look at his progress, only to pop his head in and see an Audi steering wheel fitted into the car’s dash. A lot of Lamborghinis use Audi parts, Sterling mentioned, highlighting that Audi and Lamborghini are owned by the same company, VW. The steering column on the Aventador, for example, is the same one found in Audi cars, so it seemed like a natural pick for Sterling. He didn’t have an Aventador steering wheel, so he decided to stick with the Audi one that fit perfectly into the column – something Lamborghini’s director of marketing didn’t quite approve of. Two weeks later, Sterling found a Lamborghini steering wheel in the mail straight from Italy. The Italians don’t like it when you mess with tradition, whether it’s putting ketchup in your pasta or an Audi steering wheel in your Aventador!
The overall build still needs some work, and Sterling is hoping to give the car a Red, White, and Black paint job once everything’s ready. The 3D-printed Aventador weighs just around 2700 lbs, making it significantly lighter than the original which clocks in at 4000 lbs. For now, Sterling is still working on finishing the car’s exteriors as well as fine-tuning some of the electrical parts of the car as well as the interior – something he hopes to get done before August. The 3D-printed Aventador is slated to make its first proper appearance at the Bandimere Speedway near Detroit on August 13th.

The post A Father-son duo 3D Printed an Entire Lamborghini Aventador and it looks Stunningly Real first appeared on Yanko Design.
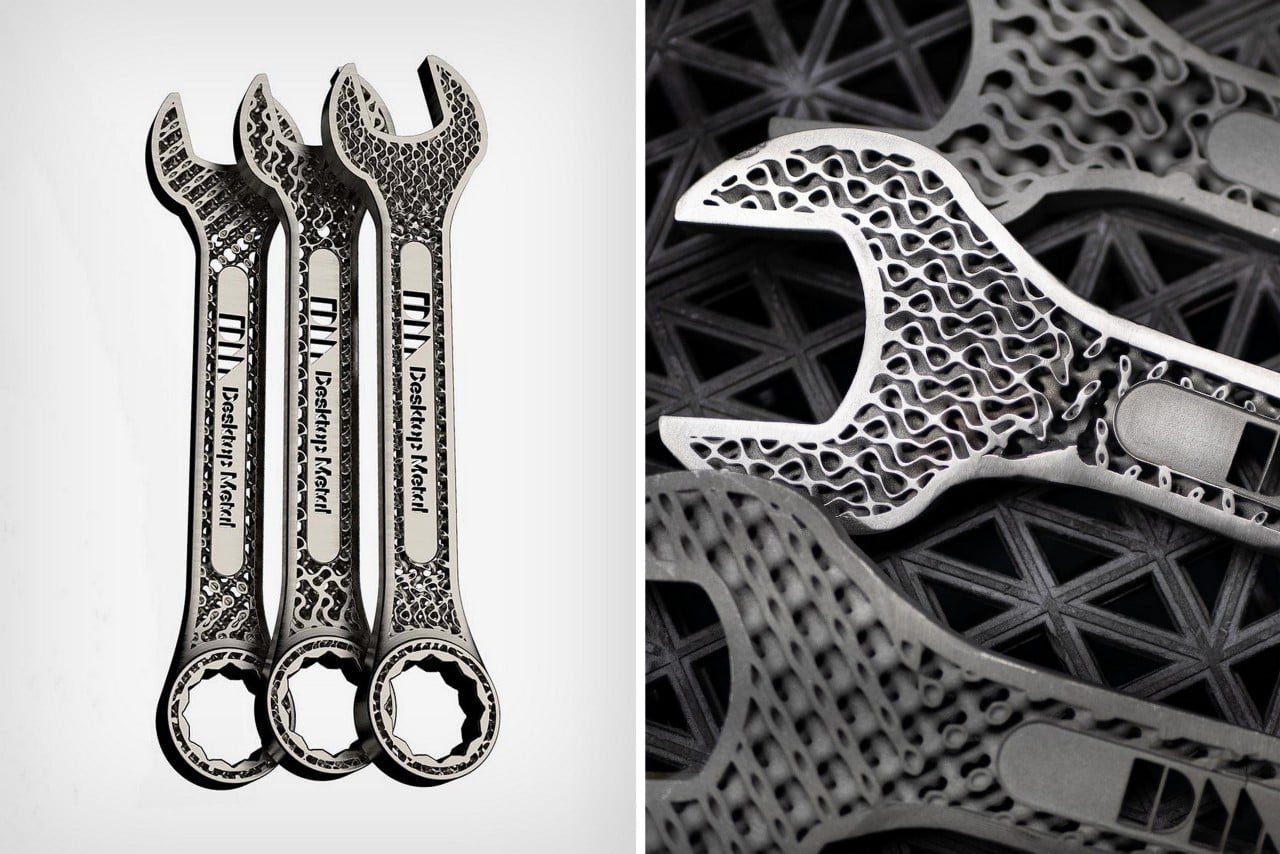
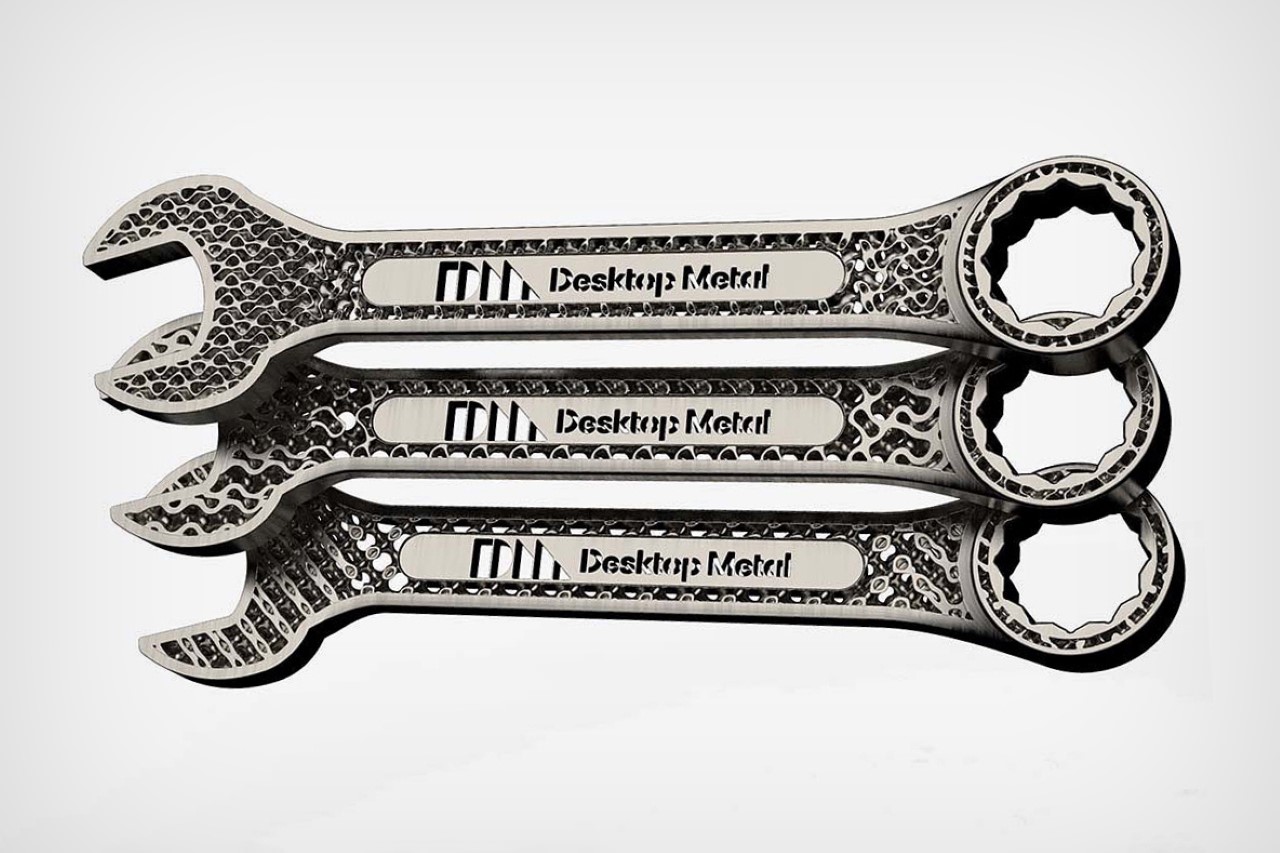
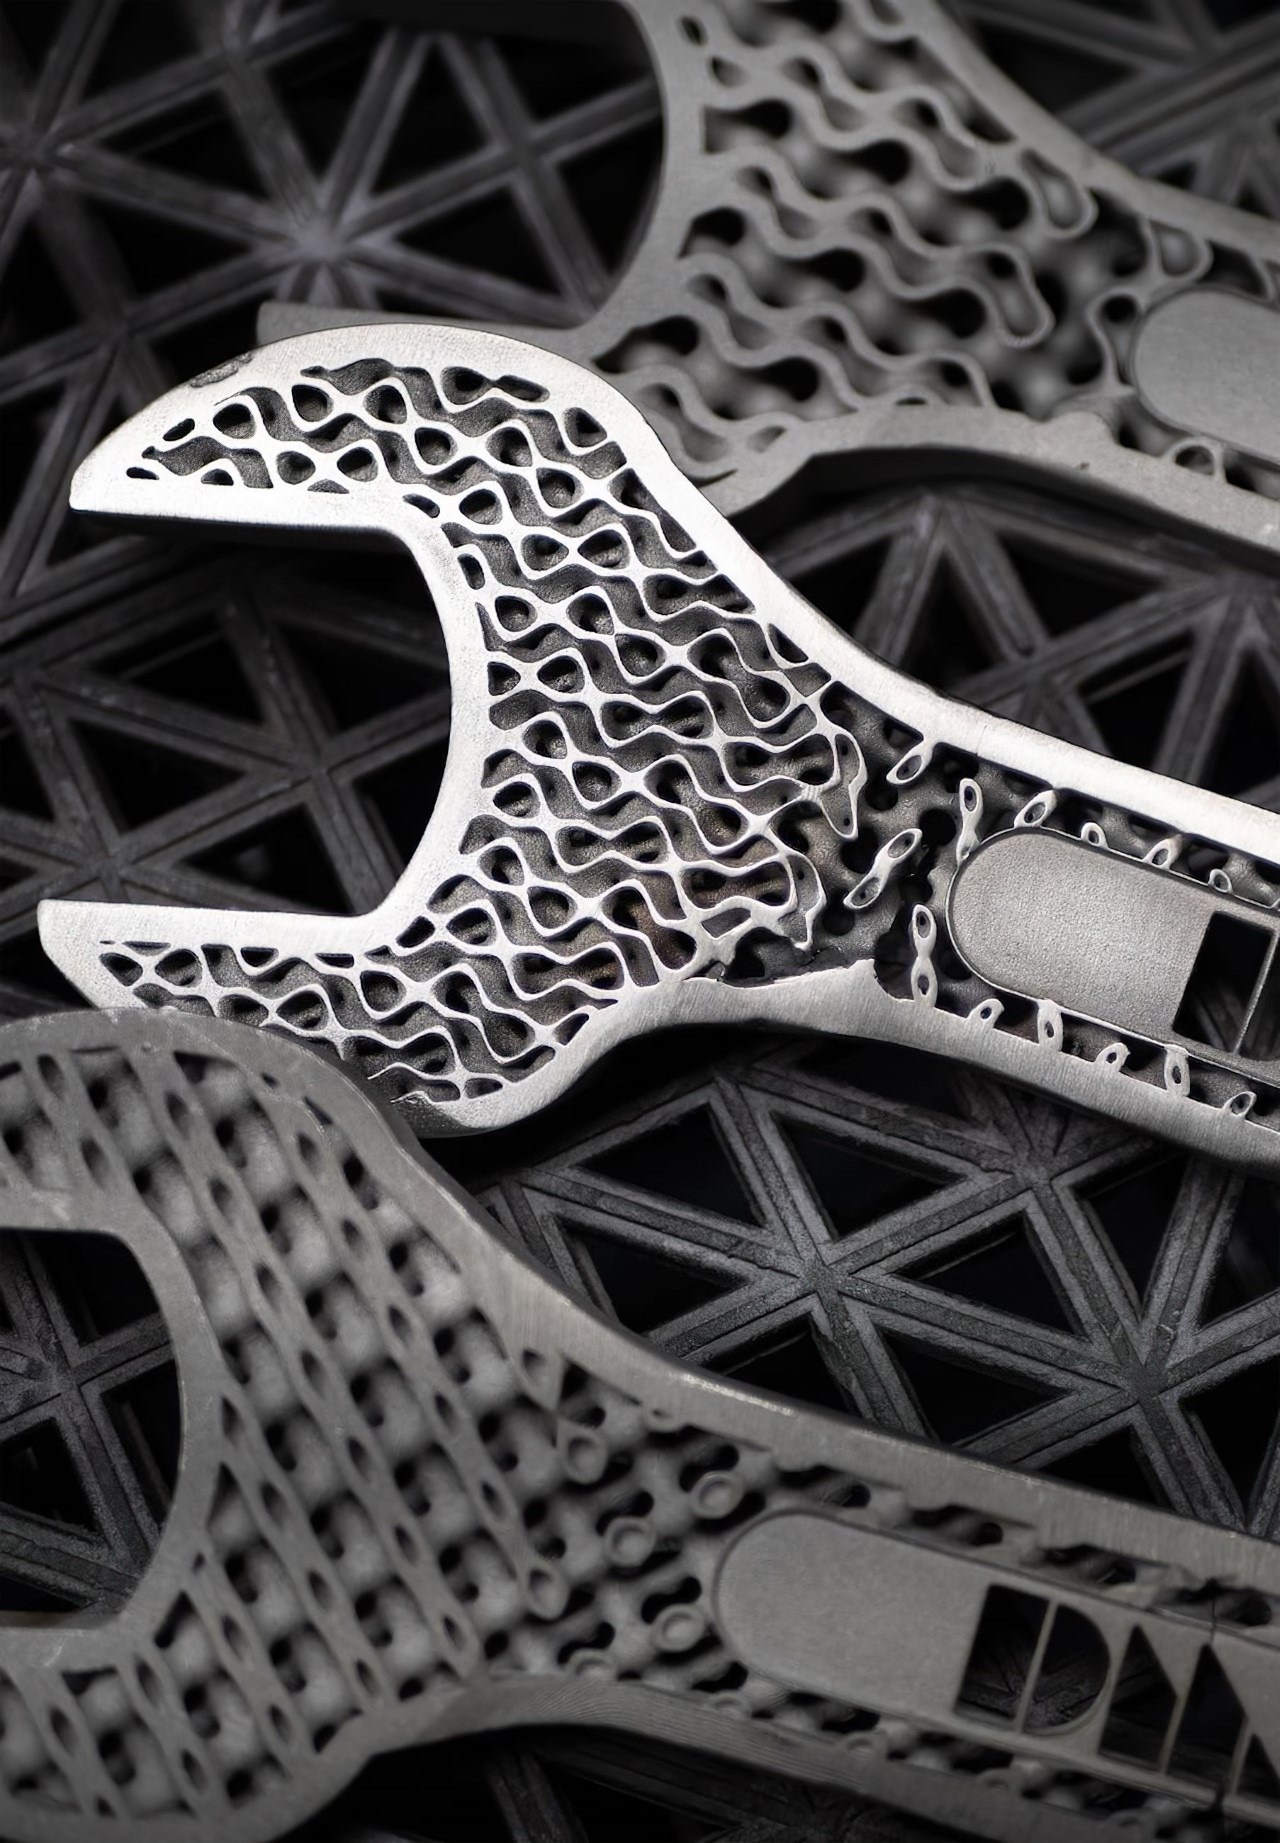
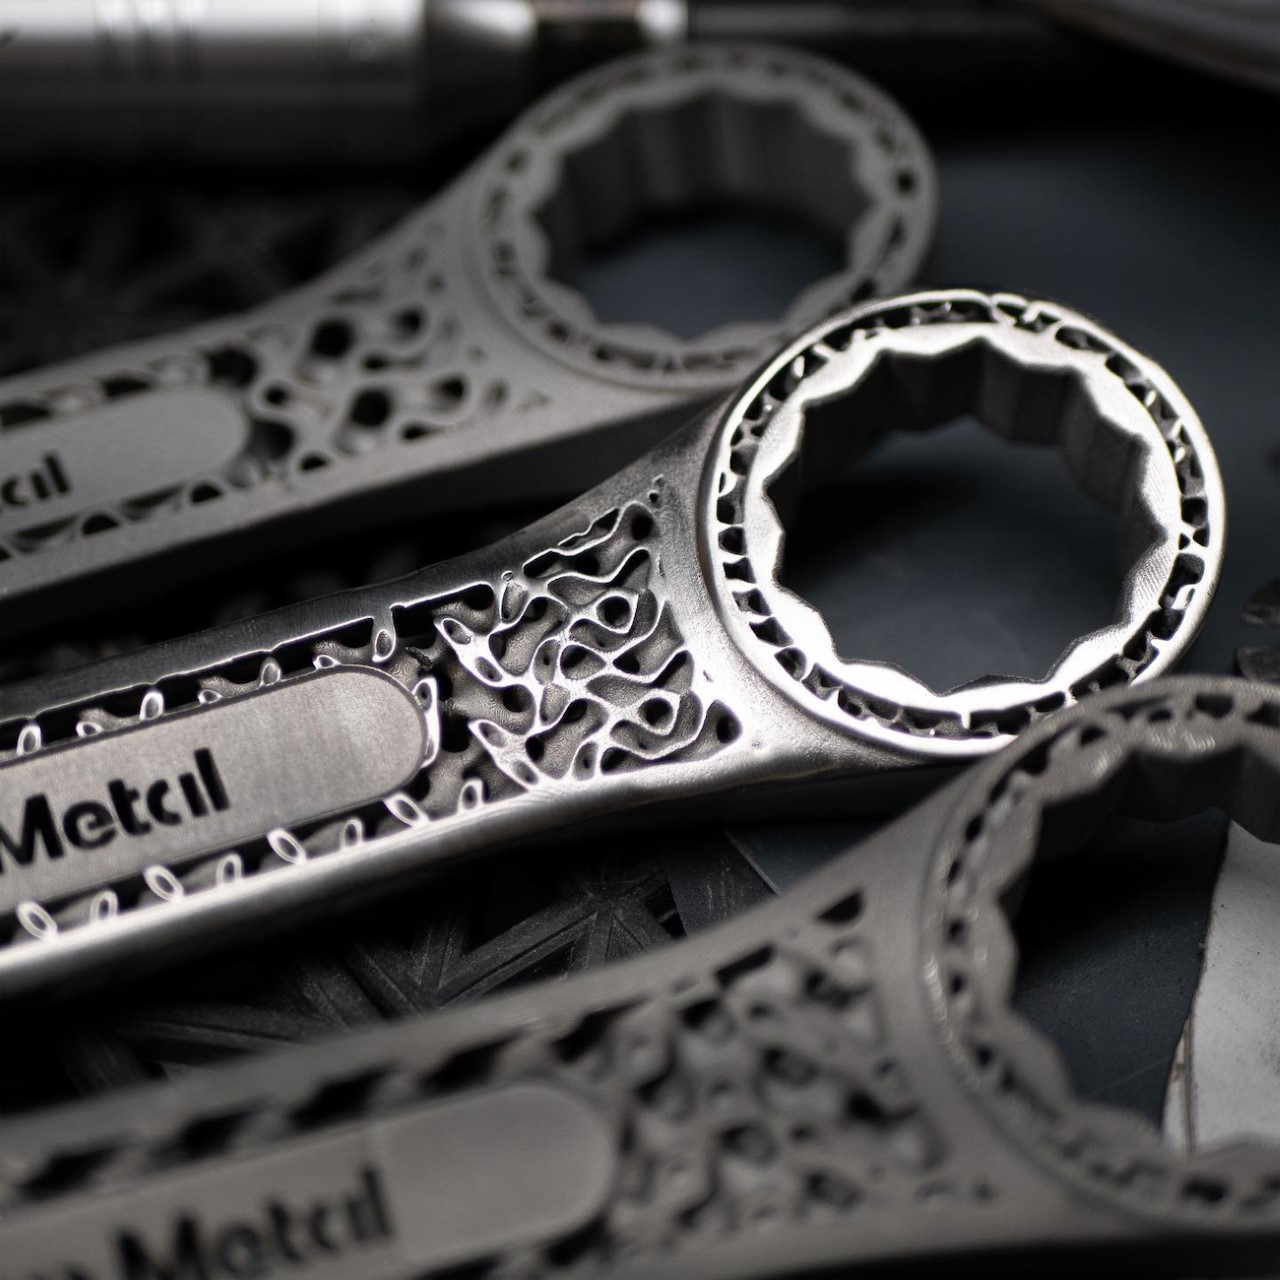
Look at these wrenches and you’ll almost instantly notice something different about them. Unlike the die-cast wrenches you see with solid metal bodies, these unique tools from Desktop Metal come with a textured inner surface, featuring multiple holes and cavities. The inner surface of these wrenches use a gyroid-style in-fill, commonly seen in 3D printing to fill up inner spaces with support material while conserving plastic. The gyroid inner mass gives these metal wrenches their strength while simultaneously cutting down on material and weight. The result is the same, functional tool but with nearly 30% less mass and weight.
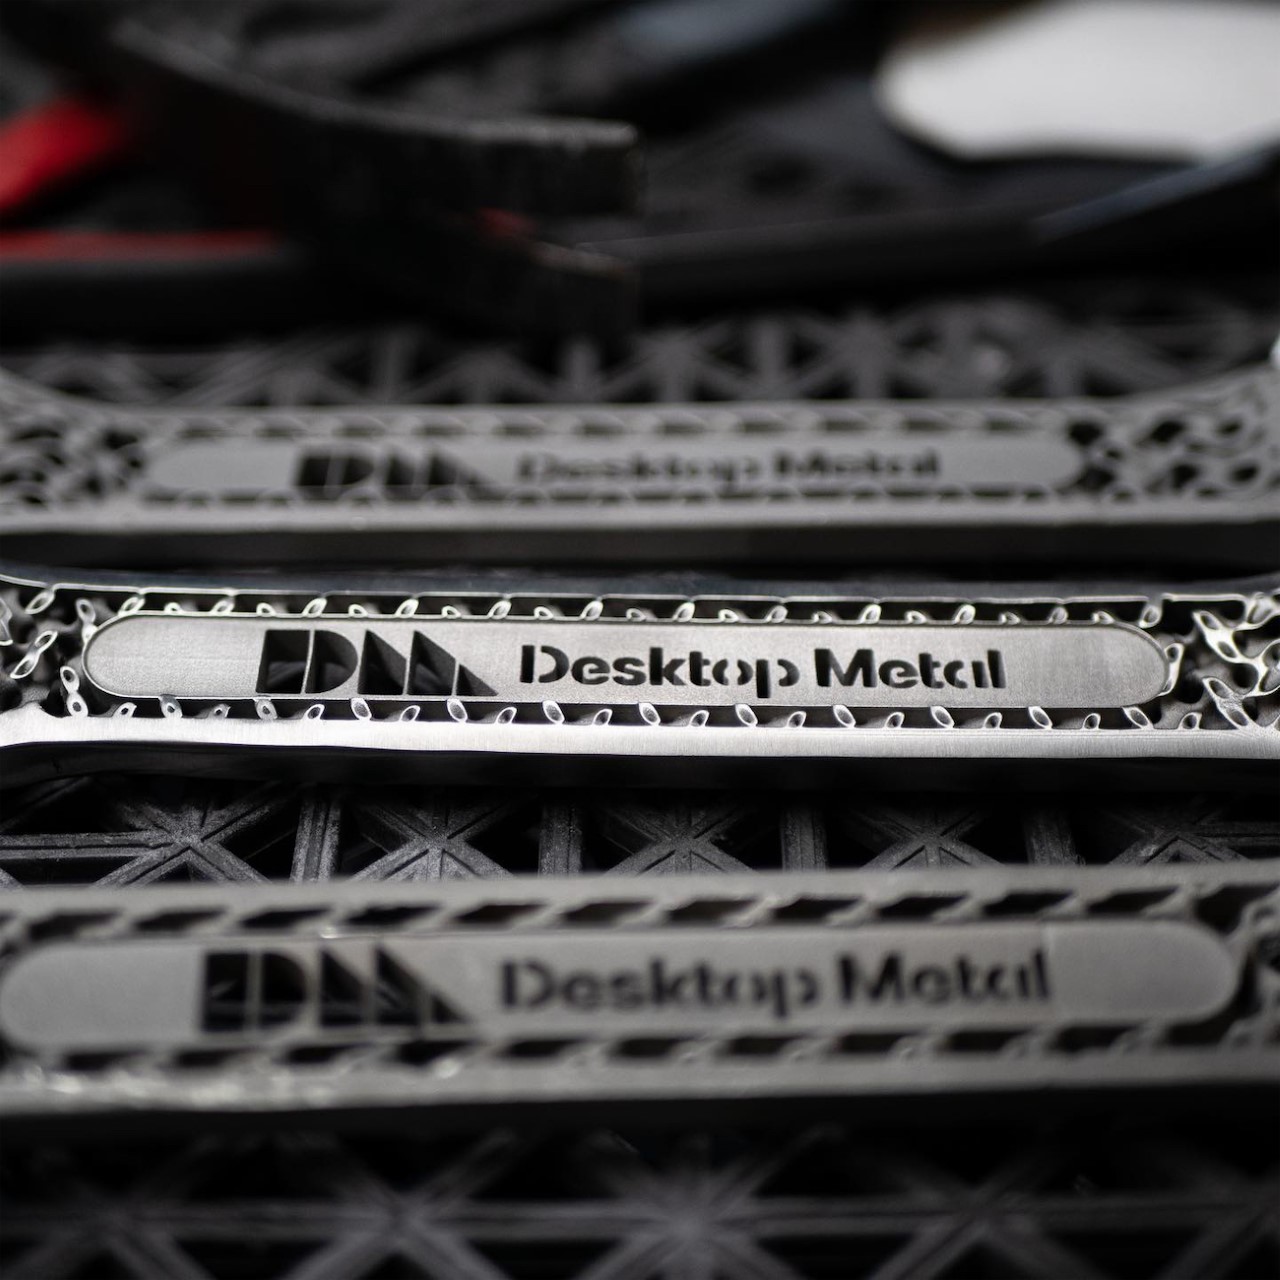
Designer: Desktop Metal
This sort of intricate manufacturing is only achievable using 3D printing. In this case, the wrenches are fabricated using a process known as Single Pass Jetting, a proprietary form of metal 3D printing developed in-house by Desktop Metal. The prototype wrench is less of an actual product and more of a showcase of Desktop Metal’s capabilities, with its extensive range of metal printing machines that cover industrial and consumer-grade use-cases.
The result of Desktop Metal’s SPJ printing is quite remarkable. The parts have a much higher and more uniform density (up to 99%) than other metal 3D printing methods while being much faster too. The way single-pass jetting or binder jetting technology works is that it uses a binding material in a vat of powdered metal to create metal products rather than using lasers to fuse metallic dust together. Once the part is made, it’s sent into a furnace for the sintering process, which causes the metallic parts to fuse together and the binder to melt out in the process. You can read more about it here.
The post 3D-printed workshop wrench offers 100% of the strength with just 70% of the material first appeared on Yanko Design.

Marketing guru Seth Godin has an analogy he likes to call “The Quarter Inch Drill Bit.” In the analogy, he highlights that when a customer goes to a shop to buy a quarter-inch drill bit, they don’t really need a quarter-inch drill bit… They just need a quarter-inch hole. The drill bit is merely a means to an end; an instrument that they require to make a quarter-inch hole in the wall that can then be used to hang a shelf. Now apply this analogy to the world of 3D printers.
You could be on the market for a 3D printer, whether it’s for building prototypes, miniature figurines, hobby items, or actual products. Instead of splurging on a 3D printer, however, the folks at Xometry have a better solution – just use their printers instead. A global company based in Maryland, Xometry has a network of over 10,000 CNC manufacturers, 3D printers, molders, and other equipment that you can access. A whole lot easier than buying, maintaining, and upgrading your own personal 3D printer, Xometry’s online dashboard and Instant Quoting Engine let you easily upload your CAD files and have them printed just the way you want and shipped to your doorstep in a matter of days.
Visit Xometry’s website to upload your 3D models and get an instant quote today!

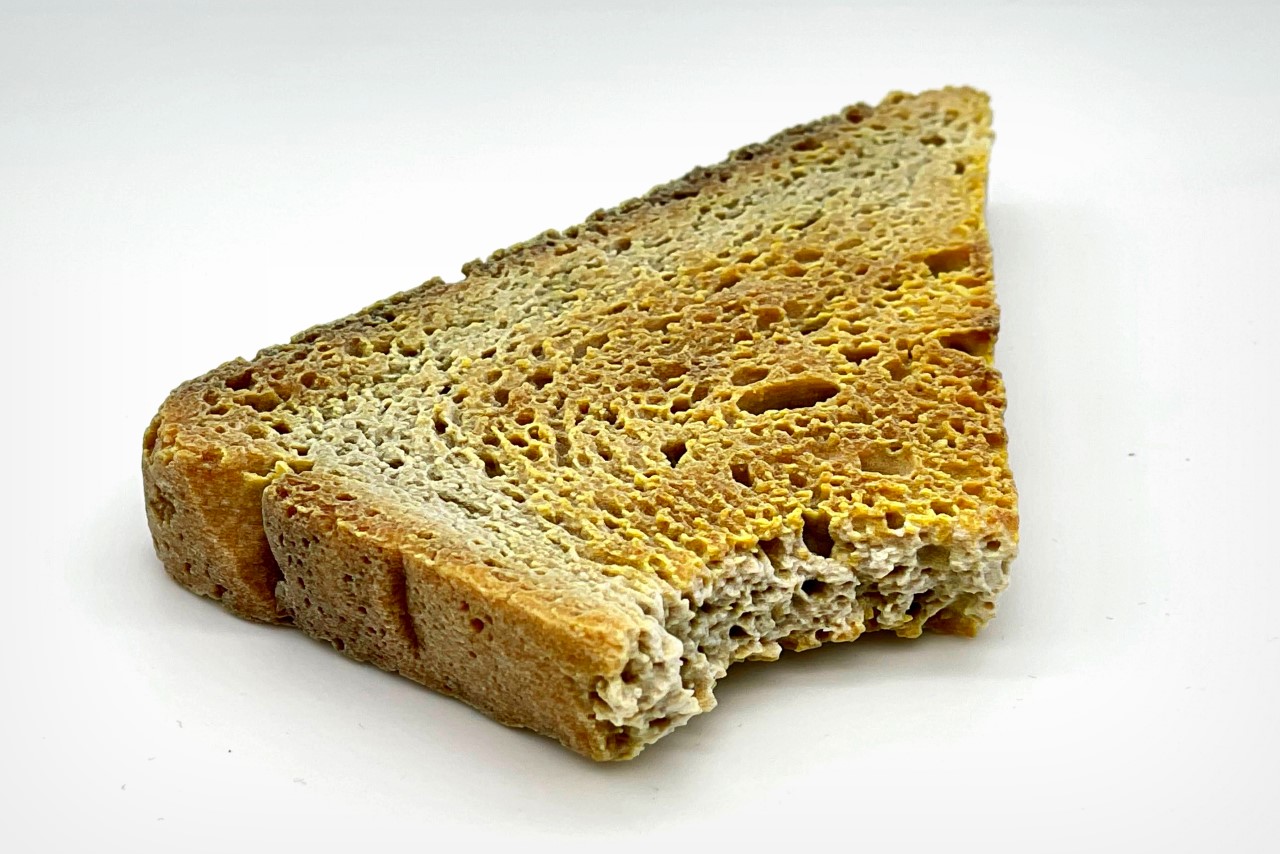
These hyperrealistic pumpkins were 3D printed on Xometry’s PolyJet printers
With its online dashboard and global presence, Xometry makes 3D printing accessible to pretty much everyone… without you even needing to own a printer. Working almost like the ‘Amazon’ of fabrication, Xometry simplifies the prototyping process to a handful of steps and gives you exactly the kind of quality you need, going from basic single-color prints to even detailed prints with as many as 600,000 colors (including those from Pantone, RAL, HEX, and CMYK libraries), and also home-delivers the results to you just like ordering something online. Quite like the way Uber makes transportation easy without owning a car, Xometry makes fabrication easy without needing to own any expensive gear or have elaborately designed spaces for it.
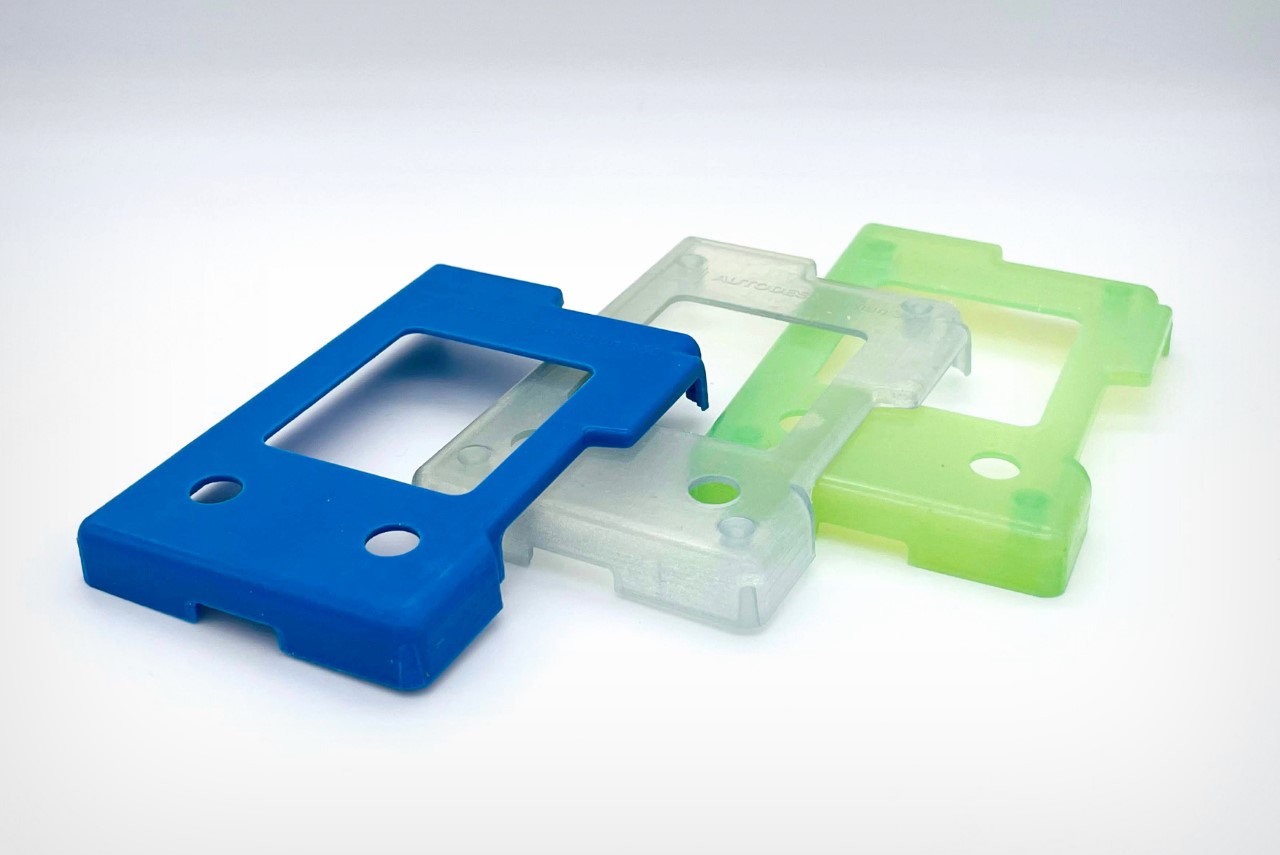
The printers allow for solid, transparent, and translucent prototyping
The 3D printers used by Xometry aren’t your average consumer-grade ones either. Xometry offers eight types of industrial 3D printing using top-of-the-line equipment from Stratasys, EOS, Carbon, Desktop Metal, 3D Systems, SLM Solutions, Concept Laser, and more.
Xometry’s 3D printing and fabrication services are used in an expansive range of industries, from design and engineering to architecture, automotive, aerospace, art & decor, and even the culinary industry. Their 3D printing services are even favored by large multinational corporations, the likes of Bosch, BMW, Dell, General Electric, and NASA, all of whom use Xometry’s platform to quickly prototype ideas to perfection without investing in expensive 3D printing equipment or massive fabrication/prototyping divisions… and honestly, you shouldn’t have to either. Xometry’s online dashboard makes it easy to just upload your design and generate a quote and delivery timeline for your final product. You can modify your process too, opting between regular or PolyJet printing, and choosing your print colors, quality, and material, saving time, energy, and money in the process. Don’t buy a 3D printer. Just rent the services of one out instead!
Visit Xometry’s website to upload your 3D models and get an instant quote today!
Polyjet printing lets you print up to 60,000 colors, layer by layer, allowing for hyperrealistic prints
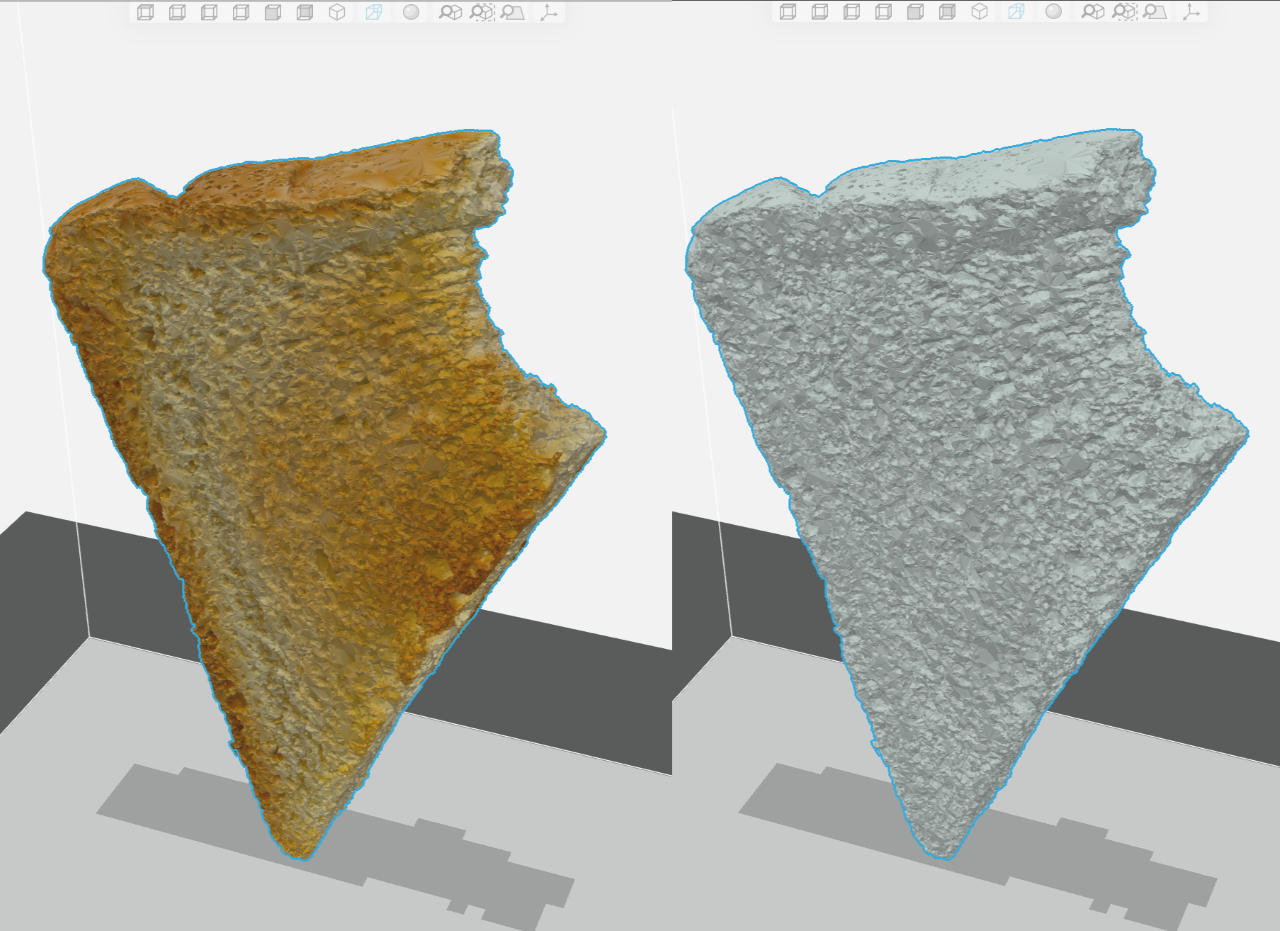

The various printing capabilities let you mimic shape, size, color, and texture.
Visit Xometry’s website to upload your 3D models and get an instant quote today!
The post Looking for a good 3D printer for your design needs? Here’s some advice for you… first appeared on Yanko Design.
Ever since smartphones became ubiquitous, we rarely see actual clocks in houses and offices. In fact, young kids now don’t know how to tell time using analog clocks since they’re so used to just seeing numbers on their screens (look for hilarious videos on Tiktok about this). And if you do have a clock on your walls, it’s the usual ones that you can buy at a store. But if you’re into design and aesthetics, there are some clocks out there that are pretty unique, and some like this, even have a noisy feel that come along with it.
Designer: Hans Andersson
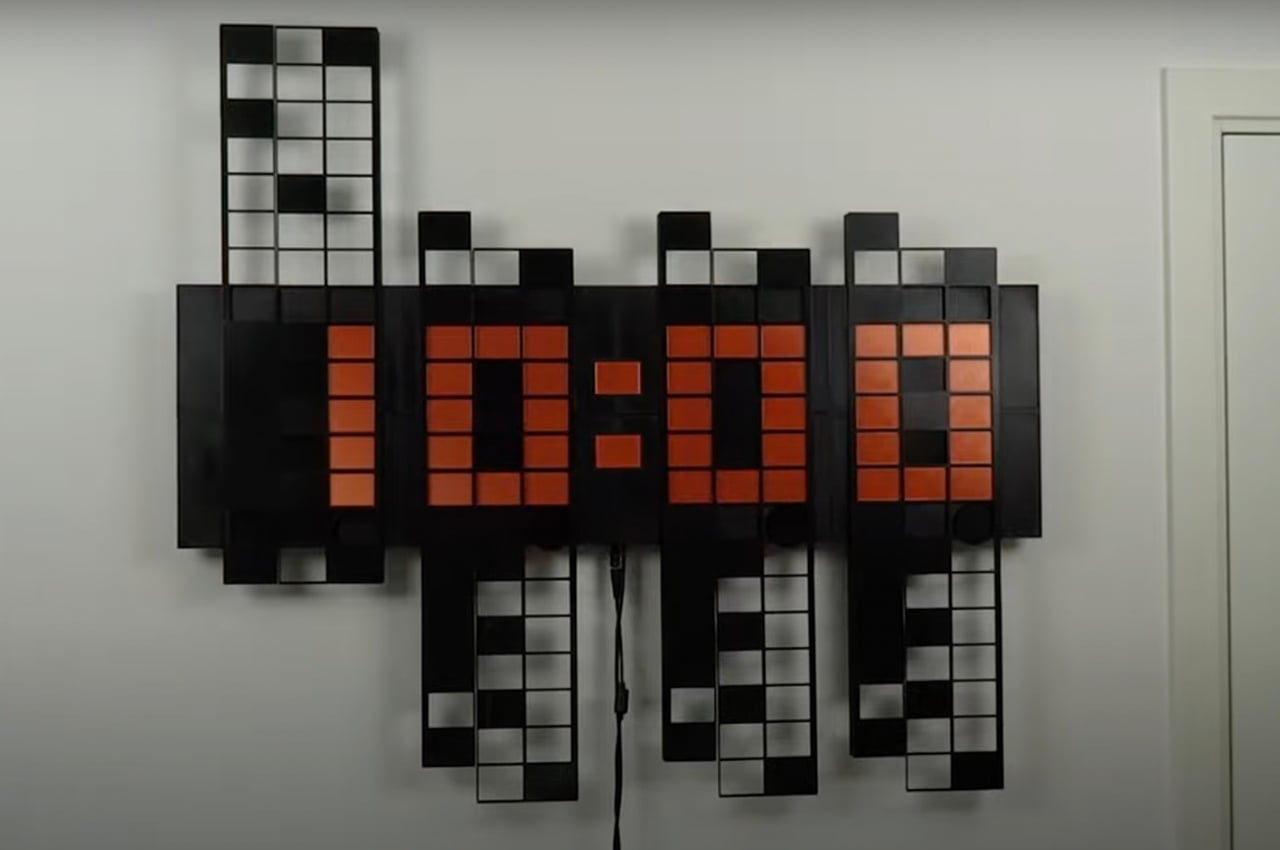
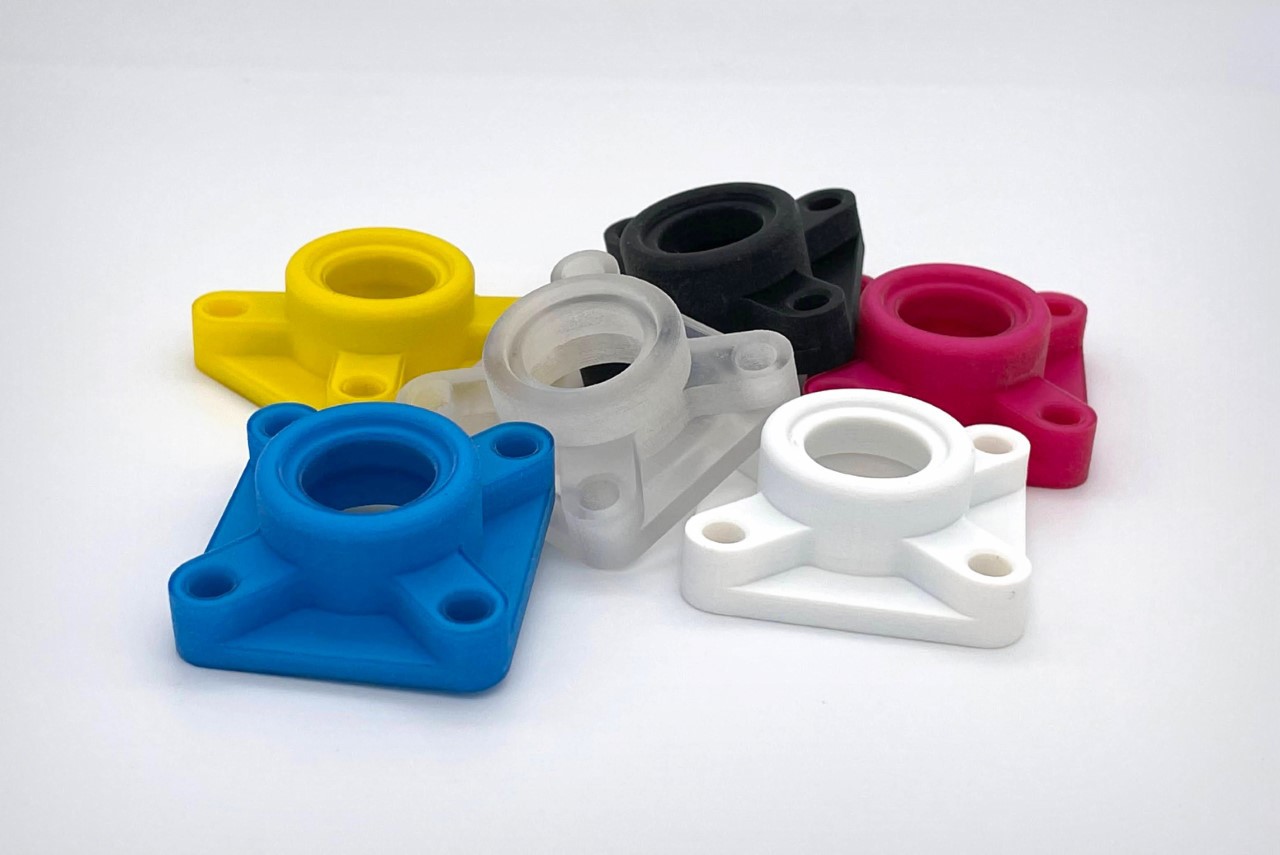
The Time Slider is a clock design that shows four sliders which look like pixels and are actually 3D-printed frames. They move up and down to various positions to show the pixels for a specific digit to tell the specific hour or minute. It is made using an Arduino Mega 2560 board, a real-time clock (RTC) module, motor drivers, wires, and a power supply. The design actually lets you scale up or down to whatever size you want the wall clock to be. It also doesn’t have any buttons to set the time so it must be configured and code uploaded when you set it up.

The other unique thing about this clock design is that it is pretty noisy. Every time it changes the numbers, which is almost every second of course, you get a very distinct, mechanical sound that can sound like an alien trying to make contact with you. So you might not be able to get any sleep the first few days this clock is installed in your house but you will probably, eventually get used to the noise. If not, you probably shouldn’t get this one since you have been “warned” about the sound.
The Time Slider really has a great aesthetic look and the stepper motors and its accompanying sound gives it an even better feel (if you can stand the noise). The fact that it’s also a 3D printed device and is an Arduino product, which is pretty popular with a certain crowd, adds even more to the appeal for those looking to bring back an actual clock to their space.
The post Meet the Time Slider, a retro-inspired pixelated clock to jazz up your space first appeared on Yanko Design.
Keeping your eye on the ball never got easier!
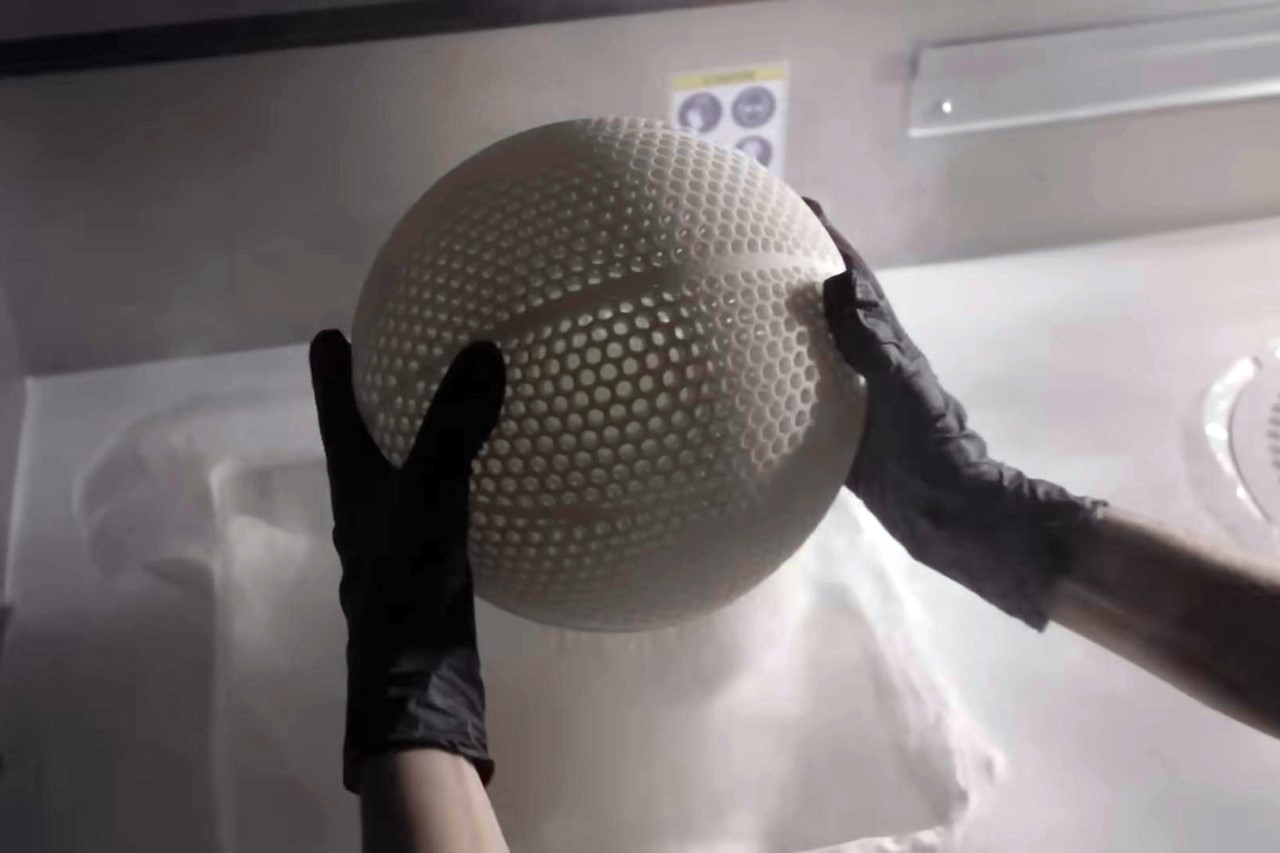
Using a format and technique similar to those airless car tire concepts we’ve seen before, Wilson’s latest airless basketball employs a similar see-through 3D-printed mesh to create a ball that bounces just like a basketball… but looks like nothing any basketball you’ve ever seen before. The design was unveiled at the NBA Slam Dunk Contest, with Houston Rockets forward KJ Martin taking the ball for a literal spin. Quite to everyone’s amazement, the Airless Basketball prototype responds to stimulus exactly like the standard inflated basketball. It’s easy to grip, has a surprisingly responsive bounce, and defies convention with its unique aesthetic!
Designer: Wilson Sporting Goods Co.

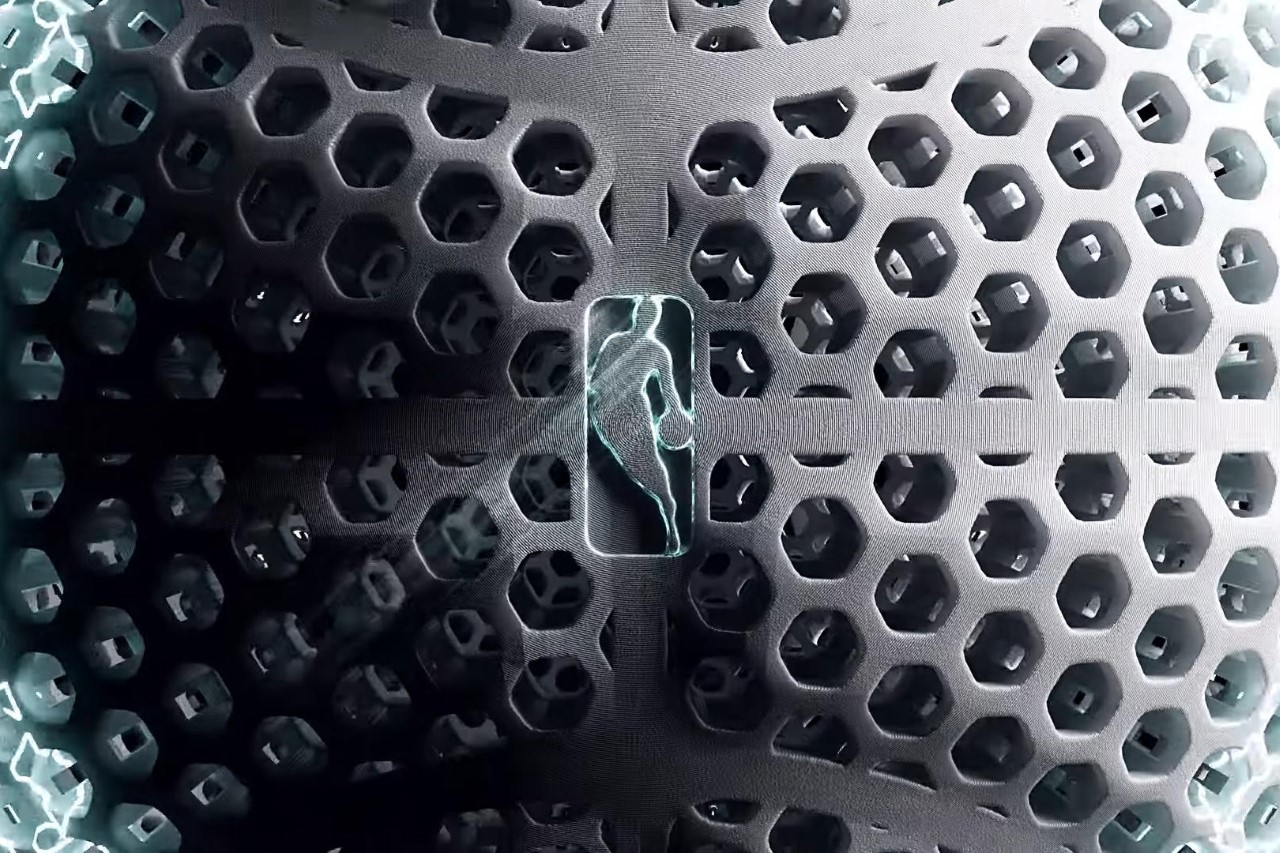
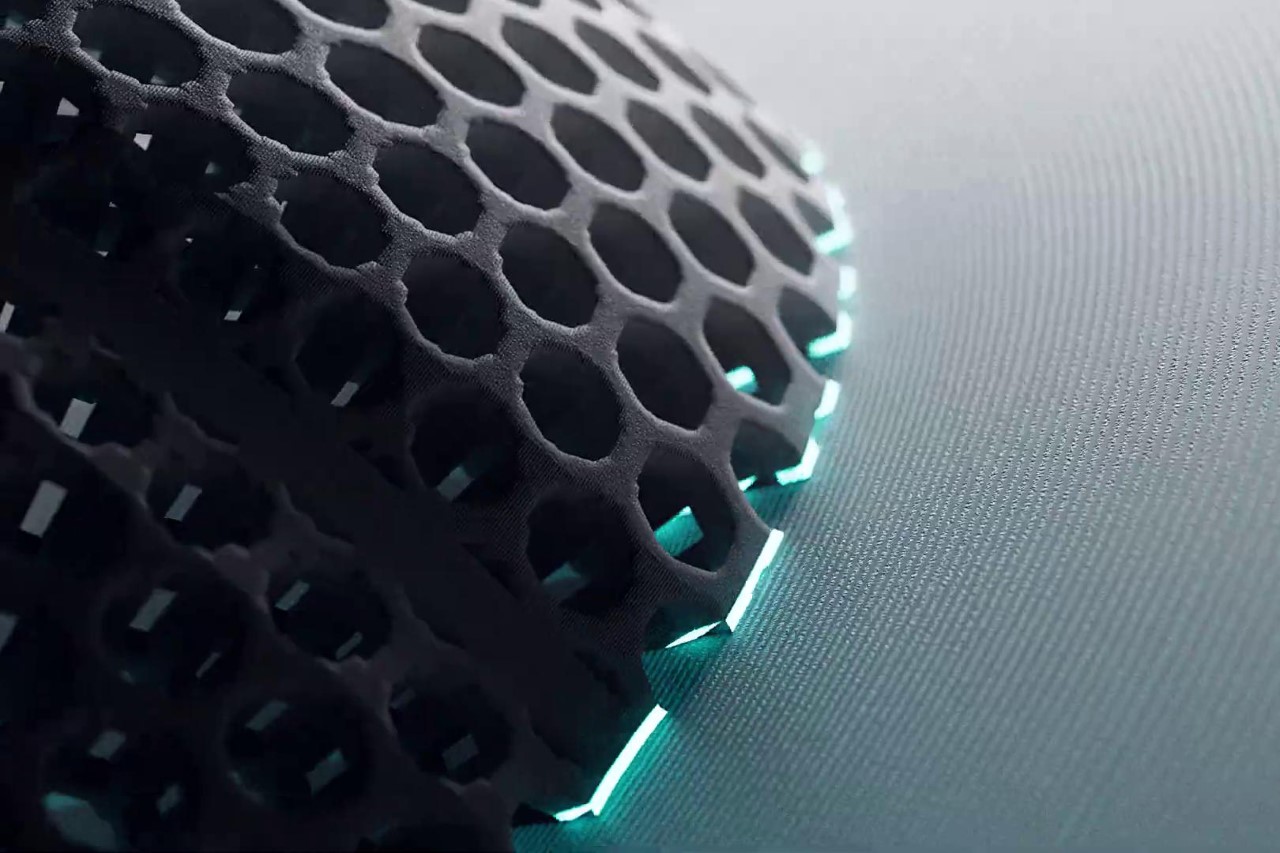
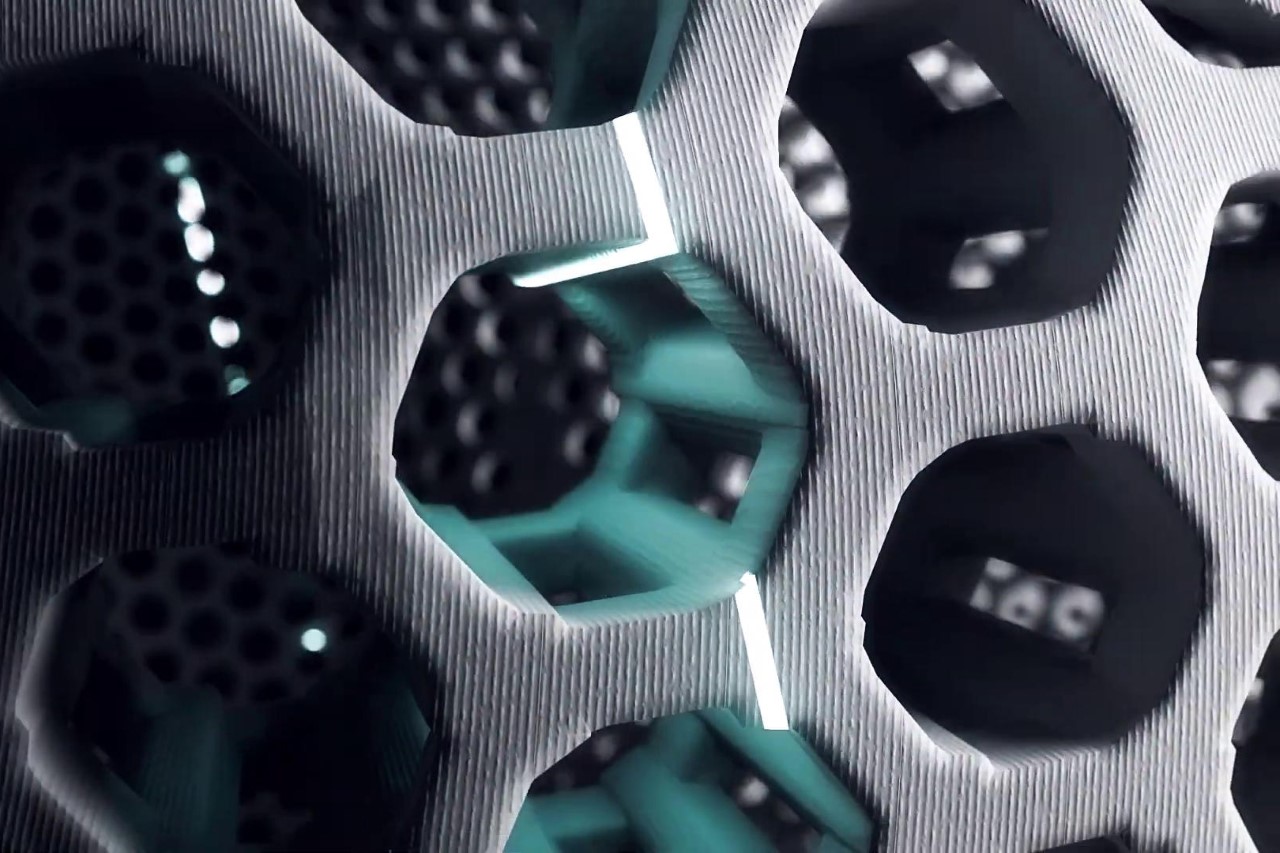
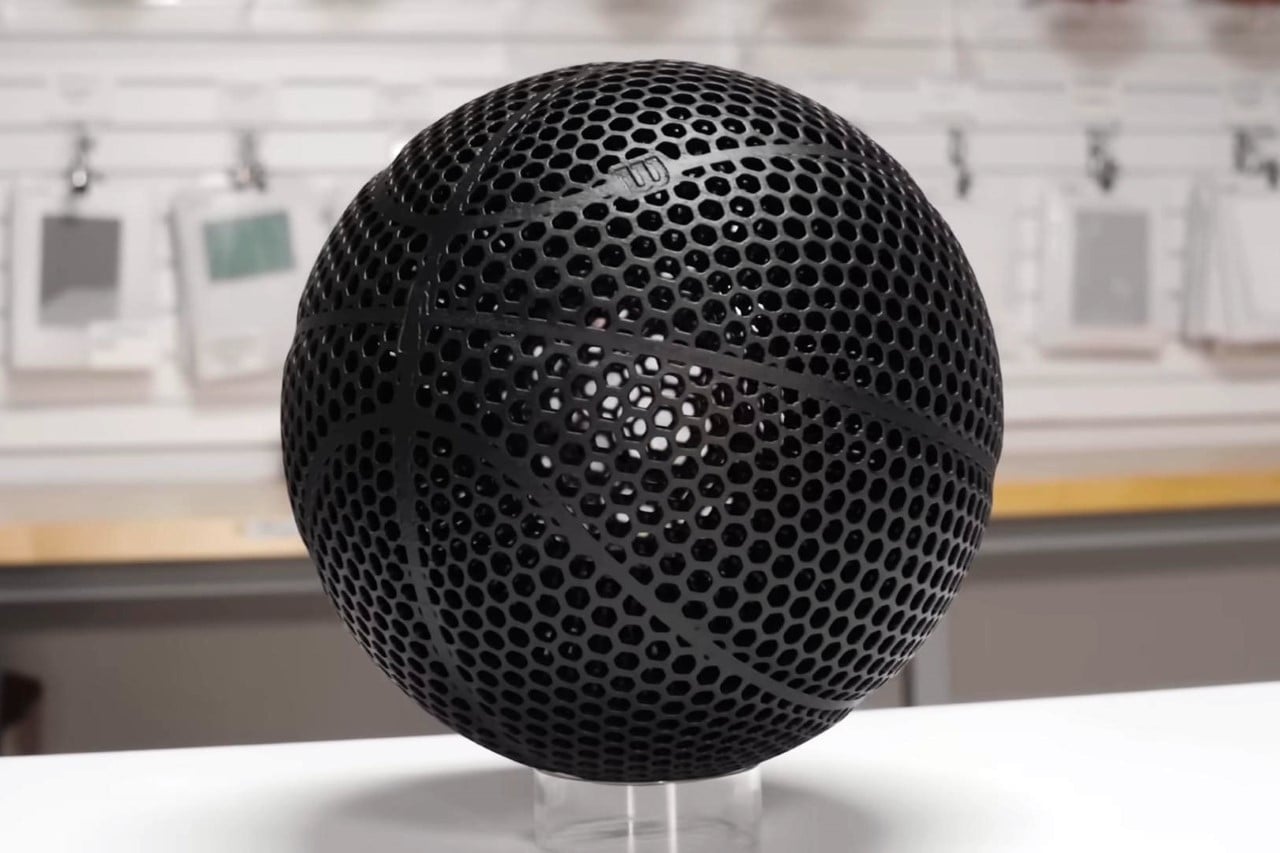
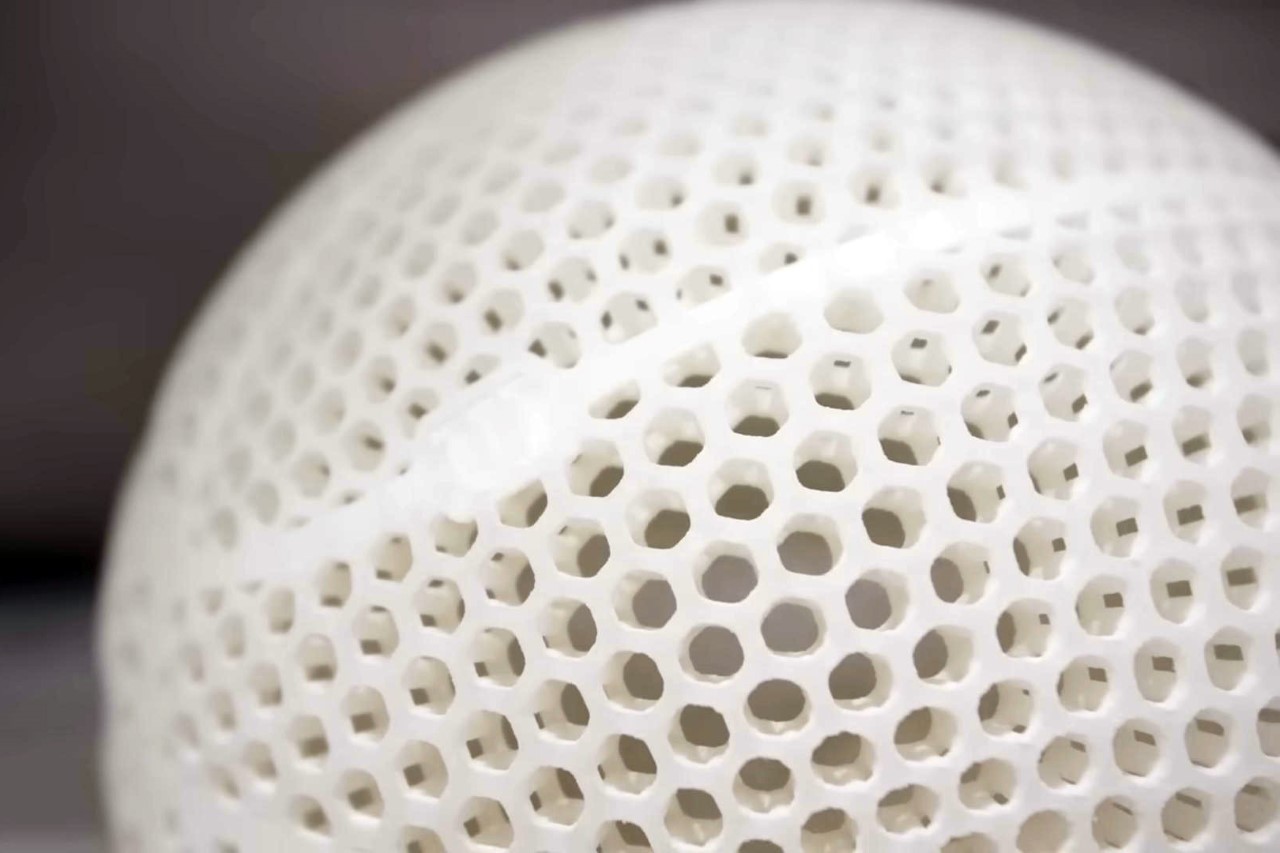
Created as an experimental prototype by Wilson Sporting Goods Co.’s R&D (Basketball) division, the Airless Basketball prototype is a stunning piece of design and engineering that looks, weighs, and bounces just like a basketball, but fundamentally rethinks the ball’s physical structure and underlying physics. The ball employs a 3D hexagonal mesh structure that’s highly elastic, enabling it to bounce just like a pressurized ball. However, its airless nature means it never needs maintaining or refilling, unlike standard basketballs that lose their bounce when they deflate mildly.
What’s so impressive about the Airless Basketball, apart from its jaw-dropping aesthetic, is that it completely rewrites the rulebook. Most basketballs have their signature bounce because they’re filled with pressurized air. Reduce the pressure and the ball just flops onto the floor with a dissatisfying thud. Wilson’s redesign goes against that notion, thanks to its unique structure and elastomeric material. Arrived through multiple design iterations and rigorous testing at the NBA test facility in Ada, Ohio, the ball cleverly balances tradition and innovation, with a futuristic mesh design that still feels relatively familiar in the hand, having the same weight as a regulation basketball and even the familiar seams for players to rest their fingers in.

The ball’s brilliant redesign comes from Wilson’s R&D division, led by Dr. Nadine Lippa, Kevin Krysiak, and a team of designers and engineers. As they worked on ‘reinventing the basketball’, Lippa knew pretty much instantly that such a complex structure could only be achieved through additive 3D printing. Having gone through multiple iterations, the team arrived at the design we see today, featuring the hexagonal mesh that not only gives the ball its signature bounce but also creates a grippy texture, much like the dotted pattern found on existing balls.
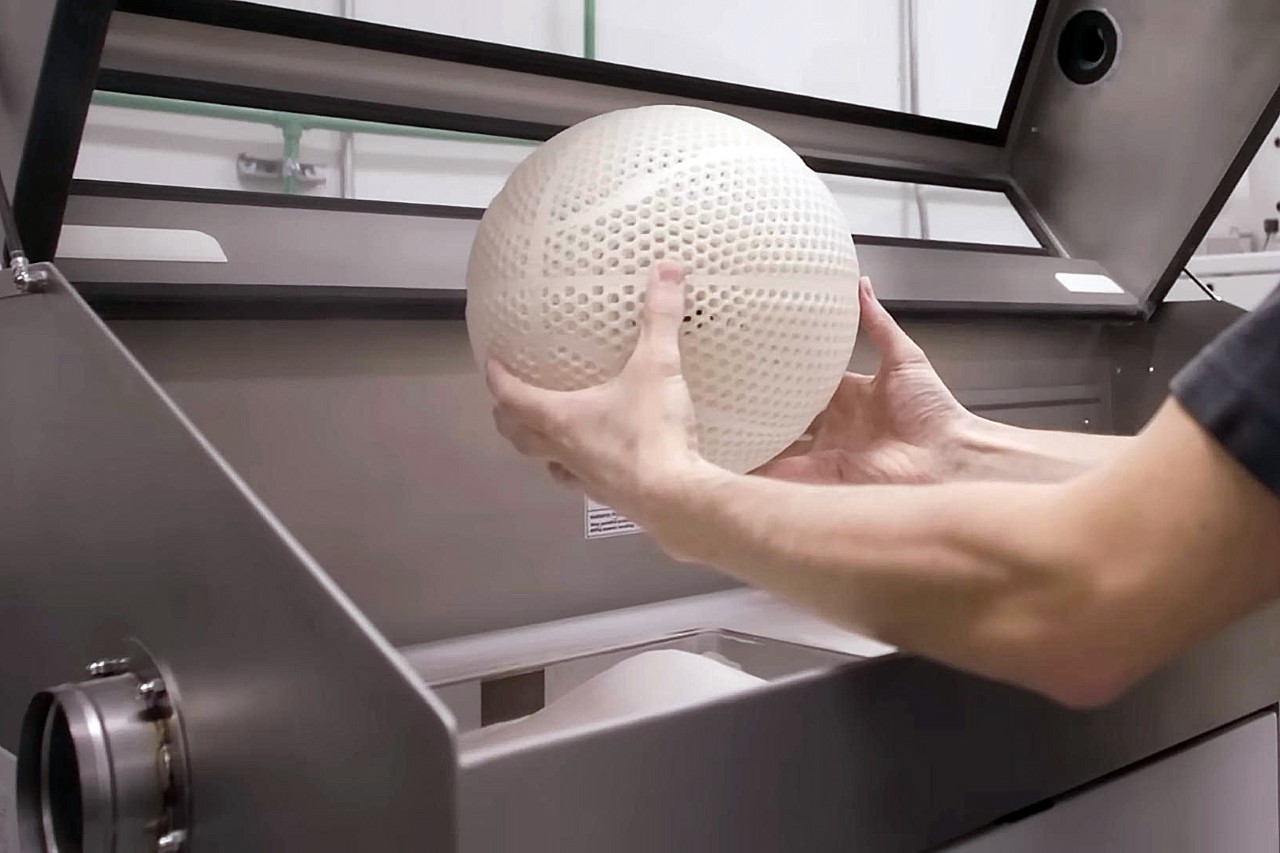
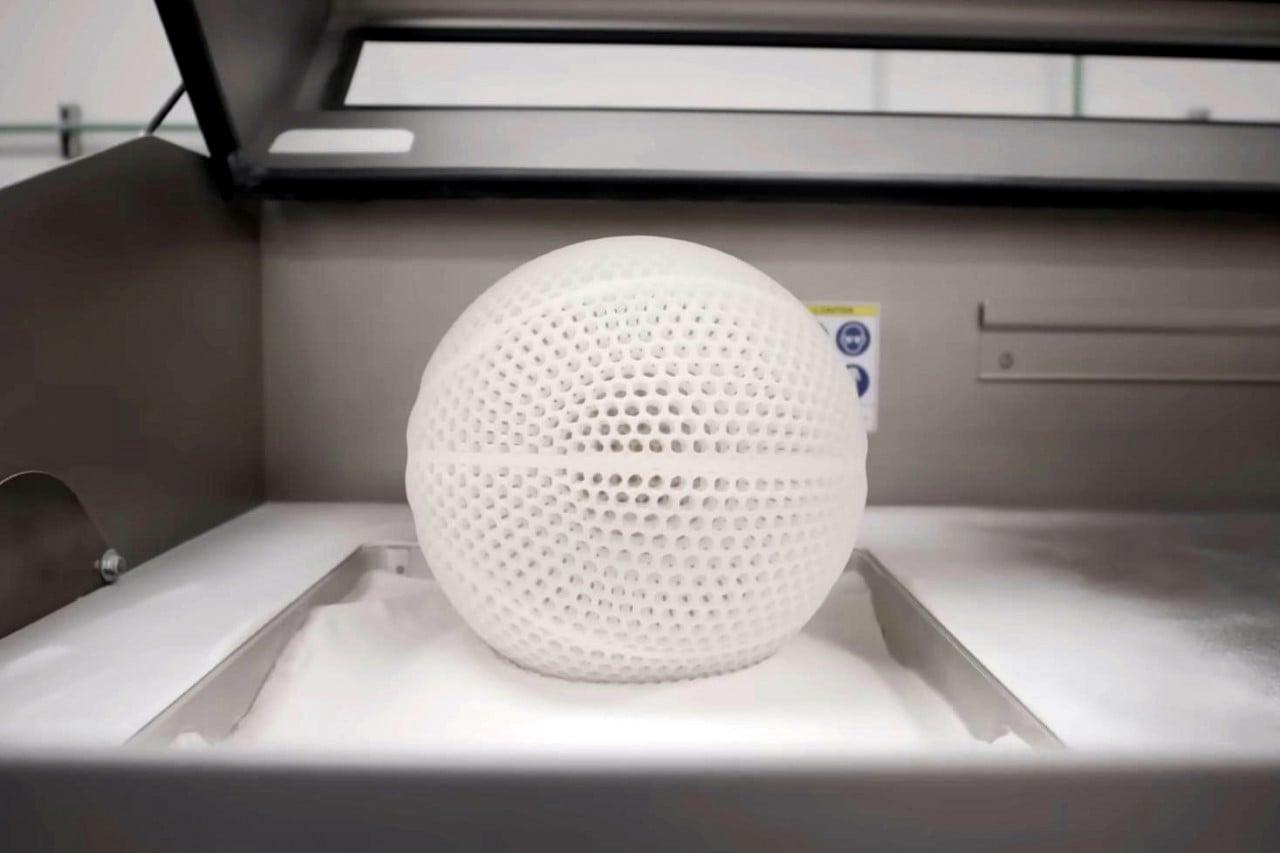
The team partnered with EOS, a 3D-printing solutions company, to help build the functional prototype. The ball started out as a pit of white powder, coming to life as the powder was melted into shape using a laser in a process commonly known as SLS or selective laser sintering. After the print was complete, the team dusted off the excess powder, before ‘sealing’ the design into its shape using yet another machine. Black dye was then injected into the model in a third and final process, giving us the final, finished ball. It’s unclear how long the entire process took, although 3D printing is known to be a relatively slower process. The trade-off, however, is a ball that requires much less upkeep and doesn’t ever need pumping or refilling.
Although the ball was just previewed for merely a handful of seconds at the Slam Dunk Contest, we’re yet to see it be used in an entire match. A lot of factors remain undetermined, like the ball’s lifespan, resistance to damage, how well players can grip it, whether objects can get stuck inside the ball’s mesh, how it reacts to spin, and what its overall aerodynamics are.
Wilson isn’t planning on manufacturing these for retail or for professional games. This prototype is the result of a long-term experiment to push the boundaries of innovation at the company and test out new materials and structures. Basketballers can be an incredibly superstitious bunch, and notoriously resistant to major change, so don’t expect to see this in any NBA games soon… although maybe it could debut as an add-on upgrade in NBA Live! EA Sports, make it happen!
The post Wilson reveals 3D printed ‘Airless’ Basketball with a stunning see-through hexagonal mesh design first appeared on Yanko Design.