The Baby Flask Is the Best Way to Sneak Booze

Pure genius Instructables user mikeasaurus has created step-by-step instructions detailing how to create a Baby Flask, a doll baby in a chest-mounted baby carrier you can fill with booze. A lot of booze too. Goodbye, hip flask, hello, Baby Flask!

The Baby Flask consists of a baby carrier holding a doll with all its stuffing removed and replaced with a 2-liter hydration bladder. The straw from the bladder comes out of the baby’s forehead, so it looks like you’re just kissing your baby on the head whenever you’re drinking. As far as genius inventions go, this might actually rival the wheel or inclined plane.

As Mike points out, if anyone asks to see your baby, you can just dismiss them with a “Shhhh, she’s sleeping.” Of course, that may be easier said than done, considering I already had a baby carrier and hydration bladder but no doll, so I had to use a Godzilla toy instead. Fingers crossed that everyone just thinks it’s a really ugly baby.

[via Instructables]

CAT-CAT: A Star Wars AT-AT Inspired Cat Condo

Because most people’s cats live better lives than I do, do-it-yourselfer Whitney Fabre constructed the CAT-CAT, an AT-AT-inspired cat condo. She built the condo for her feline friend, Captain Jack Harkness, who was named after the Doctor Who character. Why she didn’t build a TARDIS cat house instead is anybody’s guess.

For those of you interesting in building your own CAT-CAT, Whitney was kind enough to create an Instructable, so you can follow the directions and, provided you have the skills and supplies, wind up with something similar and not just a dangerous pile of wood scrap and nails like I did. But you know what they say: The best-laid plans of mice and men often go awry. And the worst-laid plans like mine almost always go awry.

There’s no question it’s a fine-looking cat condo. But even if I was able to successfully construct one, would my cat play in it or purposefully ignore it to spite me for all the time and effort I put into building it? Here, let me give you a hint: We named him Spiteful Bill for a reason.

[via Instructables]
Animated LED Super Mario Bros. Clock: The Time is 1-Up

Crafted by software engineer and Instructables user jnthas, this Super Mario Bros. animated LED clock features Mario jumping up to hit a question block to change the displayed time. How clever is that? Very clever – the answer is very clever. Far more clever than any clock I could ever come up with. Stupid raindial, what was I thinking?!

The clock consists of an ESP32 Dev Board, 64×64 RGB LED Matrix, some firmware, and a 5V power supply, all of which were purchased off AliExpress. You just slap all the parts together, and presto… nothing’s happening. Maybe you don’t just slap them all together as I had anticipated. There might be more steps.

If you want to build your own, you can follow jnthas’s Instructable, which is apparently well written and descriptive enough that multiple people have already replicated the project. Me not being one of them, just so we’re clear. Can somebody make one for me?

Make Your Own Smoking Rocket Incense Burner

Incense: if I burn enough of it at once it helps hide the fact that I haven’t taken the trash out in a while. And what cooler way to burn incense than inside a rocketship? Instructables user nomadecraftsanddreams created these detailed instructions for how to construct your very own leather rocket backflow incense burner. Prepare for blast-off!


For those of you unfamiliar, backflow incense cones have a small hole drilled through them that allows smoke to enter, cool down (becoming denser), then exit the bottom cascading downward, in this case making the rocket look like it’s smoking on its launchpad. Heck yeah, outer space, let me just stock up on astronaut ice cream and I’ll be right there.

The Instructable primarily consists of cutting leather to the appropriate shapes and sizes, then dying the pieces the color of your choice, and stitching them all together. It sounds simple enough, but I’ve never worked with leather before. Although I did own a pair of pleather pants in college that I wore too close to a bonfire and partially melted to my legs, so I’m pretty sure I’ve got this.

RadioGlobe: Spin This Globe to Listen to 2,000+ World Radio Stations

The brainchild of product design engineer and traveler Jude Pullen, The RadioGlobe is an internet-connected globe that plays a radio station from the area highlighted on the surface through its circular reticule. Just give the globe a spin to listen to the world. Well, provided you don’t land over an ocean.

Along with software designer Don Robson and a group of engineers, the team has released an Instructable detailing how to make your own RadioGlobe, which consists of 75 steps, every single one of which could be described as ‘out of my wheelhouse’ and ‘over my head.’ If they ever make it a purchasable product though, I will buy one and start learning foreign languages.

What a clever idea. Especially considering my fear of traveling any further than the grocery store, this would be perfect for me to take virtual vacations around the world. Plus I can call in to try to win all their radio contests.

[via LaughingSquid]

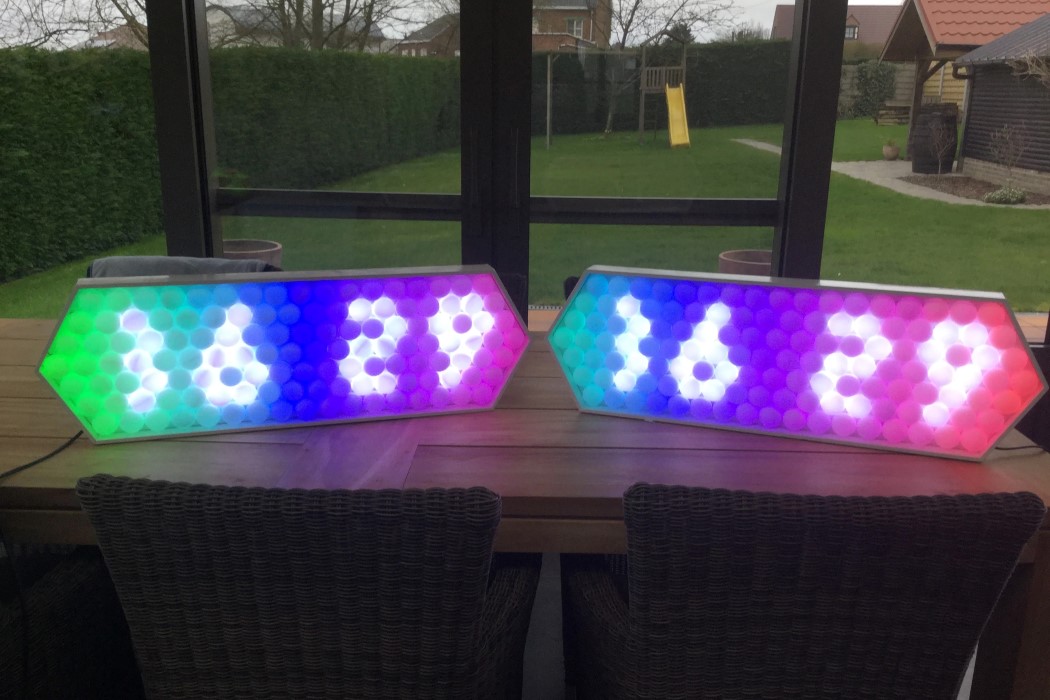
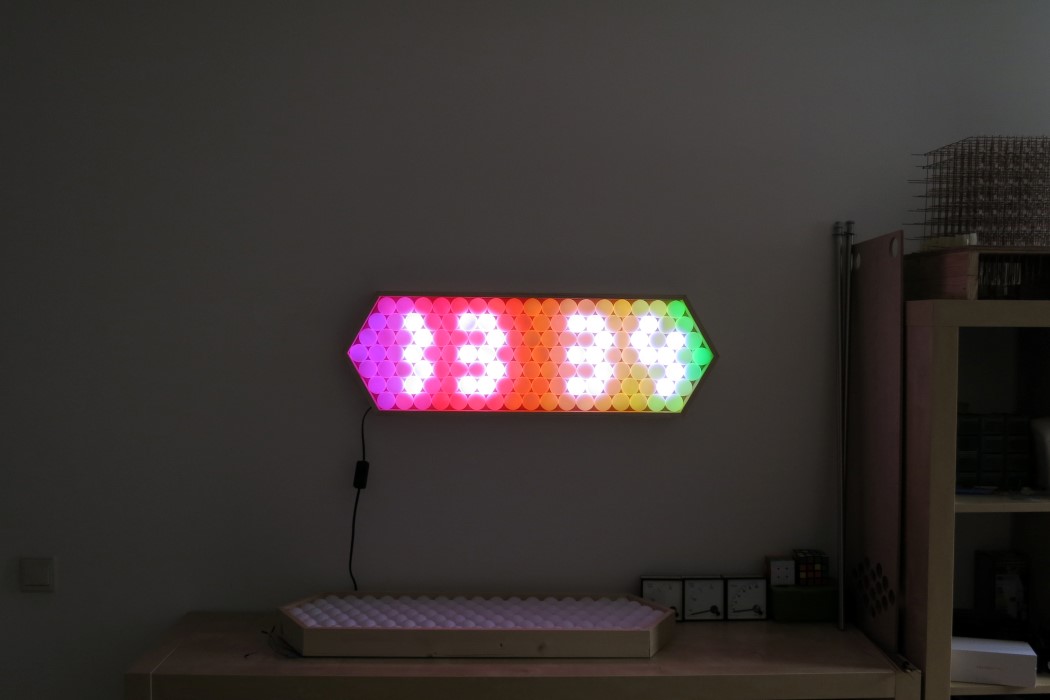
Make your own Pixel clock using Ping Pong Balls and LEDs!

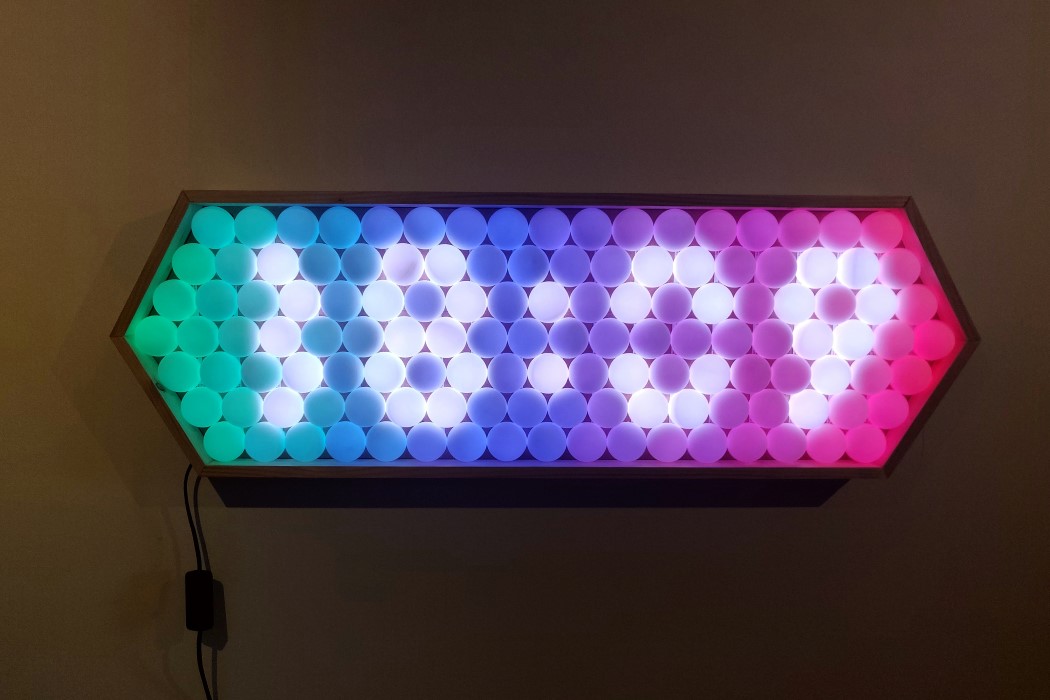
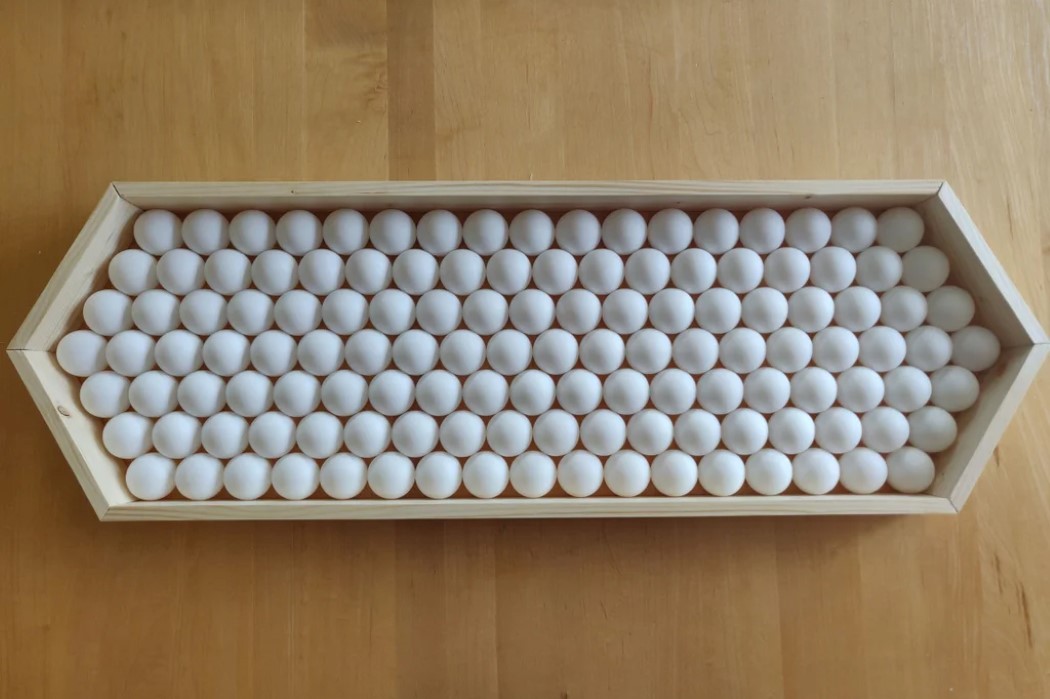
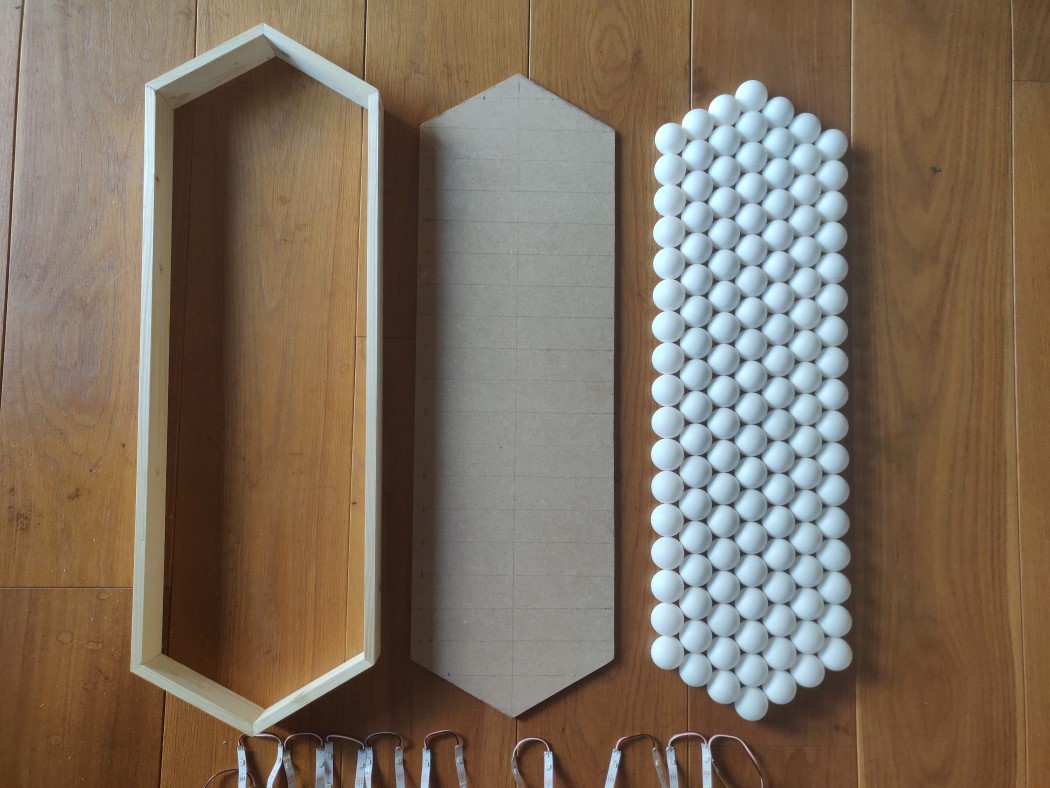
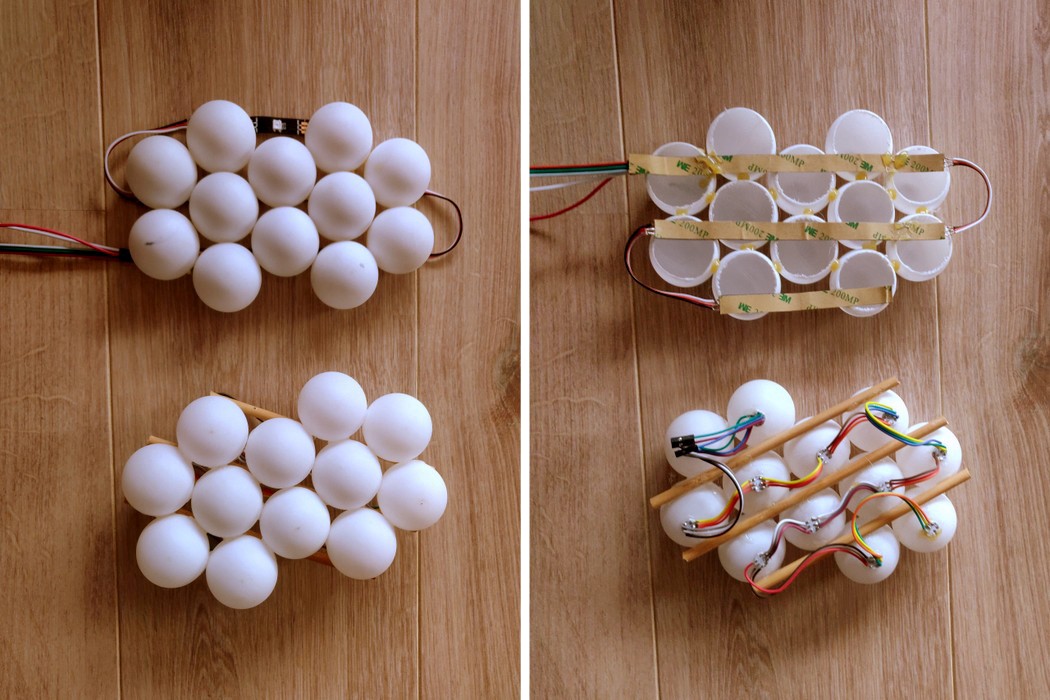
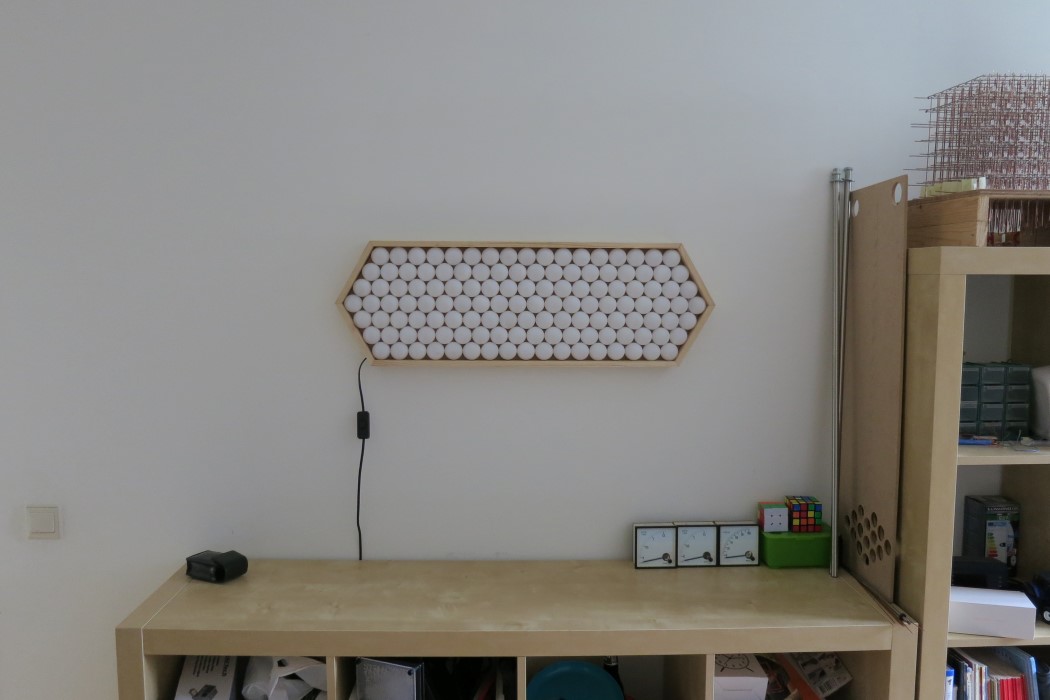
It’s a pretty rare thing for me to talk about something like the DIY Ping Pong Ball LED Clock, because it isn’t a product. It’s a set of instructions that you can follow to make your own! Posted on the Instructables website (owned by Autodesk), this nifty clock comes from the mind of a tinkerer by the username ‘thomasj152’. The clock uses a series of circular pixels, created by Ping Pong balls that have LEDs within them. The spherical shape of the balls means the pixels are arranged in a hexagonal layout (which makes for a pretty unique font style when you get numbers to flash on it), and a wooden frame holds the entire unit together, balls, batteries, circuit board and all.

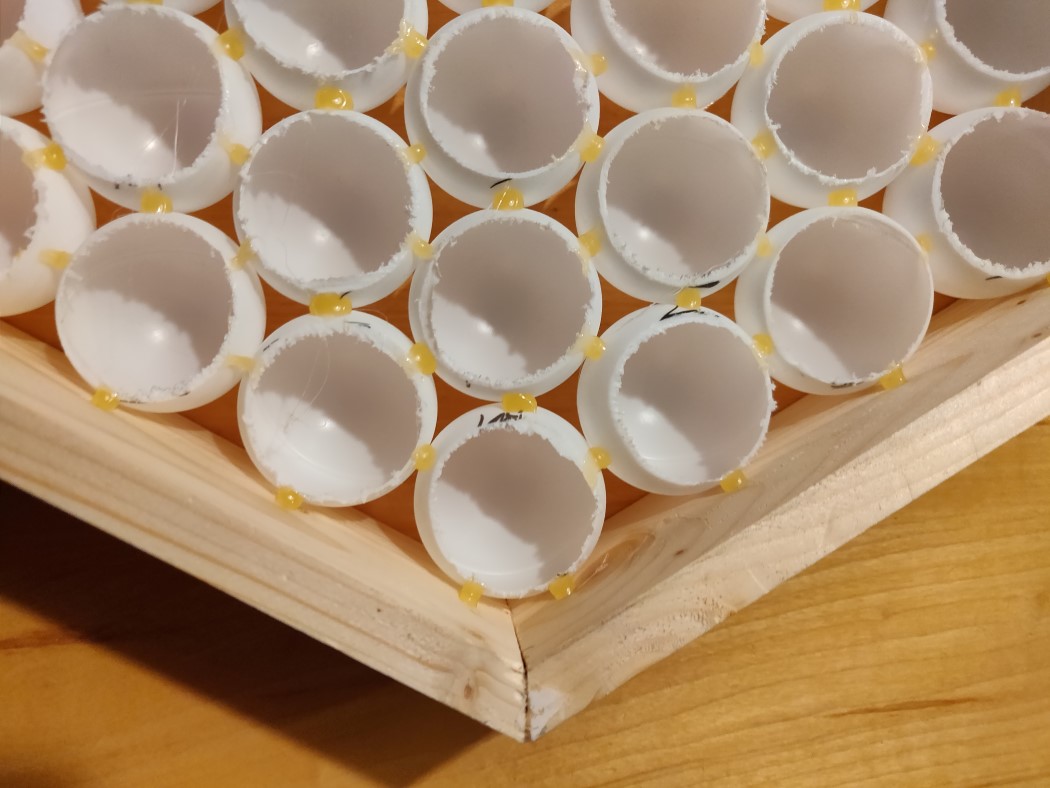
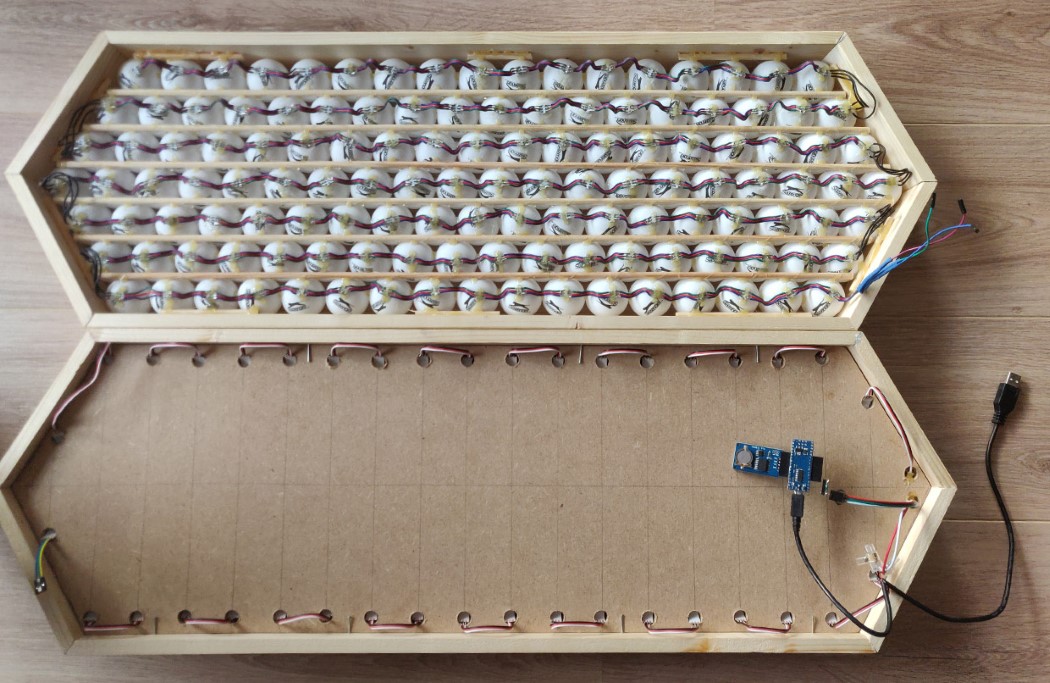
While I’m not going to lay down the step-by-step instructions here (you can head to the Instructables page to check it out), the process is relatively simple and does involve power tools. The individual ping pong balls need to be truncated (chopped) a little below the midline, before being glued together in their hexagonal layout. They’re then fitted into a frame, and mounted on a backplate that has the LEDs and Arduino board assembled in. The LEDs and Ping Pong balls don’t need to align perfectly, because the diffusive property of the plastic used in the ping pong balls will ensure the entire ball illuminates almost evenly like a glowing orb. Just make sure when you’re cutting up the ping pong balls, you take the logo out, because you don’t want that shining on your clock!

An Arduino Nano microcontroller takes care of the software end, and all you need to do is run the script provided on the Instructables site to get your clock running. Yes, that rainbow background is built right into the code, although there’s one with just the numbers too. Makes for a nice quirk-punk addition to your workspace, or even a very meaningful gift to a family member or a friend!

Designer: thomasj152

Click Here to Make Your Own!

Click Here to Make Your Own!

How To Make Your Own Wearable Alien Facehugger Entirely Out Of Rubber Bands

Looking for a fun arts and crafts project? How about making your own wearable alien facehugger entirely out of rubber bands per this Instructable created by user tofugami? Personally, I can’t wait to make one, then slip it on when my girlfriend isn’t paying attention and see what she says. Hopefully not, “Well that’s an improvement.”

I should have just followed the video, but being the sort of ‘I don’t need an instruction book’ idiot that I am, I assumed I could figure it out on my own. I could not. My first mistake was probably trying to construct the facehugger actually ON my face. I can honestly say I’d never been stung by a rubber band on the face before, and I don’t ever want to be again.

So yeah, I decided to just make a rubber band ball instead. That turned out to be significantly more in line with my level of expertise, which, if I’m being completely honest with myself, is whatever comes right before beginner.

[via Instructables]

This Saturn V Rocket Planter Is Ready to Lift Off

There are lots of types of pots out there for planting things, but most of them are simply variants of the same basic shapes. I’d rather keep my plants in something a bit geekier, like this custom-built Saturn V rocket planter by SimonRob.

Simon created this awesome 3D-printed planter based on the main stage of NASA’s Saturn V rocket. He started out with a digital model by RealAbsurdity (which I now must absolutely print for myself.) After sanding and smoothing the printed parts, Simon panstakingly painted the rocket, and then added plastic flames that he embellished with markers. To complete the effect, he wired up three tiny LEDs inside of each nozzle, and then programmed an Arduino nano to make the lights flicker when switched on.

The finished piece looks amazing, and the little succulent that Simon planted on top looks like it’ll be very happy living there. If you want to build your own Saturn V rocket planter, you cage find all of the construction details over on Instructables. While you’re there, be sure to check out Simon’s nifty Space Shuttle model that he built using recycled circuit boards and electronic parts.

This Mechanical 7-Segment Clock Tells Time with Servos

When it comes to digital clocks, they typically use segmented or dot-matrix displays in order to tell the time. But one thing most of these displays have in common is that have no moving parts. Not so with this unusual timepiece, which looks like a digital display, but is actually mechanical.

Michael Klements of The DIY Life built this cool clock that uses 28 micro-servo motors to move its segments into place.

The brains of the operation are an Arduino Uno controller and a DS1302 clock module to keep time. As the minutes tick away, the circuit and code instruct the servos to rotate back and forth. In the back position, it hides the segment on its side, while in the forward position, the segment is visible. By 3D printing the segments with a brightly-colored translucent green filament, they look kind of like they’re illuminated. You can see the clock in action in the video below:

If you’d like to build your own mechanical 7-segment clock, you can check out all of the details over on Instructables or on The DIY Life. You’ll need some basic electronics skills, along with access to a 3D printer.

How to Make an Origami Globe

If someone asked me to make an origami swan, I’d have a hard time doing it, so I can’t imagine being able to construct a complete globe of the Earth by folding paper. But those with more patience and papercrafting skills than I should check out this tutorial that was recently posted on Instructables.

Paper artist shared detailed instructions on how he created this vibrant globe using colored paper and lots and lots of folding.

The trick to building the paper globe is that it’s made up using little triangular units, each of which interlocks to form a piece of the finished model. He started out by printing a map projection that accounted for the curvature of the earth, then mapped out which paper colors would correspond to each continent. Once he had his plan, he had to individually fold over 1,400 pieces of paper, and assembled the globe one slice at a time, starting from the equator out.

The tutorial includes a listing of exactly how many triangles are needed for each slice, though I imagine you could simply multiply these counts if you wanted to build a bigger version – with some extra rows added to keep it round and not too blocky.  The main sphere is held together without glue, though the base structure benefits from some hot glue, and yes the globe actually spins, thanks to a pencil running through its center.

The Instructables tutorial makes it all sound simpler than it looks, especially since Jorik did all of the hard work planning things out. Still, you’re gonna need a lot of time and patience if you decide to build one of these for yourself,