The smart home space has always had a problem, and that problem has a name: fragmentation. Your Philips Hue bulbs want to talk to your Google Home, your Apple HomeKit wants to command your smart thermostat, and somewhere in the middle, your Amazon Alexa is just standing there, confused. For years, developers and tinkerers alike had to pick sides or wrestle with clunky workarounds. Then Matter came along, and the industry finally had a universal language for connected devices. Now, Arduino wants to put that language in your hands with the brand new Matter Discovery Bundle, priced at a very approachable $61.04.
Because here’s the thing: once every major smart home platform agrees to speak the same language, the real fun begins. Imagine designing your own smart thermostat, building a presence sensor that dims the lights when you leave a room, or retrofitting that vintage lamp on your desk into something your phone can control. Arduino’s bundle turns those ideas from “cool concept” into “actually buildable weekend project,” and it does it without requiring a computer science degree or a garage full of equipment.
Designer: Arduino
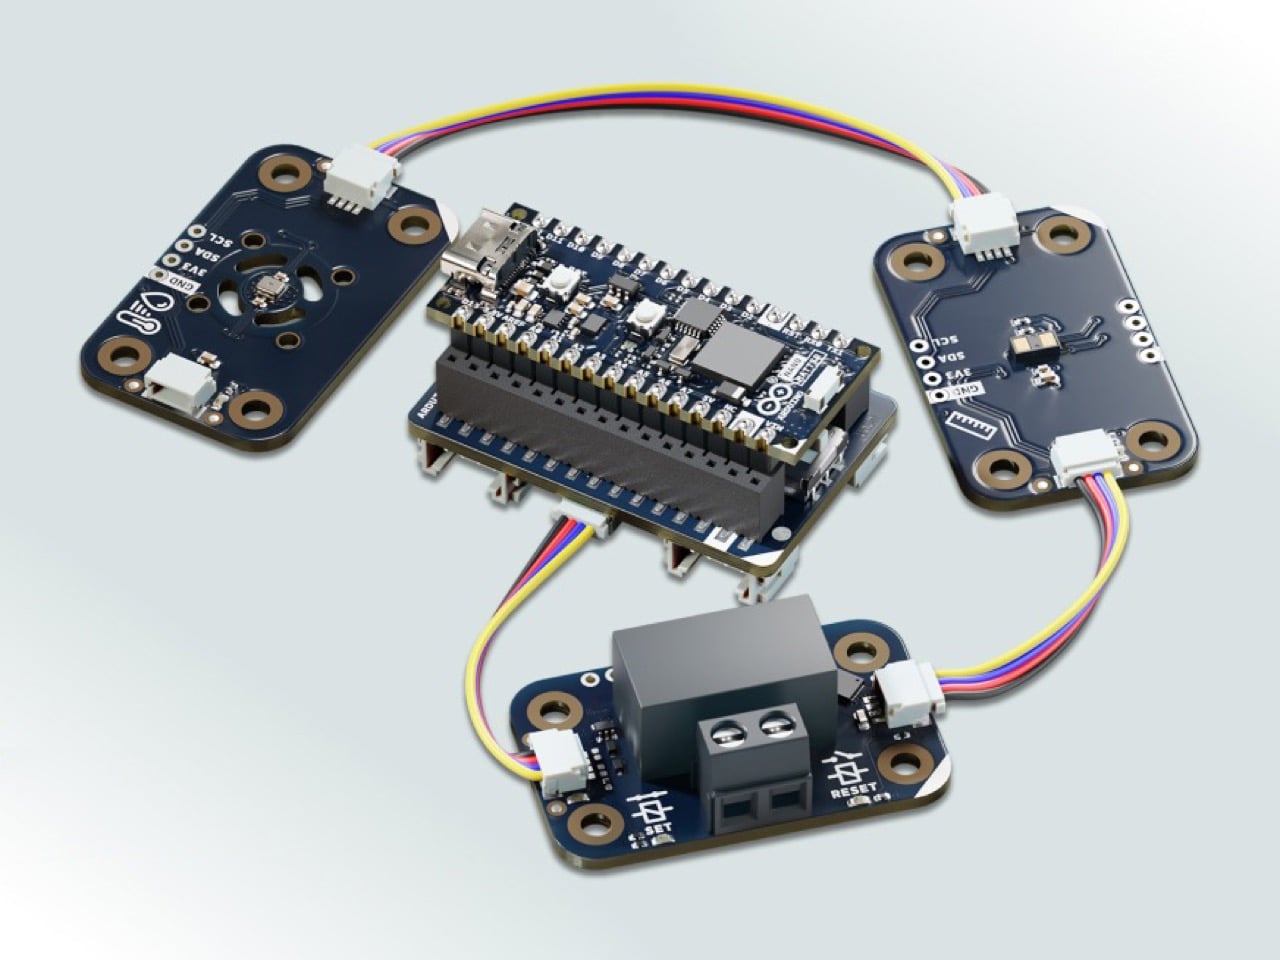
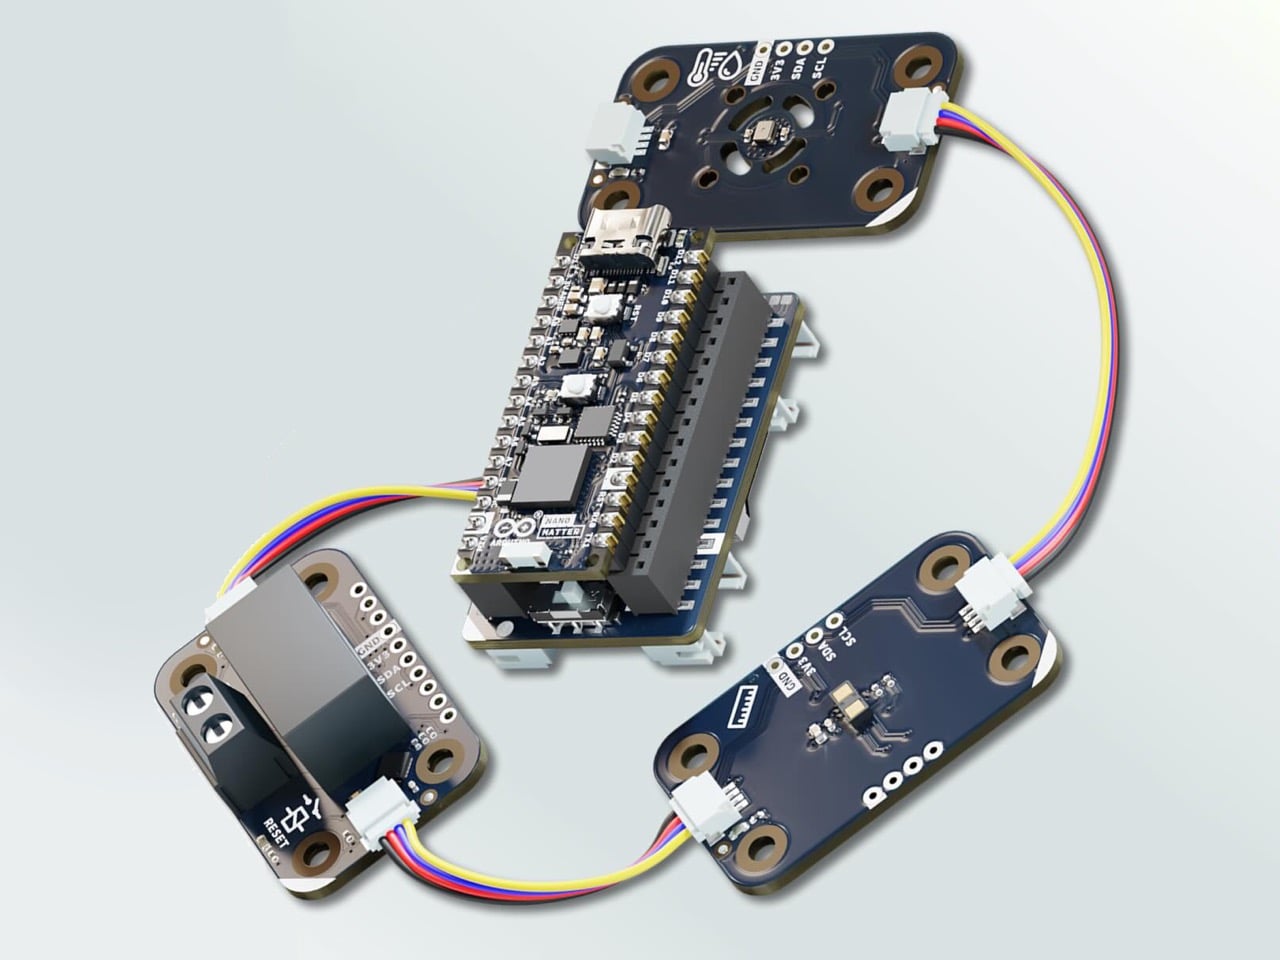
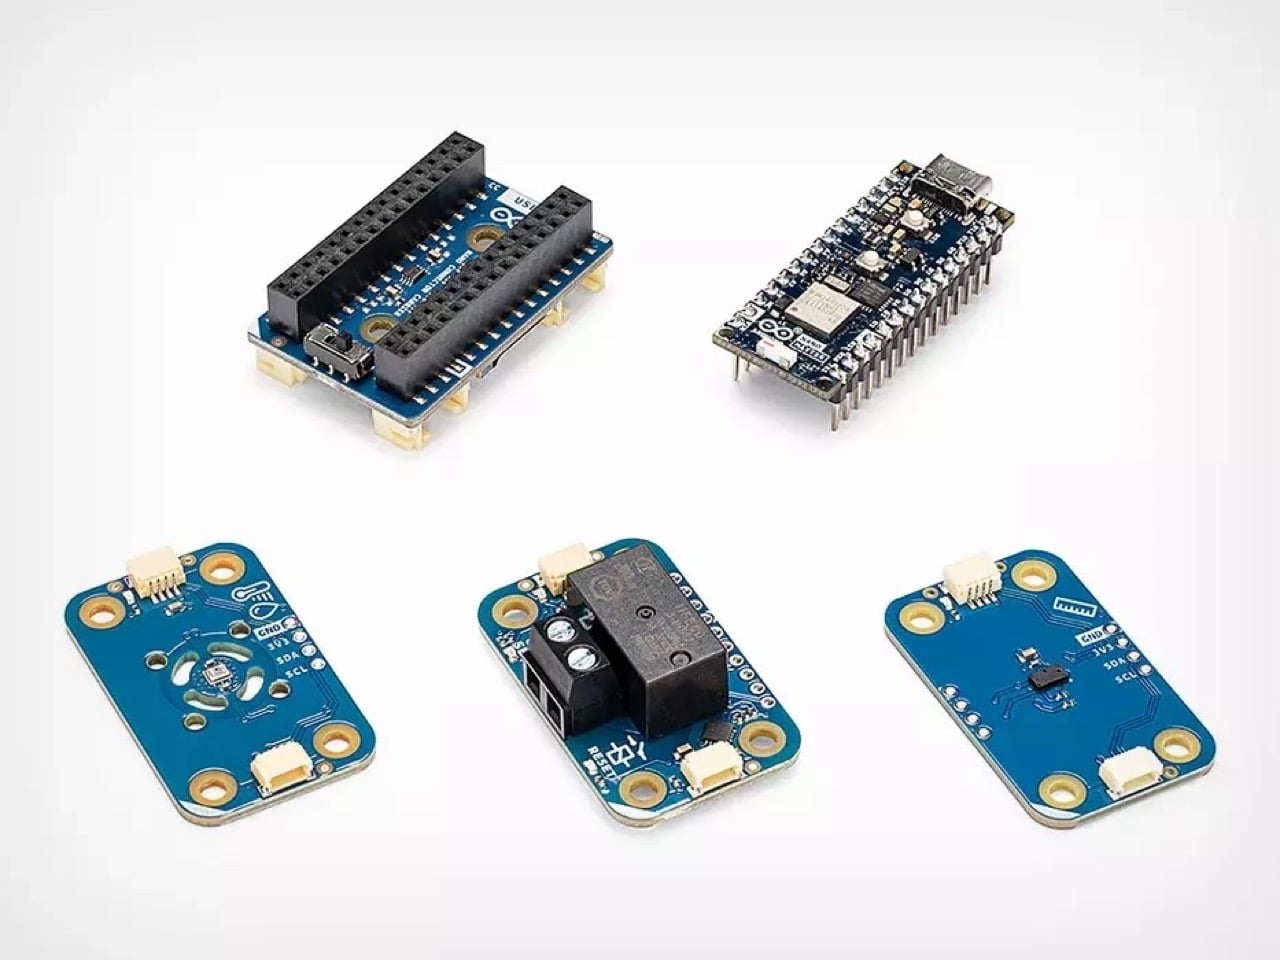
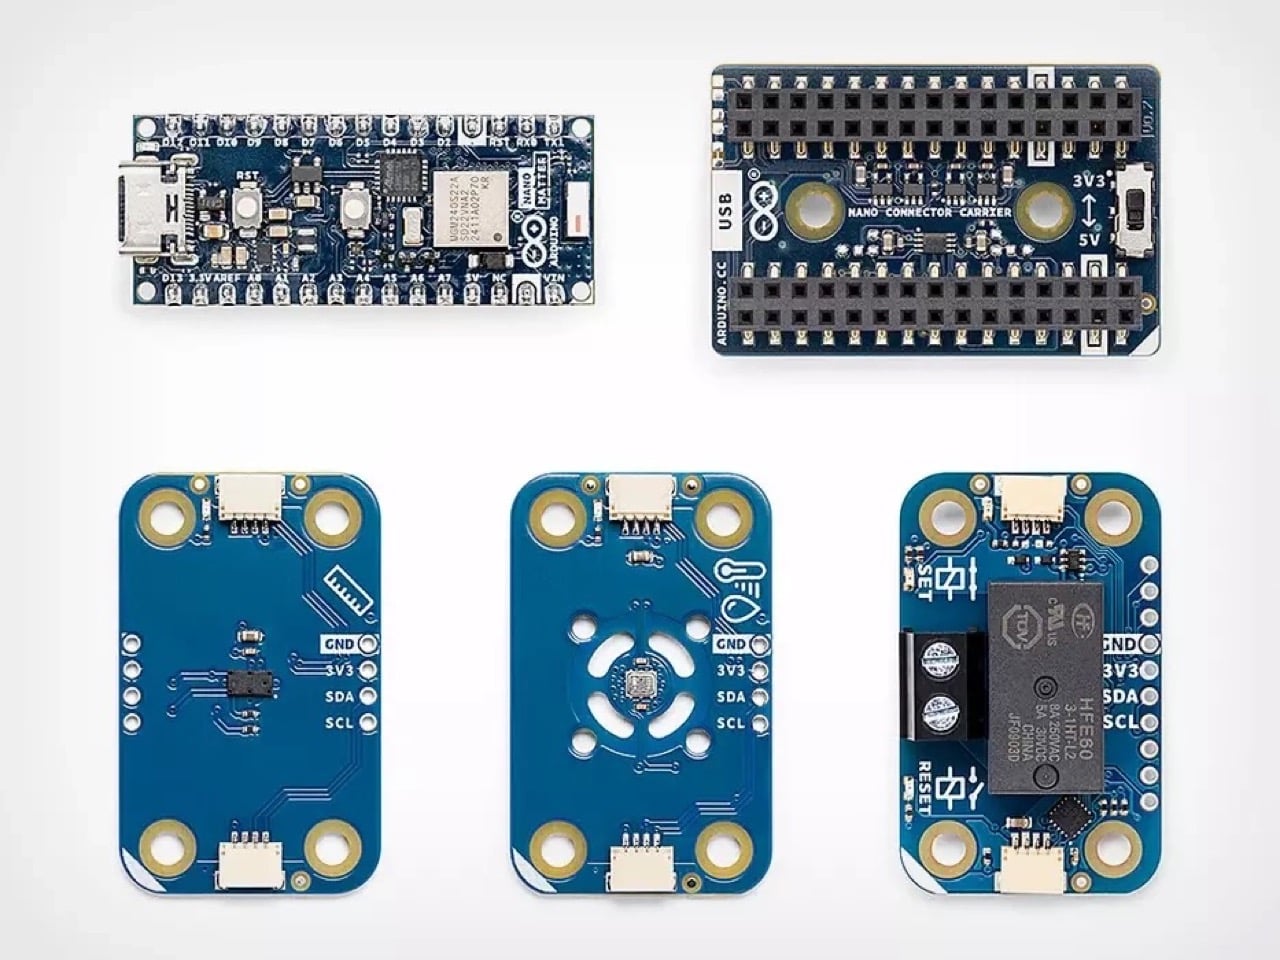
The kit is built around the Arduino Nano Matter, a compact but capable little board that forms the brain of whatever connected device you want to bring to life. Alongside it, you get a plug-and-play connector carrier that lets you snap in additional components without any soldering, and three sensor and control modules that cover the core building blocks of almost any smart home creation. One module handles switching real-world appliances and devices, one detects presence in a room using distance sensing, and one reads temperature and humidity. Output, presence, environment. Those three capabilities alone unlock a surprisingly wide range of DIY smart devices, all of which talk natively to Apple HomeKit, Google Home, Amazon Alexa, and Home Assistant right out of the box.
If the idea of jumping into this stuff headfirst sounds daunting, don’t worry… there’s a free 7-course curriculum you can access. Arduino built a free seven-module course on their Cloud platform that takes you from a complete beginner all the way through building devices that can be officially certified and even commercialized. The course balances theory with hands-on building, so you’re always making something tangible rather than just reading about abstract concepts. Complete the whole thing and you earn an Arduino Certified Engineer credential, which is a genuinely useful thing to have if you’re building a portfolio in the product design or IoT space.
The bundle was developed in collaboration with Silicon Labs, whose wireless chip technology powers the Nano Matter board at the kit’s core. All the complex smart home communication happens automatically in the background through Arduino’s Matter library, leaving you free to focus on the creative side of what you want to build and how you want it to behave. That’s been Arduino’s philosophy since the beginning, stripping away the intimidating technical layers so the idea can take center stage.
One small caveat worth knowing upfront: connecting your creations to a live smart home network requires a Thread border router, like an Apple TV 4K or a HomePod. Most households already deep in the Apple or Google ecosystem will have one without even realizing it. For everyone else, it’s a minor additional step before things really come alive.
The bigger picture here is genuinely exciting for tinkerers and creators wanting to hack together a product or an idea within an existing ecosystem. We talk about the smart home almost exclusively as a product category, something you buy off a shelf and plug into an app. Arduino’s Matter Discovery Bundle reframes it as something you design and build yourself, shaped around your actual space and your actual needs. Custom connected devices that fit your life rather than the other way around, available to anyone curious enough to try, for about the price of a nice dinner out.
The post Arduino’s $61 Matter Bundle Lets You Build Smart Home Devices That Work With Apple, Google, and Amazon first appeared on Yanko Design.