LightMake Just Solved the Hidden Costs of Multi-Color 3D Printing

Multi-color FDM printing has always had a hidden cost that most users simply accept. Every time a single-nozzle machine switches filaments, it has to push the previous color out of the hotend before laying down the next one. That costs time, and the wasted material accumulates into a tower on the build plate that nobody actually wanted there. The LightMake L4 was designed to make that trade-off unnecessary.

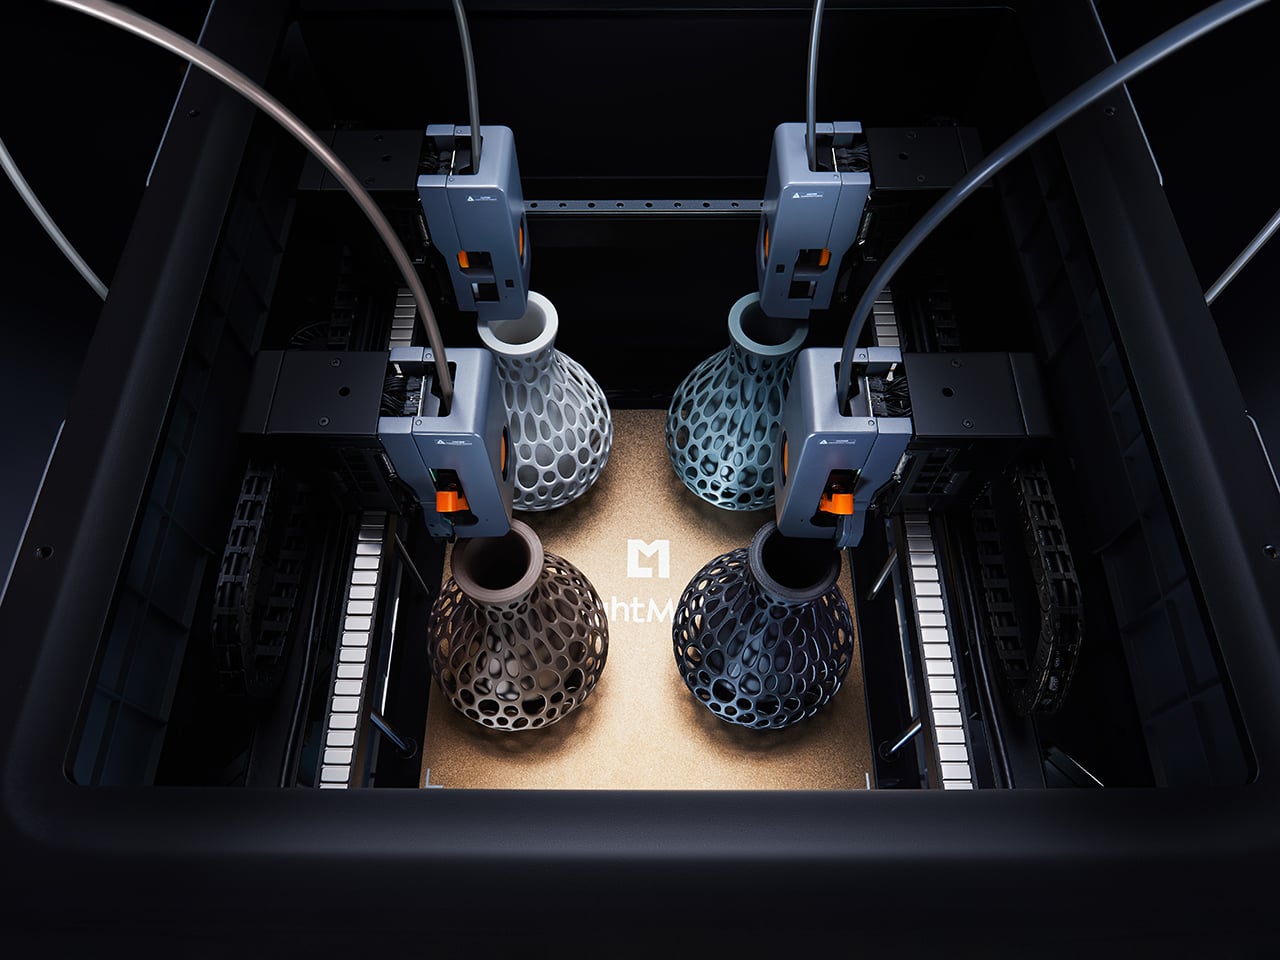
LightMake is a company with roots in precision engineering and high-speed motion control. Its L4 desktop 3D printer is built around four independent, always-preheated print heads, each dedicated to its own color or material. Think of it less as a printer wearing multiple hats and more as a small, dedicated team, each member already at their station when the job starts.

Designer: LightMake

Click Here to Buy Now: $1,299 $2,399 (46% off). Hurry, only 145/550 left! Raised over $2.07 million.
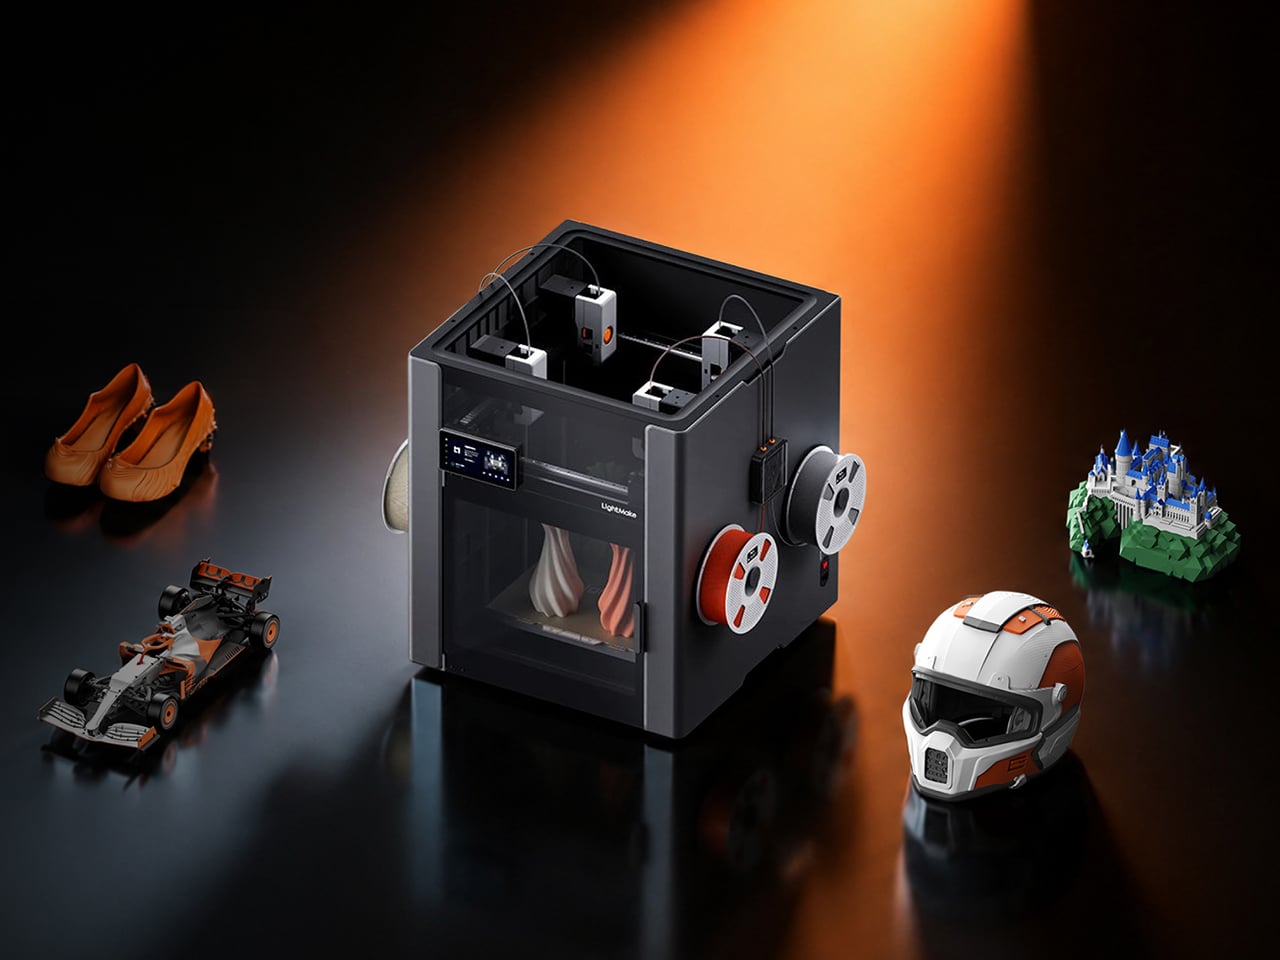
That dedicated-head setup kills the purge problem at its source. Because each nozzle handles only one filament, the L4 replaces massive purge towers with a minimal nozzle prime at the start of a job, with no purge waste during subsequent color changes. LightMake’s own testing puts material loss at under one gram, compared to the more than 237 grams for conventional multi-color setups. For anyone producing prints for clients, that recovered filament adds up quickly.
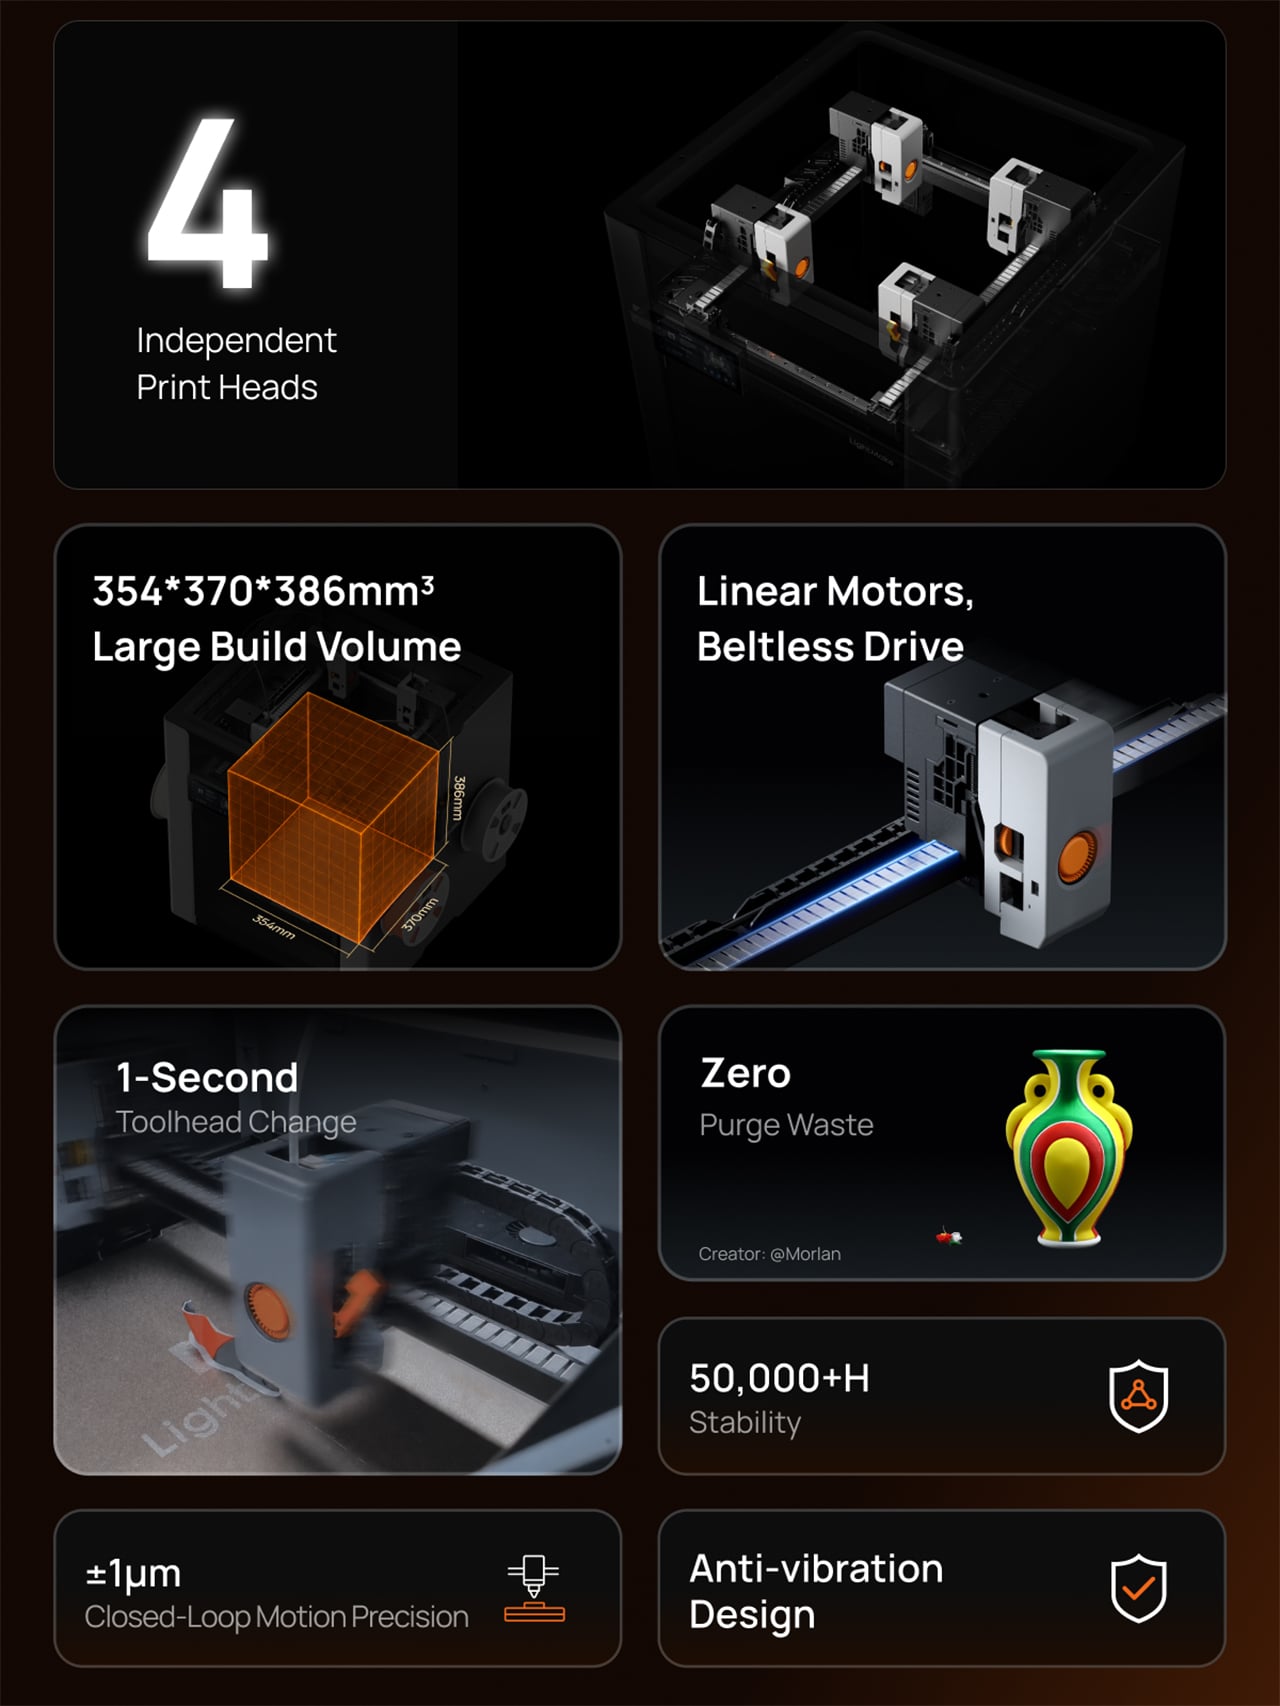
Speed is the other half of the multi-color problem, and the L4’s approach is just as direct. Because all four heads are always preheated and ready, the machine’s real-time coordination cuts toolhead switching to one second. LightMake says that can boost multi-color print speed by up to 79%, though that’s based on internal testing and will vary with job complexity and color count.
Beyond switching speeds, the L4 doesn’t shortchange on space. In single-color mode, the build volume stretches to 354 × 370 × 386 mm, large enough to produce full-size objects in a single continuous run, no splitting or post-assembly required. Multi-color jobs work within a slightly reduced 354 × 350 × 386 mm footprint, still generous enough that most projects won’t need to be scaled down or broken into parts.

Multiply that advantage by four, and you get the L4’s batch production mode. In that configuration, the workspace splits into four zones of 177mm x 195mm x 386mm each, allowing four complete identical or mirrored models to print simultaneously. For a maker selling finished pieces or a studio on a deadline, that’s the kind of output math that changes what you think a single desktop machine can do.
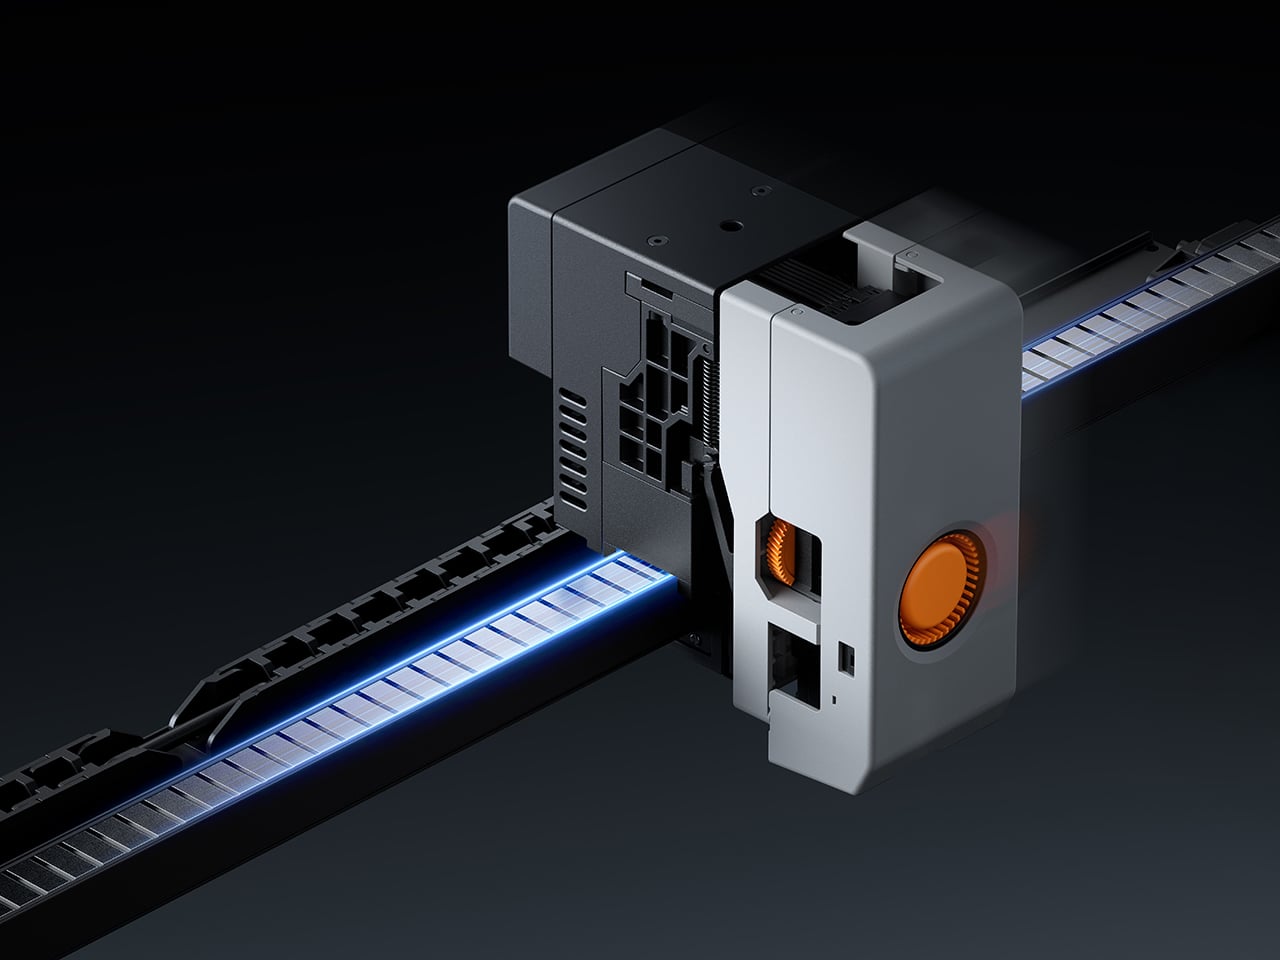
All of that output only matters if the machine stays accurate over time, and that’s where the L4 makes a longer-term argument. It uses 8 sets of industrial-grade direct-drive linear motors on the XY axes, replacing rubber belts and pulleys with non-contact magnetic propulsion. There’s no belt to stretch and no tension to adjust. LightMake rates the architecture at more than 50,000 hours, though the rails do need periodic lubrication.
Beyond longevity, the system enables what LightMake calls closed-loop control, where the motor actively monitors and corrects its position in real time. That continuous correction also keeps layer shifts from creeping in mid-print, which is good news for anyone who’s ever come back to a long job only to find it ruined somewhere around hour three. The ±1 µm figure the company quotes refers strictly to motion precision, not final print accuracy, which matters. Optical sensors achieve 30 µm absolute alignment between heads, so material transitions land exactly where intended, and parts meant to fit together actually do.
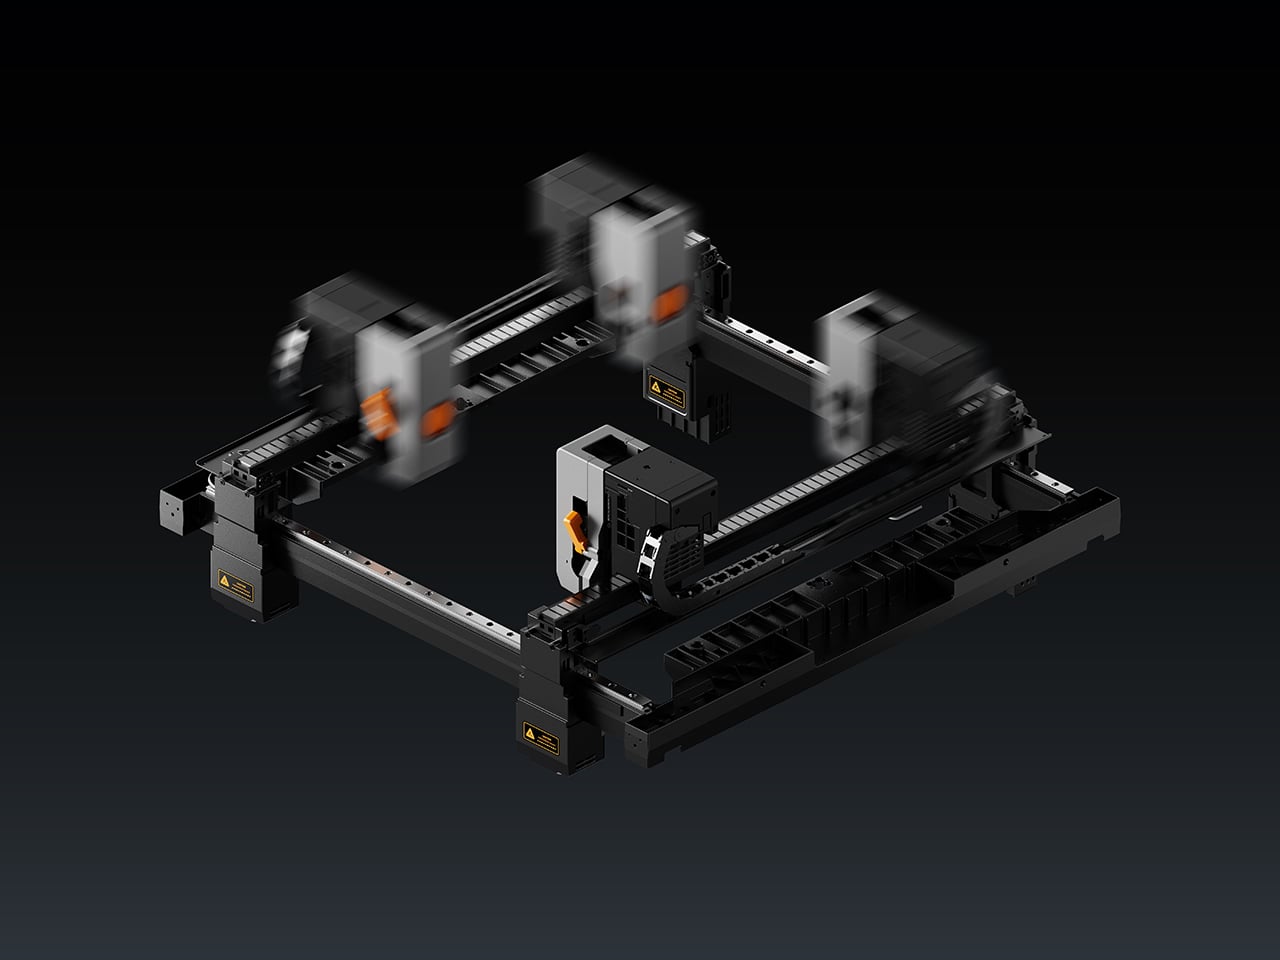
Running four moving heads at speed creates its own structural challenges, which the L4 addresses with a monolithic die-cast frame paired with vibration compensation algorithms. Together, they absorb the kinetic energy of rapid toolhead transitions and keep surface quality consistent from the first layer to the last. When a head parks between turns, it retracts automatically by 5mm, so idle nozzles never drag across already-printed surfaces.
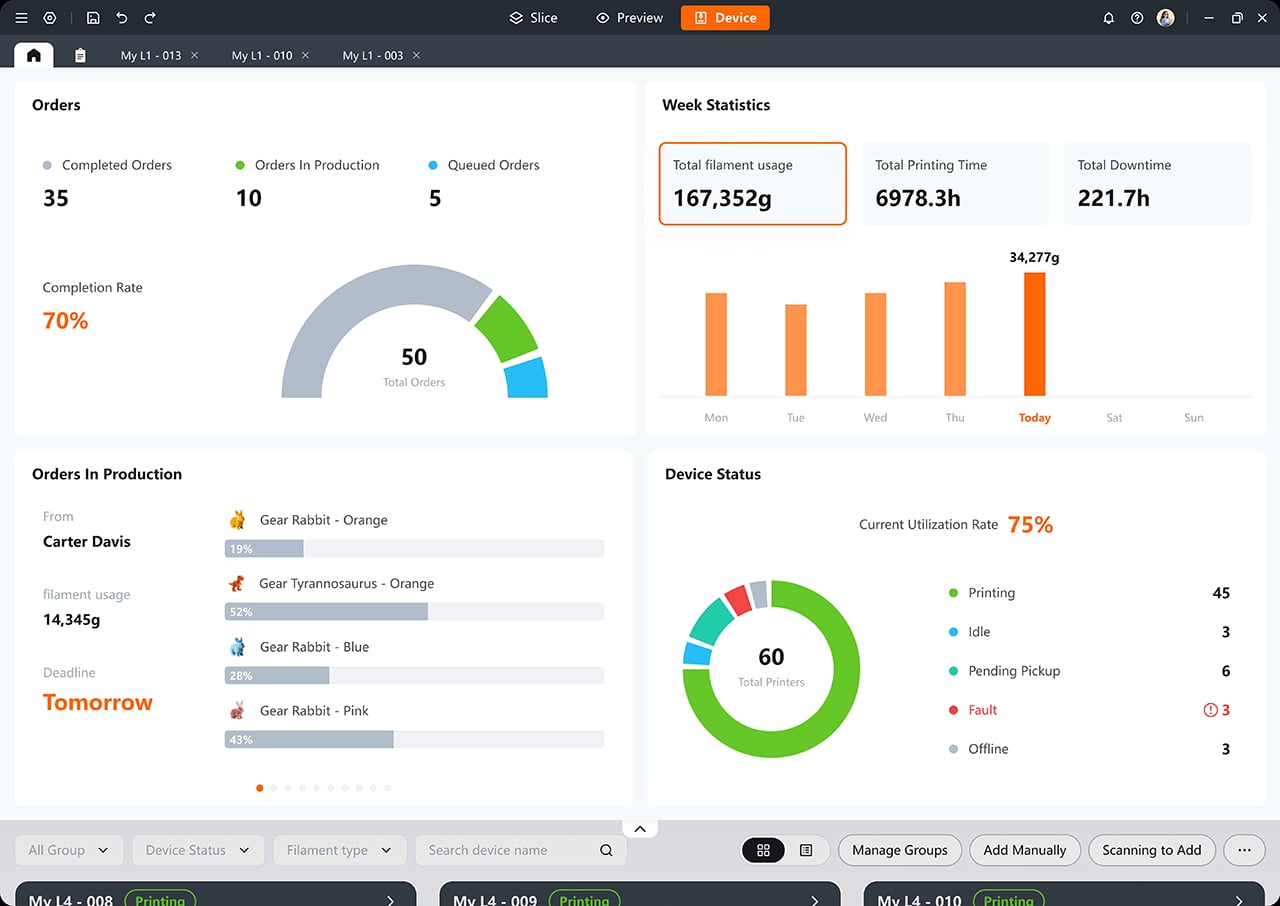
On the software side, the L4 works with LightMake’s own slicing tool, which handles automatic model arrangement for multi-head jobs and includes a farm management dashboard that connects multiple printers in one place. It’s free and open-source, unlike most paid alternatives. The machine also comes with a 6.5-inch full-color touchscreen, dual HD cameras with AI-powered failure detection, and RFID material recognition that adjusts print parameters automatically.

The L4’s reach can grow beyond its four built-in toolheads, too. LightMake’s optional Auto Filament Expansion and Dry System, or FEDS, pairs each head with additional filament inputs, pushing the total color count from four up to 16. For makers working on more ambitious multi-color designs, that’s a considerable expansion of creative range without requiring an entirely different machine to get there.
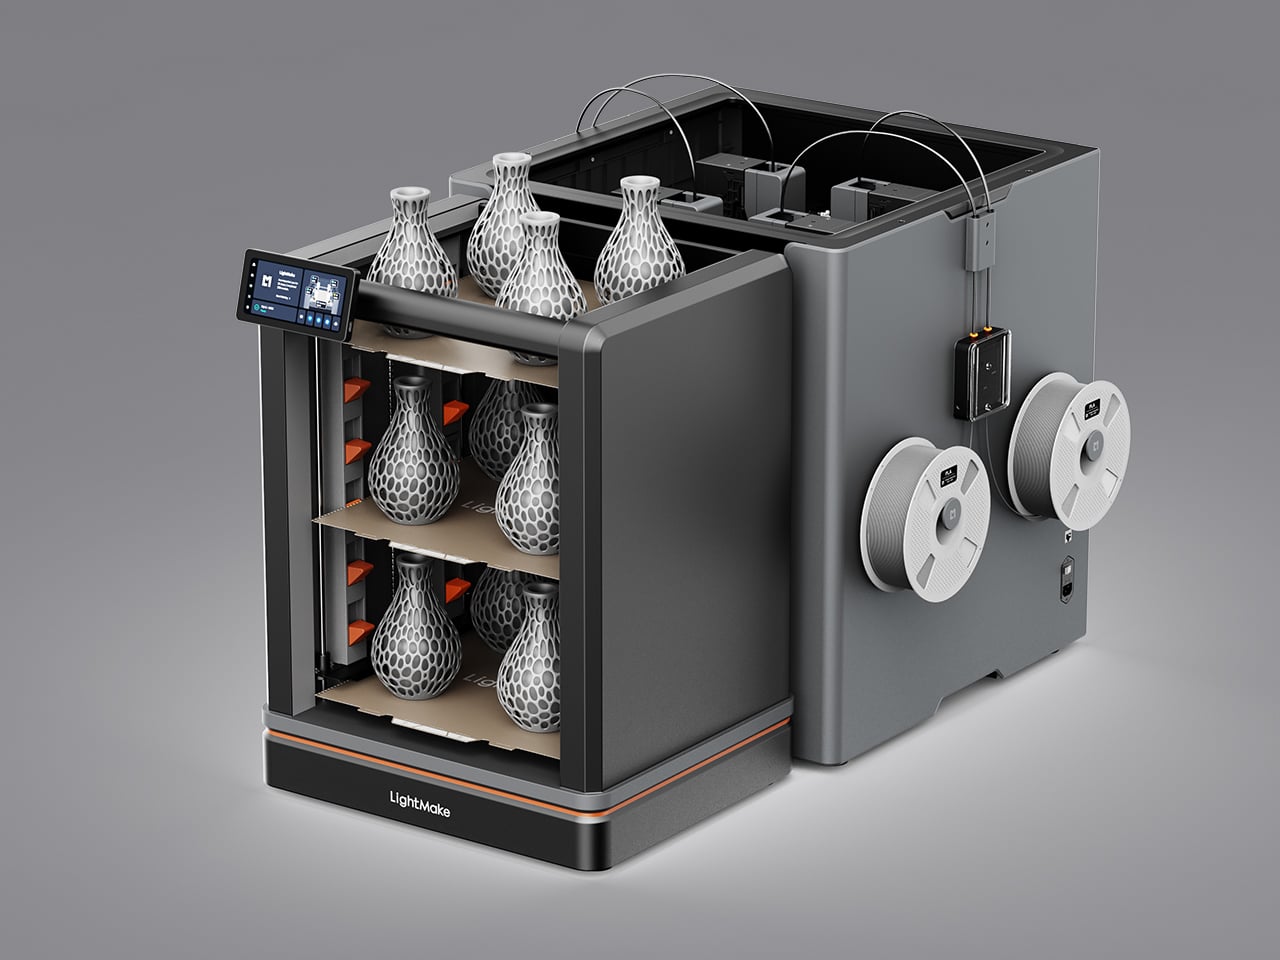
The L4 is positioned as a machine for makers who want to turn their output into something that actually generates income, whether that means selling finished pieces, producing prototypes, or running a compact print operation. What it ultimately argues is that the familiar trade-offs of multi-color desktop printing, such as speed against quality and ambition against material waste, were always choices rather than fixed limits, and the LightMake L4 helps your designs break free of those constraints.

Click Here to Buy Now: $1,299 $2,399 (46% off). Hurry, only 145/550 left! Raised over $2.07 million.

The post LightMake Just Solved the Hidden Costs of Multi-Color 3D Printing first appeared on Yanko Design.
Full-Color 3D Printing Once Cost $50,000+, HeyGears Brings It to 10% of the Cost

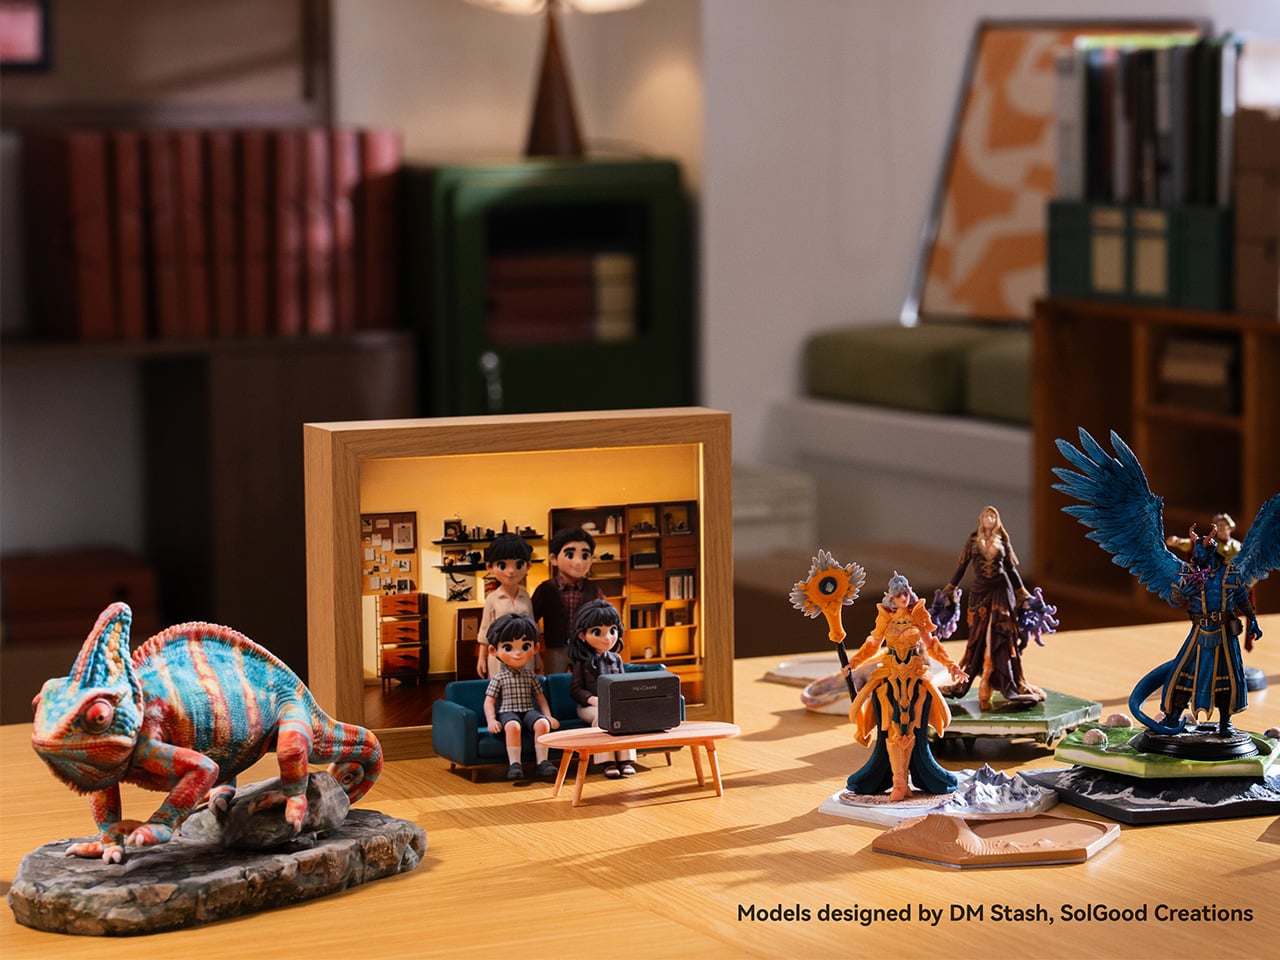
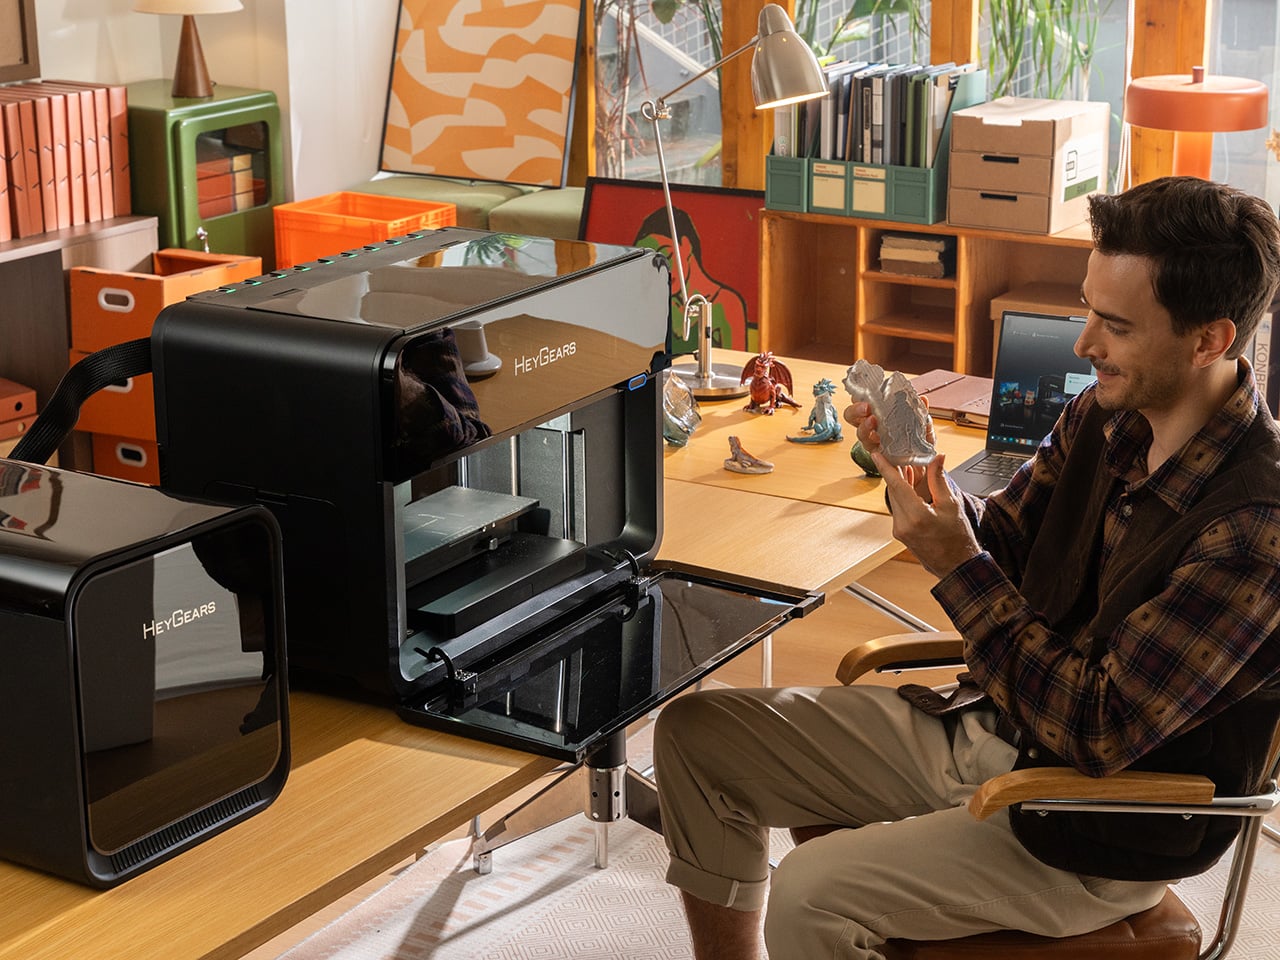
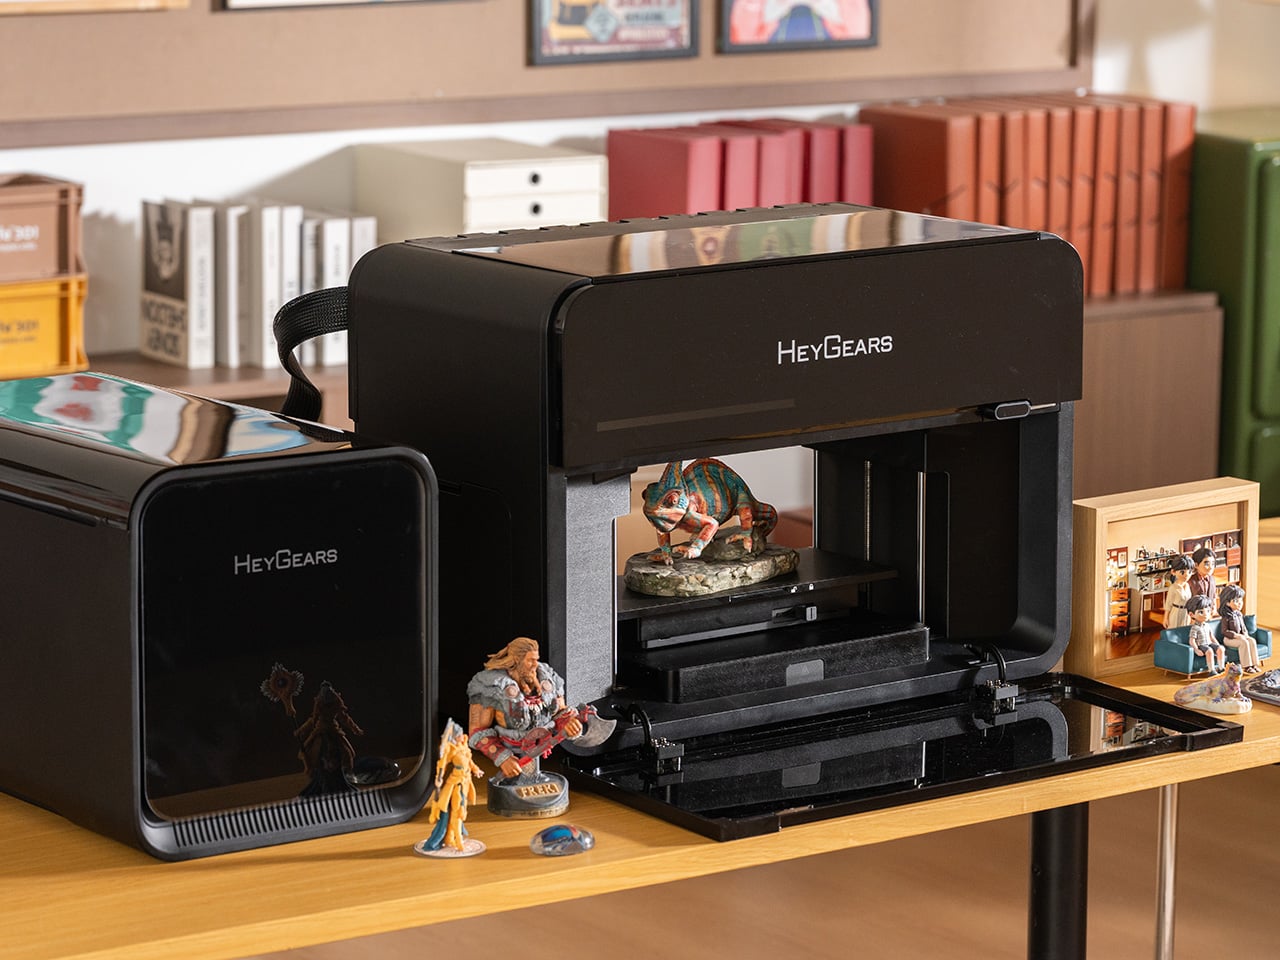
True full-color 3D printing has always lived in industrial settings, with price tags starting at $50,000 and machinery too large for any studio shelf. Most desktop alternatives can’t close that gap on their own. The HeyGears G1 Series changes that, combining full-color 3D printing, 3D texture printing, 2D UV printing, and True DTF (Direct-to-Film) & DTG (Direct-to-Garment) fabric printing into one compact desktop machine anyone can actually set up at home or in a studio.

Beyond bringing full-color 3D printing to the desktop, the HeyGears G1X also delivers outstanding UV printing performance, offering up to 12× faster printing speeds with the Epson I3200-U1HD printhead, a 10× wider color gamut, more accurate color reproduction backed by G7 Colorspace’s highest-level color certification, and lower ink costs. What’s genuinely useful here is how fluidly the G1 Series moves between modes. A small gift shop, for instance, can run custom UV prints on mugs in the morning, emboss a leather journal cover in 3D texture mode in the afternoon, and print a full-color figurine in the evening, all from the same machine.

Designer: HeyGears

Click Here to Buy Now: HeyGears is currently offering G1X backers $500+ in additional promotional savings. Hurry, only a few left! Raised over $14.4 million.

The standout of the three is the full-color 3D printing. Using Precision Piezo Inkjet technology with instant UV curing, the G1X builds vibrant, paint-free models layer by layer at just 10 to 20 μm thick, roughly half the diameter of a human hair. Transparent and colored sections print in one continuous build, and there’s no post-print assembly to deal with since water-soluble supports simply dissolve in water.

A lot of that output quality comes down to the printhead. The G1X runs on an Epson i3200-U1HD, an industrial-grade unit with 3,200 high-density nozzles across eight ink channels, a maximum resolution of 1,440 x 2,400 DPI in UV printing, and over 10 million colors in its palette. The extra channels include light cyan and light magenta, which keep gradients and skin tones from going muddy.

The G1X also offers three UV printing modes to match different production priorities, whether you want maximum printing speed or a wider color gamut. Ultra-High-Speed Mode uses 4 white-ink channels to achieve up to 12× faster printing, while High-Speed Mode uses 2 white-ink + 2 varnish channels, reaching at least 6× faster printing. Finally, Wide-Gamut Mode utilizes Wide-Gamut inks, including Light Cyan (Lc) and Light Magenta (Lm) inks, for enhanced color reproduction, with printing speeds of at least 3× faster. Whether you prioritize speed or color performance, the G1X lets you choose the configuration that best fits your workflow.

For UV work, the machine isn’t limited to any single surface type. It works on wood, leather, glass, metal, acrylic, and ceramic, among over 400 compatible substrates in total. A rotary module handles cylindrical objects up to 245 mm tall, covering everything from mugs to tumblers, and an integrated line-scan camera auto-calibrates placement so curved surfaces print accurately without manual setup.

The 3D texture mode goes a step beyond standard UV printing, producing raised embossed effects, oil-painting-style relief, and wood-carved surfaces with a recommended height of 5mm (up to 150 mm). For apparel, the G1 Series supports True DTF and DTG printing with a water-based ink set built for wash durability, and that’s what makes it one of the few desktop platforms covering both hard-surface and fabric printing in a single unit.

HeyGears paired the hardware with a full software ecosystem that goes well beyond basic print management. Blueprint Studio handles everything from model preparation to batch layout, while HeyVerse adds AI tools for text-to-3D and image-to-3D generation. There’s also a LiDAR sensor in the print carriage that monitors layer thickness to within ±0.01mm in real time, helping maintain consistent output across longer production runs.

Printhead maintenance is often where UV systems let their owners down, and HeyGears hasn’t ignored that. A quad-layer anti-clogging system combines printhead heating, white-ink agitation, standby cleaning cycles, and a sealed moisturizing state during extended downtime. Three cleaning modes handle everything from a quick nozzle check to a thorough channel flush, and built-in air filtration captures ink mist and VOCs for cleaner indoor operation.

For someone running a small studio or a product-based creative business, the appeal goes beyond having one versatile machine. It means skipping three separate consumable budgets, three learning curves, and three maintenance routines. The i3200-equipped models carry a rated printhead lifespan of 12 to 24 months, while the open ink system offers material flexibility, and HeyGears’ lower-priced inks help keep material costs well below those of comparable industrial platforms. Turns out industrial-grade color doesn’t need an industrial-sized space after all. And with a limited-time $500+ cashback offer now available to G1X backers, you wouldn’t want to miss out on this opportunity to bring your designs to life, and in full color to boot!

Click Here to Buy Now: HeyGears is currently offering G1X backers $500+ in additional promotional savings. Hurry, only a few left! Raised over $14.4 million.

The post Full-Color 3D Printing Once Cost $50,000+, HeyGears Brings It to 10% of the Cost first appeared on Yanko Design.
This $99 Trackball Has Gesture Controls That Work Without Any Software

The computer peripheral market has always been more experimental at its edges than in the mainstream. Ergonomic trackballs, in particular, have attracted a devoted following among power users, but the options tend to cluster at two extremes: consumer-facing products with locked-down firmware, and niche open-source hardware that trades polished finish for deep customizability. Finding something that genuinely does both has rarely been straightforward.

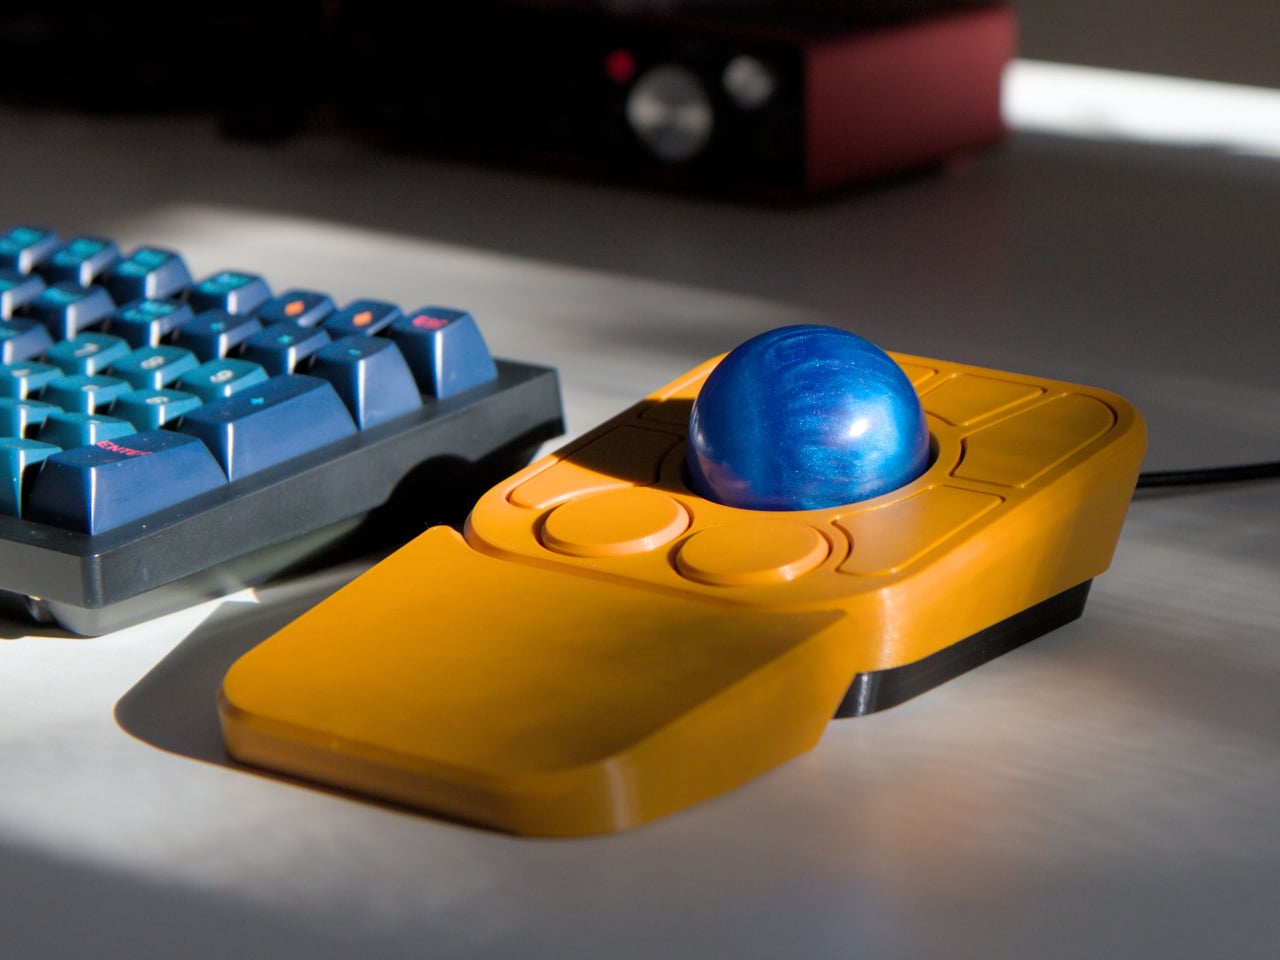
Ploopy’s Adept trackball made a compelling case for the latter category, earning a loyal following with its open-source, 3D-printed design and QMK compatibility. But it always felt like it had more to say. Its circuit board had always reserved space for two more switches that never made it to production, and the base had slots for a wrist rest that never materialized. The A+ is that unfinished story, now finished.

Designer: Ploopy

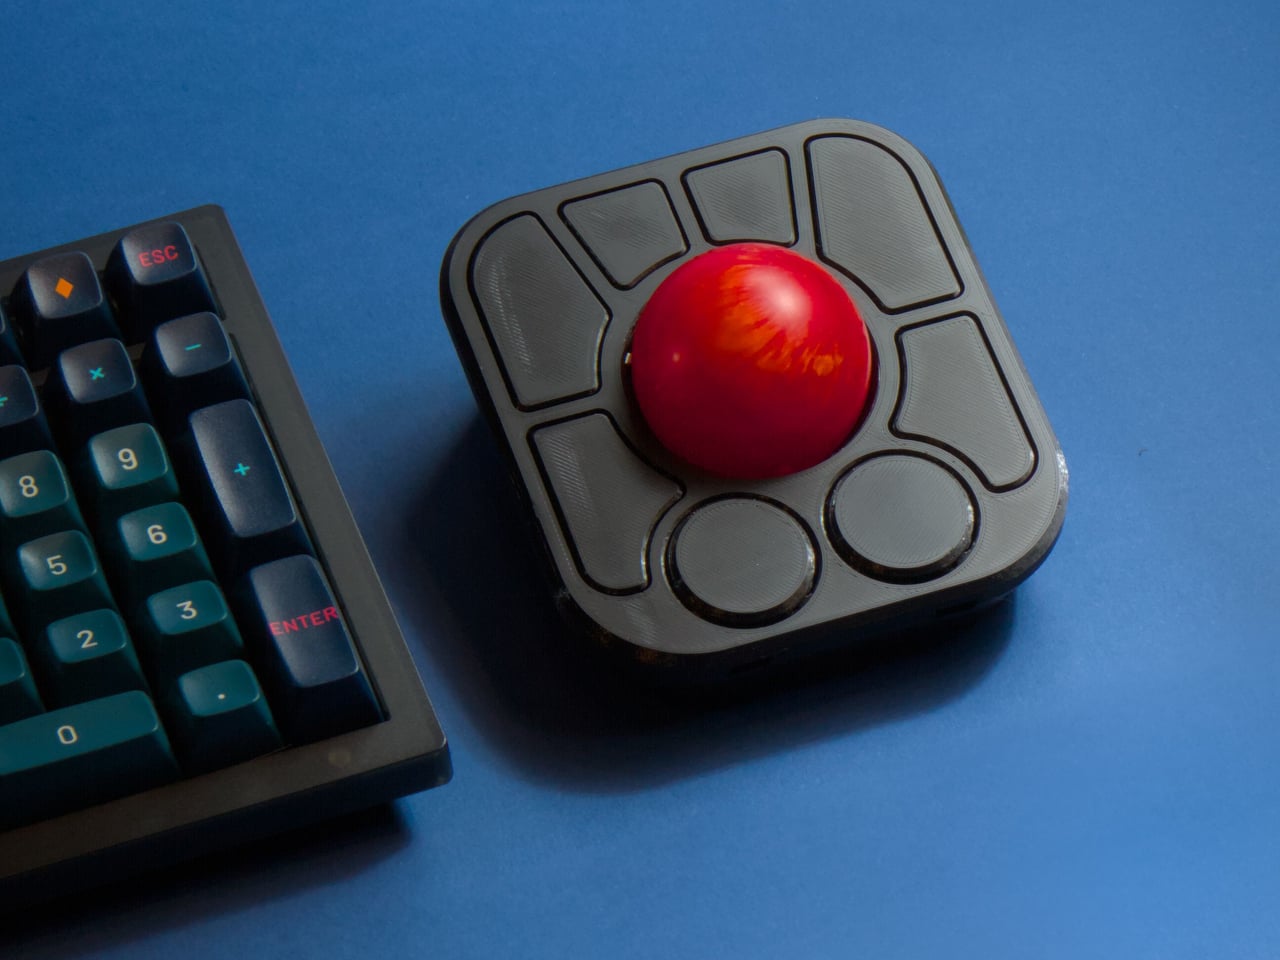
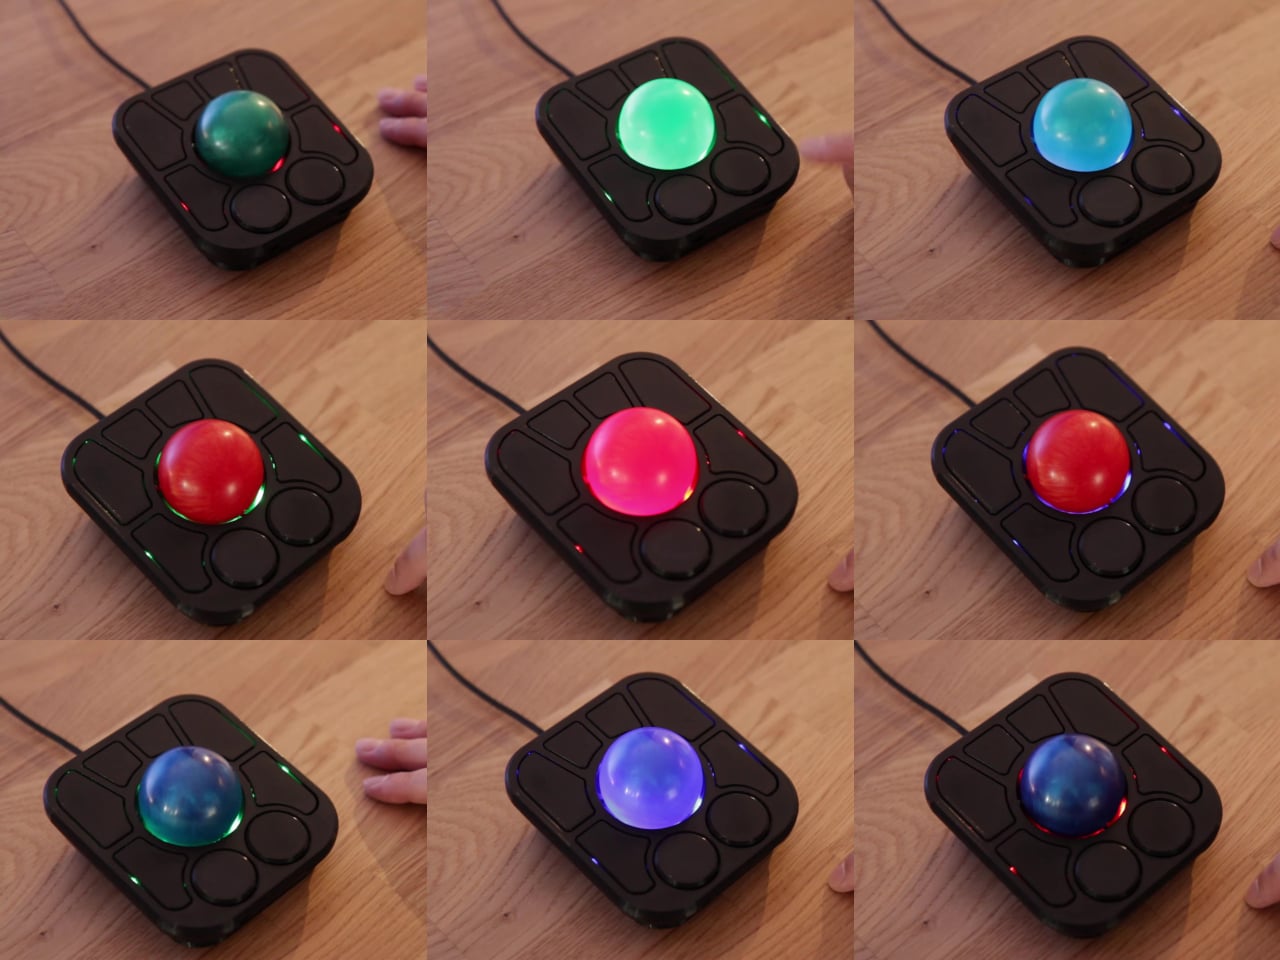
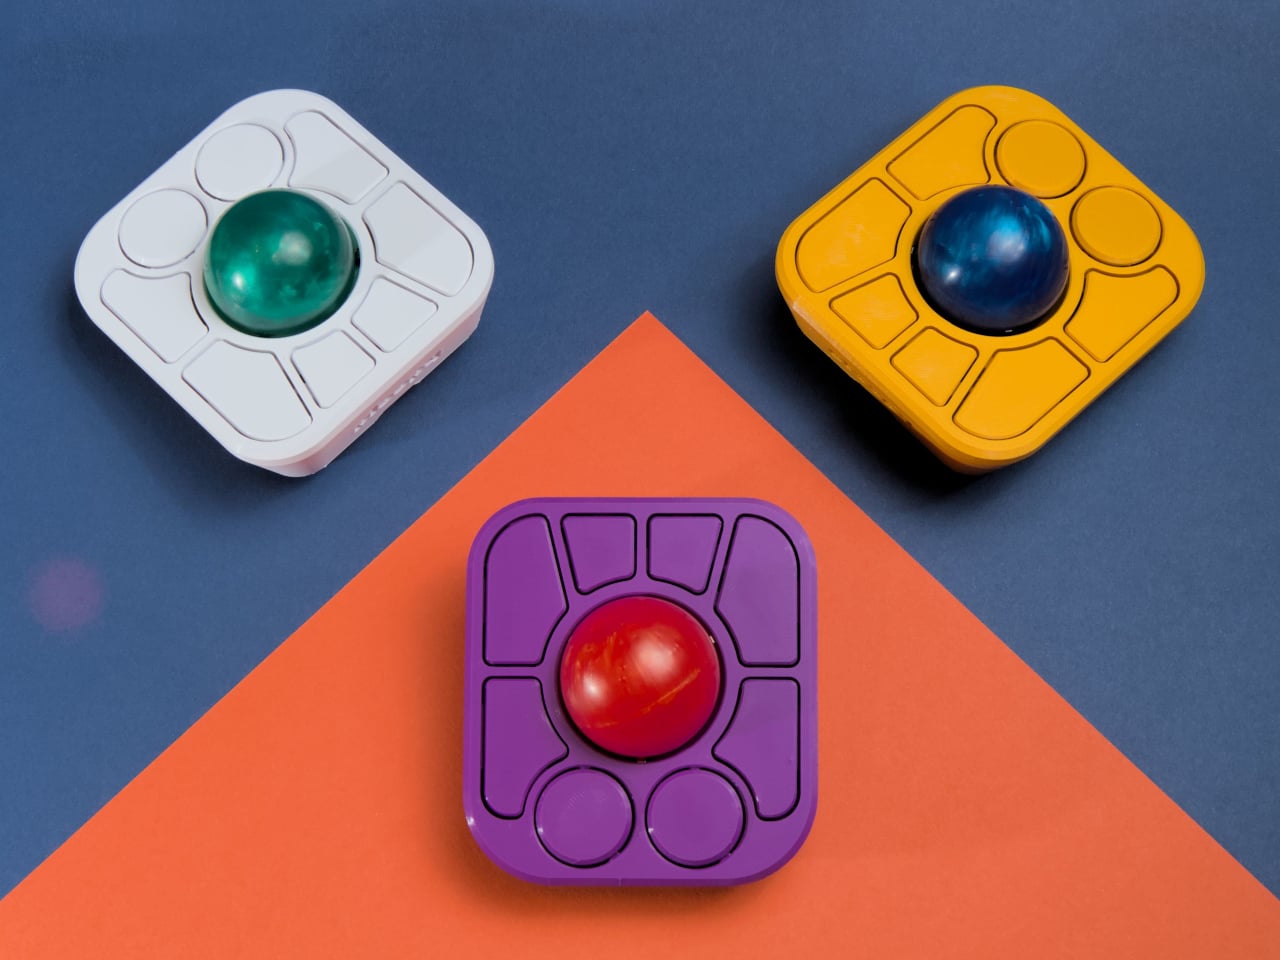
The most visible addition is the button count. The Adept had six; the A+ has eight, two of which also function as knobs. Out of the box, the knobs handle high-resolution vertical and horizontal scrolling, but both are fully reprogrammable for other functions. That dual-purpose approach keeps navigation and control within a single hand without needing a separate scroll wheel or accessory sitting alongside it.

The gesture system is arguably the more interesting addition. Hold a button and flick the ball in any of eight directions, and the device fires a command. By default, the left knob activates cut, copy, paste, desktop switching, and media controls. For someone who lives inside a browser and a text editor all day, that’s a significant amount of functionality without ever lifting a hand off the device.

Layers add another dimension. The A+ has two: a navigation layer for everyday use and a control layer accessed via the right knob. The control layer handles on-device configuration, covering left-hand mode switching, toggling between high-resolution and stepped scrolling, and other adjustments. It’s the first trackball to bring this kind of layered behavior, working entirely without any software running on the host computer. There are also two bright LEDs that can be used to visually tell you what layer you’re on without having to rely on some embedded screen.

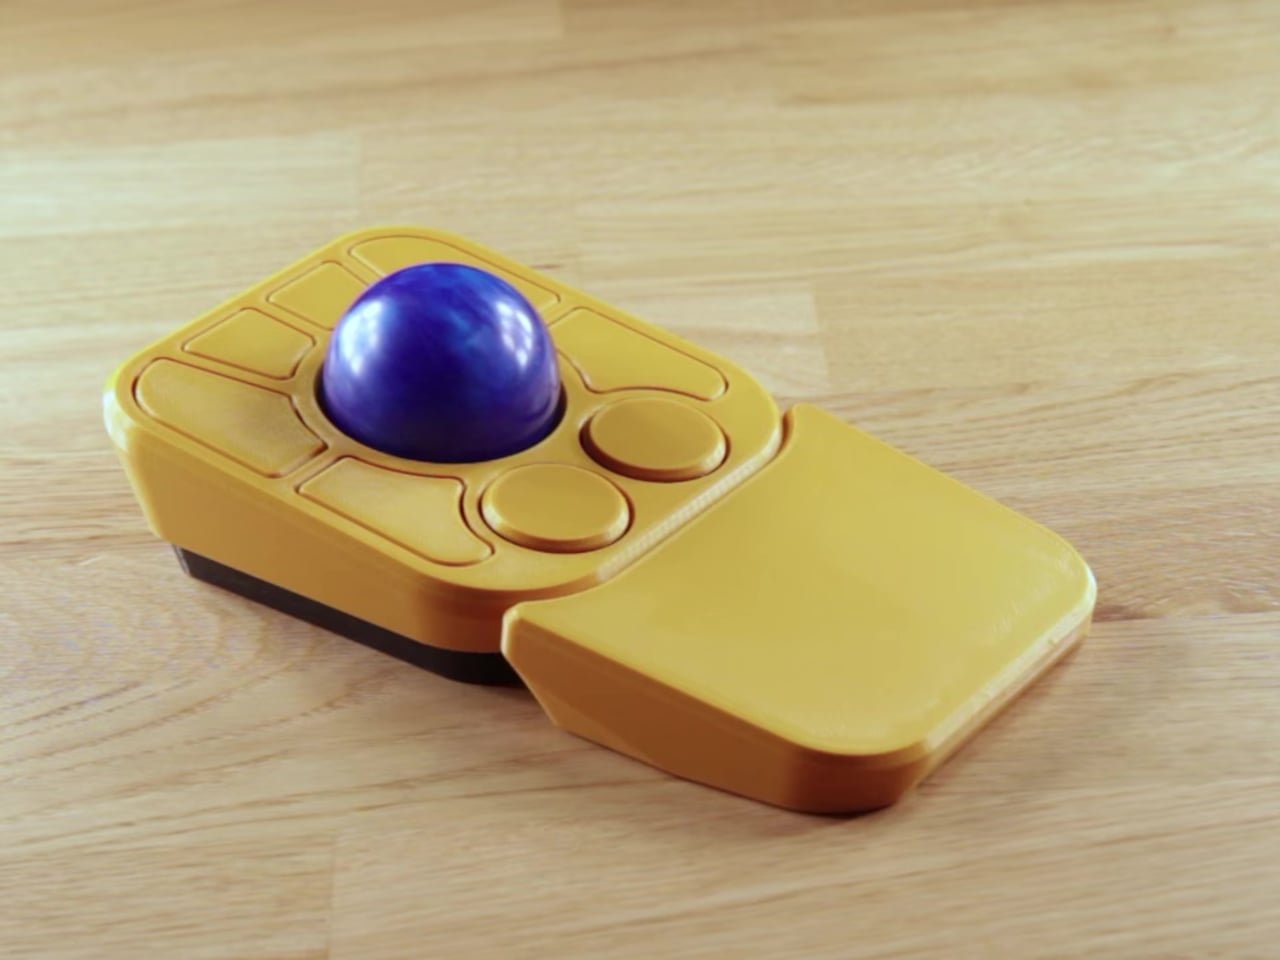
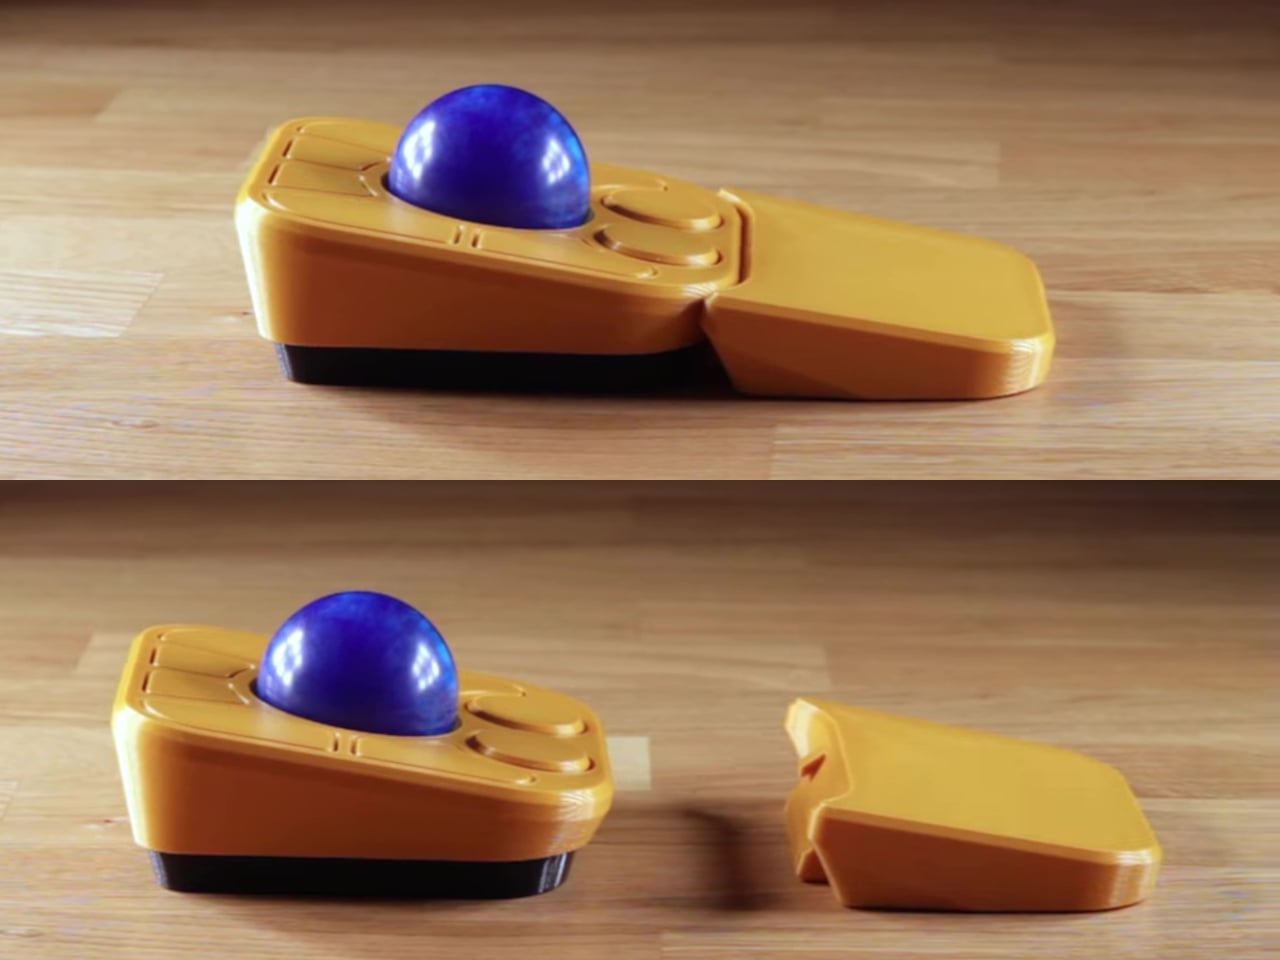
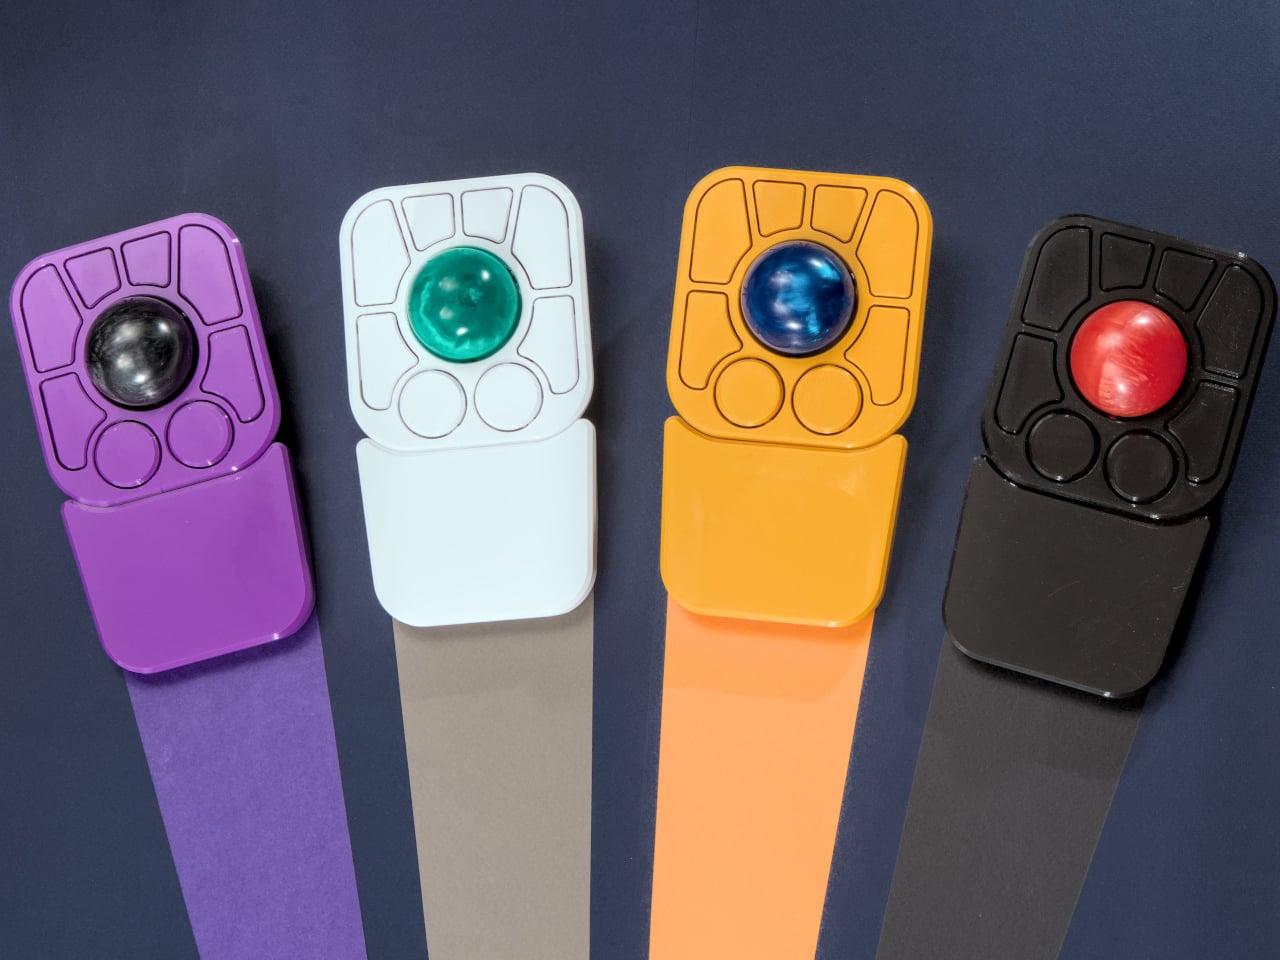
The detachable wrist rest is another long-promised feature that finally arrives with the A+. It slots in or out during use and can be screwed on permanently if preferred. The device stays ambidextrous throughout, and its 3D-printed shell means the community can print modified bodies, alter the layout, or swap in custom colors. That kind of adaptability isn’t an afterthought; it’s part of how the whole thing is designed.

The Pixart PMW-3360 sensor carries over from the Adept, running at a 1,000Hz polling rate with the tracking accuracy that has made it a standard for performance-oriented pointing devices. Omron D2LS-21 switches handle the physical buttons. The firmware remains QMK, configurable through VIA, with all design files, firmware, and assembly instructions freely available on GitHub. Kits start at $99 CAD.

The post This $99 Trackball Has Gesture Controls That Work Without Any Software first appeared on Yanko Design.
adidas BB.01 is first 3D-printed basketball shoe built to improve stability and flexibility on court

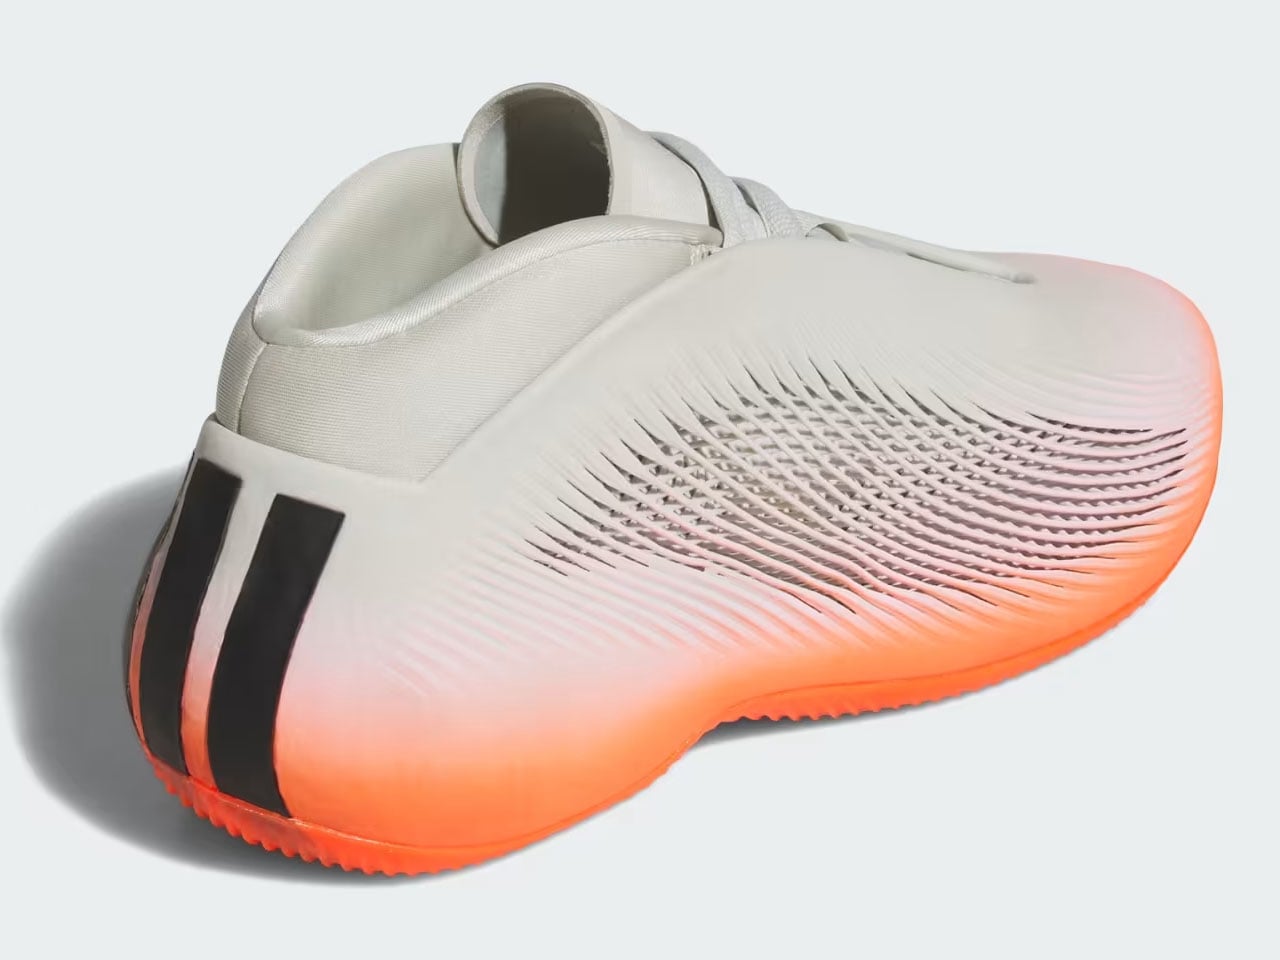
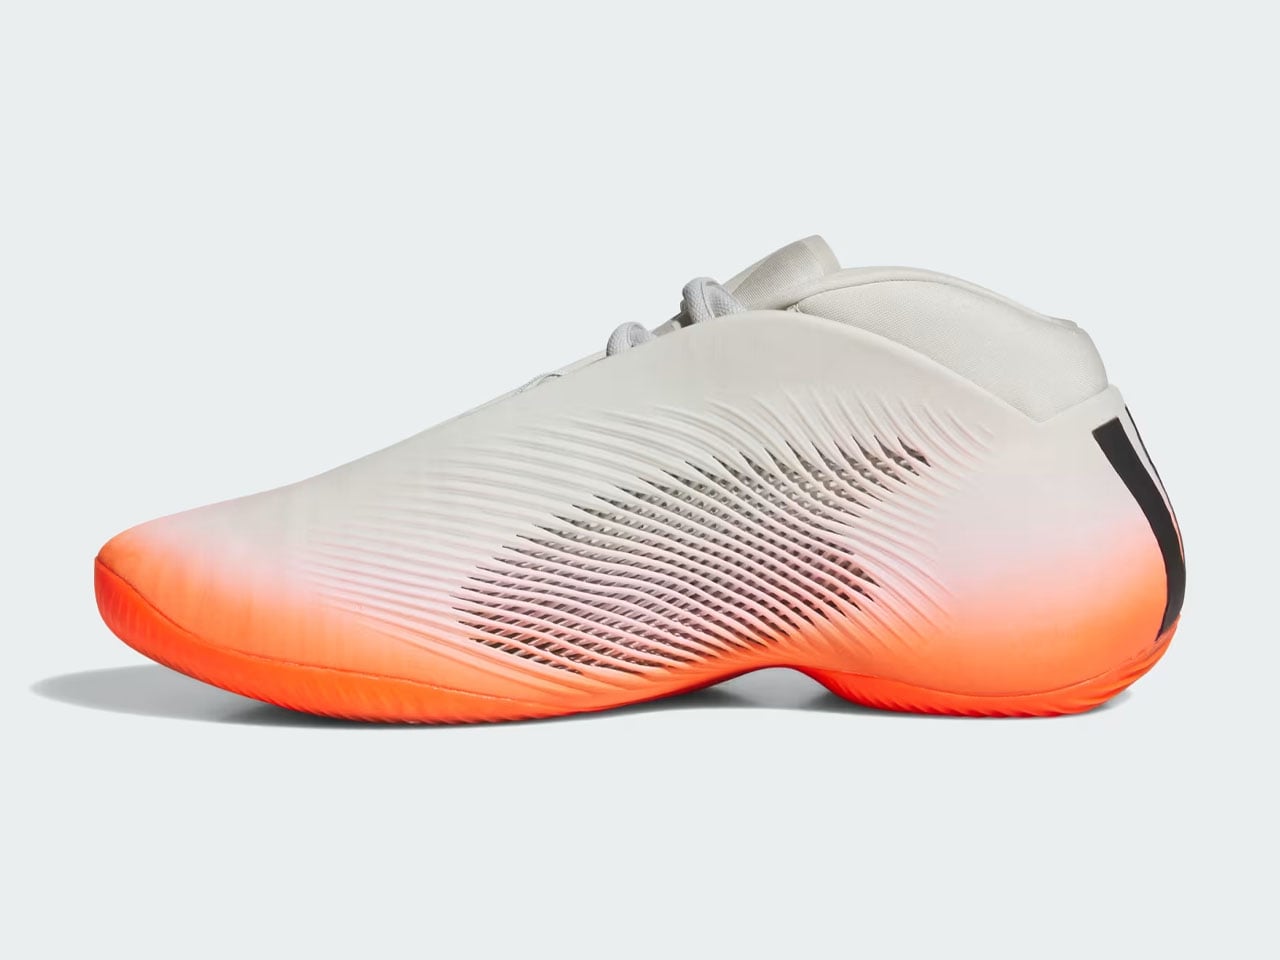
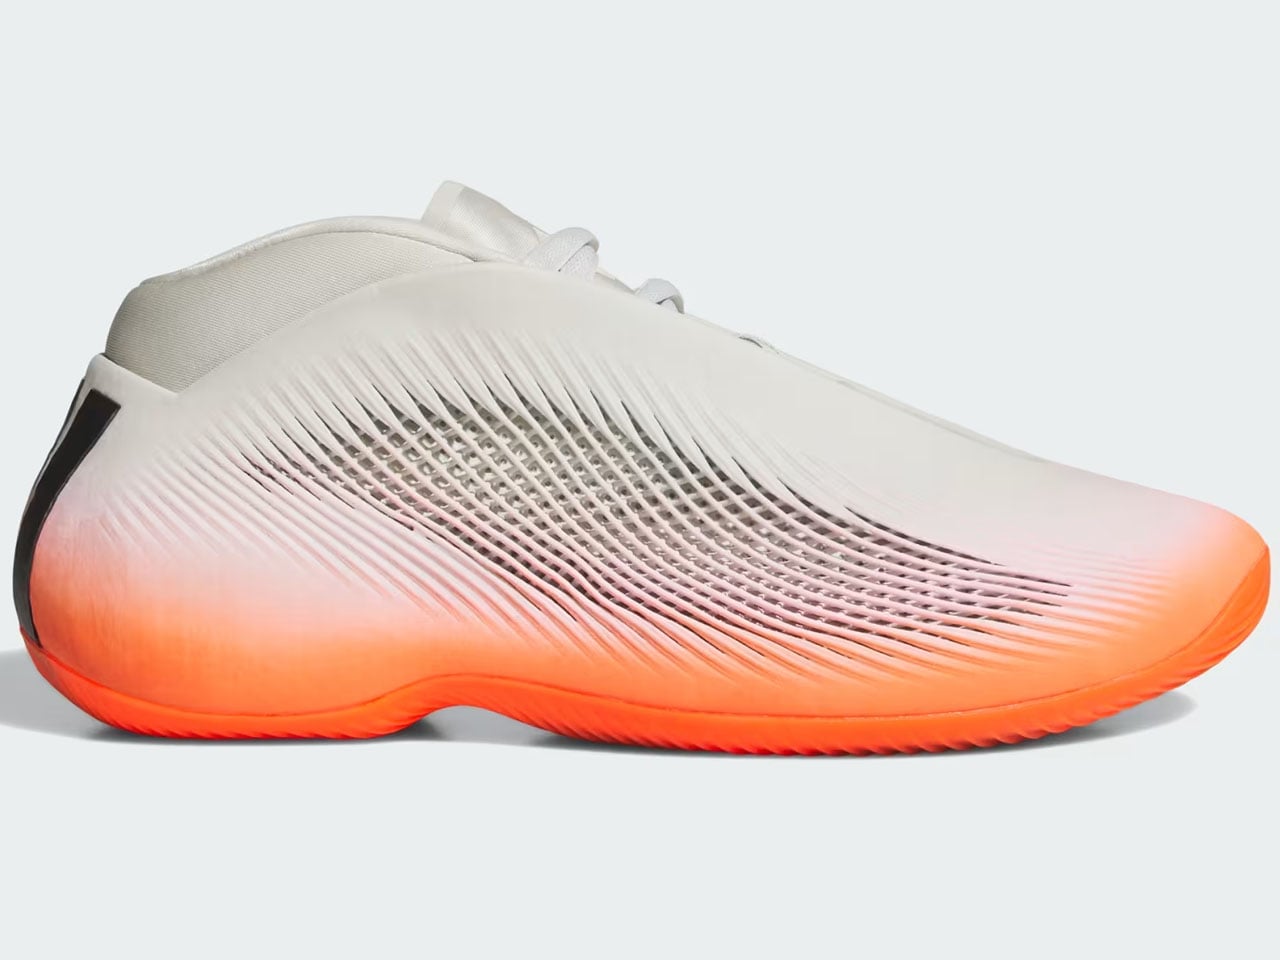
While the world is fixated on who’s making it to the quarterfinals of the FIFA World Cup. adidas thinks it’s done enough for the love of the game with the Trionda, and now it’s time to shift focus to basketball. To do that, the sportswear giant is bringing 3D-printed footwear innovation to the hardwood with the launch of adidas BB.01. It is the first 3D-printed basketball shoe to hit the market, in an eye-catching combination of Solar Red and Orbit Grey.

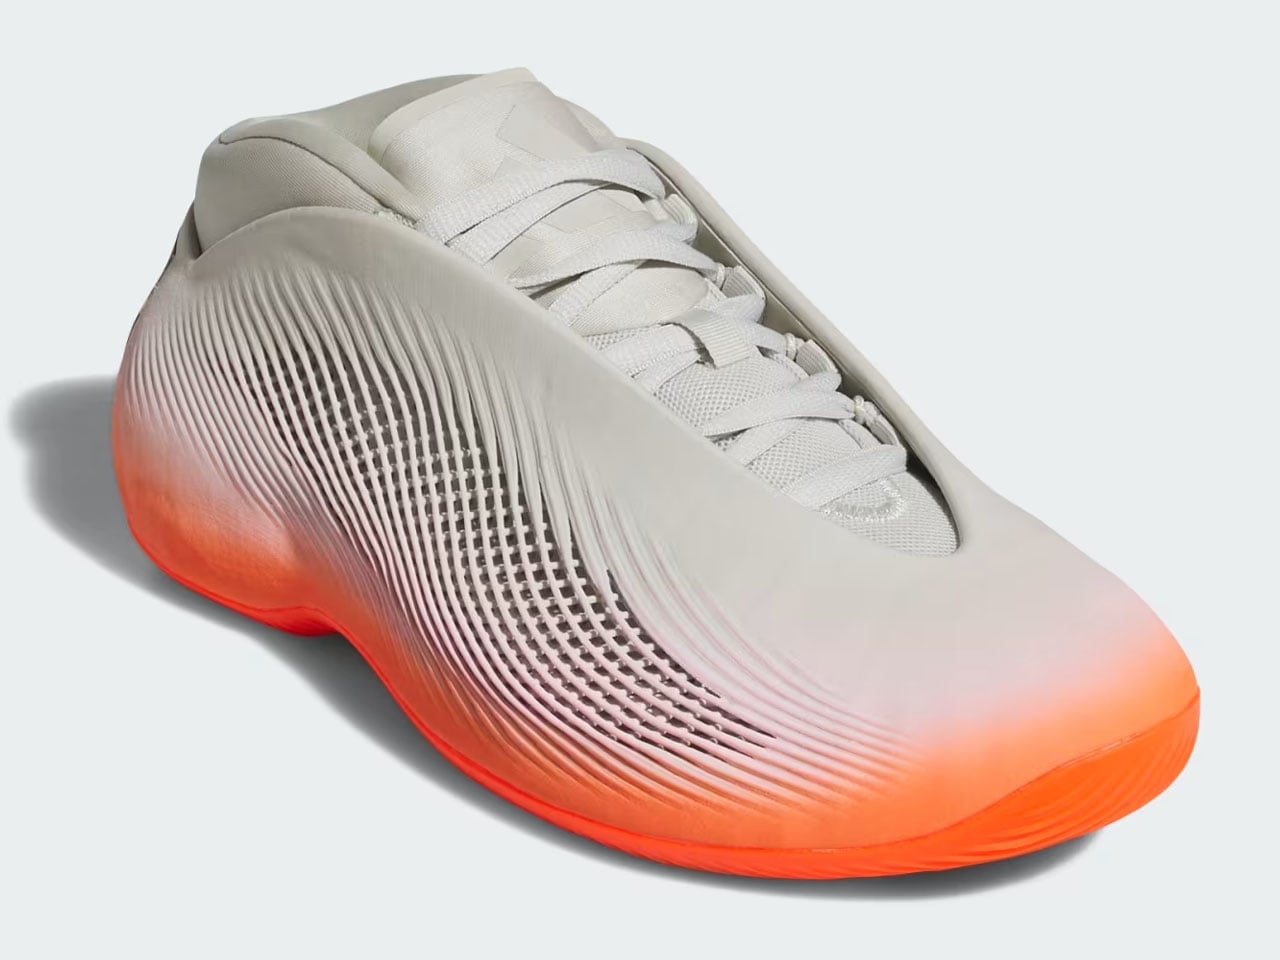
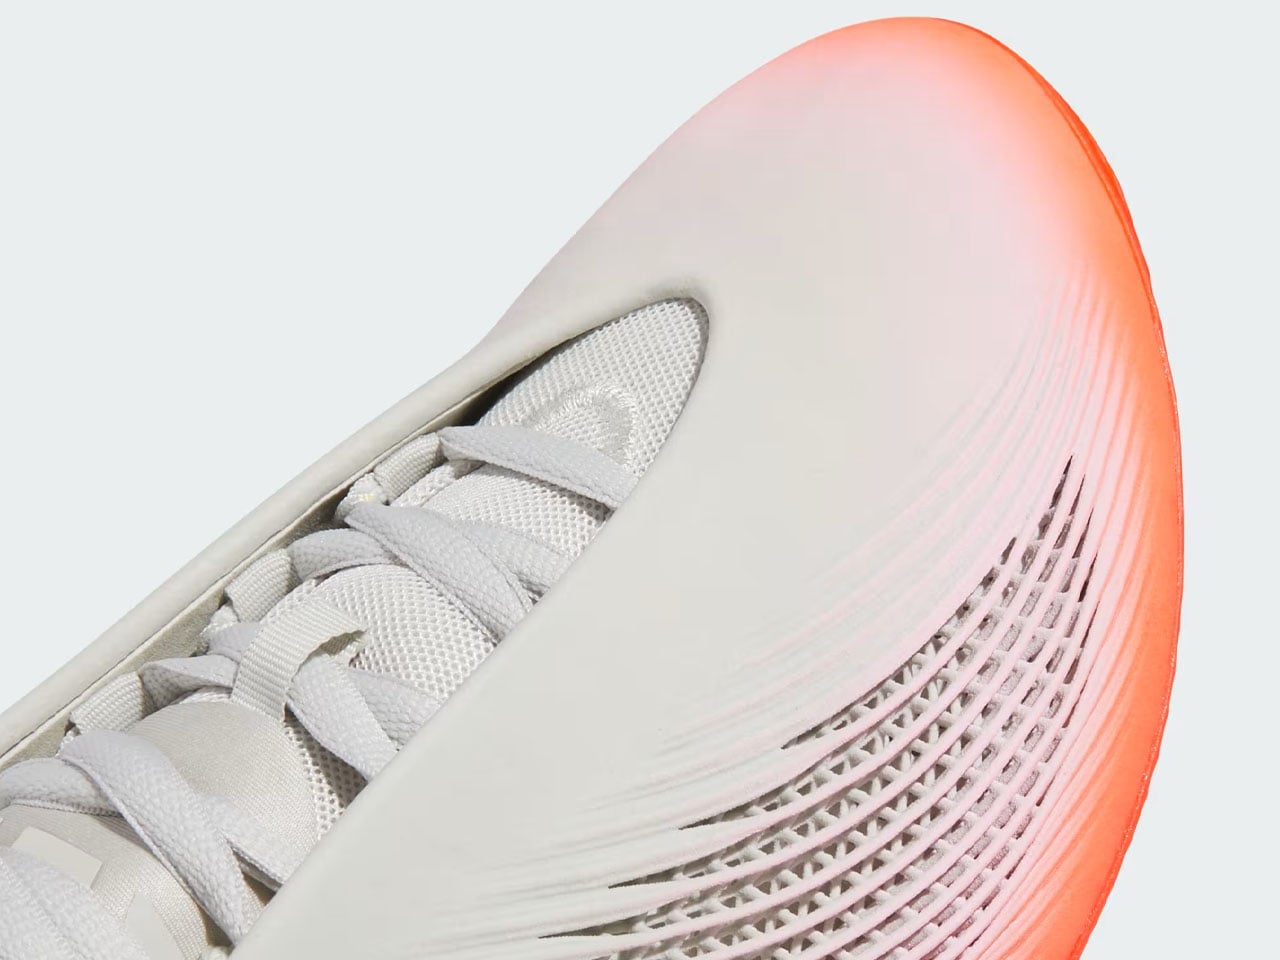
The 3D printed basketball shoe from adidas is a definite head-turner. It’s called the adidas BB.01 “Solar Red/Orbit Grey,” and it’s nothing like the traditional canvas, textile, and foam silhouettes. While most shoe midsoles are molded in factories, the BB.01 is printed entirely from resin in layers instead.

Designer: adidas

The basketball shoe is part of adidas’ Project R.A.P (Radical Athlete Perception). The program ensures that adaptive manufacturing is not just an experimental category but an actual way to create functional, court-worthy footwear. Based on this ideology, adidas BB.01 has been a long time coming.

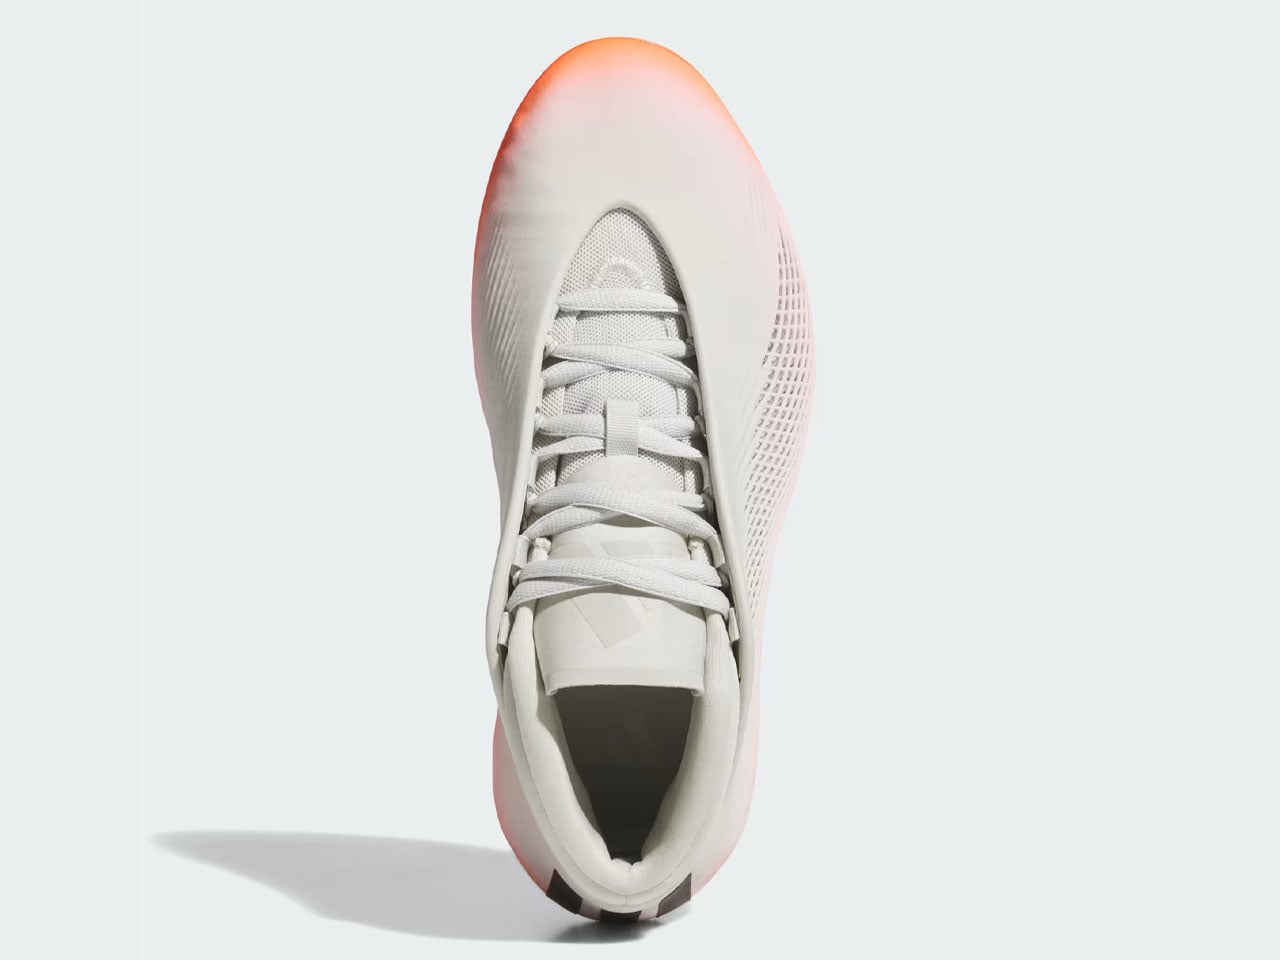
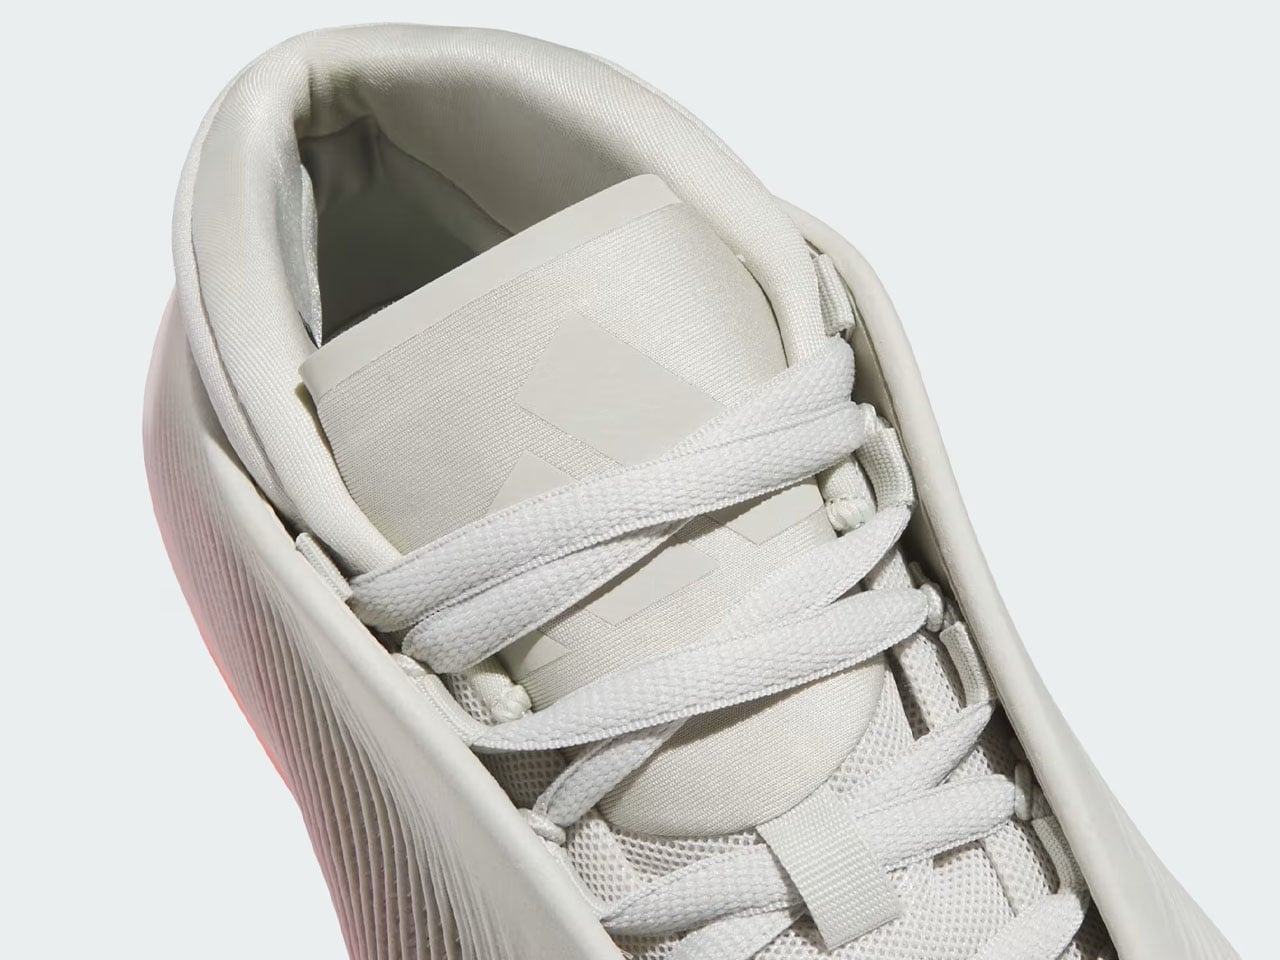
The much-anticipated footwear finally has a release date and a price. Fans should be able to get their feet into the 3D-printed marvel starting July 14, when it will be available through the adidas Confirmed app for $250. Meticulously combining “cutting-edge digital manufacturing with elite on-court performance,” the shoe features Orbit Grey in the base, which, in contrast, is highlighted by the Solar Red upper cage. The Three Stripes logo is present on the heel, from where it extends upward toward the collar.

Since the footwear is designed to complement the wearer’s performance on the court, its 3D printed midsole is designed to handle the impact and keep the player “stable through cuts and landings.” The footwear weighs only 15.13 oz (428 g) and comes with its most striking resin outer shell on top of the engineered midsole, which utilizes a lattice design across the sidewalls. This form factor allows the shoe to flex with the twisting nature of the foot. Higher-density printing is also carried out around the toes and heels for stability.

adidas BB.01 is not an attractive shoe on the outside alone. On the inside, it also features a soft textile bootie that locks the foot in place, ensuring support and comfort. A flagbearer of the future of 3D printing in the footwear industry, adidas BB.01 will release on July 14, but you can start registering for it as early as July 9 through the company website.

The post adidas BB.01 is first 3D-printed basketball shoe built to improve stability and flexibility on court first appeared on Yanko Design.
This Free 3D Lamp Has 300 LEDs and Looks Nothing Like a Printed Object

Decorative lighting has become one of the more satisfying corners of the maker movement. Most off-the-shelf lamp designs don’t bring much that’s genuinely distinctive into a space, and the ones that do tend to cost far more than the task deserves. That’s pushed a growing number of people toward building their own, using 3D printing and open-source lighting firmware to create objects that simply wouldn’t exist any other way.

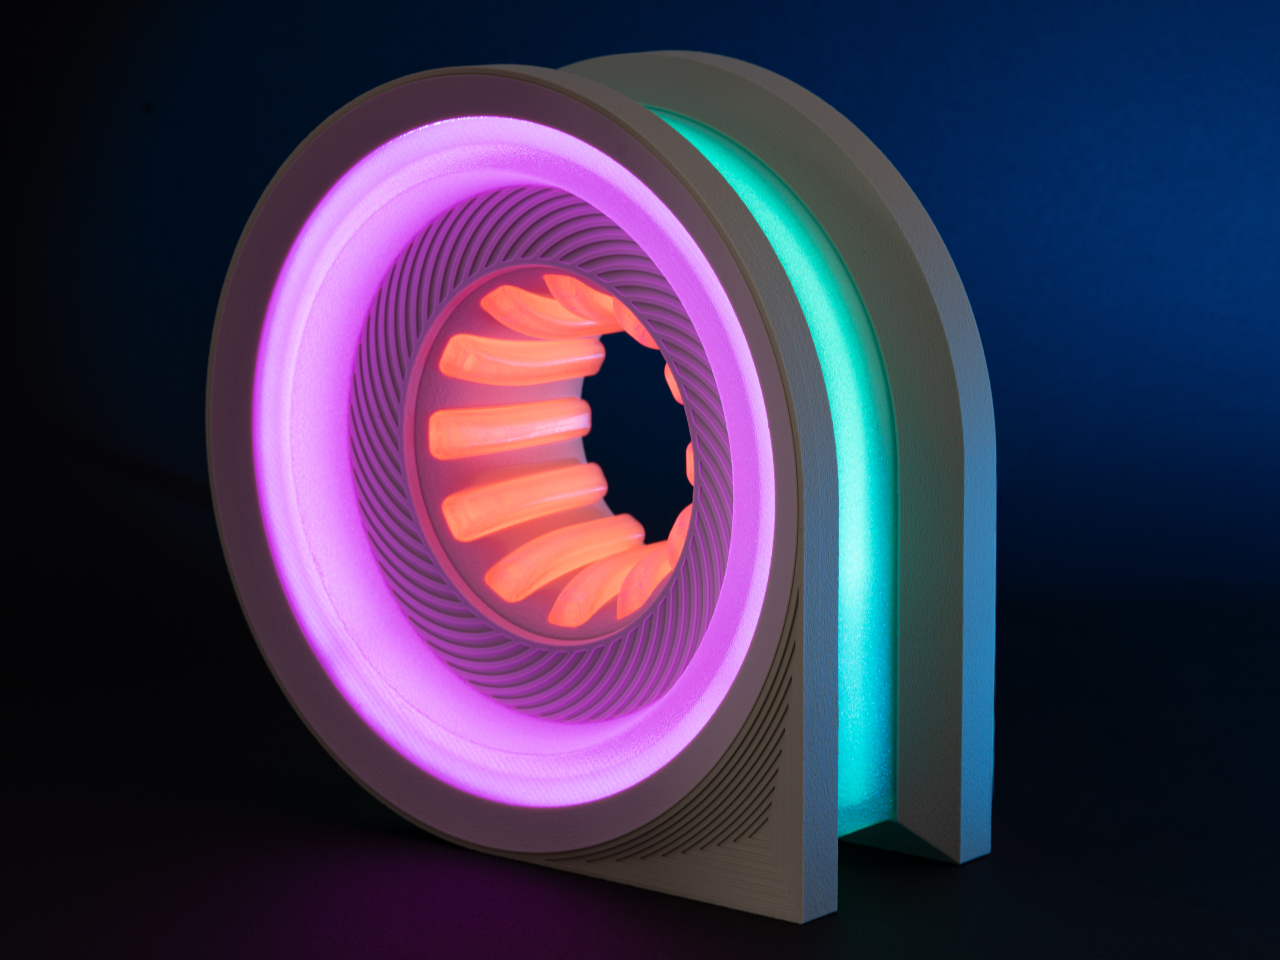
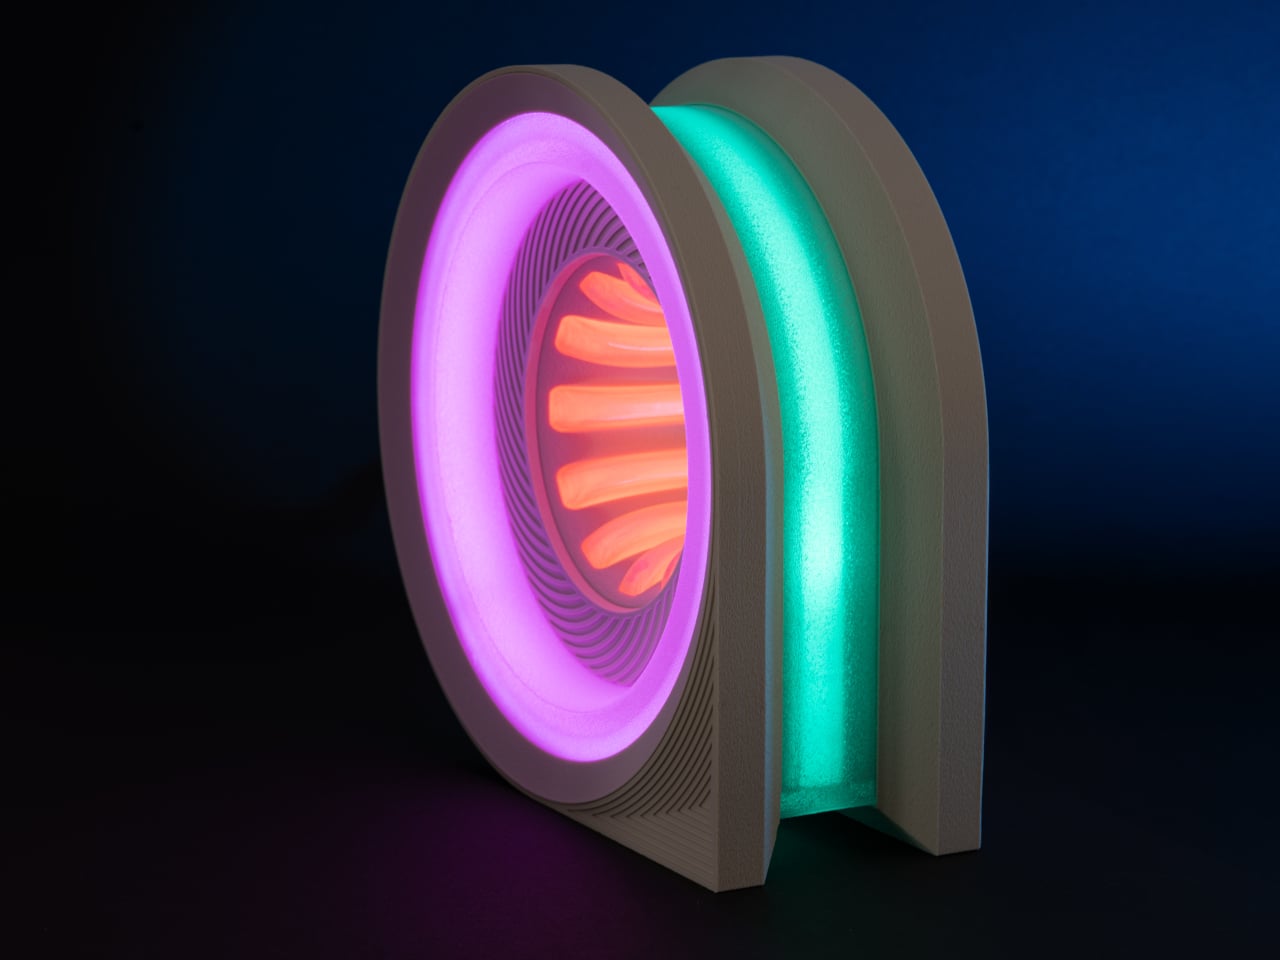
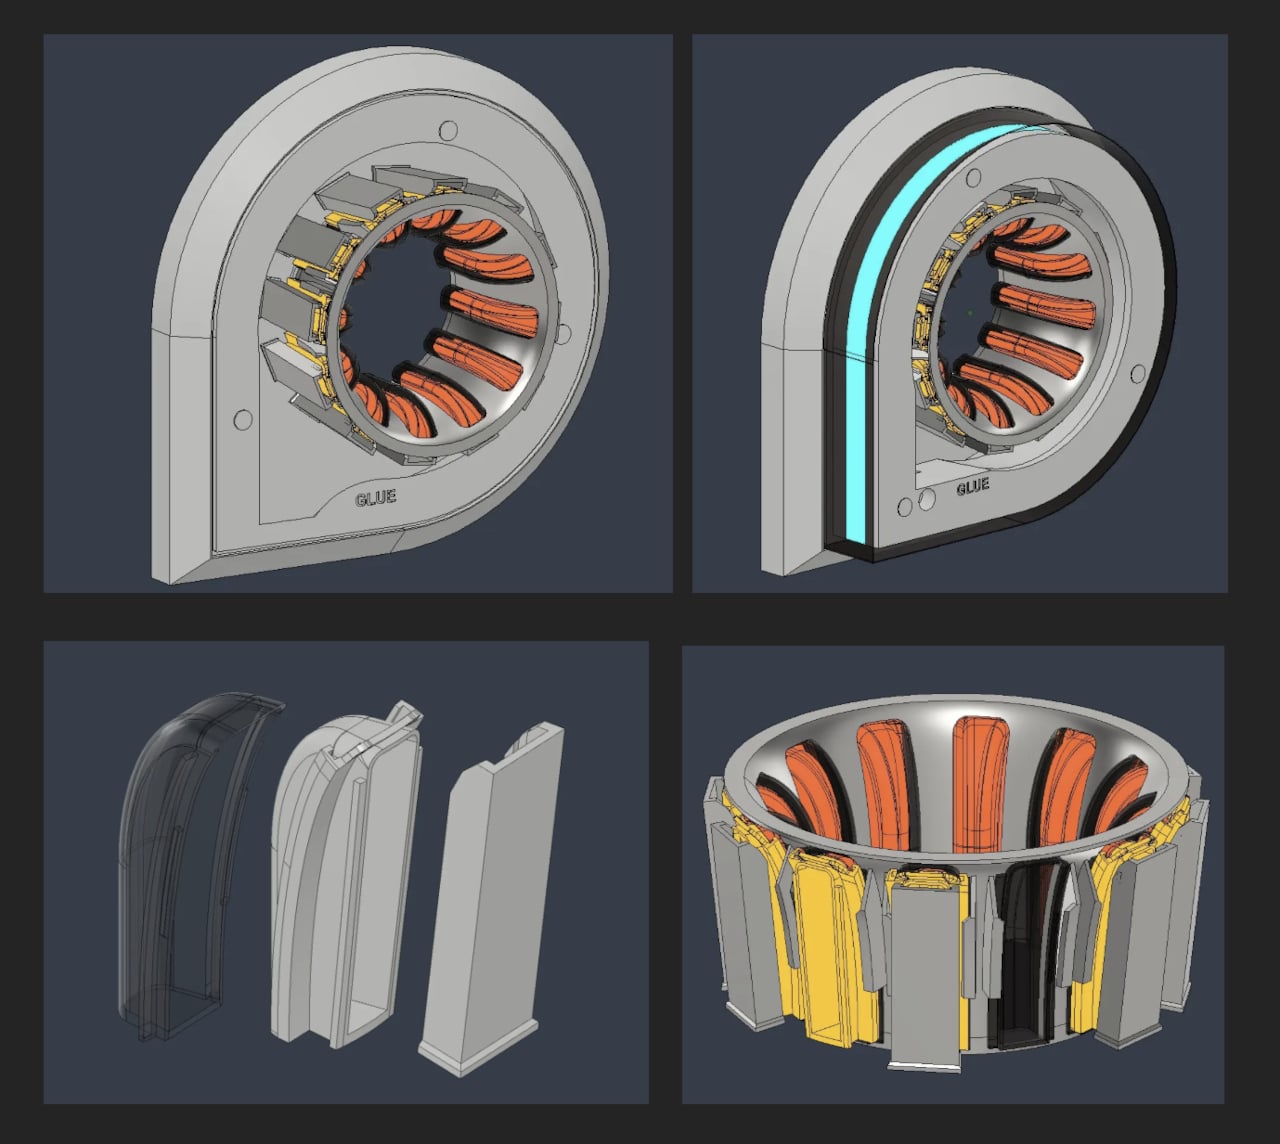
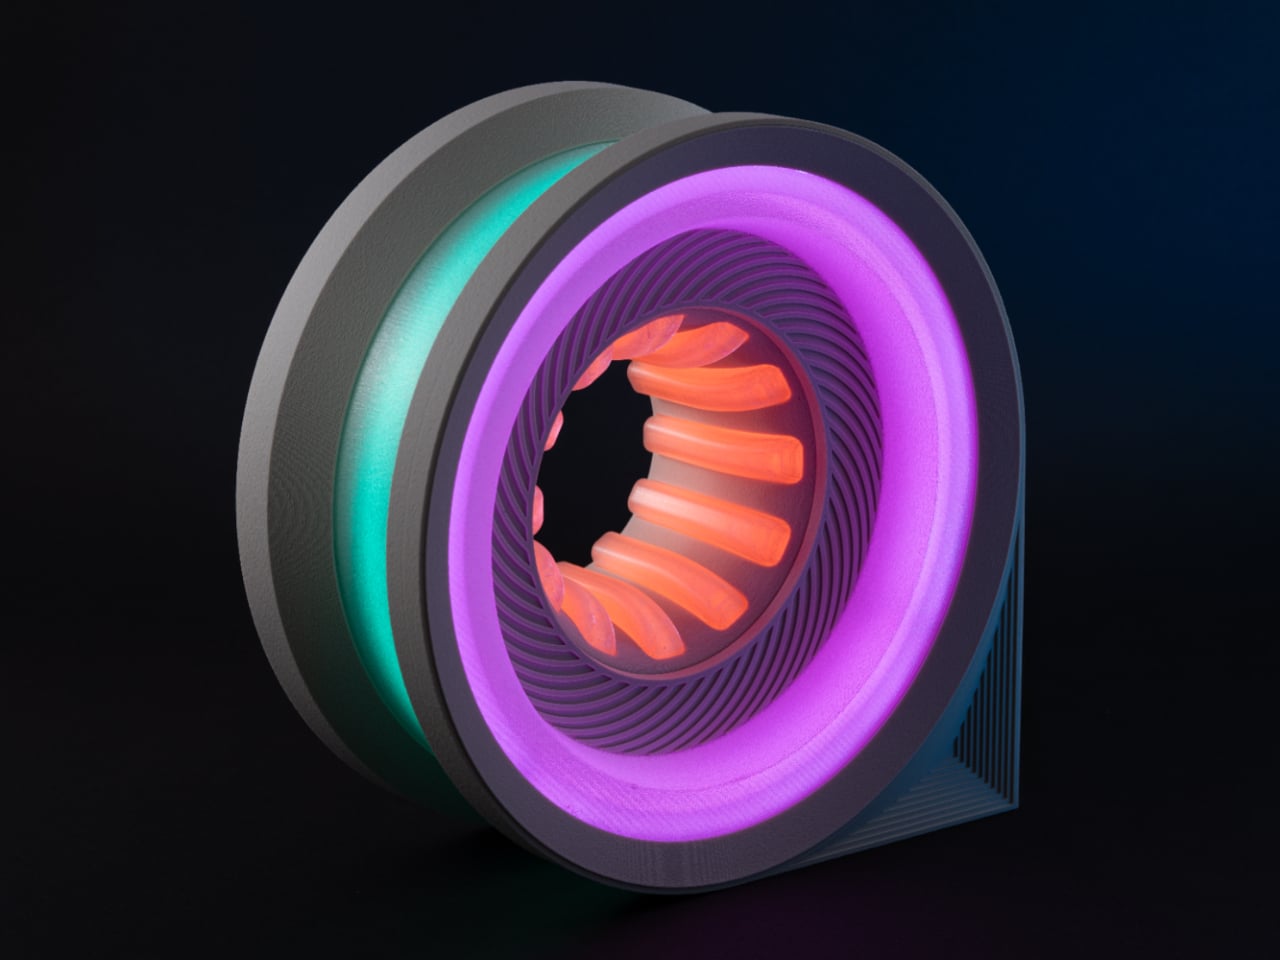
The Cyber Loop Lamp is the kind of result that tends to stop people mid-scroll. It takes the shape of a vertical wheel, somewhere between a car’s rim and a navigation pin laid flat, and wraps that form in a layered lighting system that creates an infinity-like depth effect. The files are available for free on MakerWorld, and building one is a genuinely demanding project.

Designer: LightCore3D

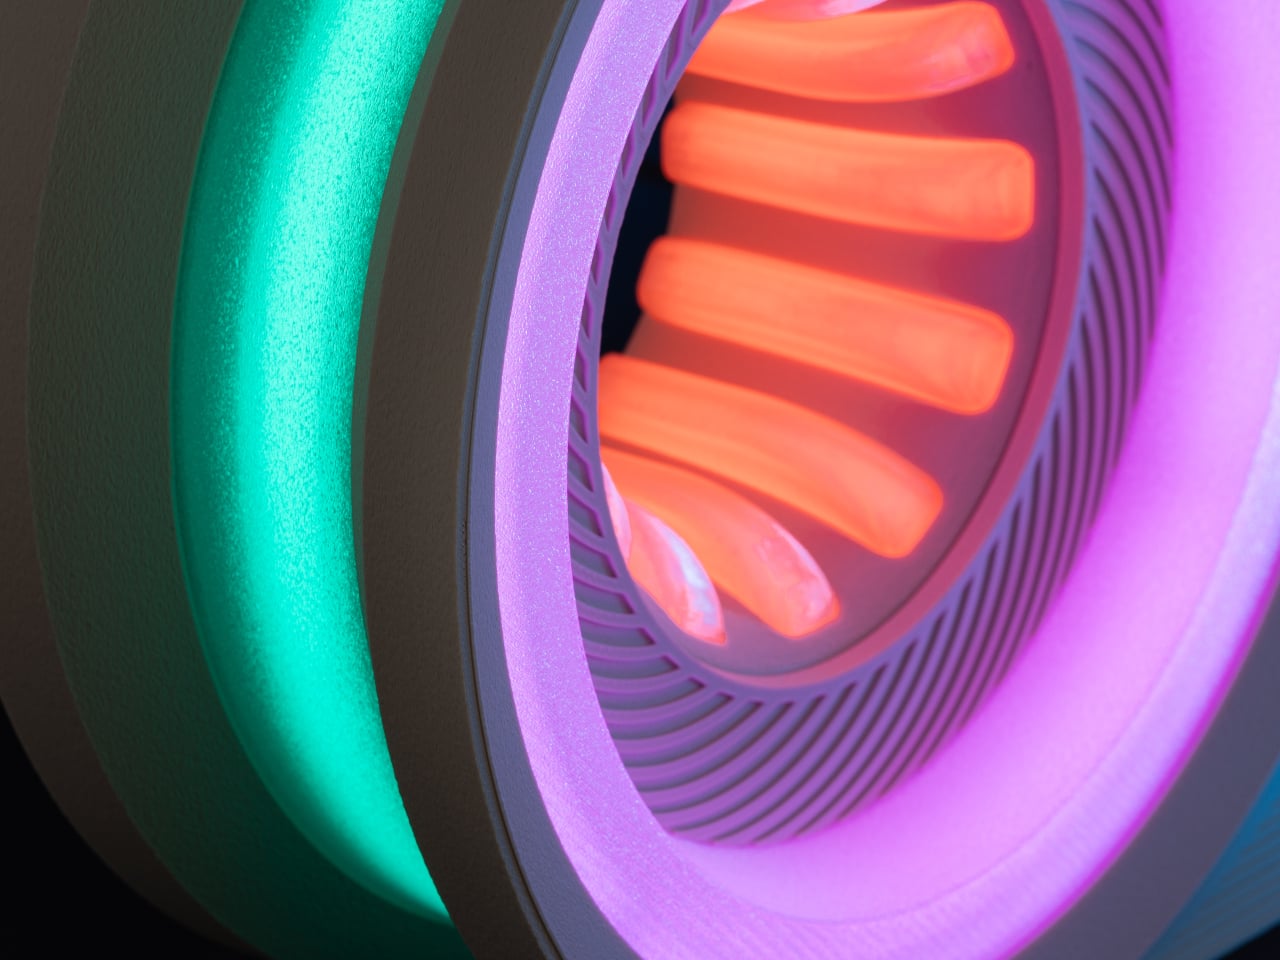
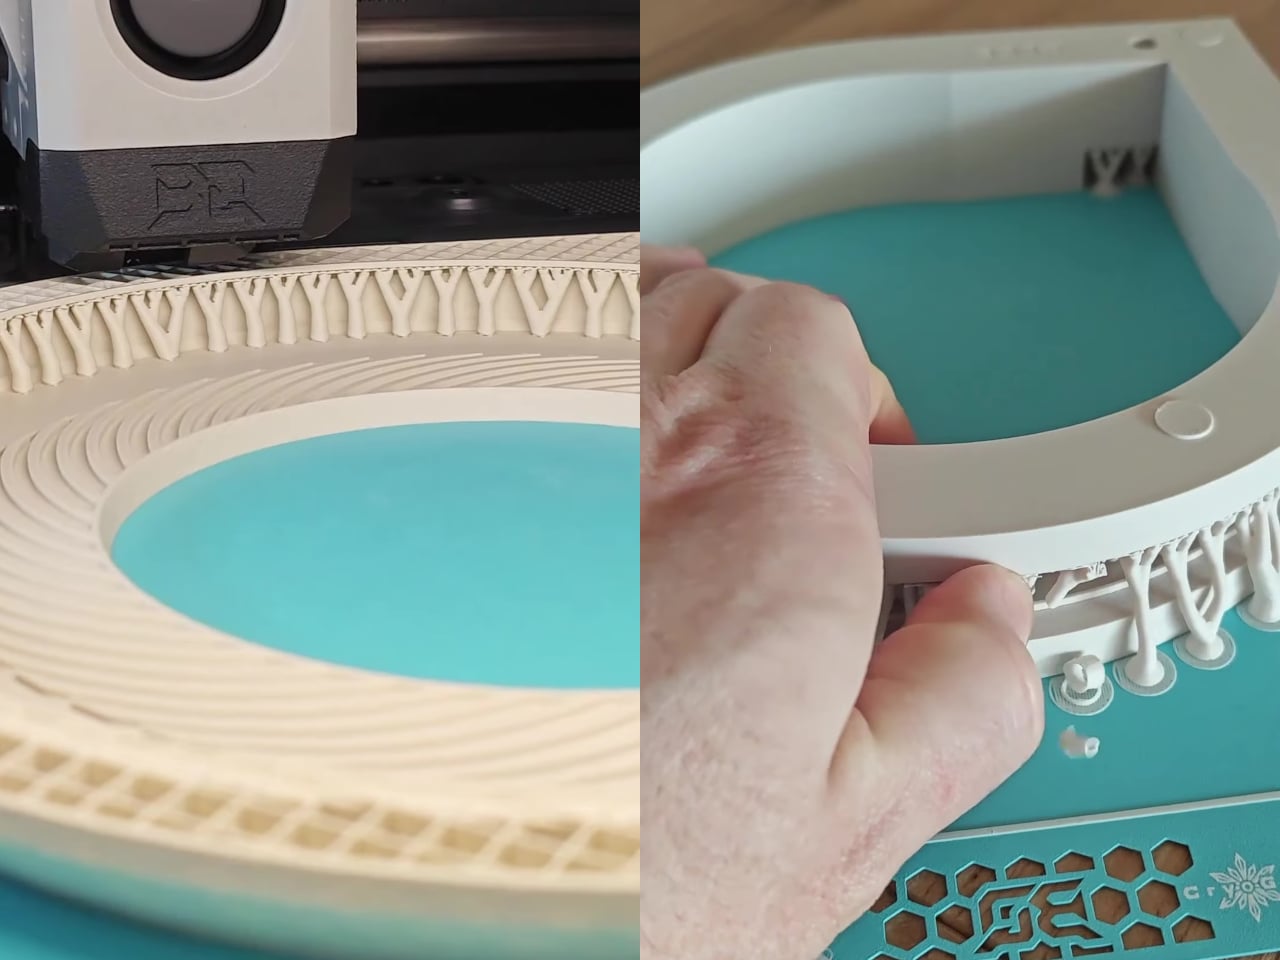
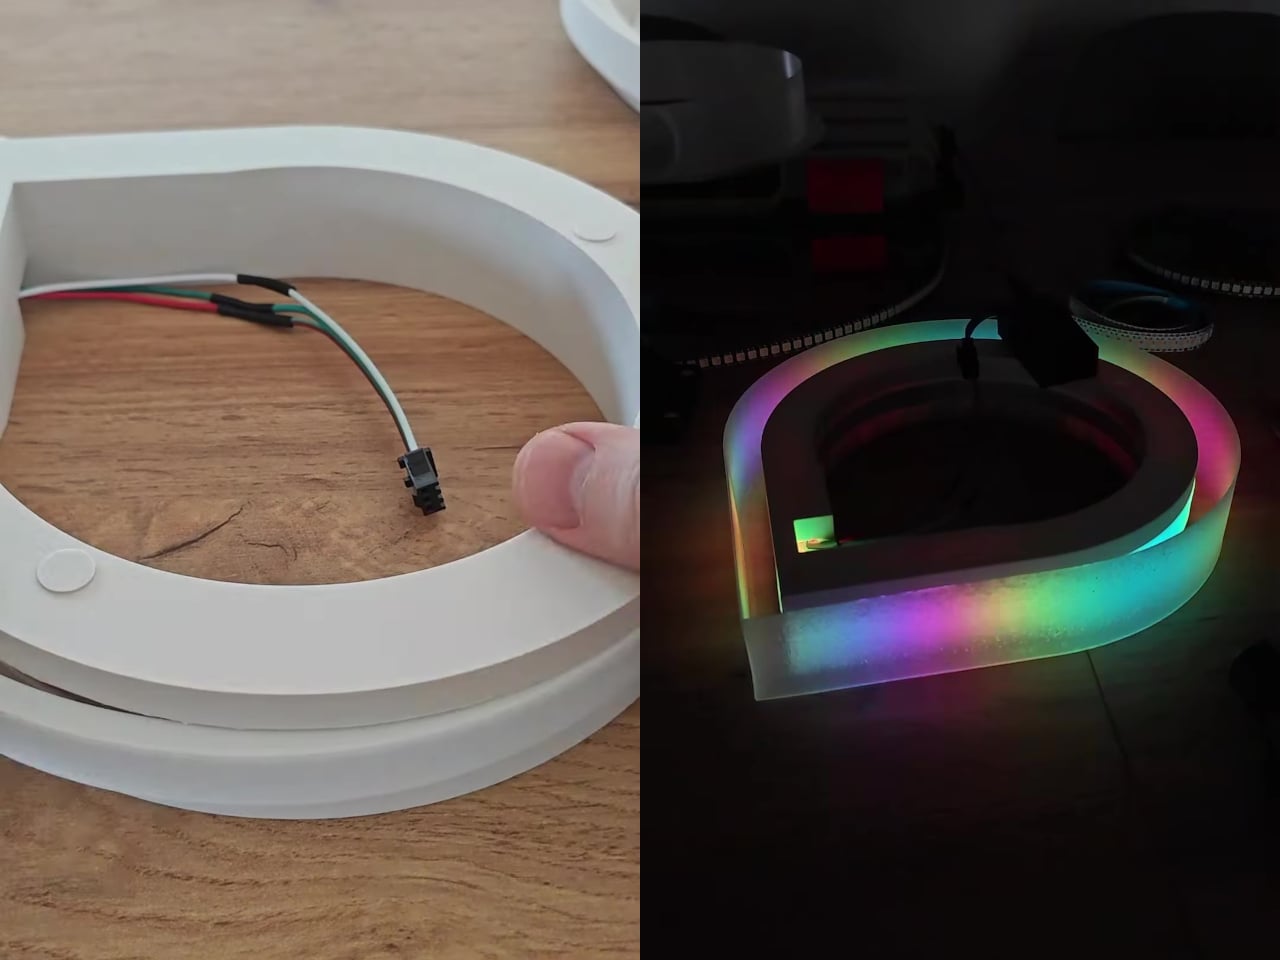
At approximately 25cm tall, the lamp has enough presence to anchor a desk corner without overwhelming it. The design uses colored filament for the outer shell and clear filament for a transparent inner diffuser layer. That separation between the light source and the outer shell produces the glowing, almost holographic depth that makes the lamp look so unlike anything that came off a 3D printer.

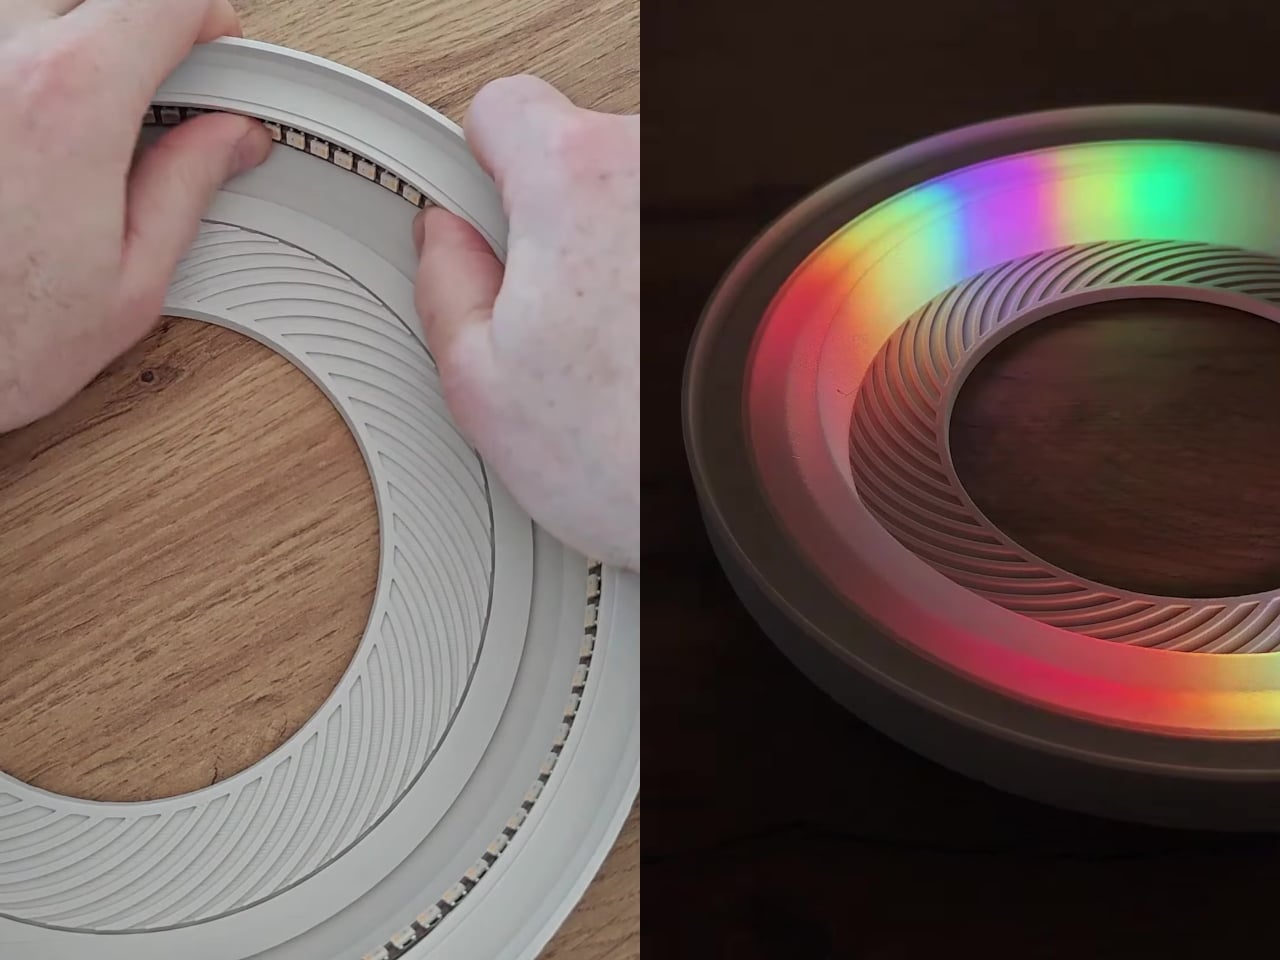
The lighting system draws from nearly 300 individually addressable RGB LEDs, packed into a 2m WS2812B strip running at 144 LEDs per meter. Three distinct zones handle the display: a central funnel, the outer perimeter ring, and roughly a dozen inner spokes. Each zone runs its own color and effect independently, giving the lamp that layered, animated quality that holds attention in a way static ambient lighting usually doesn’t.

Control comes from an ESP32 board running WLED firmware, which lets you map each LED zone to its own effects group and cycle through custom presets. WLED is open-source and widely supported, with a large built-in animation library and enough room to create your own sequences on top. The entire system draws from a 5V, 6A power supply, relatively modest for something delivering this amount of visual output.

Getting there takes real commitment. The model spans 12 print plates with an estimated print time of roughly 35 hours, and that’s before assembly begins. Soldering is required, and components like resistors and capacitors join the LED strip and controller in the electronics stack. The creator is upfront that the assembly process isn’t fully documented, so some steps will require problem-solving on the fly rather than following a defined guide.

That friction is part of what makes the result feel earned. A lamp that takes 35 hours to print and several more to assemble isn’t something you’d put together casually, which means it carries weight as an object in the room beyond what any store-bought light could. It sits at a desk or shelf and reads as something deliberately built for exactly the space it occupies.

The Cyber Loop Lamp lands in that unusual territory between a functional accent light and something closer to a display piece, the kind of object that draws questions from people in a room before they figure out what it even is. The model is free on MakerWorld, and the full bill of materials is available directly from the project page for anyone ready to commit to the build.

The post This Free 3D Lamp Has 300 LEDs and Looks Nothing Like a Printed Object first appeared on Yanko Design.
This Keychain Camera Shares Photos Over Its Own Wi-Fi, No App Needed

Keychain cameras have been enjoying a quiet revival, driven largely by a growing appetite for lo-fi photography and a general fatigue with the algorithmic complexity baked into smartphone cameras. Most of what’s available comes pre-assembled and pre-decided, right down to the app you’re expected to use and whose cloud account your photos end up in. That framing leaves very little room for the person actually taking the pictures.

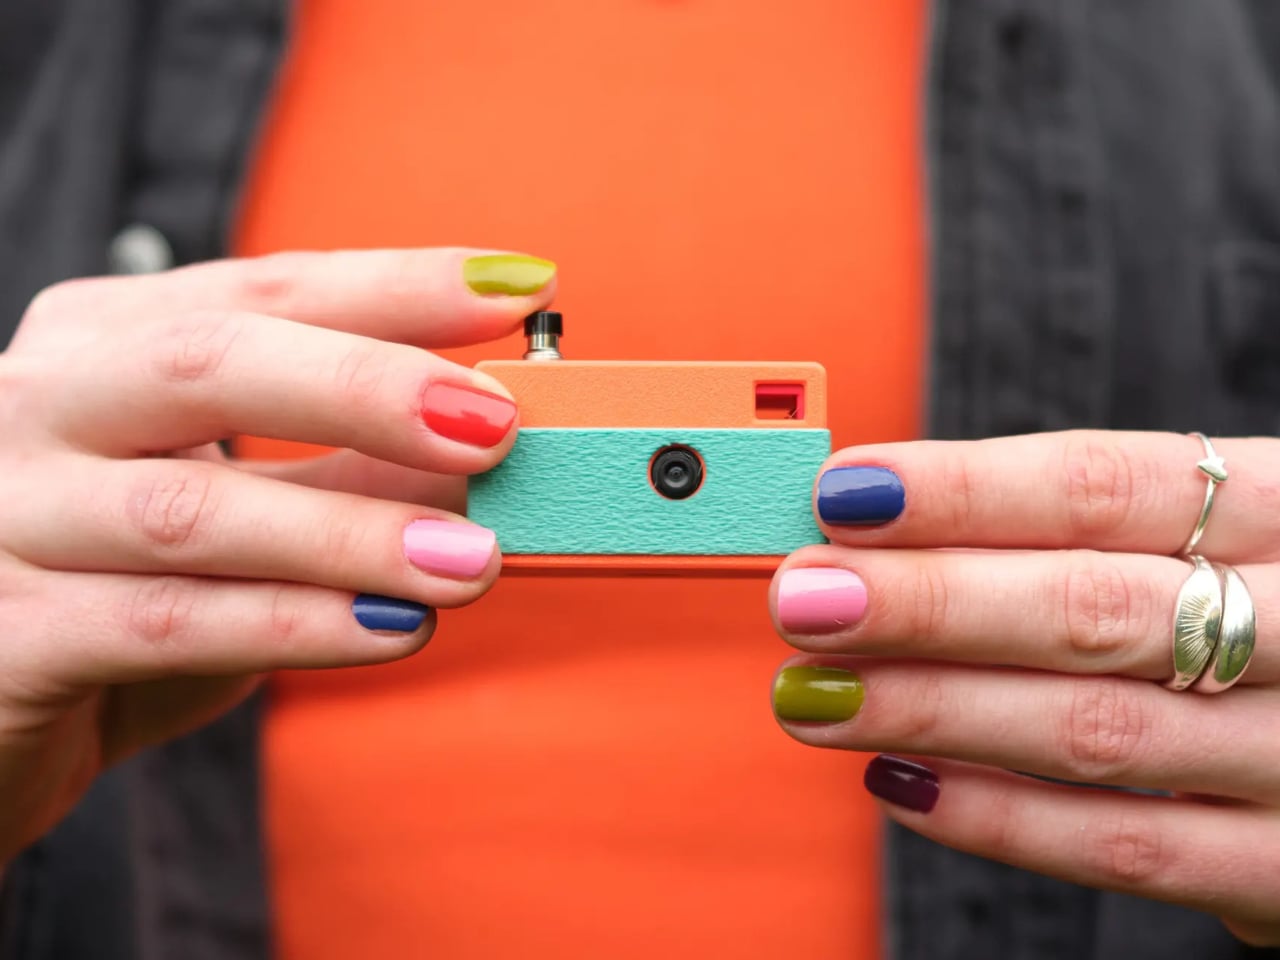
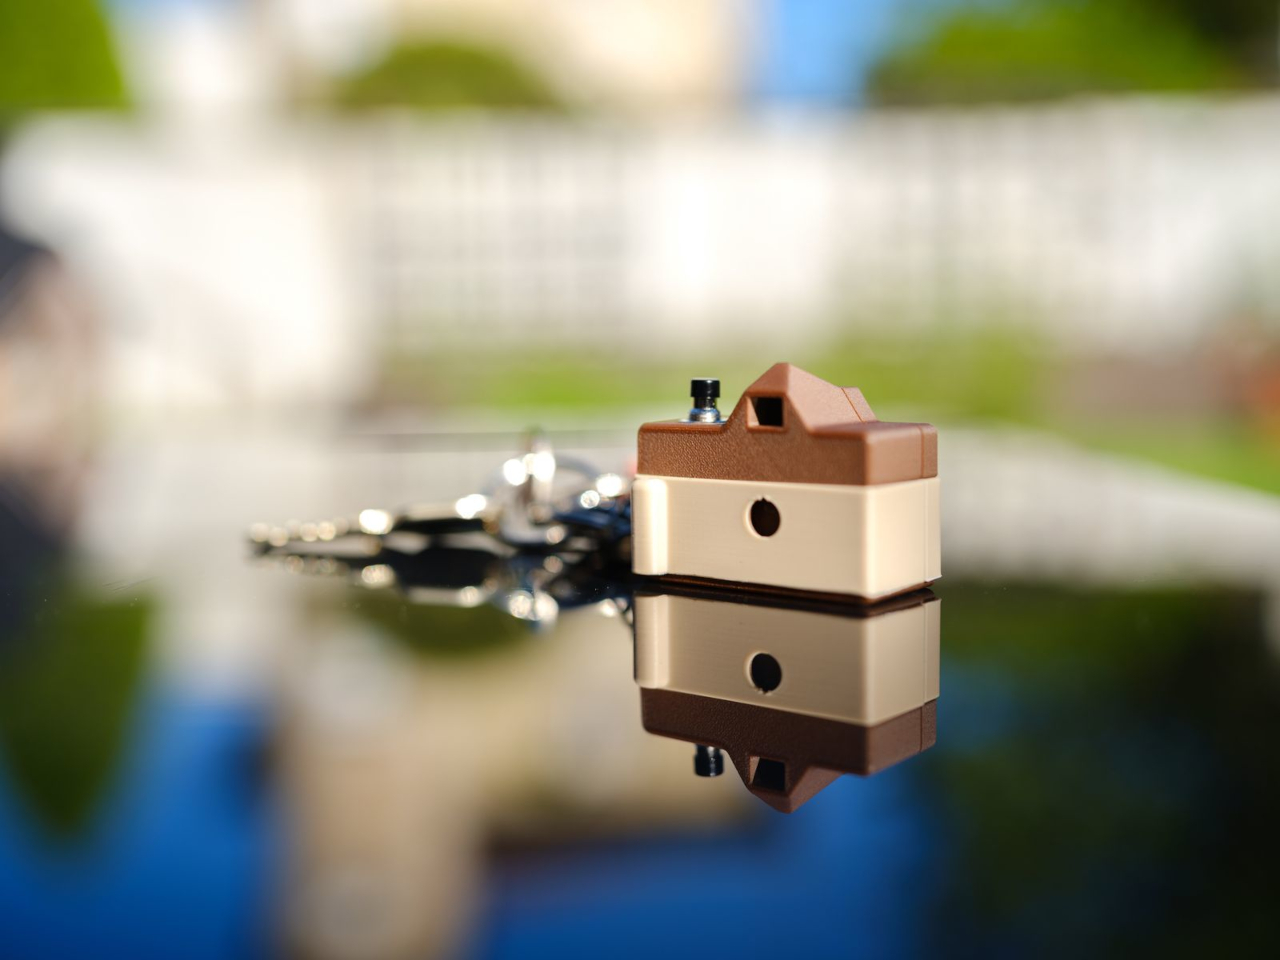
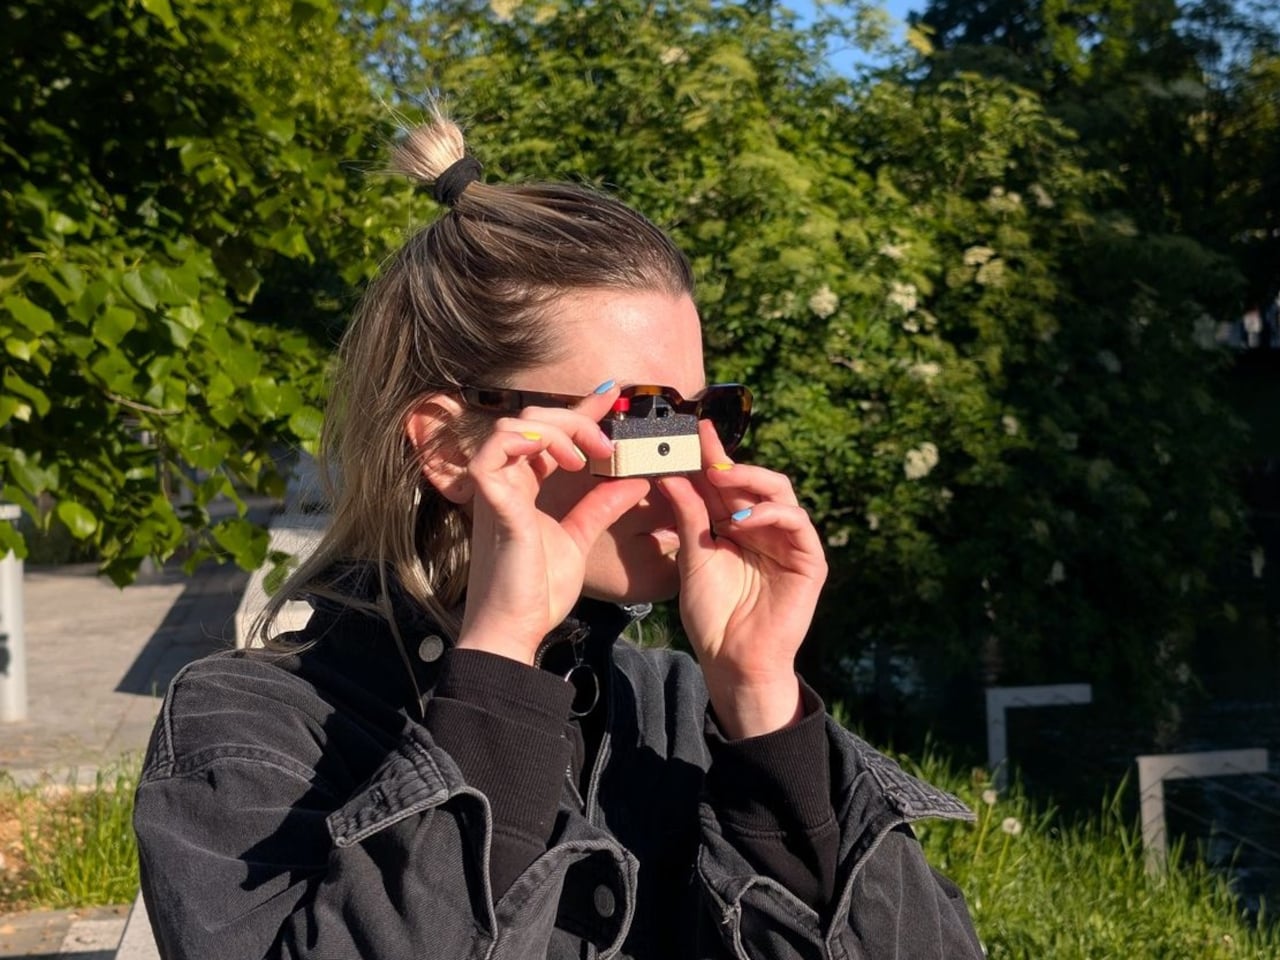
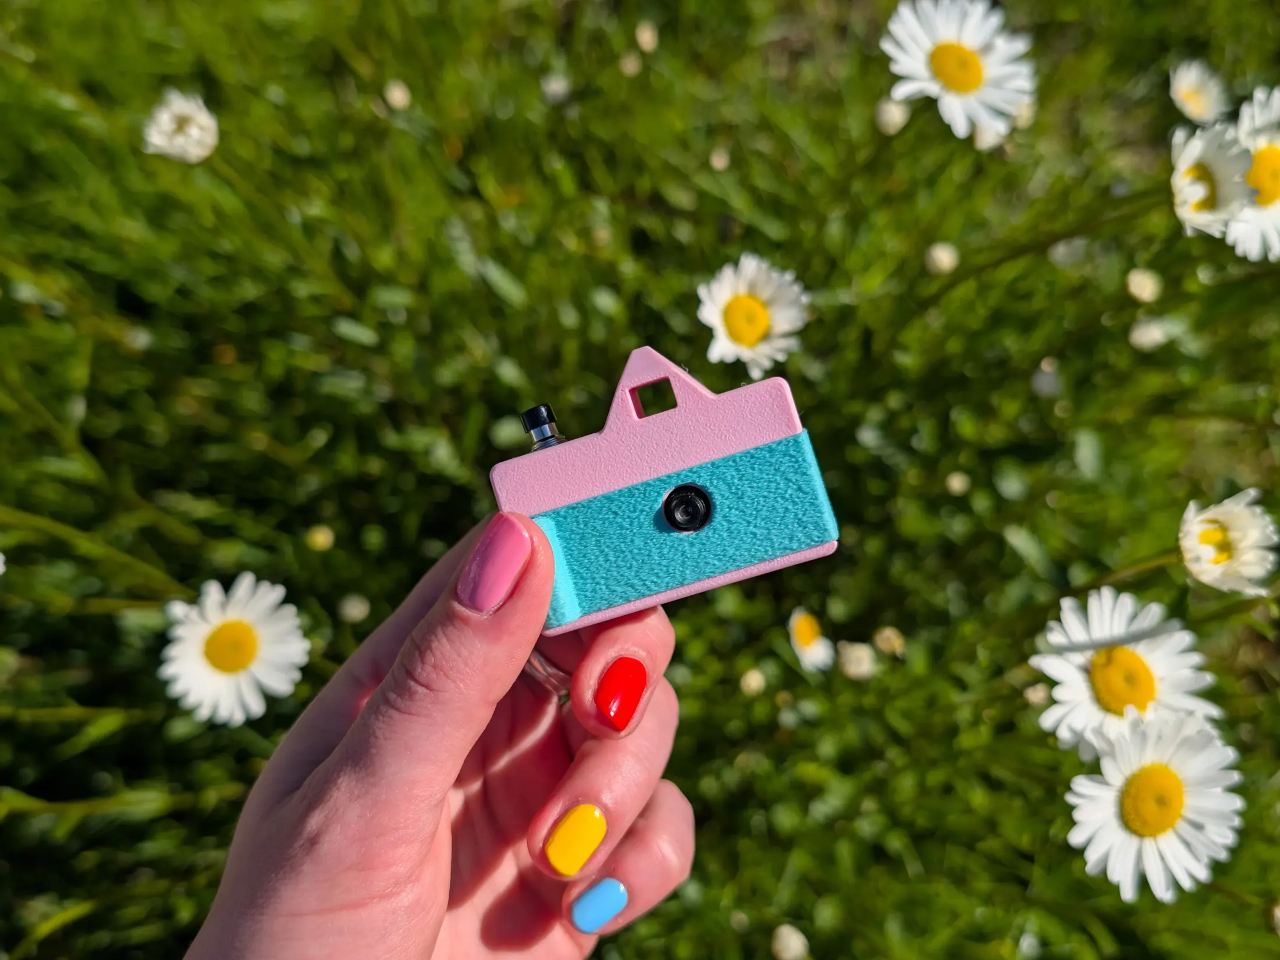
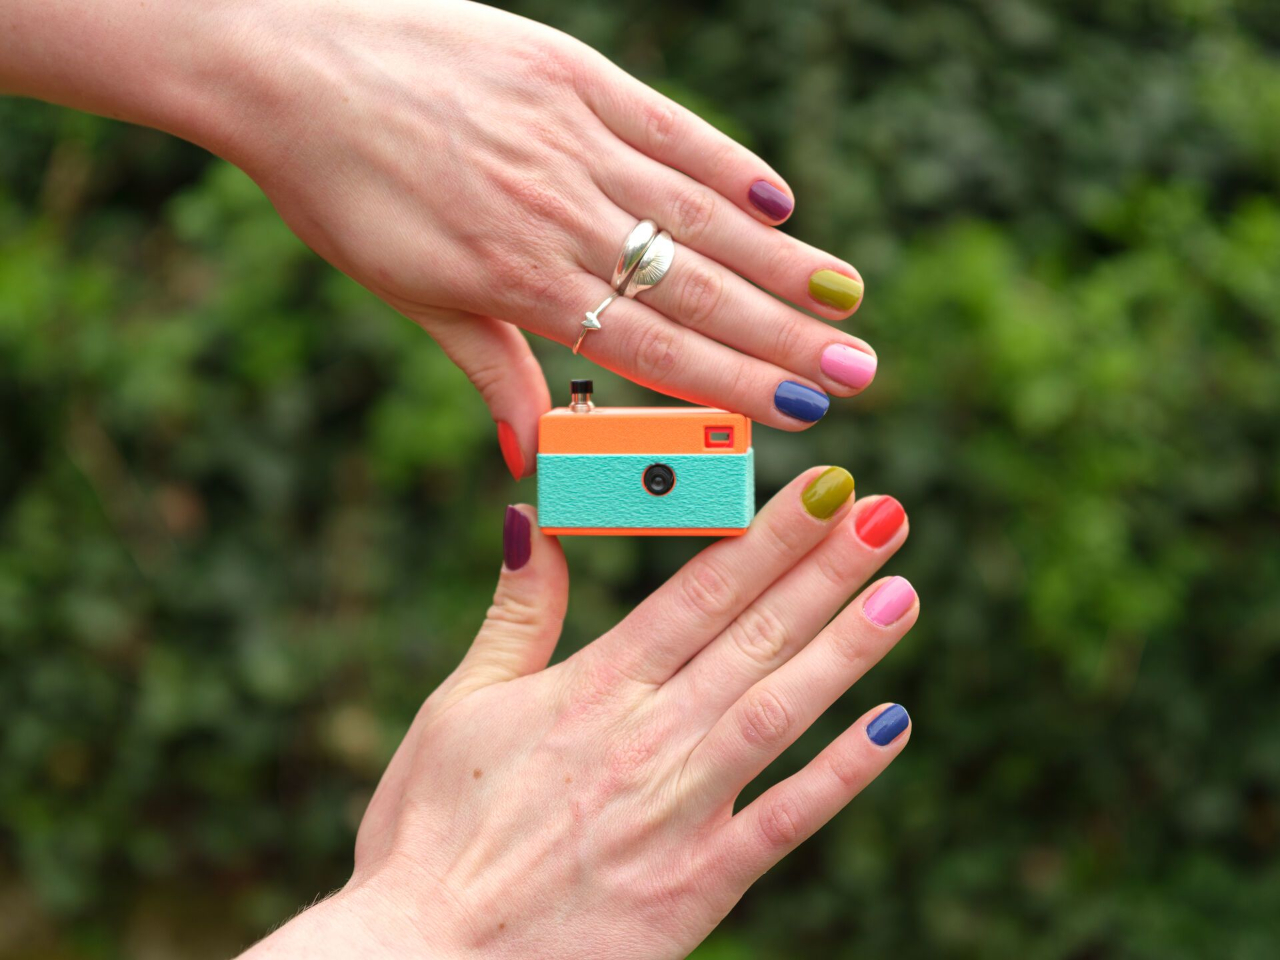
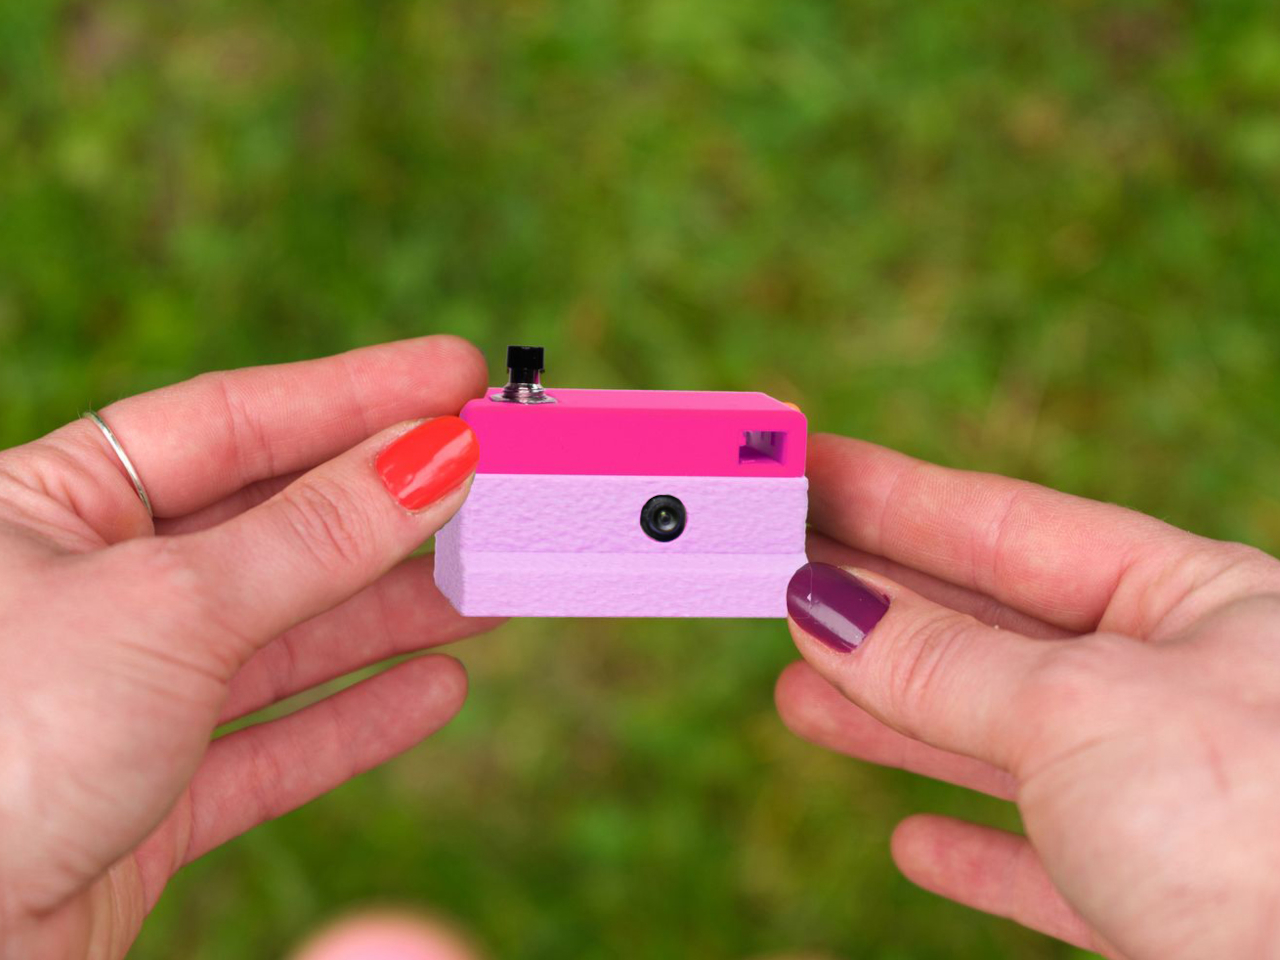
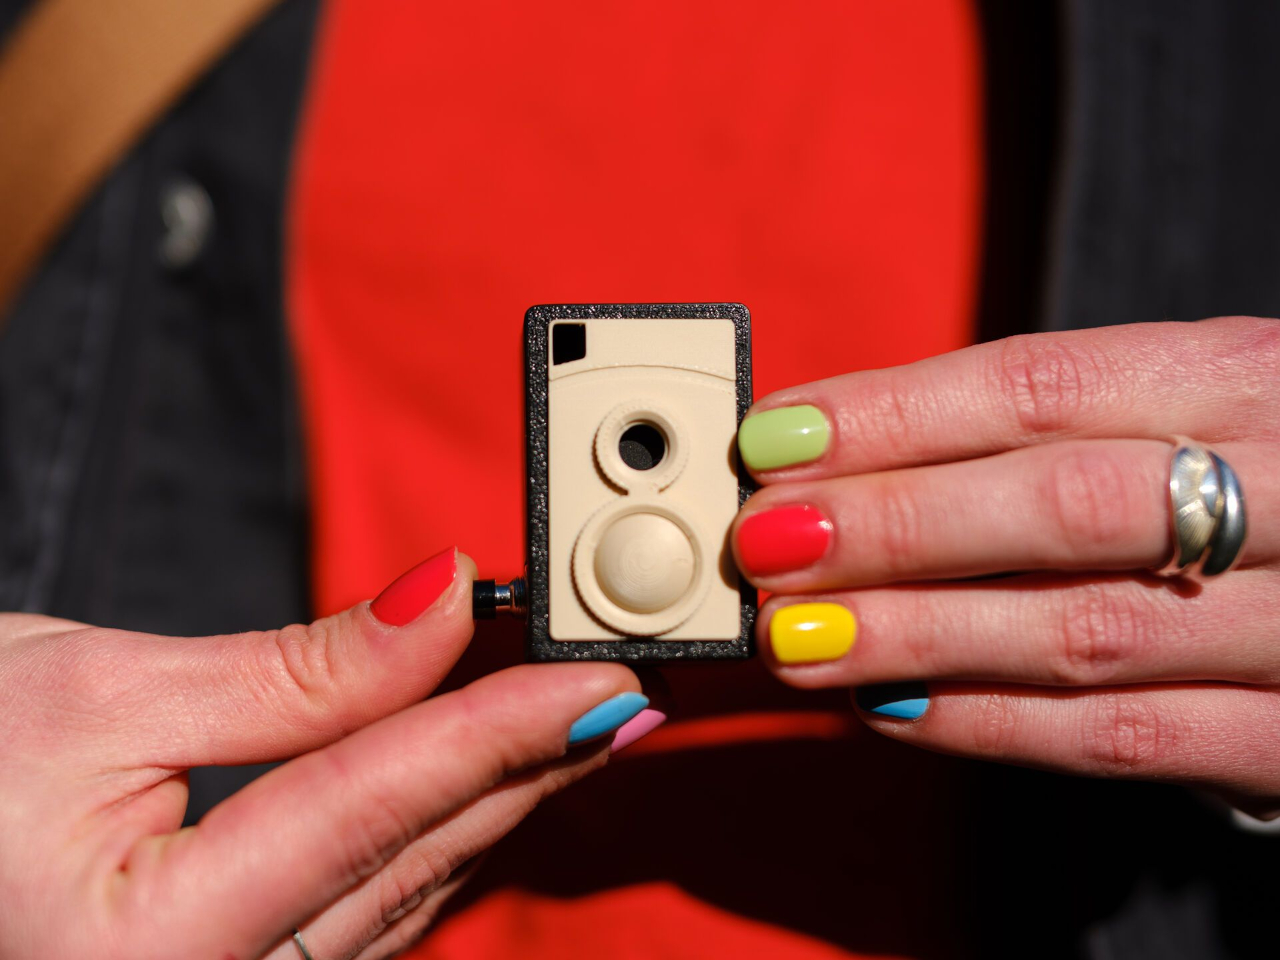
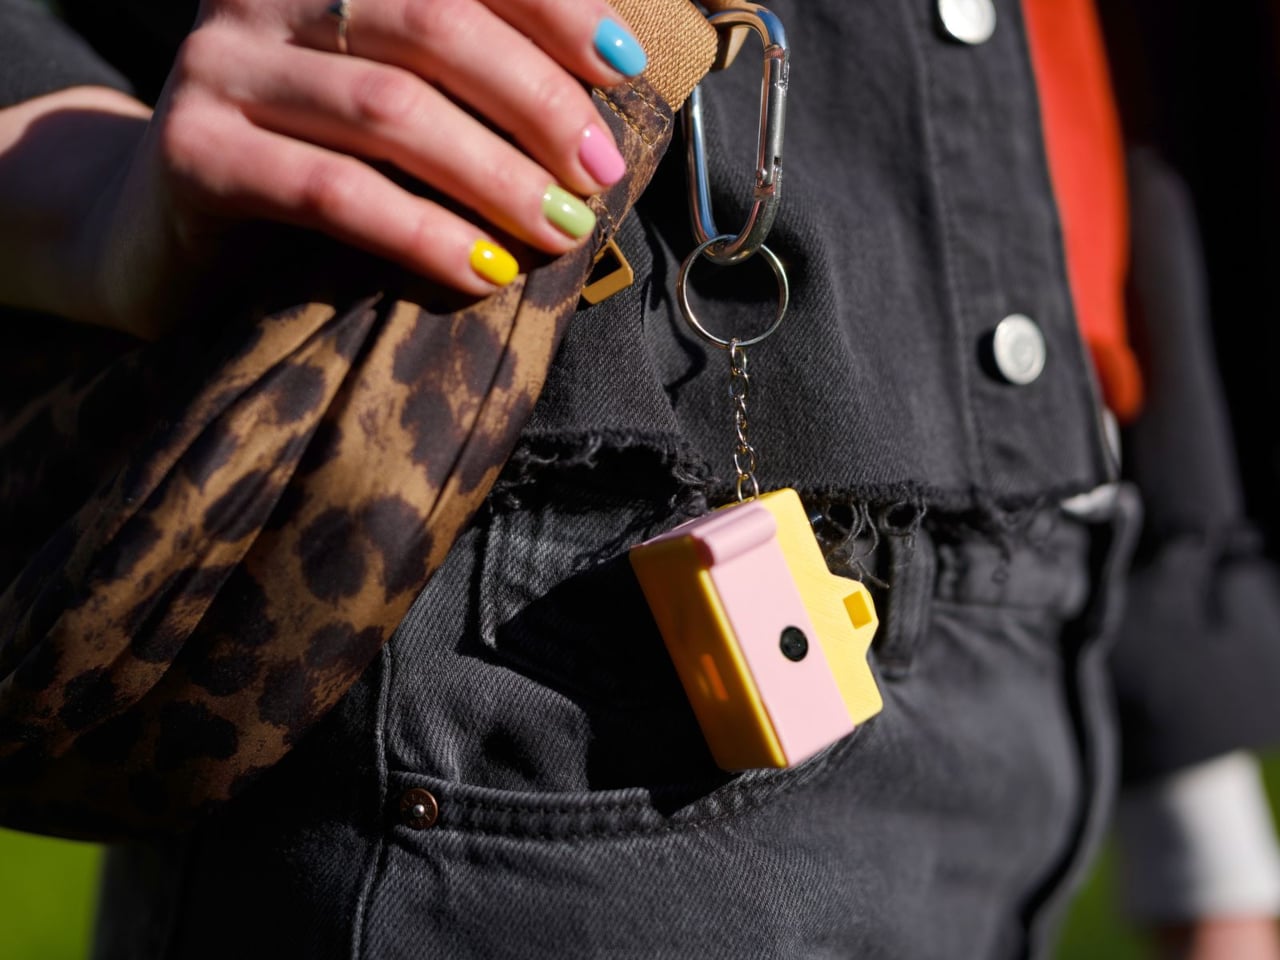
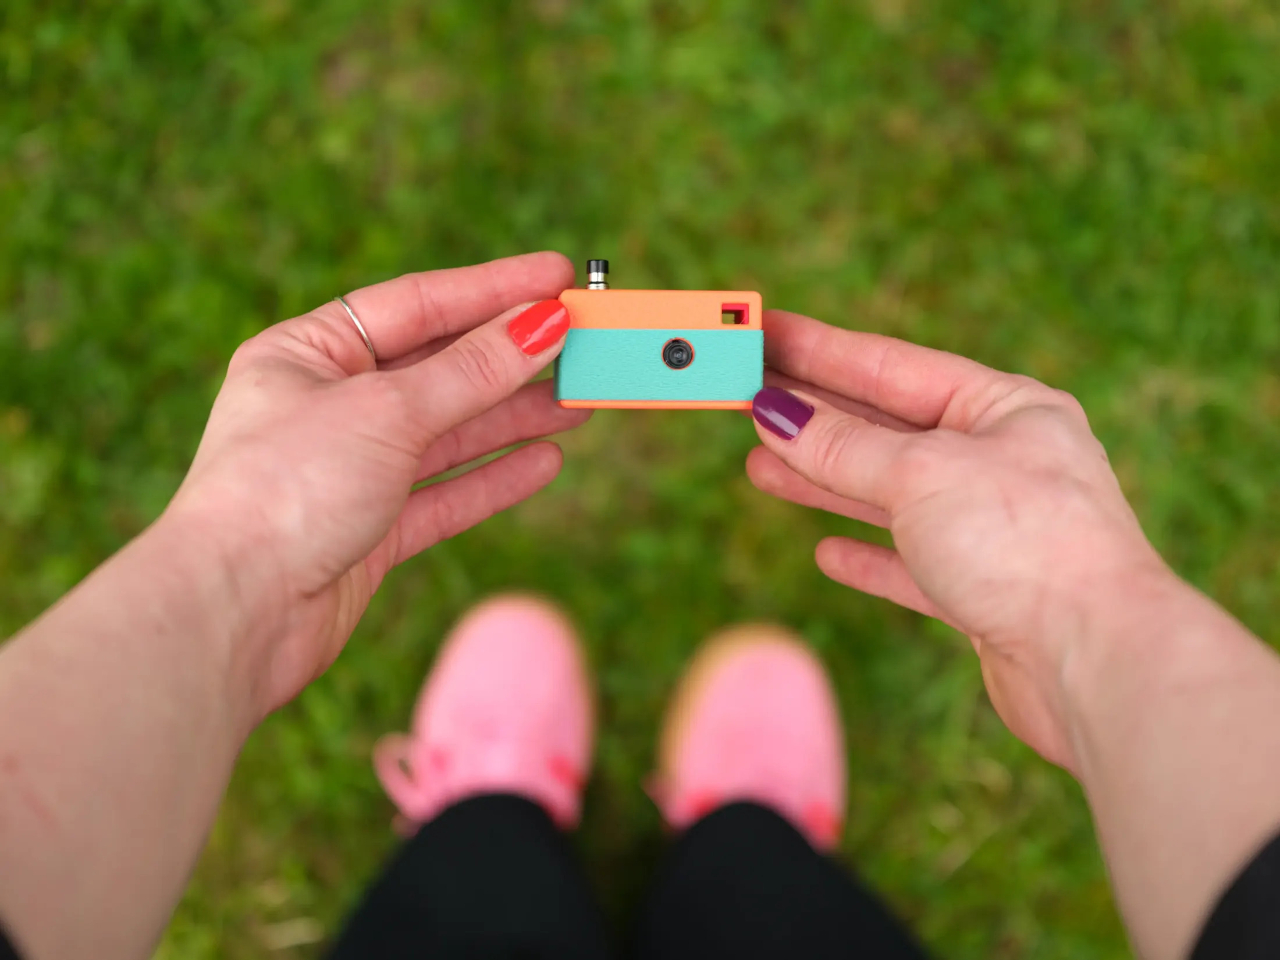
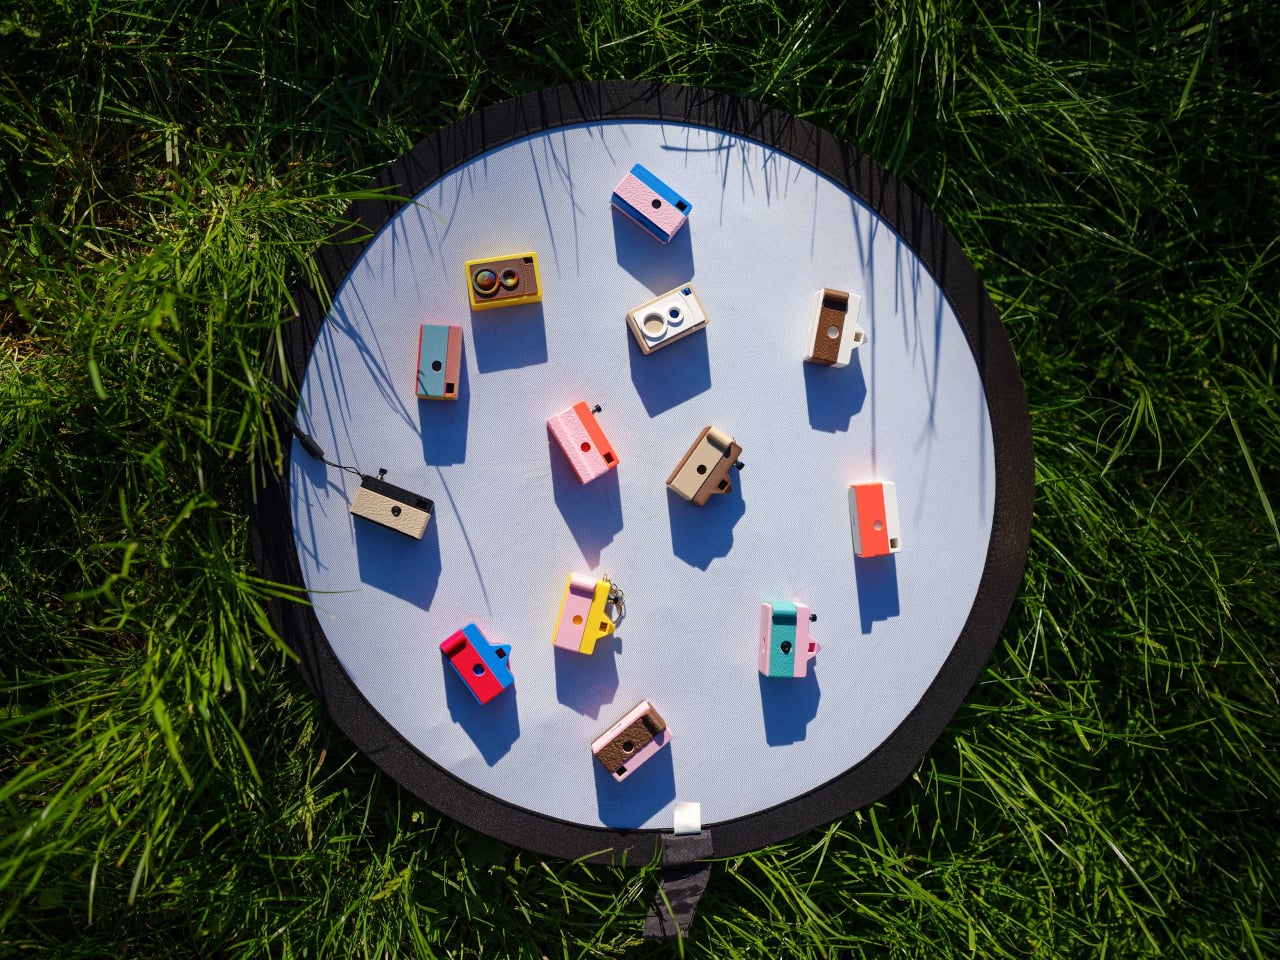
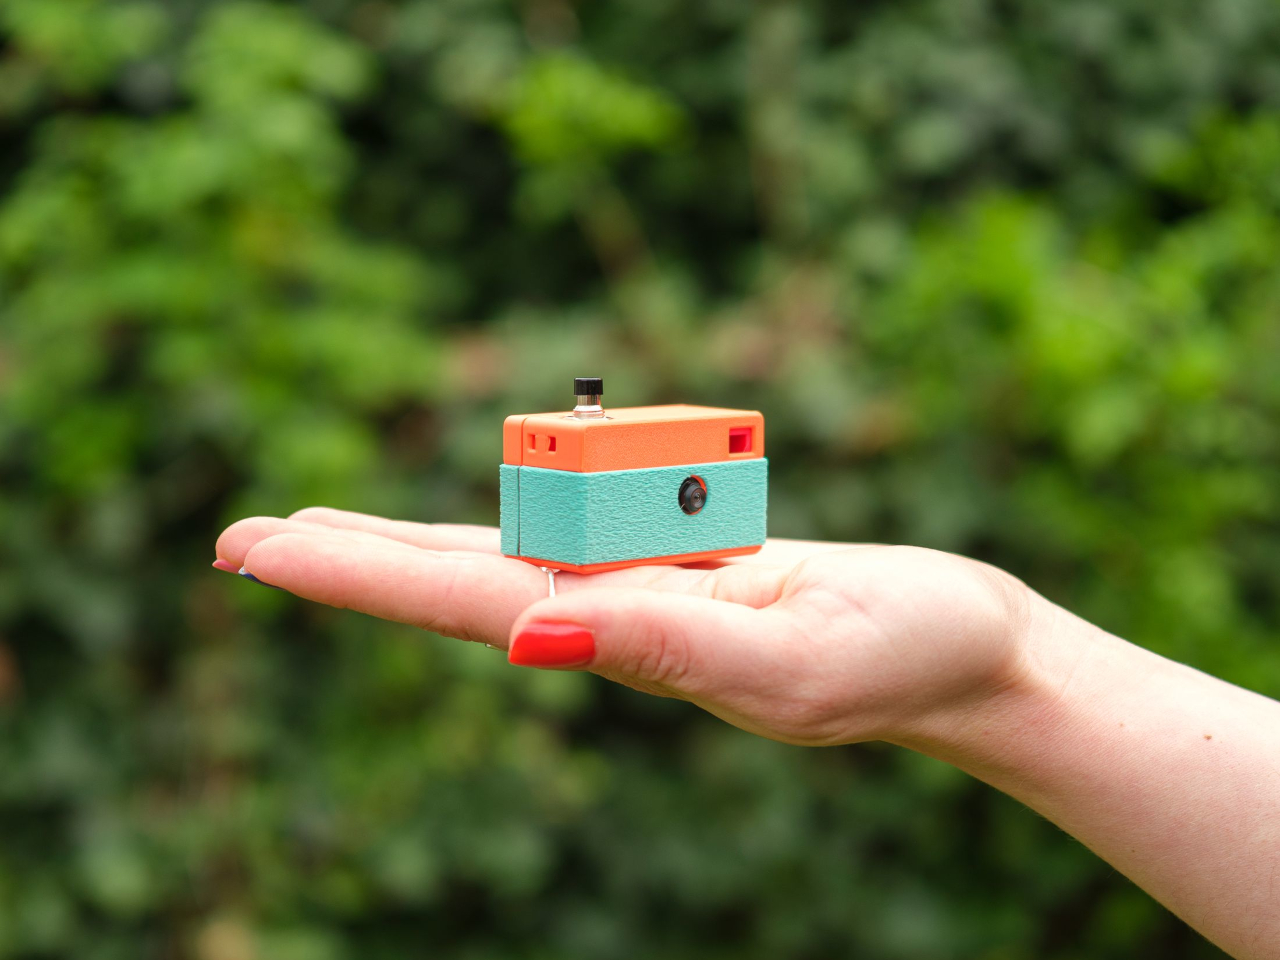
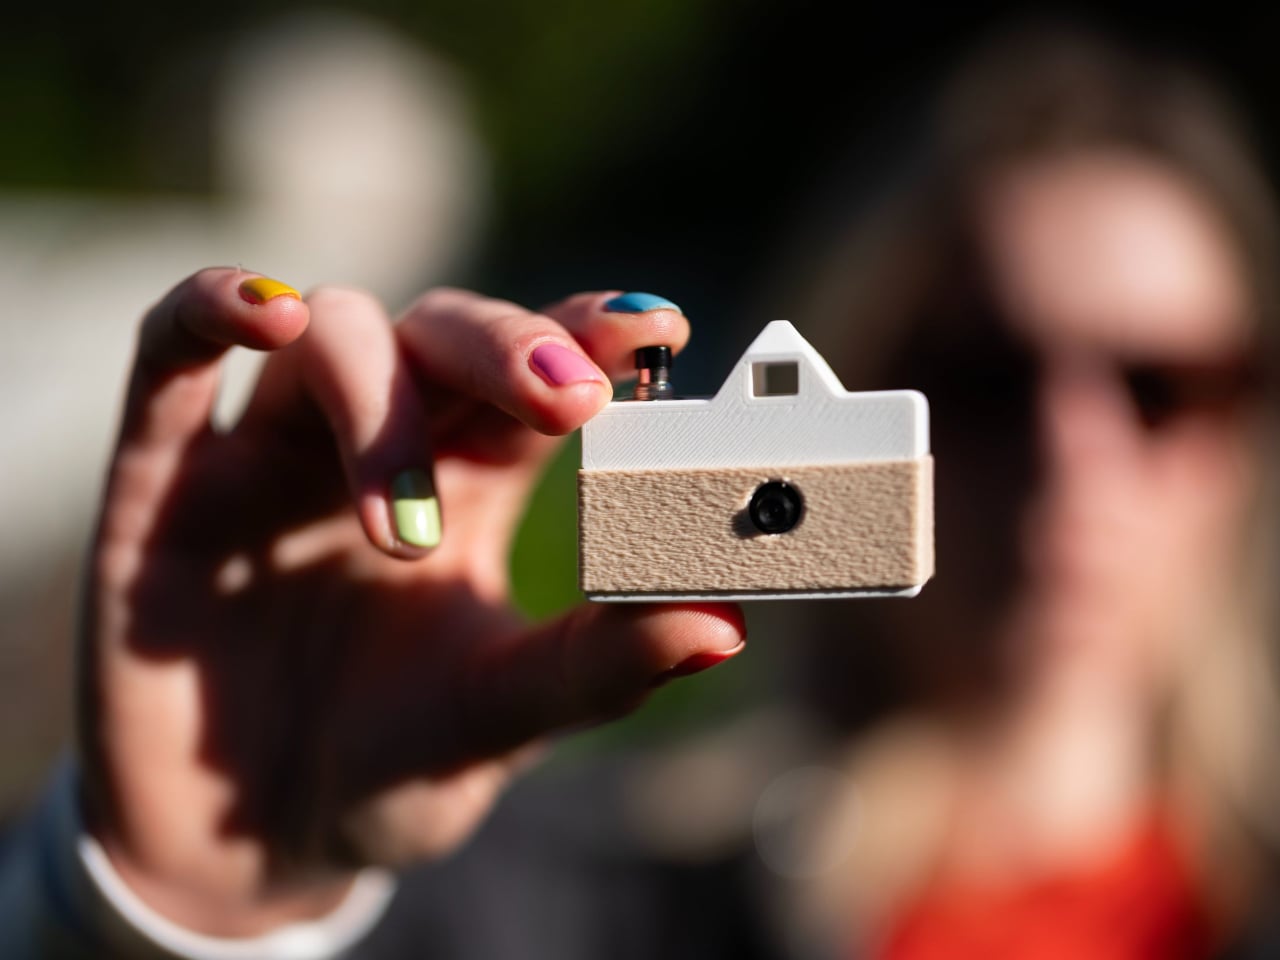
Designer Matej Nahtigal built an answer to that problem, and it’s small enough to hang off your keyring. The Keymera is a fully functional camera that you 3D print and assemble yourself, built around just five printed parts and four electronic components. It takes real 3 MP photos, stores them locally, asks for nothing in return, and fits roughly in the same space as a car key fob.

Designer: Matej Nahtigal

The build is intentionally minimal. The electronics stack consists of a Seeed Studio XIAO ESP32S3 Sense board, a 3 MP OV3660 image sensor, a small LiPo cell, and a single tactile button, connected with four solder joints. Print the shell, wire the components, flash the firmware, and press-fit everything together. No screws, no glue. The whole process takes about an hour to print and another hour to assemble.

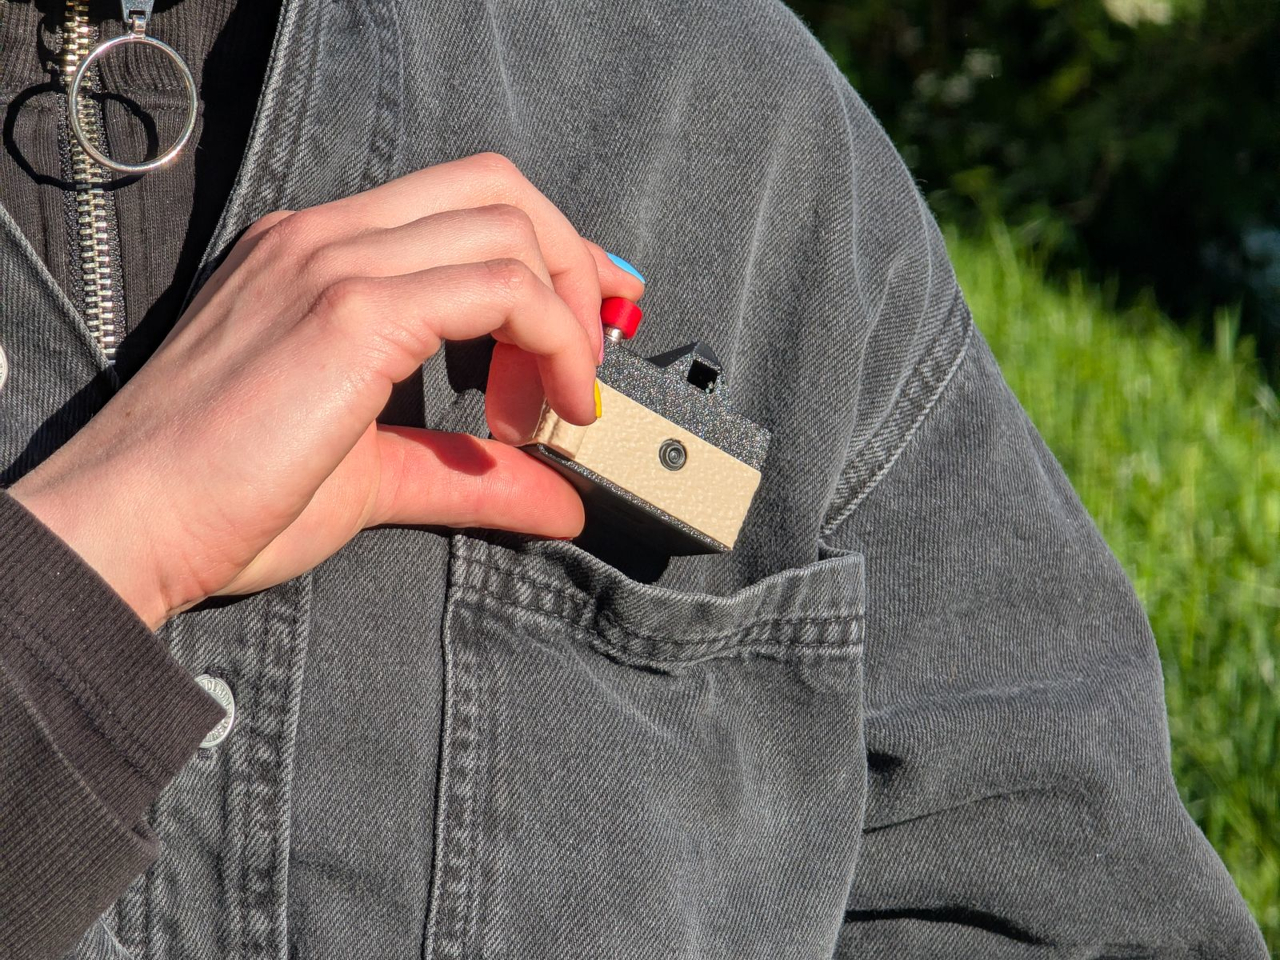
Using it is even simpler. A single button does everything. Press it once, and the camera wakes, captures a photo, saves it to a microSD card, blinks an LED to confirm, and goes back to sleep. On standby, it draws roughly 10 µA, which means it can sit on your keyring for weeks between charges without running dry. The logic behind all of it couldn’t be simpler.

Getting your photos off the camera doesn’t require a cable or an app. Hold the button, and the Keymera broadcasts its own Wi-Fi network. Connect any phone or laptop, and a gallery page opens directly in the browser. You can scroll through your shots, view them full-size, and download them from there. That gallery lives entirely on the device. No account required, no metadata harvested, no service to subscribe to.

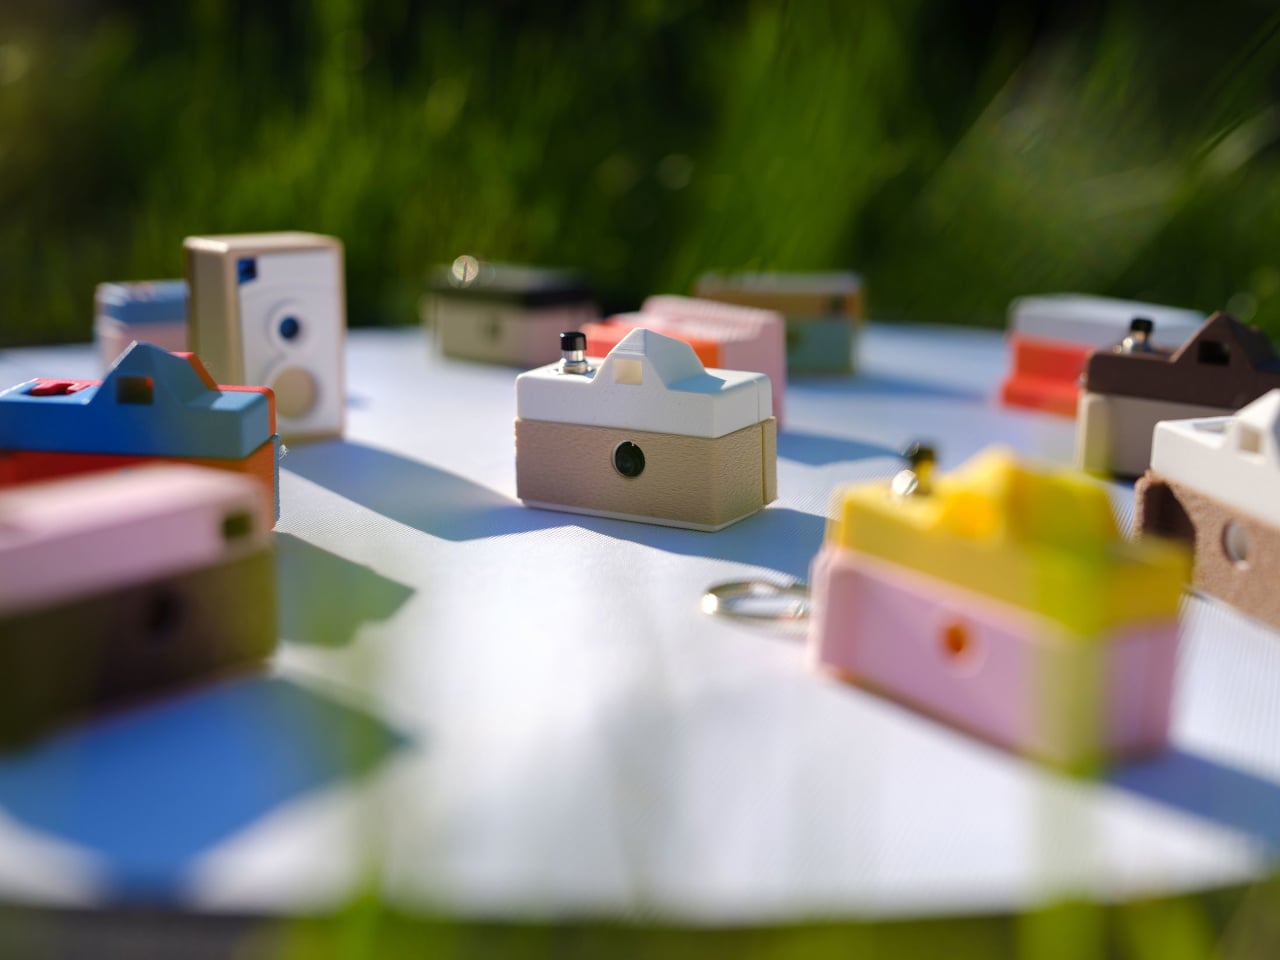
What makes the Keymera a design object rather than just a circuit board in a box is the shell system. One electronics core fits into interchangeable outer shells, each inspired by a different camera era. The original three designs reference a rangefinder, an SLR, and an instant camera, with a twin-lens reflex (TLR) added as a fourth. Any color or filament finish is yours to choose.

That idea, that a camera should fit in your pocket, behave honestly, and let you own the experience from print to final photo, reflects Nahtigal’s deliberate pushback against a moment when phones are adding AI features to everything. There’s no computational processing, no hidden metadata collection, and no account to manage. You clip it to your bag, your belt loop, or your keyring, and it’s simply there when something happens.

The Keymera’s files are sold as licensed digital products, not released as open-source files, which keeps the design controlled and the project financially sustainable for a single maker. The photos it produces are lo-fi and unprocessed, captured on a fixed 3 MP sensor with no computational adjustments applied afterward. For something this small and this honest, that kind of clarity is very much the point.

The post This Keychain Camera Shares Photos Over Its Own Wi-Fi, No App Needed first appeared on Yanko Design.
The 3D Printed Pencil Holder That Shames Everything Else on Your Desk

Most of us have a pencil holder we never actually chose. It’s the ceramic mug you retired from coffee duty, or the branded giveaway from a conference two years ago, or the squat plastic cup that came bundled with a stapler. It works. It holds pens. But you have never once looked at it and thought, “I genuinely love that thing.”

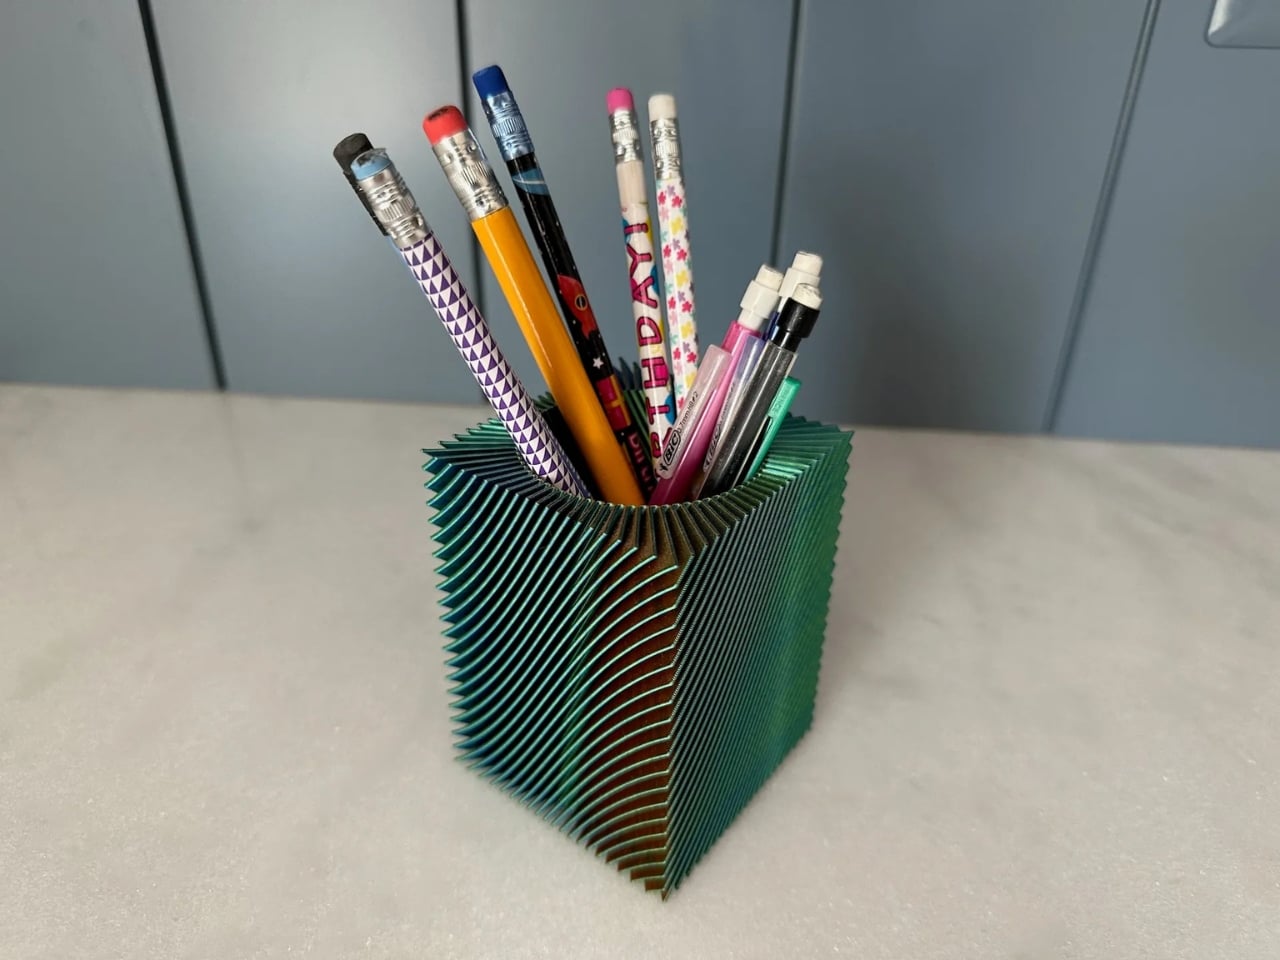
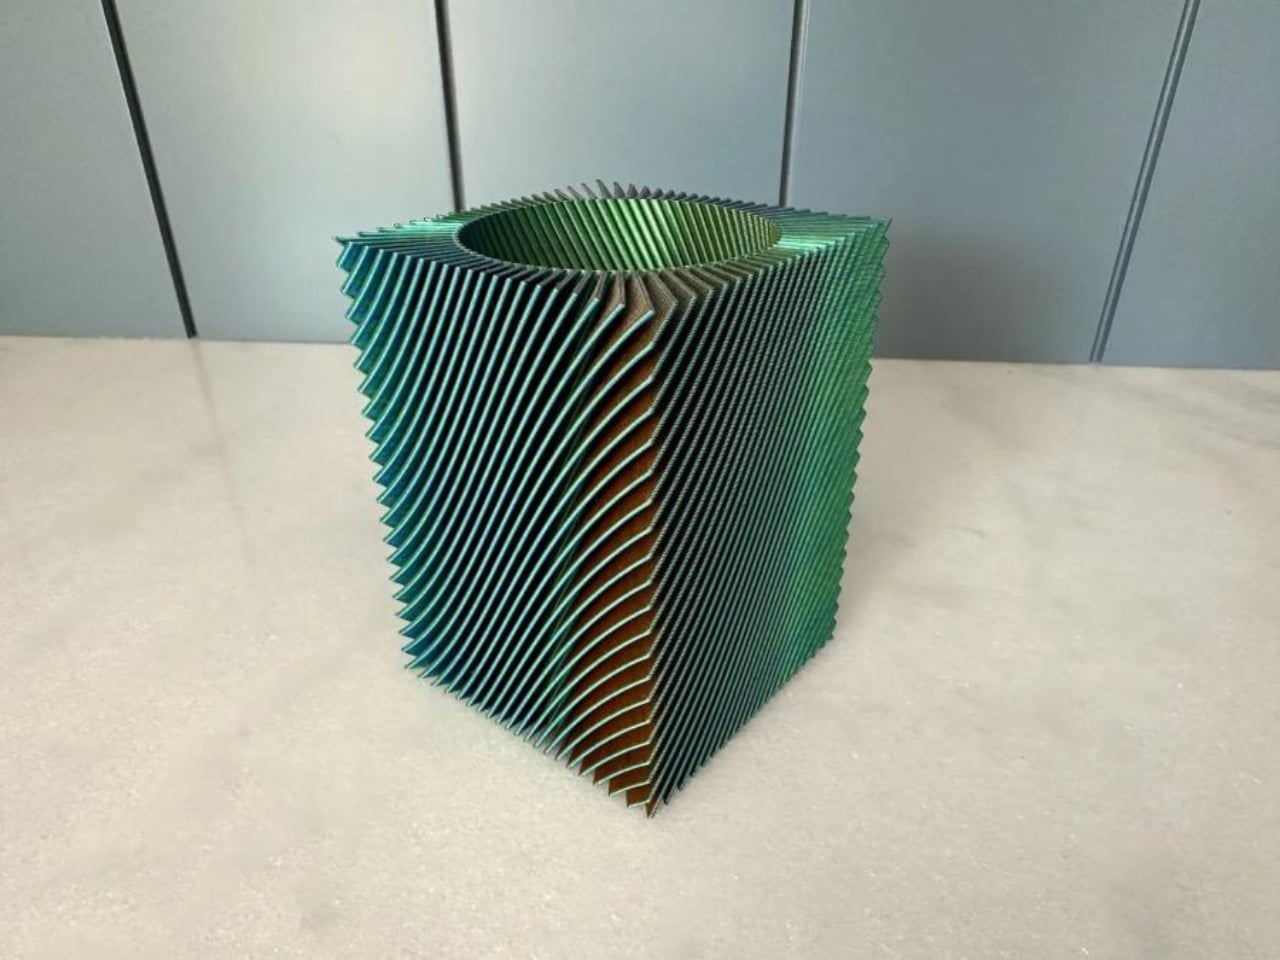
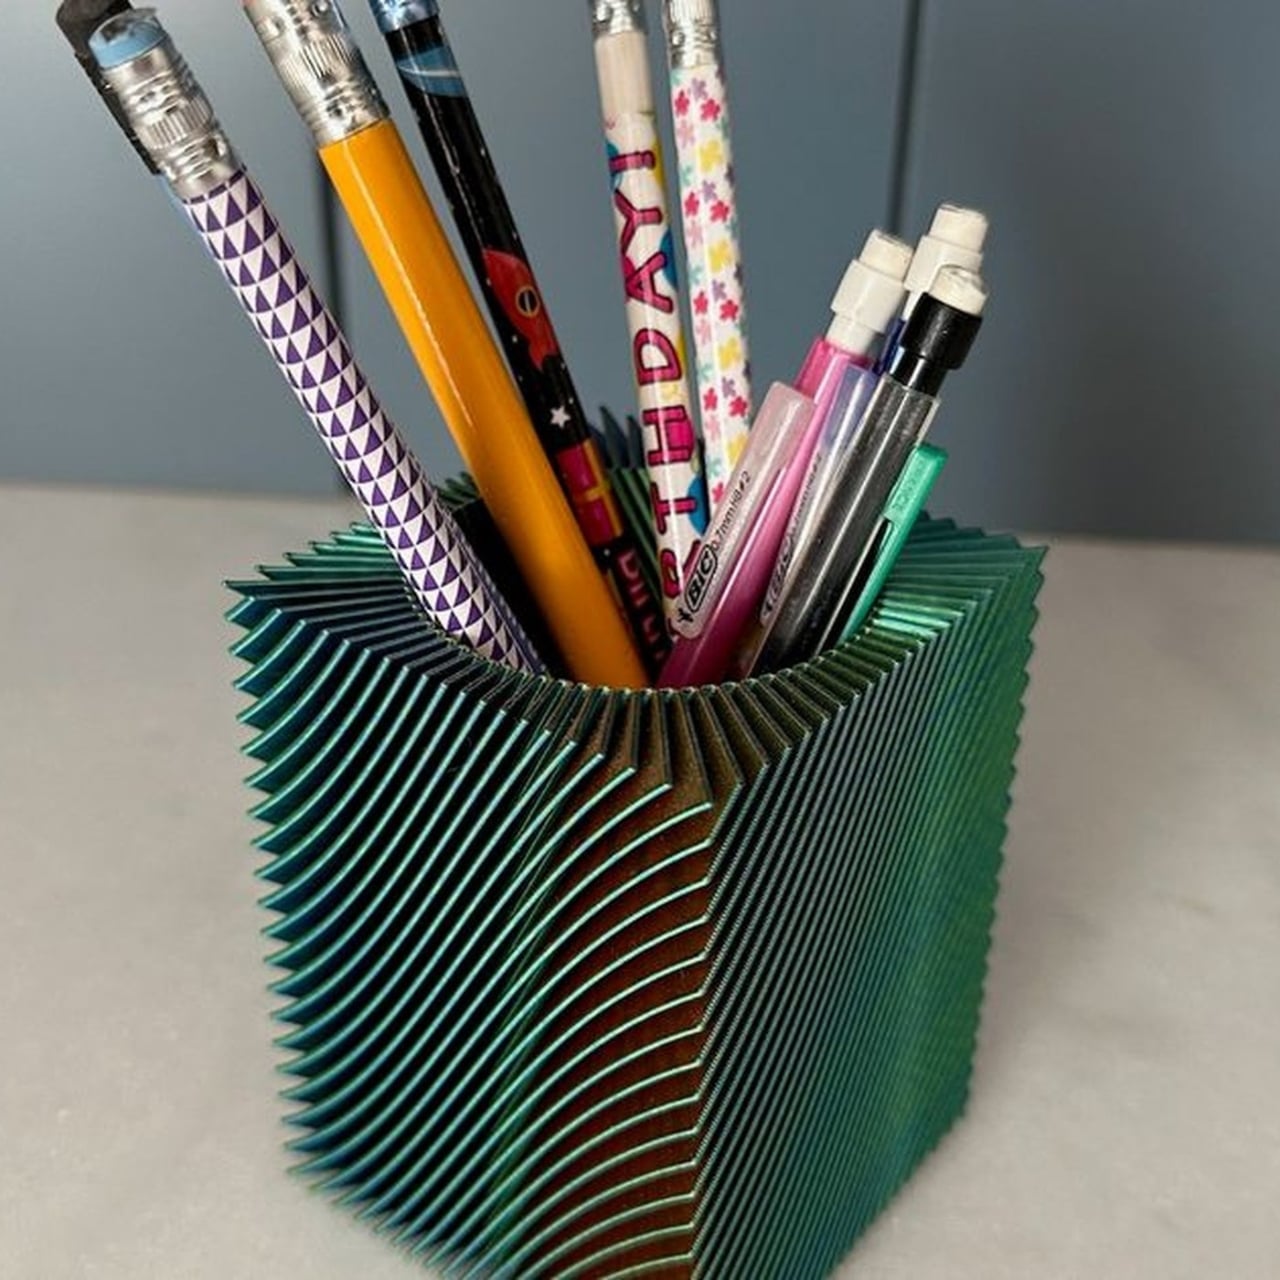
Nechiswa’s spiral vase pencil holder is the kind of object that changes that. It’s a free, downloadable 3D print model shared on Printables, and it’s been quietly making its way through design communities after being featured on Abduzeedo this week. It doesn’t look like a typical 3D print. It doesn’t look like a typical anything. It looks like someone took a mathematical idea, translated it into filament, and set it on a desk.

Designer: Nechiswa

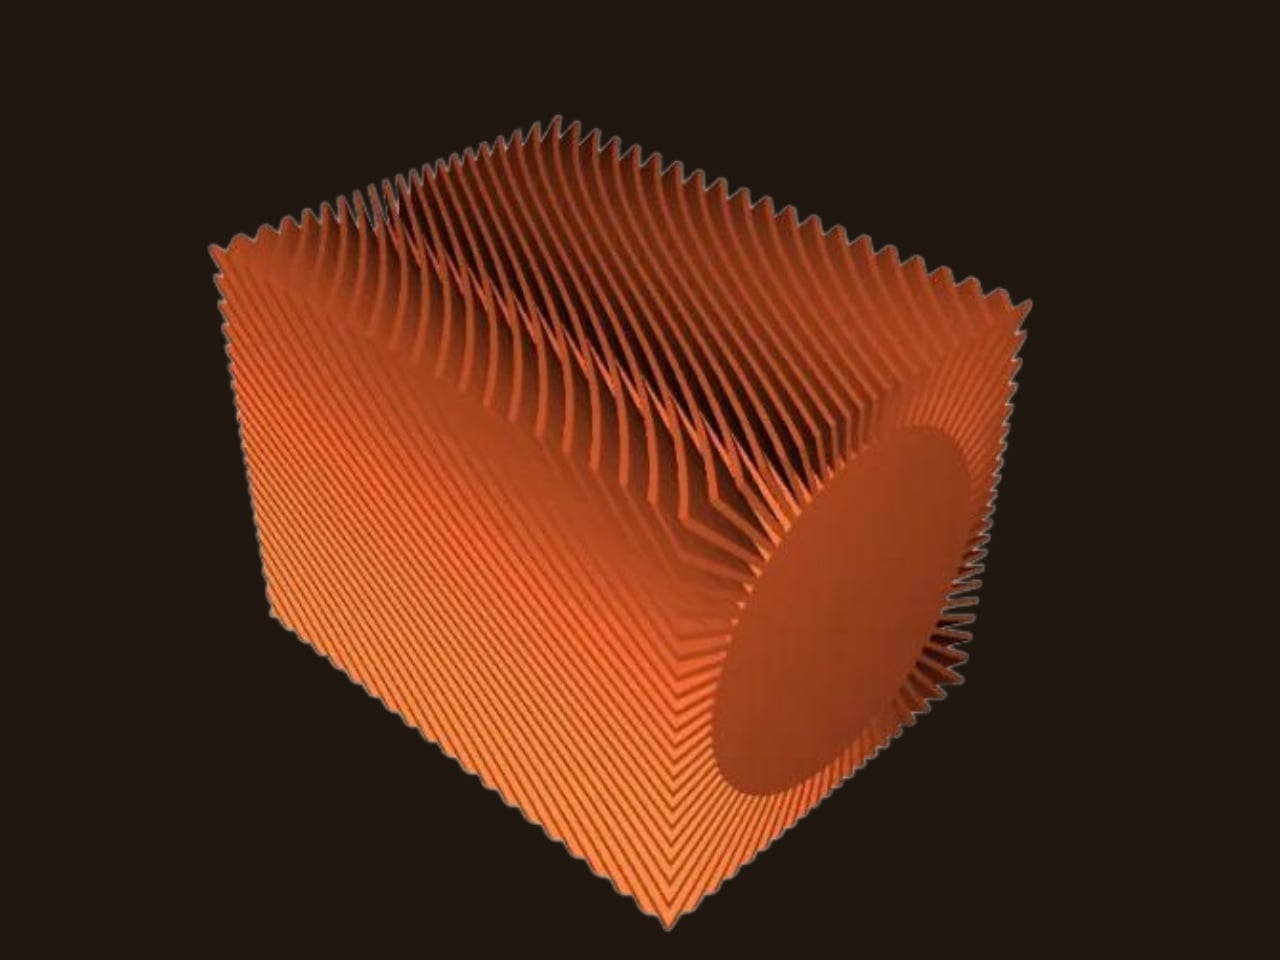
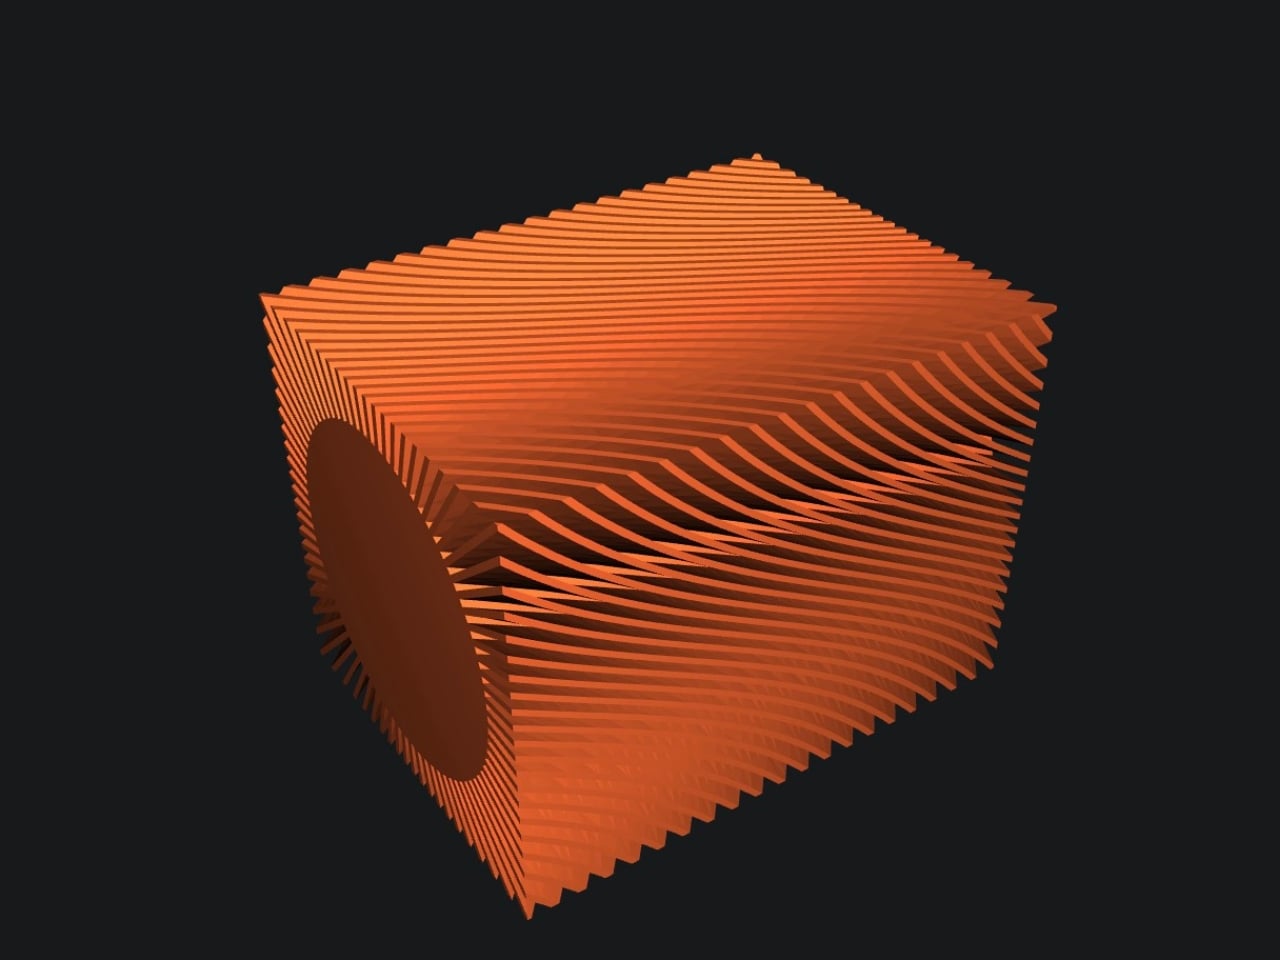
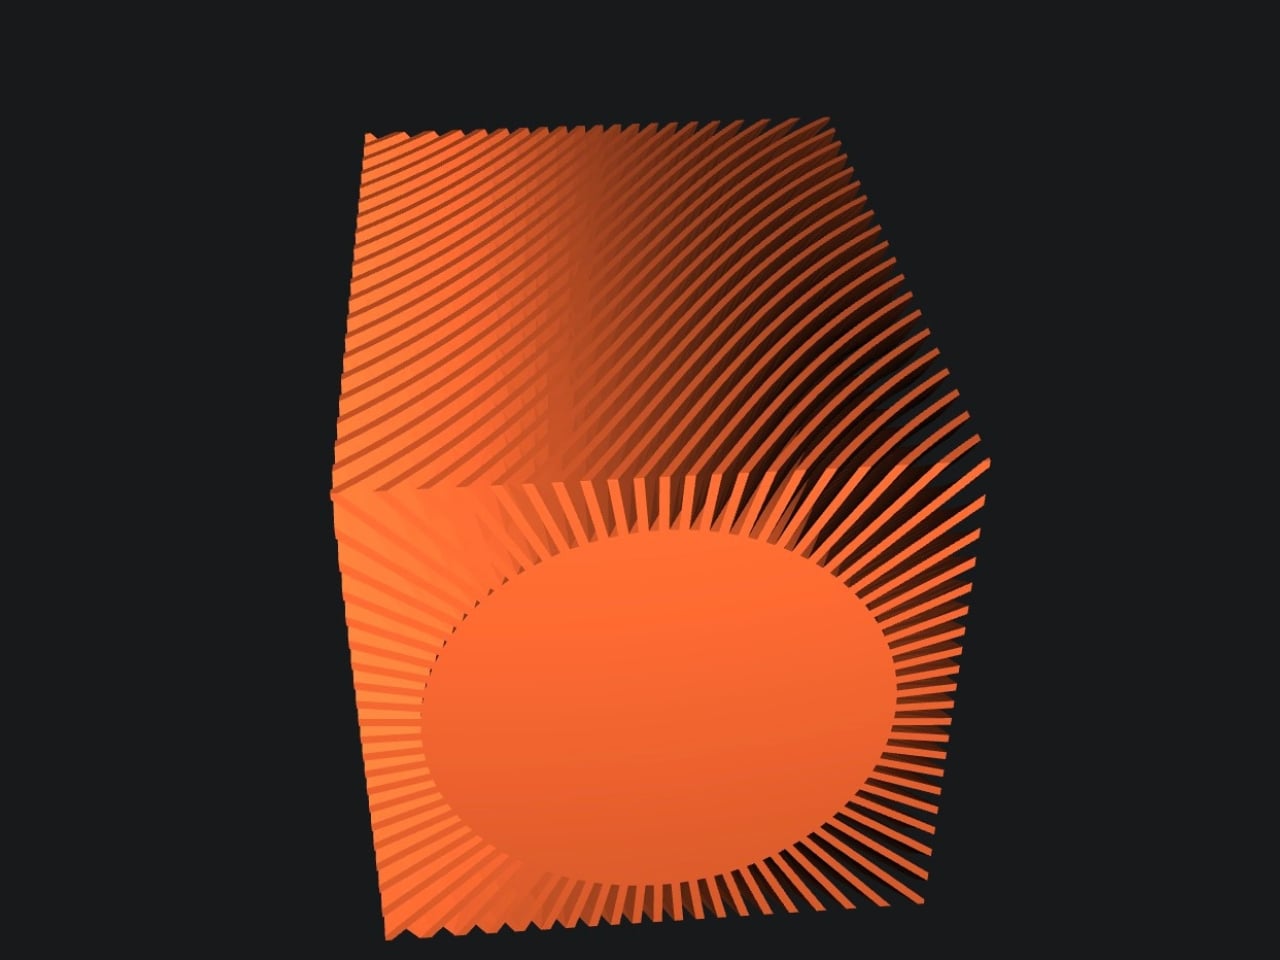
The design is built around one print technique: spiral vase mode. For those unfamiliar with 3D printing, vase mode is a setting where the nozzle travels in one continuous, uninterrupted path from the base all the way to the top of the object. No seams, no layer starts, no breaks in the extrusion. The printer just keeps going, spiraling upward in a steady, unceasing motion. At 0.6mm line width and 0.2mm layer height, the result is a thin, faceted wall that carries a quality the original feature description calls “drawing-like in detail but rigid enough to hold pens upright.” That is a precise description. It looks delicate but it isn’t.

The tri-color filament element is where it gets especially compelling. Rather than outputting a pencil holder in a single solid color, Nechiswa uses multi-color filament that transitions as the print climbs. The spiral form and the color shift work together in a way that feels deliberate at every level. Color and geometry are cooperating, and neither one is showing off at the expense of the other. The result is an object that reads completely differently depending on where you’re standing and how the light hits it. It has the visual energy of something much more expensive and much harder to make.

What strikes me about this design is that it refuses to perform utility. A lot of desk accessories are burdened with looking useful. They come with dividers, rubberized bases, stackable tiers, and ergonomic profiles. They announce themselves as products solving a problem. Nechiswa’s pencil holder announces itself as an object. The kind you position near a window so the light catches the spiral walls. The kind you instinctively move to the front of your desk, even though, functionally, placement doesn’t matter at all.

The maker community has quietly validated it. The model has been added to over 130 collections on Printables, which is a reliable indicator that something is resonating beyond a casual like or a save. The file is free, the recommended settings are straightforward, and the designer has documented everything needed to print it successfully. Vase mode at 0.6mm line width. That’s really it. No complicated slicer configurations, no support structures to wrestle with. Just a solid printer, the right filament, and some patience.

This is also a good moment to acknowledge what 3D printing continues to do for independent design. There’s a persistent idea that consumer-level 3D printing exists mainly for functional fixes: replacement clips, custom mounts, cable organizers. And it does all of that. But Nechiswa’s pencil holder is the kind of project that gently dismantles that assumption without making any big declarations. It just exists as a beautiful object, designed by someone with a clear sense of form, available for free to anyone with a printer.

If you have a 3D printer, this is worth a spool of good filament and an afternoon. If you don’t, it’s still worth a look, because it illustrates something easy to forget: that good design doesn’t require a big budget, a studio, or a production run. Sometimes it’s just a thoughtful spiral, climbing upward, one continuous line. Your current pencil holder is probably fine. But it isn’t this.

The post The 3D Printed Pencil Holder That Shames Everything Else on Your Desk first appeared on Yanko Design.
Studio Darius Ou Just Printed a Book That Reads Its Own Code

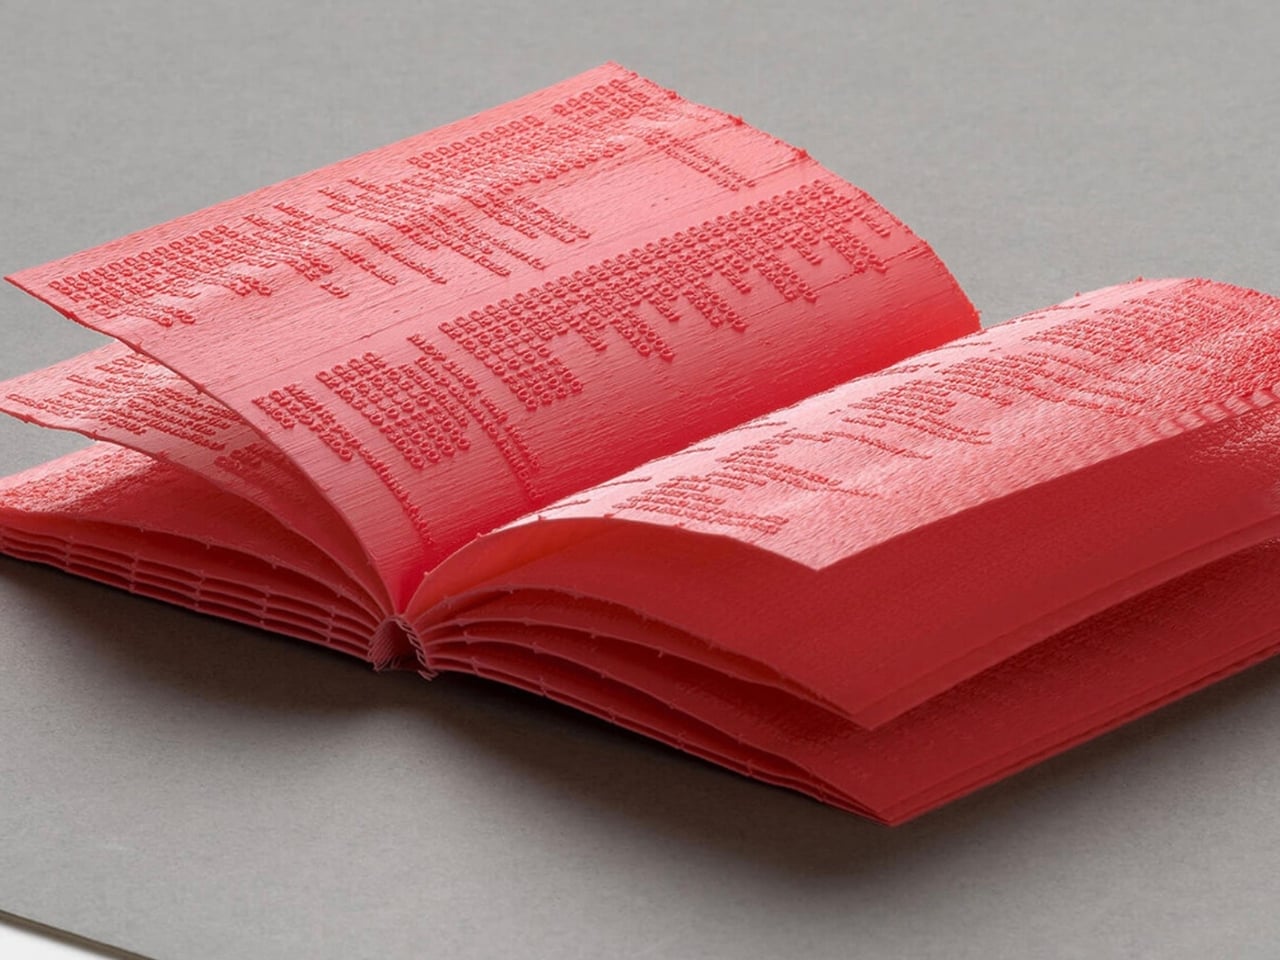
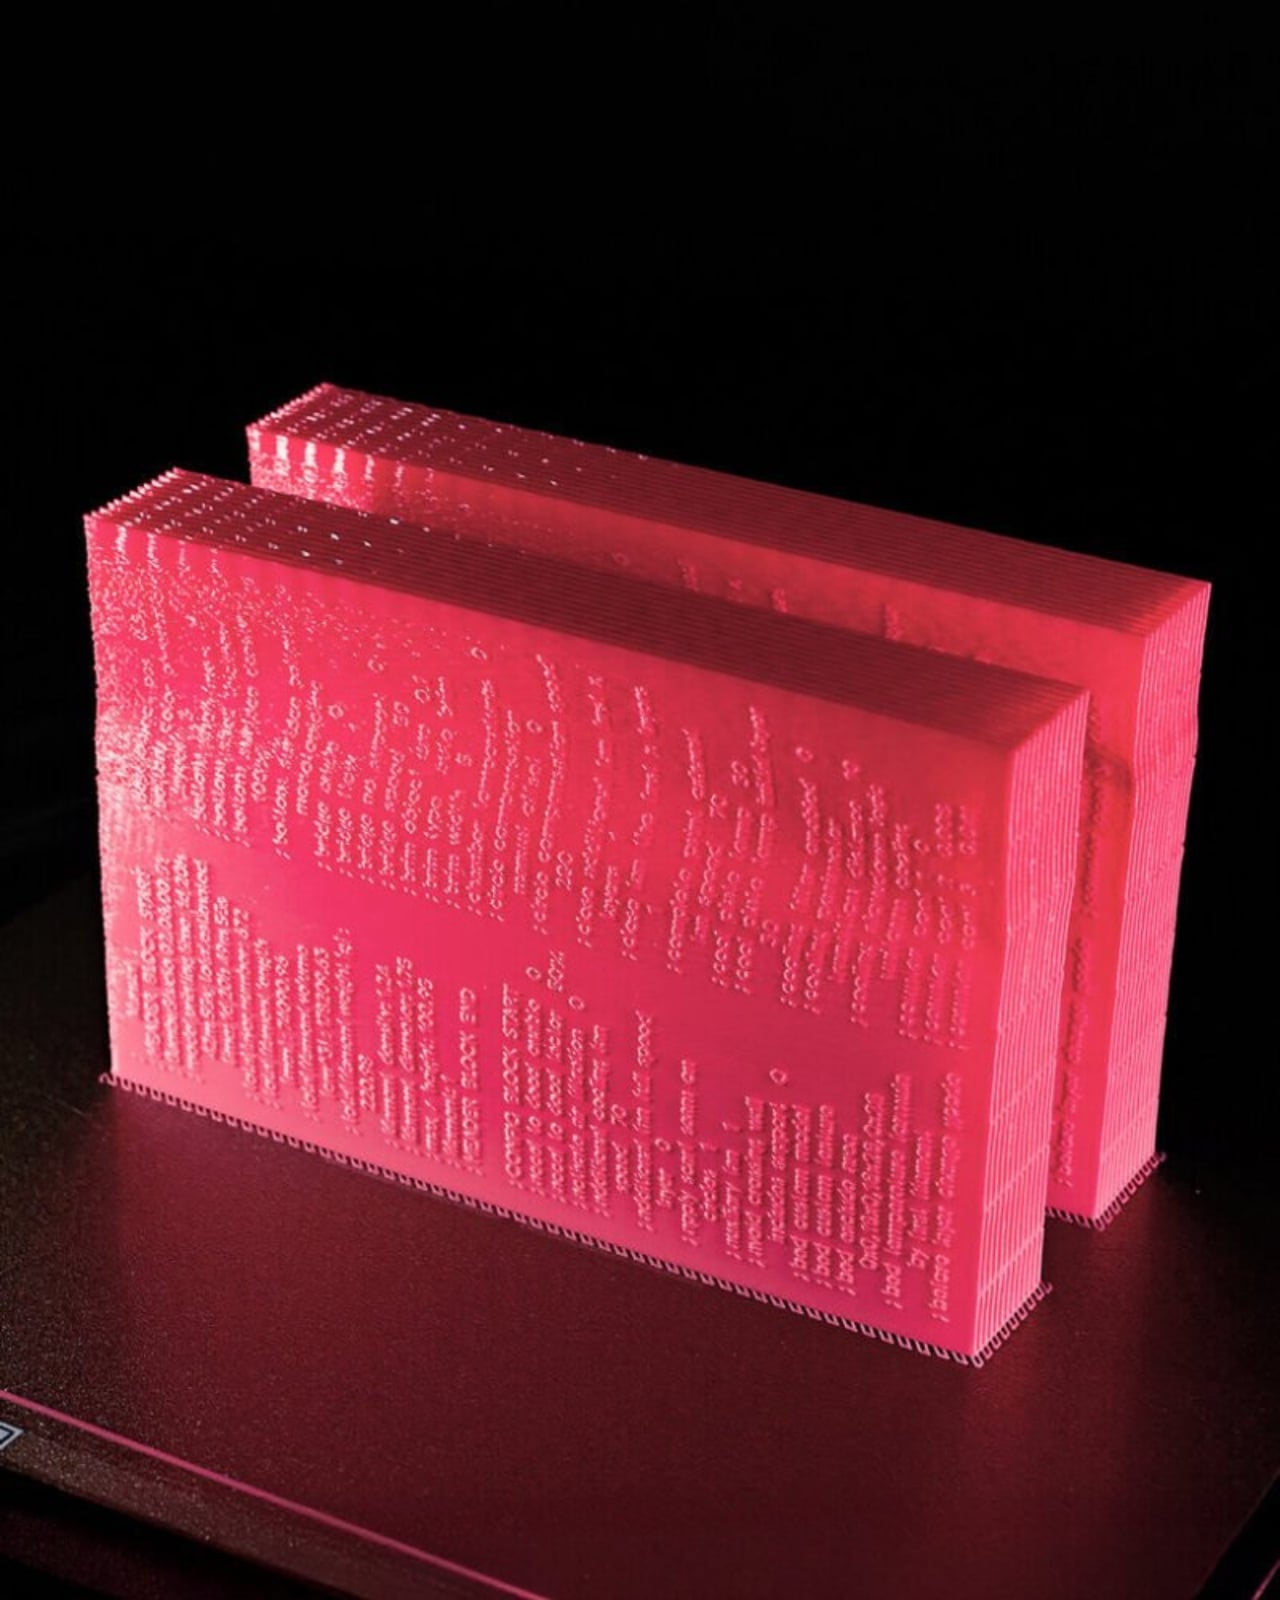
Books have always held secrets. Marginalia scrawled by long-dead readers, watermarks pressed into pulp centuries ago, the particular weight of a first edition in your hands. But Manual, a new project by Studio Darius Ou and Benson Chong, holds a different kind of secret entirely: the literal code of its own making, raised right there on its pages. Let me explain why that matters, because it sounds technical until it doesn’t.

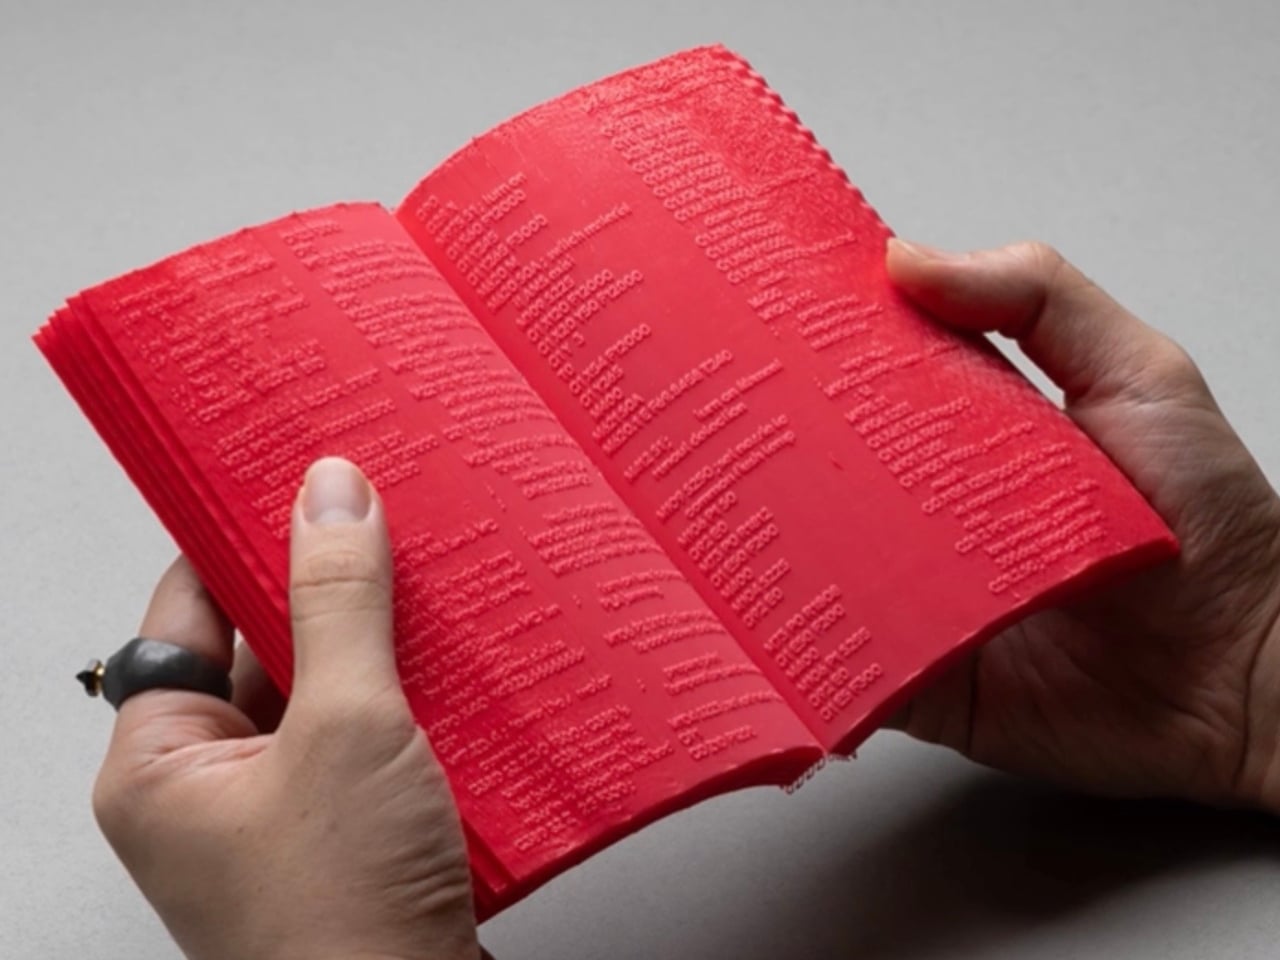
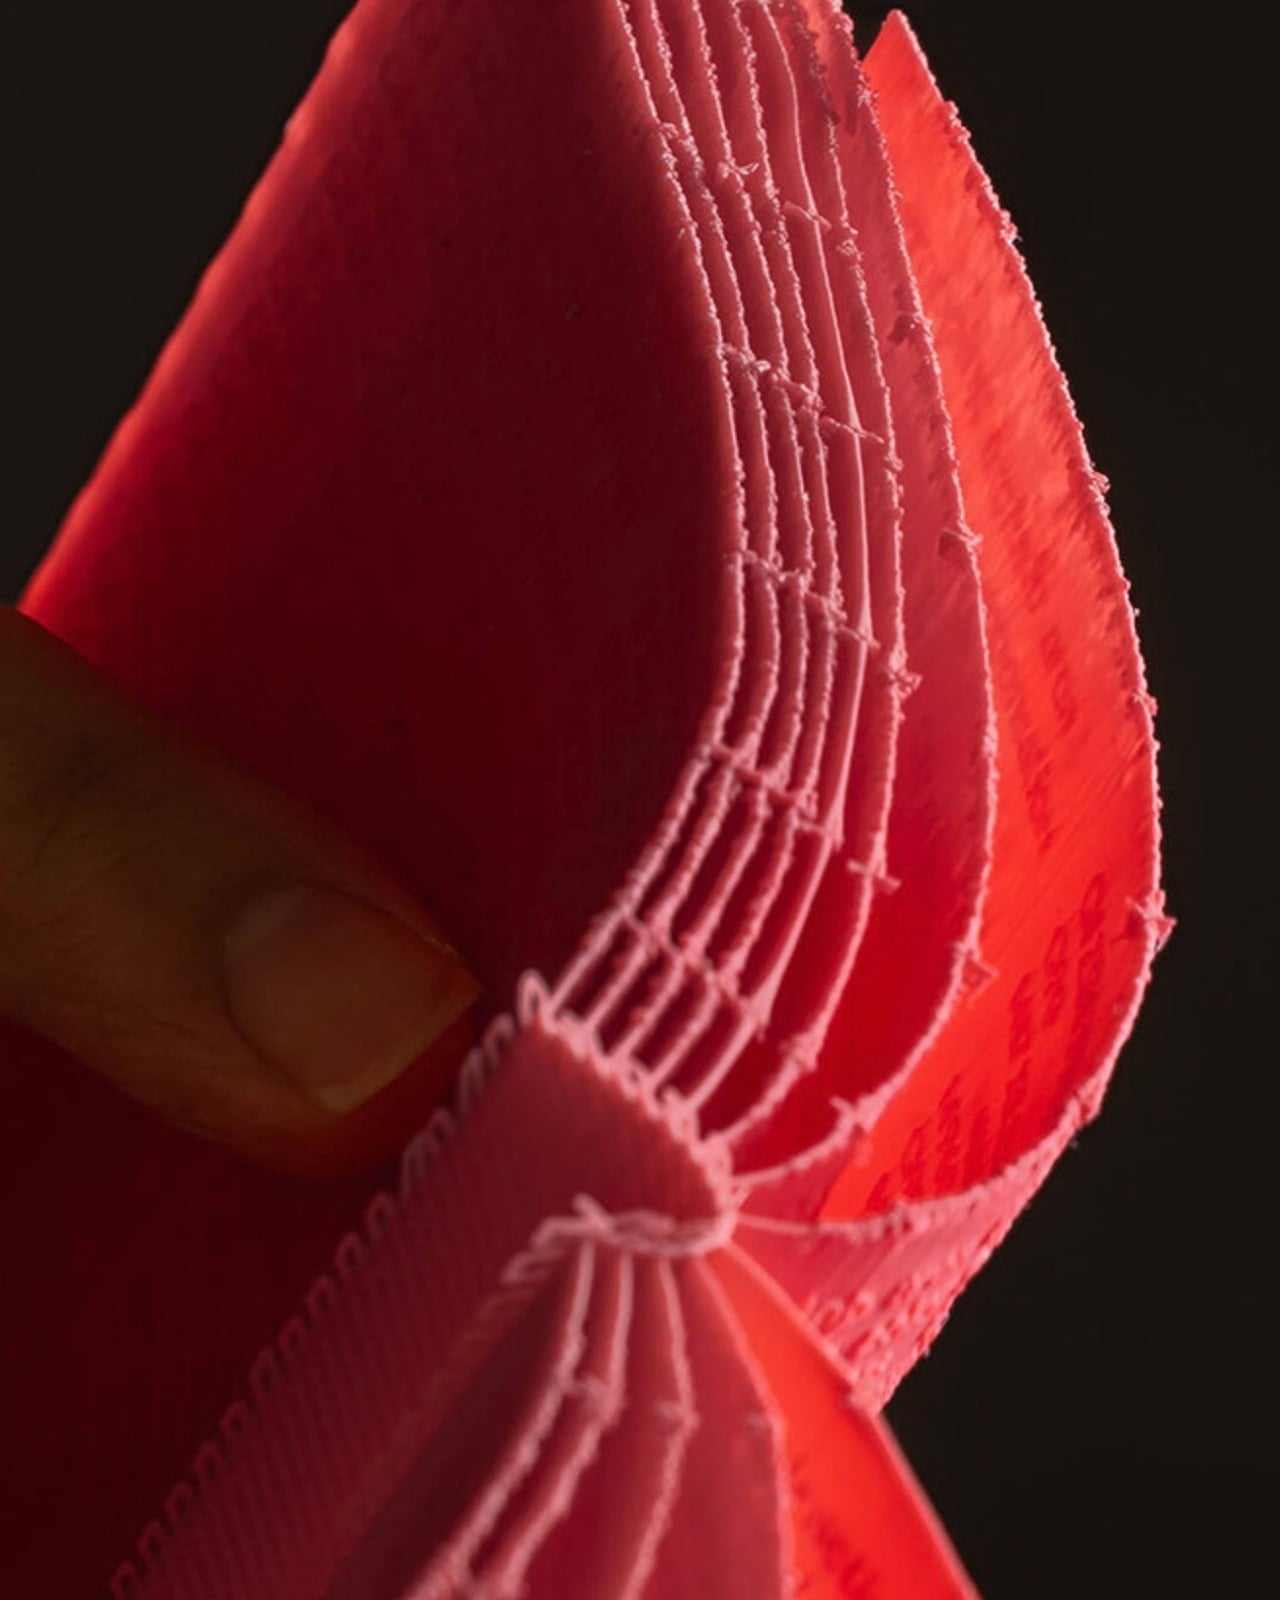
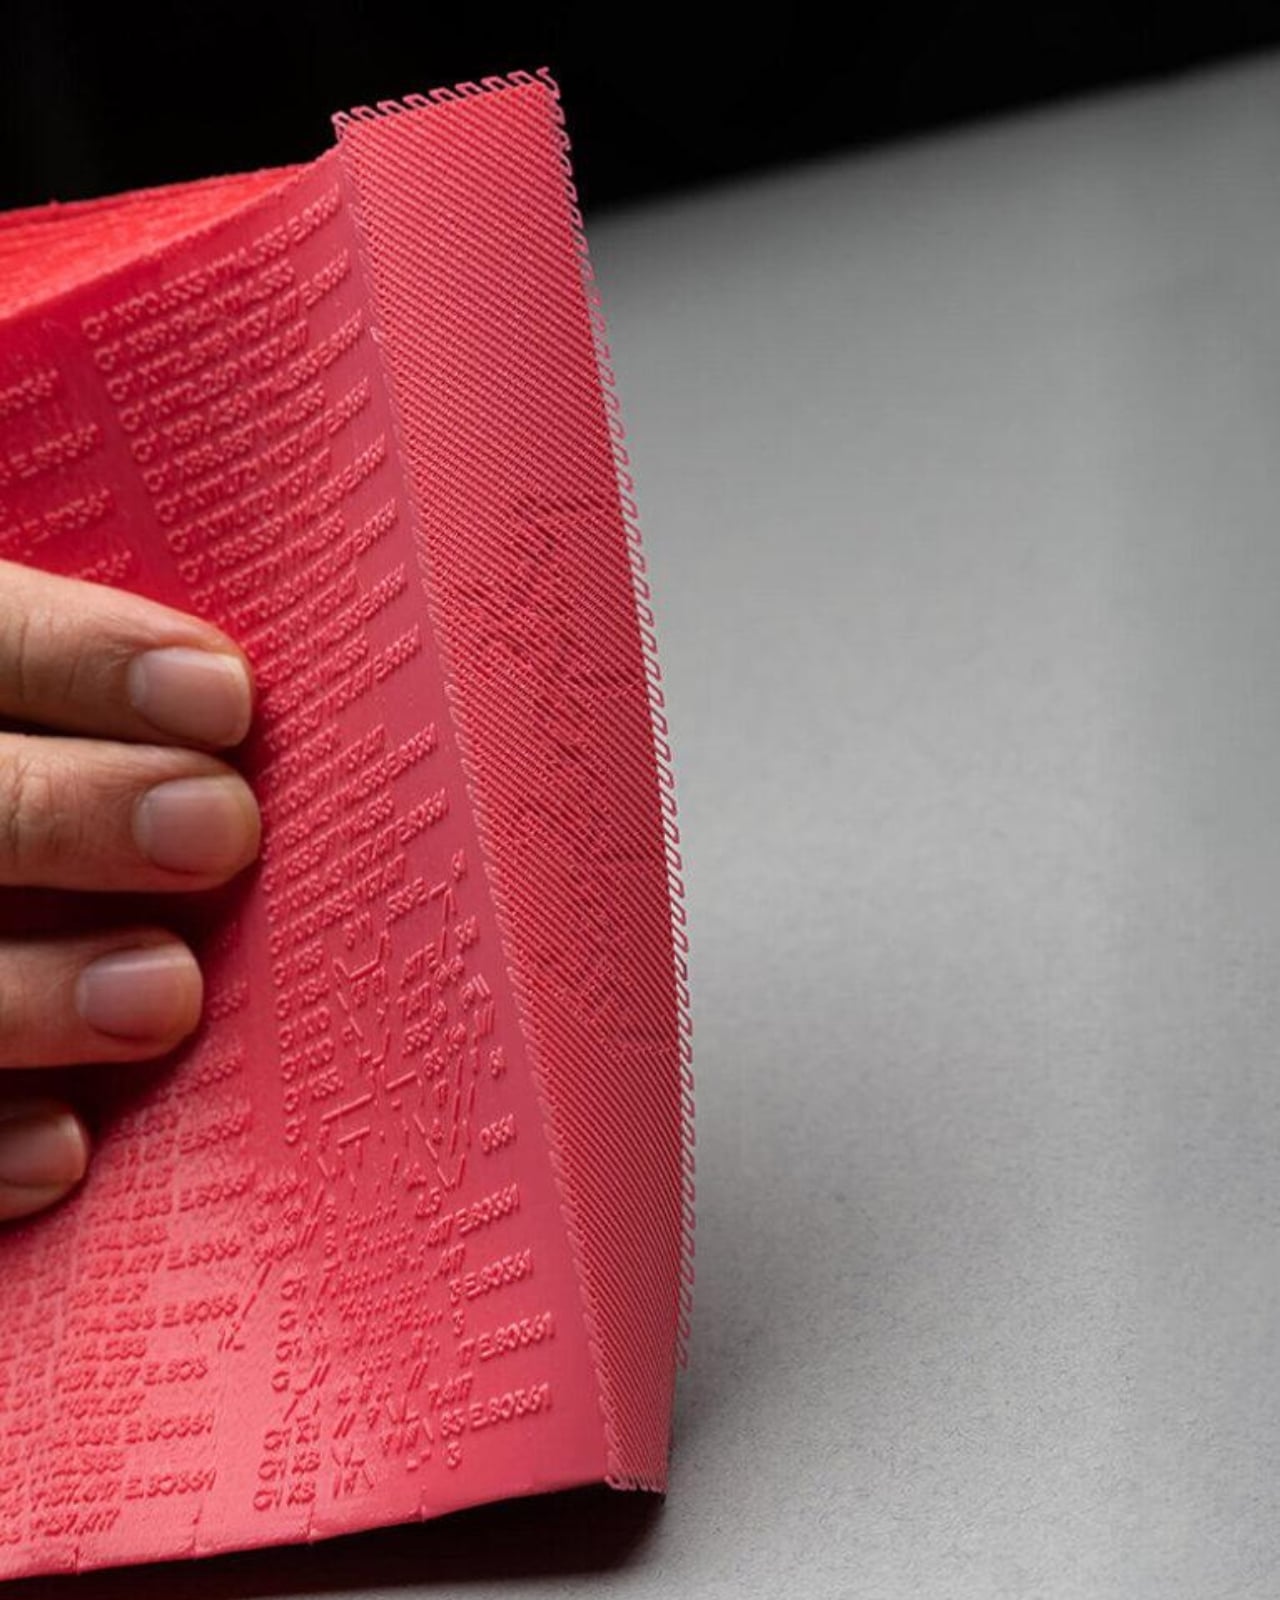
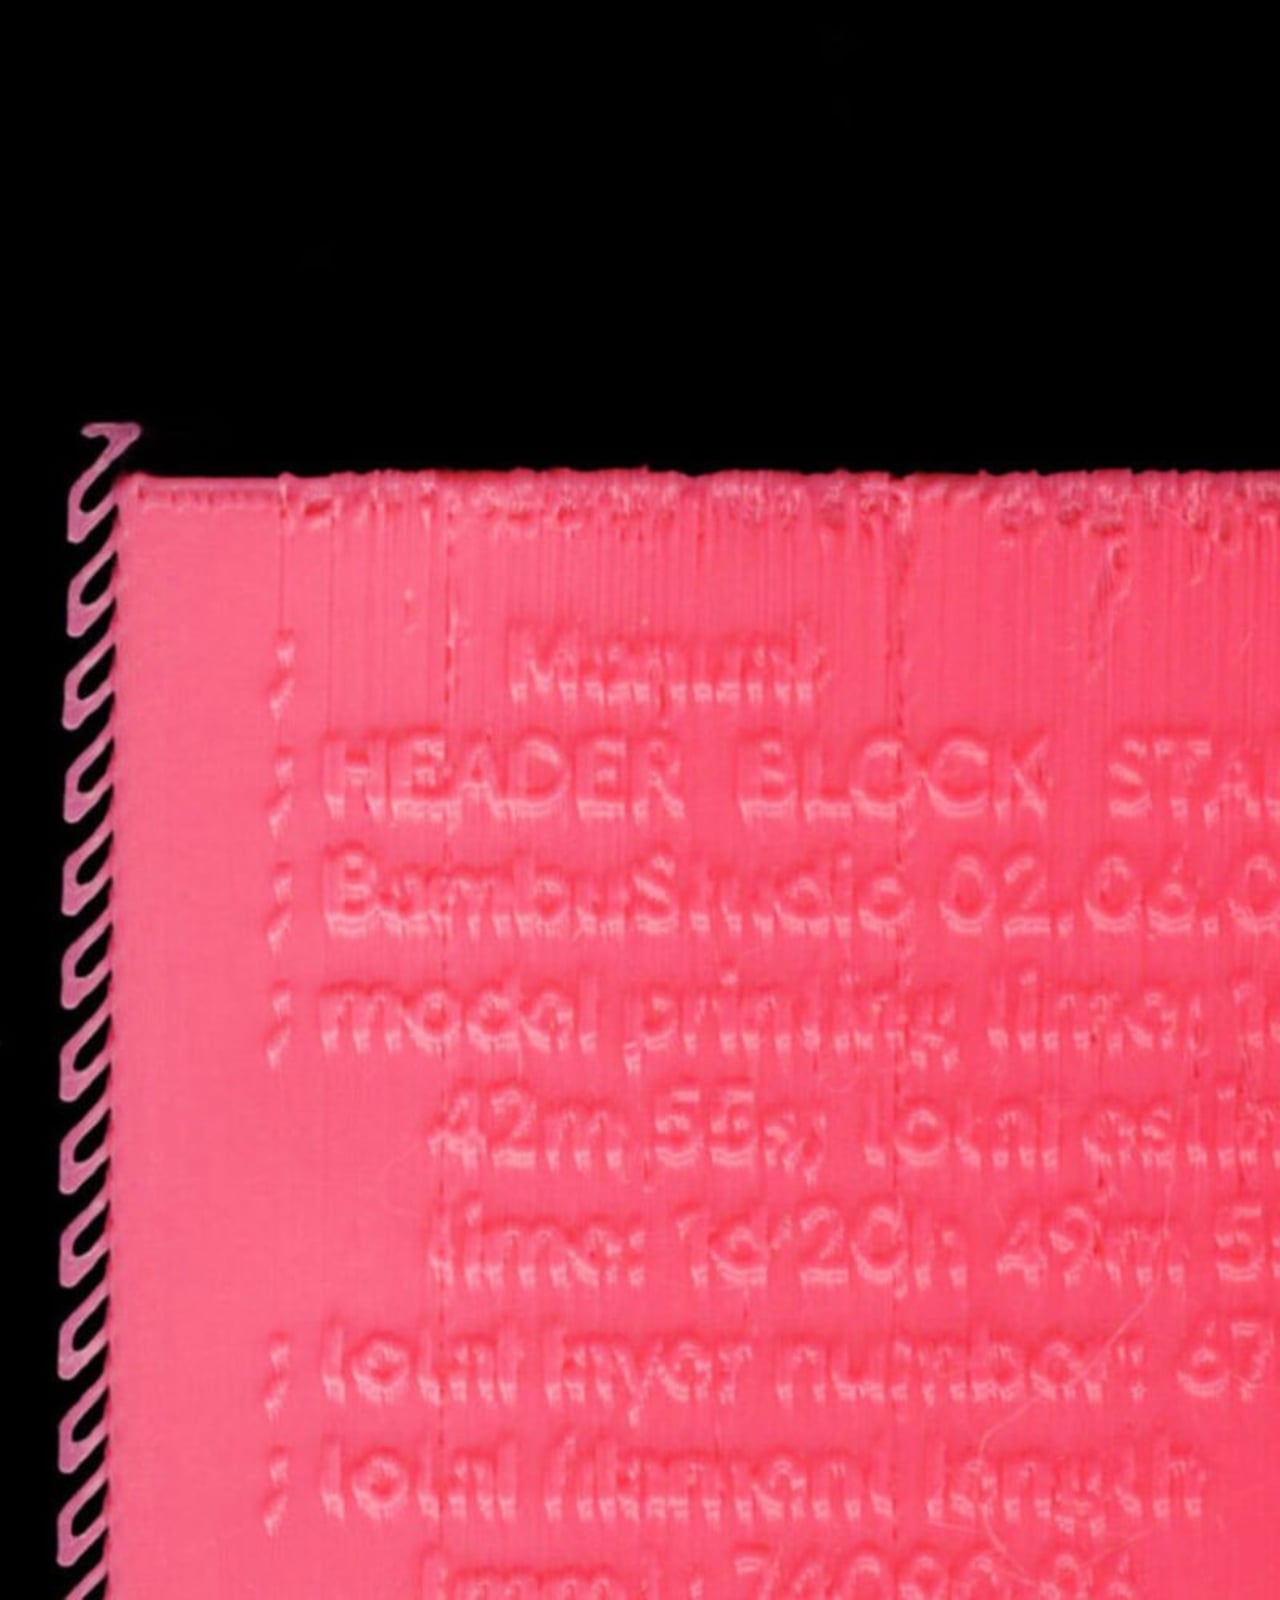
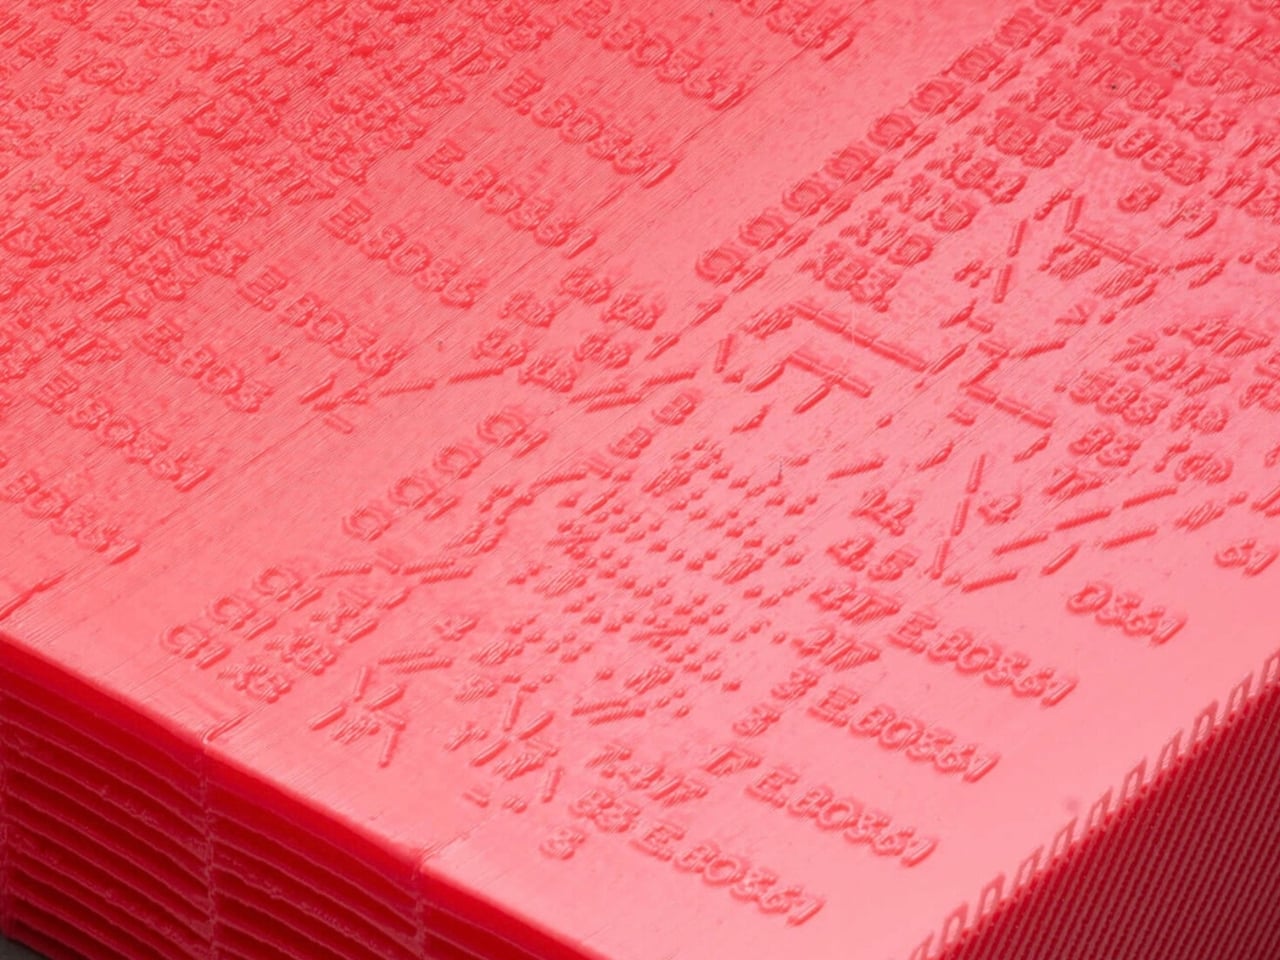
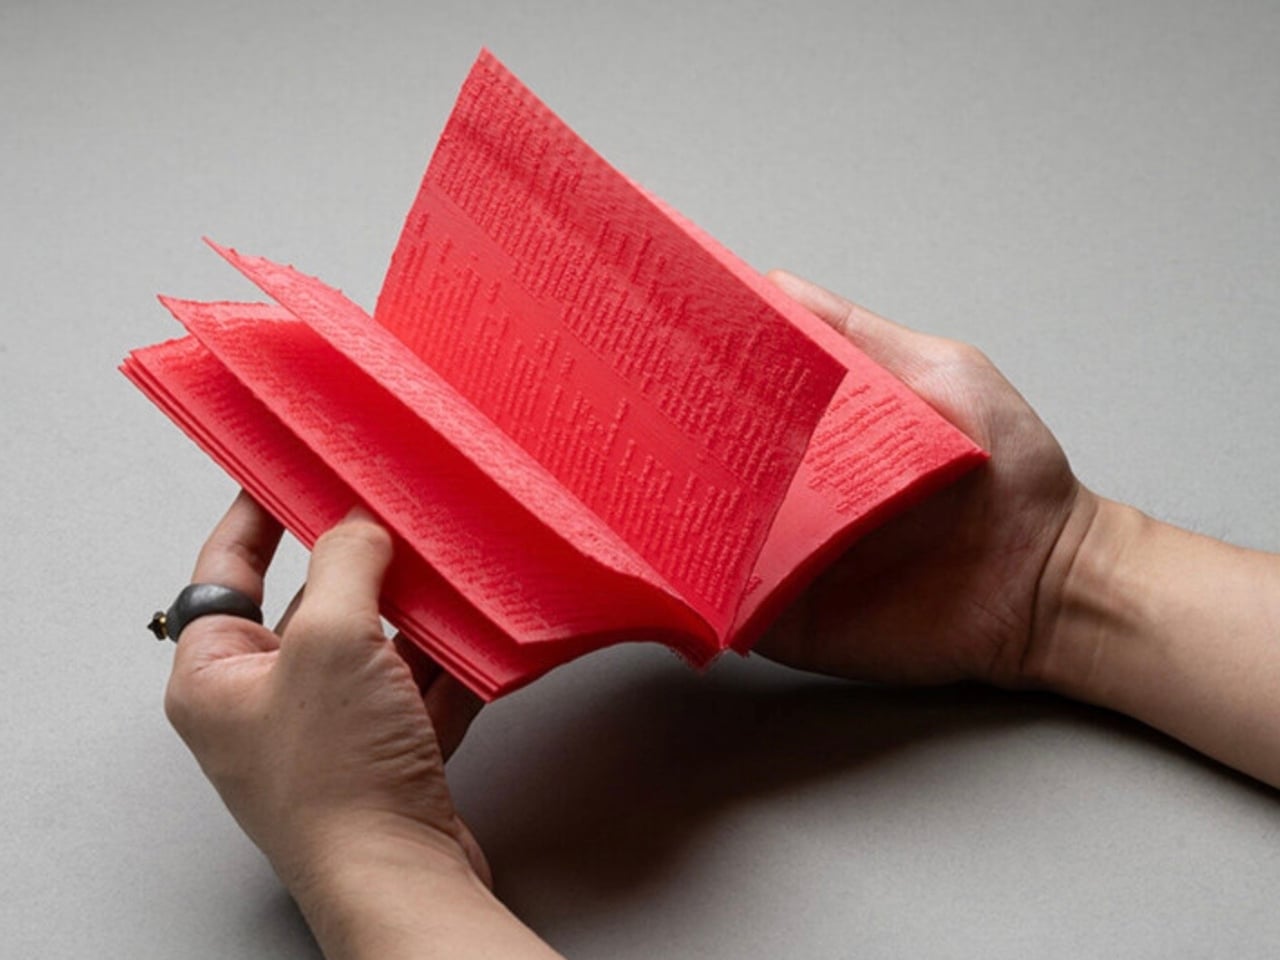
Manual is a fully 3D-printed book, and that phrase alone gets thrown around often enough that it risks losing its punch. But what Darius Ou and Benson Chong have done goes several layers deeper than “printed object shaped like a book.” The raised text embossed across its pages is G-code, the machine language that directed the printer during fabrication. Every coordinate, every movement instruction, every signal the printer received to bring this object into existence lives inside the book itself. The book you’re reading, or rather running your fingers across, is partly a transcript of its own birth.

Designer: Studio Darius Ou with Benson Chong

The printing method is worth understanding too, because it’s not standard. Ou and Chong use an XY-for-Z technique, where the printhead moves horizontally and vertically rather than building straight upward layer by layer. This allows Manual to emerge from the machine already bound, pages and all, in one continuous sequence. No assembly afterwards. No binding stage. No applied graphics. The whole object, text and structure together, comes off the print bed as a finished thing.

For anyone who has spent time thinking about what makes a book a book, that should feel genuinely strange. We’ve separated the process of making from the process of reading for so long that we barely question it. A manuscript gets written, typeset, printed, bound, shipped, and only then read. Each stage is invisible to the next. Manual collapses all of that. The making and the reading occupy the same surface.

I keep thinking about the name. Manual is doing a lot of work in one word. It calls up instruction manuals, the kind of document you consult to understand how something operates. It also calls up “manual” as in by hand, by touch, physical. The raised G-code text can be read through touch as much as sight, which means the book is almost braille-adjacent in how it asks to be experienced. You don’t just look at it. You feel the instructions the printer followed. That’s a design decision I find quietly brilliant, the kind that seems obvious in retrospect but required a very specific way of thinking to arrive at.

The project also nods to a longer lineage of self-replicating and self-referential machines, including the RepRap project, the open-source 3D printer initiative from 2005 that was specifically designed to print its own components. Manual isn’t trying to replicate itself, but it shares that same philosophical preoccupation: what does it mean for a machine-made object to carry knowledge of its own machine within it?

For the design and tech communities, the answer is clearly exciting. But I think Manual has something to offer anyone who has ever picked up an object and wondered how it got to be that way. Most of the time, that story is hidden from us. It lives in factories, in files, in supply chains we’ll never see. Manual refuses that invisibility. It puts the receipt right in the product.

Whether this opens a new chapter for publishing, or remains a provocative one-off, is an open question. I lean toward thinking it plants a seed. As digital fabrication becomes more accessible and designers get more comfortable interrogating their own tools, the idea of objects that document their own making seems less like a conceptual stunt and more like a natural evolution. A book that knows how it was built, and tells you so, is a very different kind of object than one that hides it. Manual makes that difference feel worth caring about.

The post Studio Darius Ou Just Printed a Book That Reads Its Own Code first appeared on Yanko Design.
A 3D-Printed Lamp That Finally Makes Sustainability Look Great

Most lamps do one thing. They sit on your desk, light your space, and get buried under the slow-moving chaos of charger cables and forgotten receipts. The Drop Light by Teixeira Design Studio doesn’t just resist that fate; it anticipates it.

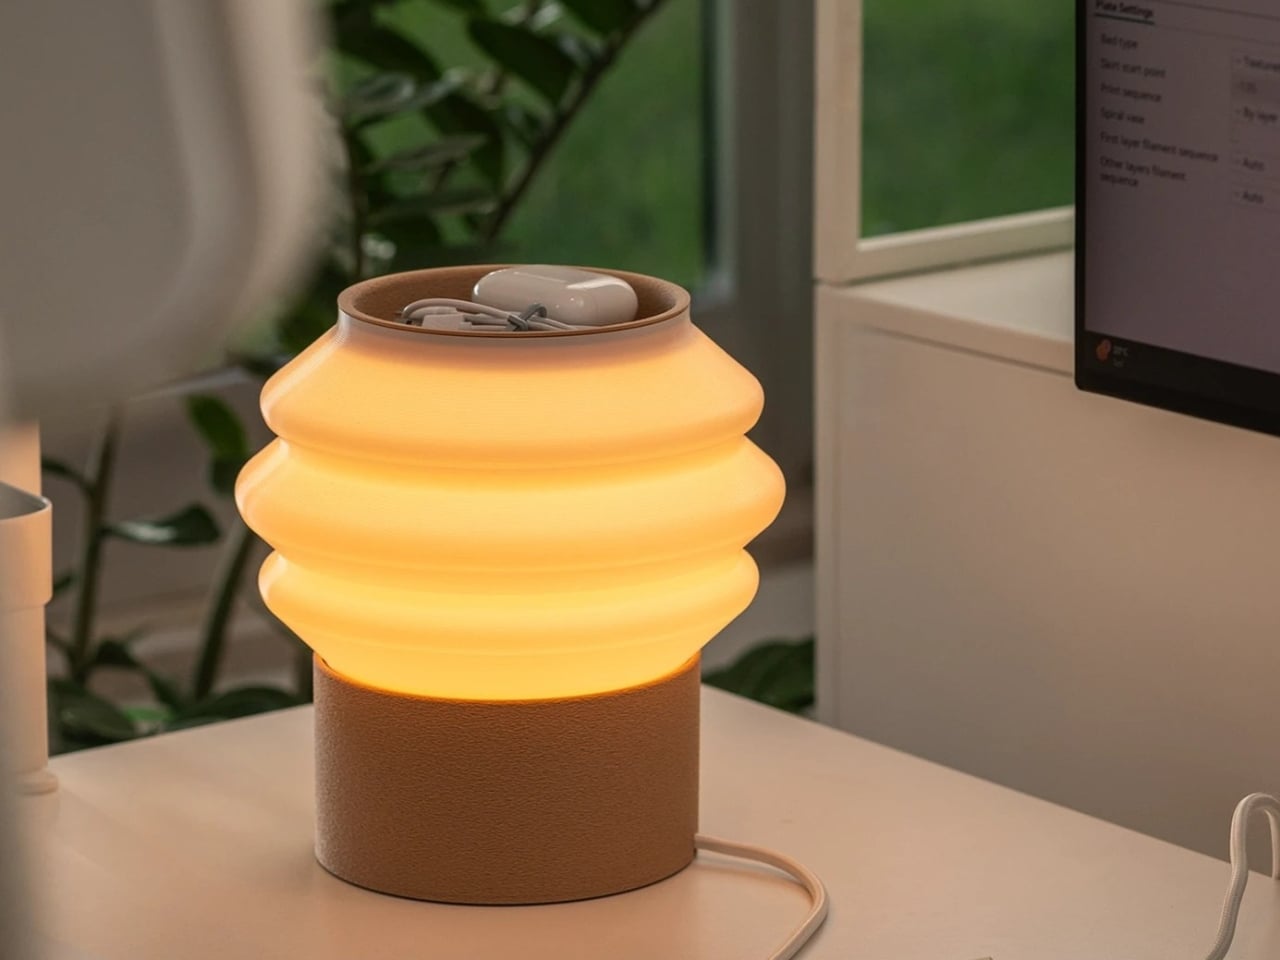
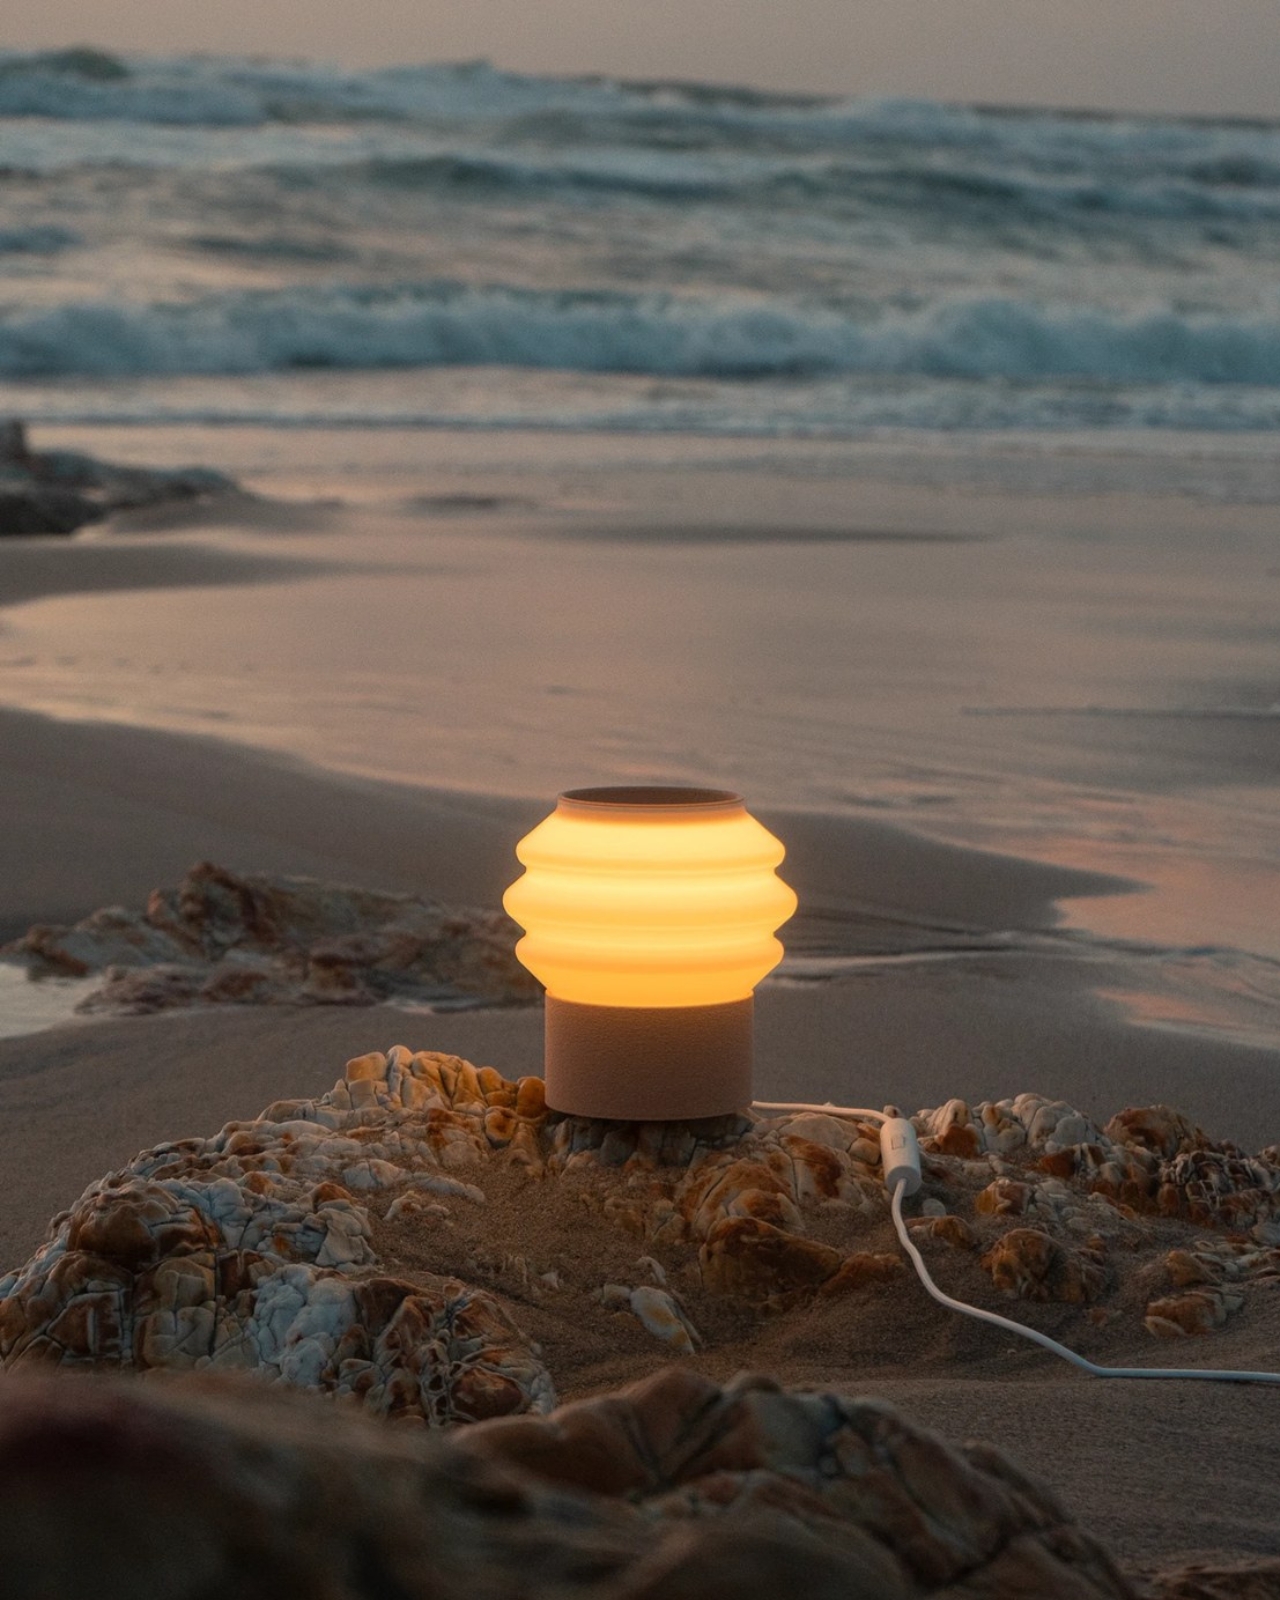
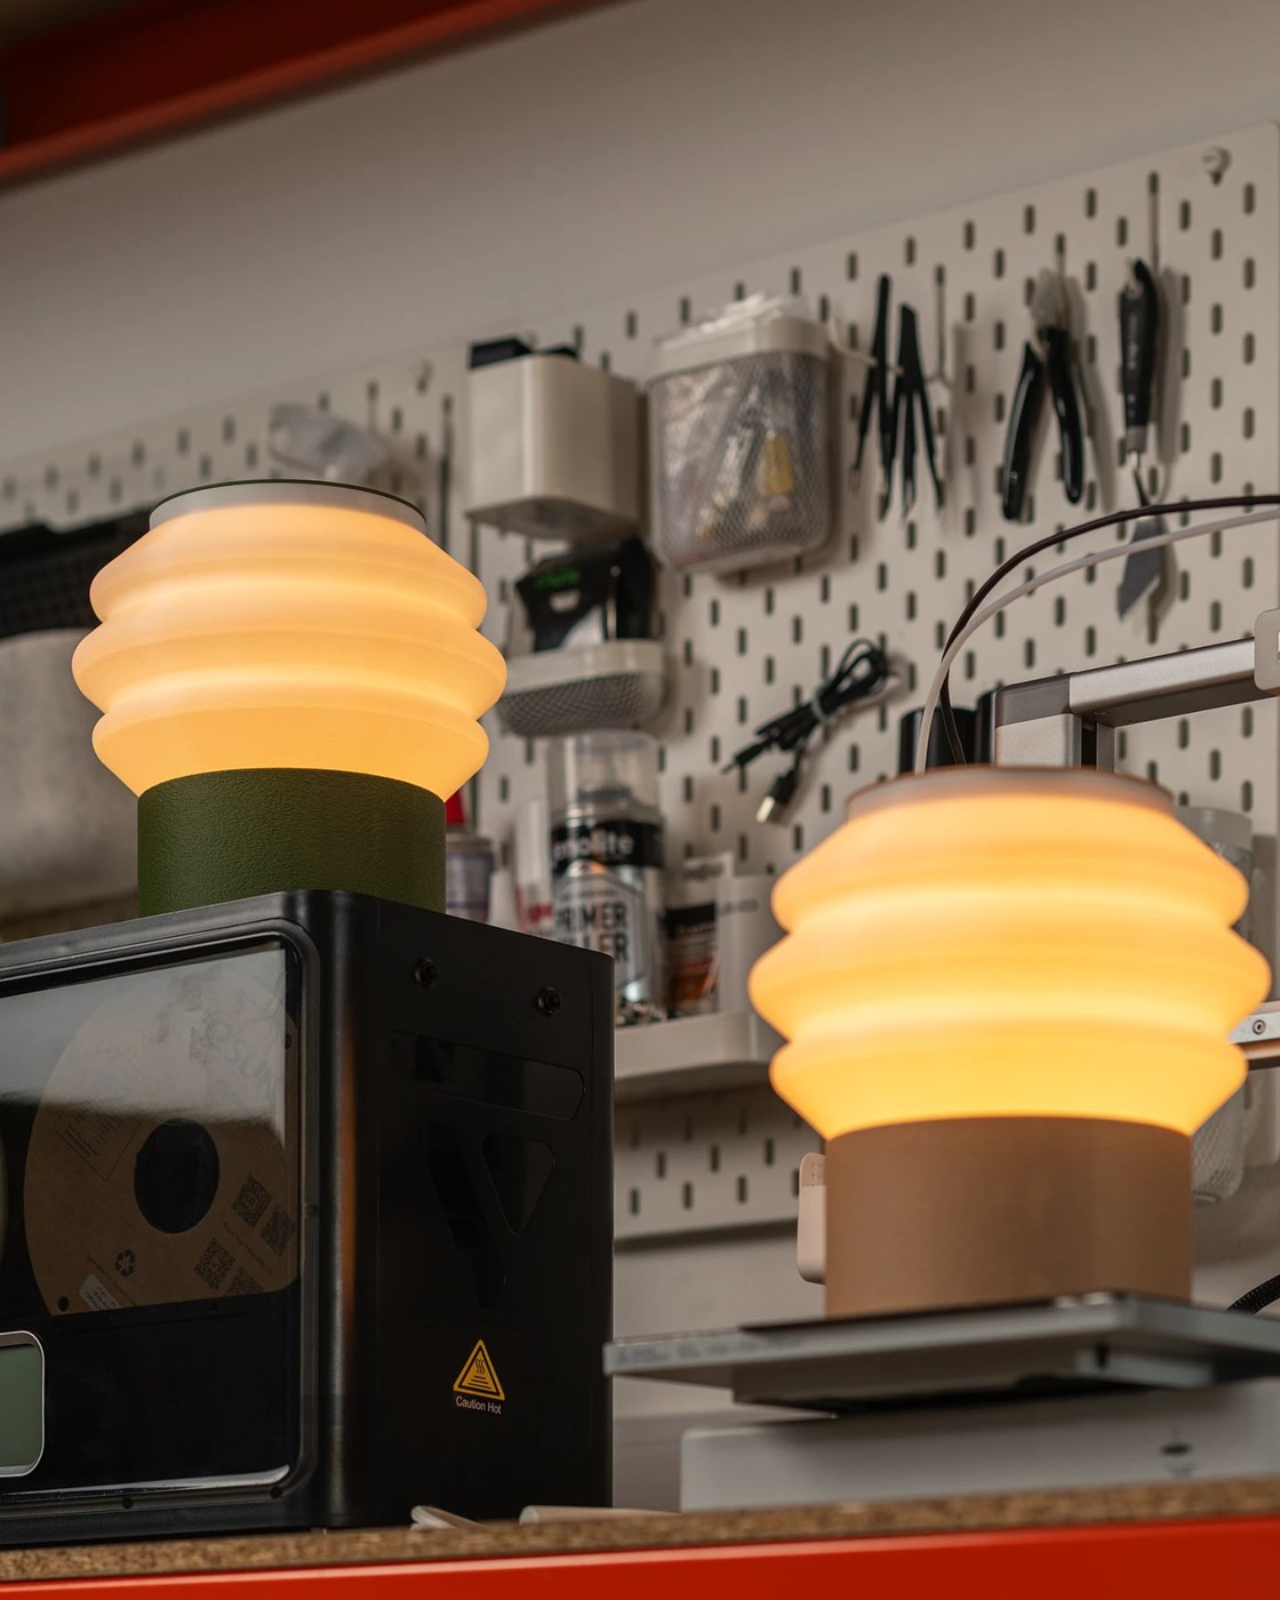
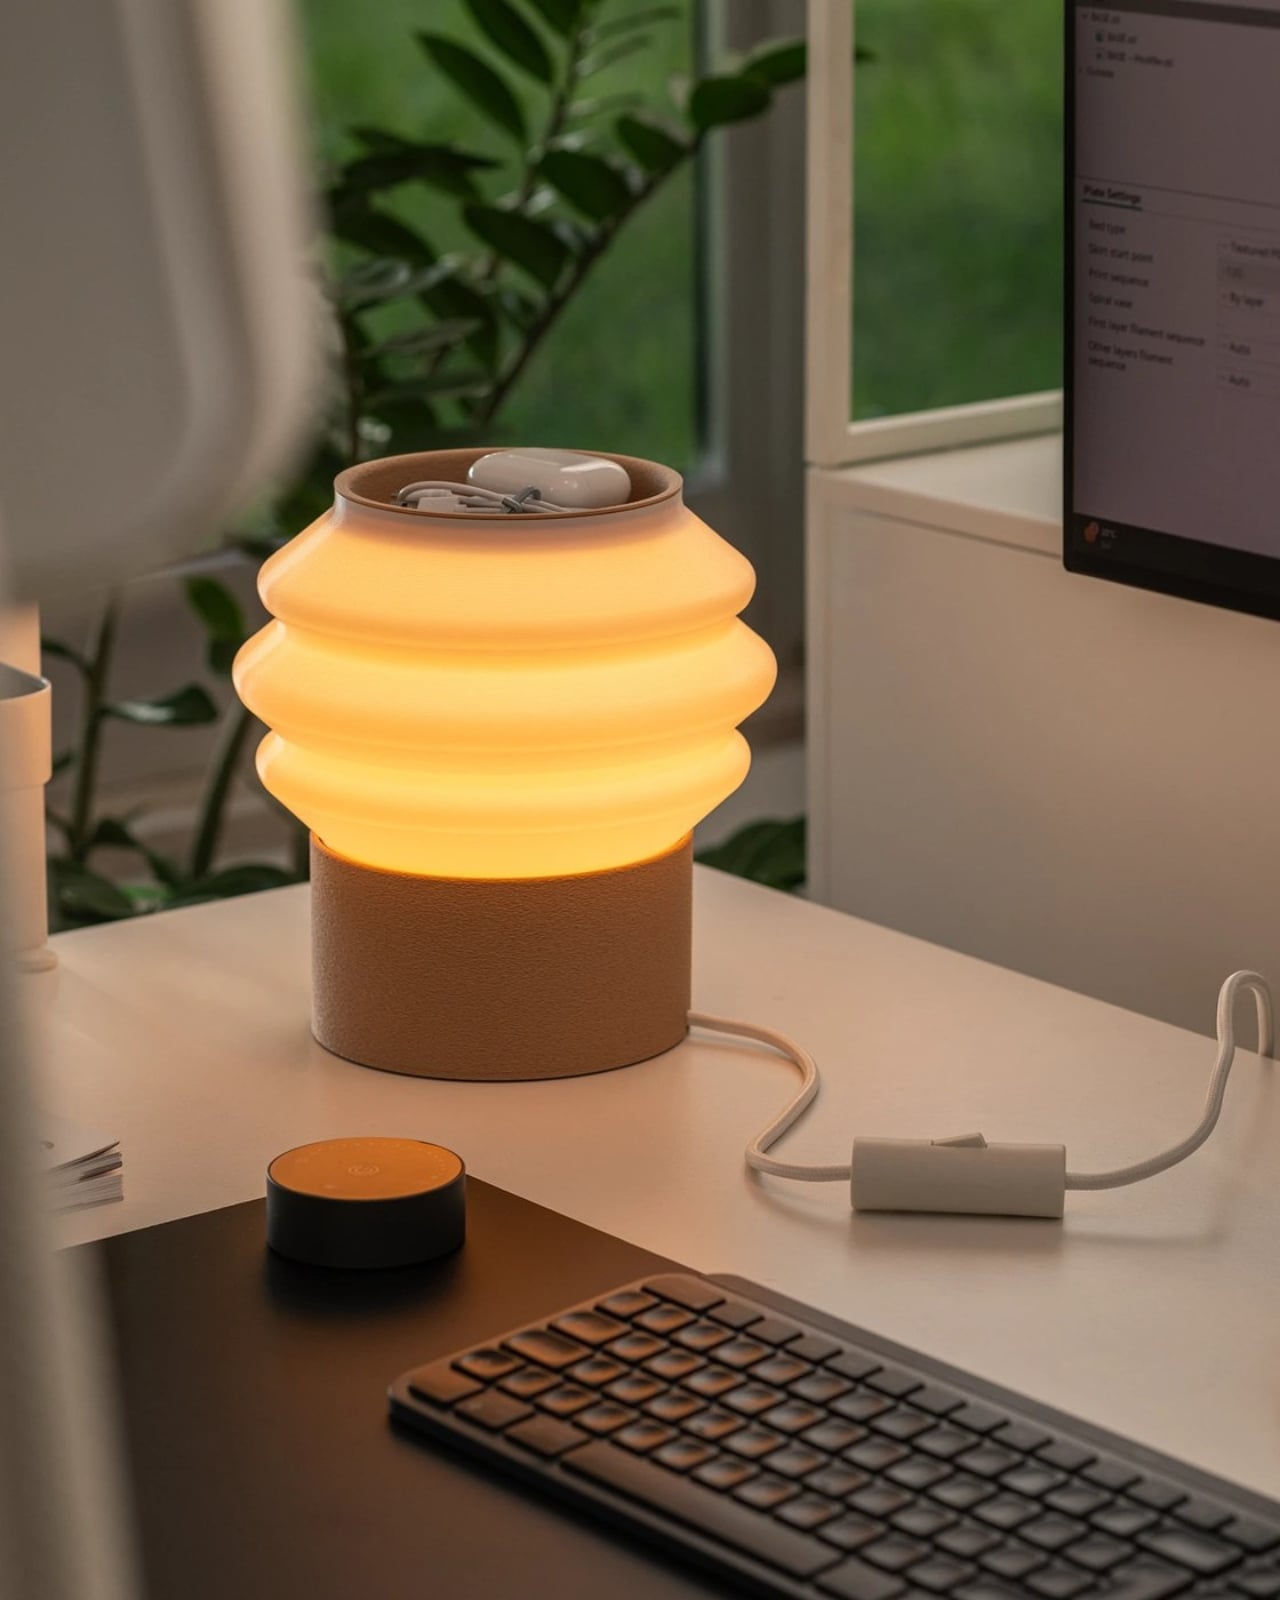
The lamp is 3D printed entirely from recycled, plant-based PLA, designed in collaboration with Oftwise Studio. It’s a desk lamp with a built-in tray at the base that holds the usual suspects: pen drives, earphones, that one charging cable you’re always looking for. The storage isn’t an afterthought bolted onto a design that already existed. It’s baked into the silhouette from the start, which is a distinction I wish more designers paid attention to.

Designer: Teixeira Design Studio

What makes the Drop Light genuinely interesting isn’t just the function-forward thinking, although that’s a big part of it. It’s the way the material actually drives the design. The base and top tray carry a fuzzy, matte PLA texture that’s scratch-resistant and tactile, almost soft to look at. The shade is printed smooth and semi-translucent, scattering light evenly without showing you the bulb. Two completely different surface behaviors, one material, one object.

That contrast between matte and diffuse isn’t just visual. It communicates function before you even plug anything in. You know instinctively where to rest your things and where the light comes from, and nothing about that has to be labeled or explained. Good design, in my opinion, should always work like that. The object tells you what it needs from you before you ask.

I’ve seen a lot of “sustainable” product design that feels more like an excuse than a commitment. Recycled materials get used in ways that look recycled. Rough edges, uneven finishes, a vague suggestion that the environmental good will outweigh the aesthetic compromise. Drop Light doesn’t do that. The layered build lines from the printing process are barely visible under the fuzzy texture, reading as intentional surface detail rather than manufacturing artifact. It looks fabricated, deliberate, finished. The plant-based PLA carries a warmth that petroleum-based plastics simply don’t, and the design leans into that warmth rather than trying to disguise it.

This is also where 3D printing, as a production method, starts to become genuinely exciting for everyday objects. For a long time, additive manufacturing lived almost entirely in the prototyping world. You used it to test a form before committing to injection molding. Drop Light is part of a growing wave of products that treat 3D printing as the final destination, not a stepping stone to something else. The result is a lamp that looks like it was designed to be made this way, not like it was designed for a factory and then adapted.

Teixeira Design Studio has done this kind of work before. Their Fold luminaire, also 3D printed, tackled the challenge of combining task and mood lighting into a single form. The studio seems genuinely interested in what the process makes possible, rather than just using it for the sustainability talking points. That consistency matters. It’s the difference between a design practice and a design trend.

Is Drop Light for everyone? Probably not. Minimalist in its silhouette, muted in its palette, it rewards people who appreciate restraint. If you’re someone who wants your lamp to announce itself, this isn’t it. But if you’re drawn to objects that feel considered, that do more than one thing without trying to look like they do, the Drop Light hits a note that a lot of current lighting design misses completely.

We talk a lot about what sustainable design could be, and not nearly enough about what it actually looks like when it works. This lamp is a solid answer to that question. Not a perfect one, but a convincing one, and sometimes that’s exactly what the conversation needs.

The post A 3D-Printed Lamp That Finally Makes Sustainability Look Great first appeared on Yanko Design.
A 4D-Printed Cast You Can Actually Shower In

Most medical devices evolve quietly over decades. Surgical tools get sharper, imaging machines get faster, drug delivery systems get smarter. But the orthopedic cast has remained stubbornly unchanged for most of its existence. Plaster, fiberglass, a messy application process, and six to eight weeks of itching, sweating, and avoiding puddles. For something that millions of people wear every year, it has always felt like a design problem nobody wanted to solve.

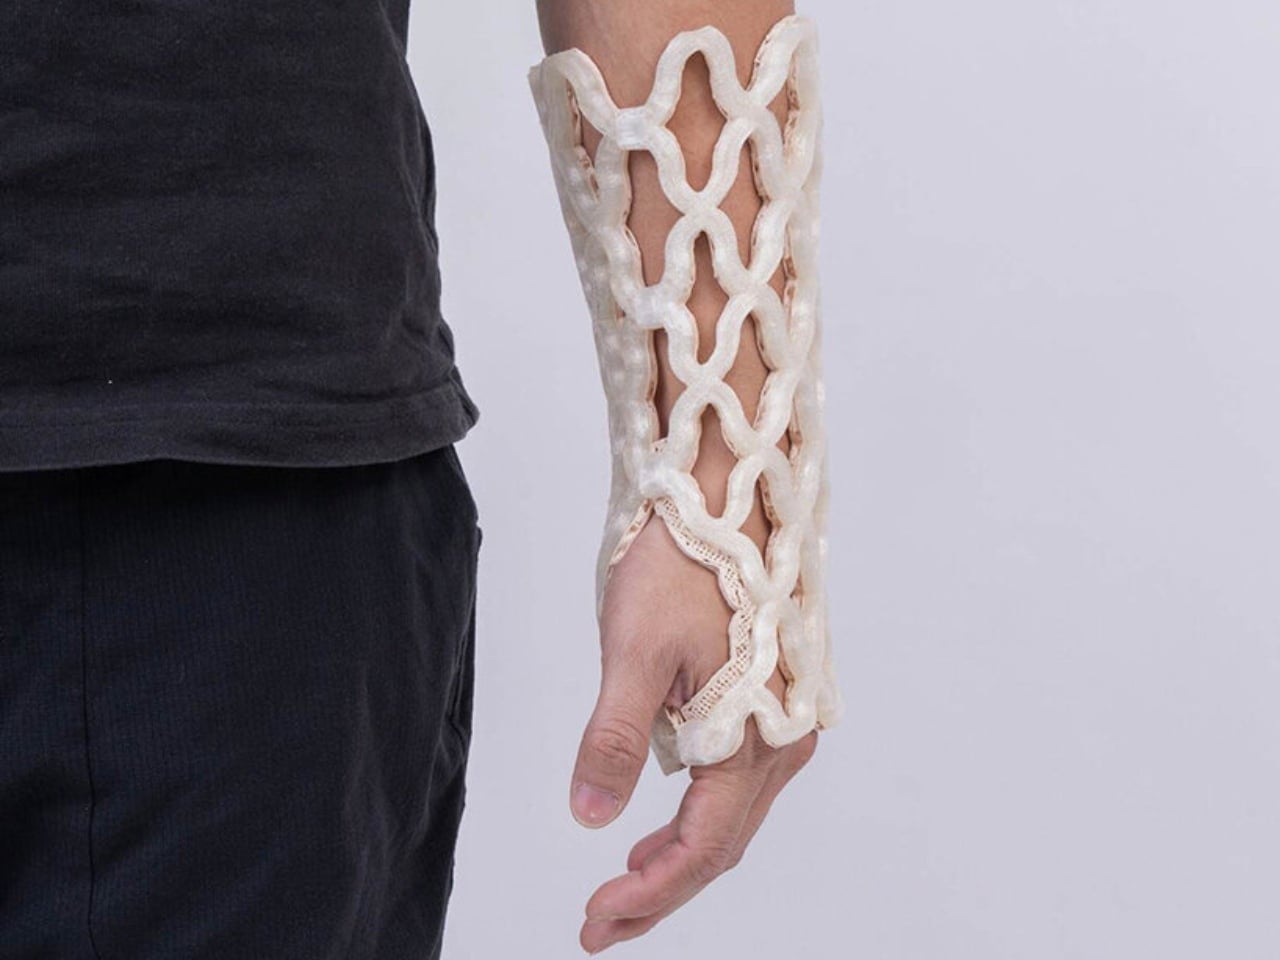
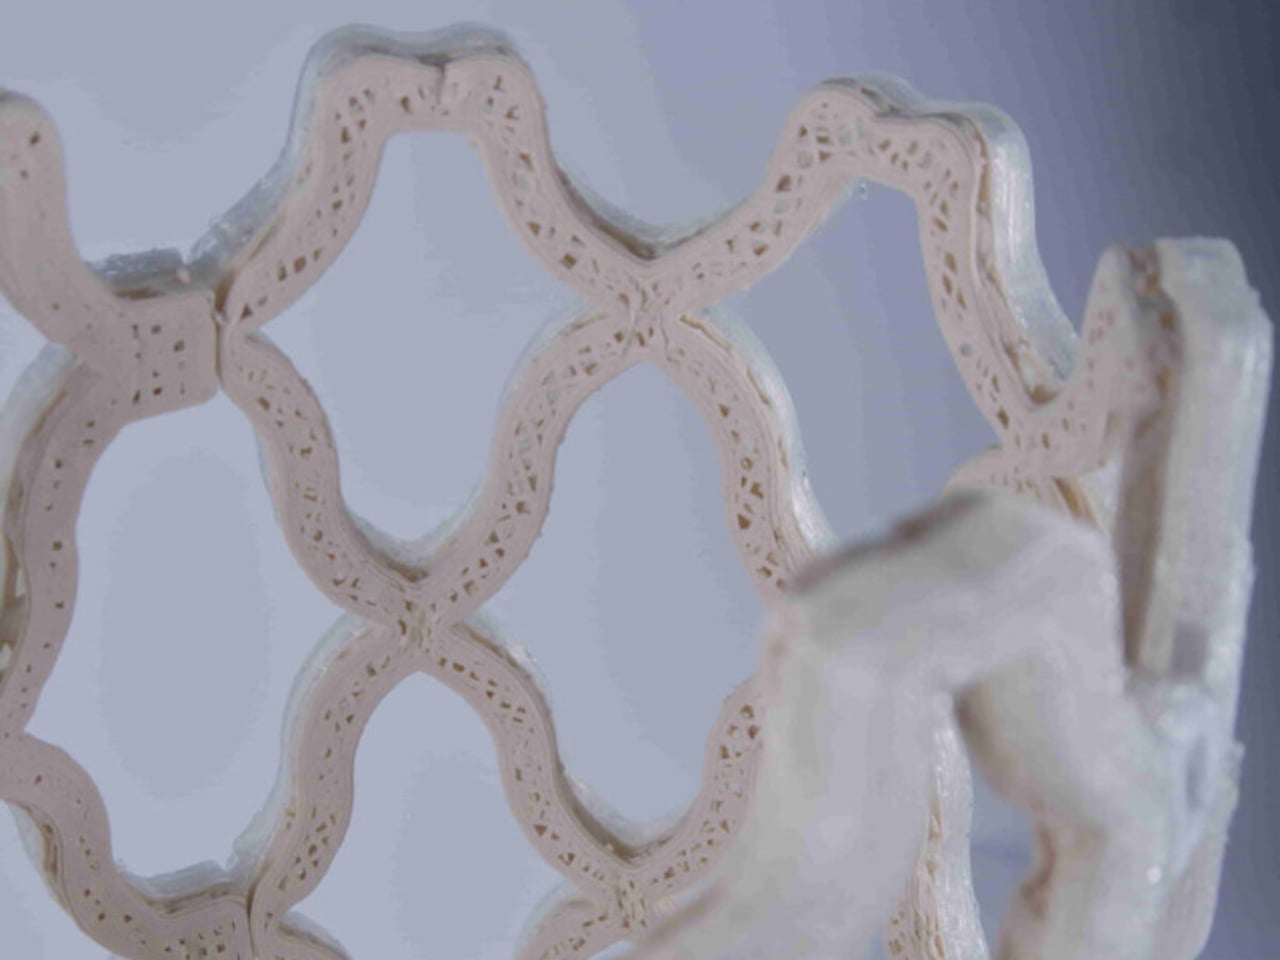
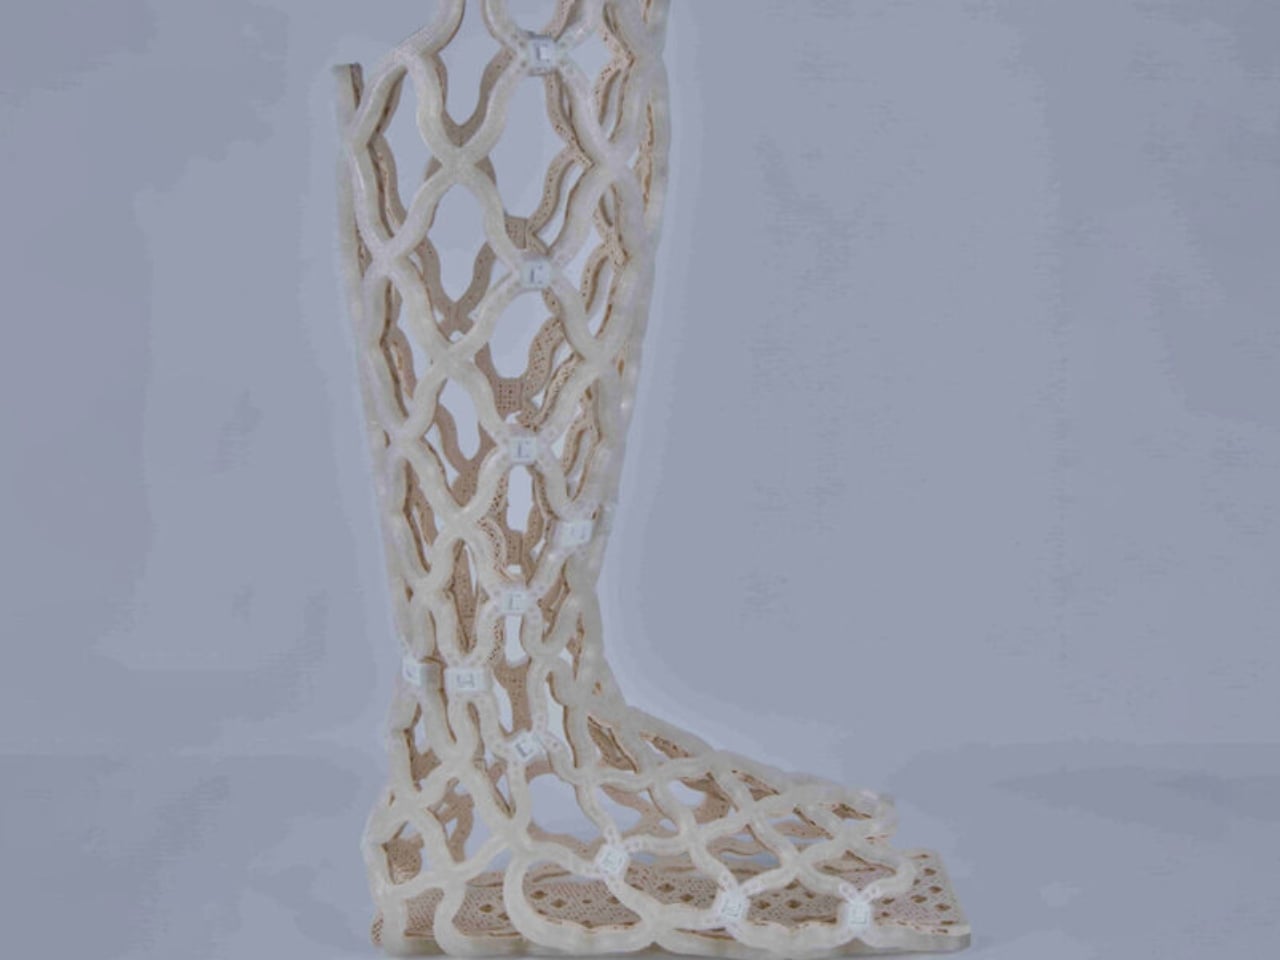
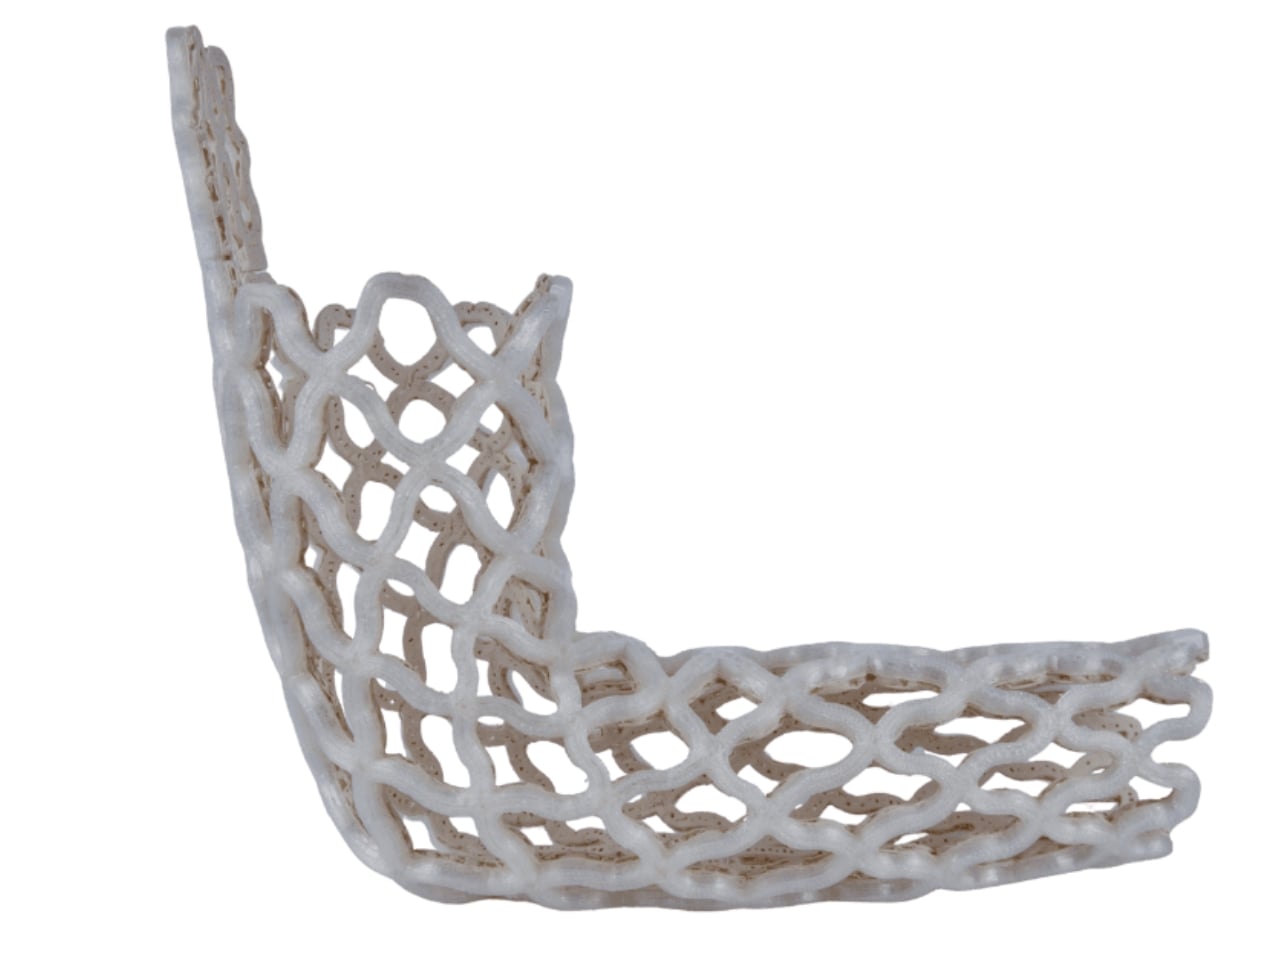
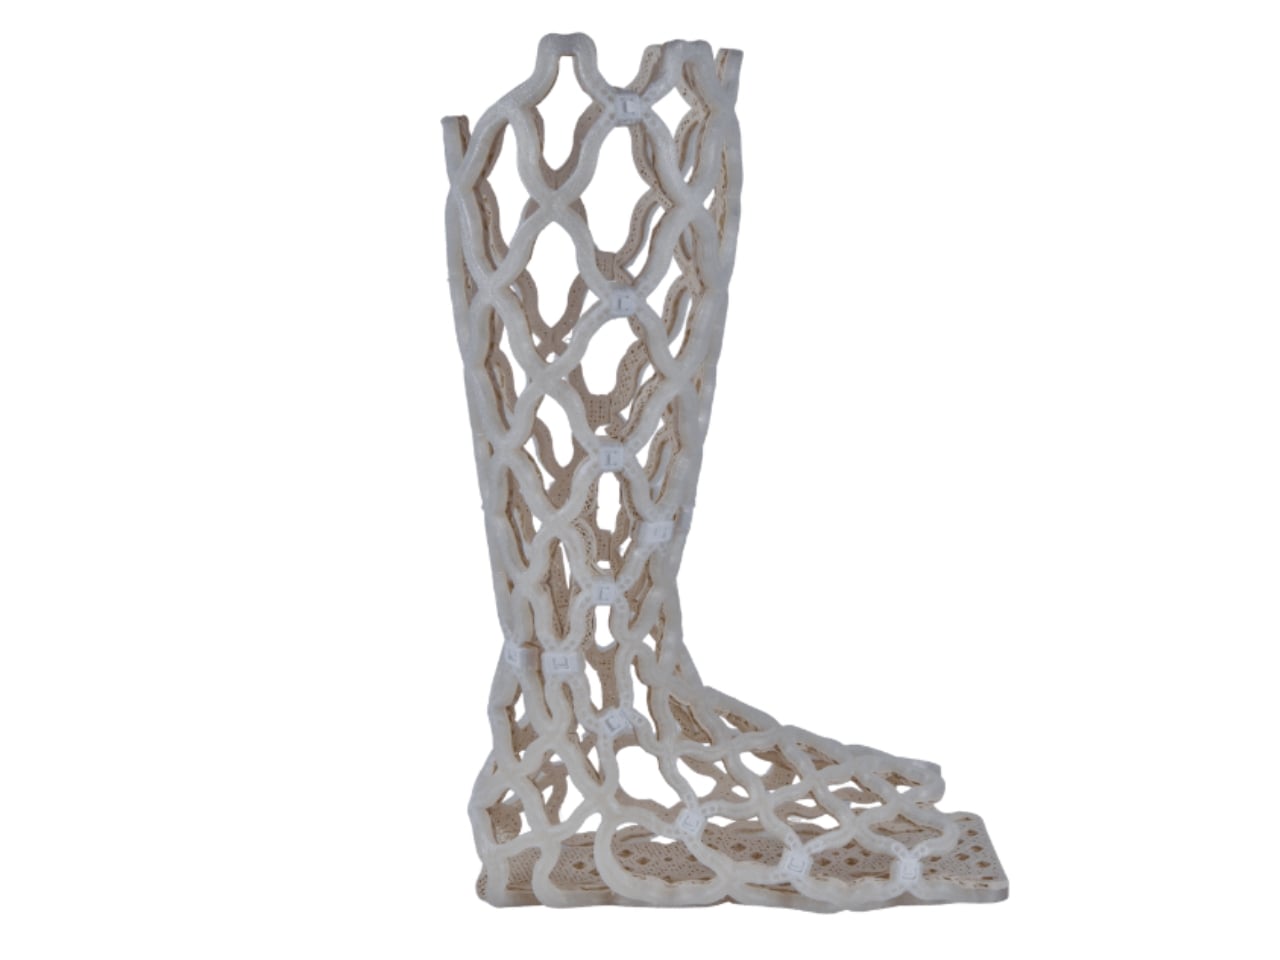
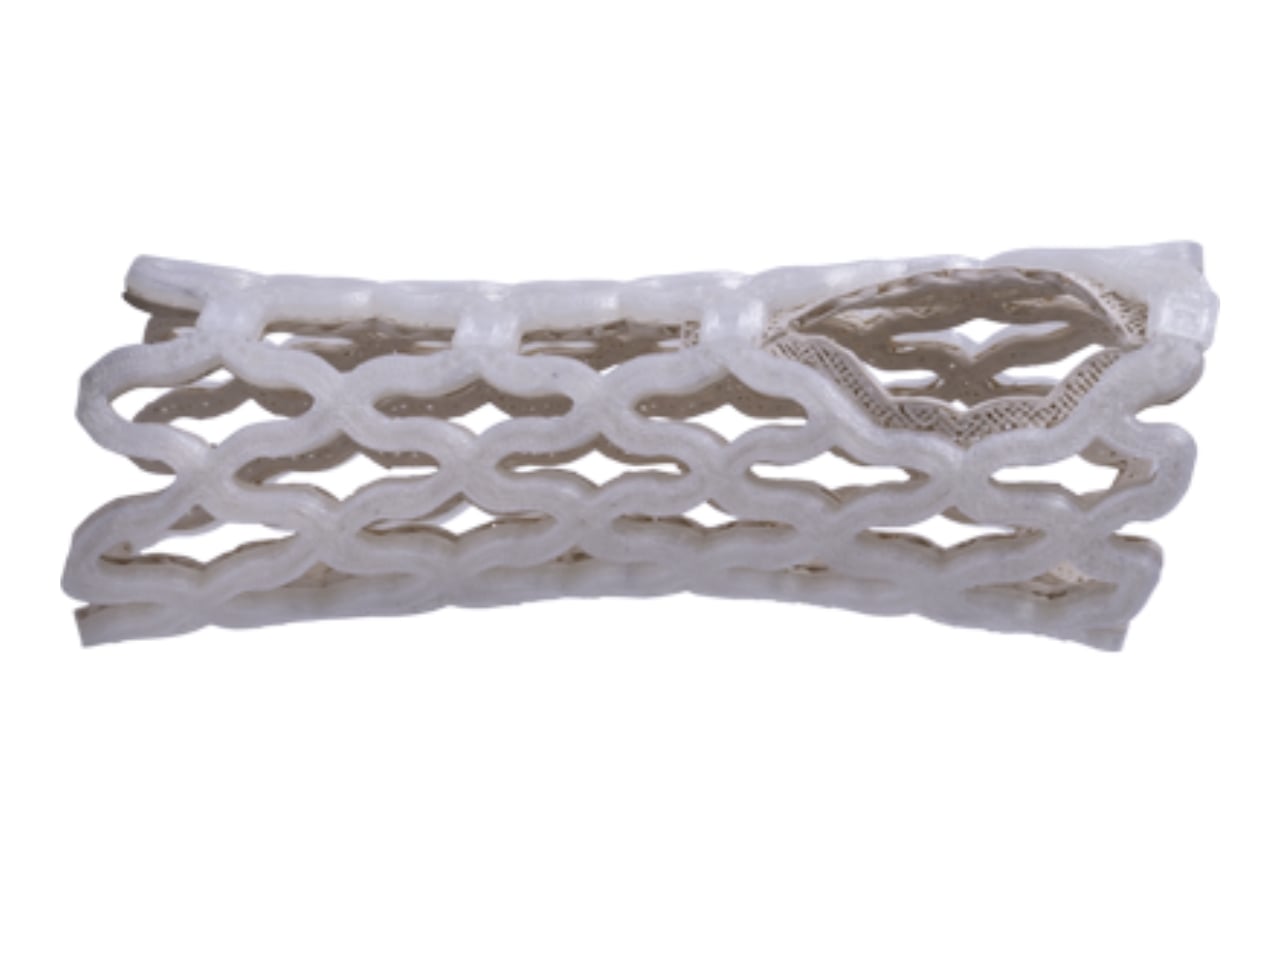
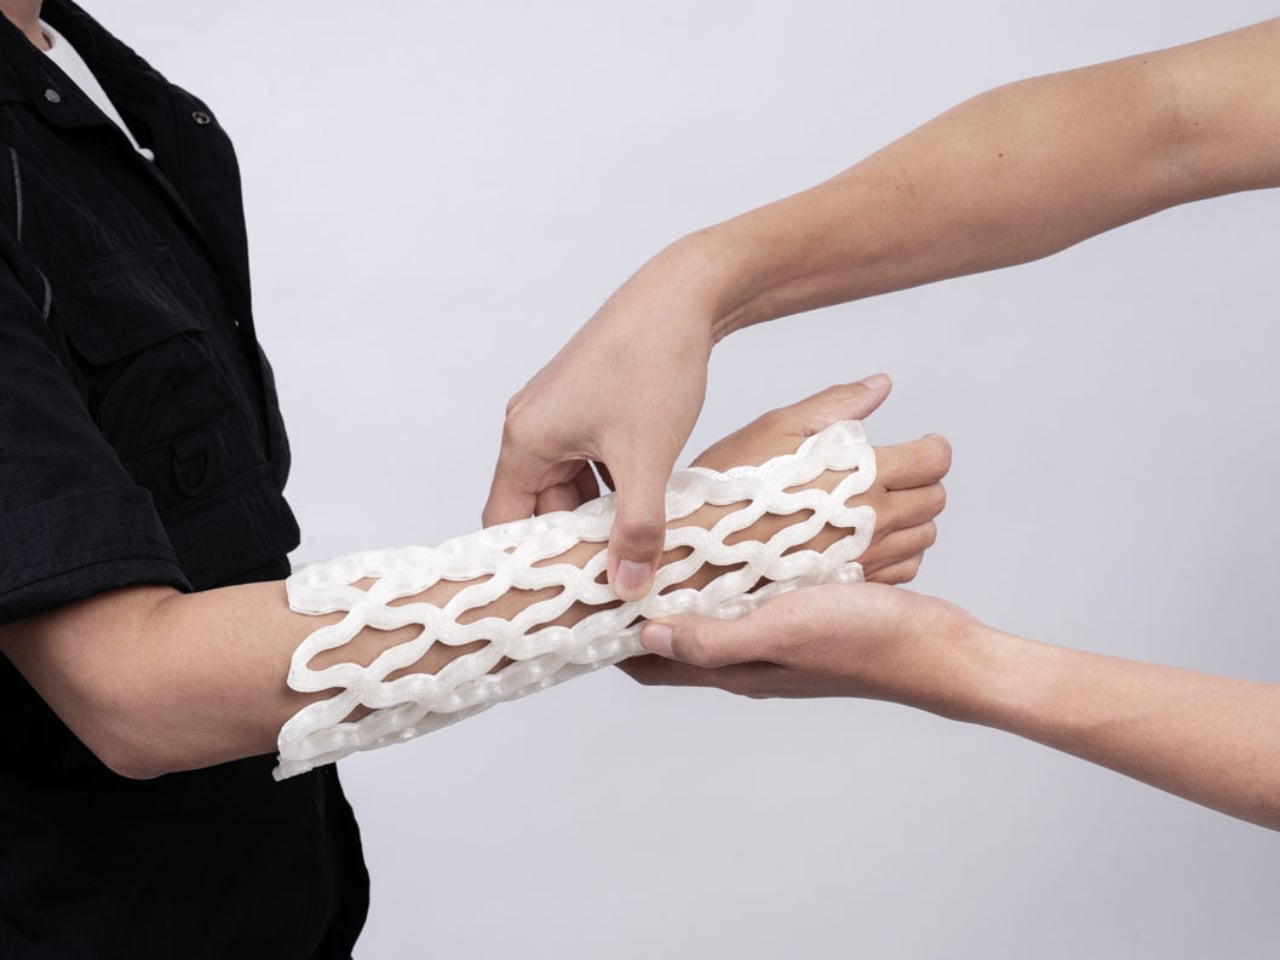
Castomize, a startup out of Singapore, decided to solve it. Their cast, TessaCast, uses what the company calls 4D printing. The terminology is worth pausing on, because it’s easy to assume it’s just marketing language. It isn’t. The fourth dimension here is time. The cast is 3D printed in advance from smart thermoplastic materials, but the real transformation happens at the clinic, when heat is applied. Once warmed, the rigid lattice shell becomes pliable. A clinician wraps it around the patient’s wrist, forearm, elbow, or ankle, clips it into position, and lets it cool. As it hardens, it conforms to the exact shape of that particular limb.

Designer: Castomize

No 3D scan. No casting tape. No plaster dust. The removal process is just as elegant. A simple pin releases the buckles, and the cast slides off. No cast saw, which anyone who has had one used near their skin can tell you is not a small thing. The anxiety of that vibrating blade hovering millimeters from your arm is its own minor trauma, even when you know it won’t cut skin.
Castomize’s design brief reads almost deceptively simple: a cast should hold the body securely while allowing skin to breathe, water to pass through, and clinicians to make adjustments without destroying the device. That sounds obvious when you read it out loud. And yet, until now, no cast on the market had actually delivered on all three at once.

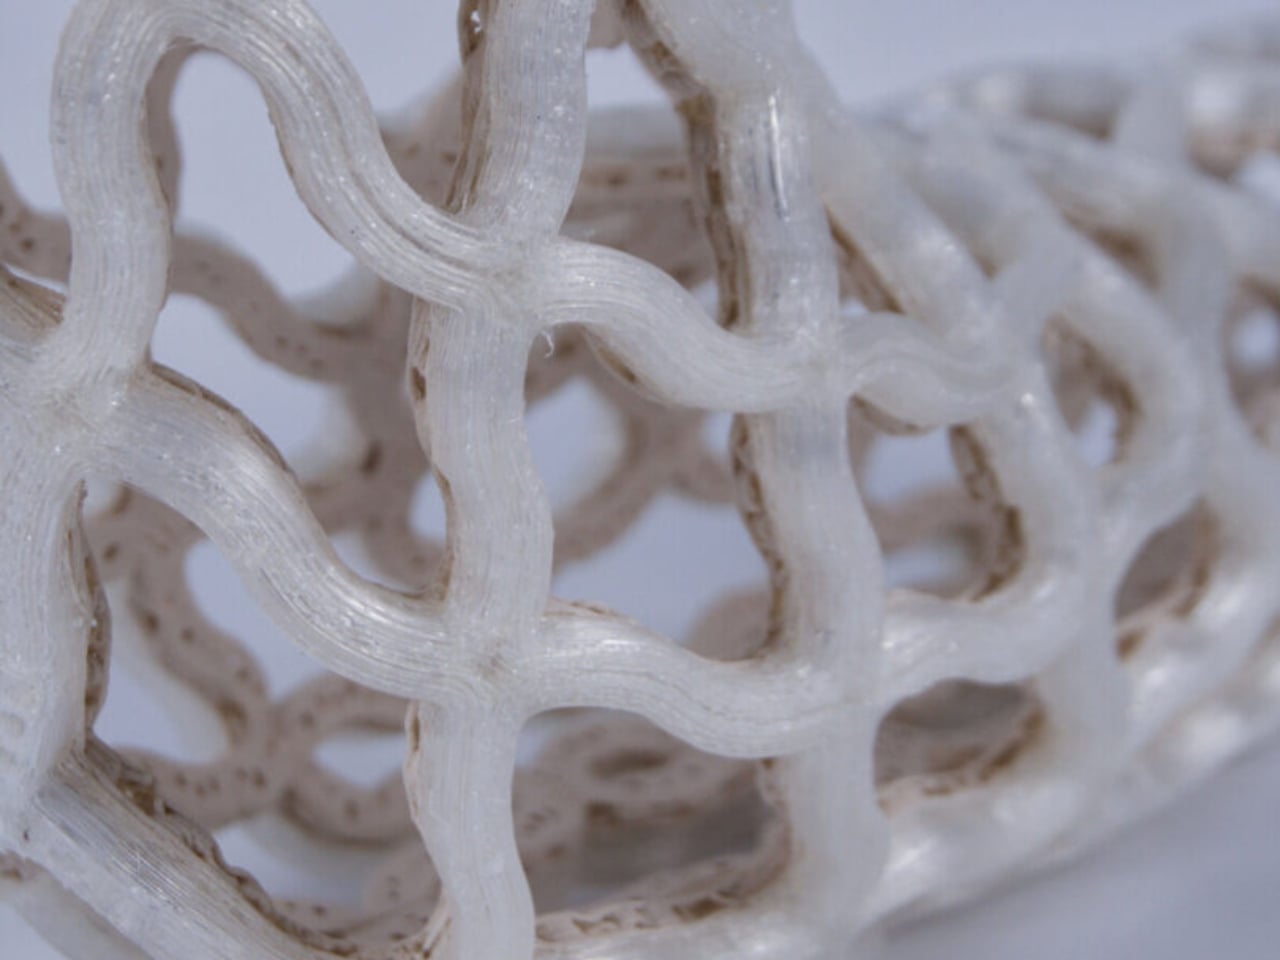
The open lattice structure of TessaCast allows air to circulate continuously against the skin, addressing the itching and sweating that make the traditional cast experience so miserable for patients. It is also fully waterproof. Not water-resistant, waterproof. The team at Castomize notes that it can even be worn while swimming, though they sensibly leave specific medical guidance to clinicians. For anyone who has wrapped a limb in a plastic bag before a shower for weeks on end, this is not a minor feature.

One detail I keep returning to is how this design manages to skip the expensive, time-consuming step of individual 3D scanning. Competitors in the printed cast space often require a custom scan per patient, which raises both cost and complexity. Castomize uses pre-made standard sizes for adults and children that become personalized through the heating and molding process. It’s a smarter workflow, one that clinics can adopt without rebuilding their entire process from scratch.

The startup originated as a student project at the Singapore University of Technology and Design in 2017, which makes its trajectory fairly remarkable. Eleora Teo, Abel Teo, and Johannes Sunarko launched it as a proper company in 2022, and TessaCast reached the market in 2025. It currently holds regulatory approval in Singapore, Australia, South Korea, and Taiwan, with FDA and CE mark applications in progress.

The cost picture is nuanced. TessaCast costs about 30 to 50 percent more to manufacture than a traditional fiberglass cast. But one hospital trial in Singapore recorded average savings of 25 percent overall, because the cast can be reheated and adjusted as the patient heals rather than replaced. Fewer return visits, less material waste, and fewer complications from casts applied too tightly or too loosely all contribute.

The traditional casting process involves ten separate steps and multiple materials, and errors during application can lead to pressure injuries. That’s a significant design failure dressed up as standard practice for a very long time. Castomize has looked at all of it and built something better. The orthopedic cast has been waiting for this moment for a very long time.

The post A 4D-Printed Cast You Can Actually Shower In first appeared on Yanko Design.