Build your own NAS Cloud Drive using a Raspberry Pi 4 and a 3D Printer

Why pay for iCloud when you’ve got your own personal iCloud at home?!

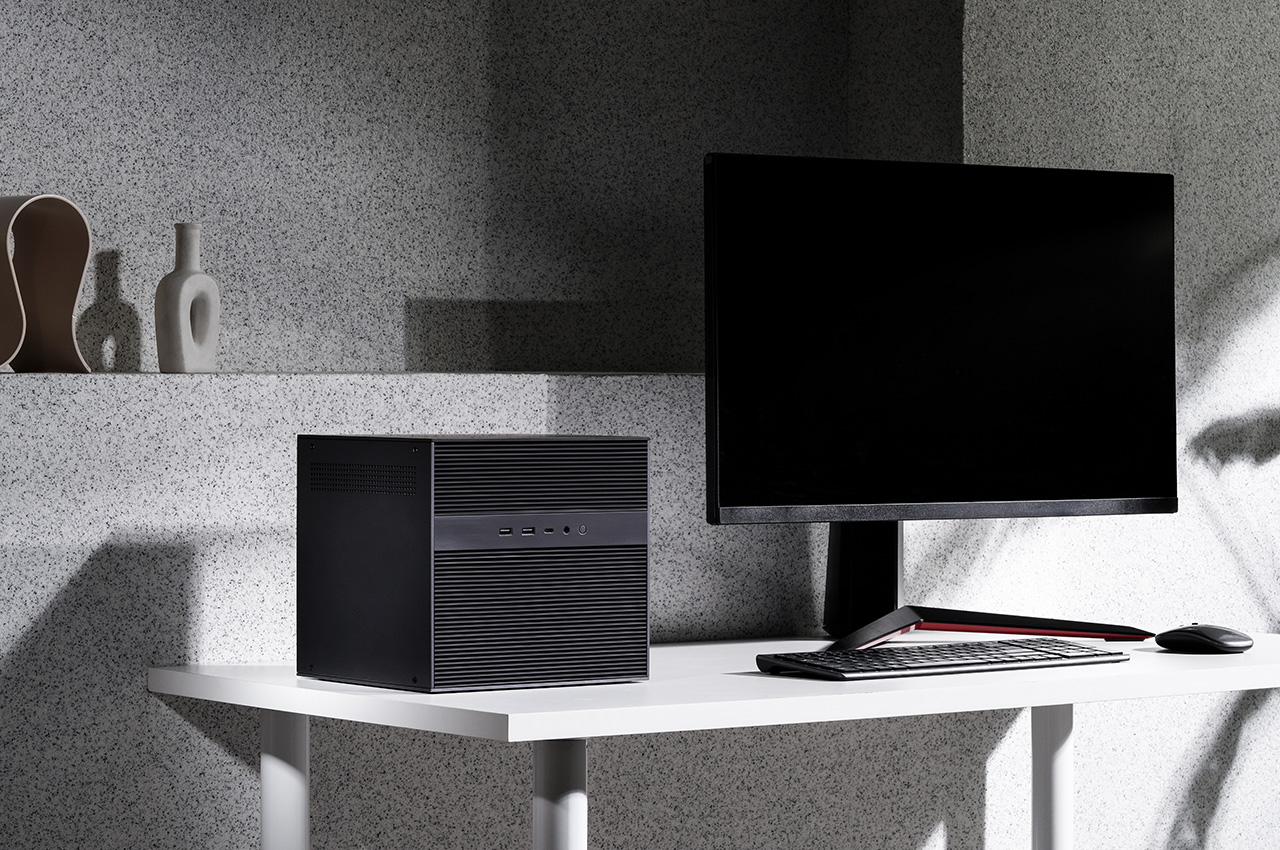
Subscriptions will be the death of our civilization. Imagine not being able to ‘own’ something because a company only allows you to rent it. You don’t own the movies you pay for on Netflix, you don’t own the music you pay for on Spotify, and you can’t own storage on the cloud because even though you’re buying 500GB worth of space, you’re merely renting the space on a cloud server somewhere. This strange arrangement has led to the rise of personal NAS (Network-Attached Storage) devices, with people choosing to simply BUILD their own cloud storage devices instead of paying Apple, Google, or Microsoft for them. The advantages of a NAS are many – you don’t need to pay monthly fees, your cloud-drive is private to you so you don’t have to worry about Google or Apple getting hacked and your data getting leaked, but most importantly, you can store and access files on your NAS from anywhere. Use it to take phone or laptop backups, to store/watch videos, or even build your own music/movie streaming library as the ultimate cord-cutting move!

Designer: Frank Bernhardt

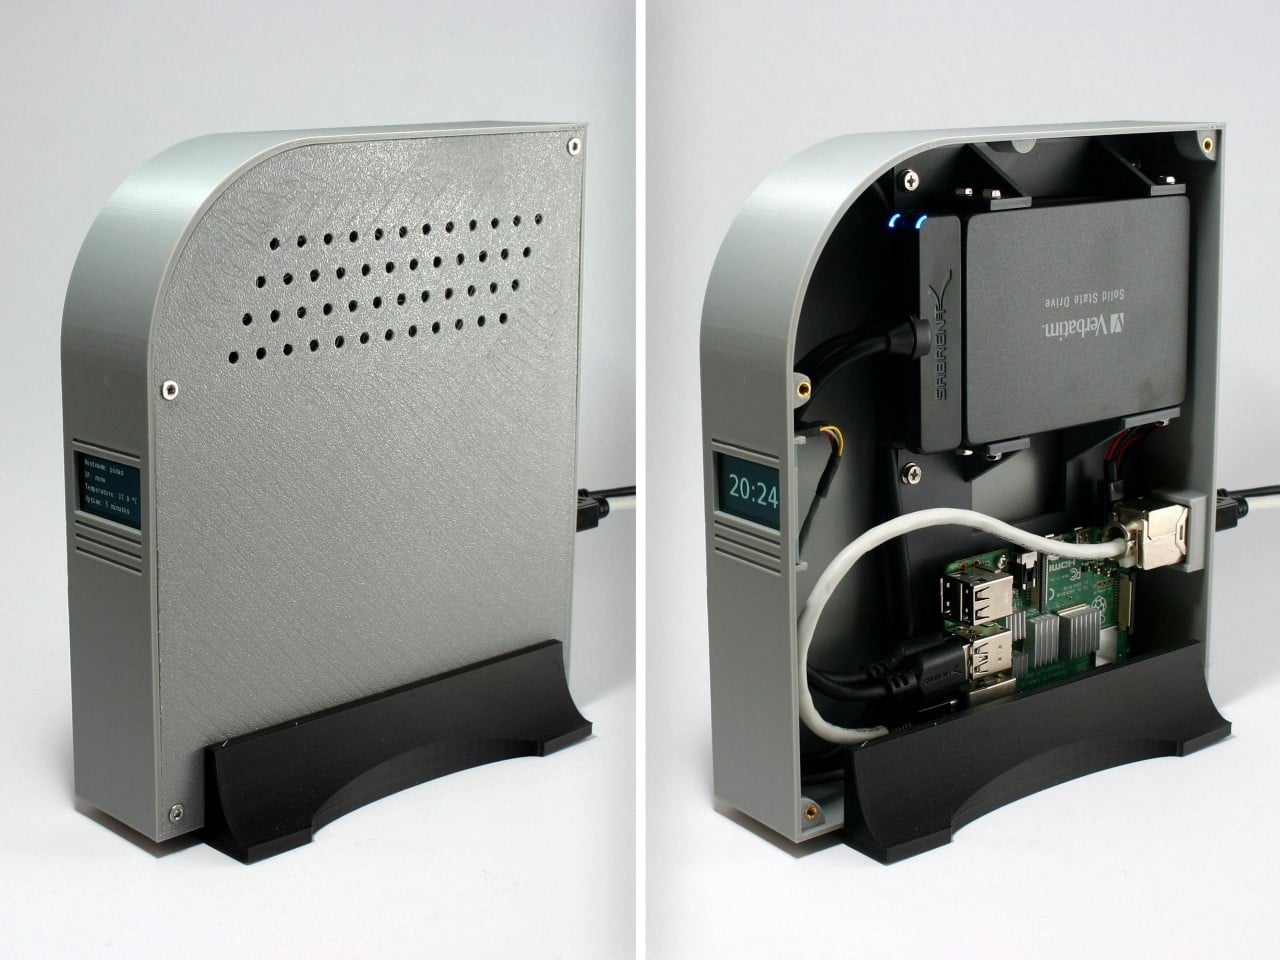
If you’re looking to buy a NAS, there are quite a few out there, but if you want to try building your own, DIY-maker Frank Bernhardt managed to put together one using a Raspberry Pi 4 module, a few extra components, and a 3D-printed enclosure. His entire process is up on Instructables for anyone to see and make, although you’ll definitely require some technical knowledge to get the software up and running.

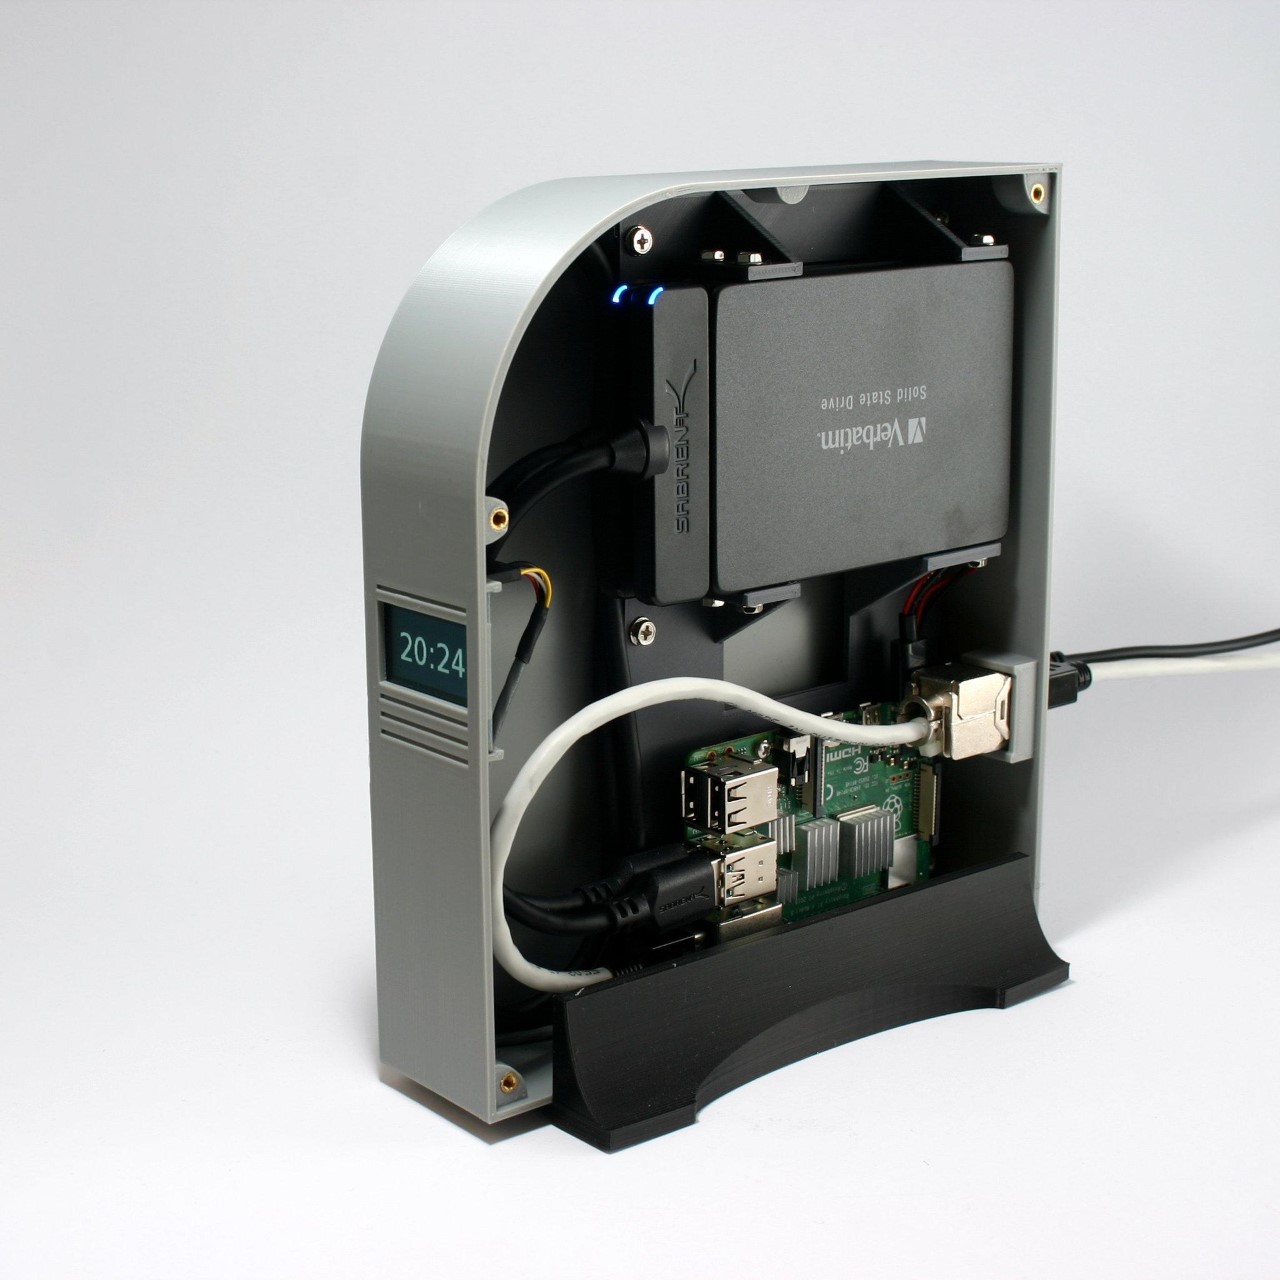
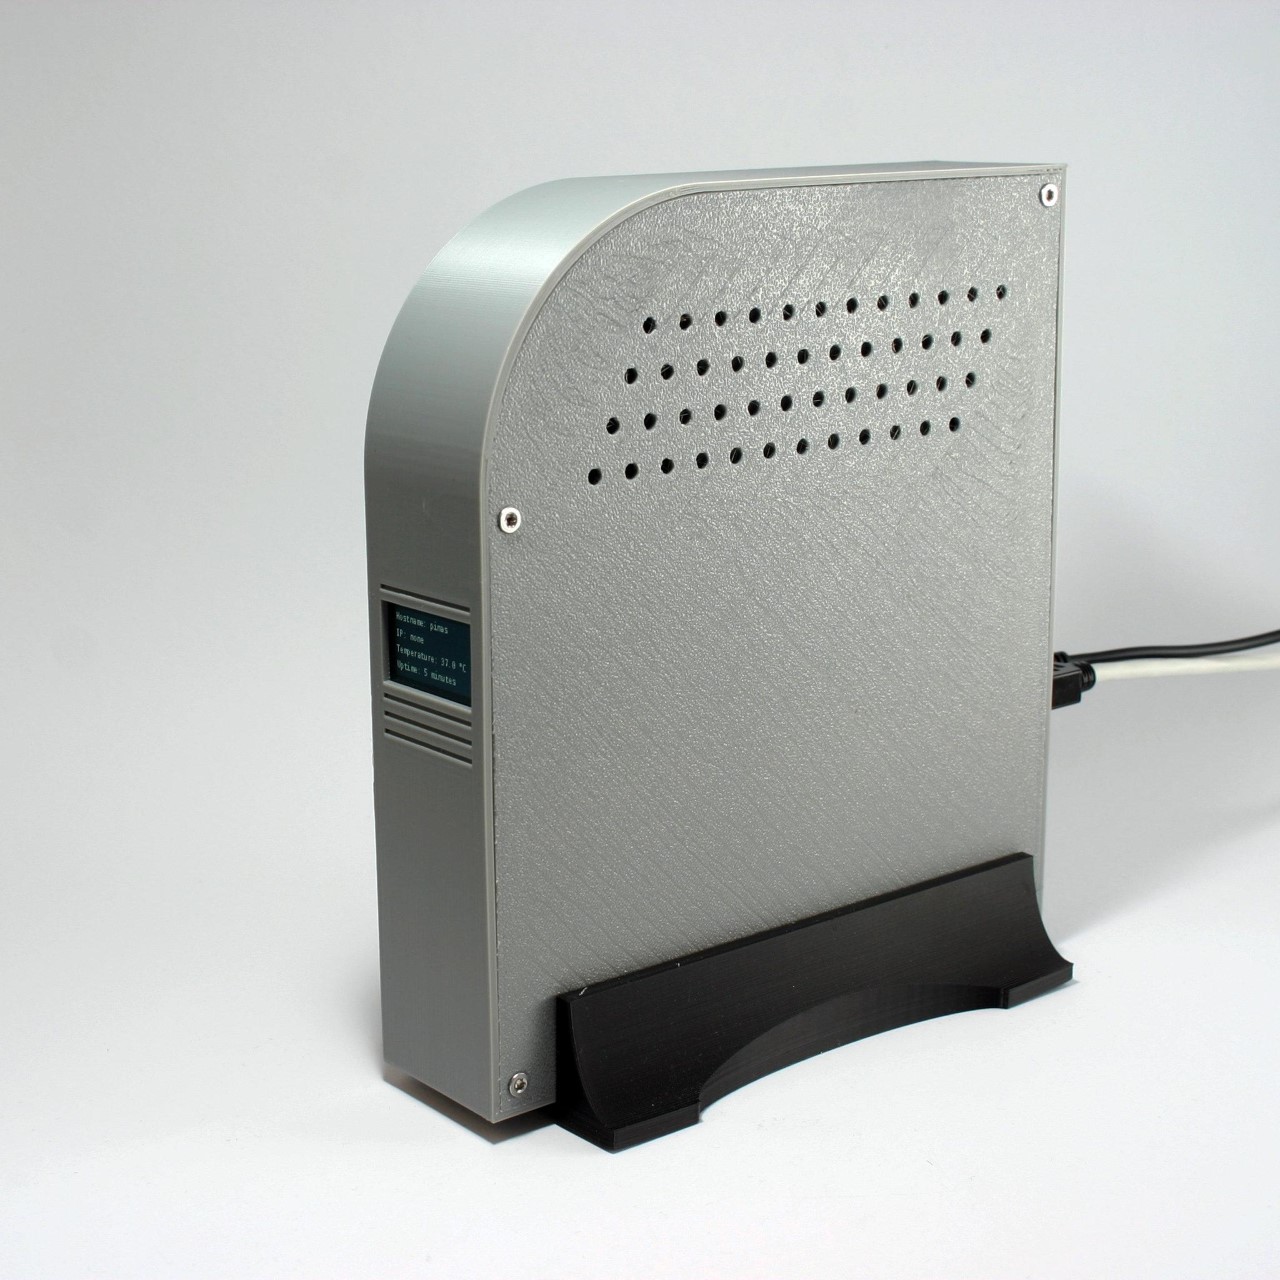
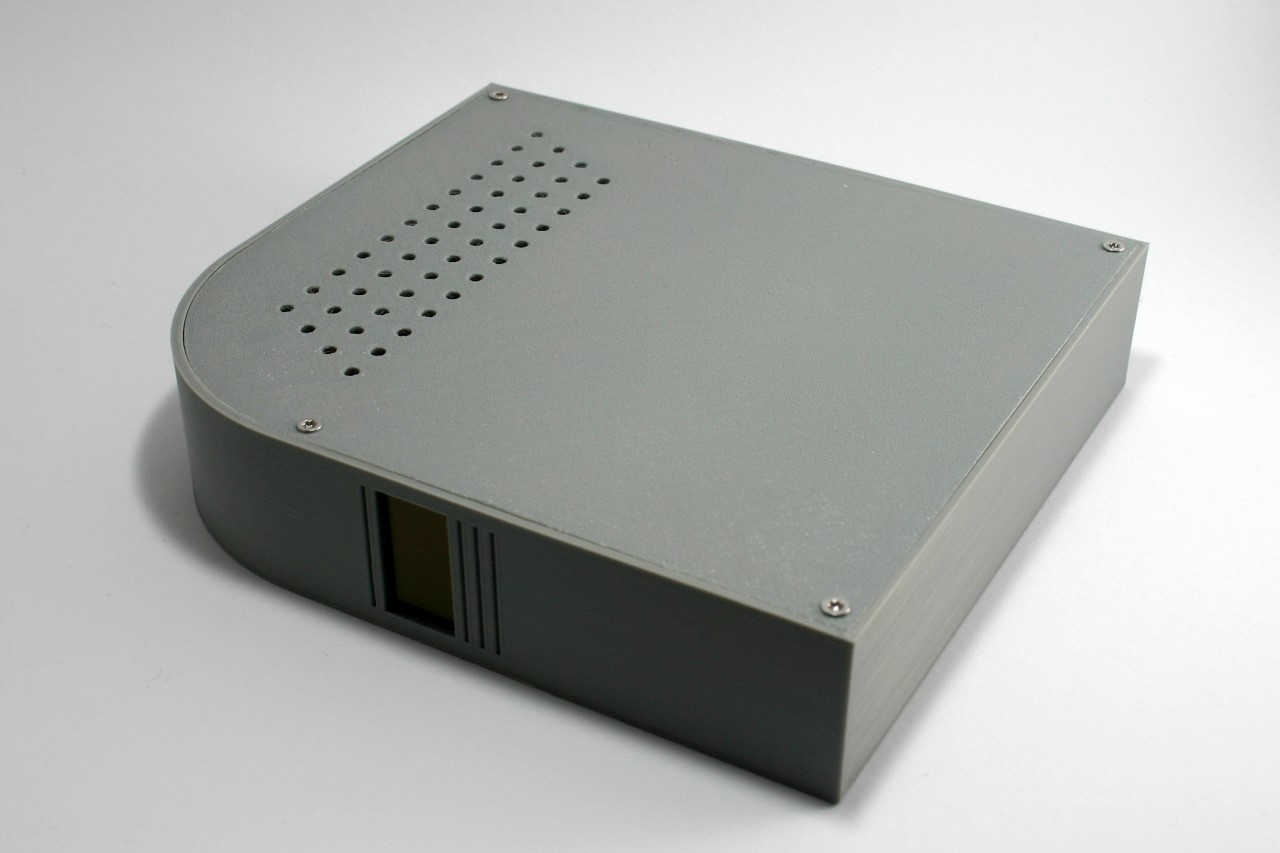
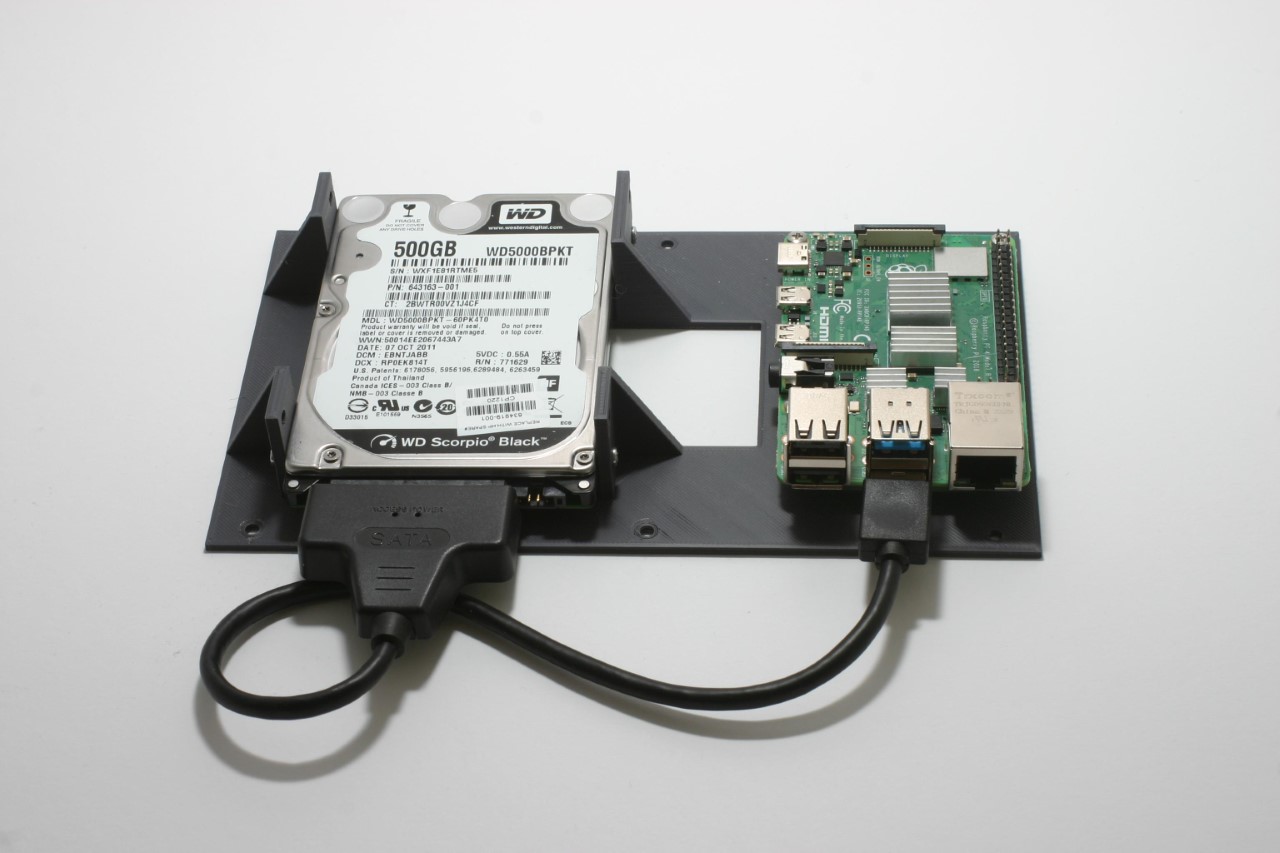
Bernhardt’s NAS runs on a Pi4 module, connected to an SSD. The entire enclosure’s printed out of plastic, with metal inserts to screw the NAS together. Instead of simple status LEDs, Bernhardt even put a functional screen on the front that displays messages and the time of day when sitting idle.

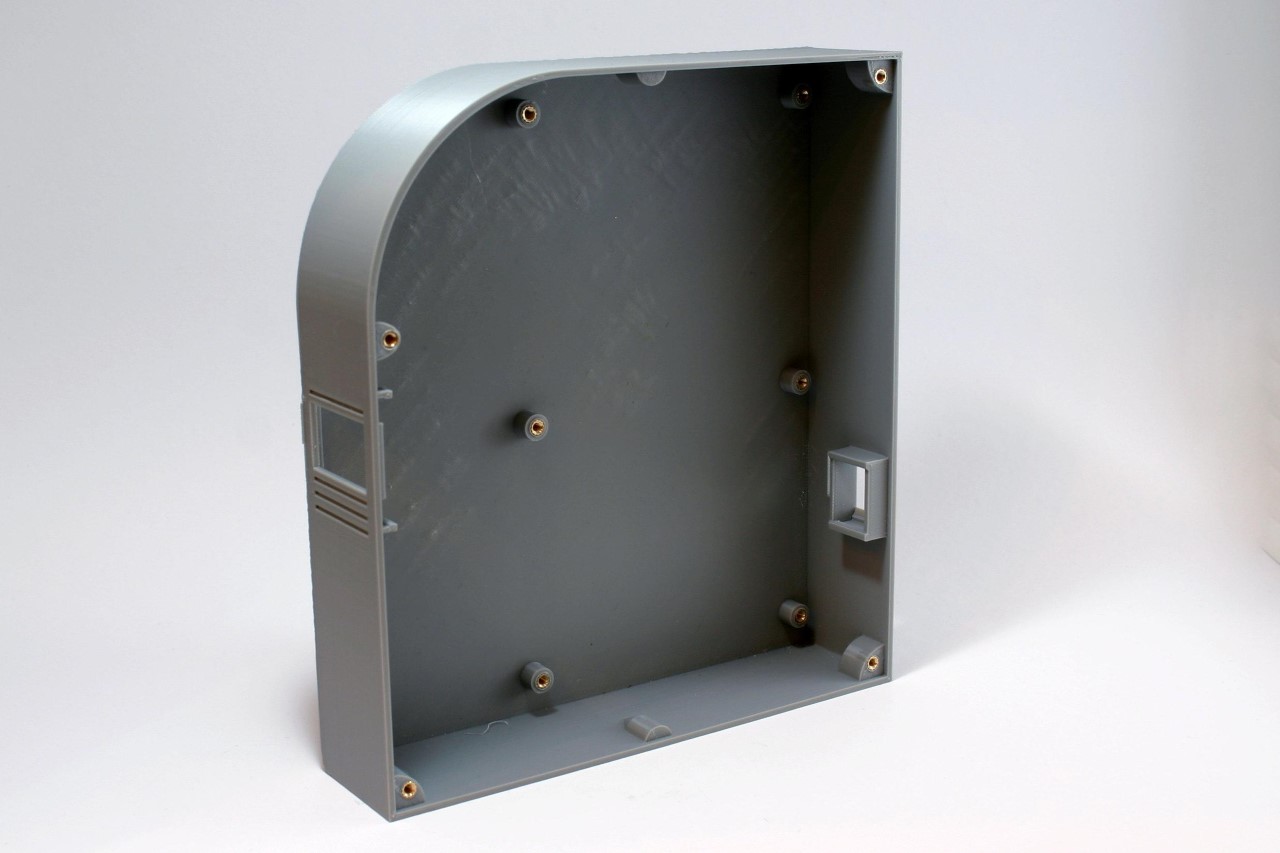
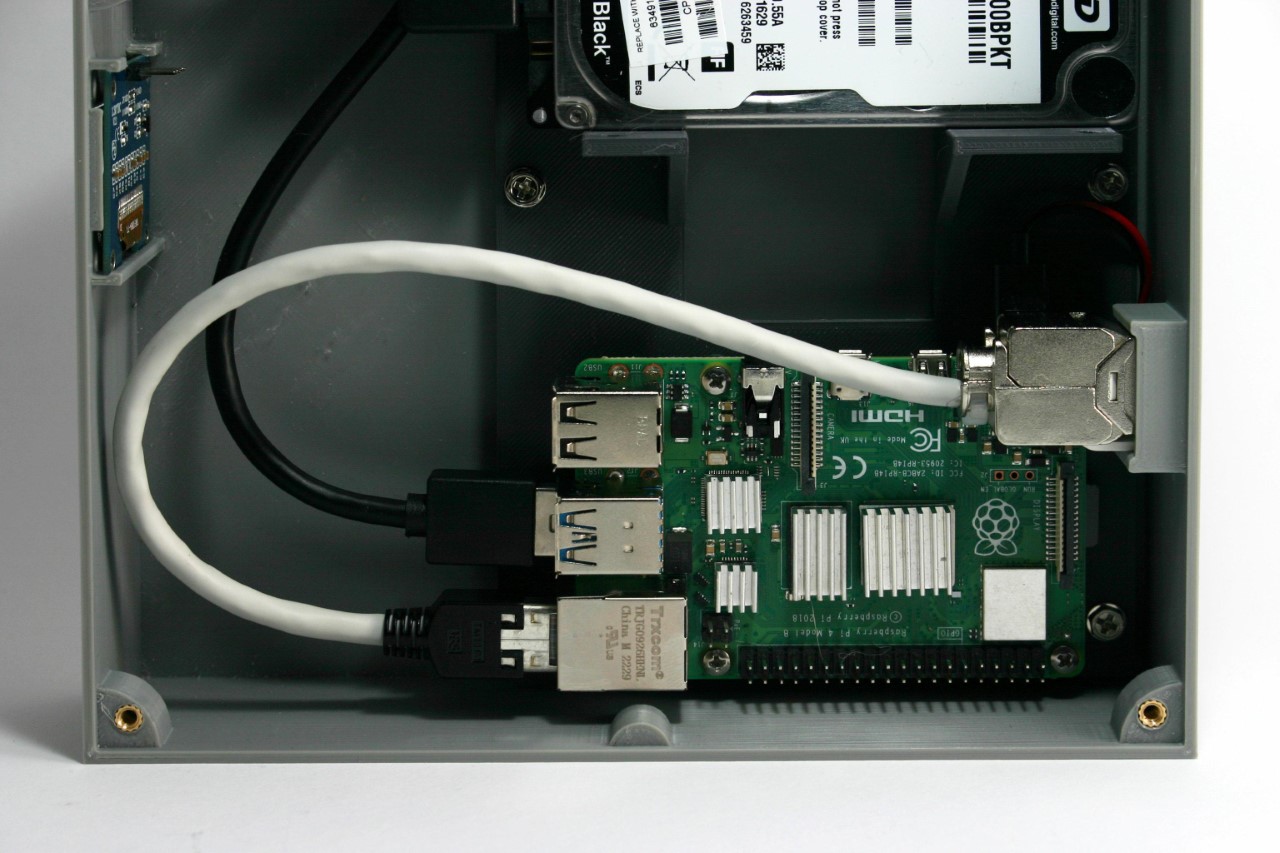
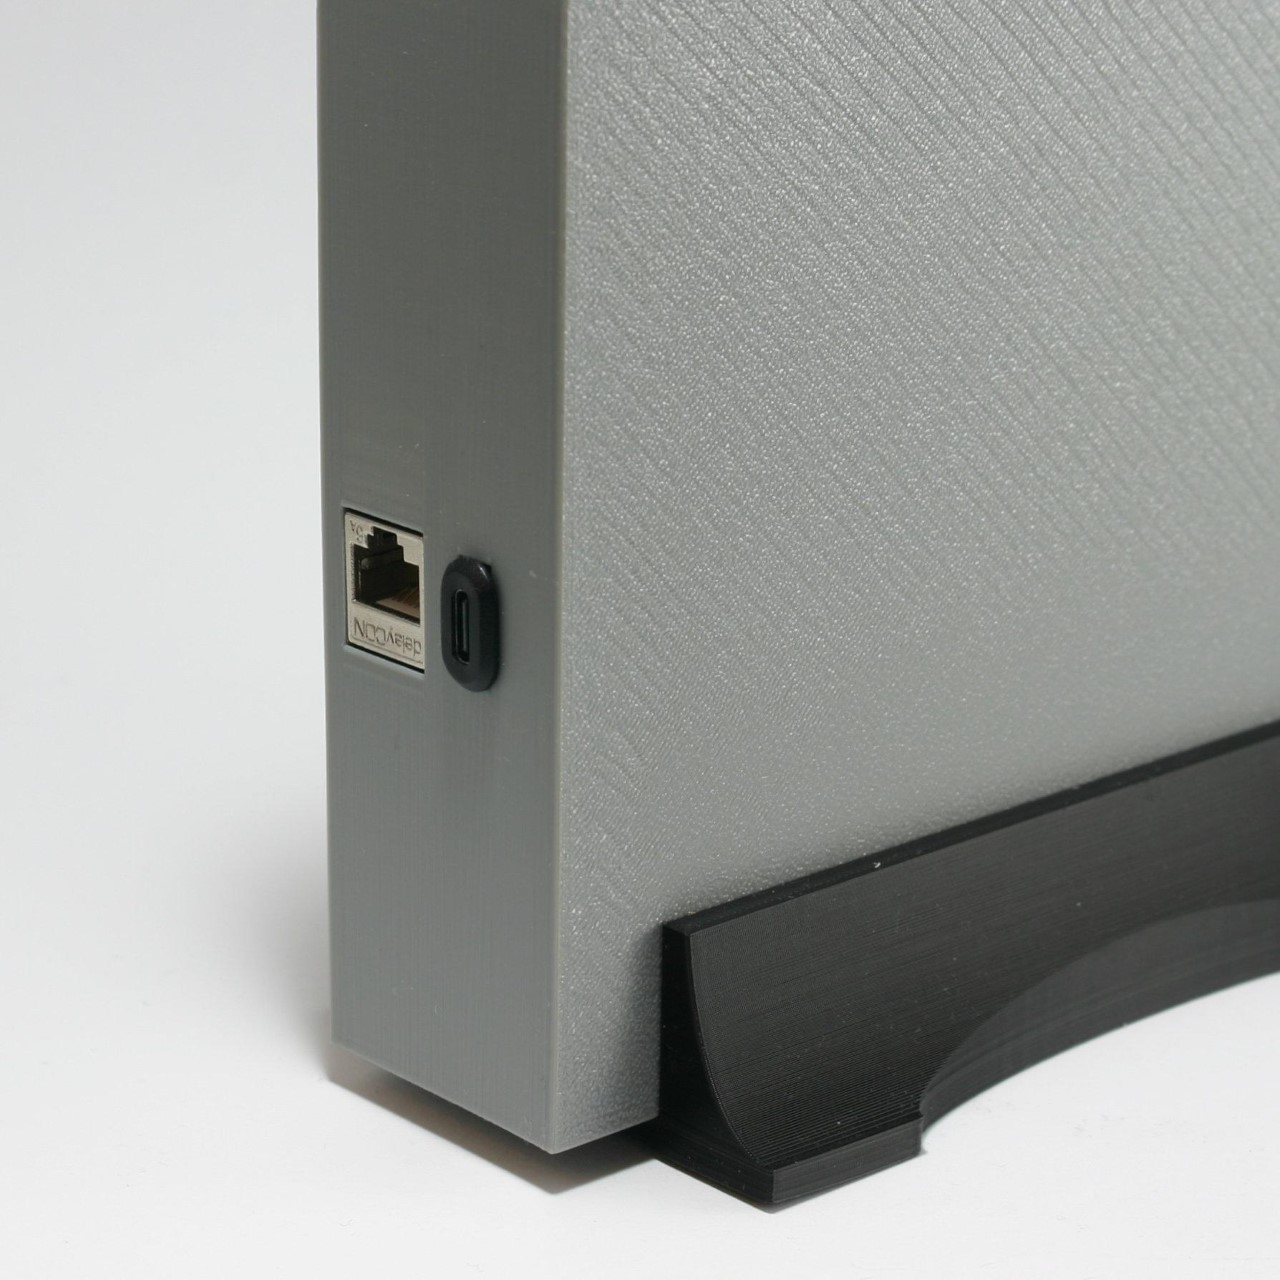
One of the primary considerations in this project is the design of the enclosure. The enclosure needed to meet several specifications: it should allow access to the power and network connectors from the rear while keeping the USB connectors inside for a clean aesthetic. The use of melt-in brass threaded inserts ensured durability, and the compact size made it printable on a standard 200 x 200 mm 3D printer bed. The design avoids the common 90-degree offset for connectors typical in Raspberry Pi cases, streamlining cable management. Moreover, the enclosure does not require active cooling, reducing noise and making it suitable for SSDs.

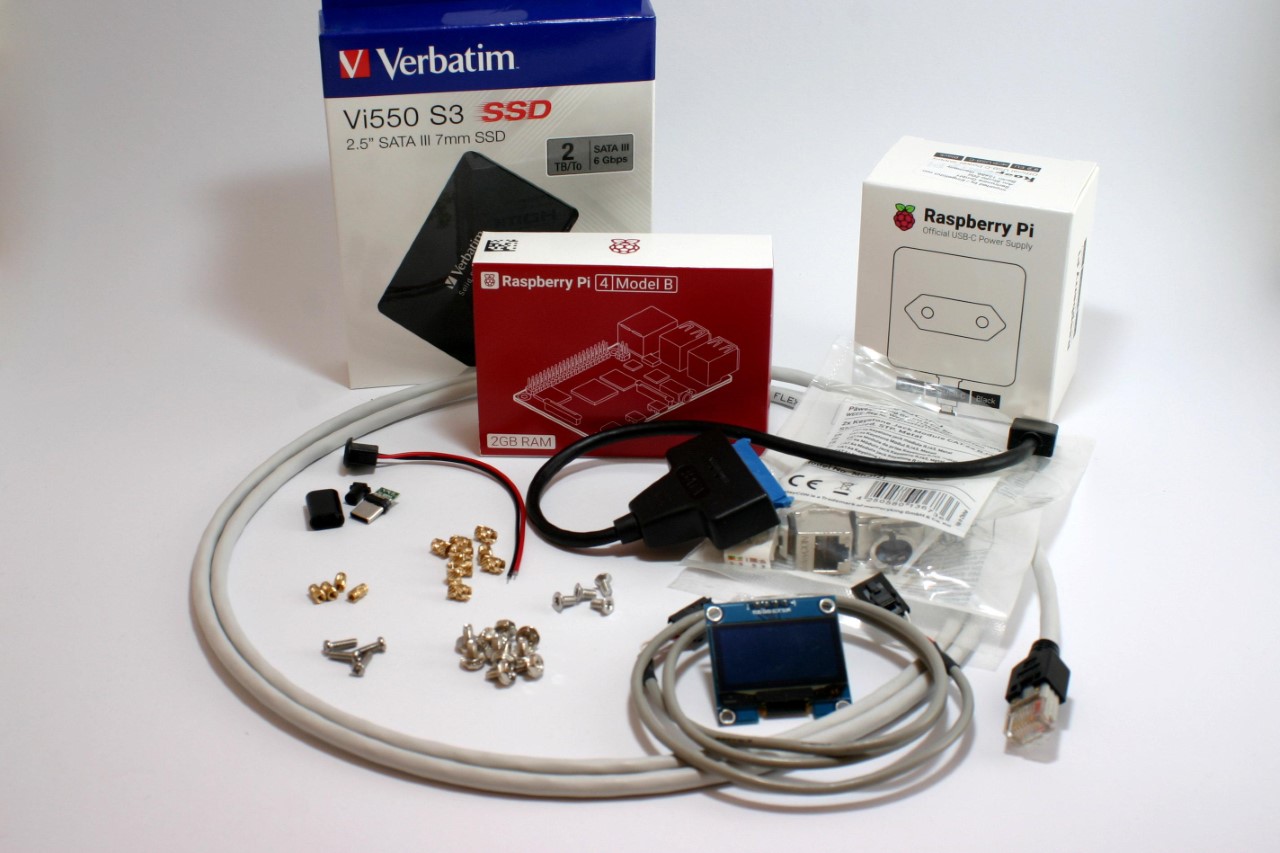
Here are the materials and components used in the entire build:
Devices for computing and storage

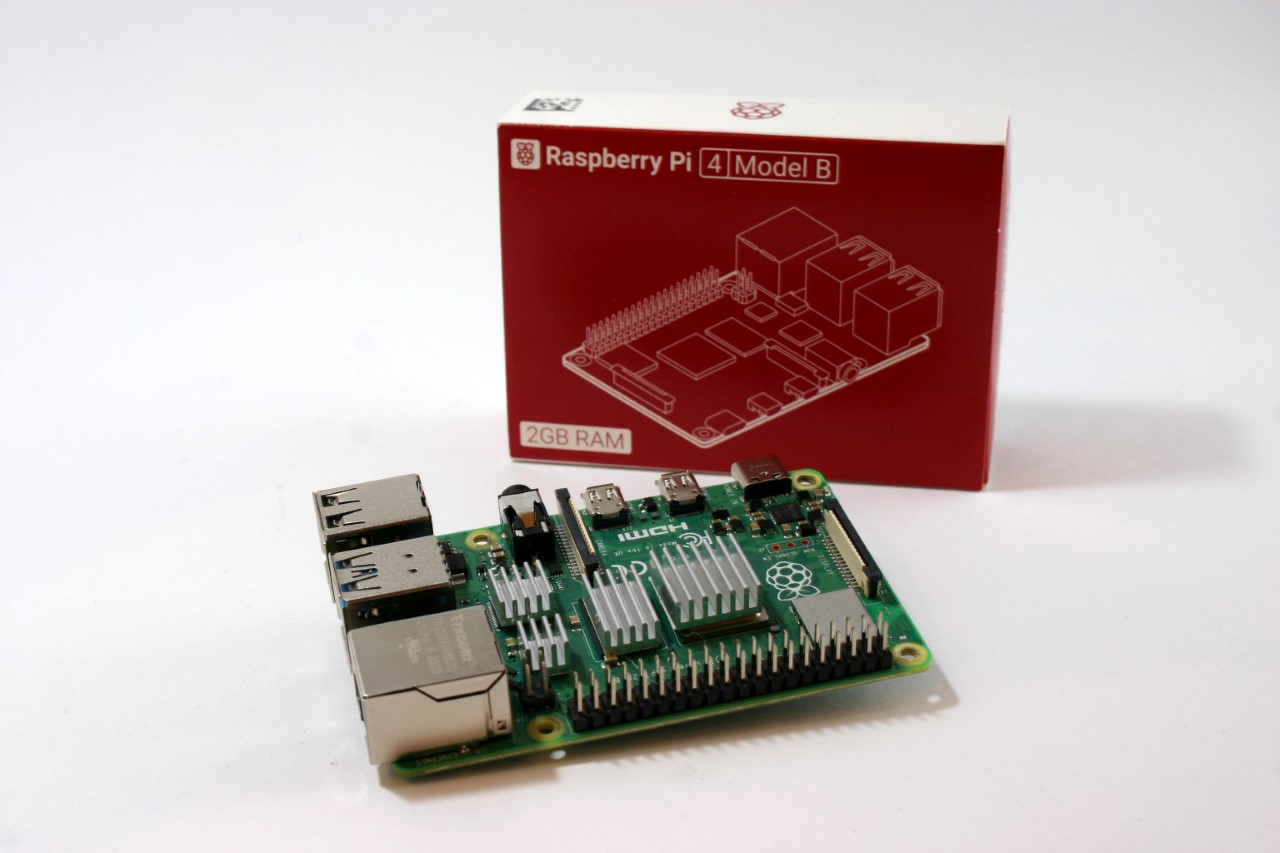
  • Raspberry Pi 4 or 5 with power supply, 2GB RAM is sufficient
  • 32 GB micro SD card, SanDisk Extreme PRO recommended
  • One or two 2.5″ SATA hard disk drives, SSD recommended
  • One or two USB 3.0 to SATA adapter(s), Sabrent adapter(s) recommended

Software

  • Raspberry Pi Operating System Image (Pi OS Lite, 64-bit no desktop)
  • NAS Software for Raspberry Pi OS, openmediavault recommended

Component parts

  • 10 x M3 brass threaded inserts
  • 10 x M3x5 screws (4 more for the second hard disk drive)
  • 4 x M2.5 brass threaded inserts
  • 4 x M2,5×6 screws
  • 4 x M3x6 countersunk head screws
  • 1 x Keystone module RJ45 Cat 6
  • 1 x RJ45 Cat 6 patch cable (length or color doesn’t matter)
  • 1 x USB type C male connector plug to solder
  • 1 x USB type C female connector jack 2 pin with wire
  • 1 x SH1106 1.3″ OLED module I2C 128X64 4 pin
  • 1 x 4-pin cable with Dupont female connectors, either self-made or ready-made
  • Some PLA filament for your printer with the colors you prefer.

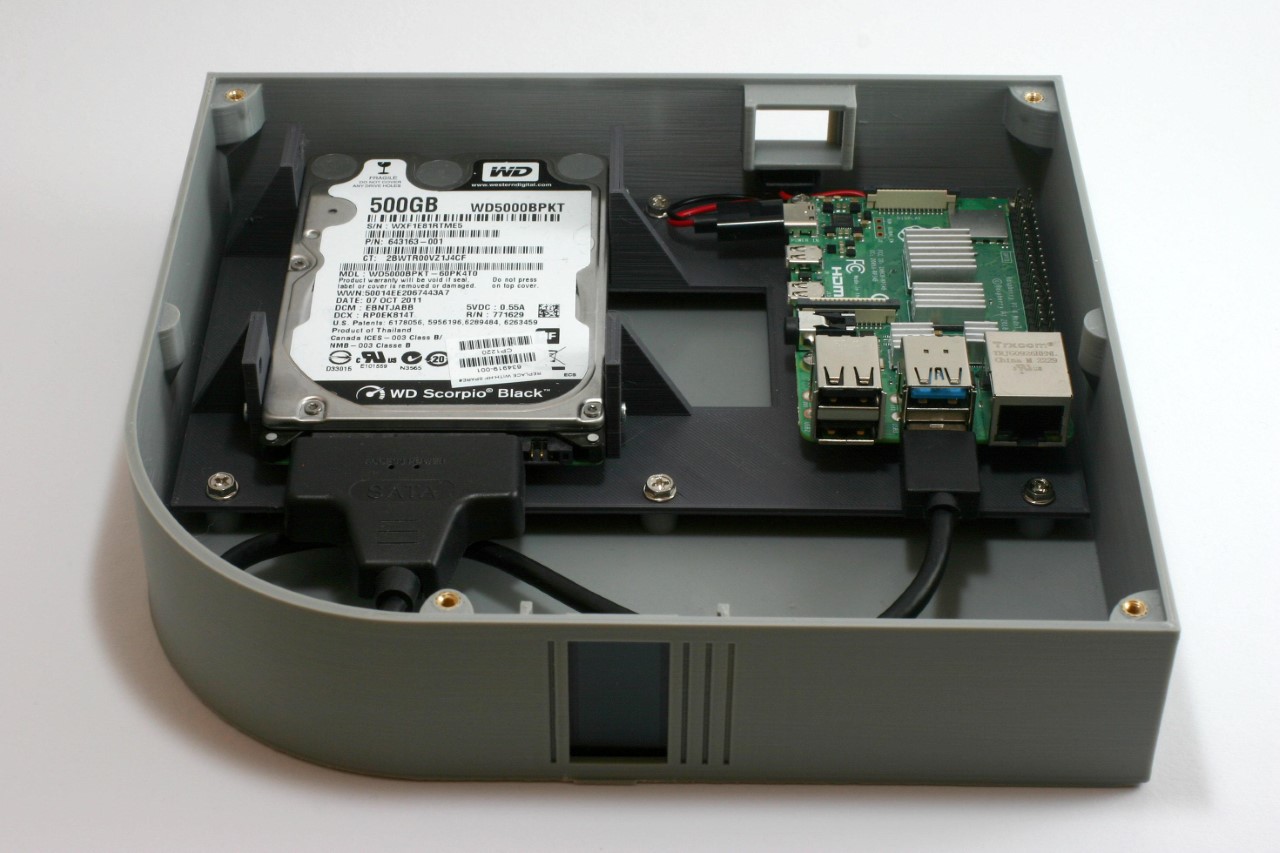
Printing the enclosure involved creating four main parts: the tray, device rack, side lid, and an optional stand. The tray required support structures for the connector openings and display window, which can be generated using slicing software. The rack holds the Raspberry Pi and hard drives, ensuring that the components are securely mounted. The assembly of the rack with the Raspberry Pi and hard drives necessitated precision, particularly when melting the brass threaded inserts using a soldering iron.

The next phase involved setting up the Raspberry Pi OS and configuring the network. Using the Raspberry Pi Imager, Bernhardt installed Raspberry Pi OS Lite (64-bit) onto a micro SD card. Essential settings such as hostname, username, password, and SSH enablement were configured during this process. Assigning a static IP address to the NAS ensured consistent network access, either through the Raspberry Pi OS, openmediavault, or a DHCP server, with a provision for regular patches and security updates

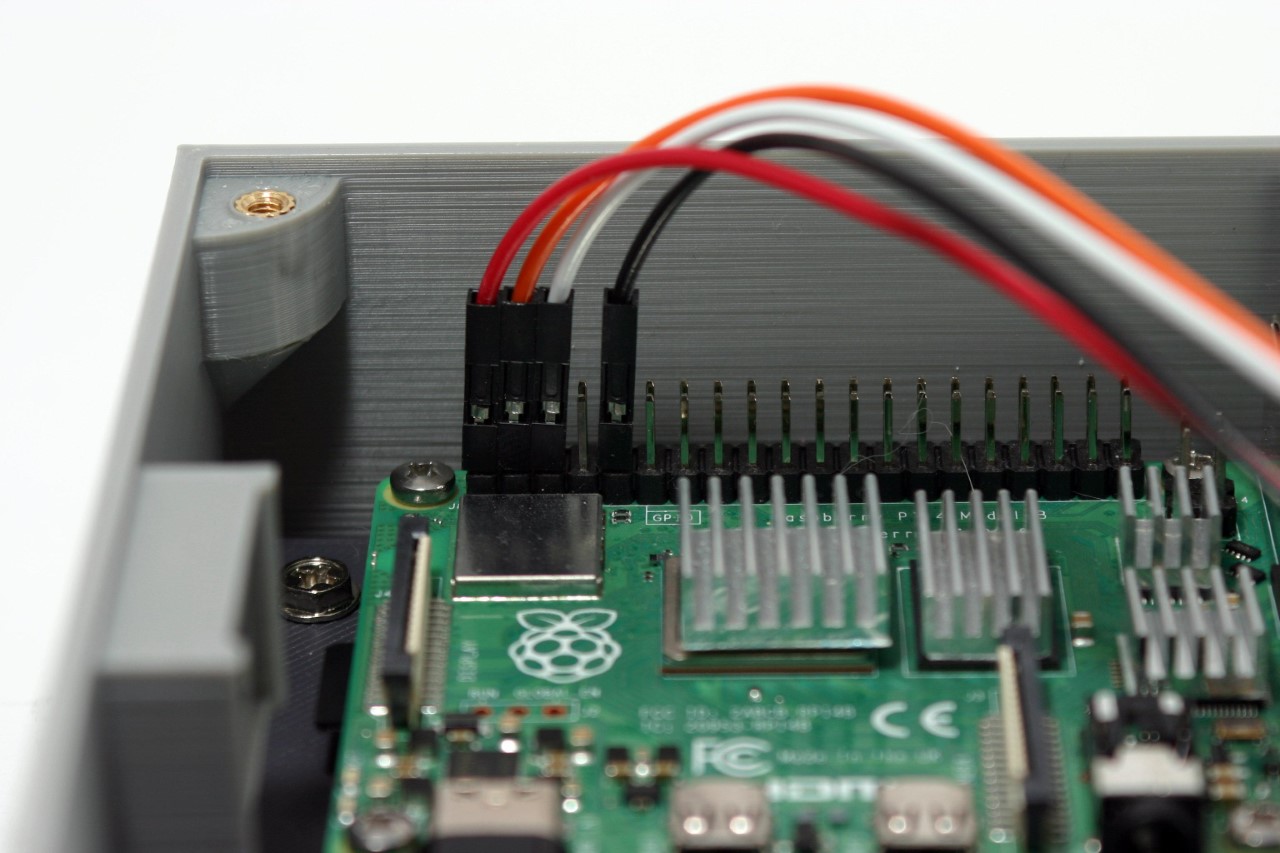
After the software setup, attention shifted back to hardware. The USB-C power connection and OLED display installation were critical steps. The USB-C socket was soldered inside the enclosure due to space constraints. The OLED display, used for status updates, was delicate and had to be installed without bending. Properly connecting the display to the GPIO pins of the Raspberry Pi was essential, ensuring to match the pin configurations correctly.

For the network connection, a keystone module simplified connectivity and future upgrades. By attaching a patch cable and keystone module inside the enclosure, the LAN port became easily accessible, accommodating both Raspberry Pi 4 and 5 models. This modular approach facilitates easy maintenance and upgrades, ensuring the longevity of the NAS setup.

Once the hardware assembly was complete, the OLED display software was installed. A Python script displays various system metrics on the OLED screen. The script runs at startup, continuously updating the display. Finally, the NAS software, openmediavault, was installed. This software provides a user-friendly web interface for managing the NAS, making it accessible and easy to configure. The installation was straightforward, and upon completion, the NAS was ready for use, with a commendable 500GB of storage.

Bernhardt’s Raspberry Pi NAS required a fair bit of technical expertise, but the process worked out MUCH cheaper than spending hundreds on a readymade NAS. If you’re looking for a nice summer project for yourself, you can build your own Raspberry Pi NAS too by following Bernhardt’s instructions here.

The post Build your own NAS Cloud Drive using a Raspberry Pi 4 and a 3D Printer first appeared on Yanko Design.

This $500 device lets you easily build your own Cloud Server instead of paying Google, Microsoft, or Amazon

Back up your systems, store all your photos, run AI models, host websites, or even have your own free streaming service, the $500 ZimaCube gives you your personal (and secure) cloud server without those pesky monthly subscription fees.

Looking almost like a beefy CPU that sits on your desk, ZimaCube is a NAS (network-attached storage) device that brings cloud computing to your tabletop. Rather than relying on Google, Amazon, Microsoft, or Apple to store all your data remotely (where your data can be accessed by companies, advertisers, governments, or worse… hackers), ZimaCube is your own personal cloud server that stores all your data in the secure confines of your home or office, but still allows you to access it anywhere on the go. Powered by a 10-core 12th-gen Intel processor, the ZimaCube offers up to 64 GB of RAM and has 6 whopping HDD bays for storing up to 120 TB of data. This basically gives you a powerful cloud server that can take backups of all your devices, host websites, run your own personal streaming service using locally downloaded files (goodbye Netflix), or better still, run your own personal AI model or GPT by hooking up an external GPU. In a world plagued by governments snooping on private citizens, and by companies looking to make a quick buck by either charging you monthly fees to store your data or by selling them to advertisers, ZimaCube lets you take back ownership of your private information, whether it’s photos on your smartphone or all the work files on your laptop/desktop.

Designer: IceWhale Technology

Click Here to Buy Now: $499 $699 ($200 off). Hurry, only 717/1000 left! Raised over $1 million.

At its core, the ZimaCube offers a massive storage capacity of up to 164 terabytes, with a unique 6+1 bay design accommodating a mix of six hard disk drives (HDDs) and four solid-state drives (SSDs). This blend ensures ample storage space for large files and speedy access to frequently used data, striking a balance between vast storage and fast performance. This makes it ideal for storing everything from important documents to extensive collections of digital assets like photos and videos, all securely in one place and accessible from anywhere.

ZimaCube provides a centralized hub of up to 164 TB for storing and cataloging all your project files, media assets, and documents. Its unique 6+1 bay design provides extra flexibility by offering HDD, SSHD, and SSD storage options.

Aside from storing backups of your selfies and videos (after all, the ZimaCube is capable of so much more), you additionally have the option of storing work files and data dumps, and directly editing them over the cloud instead of needing to download them to your device. Powering the ZimaCube is a 12th Gen Intel Core i5 processor, ensuring efficient data management, particularly for tasks requiring substantial computing power like video editing. This is complemented by cutting-edge connectivity options, including Thunderbolt 4 and 2.5GbE networking ports, facilitating rapid data transfer and smooth workflow management. For professionals relying on demanding applications, the ZimaCube’s extensive storage capacity, robust processor, and advanced connectivity make it perfect for content creators and multimedia experts who require a reliable storage solution that can keep pace with their workload.

Files stored on the ZimaCube can be accessed through a multitude of ways, enabling storage, retrieval, sharing, and even collaboration. The ZimaOS provides a clean, intuitive way to manage your data, but it goes above and beyond by also being a one-stop management dashboard for your data stored on DropBox, Google Drive, etc. All your files find a home within the ZimaOS dashboard, so you don’t have to hunt across multiple accounts and devices to find files. The ‘ZSync’ feature synchronizes file versions across all devices (so any edits made to a file update everywhere), and automatic backups take the hassle out of remembering to manually backup all your data. Want to share data with team members, clients, and stakeholders? The ZimaCube’s PeerDrop feature allows you to share files with anyone through an encrypted gateway, bypassing the public cloud entirely. It also supports various tools like Nextcloud and Seafile, allowing you to share and collaborate on files with ease. You can create shared folders, set permissions, and even generate public links. This is a boon for remotely located teams and groups who need to work together on projects, regardless of their geographical locations.

Harness the desktop-class performance of NVIDIA® Quadro® and AMD Radeon™ Pro eGPUs for professional graphics output. With Thunderbolt 4, you can daisy chain up to six external RAID arrays together and get a jaw-dropping 1PB to your ZimaCube.

Going beyond just traditional data storage, you can even run your own private AI models directly on the ZimaCube. PCIe Gen 4 ports and Thunderbolt 4 connectivity allow you to hook up powerful external GPUs to host and run your own AI models like Stable Diffusion without splurging big bucks on a GPU farm or buying GPU credits online. Moreover, the folks behind the ZimaCube also boast the ability to privately run a GPT on your own data, allowing you to effectively ‘chat’ with your own documents to retrieve information, find files, and get an overview on lengthy run-downs without as much as opening them. The AI runs entirely locally and privately, with no data ever leaving your device.

All those technical capabilities sit in the ZimaCube’s black-box-esque design that’s crafted with a predominantly metal construction, providing robustness and efficient heat dissipation. It features a magnetic attachment system for the front-mounted panel and a durable design with multiple ventilation panels, crucial for maintaining optimal temperature​. On the inside, modules plug in with LEGO-like configurability. The ZimaCube lets you customize your own server, adding modules such as a WiFi module, additional interfaces, high-speed drives, and even RAID arrays. It’s not just the hardware that’s customizable – with software options like ZimaOS, TrueNAS, and unRAID, and a community-driven range of apps and plugins, you’ve got digital flexibility too.

The ZimaCube presents two distinct variants tailored to different user needs: the Standard and Pro models. The Standard version is powered by the Intel Alder Lake-N100 processor, a competent choice for general storage and computing needs. It’s like a reliable sedan, efficient for daily tasks. On the other hand, the Pro model shifts gears with the robust 12th Gen i5-1235U core processor, akin to a sports car in the processor world, offering enhanced performance and handling more demanding tasks with ease. Both models champion significant storage capacity and connectivity options, but the Pro model stands out with its higher RAM support and processing power, making it suitable for power users who need that extra bit of computational muscle. The ZimaCube Standard starts at an early-bird price of $499 (VAT-free), while the Pro is similarly discounted with a $900 price tag (the HDDs need to be purchased separately). It ships globally with a 19V 220W power adapter, universal plugs to fit a variety of international power sockets, and a 1-year warranty.

Click Here to Buy Now: $499 $699 ($200 off). Hurry, only 717/1000 left! Raised over $1 million.

The post This $500 device lets you easily build your own Cloud Server instead of paying Google, Microsoft, or Amazon first appeared on Yanko Design.