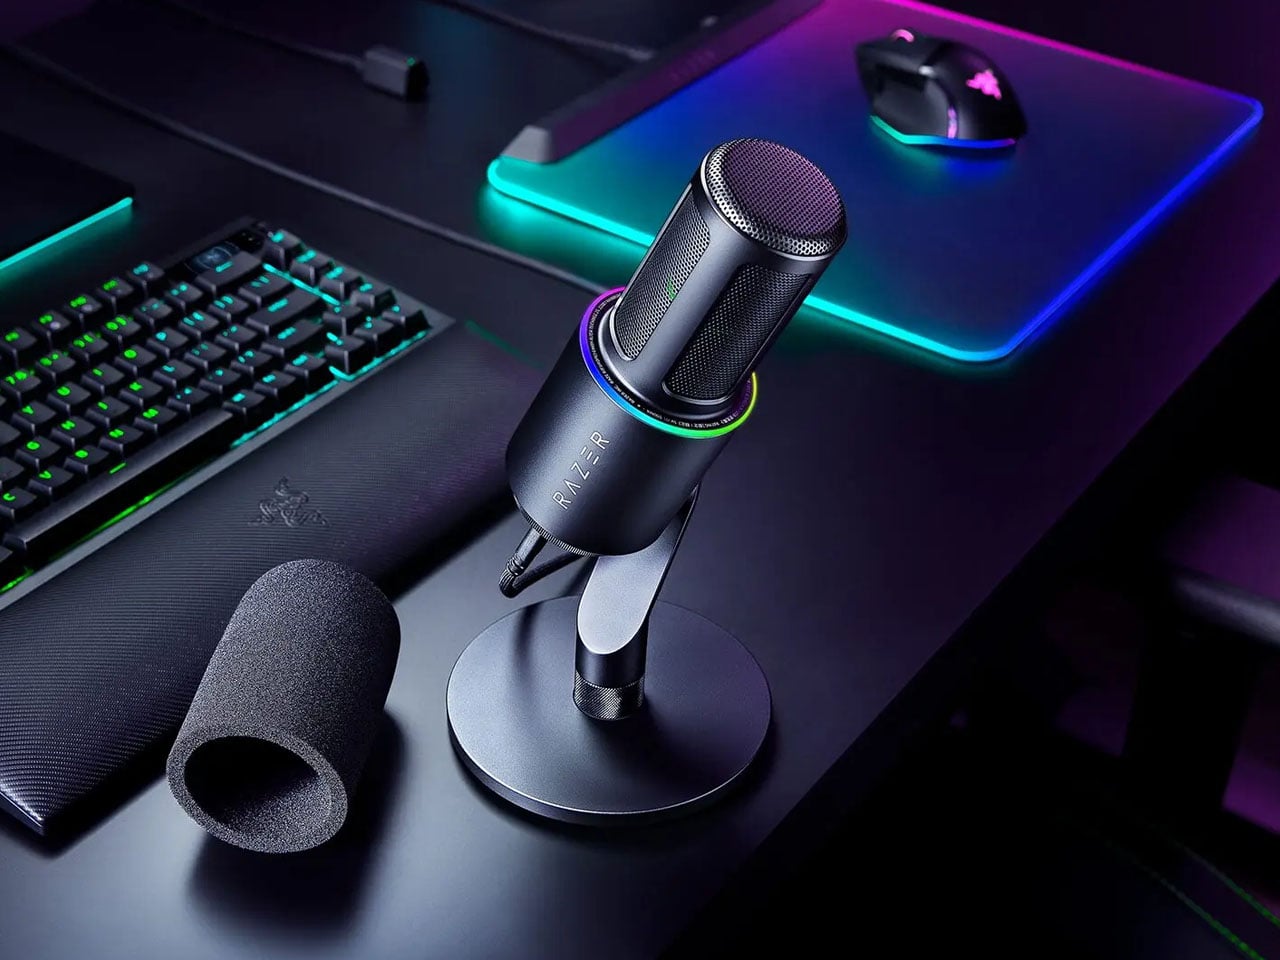
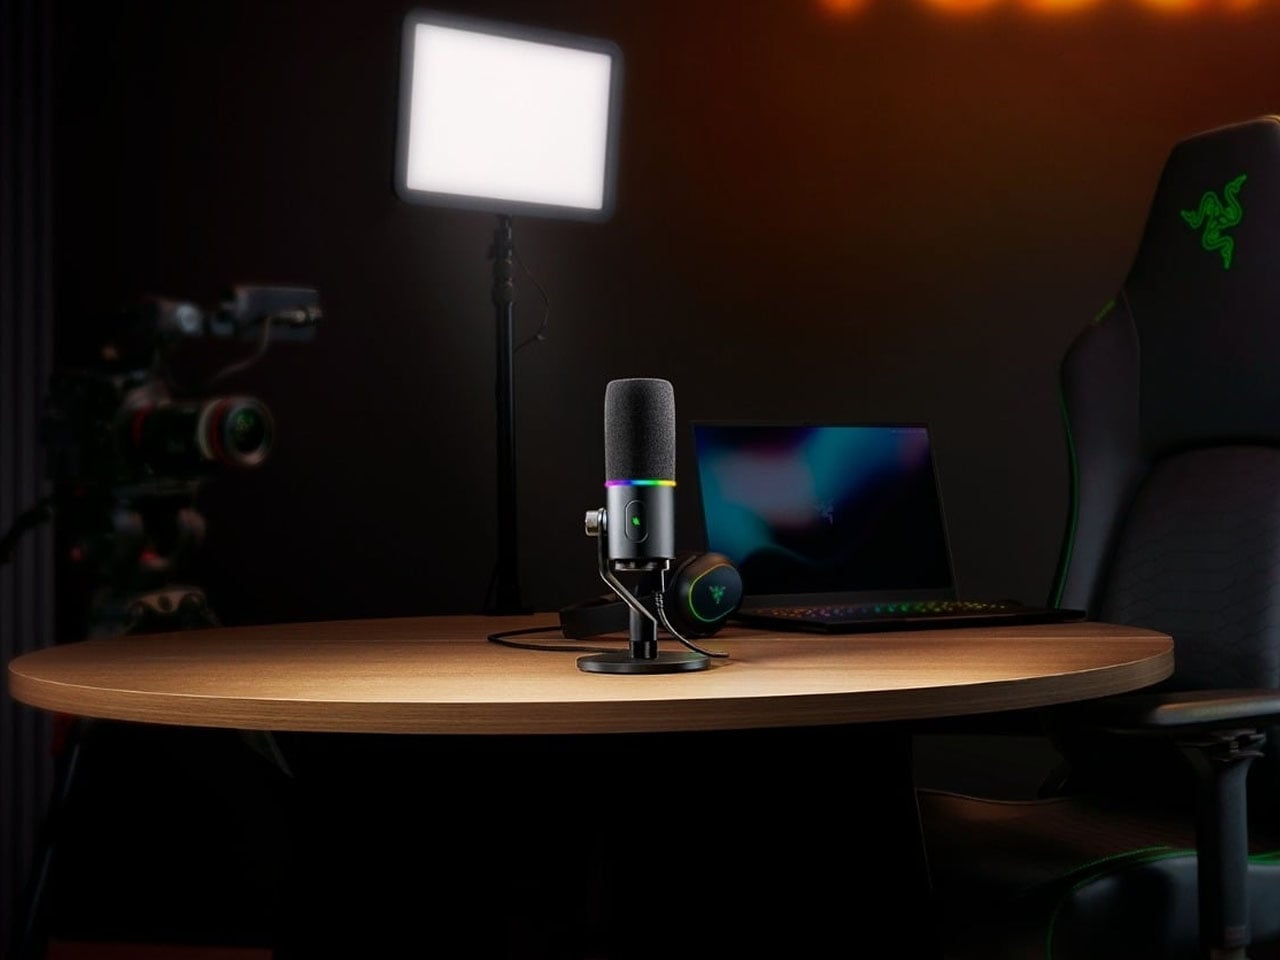
As a newbie, how many times have you shunned the idea of owning a starter-level microphone just because of the complexities involved? Always wishing to have a simpler connecting protocol for ease of use. Razer wants to address this problem with the new Seiren V3 Pro microphone targeted towards streamers, creators, gamers, and anyone who wants a pro-level mic on the fly.
The microphone comes with support for USB-C, which simplifies things beyond comprehension for amateur content creators. Topping the cake is the XLR connectivity mode, which lets advanced users use the microphone with their existing equipment. Razer has demonstrated its eagerness to address the burning issues of the gaming and content creation communities, and this new release is no different.
Staying firmly in the XLR microphone space, even though it is targeted at amateur users, the microphone is ultra-utilitarian with its versatile hybrid connectivity options. The device aids users in beginning their content creation journey with a basic USB-C setup and then eventually upgrading to pro-level equipment like audio mixers and interfaces without any barriers. Another perk of the latest Razer offering is the $250 price, which can be otherwise be another major hurdle if even a respectable high-grade piece of equipment has to be acquired at the start of your creative journey. As per Razer’s global head of its lifestyle division, Addie Tan, “With the Seiren V3 Pro, we wanted to give creators a single mic that grows with them.”
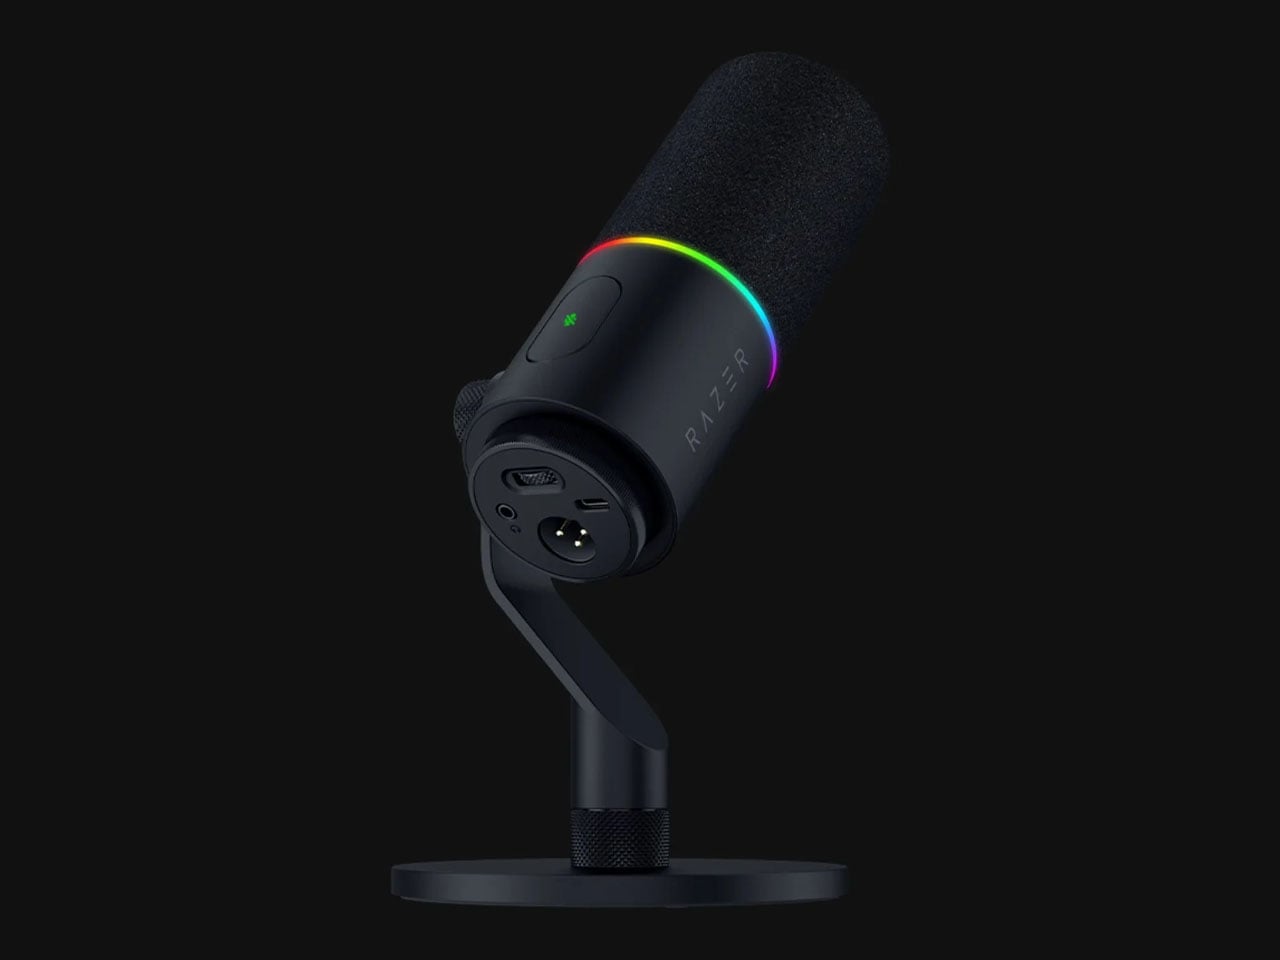
V3 Pro solves a very basic problem with pro mics having the XLR analog connector, like their previous version – they have to run via an audio mixer or interface before being routed to a computer. For that very reason newbies, choose basic level USB-C mics for their arsenal. Razer gets the best of both worlds with this release, and there’s more to it. Another pressing reason to buy the Seiren V3 Pro is the built-in DSP, which works with both modes to deliver great output. This is important because high-quality microphones often require a lot of fine-tuning to get the desired results.
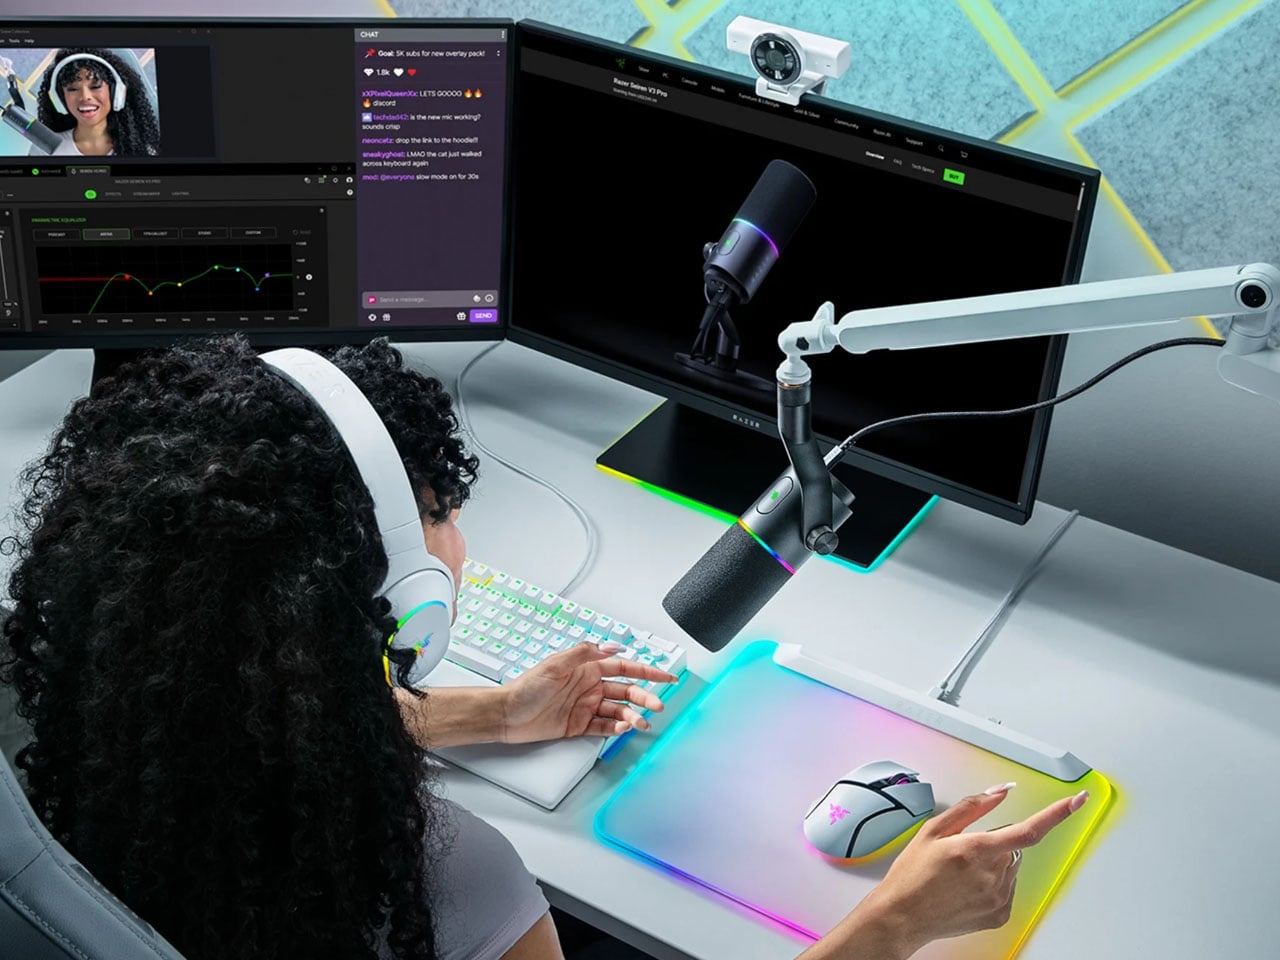
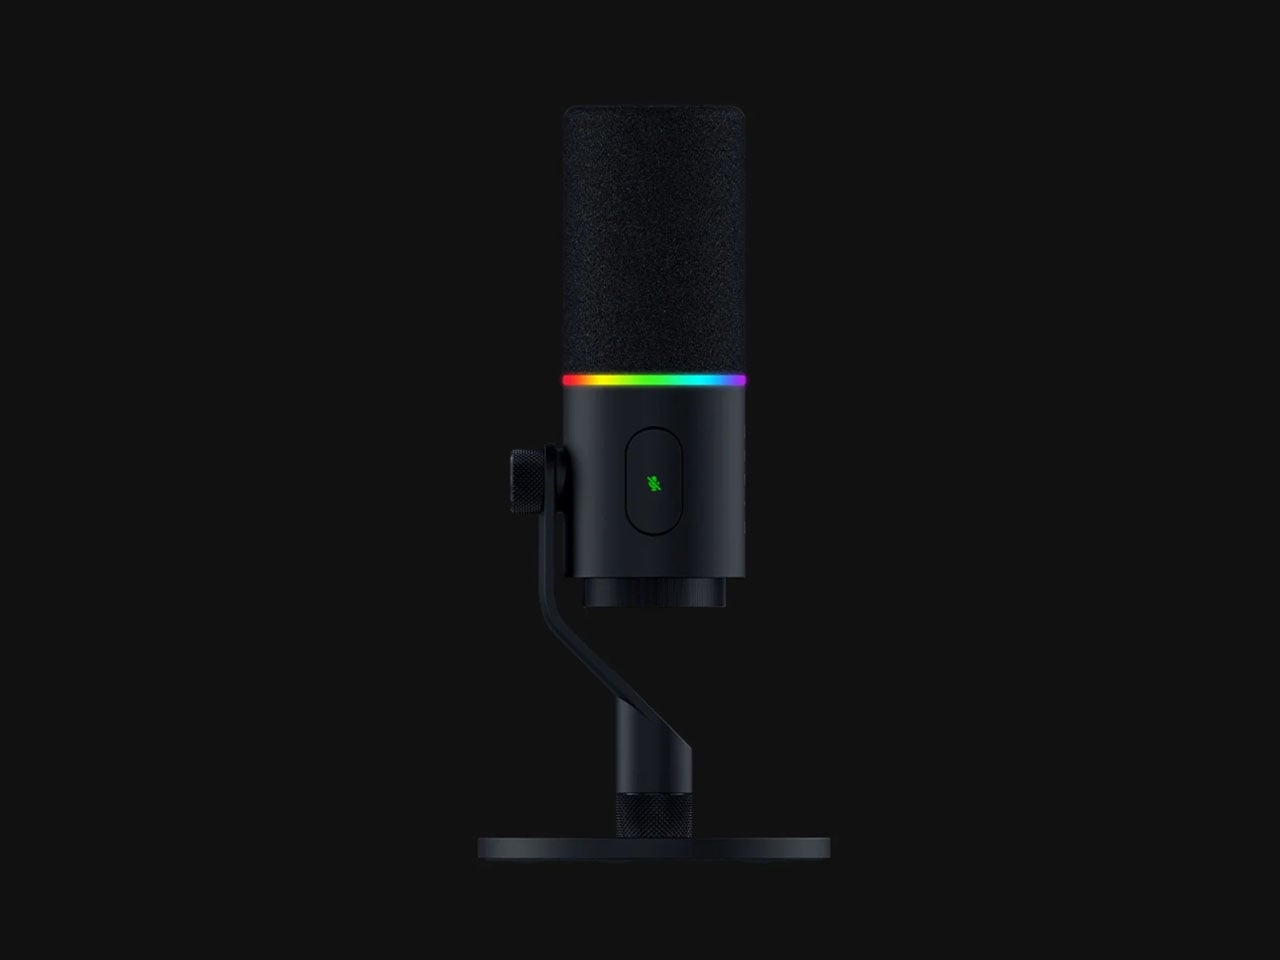
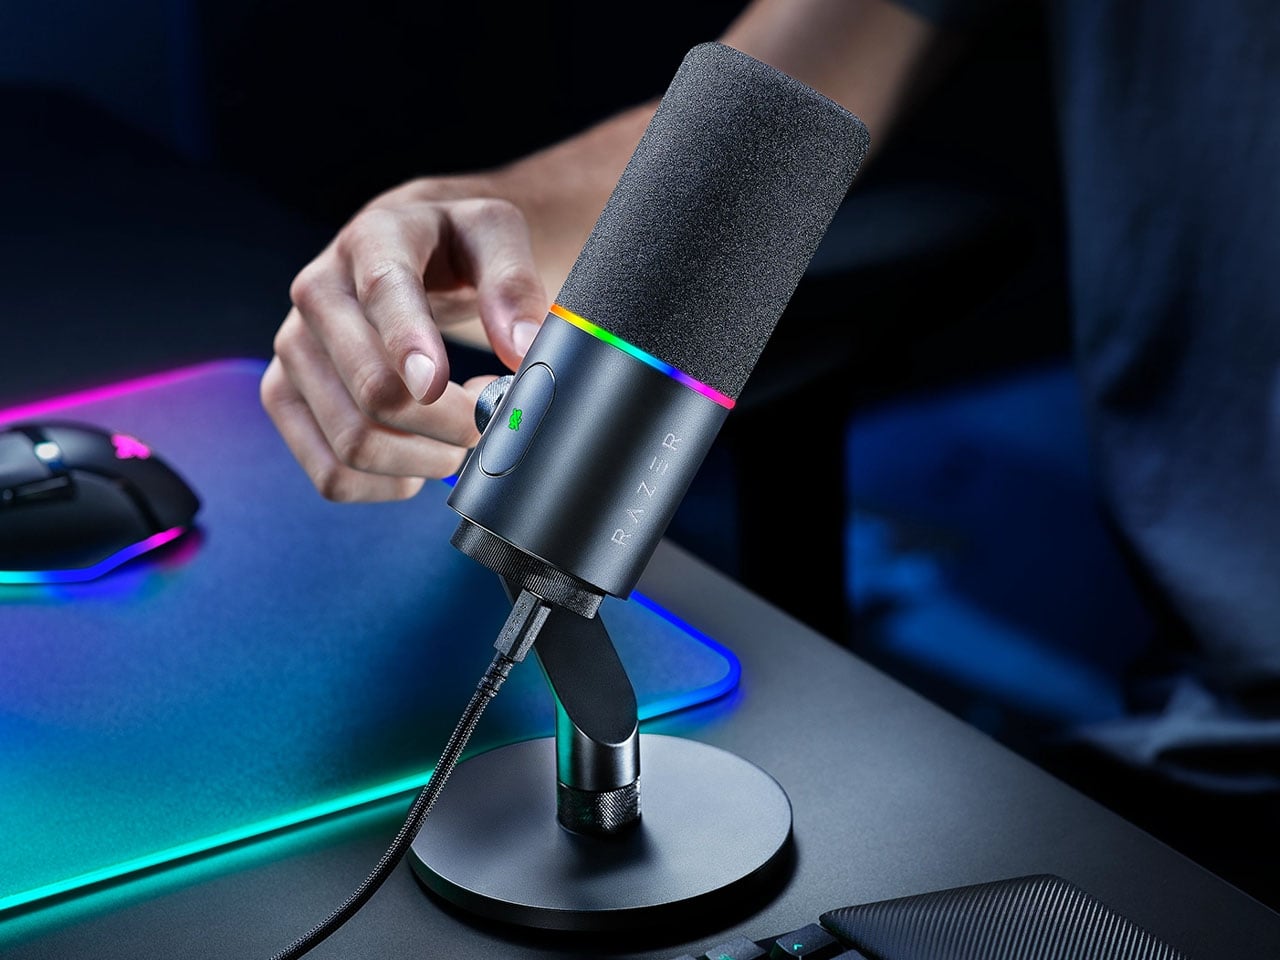
At the software level, the microphone has an AI noise remover and baked-in options that eliminate much of the tweaking needed. The device has a compressor, limiter and expander to make possible the smart tuning on the fly. At the hardware level, the mic has a pop filter and a built-in shock absorber for further clearing up the final output. The zinc unibody housing of the unit has a gain knob and mute button for ease of use. For the tech-savvy, this microphone has a 30mm dynamic range capsule and a cardioid polar pattern. The frequency range covered on this one is from 50Hz to 16kHz. The 32-bit float recording mode is also useful as it prevents clipping in audio, especially during high peak gains or sudden podcast reactions.
Content creators who look for minimalist gadgets without sacrificing functionality will love the small gain control at the bottom and the tap-to-mute sensor button, which comes in useful during live podcasts. The inclusion of a 3.5mm headphone jack lets the user hear the final output for performing any fine-tuning if required. To finish it off, the toned-down RGB lighting ring (compared to the predecessor) shows the real-time visual feedback about the gain, mute, and peak status. This can also be tweaked using the Razer Synapse app for complete control.
Audio setups for creators have long followed a predictable pattern: buy a microphone, download some software, spend an afternoon reading forums about signal chains, and still end up with a slightly imperfect result. Elgato spent five years watching that process play out across hundreds of thousands of real setups. Wave Next is what they built after deciding most of it didn’t have to be that complicated.
The centerpiece is a custom chip called Wave FX Processor, developed in partnership with Lewitt Audio. It shifts critical audio processing directly onto the hardware, so the microphone signal arrives in every application already polished, without virtual audio devices or routing workarounds. Clipguard 2.0 handles distortion prevention through multiple analog-to-digital converters and 32-bit floating-point internal processing, while five onboard DSP effects shape the voice in real time with zero latency and no CPU load.
VST Insert technology creates a dedicated low-latency path between the hardware and the computer so that studio-grade software effects can be injected directly back into the hardware signal chain. The processed audio then flows as a single input into any application. A creator streaming, recording, and on a video call simultaneously doesn’t need to configure three separate signal paths to get consistent sound across all three outputs.
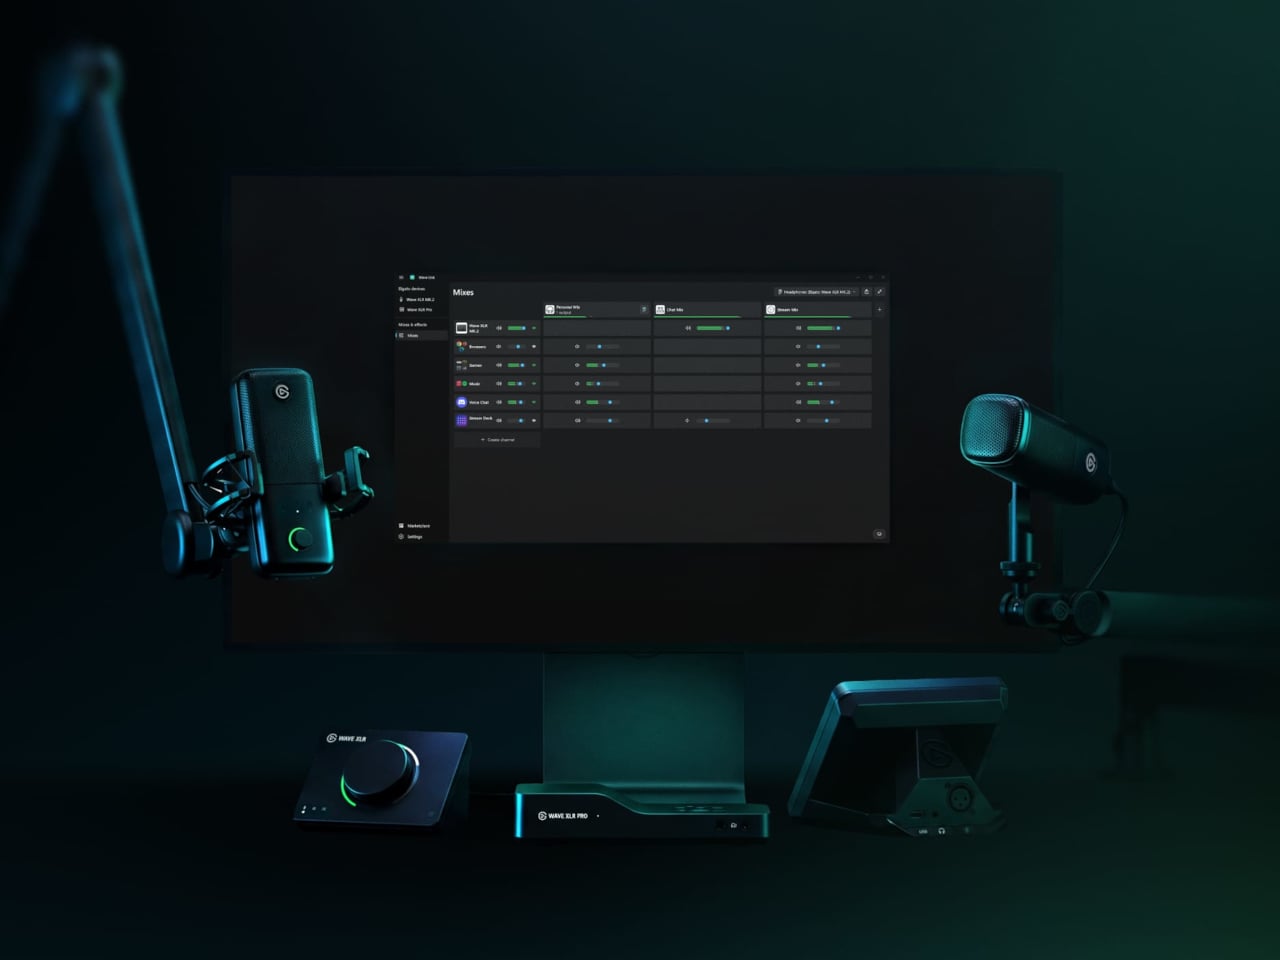
Wave:3 MK.2
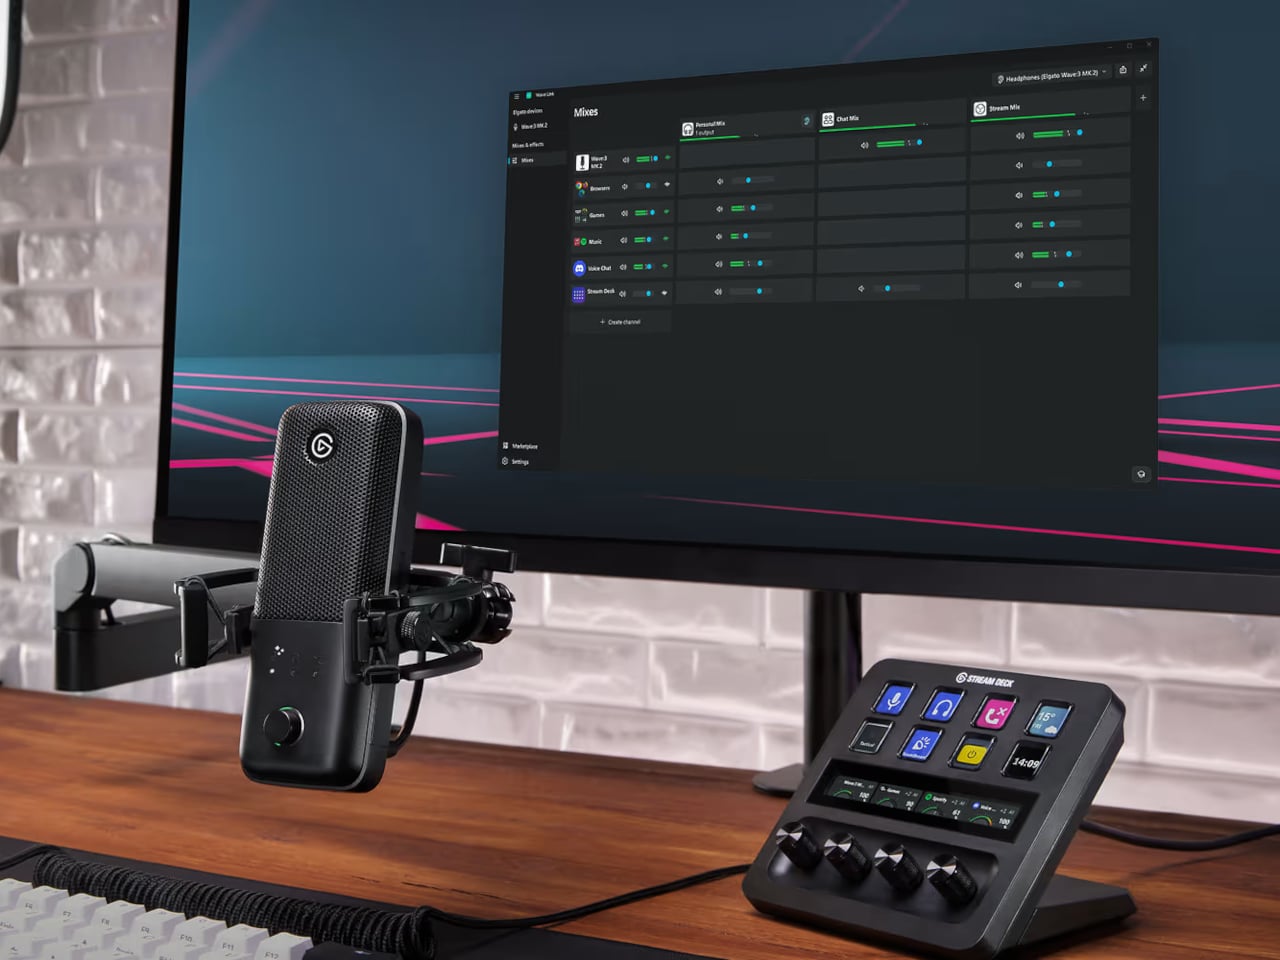
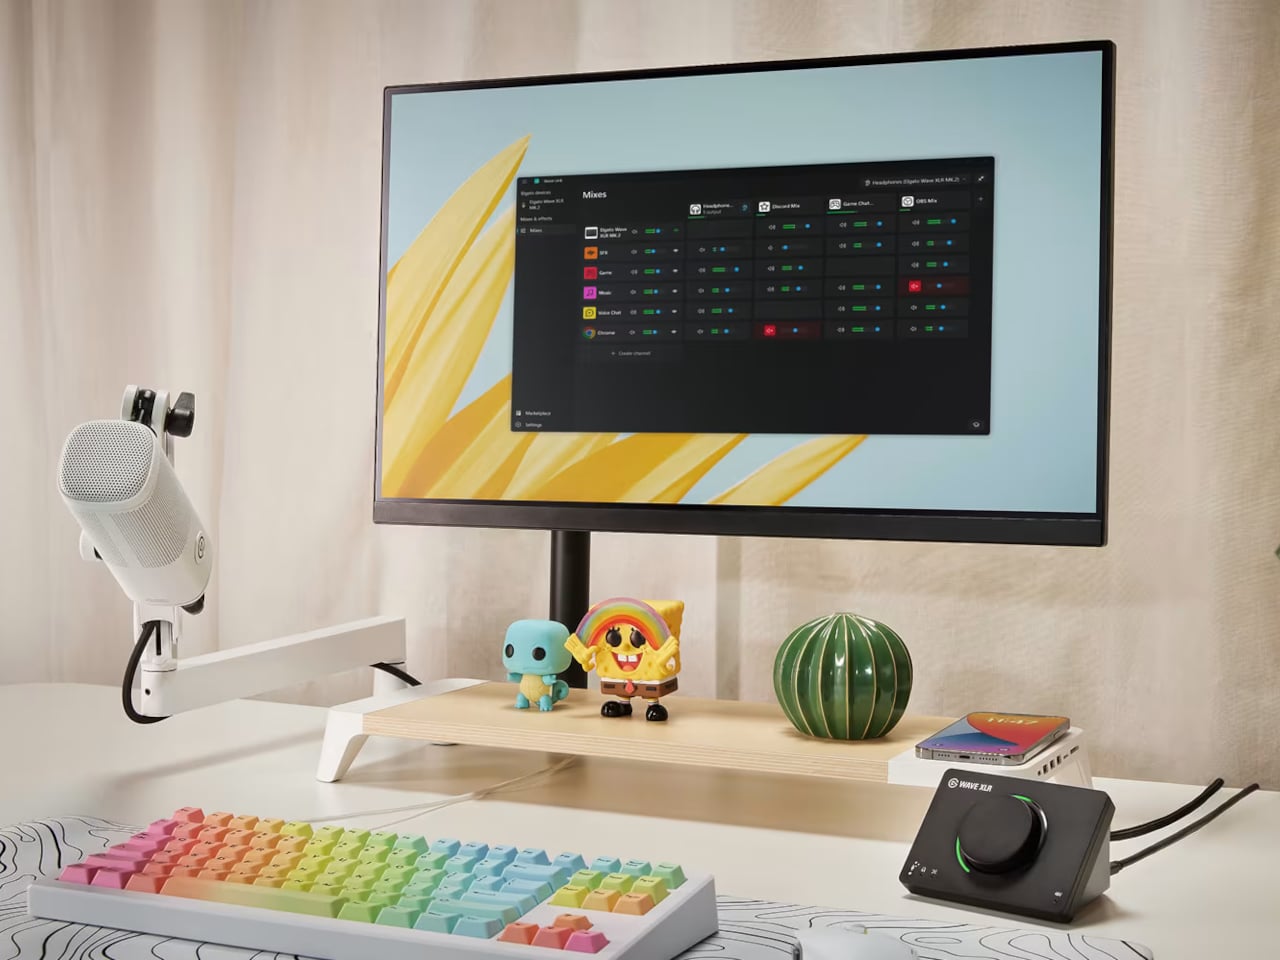
That software layer is Wave Link 3.0, overhauled completely and now free to download for Windows and macOS. It works with virtually any microphone or audio interface, not just Elgato hardware, though Wave devices unlock deeper features: guided setup, device control panels, and an Auto Gain Wizard. Up to five independent submixes let users route voice, music, game audio, and chat to separate outputs, each shaped individually through a horizontal routing table replacing traditional channel strips.
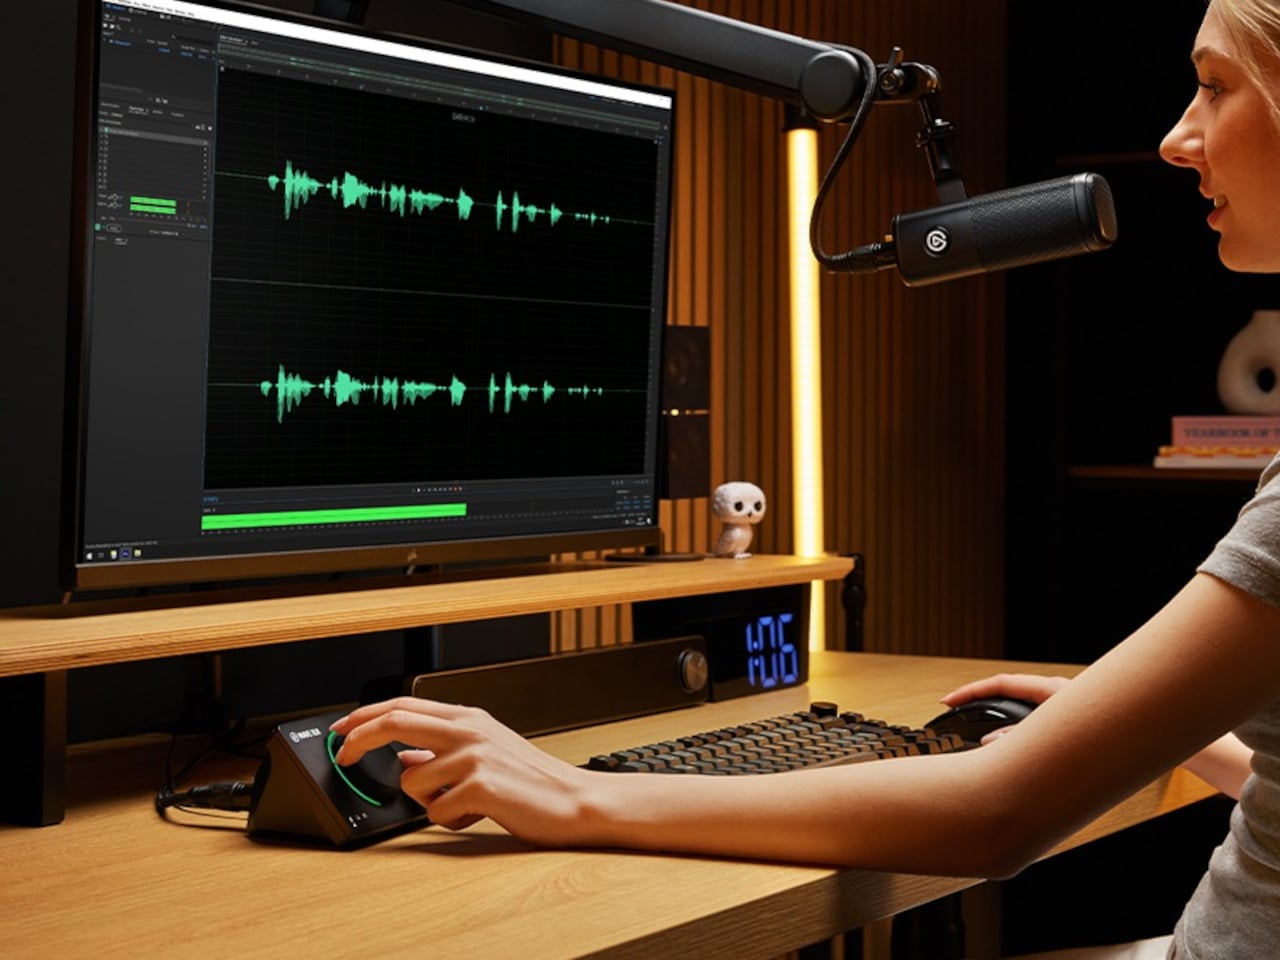
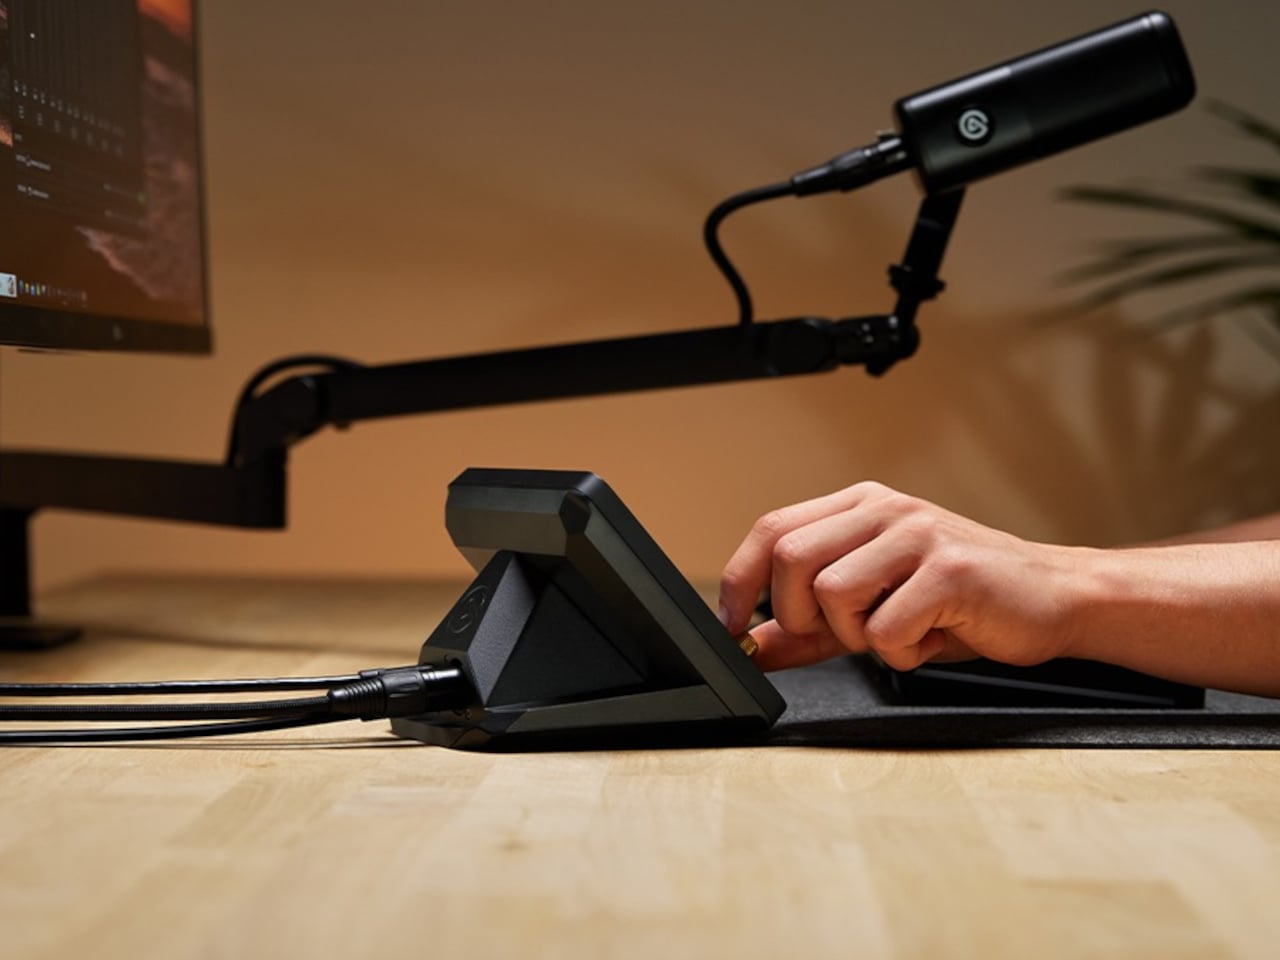
Wave XLR MK.2
XLR Dock MK.2
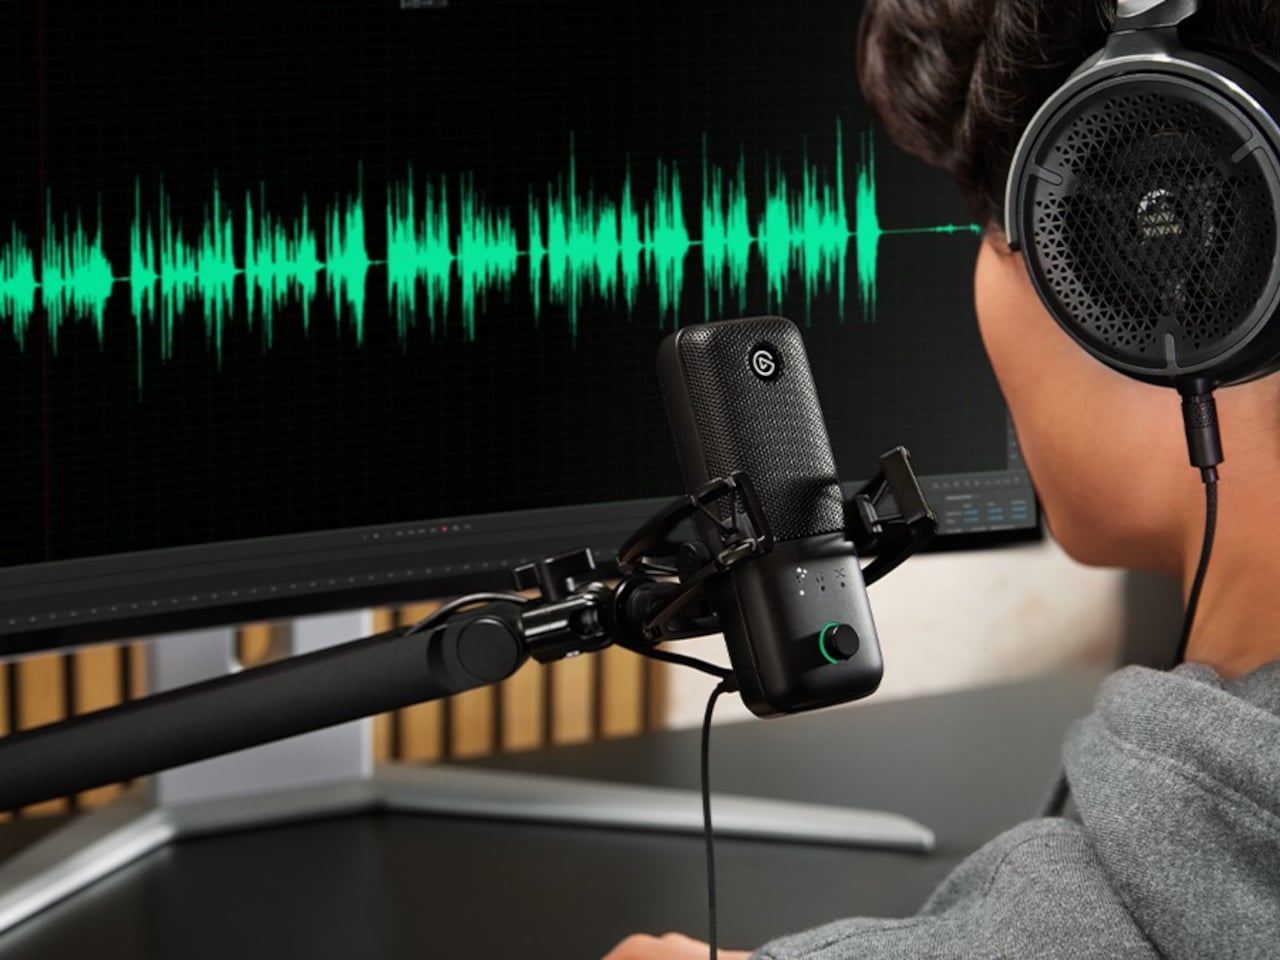
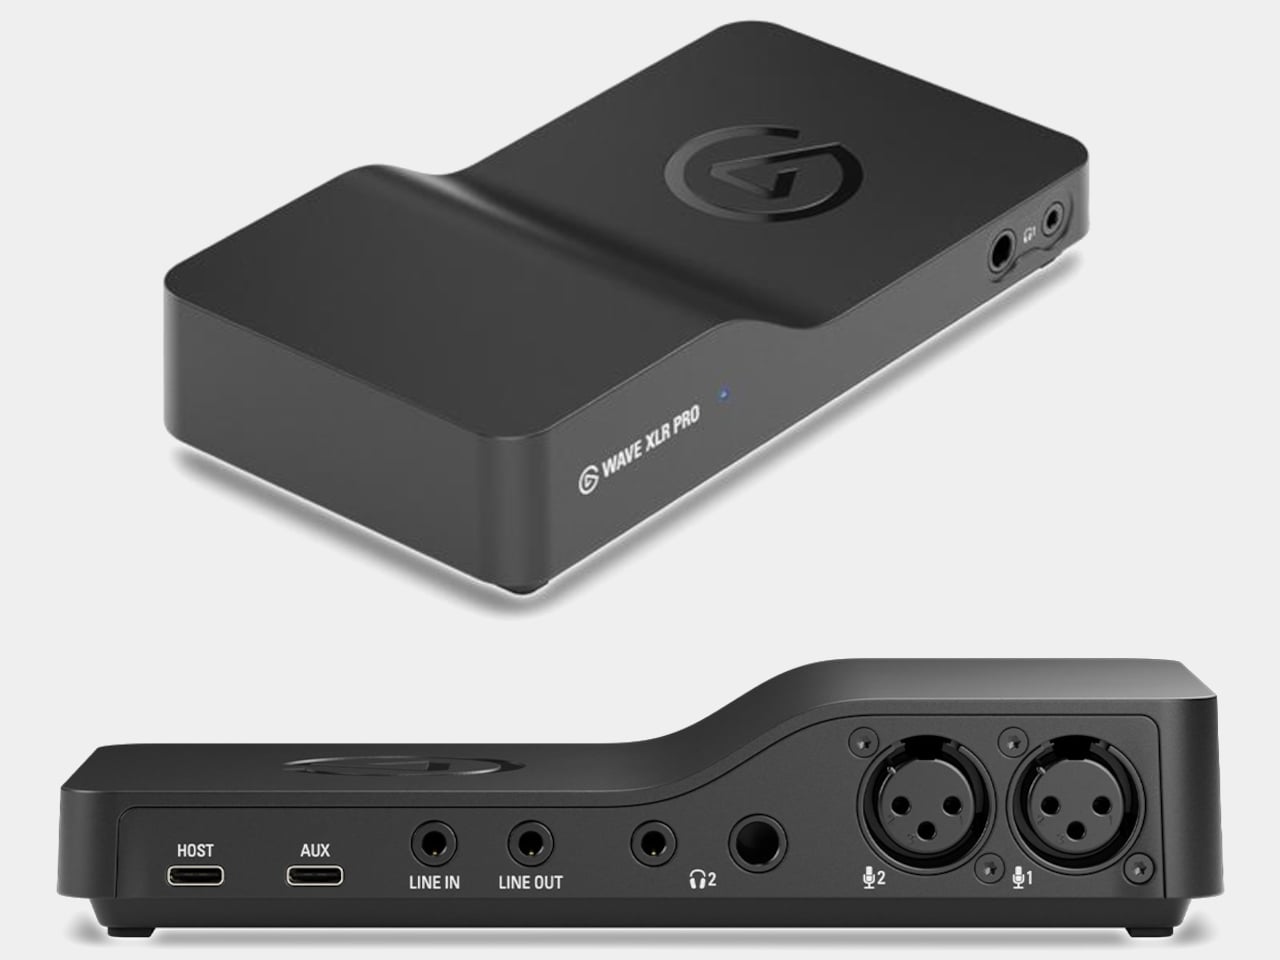
Four devices carry the Wave FX Processor. Wave:3 MK.2 is the USB condenser option, built around a supercardioid capsule tuned with Lewitt, with settings that persist across systems. Wave XLR MK.2 targets XLR microphone users with 80 dB of clean gain and 135 dB of dynamic range. XLR Dock MK.2 integrates directly into Stream Deck +. Wave XLR Pro, arriving in Q2 2026, adds dual XLR inputs and five hardware-based zero-latency monitoring mixes for two-person or multi-source setups.
Wave XLR Pro
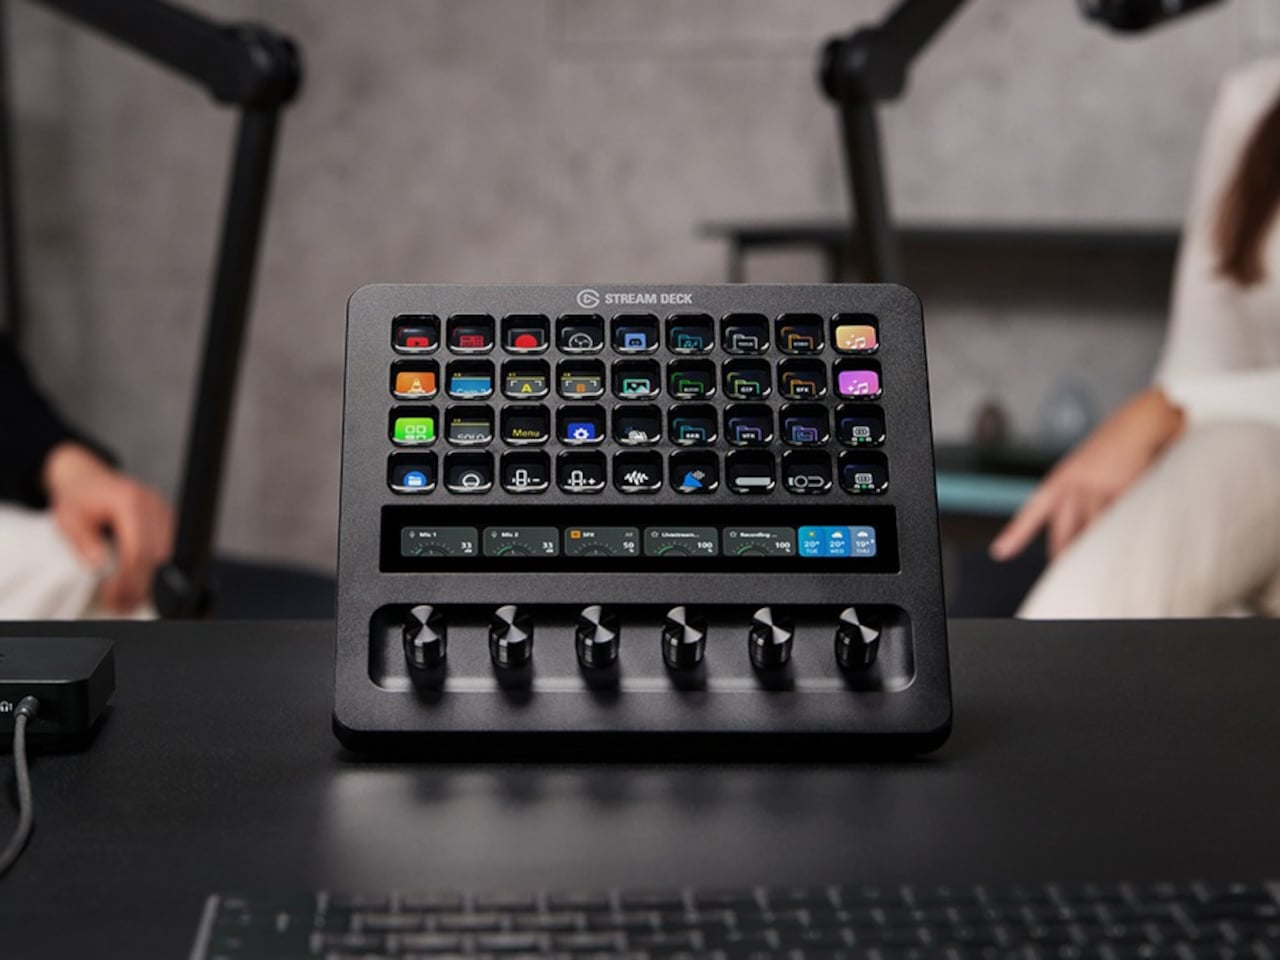
Stream Deck + XL brings physical control to the entire ecosystem through 36 customizable LCD keys, six multifunction dials, and an ultra-wide touch strip for adjusting levels, toggling effects, and switching mixes without opening a single menu. Paired with Wave XLR Pro, it handles what would traditionally require a dedicated mixing desk, though at a fraction of the footprint. That’s a meaningful trade-off for anyone short on desk space.
Stream Deck + XL
The pitch Elgato is making with Wave Next isn’t that audio production should be simple. It’s that the complexity should be optional, readable when you need it, and invisible when you don’t. For creators already deep in the Stream Deck ecosystem, the integration will feel almost obvious. For everyone else, it’s a more honest question of how much control they actually want.
Teenage Engineering has never been content to stay within conventional product categories, consistently pushing boundaries between instruments, toys, and art objects. Their approach to music hardware combines Swedish design sensibilities with genuine technical innovation, creating devices that feel both familiar and revolutionary. The company’s latest announcement signals another bold expansion into uncharted territory, moving beyond synthesizers and samplers into the world of vocal performance.
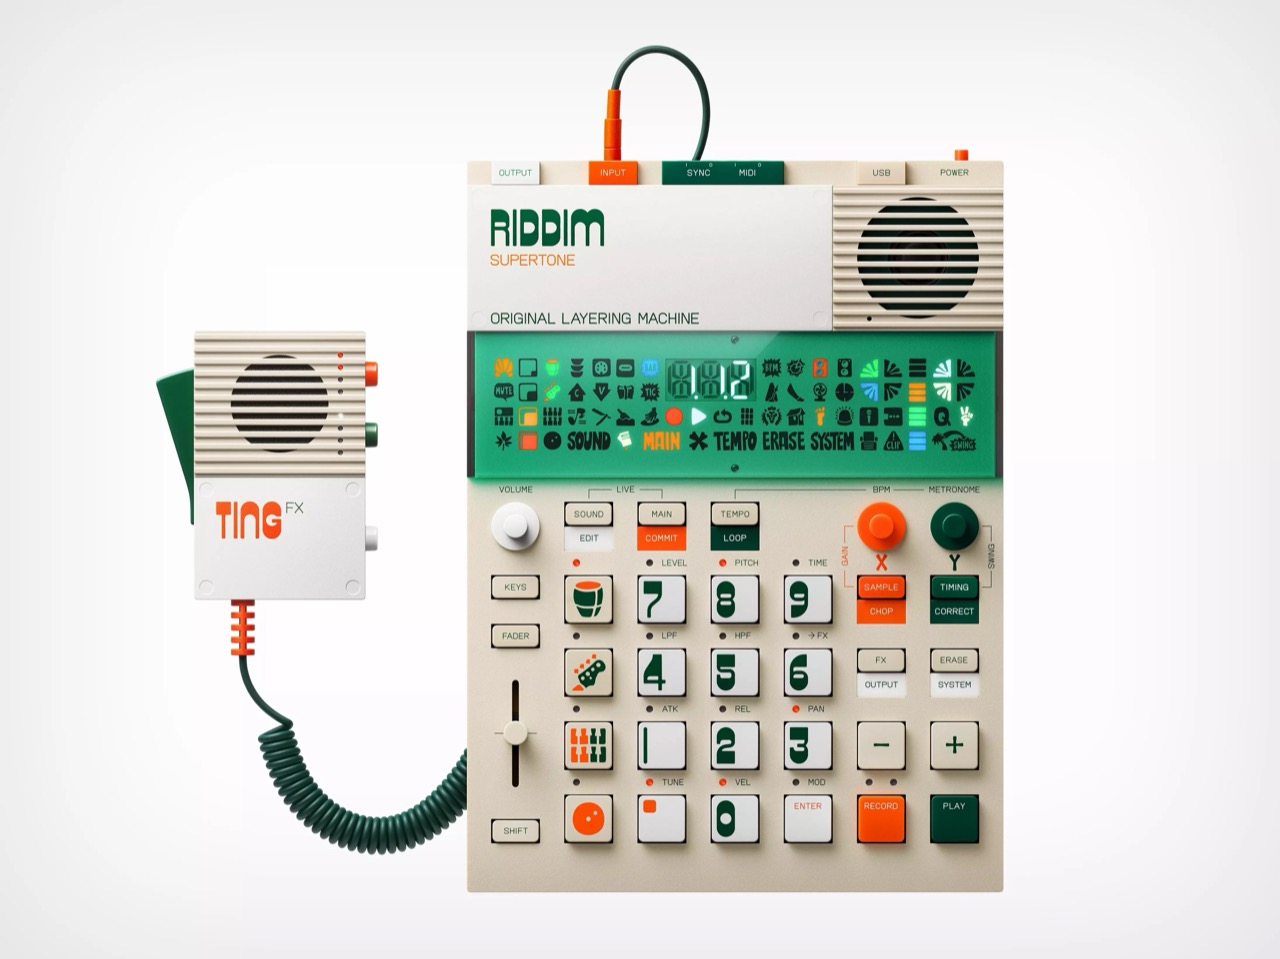
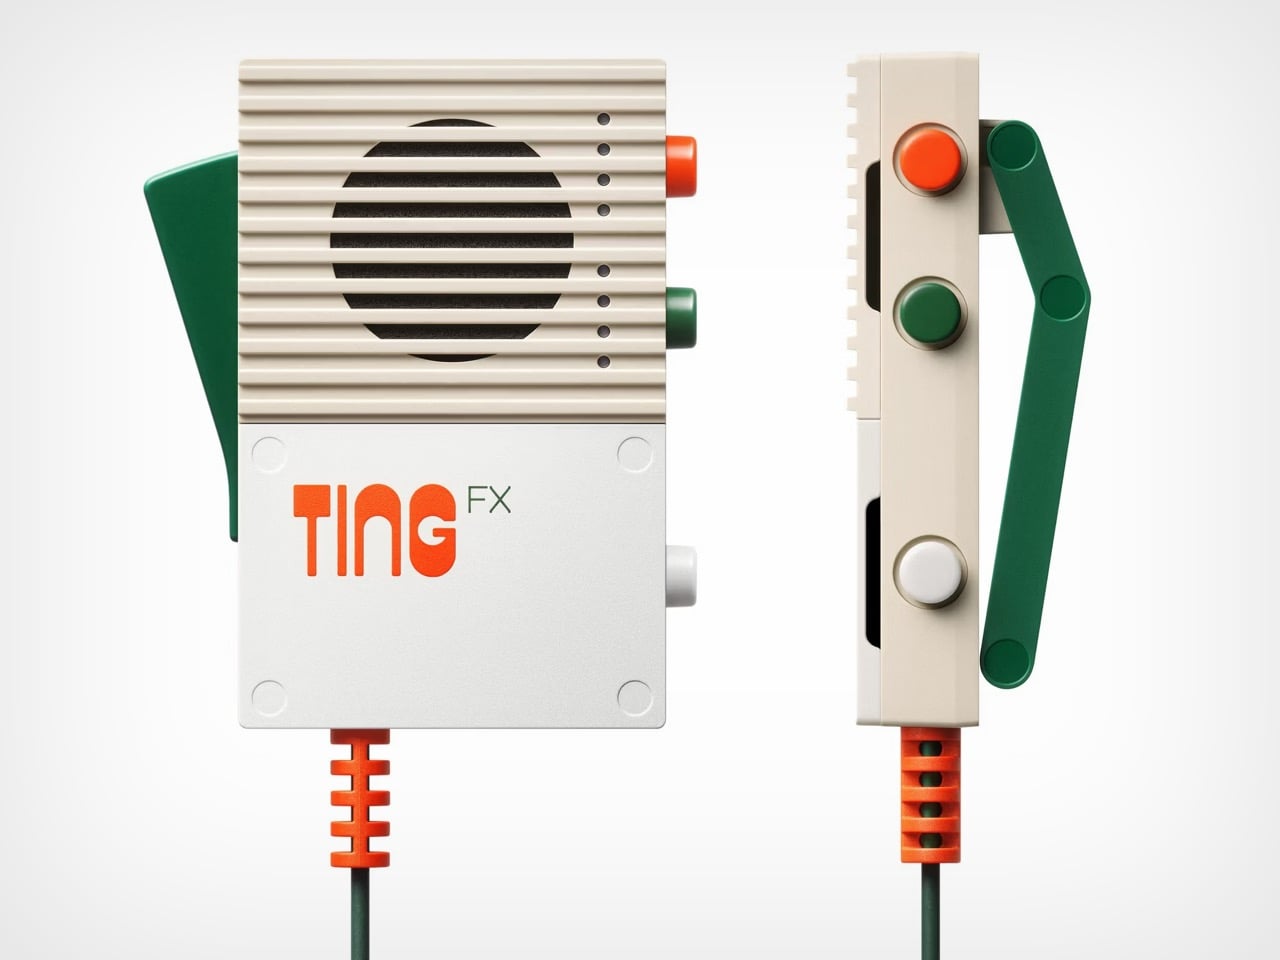
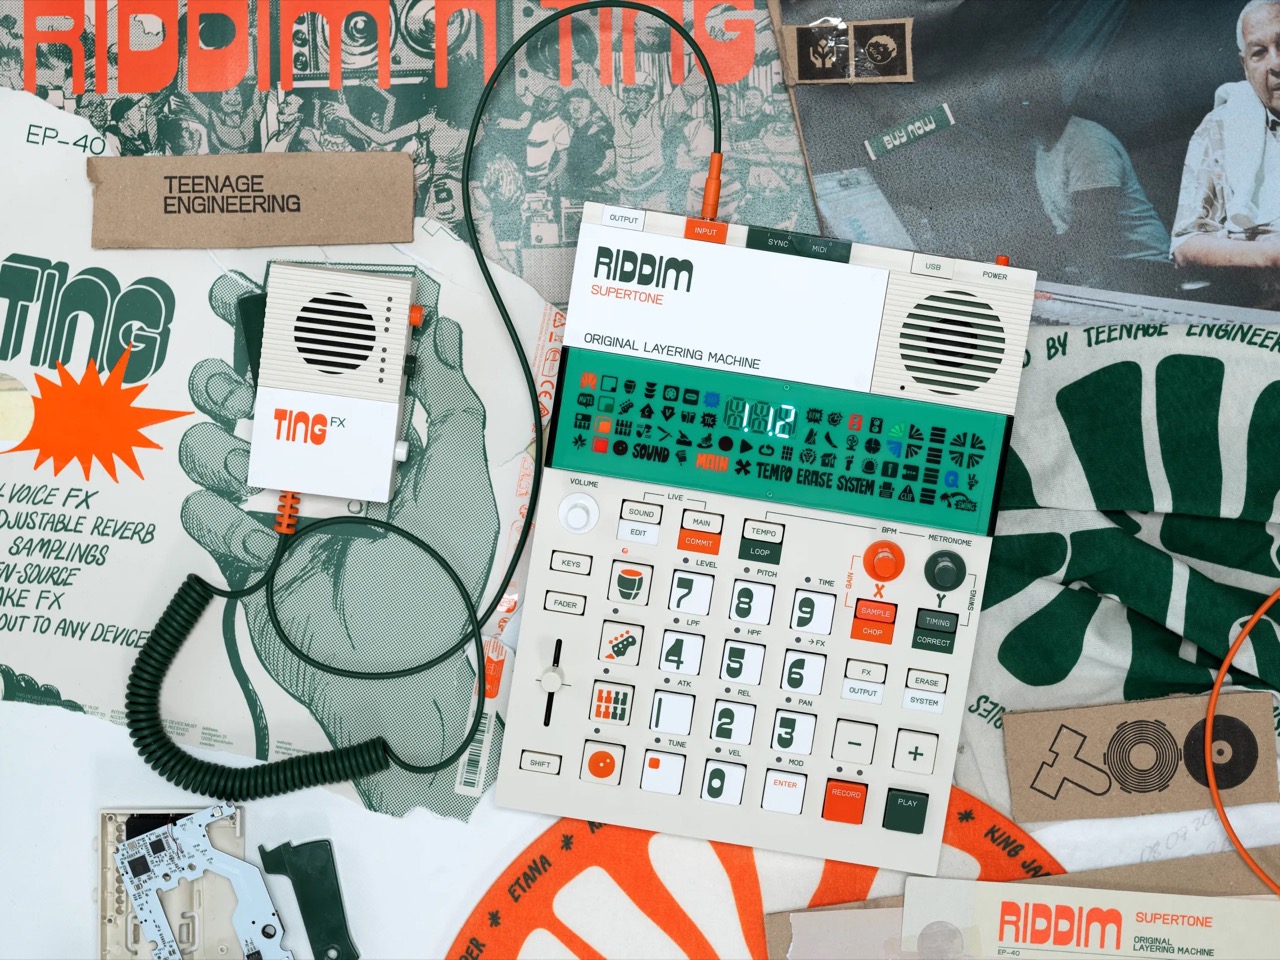
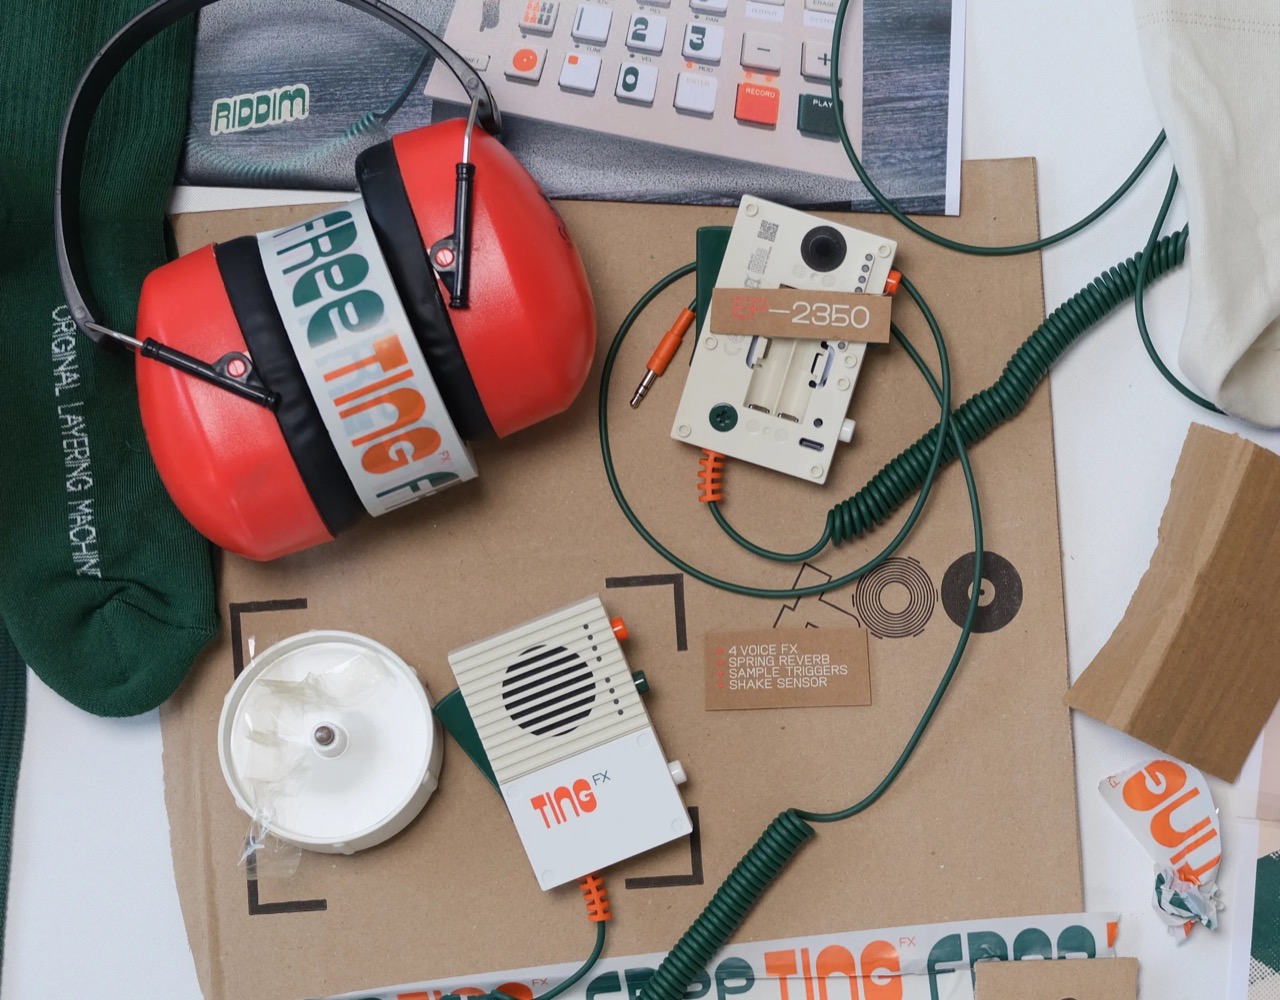
Today’s unveiling of the “Riddim N’ Ting” bundle showcases this adventurous spirit, pairing the recently released EP-40 Riddim sampler with the brand-new EP-2350 Ting microphone. The Ting represents Teenage Engineering’s first foray into microphone design, but it is far from a traditional vocal mic. Instead, it is a compact effects processor, sample trigger, and vocal manipulator rolled into one handheld device, complete with motion sensors and live-adjustable parameters that let performers tilt and move the mic to control everything from echo intensity to robotic voice modulation in real time.
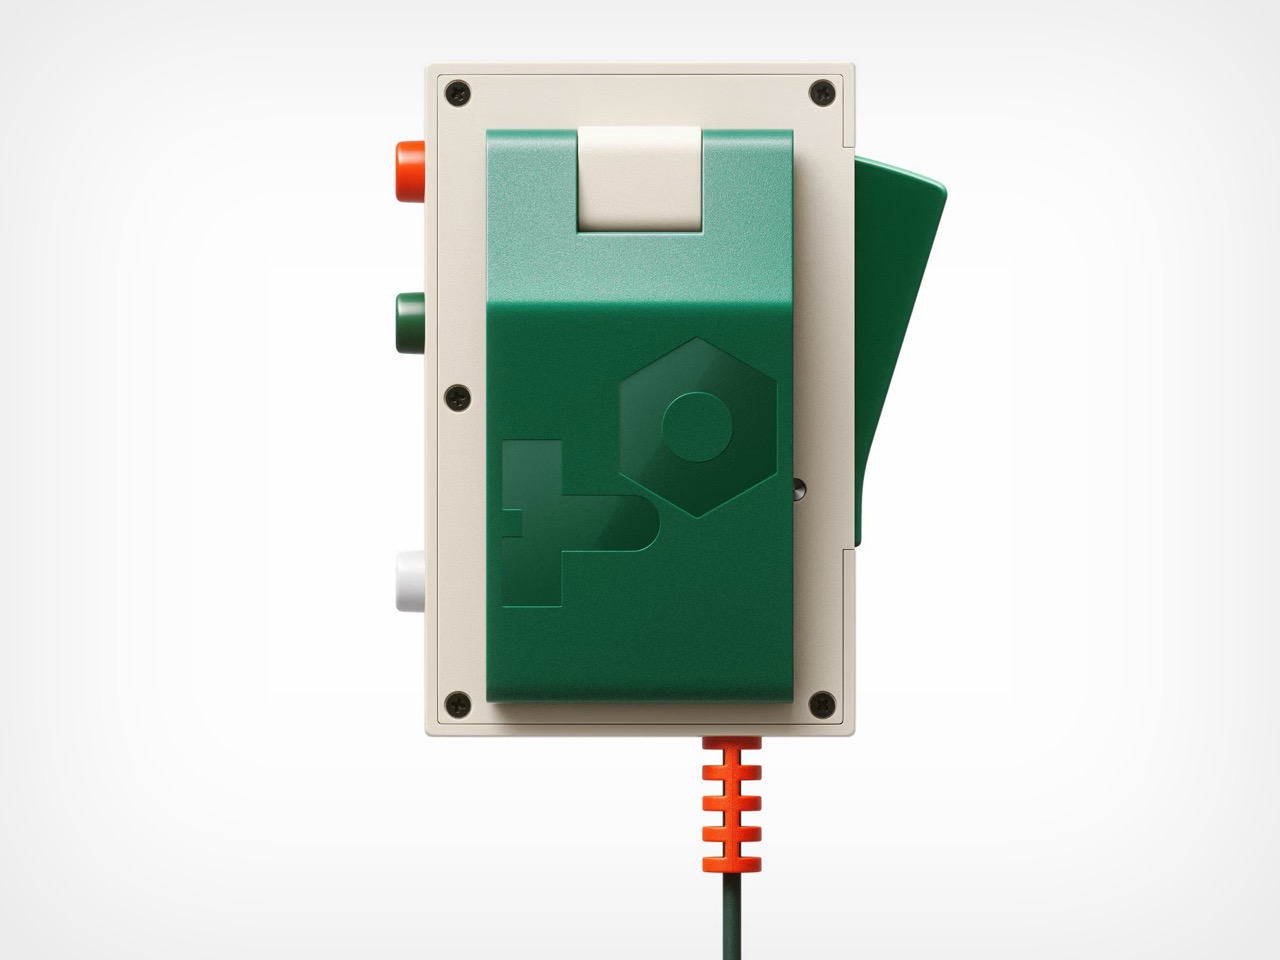
So the Ting itself is this ridiculously lightweight object, weighing a scant 90 grams, that feels less like a piece of serious audio equipment and more like a prop from a retro sci-fi film. That’s the point. It houses four primary effects: a standard echo, an echo blended with a spring reverb, a high-pitched “pixie” effect, and a classic “robot” voice. A physical lever and an internal motion sensor allow you to manipulate the effect parameters by physically moving the mic, turning a vocal performance into a kinetic activity. Four buttons on the side are dedicated to triggering samples, which come preloaded with sound system staples like air horns and lasers but are fully replaceable. It’s a dedicated hype-mic, a performance tool designed for immediate, tactile fun rather than pristine vocal capture.
Its lo-fi audio character is a feature, not a bug, leaning into the saturated, gritty vocal sounds that define dub and dancehall sound system culture. While you could draw parallels to devices like Roland’s VT-4 for vocal processing or Korg’s Kaoss Pad for real-time effects, the Ting’s genius is its form factor. It integrates these functions directly into the microphone itself, removing a layer of abstraction and making the performance more immediate. It connects to any system via a 3.5mm line out, but it’s clearly designed to be the perfect companion for its partner device. This is where the workflow becomes a self-contained creative loop.
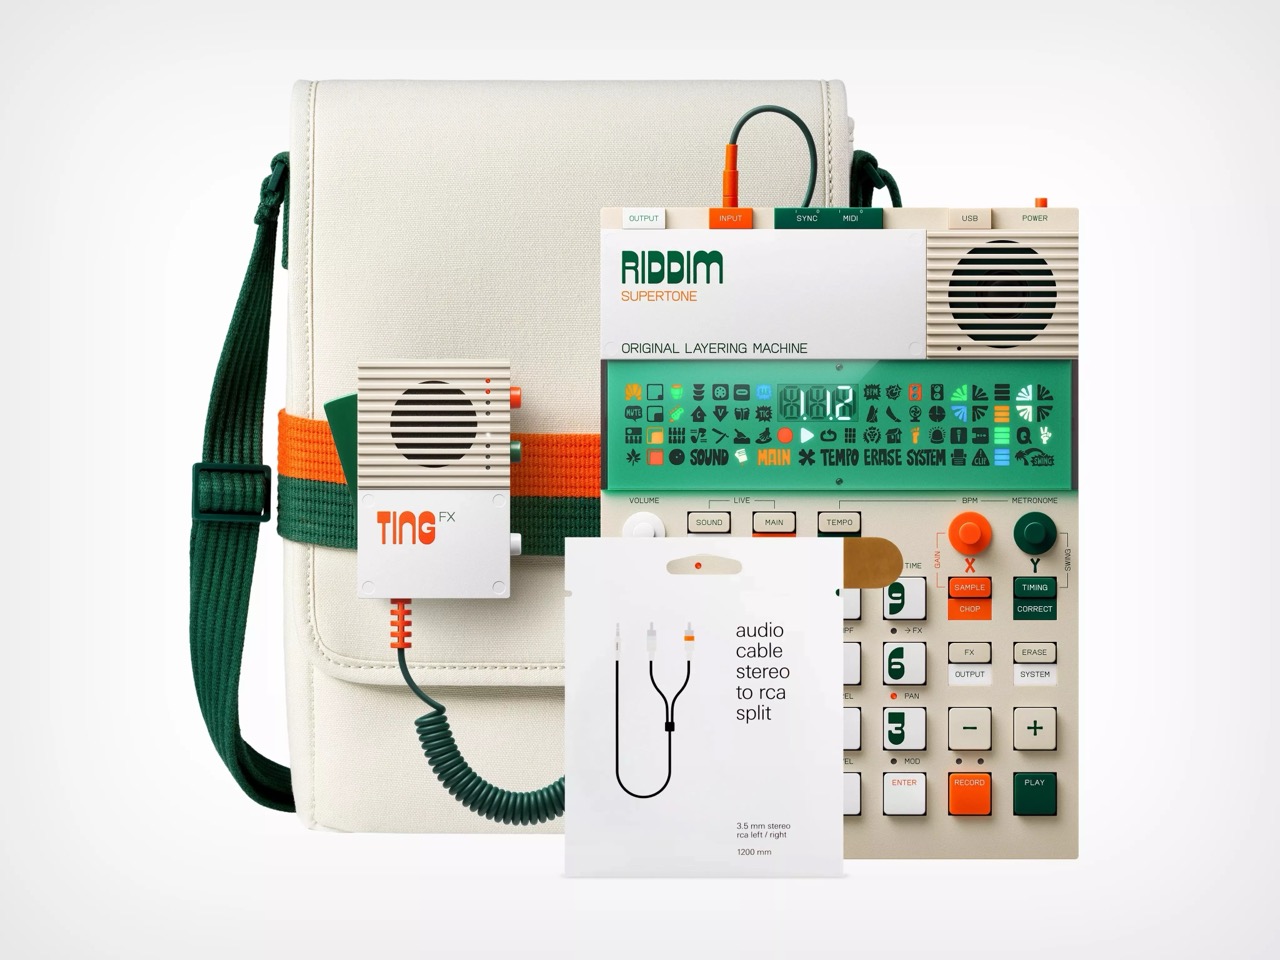
That partner, the EP-40 Riddim, is the anchor for all the Ting’s chaotic energy. While it follows the established format of the EP-series, its focus is sharp. It’s a sampler and groovebox loaded with over 400 instruments and sounds curated by legendary reggae producers like King Jammy and Mad Professor. The specs are solid: 12 stereo or 16 mono voices, a 128MB system memory, and a subtractive synth engine for crafting classic bass and lead tones. It includes seven main effects and twelve punch-in effects, all tailored for dub-style mixing. Connectivity is standard for Teenage Engineering, with stereo and sync I/O, MIDI, and USB-C. It’s a capable sampler on its own, but its true purpose is realized when paired with the Ting.
Together, they form a portable, battery-powered sound system in a box. The workflow is obvious and effective: you build a beat on the Riddim, then plug the Ting directly into its input to lay down vocals, trigger hype samples, and perform live dub-outs with the effects. For their launch, Teenage Engineering is bundling them together and offering the Ting for free, a clever move that ensures this new, weirder device gets into users’ hands immediately. It’s a compelling package that champions spontaneity and play. It proves that the most engaging technology isn’t always about higher fidelity or more features, but about creating a more direct and enjoyable path from an idea to its execution.
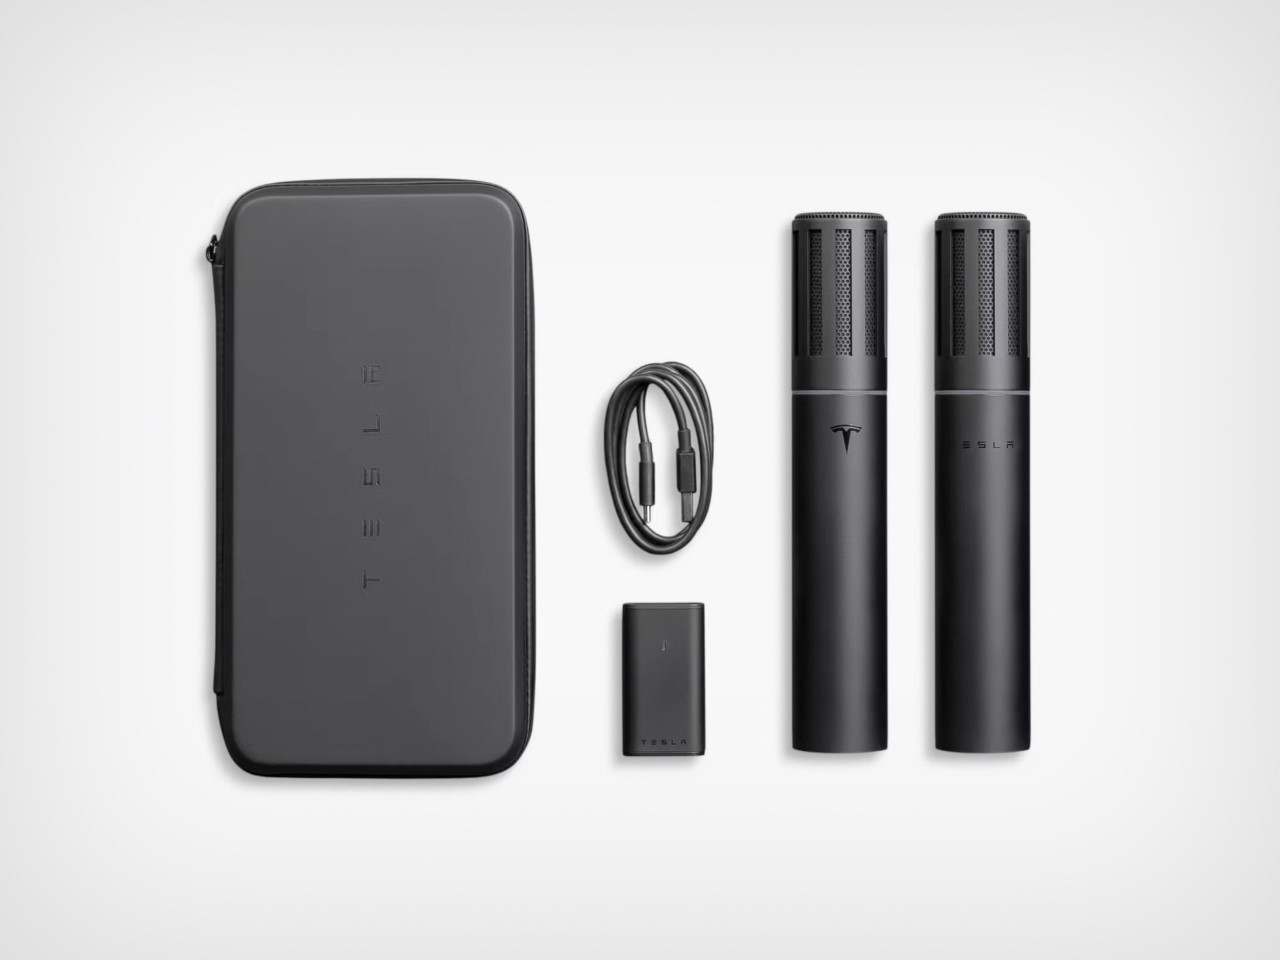
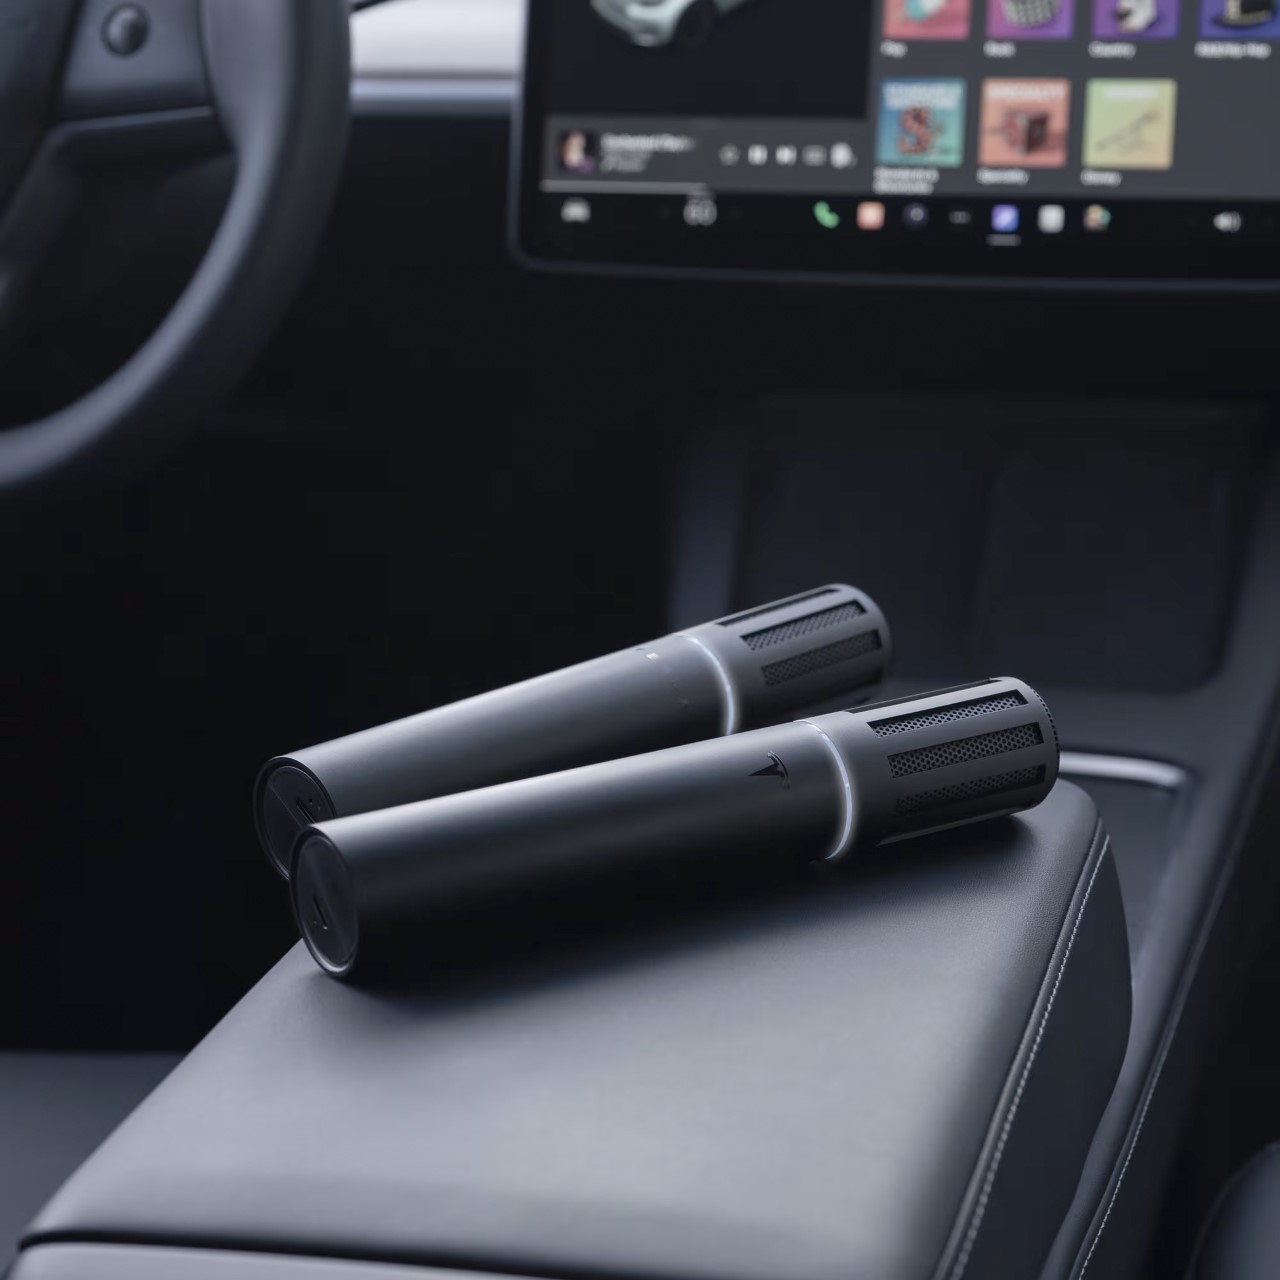
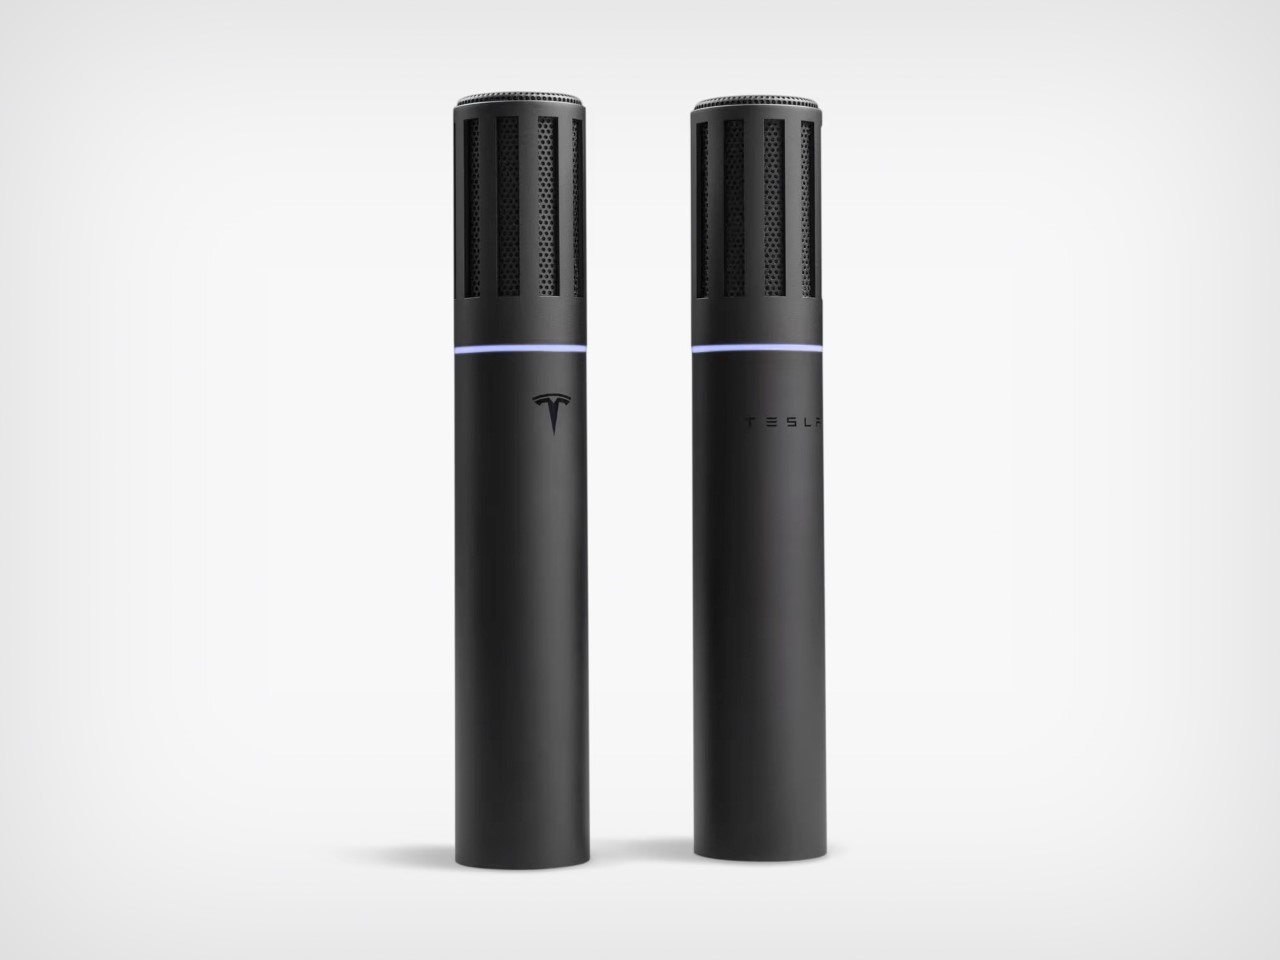
If your EV wasn’t already on the bleeding edge of technology, with sensors and cameras galore, the folks at Tesla decided to spice things up even further. Meet the CaraokeMic a set of wireless microphones designed to let you host your very own episode of carpool karaoke with all the professional gear you could possibly need – indoor dashcam not included. The set consists of two wireless microphones and one receiver that plugs into your car’s infotainment center. Set it up and your microphones let you sing along with any music playing on your car’s sound system. Sure, you could yell out the lyrics without a microphone too, but there’s something truly dignified (and fun) about belting tunes into a mic as if there’s an imaginary crowd cheering for you!
To harness the full potential of the CaraokeMic, your Tesla needs the 2024.26 firmware update and either an Intel Atom or AMD Ryzen processor. Once equipped, you can seamlessly integrate the microphones with Tesla’s media apps, including the dedicated Caraoke app. Whether you’re in the driver’s seat or a backseat passenger, the magic of karaoke is just a touch away on either touchscreen. Each microphone boasts an impressive battery life of over 10 hours, ensuring uninterrupted performances. ‘Anti-howling’ technology guarantees crystal clear vocals, while the wireless design maintains easy access to vehicle controls.
The Tesla CaraokeMic starts as a $215 kit and is currently only available in the USA excluding Puerto Rico, Alaska, Virgin Islands, and Hawaii.
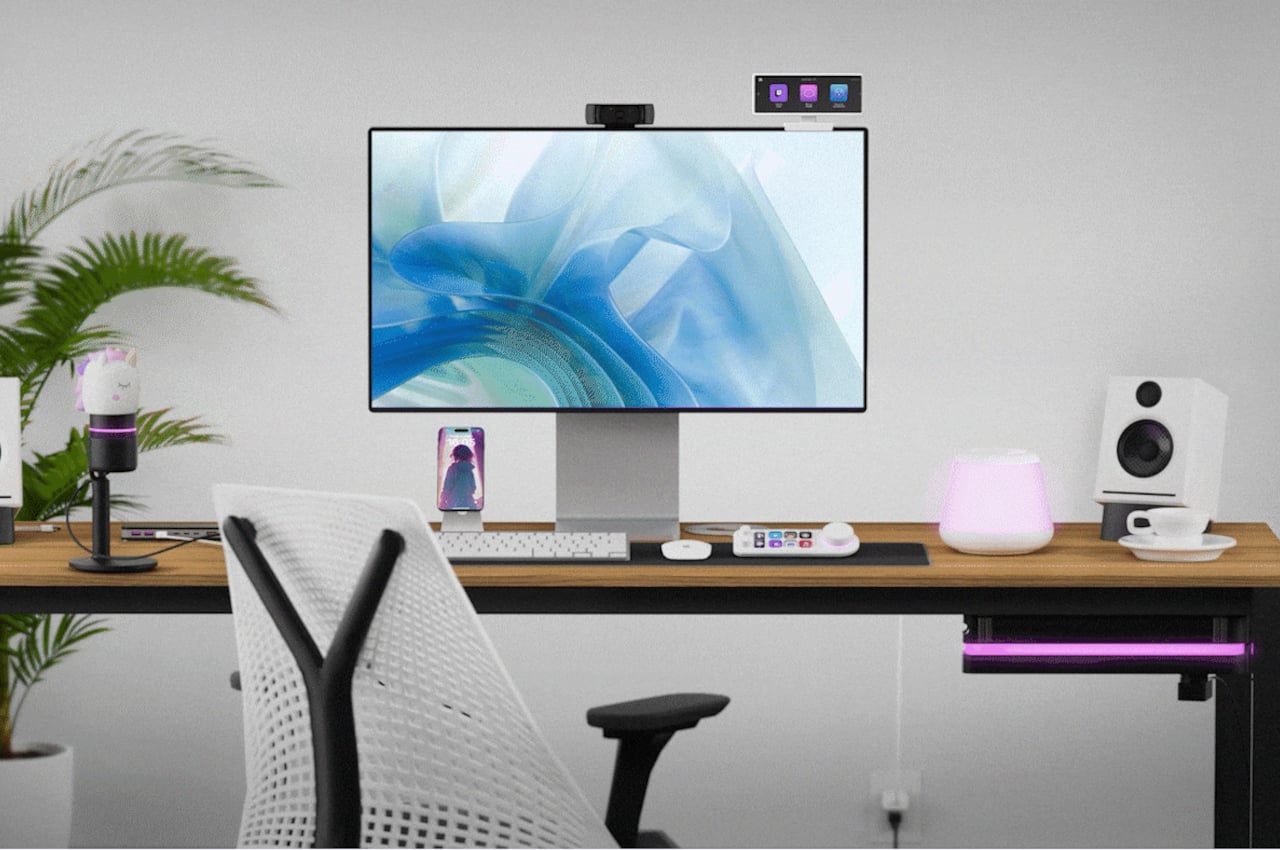
Streaming is big business these days to the point that some kids even declare it to be their dream job. And like any other dream job, the reality is that video streaming isn’t as easy or as magical as it sounds, at least if you’re really aiming to go pro and bring in all the views. You will need to invest in quality equipment that not only makes their work more comfortable but also makes the overall experience more enjoyable. These concept products try to do exactly that, assisting streamers to make them feel more alive, whether onscreen or especially offscreen.
Designers: Mariana Aréchiga, Isaac Saldaña, Ricardo Zerón, Adriana Cruz, Jonathan Gonzalez, Alondra Alvarez, Mariana Pedroza, Juan Muciño
It’s admittedly easy to get started in the live streaming industry. All you need is a decent camera, a reliable Internet connection, and content that will capture the attention of the fickle masses. Going viral and staying relevant, however, requires not only hard work but also tools that will help carry you through both the good times as well as the bad. Alive is a series of product design concepts that try to elevate the streaming experience and beyond, focusing on the things that help streamers stay in control all the time.
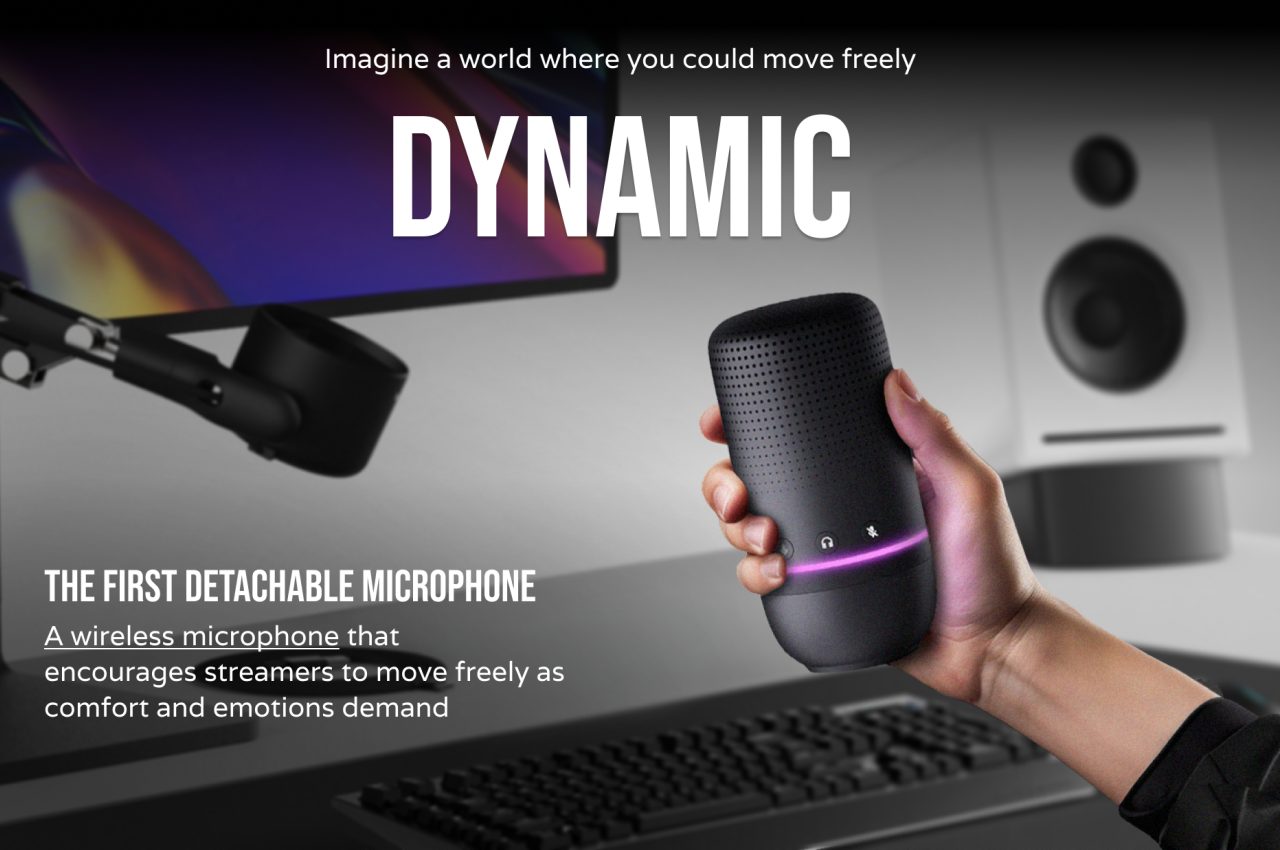
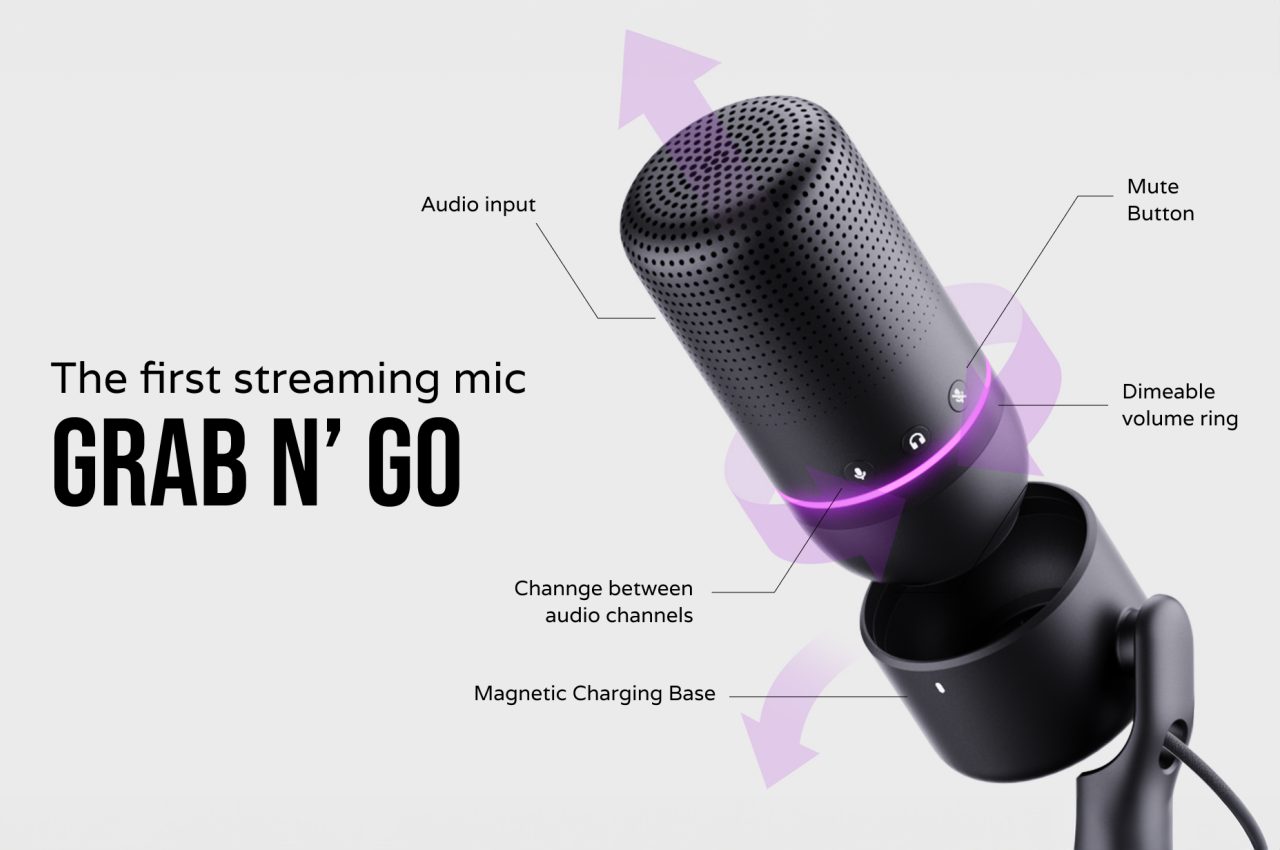
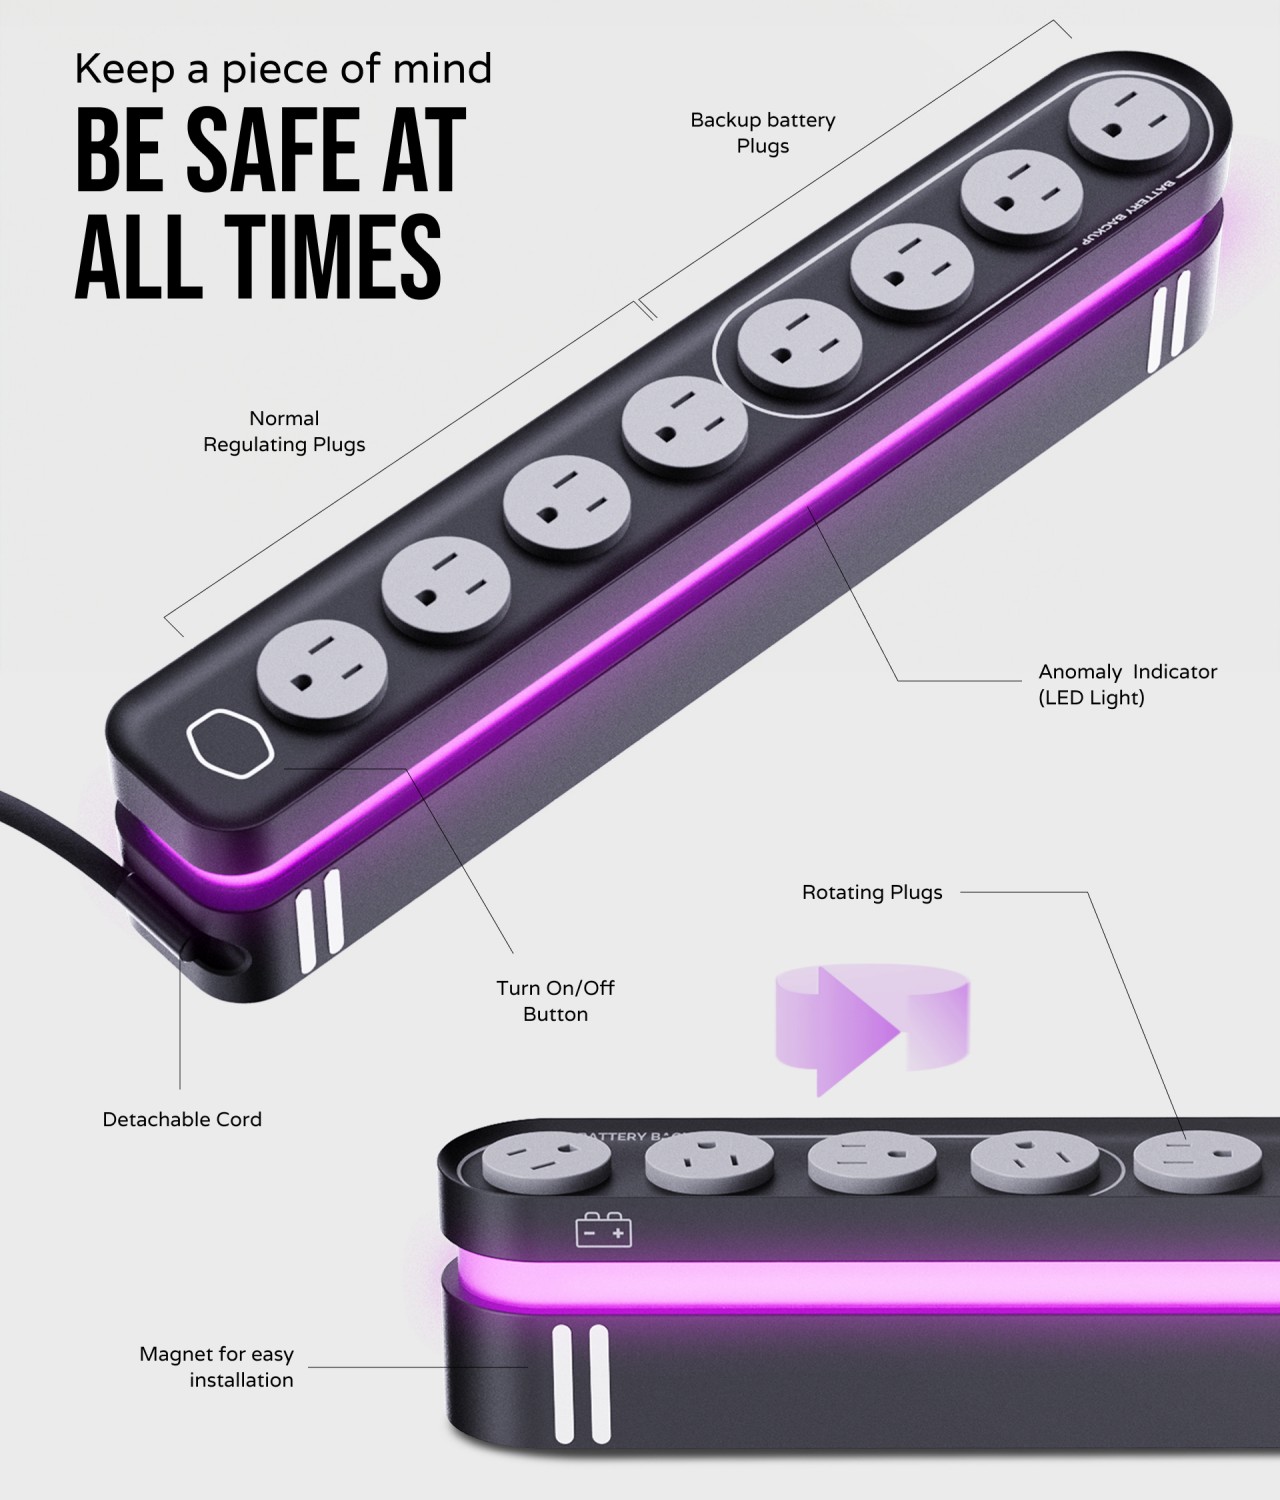
One example is a wireless streaming mic that frees you from your desk with its detachable design. While it looks like an ordinary studio mic when on its wireless charging stand, you can easily pick it up and move around without missing a beat or dropping out. It has a helpful ring indicator that quickly clues you in on the volume level without having to check your app’s or computer’s controls.
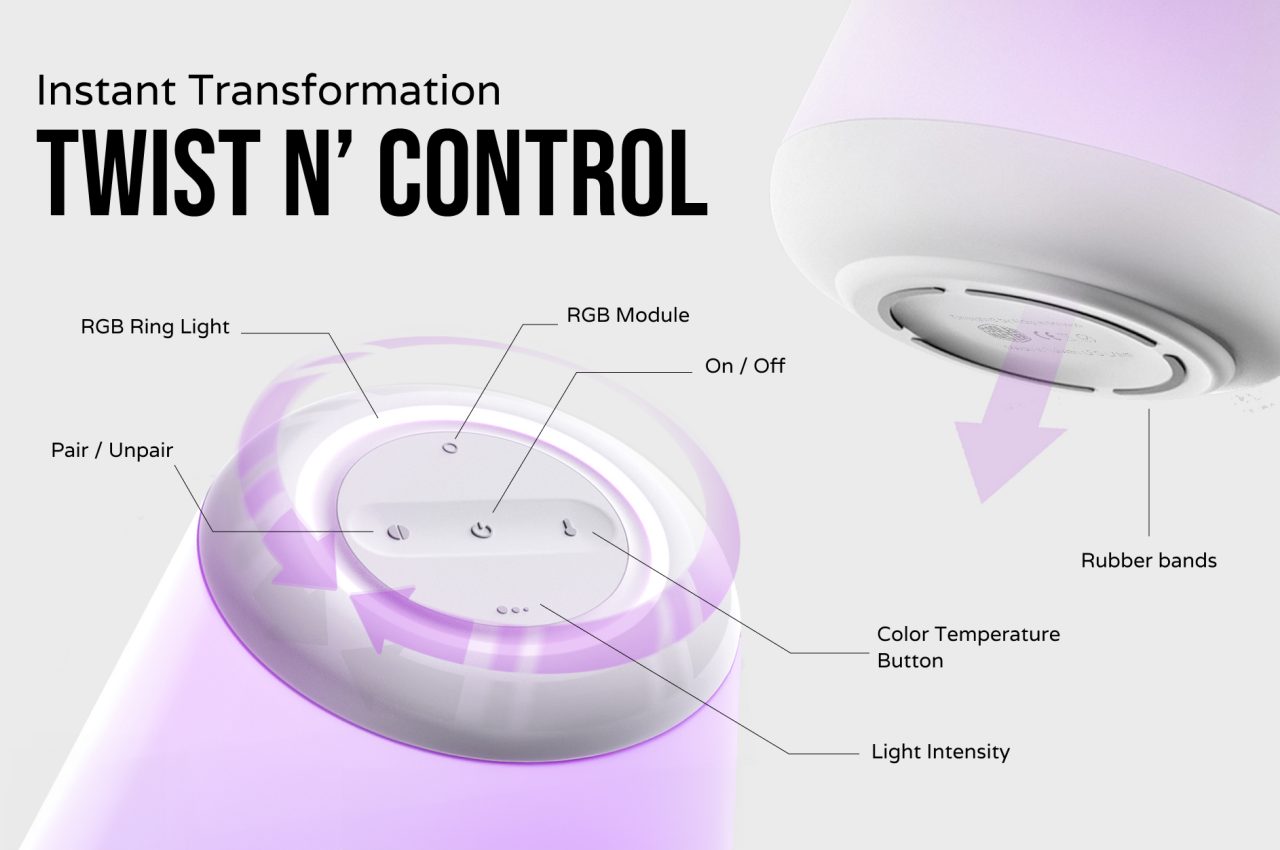
Lighting does more than just illuminate your face during streams, it can also help set the mood or even indicate your own mood. This conical desk lamp concept delivers that kind of emotional lighting but also provides direct physical controls that don’t leave you at the mercy of buggy apps and spotty network connections. Any streamer will testify to the stress and tension that occurs whenever those supposedly smart lights feel rather dumb due to those technical difficulties.
Power strips are designed to expand your wall socket, but most of them seem to still embrace the limitations of those fixed outlets. This streamer-friendly design, however, has sockets you can rotate so that they adjust to your cables and plugs, not the other way around. There’s also a section of the strip that offers battery backup to make sure critical devices stay powered up even during an emergency. These features might sound trivial, but every small thing that gives streamers peace of mind also helps them create better content.
Magnetic attachments allow more freedom where to use the transmitters
Eye-catching touch screens allow for showing brand logos in addition to recording information
Supports both real-time streaming and on-board recording
CONS:
Extra strong magnets can easily pinch the skin if not careful
RATINGS:
AESTHETICS
ERGONOMICS
PERFORMANCE
SUSTAINABILITY / REPAIRABILITY
VALUE FOR MONEY
EDITOR'S QUOTE:
Magnetic attachments and customizable touch screens add incredible value to an already excellent wireless microphone.
With plenty of focus being lavished on cameras, optics, and image sensors, you’d almost think that all we have on our heads are eyes. While the visual quality of content is definitely important, it’s also easy to demonstrate how poor or even no audio can completely ruin an experience. Audio recording equipment, particularly microphones, sometimes comes as an afterthought, a decision that filmmakers and creators often immediately regret. Finding the right mic can be a daunting experience, especially when you’re forced to choose between small lavaliers with discrete designs but barely passable recording and large mics with studio quality but distracting sizes. The Saramonic BlinkMe B2 promises to save you from that dilemma with the promise of a small yet distinctive design and unbeatable audio recording, so we naturally had to put it through the test to see how it measures up to real-world use.
Designer: Saramonic
Aesthetics
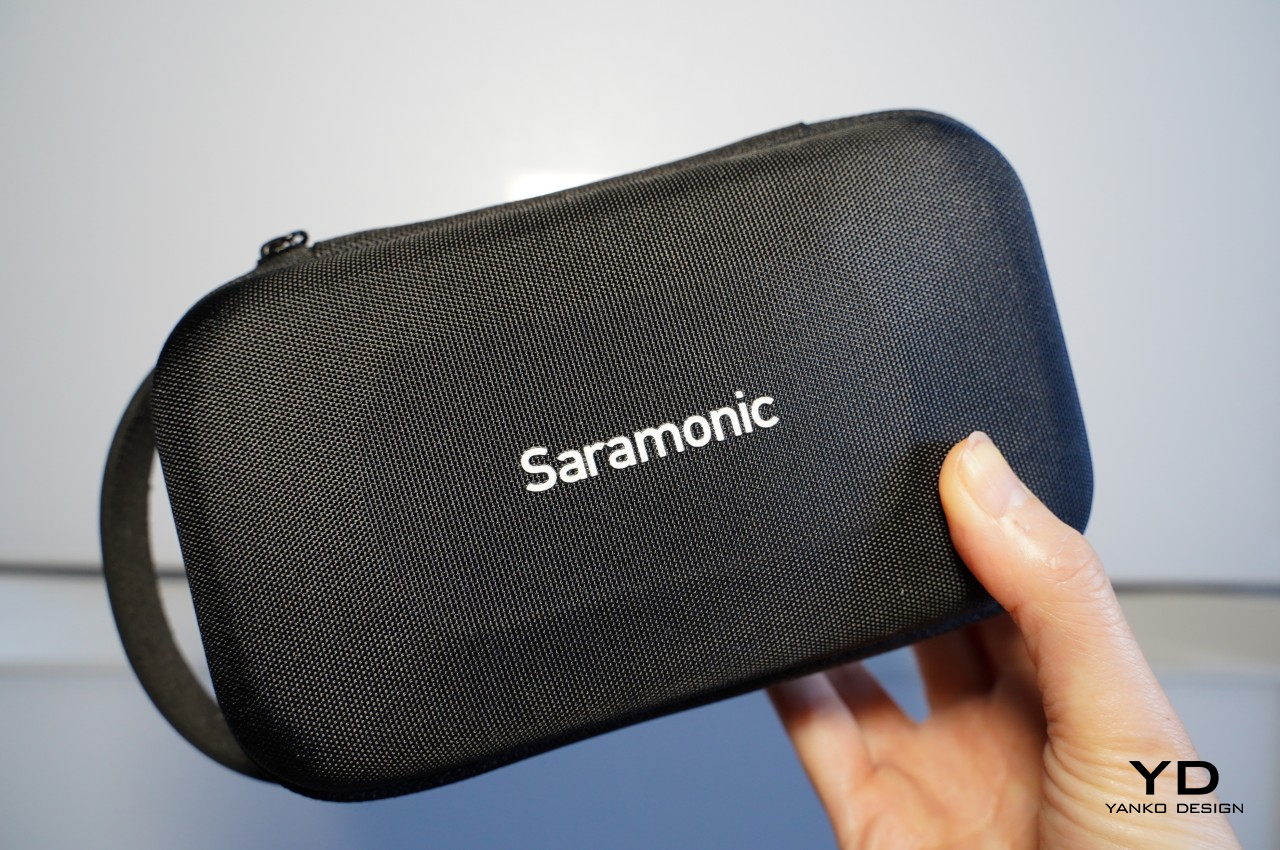
If you were expecting a small clip or some small rectangular box, you’ll be pleasantly surprised that it isn’t the case at all. The entire Saramonic BlinkMe B2 system comes in a rather unique package that is closer to some hi-tech gadget than what you’d normally see in wireless microphones. When joined together, the three parts look like a short square box with two smaller discs at the top and the bottom. You’ll probably be too focused on production to actually appreciate how distinctive the BlinkMe B2 looks, but it definitely puts the product a level higher than its peers.
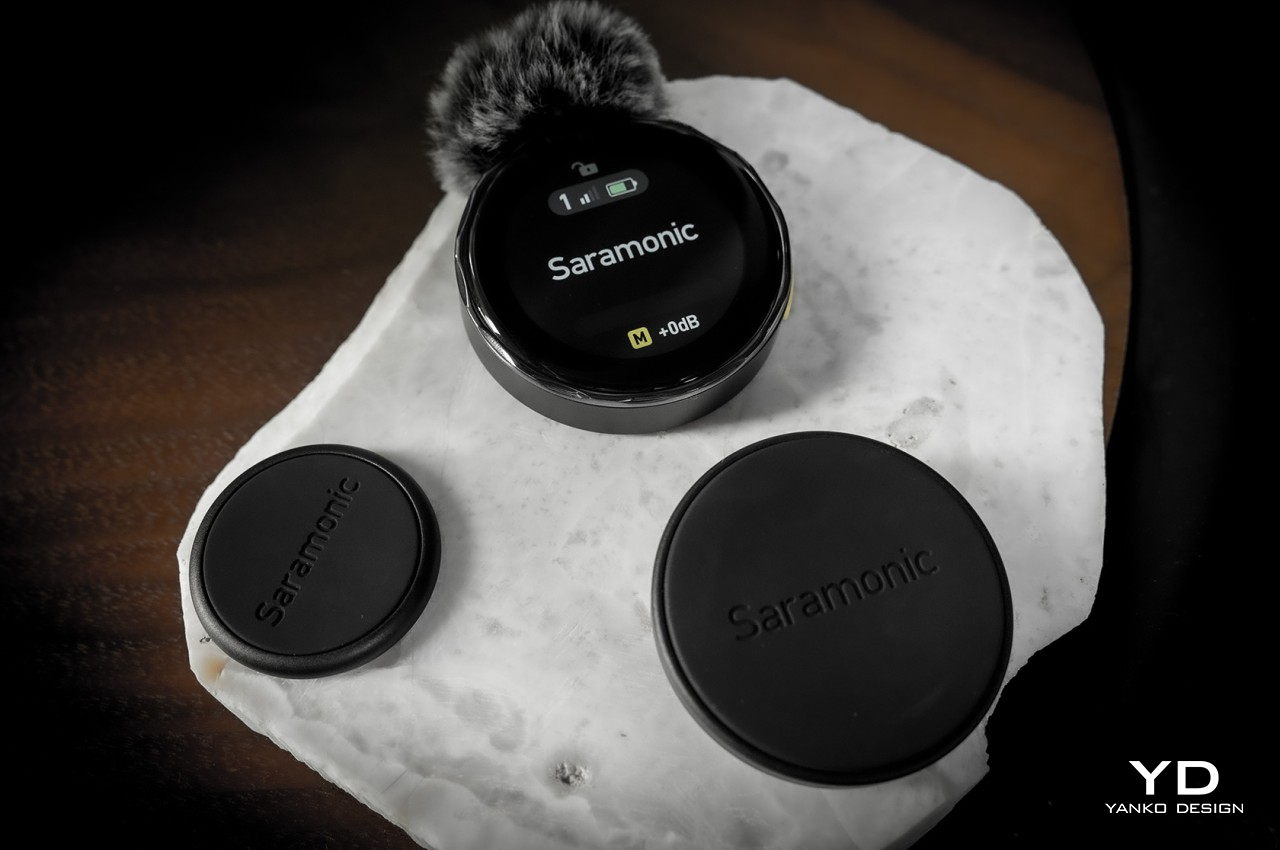
The wireless mic’s personality, however, really shines the moment you use it, particularly when you separate these three pieces. You’ll immediately discover that they aren’t held down by flimsy locking mechanisms that get in the way but only by the sheer power of very strong magnets. These make it easy to remove the transmitters from the receiver base while still holding them securely when not in use or when charging. Once you pull off the transmitters, however, you immediately see the most visible feature that makes the BlinkMe B2 extra special.
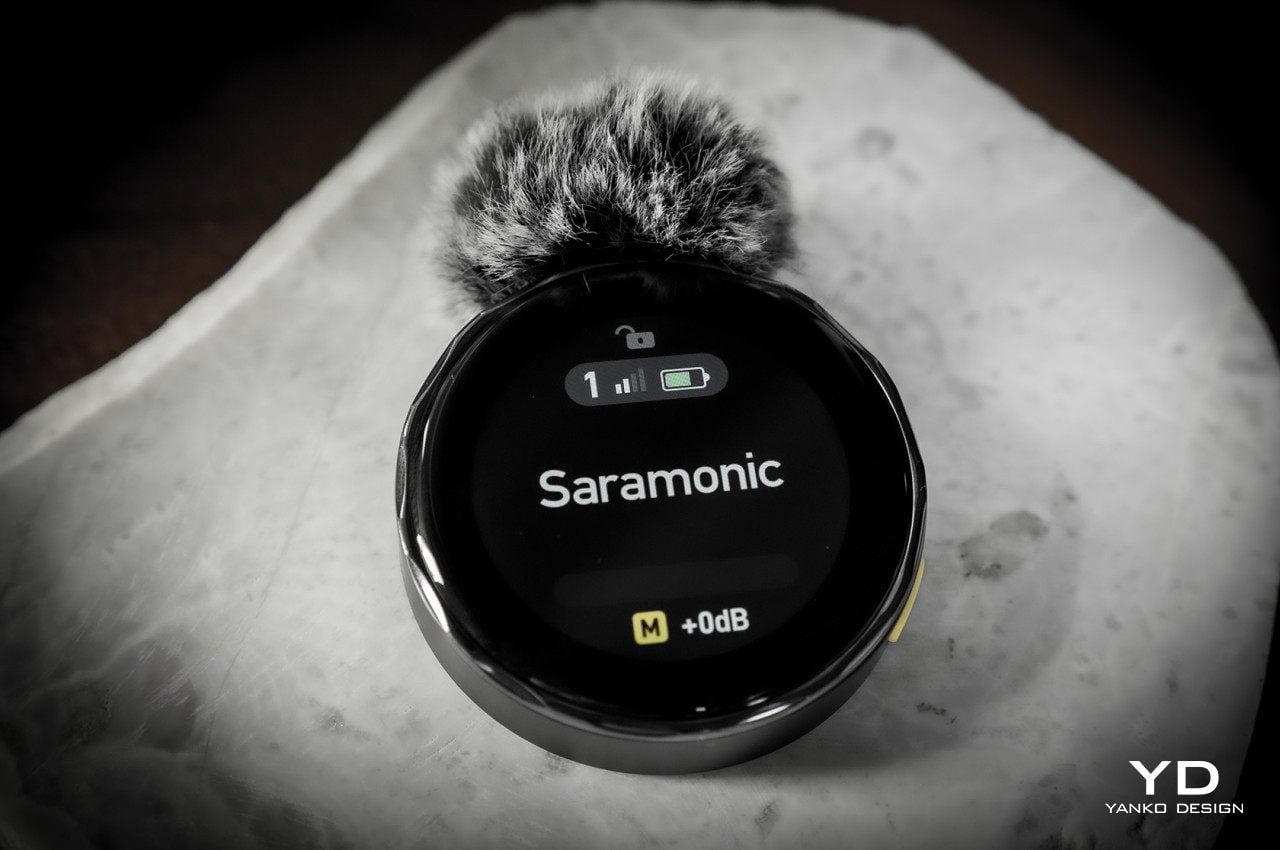
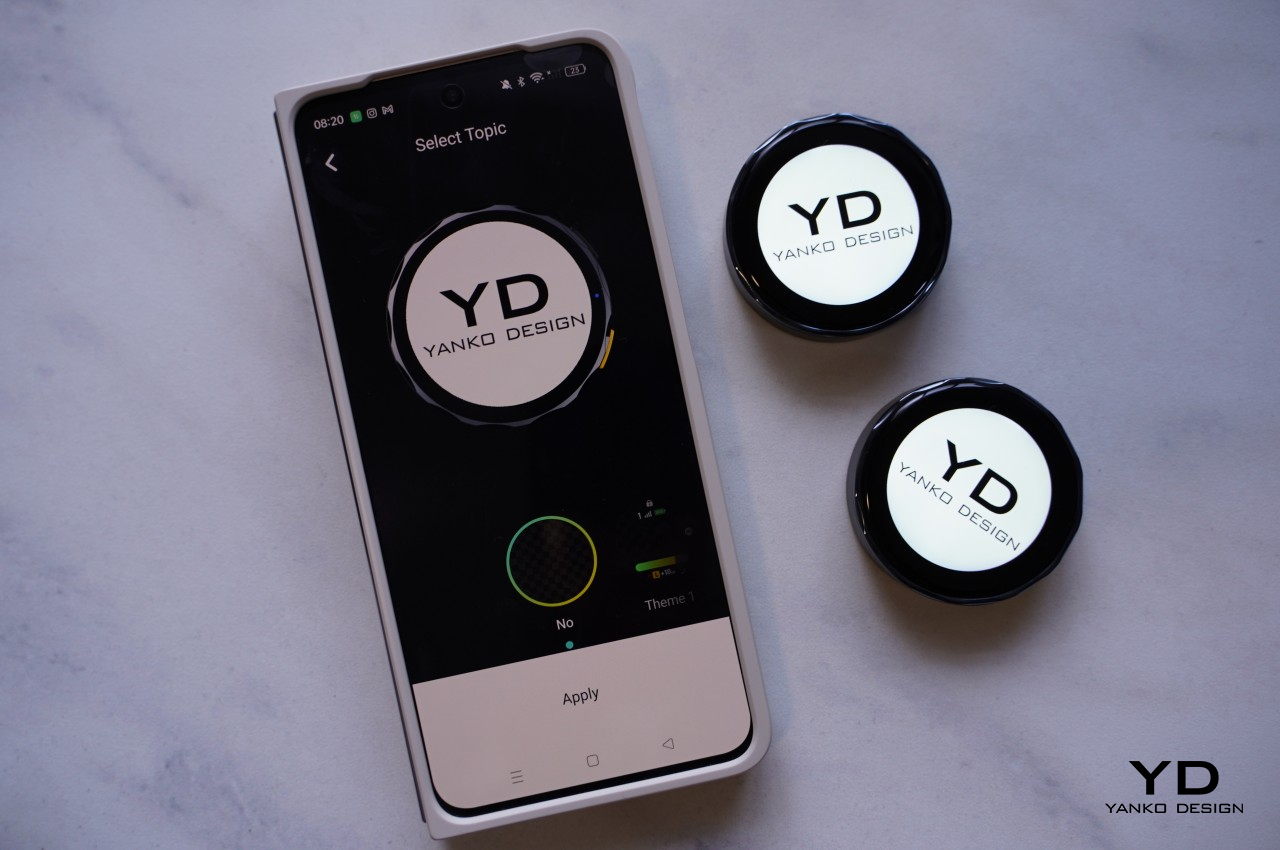
Both transmitters have circular touch screens covering their faces, making them look like smartwatches without straps. In fact, you operate them exactly like smartwatches, swiping and tapping through controls and options. There are, of course, also physical buttons on the side that, unsurprisingly, might also remind you of smartwatch buttons. This is more than just an embellishment, though. While it’s definitely dandy to see the mic’s gain levels from a distance as you record an interview, its real value shines when you realize that you can actually customize what’s shown on the screen.
In essence, you can upload your studio’s logo or any other graphic (that fits a circle area) from the Saramonic mobile app to the transmitters and have it always on display while shooting. Considering how conspicuous this disc-shaped mic will be on your chest, it’s a great opportunity to do some subtle advertising. Conversely, that also means that the BlinkMe B2 transmitter will always be visible, though not everyone will actually realize that it’s a mic and presume it’s just some sort of fancy LCD badge.
Ergonomics
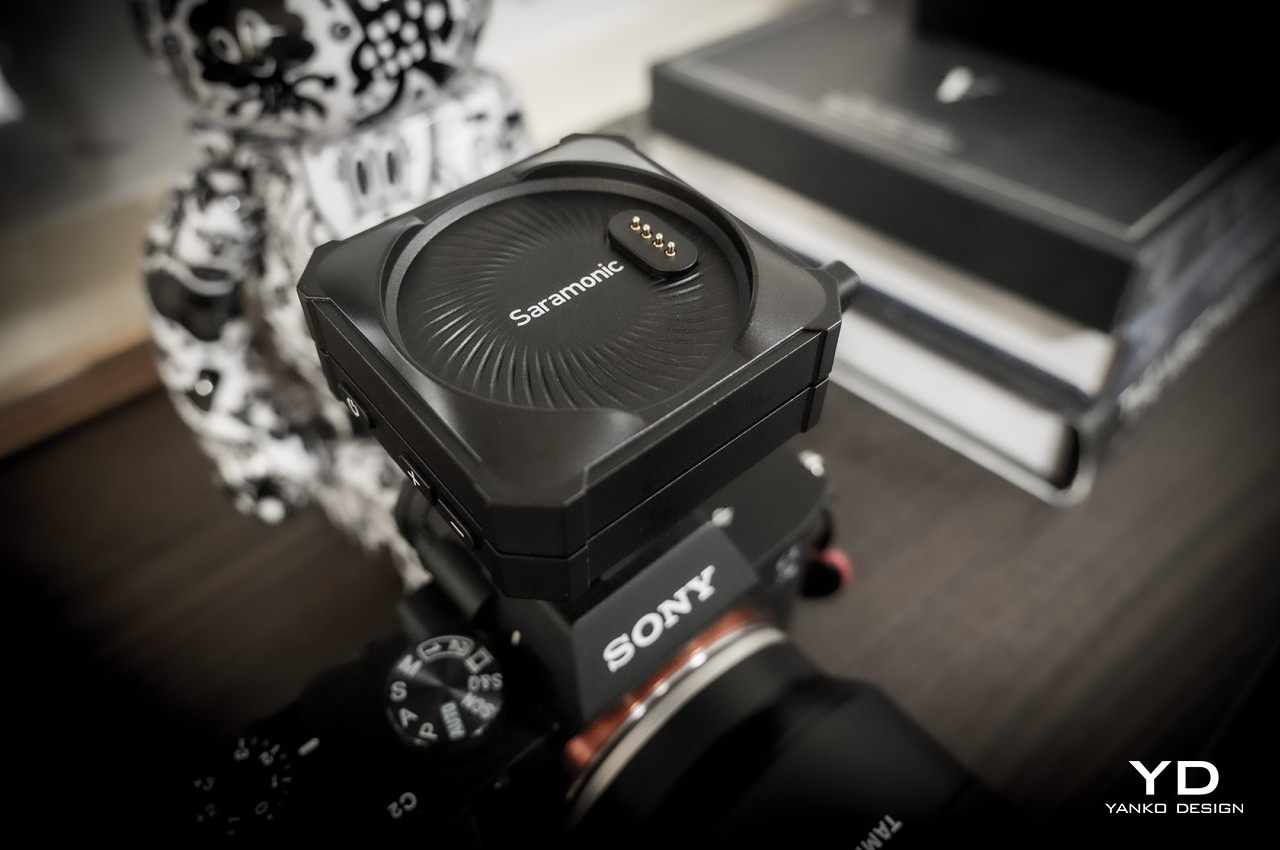
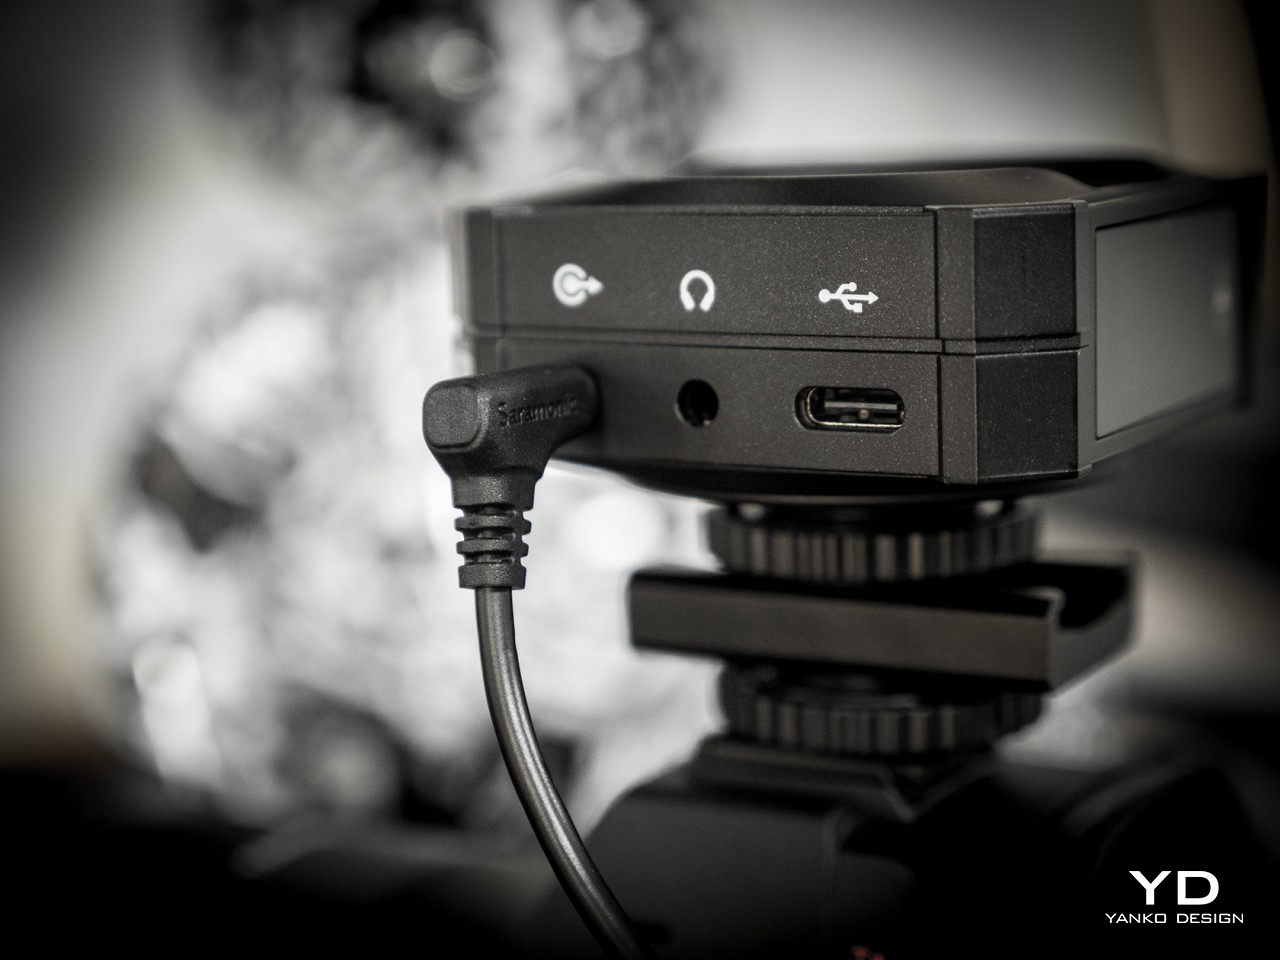
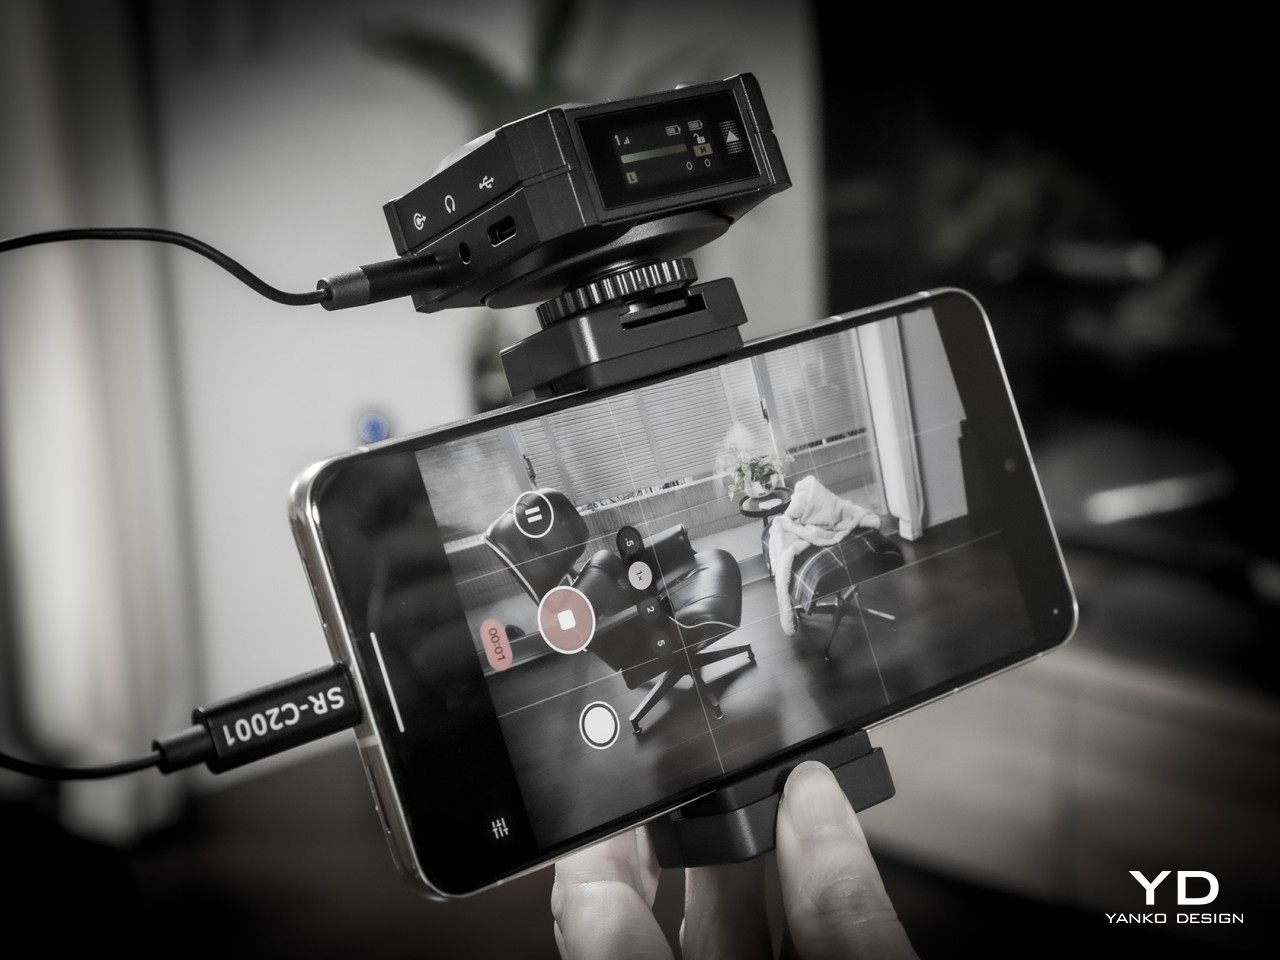
Saramonic’s use of magnets and touch screens isn’t just for show. They actually make the BlinkMe B2 one of the easiest wireless microphones to use. Need to start recording almost immediately? Simply pop off the transmitters. Need to charge one of the little pucks? Just have them snap back onto the top of the receiver. And since the transmitters can record audio on their own, you don’t even have to worry if you accidentally left the cables that would connect the receiver to a camera. It’s as simple as that.
Operating the three pieces themselves is a piece of cake thanks to the touch screens, though there are also physical buttons for the most important actions you need to have quick access to. What actions would those be? Actually, you get to decide that since you can customize what each button does through the Saramonic mobile app. The distinctive yellow button on the transmitters, however, has a single function, and that’s to toggle Noise Reduction on or off. That color might seem garish, but you won’t miss it even in a dark environment.
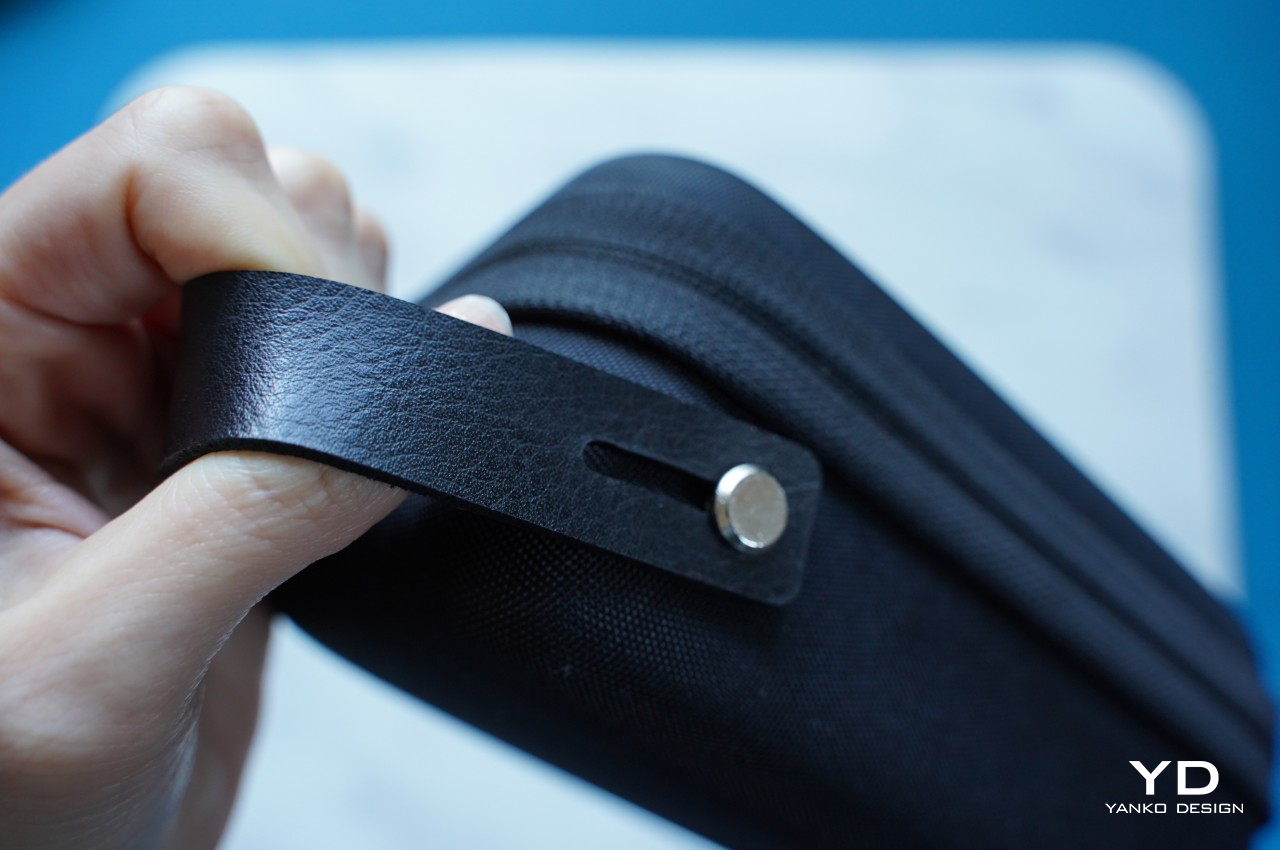
The magnets on the transmitters aren’t just a one-trick pony. Thanks to this design, you can easily stick the transmitters anywhere on a shirt, not just the edges. The package comes with four magnetic attachments that let you sandwich clothing between these two discs, though there’s also a magnetic clip in case you do need to go old school. You can even stick it to doors, posts, and any other metallic surface if you want to keep it out of the way. One word of caution, though. The magnets are so strong that you risk pinching the skin of your finger or, worse, certain body parts if you’re not careful how you connect two pieces together.
For all its ease of use, this magnet-based design does have one drawback. To charge the transmitters, you have to attach them to the receiver, which functions as the charging station. You can’t charge them independently using some accessory, so you’ll probably want to keep tabs on their battery levels. Given how the receiver is usually mounted on top of a camera, it also means you can charge only one transmitter at a time. Then again, if you do need to charge both, you’ve probably stopped recording anyway.
Performance
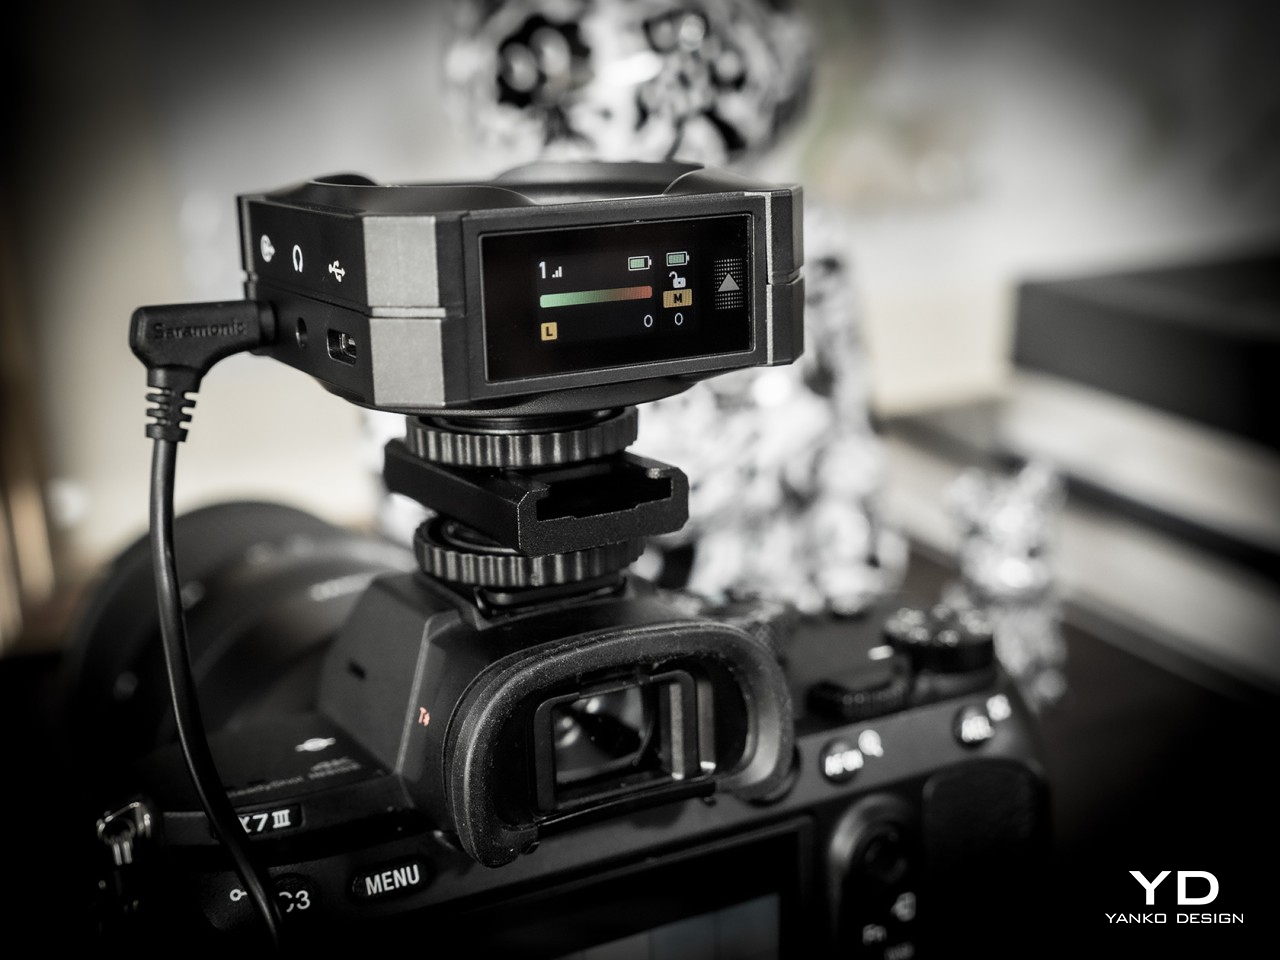
If we stopped at the BlinkMe B2’s unique aesthetic, people would simply pass it off as a pretty face. Fortunately, that is definitely not the case, because Saramonic’s smartest wireless definitely punches above its weight. You get clear and usable audio recordings even when there’s some busy activity around you, as we ourselves experienced on the hectic CES 2024 floor.
Even more impressive is that neither the signal nor the quality actually drops from a distance, even with some obstacle between the transmitter and the receiver, making it an excellent tool for sports or action footage. With the transmitter’s built-in recording functionality and 8GB of storage each, you don’t even have to worry when the stream does get cut off. As a bonus, the transmitter also has a “Safety Track” that’s recording at -6dB that’s meant to buffer against clipping and distortion, ensuring you will always have usable audio no matter the condition.
With wireless mics, battery life becomes just as important as audio quality, and fortunately, the BlinkMe B2 doesn’t skimp in that area either. Of course, Saramonic’s advertised 24 hours for the receiver and 8 hours for the transmitter are a tad too generous, but even hitting 22 hours and 6 hours, respectively is already quite an accomplishment. They charge fast, too, so you can be up and running for an additional hour with just a few minutes charge.
As mentioned earlier, controlling all the pieces of the BlinkMe B2 system is as easy as pie thanks to the sensitive touch screen. The transmitters, in particular, operate almost like smartwatches, with a swipe from the top revealing quick toggles and a swipe from the bottom going back to the main screen. The only slight complication is the smaller screen on the receiver, which is better used for displaying information rather than controlling the device. All in all, the BlinkMe B2 offers an unbeatable experience, not just in the quality of audio it produces but especially in the unique features it offers.
Sustainability
Saramonic introduced many features in the BlinkMe B2 that you won’t find in other wireless microphone systems, and thankfully, they’re all useful and essential to delivering an excellent audio recording experience. Unfortunately, that also makes the design of the device a little bit more complicated, which also means that repairs are going to require more specialized skills and components.
Although a wireless mic such as this is expected to be able to weather different environments, the presence of screens actually puts their durability at more risk. And the use of plastics and less eco-friendly materials are present all around, though not surprising considering it’s still the status quo in consumer electronics. Hopefully, the day will come when Saramonic puts sustainability as a major bullet point on its marketing material, allowing creators to make great content while also feeling good about their positive impact on the planet’s future.
Value
The Saramonic BlinkMe B2 is hardly a cheap kit, setting you back at about $249. There are definitely more accessible streaming mics in the market right now, with some of the popular ones just under $200. That said, those also have plenty of flaws of their own, like taking the form of a traditional mic that you need to place on a table. If you need something that can go the distance, literally, there are few that can outdo the BlinkMe B2.
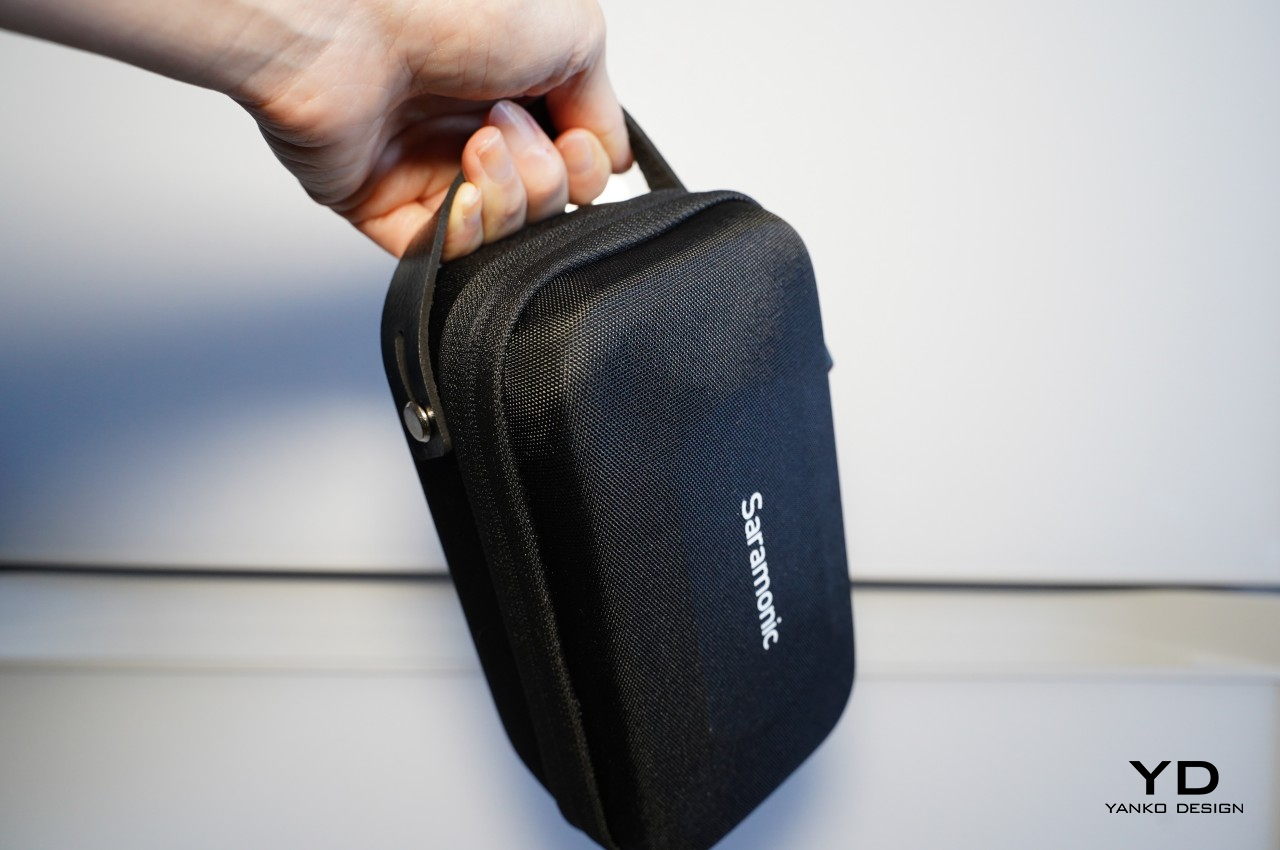
The audio clarity and volume are just impressive, especially considering how crazy it always is at CES in Las Vegas. The fact that it can deliver more than just decent recordings at great distances is a huge boon for those who want to record more dramatic footage from a safe distance. Magnets make using and placing the transmitter easier and more hassle-free, and the ability to turn these recording devices into advertisements is definitely a great help for creators and studios. Even better, that price includes an entire kit, from four magnetic attachments to two magnetic clips to even a handy carrying case that lets you bring your precious equipment with security and convenience.
Verdict
It’s almost too easy to take the importance of quality audio for granted until that dreaded moment when you realize you barely recorded anything intelligible. Reliable audio that you can use is even more critical for those moments that will never come to pass again, including interviews you might not be able to retake. It’s in those moments that you’ll wish you had an audio recorder you could also rely on, just like your camera or smartphone.
The Saramonic BlinkMe B2 smart wireless microphone system is definitely ready to step up to the challenge. It breaks away from mic design conventions to deliver a product that has just enough tech to deliver convenience and a unique aesthetic without overburdening the user with inessential details and options. It’s powerful, a little bit quirky, and, most importantly, reliable, delivering quality audio recordings even in the most trying conditions. Yes, it’s also a bit pricey, but it’s an investment that will pay for itself throughout the coming years of creating high-quality audiovisual content.
Adorning your home office/PC gaming setup with Logitech’s lineup of LIGHTSYNC RGB products is an honorable goal on its own. But if you already own a LIGHTSYNC keyboard, mouse, headphones, and computer speakers (to be fair, I really love those G560s!), you’re probably dedicated to the bit by this point. Good news: it’s time to expand your RGB setup yet again. Even if you already have those aforementioned accessories — which work remarkably well together, producing quite the lightshow when synced with in-game visuals via the Logitech G Hub software — you’re still going to need a microphone for your desk. And that’s where Logitech’s newest array of LIGHTSYNC-equipped Yeti microphones comes in.
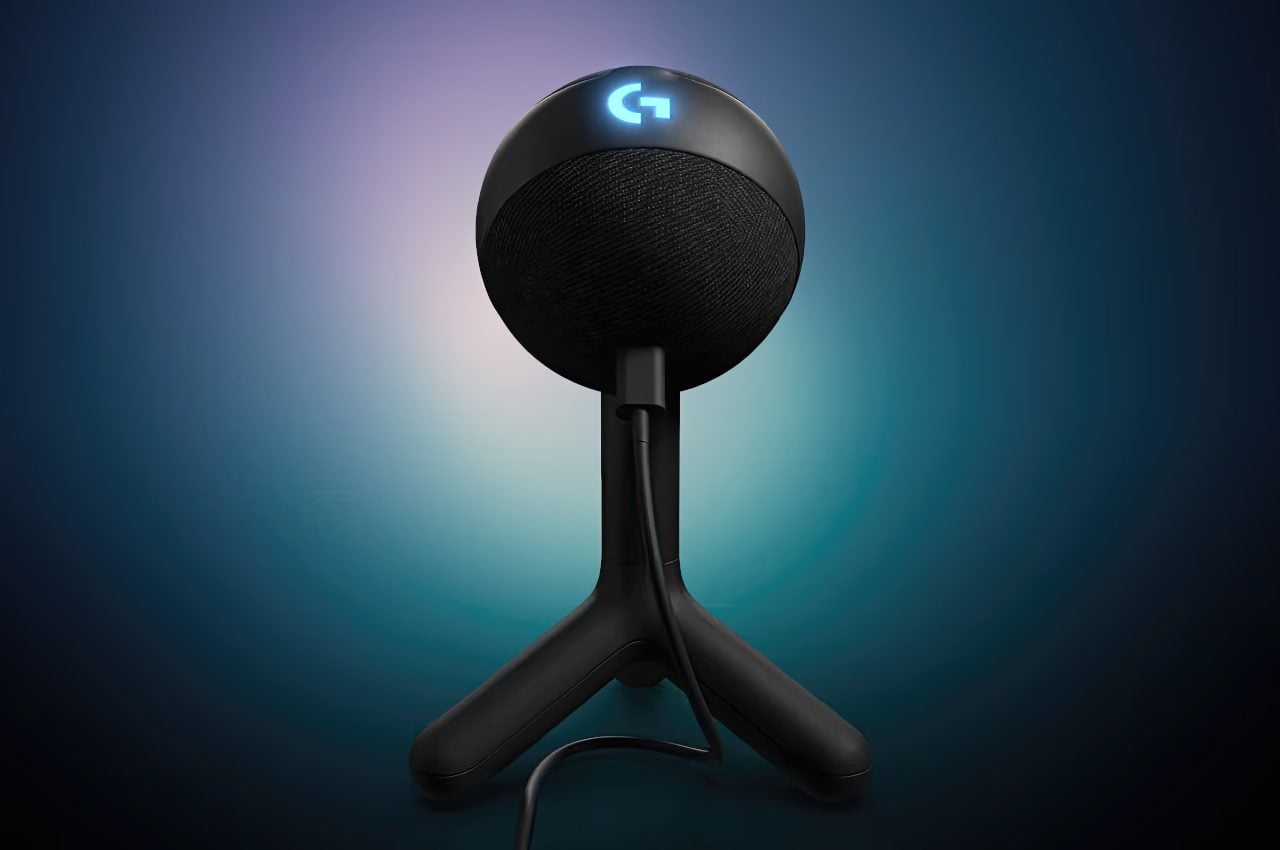
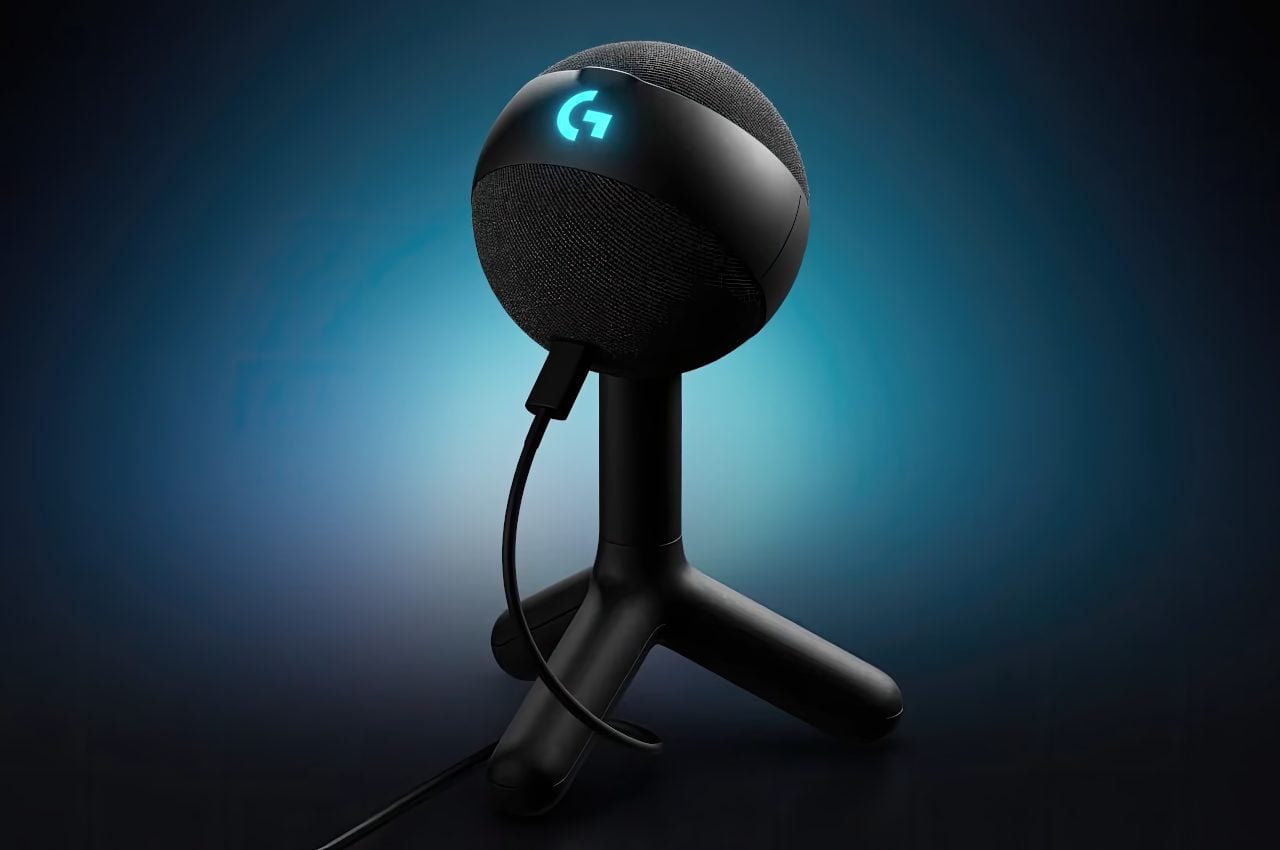
The Logitech G Yeti Orb — and, separately, the Yeti GX — are Logitech’s newest desktop mics, ditching the old Blue brand in favor of Logitech G. Both use cardioid pickup patterns, which is optimal for recording a single speaker, but the Orb is a condenser mic whereas the GX is a fancier dynamic mic, and the latter is a bit more expensive as a result. That said, it sounds like no matter which of the two you get, Logitech’s newest microphones are gorgeous thanks to their LIGHTSYNC RGB integration, and both are easy to install and set up thanks to their reliance on a single USB-C cable.
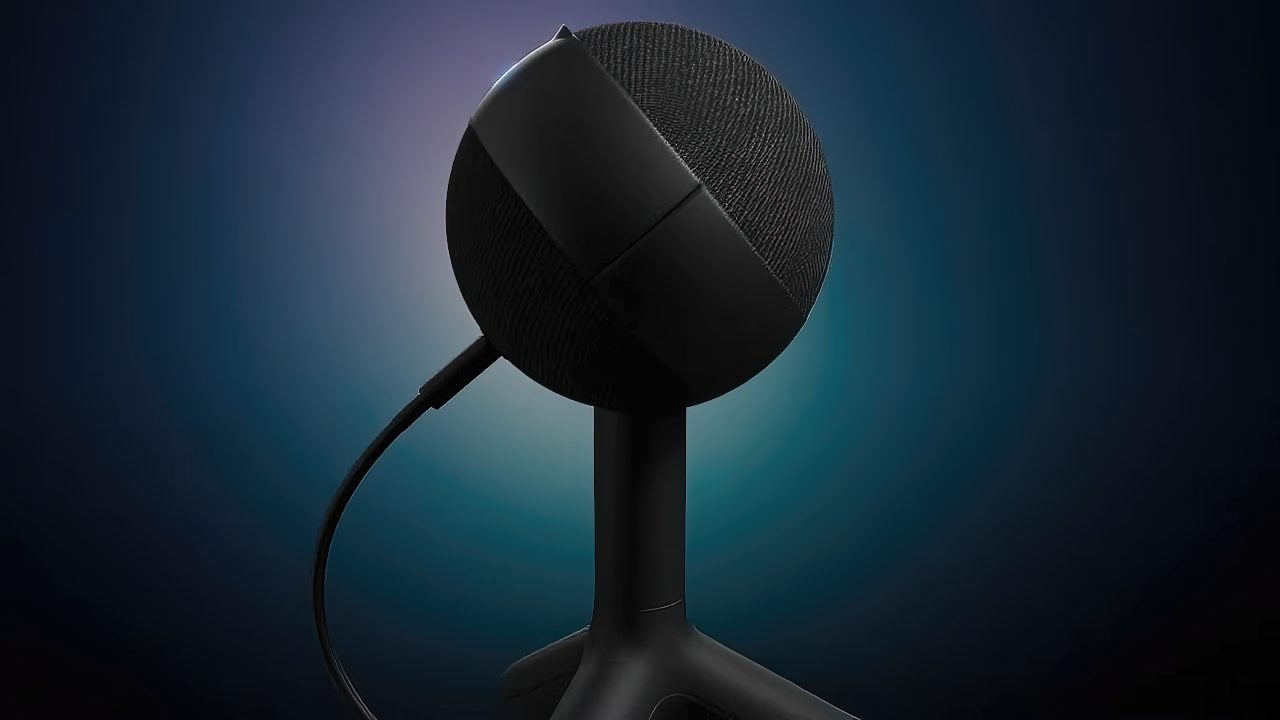
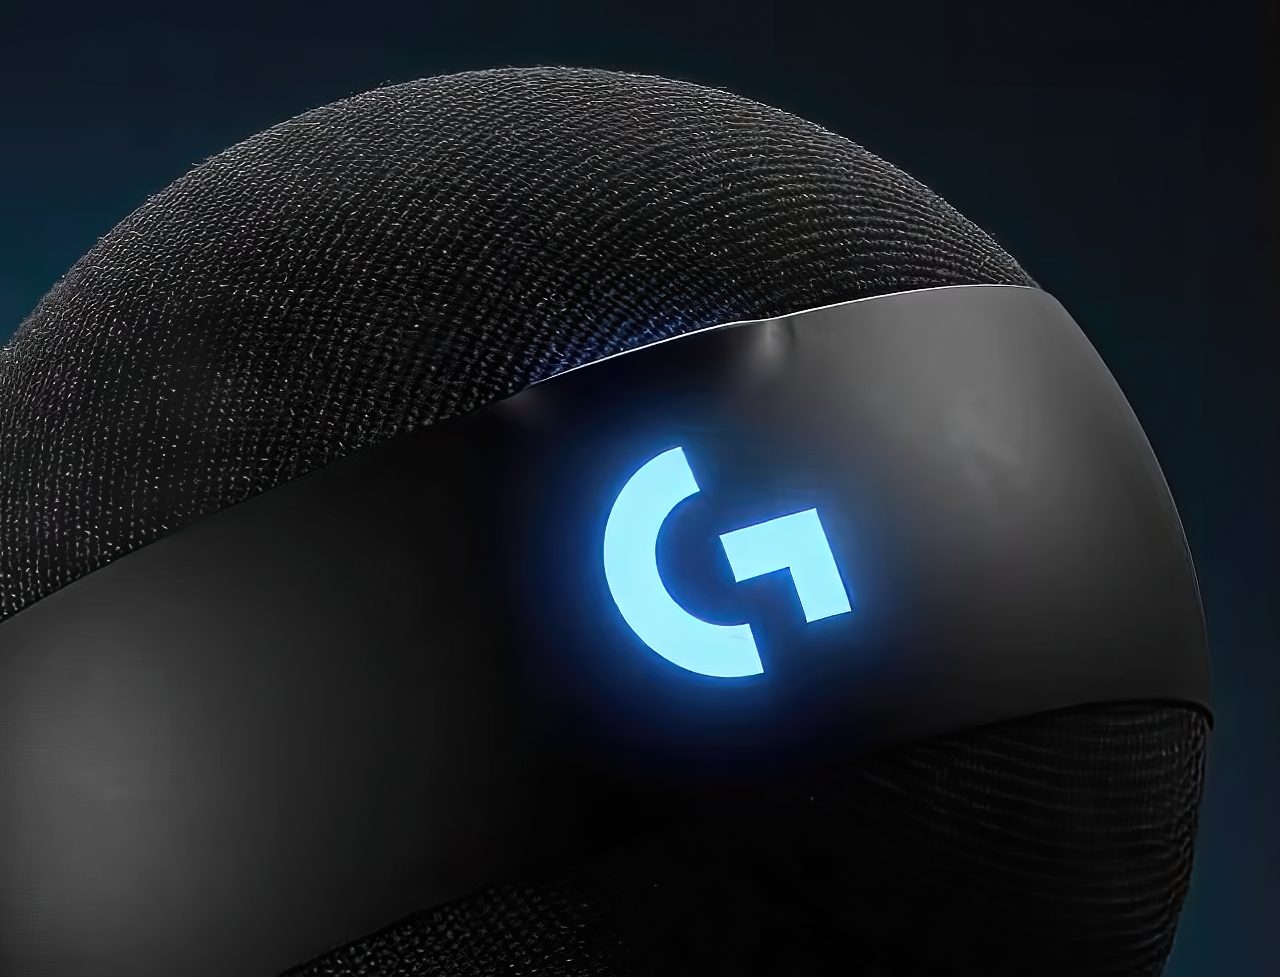
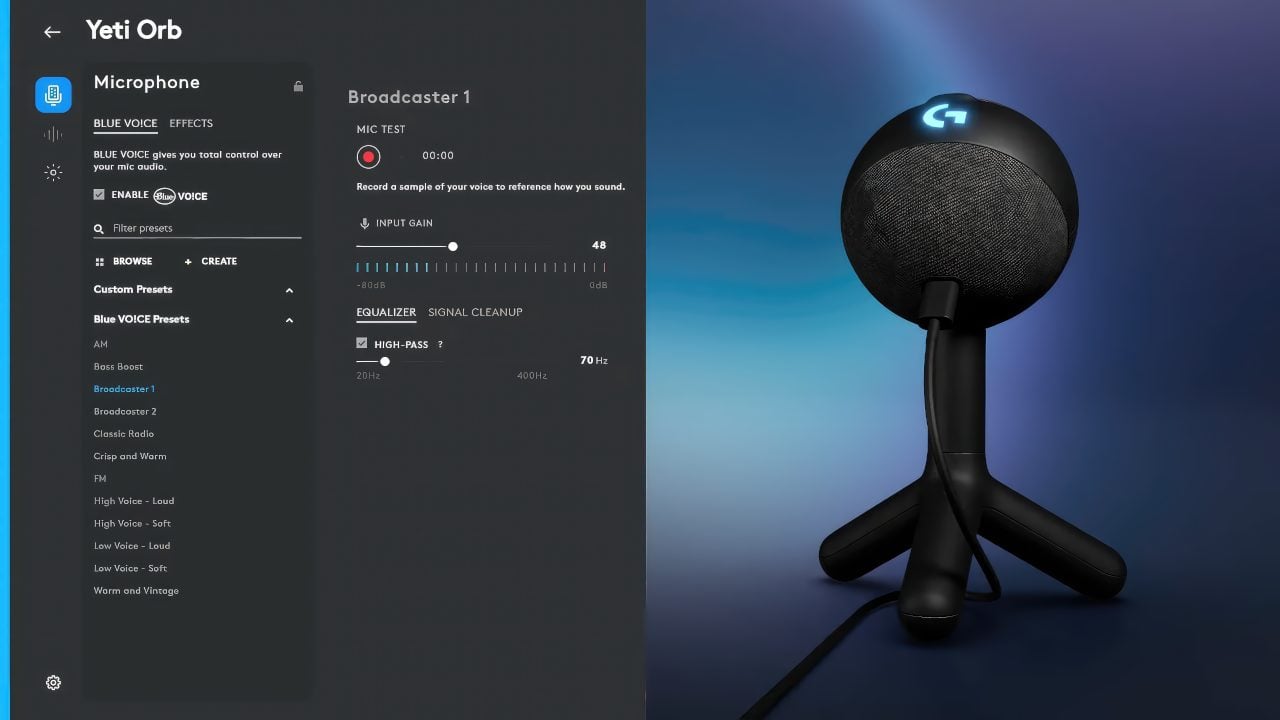
The Yeti Orb condenser mic is the lower-priced of the two new Logitech mics, and… it’s quite cute. The rather small, orb-shaped microphone stands upright on its packed-in mini tripod, making it perfect to stick on top of a desk alongside a laptop. The mic design itself is cut in two by a matte ring, which features the RGB-backlit “G” letter candidly positioned on top. According to Logitech, this is a carbon neutral design, made with “a minimum of 74% certified post-consumer recycled plastic by weight.” Moreover, Logitech claims the packaging itself is sustainably sourced from FSC-certified forests.
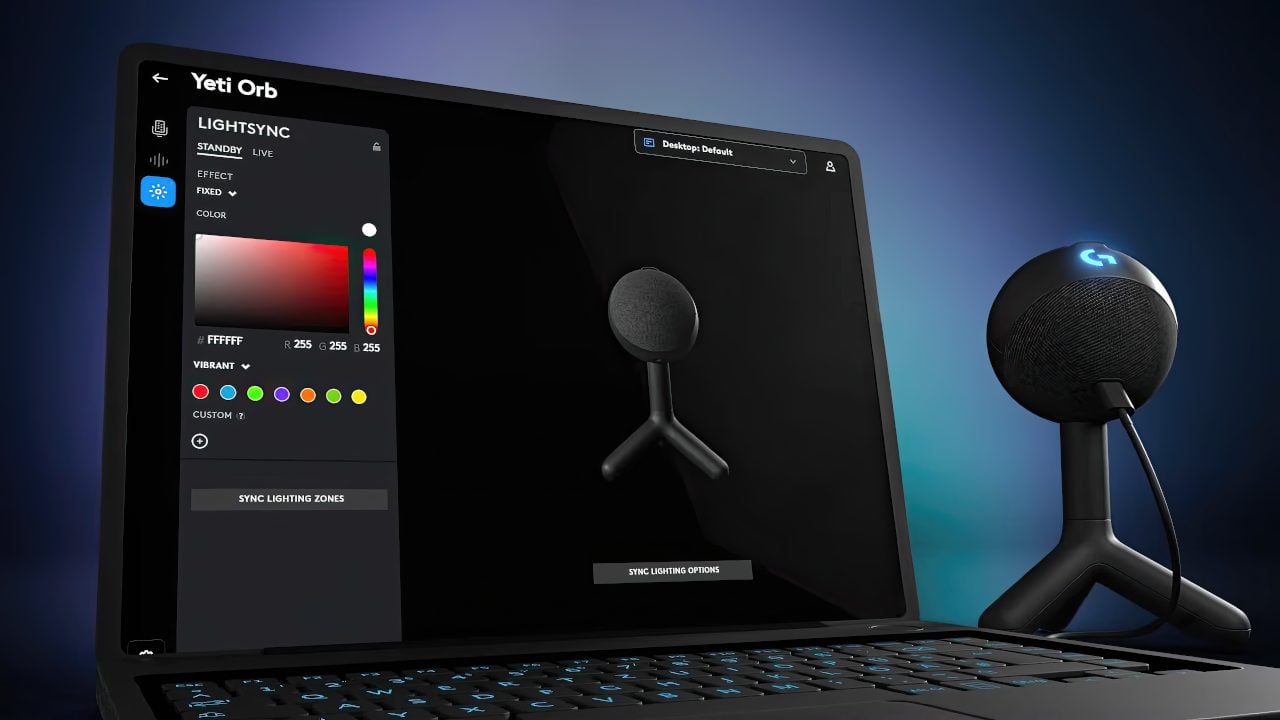
Several reviews of the Yeti Orb condenser mic indicate the audio quality on it is notably clear for the price, with Tom’s Hardware calling out its budget-friendliness at an MSRP of $59.99. The software itself sounds easy to use, especially if you’re already familiar with Logitech G Hub. All you need to do is plug it in, and then you can get started customizing your lighting and audio preferences. It even comes with several voice presets through the integrated BLUE VO!CE mode, which gives you control over the Yeti Orb’s acoustic calibration — even allowing you to do silly things, like apply special effects to make your voice sound extra deep or ethereal.