NASA has decided to bring the Crew-11 astronauts home a month earlier than originally planned due to a “medical concern” with one of them. This is the first time in its history that the space agency is cutting a mission short due to a medical issue, but it didn’t identify the crew member or divulge the exact situation and its severity. The agency is targeting a return date no earlier than January 14, with the exact schedule depending on the weather. If NASA’s original plan pushes through, the crew will splash down off the coast of California at approximately 3:40 AM on January 15.
The agency previously postponed an International Space Station (ISS) spacewalk scheduled for January 8, citing a medical concern with a crew member that appeared the day before. NASA’s chief health and medical officer, James “JD” Polk, said the affected astronaut is “absolutely stable” and that this isn’t a case of an emergency evacuation. The ISS has a “robust suite of medical hardware” onboard, he said, but not enough for a complete workup to determine a diagnosis. Without a proper diagnosis, NASA doesn’t know if the astronaut’s health could be negatively affected by the environment aboard the ISS. That is why the agency is erring on the side of caution.
Crew-11 left for the space station on August 1 and was supposed to come back to Earth on or around February 20. After they leave the station, only three people will remain: Two cosmonauts and one astronauts who’ll be in charge of all the experiments currently being conducted on the orbiting lab. The team’s replacement, Crew-12, was supposed to head to the ISS mid-February, but NASA is considering sending the astronauts to the station earlier than that.
Update, January 10, 2025, 5:15AM ET: This story has been updated to include Crew-11’s tentative return date.
This article originally appeared on Engadget at https://www.engadget.com/science/space/nasa-is-ending-crew-11-astronauts-mission-a-month-early-140000750.html?src=rss
Dolby may have announced Dolby Vision 2 a few months ago, but the company gave the new platform its first big reveal at CES 2026. I got the chance to see the improvements in person for the first time, thanks to a variety of demos and Q&A sessions. Dolby Vision 2 will be available this year, but initially, it will be limited. As such, I’ve compiled the info on where the image engine will be available first, and what’s likely to come next in terms of where and how you can use it. But first, let’s quickly summarize what Dolby Vision 2 will even do for your TV.
What is Dolby Vision 2?
Dolby Vision 2 is Dolby’s next-generation image engine that the company announced in September. The new standard will do several things to improve picture quality on your TV, including content recognition that optimizes your TV based on what and where you’re watching. This first element will improve scenes that many viewers complain are too dark, compensate for ambient lighting and apply motion adjustments for live sports and gaming.
Dolby Vision 2 will also deliver new tone mapping for improved color reproduction. I witnessed this first hand in various demos at CES, and this is the biggest difference between the current Dolby Vision and DV2 for me.
There’s also a new Authentic Motion feature that will provide the optimal amount of smoothing so that content appears more “authentically cinematic,” according to Dolby. This means getting rid of unwanted judder, but stopping short of the so-called soap opera effect.
Essentially, Dolby is taking advantage of all of the capabilities of today’s TVs, harnessing the improvements to display quality and processing power that companies have developed in the decade since Dolby Vision first arrived.
What TVs will support Dolby Vision 2?
Lifestyle photo of the TCL X11L SQD-Mini LED Series
TCL
The biggest Dolby Vision 2 news at CES was the first three TV makers that have pledged support for the new standard. Hisense is bringing it to its 2026 RGB MiniLED TVs — including UX, UR9 and UR8. The company also plans to add it to more MiniLED TVs with an OTA update. TCL's 2026 X QD-Mini LED TV Series and C Series will support Dolby Vision 2 via a future update. It will be available on TP Vision’s Philips’ 2026 OLED TVs, including the 2026 Philips OLED811, and OLED911 series as well as the flagship OLED951.
There are sure to be other companies that announce Dolby Vision 2 support in 2026. Sony doesn’t announce its new TVs at CES anymore, so that’s just one of the bigger names that’s yet to reveal its hand. Any upcoming TVs that seek to leverage the full suite of tools that Dolby Vision 2 offers will need to have an ambient light sensor as that’s one of the key facets of Dolby’s upgrade.
What content will be available in Dolby Vision 2?
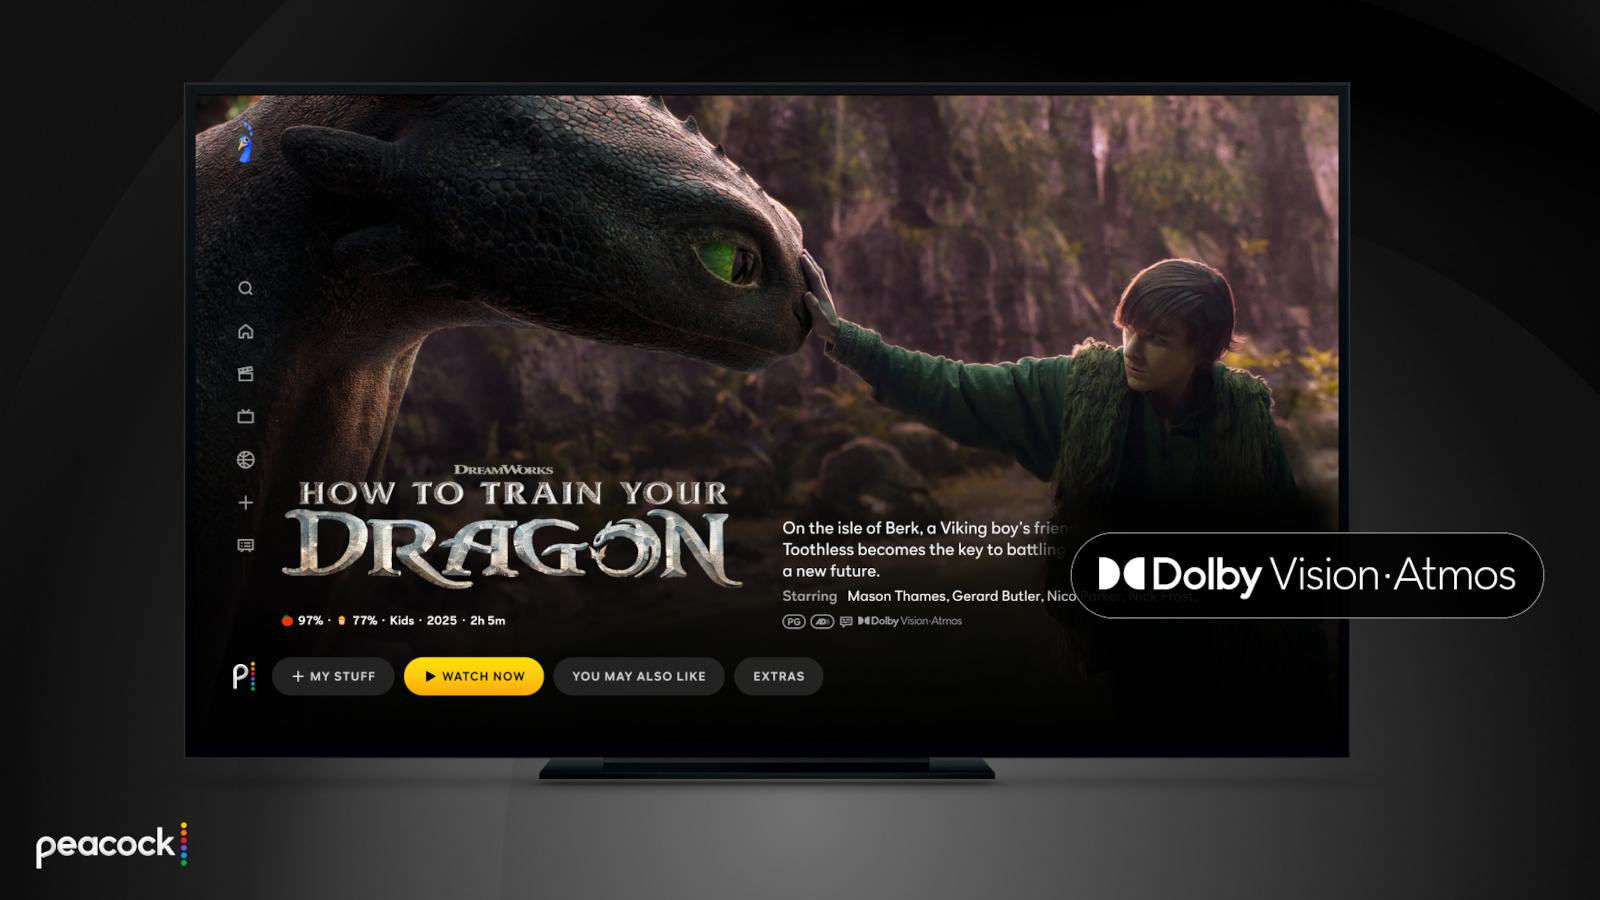
Peacock is bringing Dolby Vision and Atmos support to more live sports offerings.
Peacock
The other big piece of Dolby Vision 2 news at CES 2026 was the first streaming service that will support the platform. Peacock grabbed that honor, and so far it’s the only streamer to pledge support. However, several services support the current version of Dolby Vision, including Netflix, Disney+, Apple TV+, Amazon Prime Video, HBO Max and Paramount+. Like the additional TV support that’s sure to be announced throughout the year, I expect more streaming services will jump on board soon as well.
This article originally appeared on Engadget at https://www.engadget.com/home/home-theater/dolby-vision-2-is-coming-this-year-heres-what-you-need-to-know-140000034.html?src=rss
Even as CES 2026 wraps up soon, there’s no shortage of standout hardware hiding in plain sight. From genuinely quieter yard tools to ultra-light EVs and companion robots that want to remember your family, Day 3 was all about tech that felt a little more considered — and in some cases, refreshingly practical.
If you can’t get enough of CES, be sure to check out our picks for best of CES 2026, which highlights the most impressive new tech we’ve seen in Las Vegas. We’ve also rounded up the CES gadgets you can buy right now if you’re itching to place an order, along with a look at the weirdest tech at CES 2026, because it wouldn’t be CES without a few delightfully unhinged ideas.
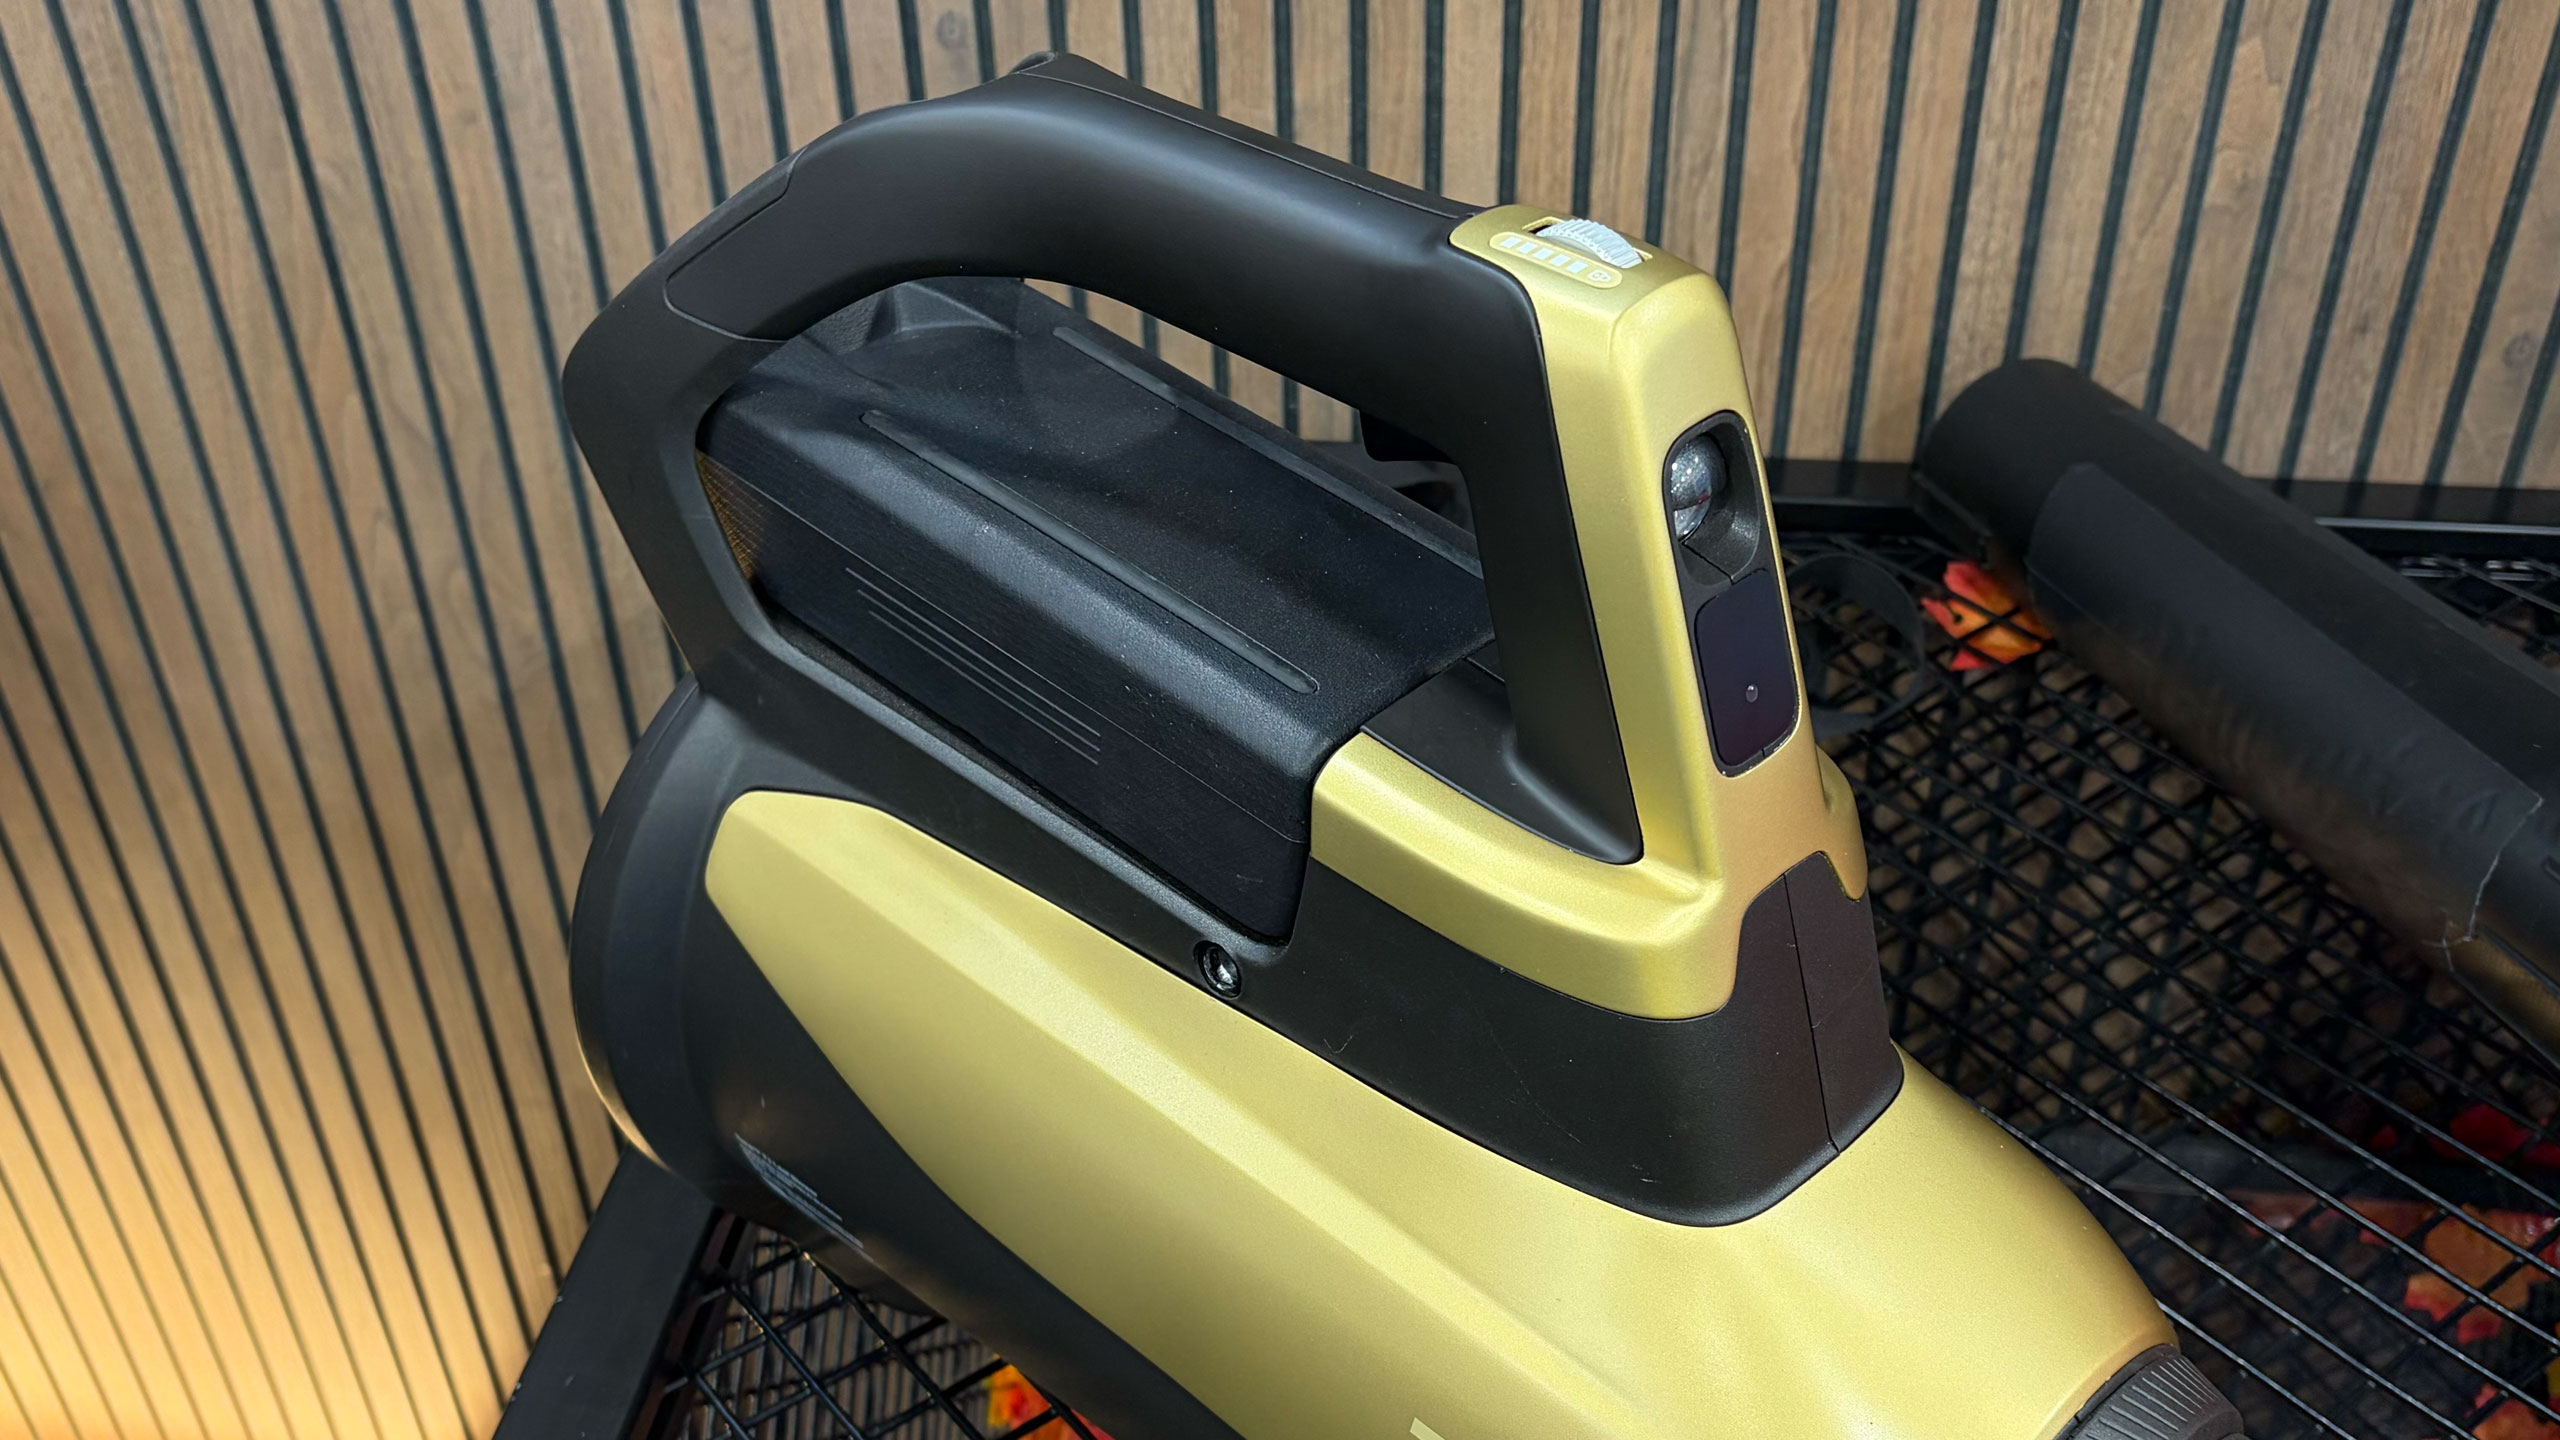
Tone Outdoors T1 leaf blower
Tone Outdoors T1
Billy Steele for Engadget
The Tone Outdoors T1 leaf blower is one of the rare CES gadgets that makes an immediate, obvious impression — mostly because it’s shockingly quiet. Whisper Aero’s aerospace-derived motor redesign delivers 880 CFM of airflow at around 52 decibels, which we could confirm even amid the noise of the show floor. It also runs up to 50 minutes in Eco mode, supports a forthcoming battery backpack and even includes an LED for nighttime cleanup. Pre-orders are open now for $599, with shipping expected in September.
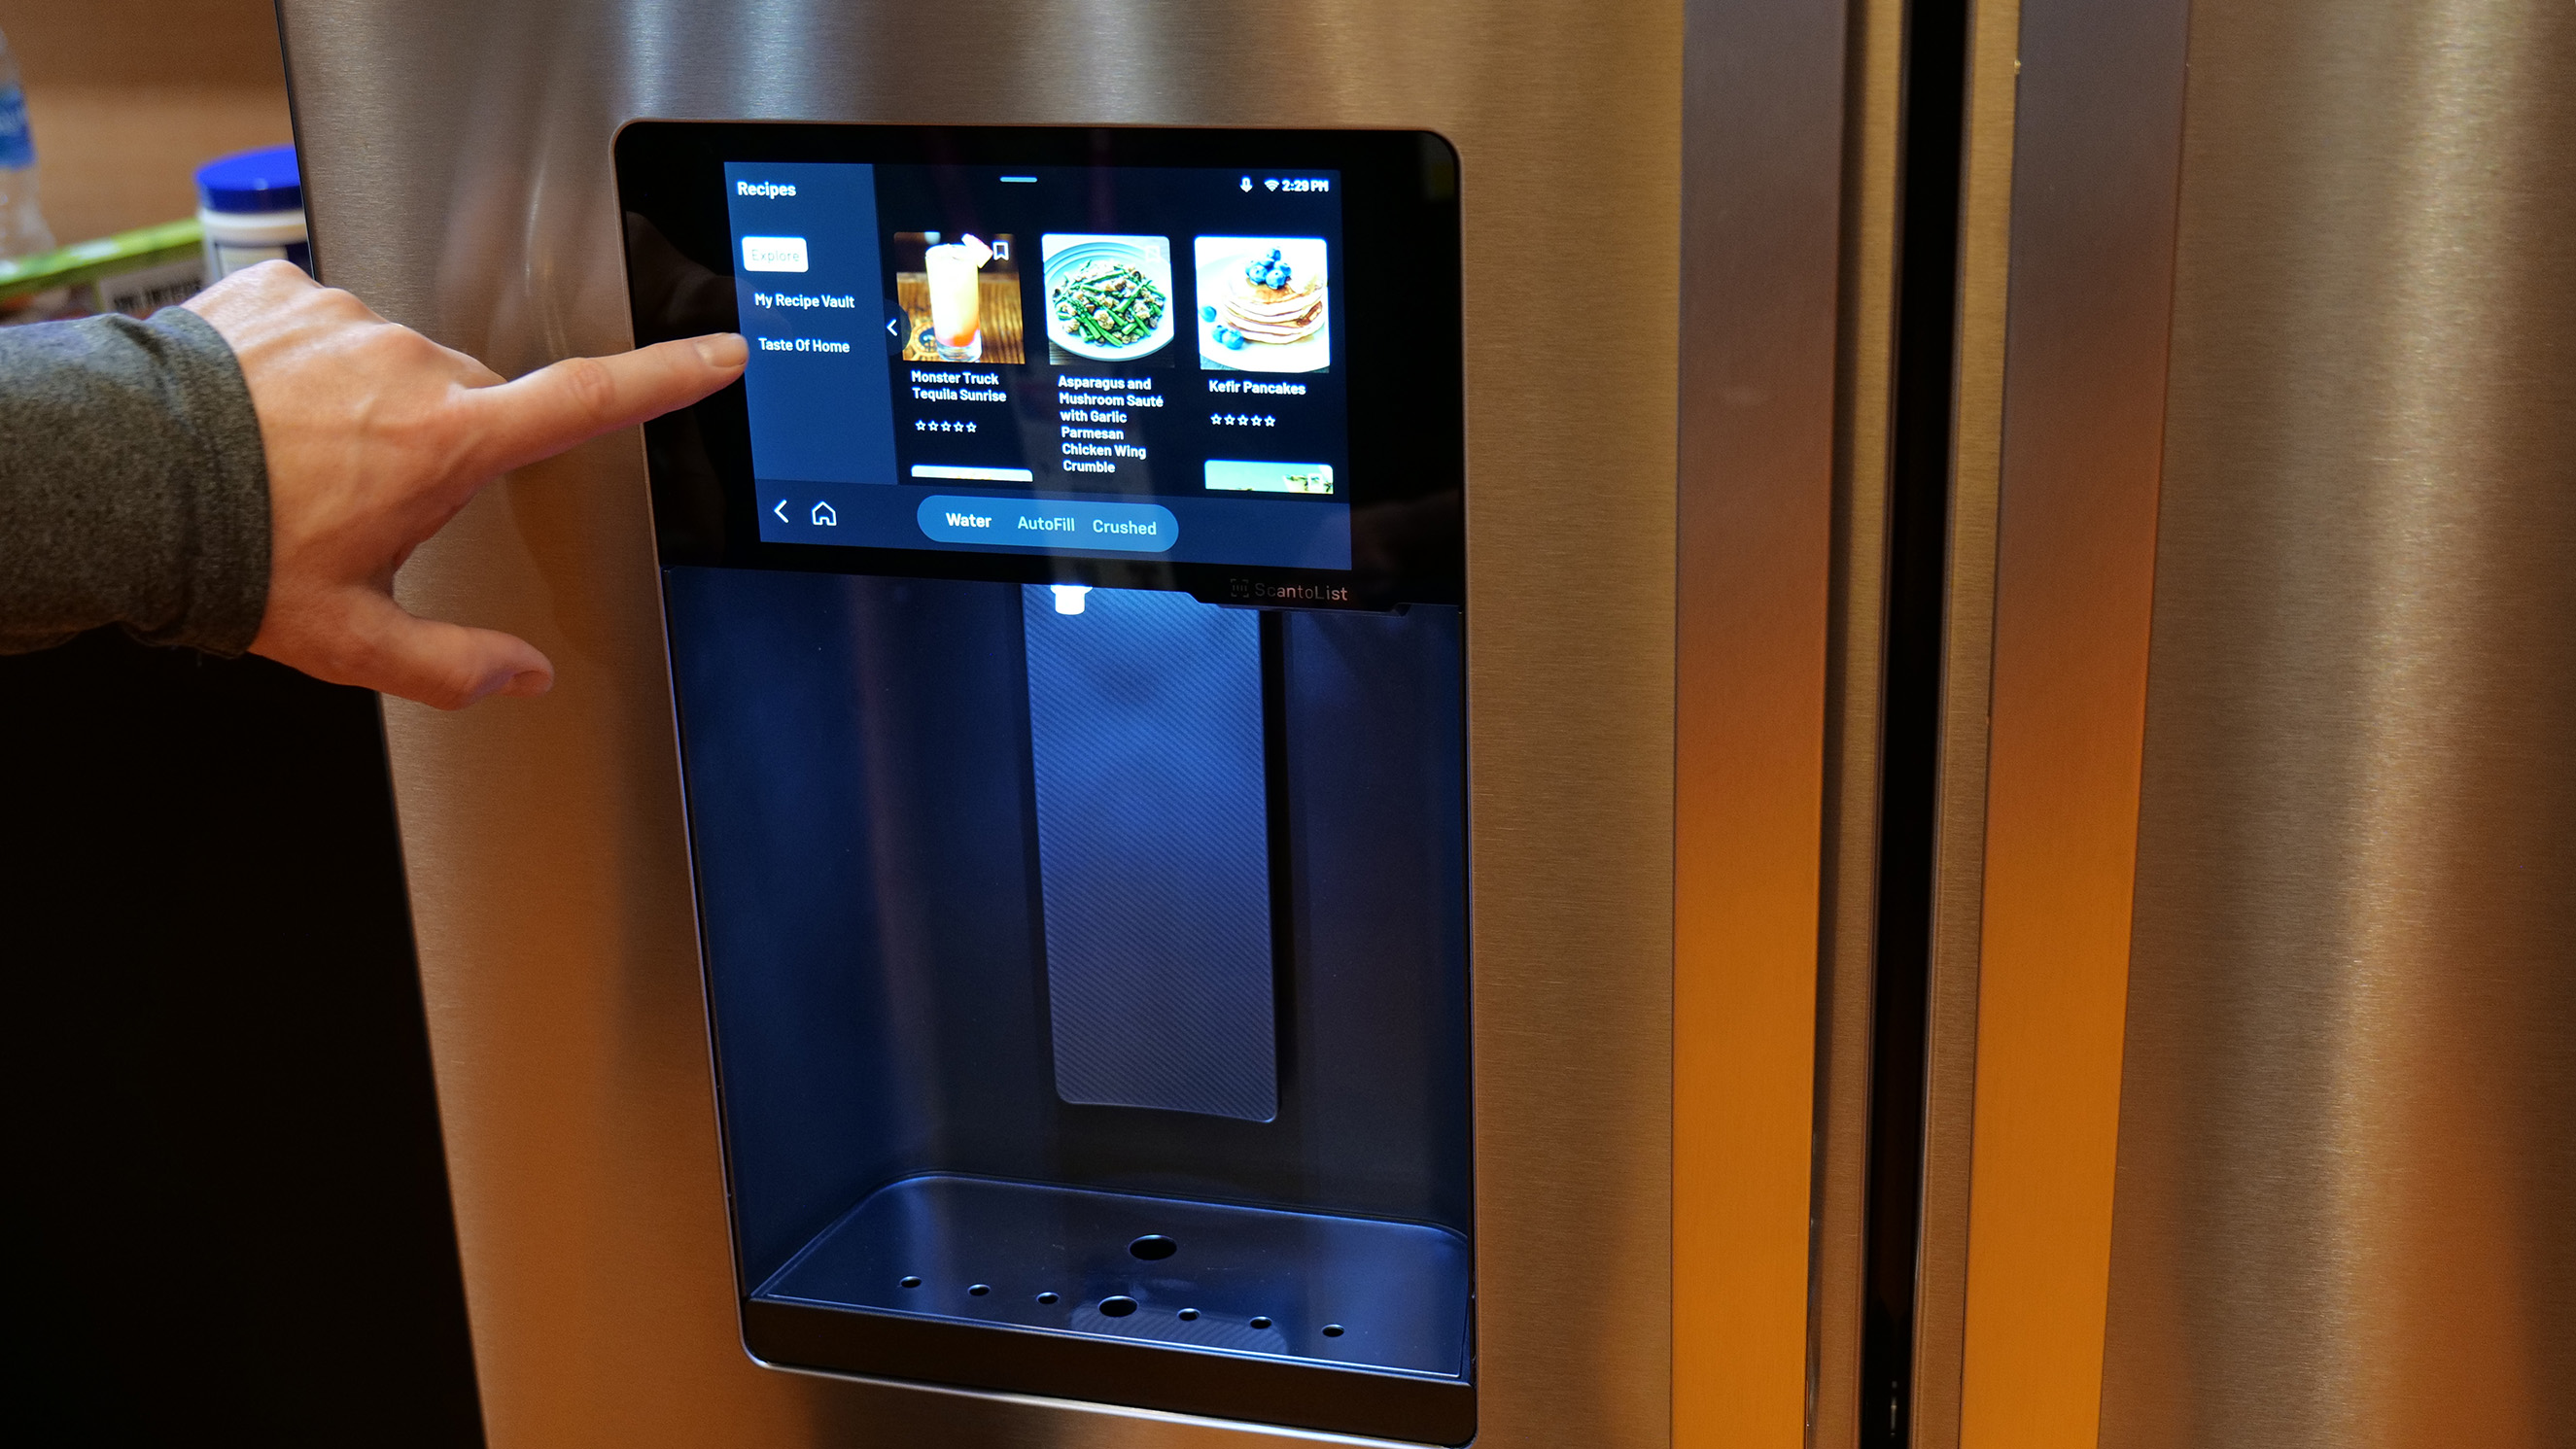
GE Profile Smart Fridge
Finally! A reasonably sized fridge screen.
Sam Rutherford for Engadget
The GE Profile Smart Fridge is the first smart fridge we’ve seen that feels like it was designed around real problems instead of just slapping a massive screen on the door. GE’s AI assistant can answer practical questions like where your water filter is, scan groceries via a built-in barcode reader and keep tabs on produce with a crisper drawer camera. The eight-inch display feels refreshingly restrained, while integrations with Instacart and recipe suggestions add utility. It launches in March for $4,899, and for once, we’re genuinely curious what it would be like to live with it.
Longbow Motors Speedster EV
Longbow Motors Speedster
Billy Steele for Engadget
Longbow Motors brought one of the most emotionally compelling EVs we’ve seen to CES, and it’s unapologetically minimalist. The Speedster uses in-wheel motors from Donut Labs to hit a jaw-dropping curb weight of just 2,200 pounds, lighter than a Miata. Its stripped-back interior, mystery shift lever and exposed motors feel like a direct rejection of touchscreen-heavy modern cars. It’s wildly expensive at just under $100,000, but also one of the few EVs here that got us excited to drive.
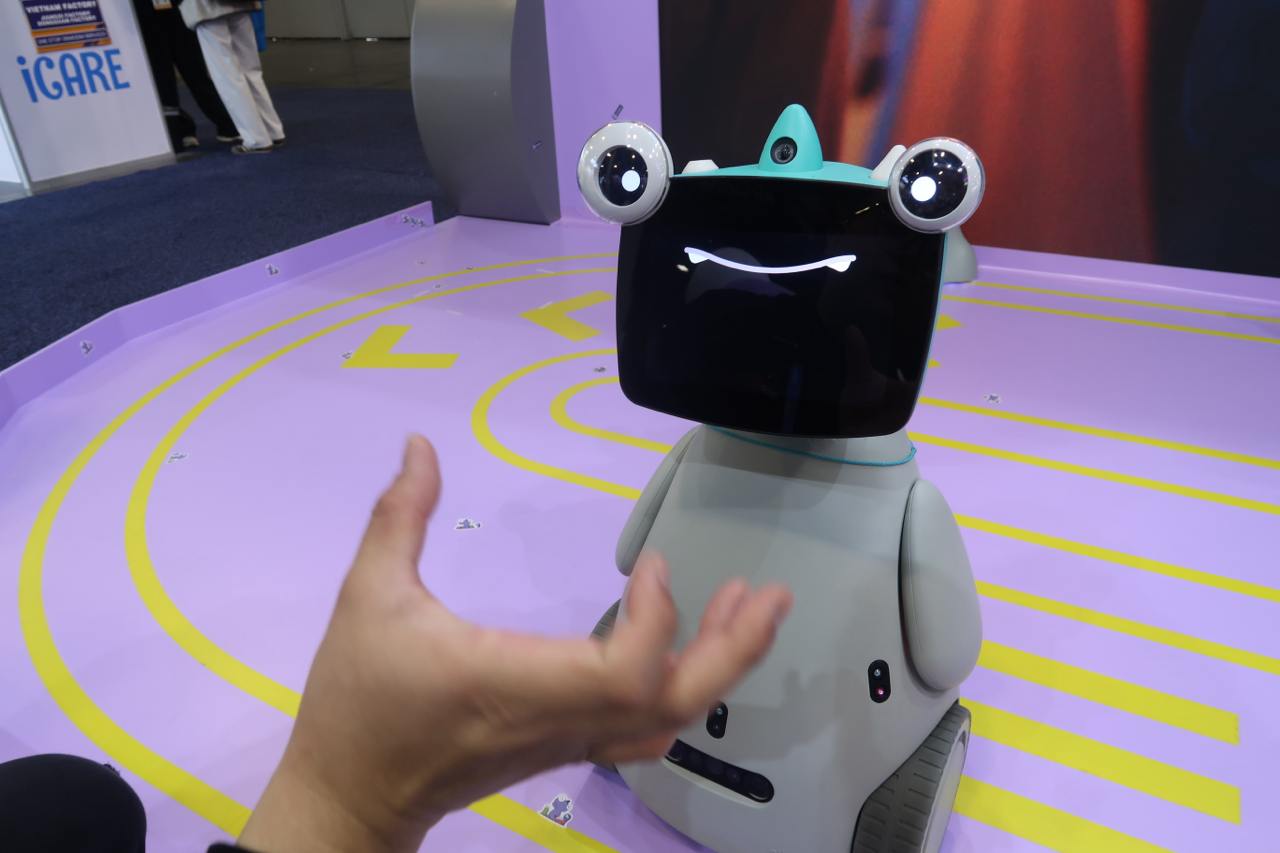
OlloBot companion robot
A robot with eyes on top of a screen showing a smile.
Cheyenne MacDonald for Engadget
OlloBot might win the award for most charmingly strange robot on the show floor. Designed as a family “cyber pet,” it responds to voice and touch, develops a personality over time and stores all its memories locally in a removable heart-shaped module. The robot can help find lost items, make calls and eventually control Matter smart home devices. A Kickstarter is planned for summer, with pricing starting around $1,000.
Bluetti Charger 2
Here's how the Bluetti Charger 2 would work with dual charging sources.
Bluetti
Bluetti’s Charger 2 fixes a very specific but real problem for off-grid users: charging from your engine and solar panels at the same time. The dual-input system supports up to 600W from solar and 800W from an alternator, dramatically speeding up battery top-ups. It also works with multiple Bluetti power stations and can even jump-start your vehicle in a pinch. Early pricing is $349 through February 7, after which it jumps to $499.
CES is ending, but we’ve got more stories to tell
The CES show floor will soon be closing down, but Engadget still has a lot of stories in our pipeline. As the crowds thin out, we’re continuing to surface the tech that actually stands out — whether it’s solving everyday annoyances or simply doing something bold and different. Stay tuned to our CES 2026 hub for more hands-ons, deep dives and final takeaways even after CES 2026 comes to a close at the end of this week.
This article originally appeared on Engadget at https://www.engadget.com/big-tech/ces-2026-day-3-the-most-interesting-tech-thats-still-on-the-show-floor-134724231.html?src=rss
Kia has unveiled its new entry level electric vehicle, the EV2. The boxy model strongly resembles the company's Soul (Kia did make an electric Soul at one point) and has very similar dimensions, though it's slightly shorter in height and length. It's not exactly a range monster and will charge a bit slower than the competition. The EV2 launched at the Brussels Motor Show and the company said it has no plans for US availability at this point.
The EV2 uses Kia/Hyundai's E-GMP platform and slots into the bottom of its EV lineup as an "entry point to electric mobility," according to the automaker. Though nearly the same size, it certainly looks nicer than the dowdy Soul and has more room inside. Competition-wise, it's going up against Volvo's EX30 and may cost about the same, though Kia has yet to divulge pricing.
Kia
The EV2 will be offered with two battery options: a 42kWh battery with 197 miles of WLTP range (likely around 170 miles by EPA standards) and 61kWh with 278 miles of WLPT range (around 240 EPA miles). That's not a lot, especially compared to the 261 mile EPA max range of the EX30 — so Kia's pricing for the EV2 will be key. As for charging speeds, Kia says the EV2 will charge from 10 to 80 percent in about 30 minutes — a bit slower than the 69 kWh EX30. Like other Kia vehicles, the EV2 supports vehicle-to-grid and vehicle-to-load (V2L/V2G) charging.
Kia calls the vehicle's interior a "Picnic Box" as a way to describe the small but useful space. Kia says its "comparable to larger vehicles" in terms of space, with generous rear legroom and rear cargo capacity up to 403 liters. It will come in four- and five-seat versions.
Kia
As for tech inside, it offers a generous screen setup, with a 12.3-inch instrument cluster, 12.3-inch infotainment screen and a 5-inch climate display. Ambient lighting in the cabin syncs up with specific vehicle functions. At the same time, it offers a fully array of manual controls climate, volume control and more. It comes with multiple USB-C ports (three up front) that support up to 100W charging.
The company has yet to reveal performance figures other than range. Production is set to start in Q1, so deliveries should commence in Europe and other regions later in the year. It doesn't look like the EV2 will arrive stateside any time soon, though, as the company said it "has not announced plans for the US market."
This article originally appeared on Engadget at https://www.engadget.com/transportation/evs/kias-budget-ev2-arrives-with-up-to-240-miles-of-range-130038144.html?src=rss
Probably my favorite thing about the Lego Smart Play system unveiled this week at CES is that it was designed for kids, first and foremost. In the past 10 years or so, Lego has increasingly courted an older audience with more expensive and elaborate sets. But when it was time to bring more advanced technology to Lego, the idea right from the beginning was more social and interactive play.
If you haven’t heard about Smart Play yet, its a way for Lego to make its sets more interactive. A Smart Brick filled with sensors makes it so sets can respond to each other, know when they’re moving, play sounds and know when the corresponding Smart Minifigures are near them. Tiny Smart Tags, meanwhile, help the Smart Brick know the context of how it’s being used — whether it’s in a helicopter, car or duck for example.
Tom Donaldson, senior VP and Head of Creative Play Lab at the LEGO Group, told Engadget that the company worked on Smart Play for about eight years before introducing it this week, and that social play was the starting point. “We started really looking at consumer needs, and this idea that kids really like social play,” said Donaldson “Kids really like the sort of things that change when they come back to them, and the kids really like agency. They want to be able to change things.”
Lego's Tom Donaldson demoing Smart Play at CES.
LEGO
But a big part of the creation process was making the Smart Brick as flexible and powerful as possible and then seeing what scenarios could take advantage of it. “We wanted to build a really powerful platform,” he said. “What we shouldn't do is say, ‘this is what we think we're gonna need.’ We needed to say, ‘let's create something that has a lot of capabilities that we can then figure out how to use.’”
One of the conflicts with the tech-packed Smart Play system, though, might be the cost. Obviously, Lego has been successful at most ventures it has undertaken in recent years, but the pricing of Smart Play sets could make adoption a bit challenging. The biggest Smart Play set, Star Wars Throne Room Duel & A-Wing, for example, has almost 1,000 pieces and costs $160. That’s quite a bit more than comparably sized sets. The dual factors of the Star Wars license and Smart Play tech certainly impacted the cost.
Lego Smart Play Star Wars set
LEGO
The set includes two Smart Bricks, five Smart Tags and three Smart Minifigures, the most “smart” gear included in any of the initial three Star Wars Smart Play sets. Will parents shell out for the more advanced capabilities that Smart Play offers, or will they stick with standard sets?
For now, Lego is betting the extremely broad appeal of Star Wars will help these new Smart Play sets find an audience. About three years ago, Lego got its team focused on the Star Wars franchise involved, as well as Lucasfilm, to figure out how to roll Smart Play out to the world. “Very early on, we all decided that starting with the original trilogy would be great,” said Derek Stothard, Disney’s Director of Global Licensing “These are such well-known scenes and characters, and they cross generations, so parents can introduce them to their kids. All that works really well together.”
Unsurprisingly, Lego is being coy about where things go beyond the initial three Star Wars sets, but it’s clear that after eight years of development, they’ll want to bring it to as many product lines as possible. “We're announcing a platform that you can see has tremendous growth [potential], Donaldson said. “We made the analogy with the minifigure as something that you’ll see across the entire [Lego] system, maybe not in every single SKU but it’ll reappear in many different places. But ultimately we're a company that really focuses on giving kids what they want, what they love, and we'll have to see how it lives in a market.”
That last point about how it lives in the market is a good one, particularly given the pricing. We probably won’t know for sure until Lego moves beyond the safe confines of Star Wars and really shows us what Smart Play can do across more varied scenarios. And going to non-licensed sets might be where Smart Play really takes off — it’s easy to imagine a cheaper Smart Play add-on kit that can bring sets to life at a lower cost. But the idea of transforming anything kids create into something more interactive has a ton of potential if Lego can broaden its appeal beyond Star Wars fans.
This article originally appeared on Engadget at https://www.engadget.com/entertainment/lego-is-trying-to-make-tech-invisible-with-smart-play-130000979.html?src=rss
There are no recruitment ads for Immigration and Customs Enforcement (ICE) running on Spotify at the moment, the streaming service has told Variety. A spokesperson has confirmed the news after an ICE agent fatally shot Renee Good in Minneapolis, but they also clarified that the ads stopped running in late 2025. “The advertisements mentioned were part of a US government recruitment campaign that ran across all major media and platforms,” they explained.
Spotify caught flak back in October for playing ICE ads, asking people to “join the mission to protect America,” in between songs for users on the ad-supported plan. The advertisements even promised $50,000 signing bonuses for new recruits. Campaigns were launched to urge users to cancel their subscriptions and to boycott the service, and even music labels called on the company to stop serving ICE advertisements. Spotify said back then that the ads don’t violate its policies and that users can simply mark them with a thumbs up or down to let the platform know their preferences.
The company reportedly received $74,000 from Homeland Security for the ICE ads, but that’s a tiny amount compared to what other companies received. According to a report by Rolling Stone, Google and YouTube were paid $3 million for Spanish-language ads that called for self-deportation, while Meta received $2.8 million.
This article originally appeared on Engadget at https://www.engadget.com/entertainment/streaming/spotify-is-no-longer-running-ads-for-ice-130000672.html?src=rss
Another first-party Xbox game is making the leap to PlayStation 5. This time around, Obsidian’s Avowed — one of our favorite games of last year — is crossing the great divide. The fantasy action RPG will hit Sony’s console on February 17, one day shy of the game’s first anniversary.
As it happens, an anniversary update is set to go live on all platforms at the same time. This includes a new game+ mode (allowing those who have beaten the RPG to replay it with all their gear and upgrades from their previous run), a photo mode, a new weapon type and more.
Avowed is set in the same universe as Obsidian’s Pillars of Eternity games. It tasks you with investigating a fungal plague that has infested the world. “The writing is stellar throughout, though the sidequests that reveal your companions’ backstories are particularly poignant," Engadget senior reporter Jessica Conditt wrote. "Avowed is gorgeous, its combat systems are fully customizable, its characters are intriguing and its encumbrance limit is generous. There’s a real sense of magic about the entire game — and no, that’s not just the mind-altering mushrooms talking."
Microsoft has brought a string of first-party Xbox games to PS5 over the last couple of years, freeing them from console exclusivity. Forza Horizon 5, Indiana Jones and the Great Circle, Senua's Saga: Hellblade II and Sea of Thieves are among the games that have crossed over to PlayStation. Later this year, you’ll even be able to play a Halo game on PS5, something that was utterly unthinkable not too long ago.
This article originally appeared on Engadget at https://www.engadget.com/gaming/playstation/xbox-is-bringing-avowed-to-ps5-120000035.html?src=rss
Lumus got a major boost in brand recognition when one of its waveguides was selected for use in the Meta Ray-Ban Display glasses. But that already feels like old tech now because at CES 2026, the company brought some of its latest components to the show and based on what I saw, they seem poised to seriously elevate the optical quality of the next wave of high-end smartglasses.
When the Meta Ray-Ban Displays glasses came out, they wowed users as they were (and still are) one of a handful of smartglassess to feature a full-color in-lens display with at least a 20-degree field of view. But going by the specs on Lumus’ newest waveguides, we’re set for a major upgrade in terms of future capabilities.
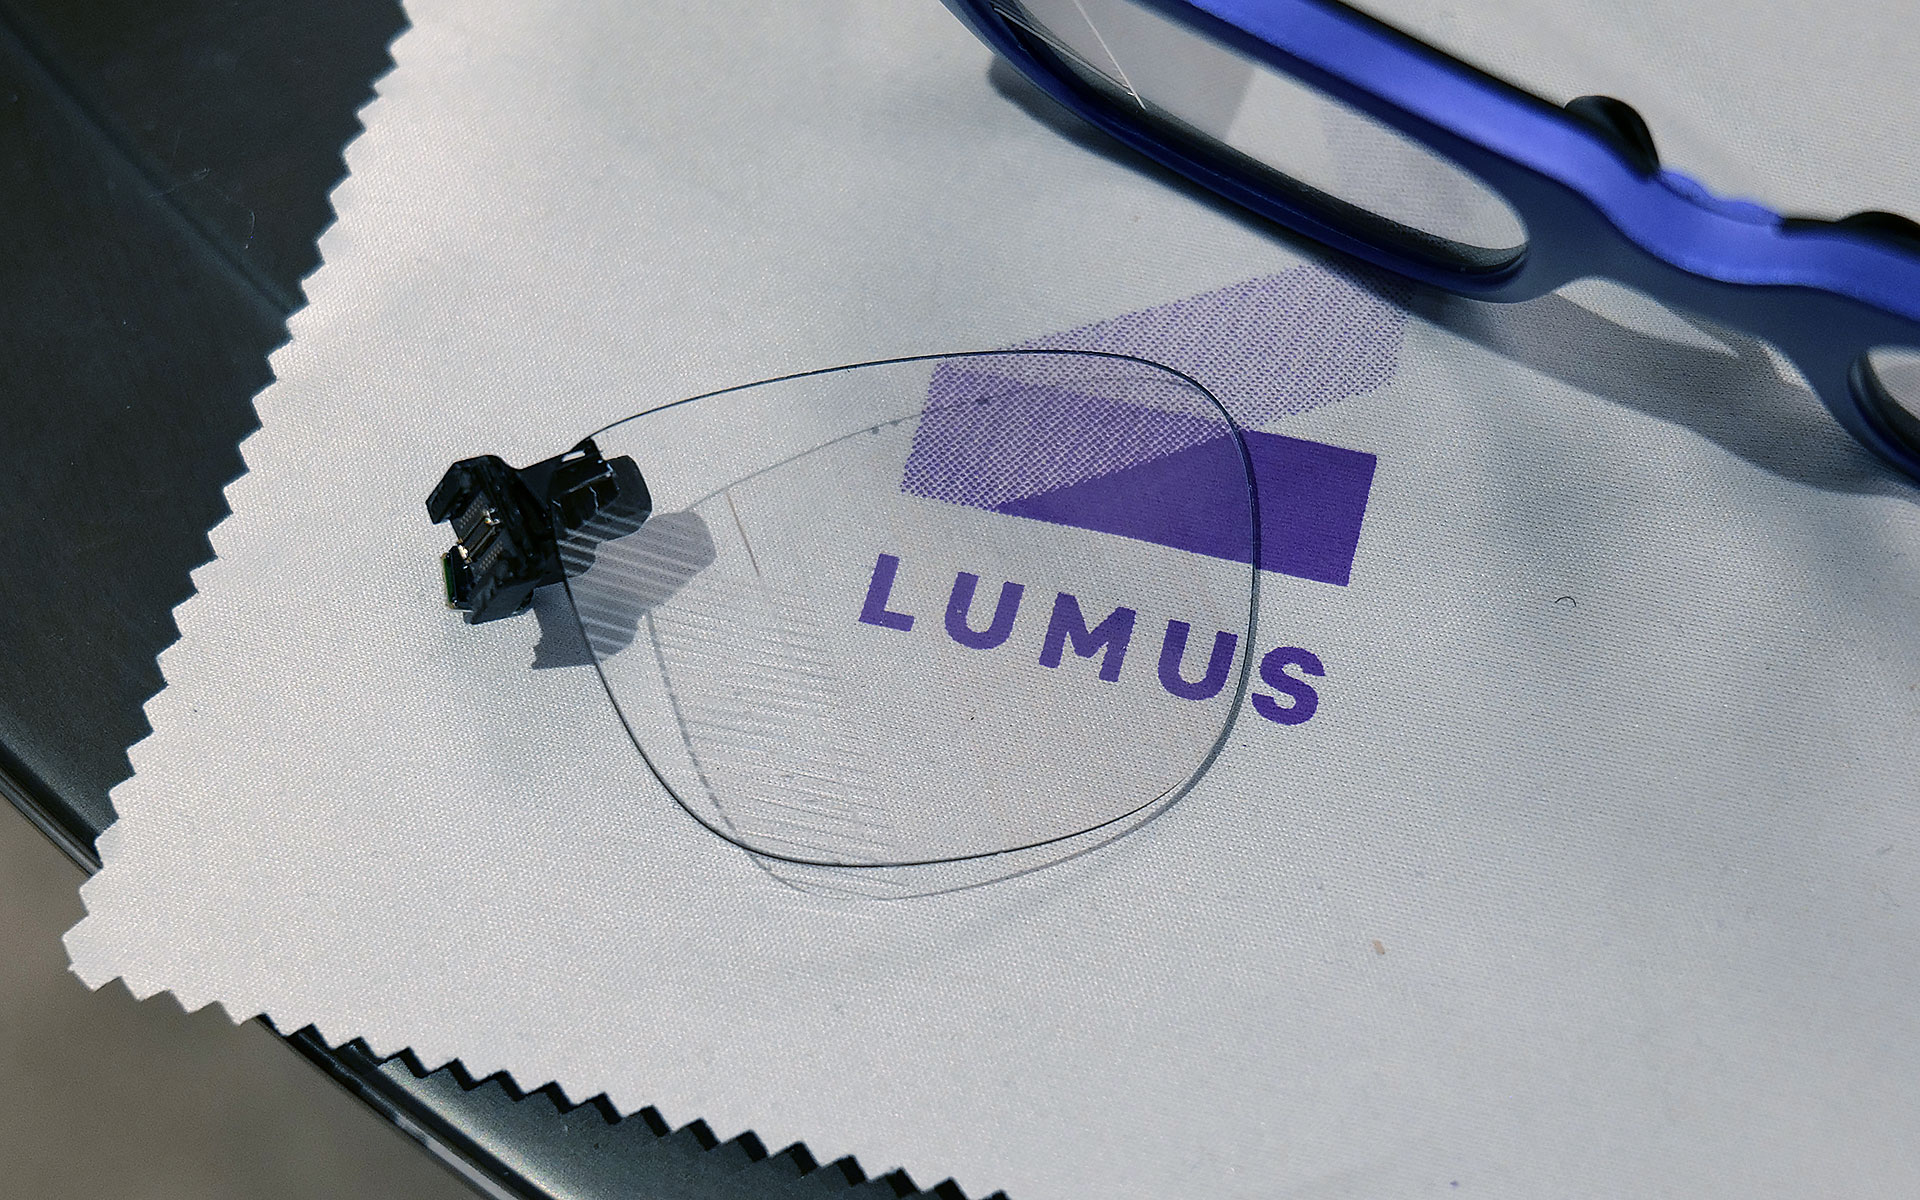
If you look closely, you can see where light from the waveguide propagates into the one of the smartglasses' lenses.
Sam Rutherford for Engadget
The first model I tried featured Lumus’ optimized Z-30 waveguides, which not only offer a much wider 30-degree FOV, they are also 30 percent lighter and 40 percent thinner than previous generations. On top of that, Lumus says they are also more power efficient with the waveguides capable of hitting more than 8,000 nits per watt. This is a big deal because smartglasses are currently quite limited by the size of batteries they can use, especially if you want to make them small and light enough to wear all day. When I tried them on, I was dazzled by both the brightness and sharpness I saw from the Z-30s despite them being limited to 720 x 720 resolution. Not only did the increase in FOV feel much larger than 10 degrees, colors were very rich, including white, which is often one of the most difficult shades to properly reproduce.
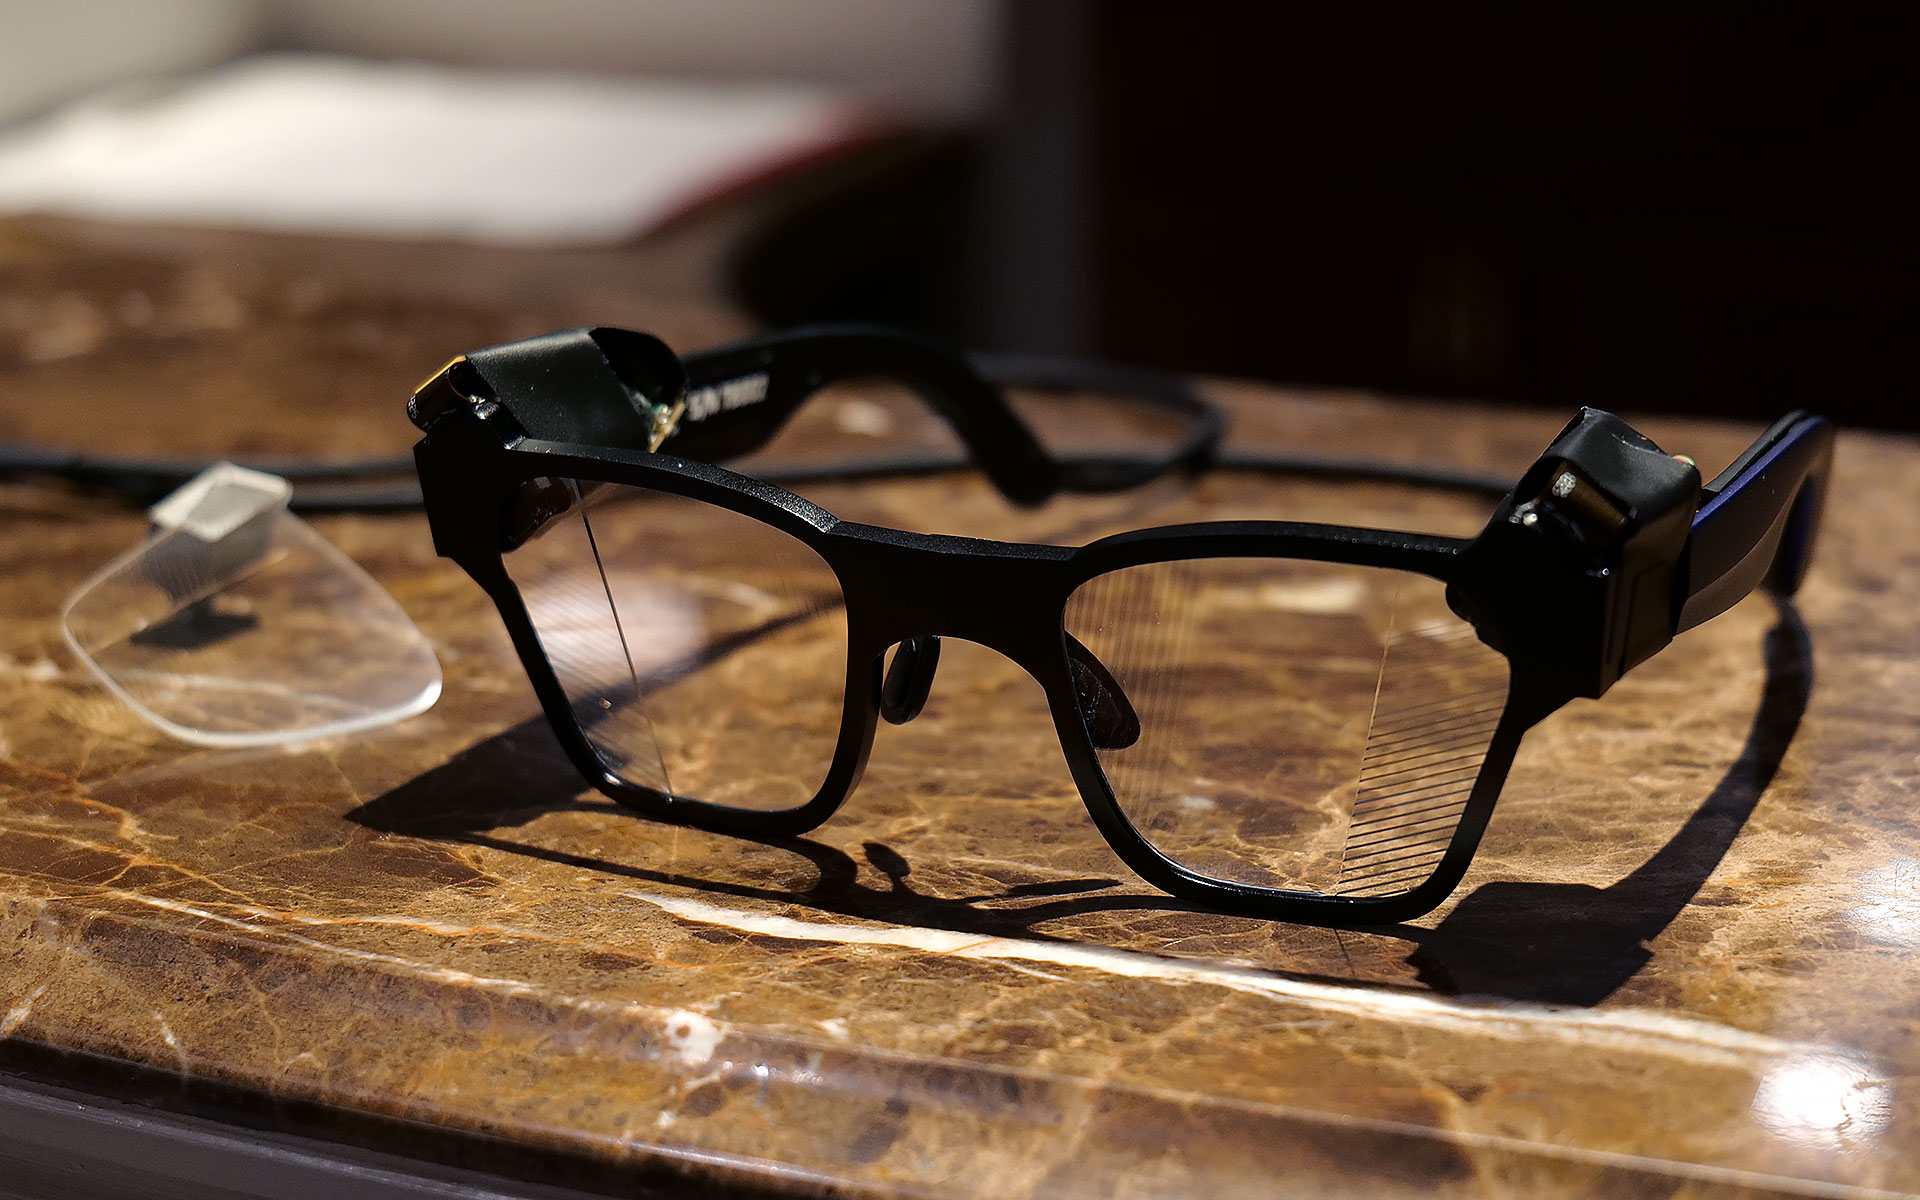
I had to take a photo of one of Lumus' non-functioning smartglasses with the company's 70-degree FOV waveguide, because two out of three of the working ones had already broke and the last one that I used was being held together by tape.
Sam Rutherford for Engadget
However, even after seeing how good that first model was, I was totally not prepared for Lumus’ 70-degree FOV waveguides. I was able to view some videos and a handful of test images and I was completely blown away with how much area they covered. It was basically the entire center portion of the lens, with only small unused areas around the corners. And while I did notice some pincushion distortion along the sides of the waveguide’s display, a Lumus representative told me that it will be possible to correct for that in final retail units. But make no mistake, these waveguides undoubtedly produced some of the sharpest, brightest and best-looking optics I’ve seen from any smartglasses, from either retail models or prototypes or. It almost made me question how much wider FOV these types of gadgets really need, though to be clear, I don’t think we’ve hit the point of diminishing returns yet.
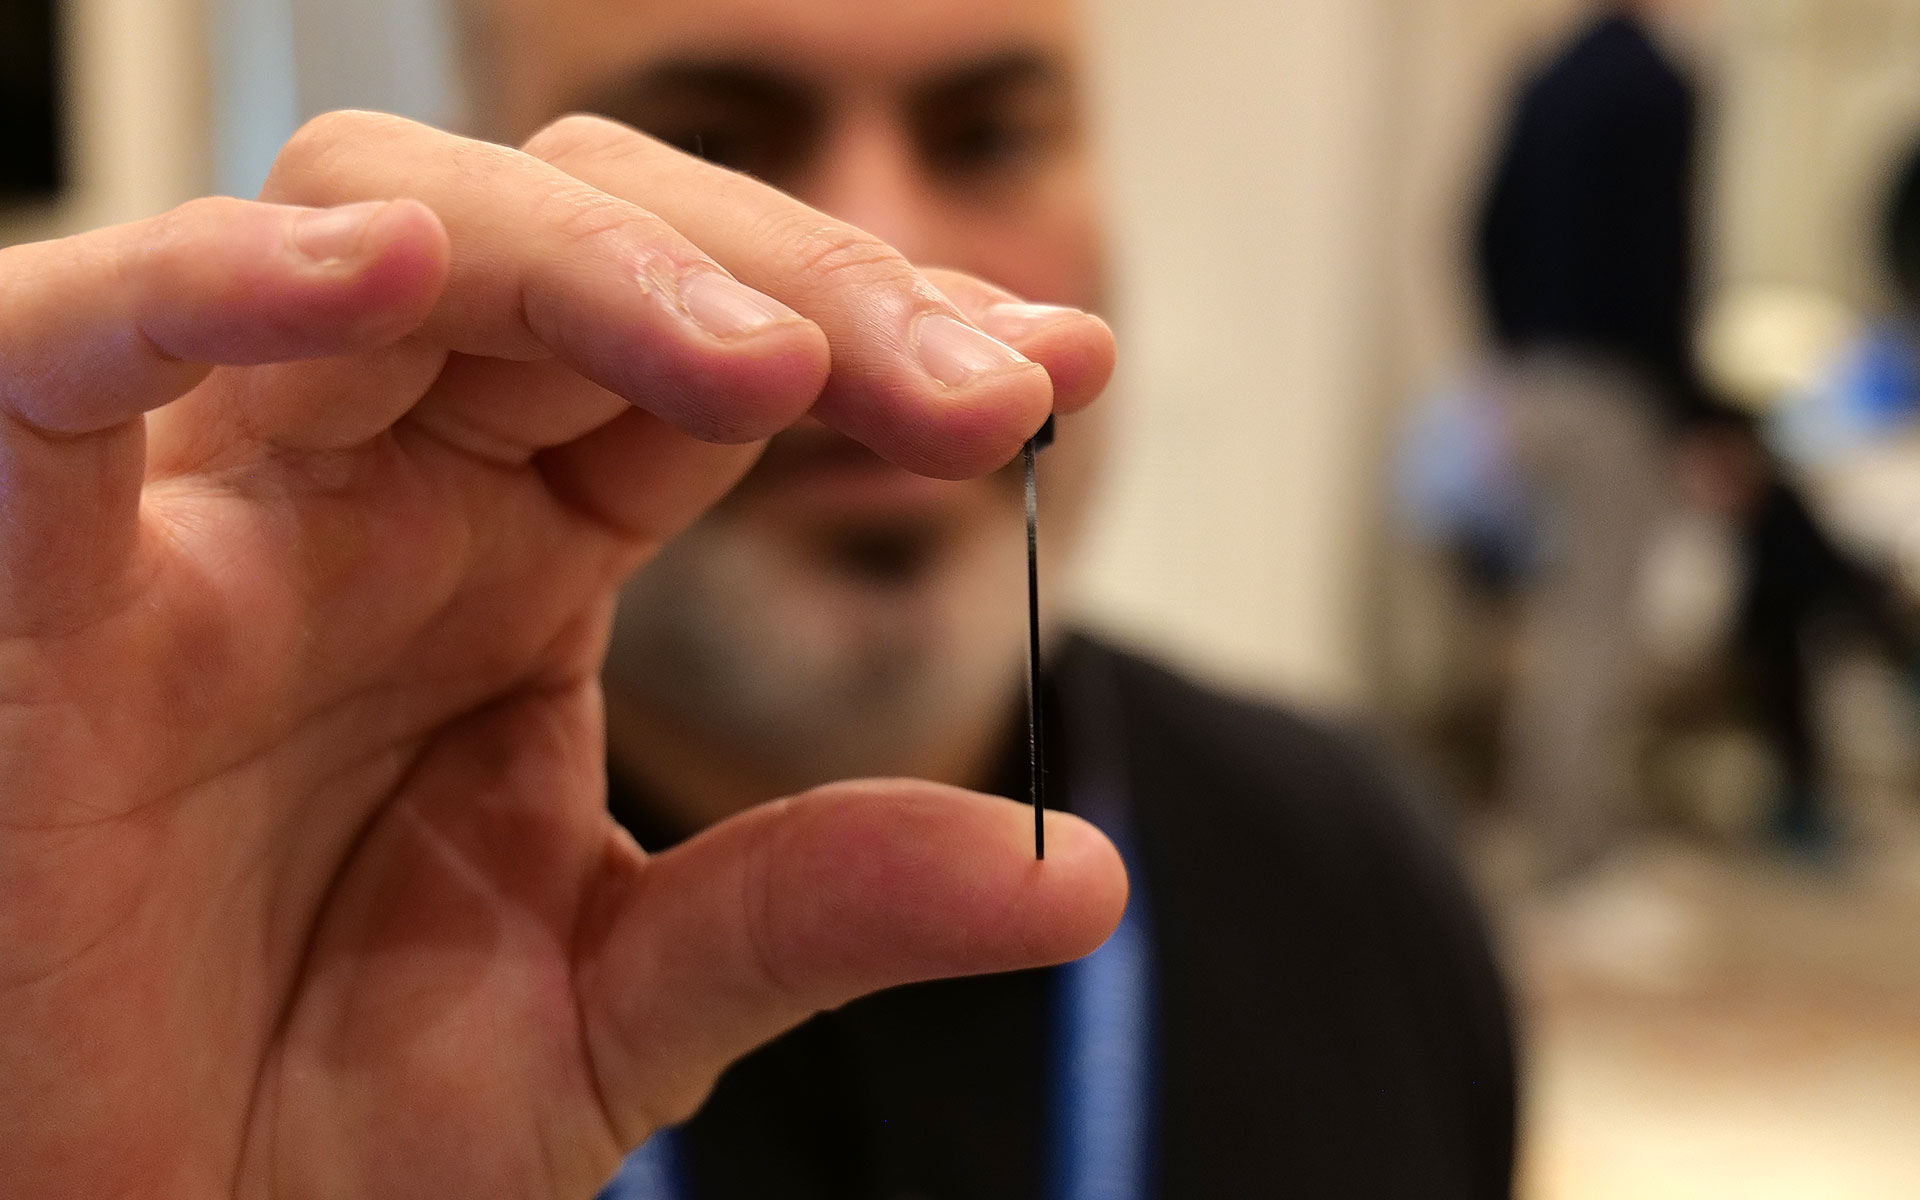
This is one of Lumus' thinnest waveguides measuring in at just 0.8mm.
Sam Rutherford for Engadget
Other advantages of Lumus’ geometric reflective waveguides include better overall efficiency than their refractive counterparts along with the ability to optically bond the displays to smartglasses lenses. That means unlike a lot of rivals, Lumus’ waveguides can be paired with transitions lenses instead of needing to resort to clip-on sunglass attachments when you go outside. Lumus also claims its designs also simplifies the manufacturing process, resulting in thinner waveguides (as small as 0.8mm) and generally higher yields.
Unfortunately, taking high-quality photos of content from smartglasses displays is incredibly challenging, especially when you’re using extremely delicate prototypes, so you’ll just have to take my word for now. But with Lumus in the process of ramping up production of its new waveguides with help from partners including Quanta and SCHOTT, it feels like there will be a ton of smartglasses makers clamoring for these components as momentum continues to build around the industry’s pick for the next “big” thing.
This article originally appeared on Engadget at https://www.engadget.com/wearables/lumus-brought-a-massively-wider-fov-to-smartglasses-at-ces-2026-233245949.html?src=rss
When Meta first announced its display-enabled smart glasses last year, it teased a handwriting feature that allows users to send messages by tracing letters with their hands. Now, the company is starting to roll it out, with people enrolled in its early access program getting it first,
I got a chance to try the feature at CES and it made me want to start wearing my Meta Ray-Ban Display glasses more often. When I reviewed the glasses last year, I wrote about how one of my favorite tings about the neural band is that it reduced my reliance on voice commands. I've always felt a bit self conscious at speaking to my glasses in public.
Up to now, replying to messages on the display glasses has still generally required voice dictation or generic preset replies. But handwriting means that you can finally send custom messages and replies somewhat discreetly.
Sitting at a table wearing the Meta Ray-Ban Display glasses and neural band, I was able to quickly write a message just by drawing the letters on the table in front of me. It wasn't perfect — it misread a capital "I" as an "H" — but it was surprsingly intuitive. I was able to quickly trace out a short sentence and even correct a typo (a swipe from left to right will let you add a space, while a swipe from right to left deletes the last character).
Alongside handwriting, Meta also announced a new teleprompter feature. Copy and paste a bunch of text — it supports up to 16,000 characters (roughly a half-hour's worth of speech) — and you can beam your text into the glasses' display.
If you've ever used a teleprompter, Meta's version works a bit differently in that the text doesn't automatically scroll while you speak. Instead, the text is displayed on individual cards you manually swipe through. The company told me it originally tested a scrolling version, but that in early tests, people said they preferred to be in control of when the words appeared in front of them.
Teleprompter is starting to roll out now, though Meta says it could take some time before everyone is able to access.
The updates are the among the first major additions Meta has made to its display glasses since launching them late last year and a sign that, like its other smart glasses, the company plans to keep them fresh with new features. Elsewhere at CES, the company announced some interesting new plans for the device's neural band and that it was delaying a planned international rollout of the device.
This article originally appeared on Engadget at https://www.engadget.com/wearables/handwriting-is-my-new-favorite-way-to-text-with-the-meta-ray-ban-display-glasses-213744708.html?src=rss
While wave upon wave of smartglasses and face-based wearables crash on the shores of CES, traditional glasses really haven’t changed much over the hundreds of years we’ve been using them. The last innovation, arguably, was progressive multifocals that blended near and farsighted lenses — and that was back in the 1950s. It makes sense that autofocusing glasses maker IXI thinks it’s time to modernize glasses.
After recently announcing a 22-gram (0.7-ounce) prototype frame, the startup is here in Las Vegas to show off working prototypes of its lenses, a key component of its autofocus glasses, which could be a game-changer.
IXI’s glasses are designed for age-related farsightedness, a condition that affects many, if not most people over 45. They combine cameraless eye tracking with liquid crystal lenses that automatically activate when the glasses detect the user’s focus shifting. This means that, instead of having two separate prescriptions, as in multifocal or bifocal lenses, IXI’s lenses automatically switch between each prescription. Crucially — like most modern smartglasses — the frames themselves are lightweight and look like just another pair of normal glasses.
Mat Smith for Engadget
With a row of prototype frames and lenses laid out in front of him, CEO and co-founder Niko Eiden explained the technology, which can be separated into two parts. First, the IXI glasses track the movement of your eyes using a system of LEDs and photodiodes, dotted around the edges of where the lenses sit. The LEDs bounce invisible infrared light off the eyes and then measure the reflection, detecting the subtle movements of your eye and how both eyes converge when focusing on something close.
Using infrared with just a "handful of analog channels" takes far less power than the millions of pixels and 60-times-per-second processing required by camera-based systems. IXI’s system not only tracks eye movements, but also blinking and gaze direction, while consuming only 4 milliwatts of power.
Mat Smith for Engadget
Most of the technology, including memory, sensors, driving electronics and eye tracker, is in the front frame of the glasses and part of the arms closest to the hinge. The IXI prototype apparently uses batteries similar in size to those found in AirPods, which gives some sense of the size and weight of the tech being used. The charging port is integrated into the glasses’ left arm hinge. Naturally, this does mean they can’t be worn while charging. IXI says that a single charge should cover a whole day’s usage.
The prototype frames I saw this week appeared to be roughly the same weight as my traditional chunky specs. And while these are early iterations, IXI’s first frames wouldn’t look out of place in a lineup of spectacle options.
The team has also refined the nose pieces and glasses arms to accommodate different face shapes. Apparently, when testing expanded from Finland to the UK, British faces were “...different.” A little harsh when talking to me, a Brit.
Eiden pulled out some prototype lenses, made up of layers of liquid crystal and a transparent ITO (indium tin oxide) conductive layer. This combination is still incredibly thin, and it was amazing to watch the layers switch almost instantly into a prescription lens. It seemed almost magical. As they’re so thin, they can be easily integrated into lenses with existing prescriptions. It can also provide cylindrical correction for astigmatism too.
Autofocus lenses could eliminate the need for multiple pairs of glasses, such as bifocals and progressives. Even if the glasses were to run out of power, they’d still function as a pair of traditional specs with your standard prescription, just lacking the near-sighted boost. IXI’s sensor sensitivity can also offer insight into other health conditions, detect dry eyes, estimate attentiveness and, by tracking where you’re looking, even posture and neck movement. According to Eiden, blink rate changes with focus, daydreaming and anxiety, and all that generates data that can be shown in the companion app.
Mat Smith for Engadget
Hypothetically, the product could even potentially adapt prescriptions dynamically, going beyond the simple vision correction of Gen 1. For example, it could offer stronger corrections as your eyes get fatigued through the day.
IXI appears to be putting the pieces in place to make these glasses a reality. It still needs to obtain the necessary medical certifications in order to sell its glasses and get all the production pieces in place. It’s already partnered with Swiss lens-maker Optiswiss for manufacturing. Eiden says the final product will be positioned as a high-end luxury glasses option, selling through existing opticians. The company hopes to finally launch its first pair sometime next year.
This article originally appeared on Engadget at https://www.engadget.com/wearables/ixis-autofocusing-lenses-multifocal-glasses-ces-2026-212608427.html?src=rss