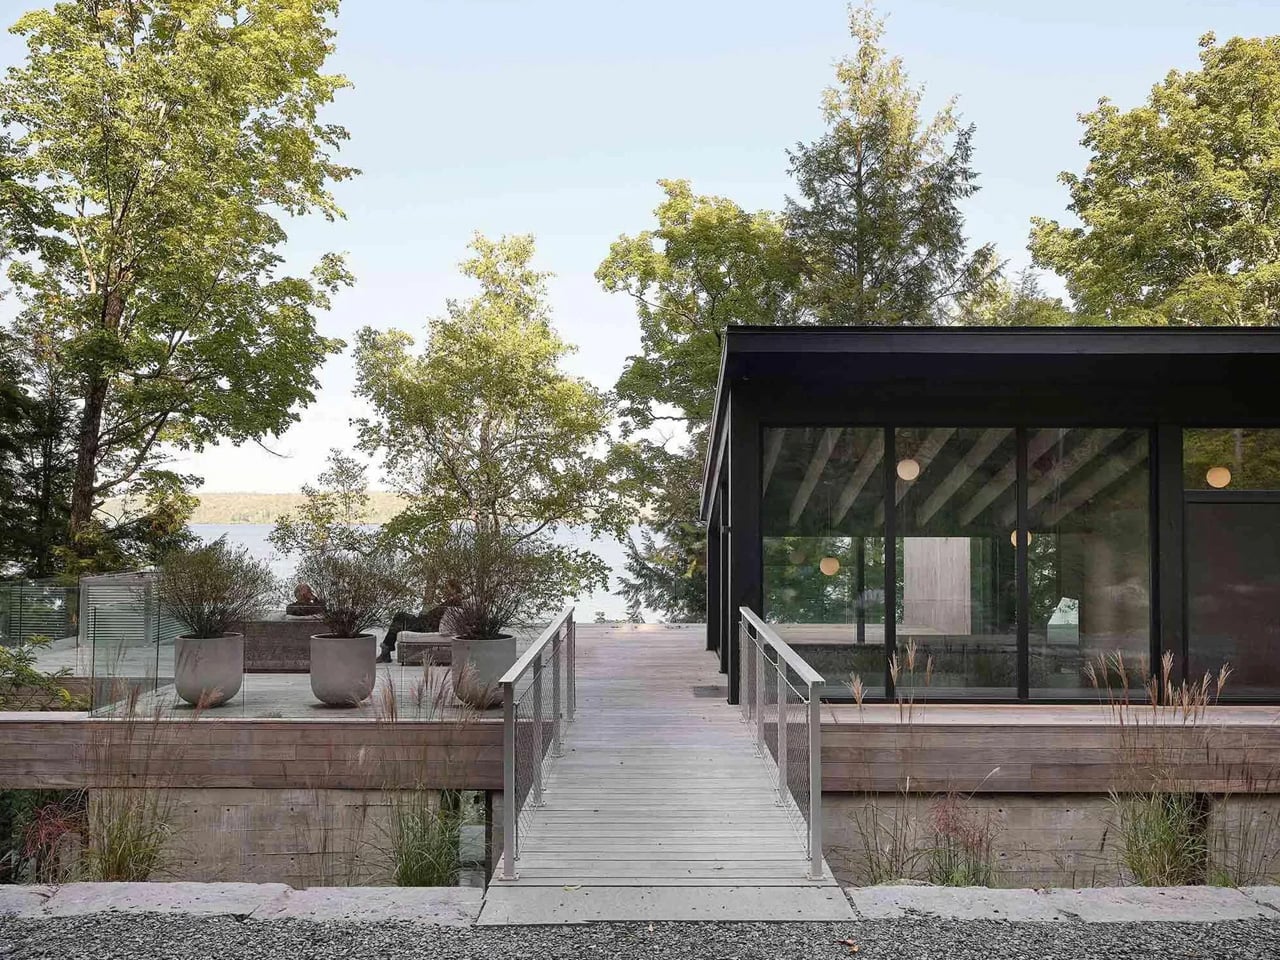
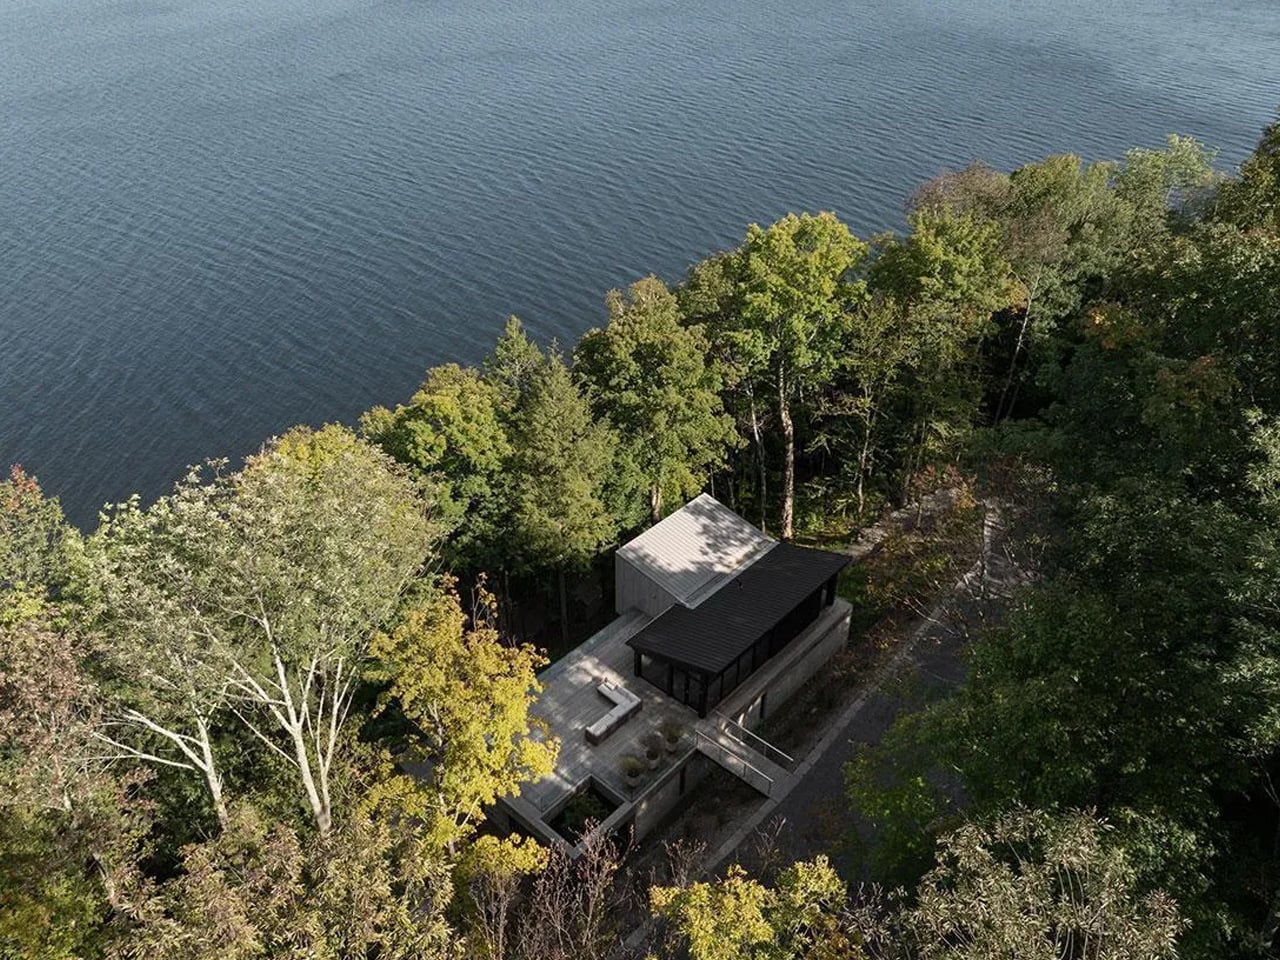
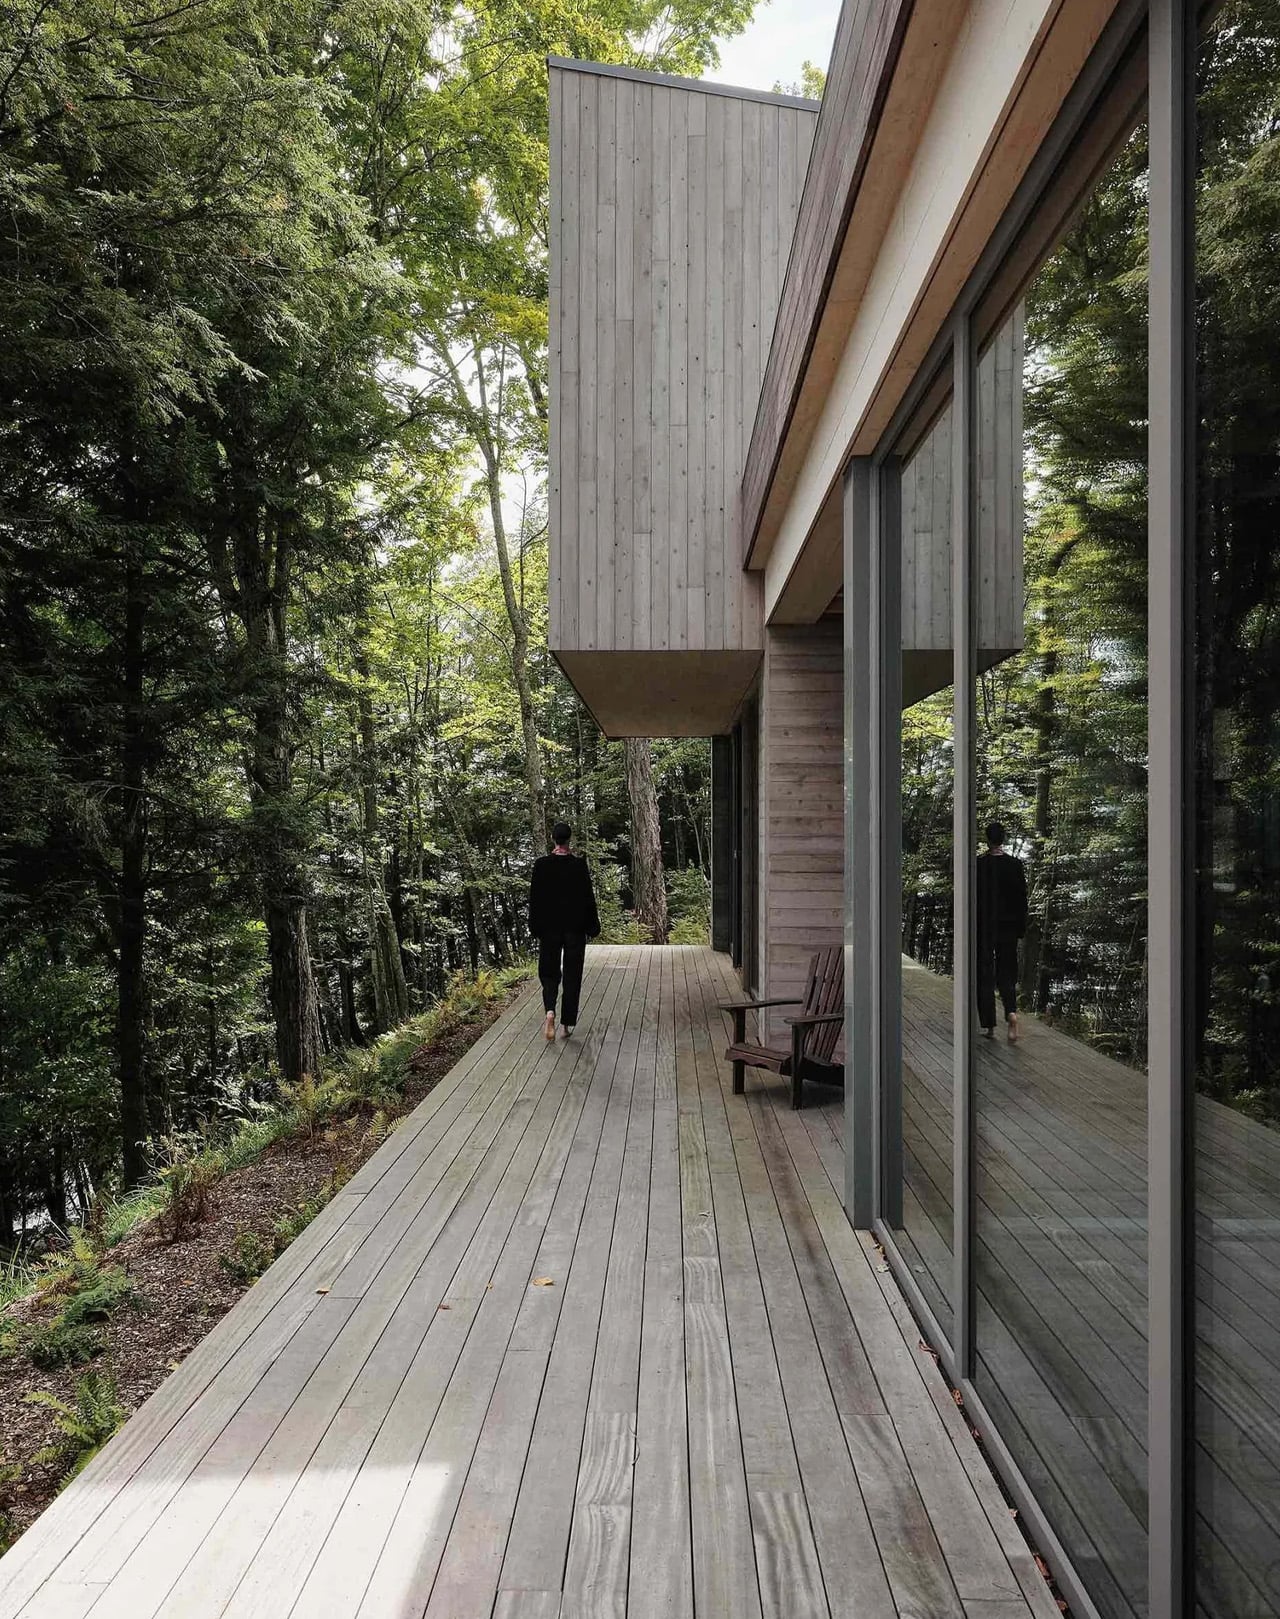
Most houses on a lake want you to know about it. The Counter-Slope House by Montreal-based yh2 Architecture is the opposite — perched on a steep slope along the southern shore of Lake Memphremagog in Potton, Quebec, it earns your attention precisely because it doesn’t demand it.
Completed in 2024 across 4,530 square feet, the residence sits within one of Canada’s most geographically charged landscapes: a terrain of dense woodland, dramatic gradients, and mountain-cast shadows. The studio, led by founding principals Marie-Claude Hamelin and Loukas Yiacouvakis, approached the site not as something to build upon, but as something to negotiate with. The result is architecture that reads less like an imposition and more like a considered guest.
Designer: yh2 Architecture
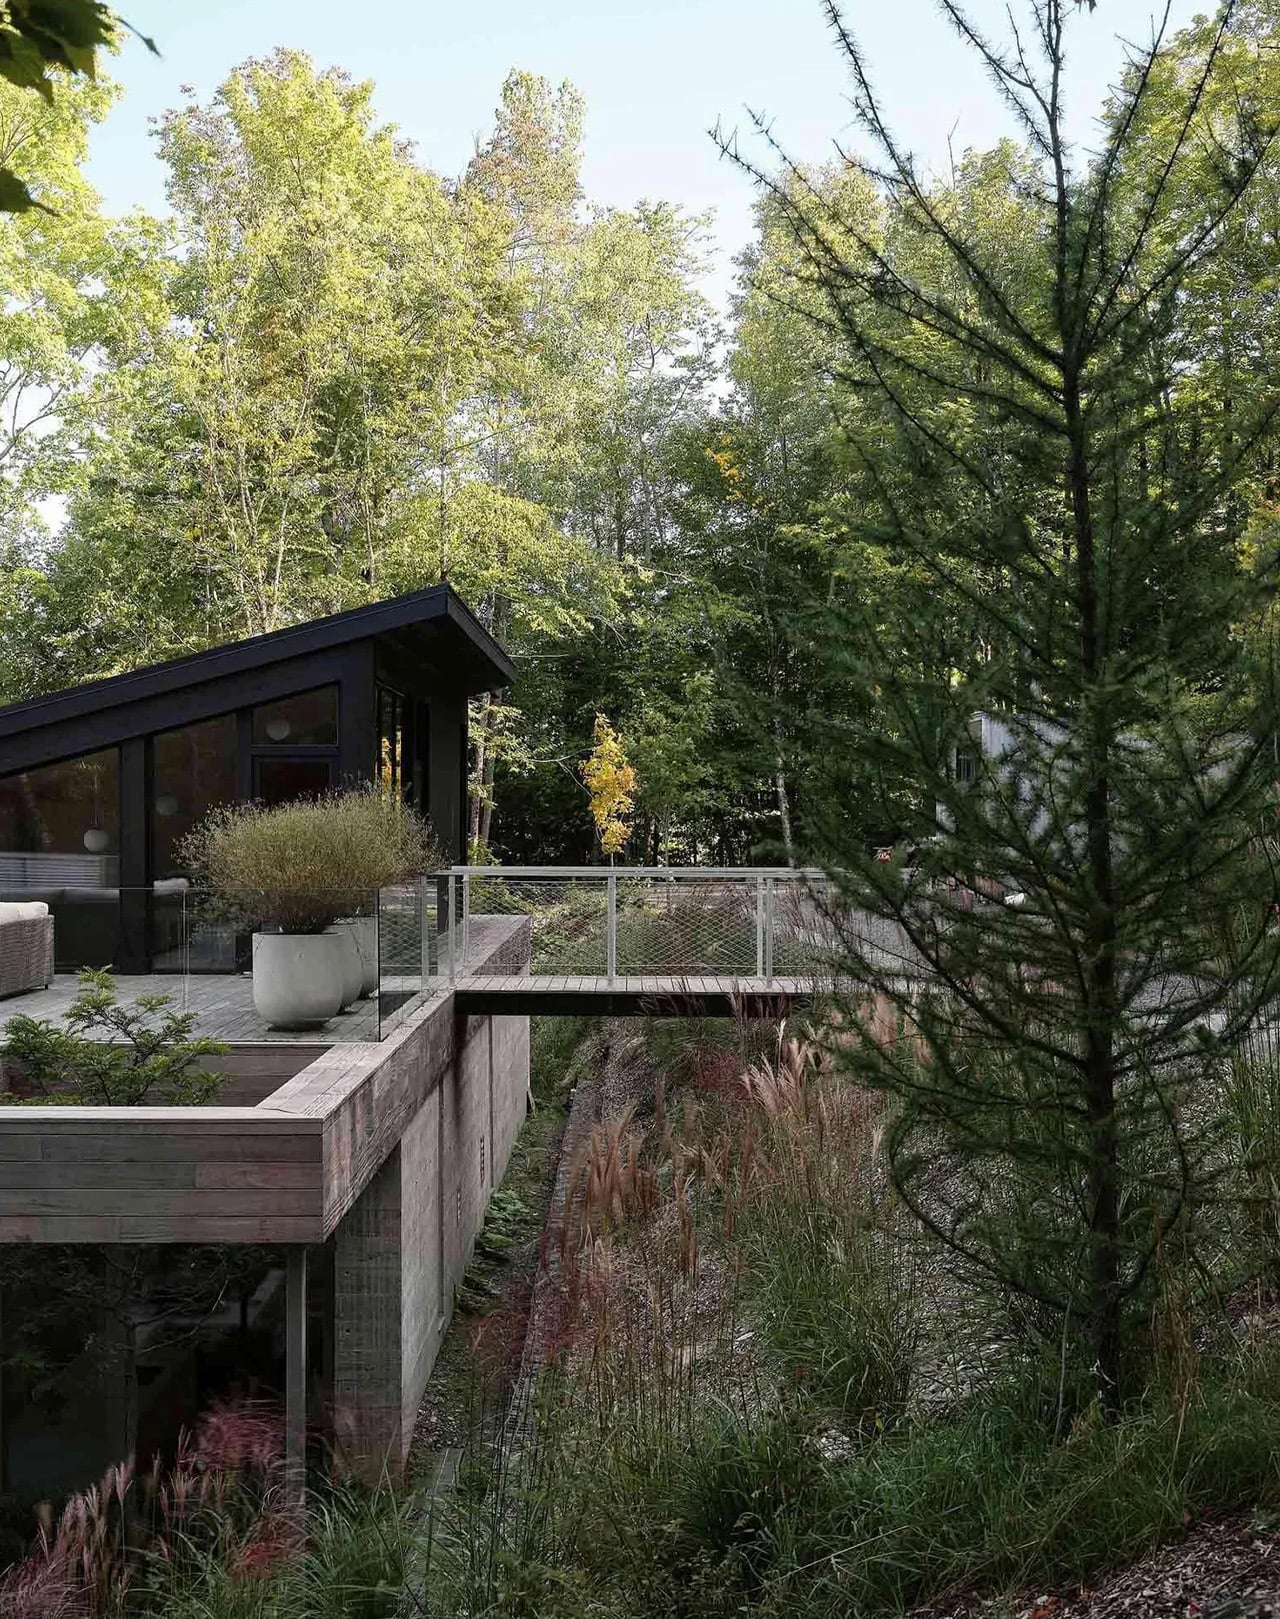
The plan breaks into two distinct volumes, each stepping gently into the slope to follow the contours of the land rather than flatten them. Above each volume, a subtly shifting dual-pitched roof reduces the building’s perceived mass while quietly echoing the topography that surrounds it. It’s a move that feels almost camouflaging — the house belonging to the hillside rather than sitting on top of it.
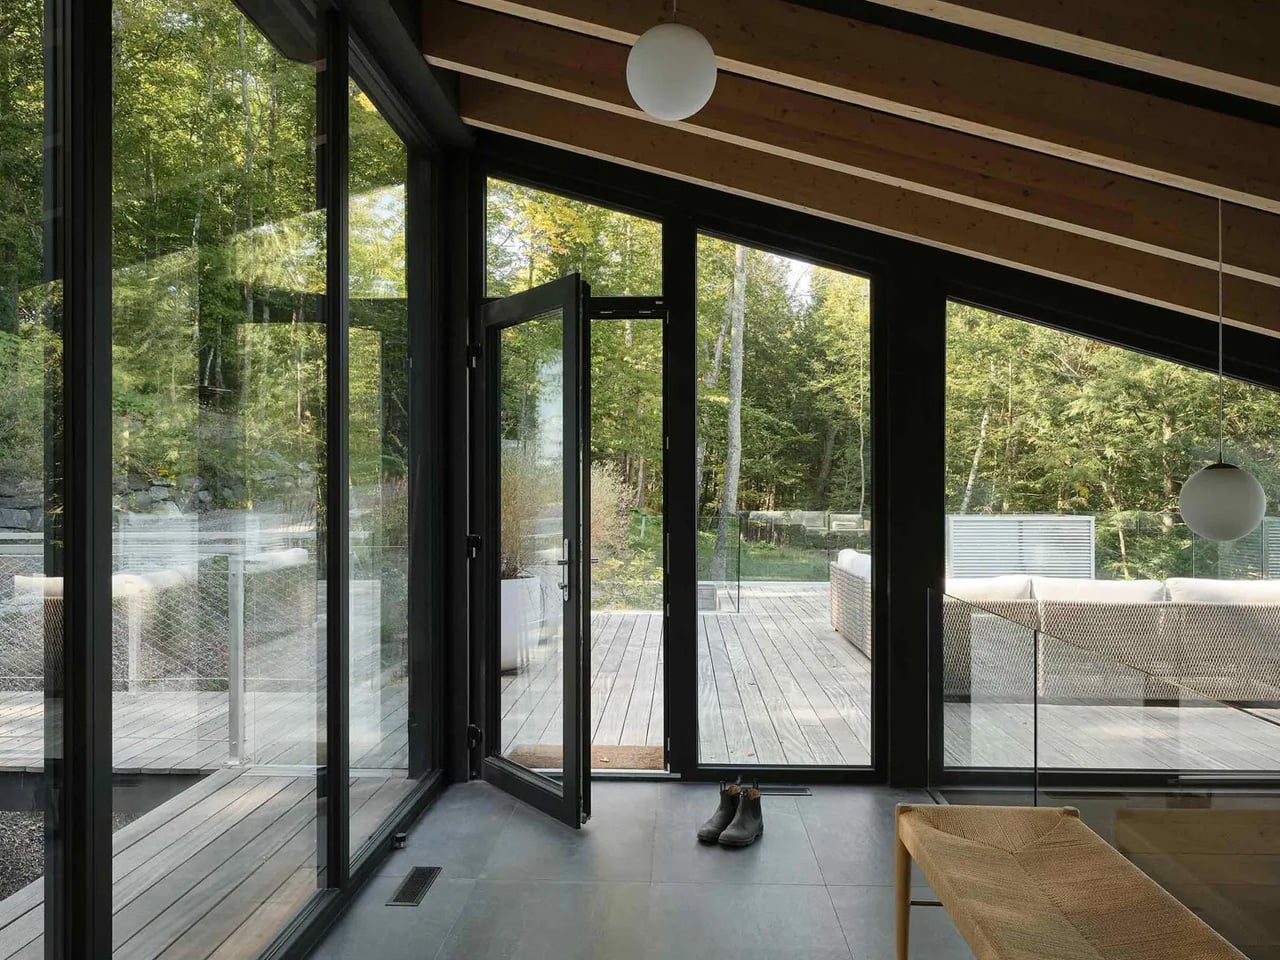
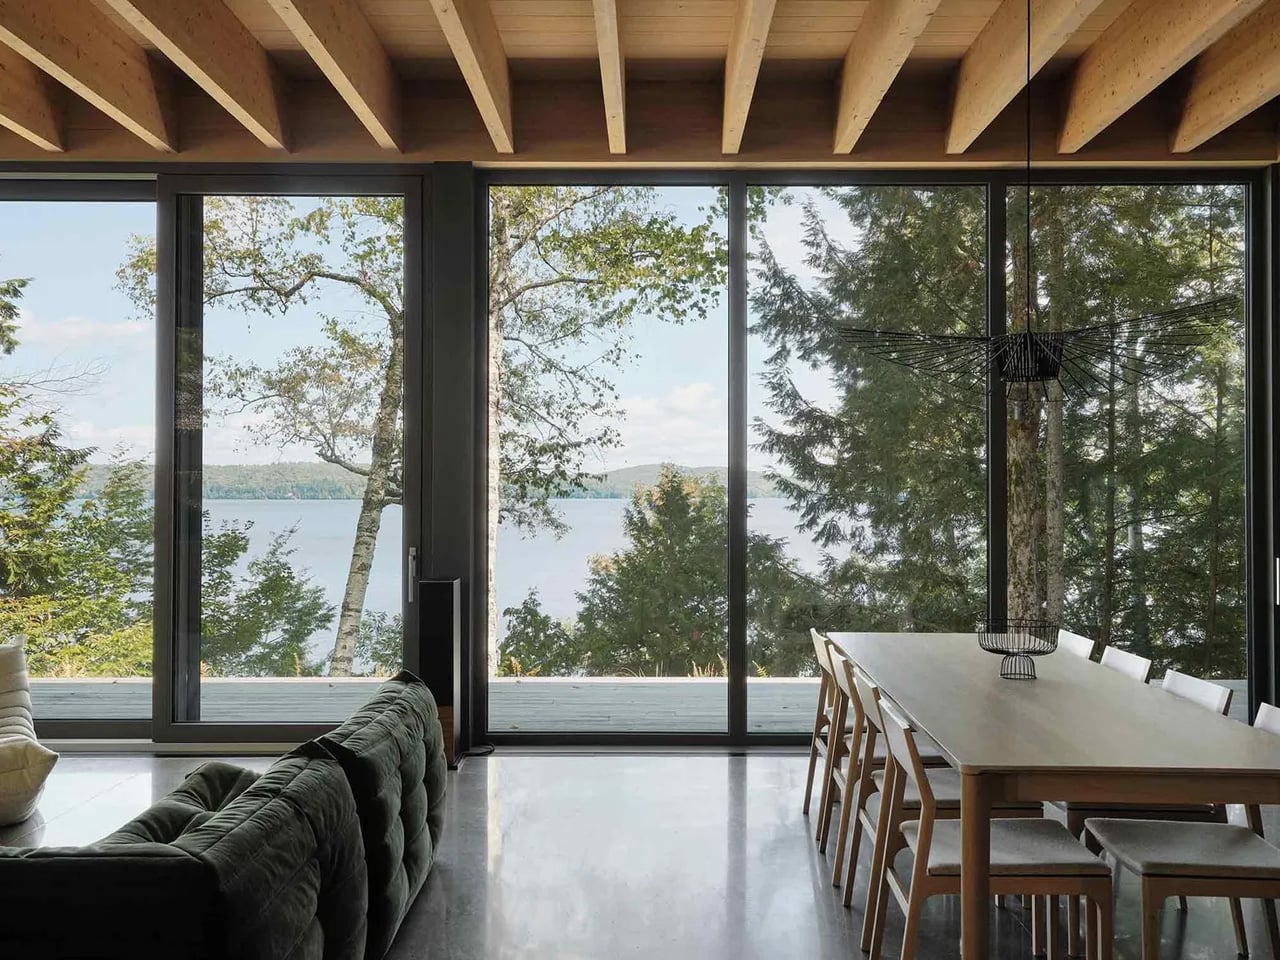
A dense treeline separates the structure from the lake, and YH2 turned this threshold into an architectural tool. Windows are positioned not to frame the water directly, but to catch glimpses of it through the leaves — shimmering and partial, like something discovered rather than displayed. Light enters from the opposite direction, filtering softly through the interior and shifting across the day. The experience of the house becomes tied to time, season, and the slow movement of the natural world outside.
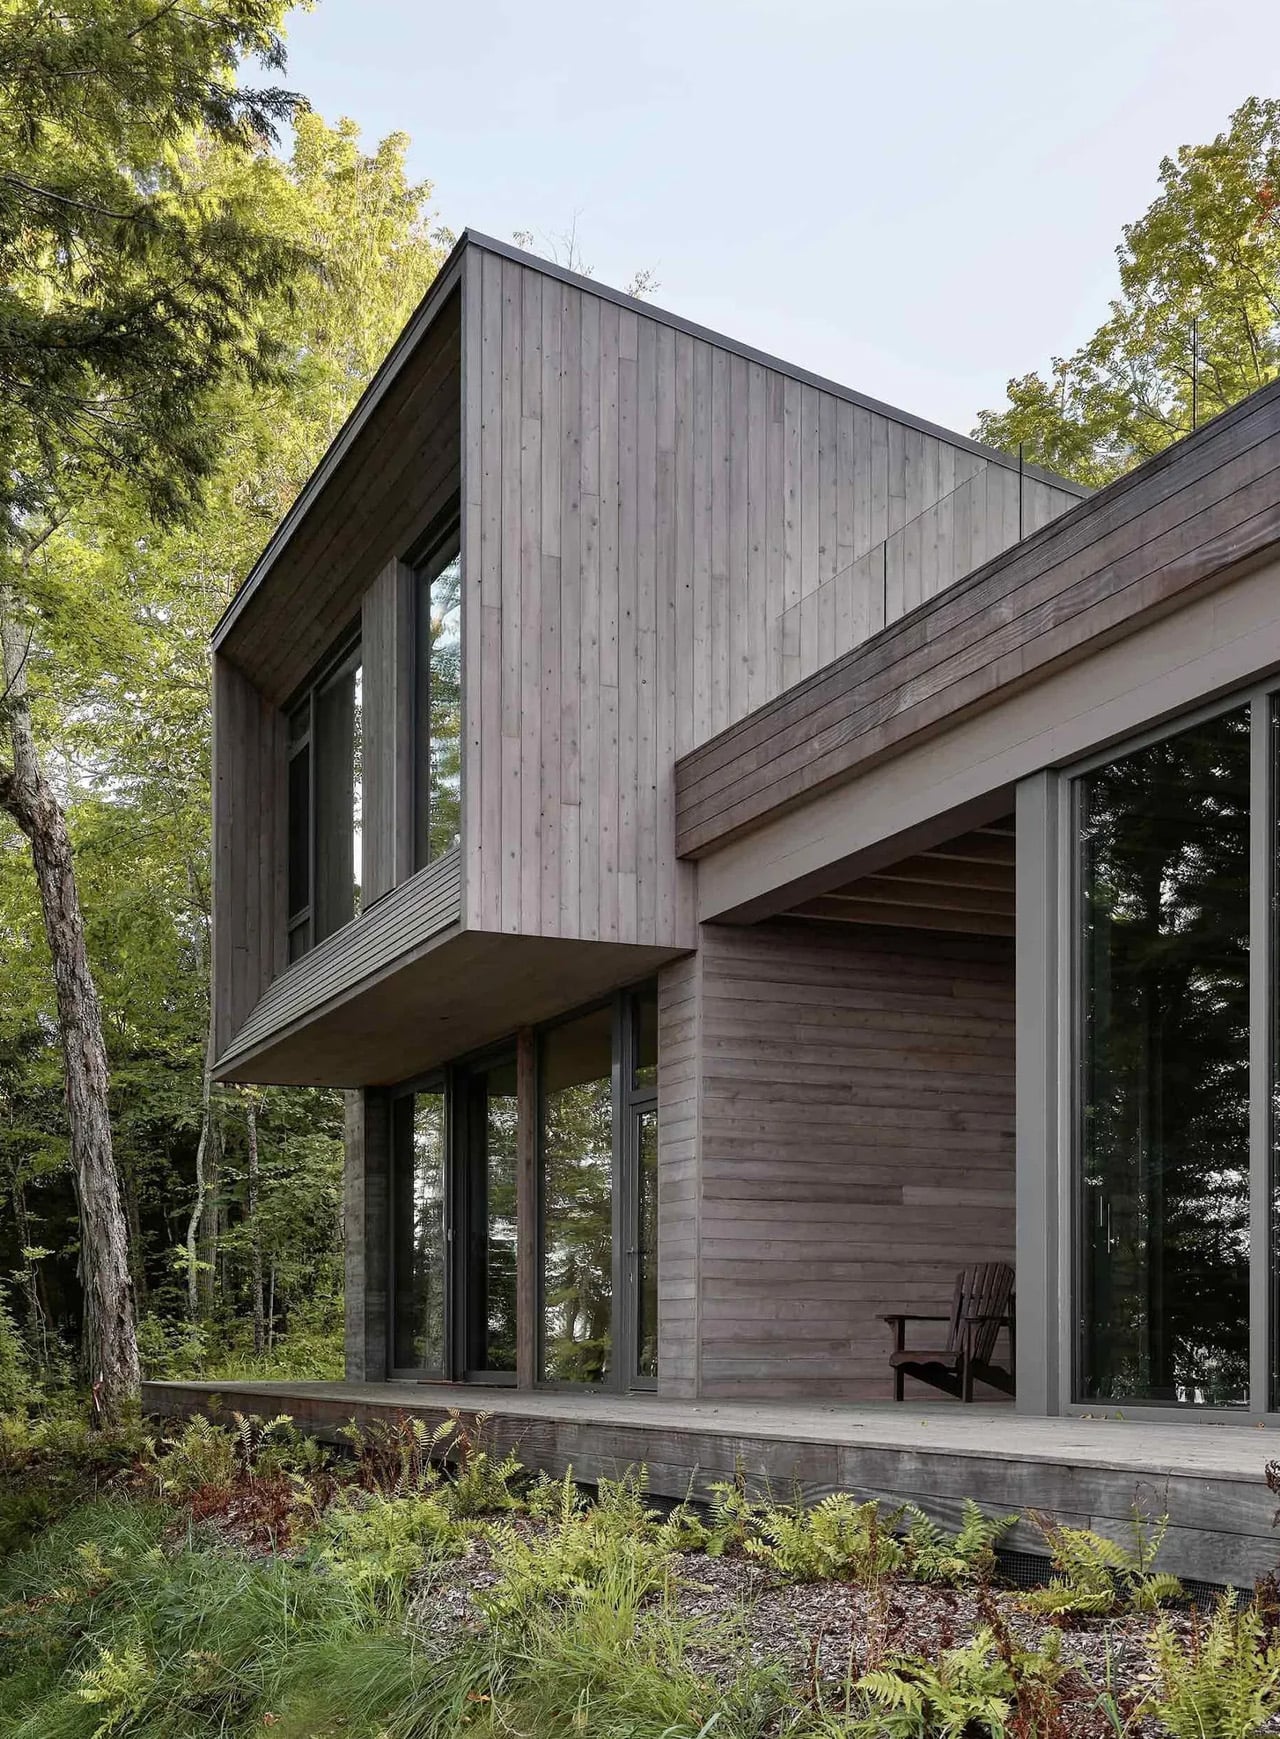
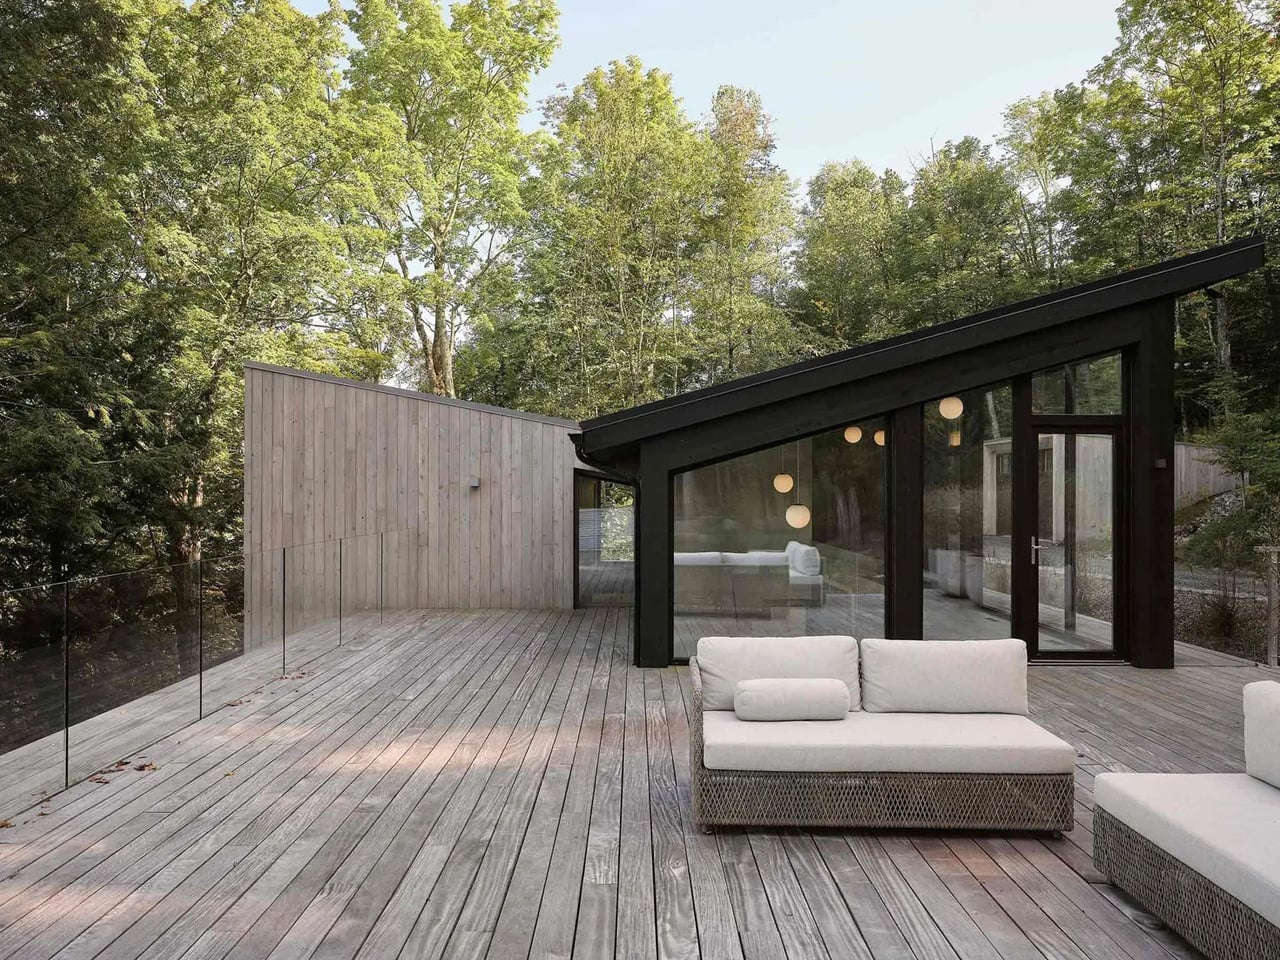
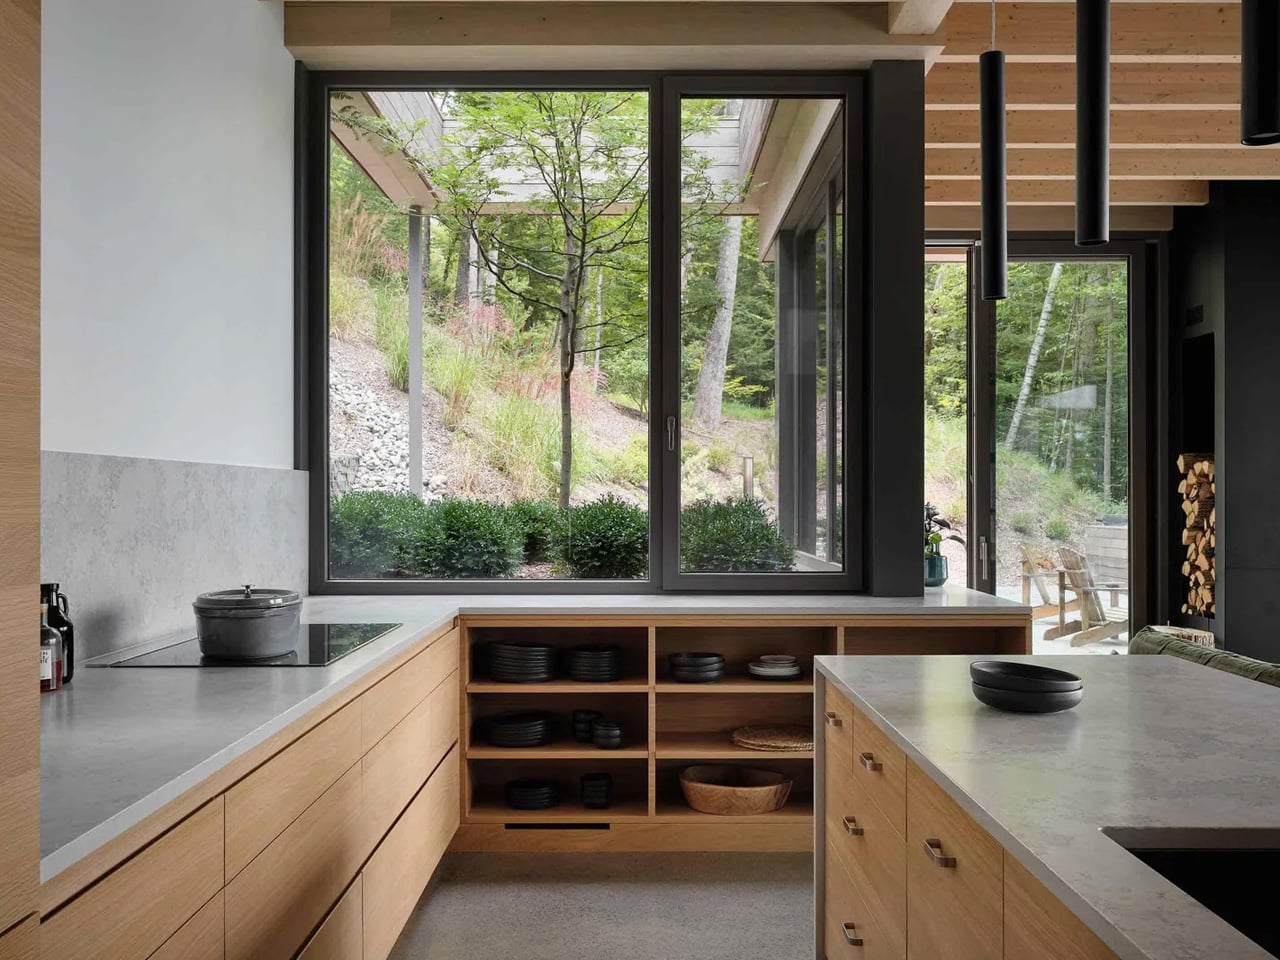
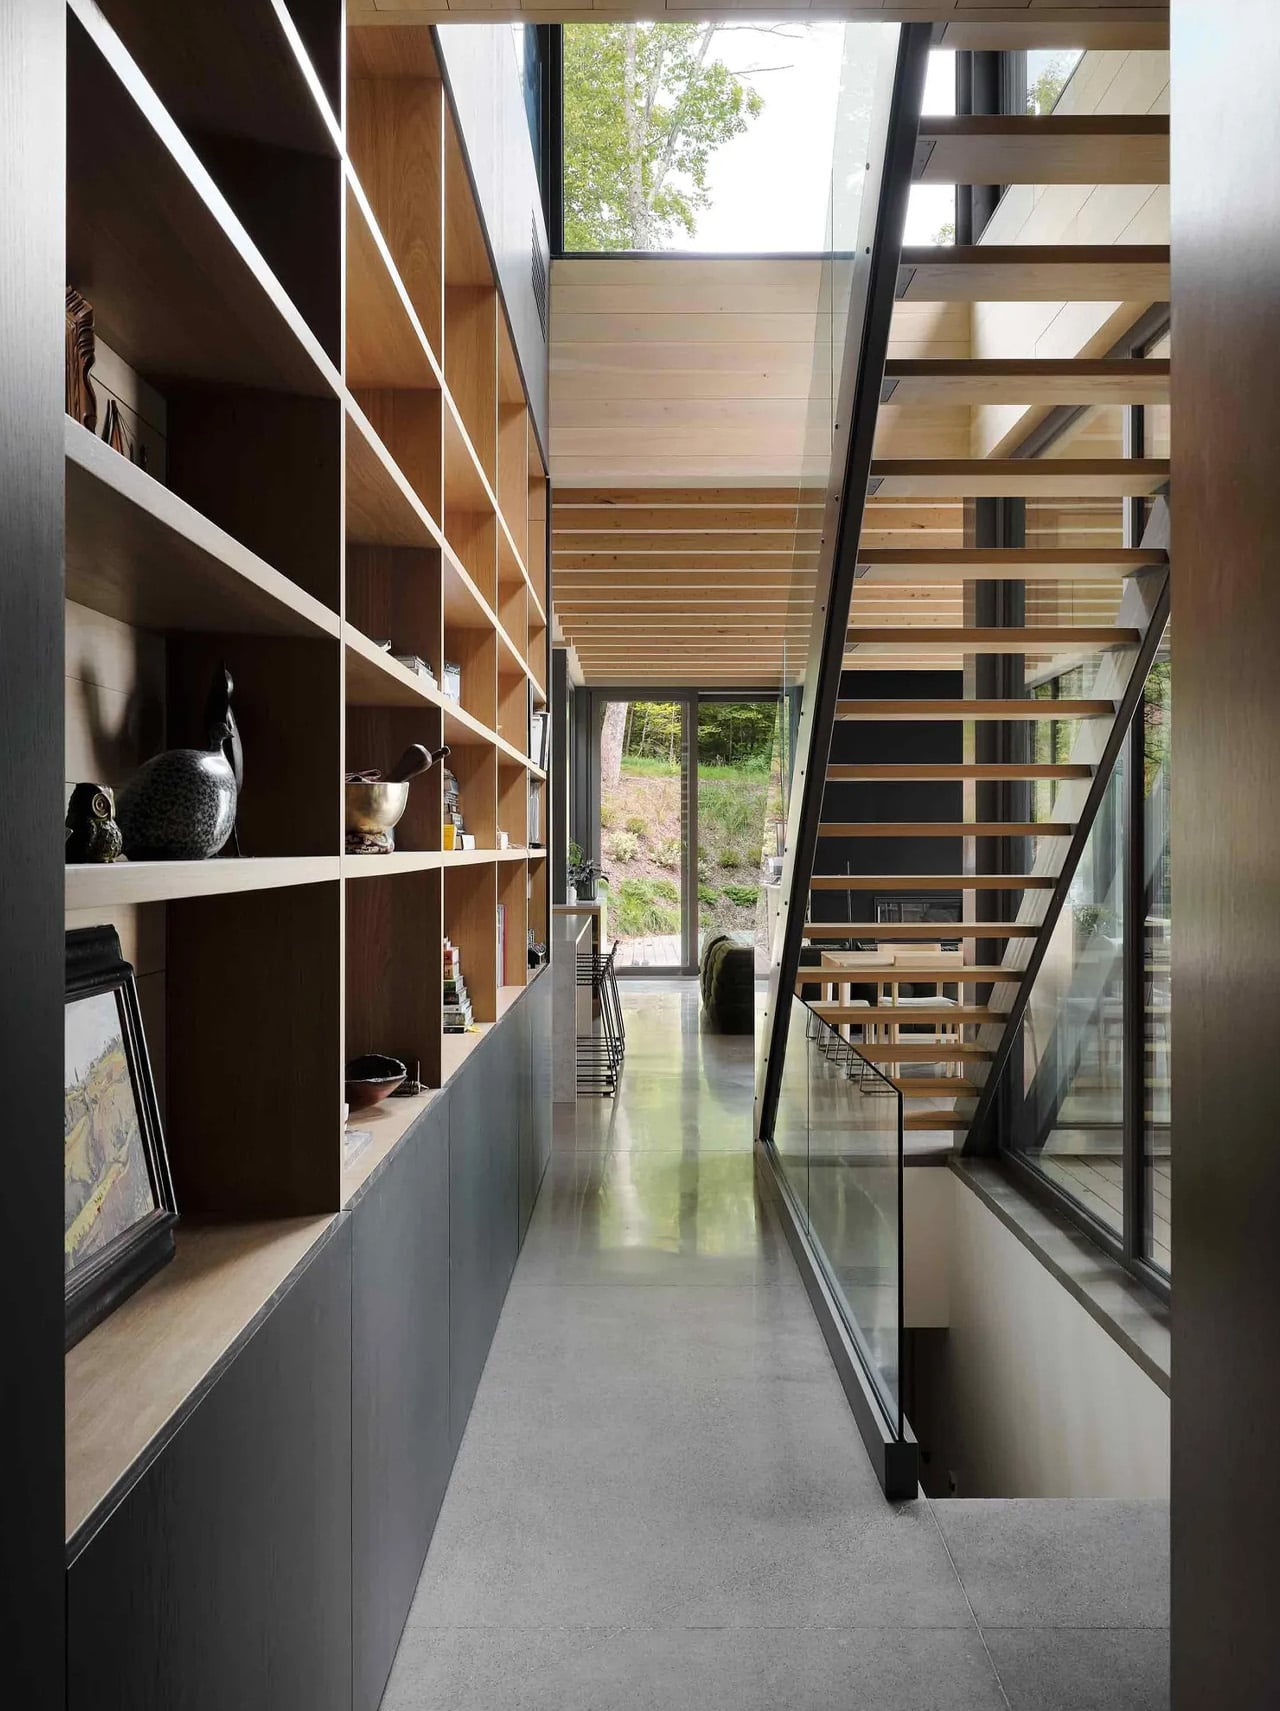
Materials were chosen with the same economy. Weathered cedar wraps the exterior, its tone and texture fading into the surrounding woodland without ceremony. Inside, white oak and an exposed timber structure give the spaces warmth and rhythm. The wood is left unfinished — honest about what it is, and precise in how it performs. Black architectural elements appear selectively throughout, acting as framing devices that sharpen the relationship between interior space and landscape view.
The Counter-Slope House doesn’t try to resolve the tension between architecture and nature. Instead, it holds that tension open, letting both exist on their own terms. For a studio with three decades of critically recognized work behind it, this project feels like a distillation — proof that restraint, when applied with conviction, is its own form of ambition.
The post This House on Lake Memphremagog Was Designed to Disappear first appeared on Yanko Design.