Your Entire Steam Library Now Fits in a Game Boy-Sized Handheld

The Steam Deck modding community has taken Valve’s handheld gaming PC to some unexpected places. Modders have swapped in more RAM, loaded the hardware with terabytes of storage, and reshaped it in ways Valve never intended. Most of those efforts stay close to the original form factor, tweaking what’s already there without fundamentally changing what the device looks like or how compact it is.

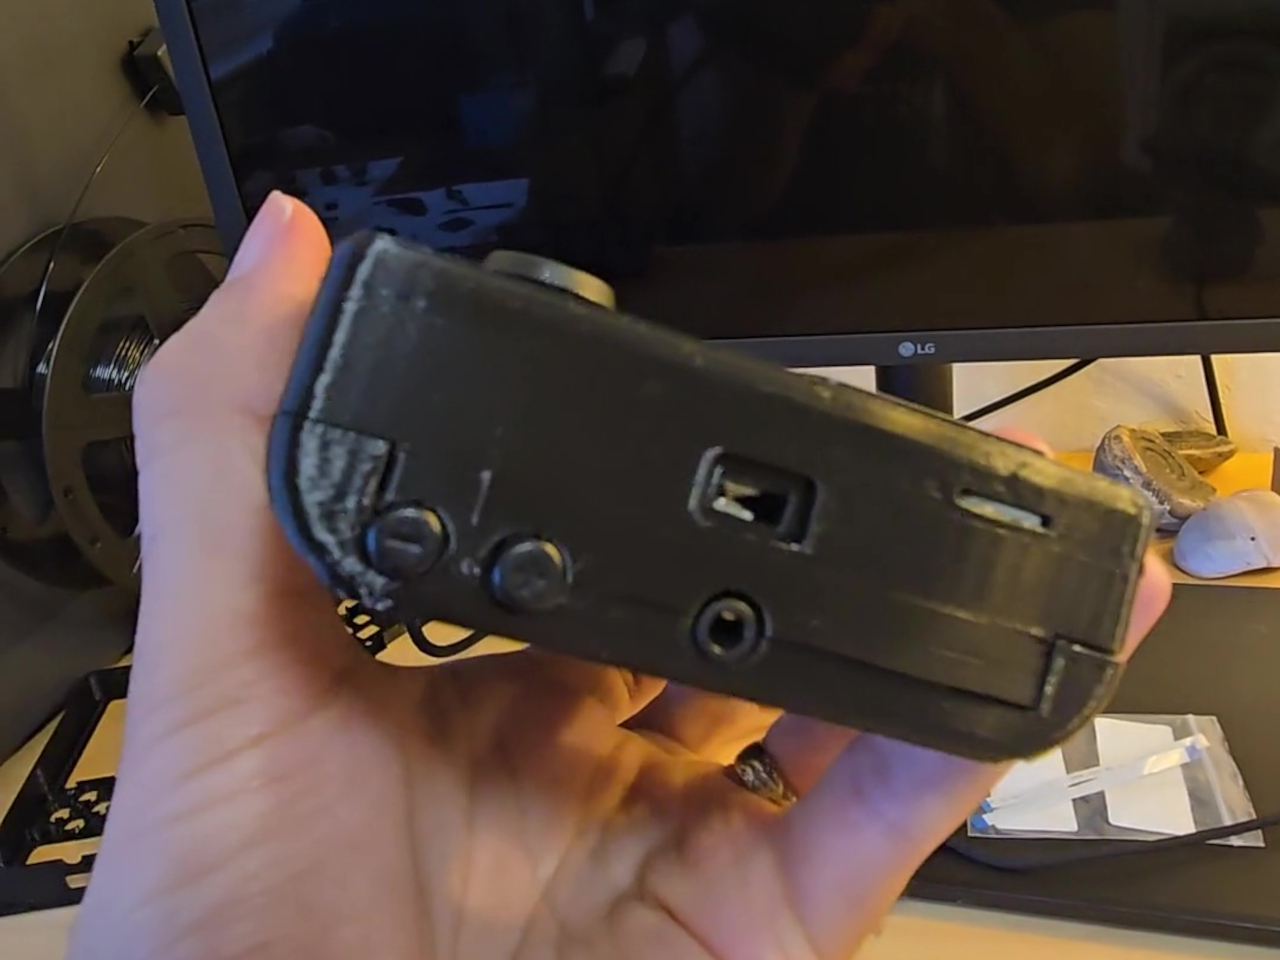
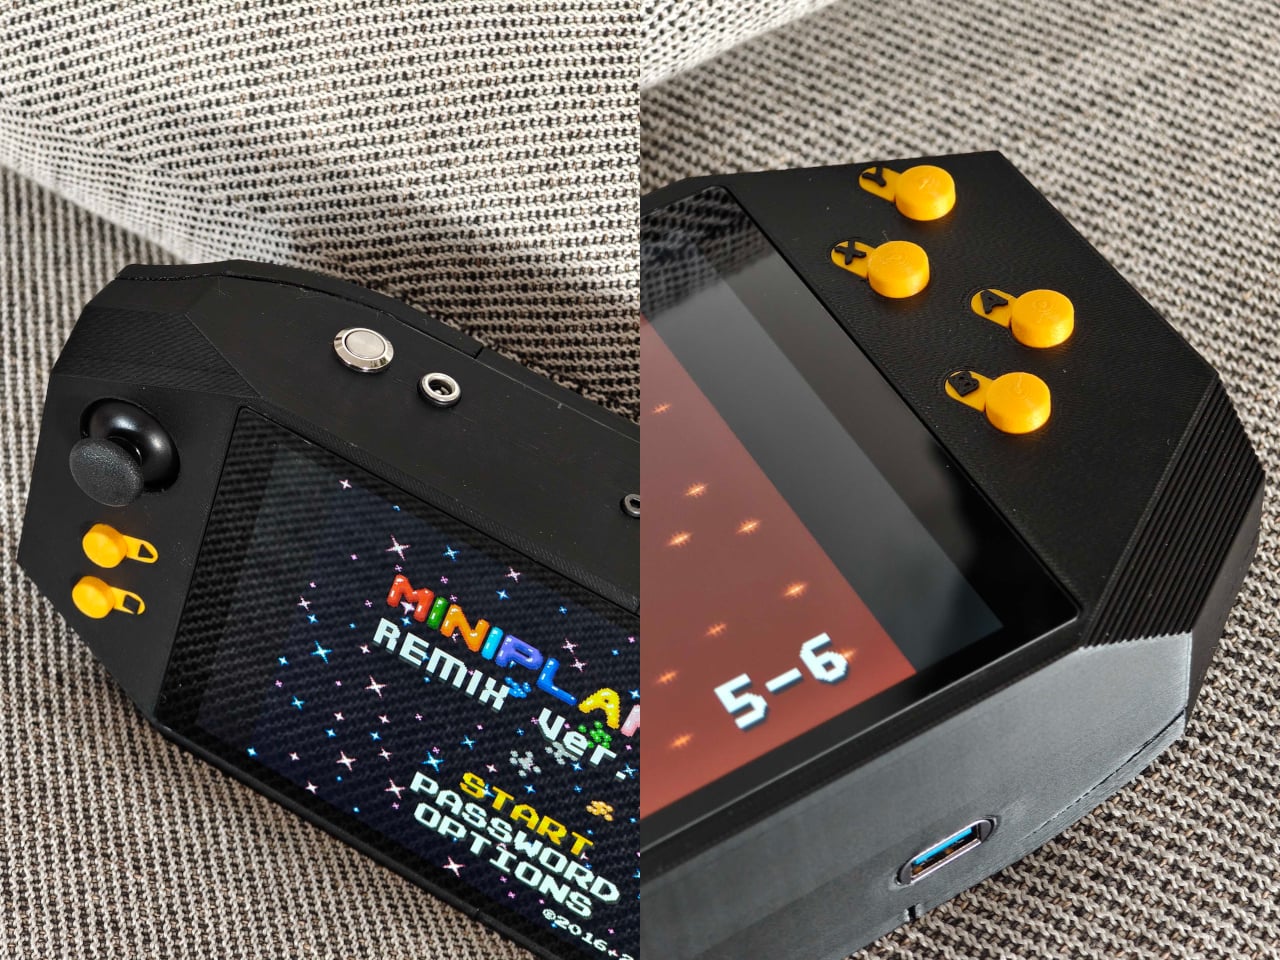
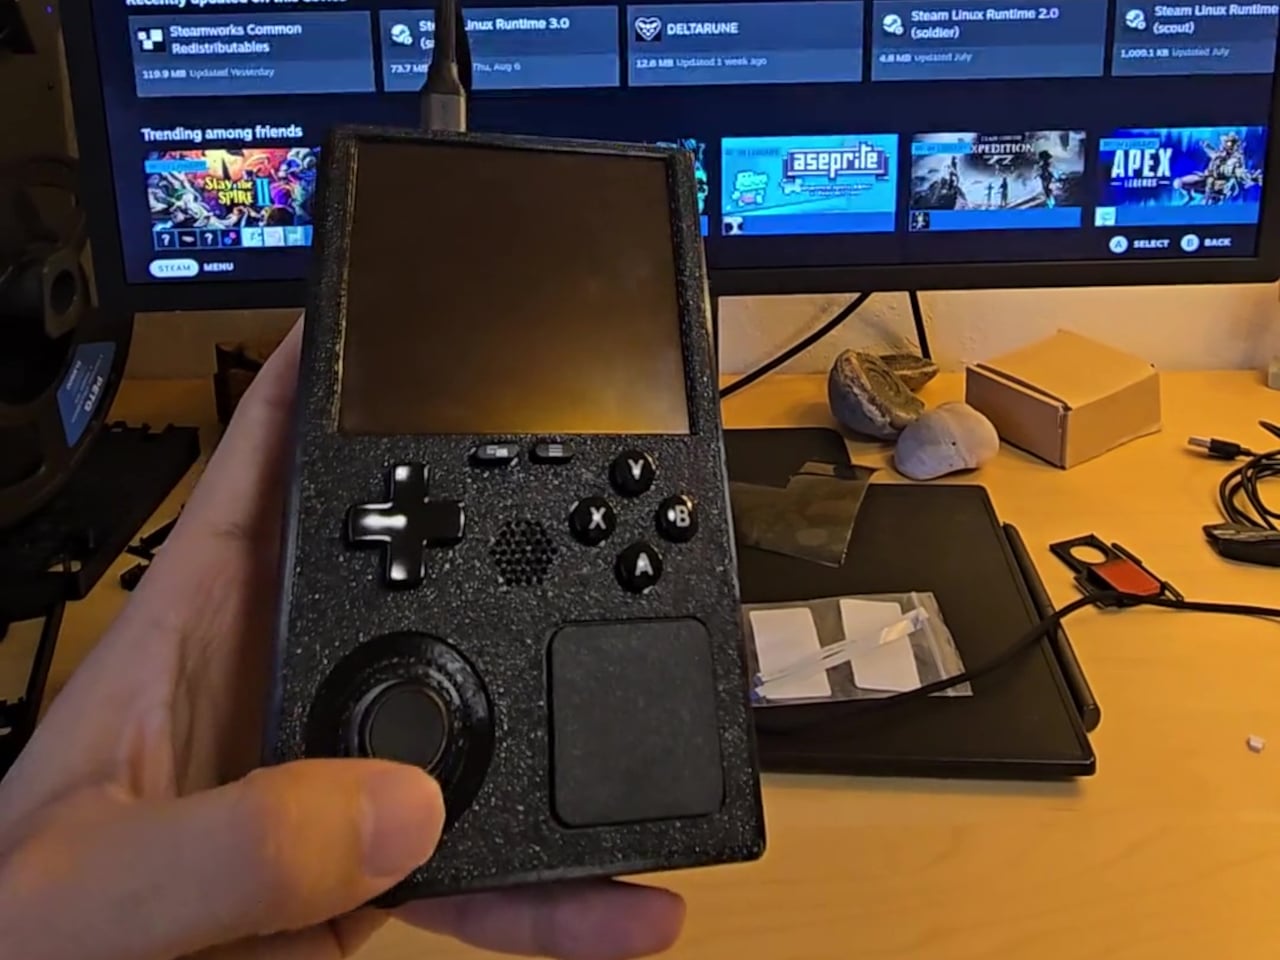
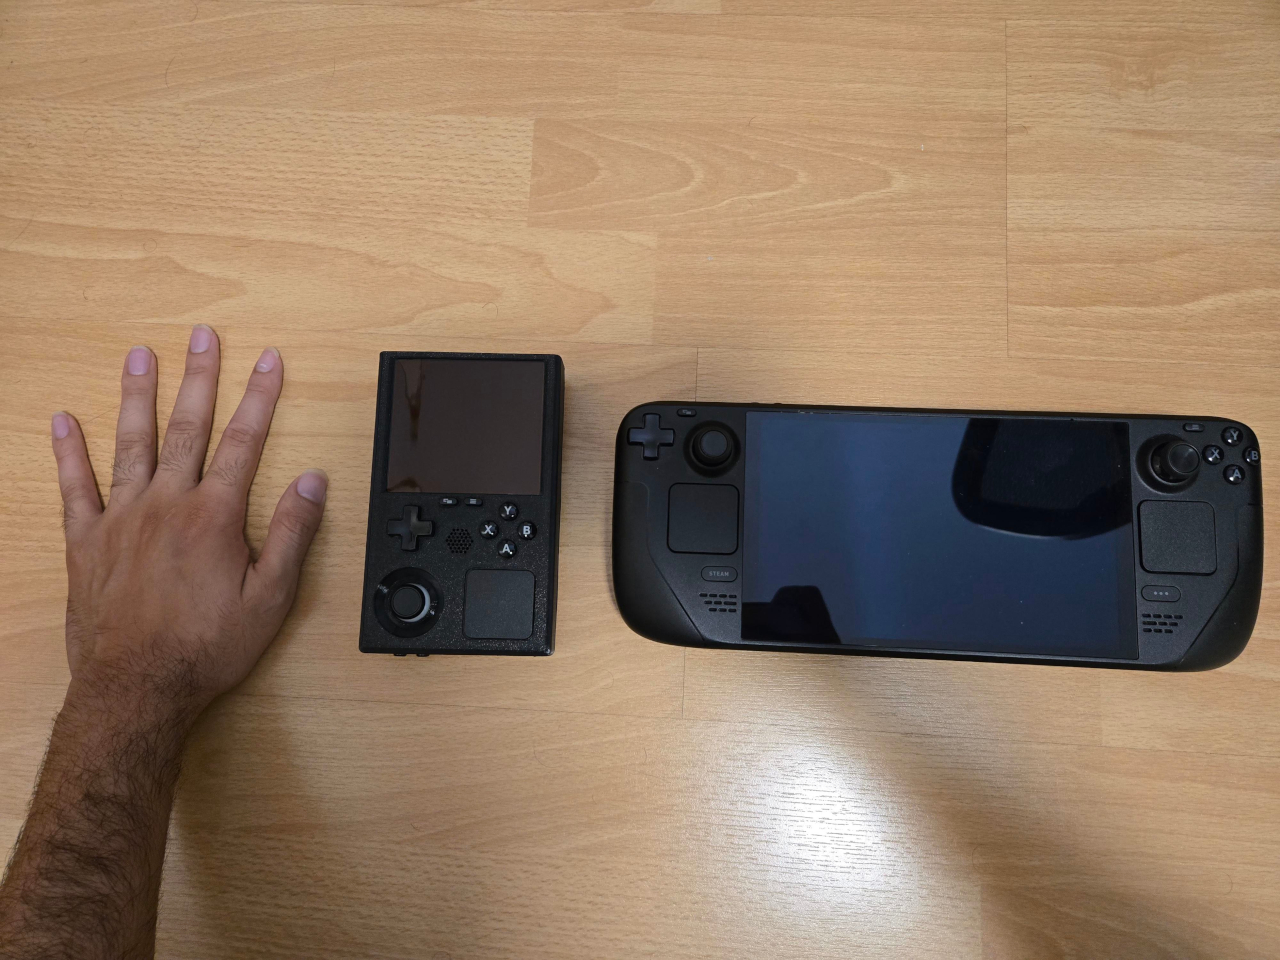
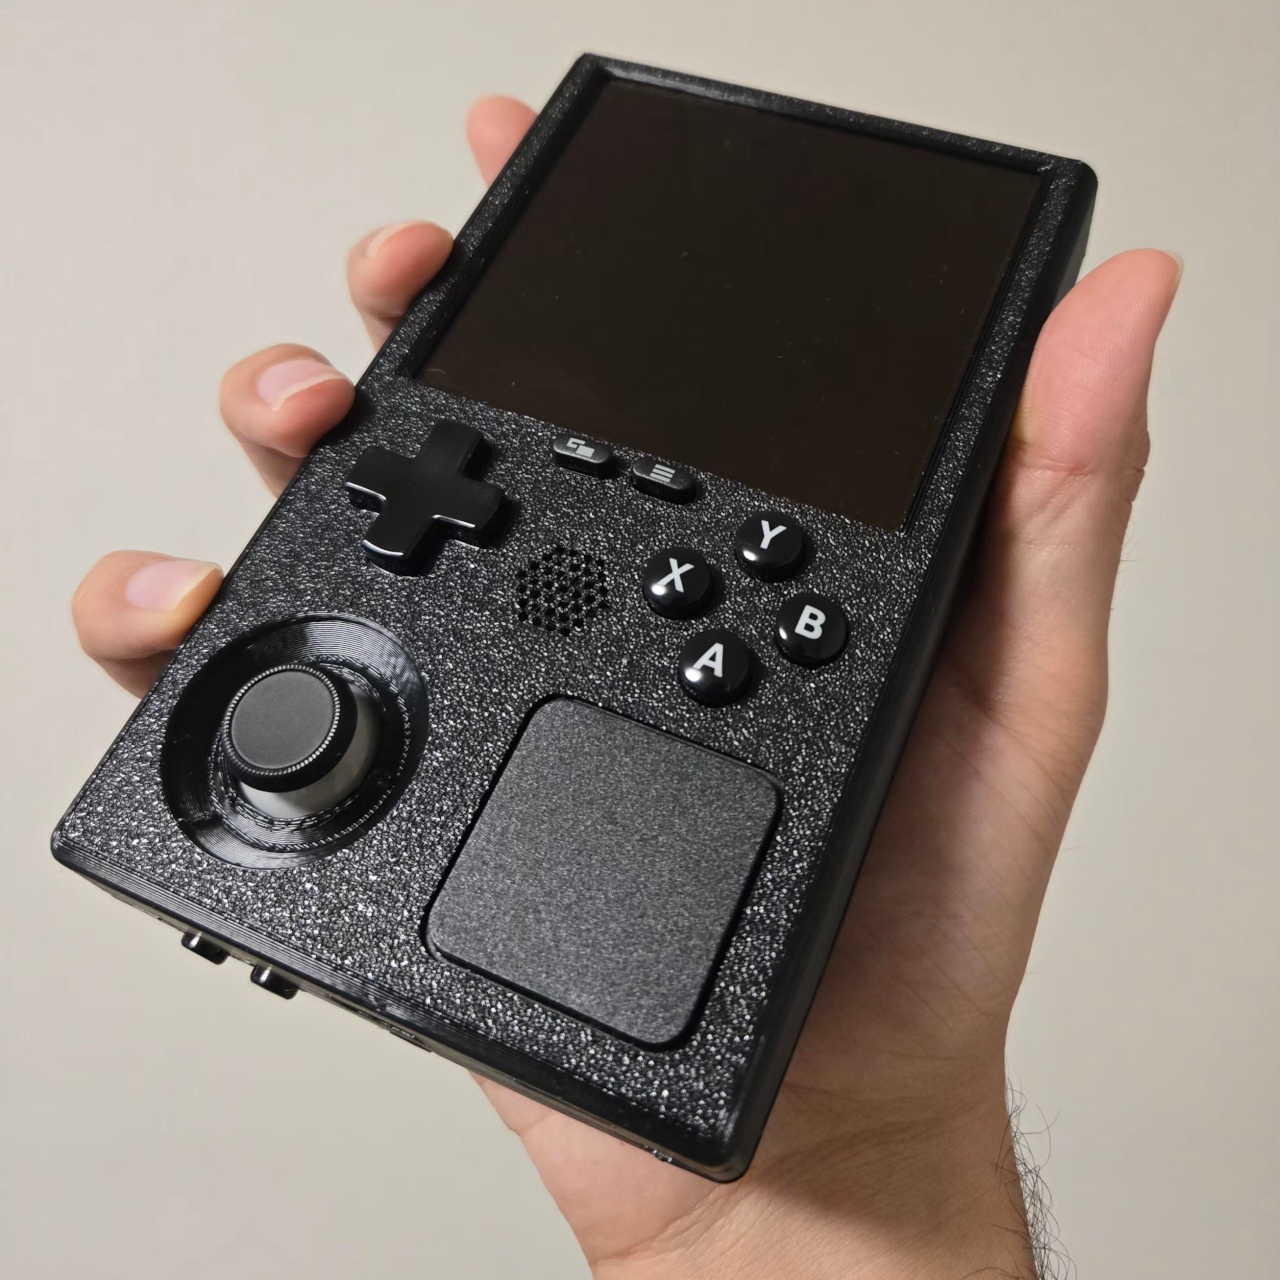
The SteamBoy goes much further. Someone took the actual working internals of a Steam Deck LCD, pulled them out of the original shell, and rebuilt everything inside a 3D-printed chassis roughly the size of an original Game Boy. The form factor shifts from the Steam Deck’s wide, horizontal layout to a tall, vertical one, running entirely on genuine Steam Deck hardware without any custom-made components.

Designer: PhyFawkes
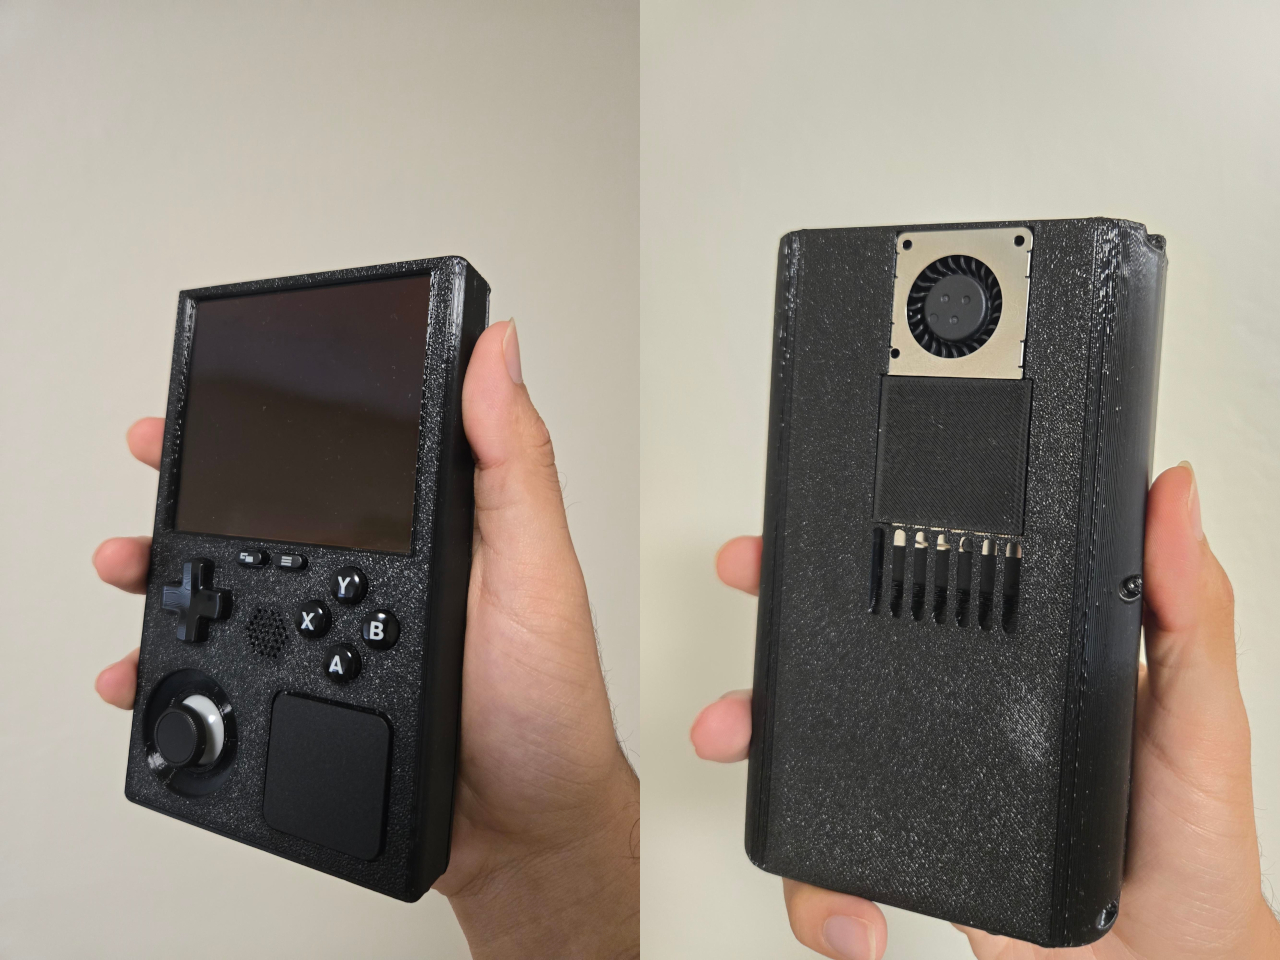
The parts at the heart of the build include the Steam Deck’s motherboard, battery, speakers, and all of the original button hardware. Getting these into a much smaller enclosure without custom-designed circuit boards is the notable achievement here. No bespoke PCBs were needed for the core assembly, which means everything is essentially the same Steam Deck hardware, just rearranged to fit a dramatically different shell.

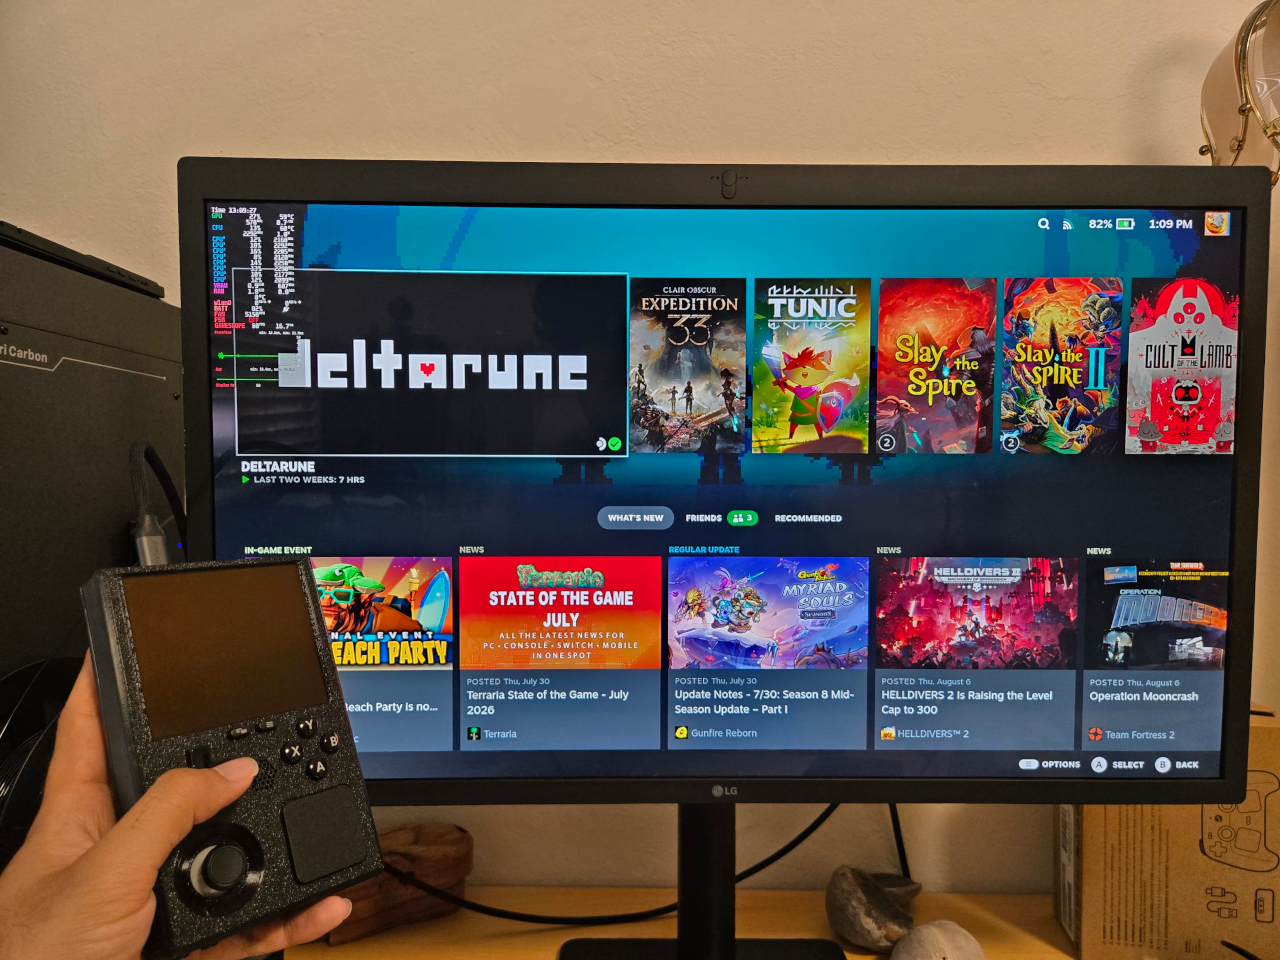
The display is where things get more involved. Rather than reusing the original Steam Deck screen, the planned replacement is a 1200×1080 AMOLED panel at 90 Hz, originally made for VR headsets. Making it work requires a custom adapter PCB between the panel and the motherboard, which is still in progress. In the meantime, the current demo routes output through a television rather than displaying on the device itself.
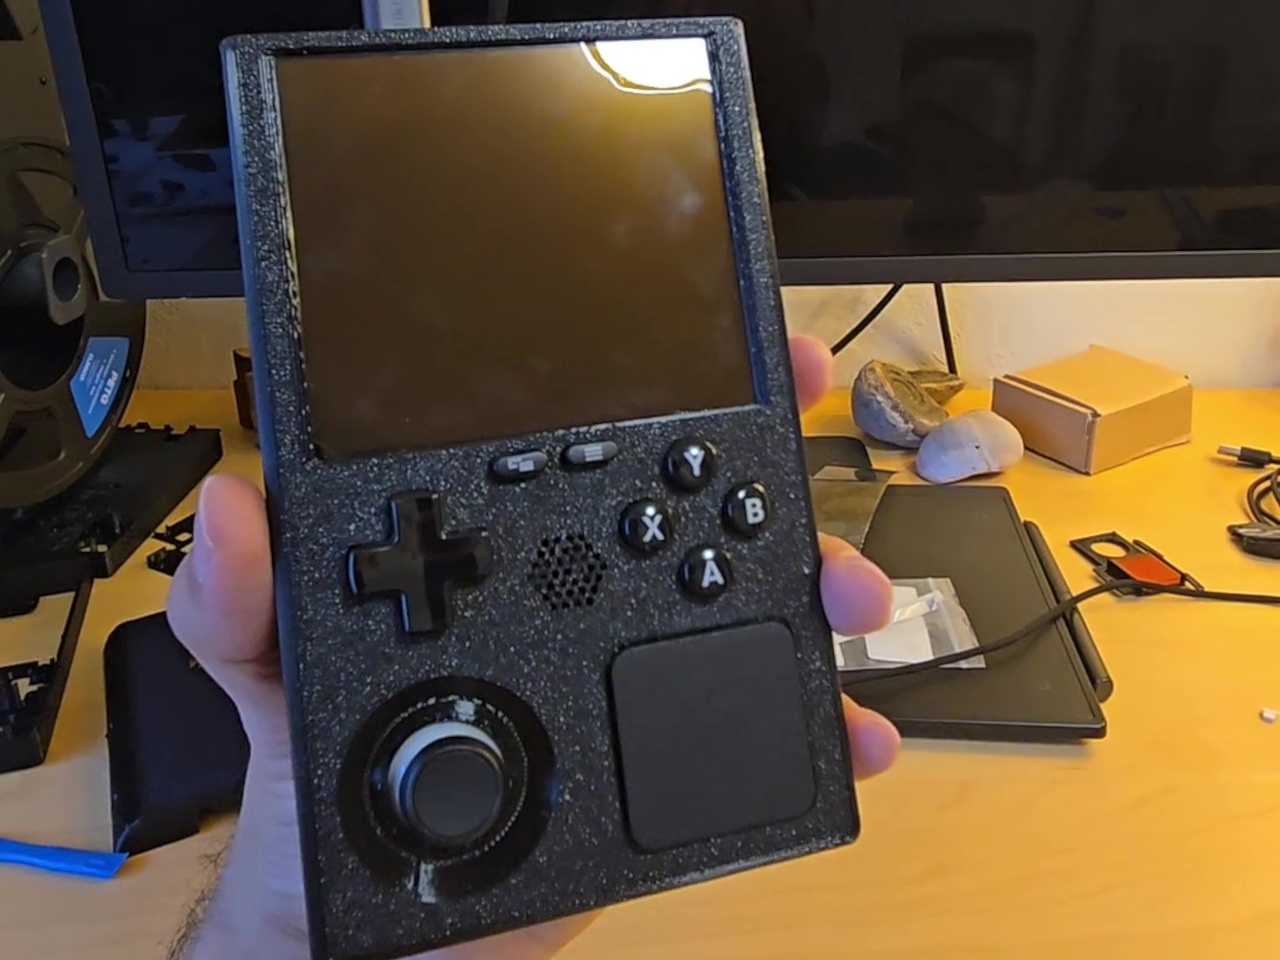
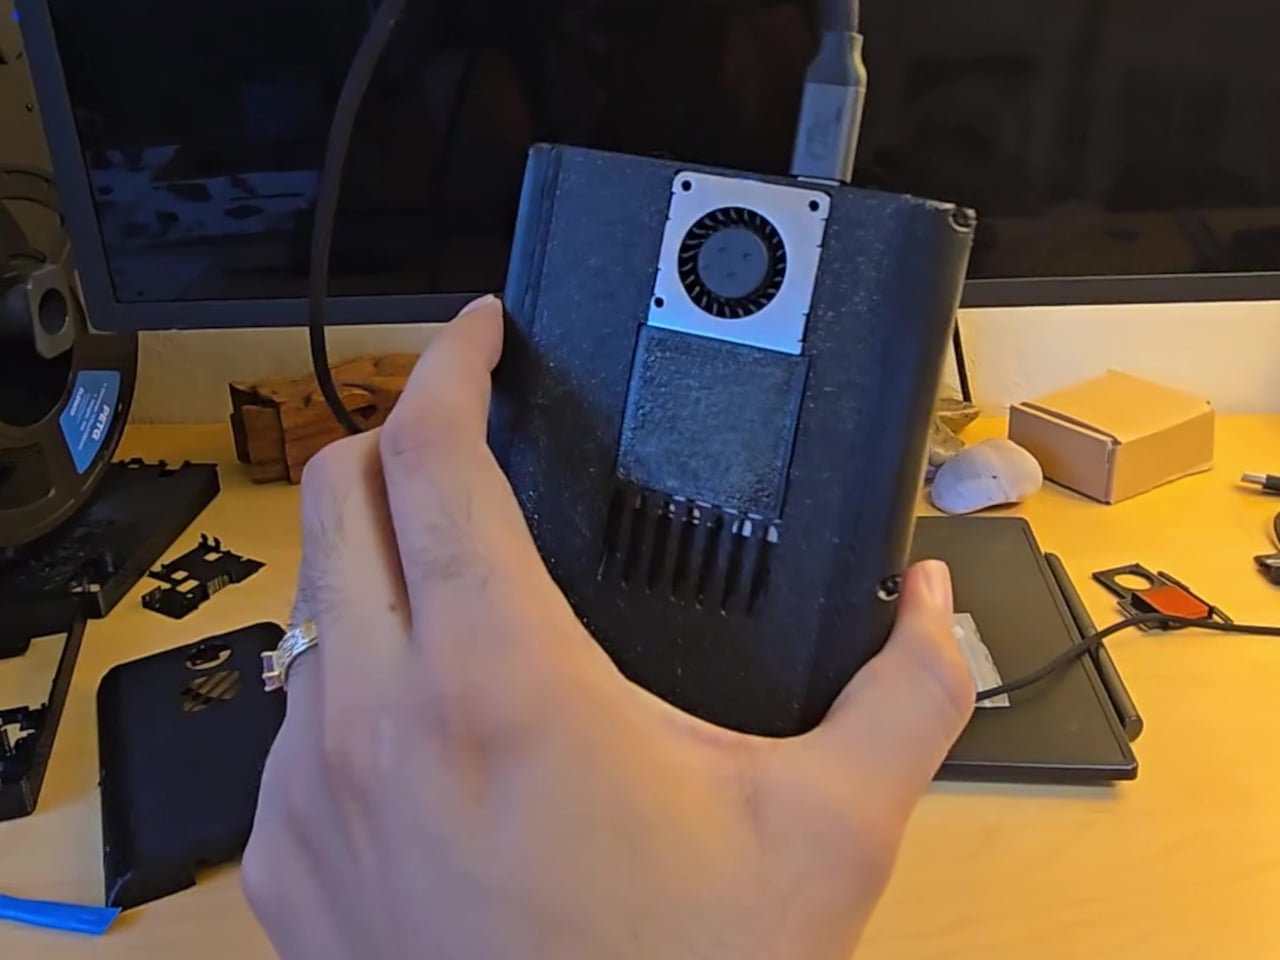
What the demo does confirm is that the hardware runs. Plug it into a display and the Steam Deck’s full library is available, complete with its familiar interface, game compatibility, and controls. The face buttons, D-pad, and thumbsticks carry over from the original hardware, giving it the full input range of a Steam Deck inside a body that fits the silhouette and spirit of a Game Boy.
The tighter enclosure does come with trade-offs. Cramming full Steam Deck internals into a chassis this compact raises real concerns about thermal management, since the original design already runs warm under load. The shell is noticeably thicker than a vintage Game Boy as a result, a reasonable concession given what’s packed inside. Cooling and battery longevity under sustained use remain open questions for the build to address.

The SteamBoy is still a work in progress, somewhere between a proof of concept and a finished handheld. The screen situation alone involves a custom PCB that hasn’t been built yet, and getting it to a polished state requires further refinement of the enclosure and its internal arrangement. A teardown video documenting how everything fits together has since followed the original reveal, showing that the assembly is at least replicable.
There’s something telling about why a project like this resonates with people beyond the usual modding community. The Steam Deck is already a capable handheld gaming PC, but the idea of that same power in a Game Boy-sized body carries a different kind of appeal. It’s the same feeling that made the Game Boy endure for decades, distilled into something that can run a modern PC library.
The post Your Entire Steam Library Now Fits in a Game Boy-Sized Handheld first appeared on Yanko Design.
This Arduino-Powered Retro Handheld Is One Anyone Can Build at Home

DIY handheld gaming has always had a ceiling for newcomers. Most builds require custom-designed PCBs, hard-to-find specialized connectors, and at least a few evenings spent with a soldering iron before anything turns on. Results from experienced makers can be impressive, but getting there has traditionally demanded an electronics background and a comfort with tools that many people simply don’t have.

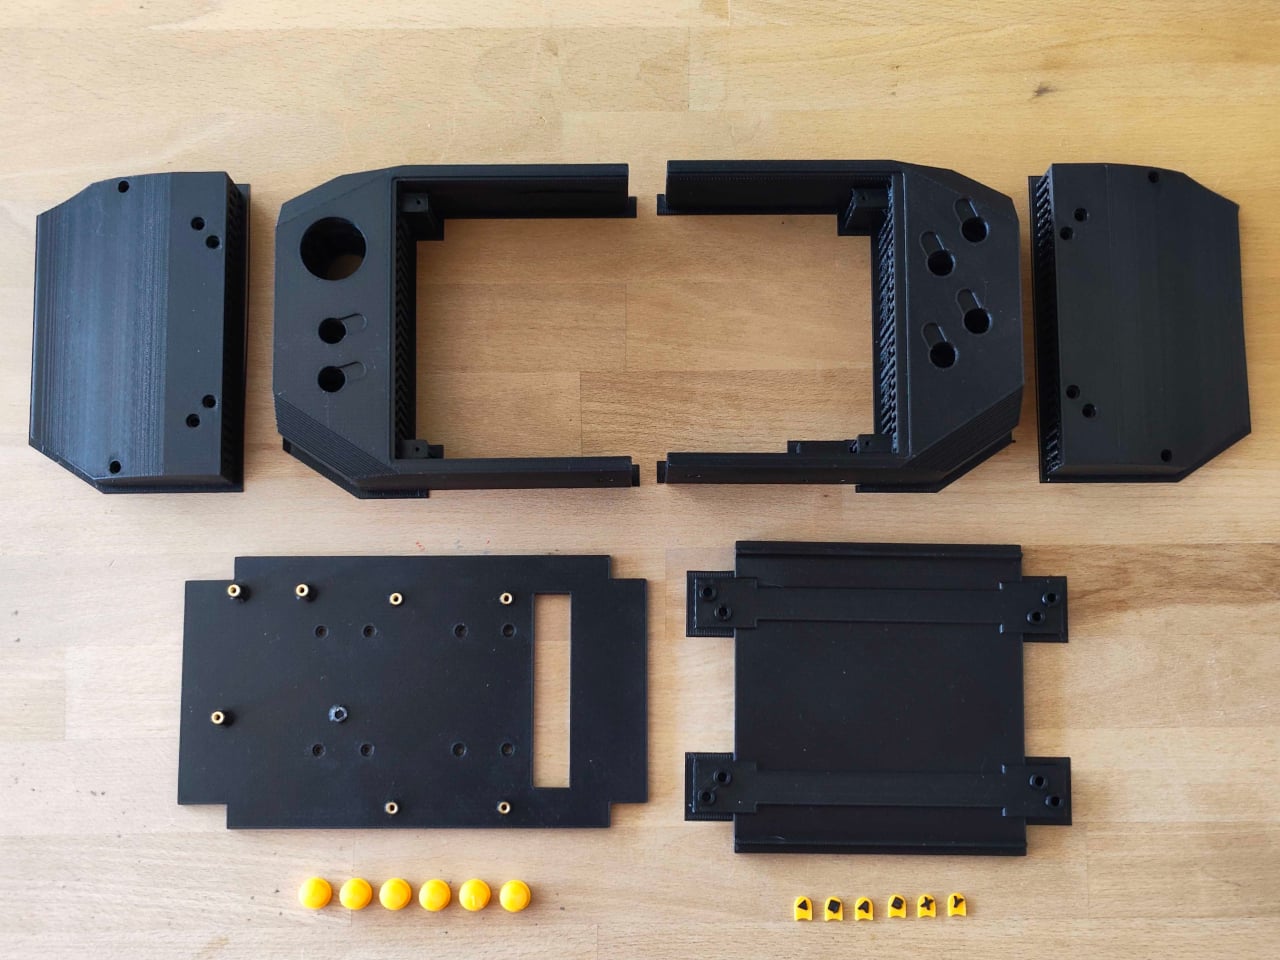
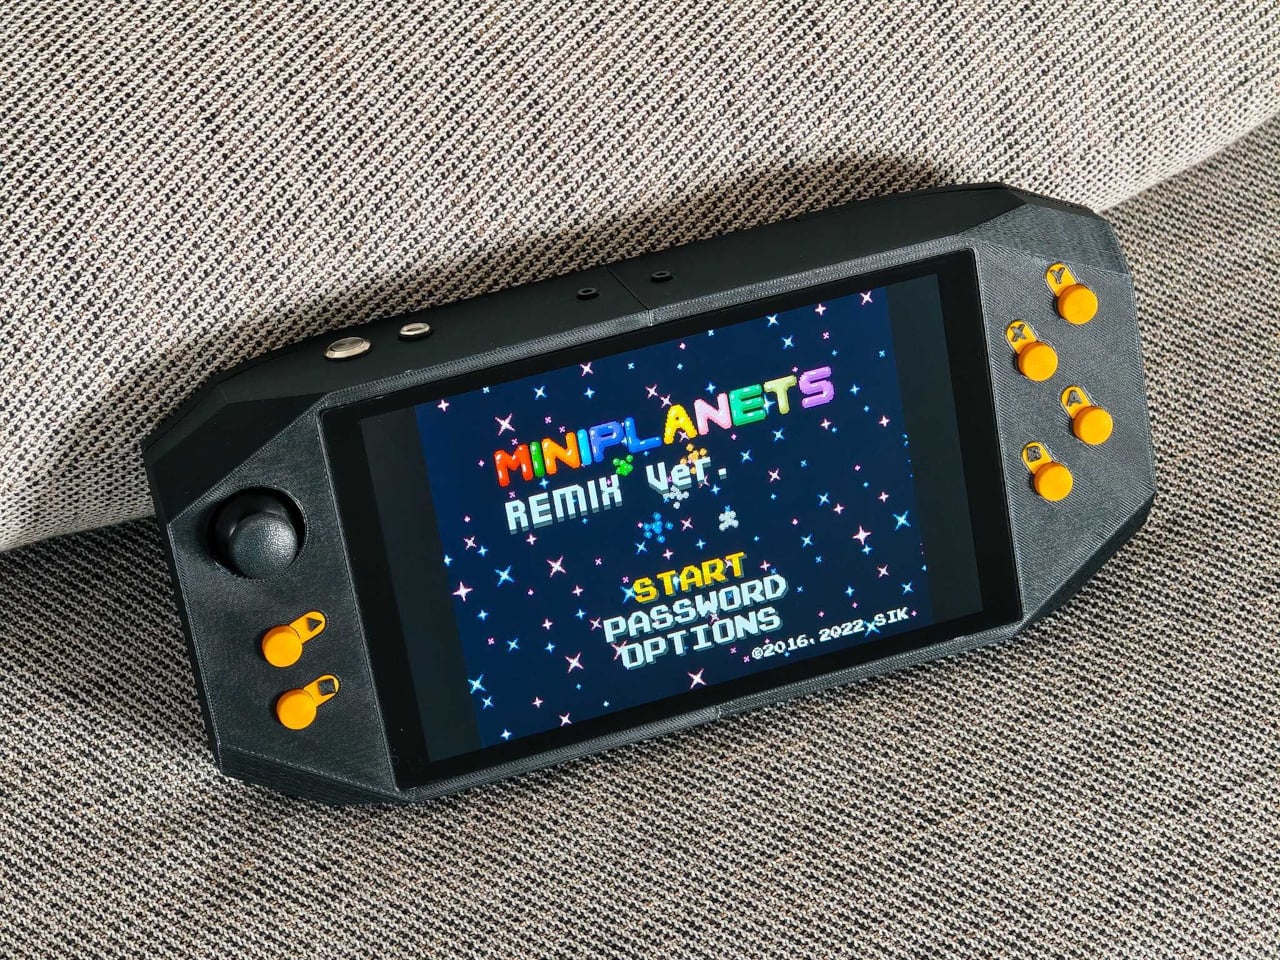
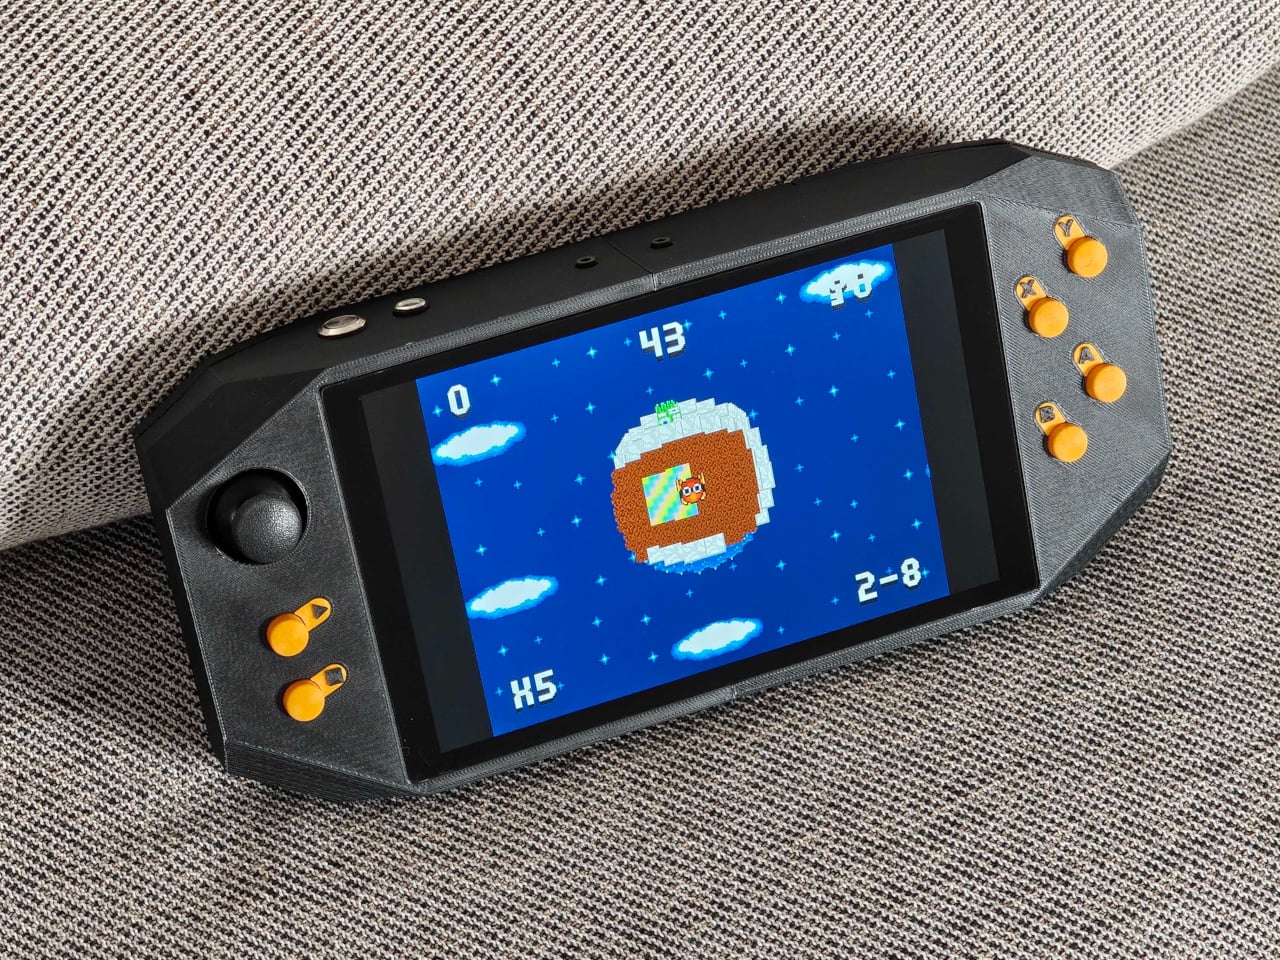
This Arduino UNO Q-based handheld console doesn’t ask for any of that. Every component can be ordered from a standard online retailer and assembled without soldering, making the build about as accessible as a maker project can get. The only parts requiring fabrication are the 3D-printed enclosure and buttons, which come together using heat-set inserts for a clean, professional-looking result that doesn’t betray its module-based origins.

Designer: zalmotek

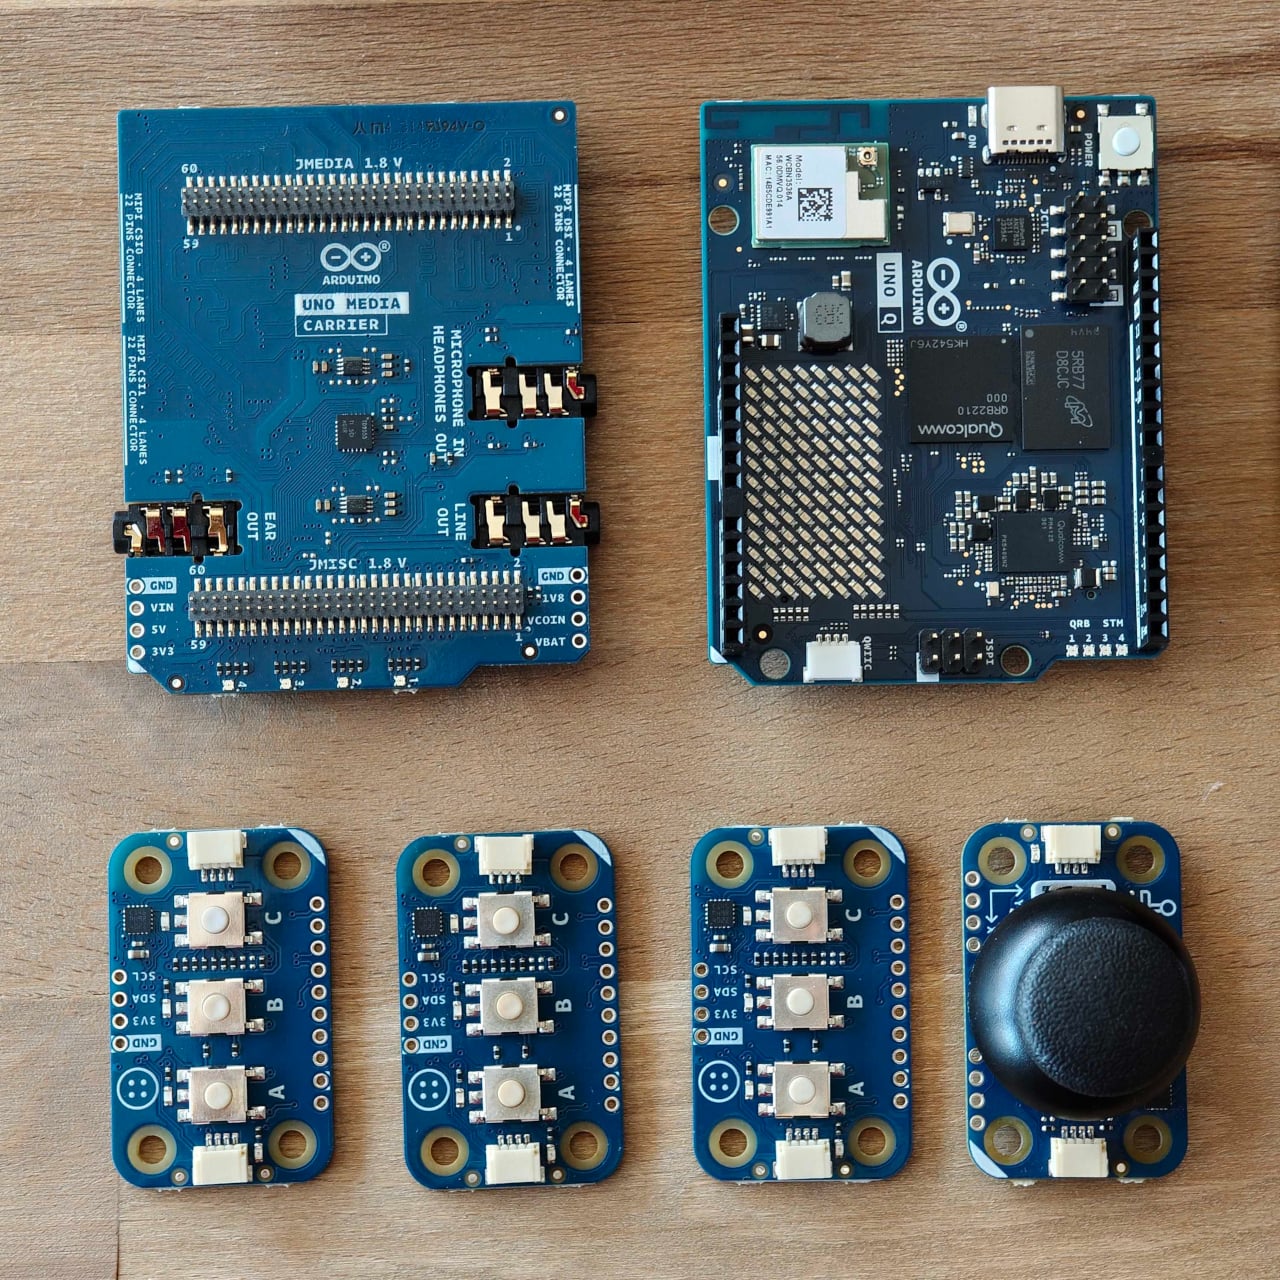
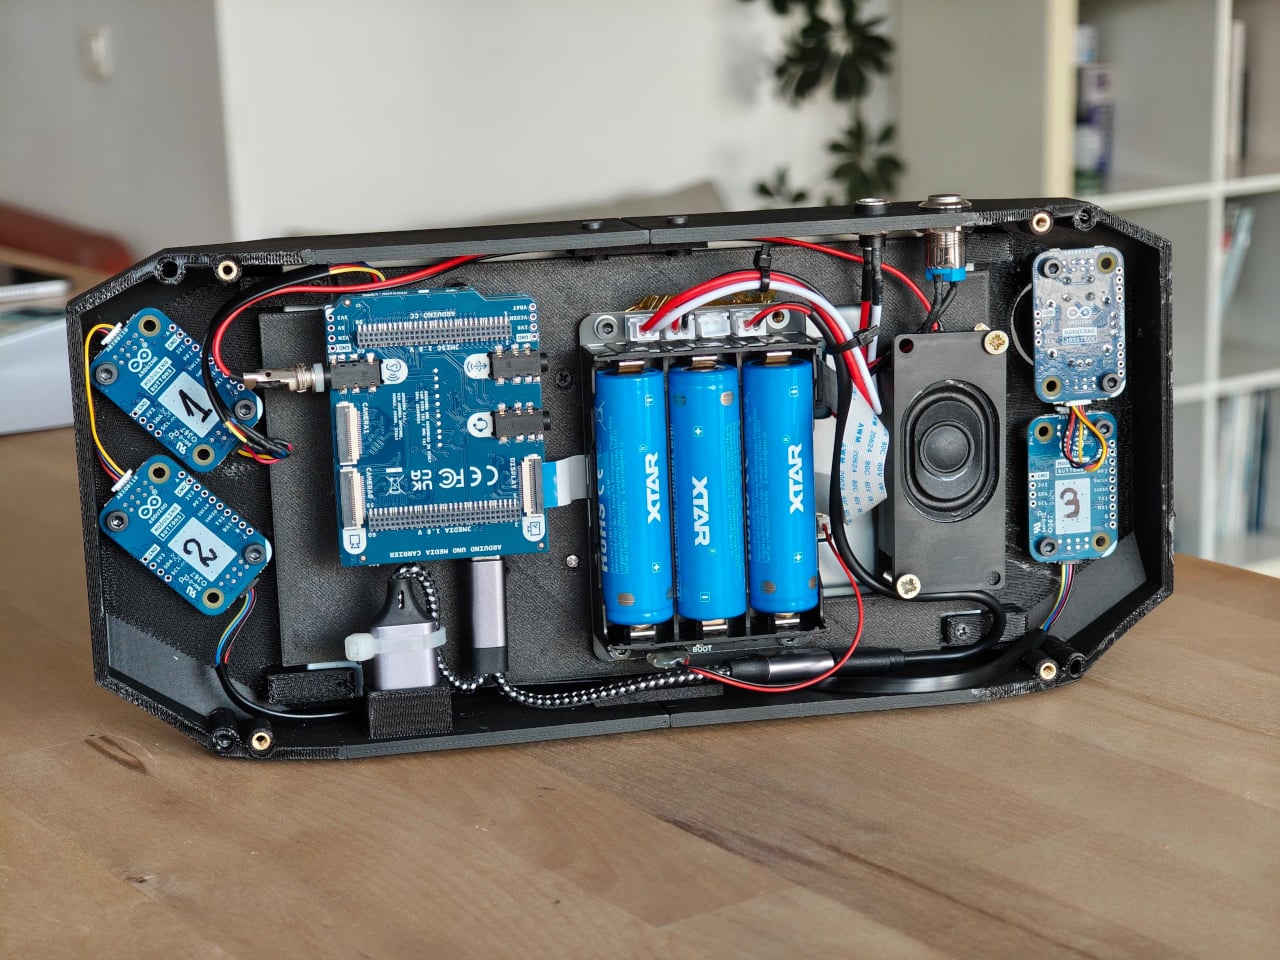
The hardware list reads like an afternoon’s shopping. At the center is the Arduino UNO Q, pairing a Qualcomm Dragonwing QRB2210 processor running Debian Linux with a dedicated STM32 microcontroller for real-time input handling. Modulino Buttons and a Modulino Joystick handle the controls, an Arduino UNO Media Carrier connects an 8-inch Waveshare touchscreen and an Adafruit speaker, and a Waveshare UPS module provides battery support.

The software side is equally well thought out. The STM32 microcontroller monitors button presses and joystick movements, then passes that data to the Linux environment, where a Python daemon converts everything into standard USB gamepad commands. RetroArch handles the emulation without any complicated setup, so loading up a game doesn’t feel different from plugging a USB gamepad into a PC.

That smoothness pays off in practice. Sitting back with a handheld you built over a weekend and scrolling through titles from systems you grew up with, everything runs cleanly with proper controls and sound. It’s a bit chunkier than a commercial device, given the module-based construction, but the feel is more polished than the trade-off might suggest, especially for a build that skips custom PCBs entirely.

There’s also room to go further than emulation. The UNO Q can run the Godot game engine, which turns the same hardware into a development platform for original games. Between that and RetroArch’s support for a wide range of classic platforms, the console covers both ends of the gaming spectrum without requiring any additional hardware beyond what’s already in the build.

The full hardware list, assembly walkthrough, and complete source code are posted on Arduino Project Hub and GitHub, keeping everything open and reproducible. The documentation also frames the build as a starting point rather than a finished product, with options like swapping the display for a different size, redesigning the enclosure, or adding a Modulino Movement node for motion controls described as natural next directions.

None of that holds together without the right foundation, and the UNO Q’s dual-brain architecture provides it quietly. The STM32 handles time-sensitive inputs without lag while the Qualcomm processor manages the emulation stack, audio, and video at the same time. A software bridge connects the two, and clean communication between them is what keeps the console from feeling like a loose collection of modules.

The post This Arduino-Powered Retro Handheld Is One Anyone Can Build at Home first appeared on Yanko Design.

DIY Writing Devices Get Expensive Fast, So This One Costs Almost Nothing

The writerdeck movement has one recurring irony: devices built specifically to cut through digital distraction have a tendency to get expensive. Custom keyboards, purpose-built screens, and precision-machined enclosures can push a DIY writing build well past the cost of a regular laptop, which rather defeats the point. The more interesting entries in the space tend to be the ones that solve the accessibility problem, not just the distraction one.

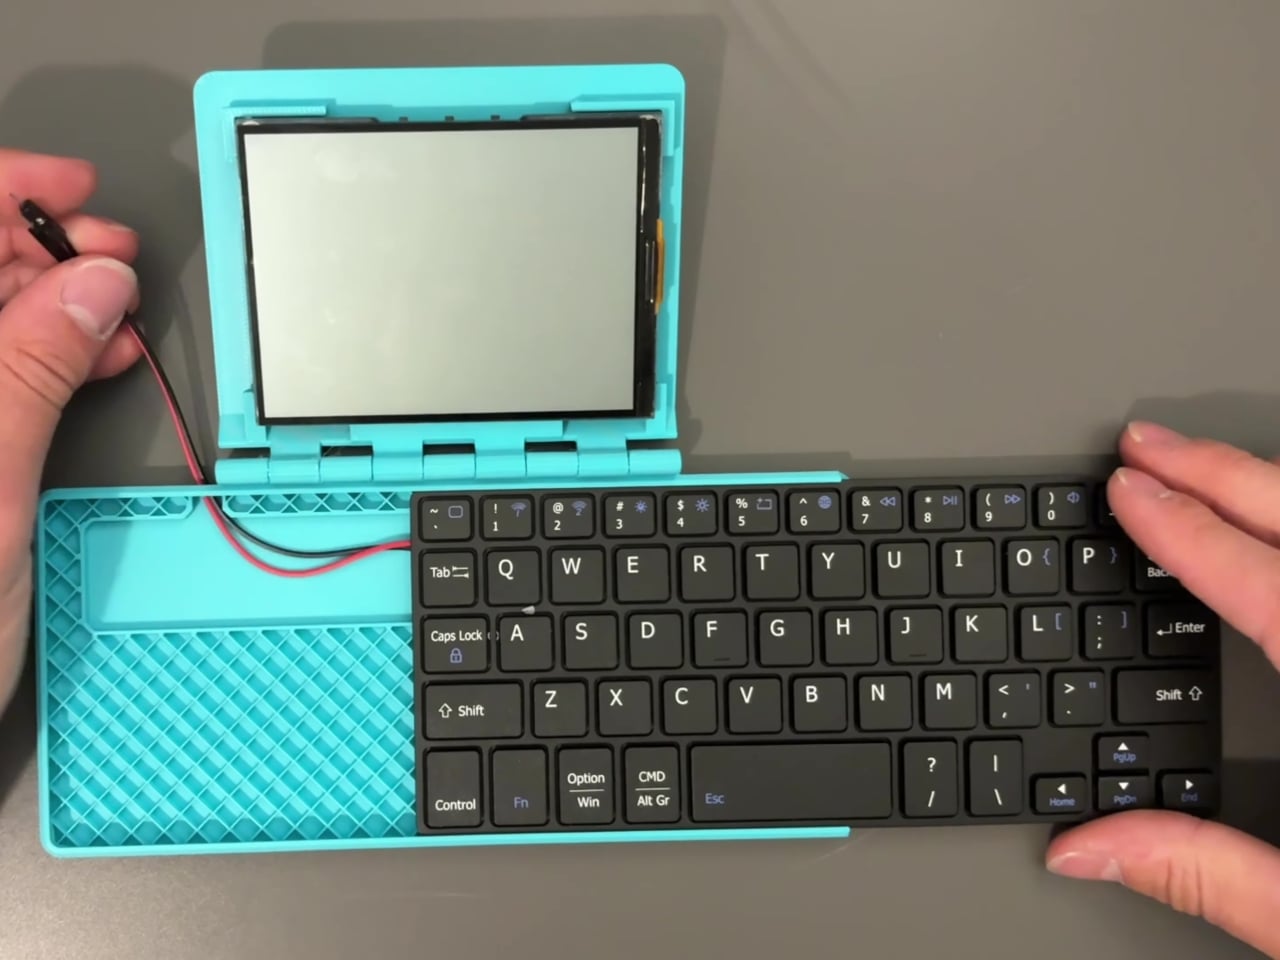
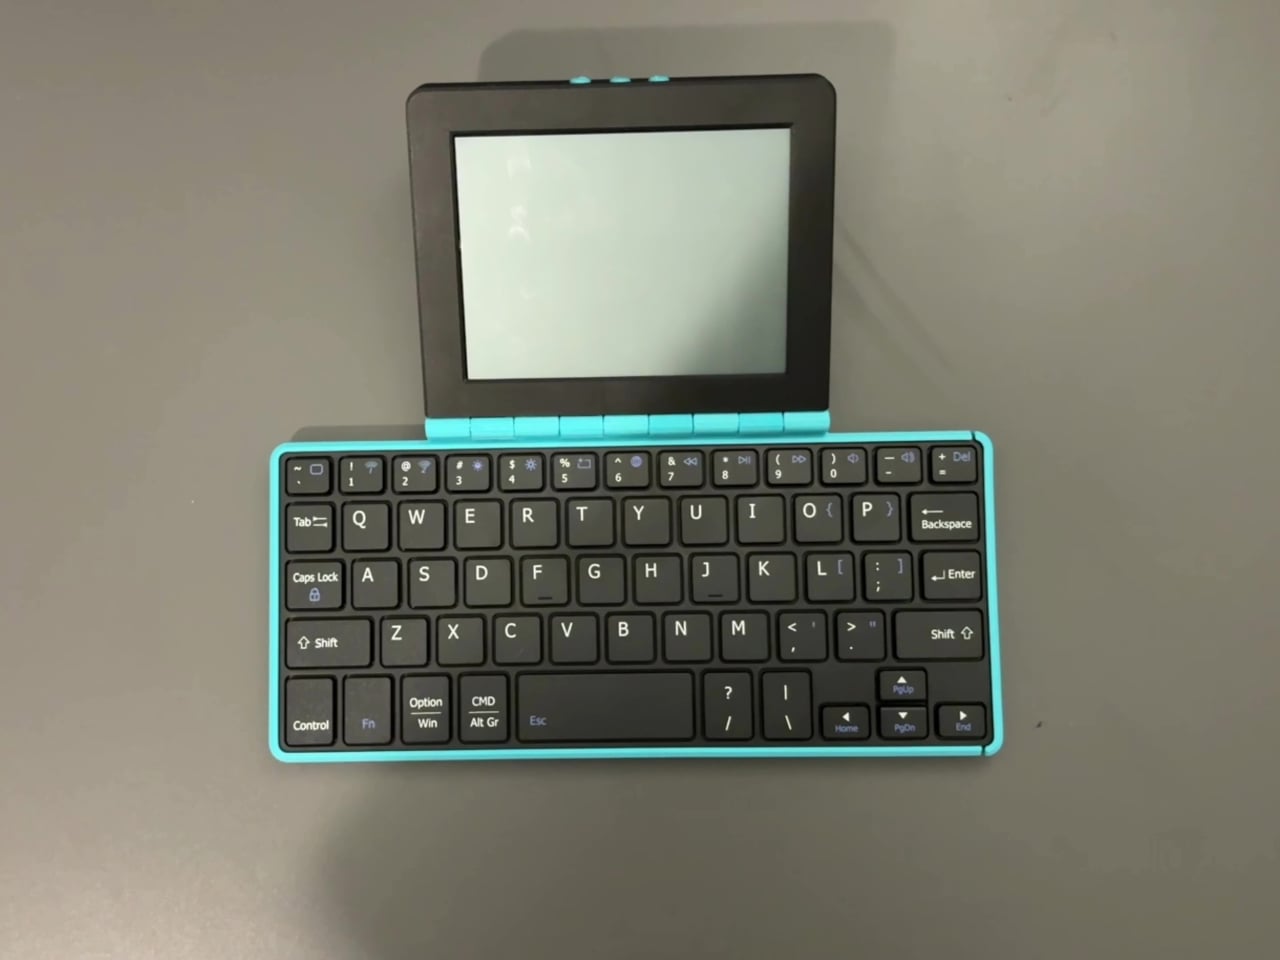
The Whale Writer is an open-source, foldable, DIY writing device designed to be as cheap and portable as possible. It’s the second writerdeck design from its creator, after Bee Write Back, built specifically to address the two most common criticisms of the first: it didn’t fold, and it cost too much. Both problems are solved here through a combination of 3D-printed parts and off-the-shelf electronics.

Designer: Simon Shimel

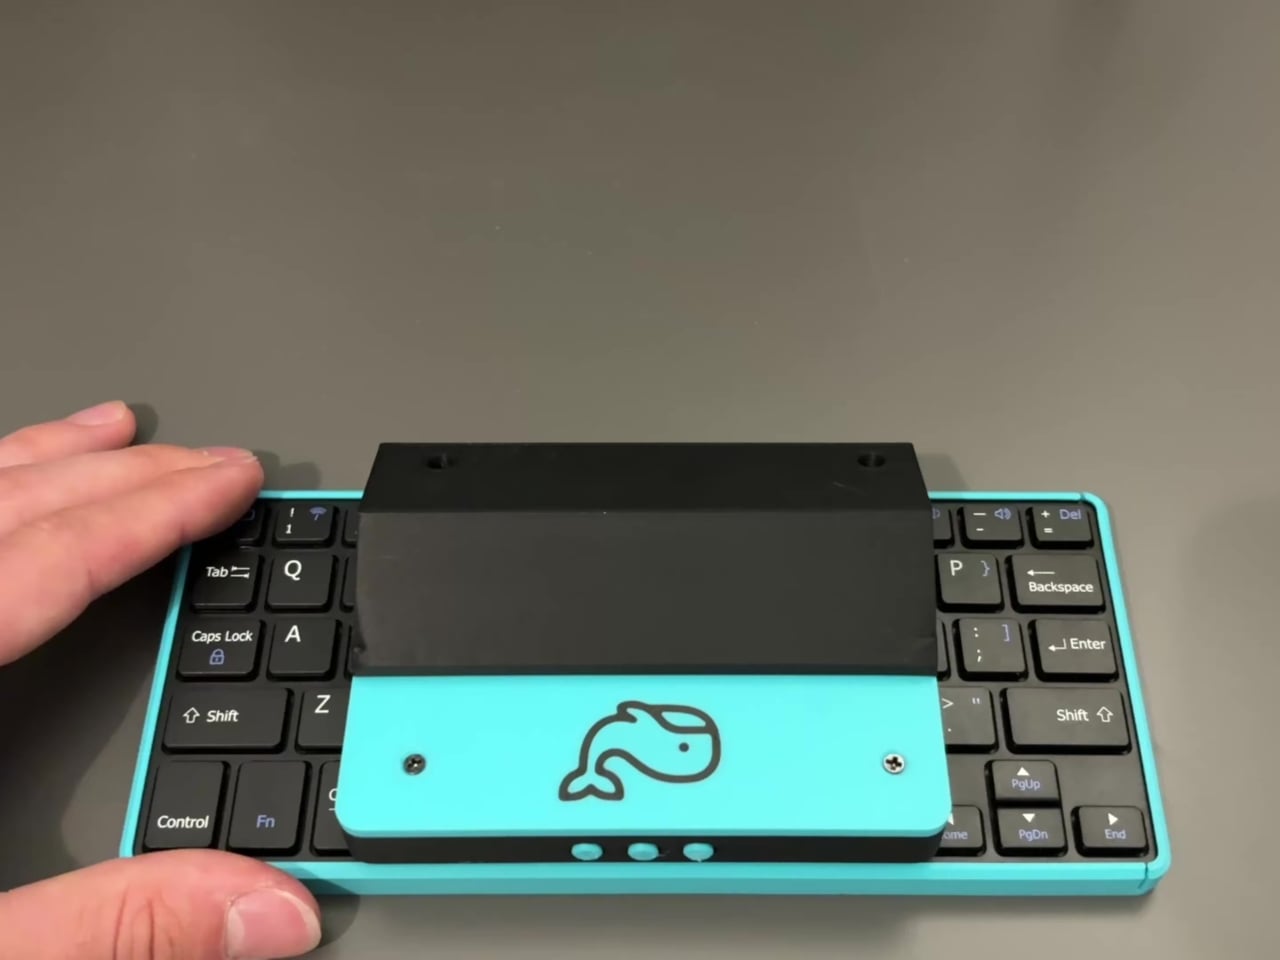
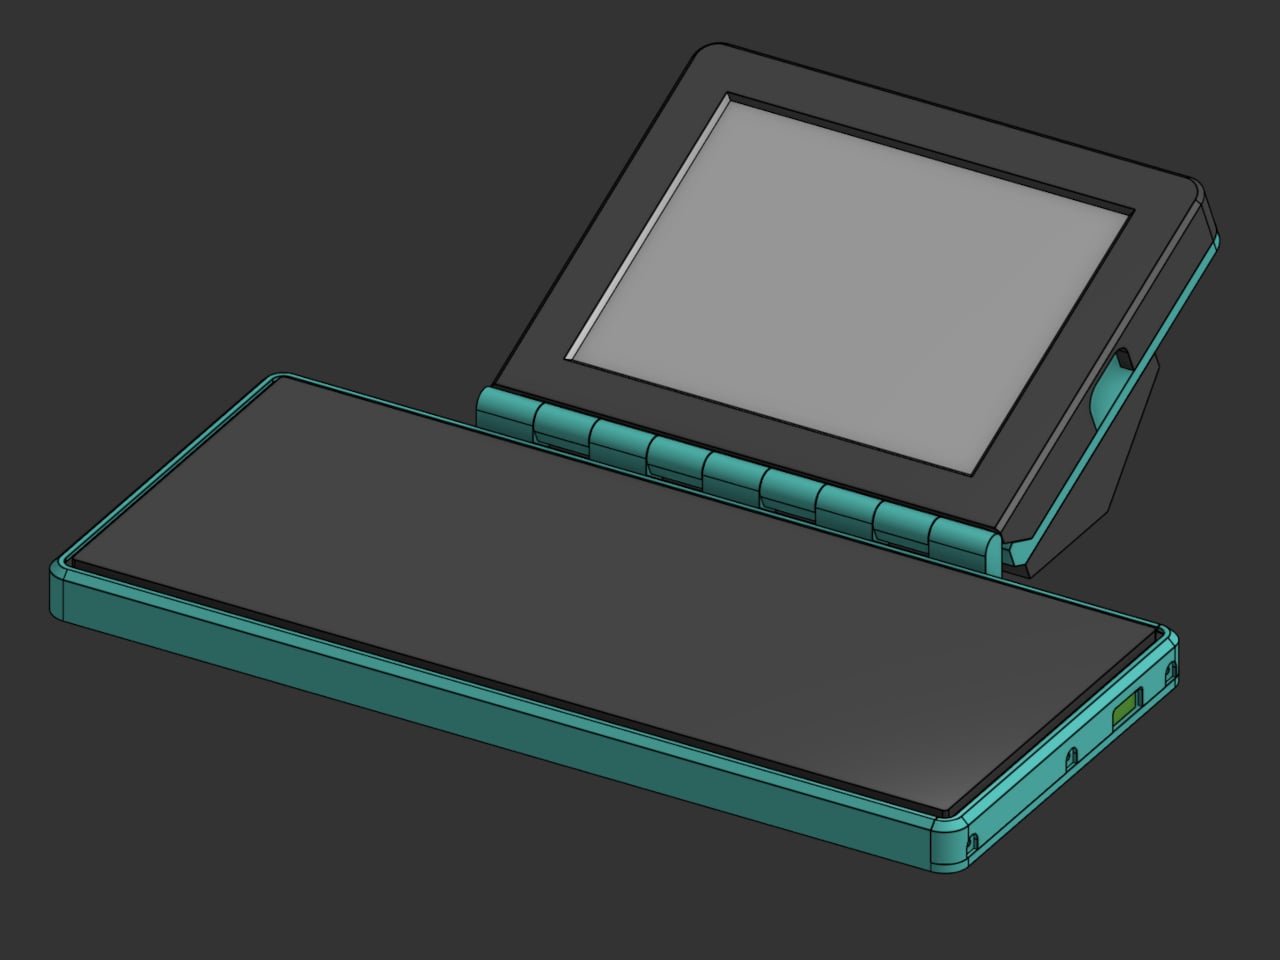
Folding is what separates this from most of the writerdeck category, where non-folding chassis designs are common. When closed, the Whale Writer flattens into a form that can travel in a bag without a full keyboard and screen sticking out at different angles. A device that sits on a café table can fold up and slide into a jacket pocket for the commute.

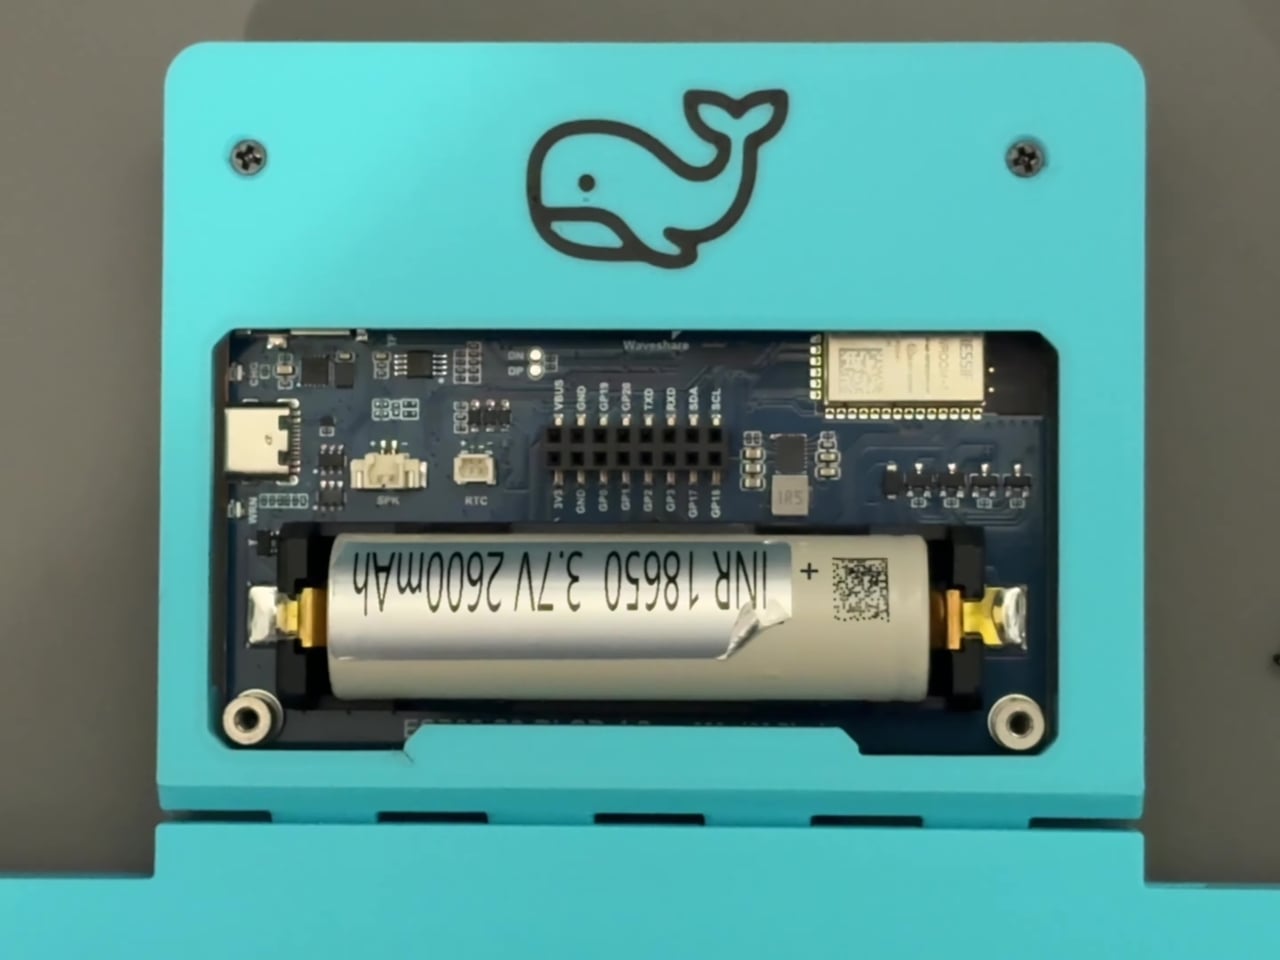
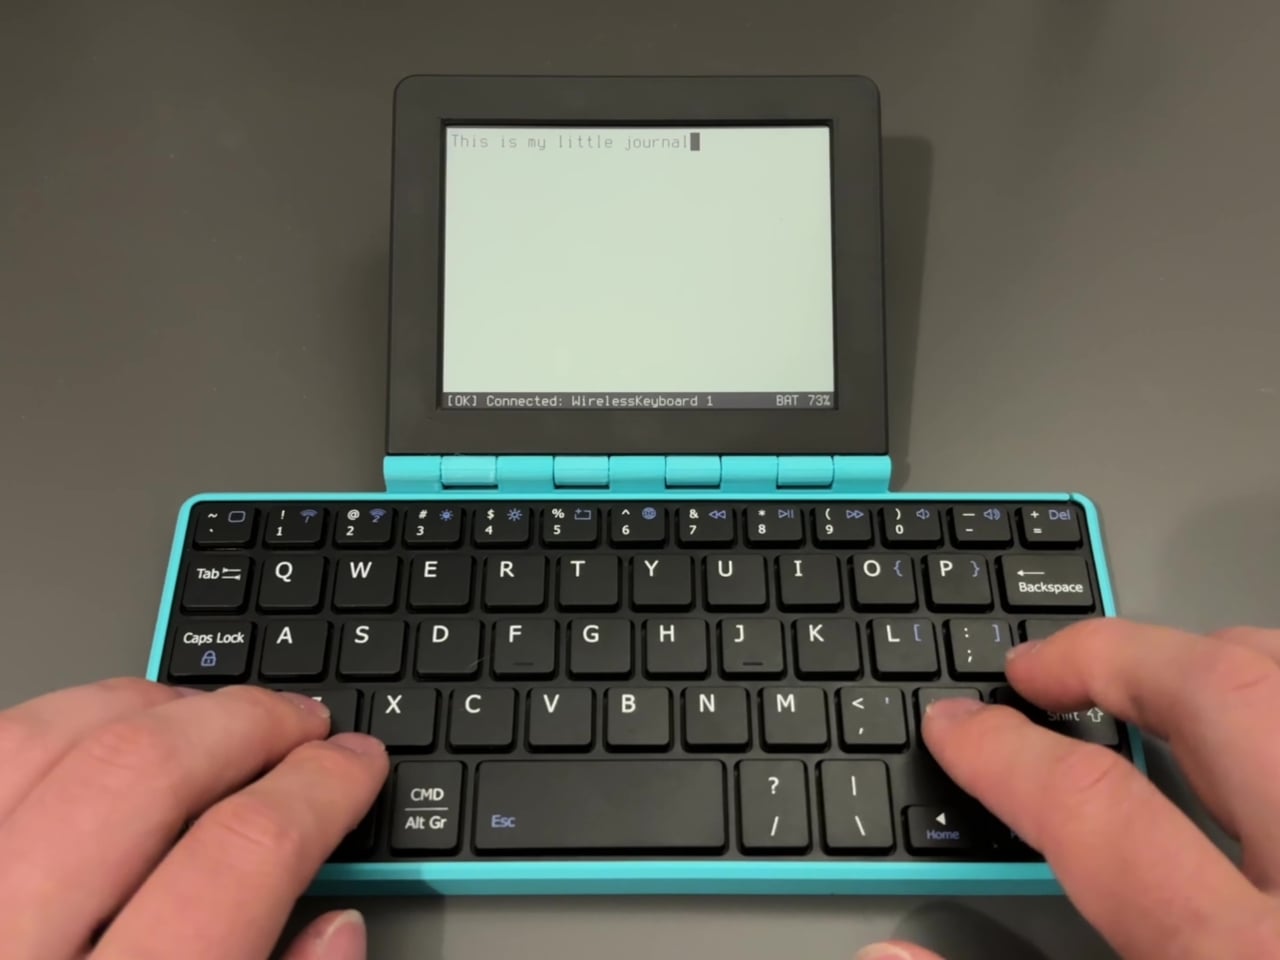
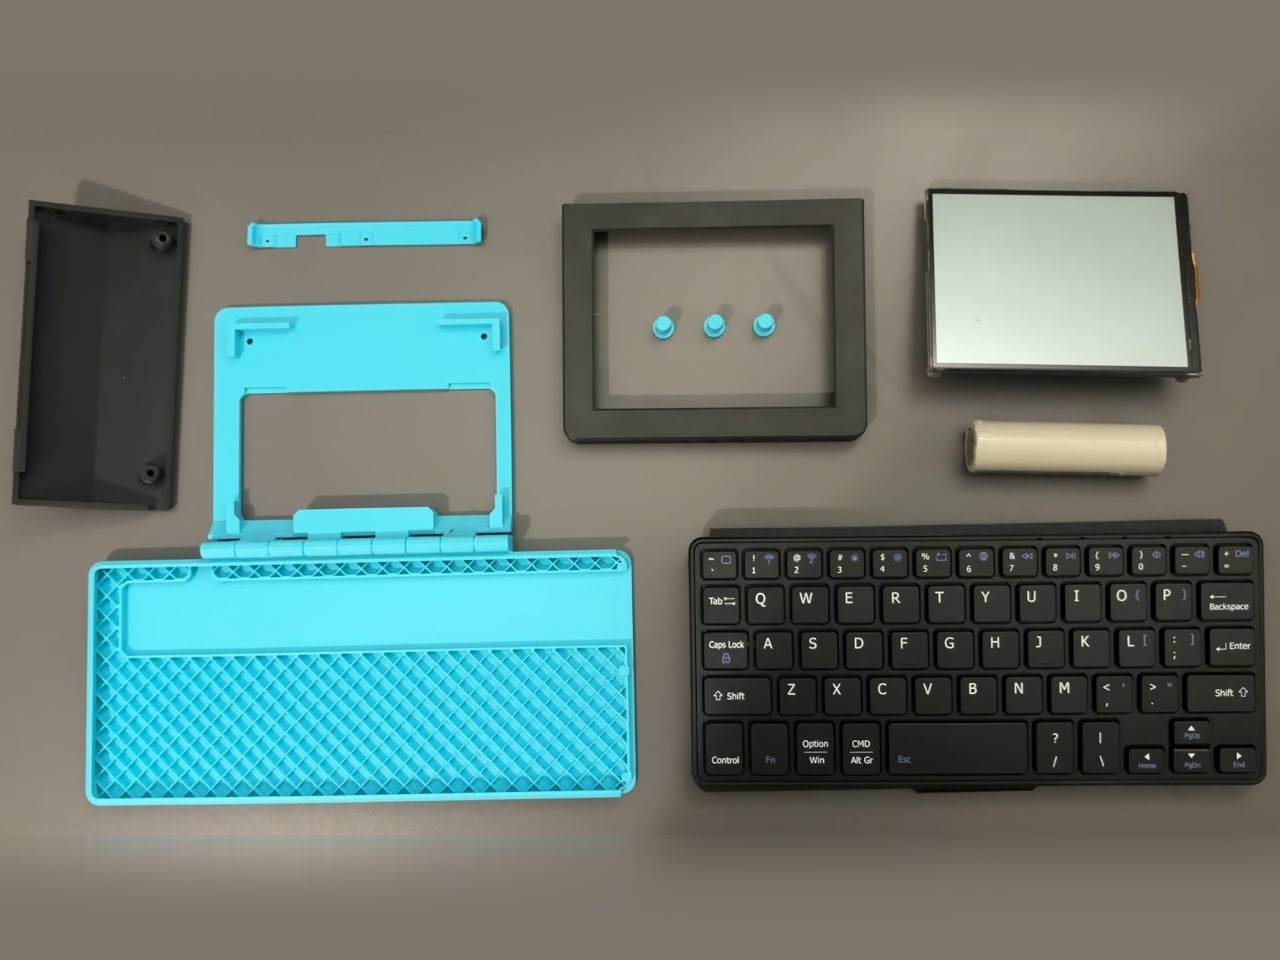
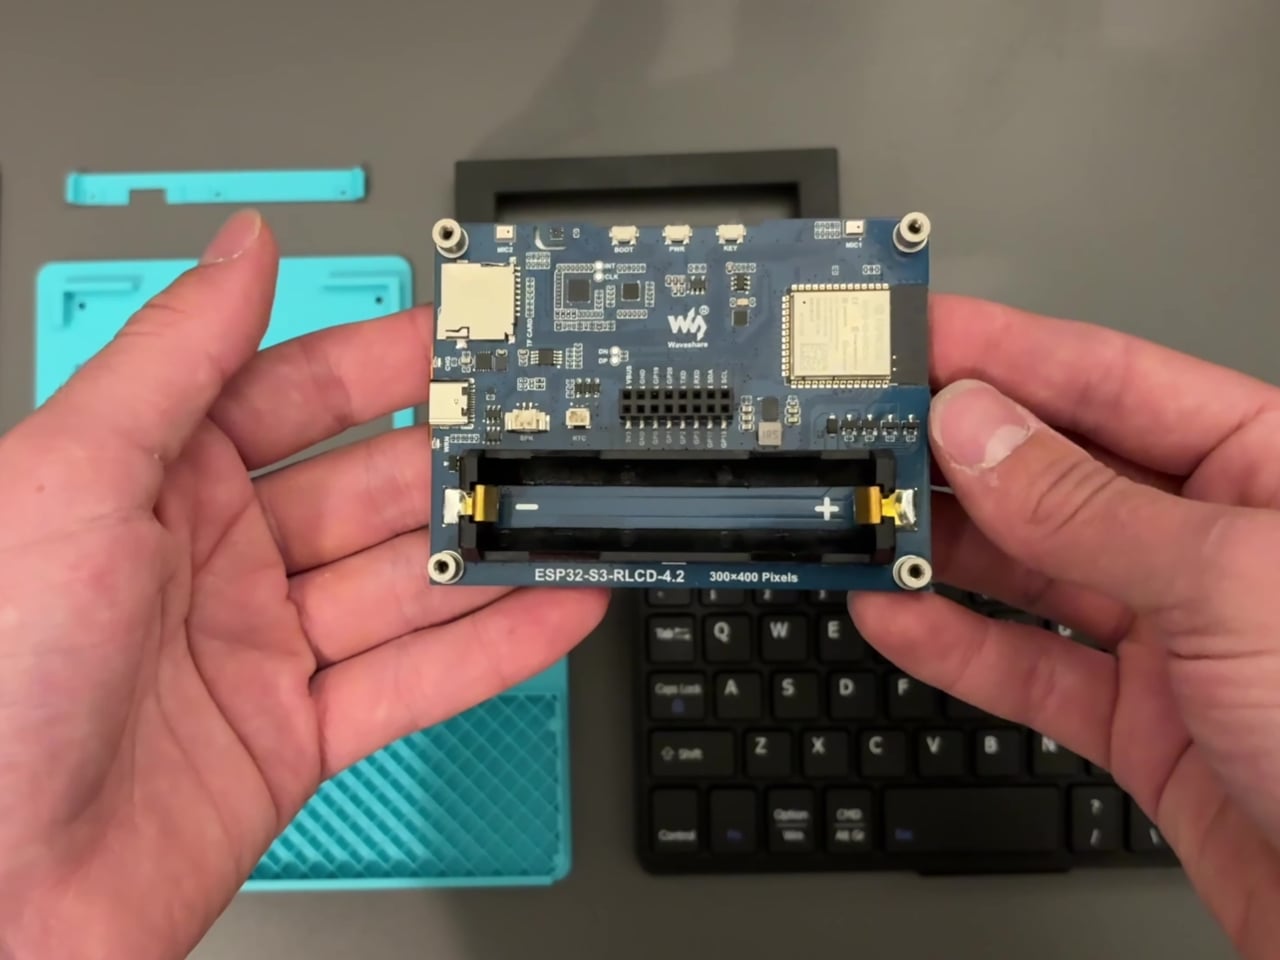
Central to the hardware is an unusual display choice. Rather than a backlit LCD, the Whale Writer uses a Waveshare RLCD, a reflective liquid crystal display that reads using ambient light instead of a power-hungry internal backlight. The result is a screen that mimics paper readability and extends battery life considerably, with an ESP32-S3 microcontroller already built into the module so no separate computing board is required.

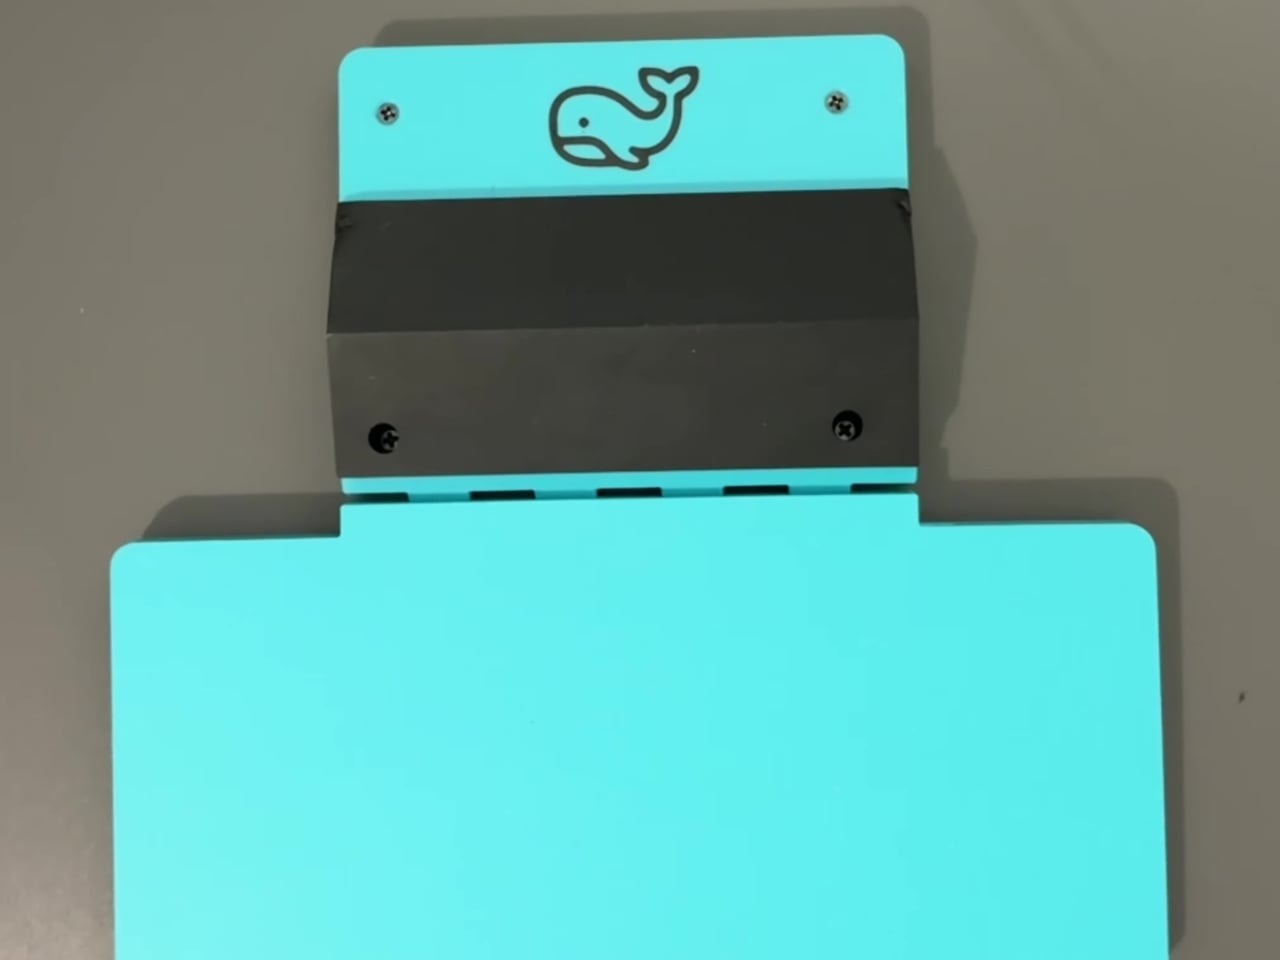
The keyboard is the most accessible component here: a standard cheap Bluetooth keyboard is fully disassembled, and its PCB, key matrix, and flex cable are repurposed inside a custom 3D-printed chassis. Four printed parts complete the build: a base plate with a print-in-place hinge, a locking plate that holds the keyboard in position, a battery cover, and a screen bezel with three button cutouts.

Power runs from an 18650 battery cell, and builders have two configurations to choose from. The simpler path keeps the keyboard’s original battery running independently from the main cell, requiring no soldering. The more involved route splices the keyboard’s power input directly to the RLCD board’s output, running everything off a single 18650, which means one battery to charge instead of two.

Software is deliberately left open. A basic word processor was built as a functionality test using an AI coding assistant, but the creator frames the Whale Writer as a hardware platform, not a finished product. The ESP32’s onboard Wi-Fi and Bluetooth leave the door open for everything from a minimal plain-text editor to a wireless draft-syncing terminal, depending on what firmware the community eventually writes.

None of what the Whale Writer does is entirely new, and it doesn’t try to suggest otherwise. The category already knows what it’s supposed to be: a device that only lets you write, without anything else competing for the same moment. What this build adds to that premise is a sincere attempt to make the experience available to people who want it but have been priced out of building one.

The post DIY Writing Devices Get Expensive Fast, So This One Costs Almost Nothing first appeared on Yanko Design.

Google Built a Translation Device That Doesn’t Need Google’s Own Cloud

Real-time translation has quietly become one of the most useful things AI can do, and most of the solutions doing it well are deeply dependent on cloud infrastructure. The phone apps and earbuds that translate conversations on the fly are continuously routing audio through remote servers, which works fine until the network doesn’t. Travel to areas with spotty coverage, use a device that can’t roam internationally, or simply value keeping your conversations off someone else’s server, and the whole pipeline collapses at the exact moment you need it most.

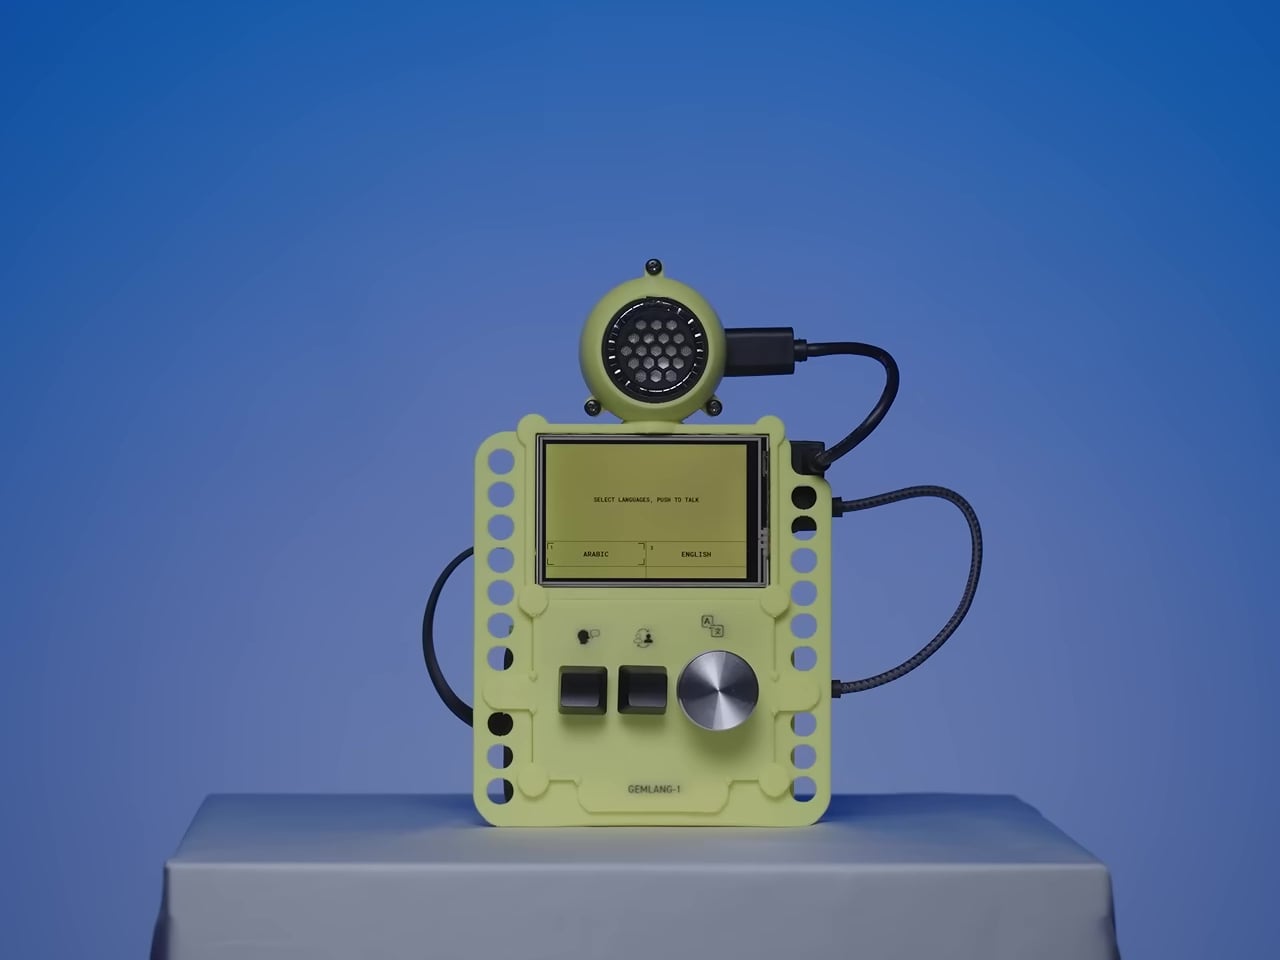
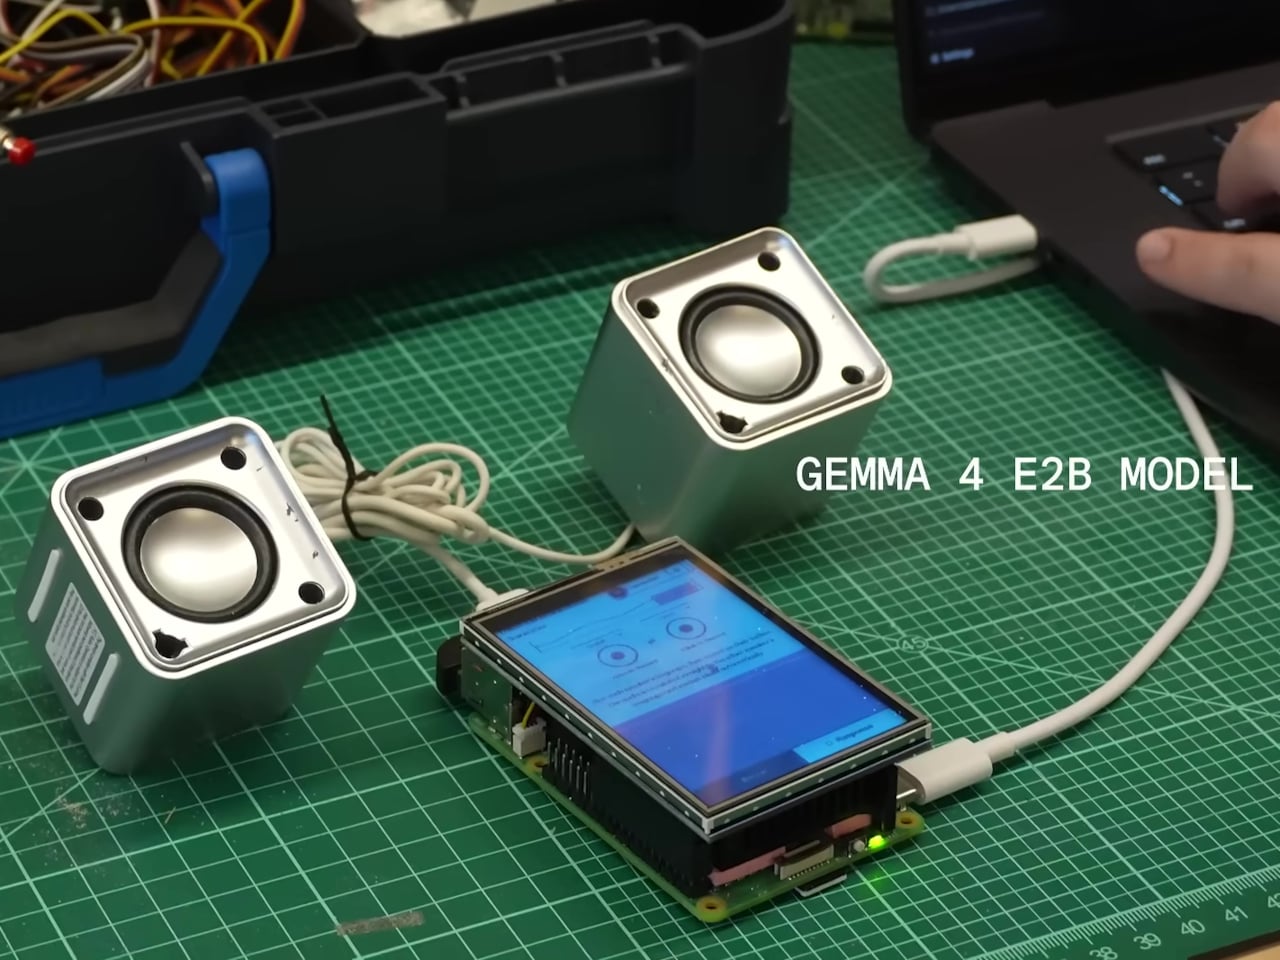
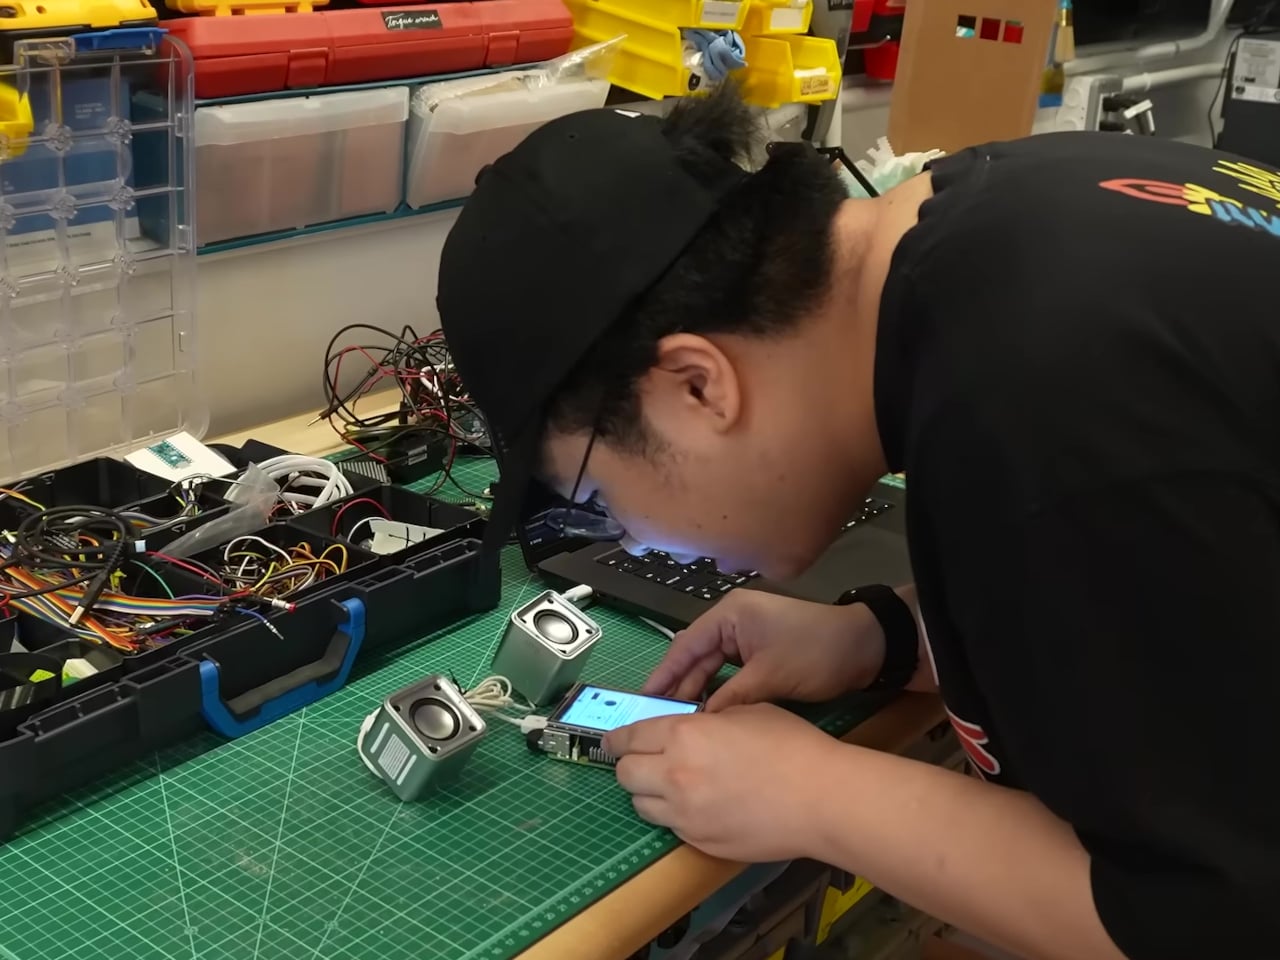
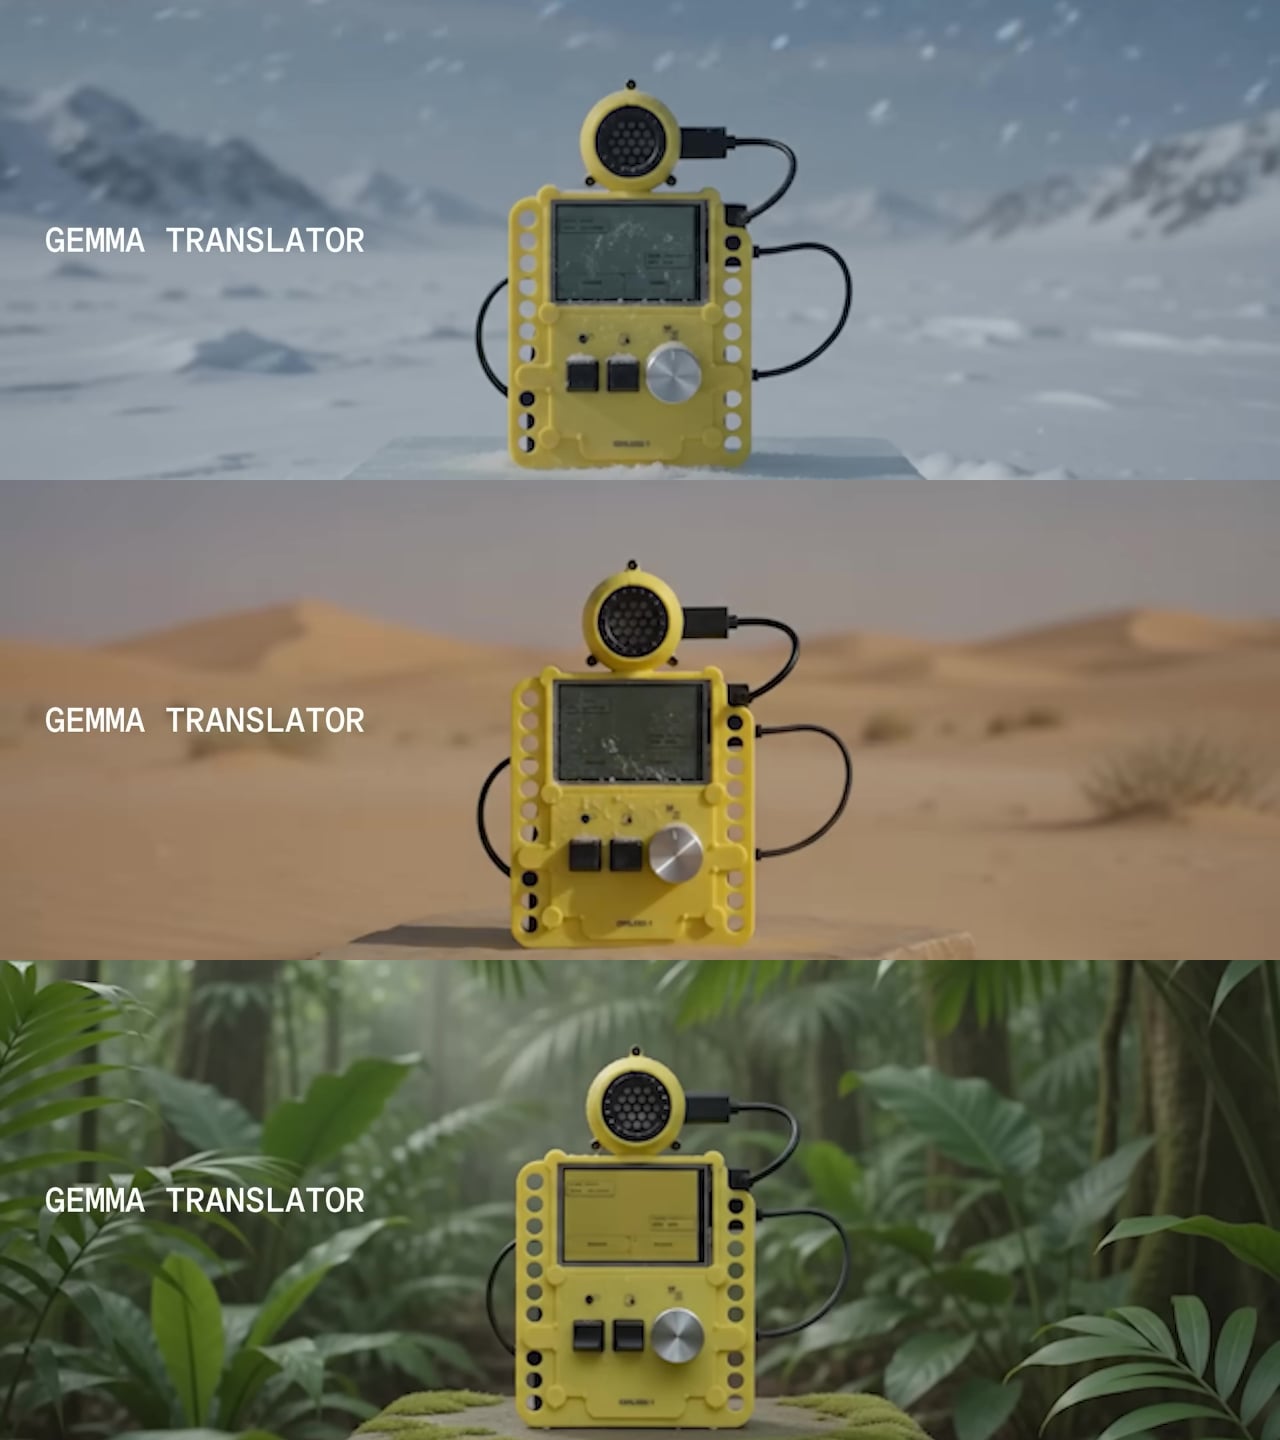
The Gemma Translator is a direct answer to that. It’s a handheld voice translation device that runs its entire AI processing pipeline locally on a Raspberry Pi 5, with no internet required after the initial setup. There’s no cloud to route audio through, no API key to maintain, and no service that can be discontinued. You speak into it, and it translates and speaks back, all on the same pocket-sized device.

Designer: Google

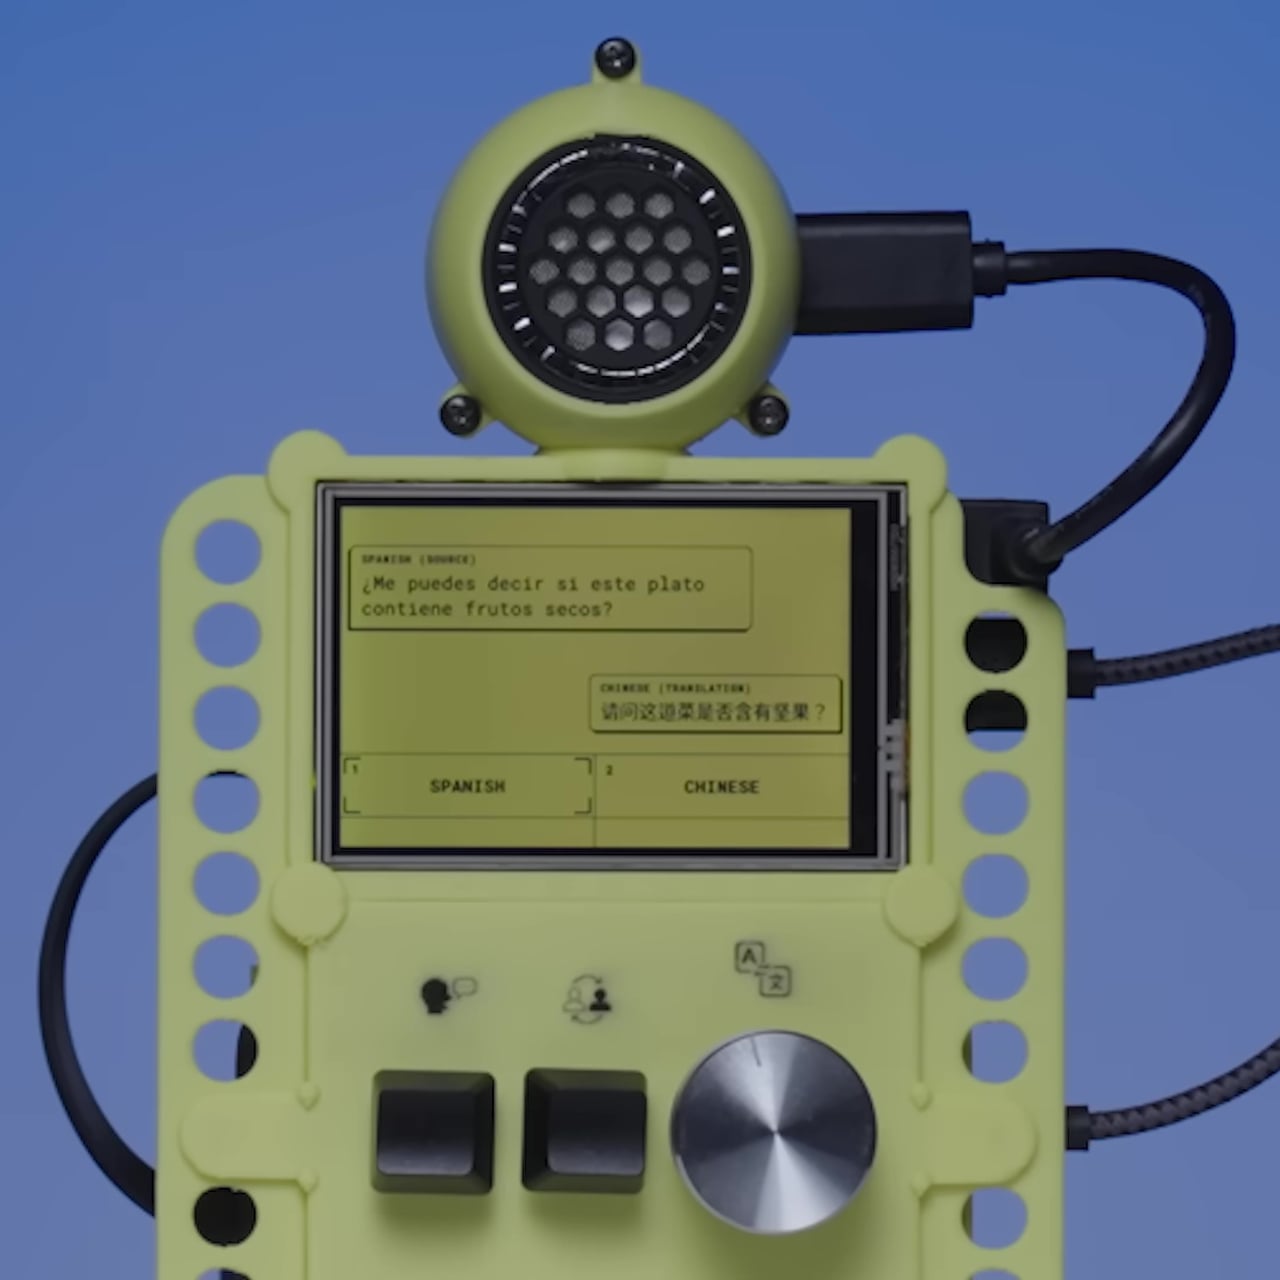
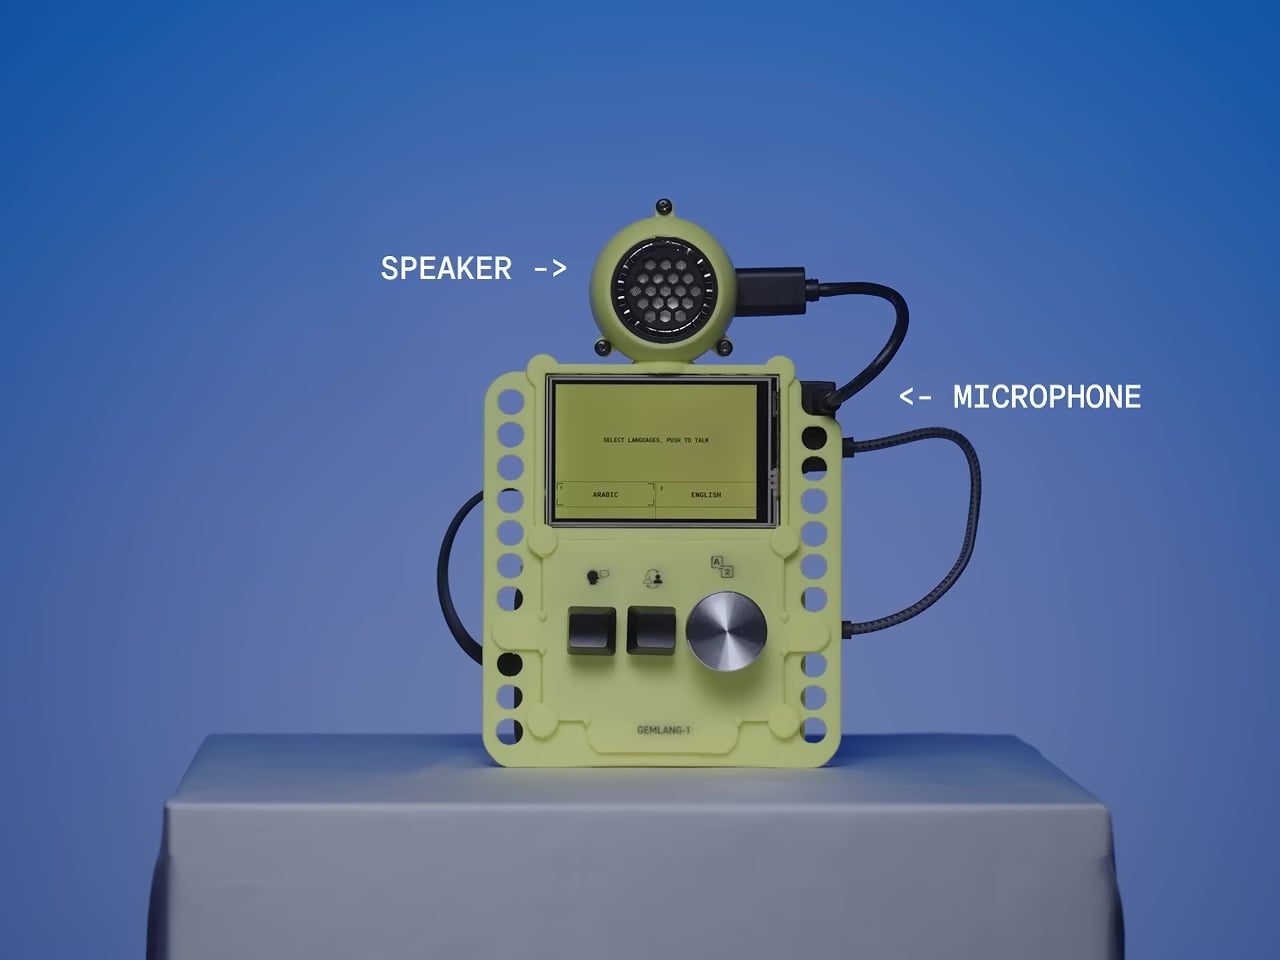
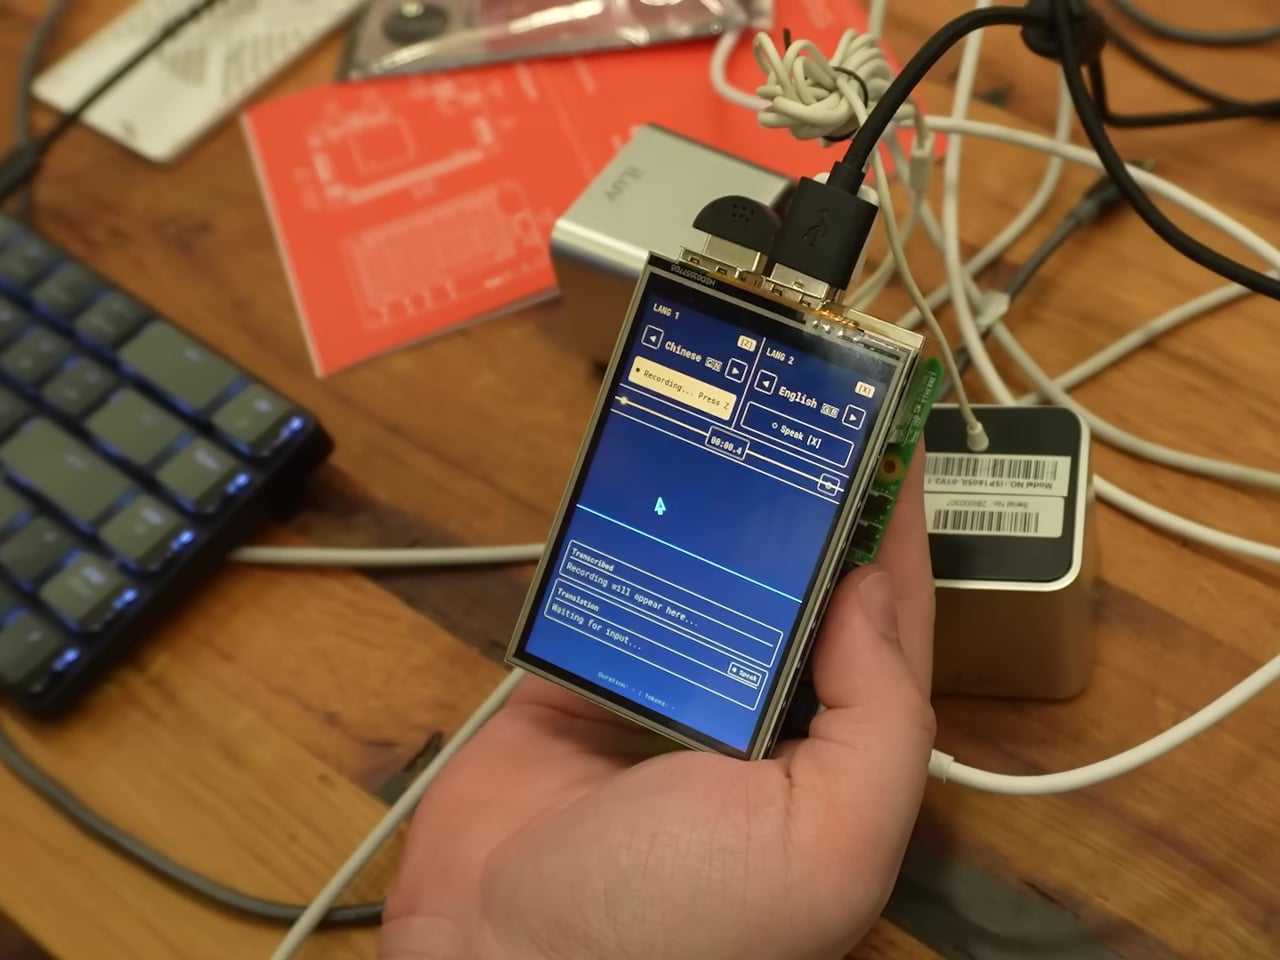
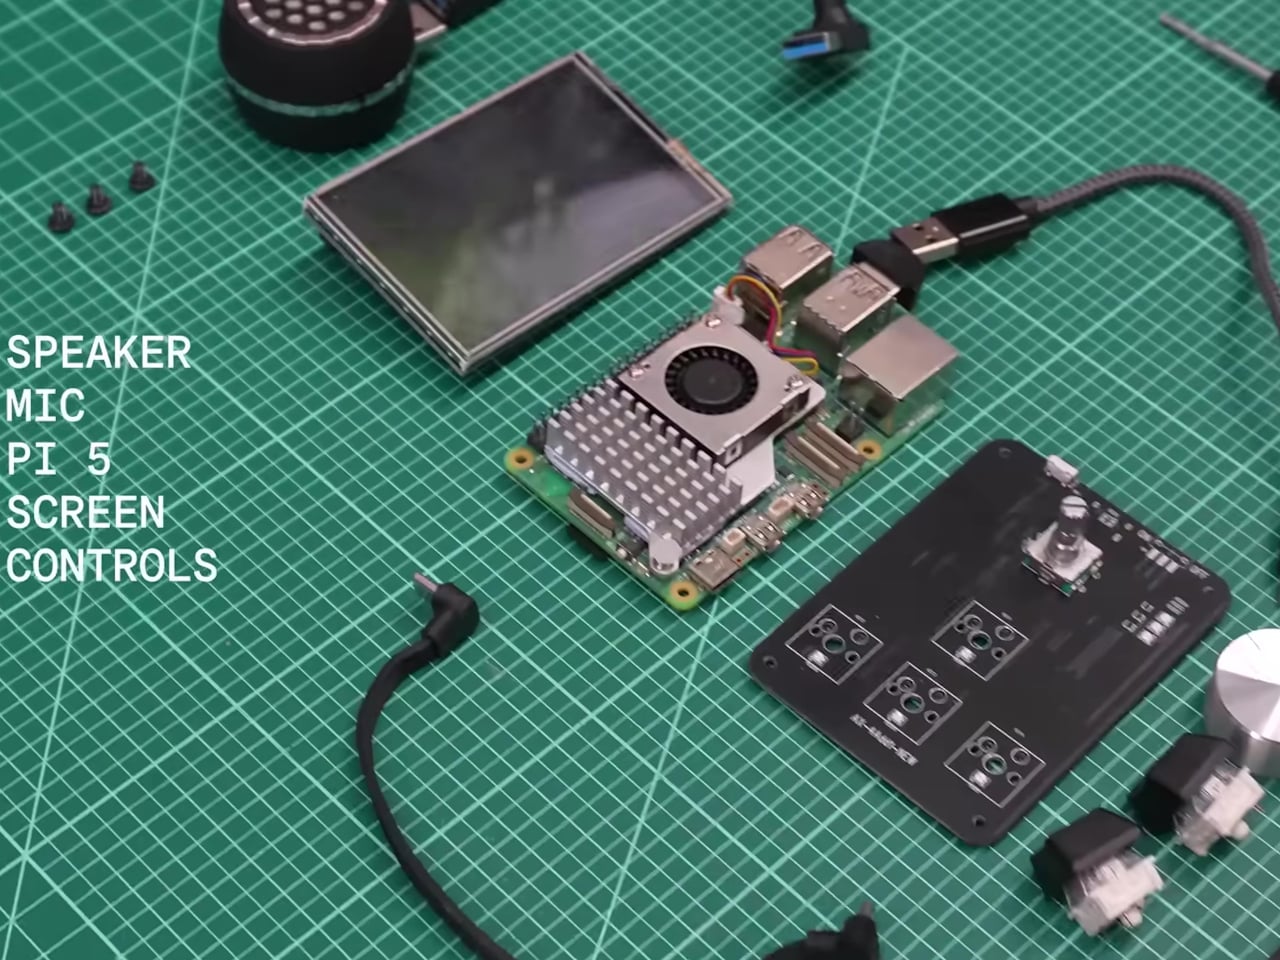
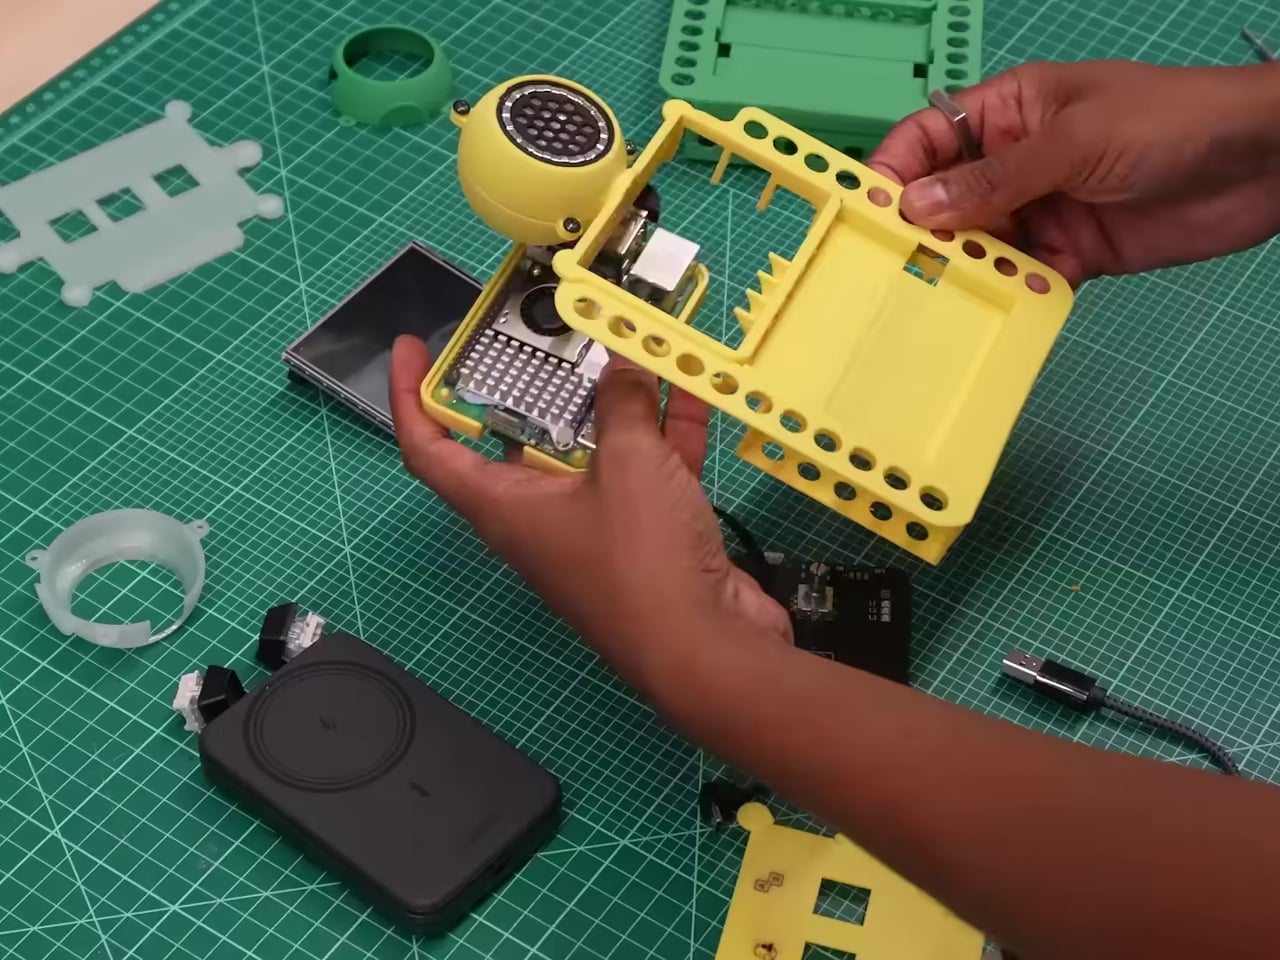
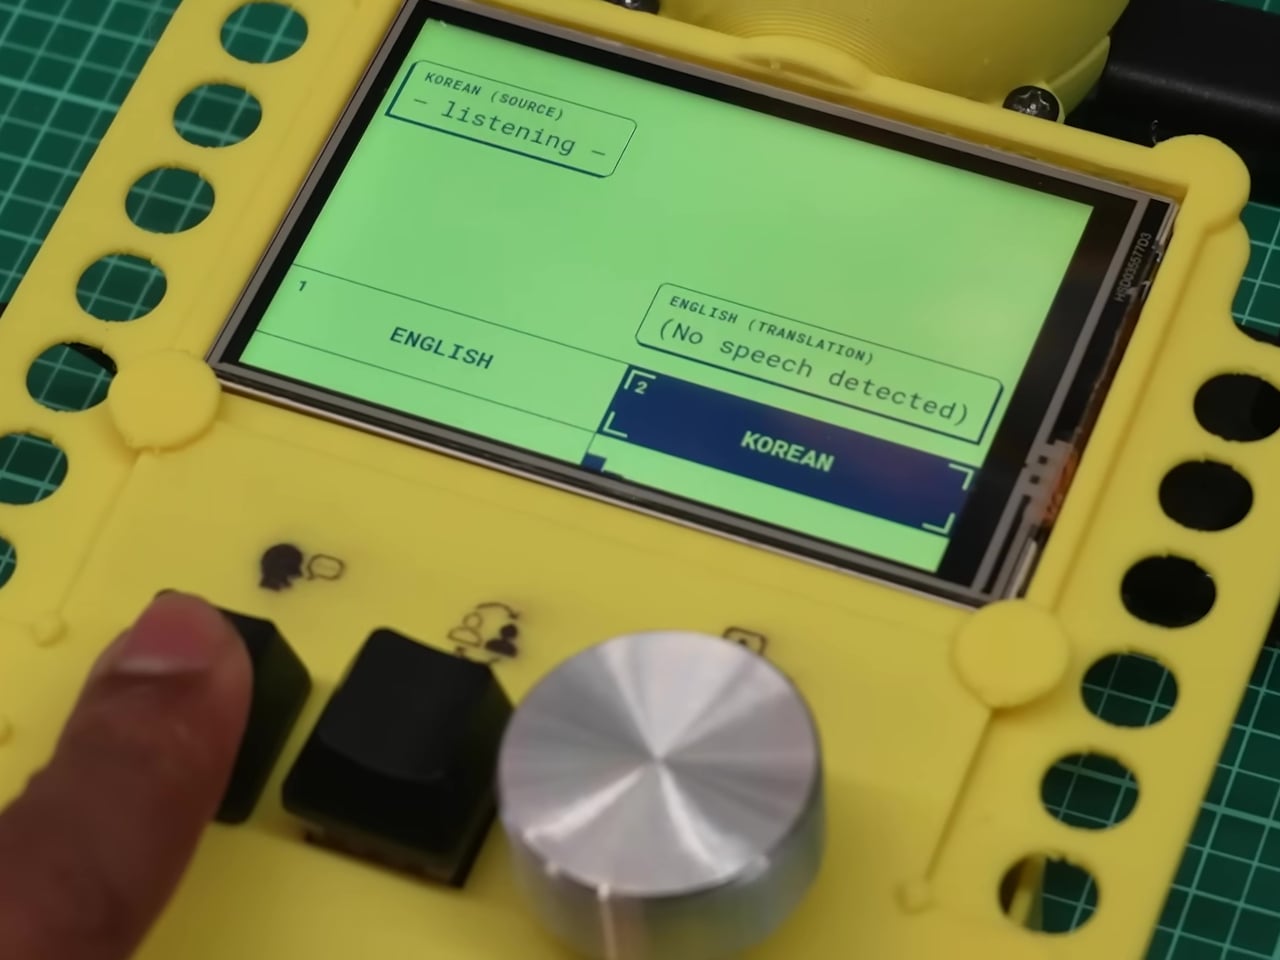
The hardware is deliberately approachable. A Raspberry Pi 5 with 8 GB of RAM powers the whole thing, paired with a 480×320 touchscreen, a microphone, a speaker, push-to-talk buttons, and a rotary encoder for selecting languages. Everything fits inside a 3D-printed enclosure in yellow and black, and the STL files for printing it are included in the open-source repository, so anyone with a printer can replicate the physical build exactly.

The software stack is what makes the offline operation genuinely work at useful speeds. Translation runs on Google’s Gemma 4 E2B model via LiteRT-LM, hitting around six tokens per second on the RPi 5 while using under 1.5GB of RAM. Speech recognition uses Moonshine, which is reportedly up to five times faster than Whisper Tiny. Text-to-speech output runs through Kokoro. The result is a complete speech-in, speech-out translation loop that stays on the device from start to finish.

The interface was designed specifically for face-to-face conversation rather than solo use. Two modes let the device handle either one person managing both sides of the exchange or two people independently operating their own microphone and language selection. Physical buttons keep recording controls tactile, which matters when you’re trying to have a conversation rather than navigate menus.

The privacy argument is almost incidental to how useful the offline capability turns out to be in purely practical terms. Field researchers in areas without reliable networks, travelers moving through places where international data is expensive, and anyone working in a sensitive conversation context all get the same thing: a translation device that doesn’t require a connection to keep working. The fact that none of the audio ever leaves the device is simply a consequence of building something that had to work without one.

The post Google Built a Translation Device That Doesn’t Need Google’s Own Cloud first appeared on Yanko Design.
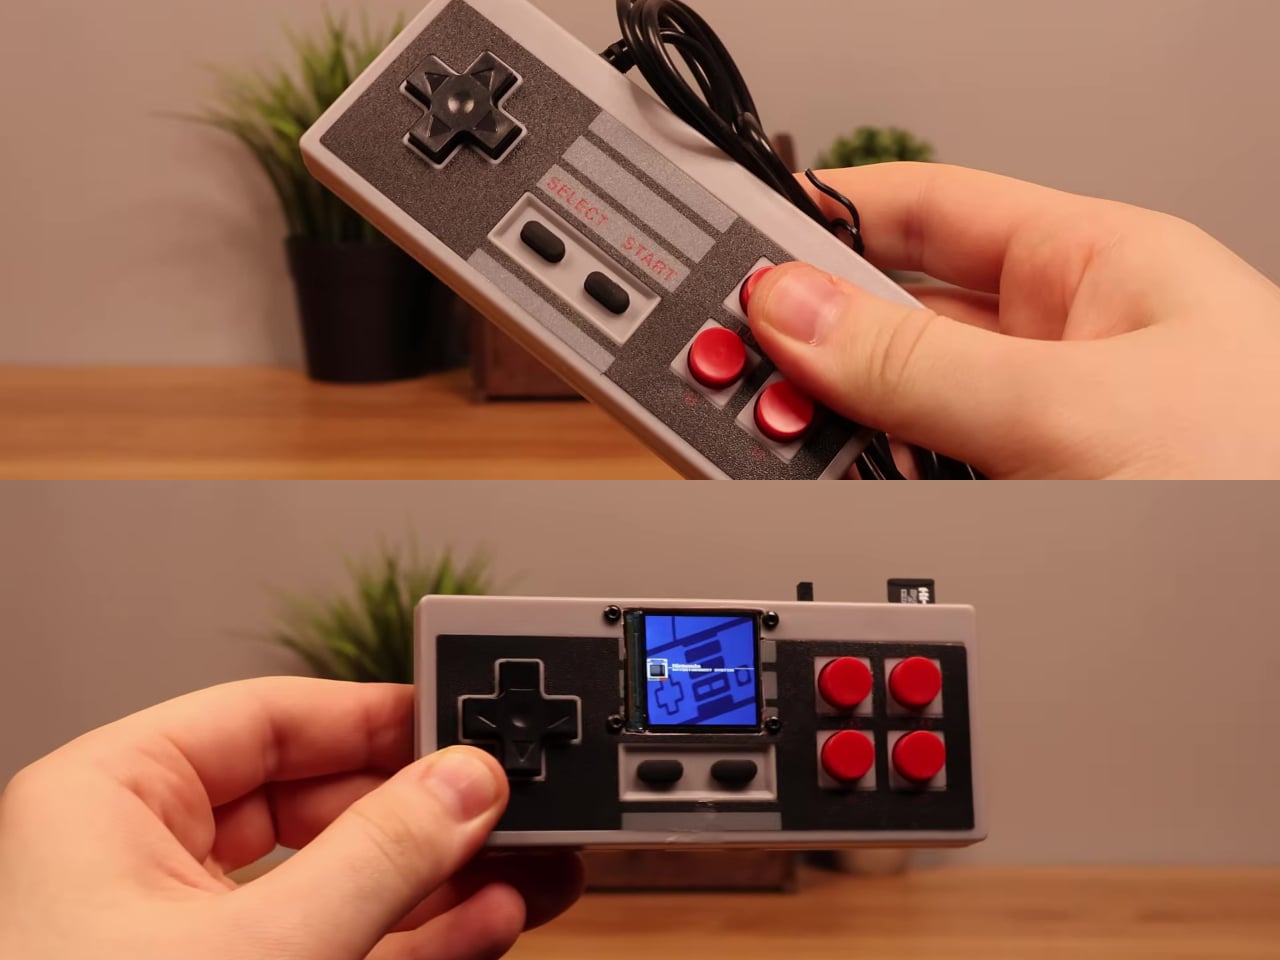
Someone Stuffed a Full Retro Console Inside an NES Controller for $17

Most original NES controllers haven’t seen active duty in decades. They survive in storage bins and attic boxes, physically intact and perfectly functional as controllers, but with nothing left to plug them into. The consoles they were paired with have long since been replaced or decommissioned. The hardware was always well built, but the form factor has been sitting idle for years.

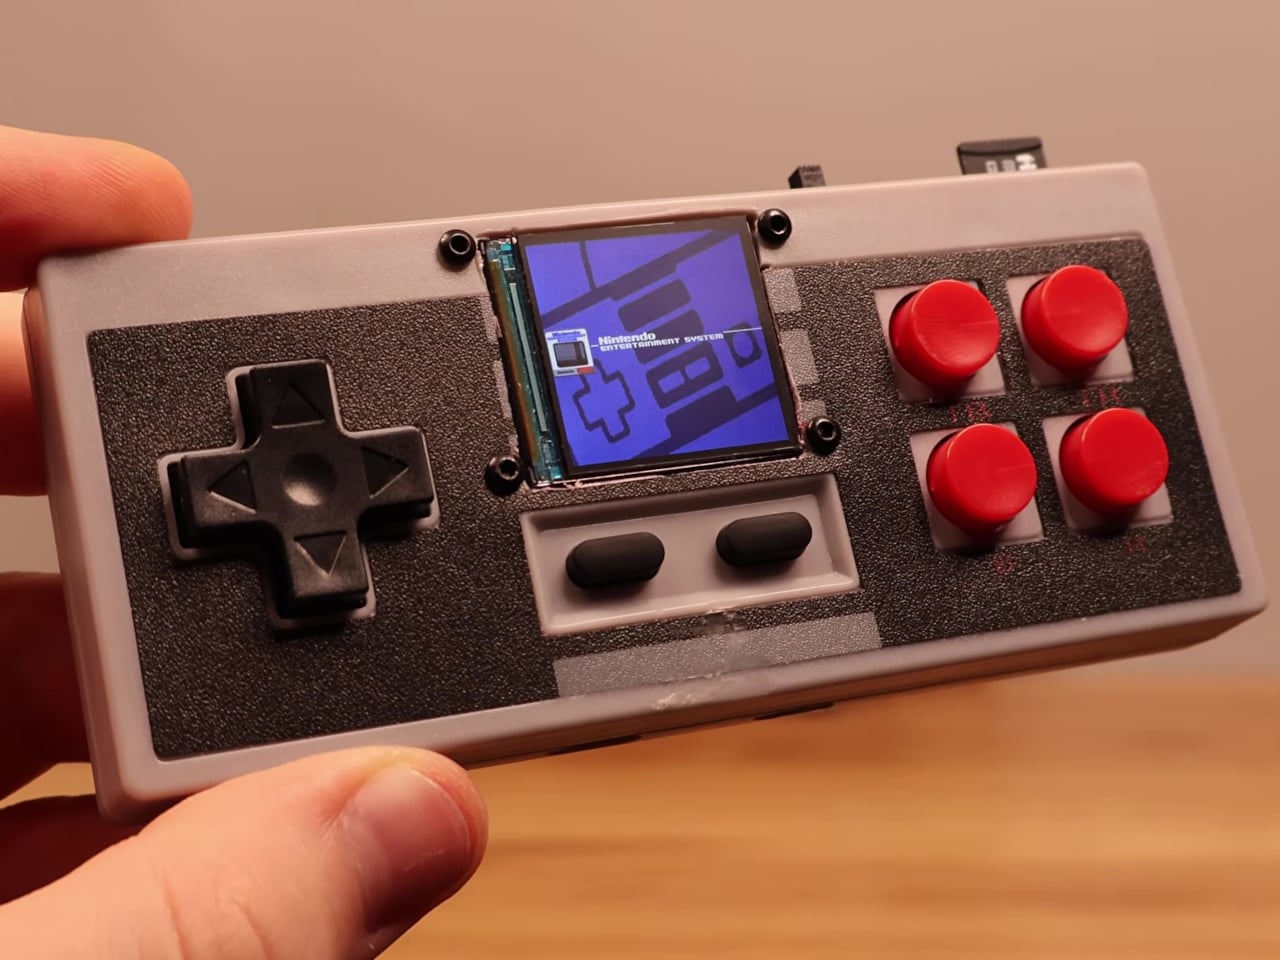
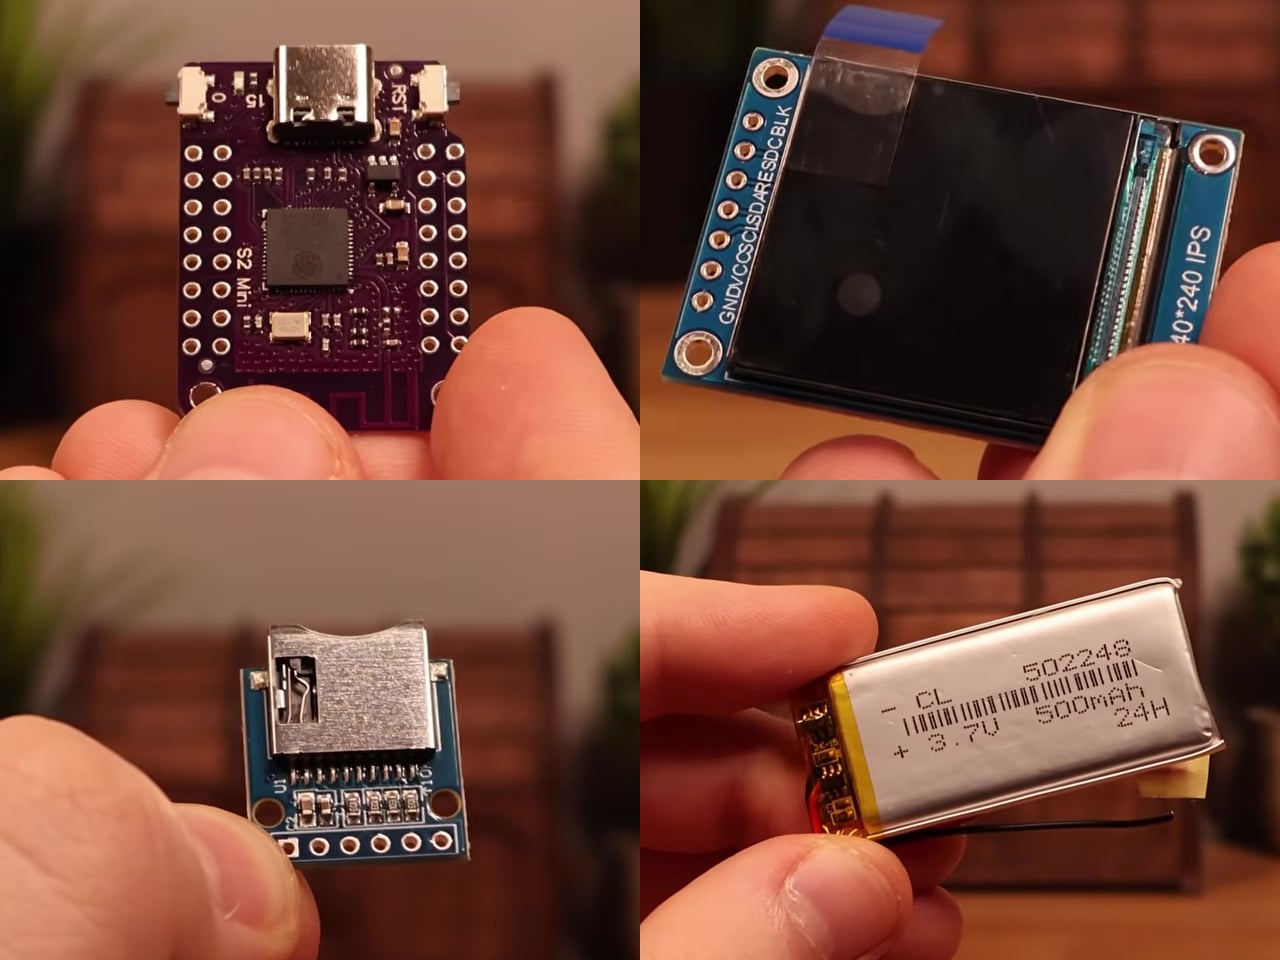
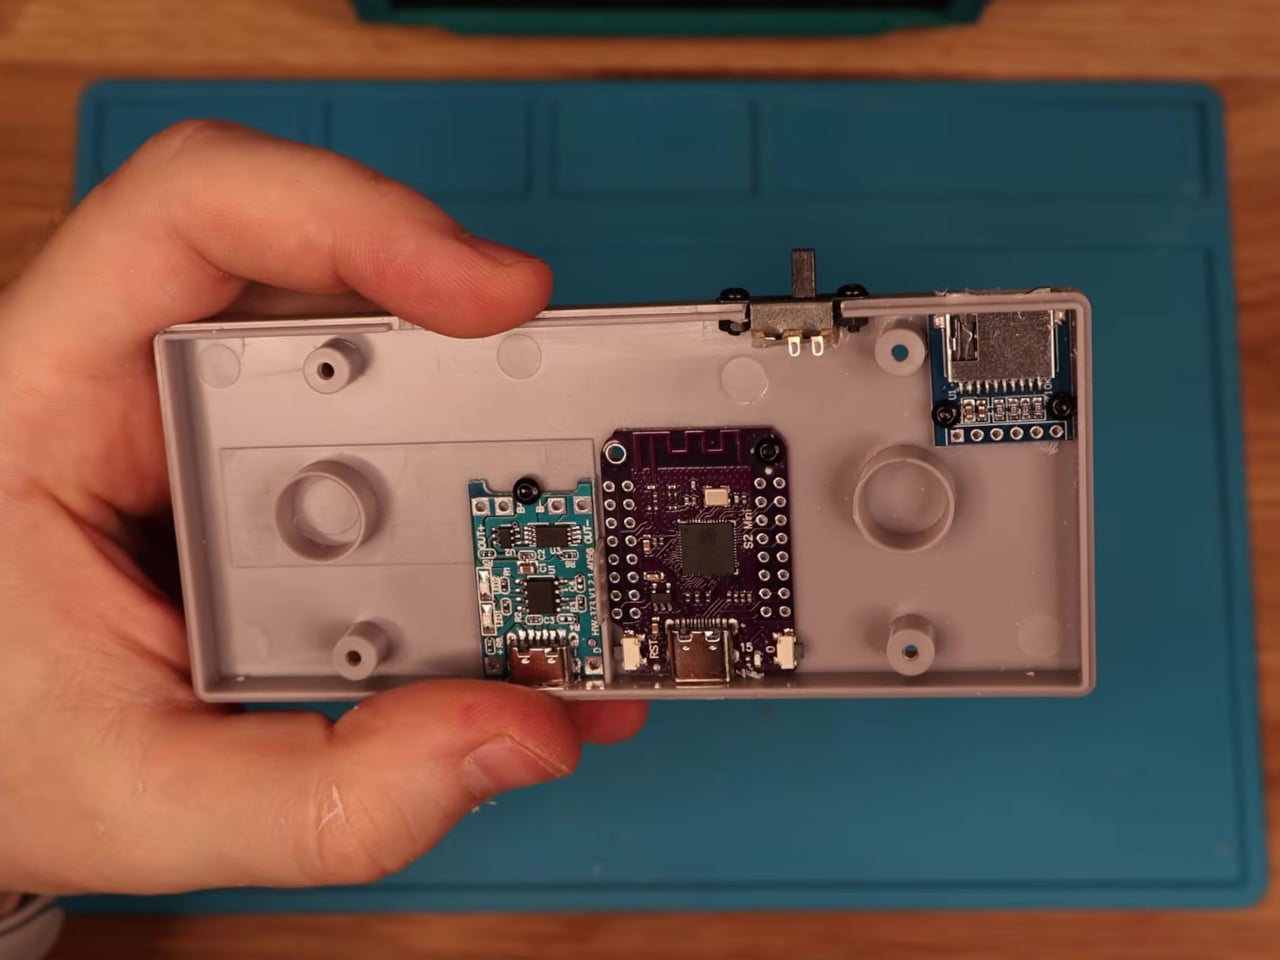
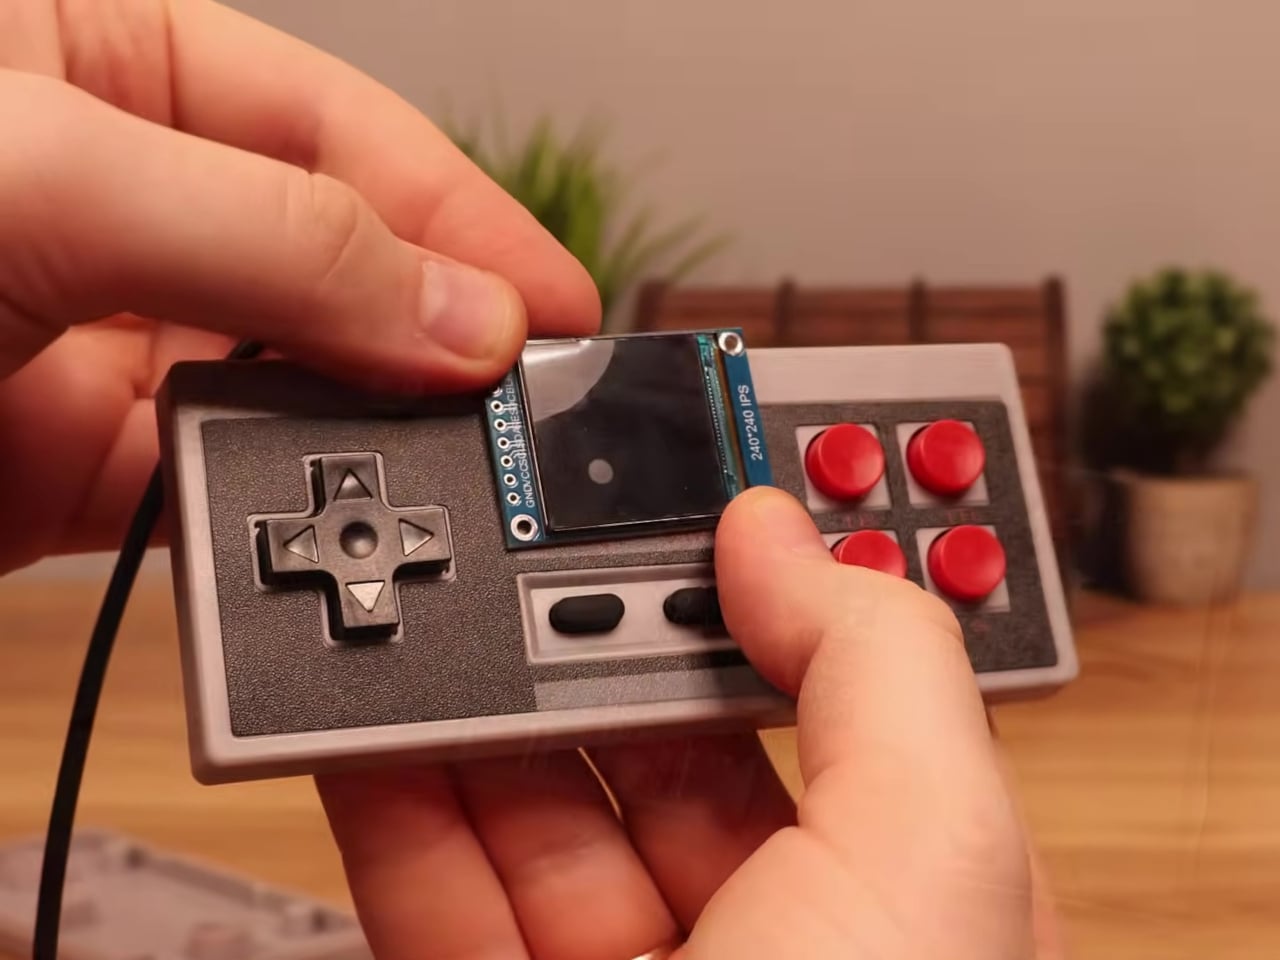
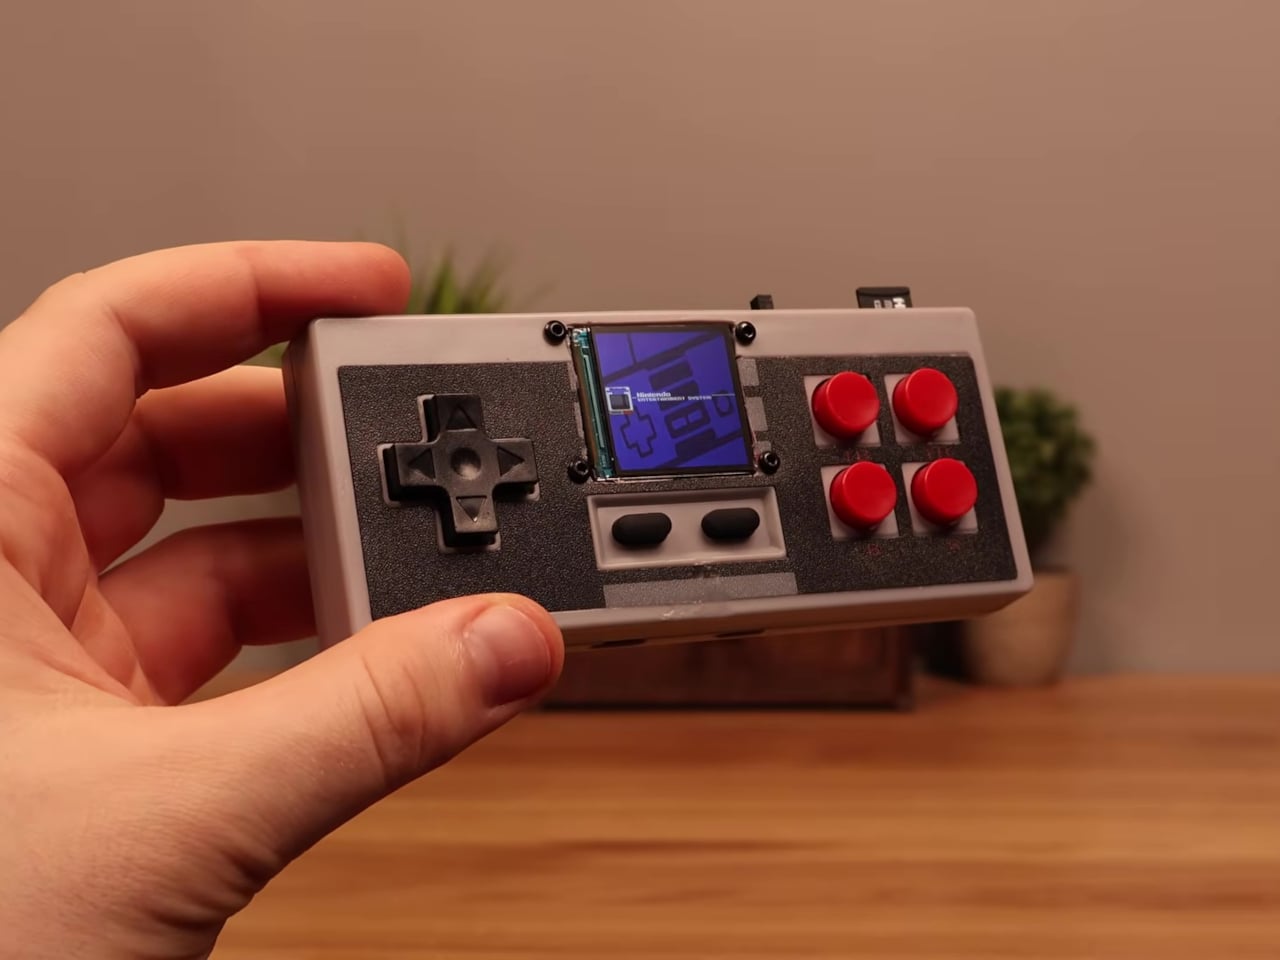
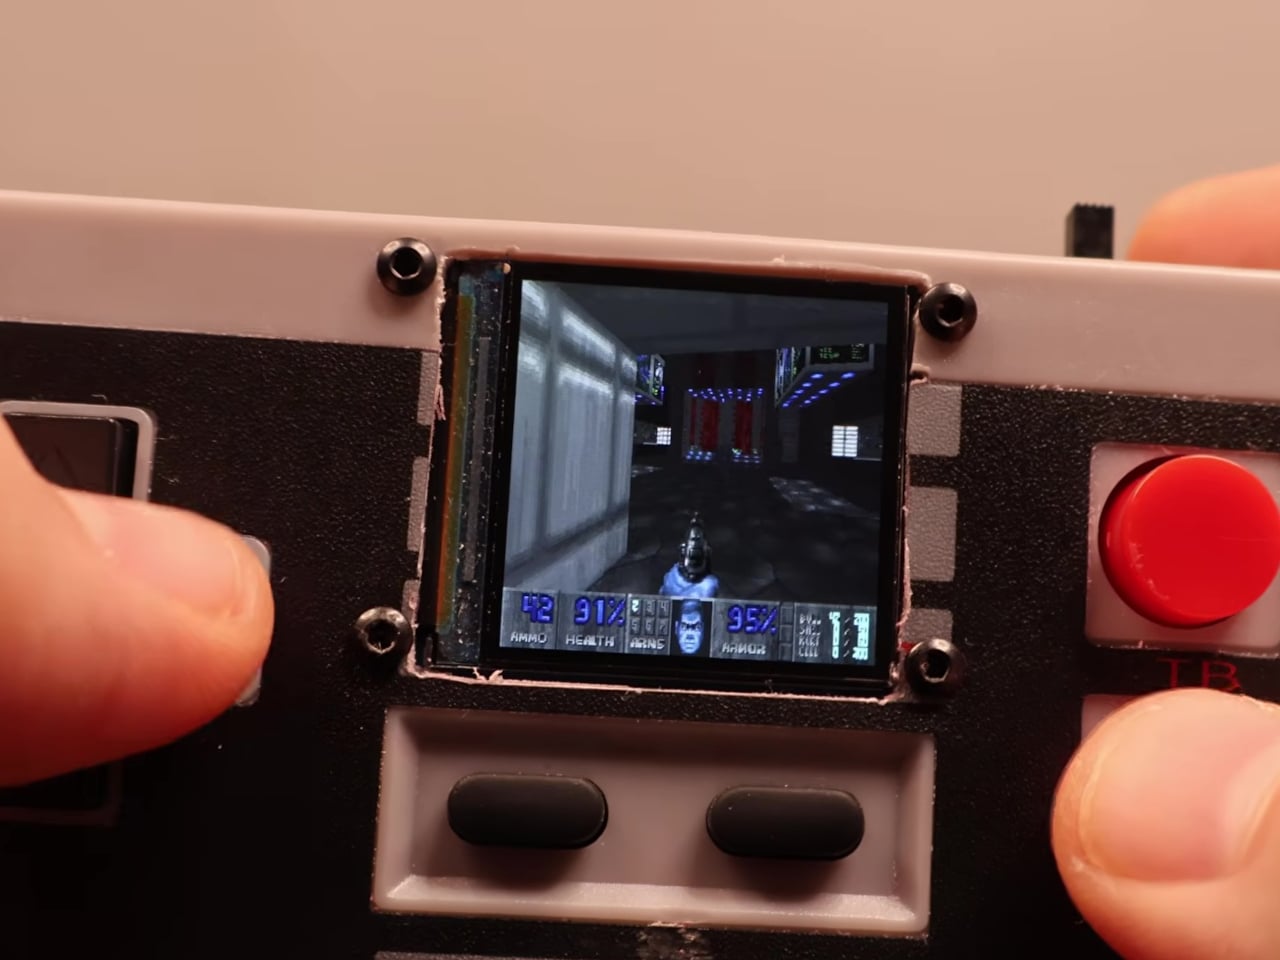
This mod changes the job description of that controller shell entirely. The electronics inside a standard NES-style gamepad were stripped out and replaced with a Wemos ESP32-S2 Mini development board, a 1.54-inch 240×240 TFT display, a MicroSD card module, a 500 mAh lithium-polymer battery, a charging board, a speaker, and a slide power switch. From the outside, it still looks exactly like an NES controller.

Designer: Logic Gate Labs

Choosing the right processor was essentially a geometry problem. A larger ESP32-S3 would have offered dual-core performance and enough PSRAM to keep entire game ROMs in memory, but it was too big to fit inside the housing. Smaller ESP32 variants without PSRAM lacked the memory for smooth emulation. The ESP32-S2 Mini landed in the narrow window between board size and processing capability that the build required.

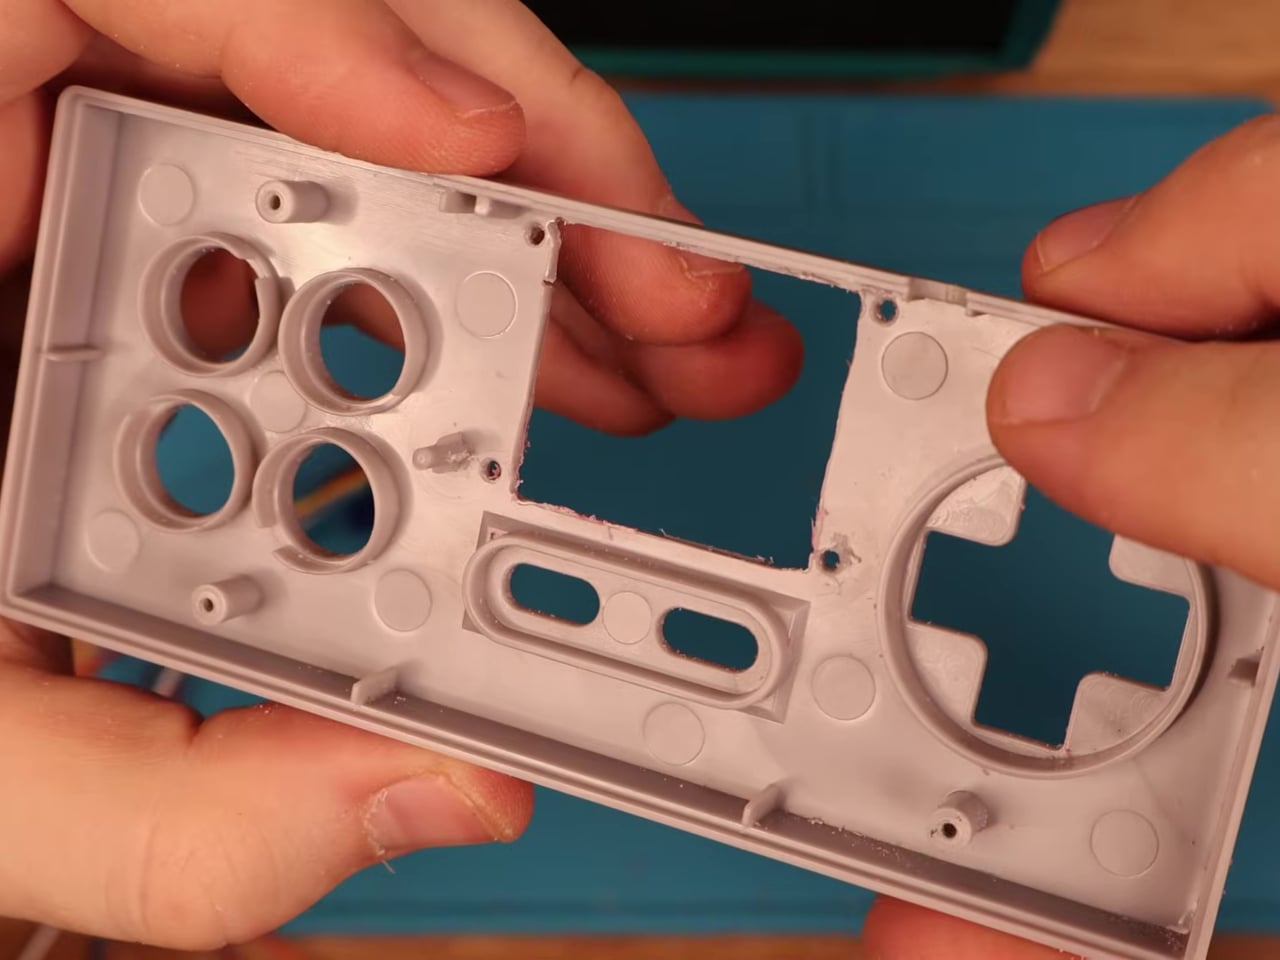
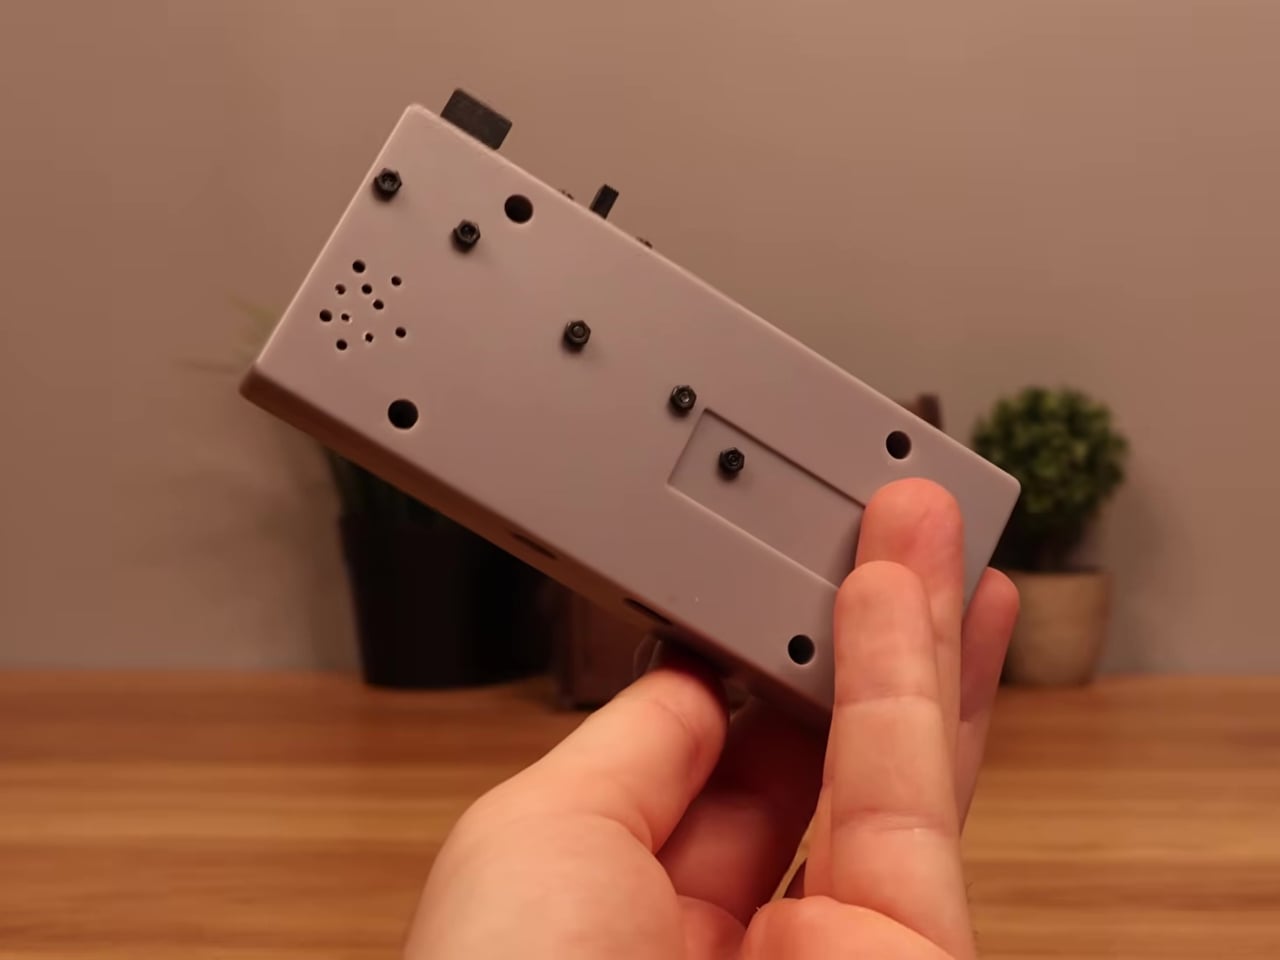
Getting everything to fit required real surgery on the shell. Internal plastic supports had to be trimmed back to make room for the display, and new openings were drilled for the screen, USB charging port, MicroSD slot, speaker, and power switch. A bare copper wire serves as a central ground distribution rail, cutting the number of individual ground wires needed and making it possible to actually close the controller afterward.

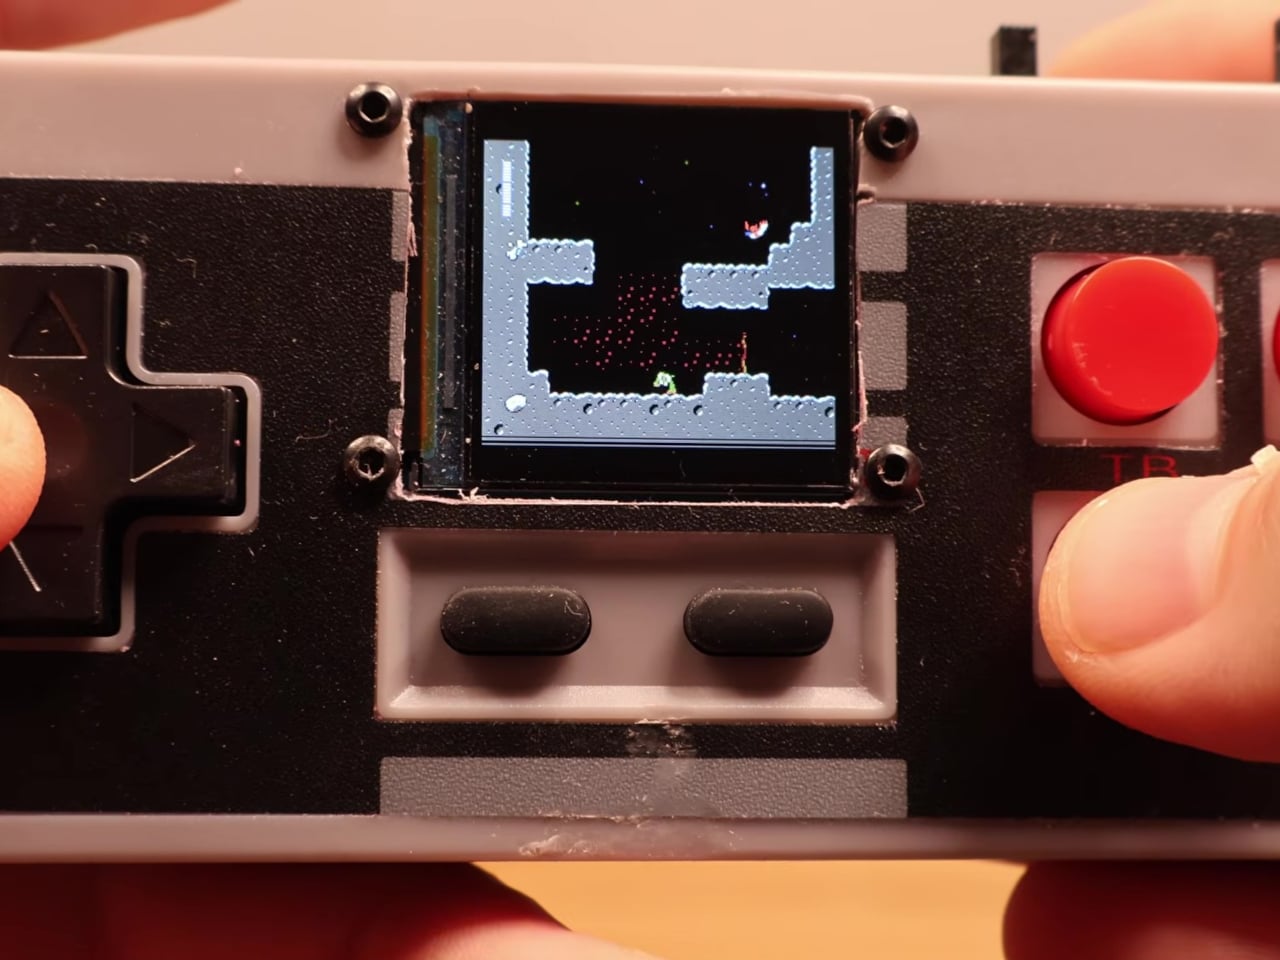
On the software side, the device runs the Retro-Go emulator framework, compiled using ESP-IDF and CMake since the ESP32-S2 isn’t a standard Retro-Go target. The result handles a range of classic 8-bit systems comfortably. As a bonus, Doom runs via PrBoom-Go from a Freedoom WAD file loaded on the MicroSD card, managing somewhere between five and 15 frames per second depending on the scene.

The total build cost runs about $17 using common suppliers, or closer to $8 when sourcing directly from overseas markets. That puts the project well under the price of a single modern game release. Flip the power switch, select a ROM from the MicroSD card, and the screen loads games that once required a dedicated console and television setup. No additional hardware is needed.

What makes this more than a novelty is how it reconsiders a form factor most people already have muscle memory for. The D-pad clicks the same way it always did, and the A and B buttons carry the same spring. What changed is where the signal goes after the press. Instead of traveling to a console that no longer exists, the controller now processes it directly inside its own shell.

The Retro-Go framework is open source, the parts are widely available, and the NES controller shell is one of the most common pieces of vintage hardware still circulating through the secondhand market. Nothing about this build required specialized equipment or proprietary components. The total part list costs less than a single new game on any current platform and fits inside hardware that most people already own.

The post Someone Stuffed a Full Retro Console Inside an NES Controller for $17 first appeared on Yanko Design.
Someone Built a Handheld PS4 Twice Because Sony Never Will

Sony’s PlayStation has always been a home console first and only. The PlayStation Portal, which came closest to answering the demand for a portable PlayStation, streams games from a PS5 rather than running them on the device itself. That gap, an actual PlayStation that plays its own library locally, has stayed open long enough that at least one person decided to fill it themselves, twice.

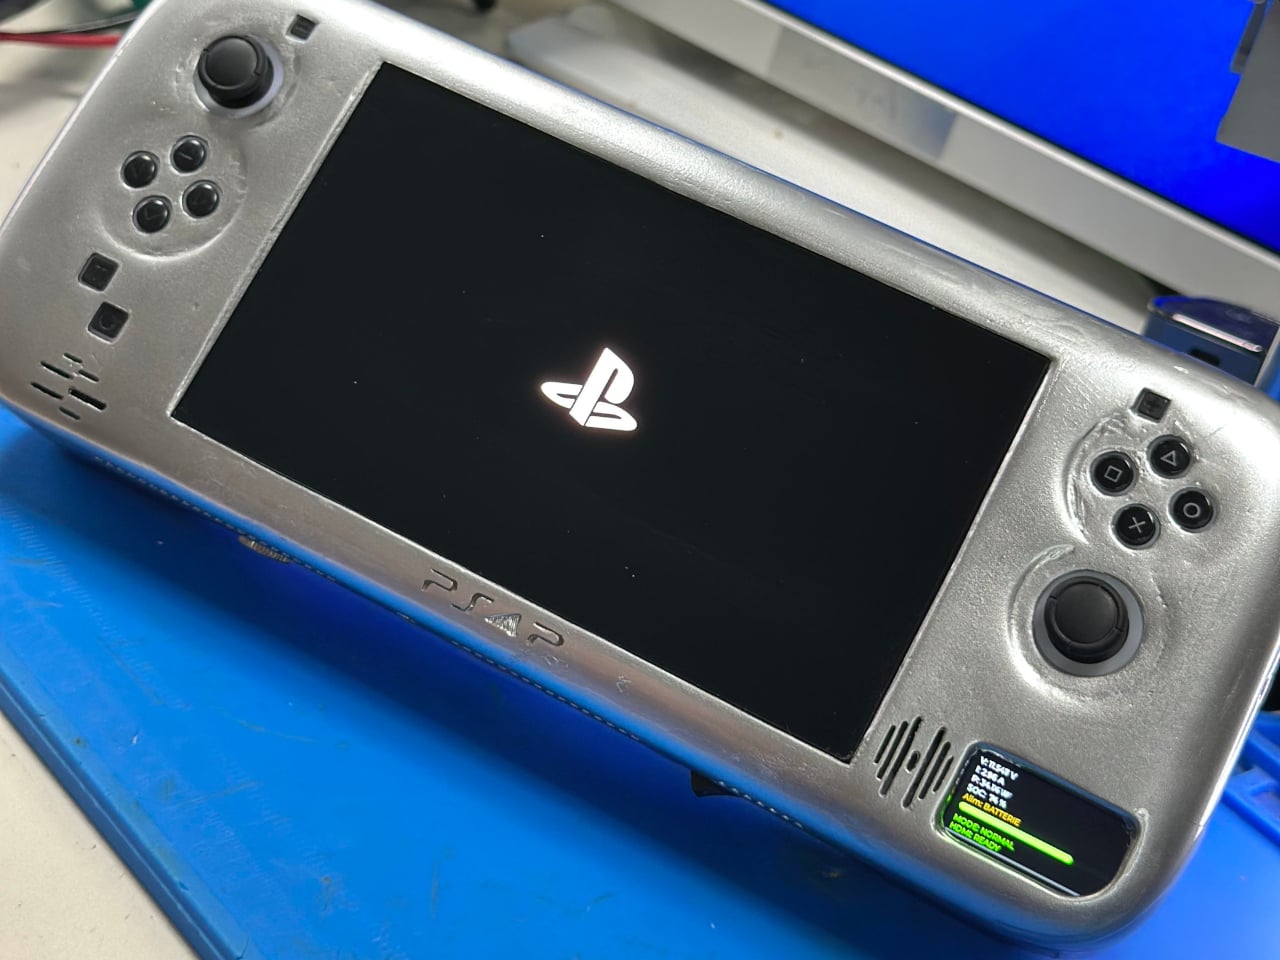
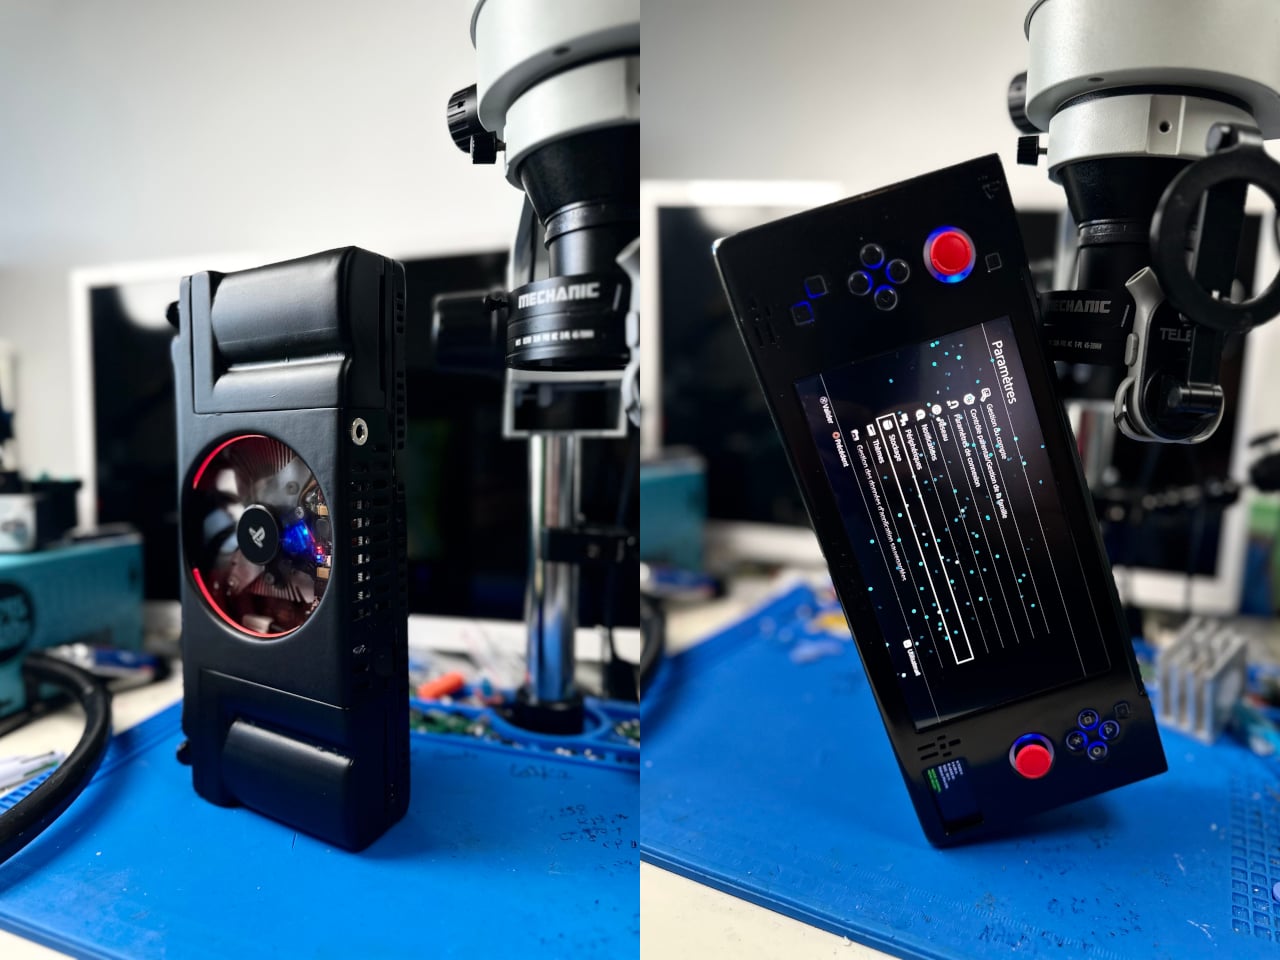
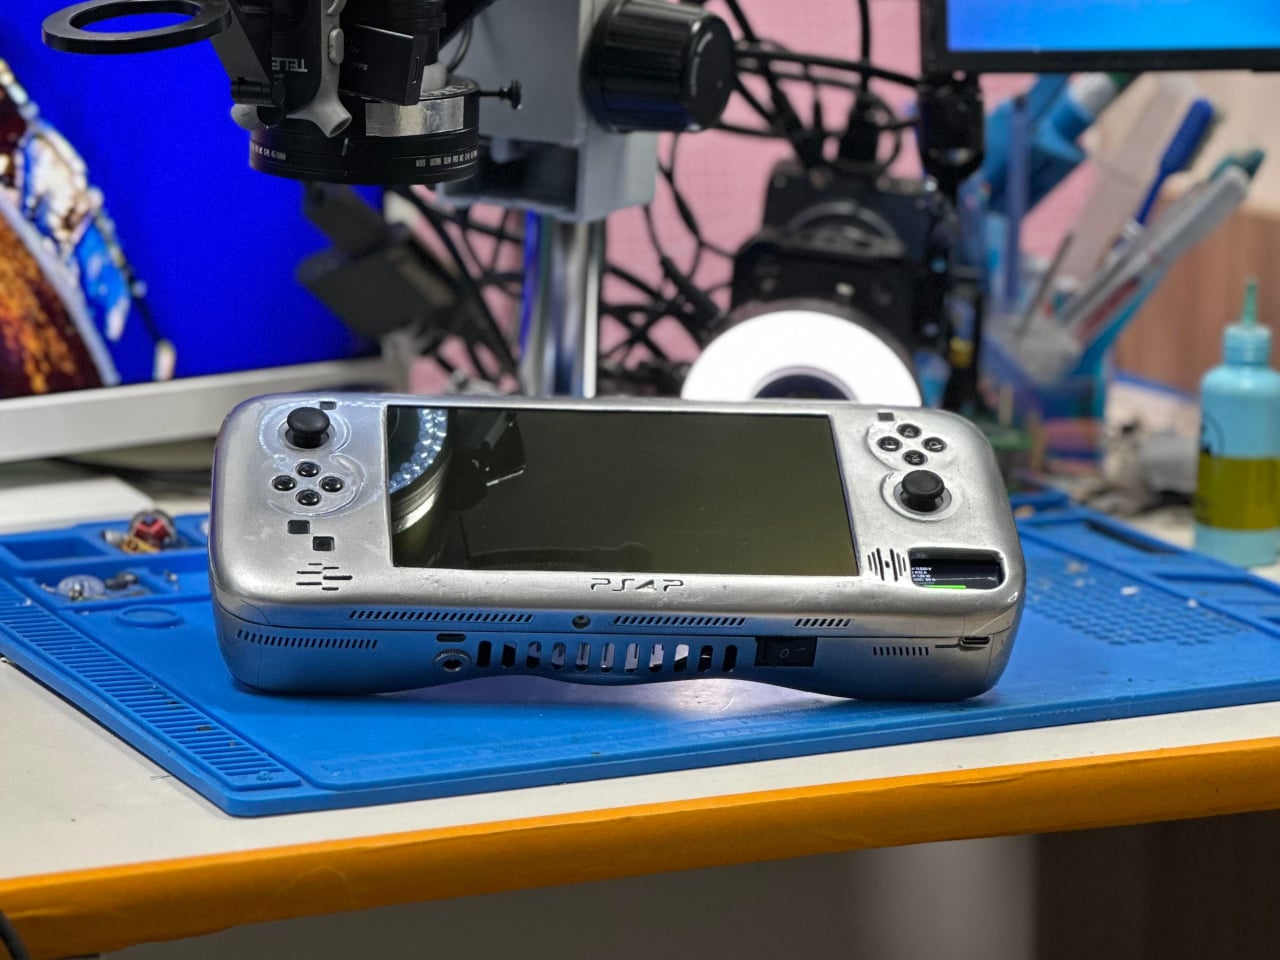
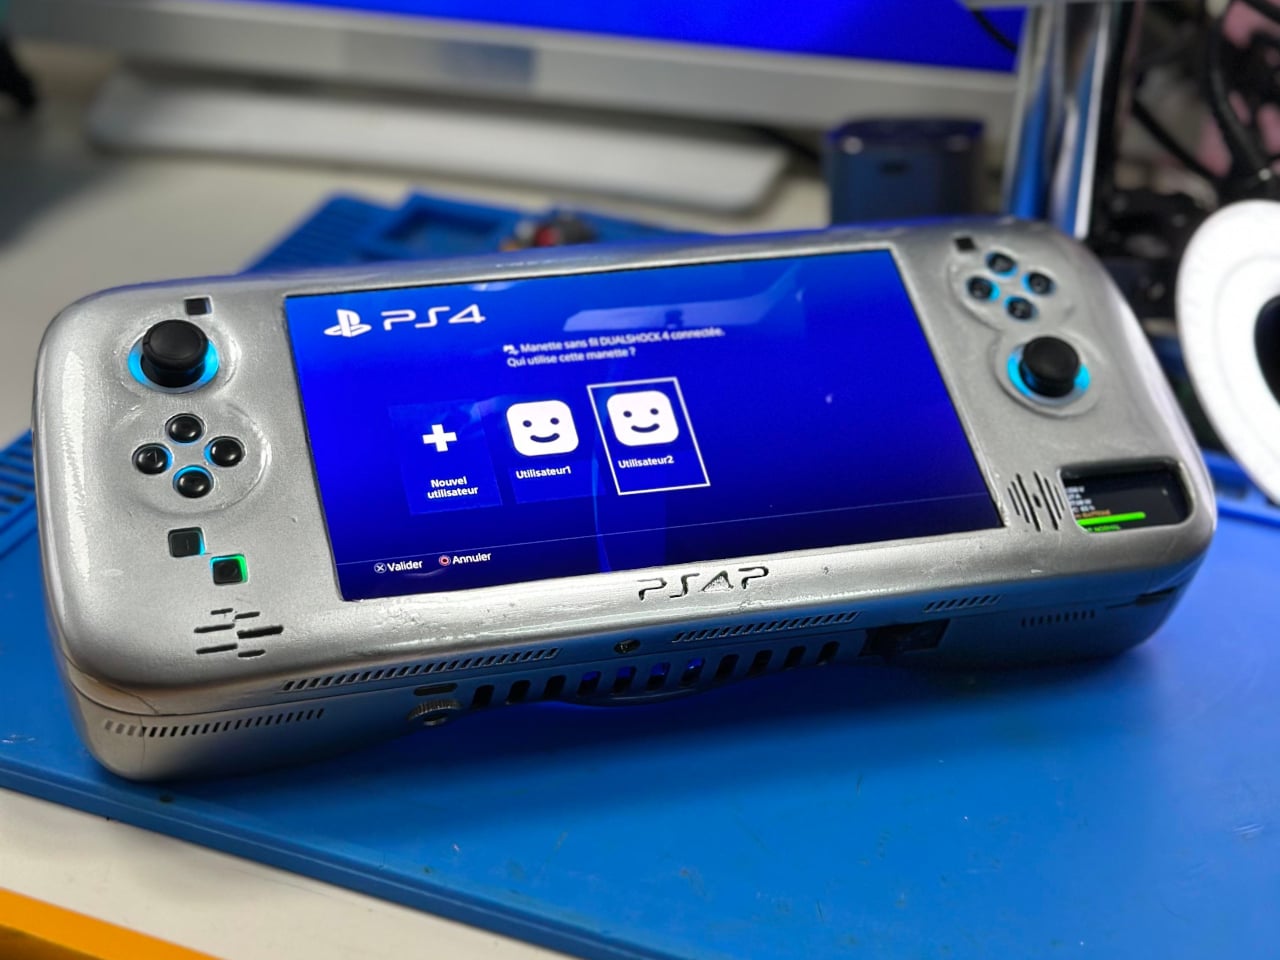
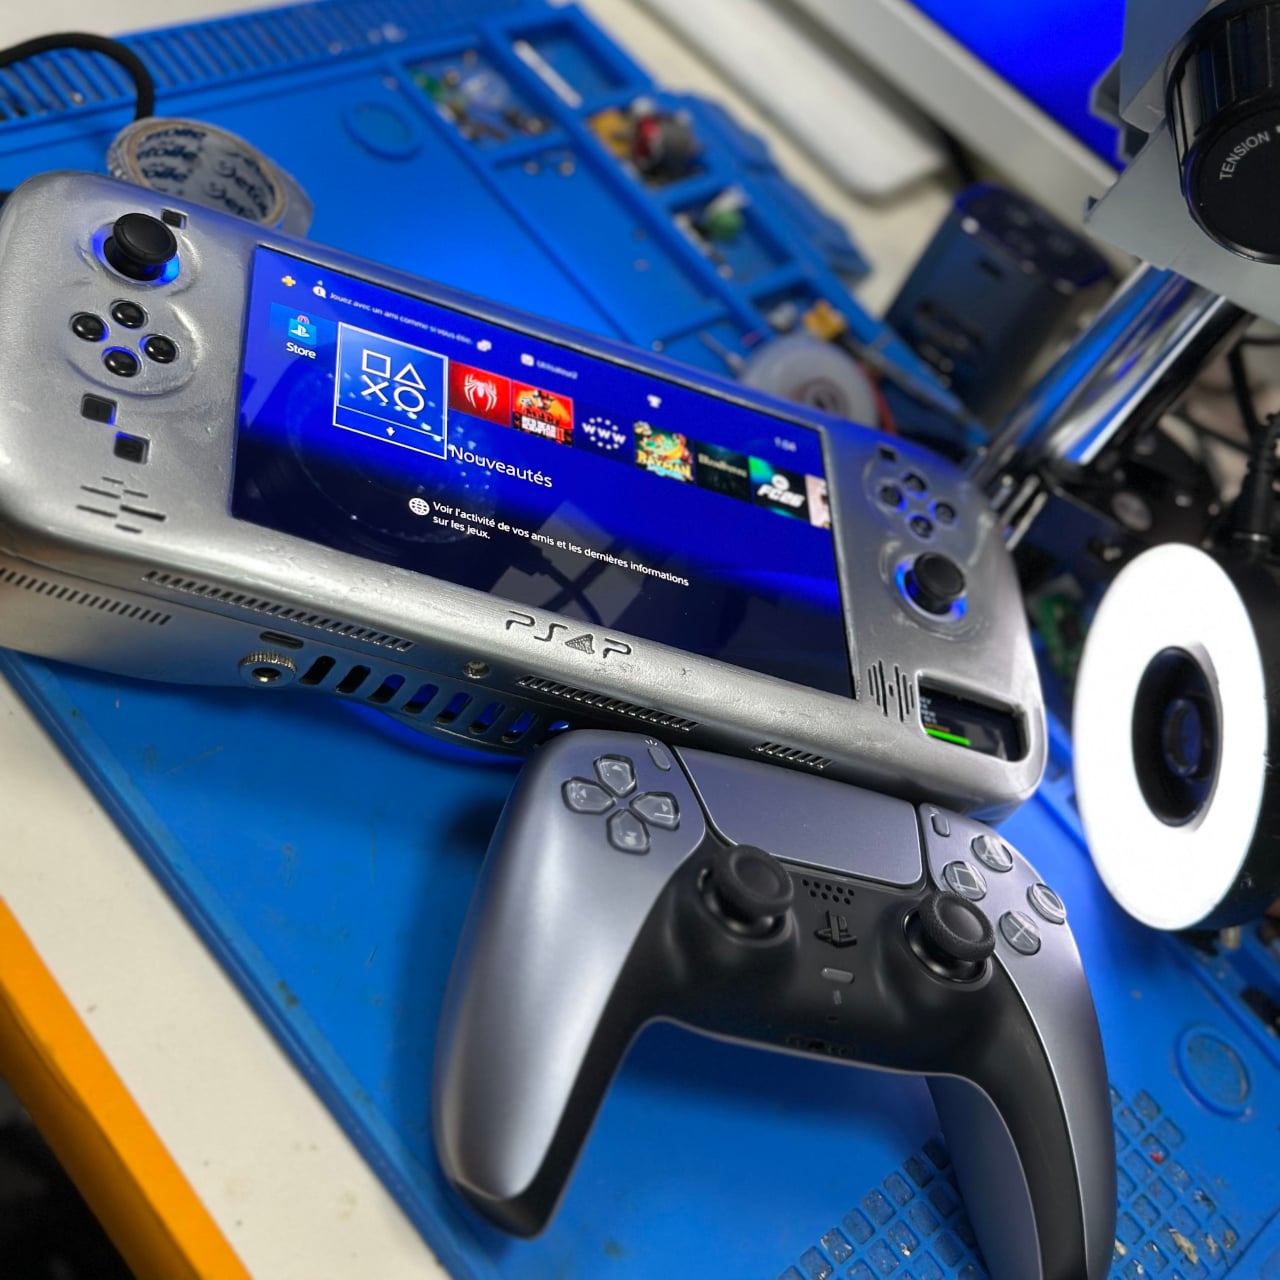
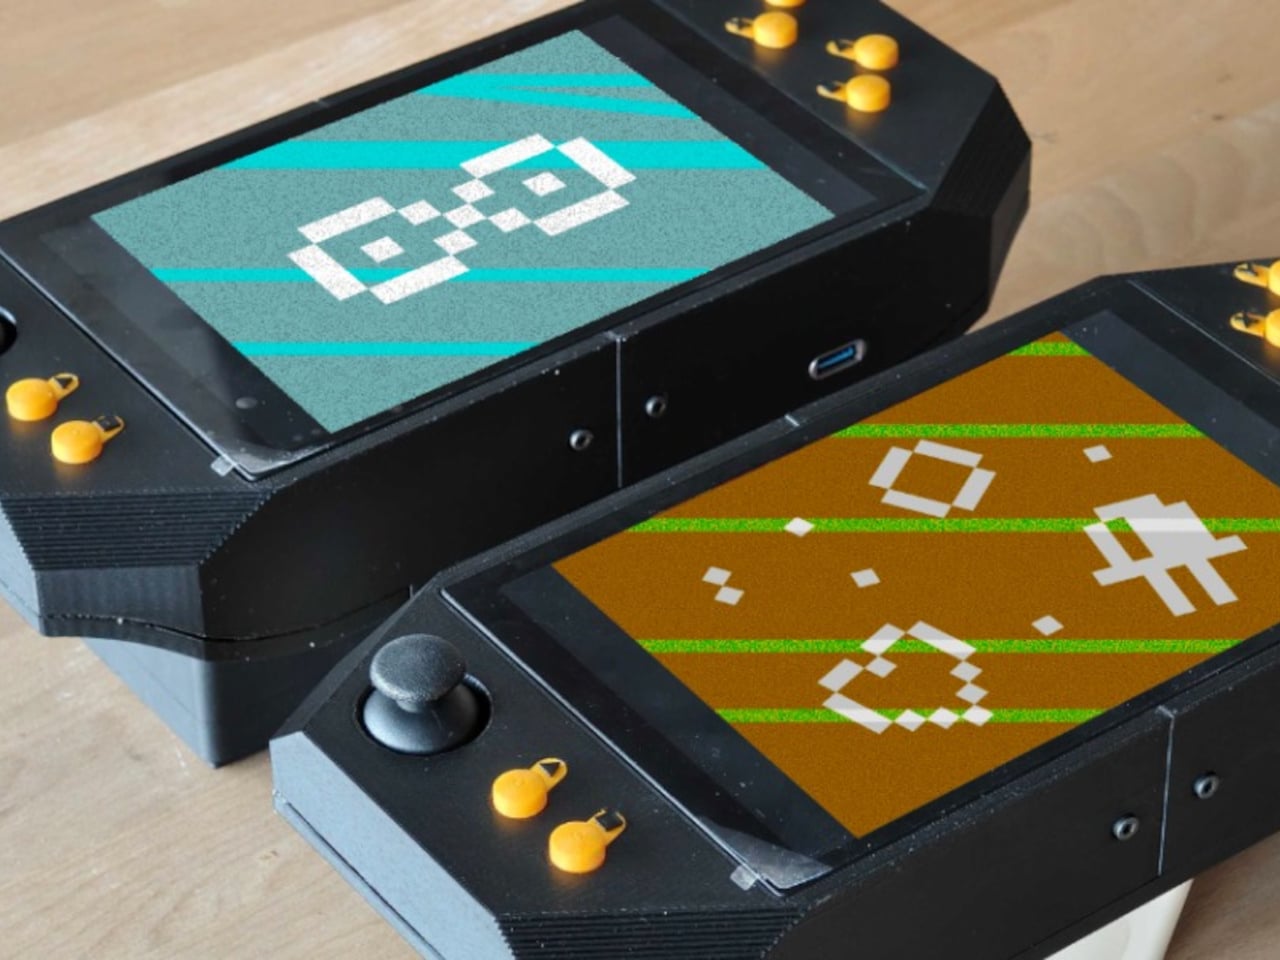
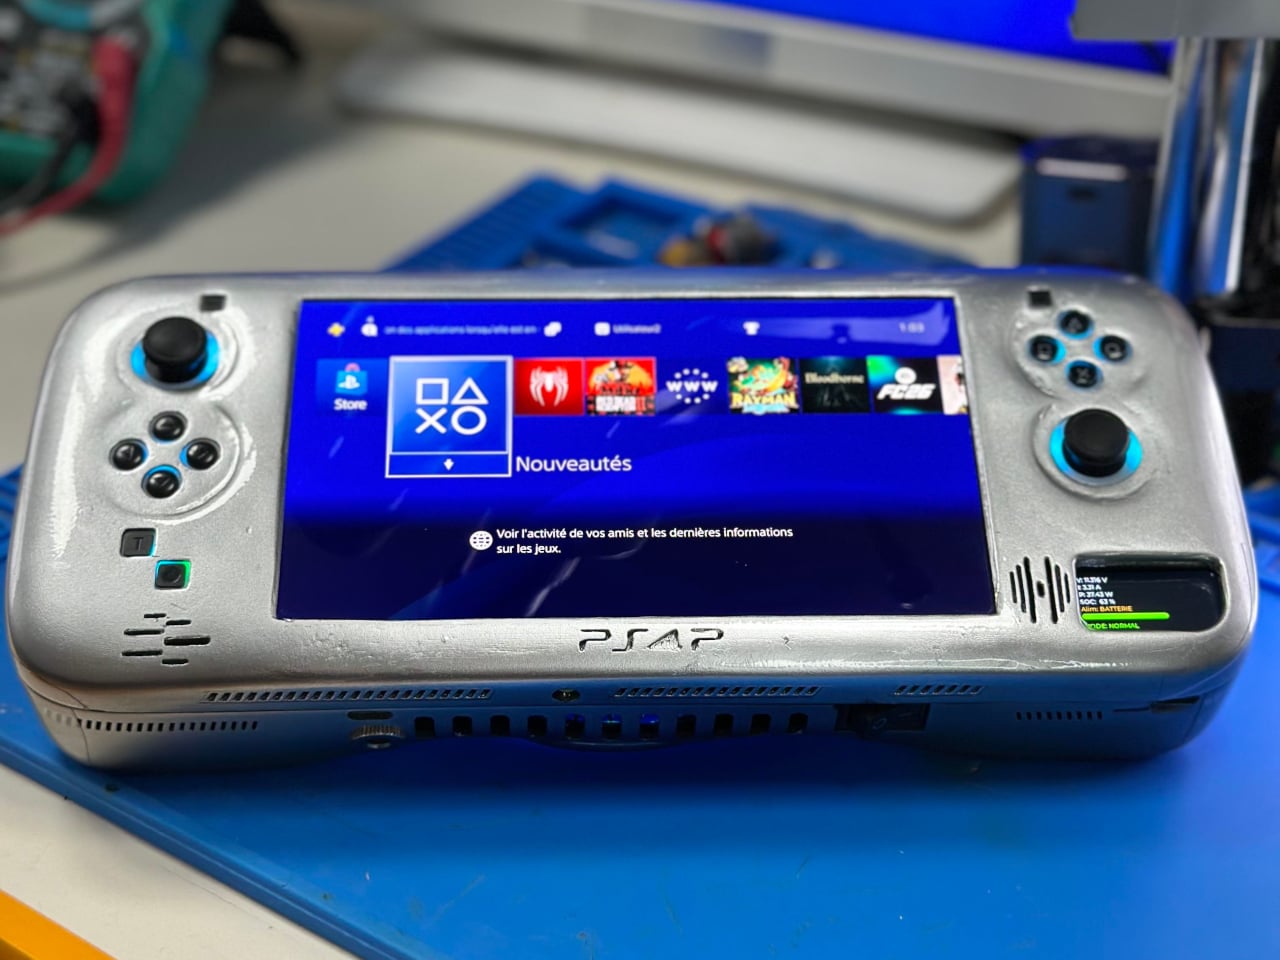
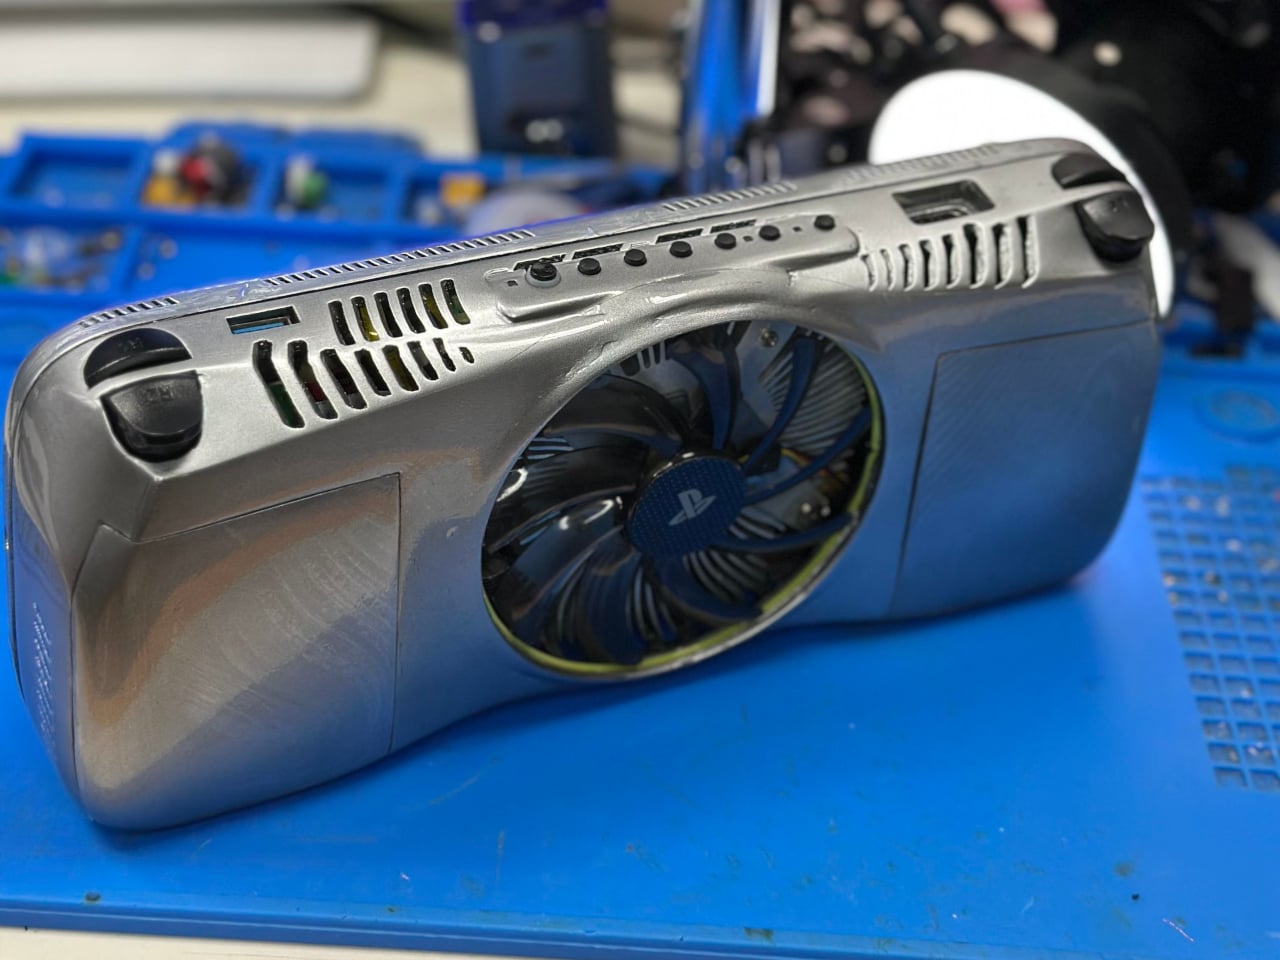
The PS4P v2 is the second version of a DIY handheld built around a real PS4 Slim motherboard, trimmed and modified to fit inside a 3D-printed shell. The first version, completed earlier this year, was a functional proof of concept that came in at around 1.5 kg and looked more like a prototype than a finished product. This second build is a step up in almost every meaningful way, and the jump in refinement between the two is obvious from the build photos alone.

Designer: wewillmakeitnow

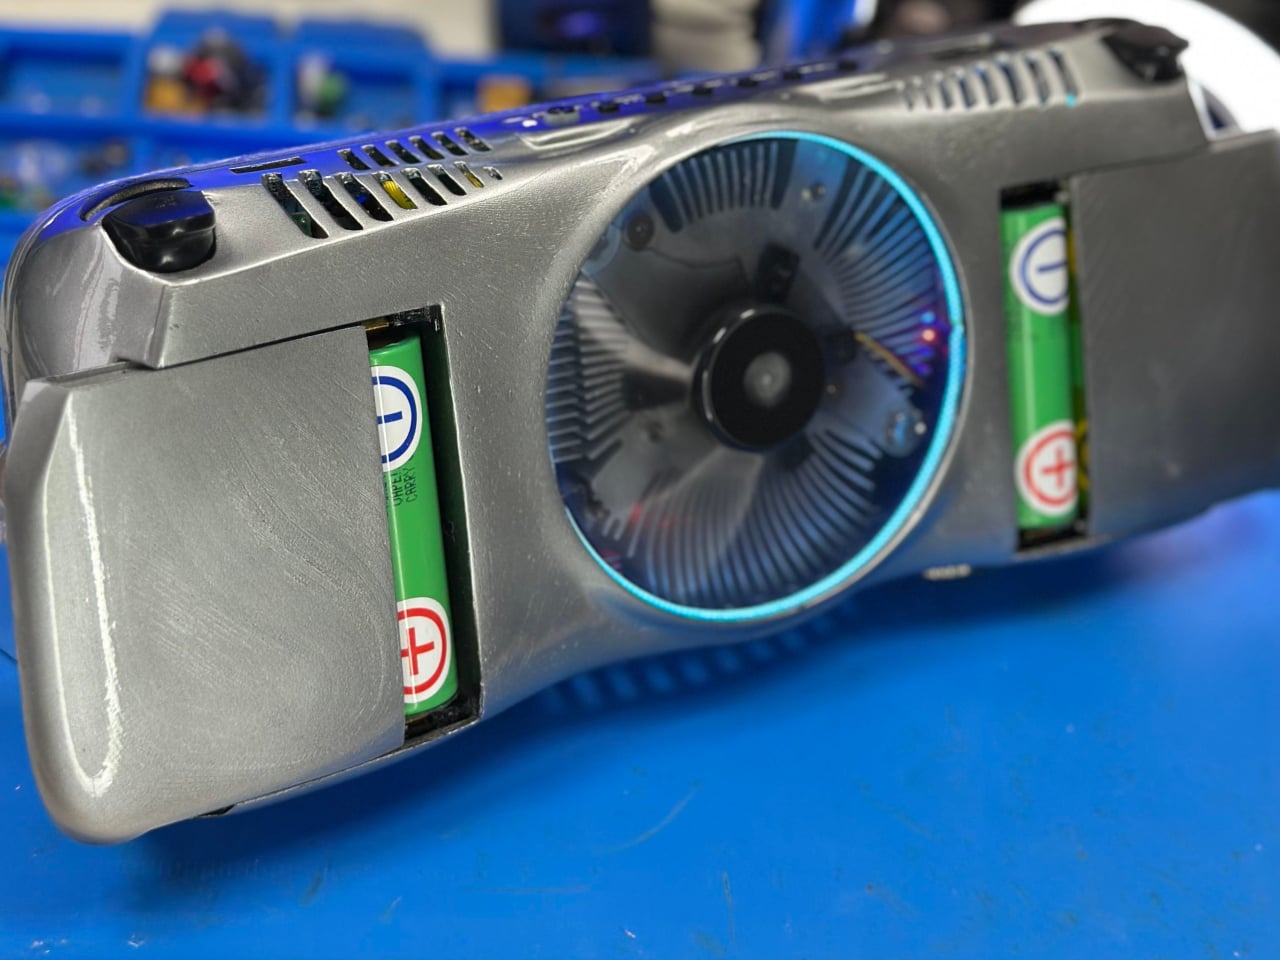
The core remains a cut-down PS4 Slim board, but the second version draws less power than the first, which helps push the battery life a bit further. Six 21700 cells, each rated at 5,000 mAh, power the whole thing for anywhere from 1.5 to 3 hours depending on what’s being played. It can also run off external power for longer sessions, and HDMI output means the whole unit can connect to a television with a real DualShock controller attached.

PS4P V1

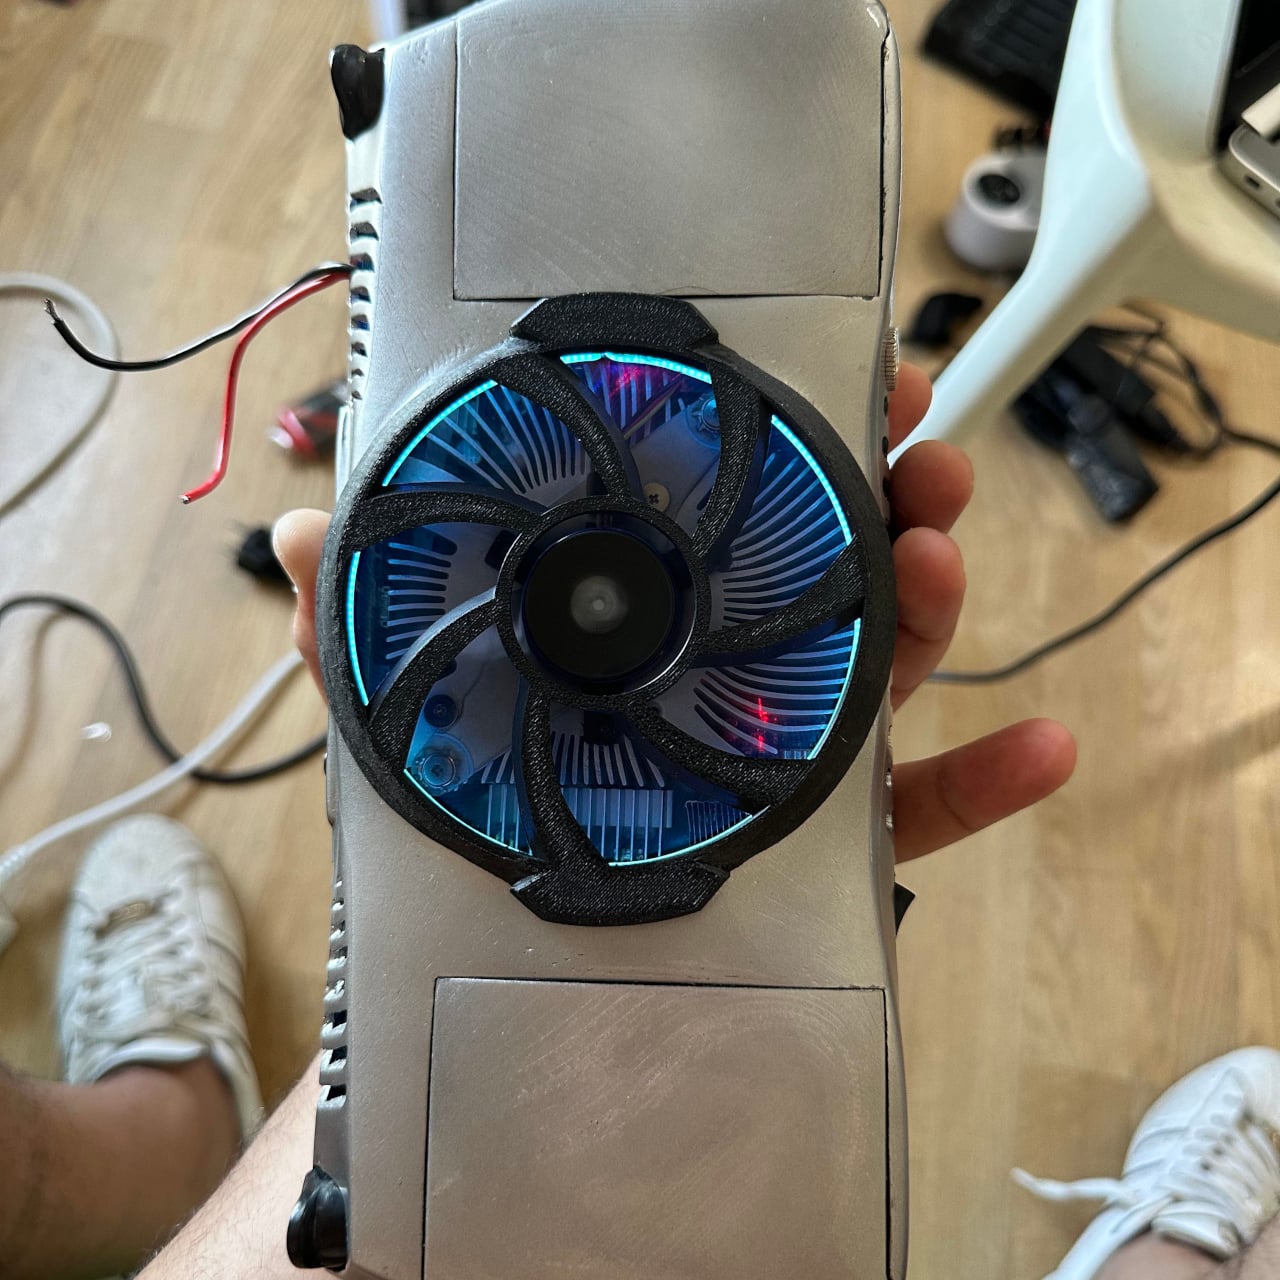
The display is a 7-inch 1080p OLED panel, which puts it in a different category from most handheld screens at this scale. Cooling is handled by a fan pulled from a retired GTX 750 graphics card, mounted on the rear of the unit. A removable guard sits over the fan, and pulling it off improves airflow when the game demands it; leaving it on protects the fan from dust and impacts during storage or travel.

The finished unit weighs 1.3 kg, which is heavy by any commercial standard. A Steam Deck is considerably lighter. But the honest comparison isn’t really with a Steam Deck, which runs PC games through an x86 processor. This runs the PS4’s actual hardware, which means native execution of the PS4’s library without emulation, streaming, or compatibility layers getting between the player and the game.

The build sits closer to a real commercial product than most DIY console conversions manage. The 3D-printed shell holds everything together cleanly enough that, at a glance, it reads as something you might actually find in a store. That it came out of a single person’s workshop rather than an engineering team with a production budget makes the result even harder to dismiss.

For now, it remains a one-off. Making it smaller, lighter, or more energy-efficient would require changes to the PS4 Slim’s motherboard that go beyond what any single modder can reasonably achieve. The constraints are baked into the hardware. But as a demonstration of what dedication to a specific piece of gaming hardware looks like when Sony won’t build it themselves, the PS4P v2 makes its point clearly.

The post Someone Built a Handheld PS4 Twice Because Sony Never Will first appeared on Yanko Design.
This $19 Module Solves the Hard Part of Building a Custom Smartwatch

The consumer smartwatch market has become a fairly predictable place. Most wristwear from major brands covers health monitoring, notifications, and a tightly controlled app ecosystem, with little room for deviation. Tinkerers and developers who want something outside that formula have traditionally had to cobble together components from different sources, which is more a test of patience than a creative process and rarely results in something worth wearing.

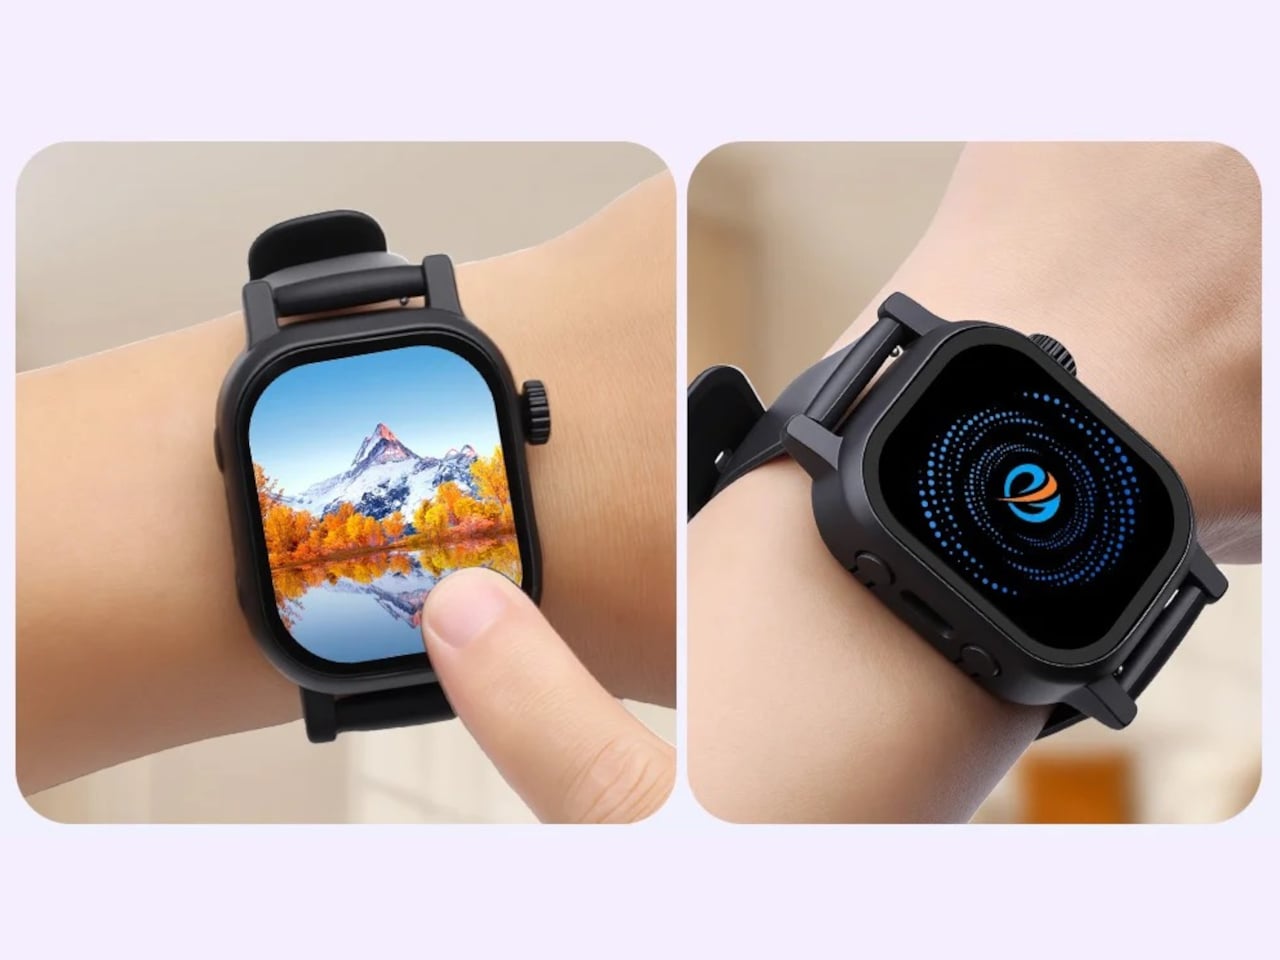
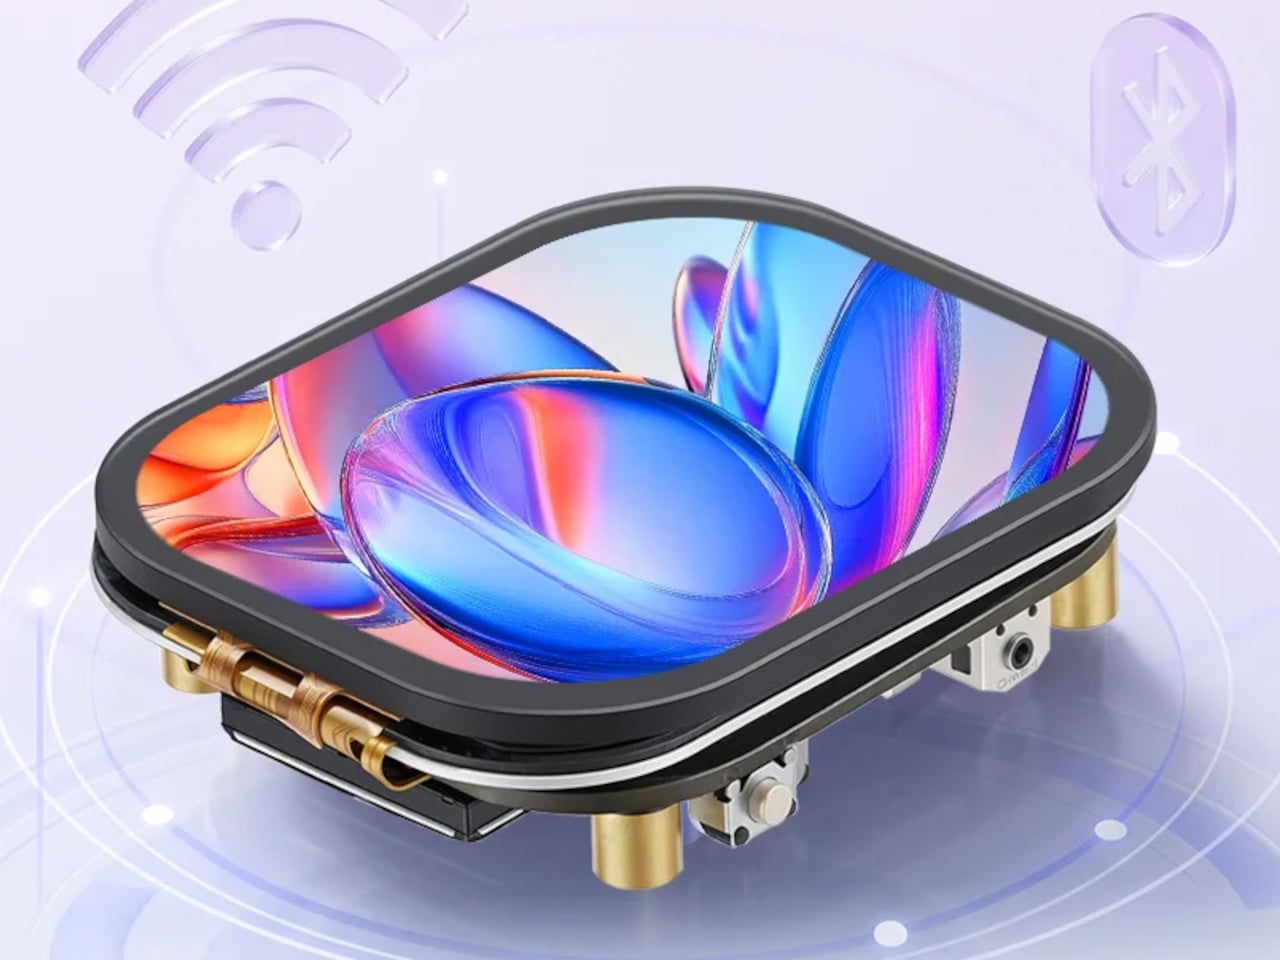
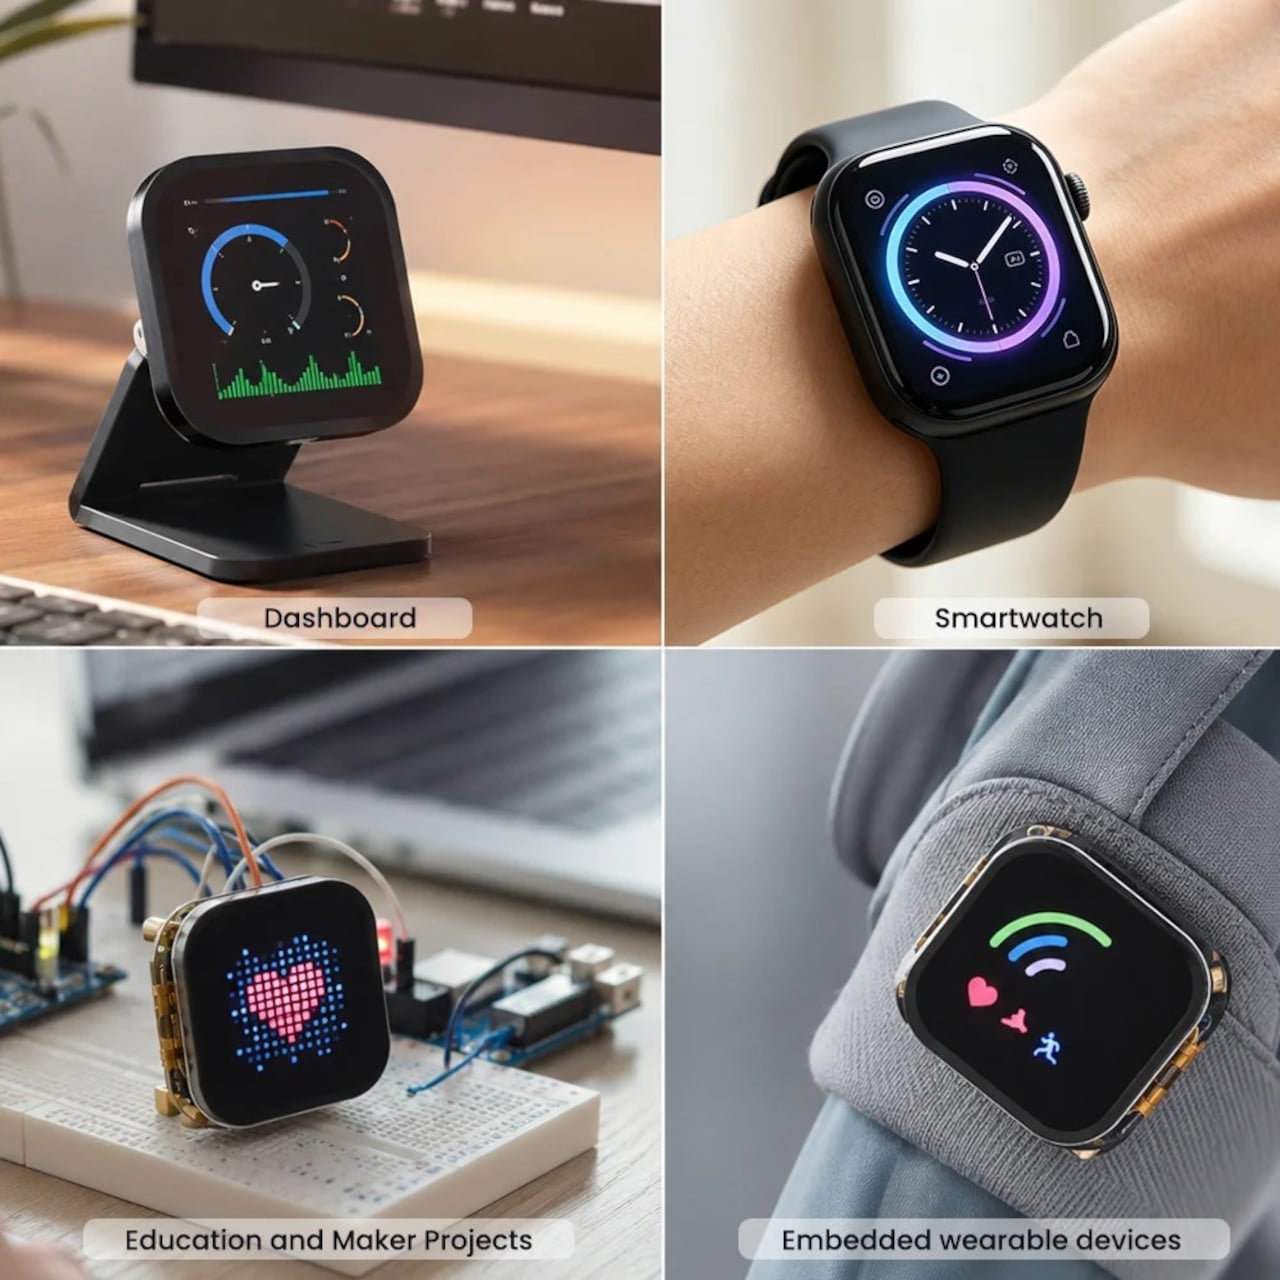
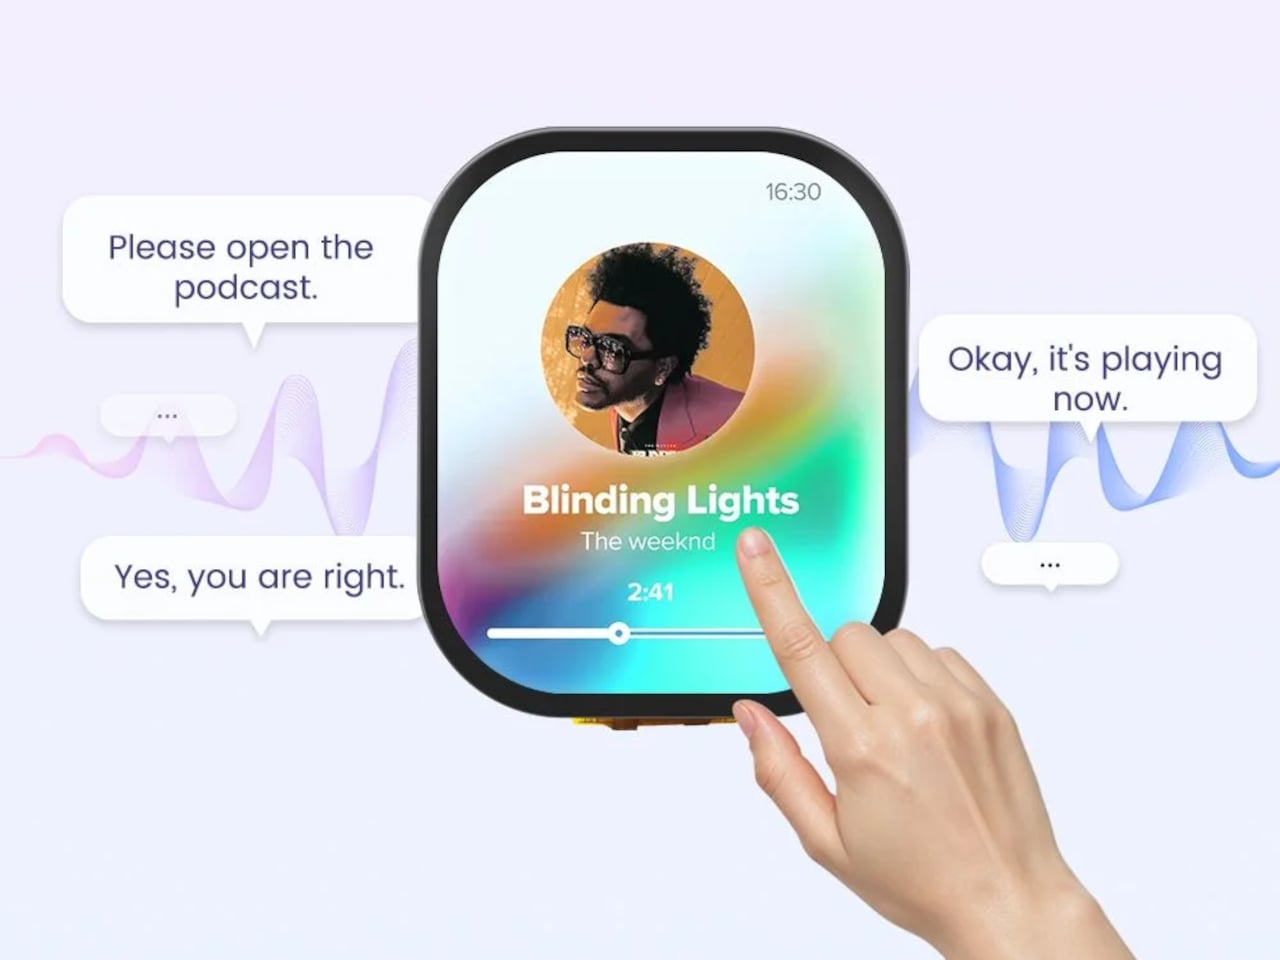
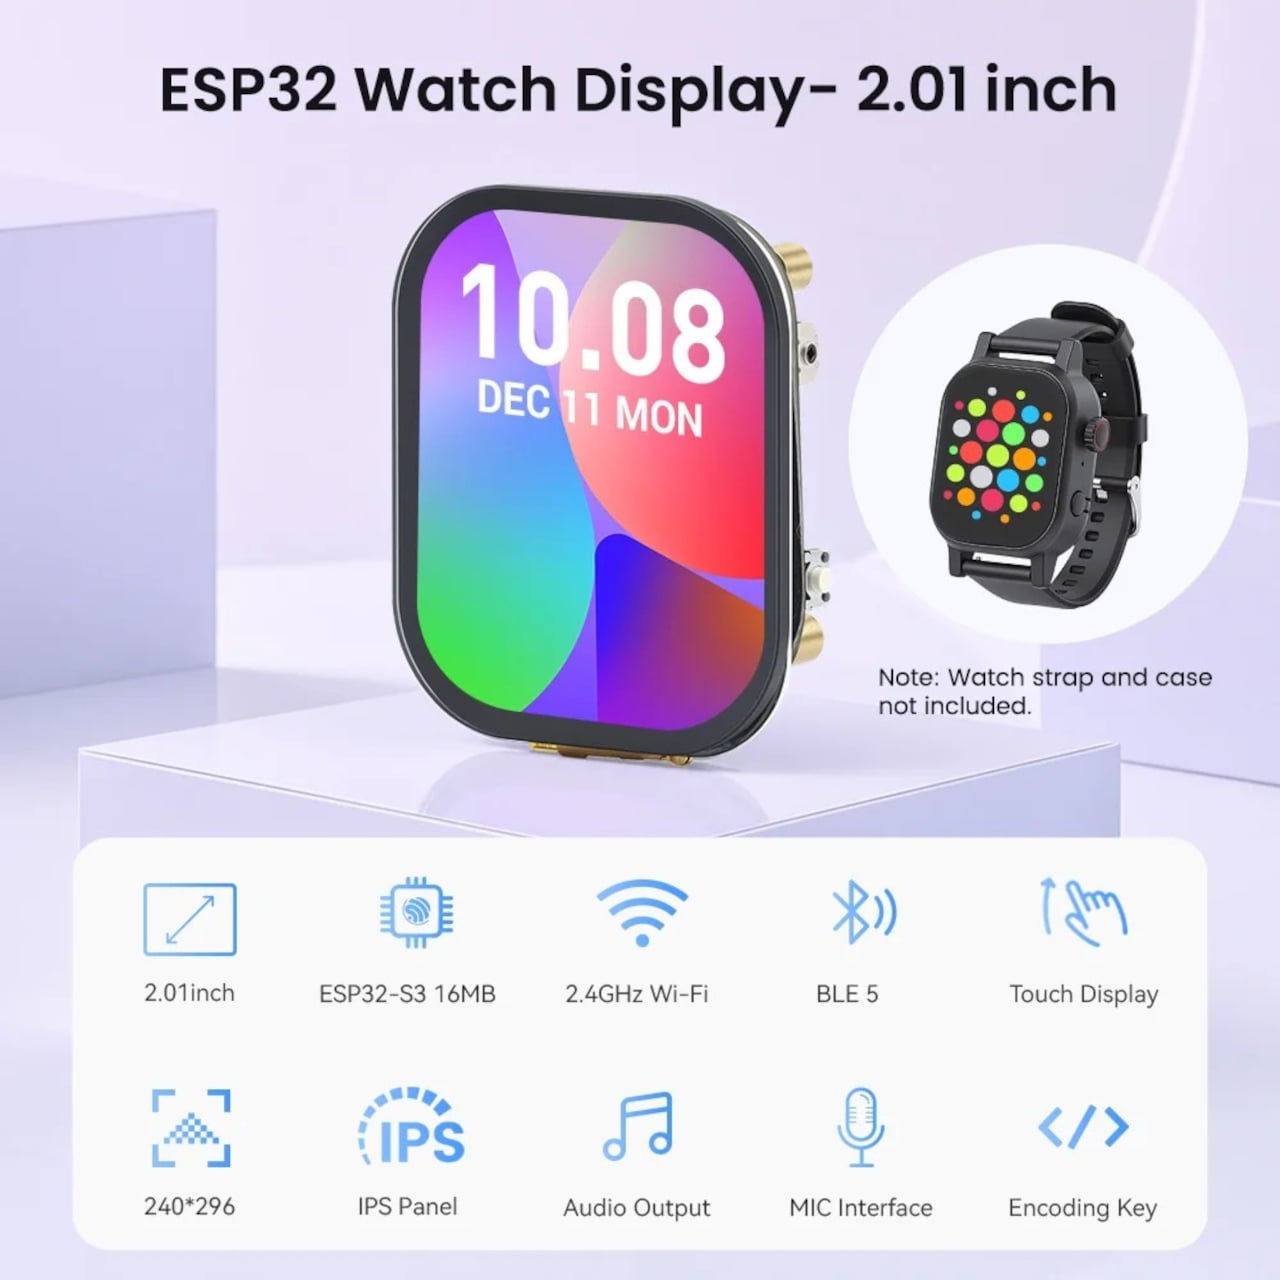
Elecrow’s CrowPanel Watch Display is a ready-made starting point for building something more personal. It’s an all-in-one development module built around the ESP32-S3 microcontroller, packaged as a wrist-sized board complete with a 2.01-inch touchscreen, a microphone, a rotary encoder, and expansion contacts. The idea is that most of the hardware problem is already solved, leaving you with the more interesting part: deciding what the device should actually do.

Designer: Elecrow

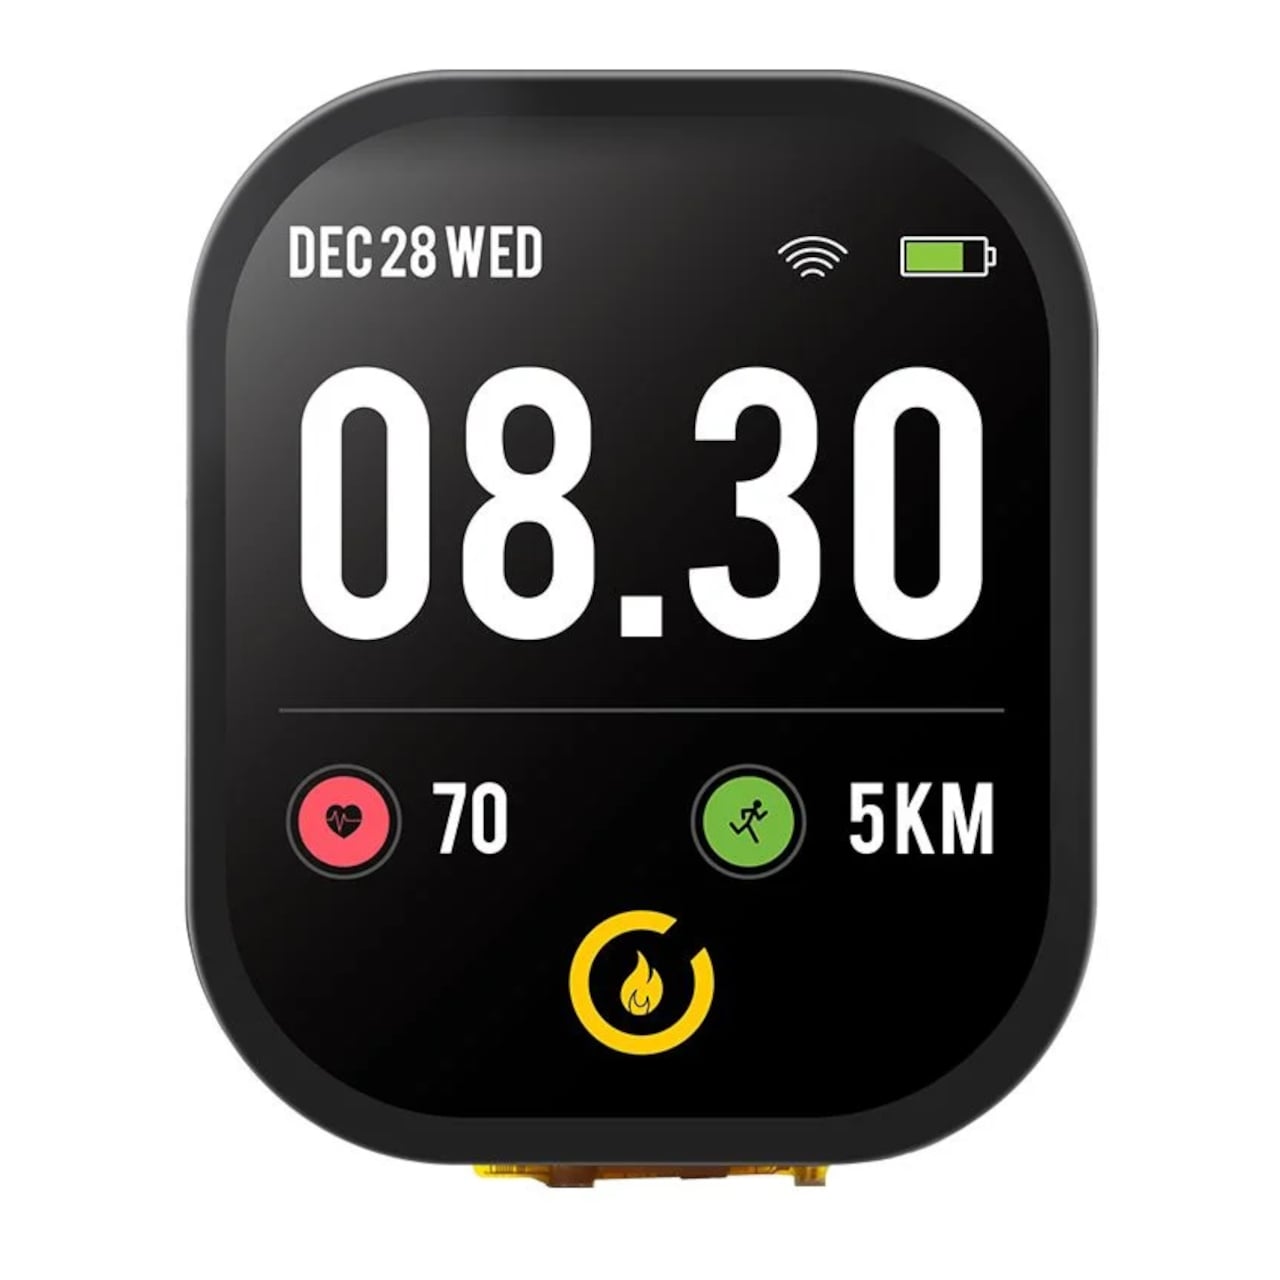
The IPS panel has a resolution of 240×296 pixels, capacitive touch, and a 178-degree viewing angle. Navigation doesn’t depend on touch alone. A rotary encoder functions like a traditional watch crown for scrolling and selection, and a dedicated side button rounds out the physical inputs. Both keep the interactions familiar to anyone who’s worn a watch before.

Under the hood, the ESP32-S3 runs a dual-core Xtensa LX7 processor clocked at up to 240MHz, with built-in Wi-Fi and Bluetooth 5. That means the watch can pull weather data, push notifications from a paired phone, or interact with a smart home network from the wrist. The Wi-Fi capability also makes it a viable control panel for home automation, a secondary identity the hardware handles just as comfortably.

The built-in microphone and speaker add voice control to the mix, allowing spoken commands to trigger actions on the device or interact with connected services. That’s a feature most entry-level wearable modules skip entirely, and it opens up a range of hands-free interactions well beyond setting a timer. For anyone building a smart home companion for the wrist, that’s a significant difference in day-to-day usability.

A gyroscope handles motion sensing, and a vibration motor is on board for haptic feedback. The package doesn’t include a heart rate sensor or GPS, which rules out the health-tracking and location features that define most commercial smartwatches. A battery isn’t included, but the board provides the necessary contacts to connect one, giving builders control over form factor and battery capacity from the outset. For a DIY module at this price, that tradeoff is expected.

The module sells for $18.99 as a bare PCB, without an enclosure or strap. That part of the build is left entirely to the maker, which is the point. For engineers, hobbyists, or students who’ve wanted a genuinely custom wearable without sourcing a dozen individual components, it’s a reasonably priced foundation that does far more of the groundwork than most development boards at this size and cost.

The post This $19 Module Solves the Hard Part of Building a Custom Smartwatch first appeared on Yanko Design.
The $8 Steam Cartridge Every PC Gamer Has Always Wanted

PC gaming has never had a proper physical media equivalent. Console players have always had something tangible to hold and shelve, a disc or cartridge that represents one specific game. On PC, games live in a library on a platform that’s only yours as long as the platform stays up. It’s convenient, but a lot of PC gamers quietly miss the ritual of picking something physical off a shelf.

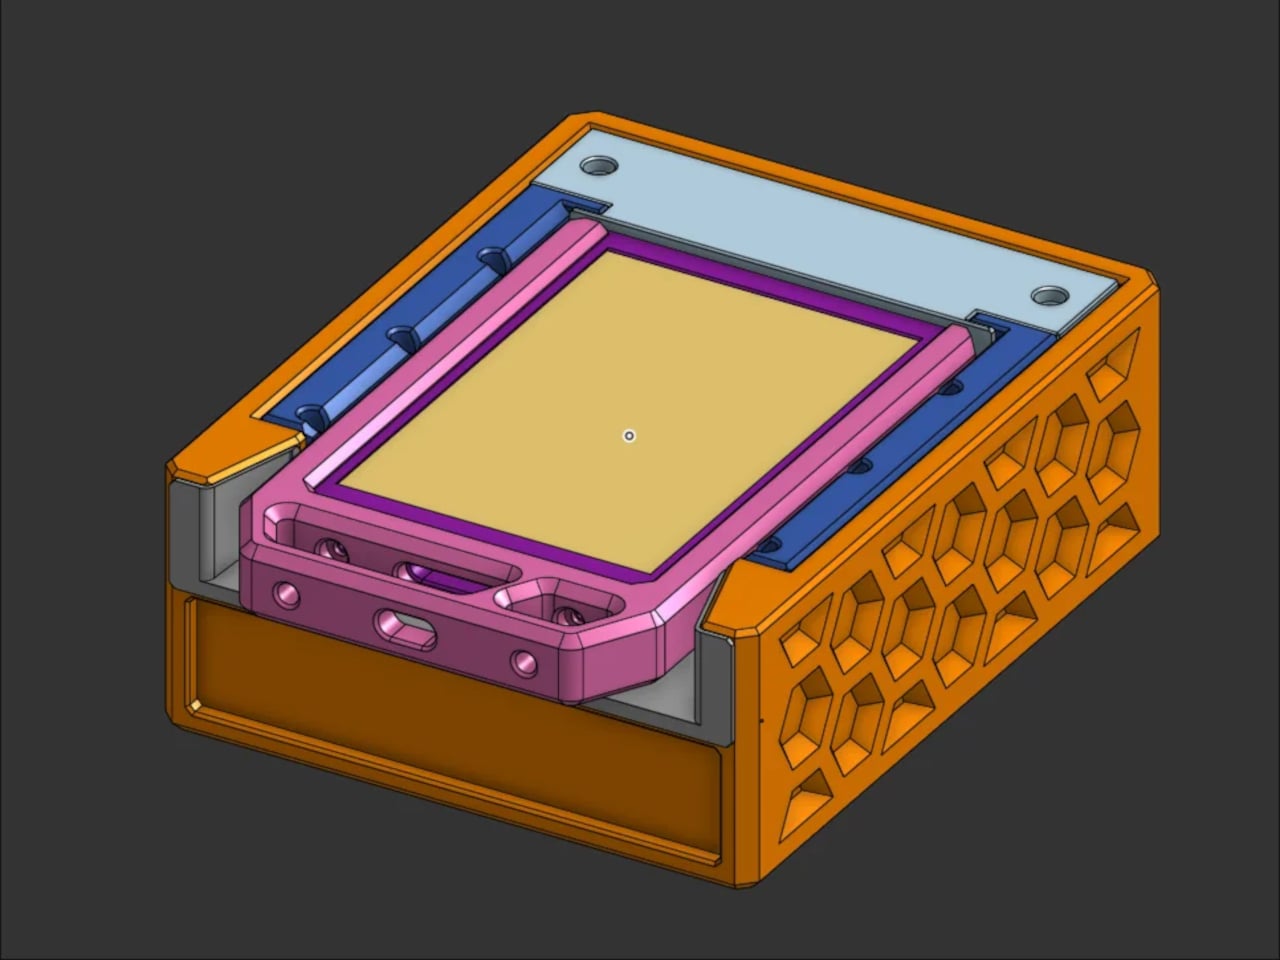
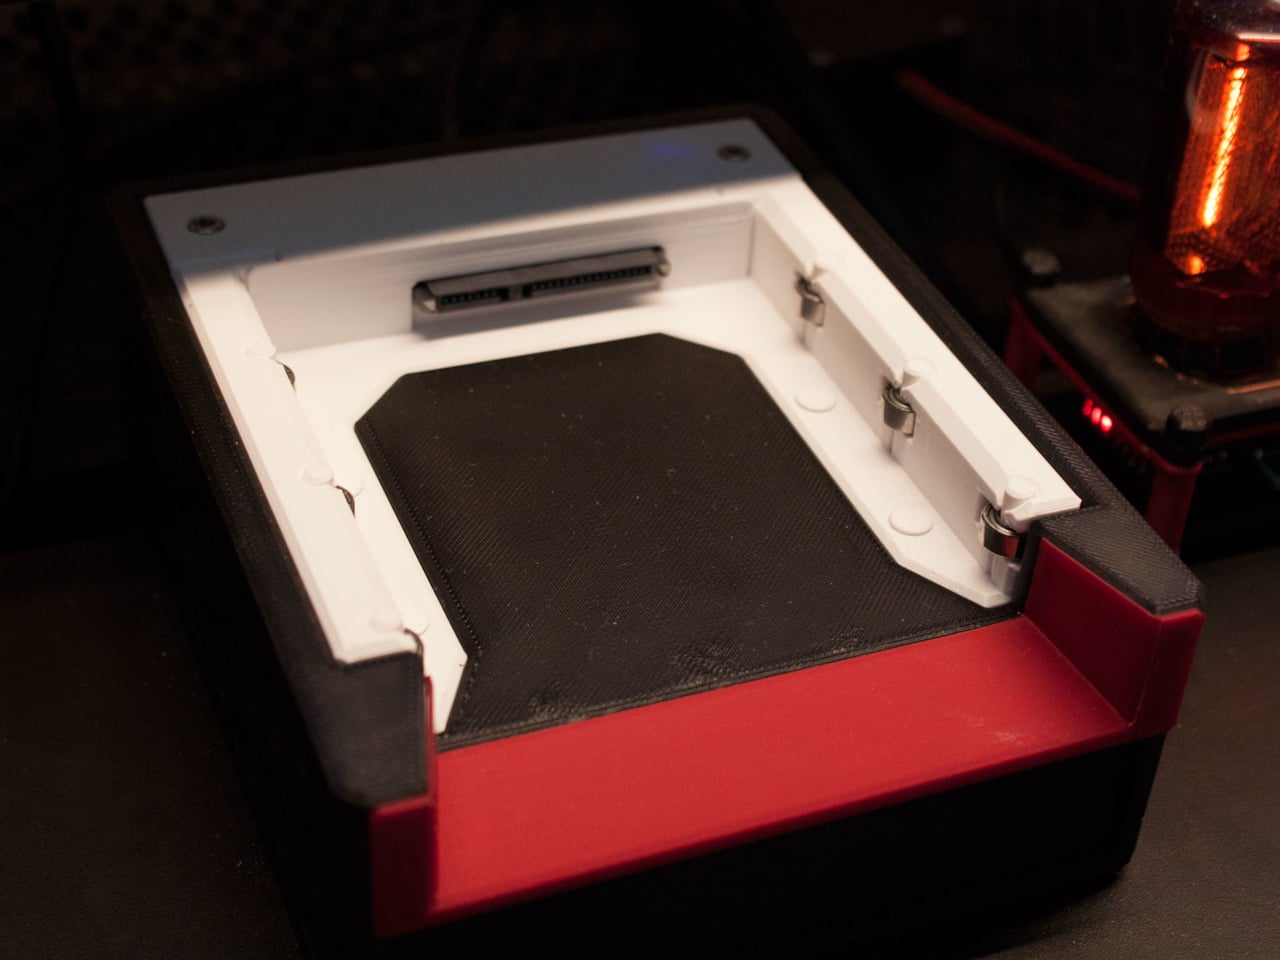
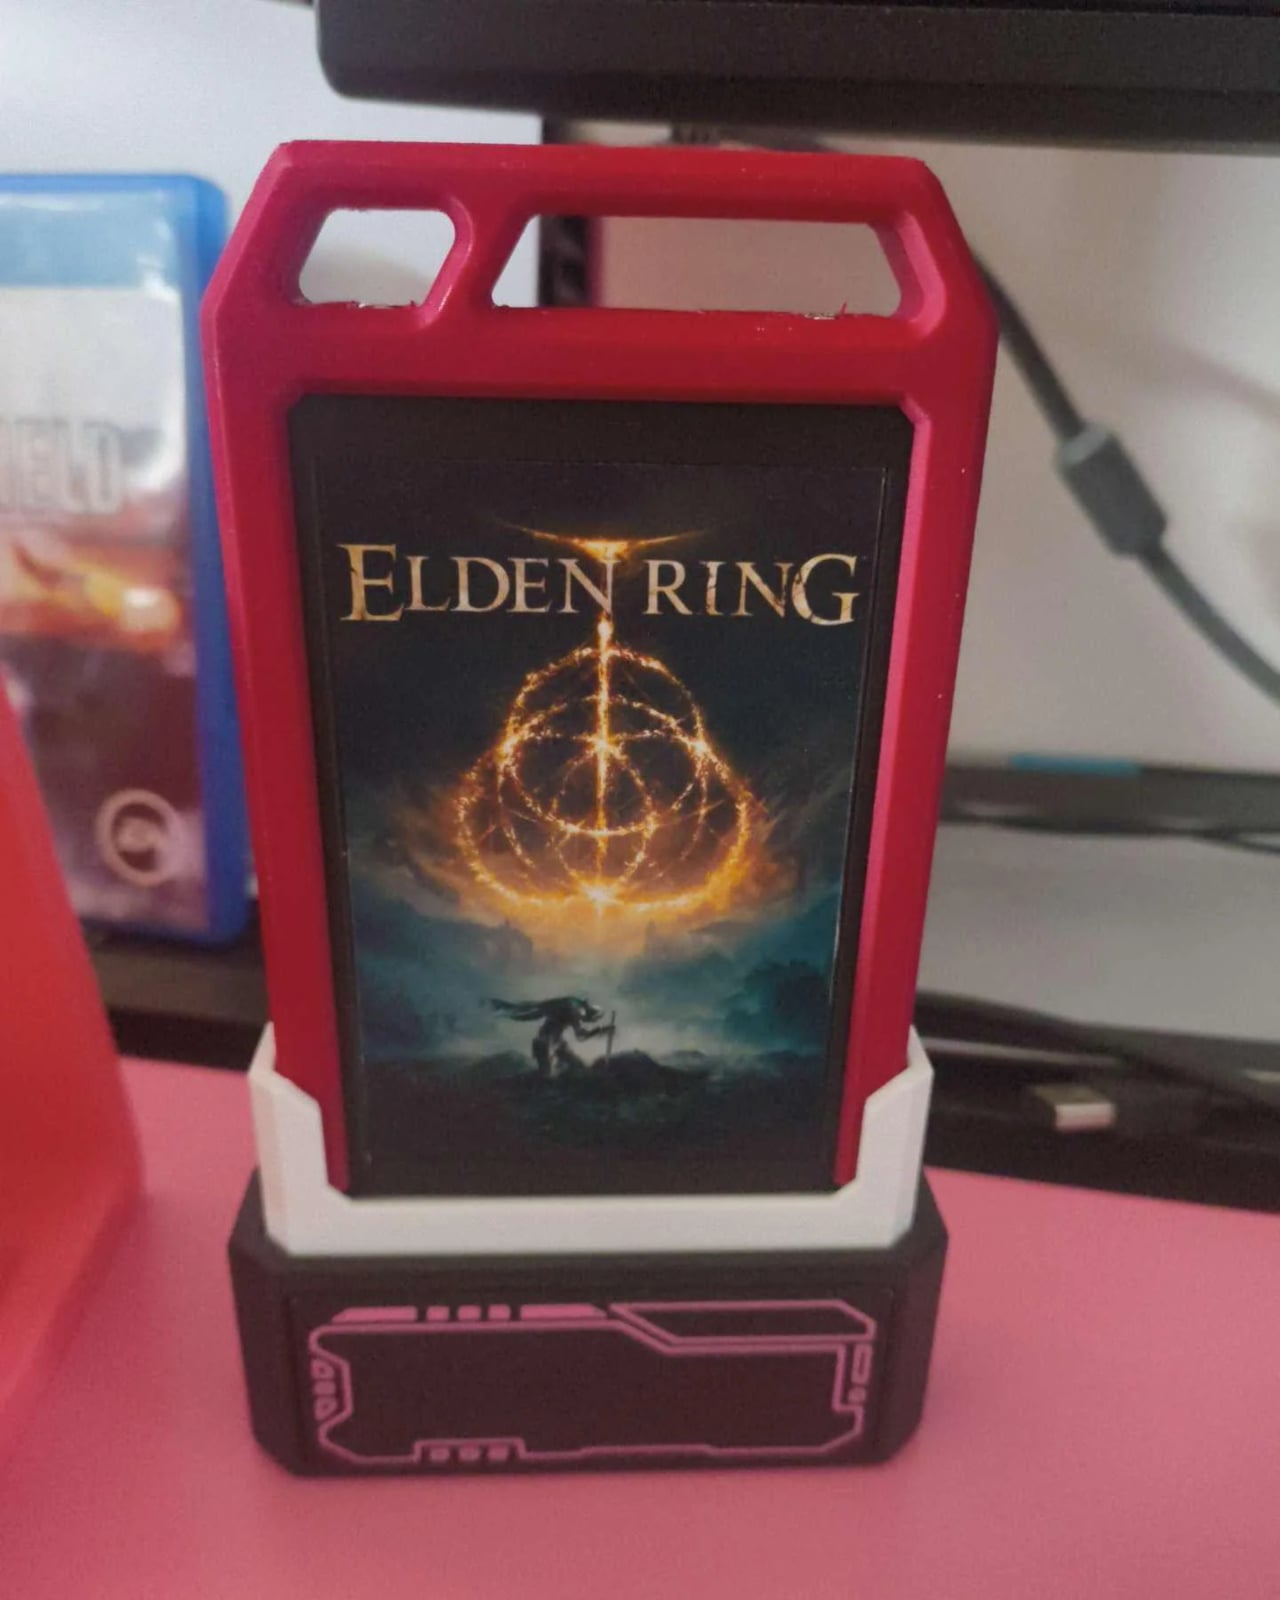
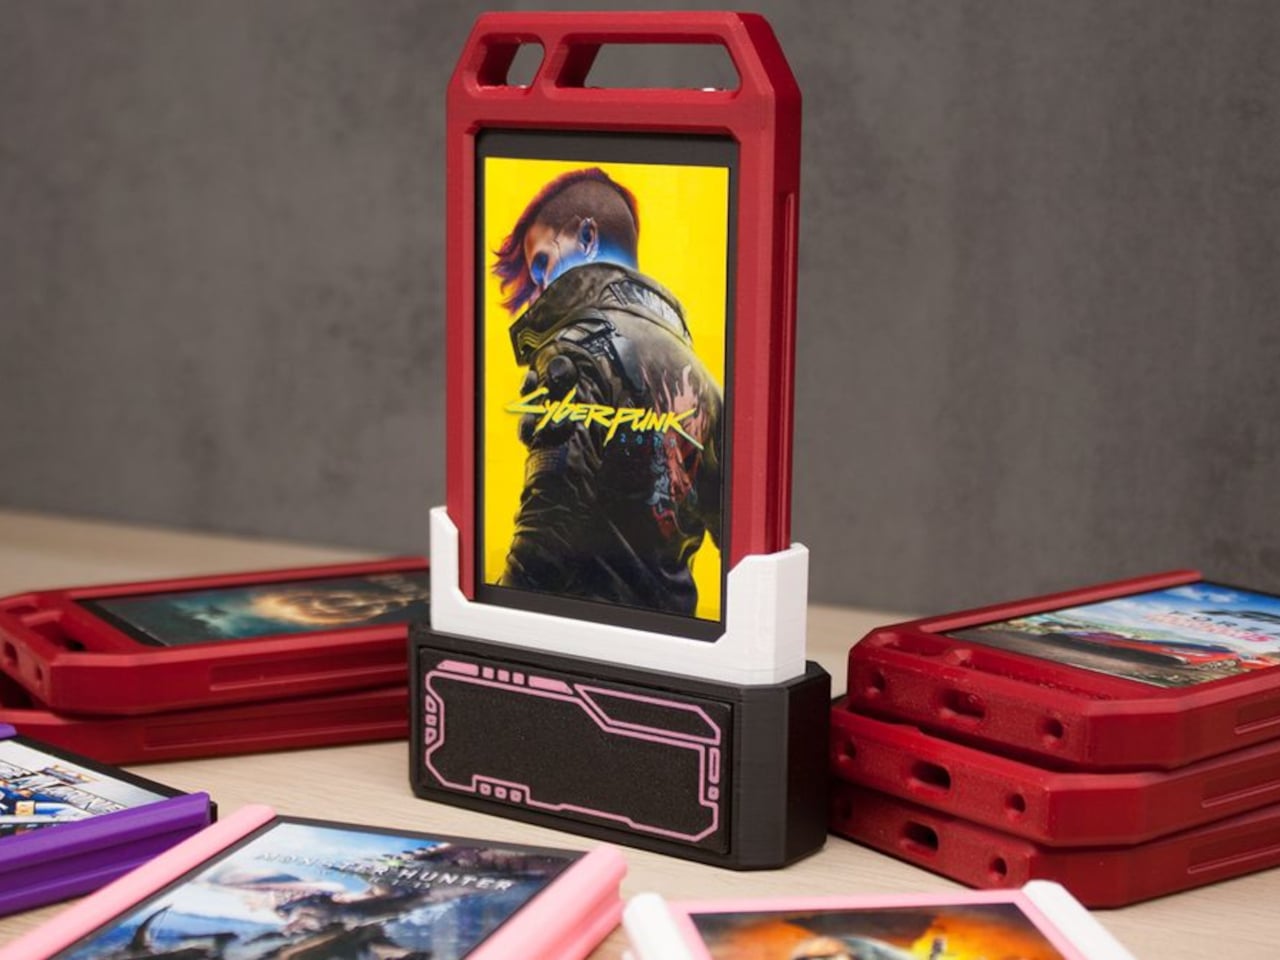
A post on Reddit recently took a direct swing at that gap. A gamer picked up a handful of secondhand 2.5-inch SATA SSDs, each 128 GB and priced at around €7 ($8) a piece, and built a cartridge system for Steam. Each drive holds a single game alongside a script that auto-navigates Steam to that game’s page once the drive is plugged in. Auto-launching the game directly is also possible.

Designer: Jibril-sama (images courtesy of Tom’s Hardware)

What really sells the effect is the presentation. Rather than leaving the drives as bare hardware with labels stuck on, each SSD sits inside a colorful protective case with custom game art on the cover. The result looks genuinely like a cartridge collection, not a pile of storage drives. It’s the kind of detail that makes the idea land visually rather than just functioning as a clever technical trick.

The system runs on Linux. When an SSD is plugged into a SATA dock connected to the PC, a udev rule detects the mount event and triggers a systemd daemon, which finds the script on the drive and executes it. Valve’s Steam URL Protocol handles navigating to the game’s page or launching it. The hardware side requires nothing more unusual than a standard SATA dock.

There are genuine practical limits. Steam still needs to be installed, and the game needs to be in your library, so this isn’t a workaround for ownership or a way to share games. Updates are the bigger friction point, since multi-gigabyte patches push regularly even to older titles. The creator’s approach is to keep cartridges for games worth replaying occasionally rather than live-service titles that need constant updating.

The reaction ran heavily nostalgic, with comparisons to NES cartridges, Switch game cards, and the general ritual of pulling a game off a shelf. Some commenters want the system extended to GOG libraries. Others are already planning their own versions, with several suggesting 3D-printed cartridge shells to push the aesthetic even further.

What the project surfaces is how much the ritual of physical media matters, separate from convenience or ownership. These drives don’t give you anything you couldn’t already get by clicking a game in your Steam library. The Linux requirement narrows who can replicate it directly, but at €7 ($8) per drive, the cost to build a collection of ten or fifteen games is still less than a single new release.

The post The $8 Steam Cartridge Every PC Gamer Has Always Wanted first appeared on Yanko Design.
This elastic band-powered car proves you don’t need an engine to experience real mechanical thrills

Kinetic energy is a fascinating thing, a fact I first realized after becoming obsessed with pull-back toy cars as a child. The simple act of rolling the car backward to store energy before watching it shoot forward at surprising speed felt almost magical. I didn’t understand the physics back then, but I knew there was something immensely satisfying about turning stored energy into motion.

Tell that to James Bruton, and you’ve got an engineering challenge rather than a toy. The inventive YouTuber is back with another delightfully unconventional experiment, this time asking whether a vehicle can be powered entirely by elastic bands. Not the thin rubber bands you’d find in a desk drawer, but heavy-duty resistance bands designed for fitness training, capable of storing far more energy than their humble appearance suggests.

Designer: James Bruton

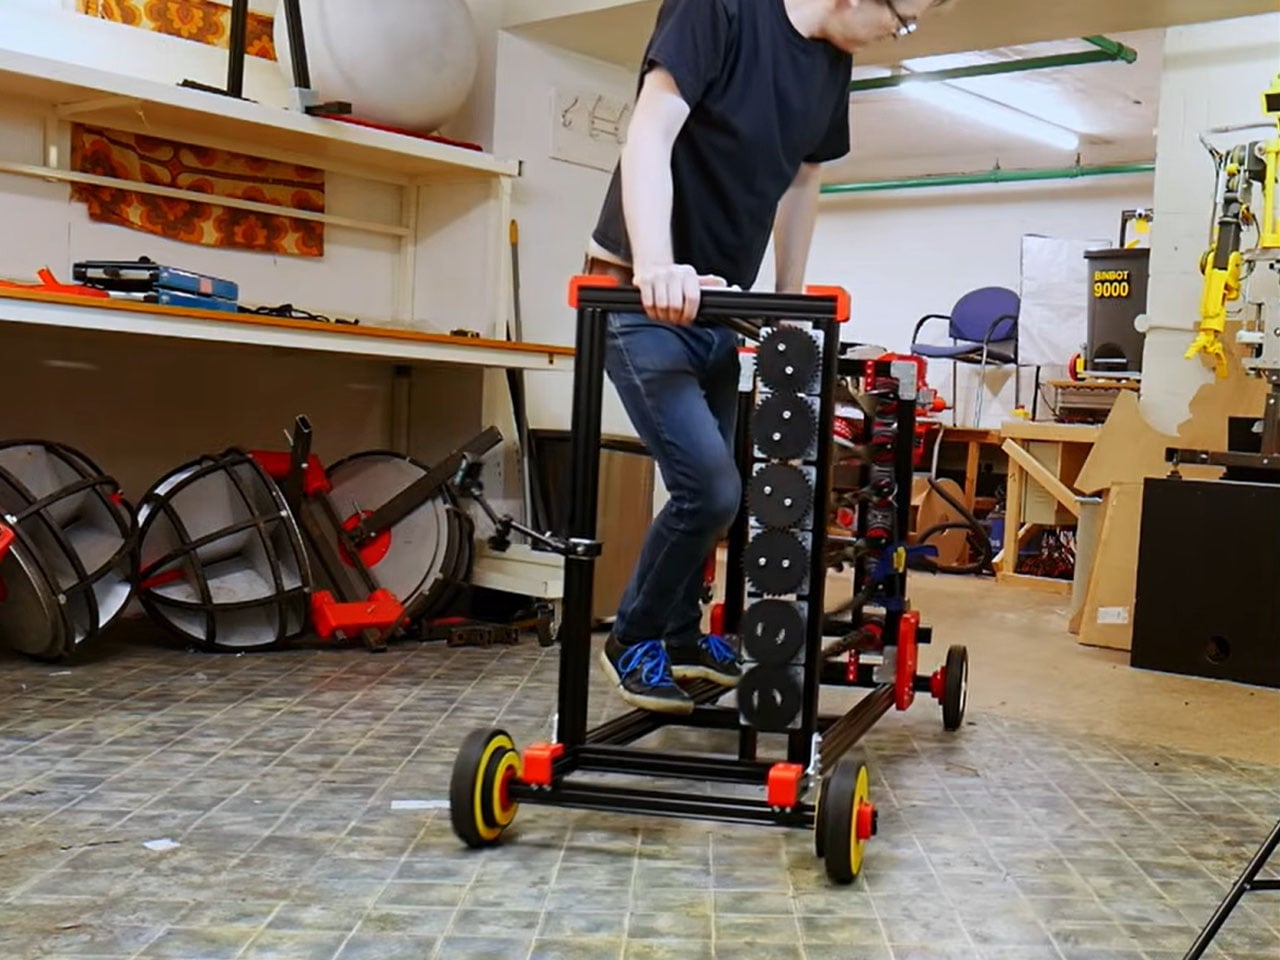
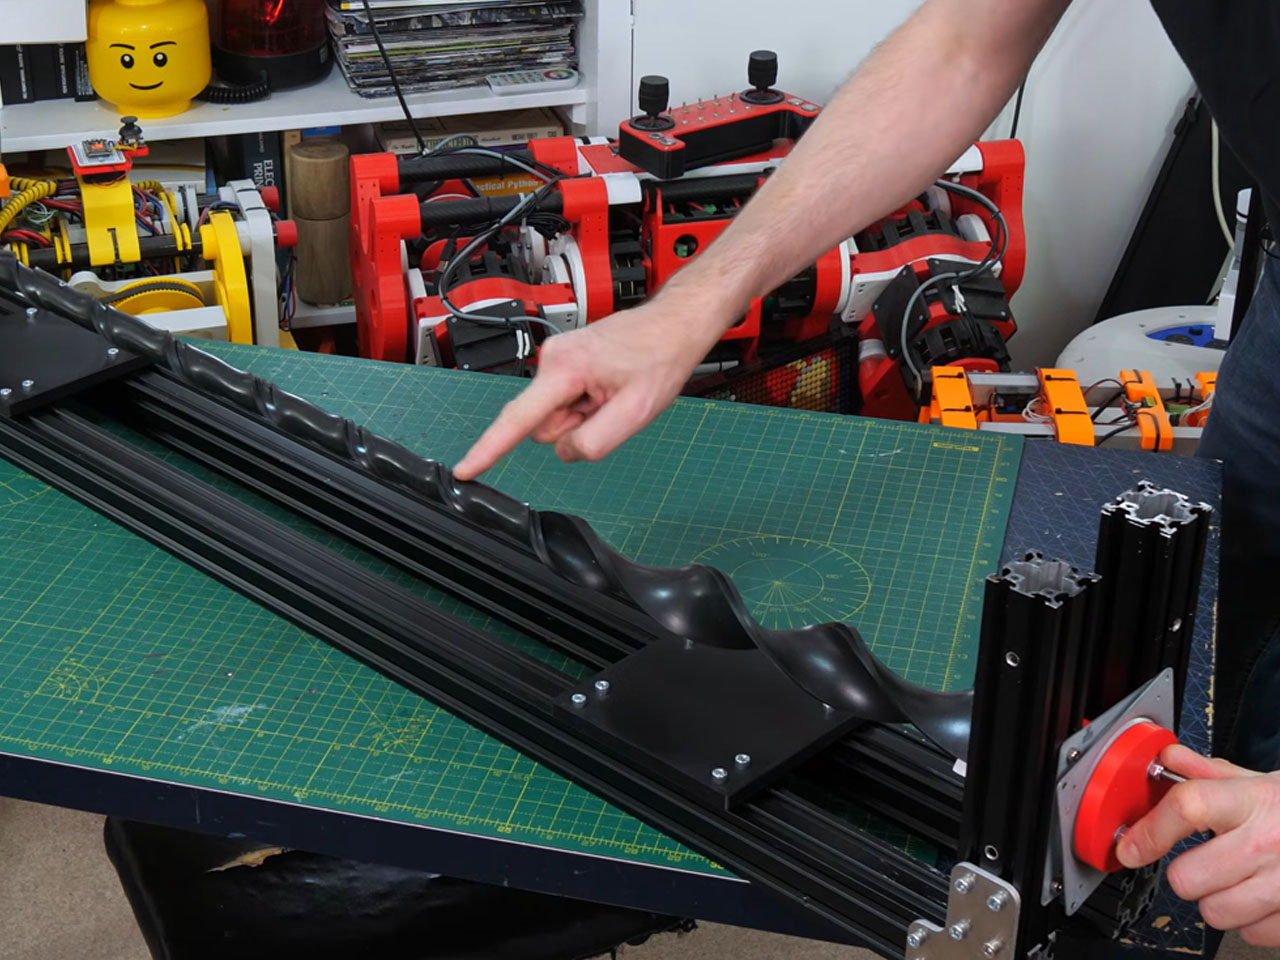
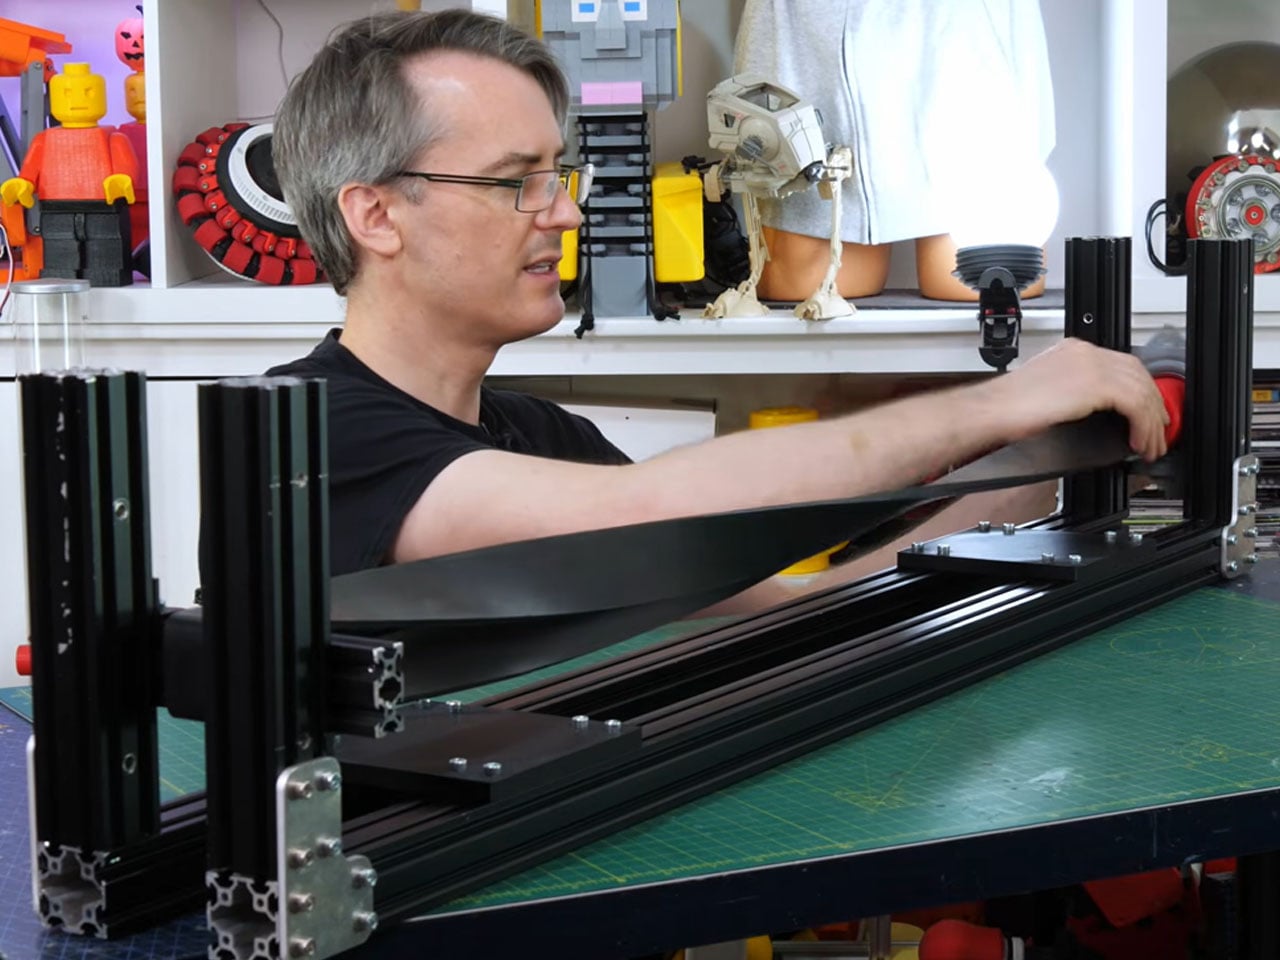
Bruton begins by building a test rig from industrial 4040 aluminum extrusions to understand how much energy these bands can store when twisted rather than stretched. The setup uses inexpensive Lazy Susan thrust bearings to let the mechanism rotate with minimal friction while a single resistance band is wound tighter and tighter. The initial tests prove surprisingly encouraging, with the band accepting dozens of twists before reaching its limit, hinting that there may be enough stored energy to propel a person.

Turning that potential into useful motion, however, proves far more complicated. A pair of 3D-printed bevel gears delivers a 2:1 reduction to increase torque before driving a set of lightweight wheels. The prototype manages to move Bruton, but only for a couple of meters before the band eventually snaps under excessive winding. Rather than dismissing the concept, he treats the failure as valuable data, redesigning the drivetrain with an additional reduction stage that increases the overall ratio to 6:1. The improvement isn’t dramatic in terms of distance. Still, it delivers smoother power without permanently deforming the elastic band, confirming that gearing plays a bigger role than simply storing more energy.

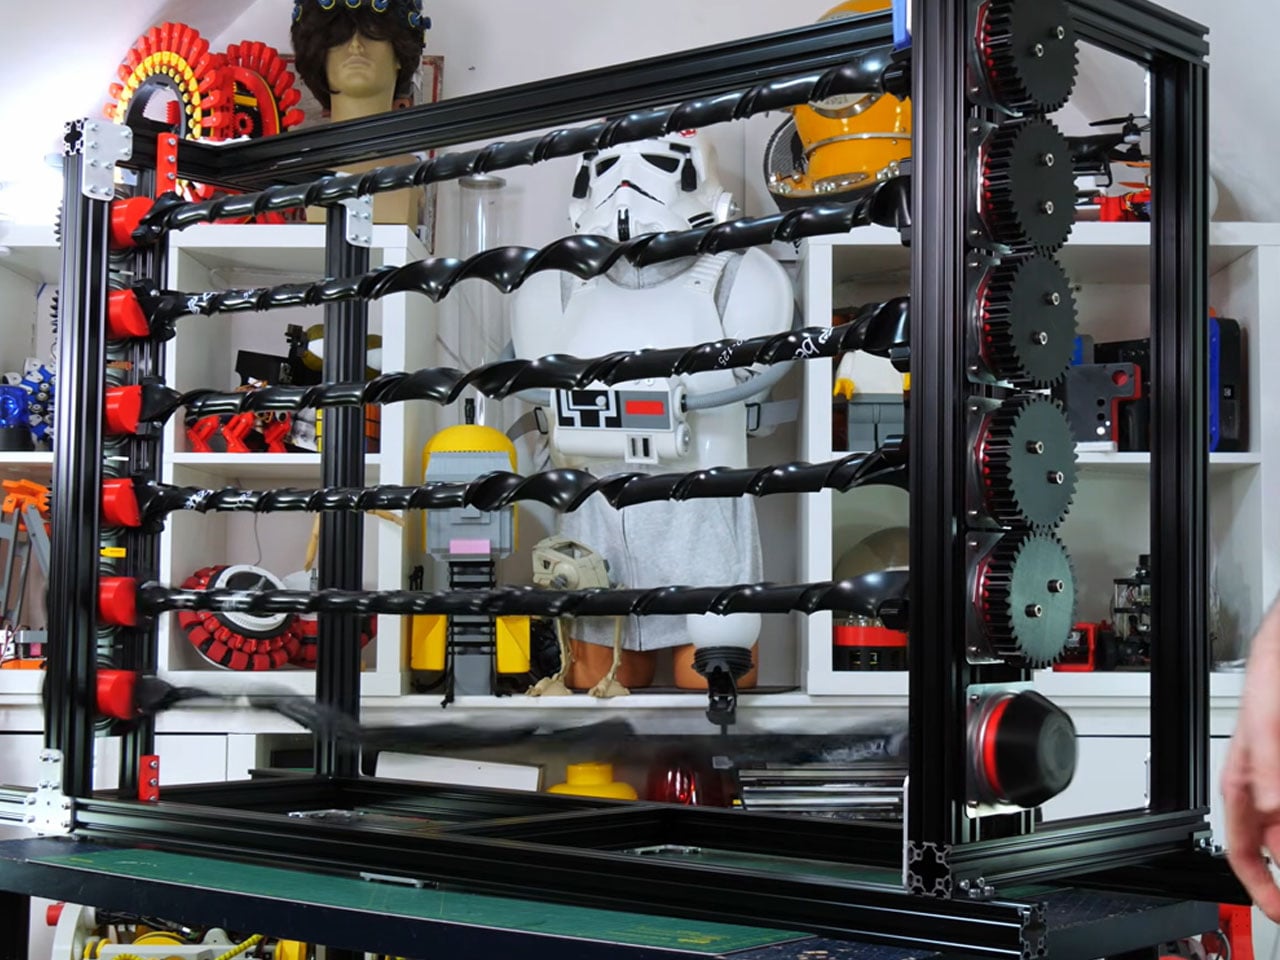
The next logical step is to increase the amount of stored energy itself. Instead of making the vehicle impractically long with one giant elastic band, Bruton develops an ingenious routing system that sends multiple bands back and forth through the chassis using intermeshing gears. CNC-machined aluminum brackets, industrial extrusions, custom 3D-printed components, and dozens of modified bearings come together to create a rigid frame capable of containing the enormous twisting forces generated by the growing elastic drivetrain.

Experiments with six bands connected in series reveal an unexpected lesson in physics. While the system stores more energy, it doesn’t produce a proportional increase in usable torque, leaving much of the stored potential untapped. Rather than forcing the design to work, Bruton completely rethinks the layout by arranging eighteen resistance bands into three parallel columns, each feeding a common output shaft through bevel gears. The configuration increases available torque while preserving a useful amount of unwinding time, striking a far better balance between power and efficiency.

After countless iterations, careful winding, and more than a few anxious moments trying not to snap another band, the elastic-powered machine finally delivers the result Bruton had been chasing. The vehicle carries him almost 10 meters on nothing more than the energy stored in twisted resistance bands, with a best run measuring just under 9.9 meters before a final all-out attempt stretches that distance beyond 12 meters. It may not be replacing electric drivetrains anytime soon, but that’s hardly the point.


The post This elastic band-powered car proves you don’t need an engine to experience real mechanical thrills first appeared on Yanko Design.
Wake Up, Neo. Your Ring Is Playing the Matrix.

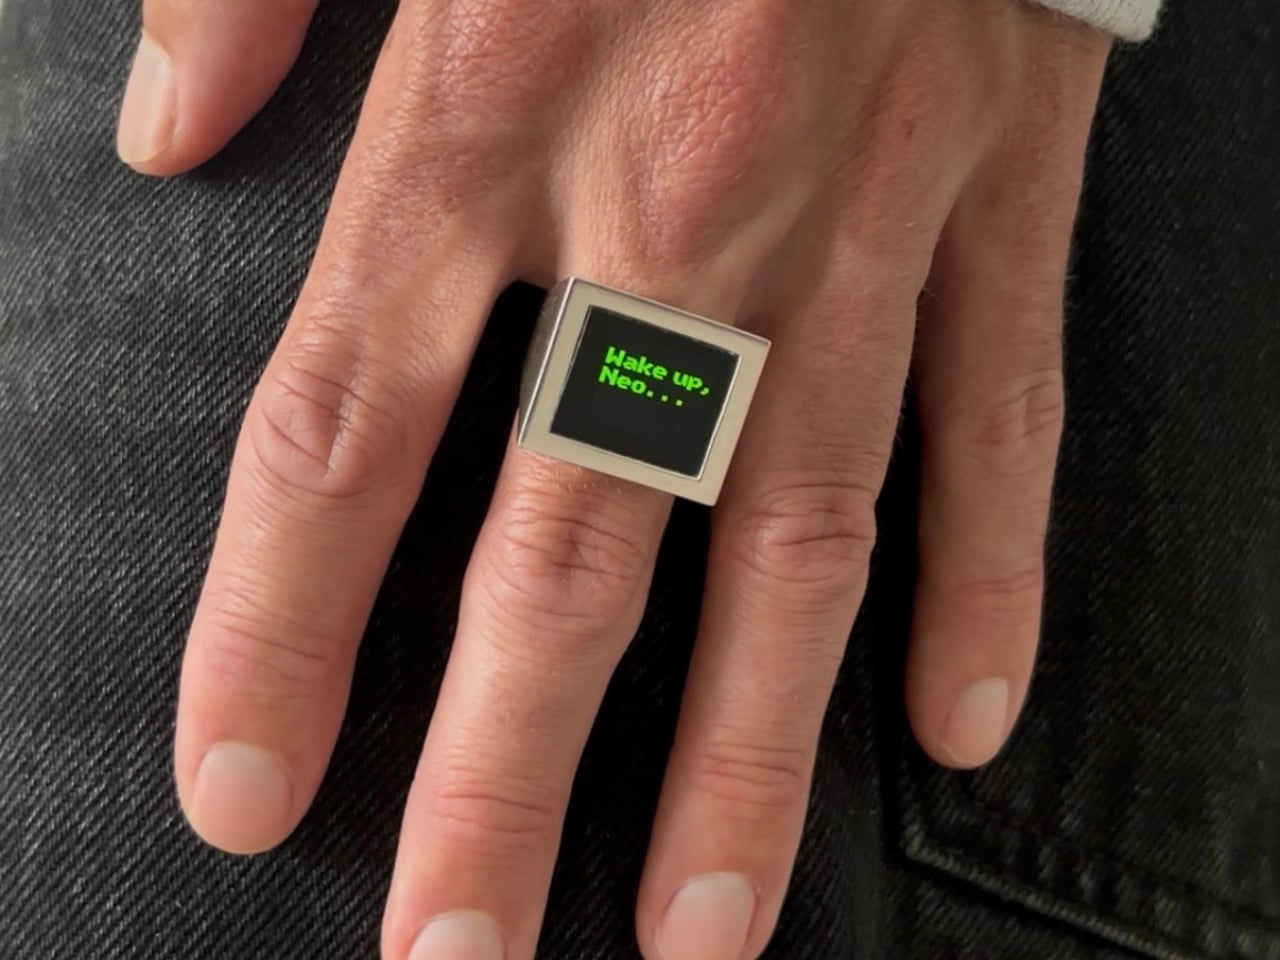
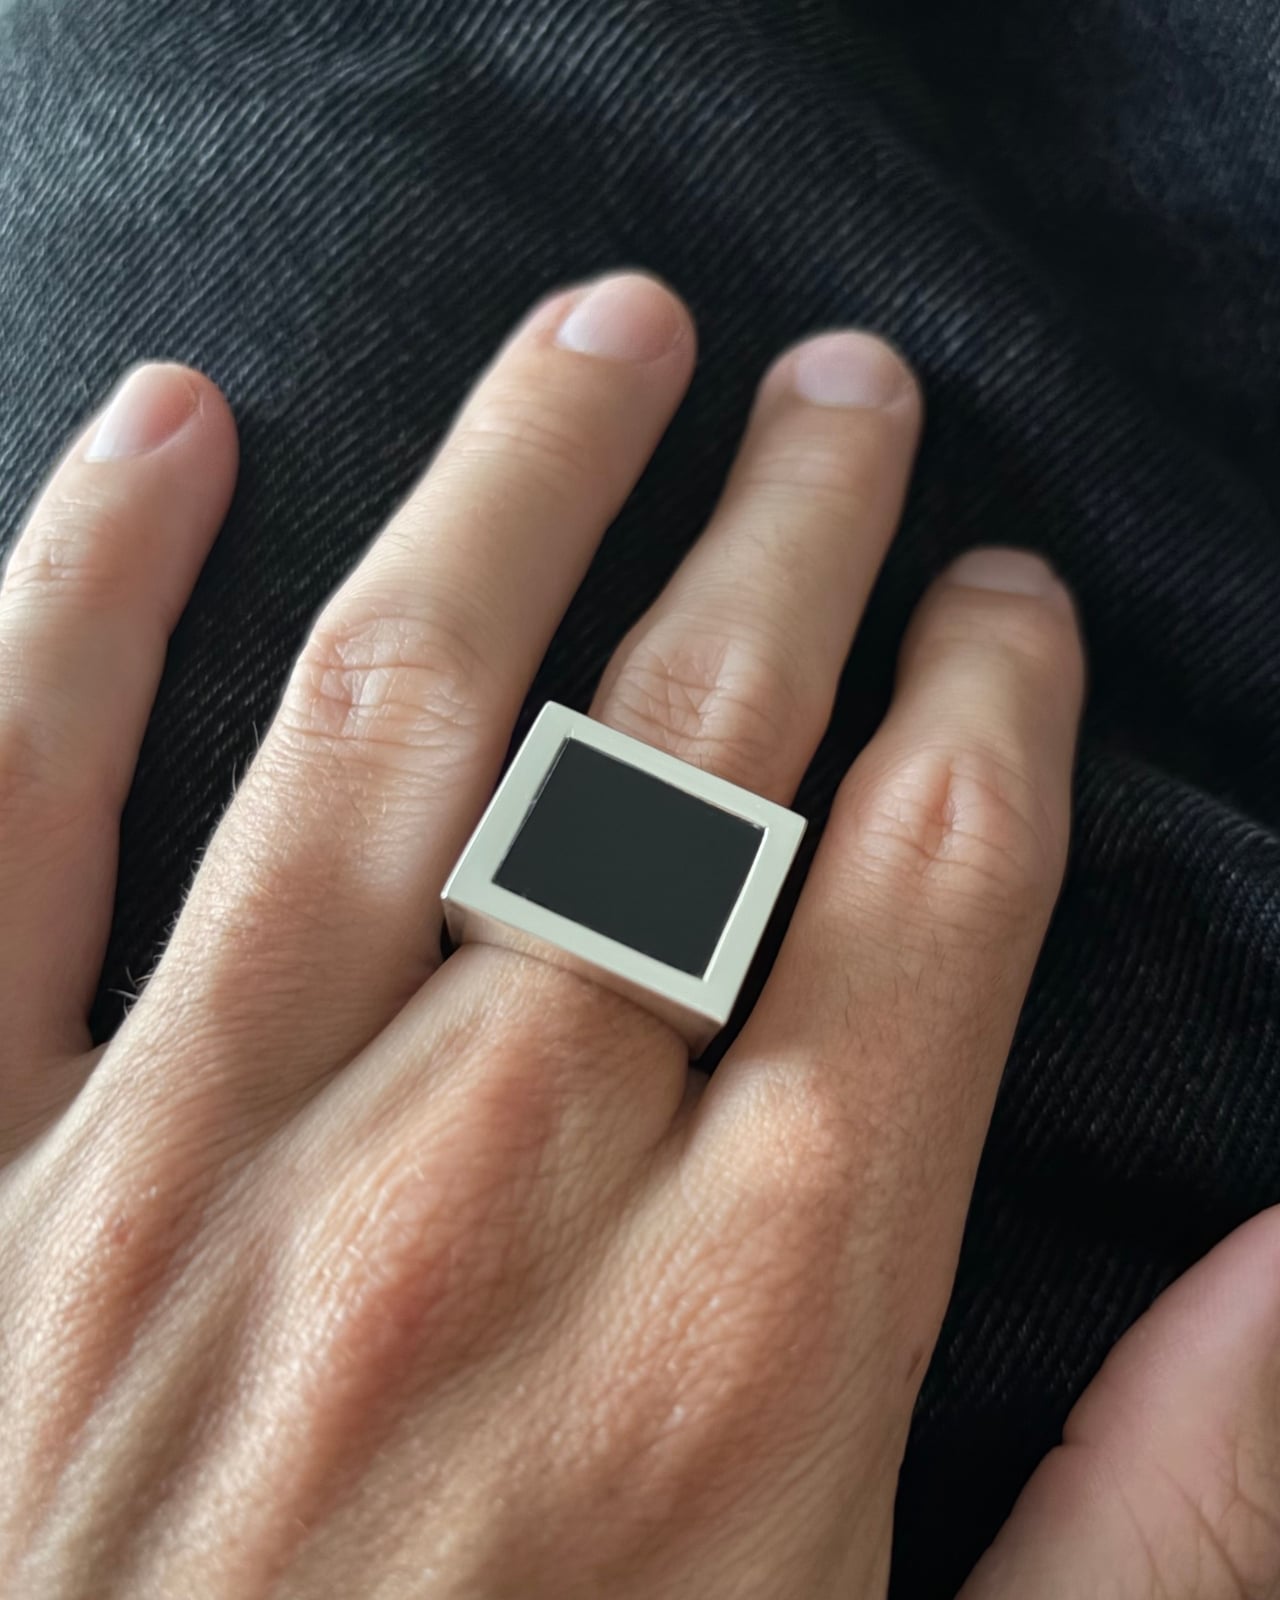
Look at the Digital Rain Ring when the screen is off, and you might not immediately clock what you’re looking at. A clean silver bezel. A flat black face. Bold, architectural proportions that sit somewhere between a modern signet ring and a minimalist sculpture. It reads as jewelry, completely and confidently. Then the animation starts.

That double life is arguably the most deliberate design decision Daniel Idle made. The OLED display, sitting recessed behind a polished silver frame, does something that most tech-forward jewelry fails to pull off: it disappears when it’s not in use. The black glass of the screen at rest looks remarkably close to a dark stone setting, the kind of graphic, monochromatic face you’d expect on a considered piece of contemporary jewelry. It’s only when the Matrix rain animation loops across it that the object reveals its other identity.

Designer: Daniel Idle

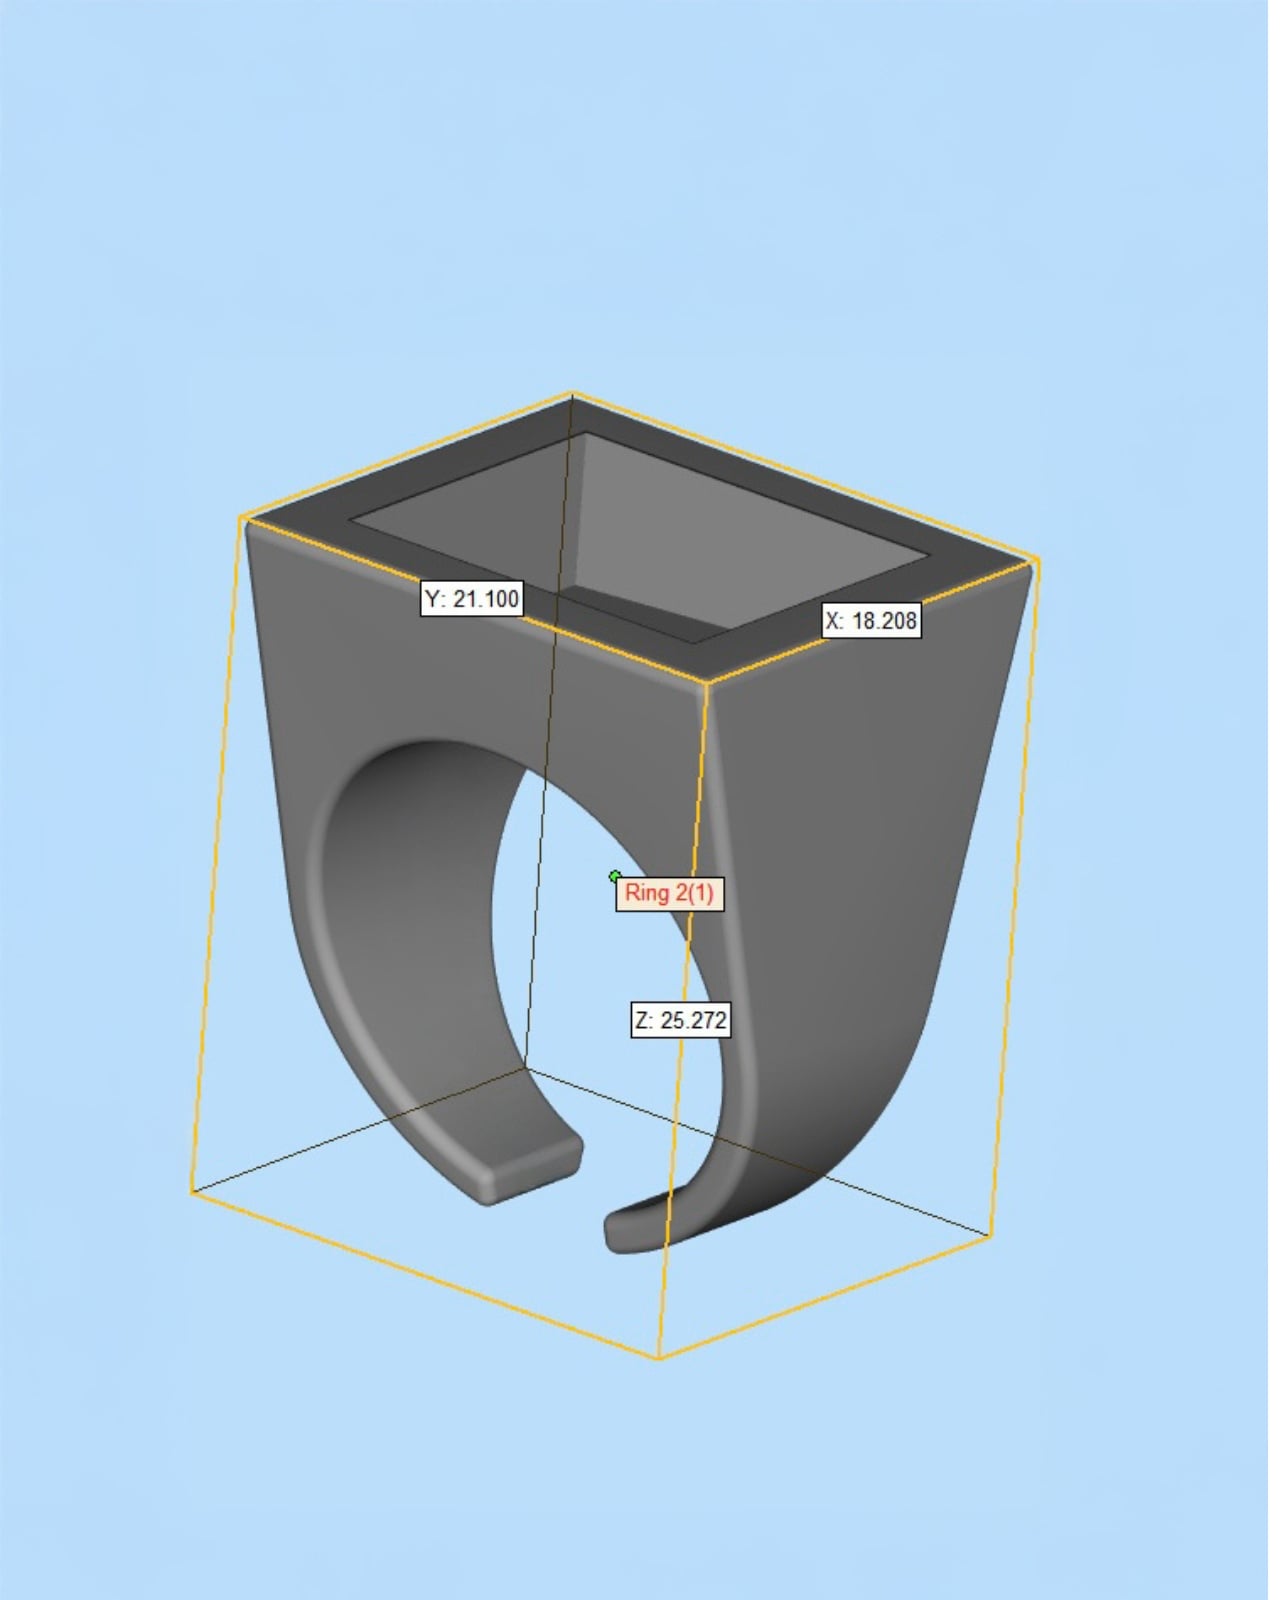
The physical form took real thinking to get right. Looking at the CAD model, the ring measures approximately 21mm by 18mm across the face, with a total height of just over 25mm. Those proportions matter. The face is large enough to hold the display at a readable scale, but the tapered body connecting it to the band keeps the overall silhouette from reading as clunky. The geometry is almost architectural, widening from the band up toward the face in a way that gives the piece visual weight without making it feel like you’re wearing a small appliance on your finger.

The band itself is an open C-shape rather than a fully closed ring. It’s a practical call given the electronics that need to live inside the body, but it also lands well aesthetically, softening what is otherwise a very hard-edged, geometric form. From the side, the two components sit in good proportion to each other. Nothing feels like an afterthought.

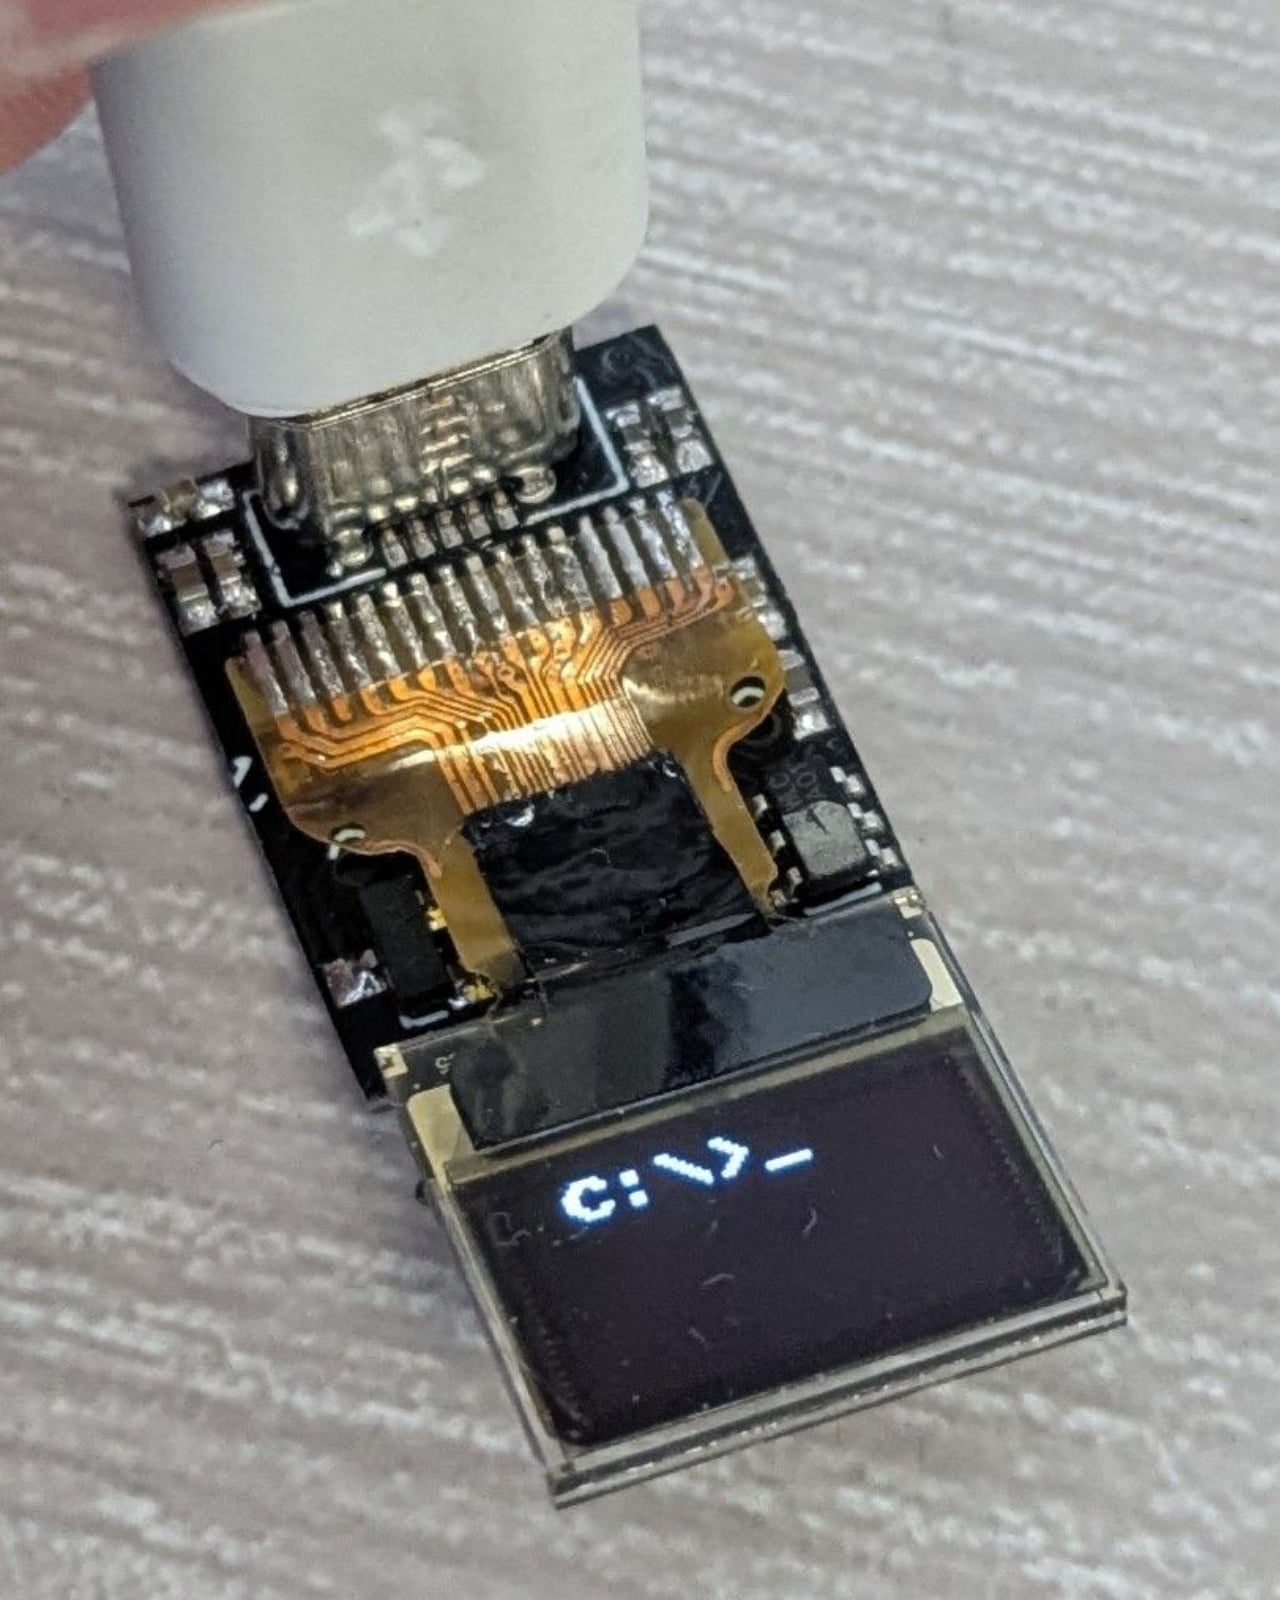
The custom PCB is worth pausing on. It’s tiny, densely packed, and clearly built to exact dimensions to fit within the ring body. A flexible ribbon cable connects the board to the OLED display, and a USB-C port is integrated for charging. The fact that all of this infrastructure lives inside something you wear on your finger is genuinely impressive engineering, but Idle’s judgment was to make sure none of it is visible in the finished piece. That restraint is what separates this from a hobbyist build.
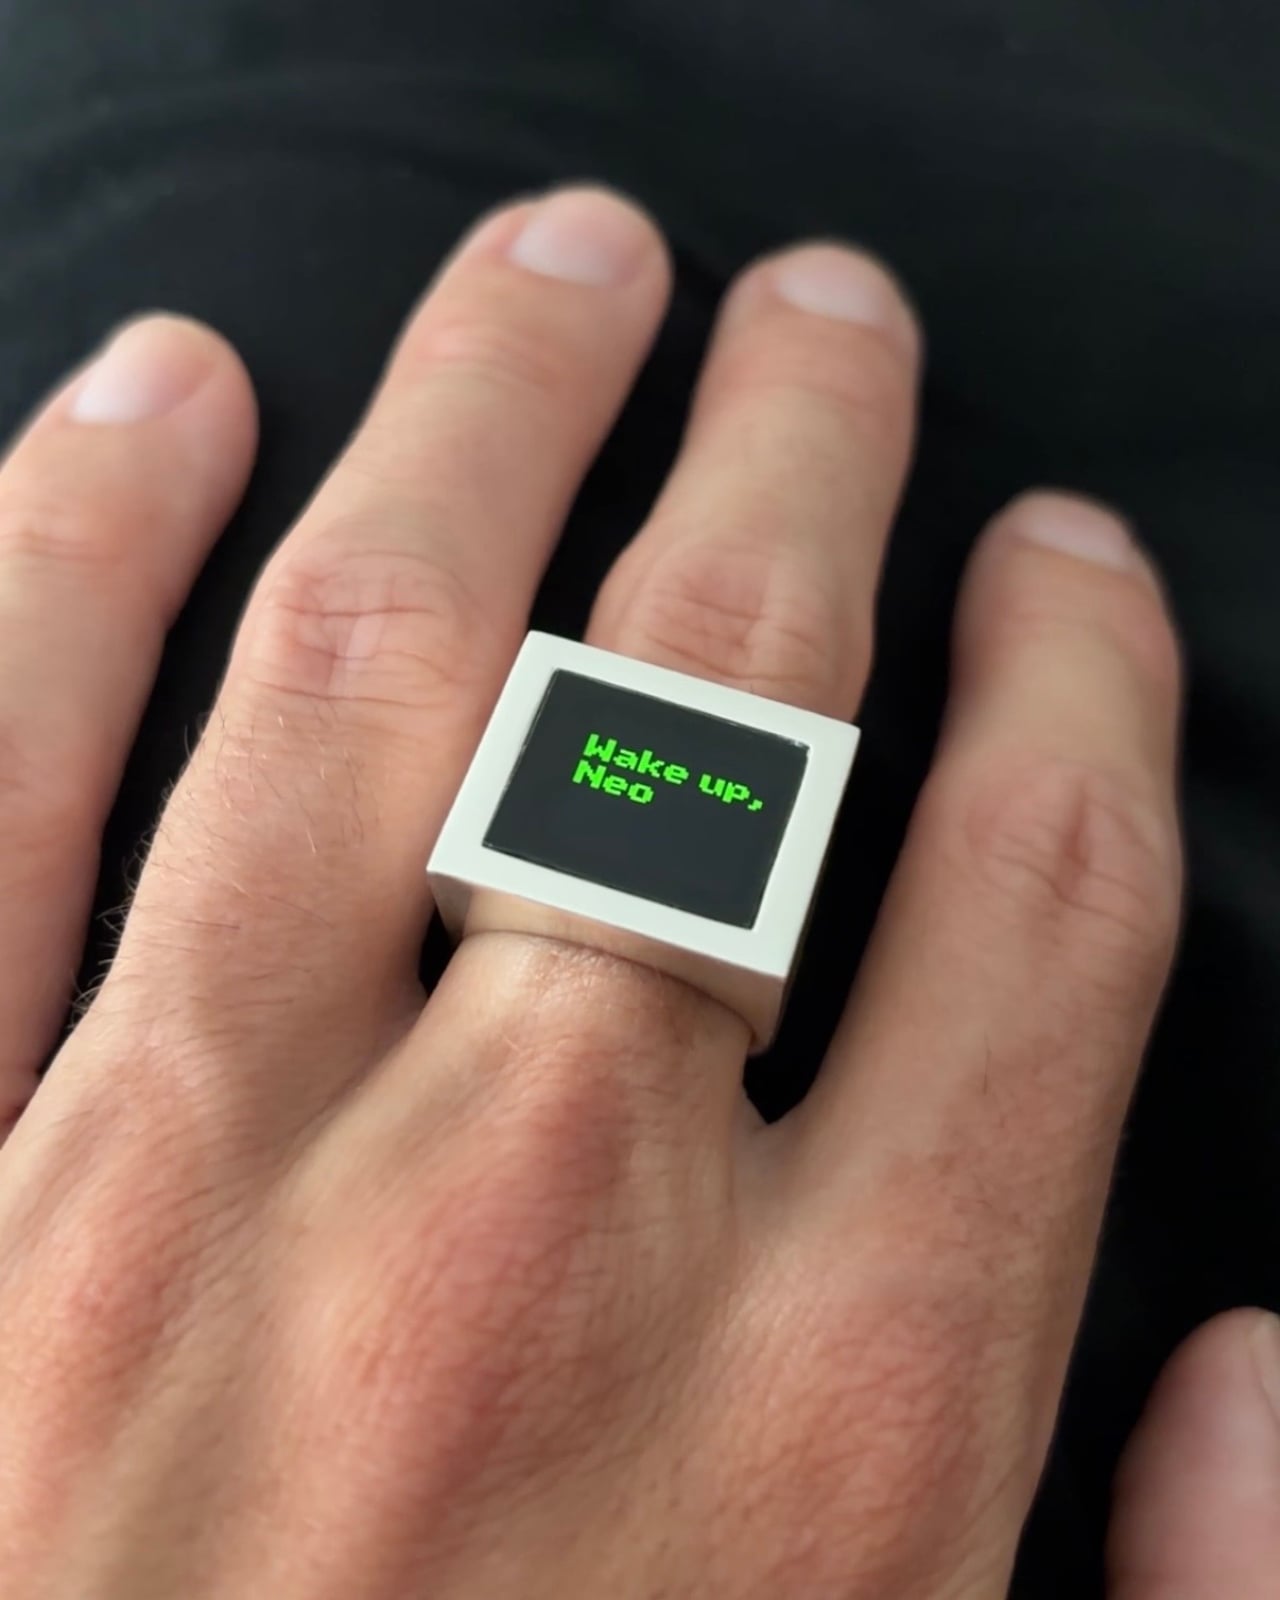
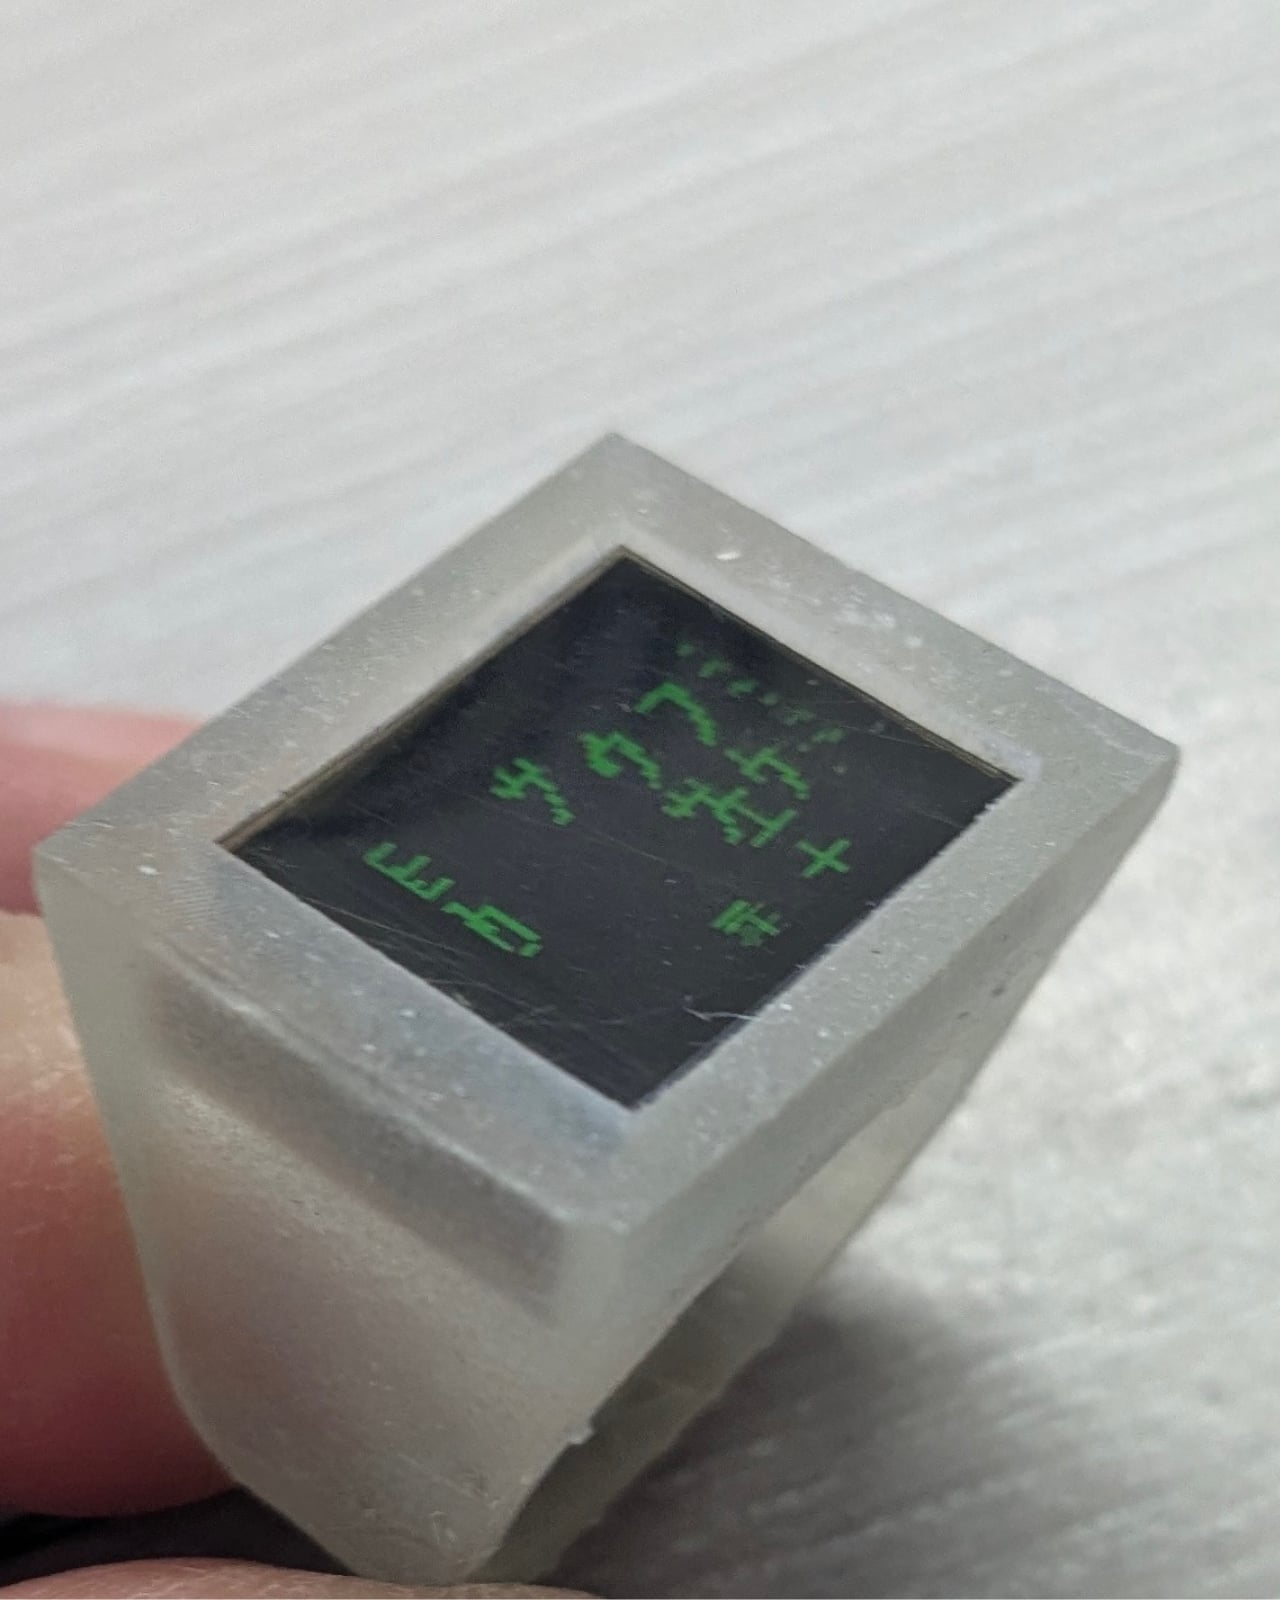
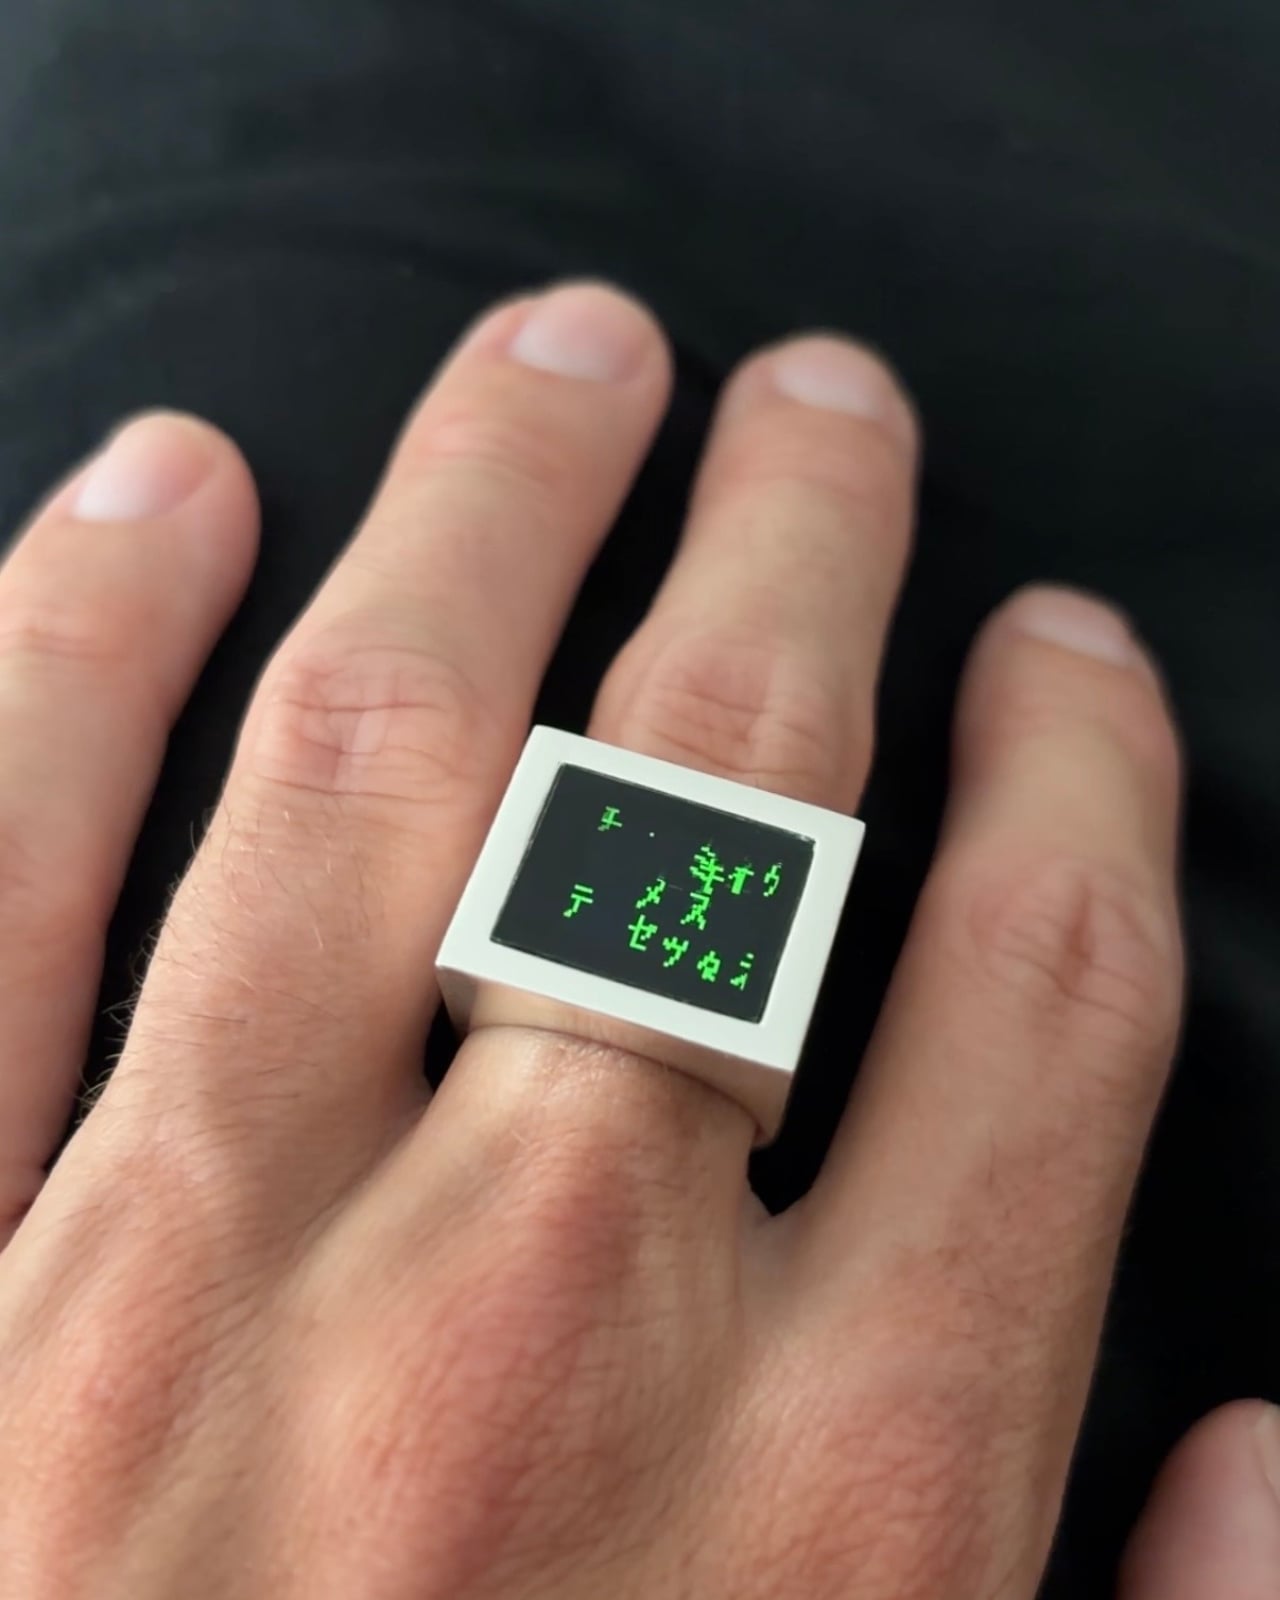
The prototype stage used a white resin body, which actually shows the concept quite clearly in a raw, honest way. You can see the display sitting flush with the face, the green animation already doing its work against the matte surface. But the shift to polished silver for the finished version was the right call. Silver gives the piece the visual language of jewelry rather than a prototype, and the contrast between the warm metal bezel and the deep black of the OLED screen is genuinely considered. It has the graphic confidence of a piece that was thought about as an object first and a technology project second.

The animation choice suits the form well too. The Matrix rain, those cascading columns of green katakana-inspired characters, fills a small square display naturally. It loops cleanly, it doesn’t demand to be read in detail, and its cultural weight does a lot of communicative work in a very compact space. “Wake up, Neo” appearing in green pixels on a silver ring is a complete sentence in the language of pop culture, and Idle clearly knows that.

What makes the Digital Rain Ring worth paying attention to is not the novelty of putting a screen on a ring. It’s the evidence that someone thought through the design consequences of doing so. The proportions hold up. The material choices are intentional. The off-state is as considered as the on-state. Most tech jewelry gets the technology right and the jewelry part wrong. This one seems to have gone in the other direction, starting with the object and working inward from there. That’s a harder problem to solve, and it’s the one that actually matters.

The post Wake Up, Neo. Your Ring Is Playing the Matrix. first appeared on Yanko Design.