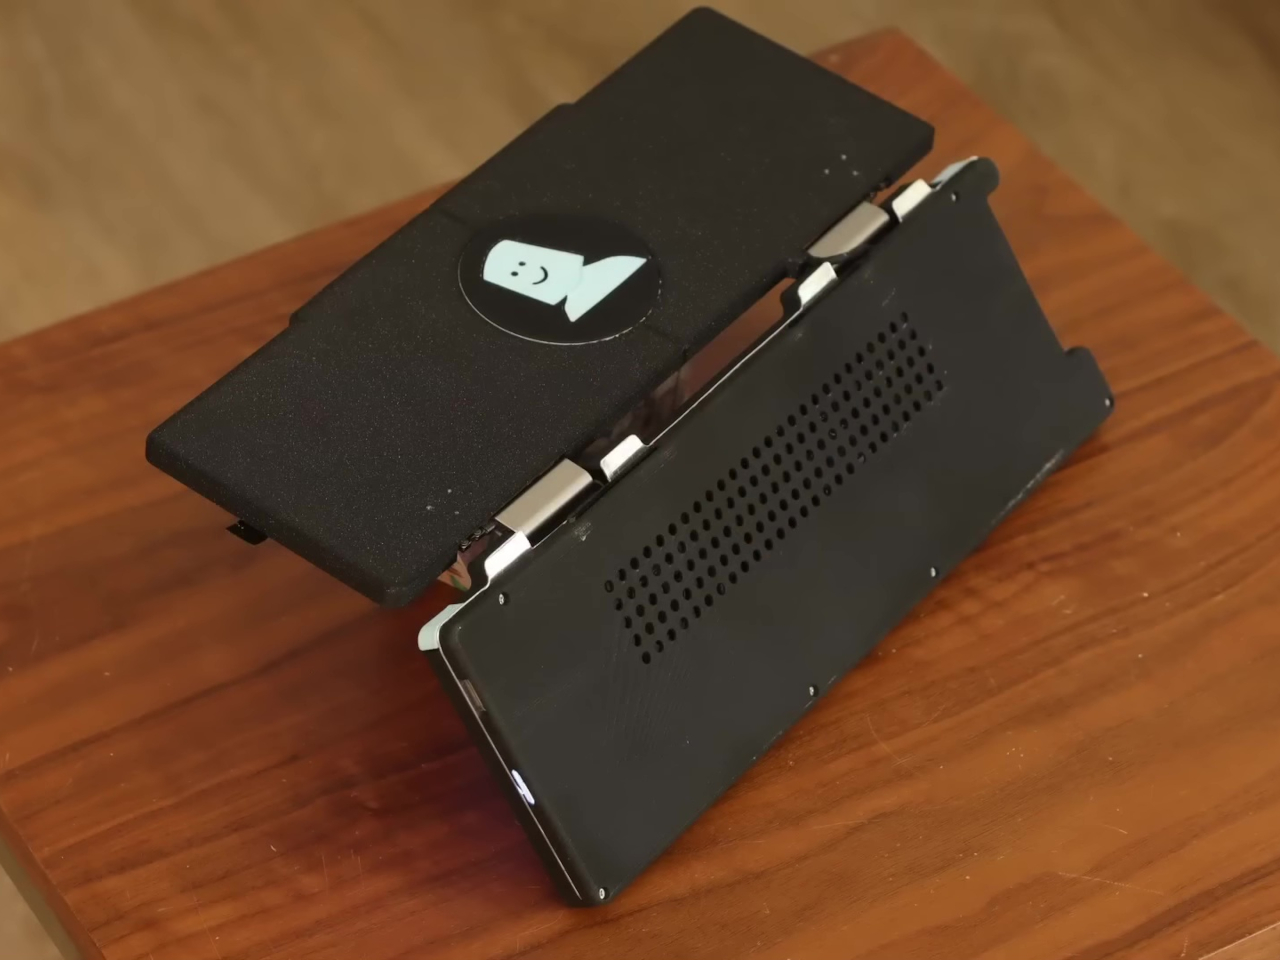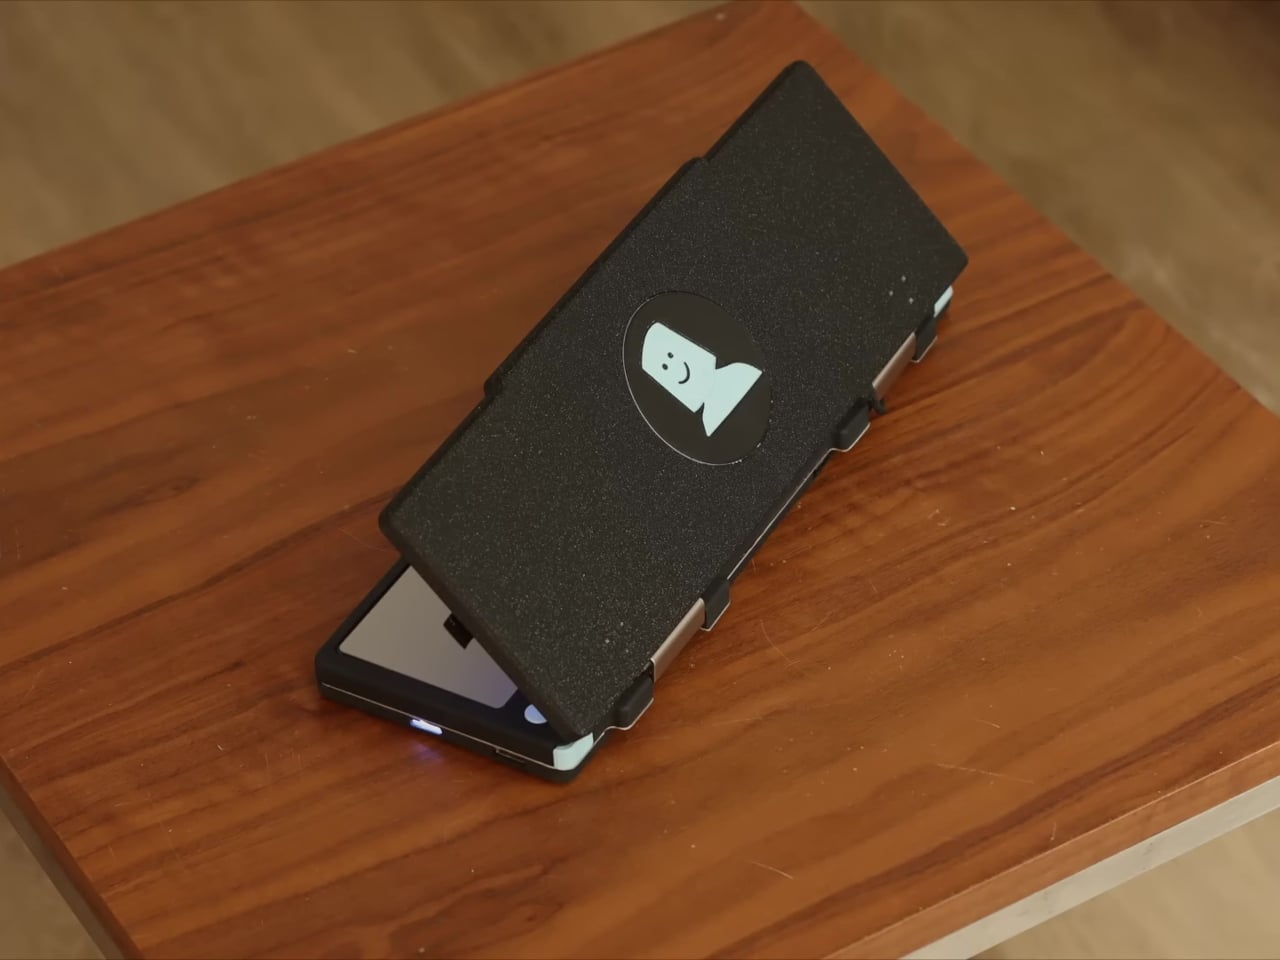
Nike Air Max 90 turned into fully playable SNES console is the ultimate retro-modern mashup

Sneaker culture and gaming go a long way back, good enough reason we’ve seen many interesting collaborations that signify the retro-modern charm of reliving the golden era. The excitement of playing arcade titles that defined the ’80s and ’90s keeps the creative juices of inventive DIYers flowing. While having the superficial elements of gaming on a pair of sneakers is common, having an actual gaming console running right off your sneaker is worth the attention.

Designer Gustavo Bonzanini has come up with a unique way to celebrate the Super Nintendo’s 35th anniversary since its release in Japan. The one-off sneaker running the 16-bit SNES games is a homage to the 90s fashion and gaming technology. He calls them the AIR SNES since they are based on the Nike Air Max 90, which are as nostalgic as the arcade games we are all obsessed with. He positions them as comfort-laden classic runners that bring the thrill of 16-bit adventure.

Designer: Gustavo Bonzanini
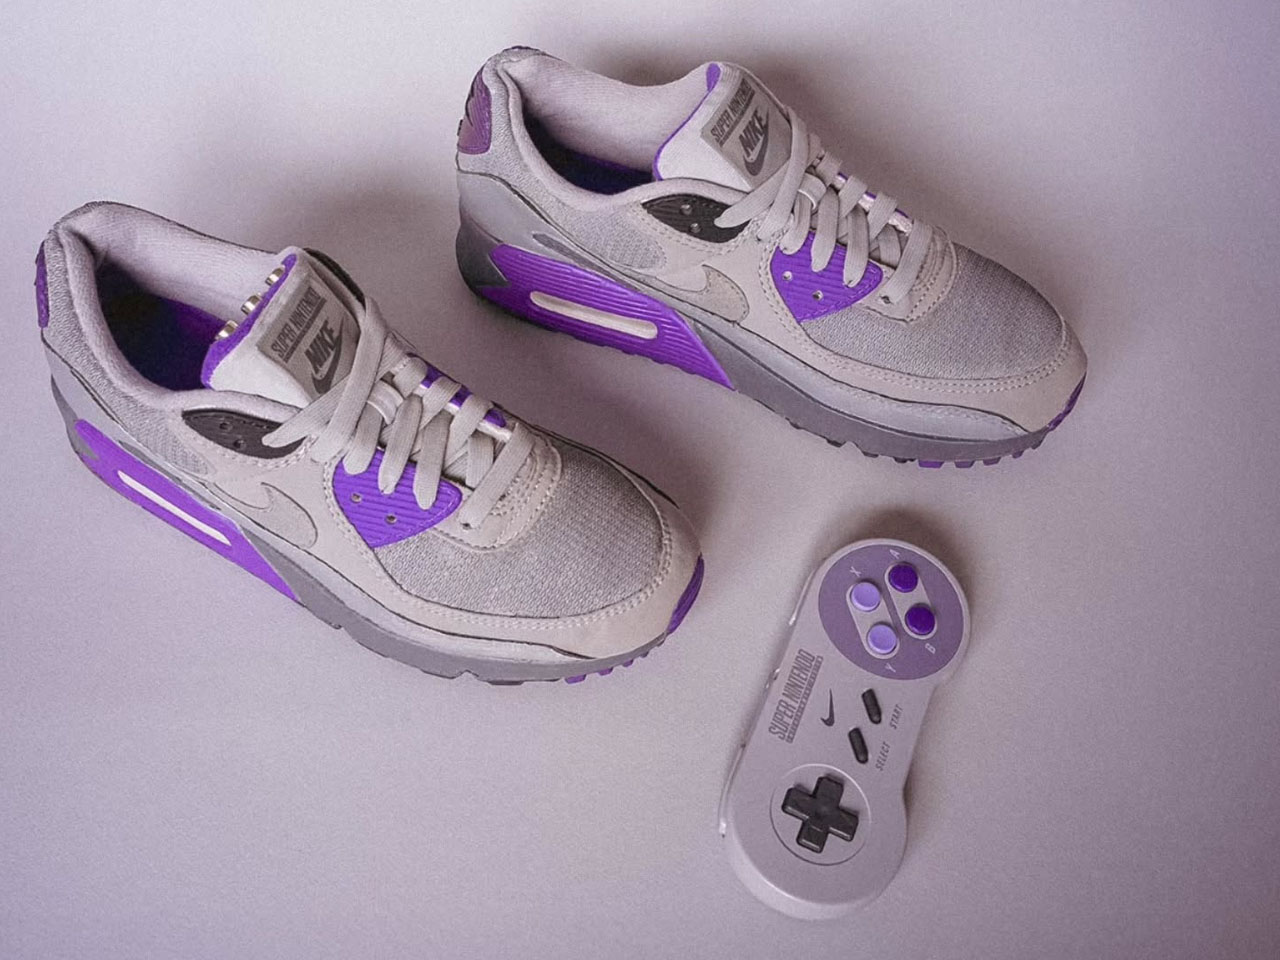
The Singapore-based designer has a knack for creating unique wearable art from everyday shoes. This time, he’s hit the note right with the retro arcade vibe of gaming consoles of yesteryear. The idea for the build came from his Street Fighter II gaming streak, as he noticed Ryu launching fireballs from the device linked to the foot. Gustavo asked himself a question: why can’t a pair like the Nike Air Max 90 that looks like a video game double as a gaming console? Hence came the idea of designing sneaker shoes with built-in gaming capabilities. The best thing is that they are completely wearable, and you can play games right off them. The majority of the shoe remains the same, like the air cushioning system, but the magic happens right up at the tongue. The section is loaded with a Raspberry Pi Zero W tiny computer that’s no bigger than a business card.

It is paired with a small battery placed in the footbed, which provides 30 minutes of playtime. You can just plug it into an old school TV and play, since it has RCA output ports (instead of an HDMI output) to retain the classic feel. According to him, this was done, “to make the design feel like it could exist in 1990.” Of course, you need a controller to enjoy the games, so he had to tinker around with the regular SNES controller to get going. He modified the peripheral with a new internal for improved reliability and Bluetooth connectivity via the 8BitDo Mod Kit. That had to be done as the shoe’s contraption could not fit the input for the controller and would have added to the overall weight.

The AIR SNES can be used to play titles like Super Mario World or The Legend of Zelda: A Link to the Past via the microSD card slot, which is slotted inside the tongue. Gustavo has even gone the length to test the sneakers on the road and thereafter play games on them to make the build as authentic as possible. The final element comes in the form of a gray and purple palette of the sneakers, complemented by the light purple stitching along the seam to replicate the controller’s button layout. Unfortunately, these sneakers are not available to buy, and you’ll have to follow Gustavo’s build to create one for yourself.

The post Nike Air Max 90 turned into fully playable SNES console is the ultimate retro-modern mashup first appeared on Yanko Design.
Dad Built a 4-Step Sequencer Synth Simple Enough for Age 3

A father built a portable synthesizer for his daughter’s third birthday, and the result looks almost too polished to be a first electronics project. It’s a four-step sequencer with sliders instead of keys, designed so a toddler can make looping melodies just by moving colorful controls. The synth is as much a design and learning story as it is a music gadget, documenting what happens when someone jumps into hardware with no experience and a clear deadline.

The idea started with a Montessori activity board full of switches and LEDs. Watching his daughter twist knobs and flip switches reminded Alastair Roberts of a synth control panel, and he wondered if he could build a musical version. He had no prior hardware experience, which turned the project into an excuse to learn microcontrollers, CAD, PCB design, and 3D printing along the way, all while trying to finish before her birthday.

Designer: Alastair Roberts

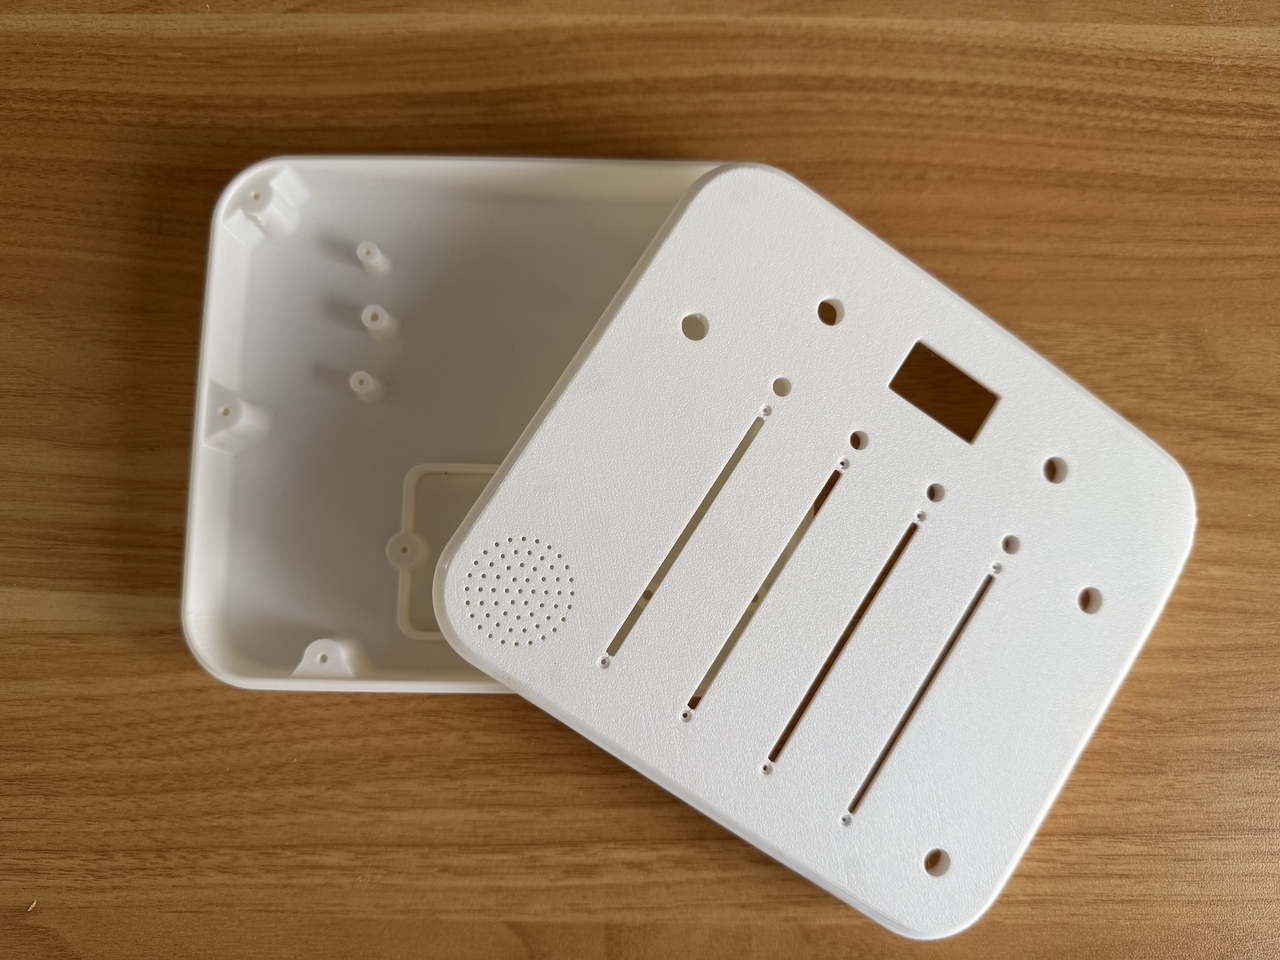
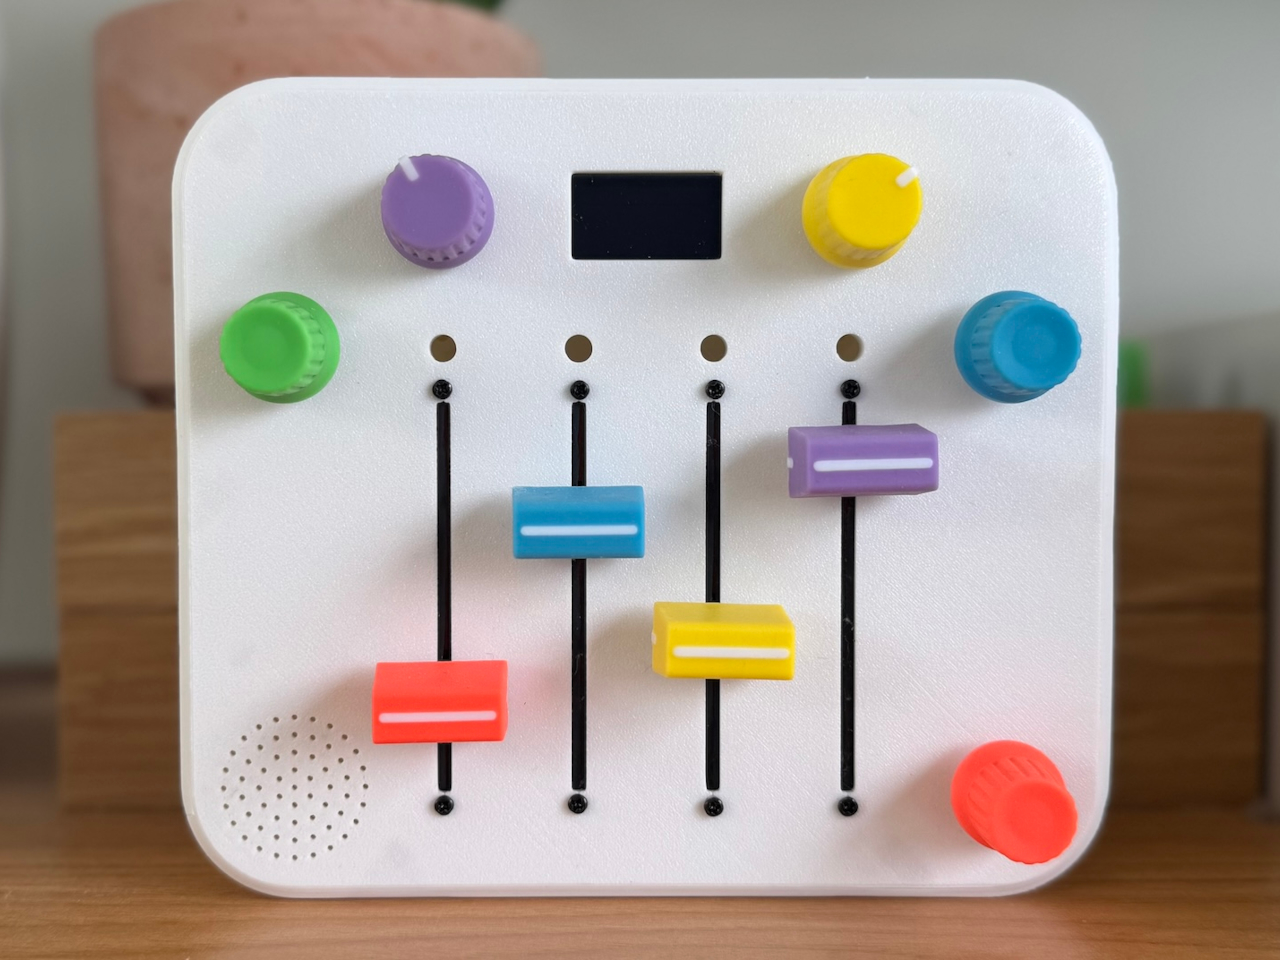
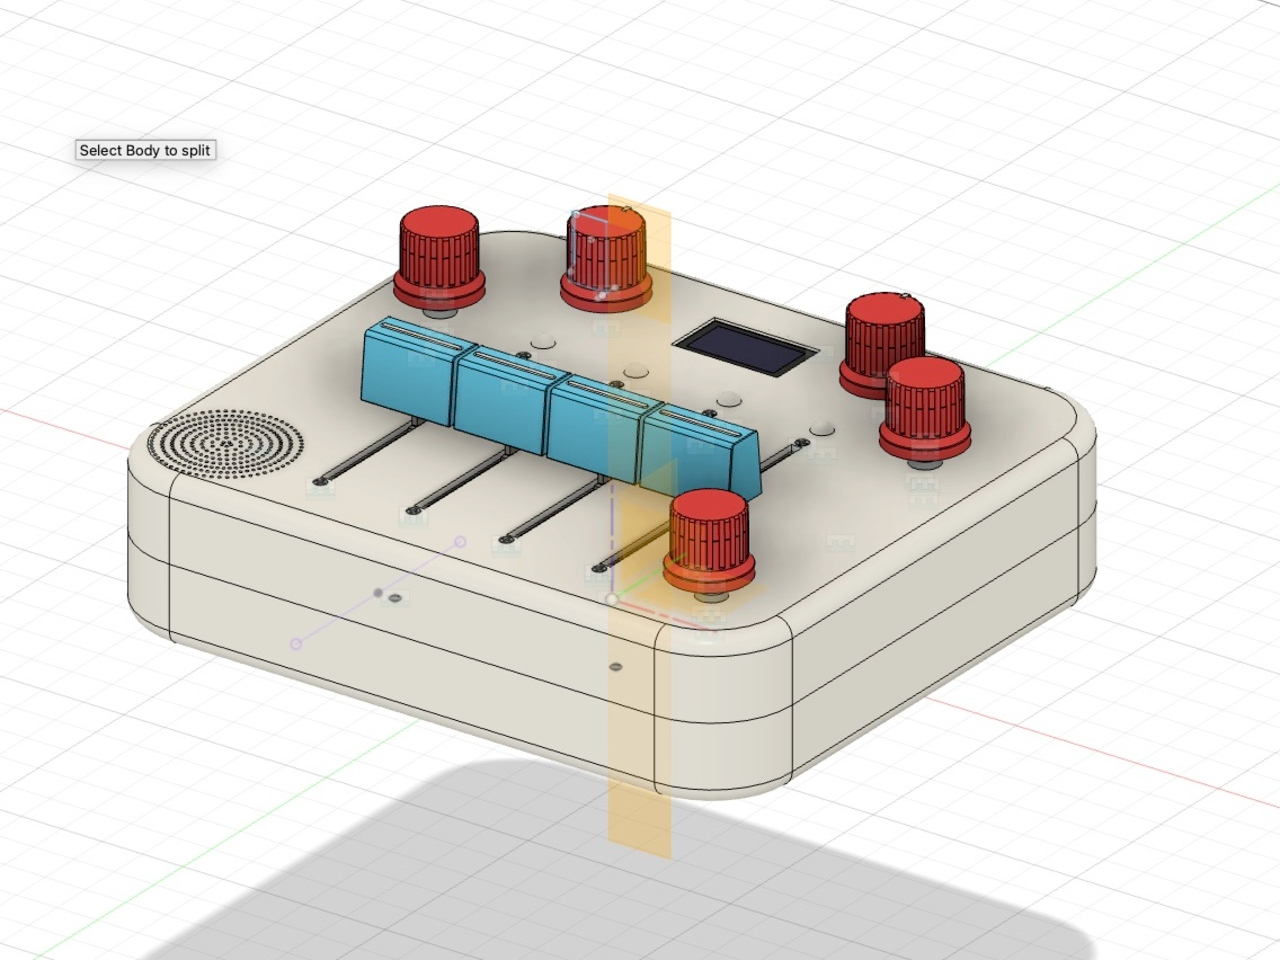
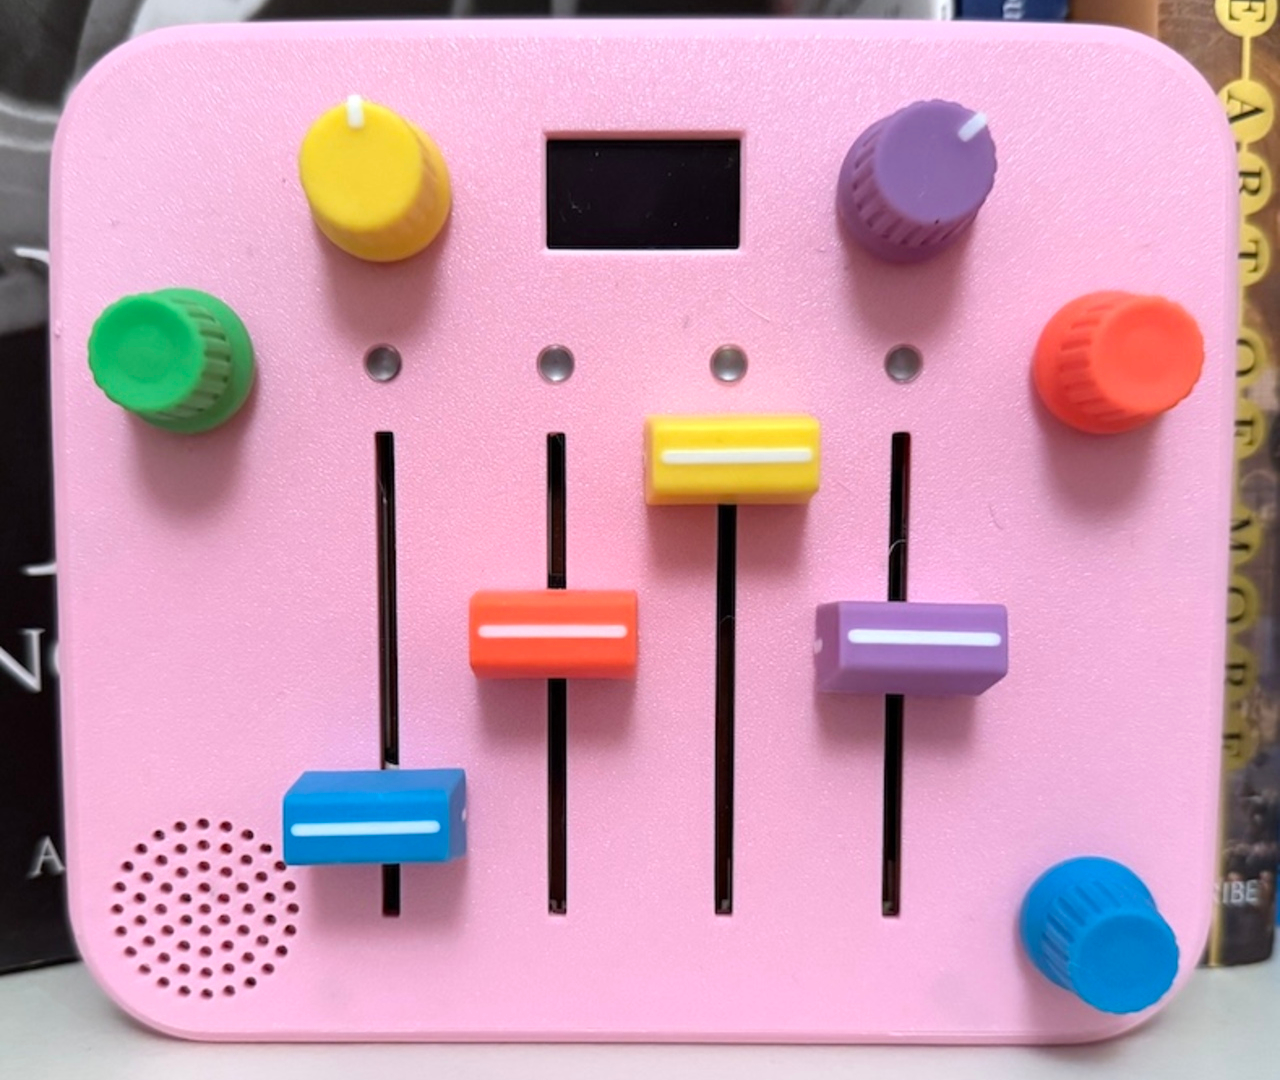
The finished synth is a rounded square box in pink or white, with four vertical sliders in bright colors and four matching knobs at the corners. Slide up for higher notes, down for lower, while a tiny OLED screen shows a dancing panda. There are no menus or hidden modes, just a looping sequence that keeps playing while little hands experiment with pitch and tempo, creating simple melodies that shift and evolve with every adjustment.

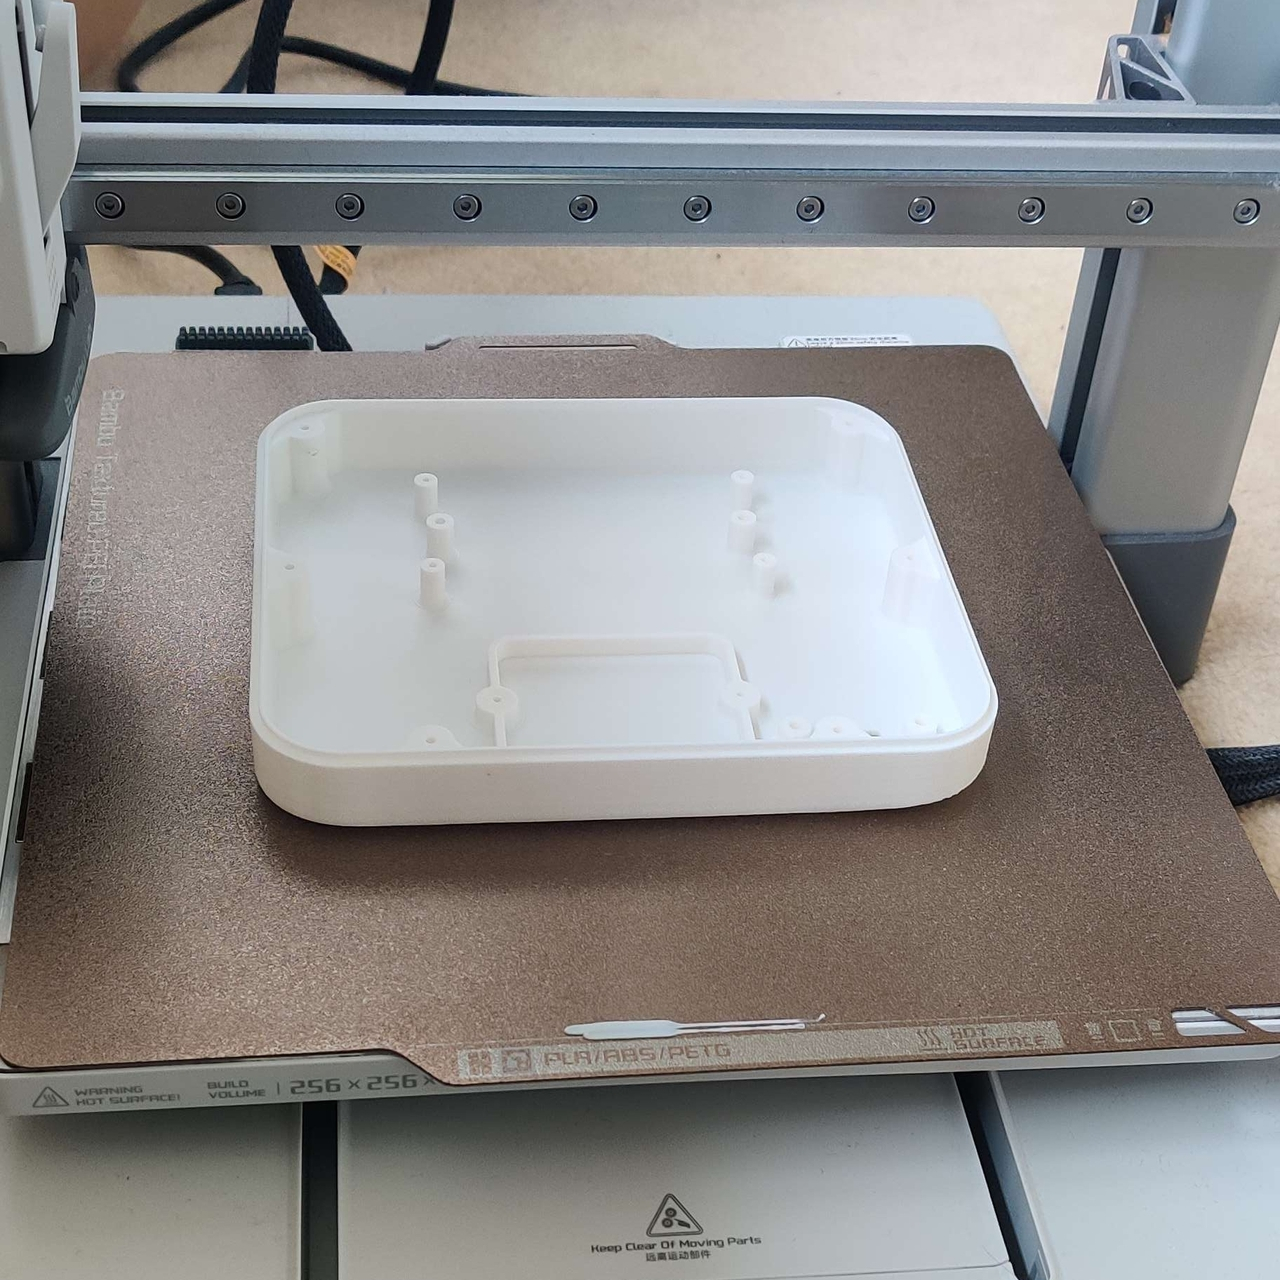
Roberts started on a breadboard, then realized he needed a proper enclosure that his daughter could actually hold. Off-the-shelf cases were the wrong size and the wrong colors, so he opened Fusion 360 for the first time and slowly modeled a custom shell. A friend’s 3D printer turned those sketches into a real, toy-like enclosure that feels closer to a commercial product than a hack, complete with rounded corners and smooth edges.

The first hand-wired version worked but was fragile, with a nest of wires that broke when he closed the case. That pushed him to design his first printed circuit board, using Fusion’s electronics tools to lay out sliders, knobs, and connectors in a neat, single layer. The PCB not only made assembly faster, but it also gave the interior the same sense of order and intention as the exterior, no hidden messes or shortcuts.

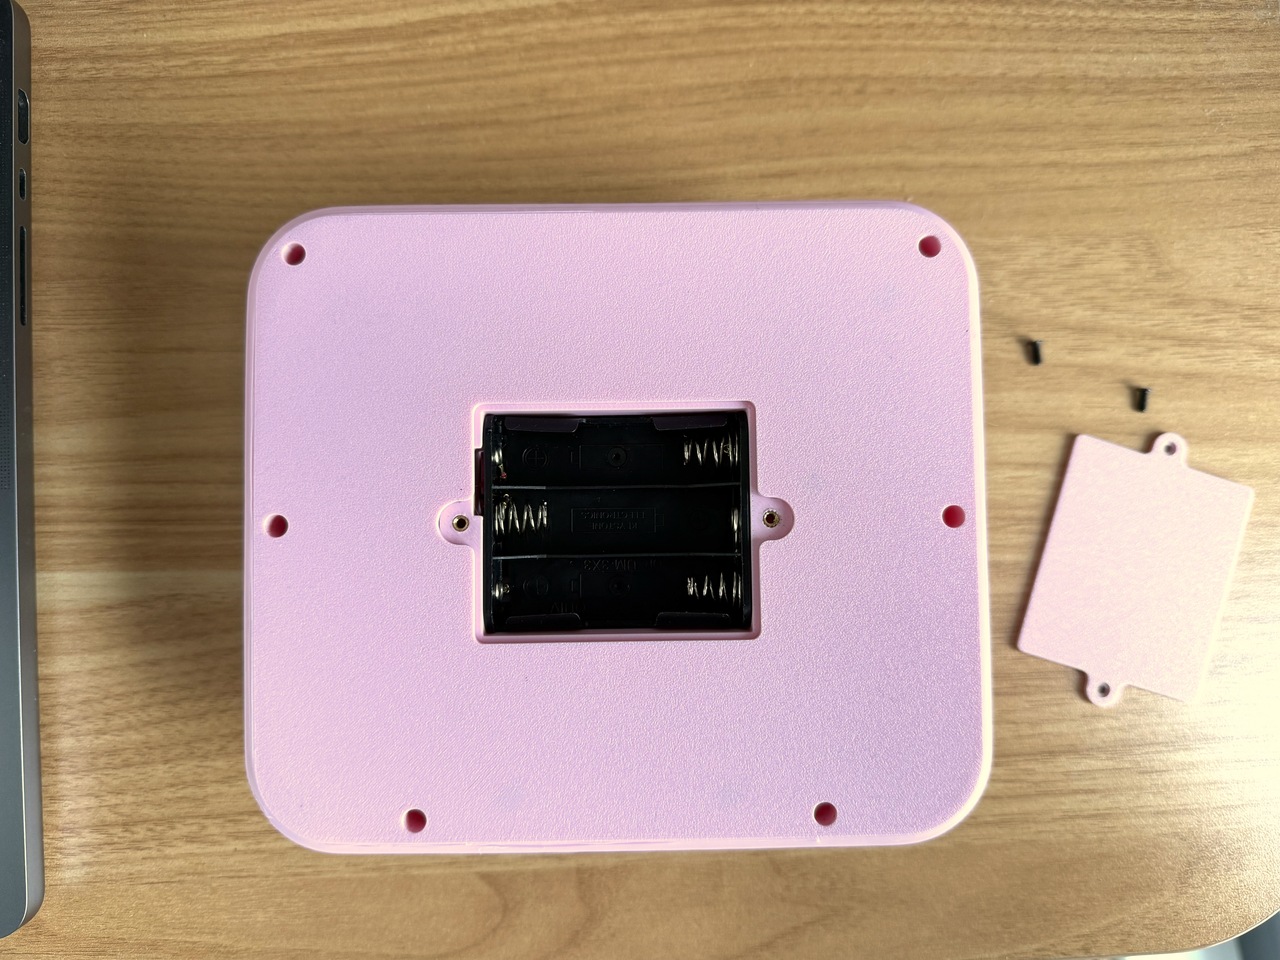
Small design touches make it feel finished. A dedicated battery compartment with a removable cover, mounting posts that let the board screw down securely, and a raised bezel around the OLED so it sits flush with the top surface. The front panel carries his daughter’s name, Alma, turning the synth into something personal. It now lives on a shelf with her other toys and, according to him, gets regular use.

The synth works at two levels. For kids, it’s a fun, tactile way to poke at sound without needing lessons or screens. For adults, it’s a reminder that you can go from zero hardware experience to a polished, gift-worthy object by following curiosity and learning each tool as you need it. Whether or not it ever becomes a product, it’s already a successful piece of design for the one user who mattered most.

The post Dad Built a 4-Step Sequencer Synth Simple Enough for Age 3 first appeared on Yanko Design.

YouTuber custom-builds coffee table with functional star system around an exploding sun

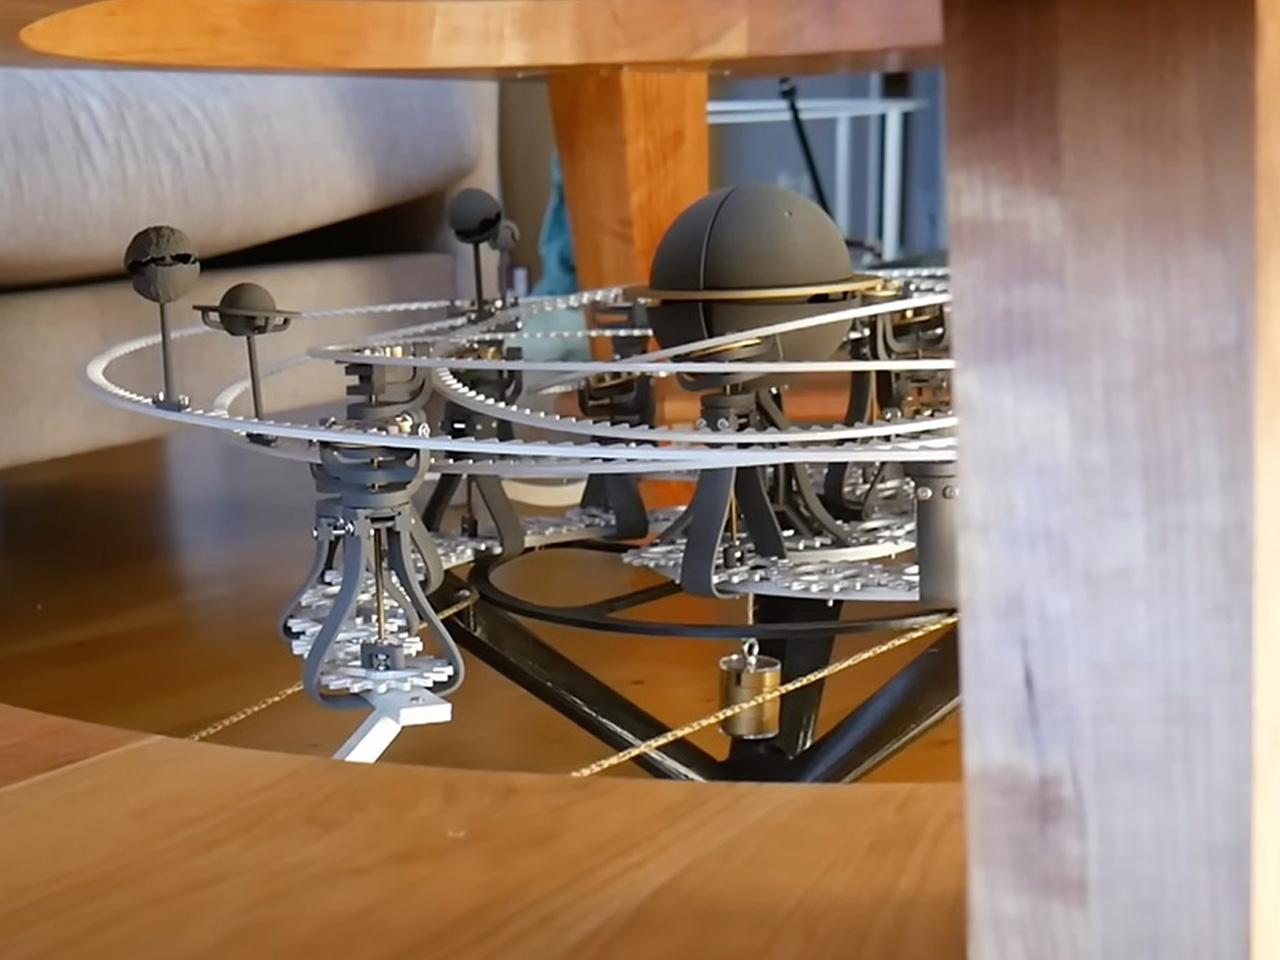
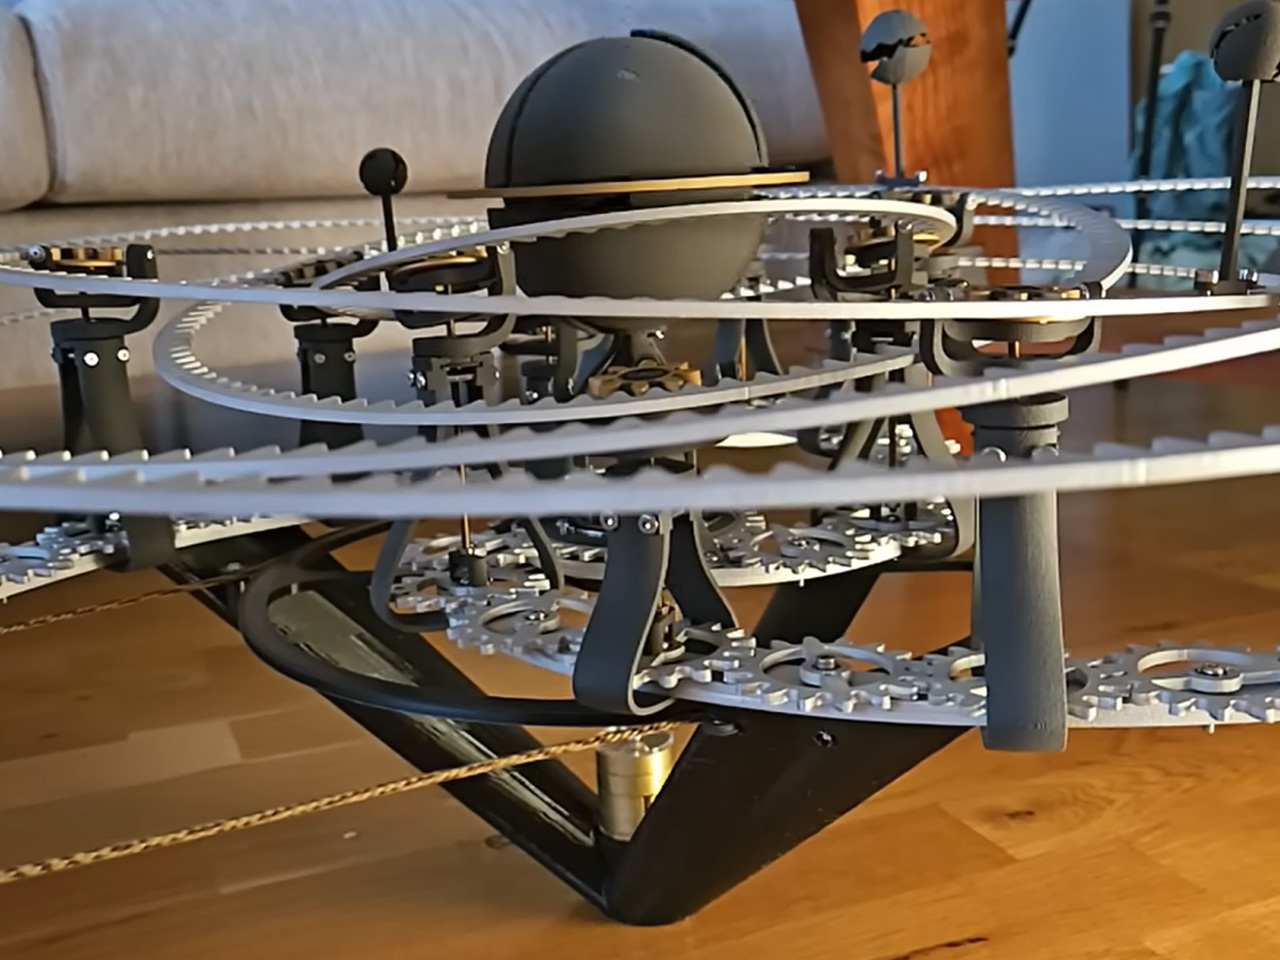
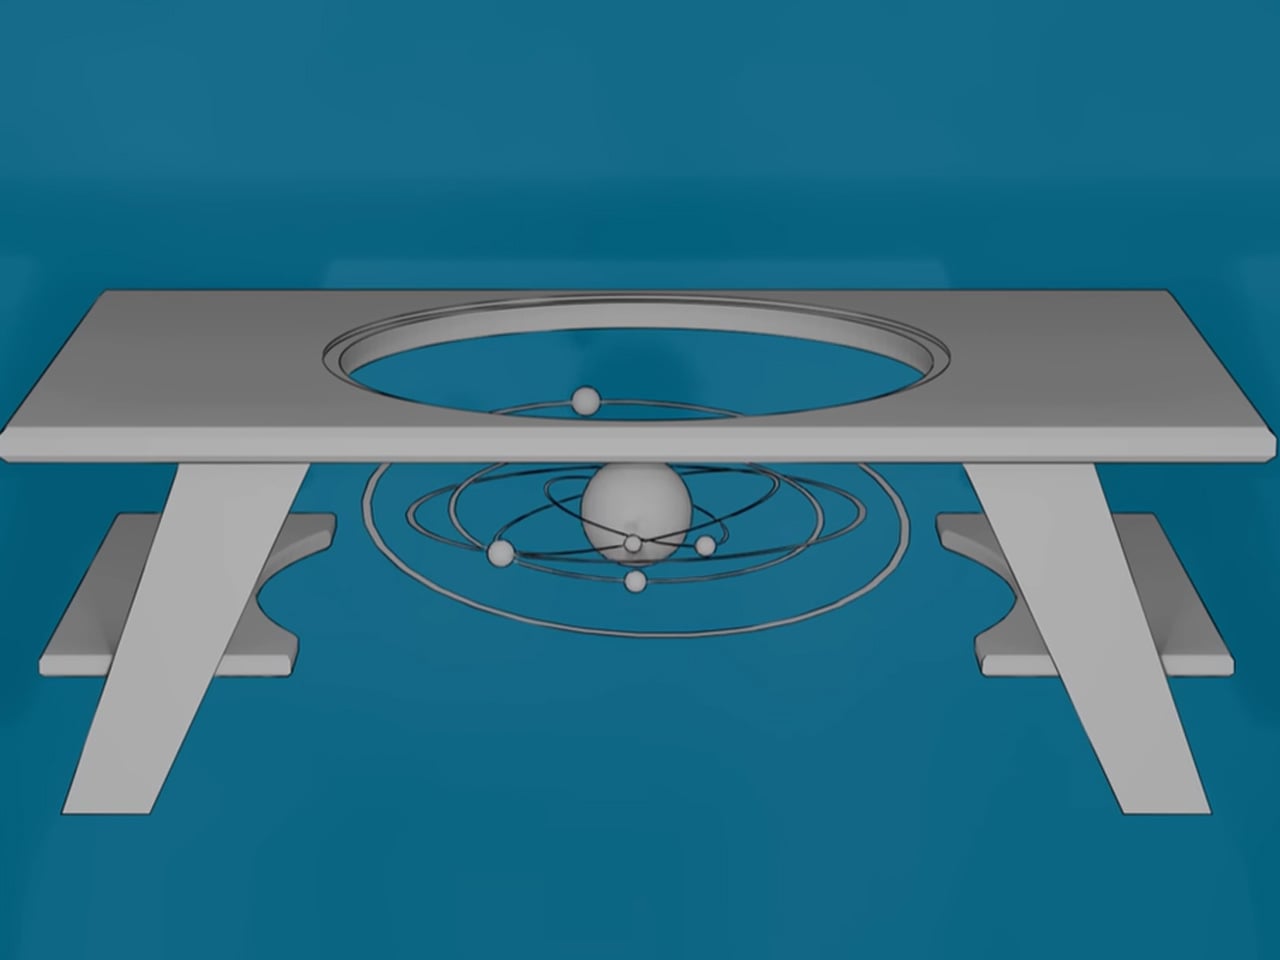
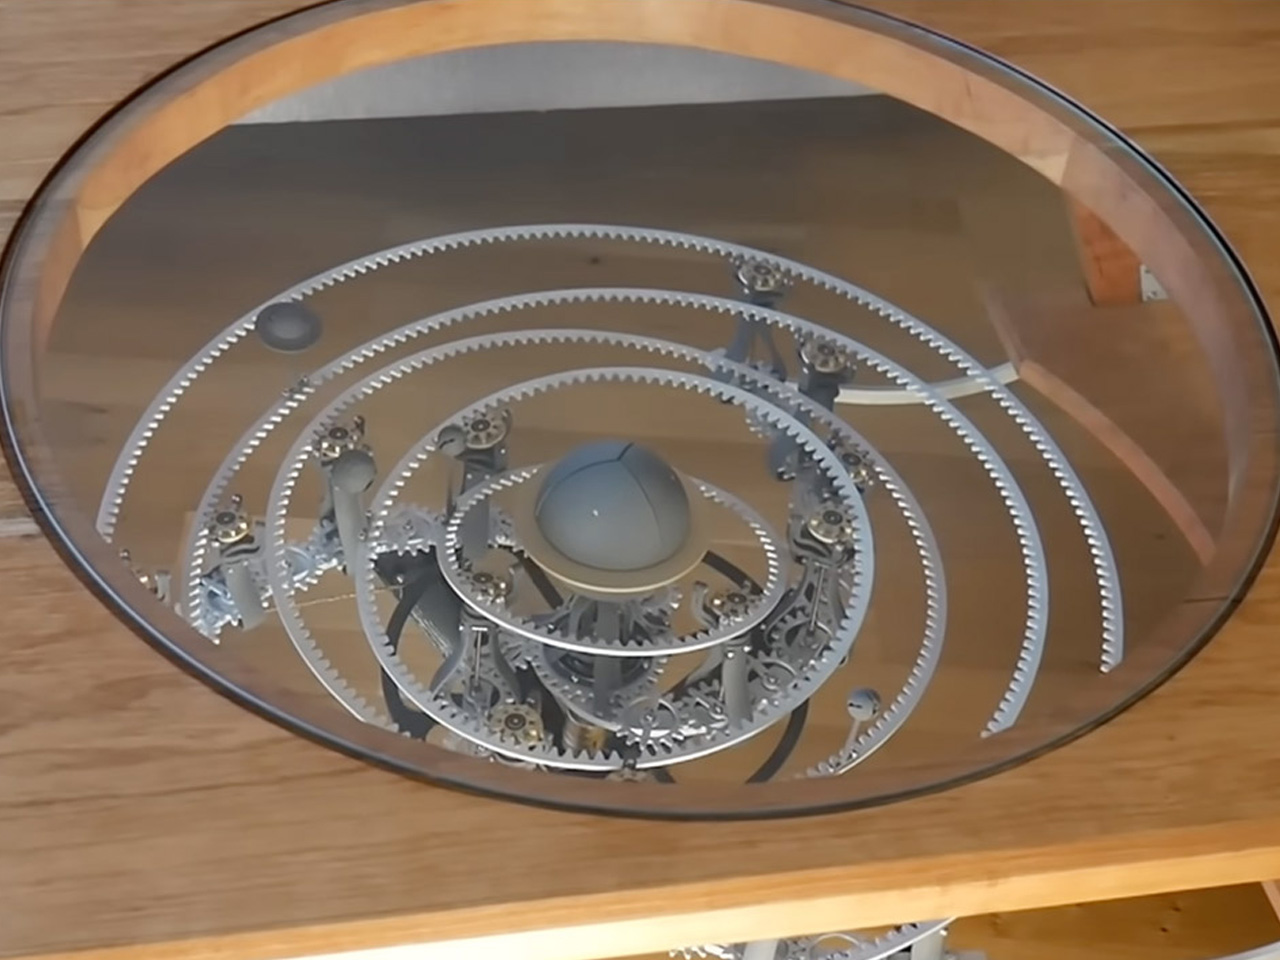
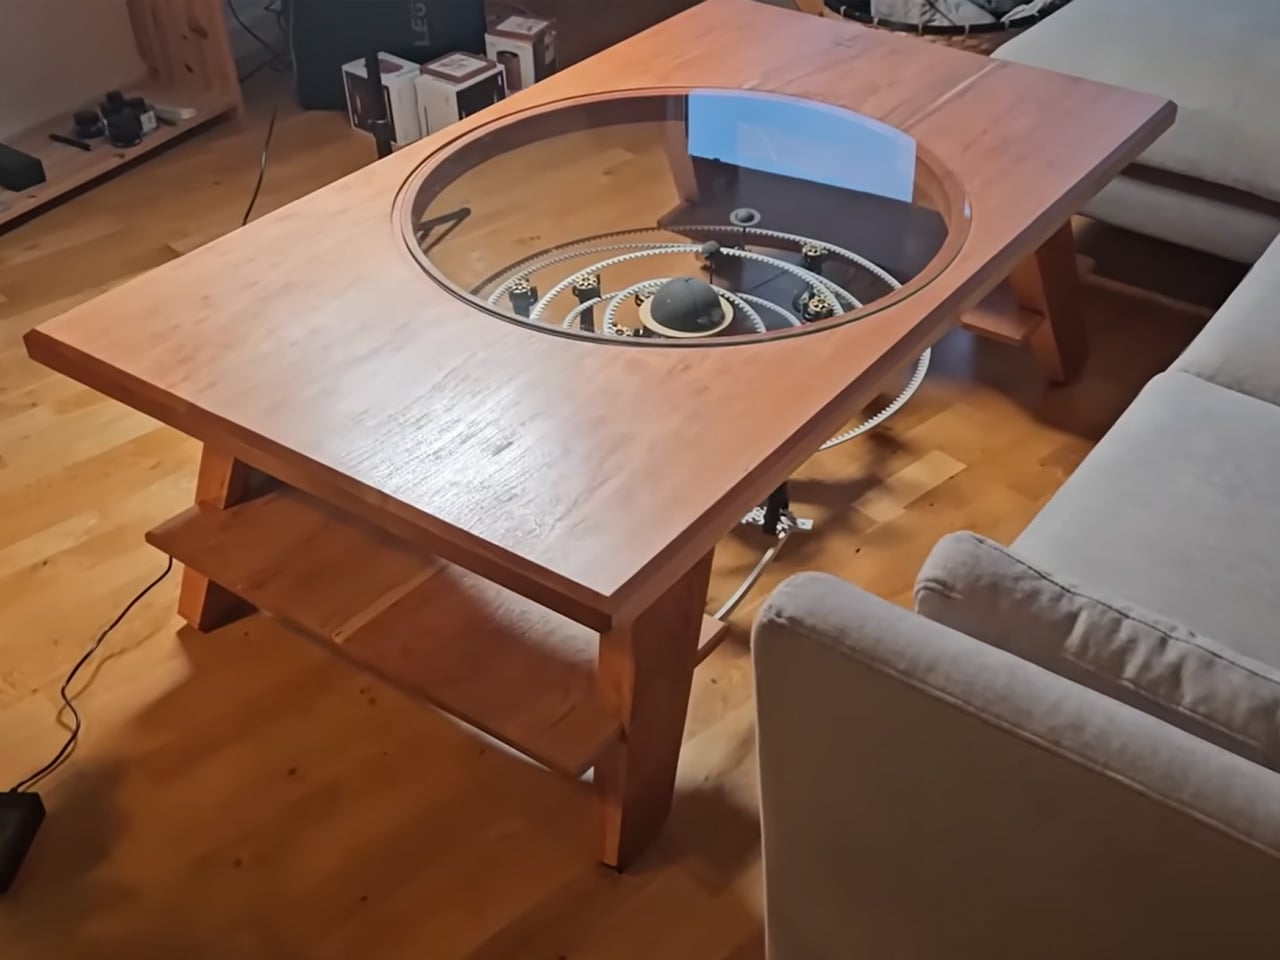
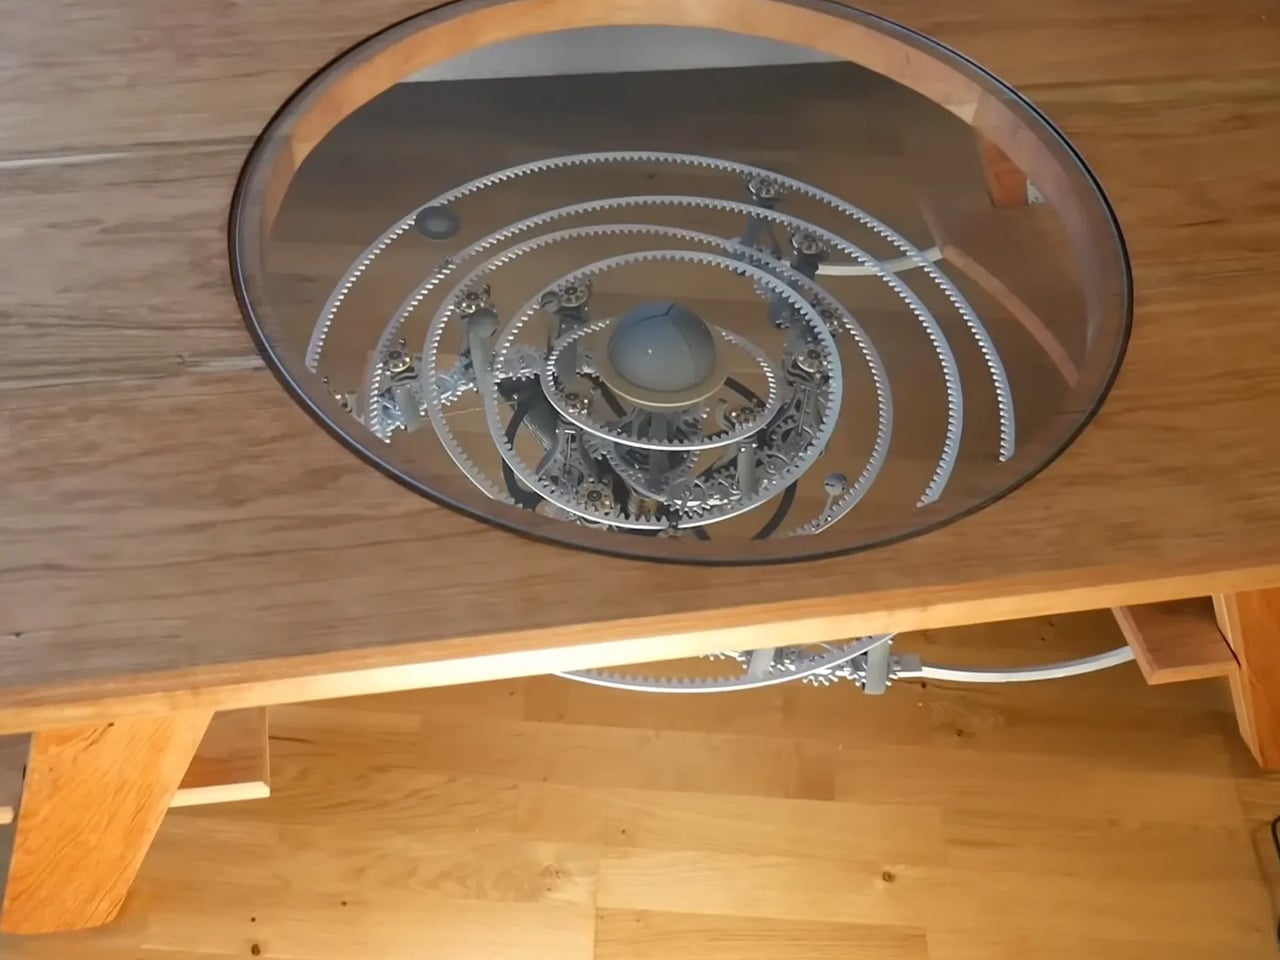
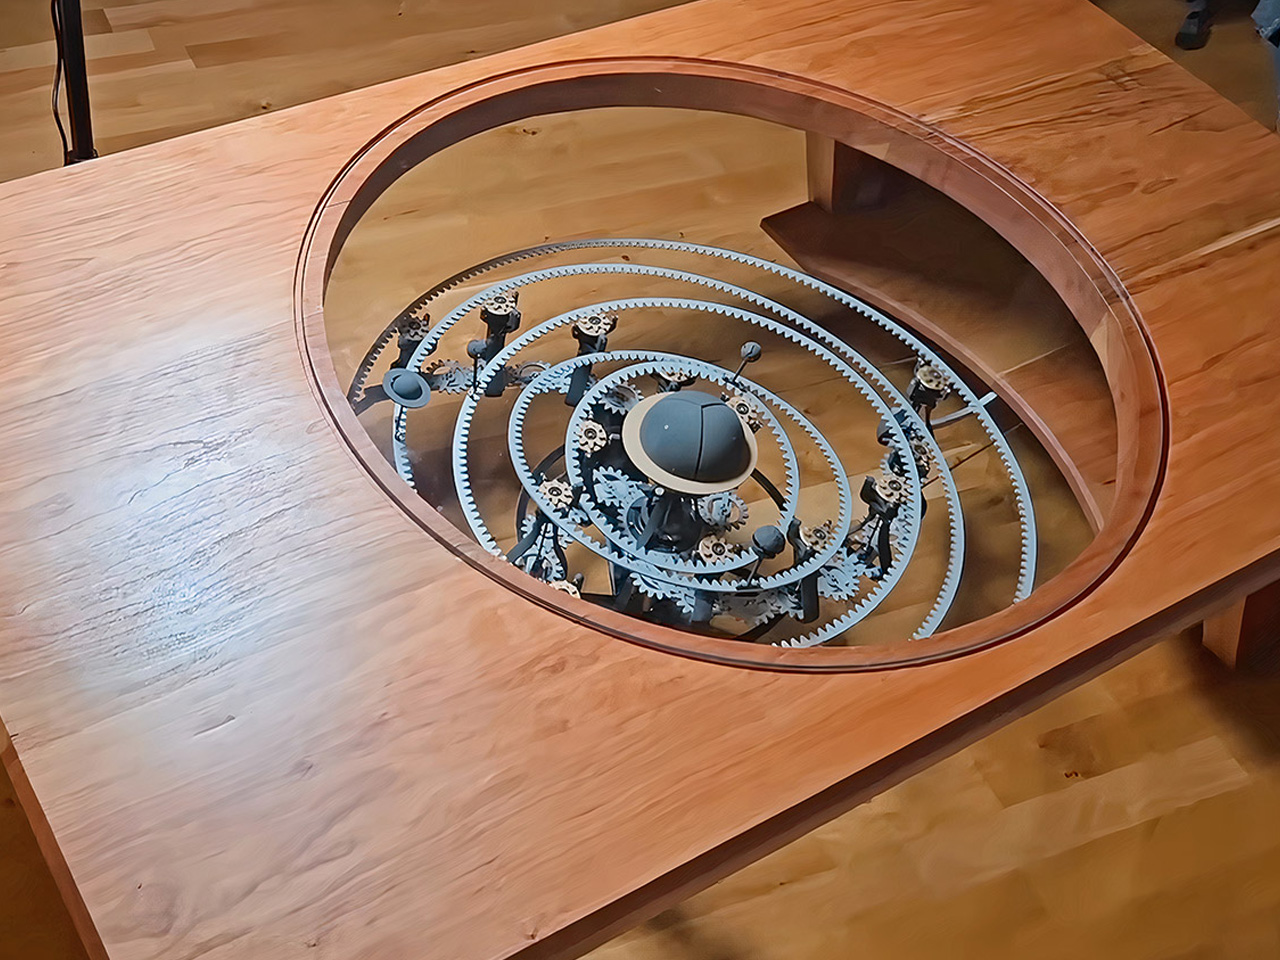
Have you ever dreamed of sitting around the solar system? Modder at The 5439 Workshop on YouTube may have just made it possible with this new kind of solar system inside a coffee table. This is a cherry wood and aluminum coffee table with a precision cutout in the middle where a “mechanical orrery with both tilting orbits and an exploding star” finds refuge under a glass cover.

The modder refrains from calling this contraption a “particularly practical one,” but I stand to disagree. At the first given chance, I would put this guy in my living room without a thought and flaunt the celestial magnificence it beholds to just about anyone walking inside the main entrance.

Designer: The 5439 Workshop

If you don’t know much about 5439, the Swedish modder doesn’t have a massive following, that’s why. With only three published videos and a modest 5.6K followers, he is just starting out with robotics, and this coffee table is perhaps the “most mechanically complicated” – in his own words – thing he has designed and built. Before we get to the details of the star system, let’s get the other details of the table out of the way.

The table, as mentioned, is meticulously crafted from cherry wood. The wood is essentially chosen for its warm texture and its ability to reflect light at the right place. The two-layered table is nicely engineered by squaring the cherry wood planks – two of them, which are combined with three white boards to make up the tabletop. Once the top is created, a giant cutout is made in the middle, which, along with the glass top, creates a viewing window to the mechanical star system hidden below. The table sits on four robust pillars (legs) attached to a base frame.

After sanding and smoothing all the blemishes (after the glueing) in the top and the rough parts of the center cutout, the modder gets to creating the covering of the center hole with the sheet of glass and then gets to the bottom of the t where the celestial goodness is built. Visible through the glass viewport, this mechanical model of the planets dancing around the sun is not short of a feat.

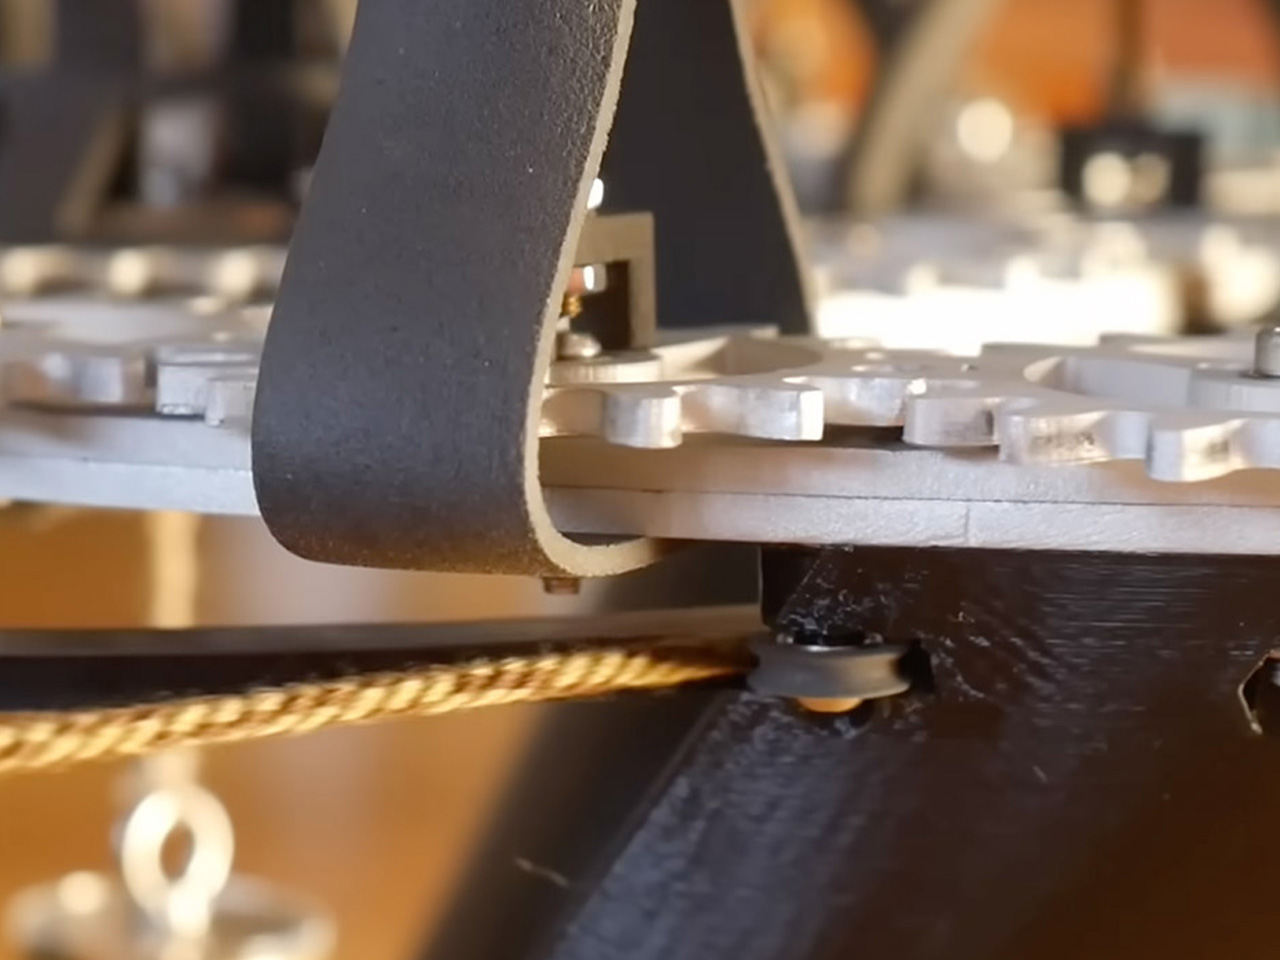
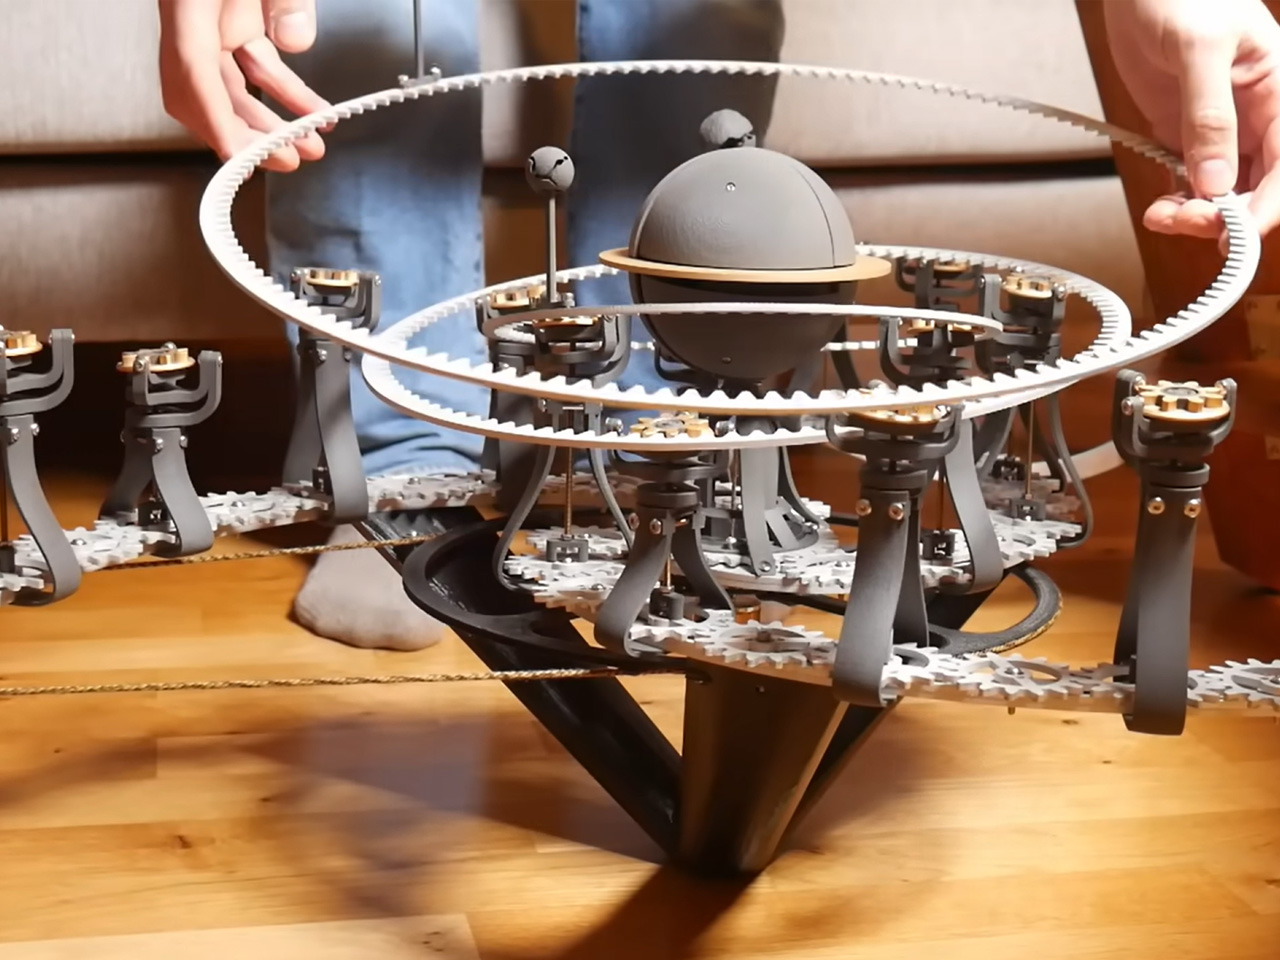
The entire contraption of gears, bearings and motors finds an exploding sun at its center with the planets (in their usual) revolving around, happily on their own axis that of course, are elliptical and tilting to mimic the universe. The sun is notably a fist-sized sphere, built layer-by-layer using a selective laser sintering (SLS) printer with nylon powder, which splits open like the flower petals when it explodes.

Made of anodized aluminum parts, the star system features rings tilting at unexpected angles, making the planets move up and down on a single plane with the power of a nearly silent motor tucked into the table frame. The YouTube community seems to like what they see in the video demonstration (embedded above). The comment section is filled with positive feedback, including ideas where one commenter “suggests walling off the sides,” while the other recommends adding a “black run” underneath “to really make the mechanism pop.” What do you think?


The post YouTuber custom-builds coffee table with functional star system around an exploding sun first appeared on Yanko Design.

DIY 3D-Printed Clamshell Turns BOOX Palma Into a Tiny Laptop

Palmtops and UMPCs are experiencing a quiet resurgence among people who want something more focused than a laptop and more tactile than a phone. Compact e-ink devices and tiny Bluetooth keyboards have become affordable building blocks for exactly this kind of project, letting makers combine them into pocketable machines tailored to writing, reading, or just tinkering. The result is a small but growing wave of DIY cyberdecks and writerdecks that feel like modern reinterpretations of classic Psion palmtops.

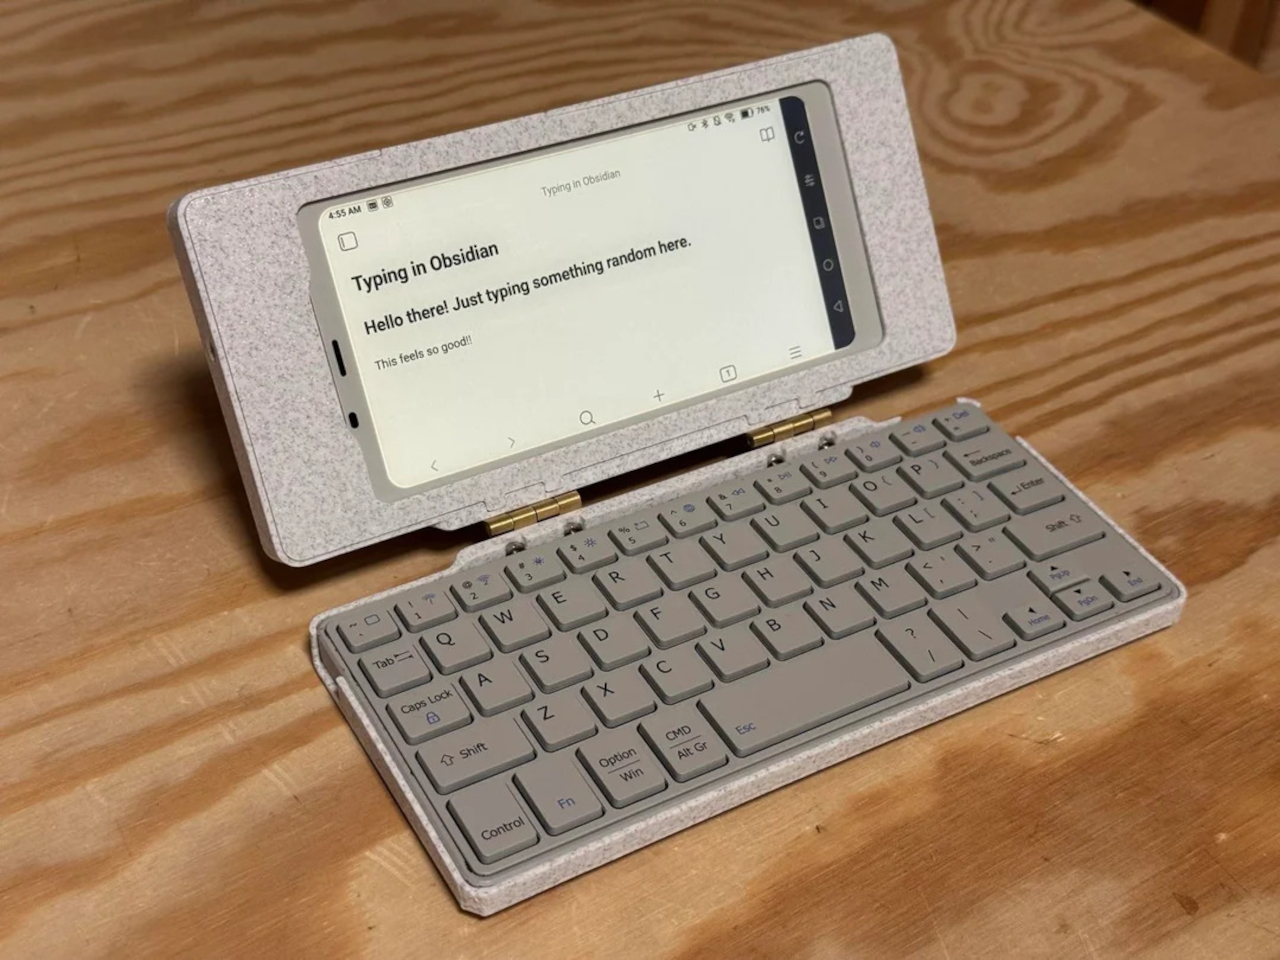
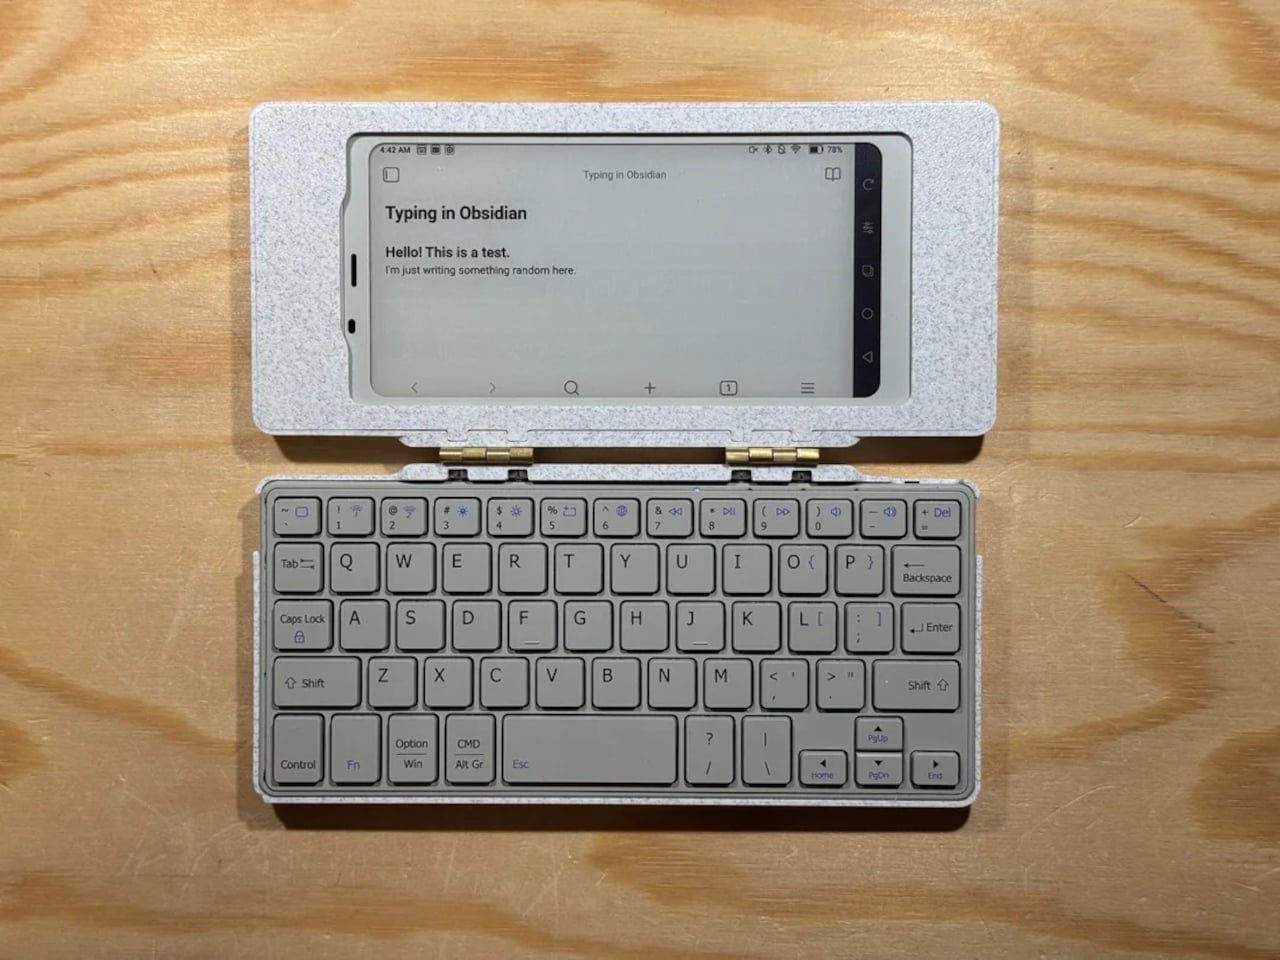
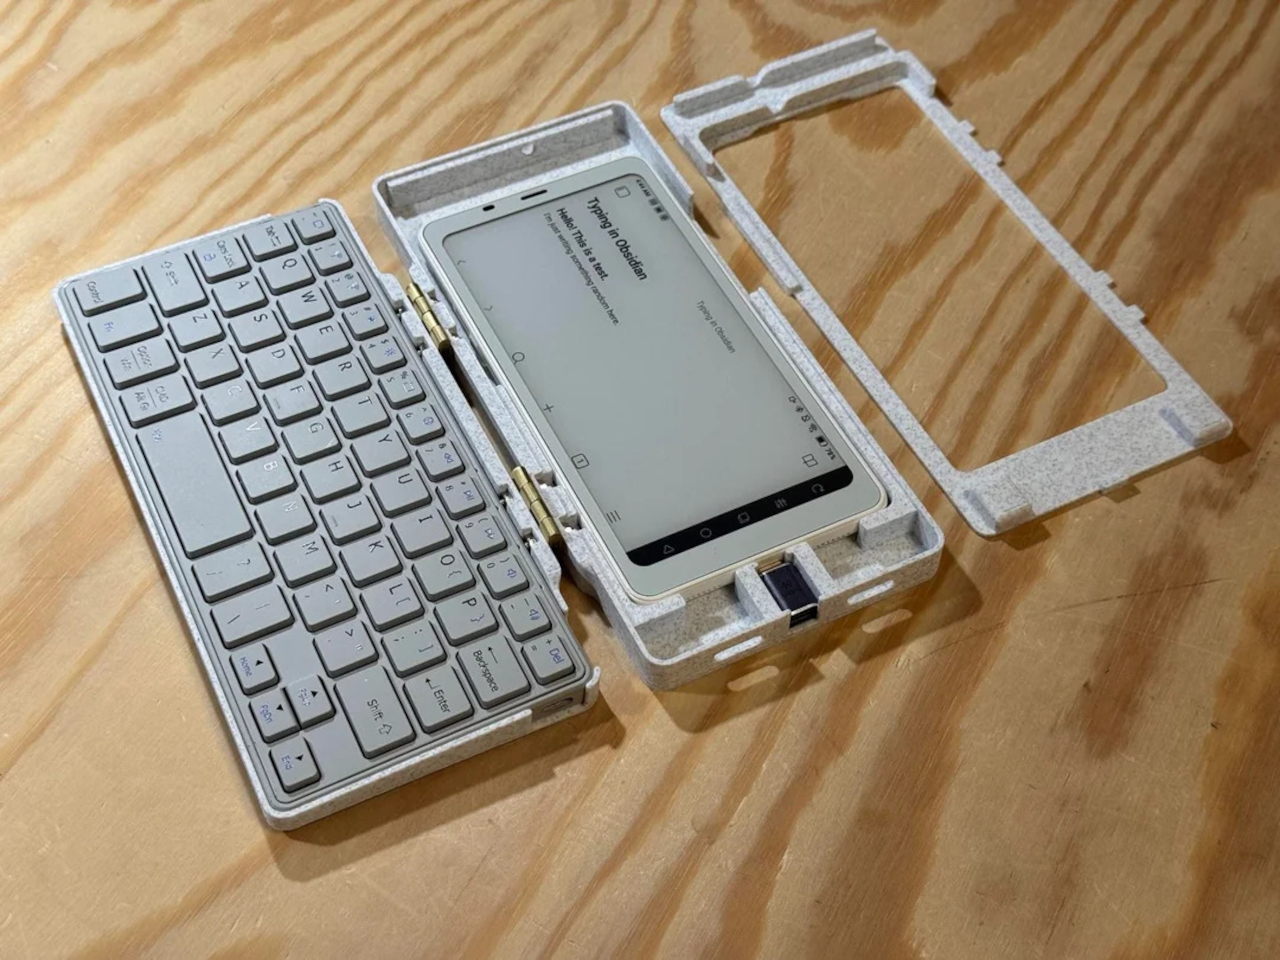
The Palm(a)top Computer v0 is one of those projects, born on Reddit when user CommonKingfisher decided to pair a BOOX Palma e-ink Android phone with a compact Bluetooth keyboard and a custom 3D-printed clamshell case. The result looks like a cross between a vintage Psion and a modern writerdeck, small enough to slide into a jacket pocket but functional enough to handle real writing and reading sessions on the go.

Designer: CommonKingfisher

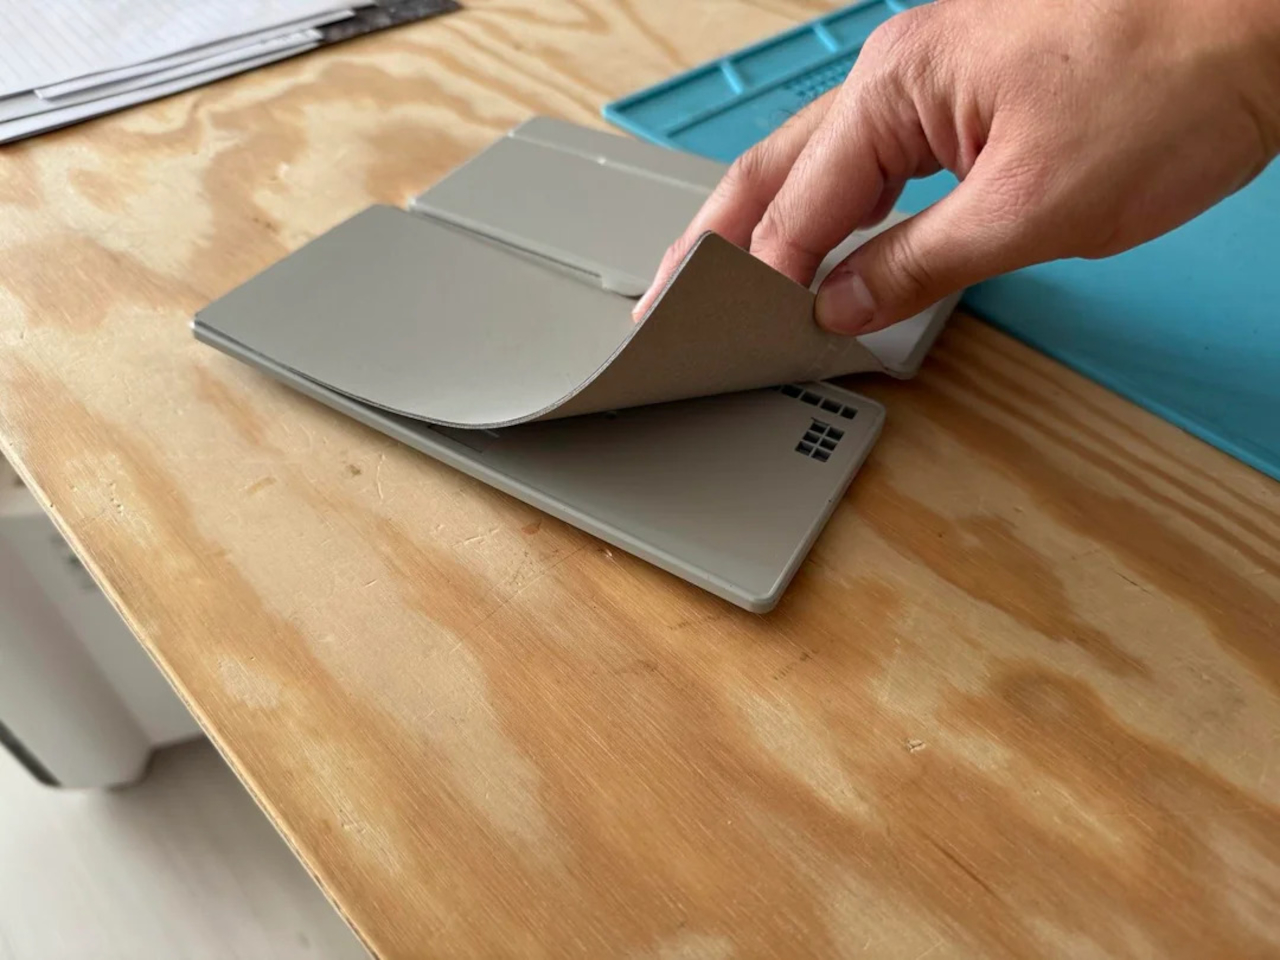
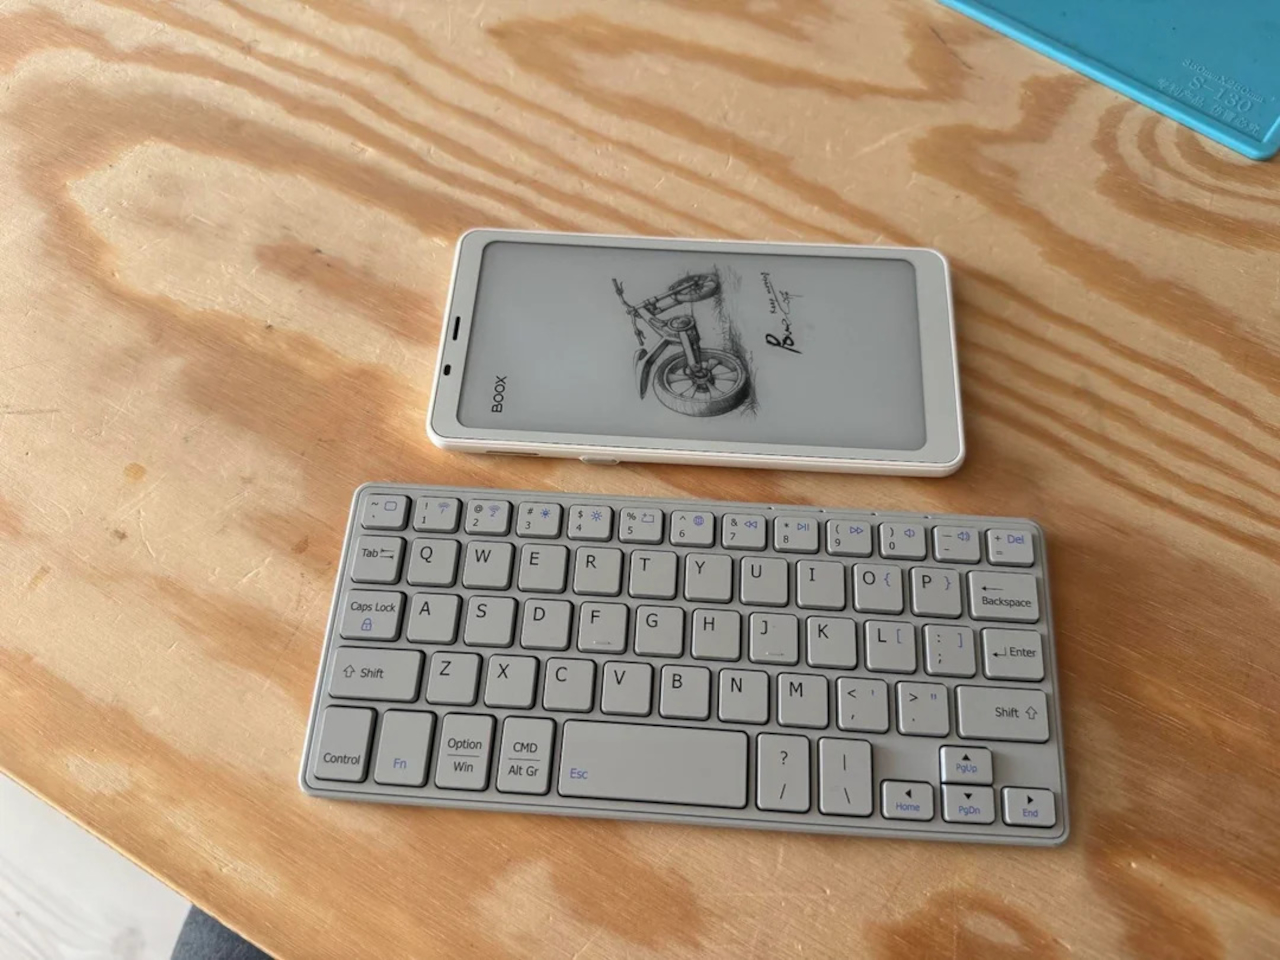
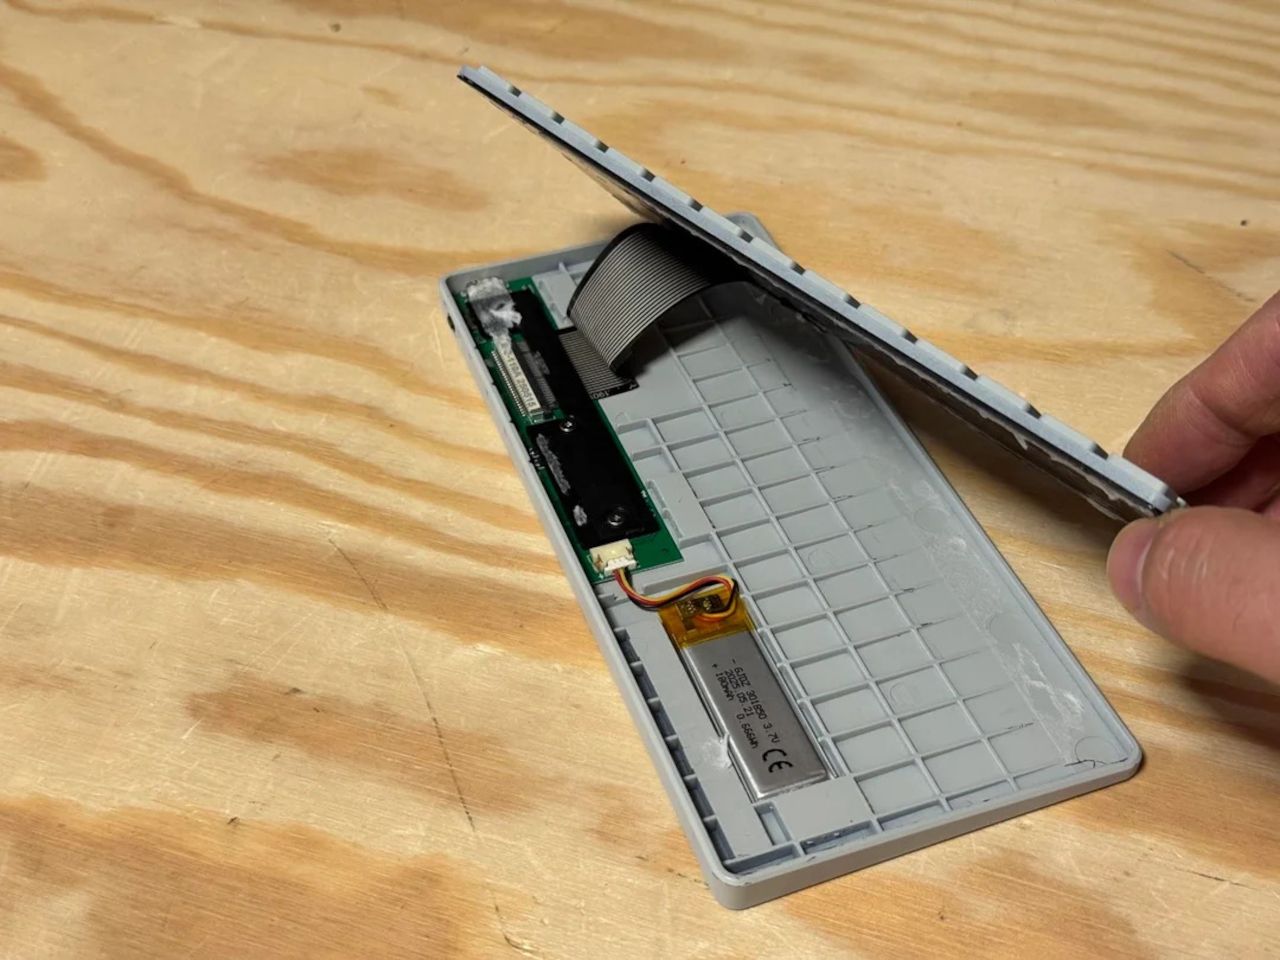
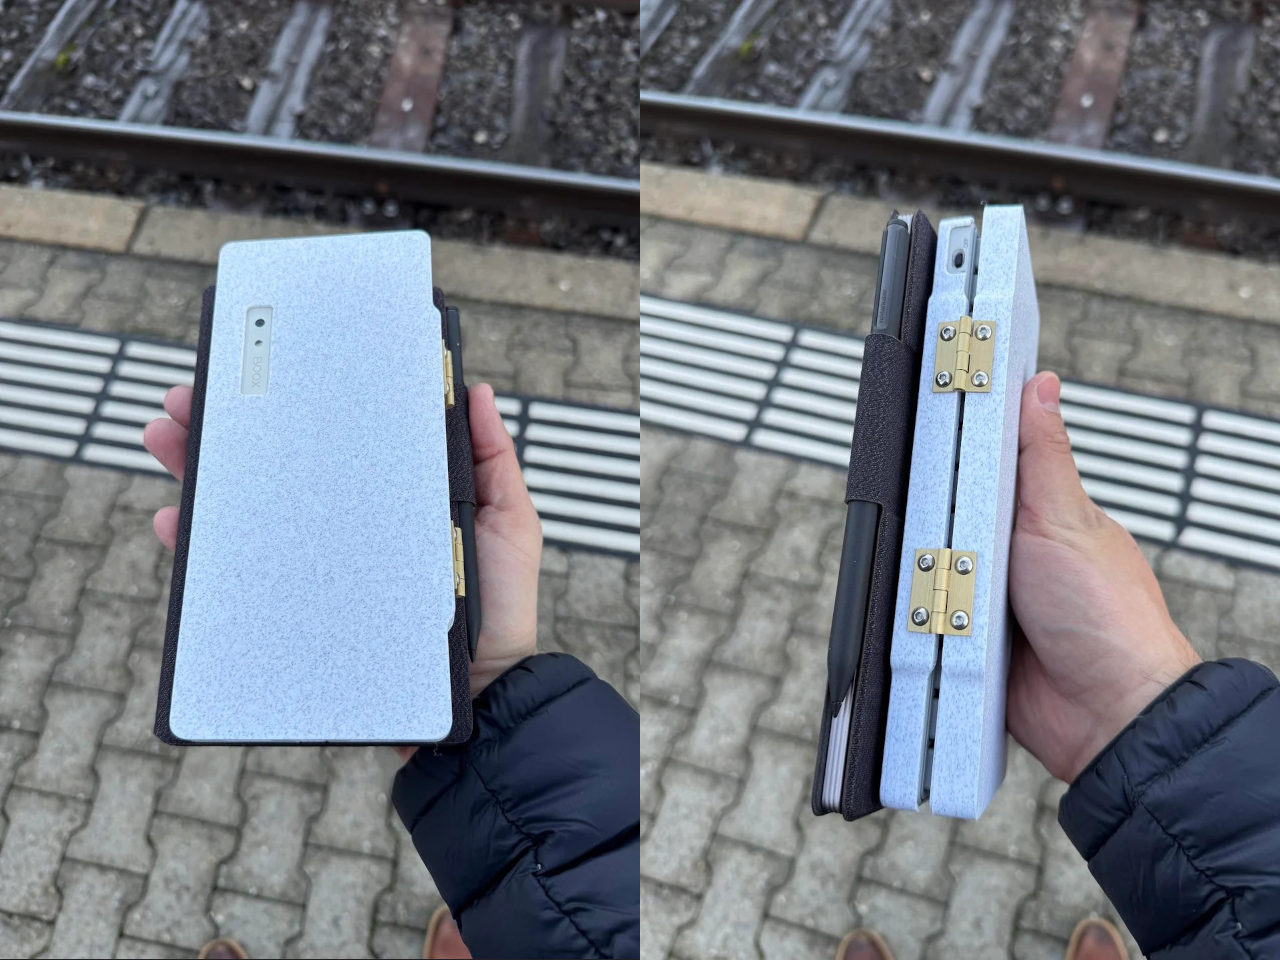
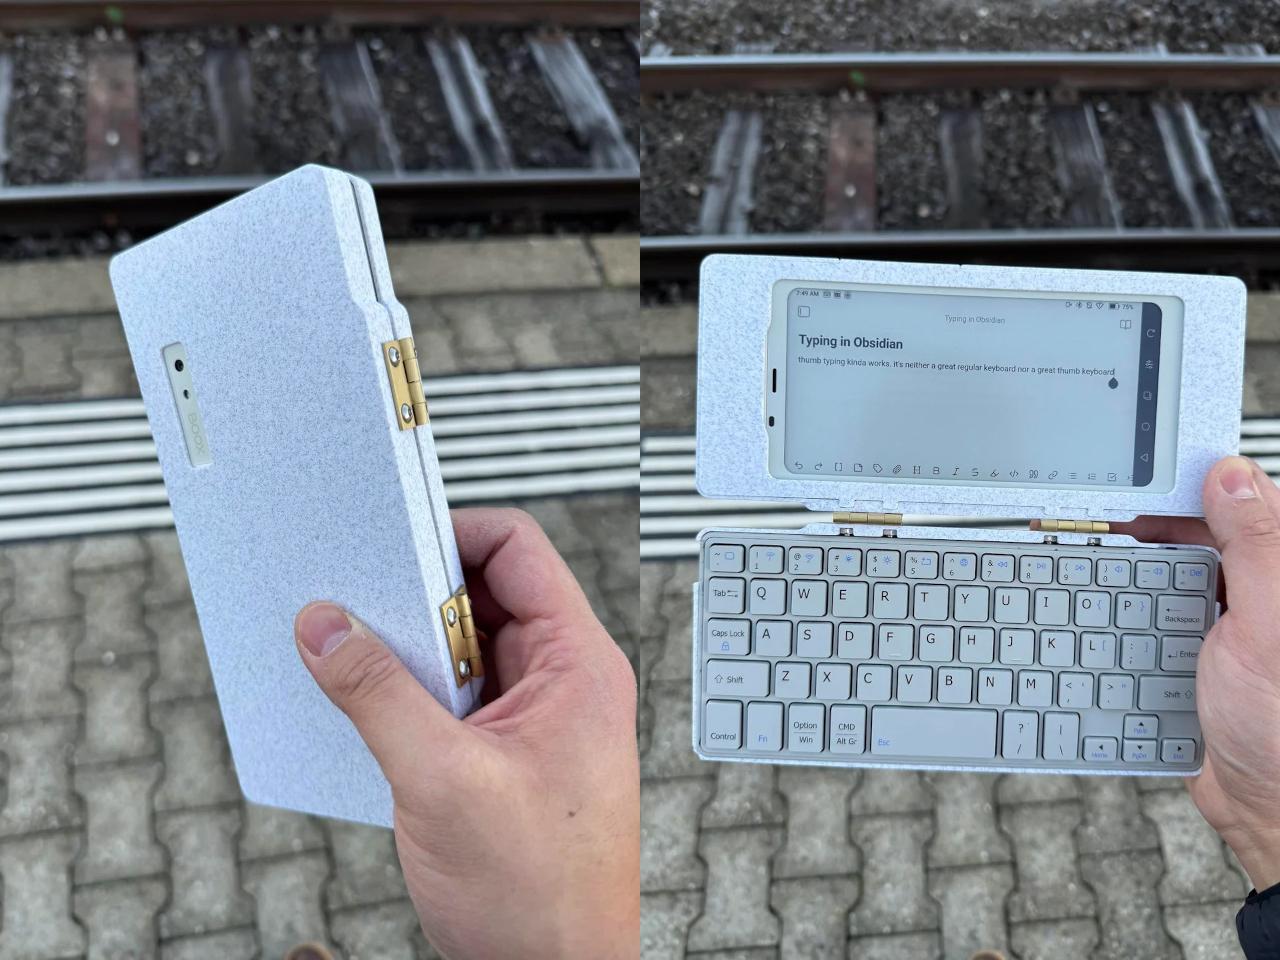
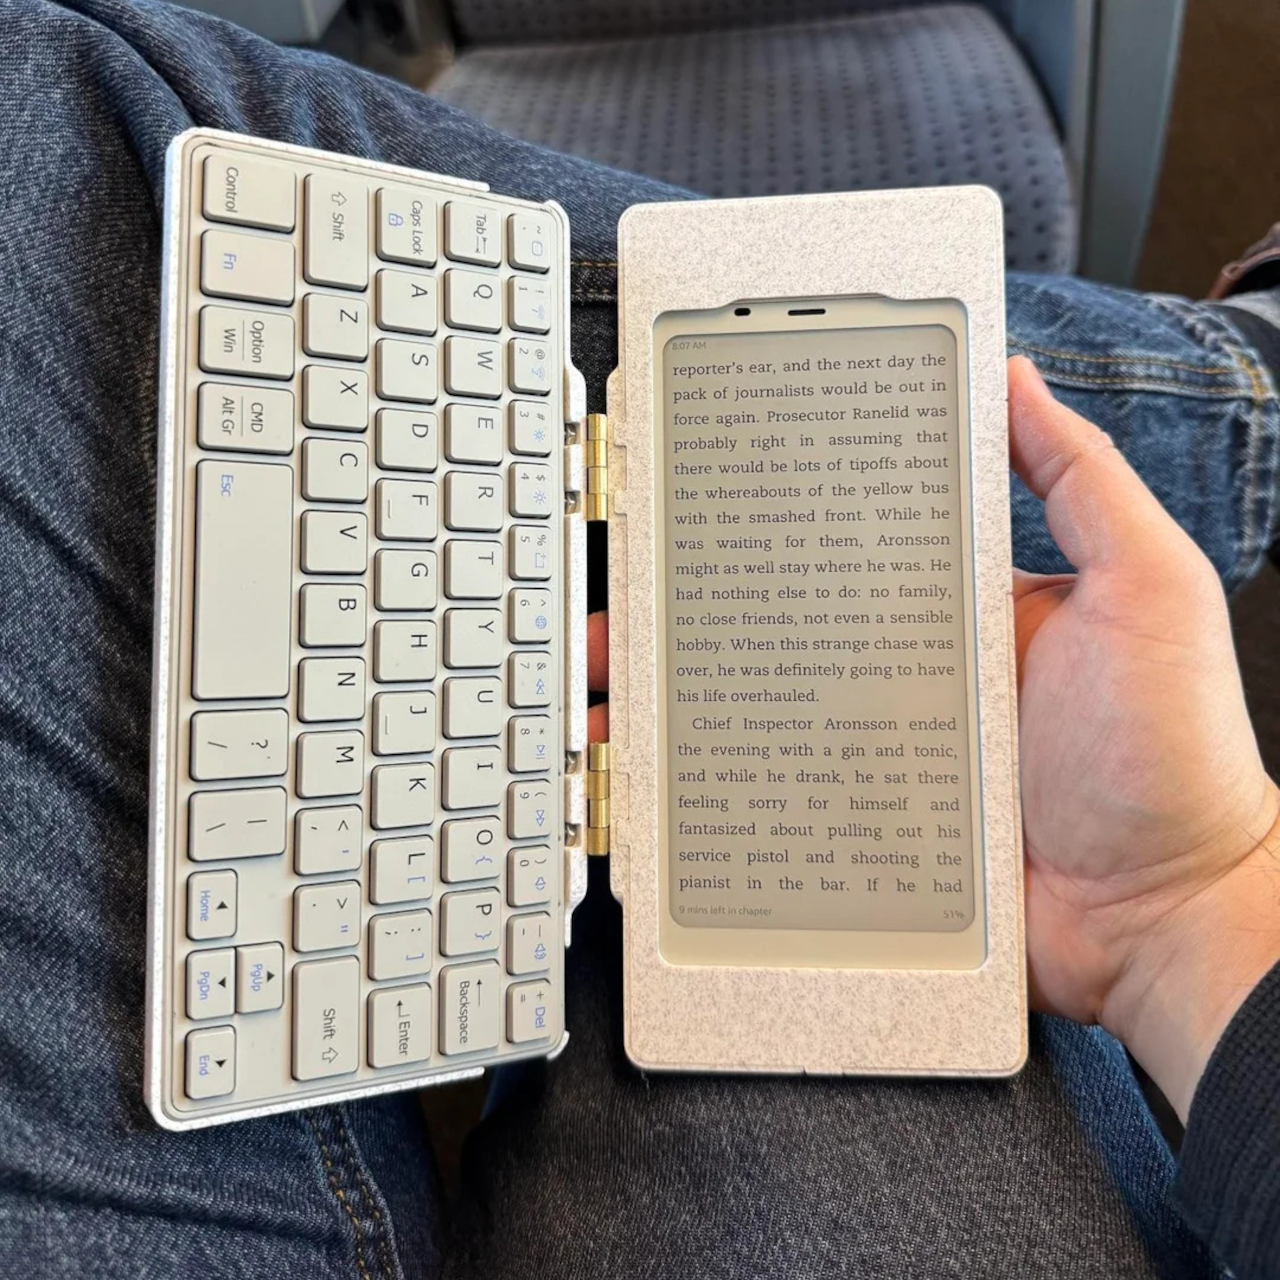
The core hardware is straightforward. The BOOX Palma sits in the top half of the shell, while a CACOE Bluetooth mini keyboard occupies the bottom half. The keyboard was originally glued into a PU-leather folio, which the maker carefully peeled off using gentle heat from a hair dryer to expose the bare board. When opened, the two halves form a tiny laptop layout with the e-ink screen above and the keyboard below.

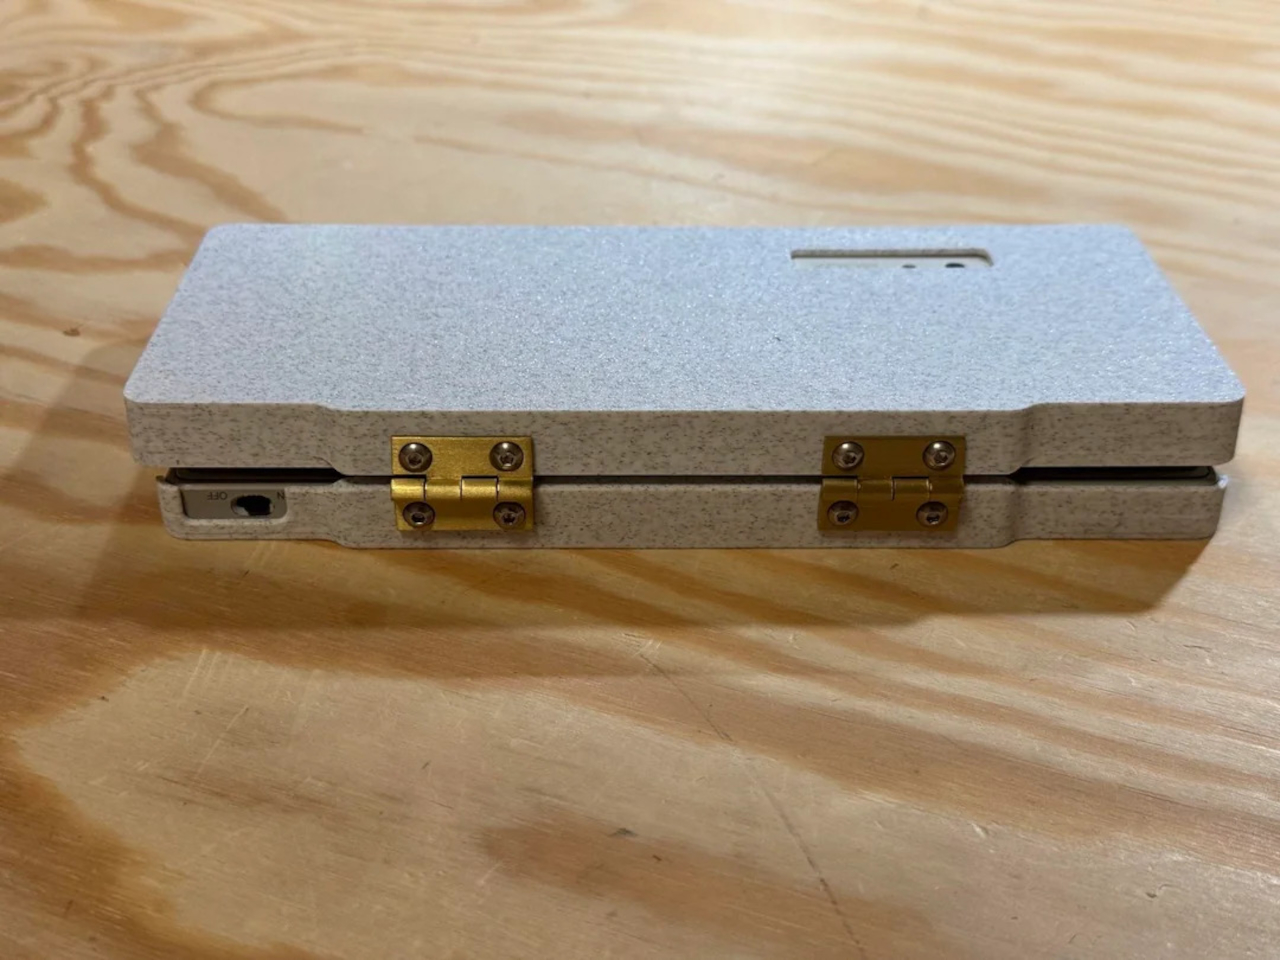
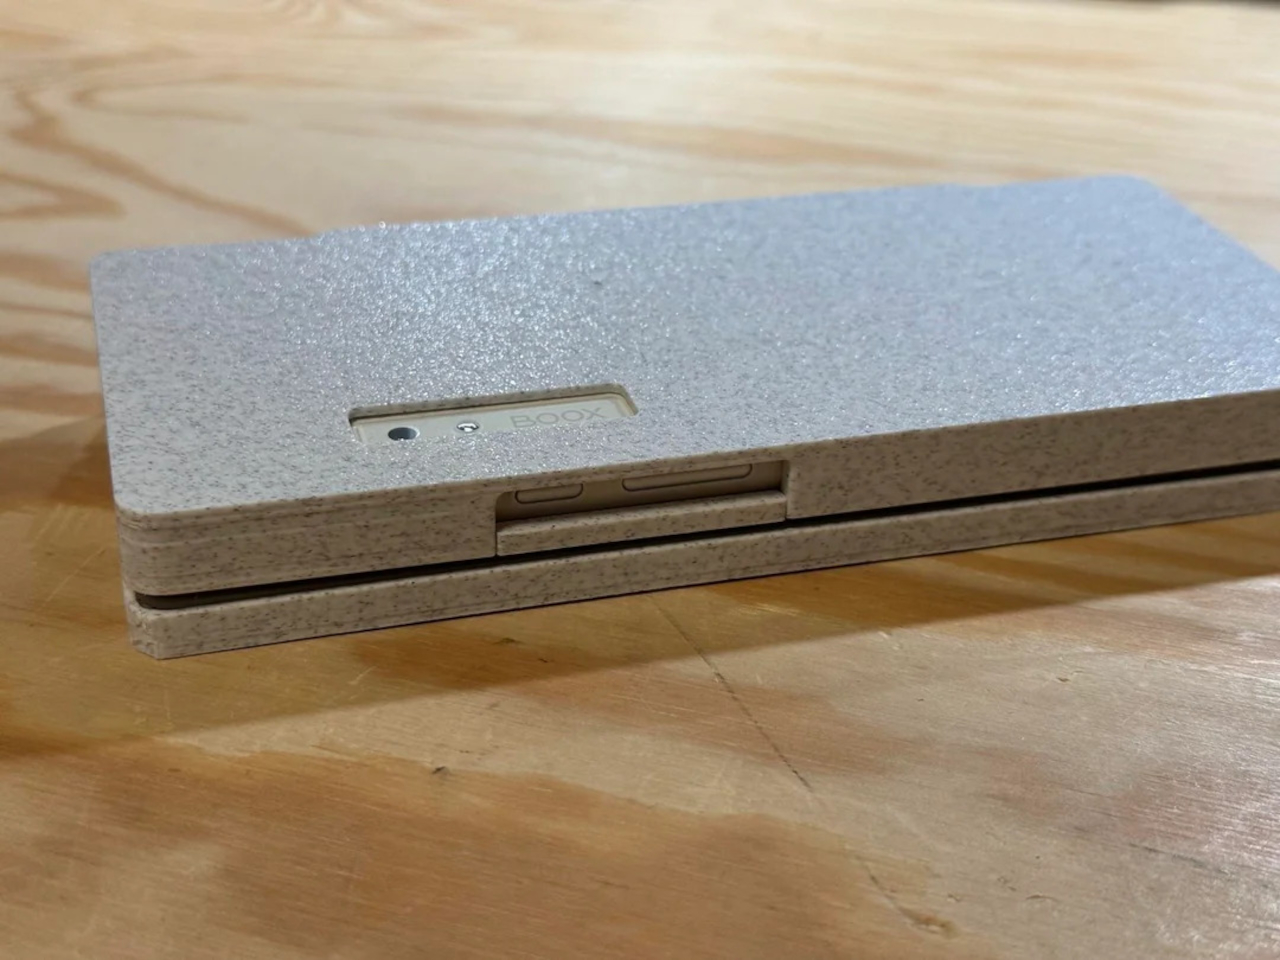
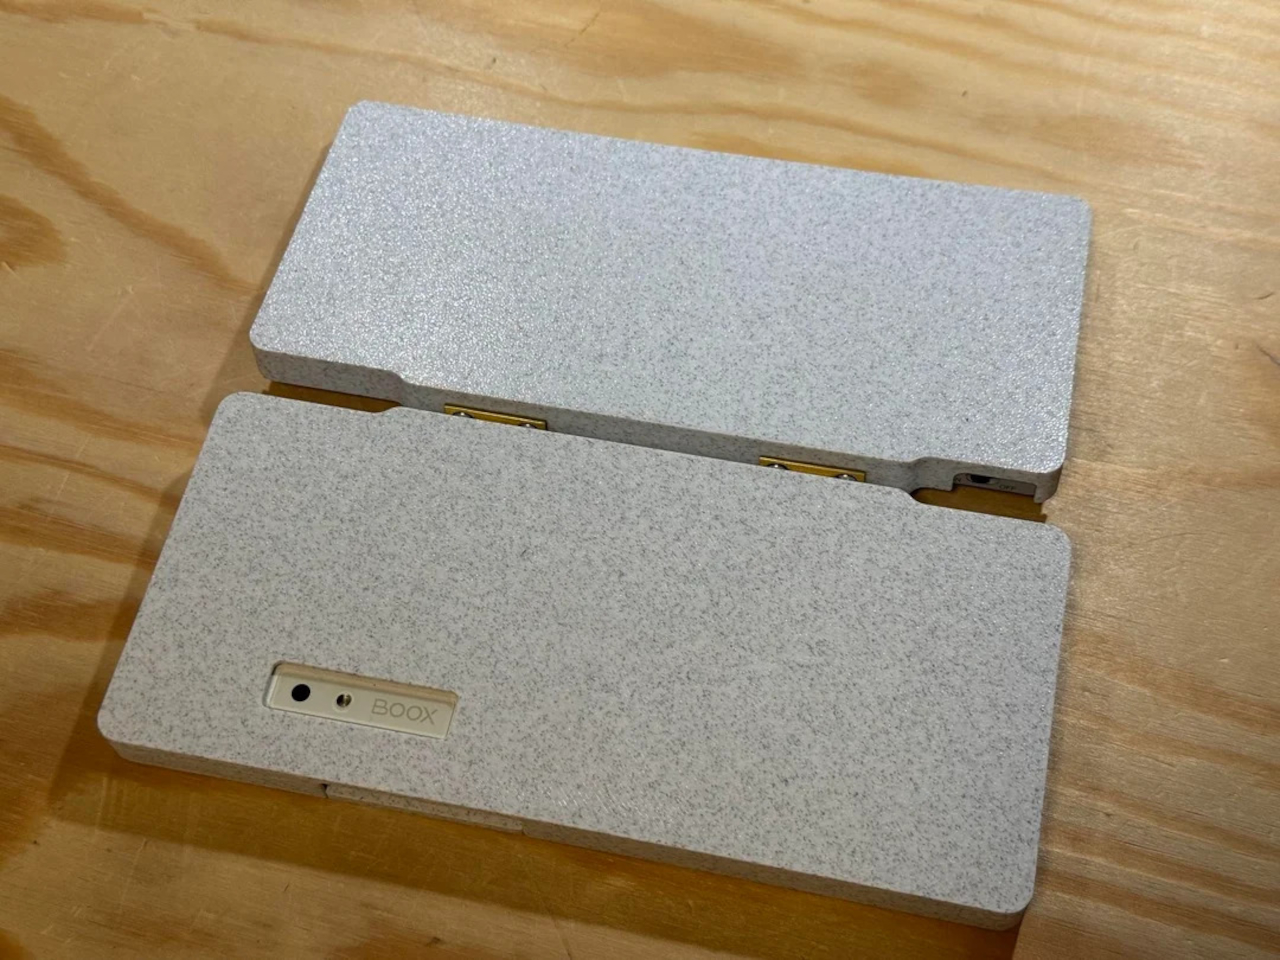
The clamshell itself is 3D-printed in a speckled filament that looks like stone, with two brass hinges along the spine giving it a slightly retro, handcrafted feel. Closed, it resembles a small hardback book with the Palma’s camera cutout visible on the back. Open, the recessed trays hold both the screen and keyboard flush, turning the whole thing into a surprisingly polished handheld computer, considering it’s a first prototype.

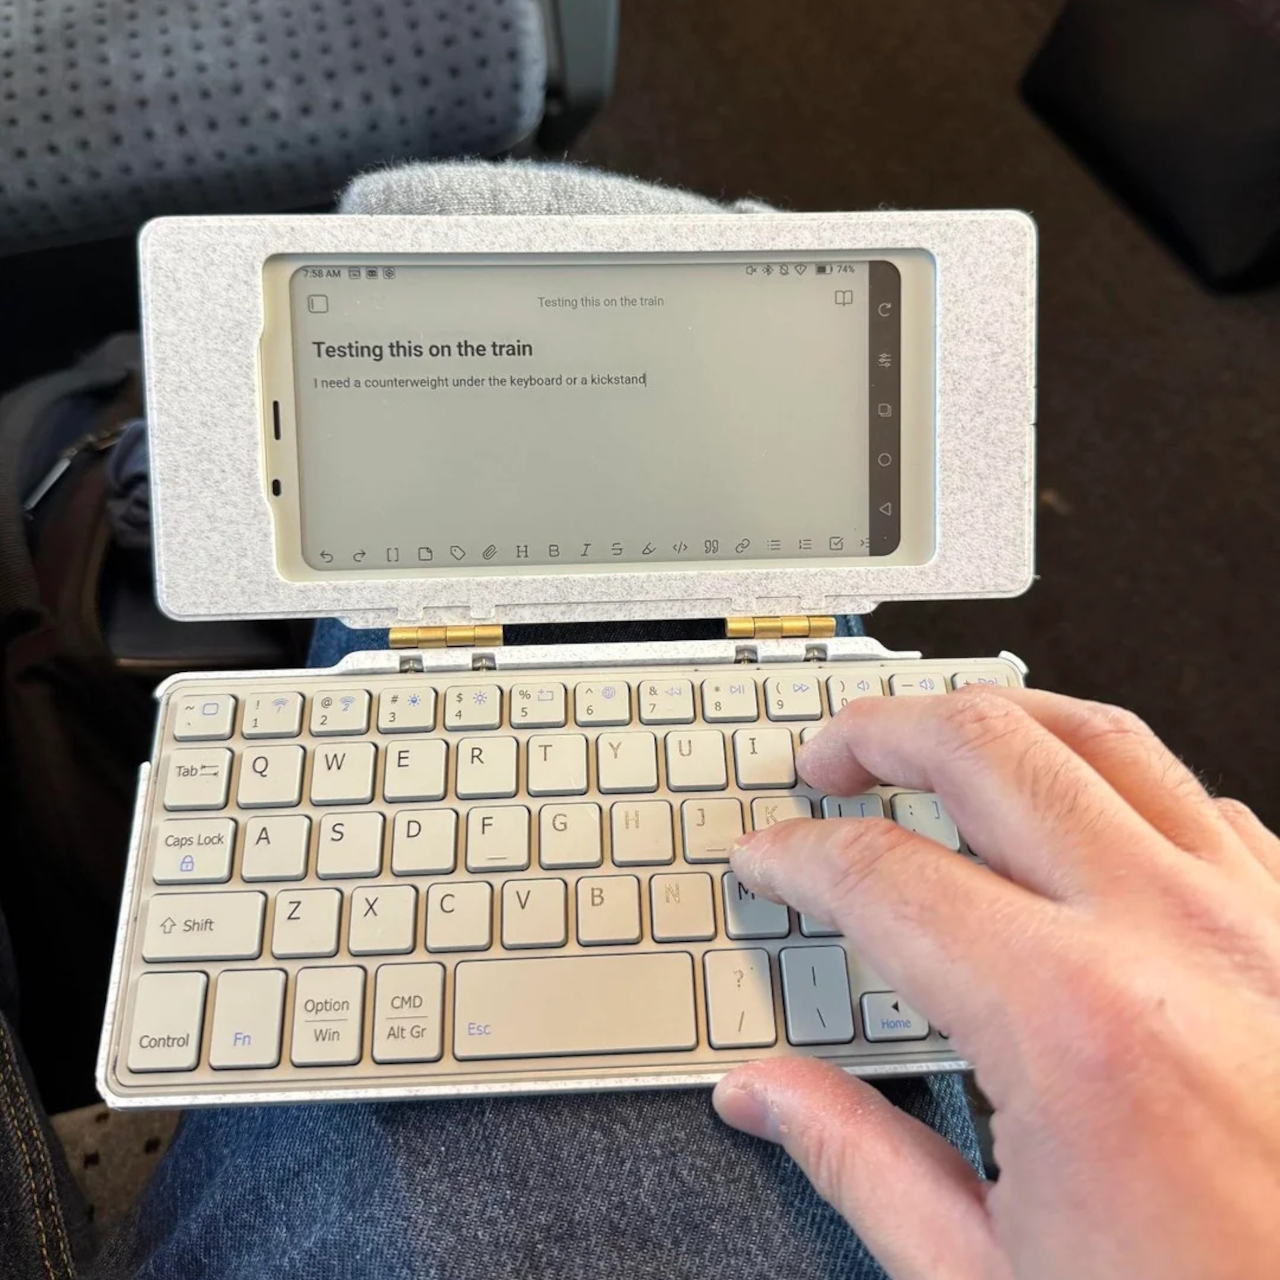
The typing experience is functional but not perfect. The maker describes it as “okay to type on once you get used to it,” and thumb typing “kinda works,” though it’s not ideal for either style. You can rest the device on your lap during a train ride and use it vertically like a book, with the Palma displaying an e-book and the keyboard ready for quick notes or annotations.

The build has a few issues that the maker plans to fix in the next version. It’s top-heavy, so it needs to lie flat or gain a kickstand or counterweight under the keyboard, possibly a DIY flat power bank. The hinge currently lacks friction and needs a hard stop around one hundred twenty degrees to keep the screen upright. There are also small cosmetic tweaks, like correcting the display frame width.

Palm(a)top Computer v0 shows how off-the-shelf parts and a 3D printer can turn a niche e-ink phone into a bespoke palmtop tailored to one person’s workflow. Most consumer gadgets arrive as sealed rectangles you can’t modify, but projects like this embrace iteration and imperfection. It’s less about having all the answers and more about building something personal that might inspire the next version.

The post DIY 3D-Printed Clamshell Turns BOOX Palma Into a Tiny Laptop first appeared on Yanko Design.
Someone Built a Working Synth From Cardboard and Walnut Keys

Most synthesizers look and feel like appliances. They’re plastic boxes mass-produced in factories, efficient and functional but utterly lacking in personality or warmth. Pianos and guitars get to be handcrafted instruments with wood grain and visible joints, while synths are treated like glorified toasters with circuit boards inside. That disconnect between electronic music and tactile craft has always felt like a missed opportunity, especially when you consider how satisfying it is to play a real wooden keyboard.

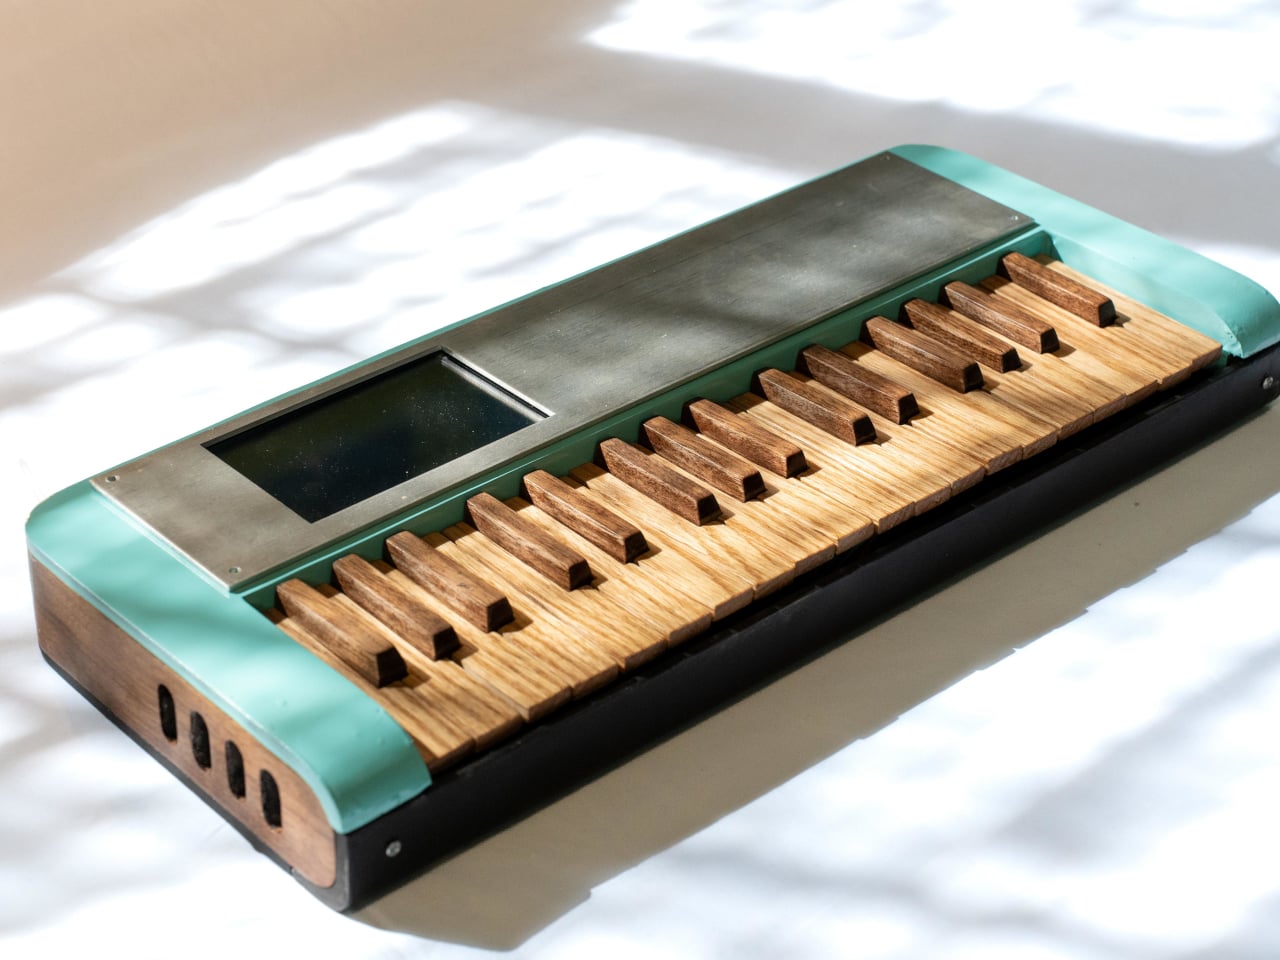
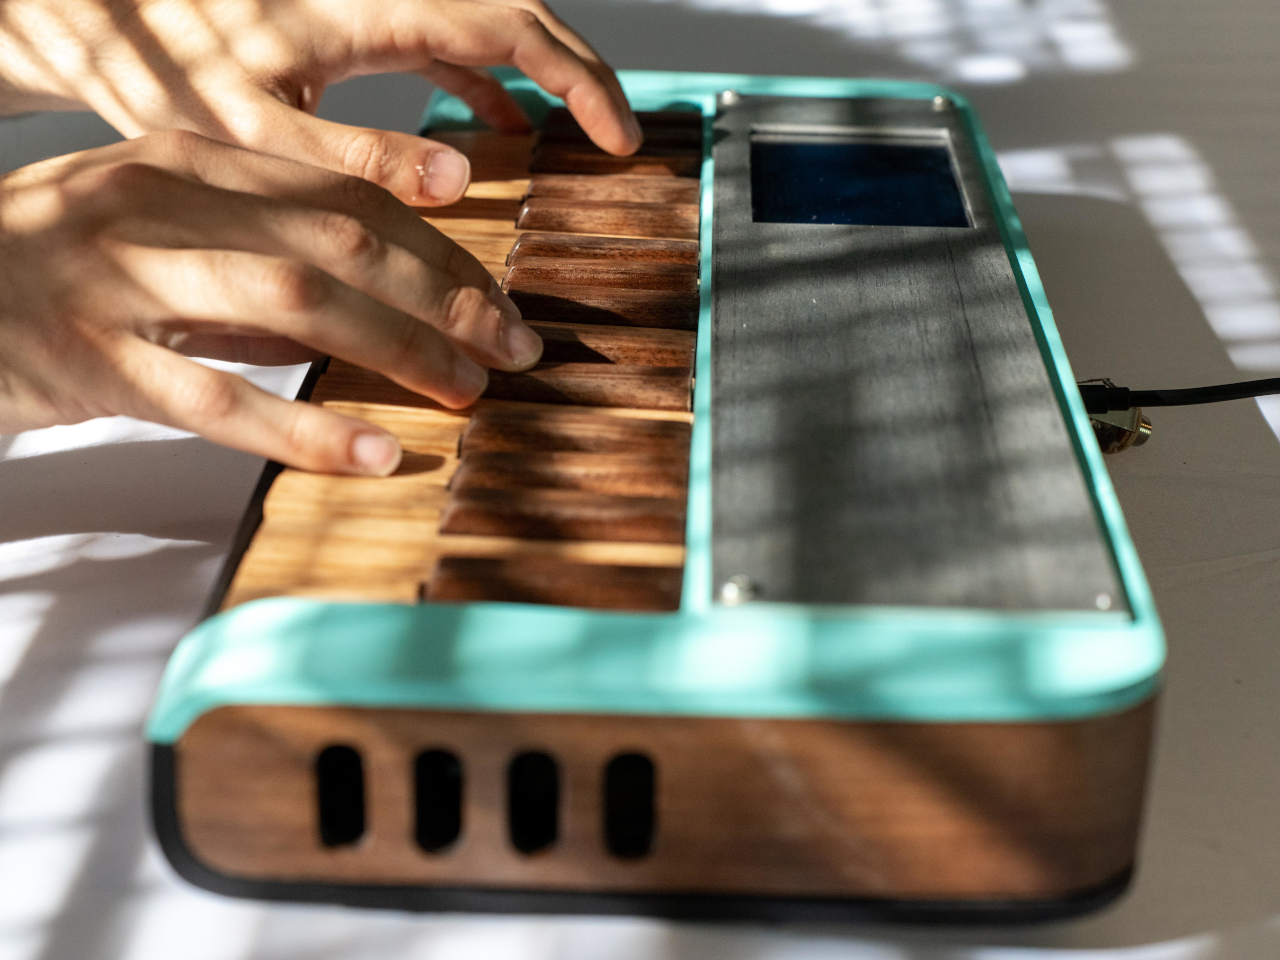
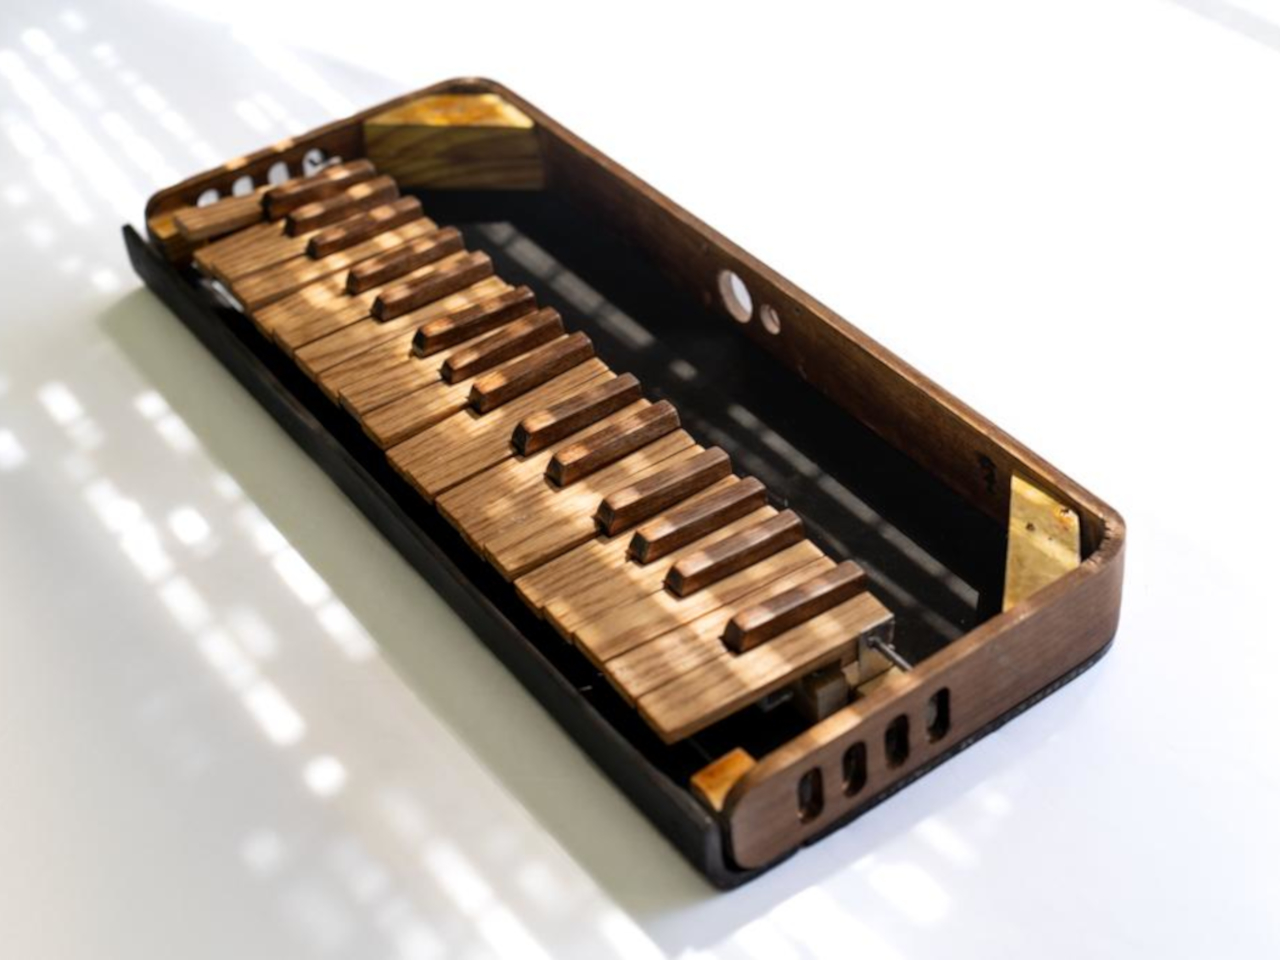
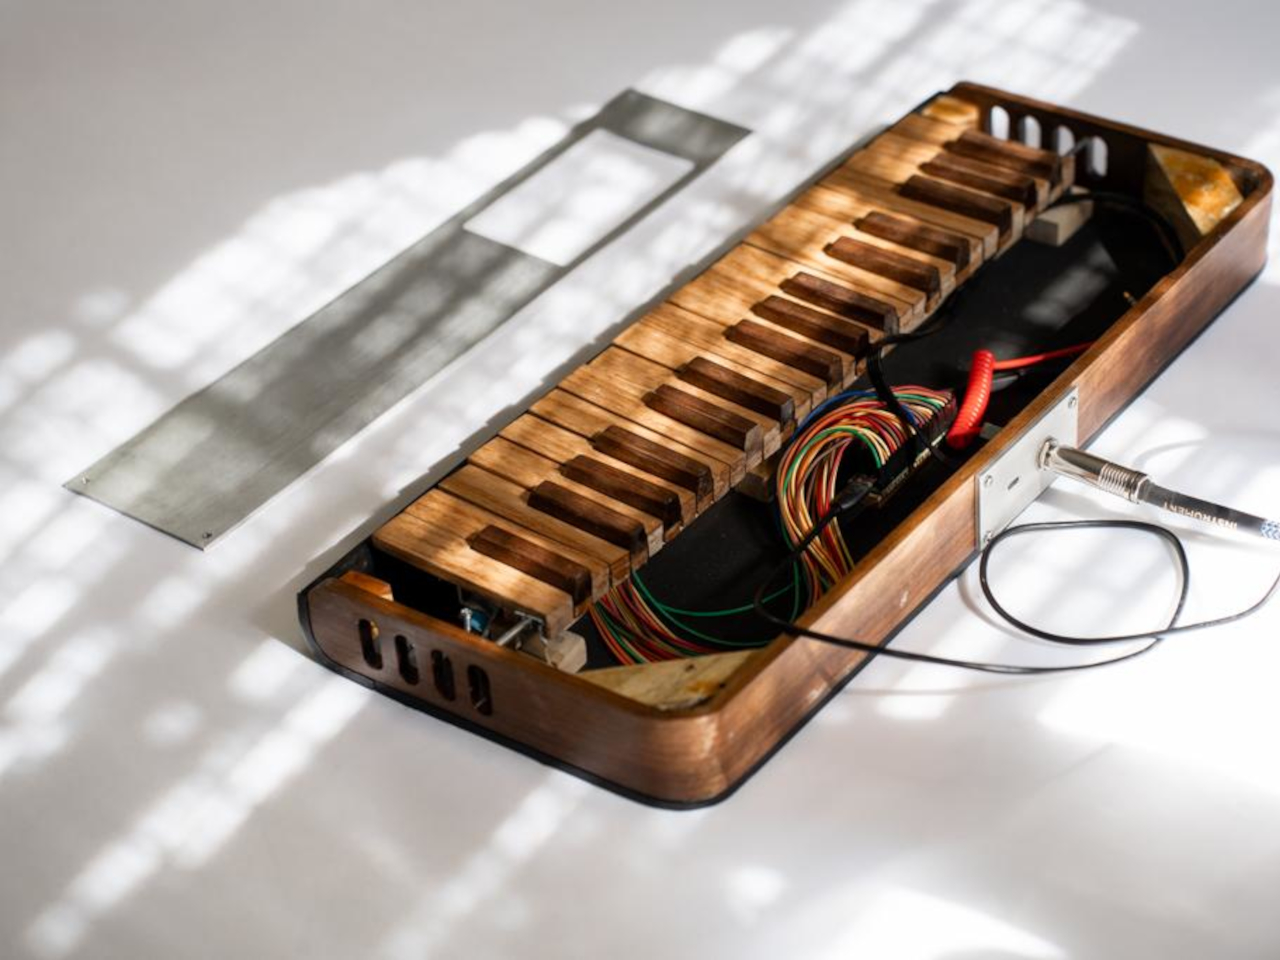
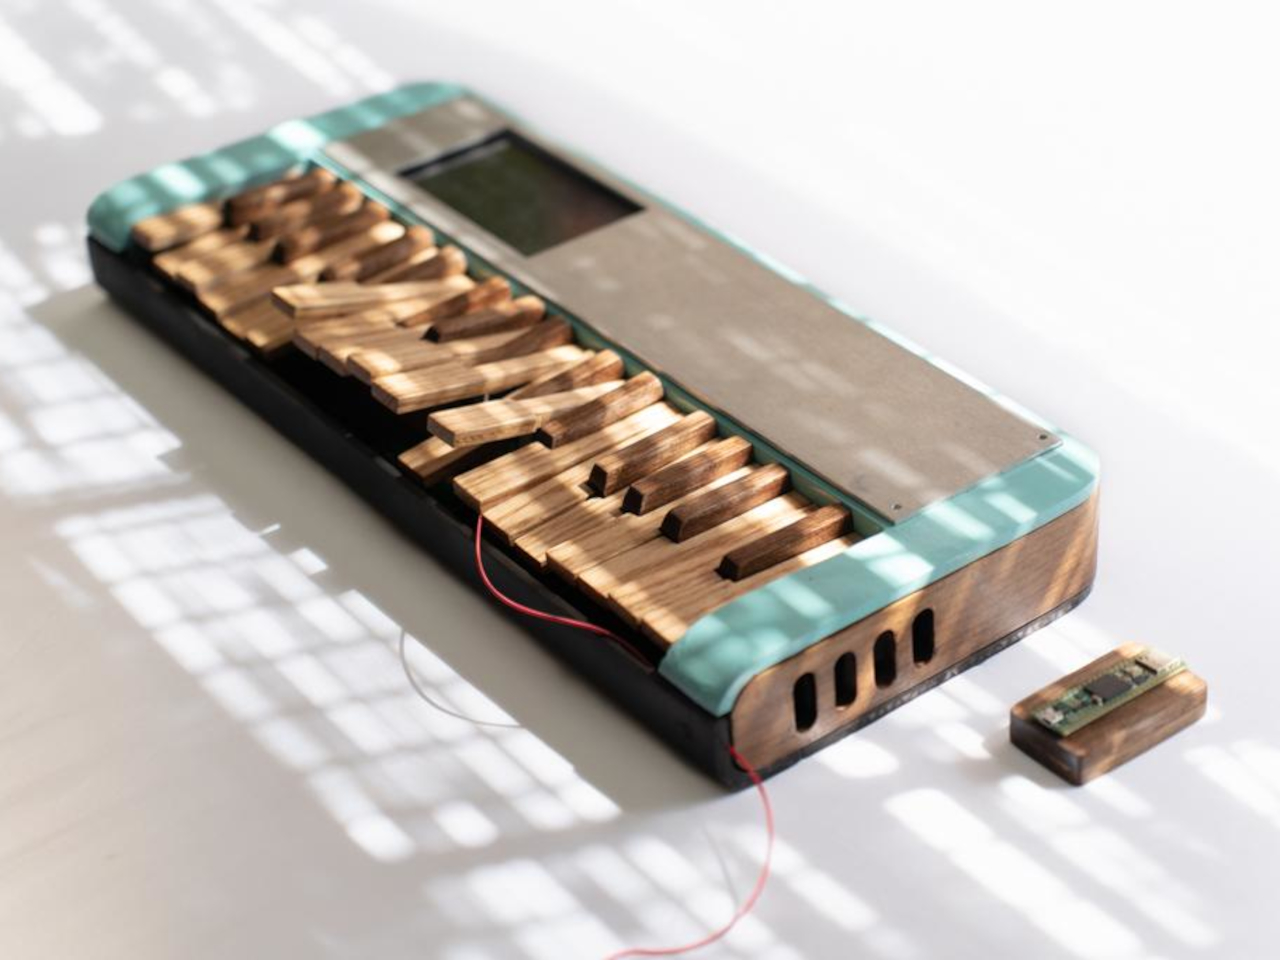
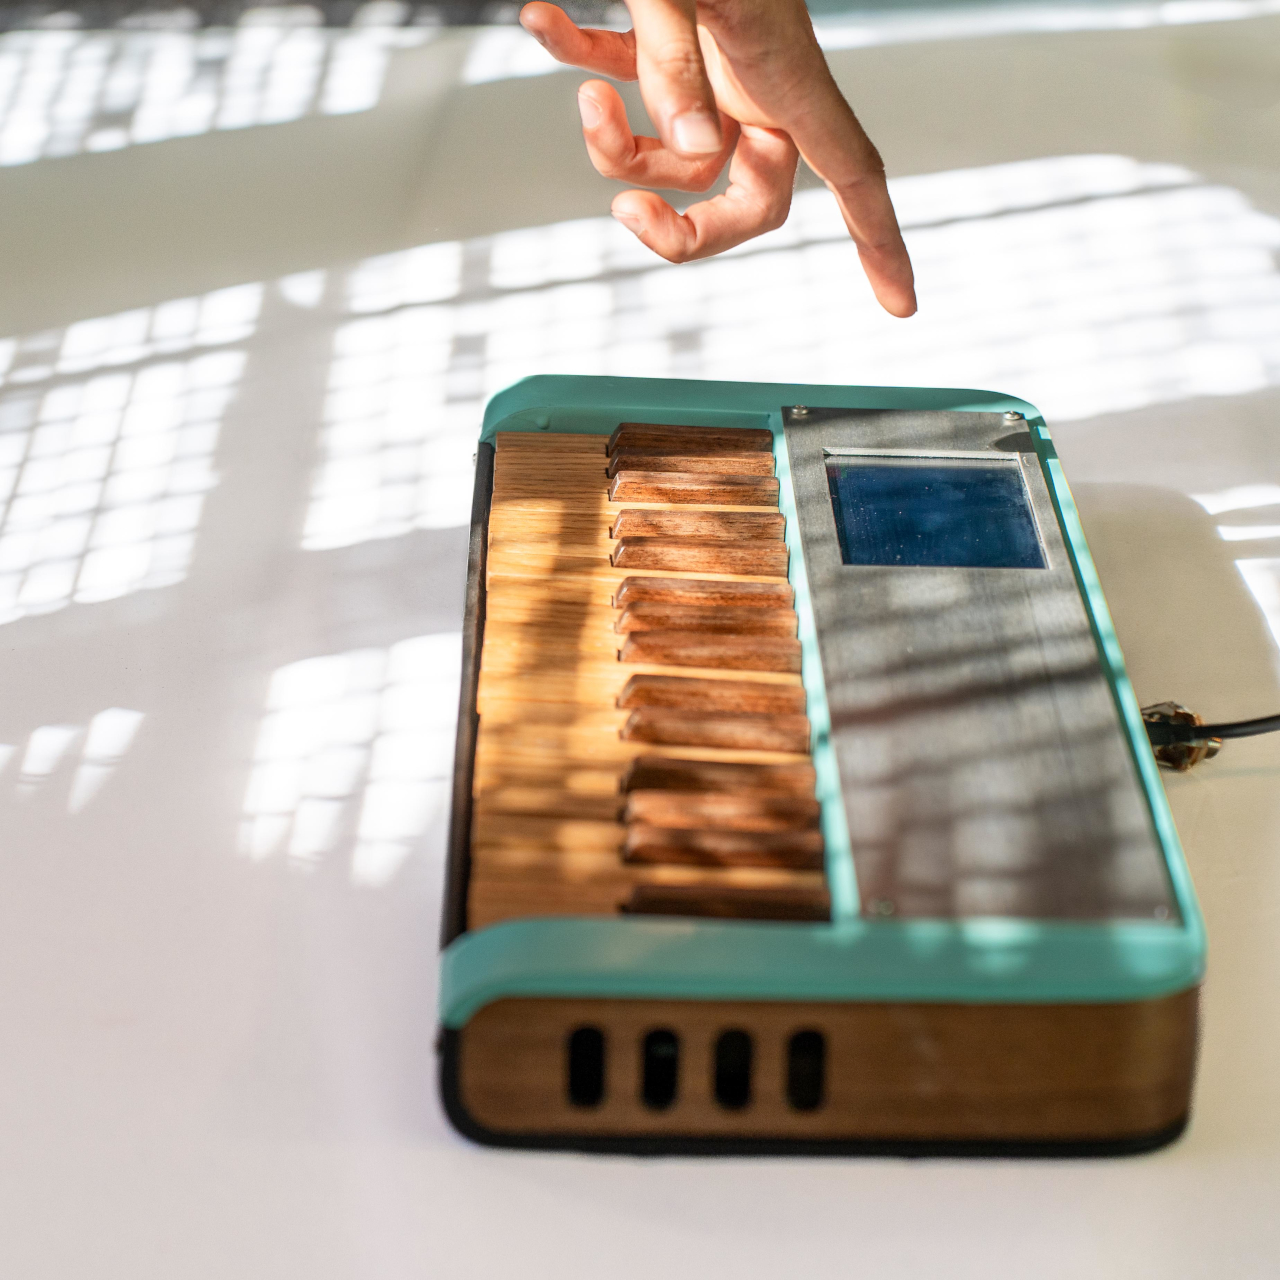
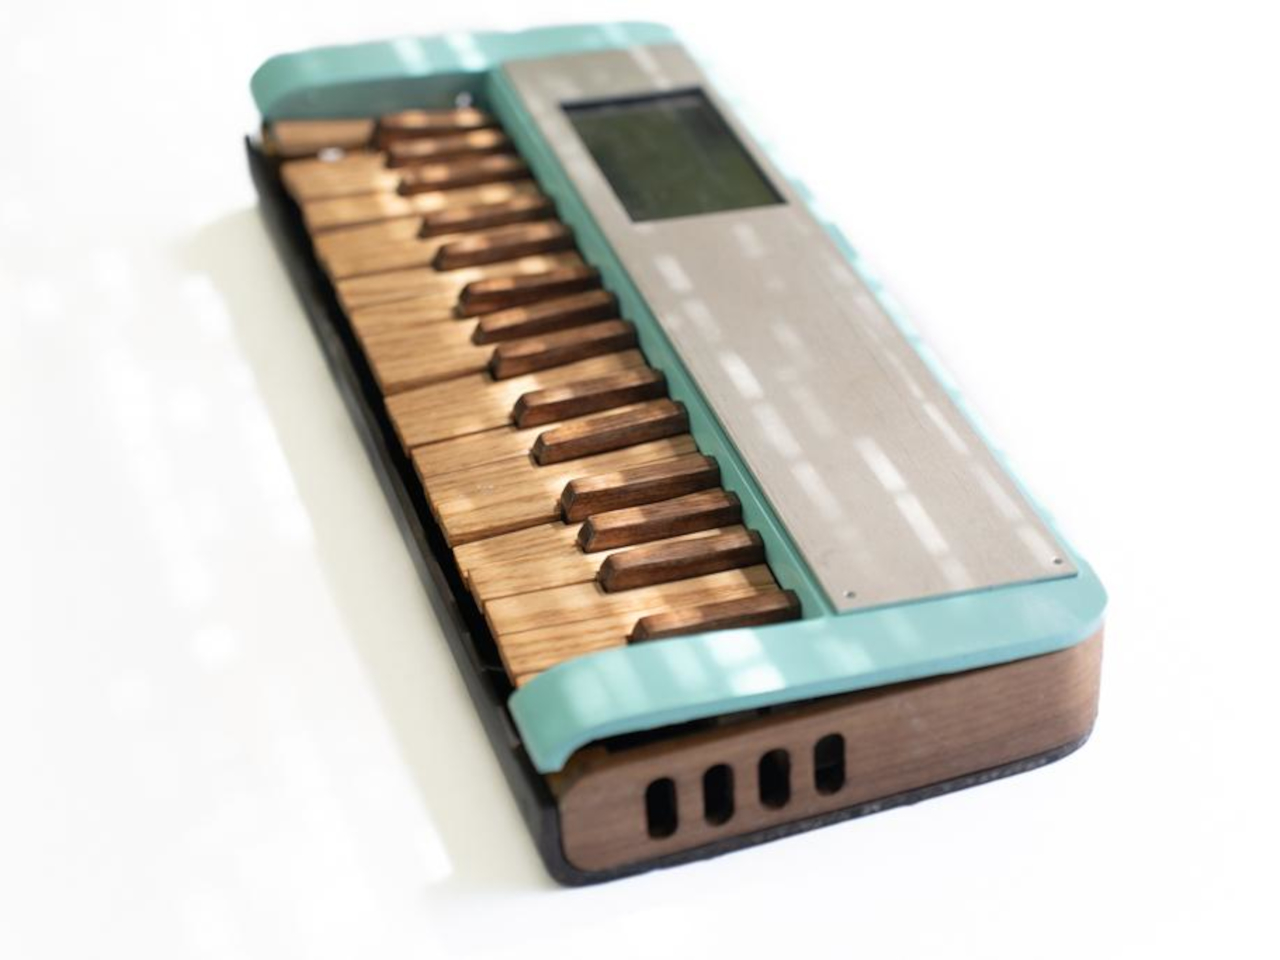
One maker decided to fix this by building a fully functional synthesizer from scratch, using materials that sound completely impractical. The result is a compact, 34-key synth with a fiberglass-reinforced cardboard body, a steam-bent walnut frame, and individual keys handmade from oak and walnut. It looks like something between a vintage record player and a mid-century hi-fi component, with a turquoise fiberglass shell and warm wooden accents that feel more like furniture than electronics.

Designer: Gabriel Mejia-Estrella

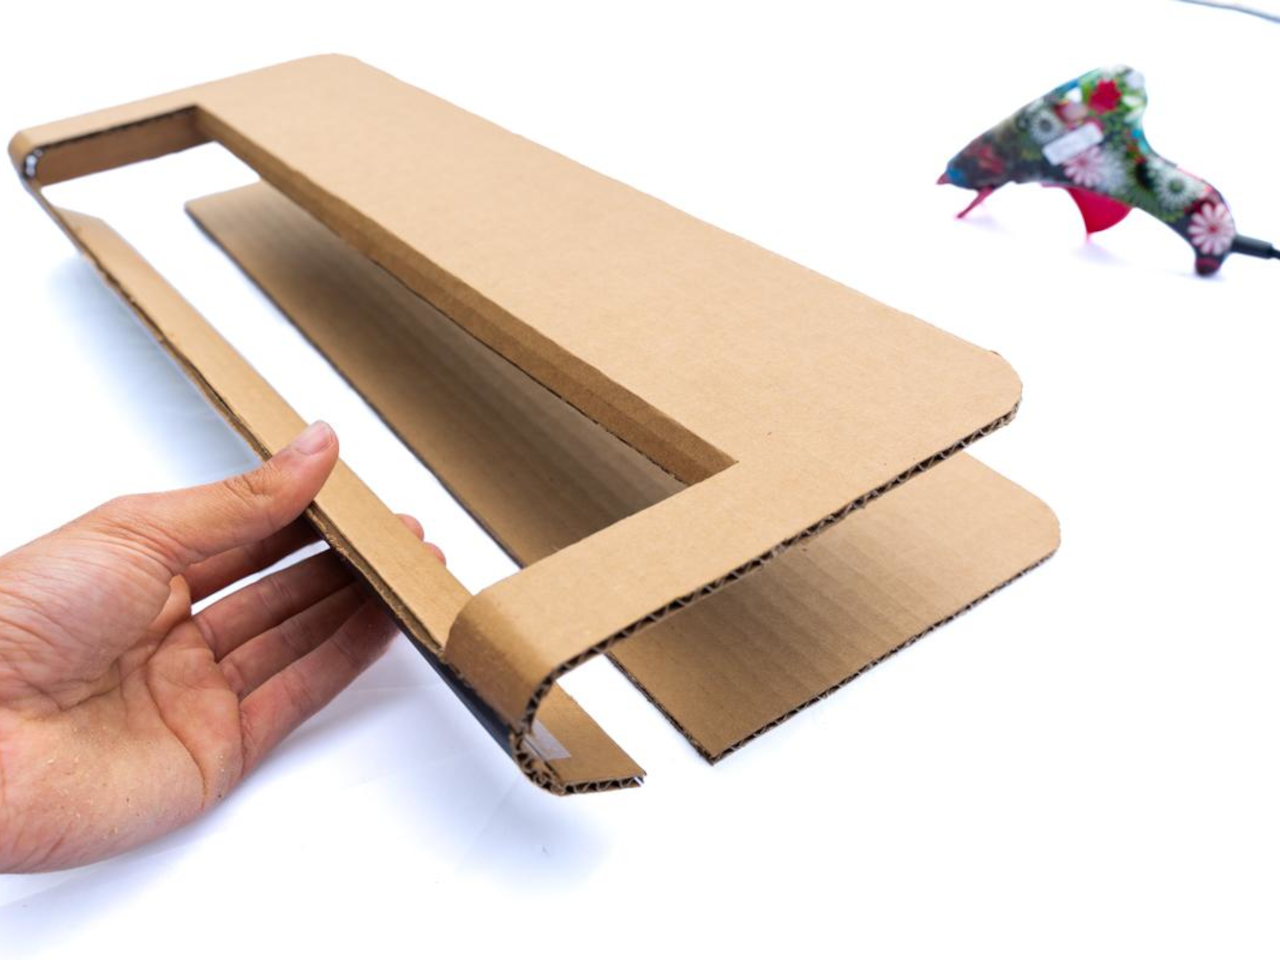
The body starts as folded cardboard panels cut from a template, then gets layered with fiberglass cloth and epoxy until it transforms into a rigid, glossy shell. The process borrows from old automotive techniques where fiberglass shaped custom car bodies in the 1950s, giving the synth a retro-futuristic sheen. Around the perimeter sits a continuous steam-bent walnut strip with oval cutouts that mimic speaker grilles on vintage radios, adding visual warmth and a furniture-like presence.

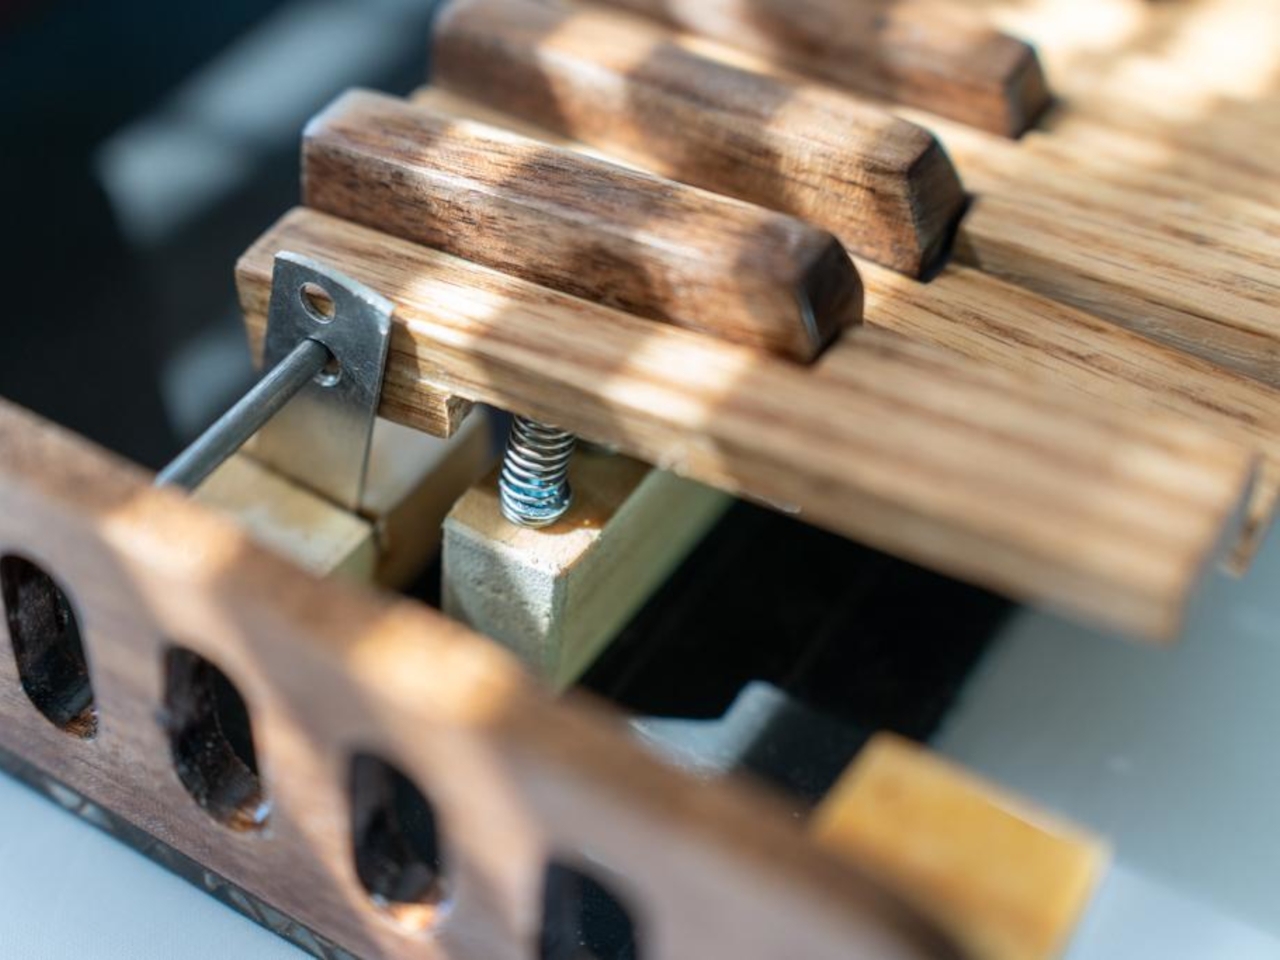
The keys are where the craft really shows. Black keys are made from laminated walnut offcuts, while white keys are cut from oak for contrast and durability. Each key is individually shaped, drilled for a shared steel rod pivot, beveled to prevent jamming, then coated with fiberglass and sanded up to 3000 grit for a smooth finish. The result looks and feels closer to a piano than a typical plastic keyboard.

Underneath sits a custom flexible printed circuit with interdigitated copper pads and rubber dome switches. When you press a key, the dome collapses and bridges the pads, closing a circuit that a Teensy microcontroller scans continuously. The Teensy sends MIDI messages to a Raspberry Pi running Zynthian, an open-source synth platform packed with engines and presets, all displayed on a small touchscreen.

Of course, using cardboard and steam-bent walnut creates challenges the designer readily admits. Cardboard turned out to be impractical, requiring multiple fiberglass layers and tedious filling. Walnut is notoriously stubborn to bend, needing kerf cuts and boiling water to soften the fibers. The designer suggests foam board or 3D printing as easier alternatives and notes that more precise tools would have made the keys cleaner.

What makes this synth significant is how it challenges the assumption that electronic instruments have to be cold and industrial. By using wood, fiberglass, and visible handwork, it reintroduces warmth and personality into something usually purely functional. It’s less a finished product and more proof that synthesizers can be beautiful, tactile objects worth admiring even when silent.

The post Someone Built a Working Synth From Cardboard and Walnut Keys first appeared on Yanko Design.
DIYer builds first 100% solar-powered drone that flies without batteries

It’s not usual for DIYers to step up and experiment with the logic of solar-powered devices as we know it. The ideal generally is to keep it simple. Add solar panels, connect them to a battery system, and power the connected devices. But that’s way too straightforward for Luke Maximo Bell, who runs an eponymous YouTube Channel and already has a Guinness World Record to his credit.

Last year, Luke and his father challenged the record for the fastest drone from Red Bull with their 3D-printed drone. It not only officially surpassed the former’s top speed of 350km/h, but actually bettered it by nearly 50 percent, hitting high speeds of 500km/h (310mph). A record-breaking feat verified by the team at Guinness Book of World Records.

Designer: Luke Maximo Bell

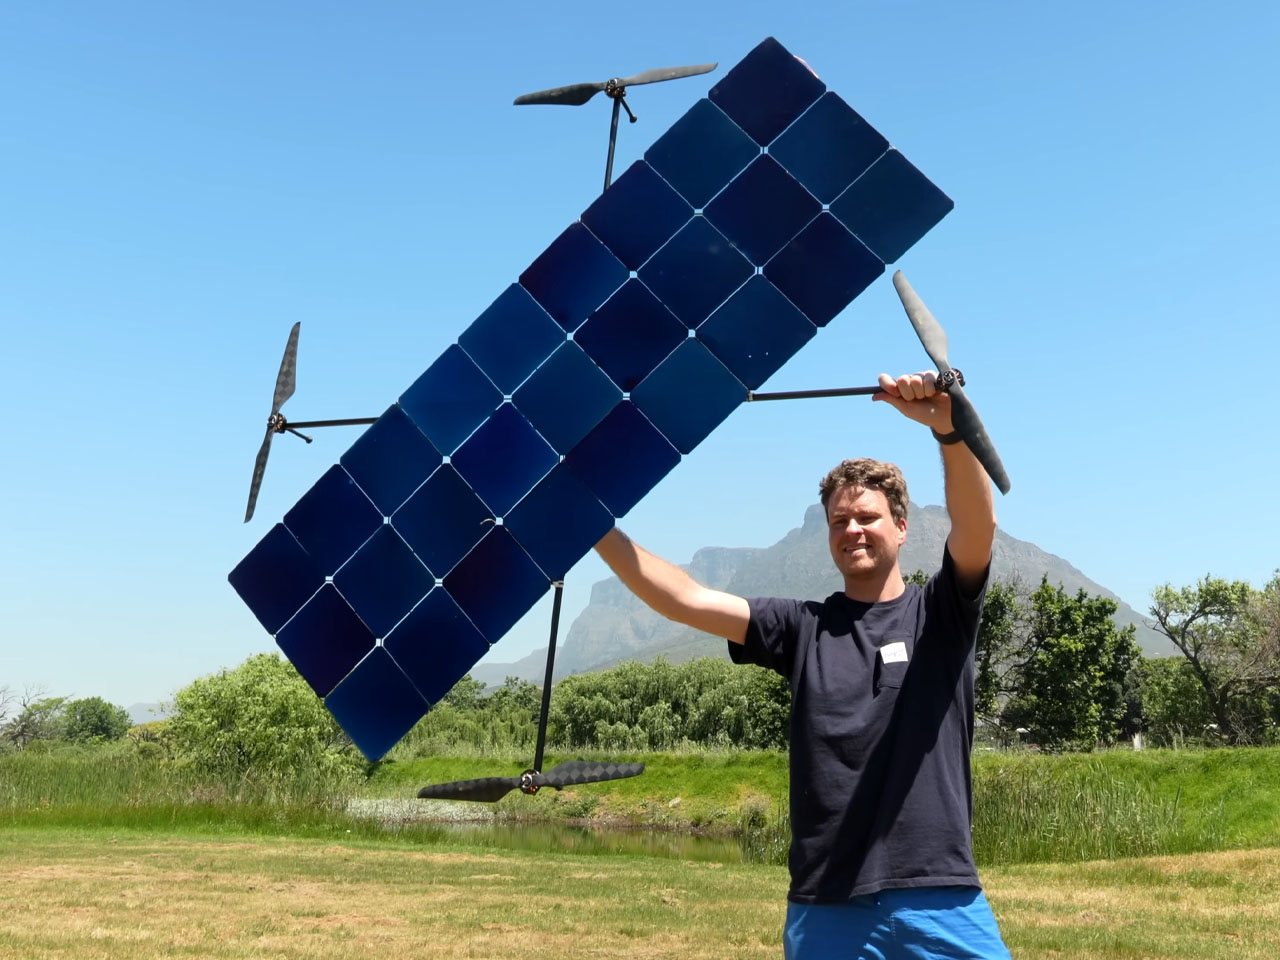
The idea of this new solar-powered drone, based on an X-shaped frame, is not to shatter any records per se, but to experiment with the feasibility of a drone that runs completely on solar power, without any battery attachments. Of course, as you see it, a drone like that would practically have little real-world applications, but it could pave the way for more exploration, certainly. Maybe the kite festival of Jaipur, India, could see ropes tethered to kites mounted with solar panels on them someday.

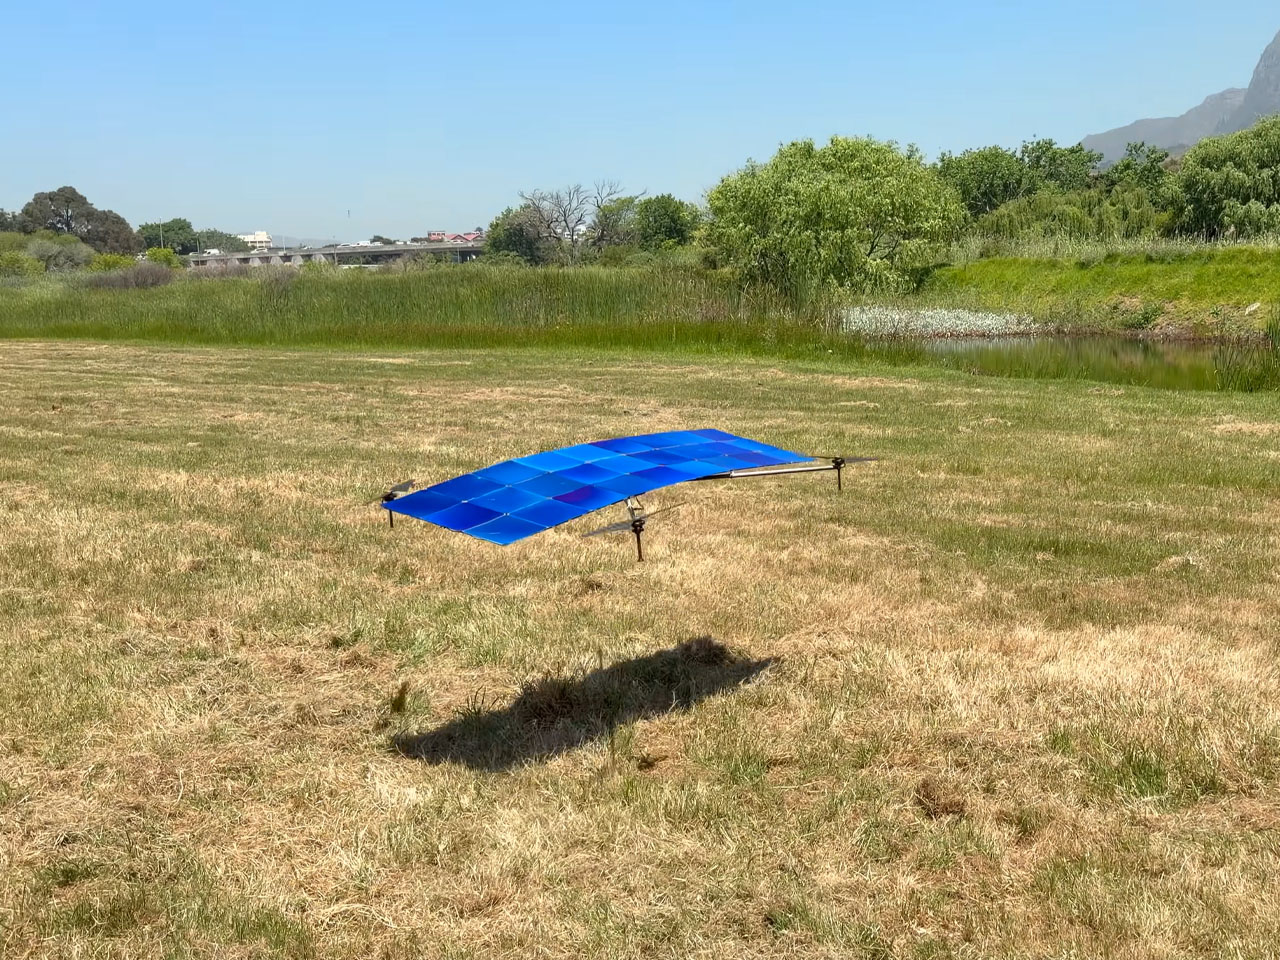
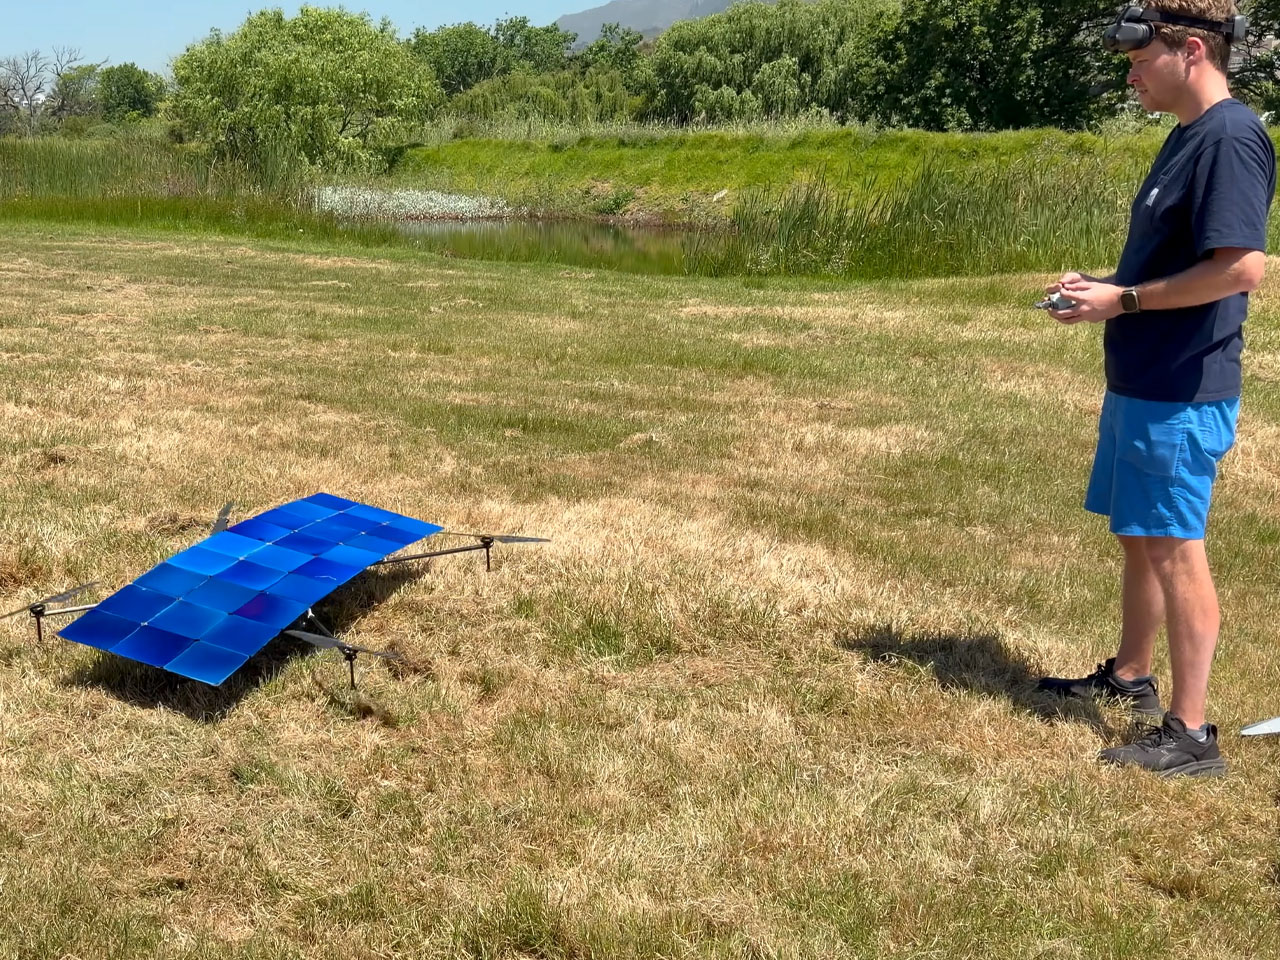
Jokes apart, Luke as for years had this thought of, what if a drone could fly on solar power alone? And this project is “designed to find that out.” From the video demonstration, the drone looks like nothing more than a flying sheet of solar panels, but it has been successfully tested to fly, which is an achievement.

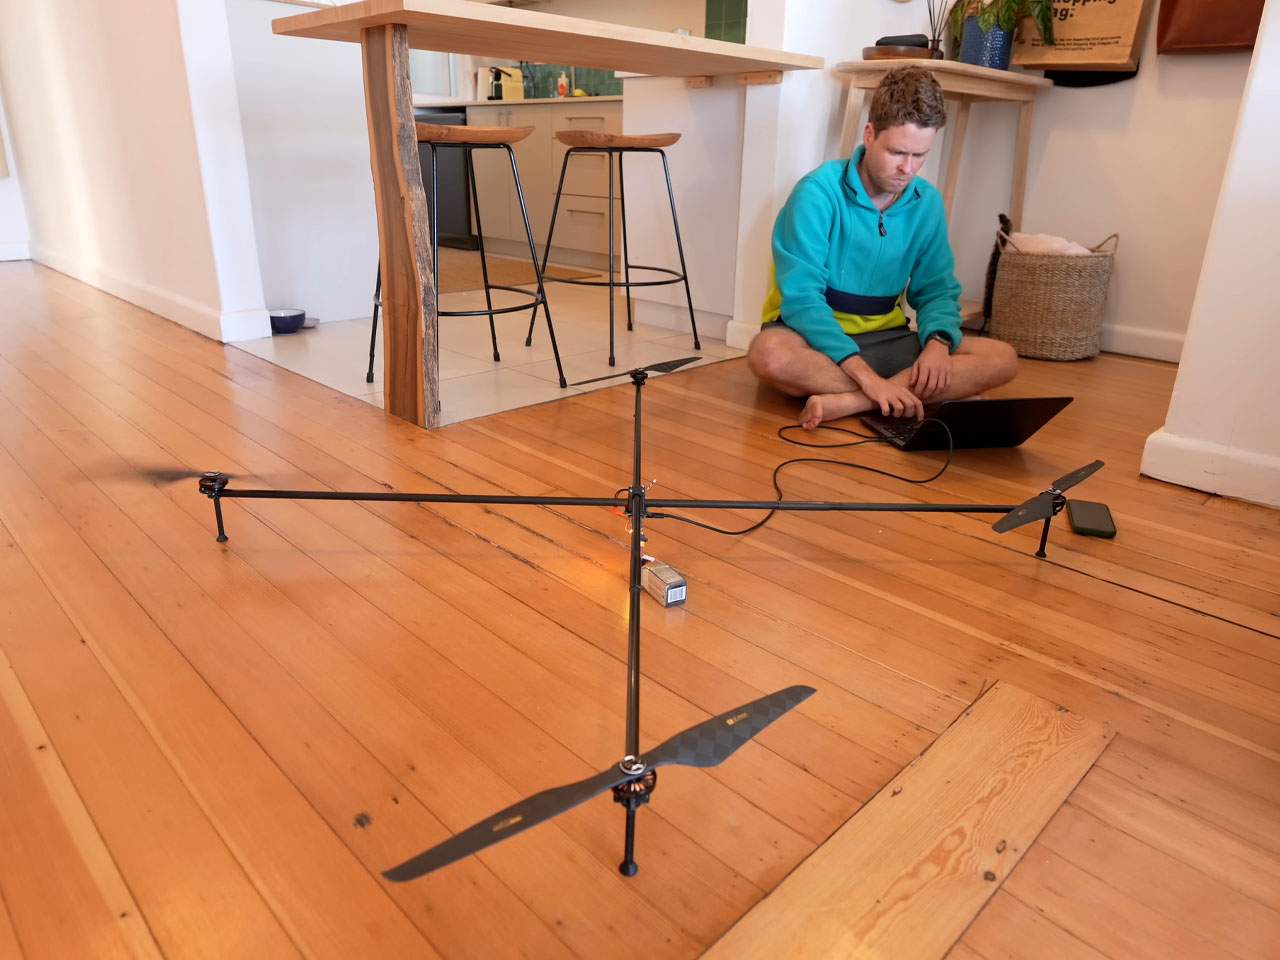
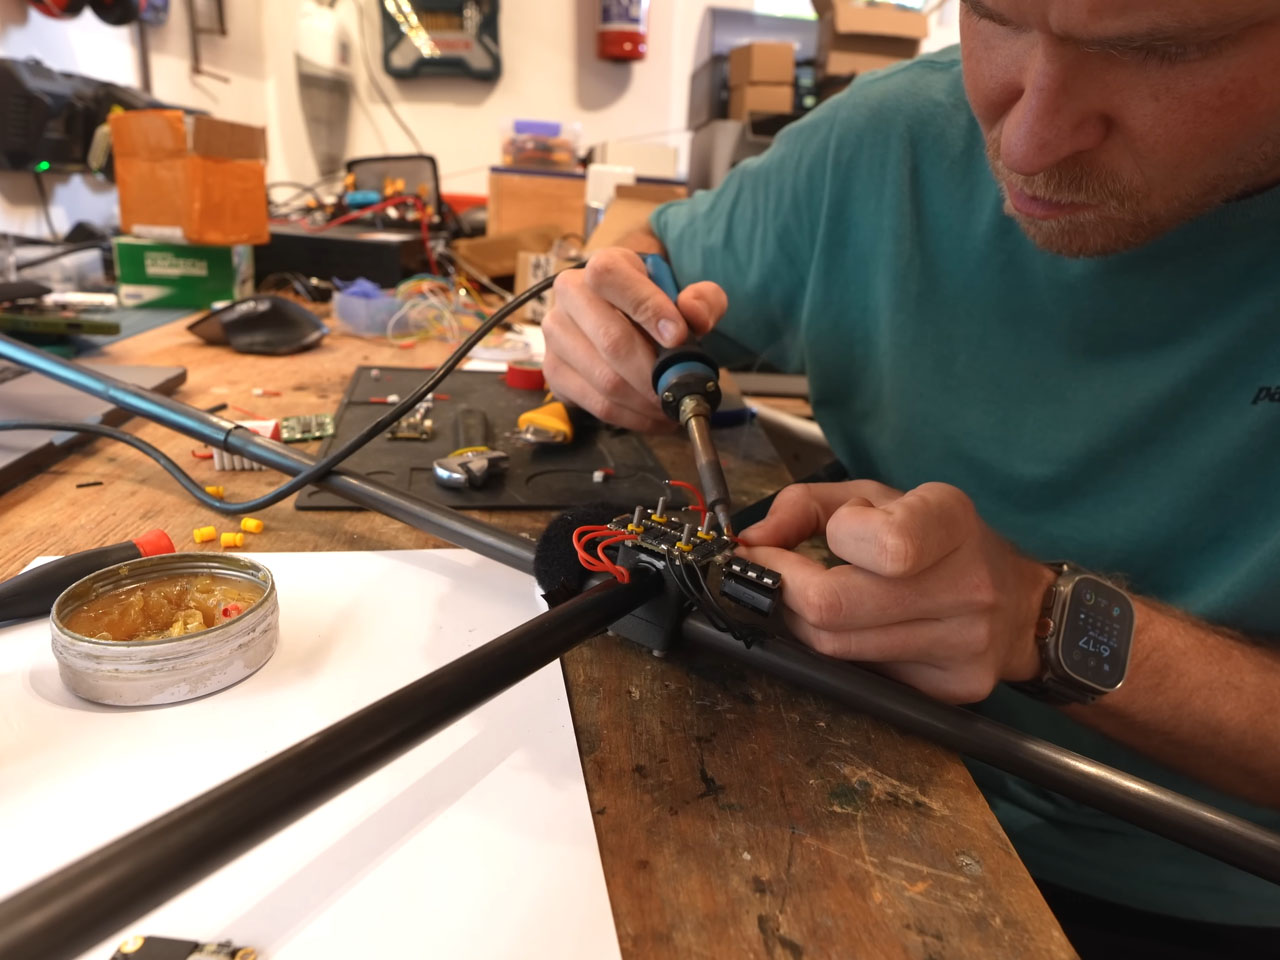
The idea of the drone is based on two parts, as Luke puts it, the drone itself (comprising antigravity motors residing on 3D printed mounts, propellers, and frame. And the second part being the photovoltaic panels. Both are combined to create this sun-loving drone that keeps airborne as long as the sun shines on it. The 18-inch X-frame of their unique drone is made of carbon fiber tubing, and it features the decisive flight controller installed right at the X intersection of the two frame bars holding the propellers at their ends.

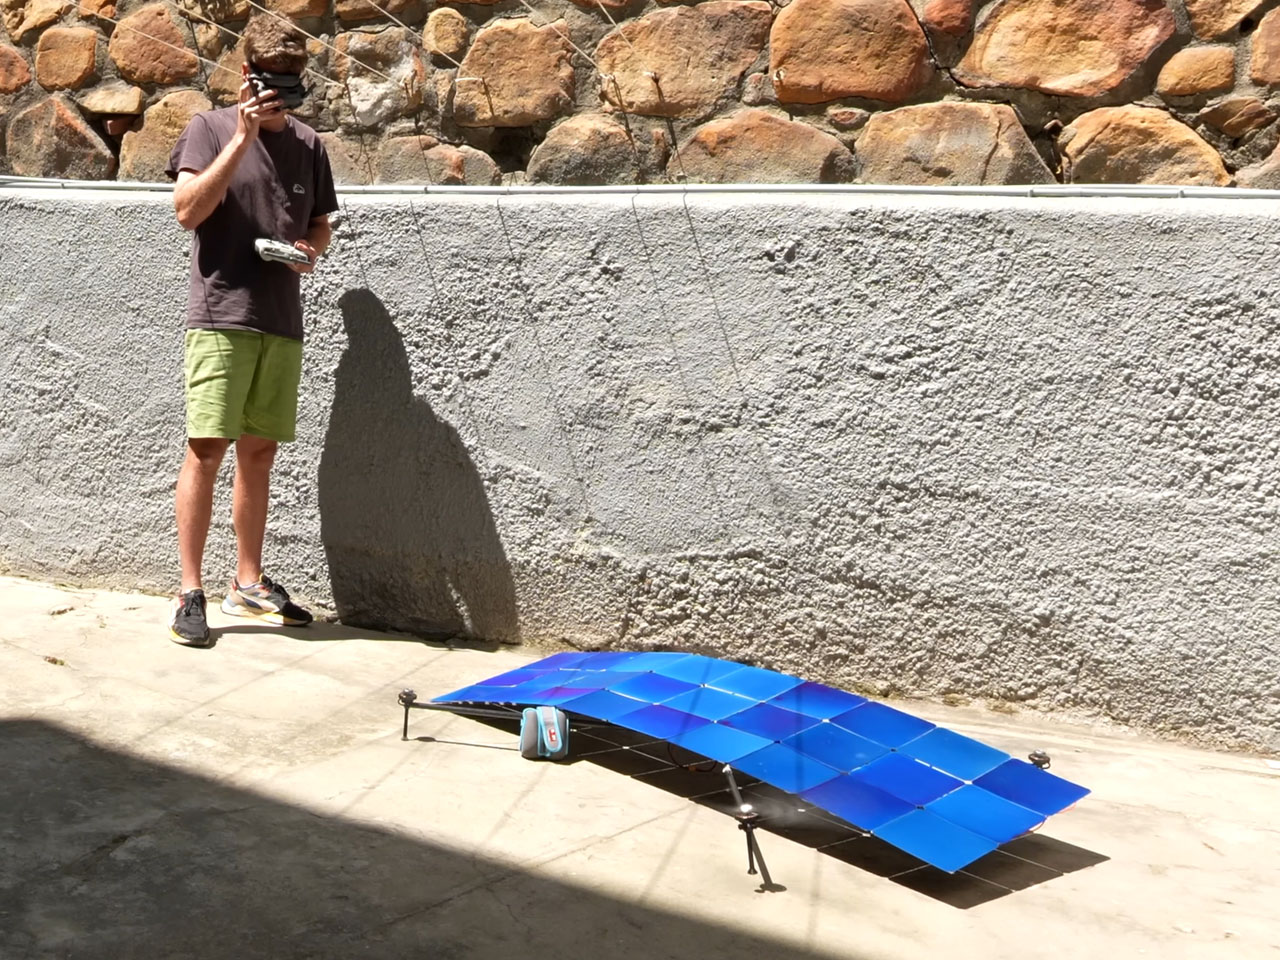
Understandably, the entire contraption has taken Luke hours of jostling through the odds, check out the video above for more details; but he has been able to pull it off. With solar panels and no batteries on board, the drone does take off after a few nervous minutes on 100 percent solar power alone. The flight was a “bit shaky,” Luke says in the video, but it’s “flying,” and the testing was “successful,” he proudly notes.

The post DIYer builds first 100% solar-powered drone that flies without batteries first appeared on Yanko Design.
3D Printed case for Halcyon Elora split mechanical keyboard has magnetic wrist pad attachments

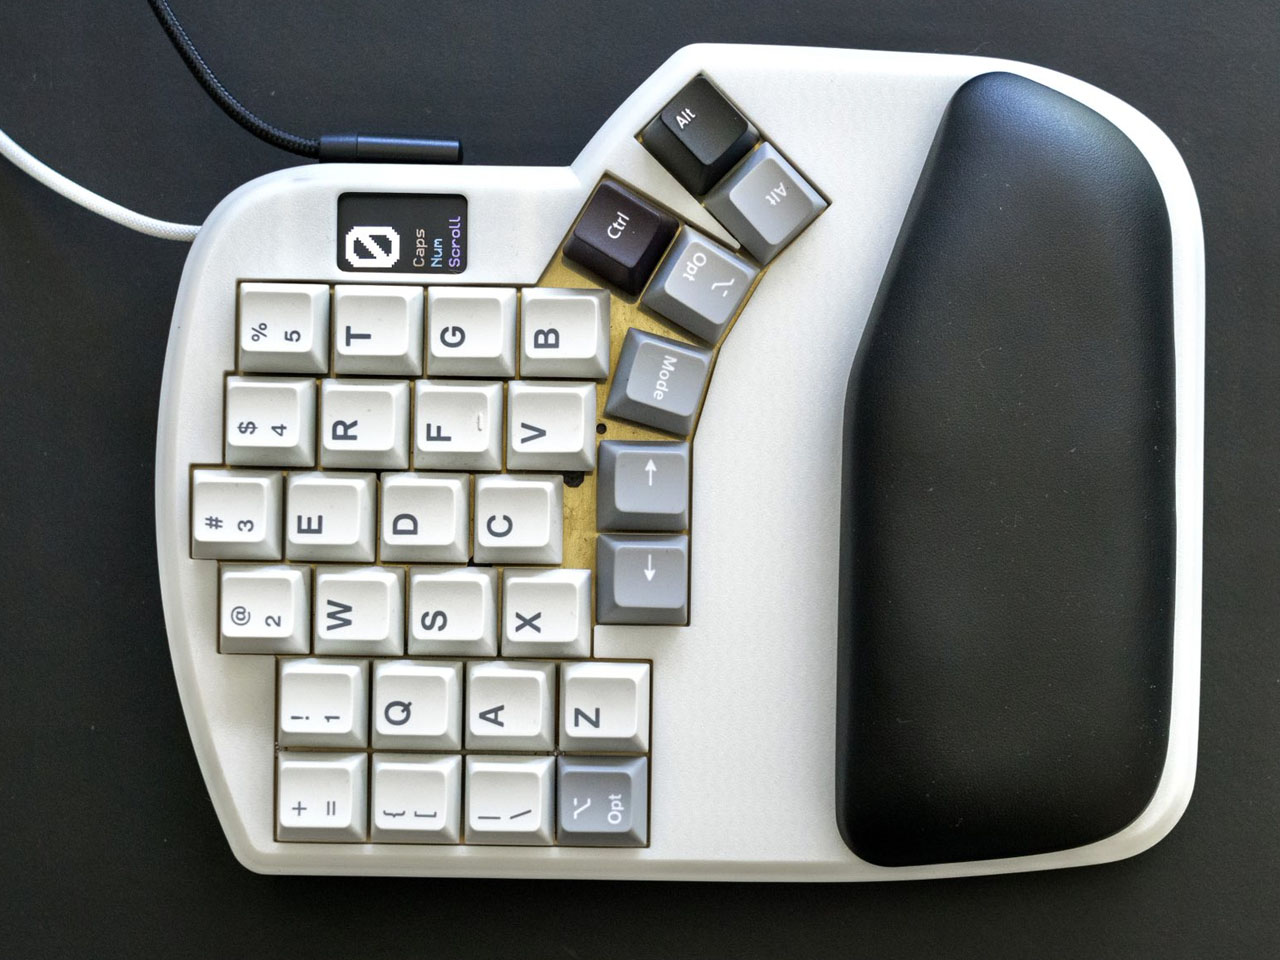
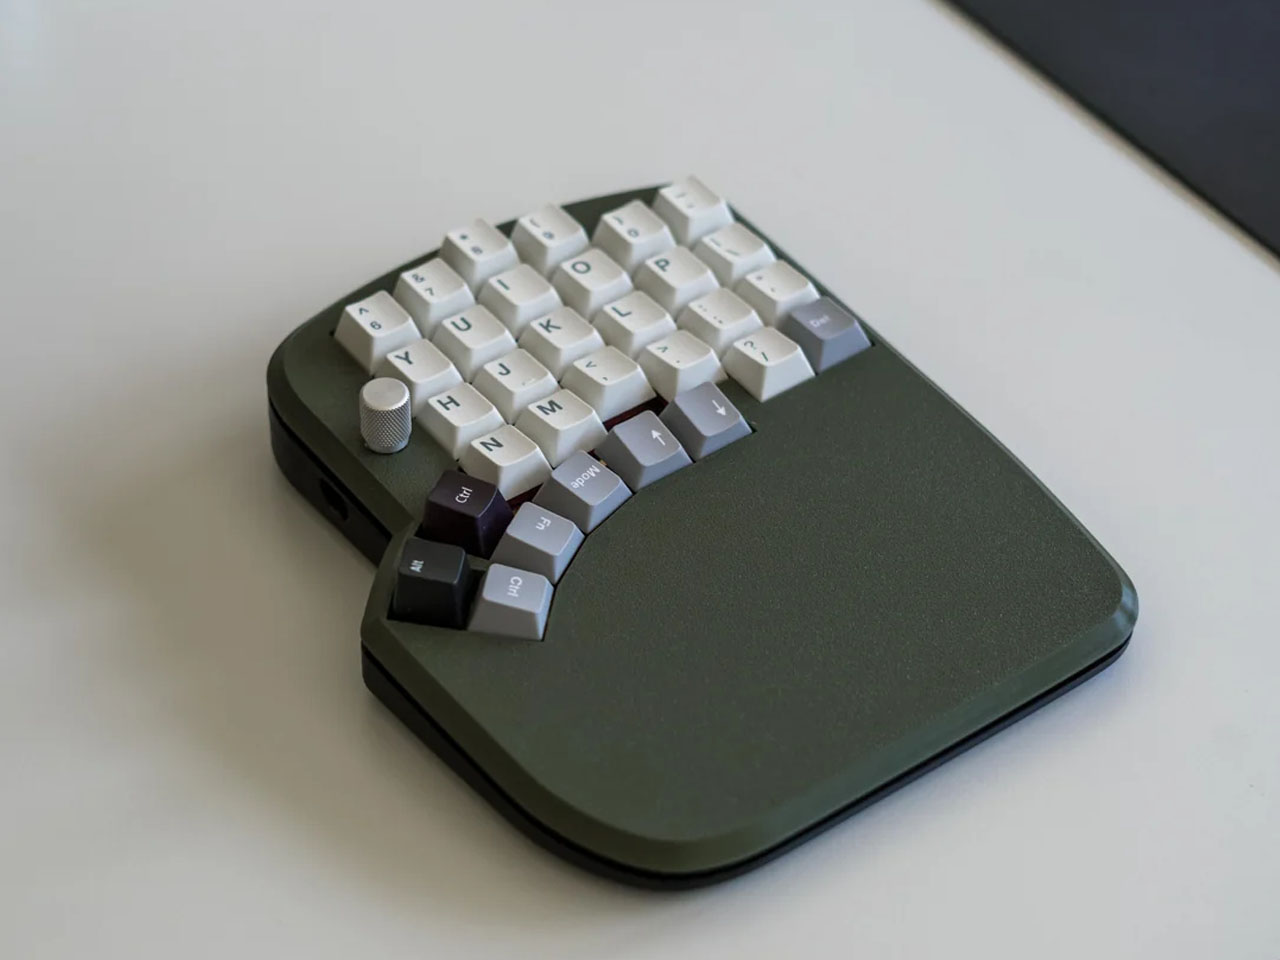
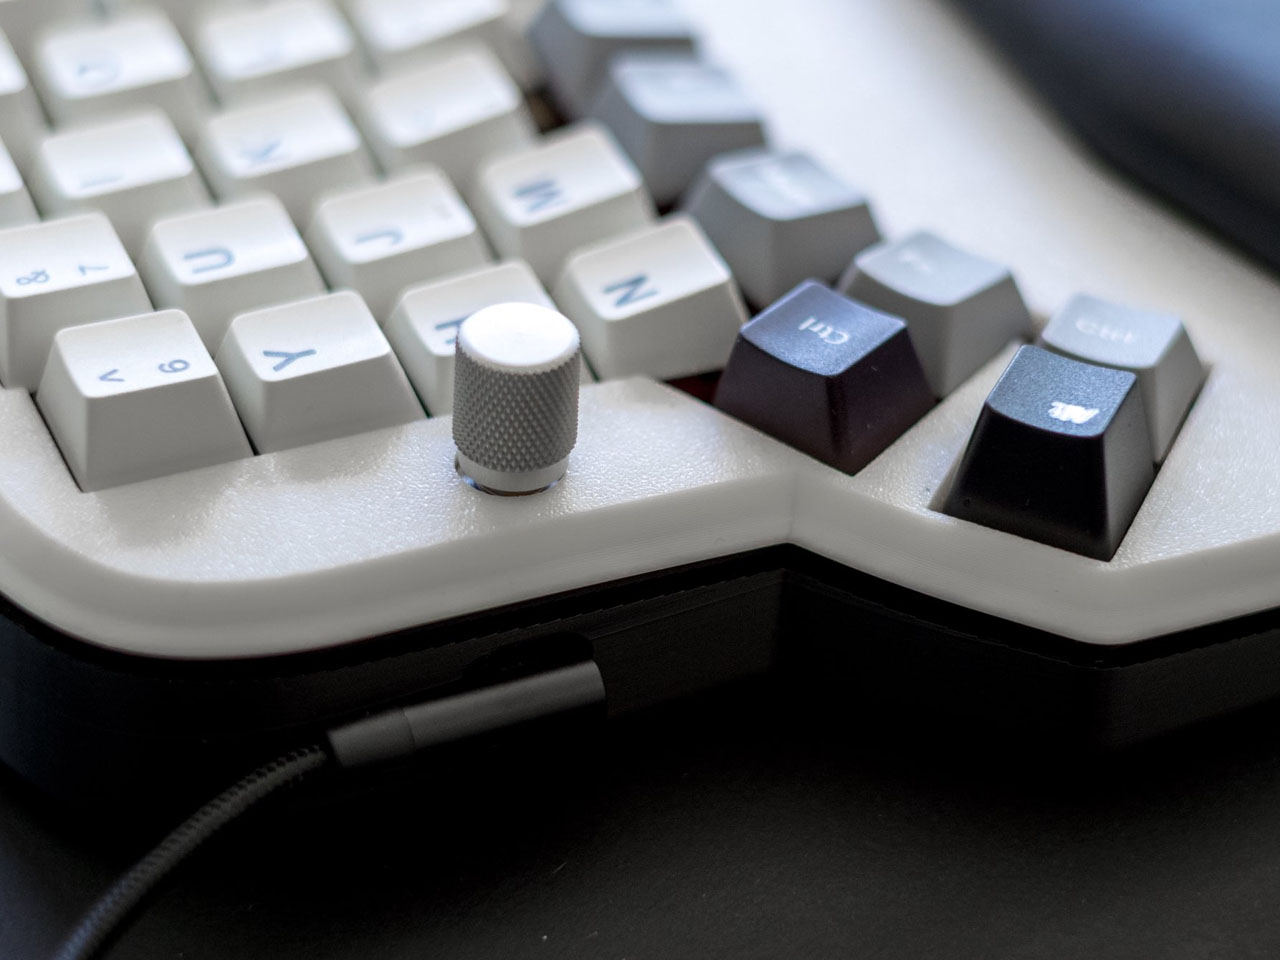
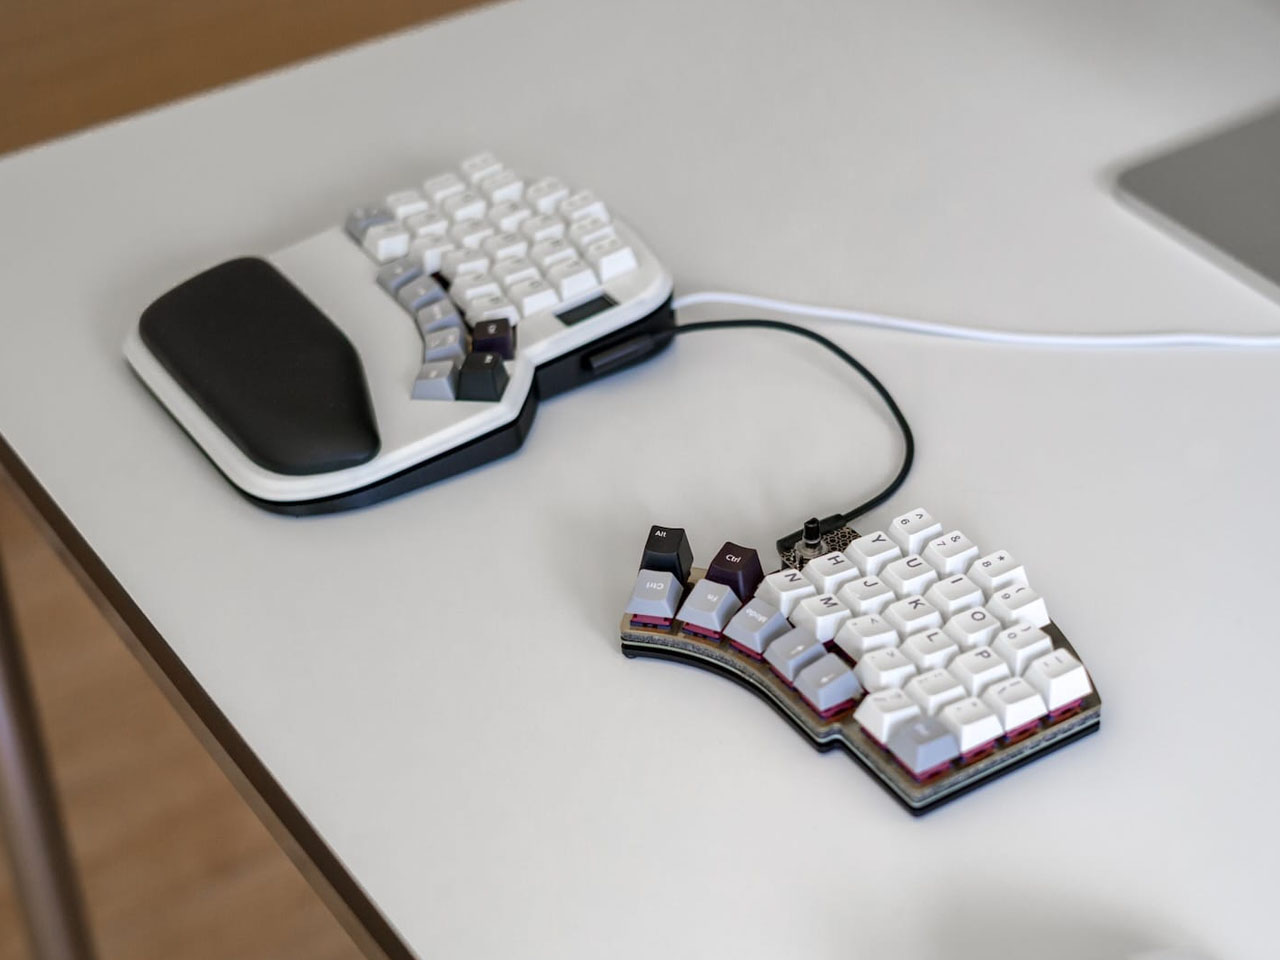
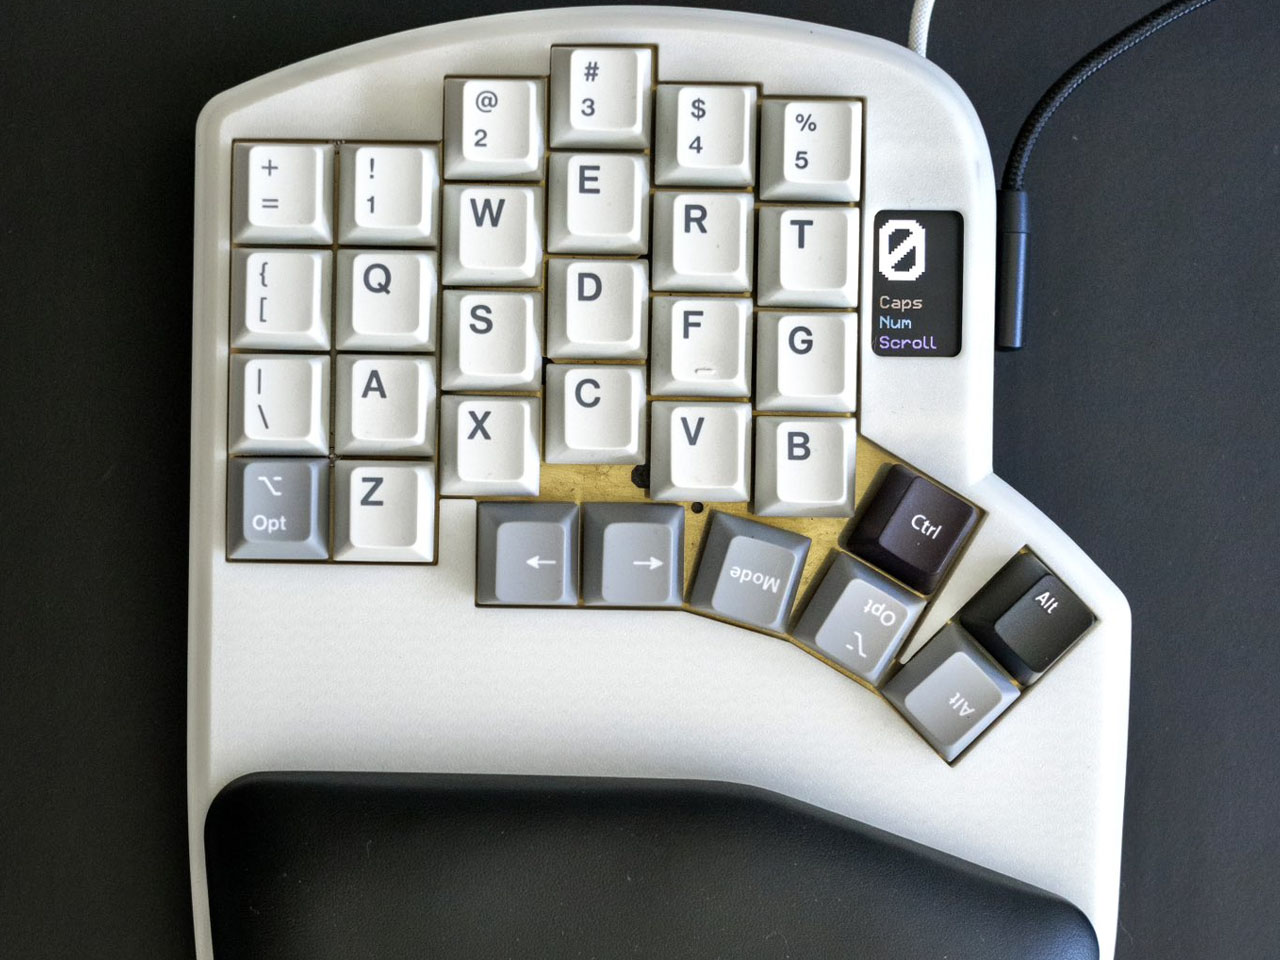
KeyChron brought the world’s first split keyboard that retained the vibe of a regular keyboard to spice up the rather boring accessory, which has seen ergonomic design changes, addition of custom keys, and not much of a design DNA evolution. The idea of a PC split keyboard stems from the notion that it alleviates long-term strain and gives the user more freedom to set up a productive desk layout. The Halycon Elora split keyboard (based on the popular Kria keyboard) has an added row of keys for easier access to numbers and symbols, which all goes well for fast typing. But does this split keyboard take the title for being ergonomically comfortable? Surely not.

That’s the reason why a DIYer decided to create an open-source 3D printable split mechanical keyboard case for the Halycon Elora. With this tweak, the everyday accessory feels more comfortable to work with, especially for long sessions. To take things a step further, the custom design makes sure you have a case to put the keyboard in, literally fitting like a glove.

Designer: Fatih Arslan

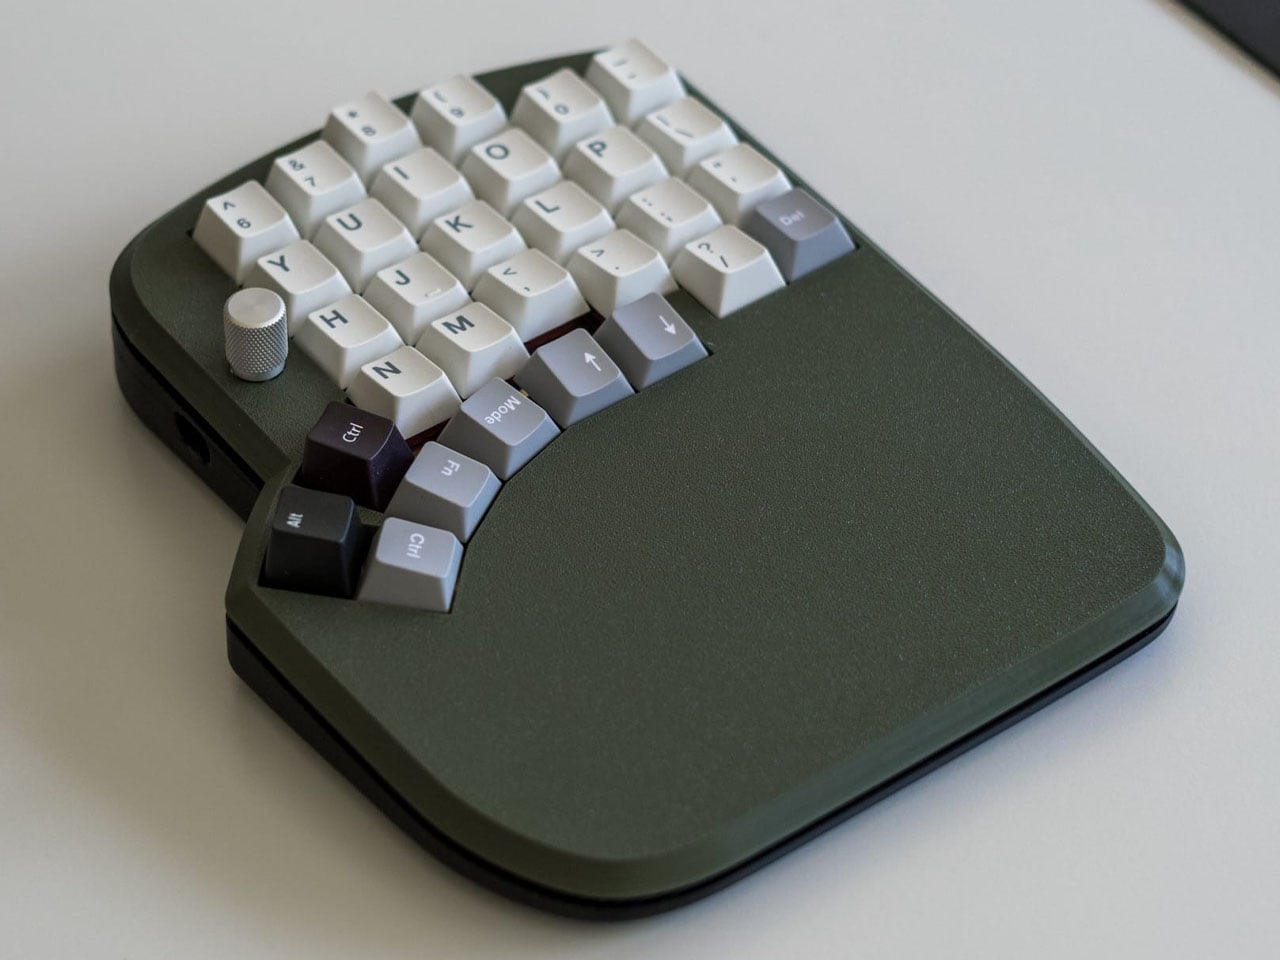
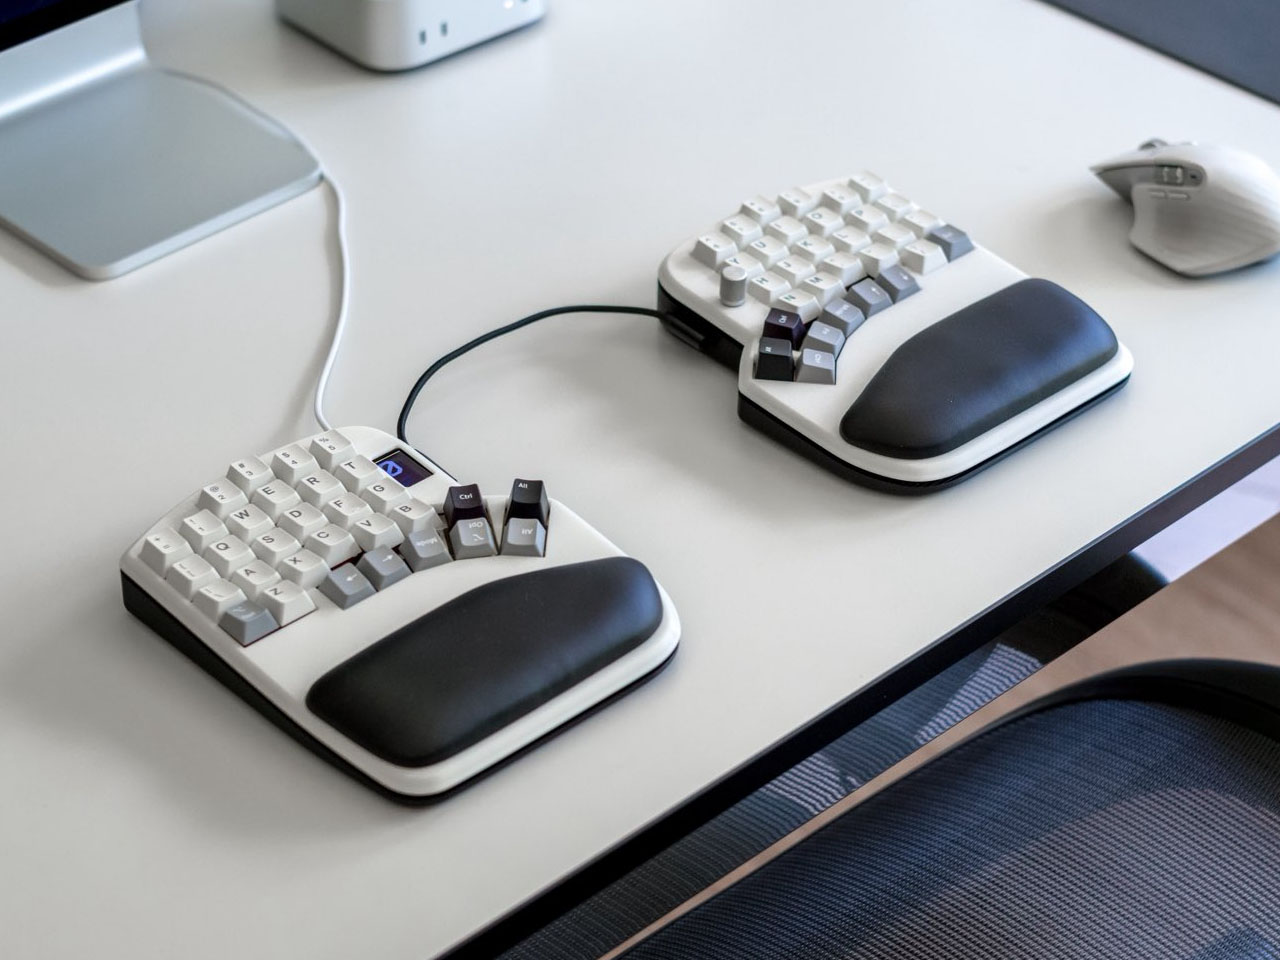
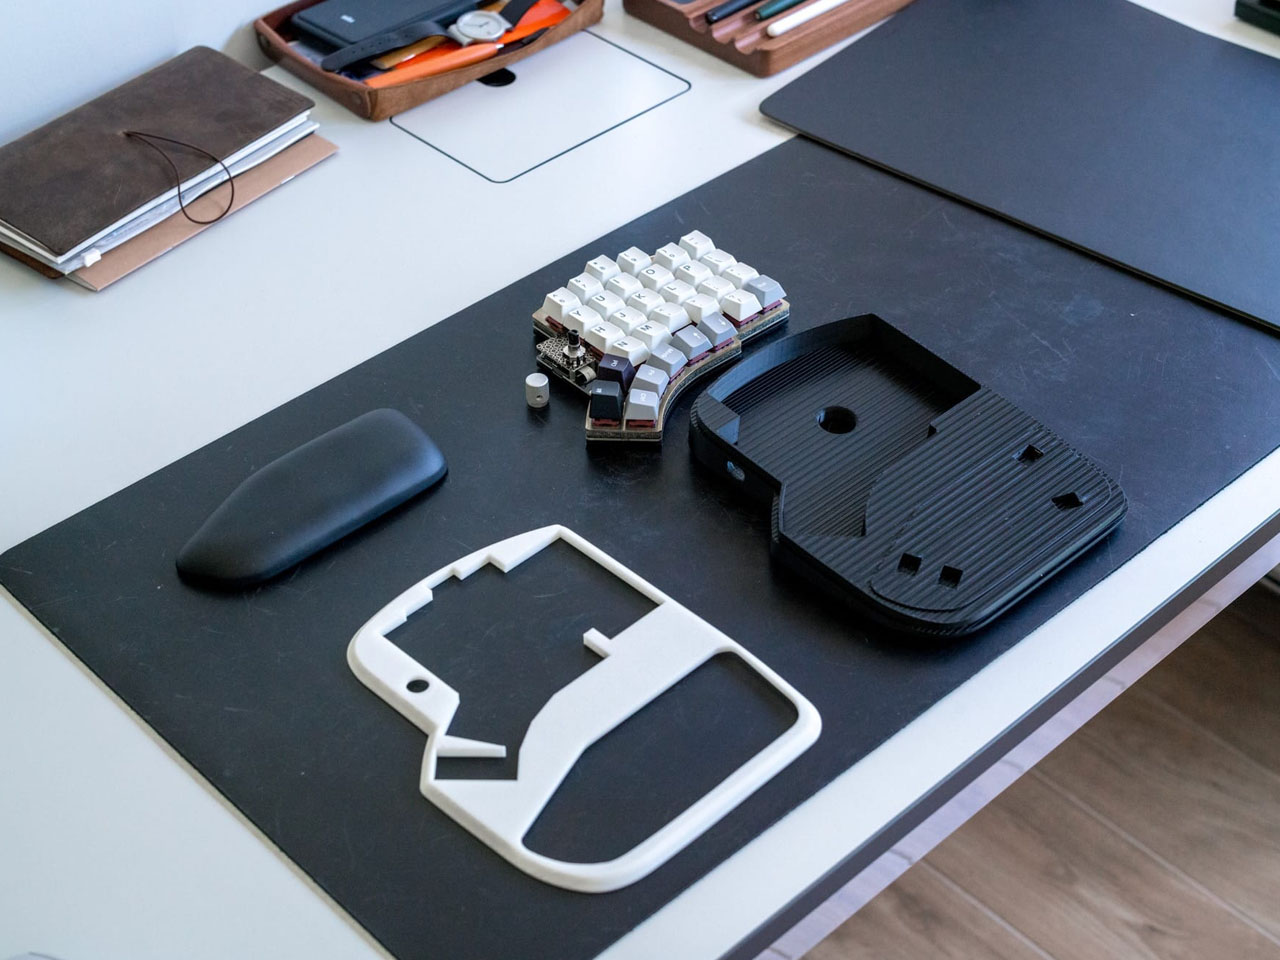
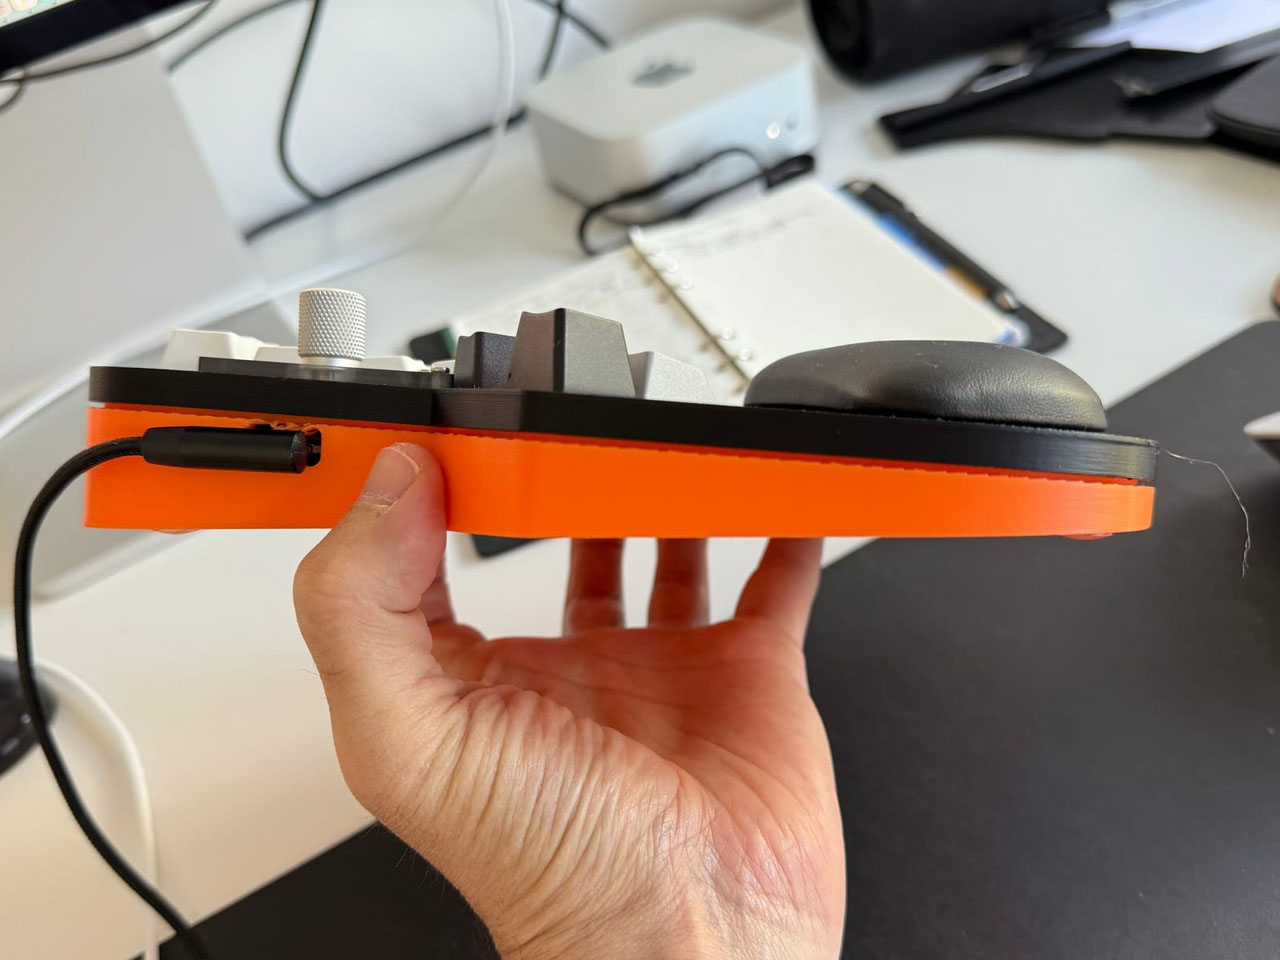
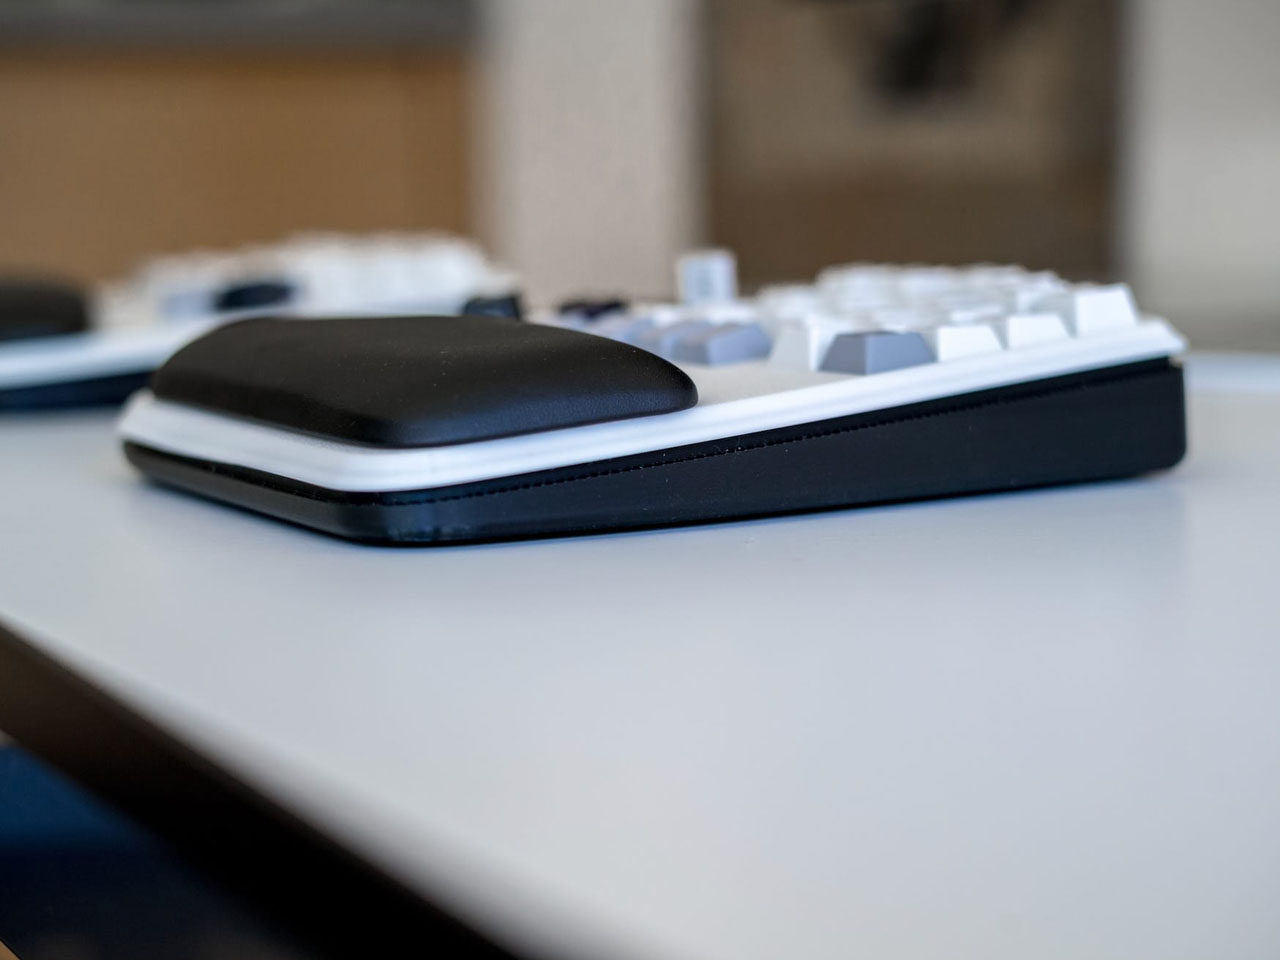
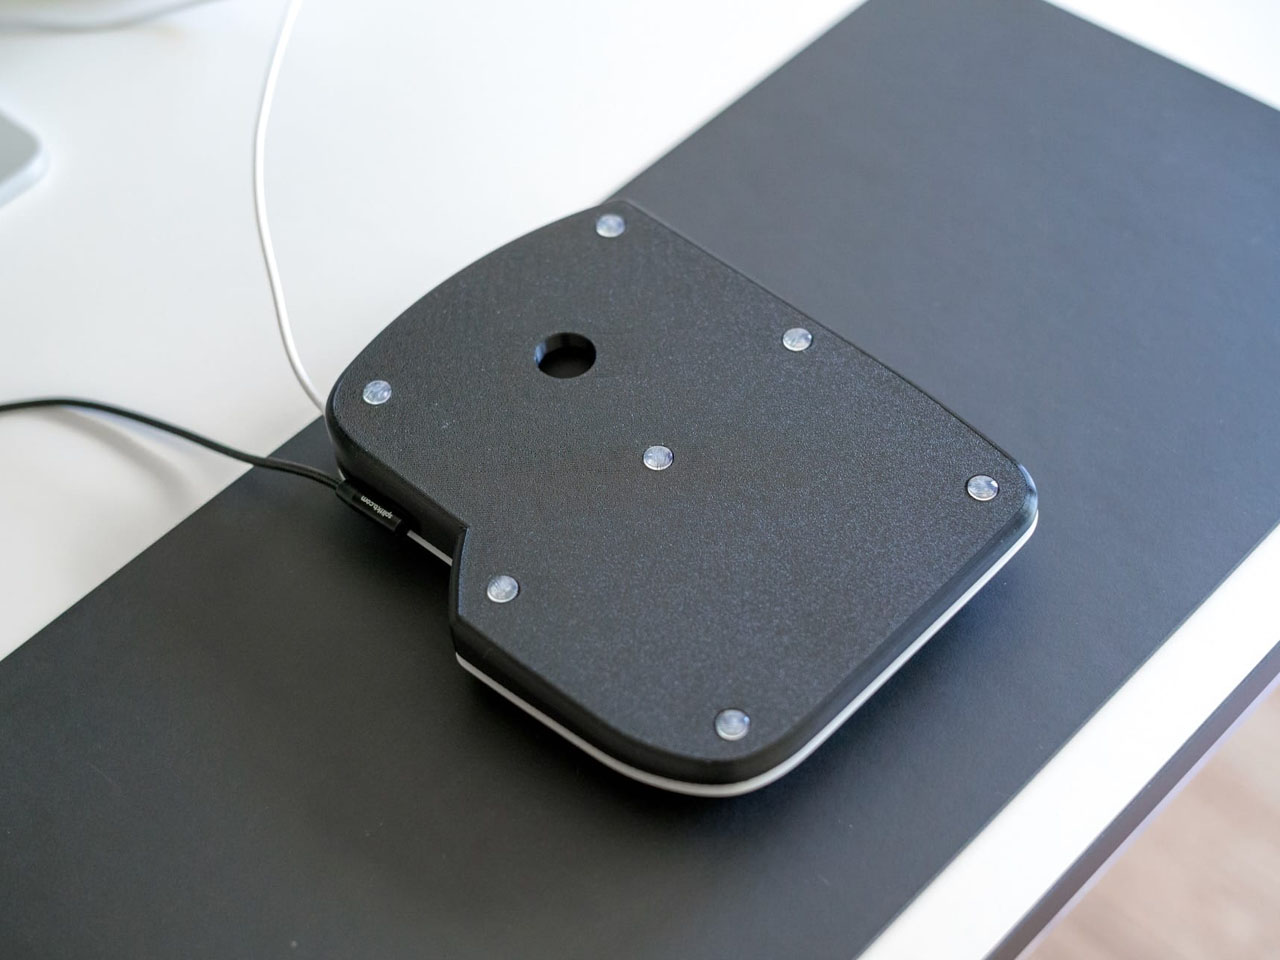
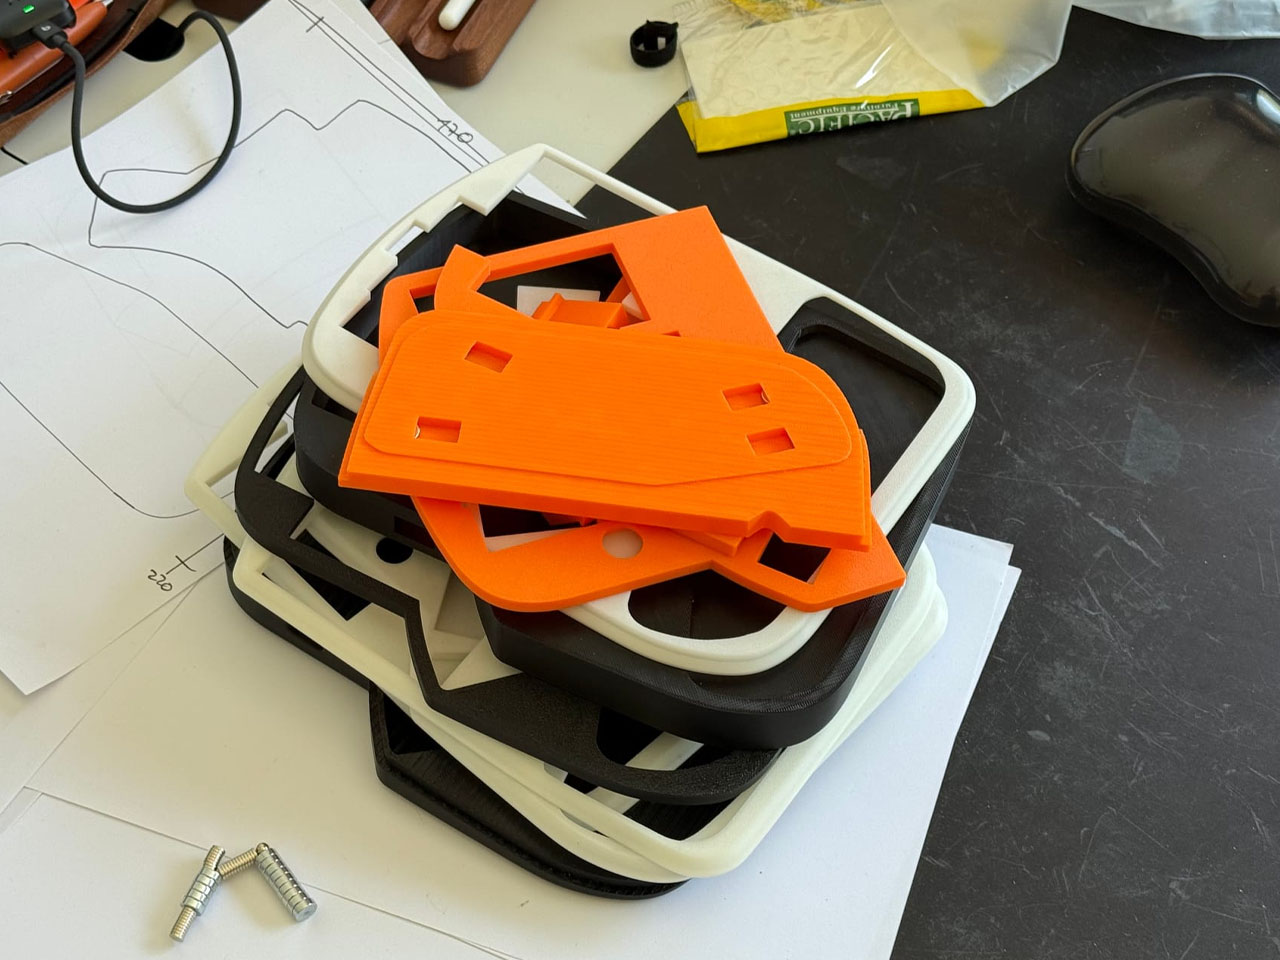
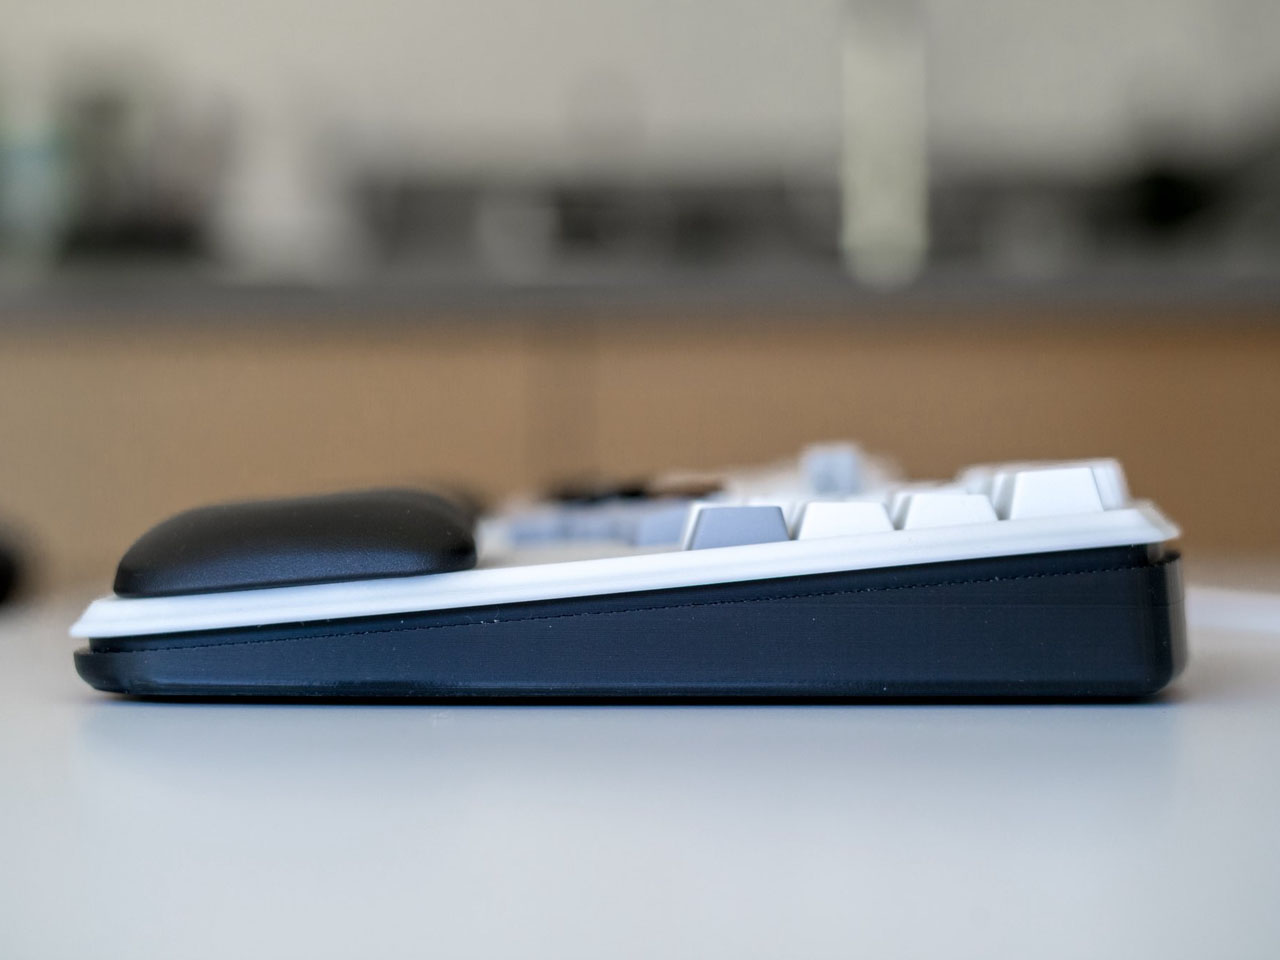
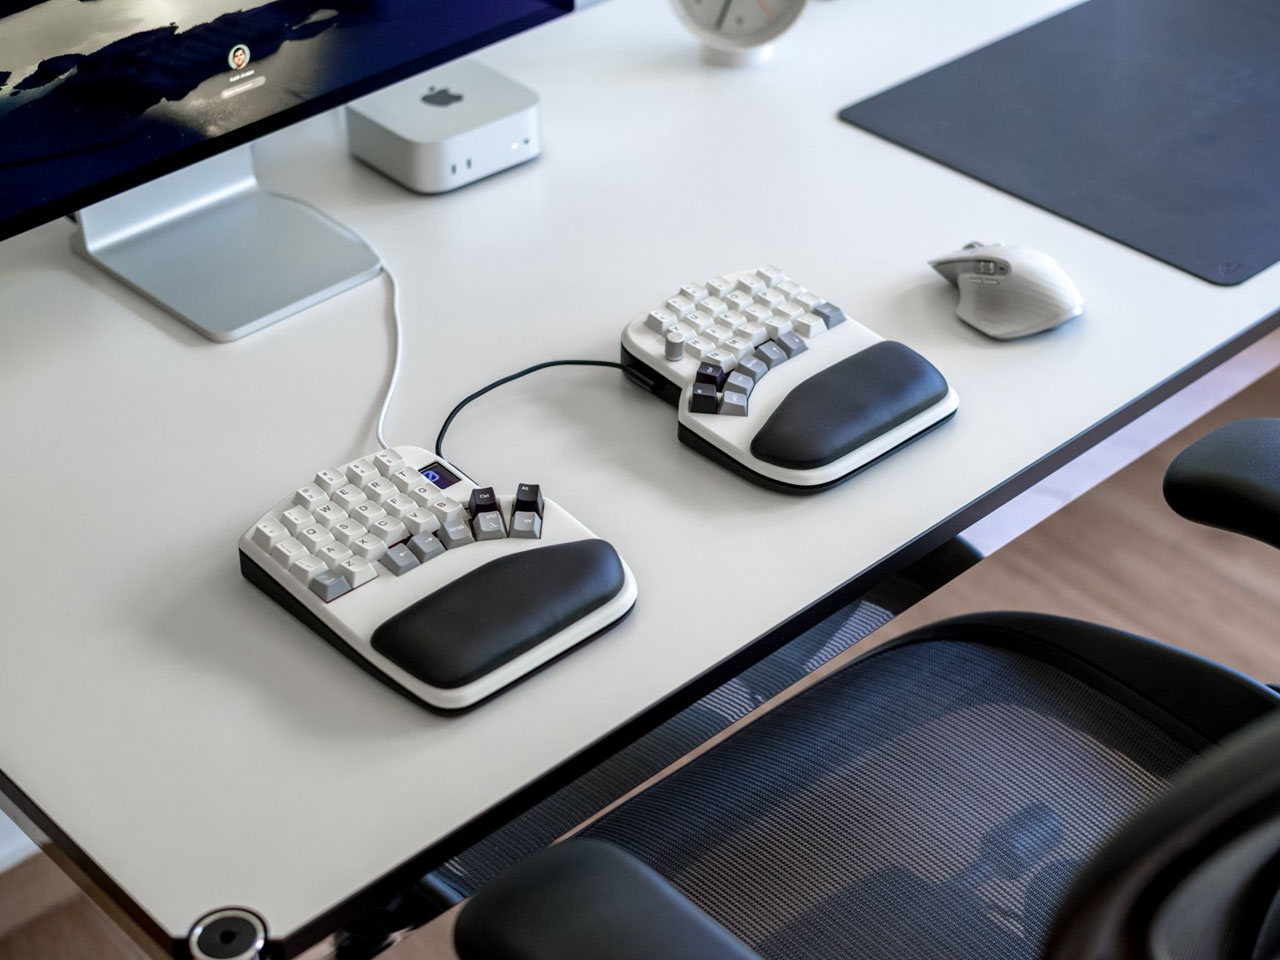
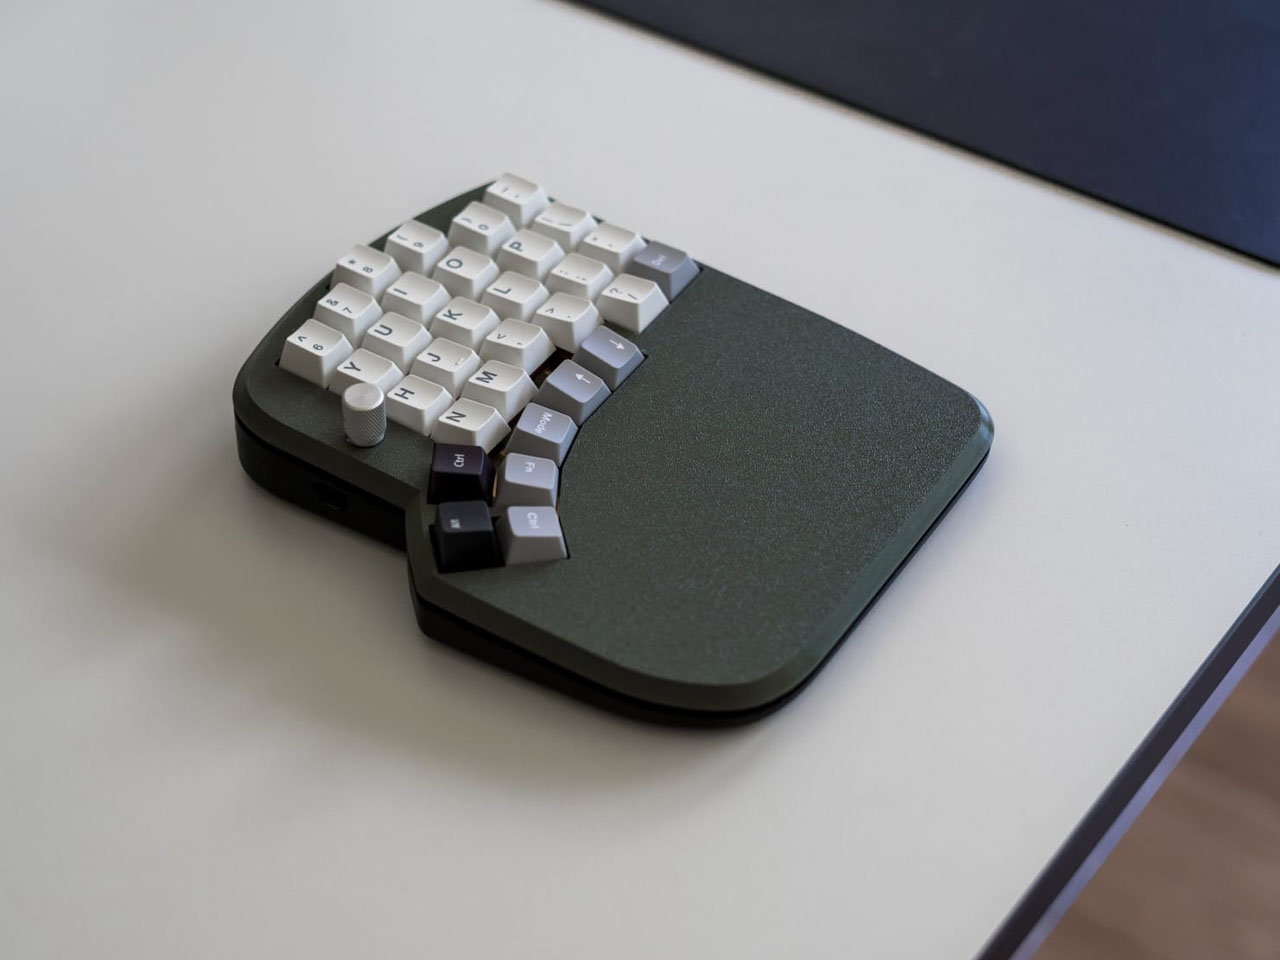
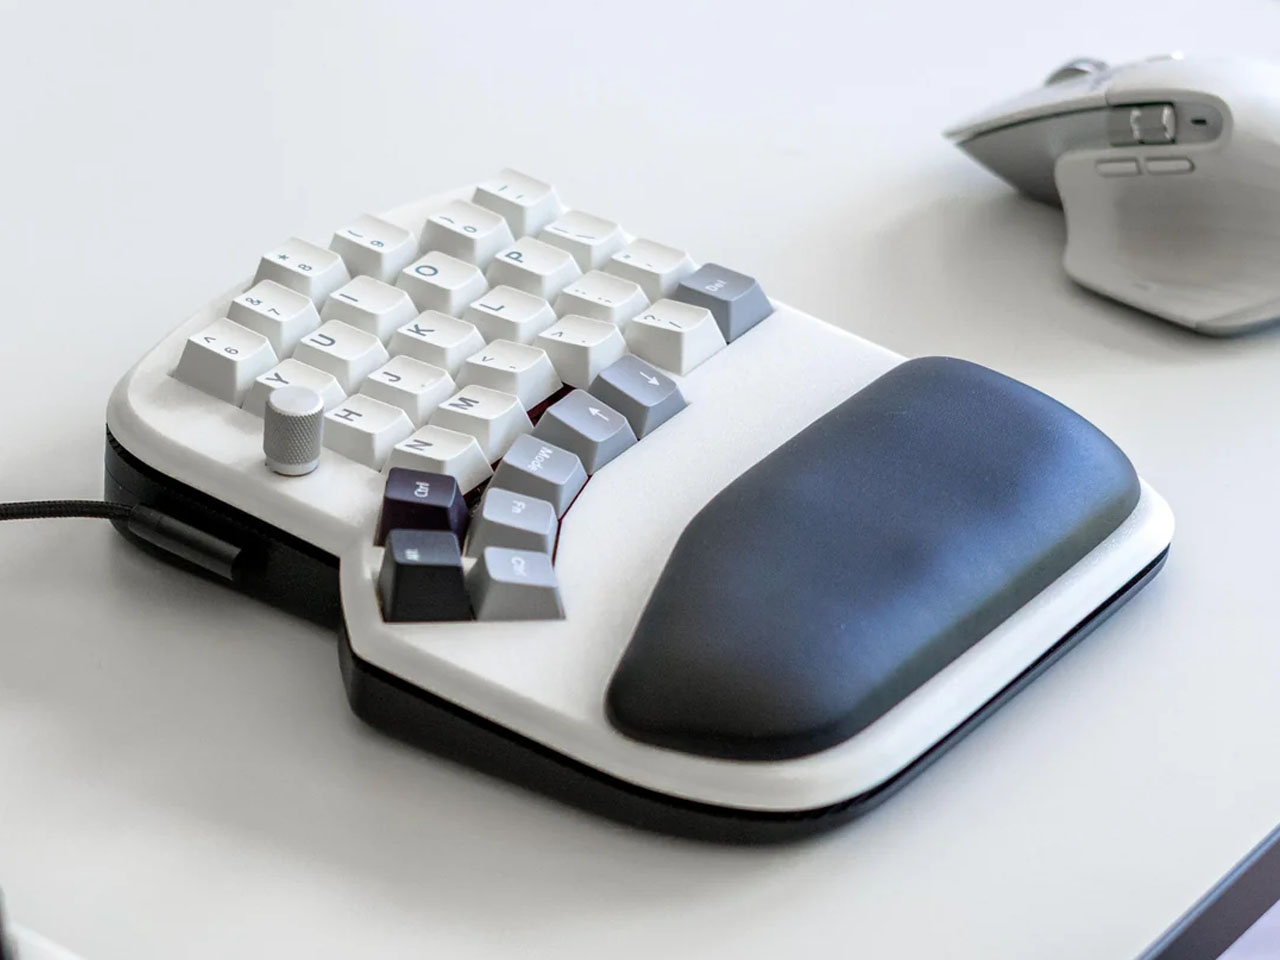
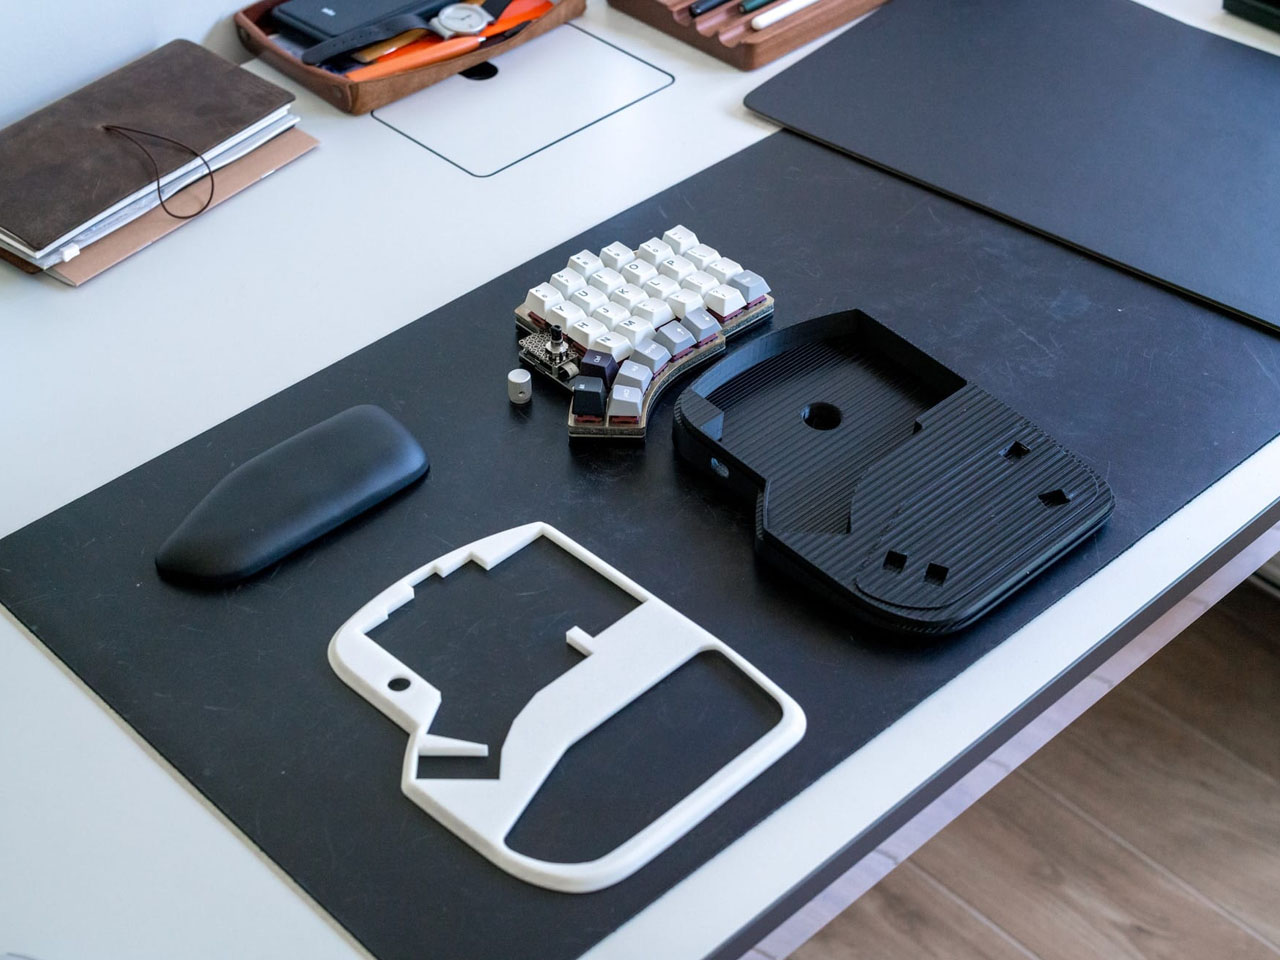
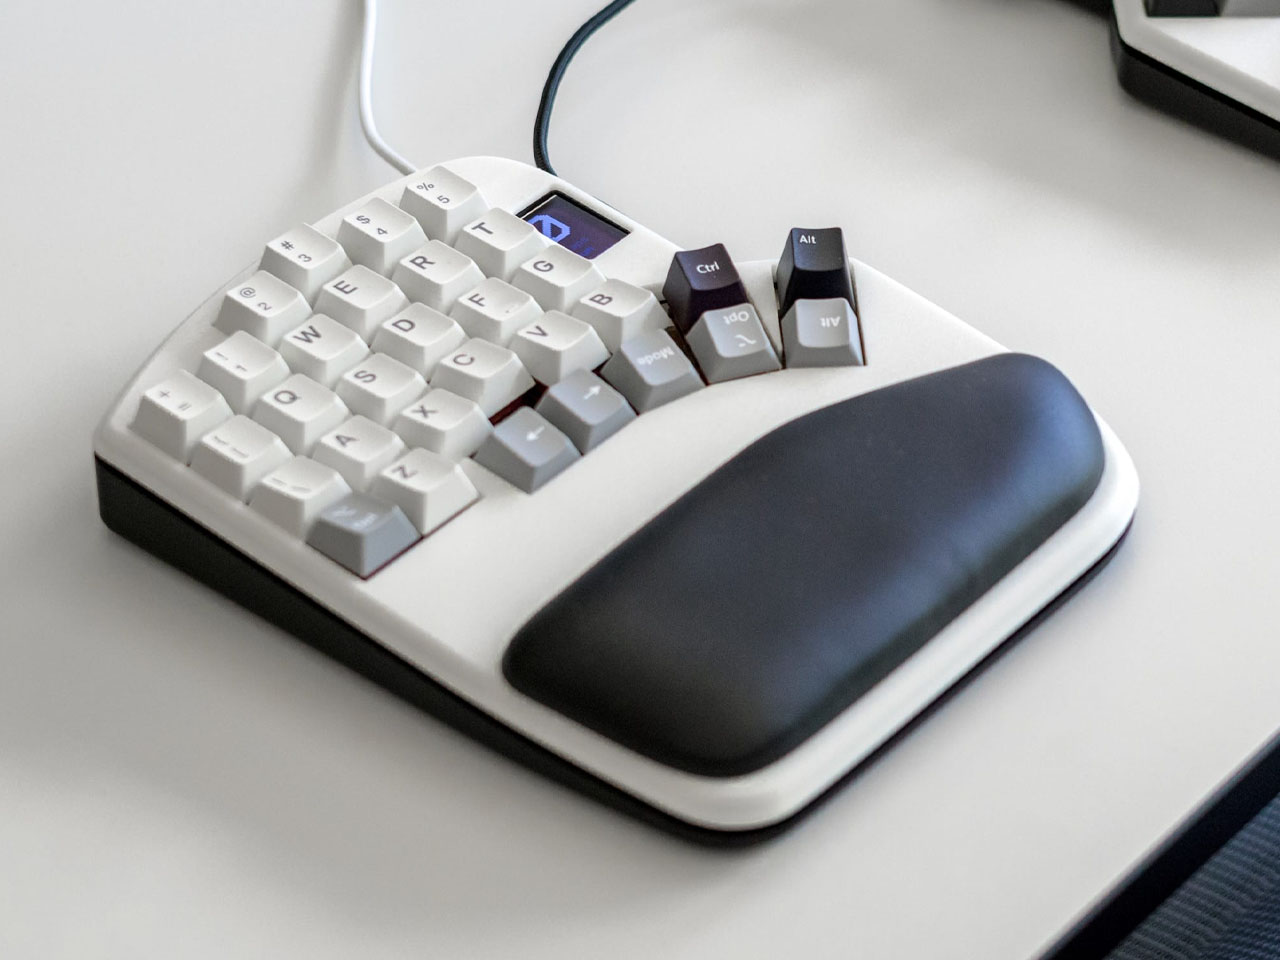
The barebone Elora keyboard does look a bit incomplete and could hamper the look of your desk setup. Nor does it provide any support for your wrist, which prompted Fatih to draw inspiration from the Kinesis Wrist Pads to create the perfect split keyboard case for the accessory. After careful planning, he made a prototype that added a 5-degree tilt to the keyboard for better reach, especially for people with small hands. There are customizable top and bottom plates, integrated magnetic wrist pads, and rubber stops for stability and control.

Depending on the user, the case can be attached with a wrist pad or the faceplates, thanks to the optional support for attaching an encoder, touchpad, or display to the Elora keyboard. The new accessory for the split keyboard comes with dual USB-C ports for the left part, and one for the right. Magnetic holes at the bottom base fit the compatible Kinesis leather wrist pads, and the DIYer also created versions that have magnetically snapping top plates for people who prefer a different typing position. There are holes at just the right place to route the cables, which the eager users will appreciate.

Most of all, the custom-designed case makes the mechanical split keyboard sturdier and gives it a more finished look that it lacked earlier.  The accessory comes with 12 top plate designs in total that the maker has put up for download, so that users can 3D print and use right away. Of course, there is the freedom to modify the designs to fit individual needs as well.

The post 3D Printed case for Halcyon Elora split mechanical keyboard has magnetic wrist pad attachments first appeared on Yanko Design.
DIYer recreates a fully functional version of the iconic Xbox “Big X” prototype

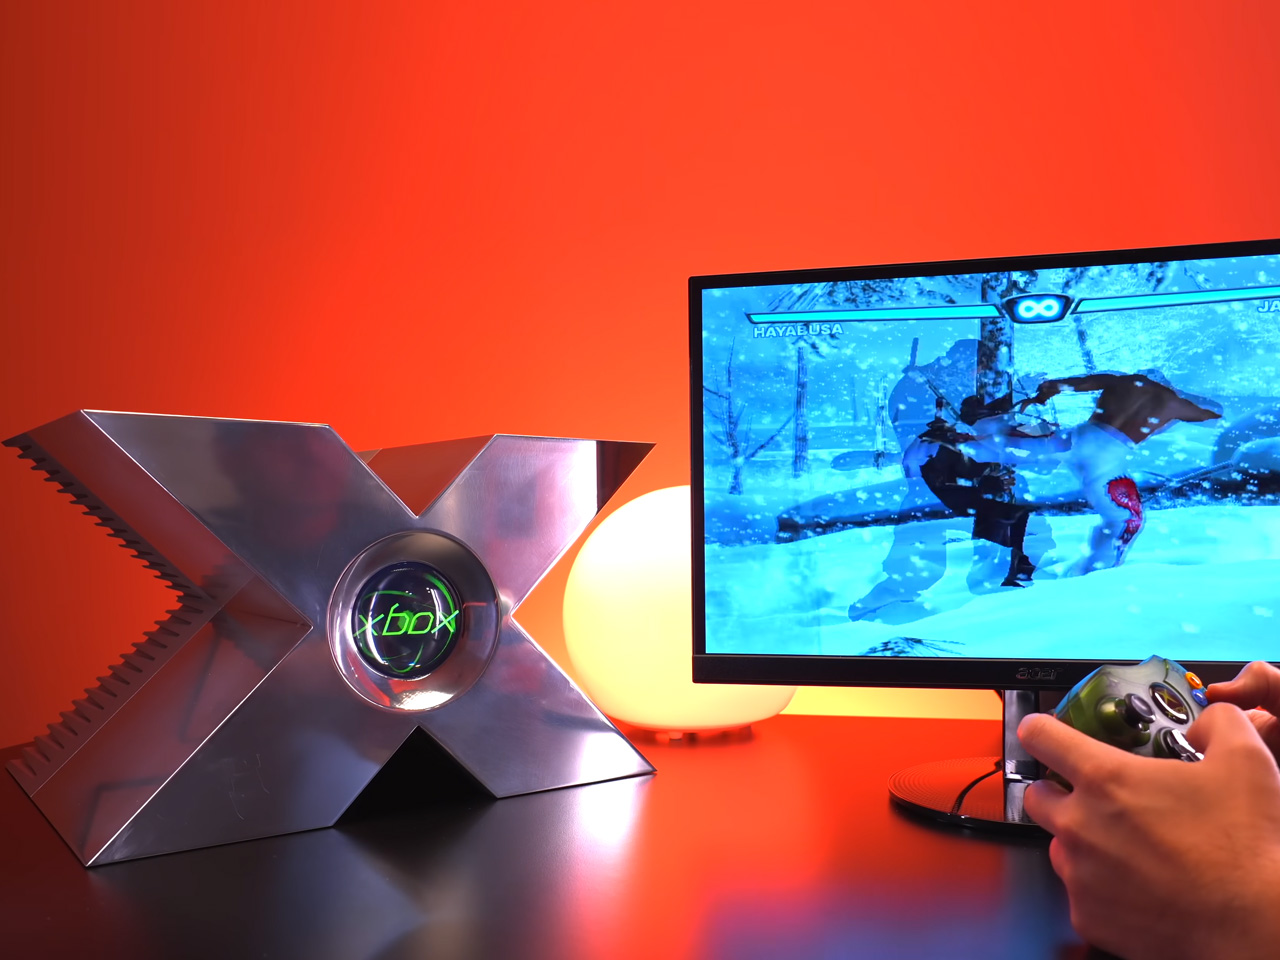
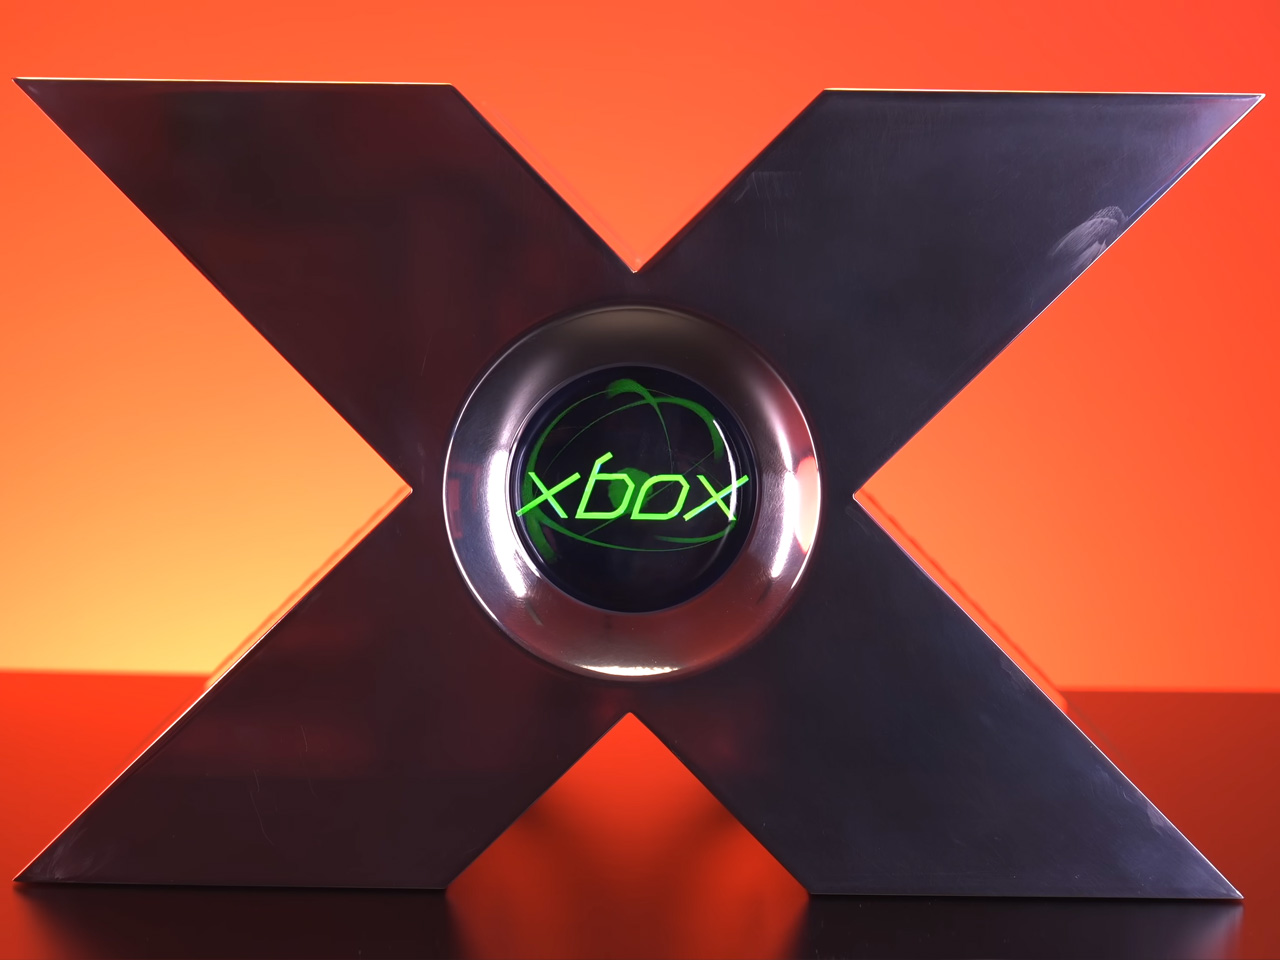
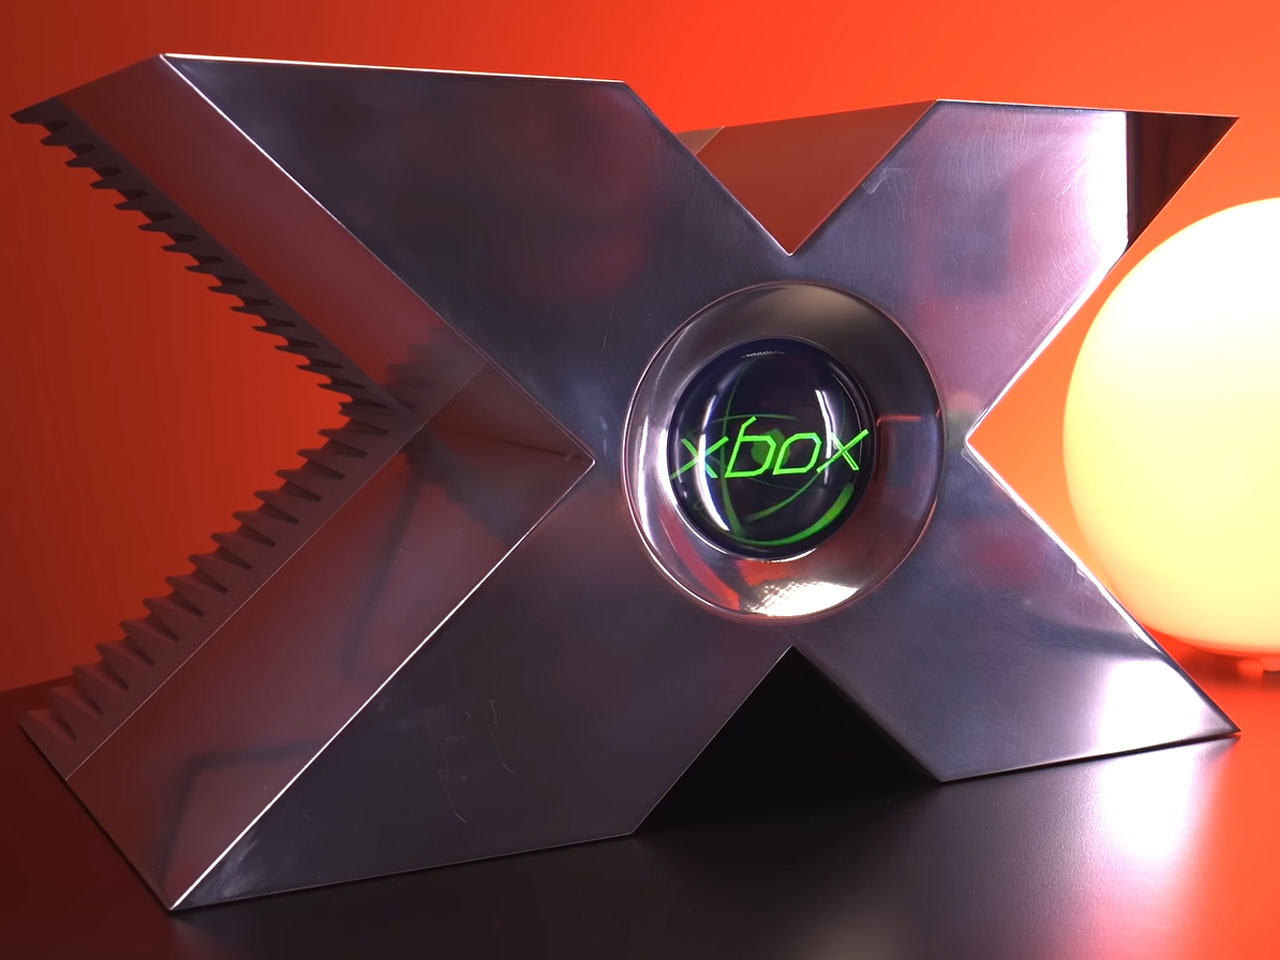
Before releasing the official Xbox console, Microsoft was skeptical whether prospective gamers would be able to keep their software image distinguishable from the new hardware venture. To ensure the inaugural gaming console would be perceived as a standalone product, the company created a prototype that looked radically different from a desktop product. At the 2000 Game Developers Conference, Bill Gates and Seamus Blackley showcased the X-shaped version to build the brand image.

Made from solid aluminum, the prototype weighed 40 pounds and cost nearly $18,000 to manufacture at the time. It was not a functional gaming console and was only created to build the brand perception. The first-ever Xbox came a year after that, and the rest is history. Fast forward to the present day, as one DIYer wants to see if the X-shaped console would be an actual feasible product. The answer is yes, as this functional Xbox prototype-inspired console proves it.

Designer: Tito Perez

Meet Tito Perez of the YouTube channel Macho Nacho Productions, who set out to make the functioning variant of the console prototype. The starting point for him was the reference images of the model taken from the rare one on display in New York. The next step involved building a 3D model of the prototype from the visual reference of every curve, screw hole, and other little details. Thereafter, the finalized file was sent to the PCBWay factory to craft the aluminum model, which cost him around six thousand dollars.

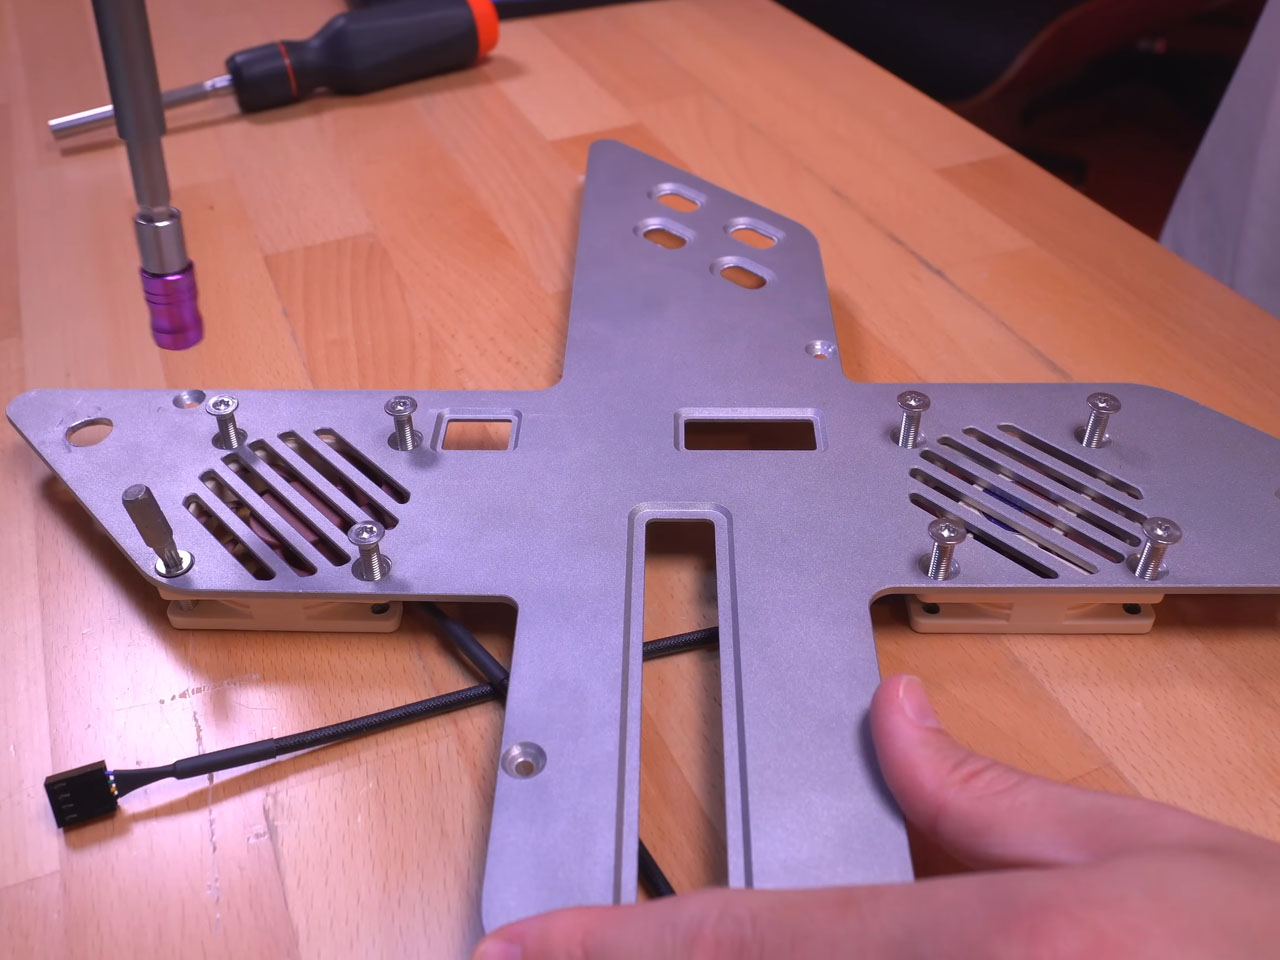
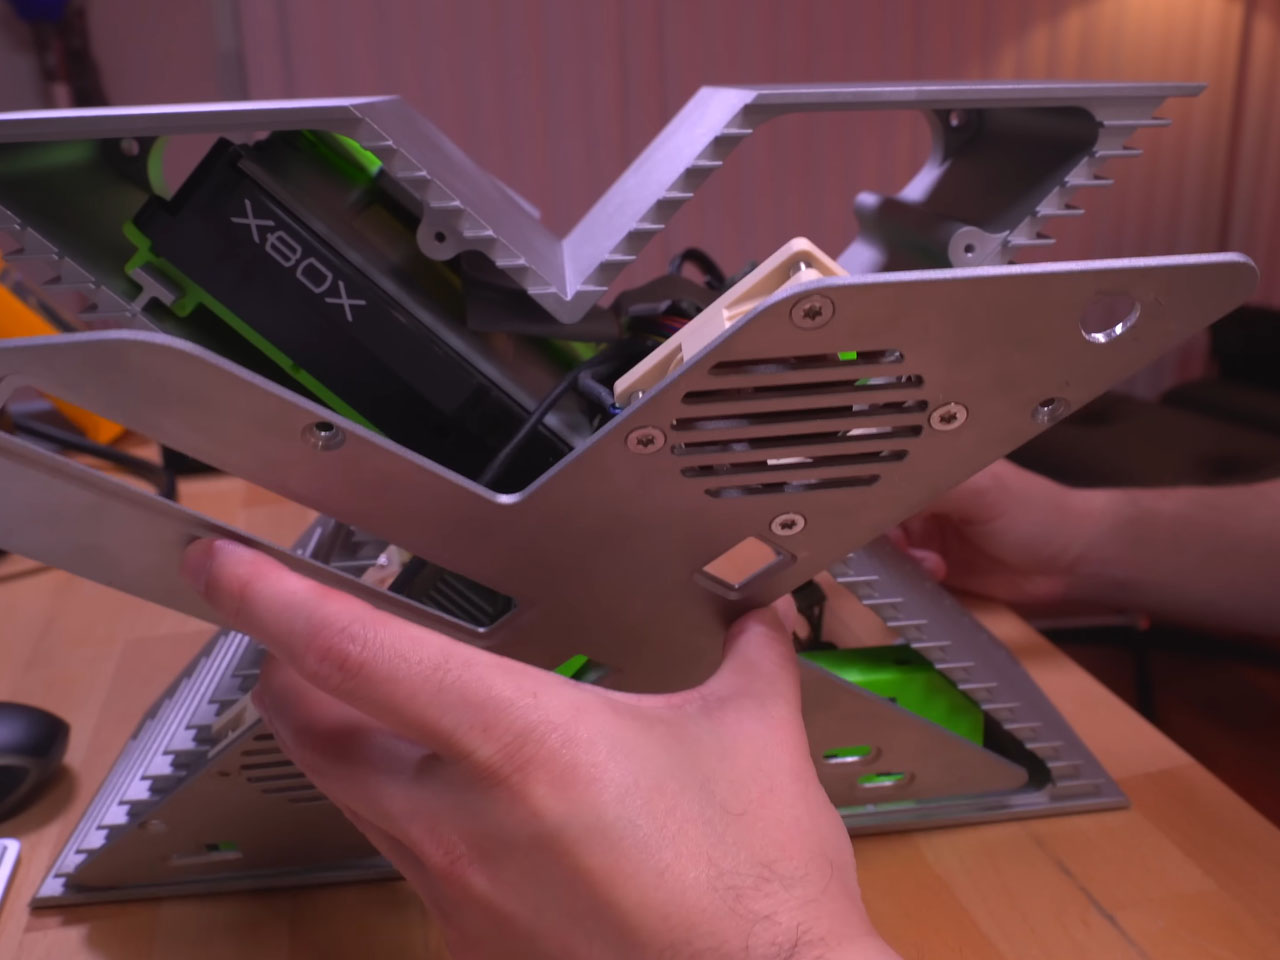
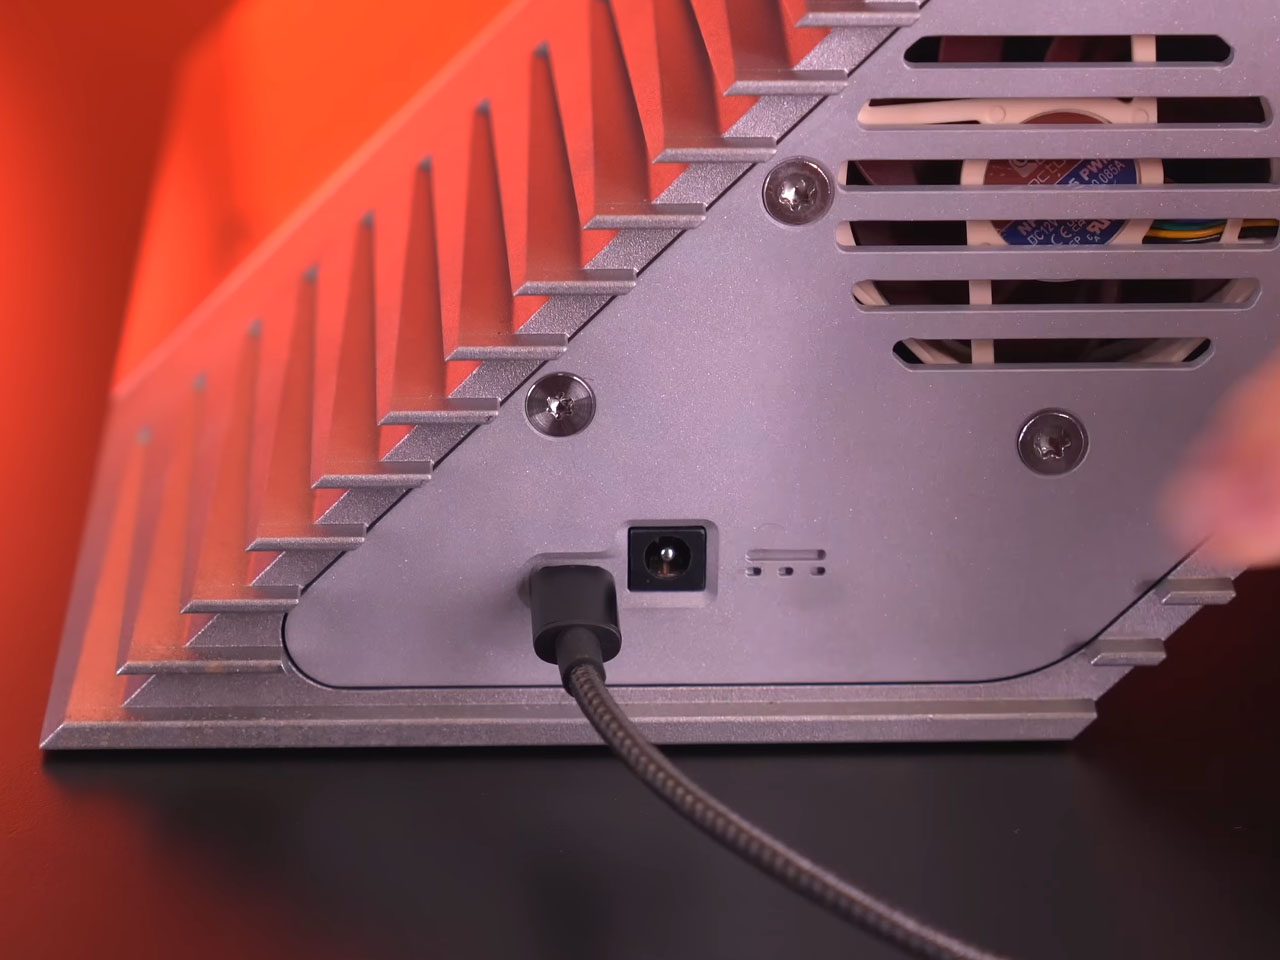
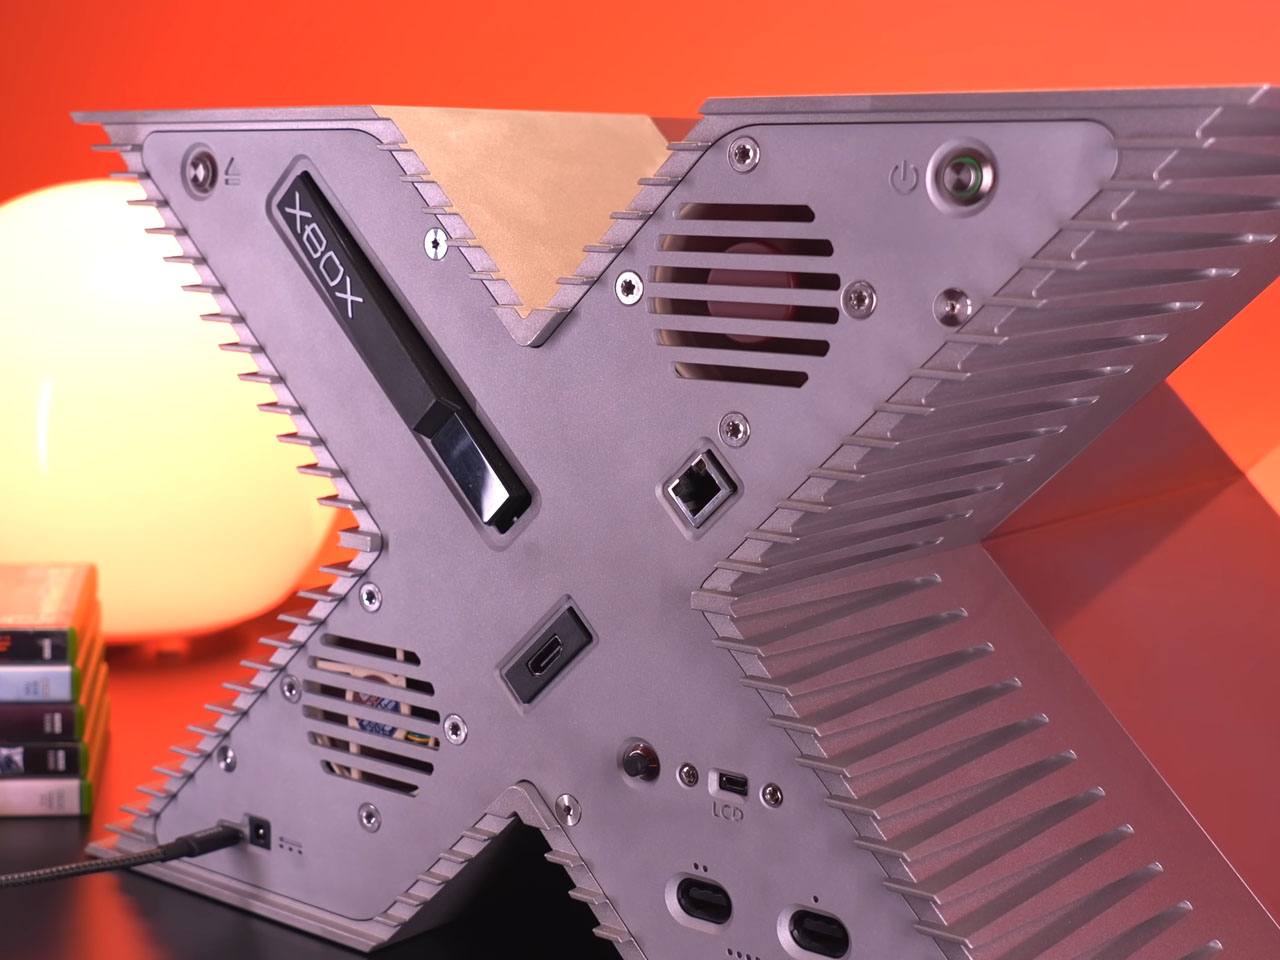
The thing was not as shiny as the original one, so Tito took on the task of polishing it himself to recreate the mirror look. Then he had to figure out a way to fit the hardware components inside the “X” form. The modder chose the original time-correct components and also added new components like HDMI, USB-C power supply, and a large-capacity SSD to the mix. To make this possible, he crafted 3D printed mounts and integrated rails to make use of every inch of space. One hardware component that posed a challenge for him emerged as the power supply unit, which was too big for the rig. For this, he took help from a modder friend who designed a custom USB-C power supply that supplied the needed power while being smaller in form factor.

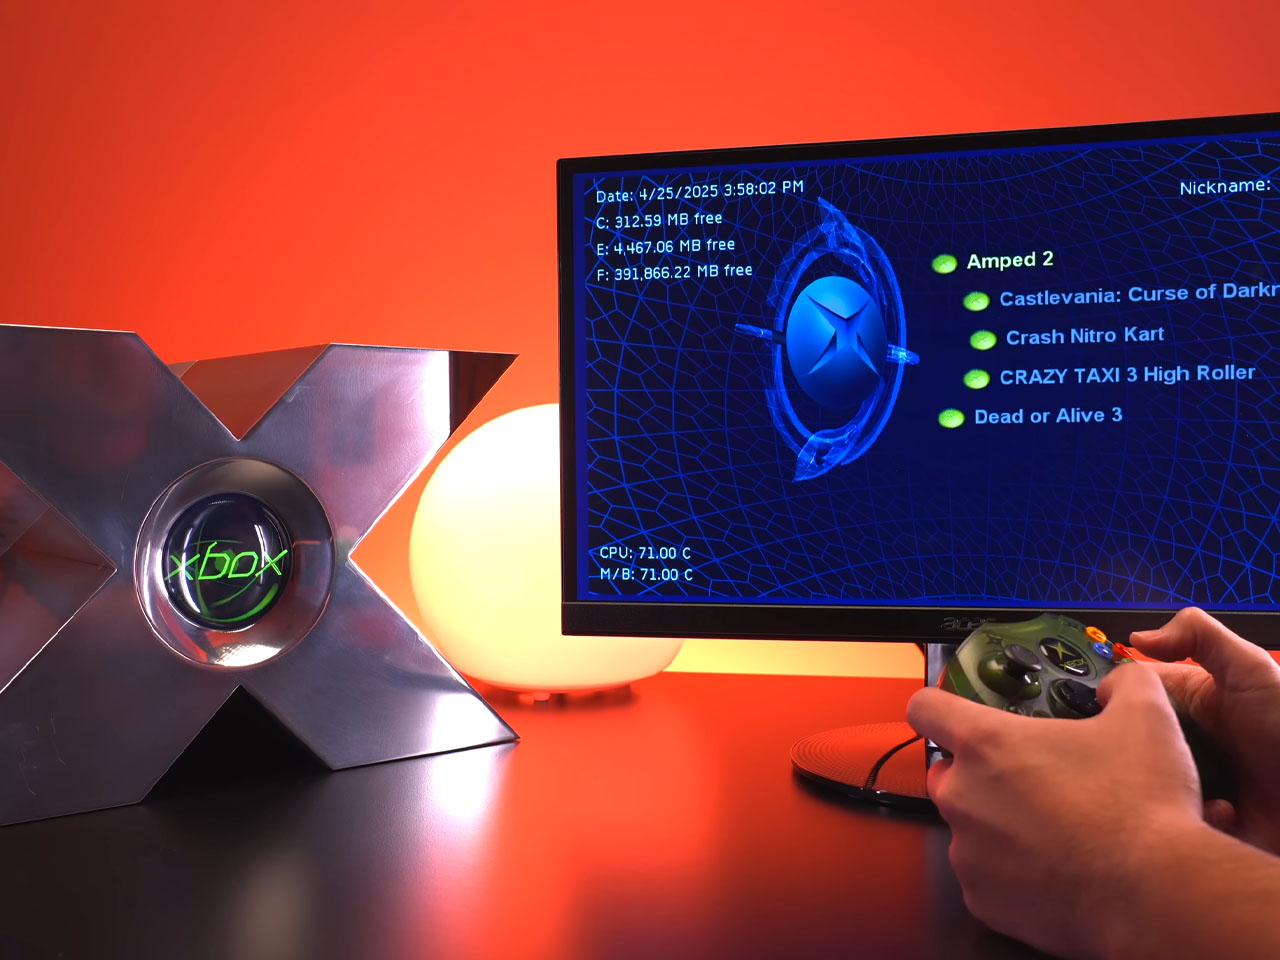
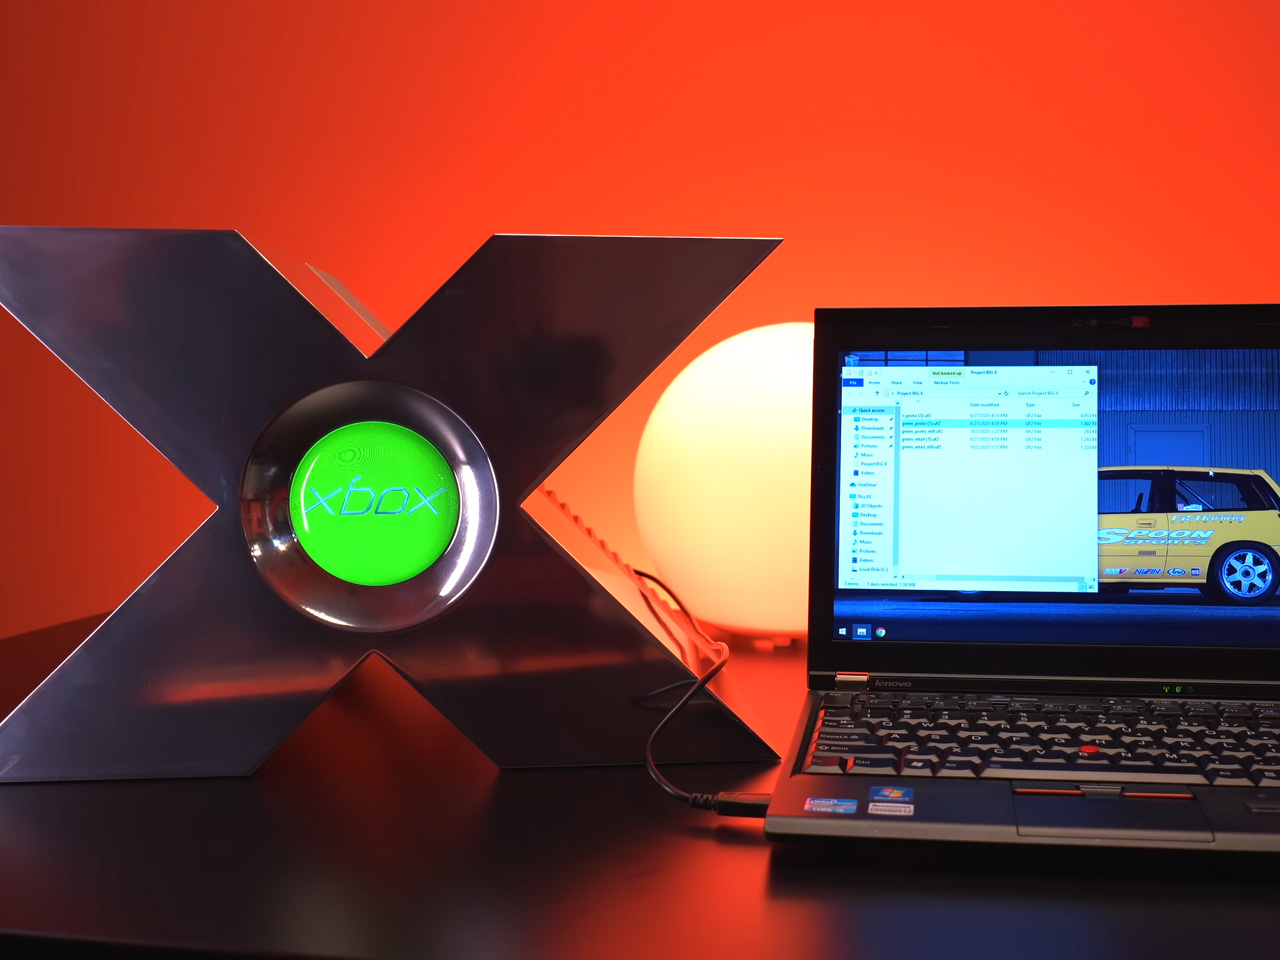
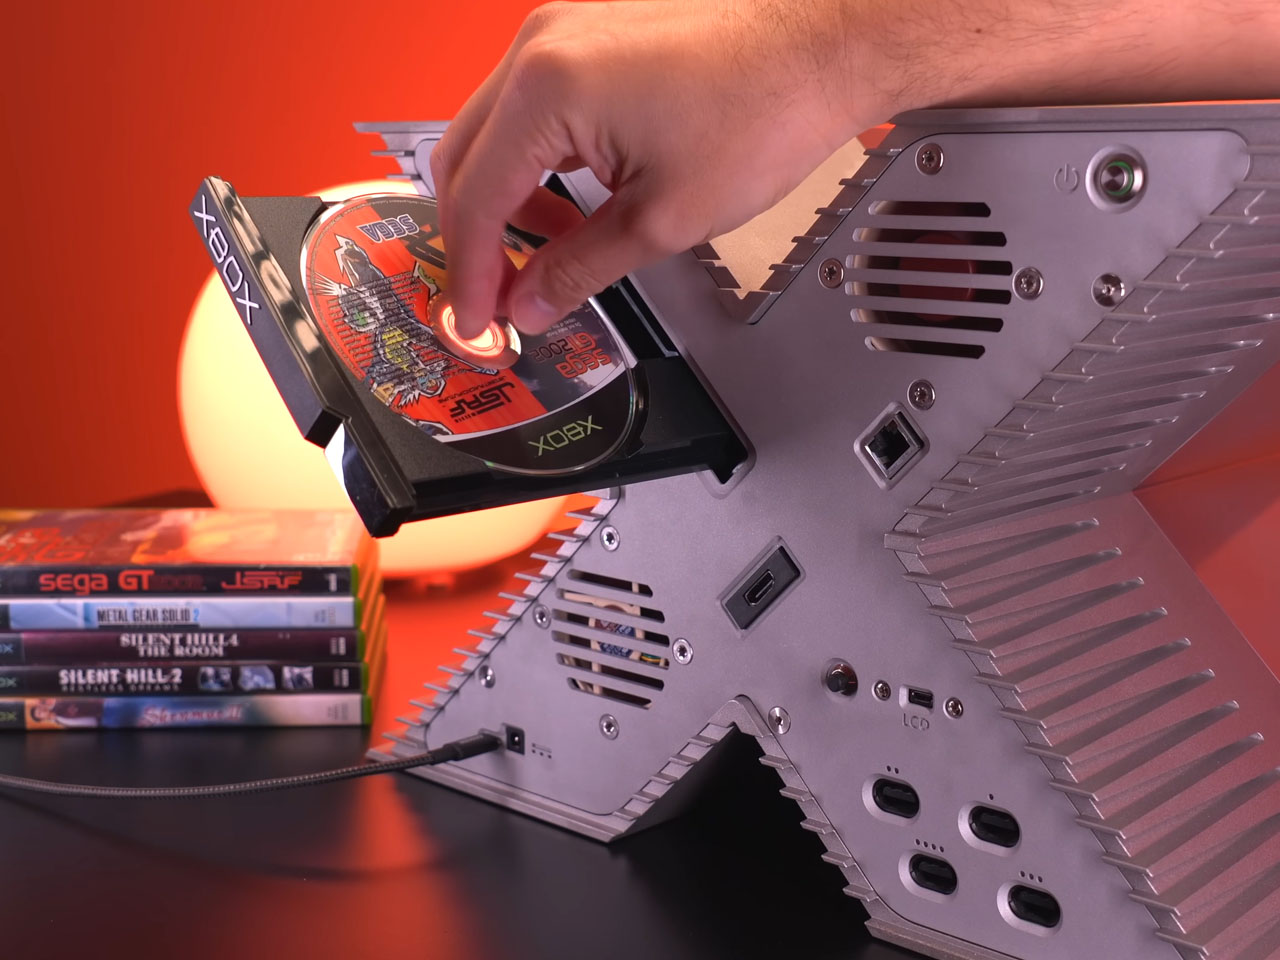
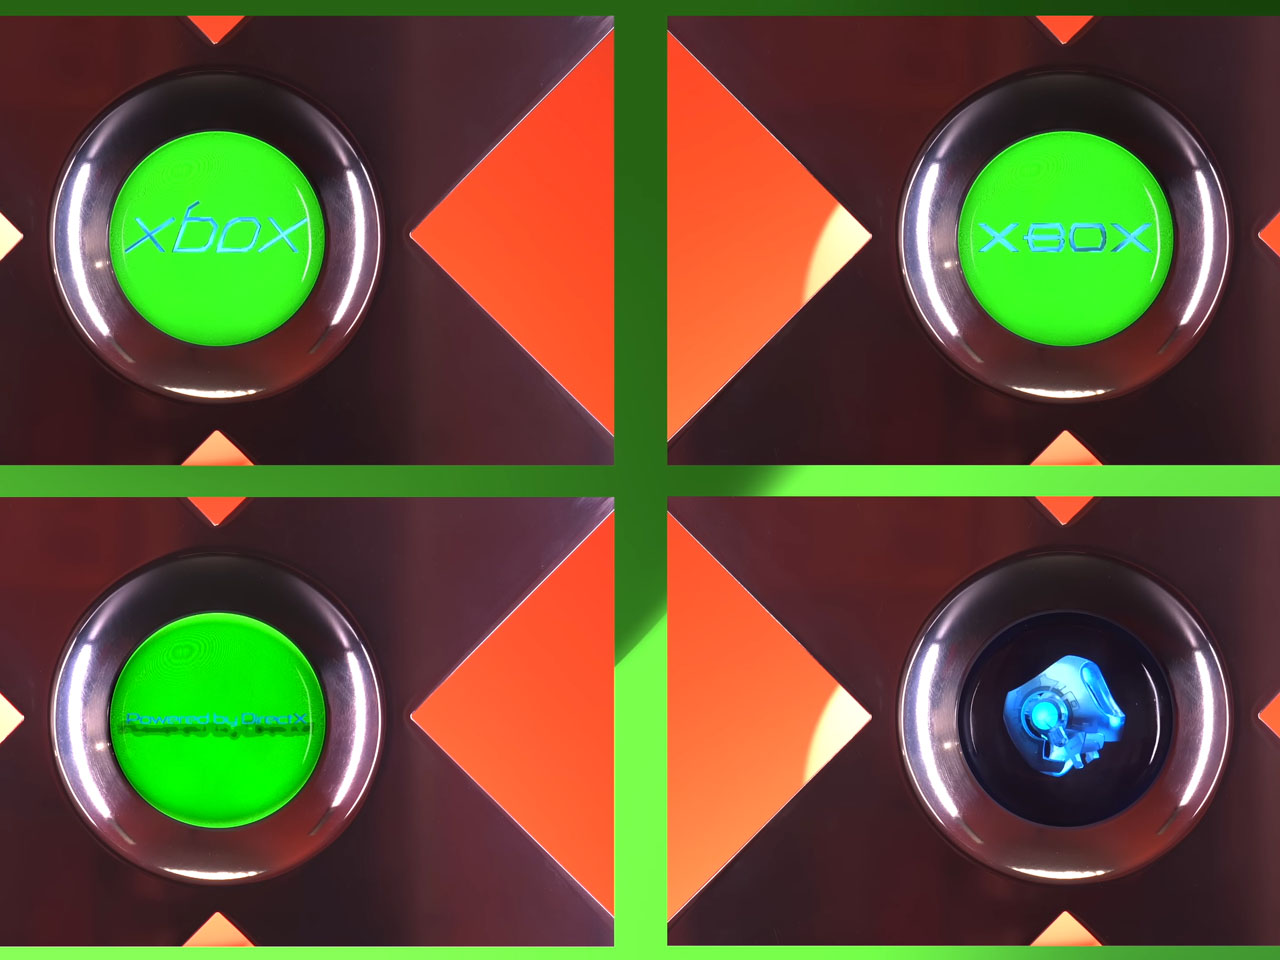
As a last modification, Tito decided to replace the center jewel with his own modernized version that looks much better than the original, to be honest. It is even more functional since the Xbox logo comes to life, or one can program it to show any custom video file as well. The one-of-a-kind console shell has all the ports and jacks on the rear arranged in a hypnotic layout. Gaming works as intended when connected to the console, and carrying it around is no hassle with the custom-built foam case that houses the Xbox console and the accompanying controllers. Tito wants to showcase his creation in conventions and gaming events, which is downright inviting, and I’m sure the gaming community will love this every bit.


The post DIYer recreates a fully functional version of the iconic Xbox “Big X” prototype first appeared on Yanko Design.
Raspberry Pi E-Ink To-Do Display Disguises as Framed Desk Art

Most productivity tools are designed to grab your attention constantly with pop-up reminders, blinking notifications, and endless browser tabs competing for focus throughout the day. But sometimes, the best way to stay focused is to keep your most important information quietly in view, not fighting for your eyes or demanding immediate action every few minutes. Finding that balance between visibility and distraction remains surprisingly difficult in modern productivity software.

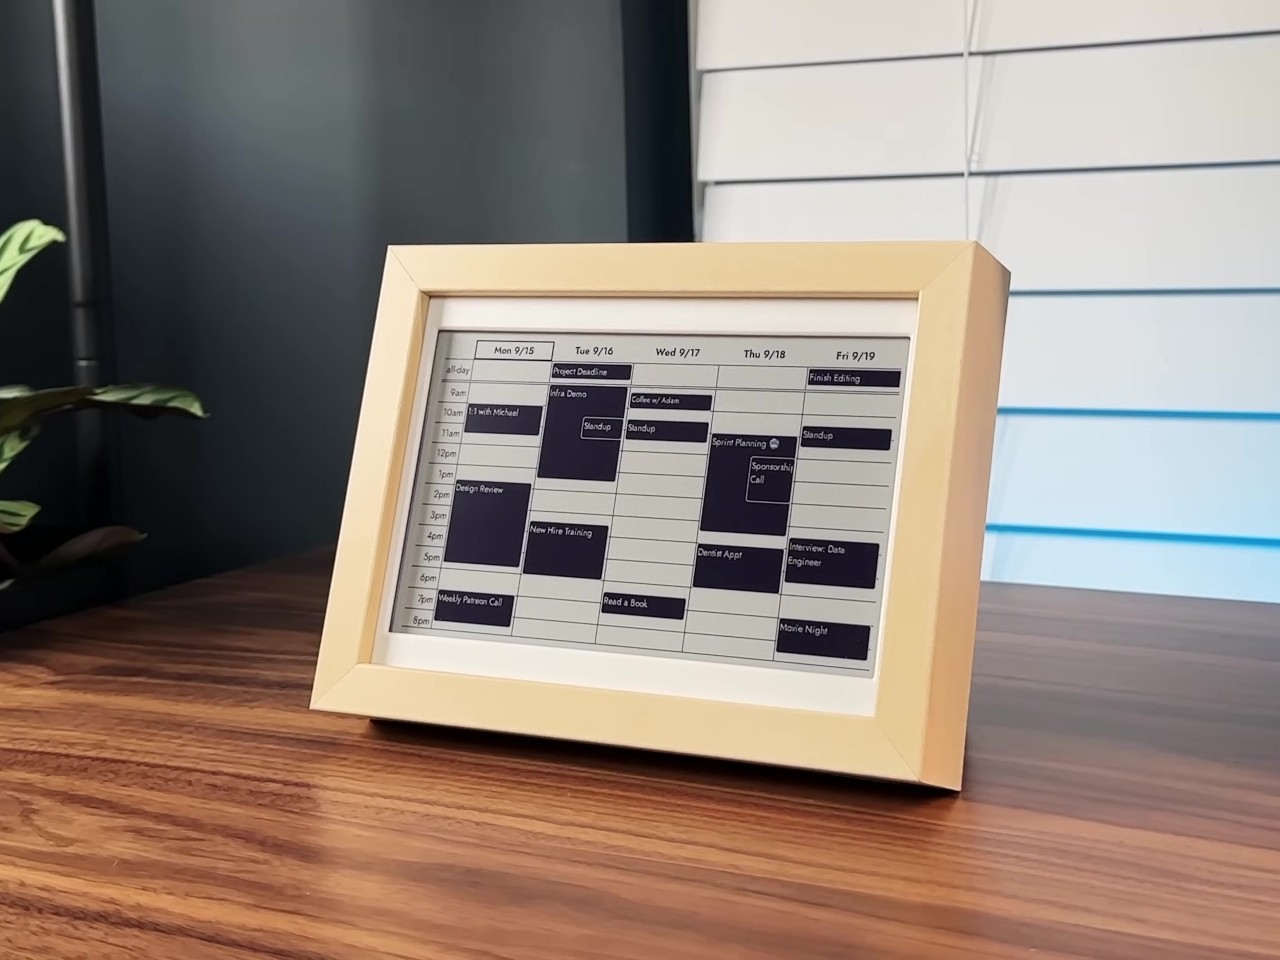
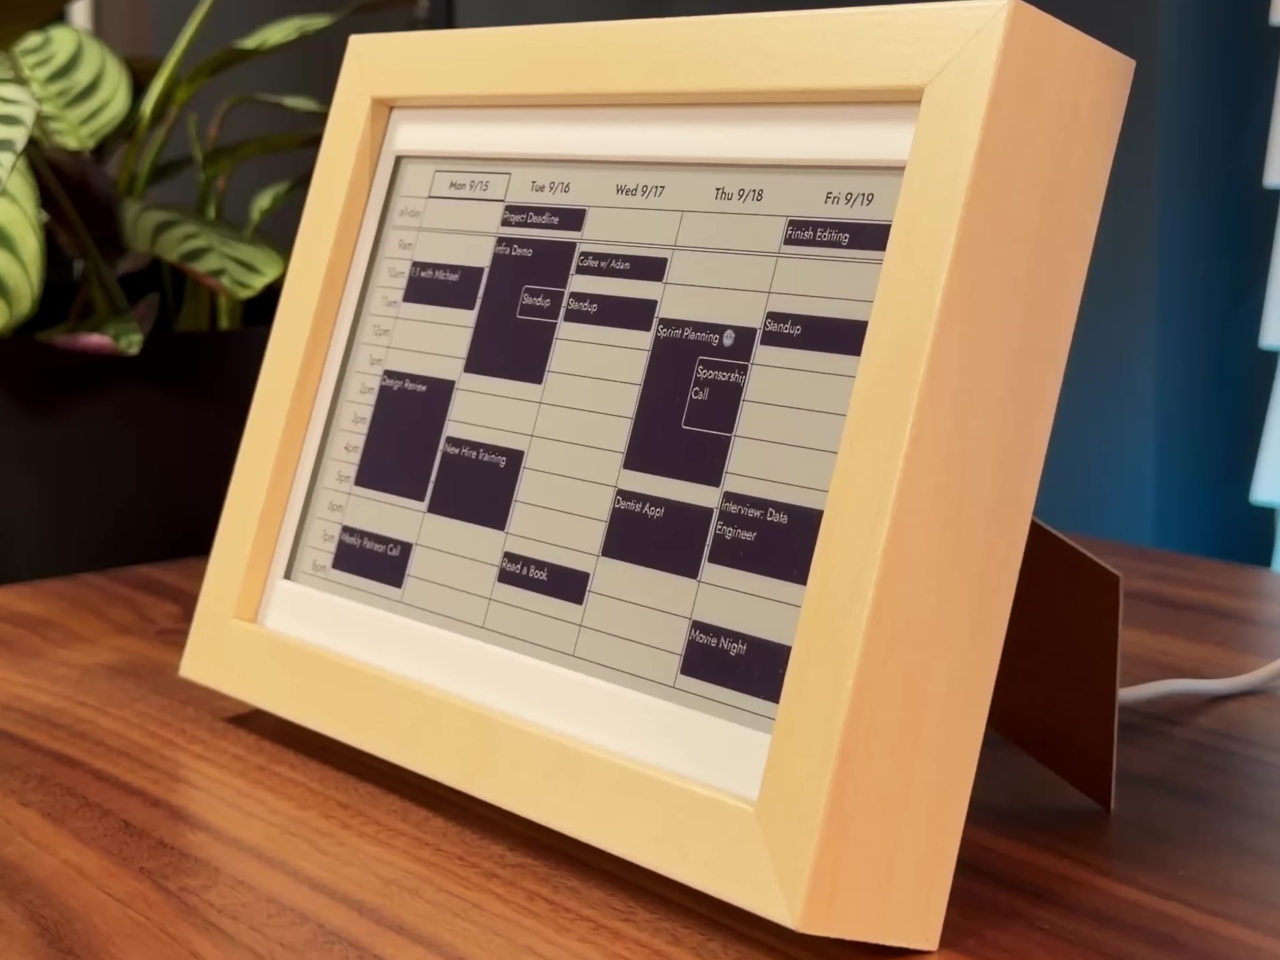
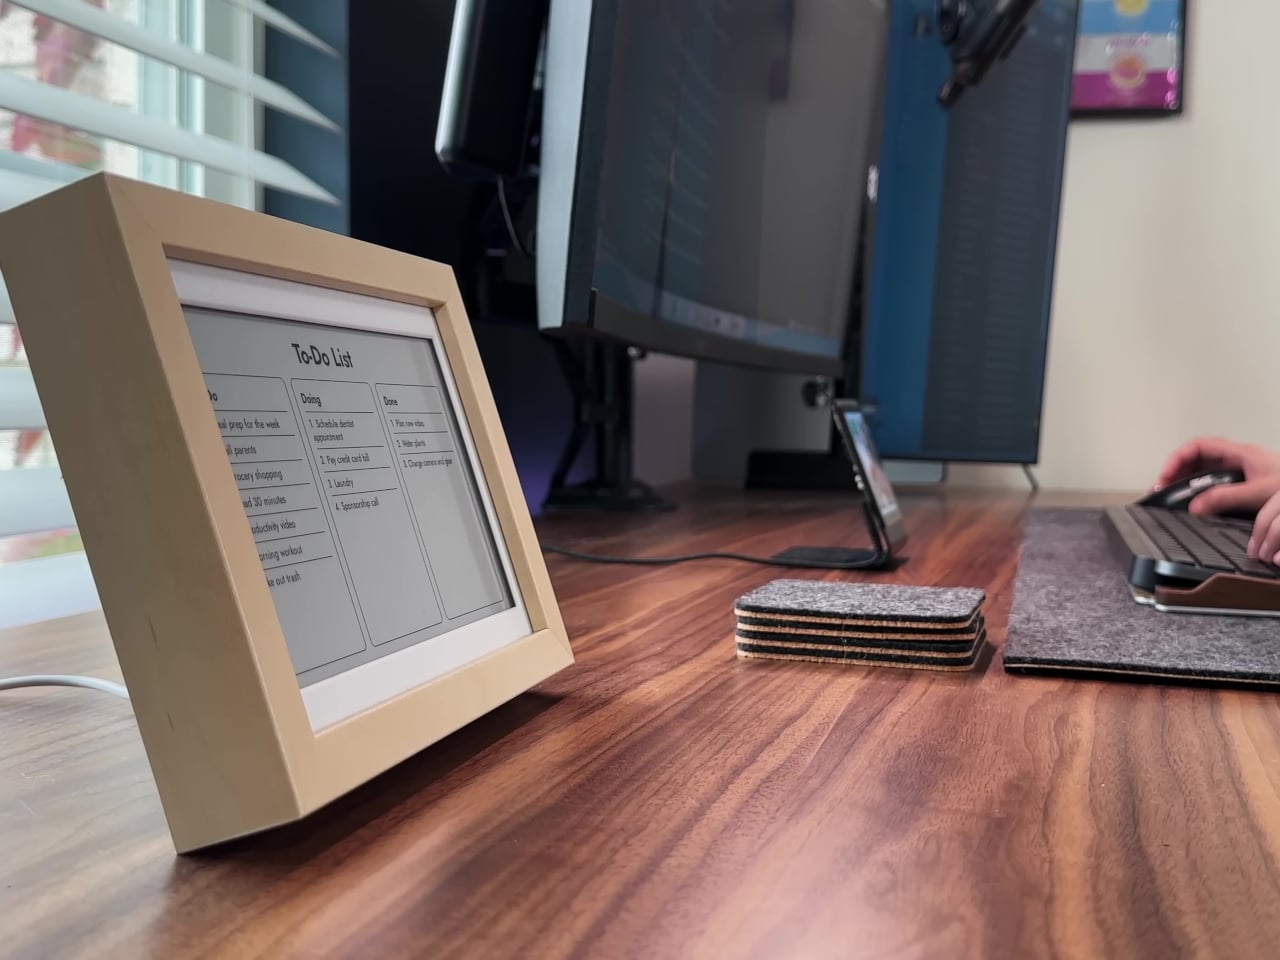
The InkyPi E-Paper Productivity Display is a DIY project that addresses this challenge directly and elegantly with minimal hardware. Built with a Raspberry Pi Zero 2 W and a crisp E-Ink screen, it turns your to-dos, deadlines, and progress into a calm, always-on dashboard that helps you stay organized without the noise. The project is open-source, customizable, and refreshingly simple in its approach to keeping you on track without overwhelming you.

Designer: AKZ Dev

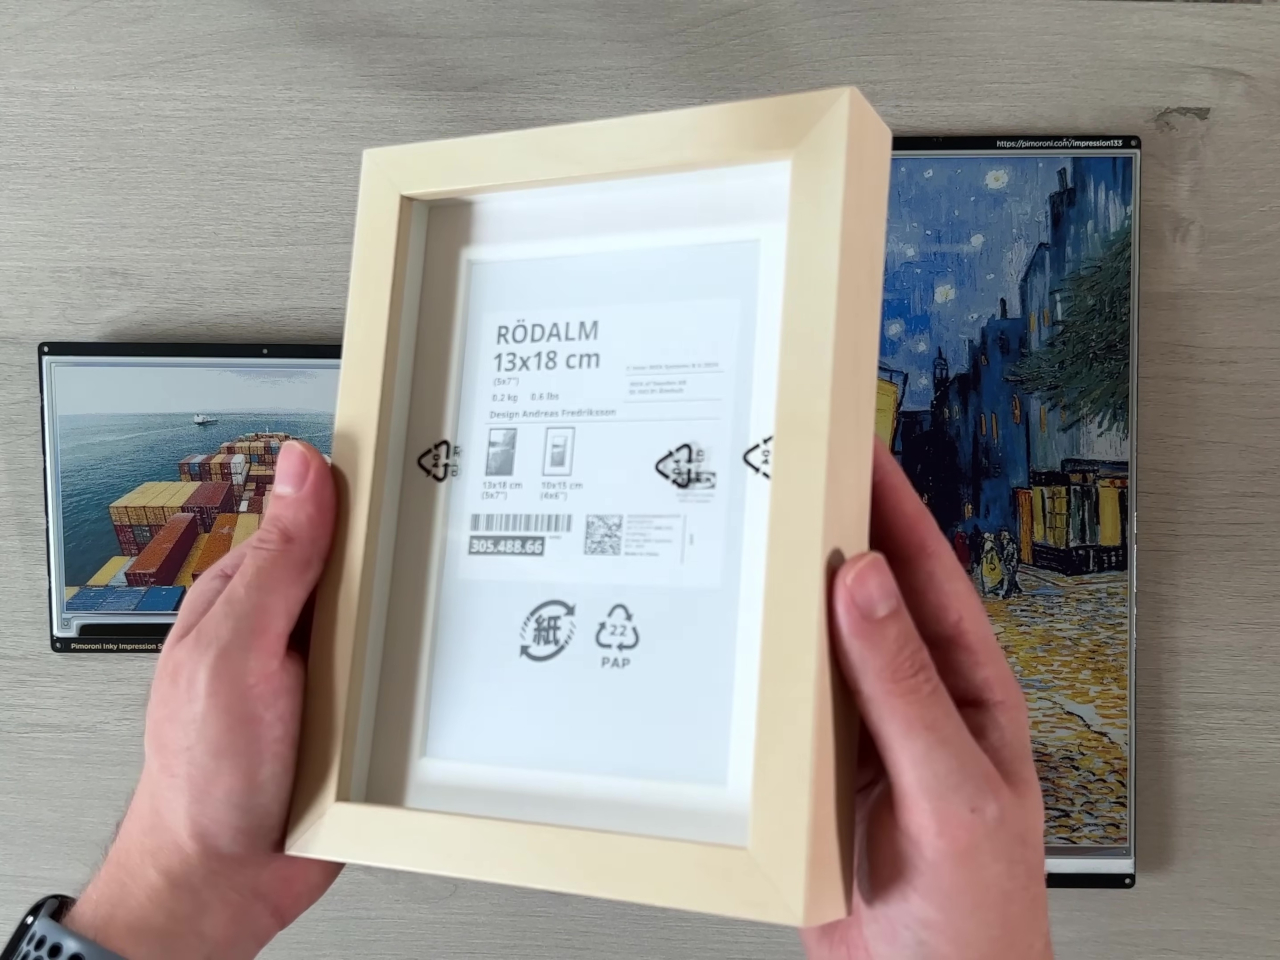
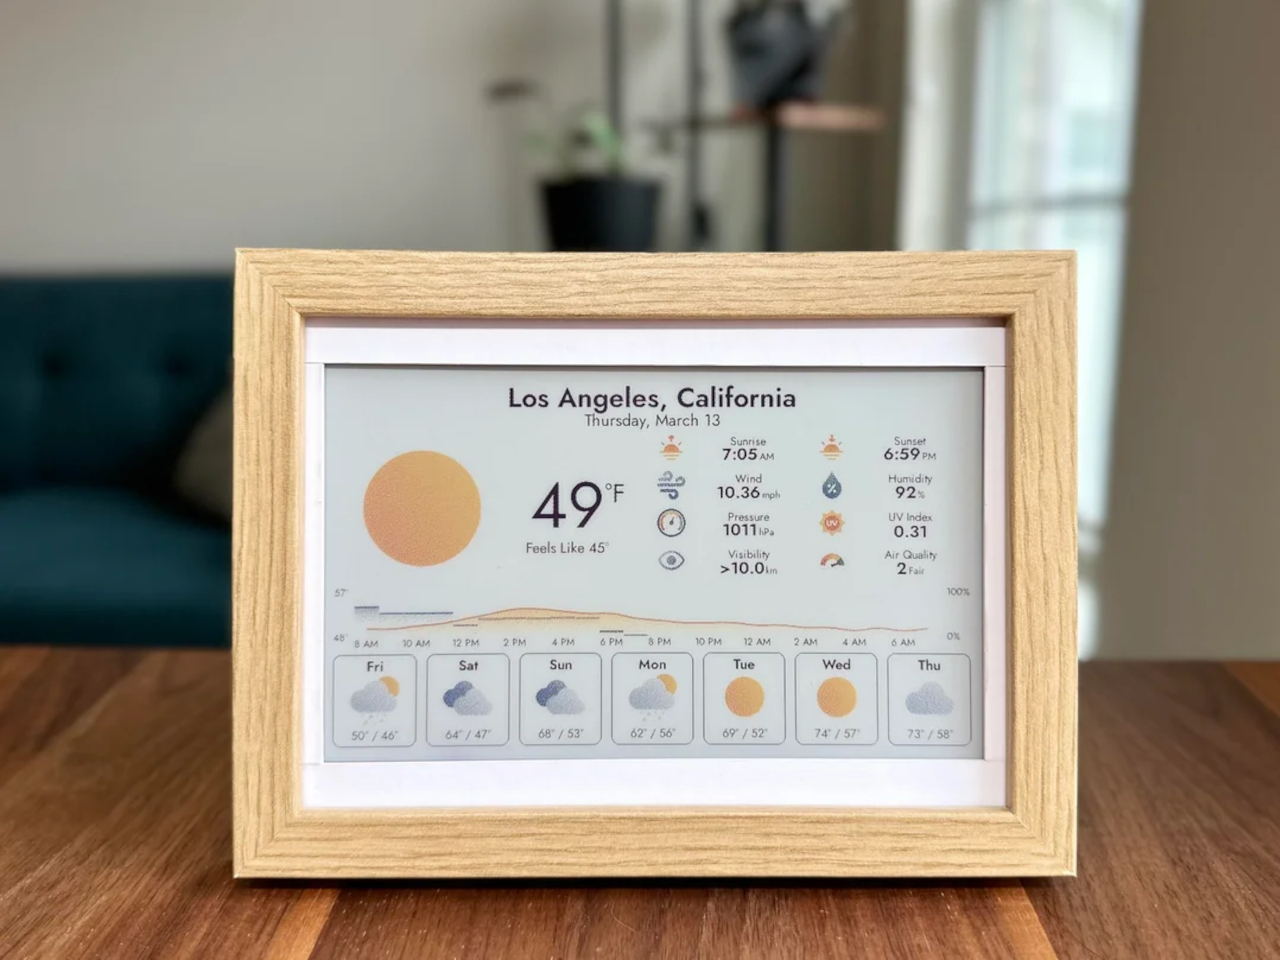
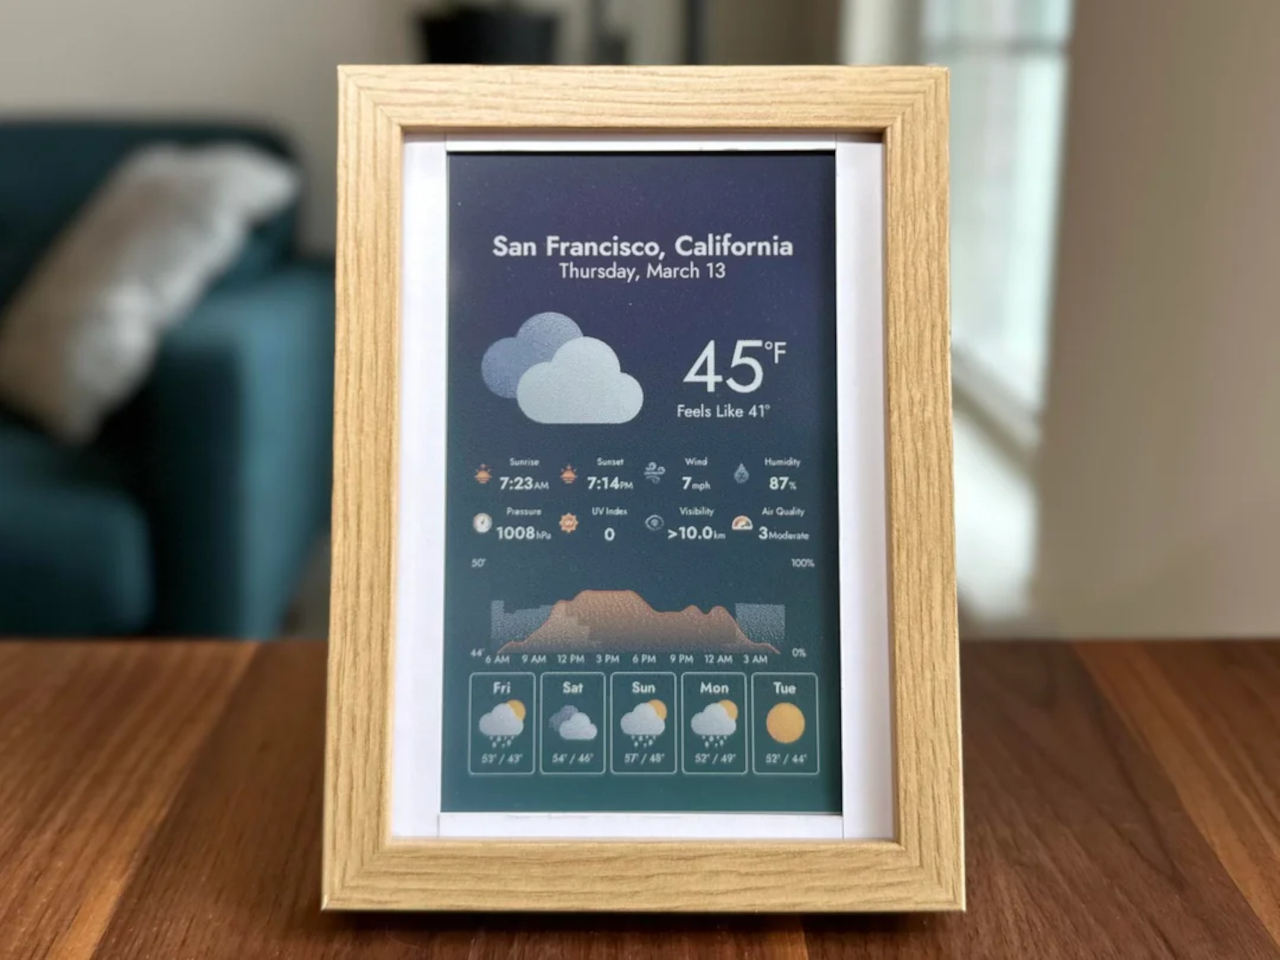
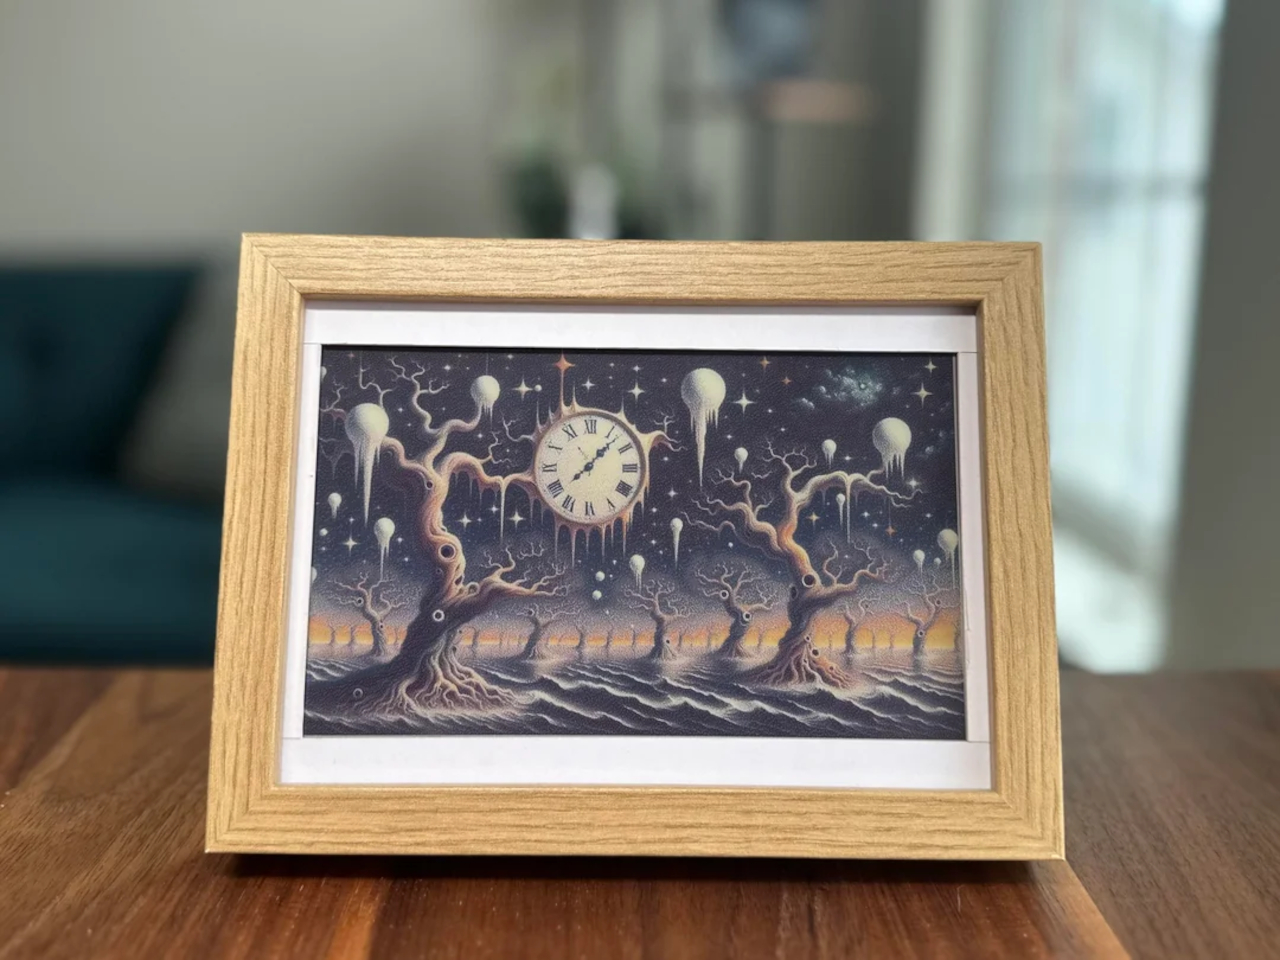
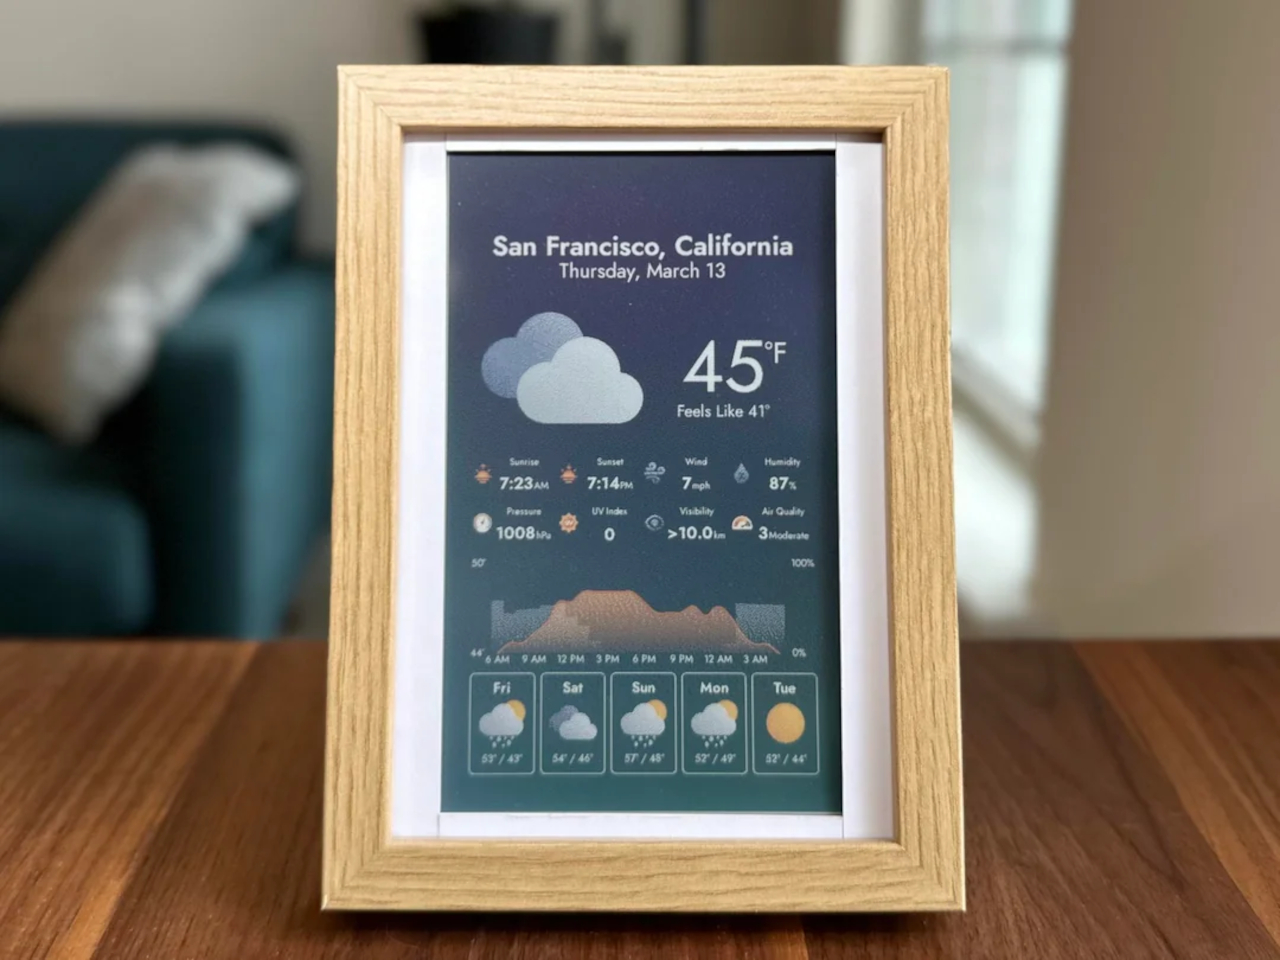
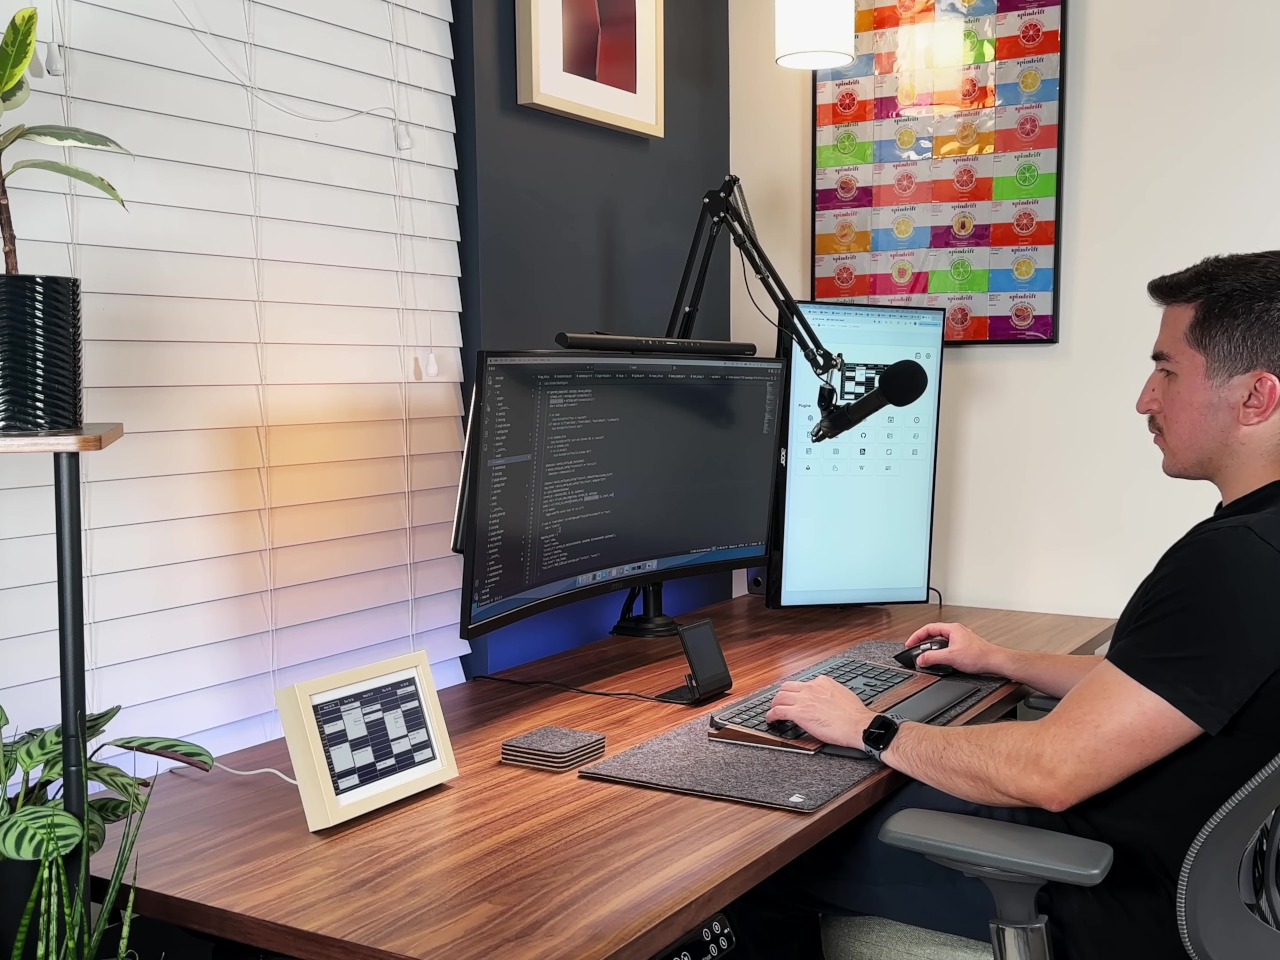
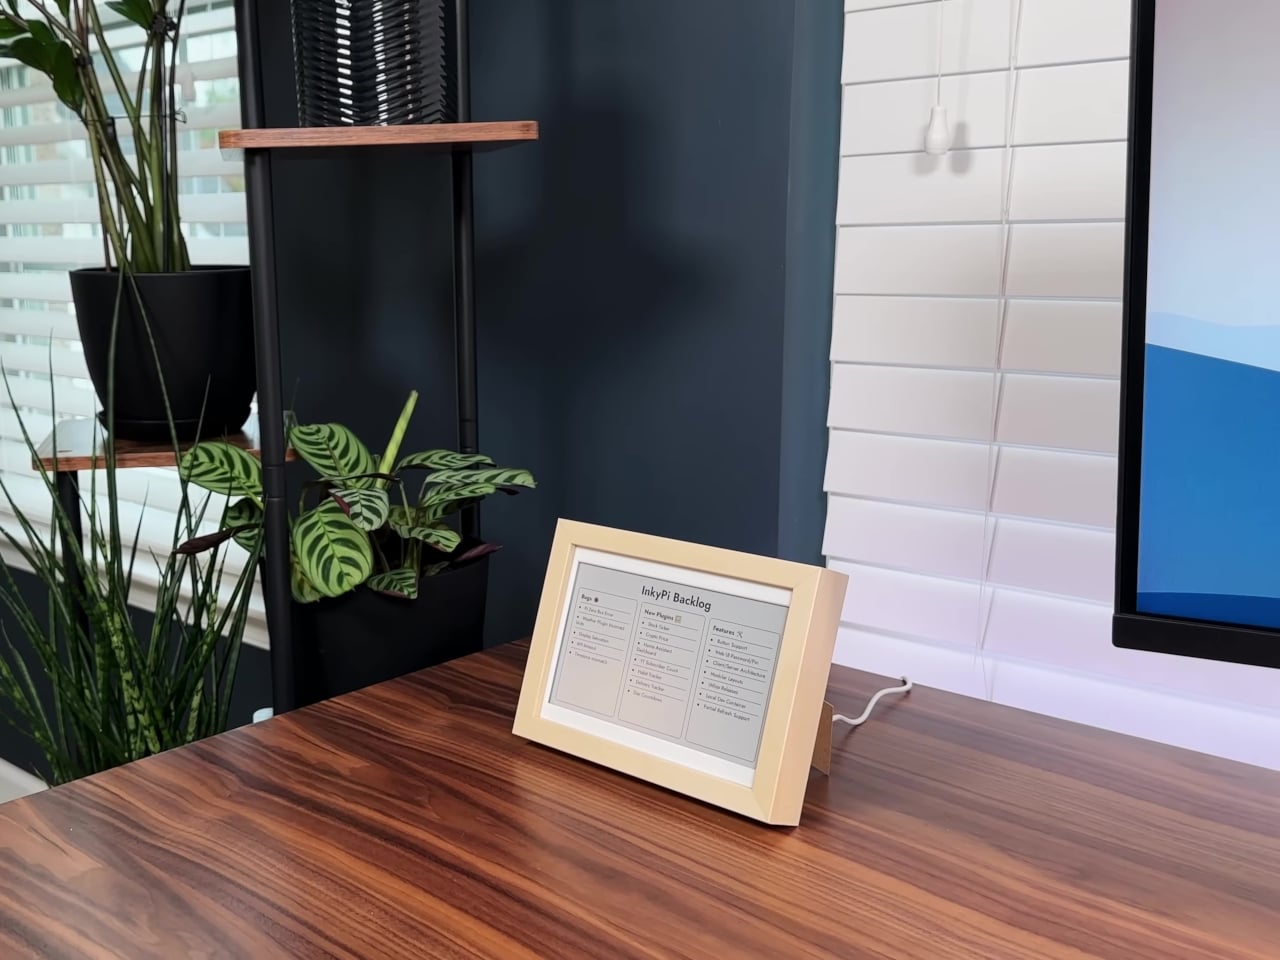
InkyPi’s minimalist design starts with a 7.3-inch or 7.8-inch E-Ink panel from Pimoroni or Waveshare, framed in a simple IKEA picture frame that looks more like a piece of art than a gadget on your desk. The Raspberry Pi Zero 2 W sits discreetly behind the display, keeping the whole setup slim, silent, and consuming minimal power throughout the day. The paper-like display is easy on the eyes and never glows or flickers.

The framed display can be wall-mounted above your desk for easy glances throughout the day or set on a stand for desktop reference during intensive work sessions. The E-Ink screen shows information with the clarity of printed paper, making text and graphics readable from across the room without squinting. The lack of a backlight means it works well in any ambient lighting without causing eye strain during long days.

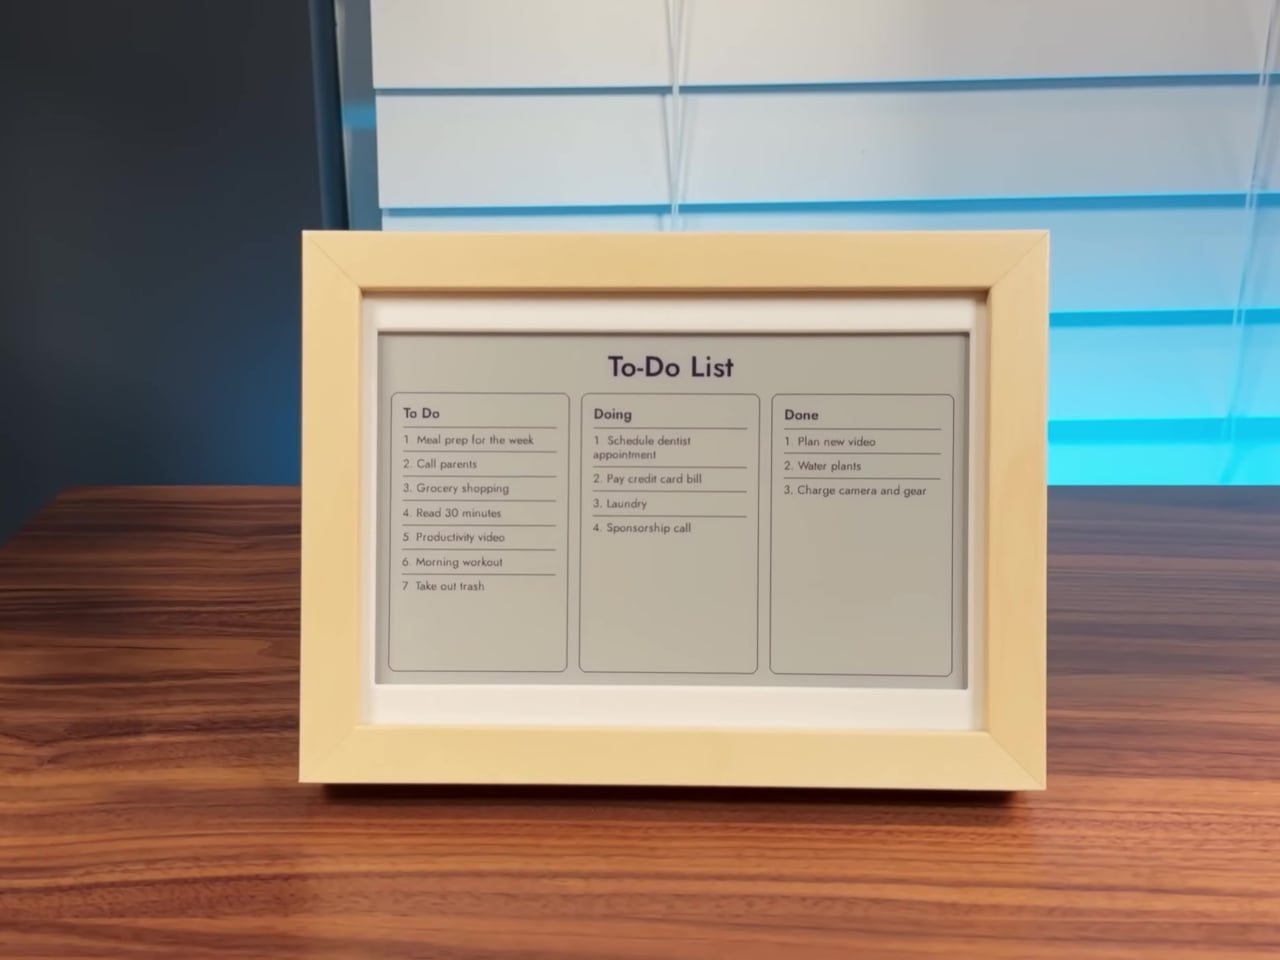
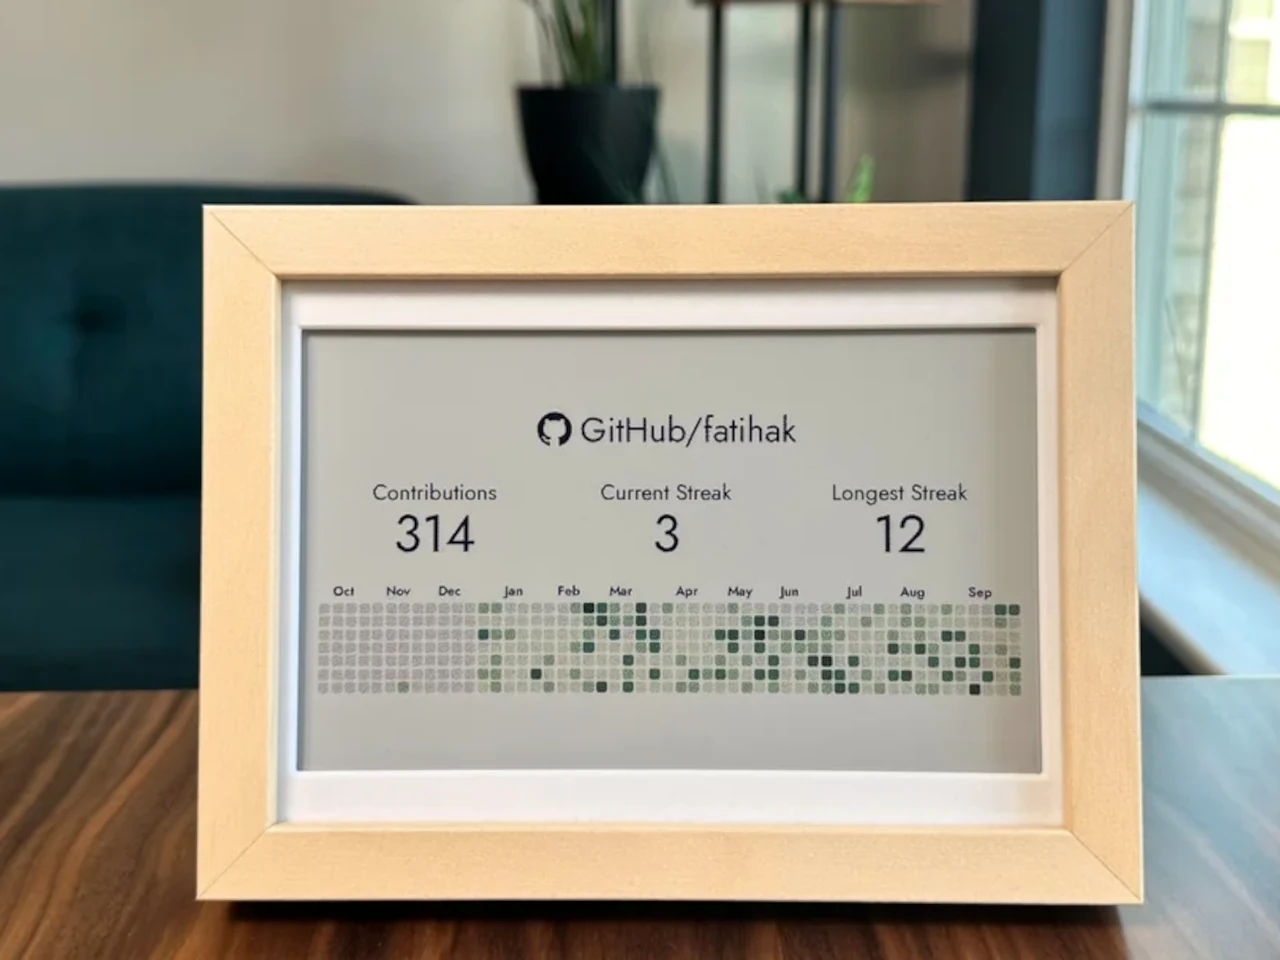
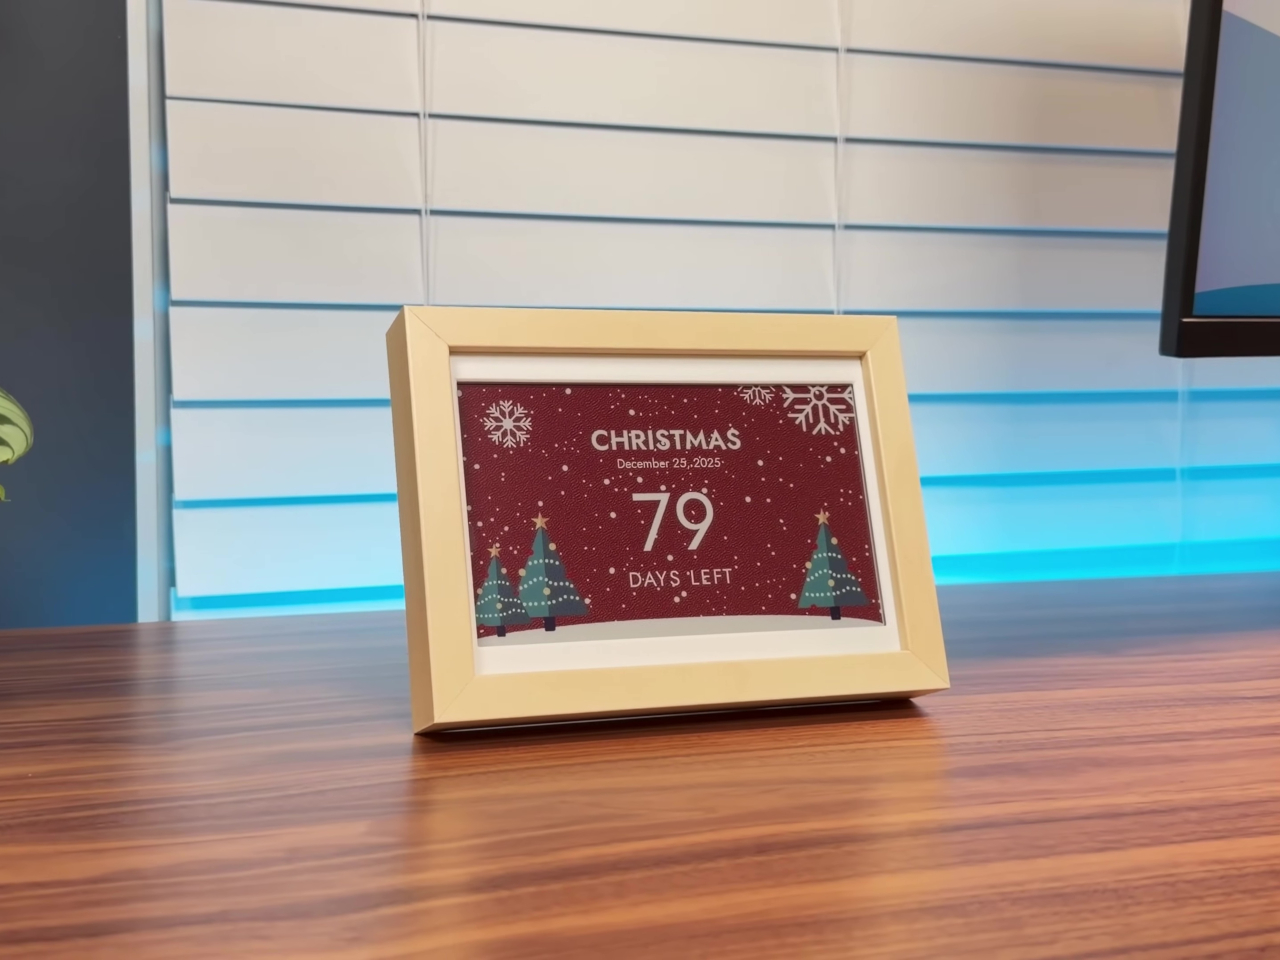
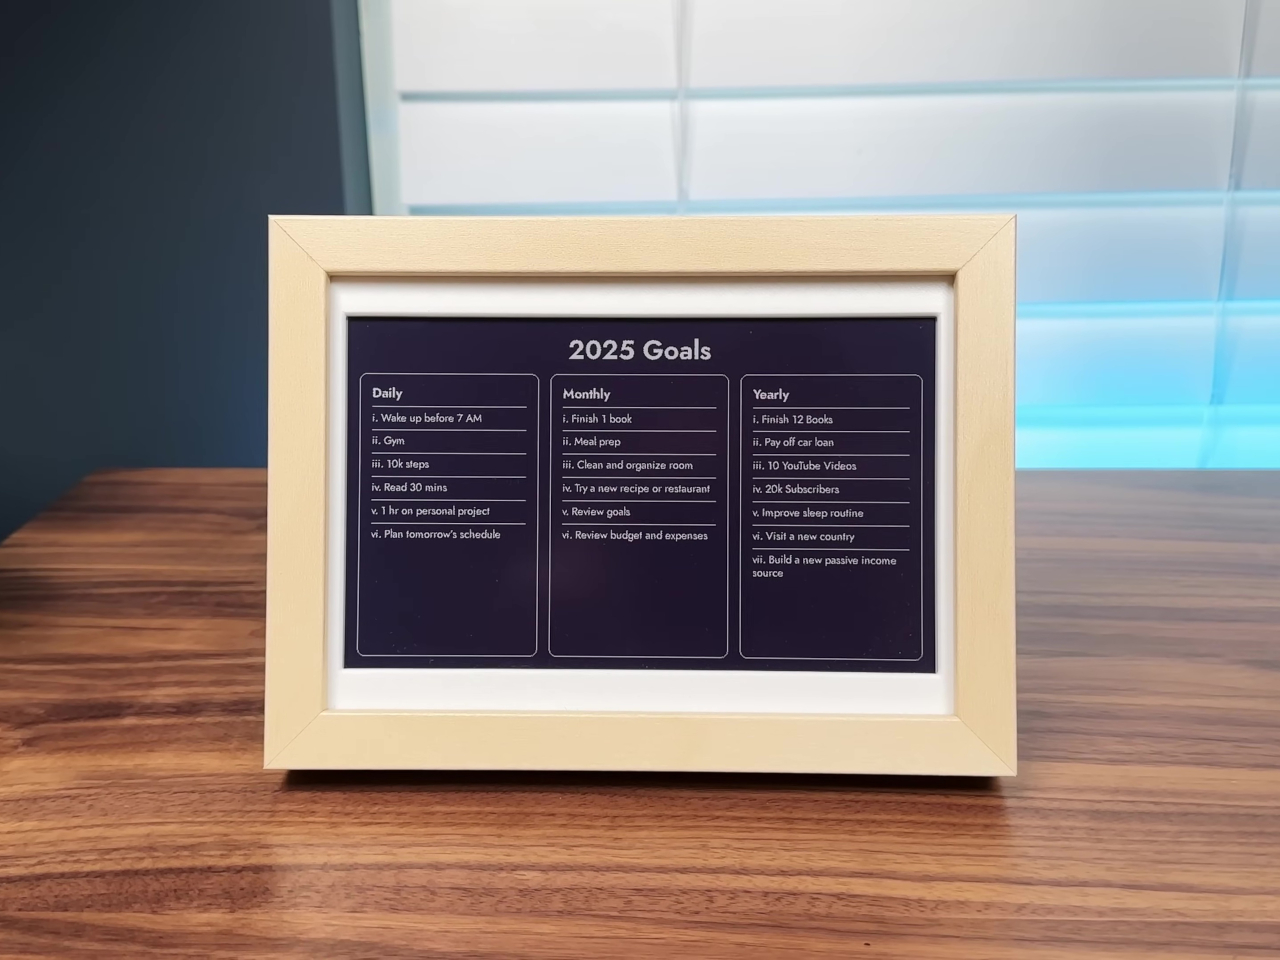
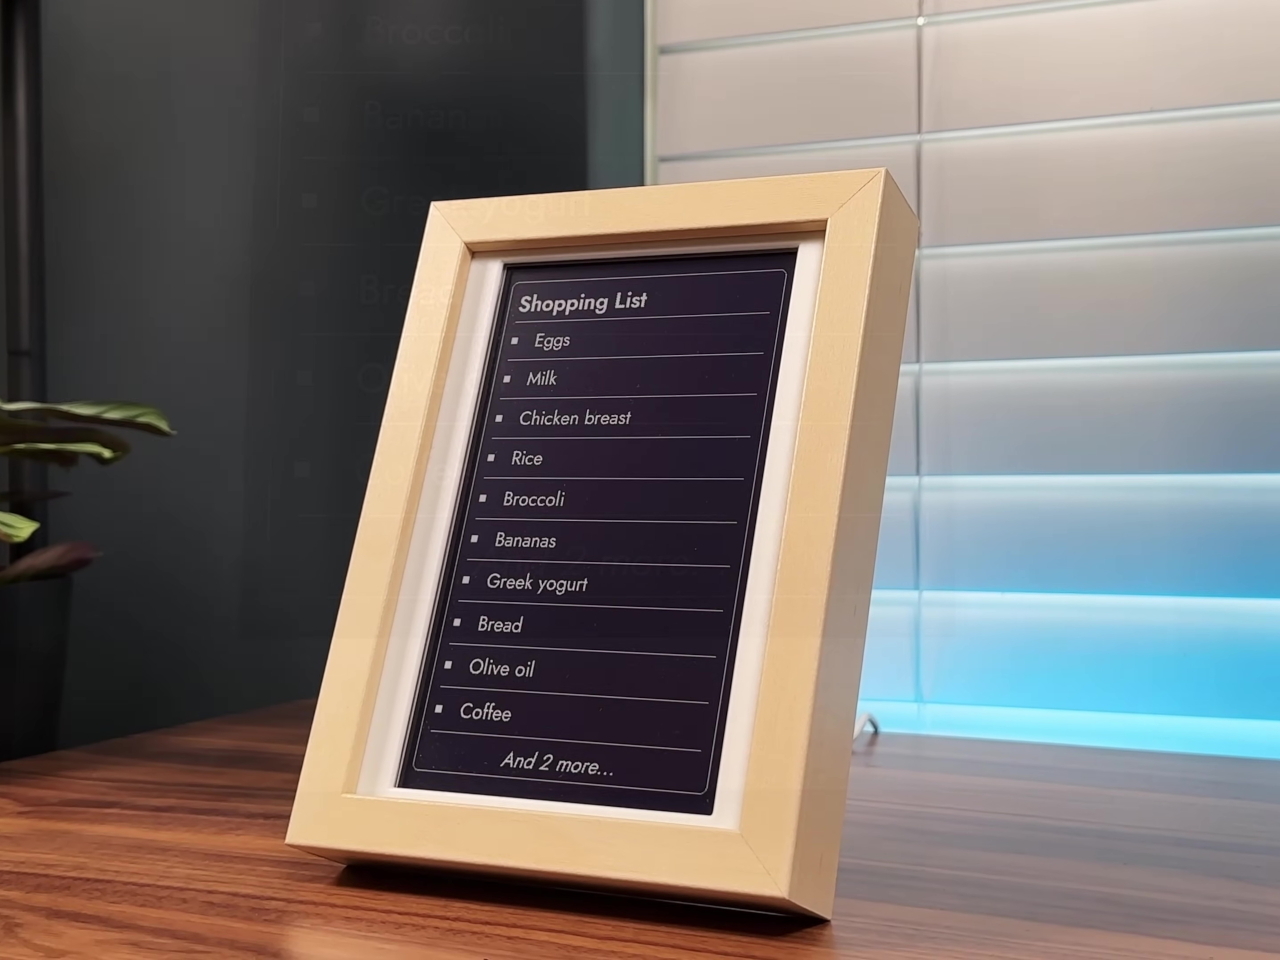
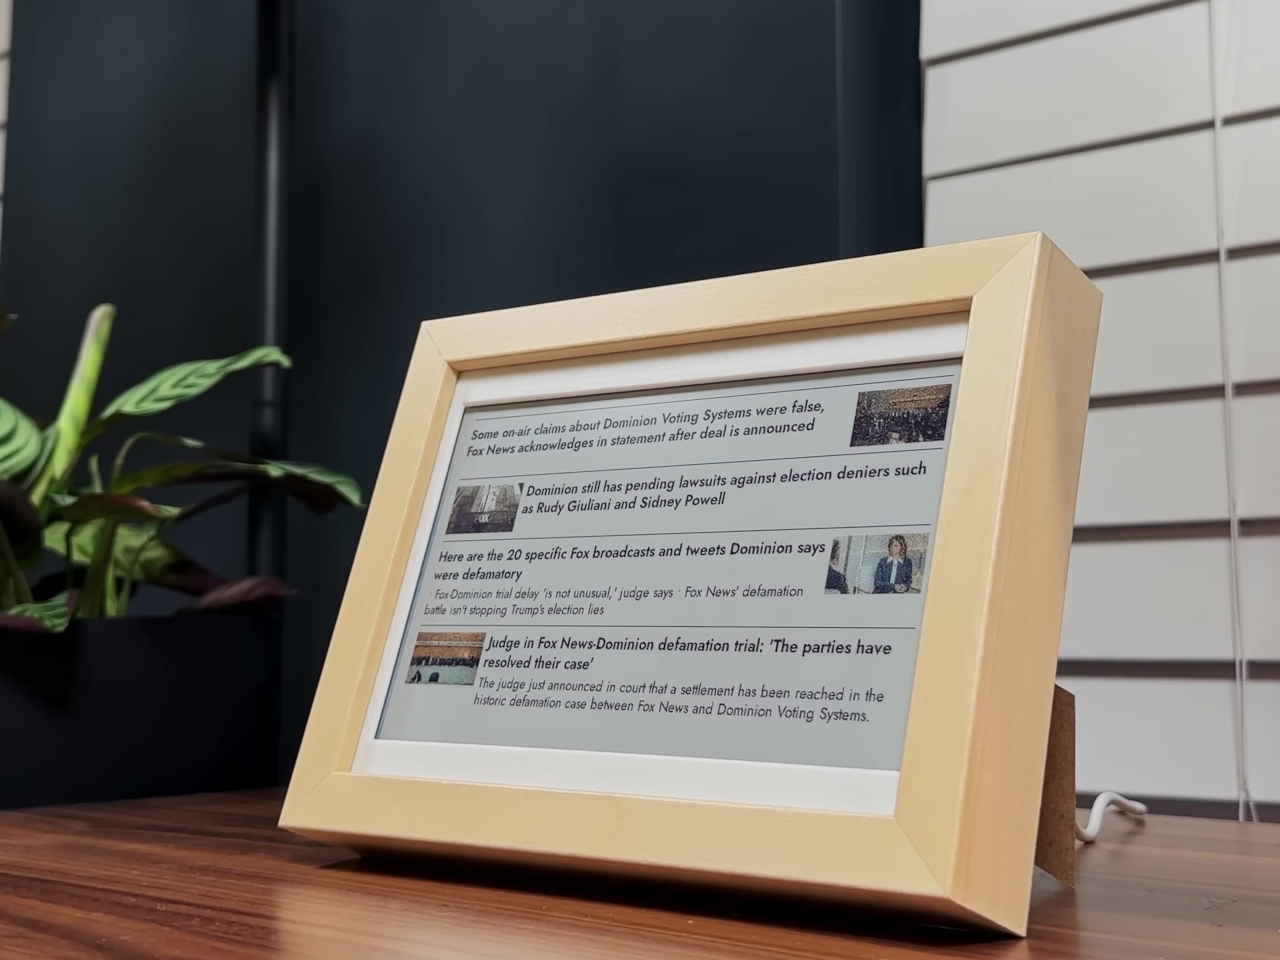
The open-source InkyPi dashboard runs a growing library of 20 plugins, all managed through a web-based user interface that’s accessible from any device on your network. You can schedule automatic refreshes, rotate through different plugins throughout the day, and customize layouts for your specific workflow. Recent plugin additions include a to-do list, day countdown, GitHub commit graph, year progress bar, and RSS feed reader for staying informed.

Each plugin is designed to give you just enough information to stay on track without overwhelming you with excessive detail or constant updates that break concentration. The to-do list shows three customizable lists with clean formatting, the year progress bar visualizes how much of the year remains for goal planning, and the GitHub graph motivates coding consistency through visual streak tracking. Everything updates automatically on your chosen schedule without requiring manual intervention.

The E-Ink display’s slow refresh rate and lack of backlight mean it’s only updated when necessary, keeping your focus on the task at hand rather than the screen itself pulling attention. The dashboard is intentionally passive, meant for glancing rather than interacting, so you’re never tempted to click, scroll, or dive into rabbit holes when you should be working. The analog feel makes it more like checking a wall calendar or notepad.

All hardware and software files are open-source on GitHub, with active community support and ongoing plugin development from contributors worldwide who continue adding features. For anyone tired of digital noise and constant notifications interrupting deep work, the InkyPi E-Paper Productivity Display offers a reminder that sometimes less screen time is exactly what you need to accomplish more meaningful work throughout your day without burning out.

The post Raspberry Pi E-Ink To-Do Display Disguises as Framed Desk Art first appeared on Yanko Design.
DIY ultra-wide Steam Deck DS hybrid trades joysticks for a keyboard and trackpad

Although hardly the first of its kind, the Nintendo Switch definitely kicked off a handheld gaming renaissance. Now we have mini PCs letting us play all sorts of games on the go and innumerable projects that try to cobble up together their own handheld console. The latter has given rise to many unconventional designs, though most follow the standard combination of buttons and joysticks found on gaming controllers.
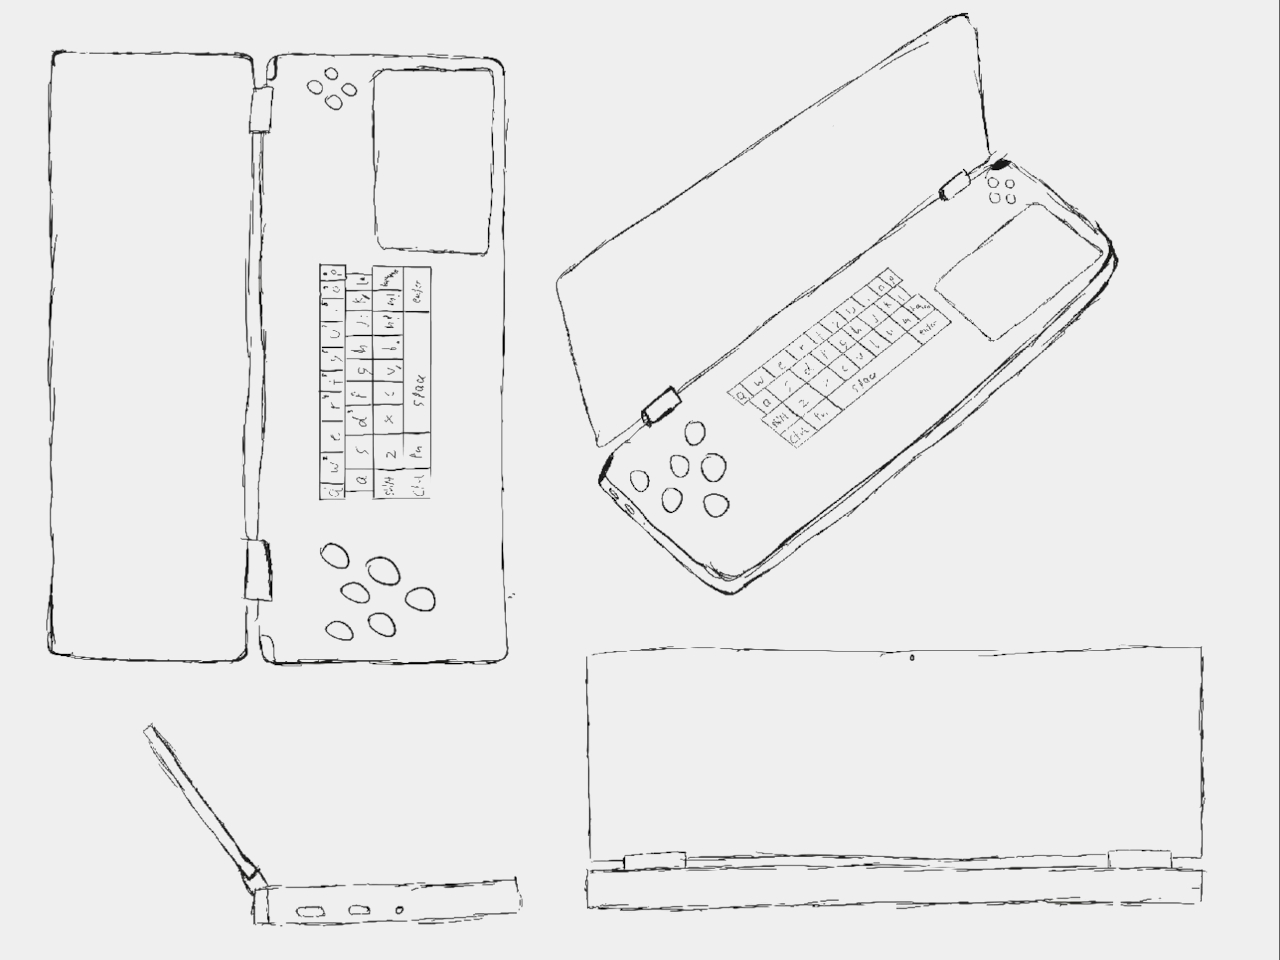
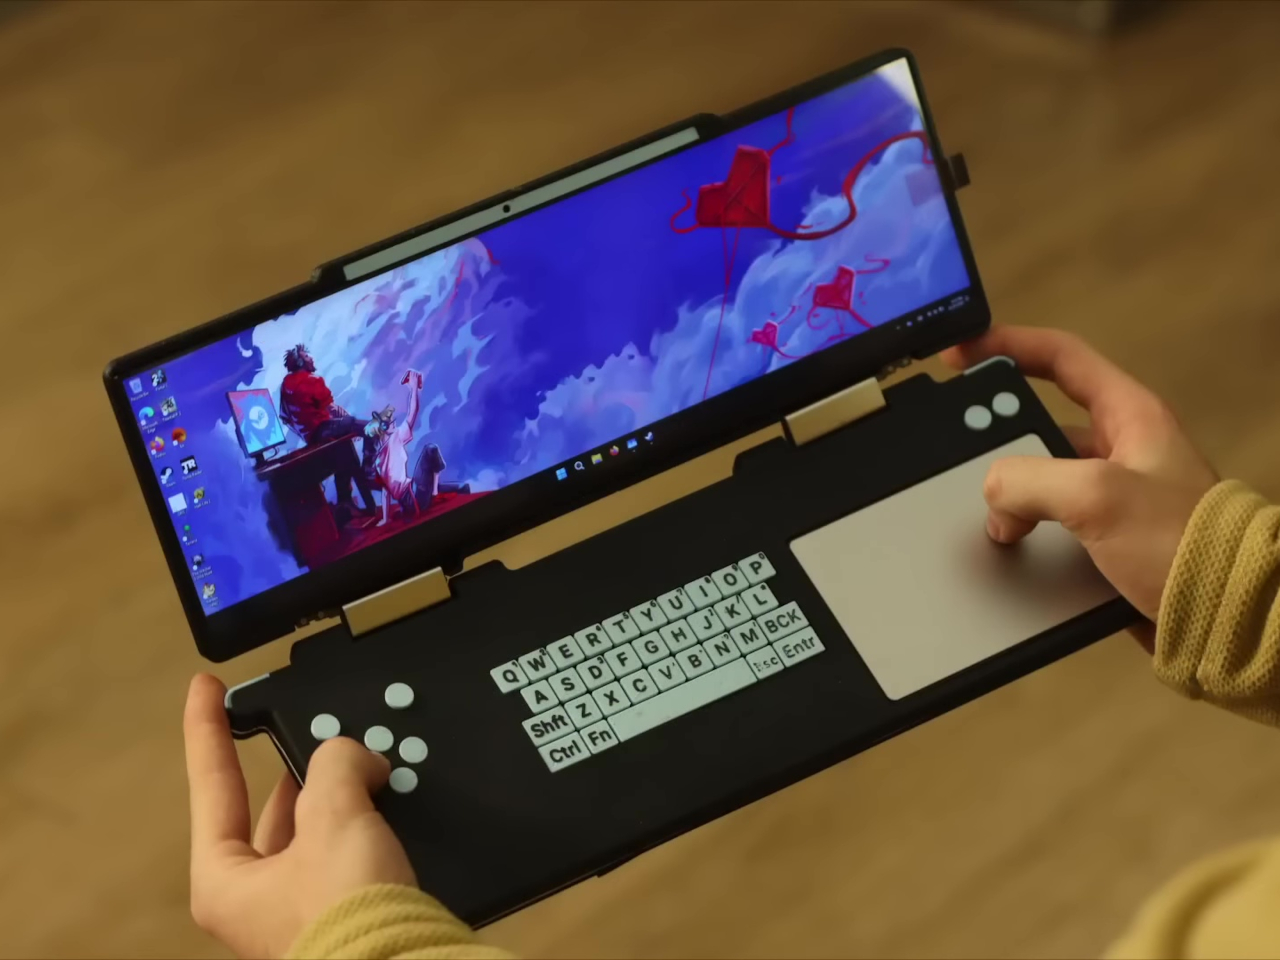
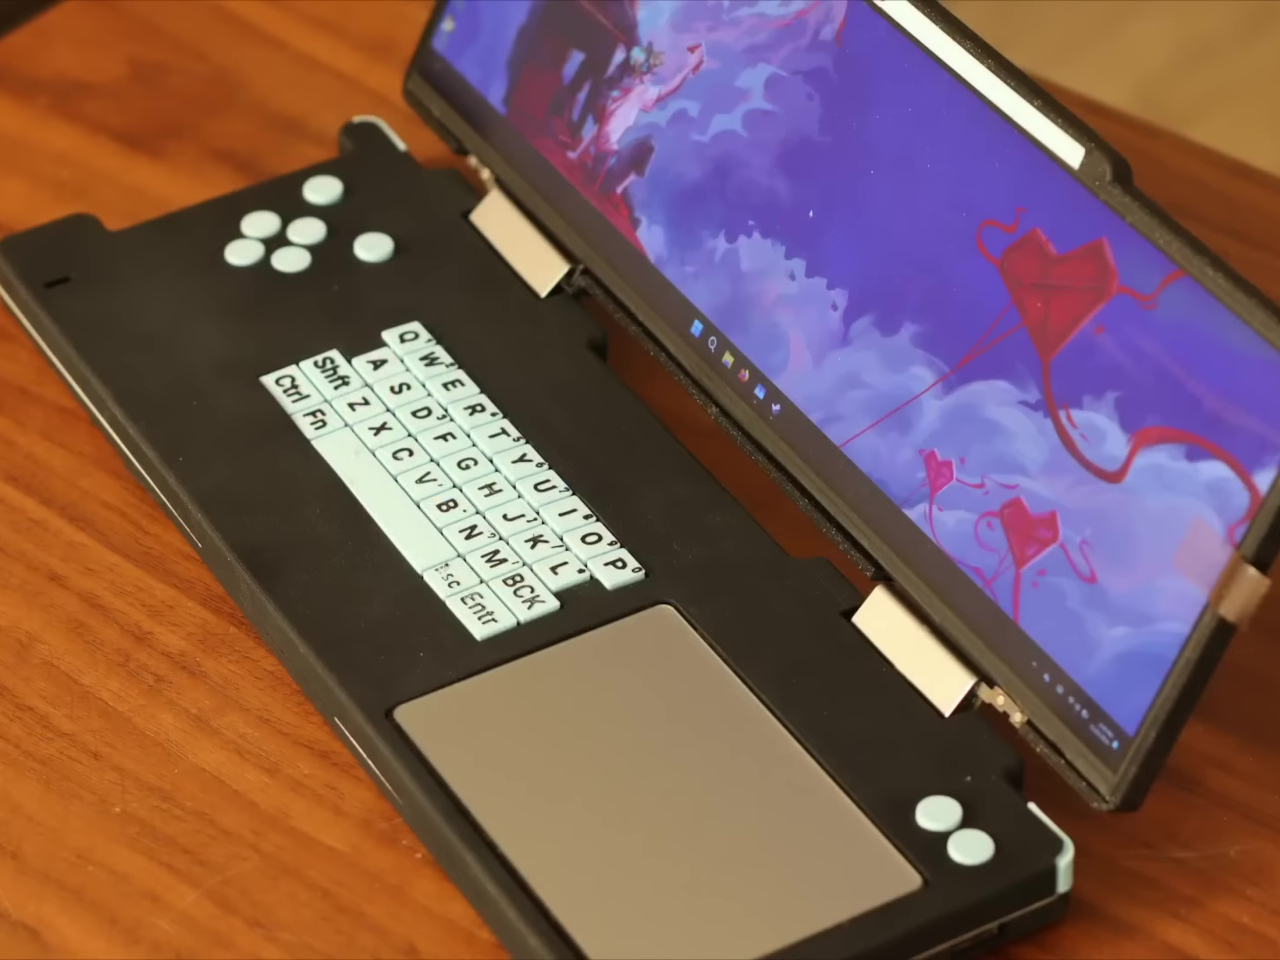
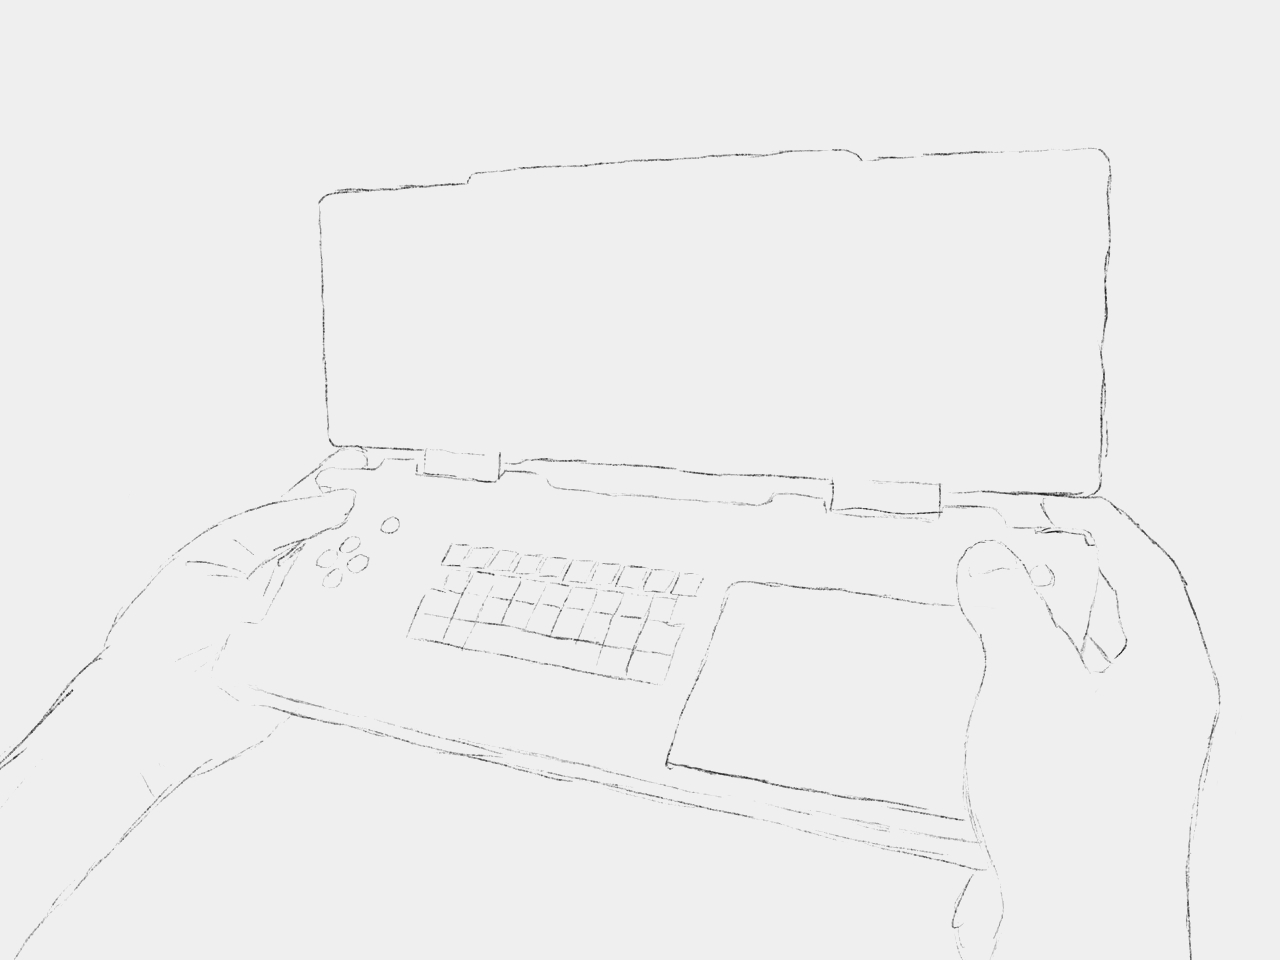
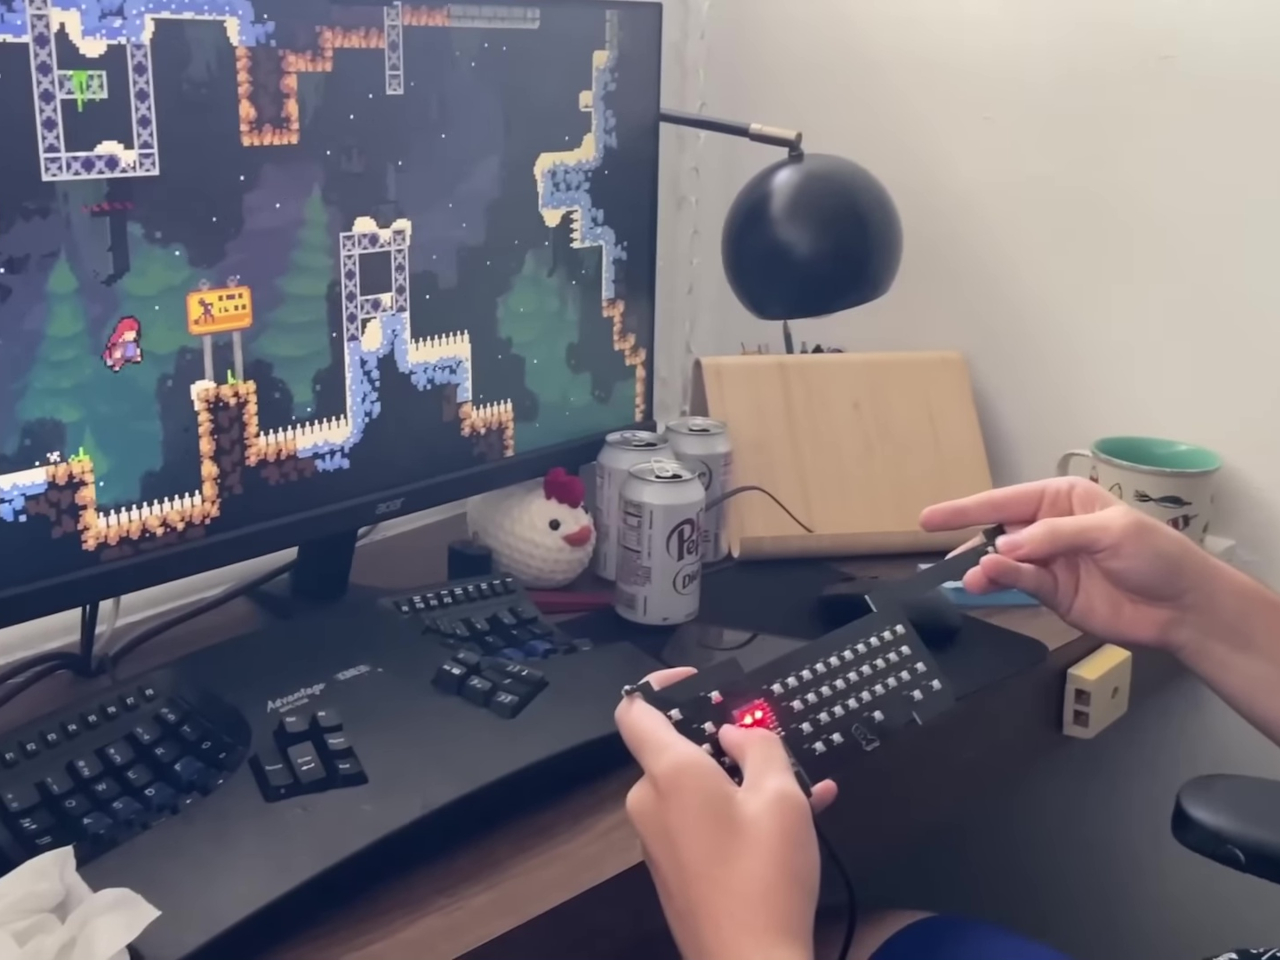
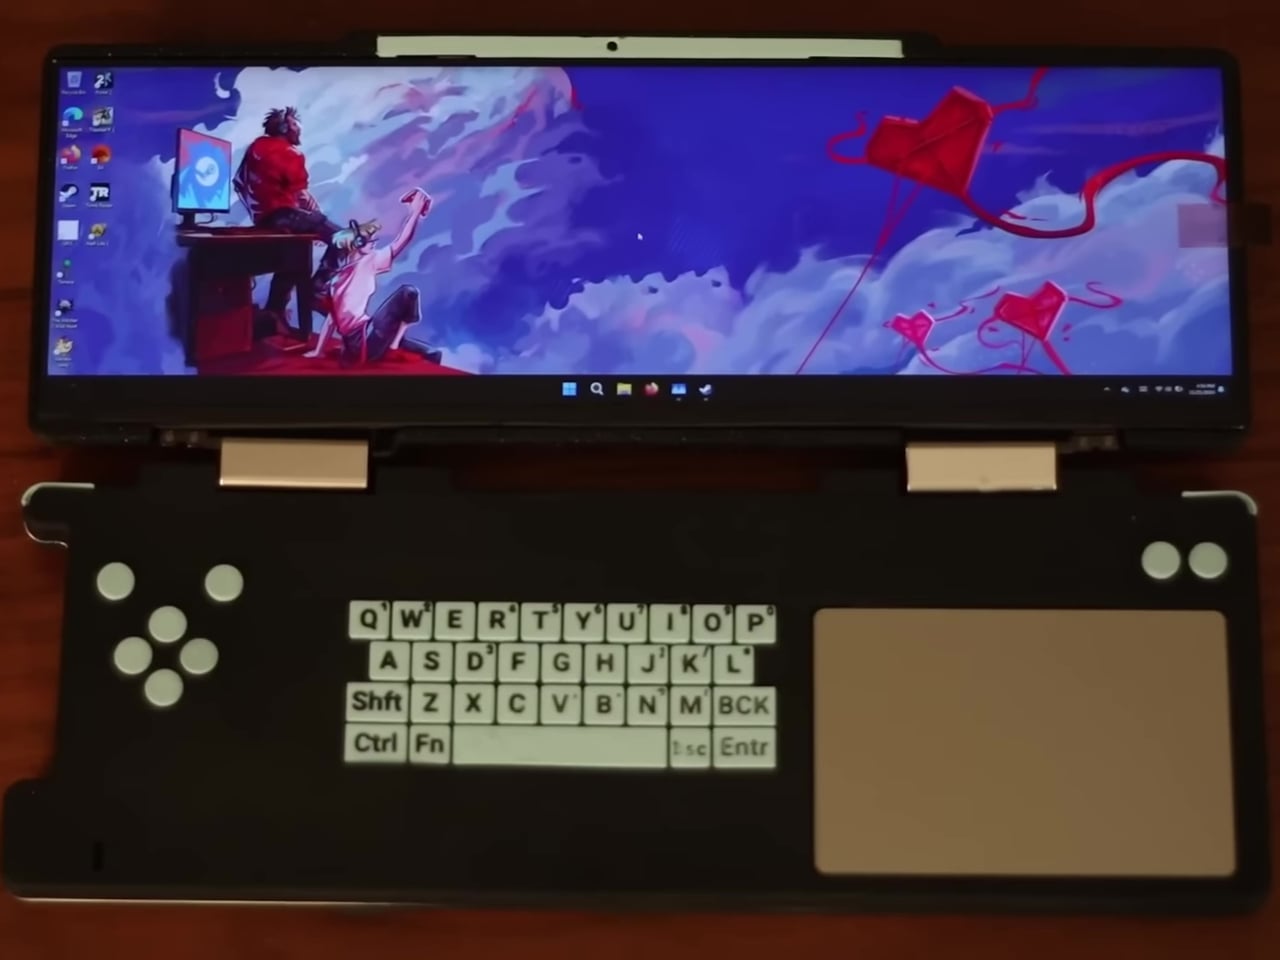
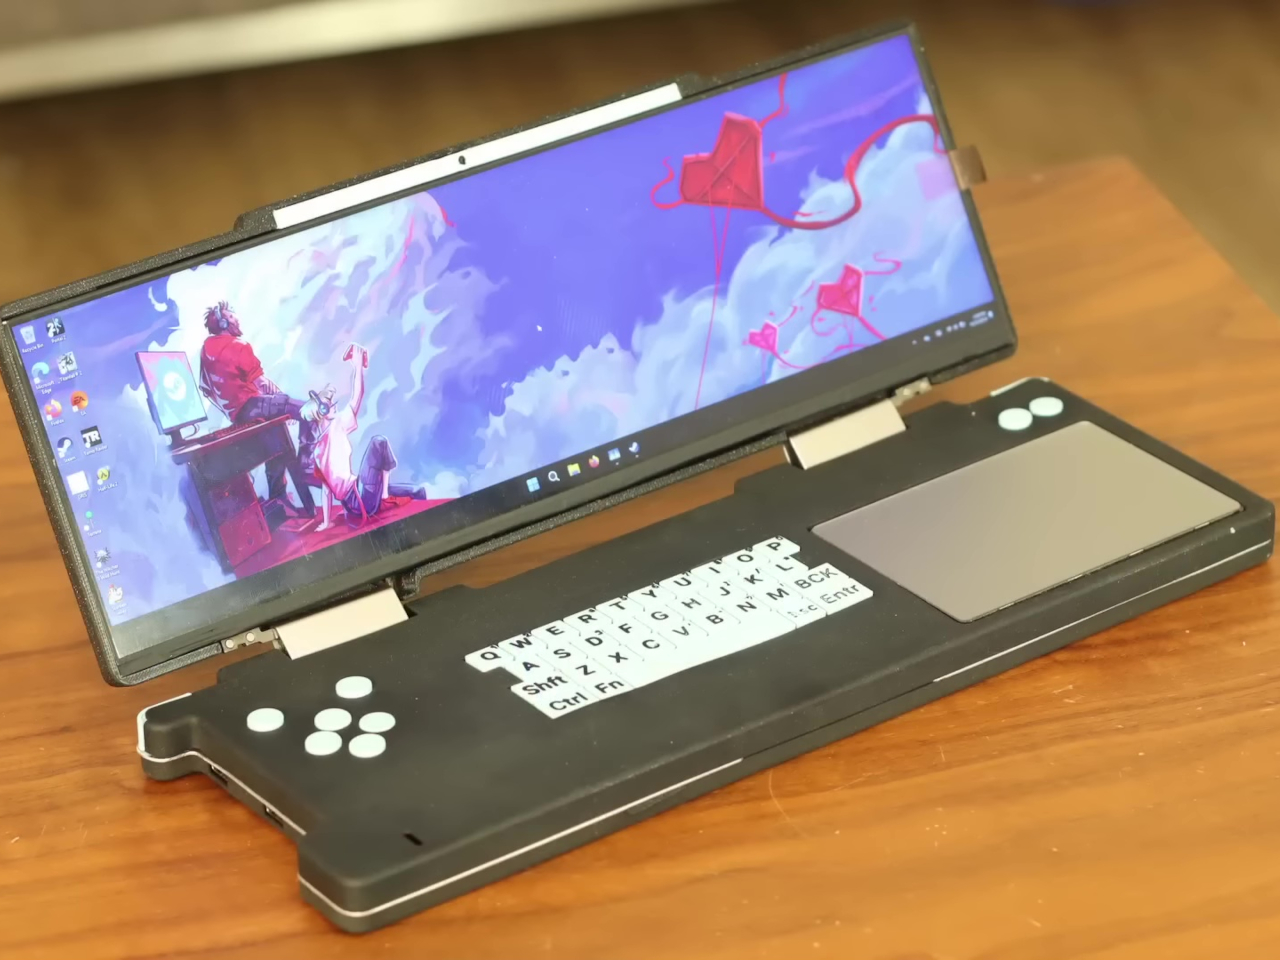
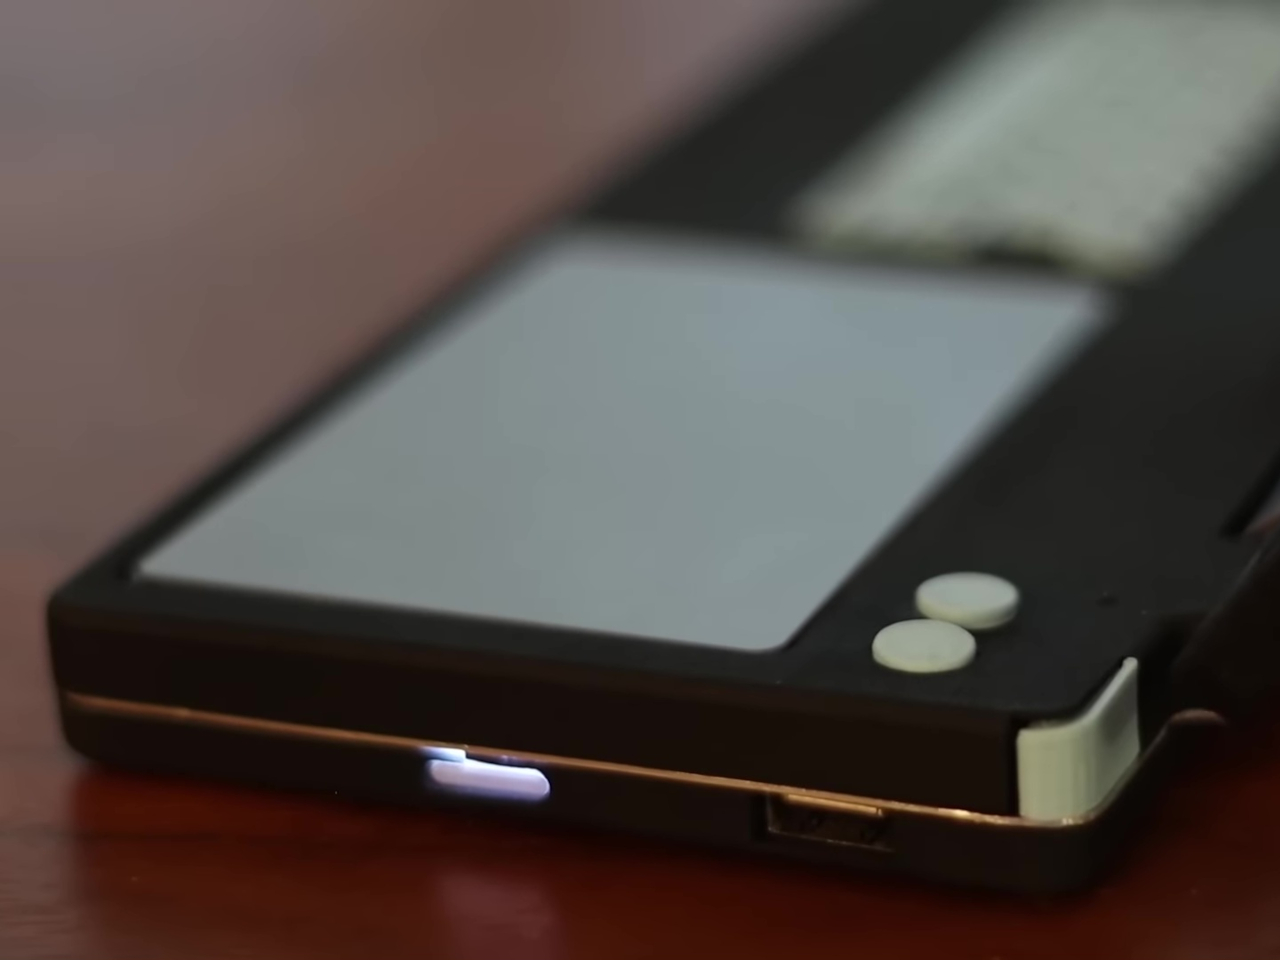
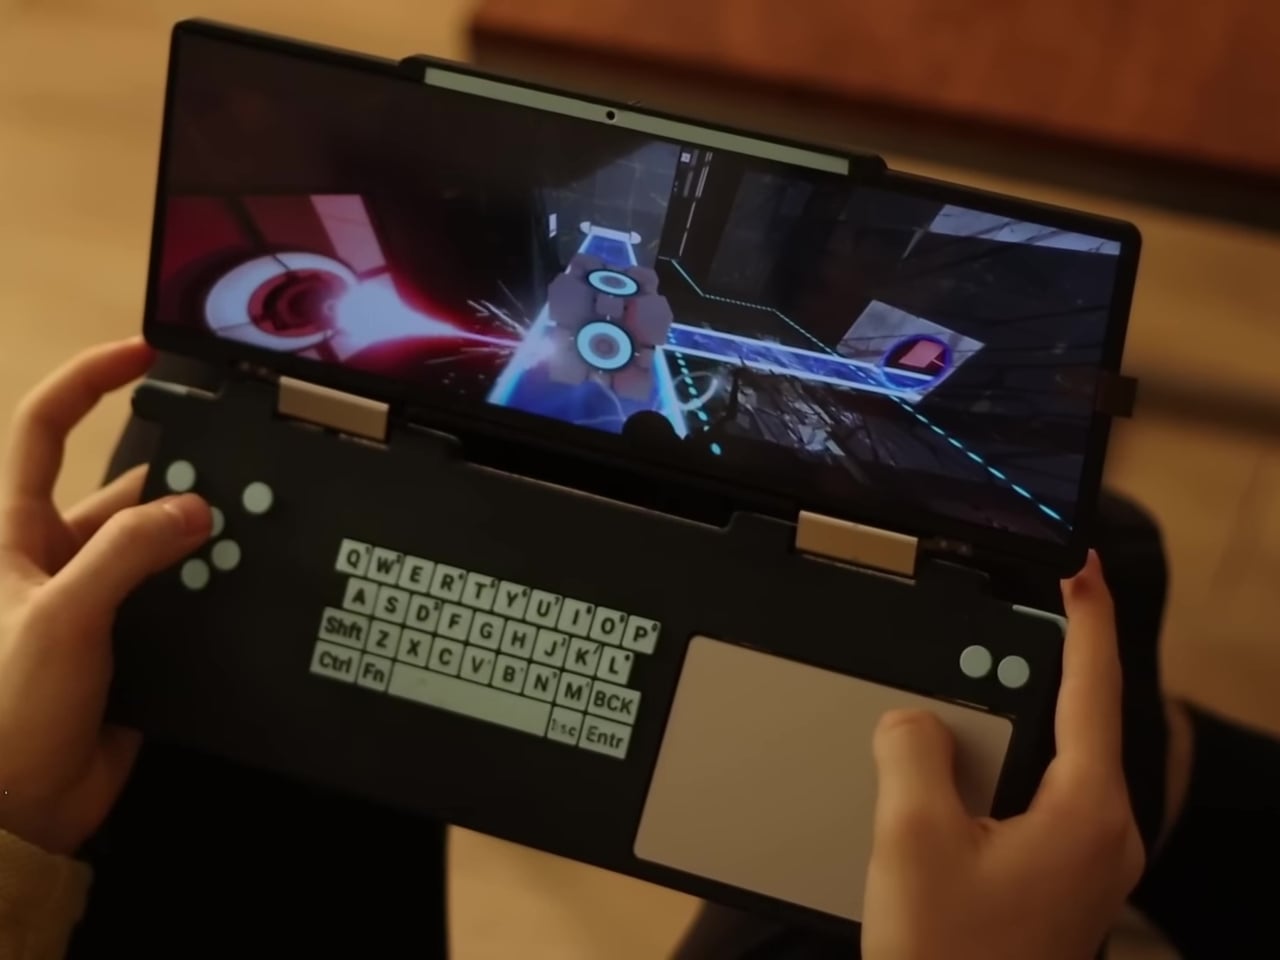
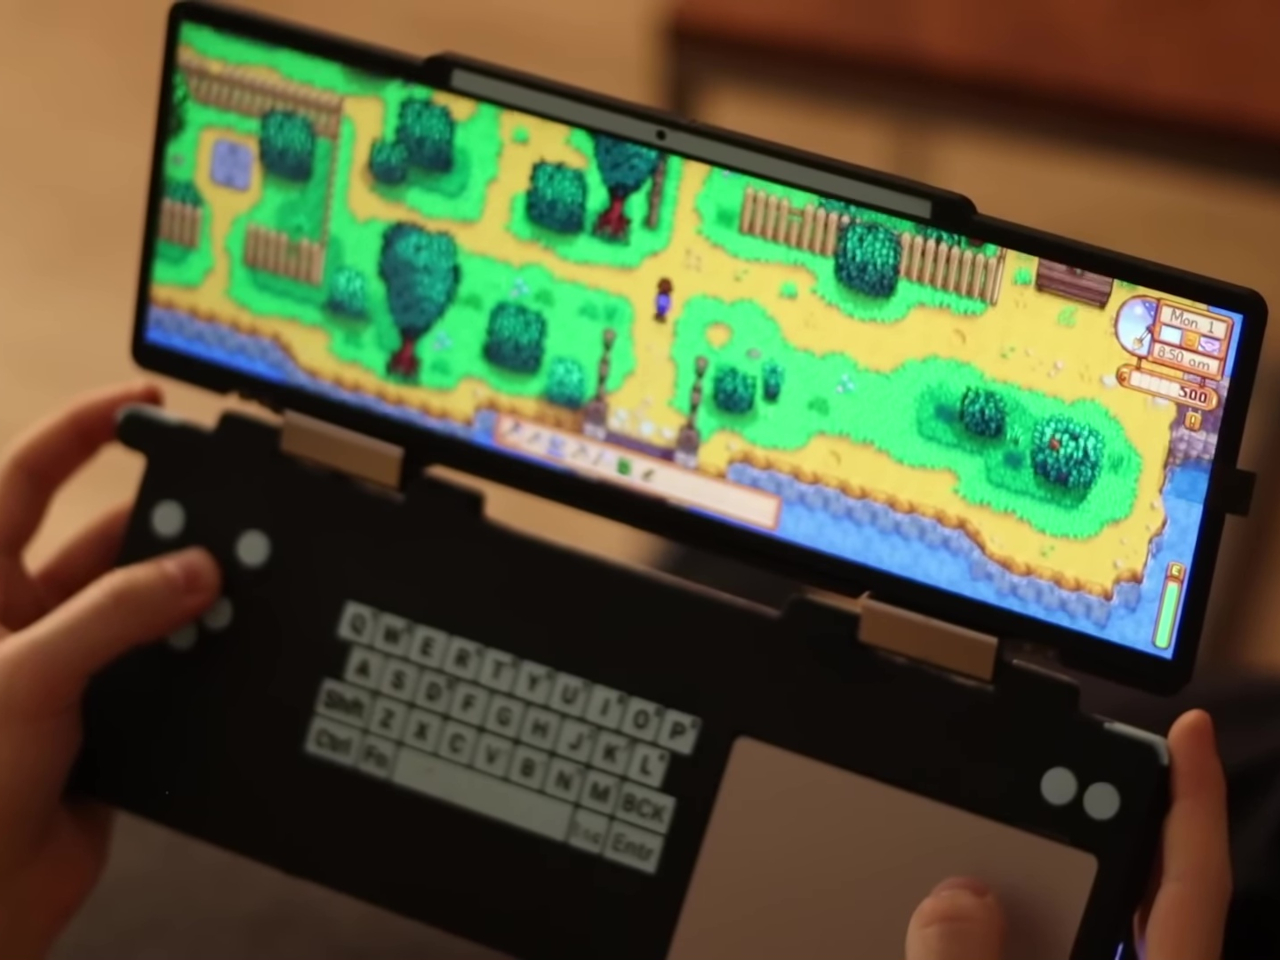
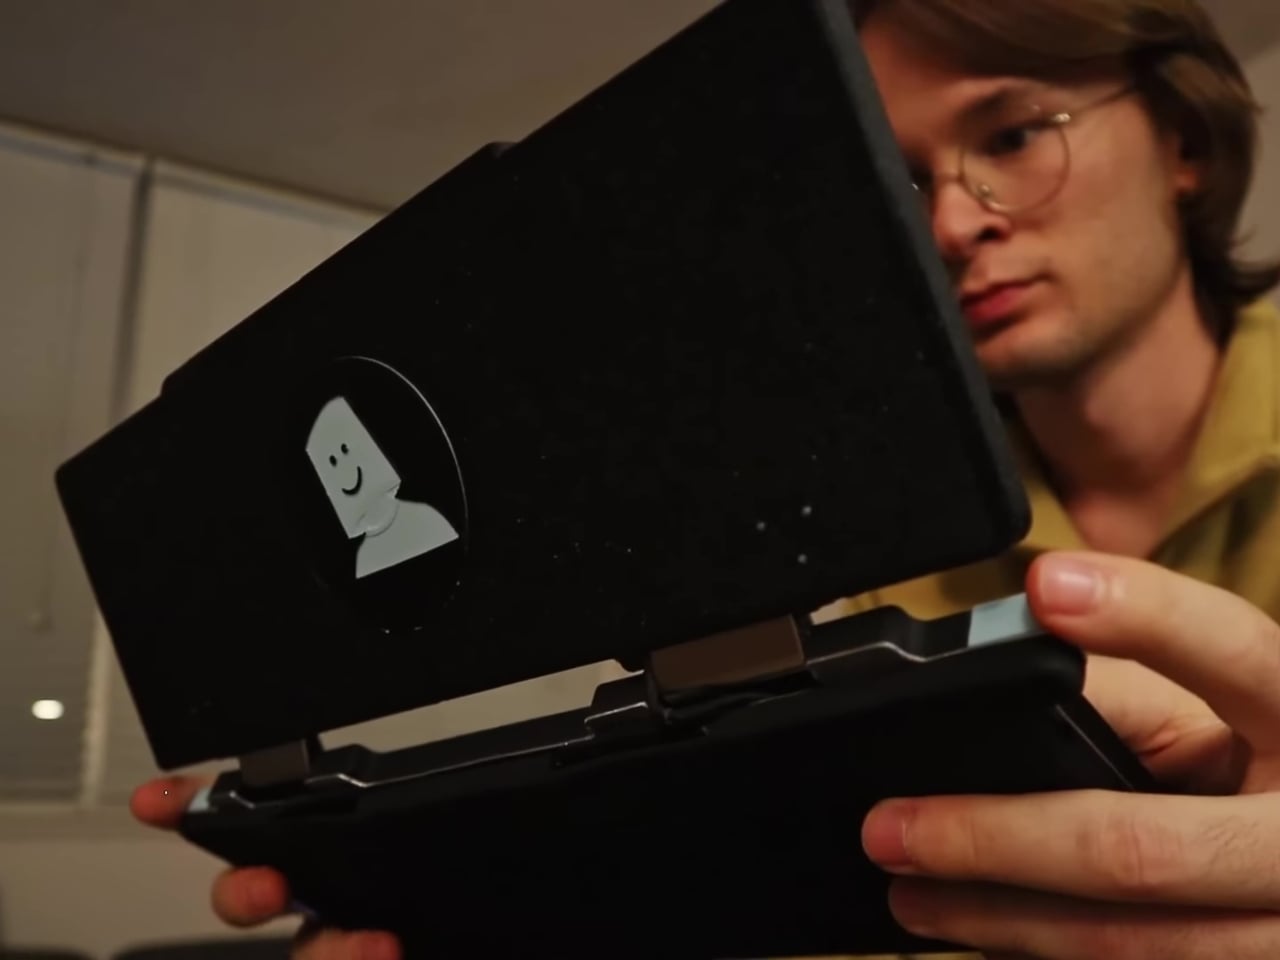
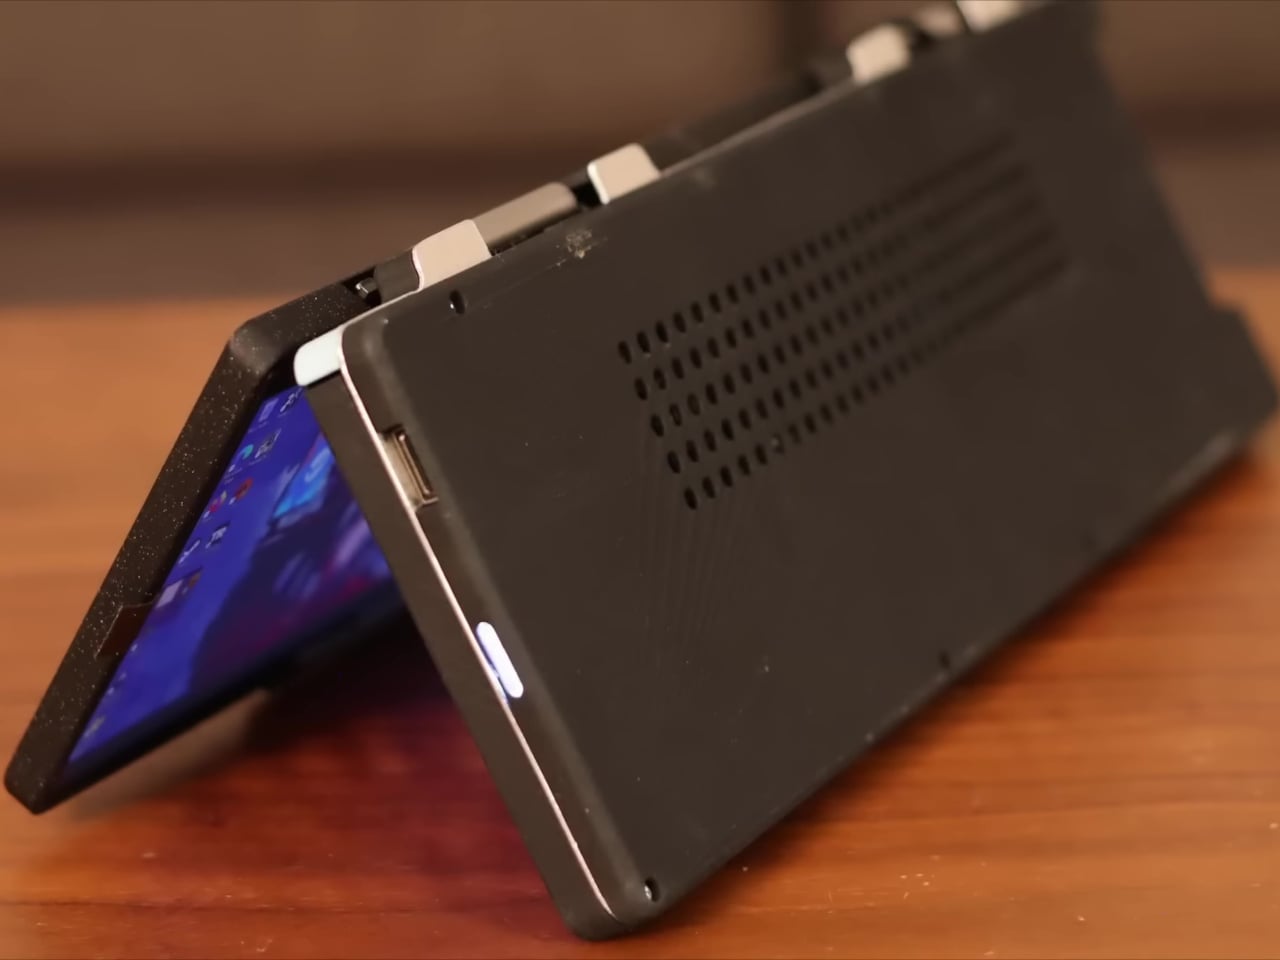
One designer, however, went out of his way to do something different thanks to his dislike of joysticks. The result is a unique and rather curious handheld device that combines the clamshell form factor of the Nintendo DS and the guts of a laptop, and then stretches it wide to a rather unusual degree.

Designer: Marcin Plaza

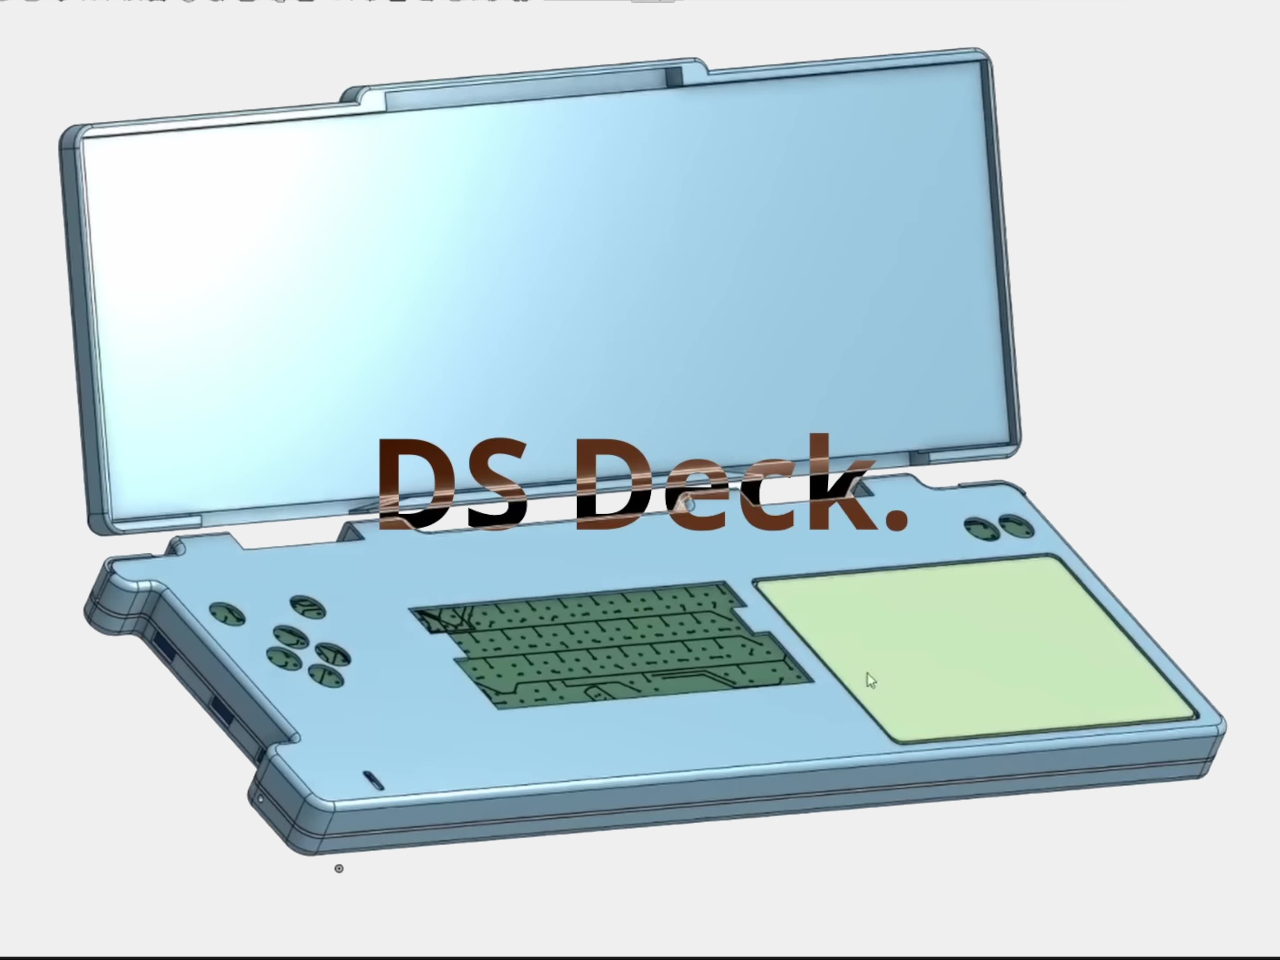
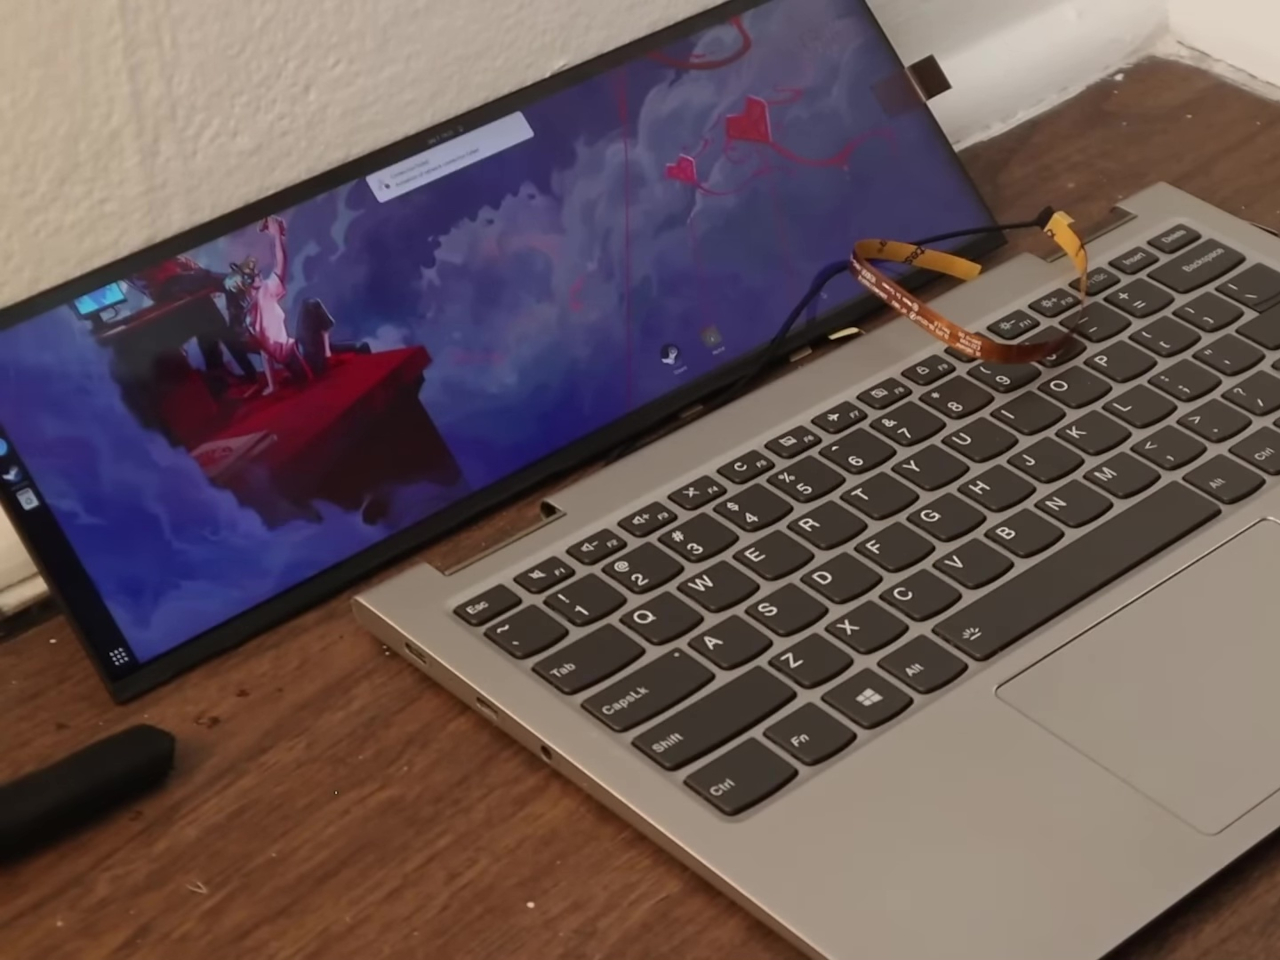
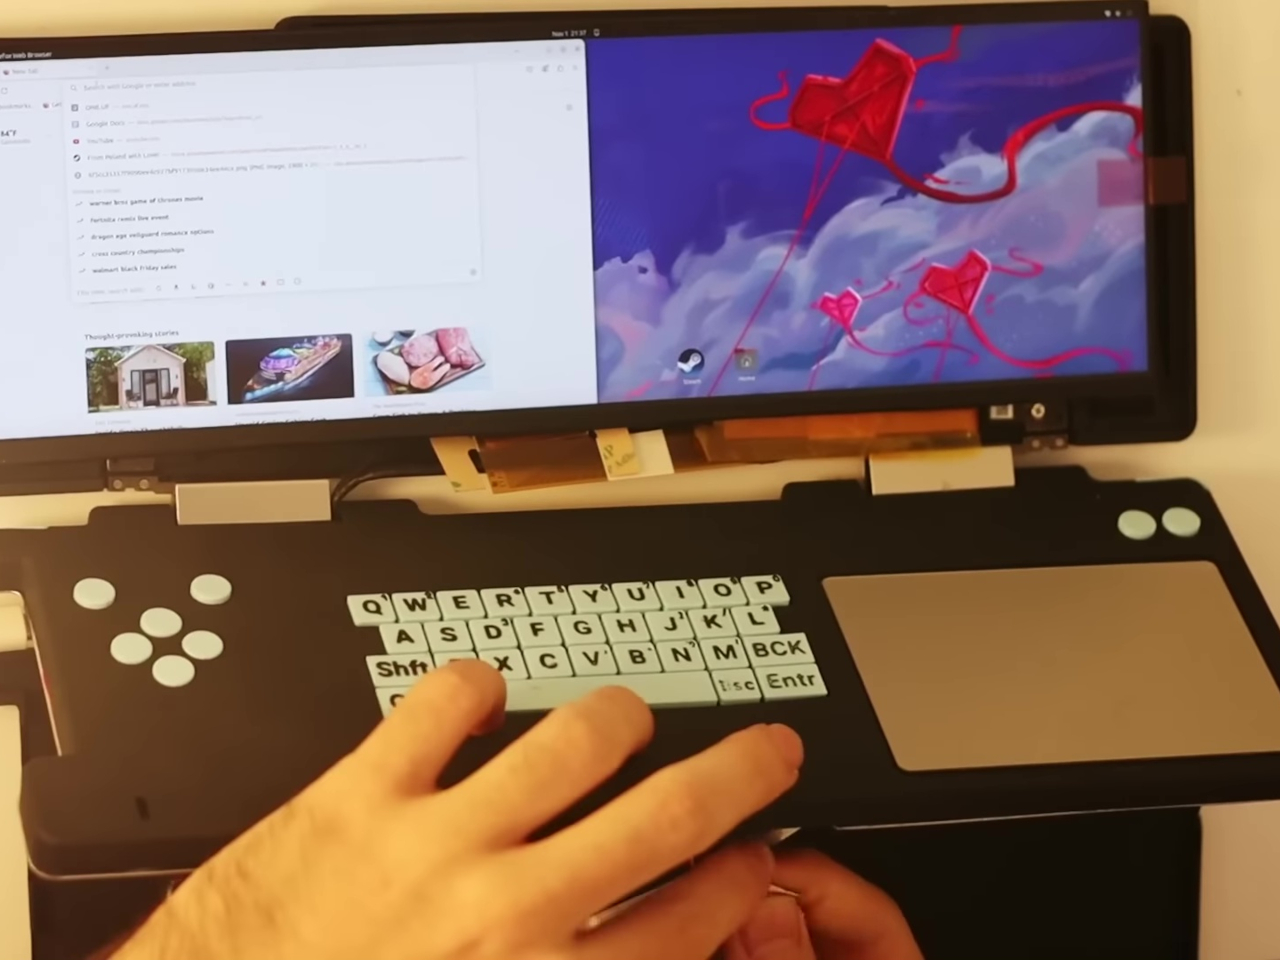
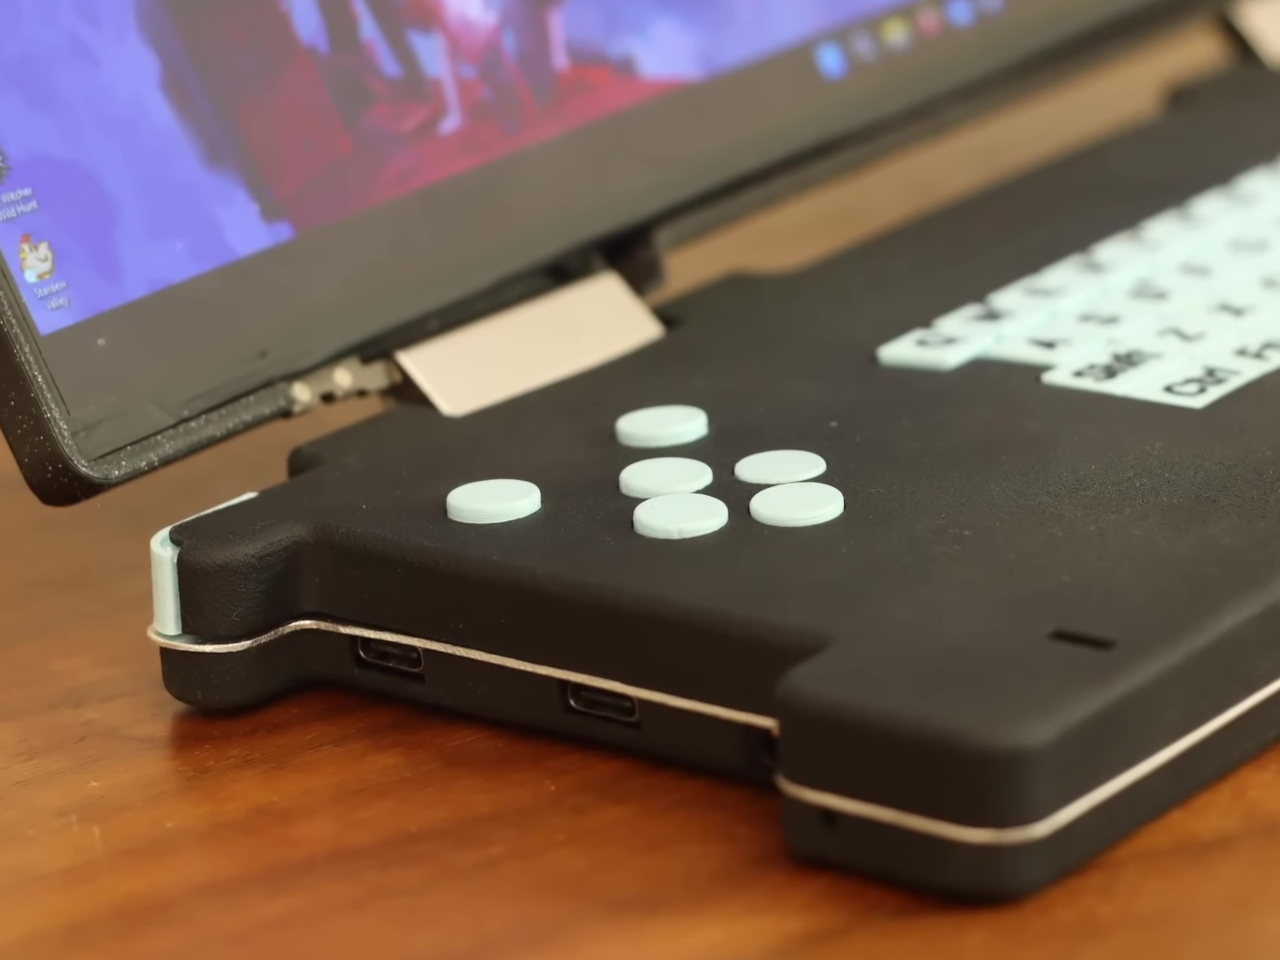
There are a few things quite unconventional about this ultra-wide Steam Deck Nintendo DS hybrid, not just its super-wide form factor. Actually, that shape was a result of the decision to repurpose the usable motherboard of a broken Lenovo laptop, which happened to be roughly 13 inches wide. But unlike another DIY Steam Deck that did the same with a modular Framework laptop motherboard, the “DS Deck” didn’t go the usual joysticks and buttons layout either.

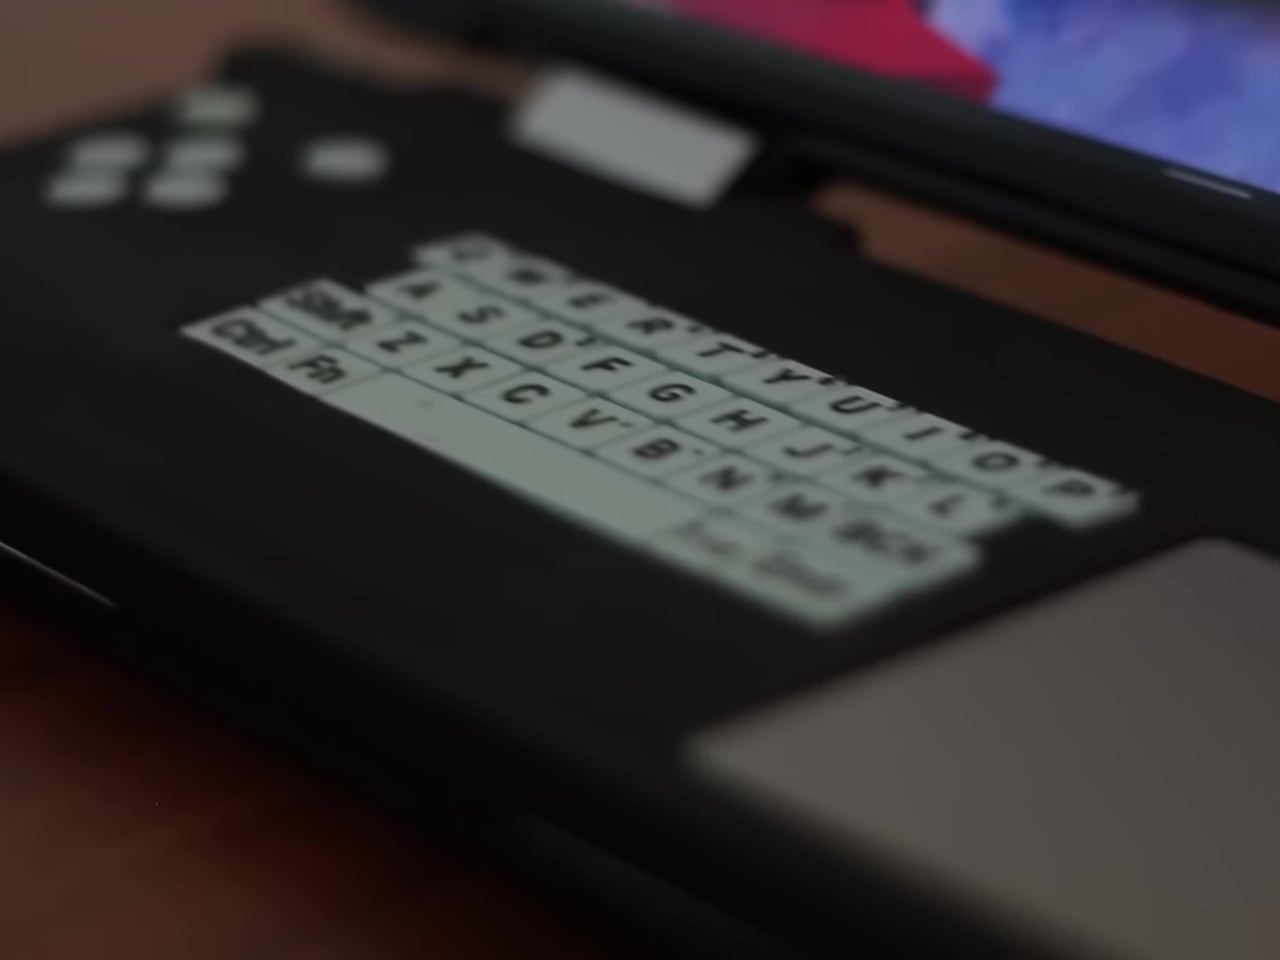
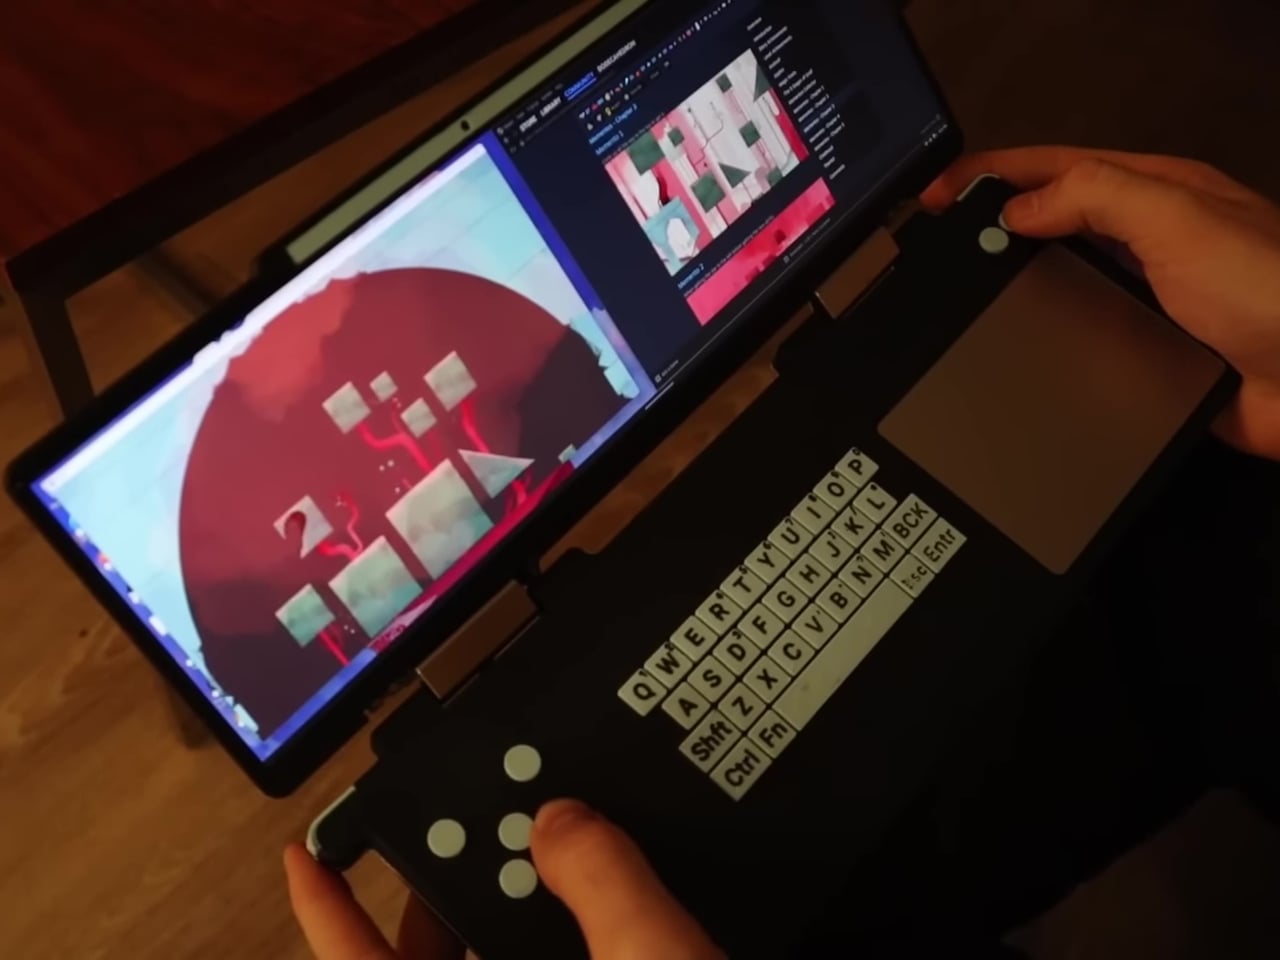
Since the goal was to ditch the joystick and replace it with a more PC-oriented keyboard and trackpad, a new kind of shell design was needed. Long story short, it required looking for a compatible 12.7-inch screen that happened to also be in an ultra-wide aspect ratio. These restrictions and requirements led to a design that followed the footsteps of the clamshell DS, which made for a rather interesting device.

While time and effort were saved in using the laptop motherboard as-is, more time was spent designing a custom circuit board for the non-standard keyboard and button layout. There was plenty of soldering and assembly involved, not to mention repairs of data cables that were accidentally torn off. Suffice it to say, this is a project very few will be able to follow.

Still, the final result is just as interesting and special. The DS Deck is able to run a full operating system like Windows or Linux because it basically uses the same motherboard and battery as the source laptop. Widescreen compatibility with games is a mixed bag, but one can always run two windows side-by-side thanks to the screen size. The custom design definitely needs a lot of work, as it doesn’t take into account safety and heat management, but the fact that it even works is itself already a commendable accomplishment.

The post DIY ultra-wide Steam Deck DS hybrid trades joysticks for a keyboard and trackpad first appeared on Yanko Design.