This 11-in-1 Titanium EDC Multitool Also Transforms Into A Phone/Tablet Stand

The term EDC broadly refers to a category of belongings referred to as ‘everyday carrys’. These could be everything from your watch, wallet, phone, to more obscure devices like pocket knives, multitools, flashlights, or even stationery. Most of the EDC we cover on this website falls within the tactical category, pocket blades, toolkits, Swiss-army multitools, etc. but the AceStand has a surprising feature that goes beyond your average set of features. Sure, it’ll open bottles and cans, tighten/loosen screws, and even help you start a fire outdoors… but it surprisingly also transforms into a tiny stand for your smartphone or tablet, making it uniquely useful enough that you’re sure to carry it everywhere with your phone and other belongings. It’s EDC for your EDC, simply put!

Designer: MeTool

Click Here to Buy Now: $59 $79 (25% off) Hurry! Only 16/480 units left!

What we personally love about the AceStand is the fact that it ticks all the right boxes when it comes to effective EDC design. It’s compact, rugged, versatile, and most importantly, it’s well-thought-out, with features you’ll appreciate almost immediately, and a few that you’ll come to love with time. It satisfies almost all EDC needs, whether it’s working with tools or repairing things, or opening items like bottles, cans, and envelopes. The fact that it’s made from titanium makes it rugged enough to pass down even to your great-grandchildren, although the built-in phone-stand may come handy now, but who’s to say if phones will even be a thing in the year 2100?!

The AceStand features a two-part body that pivots at one end, opening and closing somewhat like a clamshell. Magnets hold the device together when you need to keep the AceStand shut, providing a satisfying snap that lets you close the stand while not in need. However, opening the AceStand reveals the sheer wealth of tools integrated into the stand’s overall design. With as many as 11 different tools built-in, the AceStand becomes useful pretty much anywhere. Hex wrenches let you tighten and loosen bolts, square wrenches let you work with bicycle spokes, a standard hex bit sits sandwiched between two halves of the AceStand, and can be taken out and used for working with screws. One of the AceStand’s tip serves as a pry-bar for opening tins and prying apart nails, while the wedged design helps serve as a flint-scraper to start fires, or even a dull-enough edge to open boxes. The stand opens 180° into a flat 14-inch scale that’s perfect for drawing straight lines or even measuring, thanks to the inclusion of both metric and imperial units engraved into the top. A bottle opener can also be found in the stand’s design, letting you crack open a brewski while you’re in the middle of repairing, work, or outdoor exploration… and if a chilled beer isn’t much of a mood-lifter, the stand’s pièce de résistance is the fact that when opened at an acute angle, it lets you easily dock a phone or tablet into two cutouts on the top.

Working almost like an easel for your phone, the AceStand’s cutouts let you rest a smartphone or a tablet in both landscape and even portrait modes. The cutouts are fairly wide, working just as well with thick phone cases too, making the AceStand a rather handy tool to have for when you’re bored, when you quickly want to watch a YouTube tutorial while repairing something, or when you just want to keep your kid occupied at the dinner table at a restaurant.

Carefully placed magnets inside the AceStand let you dock a hex bit of your choice, while magnets at the tip help close the EDC when you’re done using it.

The AceStand measures roughly 7.5 inches when closed, and comes with a keychain slot that lets you easily string it along with your keys or even wear it across your neck like a modern dog tag. The fact that it weighs a paltry 53.3 grams (1.8 ounces) makes it an easy carry too. The entire stand comes machined from solid Grade-5 Titanium, making it durable, waterproof, corrosion-resistant, rust-proof, and incredibly reliable (don’t worry about it breaking while in use), and a clever inclusion of three tritium slots on the outside let you add glowing vials in your EDC, so that it’s visible even in the dark.

The AceStand starts at a discounted $59, ships globally, and should easily last decades even with sustained usage thanks to the titanium construction (even though the maker doesn’t explicitly provide a written guarantee).

Click Here to Buy Now: $59 $79 (25% off) Hurry! Only 16/480 units left!

Click Here to Buy Now: $59 $79 (25% off) Hurry! Only 16/480 units left!

The post This 11-in-1 Titanium EDC Multitool Also Transforms Into A Phone/Tablet Stand first appeared on Yanko Design.

This Tiny Palm-Sized Drone is the Future of Battlefield Surveillance and Military Recon

Quite reminiscent of the Hunter-seeker drones from the DUNE movie series, the Black Hornet 4 is shaping up to be an incredibly small yet exceptionally handy recon drone, capable of flying into areas unnoticed, and helping perform important surveillance required during military strategy and battle planning. This miniature marvel, weighing a mere 70 grams, packs a powerful array of features. Equipped with a 12-megapixel camera, superior low-light performance, and a high-resolution thermal imager, the Black Hornet 4 empowers soldiers with exceptional situational awareness on the ground.

Designer: Teledyne FLIR

However, its true potential lies in its ability to excel in challenging environments. Boasting a flight time exceeding 30 minutes, a range surpassing 2 kilometers, and the capability to withstand strong winds, the Black Hornet 4 navigates even the most demanding situations with ease. Additionally, its low visual and audible signature makes it ideal for covert operations, allowing for discreet deployment and data collection. The system’s ability to function in GPS-denied environments adds another layer of versatility, ensuring reliable operation regardless of external factors.

This innovative technology has already seen significant global adoption, with over 20,000 units deployed. The recent contract awarded by the U.S. Army for additional systems further underscores the Black Hornet 4’s impact. This tiny tech marvel represents a significant leap forward in the realm of personal reconnaissance, offering soldiers unprecedented capabilities and operational flexibility.

Beyond its military applications, the potential of the Black Hornet 4 extends to various civilian sectors. Search and rescue operations in disaster zones, environmental monitoring in remote areas, and even industrial inspections in hazardous environments could all benefit from the capabilities of this miniature marvel. As the technology continues to evolve, we can expect to see the Black Hornet 4, or similar systems, playing an increasingly crucial role in diverse fields, pushing the boundaries of what’s possible in the world of miniaturized aerial technology.

The post This Tiny Palm-Sized Drone is the Future of Battlefield Surveillance and Military Recon first appeared on Yanko Design.

Samsung’s Rollable Phones Will Be Able To Measure Air Quality, Thanks To A New Patent

Representational Image

Your phone is an absolute jungle of sensors – it can measure temperature changes, pressure changes, touch input, voice input, environment brightness, gyroscopic tilt, movement, among quite a few other things… and now Samsung wants it to measure the air quality around you too. It might seem odd at first (I felt so too), but this feature ties in with the broader approach at making your phone or any other wearable a health-focused device. If your watch can tell you that you’re in a high-noise environment and you should consider protecting your hearing, why not have a phone tell you if the air you’re breathing is polluted or contaminated? A patent uncovered by Twitter user @xleaks7 and tech blog Pigtou highlights the integration of an air quality sensor into Samsung’s upcoming Rollable Smartphones. This effectively helps your phone constantly measure the air quality on a hyper-local level, letting you know if you need to ventilate your kitchen or living room, or if the area you’re in has bad air, prompting you to leave or put on a mask.

Designer: Samsung

Representational Image

Imagine a phone that unfurls to reveal a sensor, discreetly tucked away when not in use. This is the essence of Samsung’s patent. The phone’s rollable display transforms into a gateway for external air, allowing the sensor to take accurate readings without compromising the phone’s sleek design. This eliminates the need for bulky external components, a common drawback of conventional air quality monitors.

But what makes air quality monitoring so important? Air pollution, particularly fine particulate matter (PM2.5), poses a significant health risk. By integrating sensors into everyday devices, Samsung offers a solution for convenient, on-the-go air quality monitoring. This empowers users to make informed decisions about their health and well-being, especially when spending time outdoors or in unfamiliar environments.

Here are a few features highlighted in the patent:

  • Adjustable Housing Concept: Tailors the display size and regulates airflow for precise sensor functionality.
  • Flexible Display Technology: Adapts seamlessly to varying screen dimensions, maintaining device portability.
  • Innovative Airflow System: Channels external air directly to the air quality sensor, enhancing measurement accuracy and speed.
  • Intelligent Opening and Closing Mechanism: Seamlessly integrated with the housing, optimizing sensor performance by managing air intake.
  • Improved Sensor Response Time: Facilitates swift sensor reaction to air quality fluctuations, ensuring timely feedback to users.
  • Built-in Sensor Protection: Shields the sensor from internal contaminants, guaranteeing consistent air quality assessments.
  • Streamlined Design: Maximizes space utilization, keeping the device sleek without compromising functionality.

The implications extend beyond personal health. This technology has the potential to foster a more environmentally conscious society. By raising awareness of air quality fluctuations, users can be prompted to take action, such as using public transport on high-pollution days. This collective effort can contribute to cleaner air and a greener future.

Patent via USPTO

The post Samsung’s Rollable Phones Will Be Able To Measure Air Quality, Thanks To A New Patent first appeared on Yanko Design.

Hilarious-looking Bicycle Helmet Gives You Bullet-like Aerodynamics… But Is It Worth it??

“When you see how fast it is, you won’t laugh anymore,” says Jonas Vingegaard, who can be seen adorning the Aerohead II helmet. However, those gains in speed do have a trade-off… you end up looking as if someone designed a Daft Punk helmet for unicorns. And that’s me being very charitable.

Professional cycling, much like any competitive sport, is a constant dance between innovation and tradition. While aesthetics often hold a certain allure, function reigns supreme, which is why we have that viral video of a man who lays down stomach-first on his bicycle and cruises past all his opponents. Here, every component, from the frame and wheels to the rider’s clothing and even posture, is meticulously optimized to shave off precious seconds in the pursuit of victory. Helmets, however, have traditionally occupied a somewhat unique space, balancing safety with aerodynamics and maintaining a familiar, rounded form. The Aerohead II, however, pushes the limits of aerodynamics so far, that it’s worth discussing on a design blog. The one-of-a-kind design focuses solely on reducing wind resistance and redefines the future of time trial helmets.

Designers: Giro and Team Visma

Developed in collaboration with the Dutch racing team Team Visma/Lease a Bike, the Aerohead II looks like it materialized from a futuristic vision board. The most striking feature is the undeniably unconventional, long, wedge-shaped “nose cone” (yeah sure) that extends far ahead of the rider’s head. This design choice, coupled with a tapered tail section, aims to create a smooth, aerodynamic profile, minimizing the drag caused by the rider’s head and neck.

While the helmet’s appearance might bewilder some and inspire some nasty memes, its purpose is undeniable. Time trials are races against the clock, where even the slightest reduction in drag can translate to significant time savings. Unlike traditional helmets designed for everyday riding or commuting, the Aerohead II prioritizes pure speed, making it a specialist tool specifically crafted for the unique demands of time trialing.

It’s worth noting that the Aerohead II isn’t the first foray into aerodynamic headwear for cyclists. Back in 1986, Giro’s original Aerohead, designed for cyclist Greg LeMond, helped him secure victory in the Tour de France. However, the Aerohead II takes things a step further, adopting a more extreme design and incorporating a wider, wraparound visor for improved visibility when the rider is in the low, tucked position crucial for optimal aerodynamics.

The helmet has already undergone extensive testing and made its competitive debut in the opening time trial of the prestigious Tirreno-Adriatico race in Italy. While some riders might have been initially surprised by the unconventional design, Team Visma/Lease a Bike’s head of performance, Mathieu Heijboer, reports that the focus on performance quickly won them over. Heijboer states, “The riders did look up a bit when they first saw the helmet, but in the end that didn’t last long. After a few tests and seeing the gains, everyone was quickly convinced.”

Beyond its immediate impact on the world of professional cycling, the Aerohead II also raises interesting questions about the future of helmet design in general. Could similar aerodynamic principles be incorporated into everyday cycling helmets, offering marginal gains for recreational riders? Or will the focus on pure speed remain exclusive to the high-performance realm of time trialing? Only time will tell, but until then, let’s spend some more time figuring out how to design this helmet so that it makes its wearer look less like a phallus-head?

The post Hilarious-looking Bicycle Helmet Gives You Bullet-like Aerodynamics… But Is It Worth it?? first appeared on Yanko Design.

Wireless Keyboard Inside An Altoids Tin Is Perfect For People Missing Their Blackberry Phones

Remember the Clicks Keyboard from earlier this year? What if you could somehow build your own and carry it around in an Altoids tin??

YouTuber ‘Flurples’ decided the Altoids tin was honestly the perfect vehicle for this miniature keyboard. It was roughly the width of your standard Blackberry phone, which means the keys would be perfectly thumb-sized, and it had the added benefit of coming with its own metal case and lid that made carrying it around incredibly easy. The only thing left was to actually build the keyboard.

Designer: Flurples

Dubbed the Mint Board, this tiny keyboard is quite the tactile dream come true. It fits in your pocket, has an on/off switch, and wirelessly connects to any Bluetooth-capable device to turn into a keyboard. While it’s incredibly small, it’s perfectly usable (even more so than those godawful touchscreen keyboards) although most people will sorely miss the presence of a number row on top. The Mint Board also charges via USB-C, although Flurples didn’t mention what the battery life of the keyboard is on a full charge.

The Mint Board works with an iPad, allowing you to type on a tactile surface and have the letters appear on screen

Initially conceptualized as a 60% layout keyboard, the Mint Board’s design journey was marked by meticulous planning and adaptation to spatial constraints, ultimately settling for a 40% layout that would only feature the essential Qwerty and special keys (no numbers either). Key spacing and switch selection were pivotal considerations when it came to choosing this layout, ensuring optimal utilization of the limited space within the tin.

At the core of the Mint Board lies a meticulously crafted PCB, meticulously designed to accommodate switches, diodes, a microcontroller, and an on/off switch. Firmware development was a strategic endeavor, with Flurples opting for a Nice Nano microcontroller and ZMK firmware to enable Bluetooth connectivity. Despite the transition from the familiar QMK firmware, Flurples found solace in the shared conceptual framework, facilitating a seamless integration process. The assembly process proved to be both a challenge and a triumph, as Flurples meticulously soldered each component, including the microcontroller and battery, with precision and finesse. However, unforeseen challenges arose, such as tight keycaps, prompting Flurples to undertake a redesign.

Once the inner workings were ready, Flurples built the outer housing, relying on a 3D printer to make the upper and lower halves of the keyboard body, as well as the 41 individual keys. The keyboard was secured together using four screws that sandwiched the PCB in between the plastic components, and glued into the Altoids tin, whose sides had cutouts made to coincide with the ports and switches on the Mint Board’s PCB.

Yet, the true pièce de résistance of the Mint Board lies in its personalized keycaps, each painstakingly crafted with legends created in Illustrator, cut using a Cricut Machine, and finished with a layer of clear-coat resin to give it its signature domed shape. Using the keyboard proved to be gorgeously tactile too, with satisfying click sounds that most Blackberry users will fondly remember. The best part, the entire keyboard could wirelessly connect to pretty much any device, giving you a familiar typing experience on everything from your smartphone to even your iPad.

Flurples should seriously consider building a screen into the lid and turning this into a miniature laptop!

The post Wireless Keyboard Inside An Altoids Tin Is Perfect For People Missing Their Blackberry Phones first appeared on Yanko Design.

LEGO Godzilla might be smaller than its living counterpart, but it’s just as ferocious

It’s strange that we’ve got probably around ten or more Godzilla movies, but no Godzilla LEGO set yet. Hoping to change that, LEGO Builder Matthew Esposito decided to make a small-scale brick version of everyone’s favorite city-smashing reptile. Modeled after the ‘King of Monsters’ Godzilla (from the 2019 movie), this tiny terror stands merely a few inches tall, but encapsulates every inch of its original form’s grandeur, with its hefty body, incredibly long tail, and the ability to blow blue flames in any direction, razing cities down in mere minutes with zero regret.

Designer: Matthew Esposito

“I was really blown away by the new look of the Godzilla in these newer movies. I was fascinated by how this new iteration of Godzilla was designed, and I thought that this new look would translate incredibly well into LEGO,” says LEGO builder Matthew Esposito. “This model would make a great LEGO set because I believe that, with the new movie coming soon into theaters and onto streaming services, I believe that many people would be hyped and excited to watch this new movie, as well as have their own buildable Godzilla at hand to play with.”

Esposito doesn’t mention how many bricks his build uses, but it’s probably in the ~500 ballpark (I could be completely wrong). The Godzilla features multiple moving parts, including opposable hands and fingers, a moving jaw, adjustable legs, and even an adjustable tail (which does need its own separate support given the Godzilla’s strange CG). Esposito employs the use of grey bricks, which lends itself well to the iconic monster, and even uses bricks with cracks at certain intervals, highlighting Godzilla’s imperfect skin. The LEGO brick bumps are visible across the body too, almost acting like scales!

This build also comes with its own rich blue fireball that fits right in Godzilla’s mouth, making it look like it’s shooting flames at a building or a nearby helicopter.

Esposito originally built this LEGO version of Godzilla back in 2021, gaining massive support from the LEGO Ideas community who rushed to give him the 10,000 votes he needed to enter the review stage of the LEGO Ideas process. Sadly, the internal team at LEGO rejected the submission at the time, but Esposito resubmitted his MOC (My Own Creation) to the forum again this year, already garnering over 3,400 votes. If you want to see the LEGO Godzilla turn into a retail box set, head down to the LEGO Ideas website and give Esposito your vote!

The post LEGO Godzilla might be smaller than its living counterpart, but it’s just as ferocious first appeared on Yanko Design.

Logitech’s Latest MX Brio Webcam Has 4K Output, A Privacy Shutter, and Apple-style ‘Desk View’

While the Brio line isn’t new, Logitech’s new MX Brio marks the first time their MX Series gets its own webcam. Tuned for creatives, professionals, and anyone who needs an online presence for their work, the webcam comes with top-notch hardware, infinitely adjustable software, a focus on privacy, and a little feature called ‘Show Mode’ that lets you capture your desk setup quite similar to Apple’s Desk View feature from 2022.

Designer: Logitech

This is the first time Logitech’s MX Master Series gets its own webcam. The Brio webcam line has been around for long enough (and has shot in 4K since as early as 2017), but the MX Brio is quite literally a different beast. It comes after an extensive survey of nearly 2200 individuals across both WFH and office-based setups that found that users weren’t just looking for high-res video, they wanted other features like image adjustability, better performance in low light and backlight scenarios, accurate color representation for different skin types, compatibility across popular meeting apps, privacy focus, and hi-res audio.

The MX Brio boasts a slew of impressive features, starting with its video quality. Capable of delivering 4K resolution at 30 frames per second and 1080p at up to 60 frames per second, it sets a new standard for clarity and fluidity in video calls and content creation. This leap in quality is supported by an advanced sensor and Logitech’s custom lens design, ensuring that users enjoy a wide field of view without sacrificing image precision. In challenging lighting conditions, the MX Brio shines—literally. Its back-illuminated Sony sensor excels in low light, making sure you’re seen clearly regardless of your environment. Coupled with its innovative autofocus system and face-based exposure adjustment, the webcam offers unparalleled image quality that automatically adapts to maintain natural skin tones and balanced lighting.

Beyond video, the MX Brio takes audio seriously too. It features dual-integrated microphones that utilize beamforming technology to focus on your voice while filtering out background noise, ensuring that you’re heard as clearly as you’re seen.

The MX Brio’s Design is a classic example of Logitech going down the ‘Form Follows Function’ route. It tries not to reinvent the wheel, but sticks to the most effective format, with a lens in the center and two beam-forming microphones on each side. Given its MX status, the webcam gets an upgrade with an anodized aluminum body (available in pale gray, graphite, and black), and features the universal monitor clamp that lets you attach your webcam to a desktop or even a laptop. The webcam now sits on a hinge that lets you angle it on the vertical axis, facing either directly at you, or even downwards. Angle it down and you can access Logitech’s new Show Mode, which does some image processing to capture a perfect birds-eye view of your desk. Quite similar to Apple’s Desk View mode that they introduced with their Continuity Camera feature, the Show View is a great way to record your notes, sketches, or just a wonderful way to capture your PoV as you work. Like every good webcam, the MX Brio also comes with a privacy shutter that covers the lens when you twist the webcam’s outer ring.

Sustainability is another cornerstone of the MX Brio’s design. Logitech has made a concerted effort to reduce the webcam’s environmental impact, utilizing low-carbon aluminum, post-industrial recycled aluminum, and up to 82% post-consumer recycled plastic in its construction. The packaging further reflects this commitment, being made from FSC-certified paper.

Being a part of the MX Series, the MX Brio is fully integrated with Logitech’s software ecosystem, including Options Plus and G HUB, allowing users to tweak settings for optimal performance across various lighting conditions and applications. Whether for professional use in Microsoft Teams and Zoom or streaming on platforms like Twitch, the MX Brio adapts to your specific needs, and can even be controlled using dedicated keys on Logitech’s other MX devices like the keyboard and mouse.

The MX Brio comes in three colors – Pale Gray, Graphite, and Black, with a $199 price tag. Enterprise users can opt for the MX Brio 705 For Business, which also has the same price tag, compatibility with Tune and Sync, and comes with Logitech’s RightSight Autoframing. A purchase of the MX Brio also gets you a 1-month subscription to Adobe Creative Cloud’s ‘All Apps’ plan, or a 2-month subscription to the ‘Photography Plan’ along with 20GB Creative Cloud storage.

The post Logitech’s Latest MX Brio Webcam Has 4K Output, A Privacy Shutter, and Apple-style ‘Desk View’ first appeared on Yanko Design.

YouTuber Turns Tesla’s Cybertruck Into A Full-Blown Snowmobile With Tracks Instead Of Wheels

We’ve seen the Cybertruck handle off-road tasks with the ease of a machete cutting through soft butter… Whether it’s asphalt, gravel, sand-dunes, or even a shallow riverbed, it seems like Cybertruck drivers have managed to push the electric pickup truck to its limits to have it conquer those surfaces, but what about snow? YouTuber Heavy D Sparks decided to test the truck’s off-road abilities by having it run on one of the trickiest surfaces for any vehicle, snow-capped hills. Except, he wasn’t planning on just taking the Cybertruck as is, no… Heavy D Sparks decided to build the world’s first (and only) Cybertrack – a truck/snowmobile hybrid with treads instead of wheels. Borrowing a Cybertruck from fellow YouTuber Supercar Ron, Heavy D Sparks (also known as Heavy Diesel) decided to give the truck its biggest hardware upgrade ever.

Designer: Heavy D Sparks

The aim was to outfit the Cybertruck with “hell tracks,” a modification promising unparalleled off-road prowess. This endeavor was not without its hurdles, though; given the Cybertruck’s sheer weight and output, multiple parts and brackets ended up needing reinforcements because of how heavy the truck was. Parts would break, fold like cardboard, or even completely disengage, causing the truck to lose control or stop working entirely.

The truck was sourced from Supercar Ron, who happened to have an early Founder’s Edition of the Cybertruck, and very graciously gifted it to the Diesel Brothers team to modify however they saw fit. The journey of modification was a meticulous process involving the creation of custom parts such as bumpers and the addition of extra batteries in the back to support the massive lights installed on the top and the front courtesy Baja Designs. Finally, the truck got a custom wrap featuring a unique camouflage pattern that mimicked the Cybertruck’s angular design.

Testing the modified vehicle revealed a stark duality of success and challenge. On one hand, the Cybertruck demonstrated enhanced stability and performance, a direct result of the thoughtful modifications. On the other, the project was met with significant mechanical setbacks, including a broken spindle—a clear indicator of the factory parts’ limitations under rigorous testing conditions.

However, when the Cybertrack DID work on snow, Heavy D (who was piloting the vehicle) pointed out that the truck was handling the snow incredibly smoothly. “It feels so stable,” he mentioned. “I would feel totally comfortable loading this thing full of skiers and going to the top of any ski resort around, like the steepest runs.” The truck could comfortably cruise around at 40 to 50mph on snow, although there’s a fair discrepancy between what the speedometer says versus your actual ground speed. The speedometer outputs nearly double of what your actual ground speed is (because of how the treads rotate and how that translates to actual ground movement). It held its own on steep inclines too, but there was a bit of a malfunction right towards the end of the video.

Unexpectedly, the project received an encouraging nod from Tesla, an acknowledgment that perhaps was not anticipated. This support not only underscored Tesla’s openness to seeing its vehicles pushed to new boundaries but also cemented a deeper appreciation for the brand and its leadership, marking a positive shift in perception among the project team.

There’s a Part 2 video coming soon, with probably more repairs and modifications to the Cybertrack. You can follow Heavy D Sparks on YouTube for more.

The post YouTuber Turns Tesla’s Cybertruck Into A Full-Blown Snowmobile With Tracks Instead Of Wheels first appeared on Yanko Design.

This Ridiculously Simple Trick Can Transform Your Good Designs Into Great Designs

“A great design can’t be great if it doesn’t end up reaching its audience”

If people aren’t sharing/talking about your design, then it’s failed its first basic step: creating an impact. Most designers are so enamored (in a good way, obviously) with the idea of creation that they forget the next logical step – ensuring that the design reaches as many people as it can. The one secret you need to know, whether you’re a designer, a creator, a maker, a studio, or even a company looking to get eyeballs on your work… is to make your design project easy to share with others. The way you do it is simple – create a Press Kit.

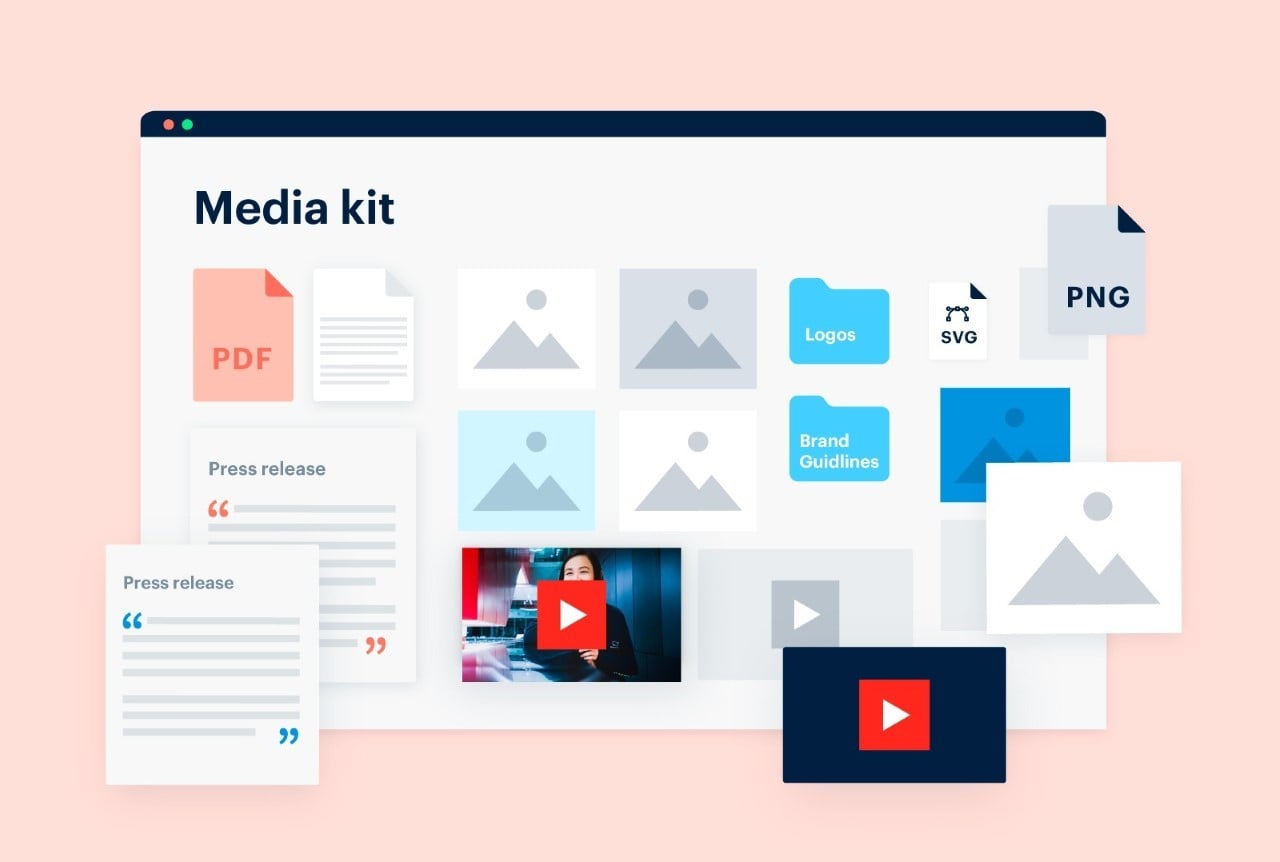
A Press Kit or a Media Kit is basically a kit/page/folder that contains high-resolution images, videos, GIFs of your design, and a written document describing your project in detail. It’s the basic raw material for journalists, bloggers, PR teams, marketers, and content creators to help them promote and broadcast your work. When people talk about your work, people notice your work. It’s that simple.

How To Make A Press Kit?

You know how a picture’s worth a thousand words? The press kit is quite literally those thousand words. Instead of leaving your work up to everyone’s interpretation, a Press Kit helps people understand your work so that they can then share it with others. It’s pretty much routine in the media world to have a press kit before writing about any project – the press kit (also known as the media kit) has three important aspects to it: Words, Images, and Videos. Every article you read online (or even offline), every social media post, every reel or TikTok is made up of these three things – Words, Images, and Videos. These three aspects are firmly within your control when you’re the creator, whether it’s a piece of furniture, an app, an electric vehicle, or any product/service/experience. Building a press kit to go with your creation is a great way of helping shape that narrative.

So how do you build a press kit? Simply collect all the information related to your project and present it in text form. On the side, also give people the option to view/download/share high-resolution images and videos regarding your project. You could compile all of these into a compressed folder (a .zip attachment in your email), or make them available via cloud storage or even directly on your website. The latter is a great way to track how many people access the press kit, giving you a unique metric to measure reach.

What To Include In Your Press Kit?

There are three aspects to a press kit – Words, Images, and Videos. The quantity and the emphasis on these three mediums is entirely up to you, but it’s essential to include a combination of all three aspects in your kit. The ‘Words’ element of the press kit is referred to as a press release, it contains all the information people need to know about your project. Hypothetically, you explain the background, the process/intent, the end result, the features, the human context, and other details like pricing and availability. Press releases also end with a note on the creator, giving media personnel a background on you so that they can use it to craft their narrative.

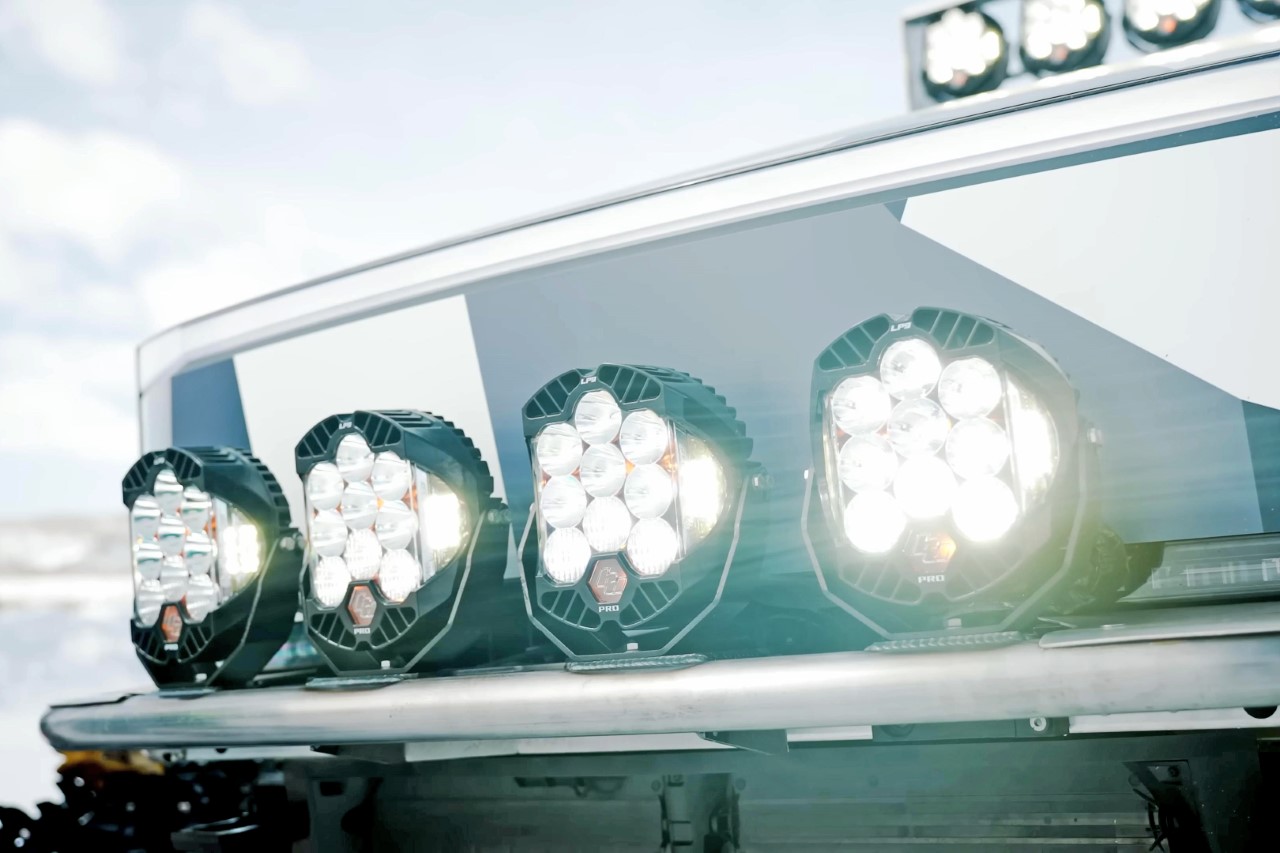
The words or text form the backbone of your press release, but arguably, the images and videos are what grab the attention of people in the first place. Your press kit needs to have great, high-resolution images to attract viewers, and preferably even a video to help people see your product in action, or get a sense of your product’s usage/features/background. The images need to be high-resolution for a variety of reasons – for starters, it just makes sense to not have blurry images in your press kit. Media outlets hate publishing bad-quality images because it reflects directly on their brand. Besides, sometimes a journalist/writer will crop a part of your image to focus on an element, so having good-quality images definitely goes a long way. Besides, search engines prioritize articles with great-quality media, so you want to make the best of that algorithm.

Tips And Tricks For Improving Your Existing Press Kit

As an ex-designer who’s been in the design+tech blogging world for nearly a decade, I think it’s time I share a few tips and tricks to help you build a stellar press kit.

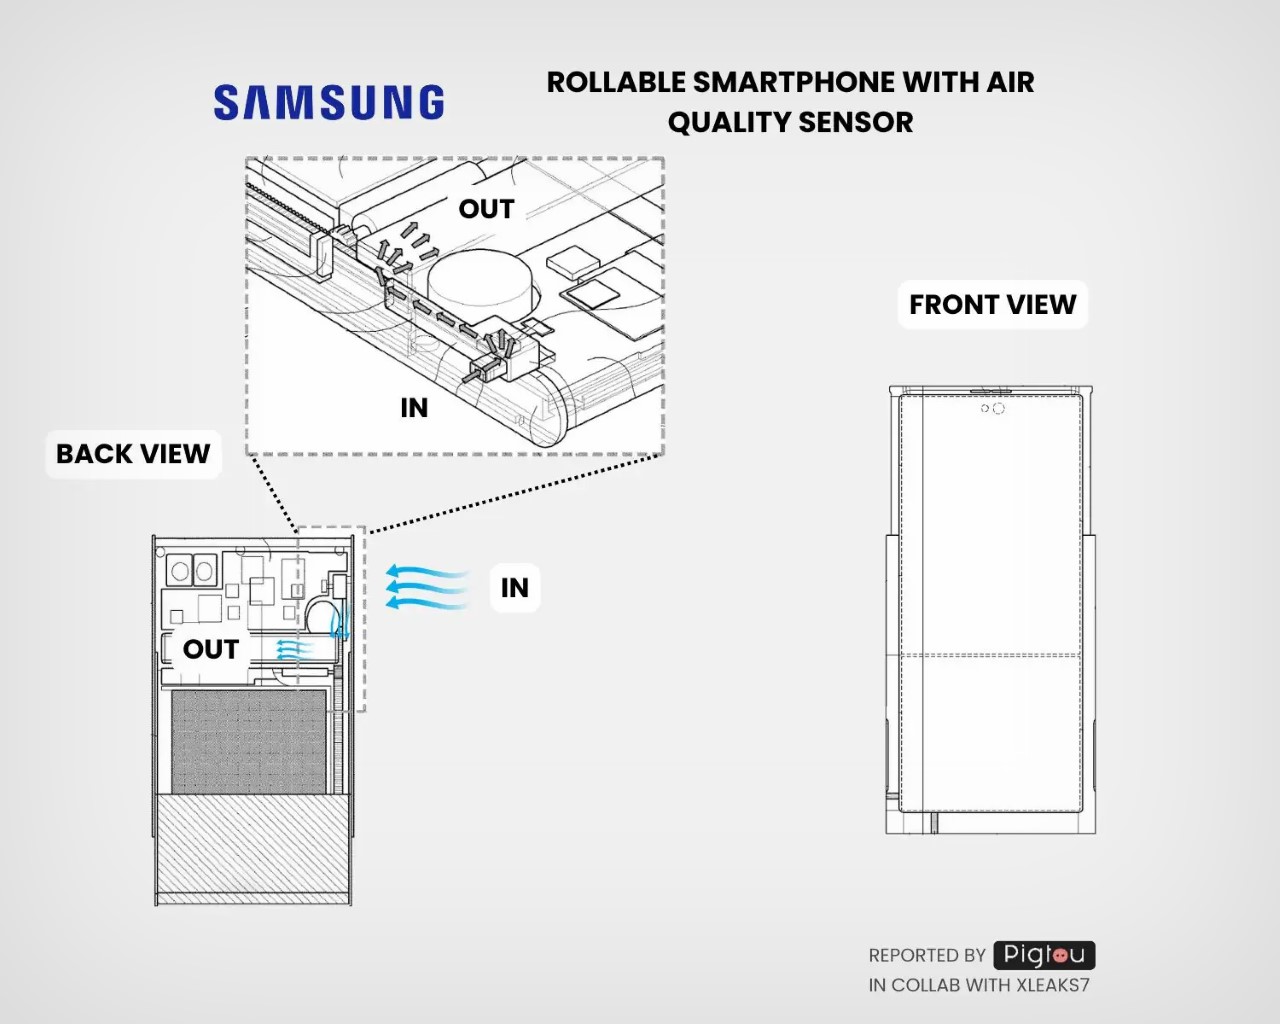
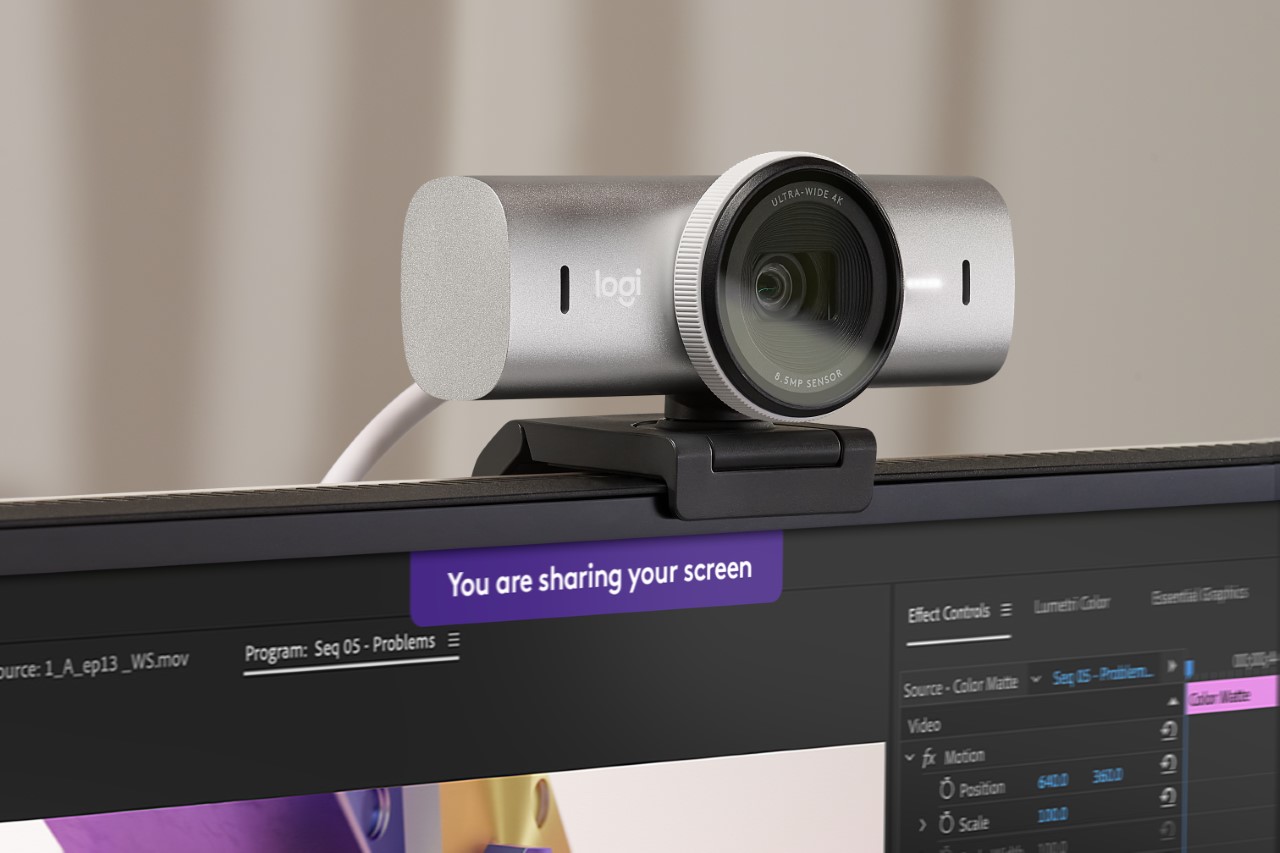
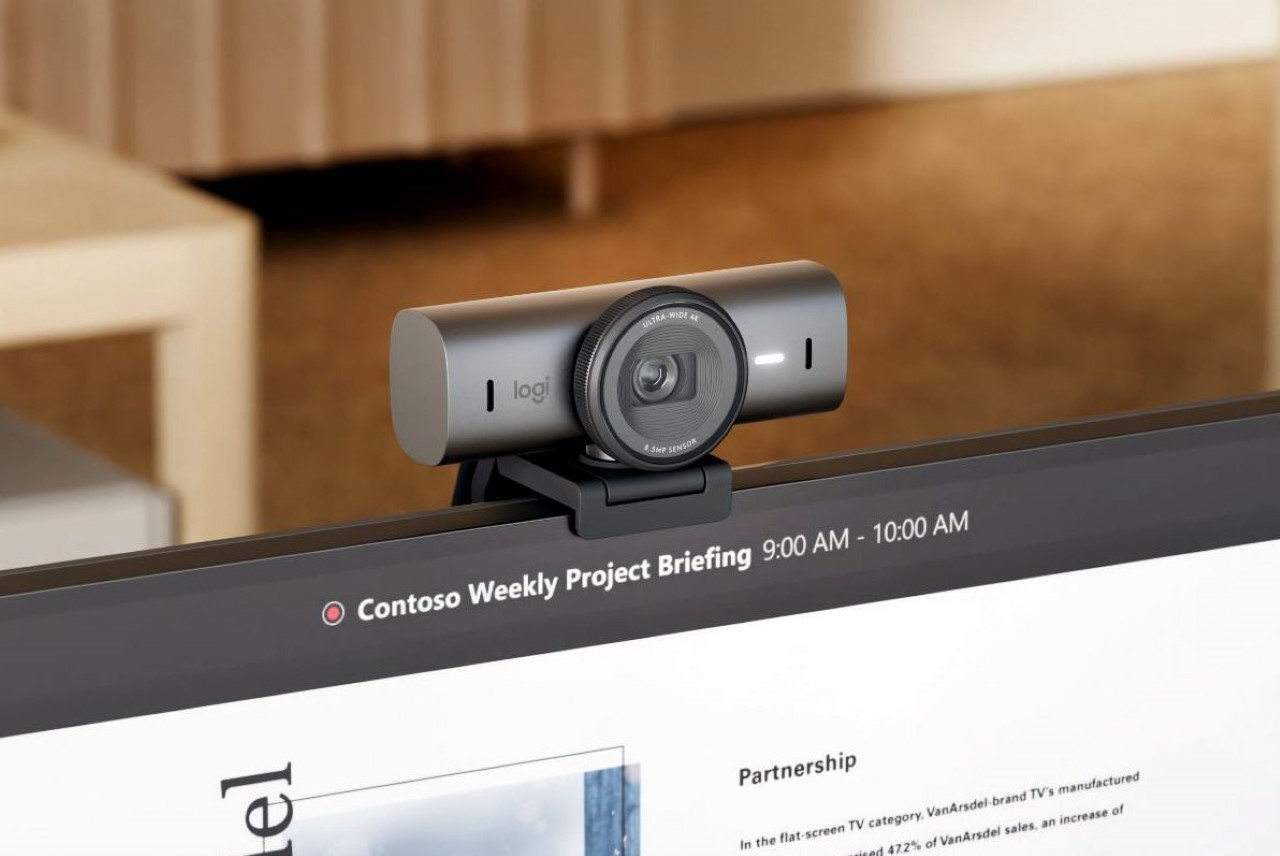
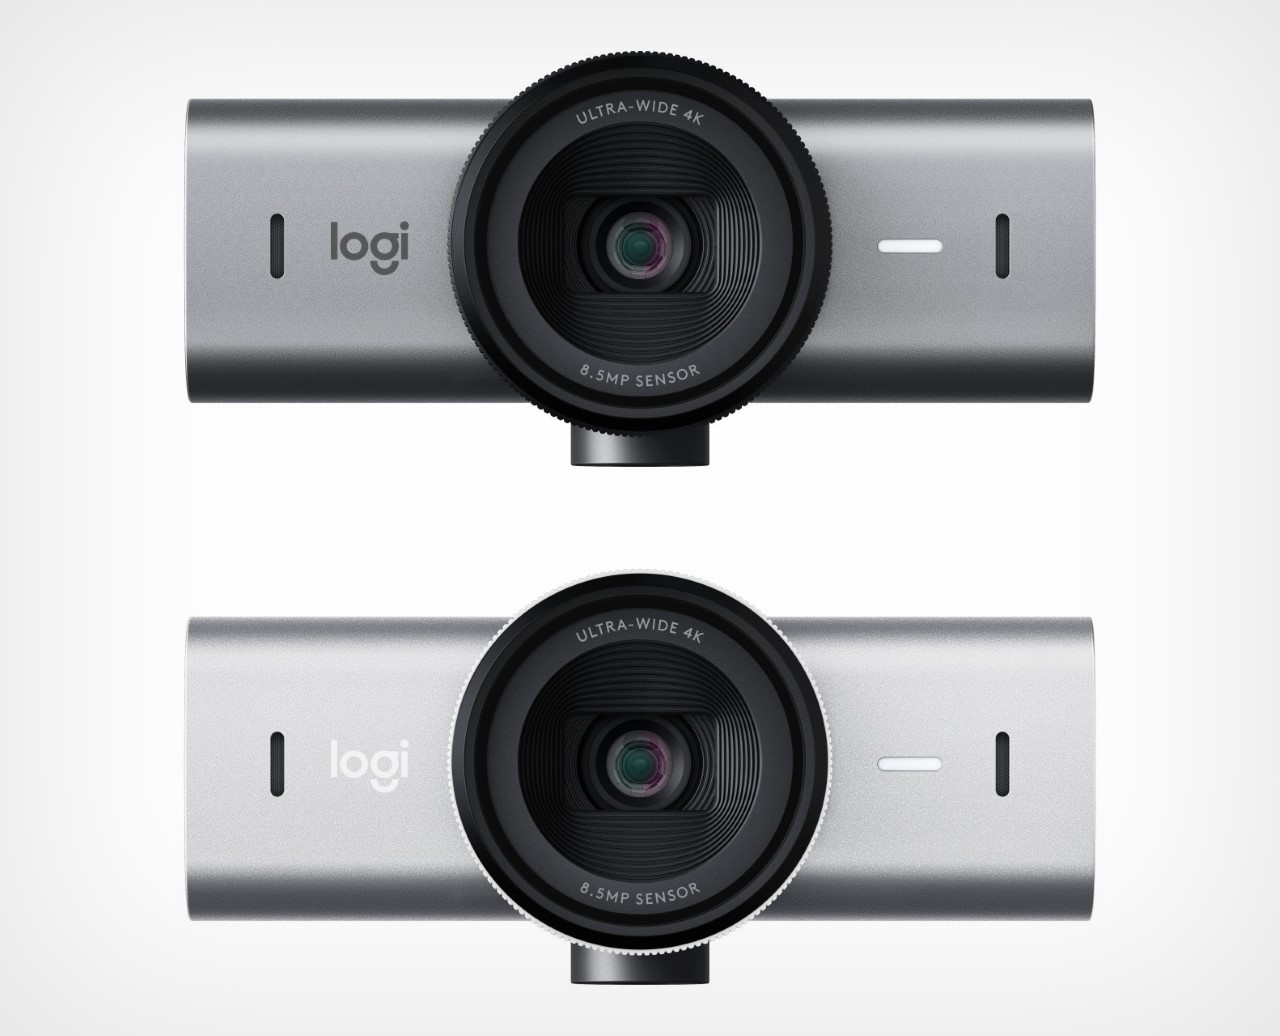
Aspect Ratios – The Not-So-Secret Way To Easily Improve Your Kit

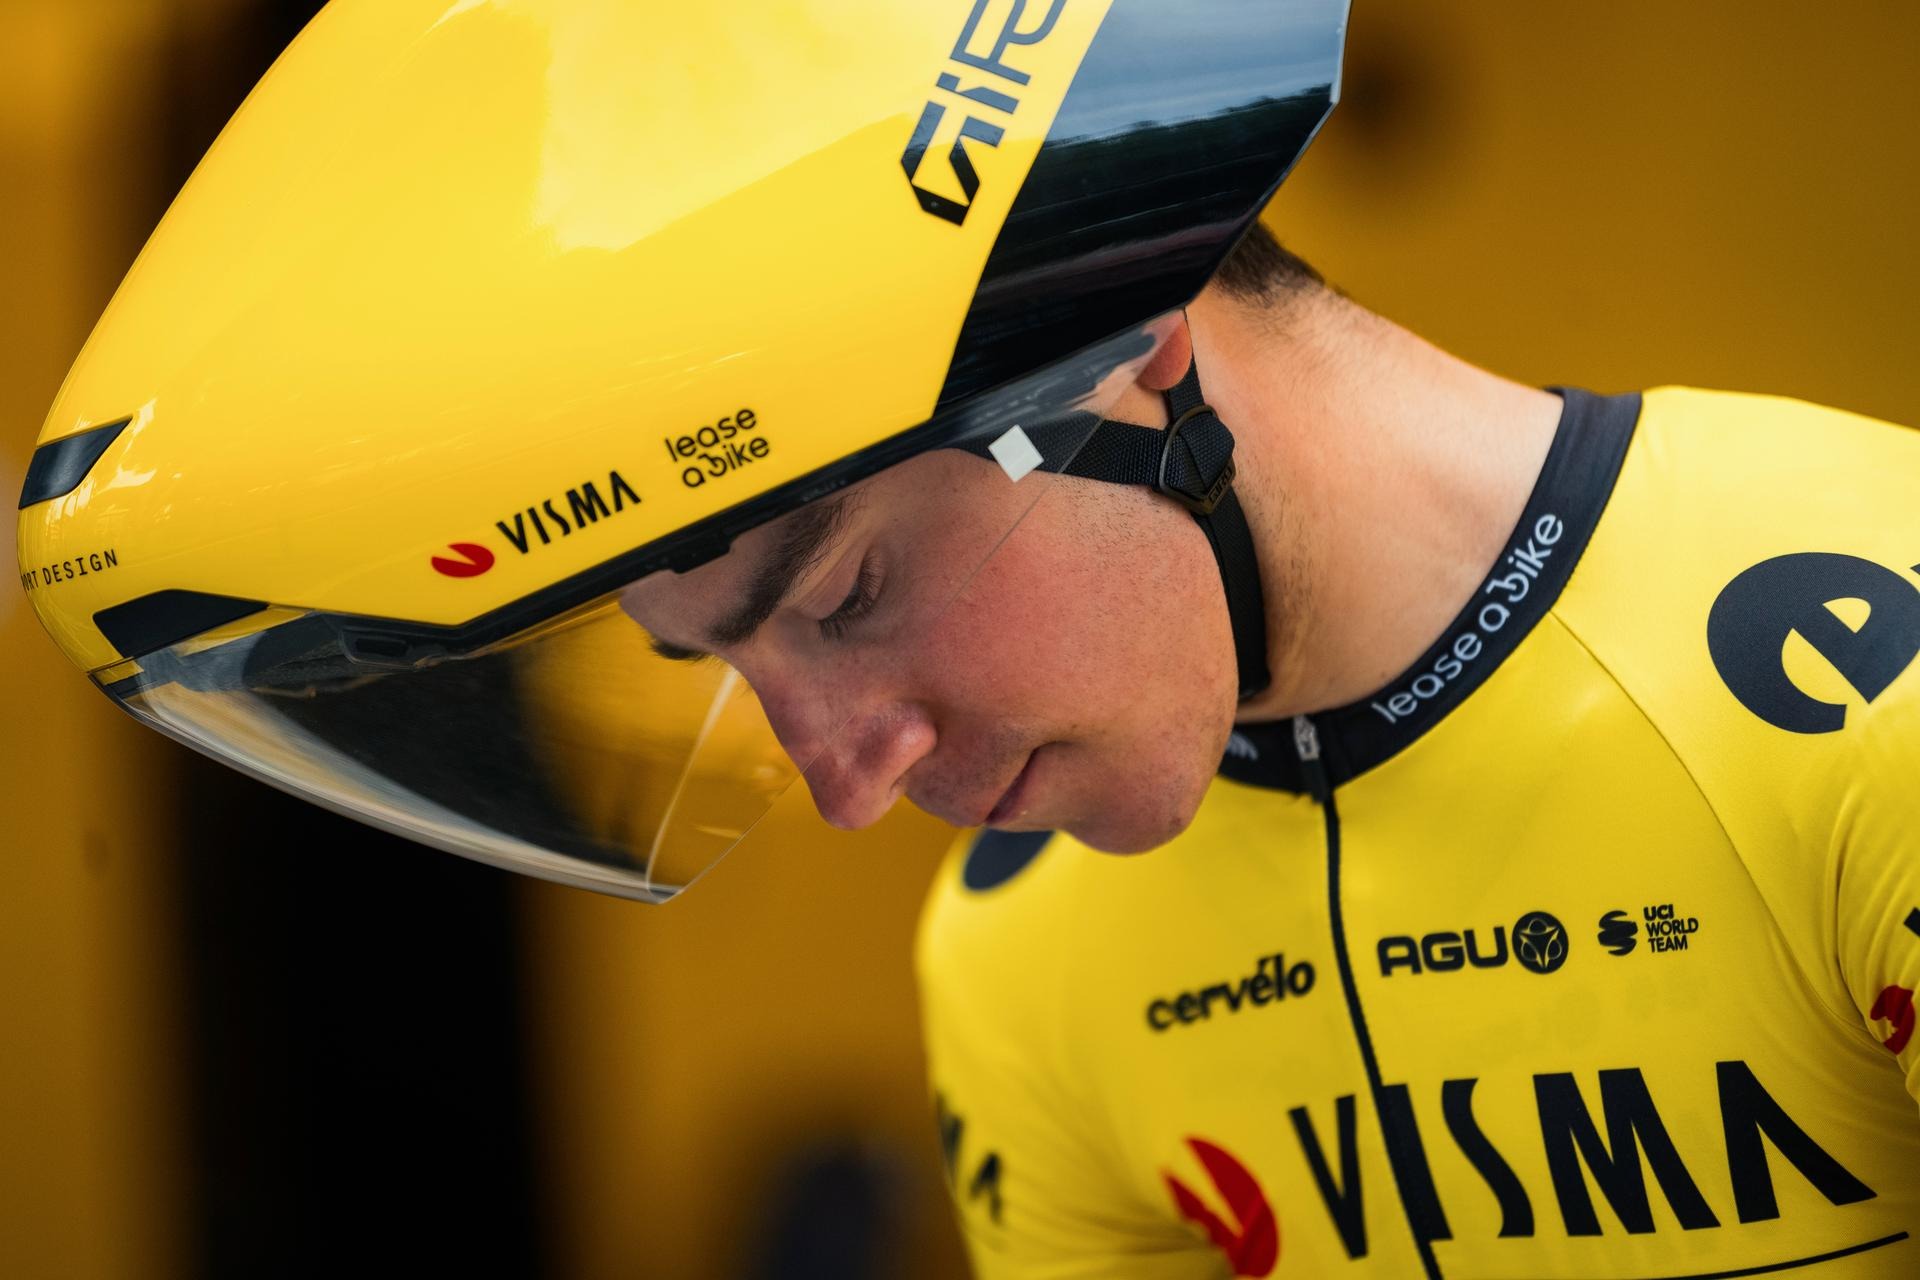
Ten years ago, this wouldn’t have mattered so much, but we’re now in an age of multiple aspect ratios. For years, landscape images and videos were the gold standard, but given the dawn of social media, a lot has changed. Landscape images and videos are still an absolute necessity, but they’re now a form of ‘legacy’ media. Portrait or vertical images and videos dominate apps like TikTok, Instagram, and YouTube Shorts, which people spend most of their time on, and if you want to play it safe, the Square image reigns supreme, working well everywhere, from print to online use, and even on platforms like Facebook, LinkedIn, Twitter (X), Pinterest, and Instagram. Make sure your press kit contains images of all aspect ratios, making it easy for everyone from journalists to influencers to broadcast and share.

Always consider multiple aspect ratios for your press kit so that your work can be viewed on multiple devices
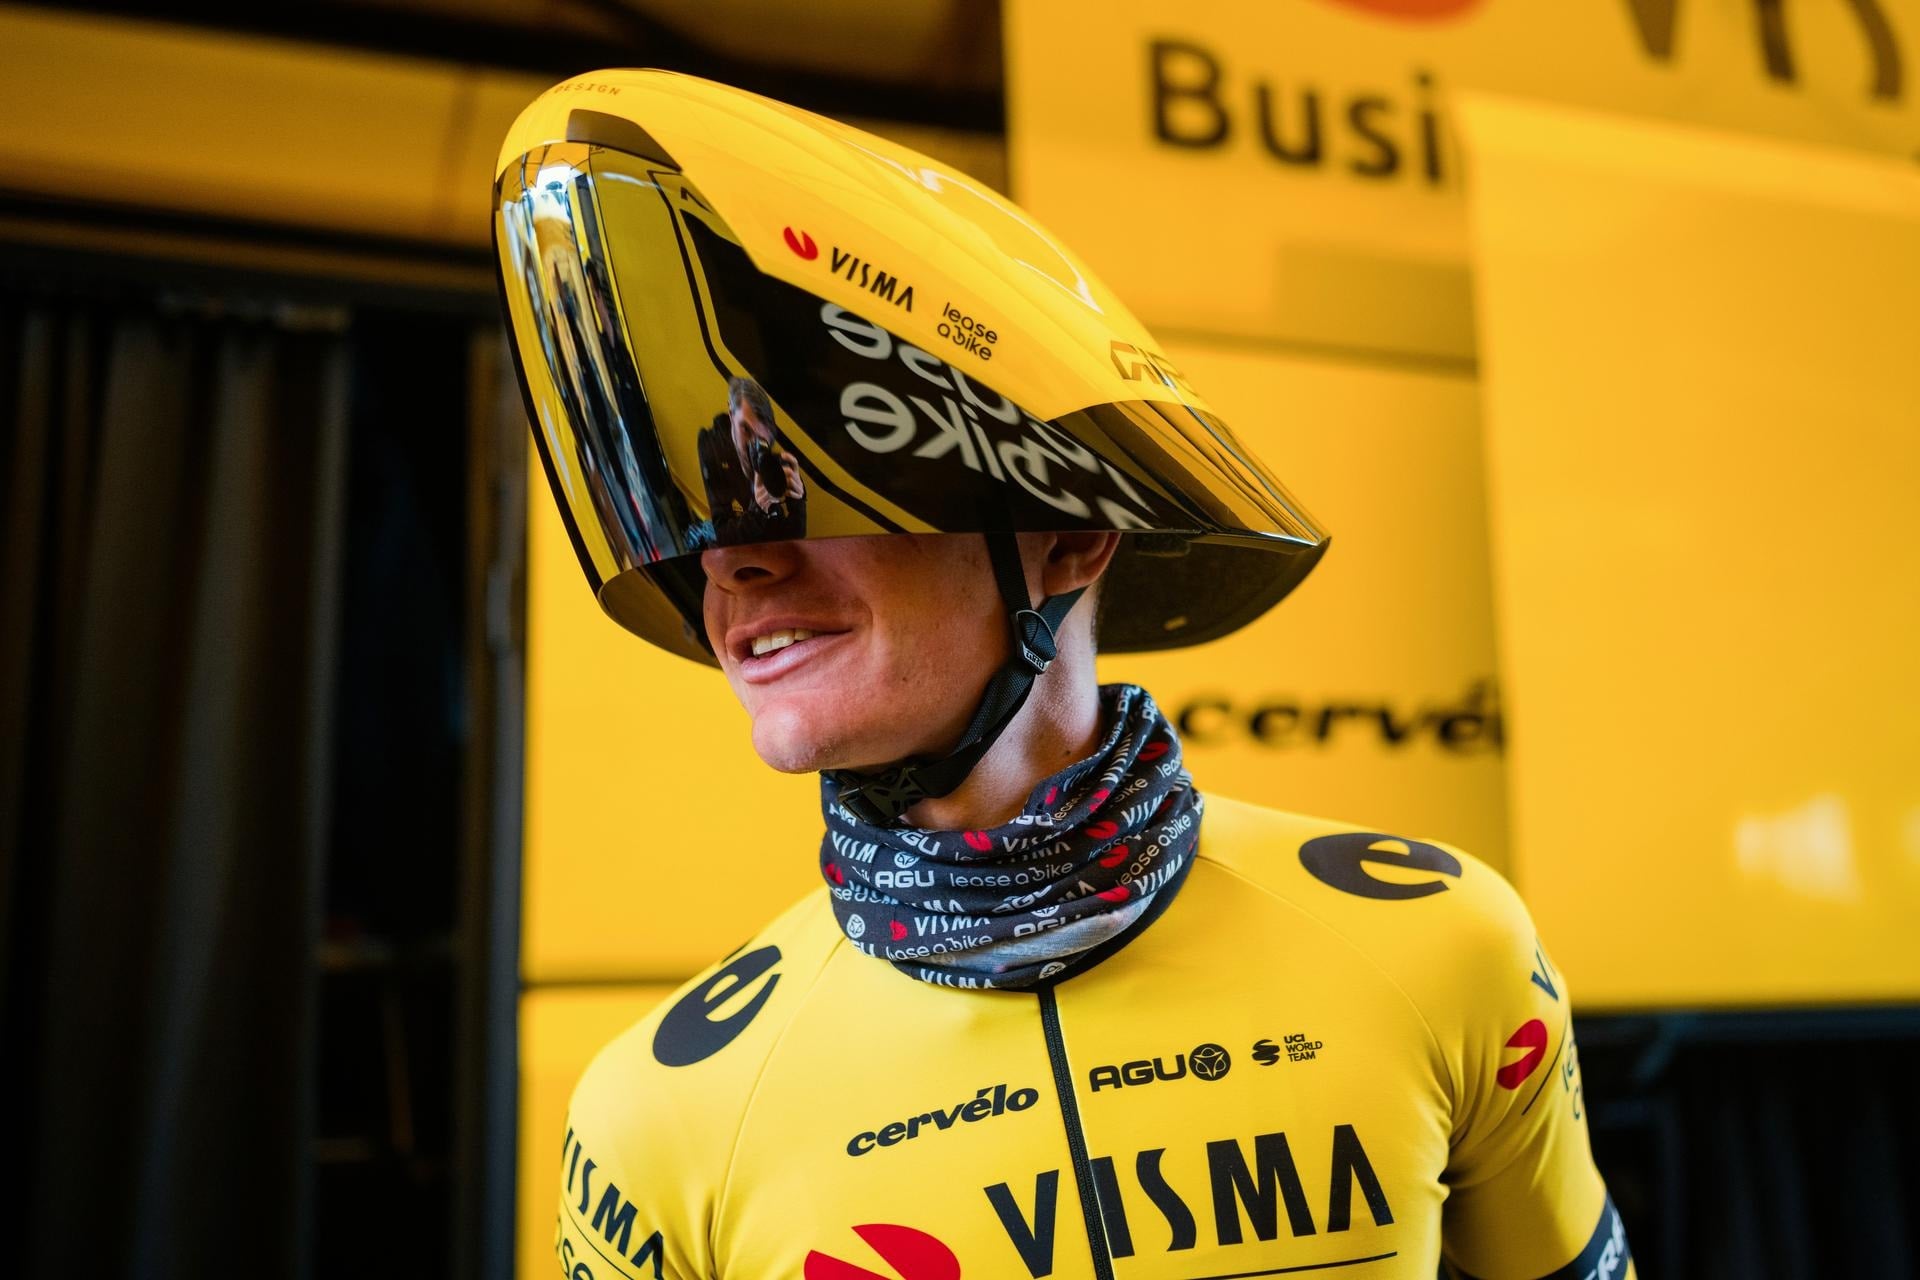
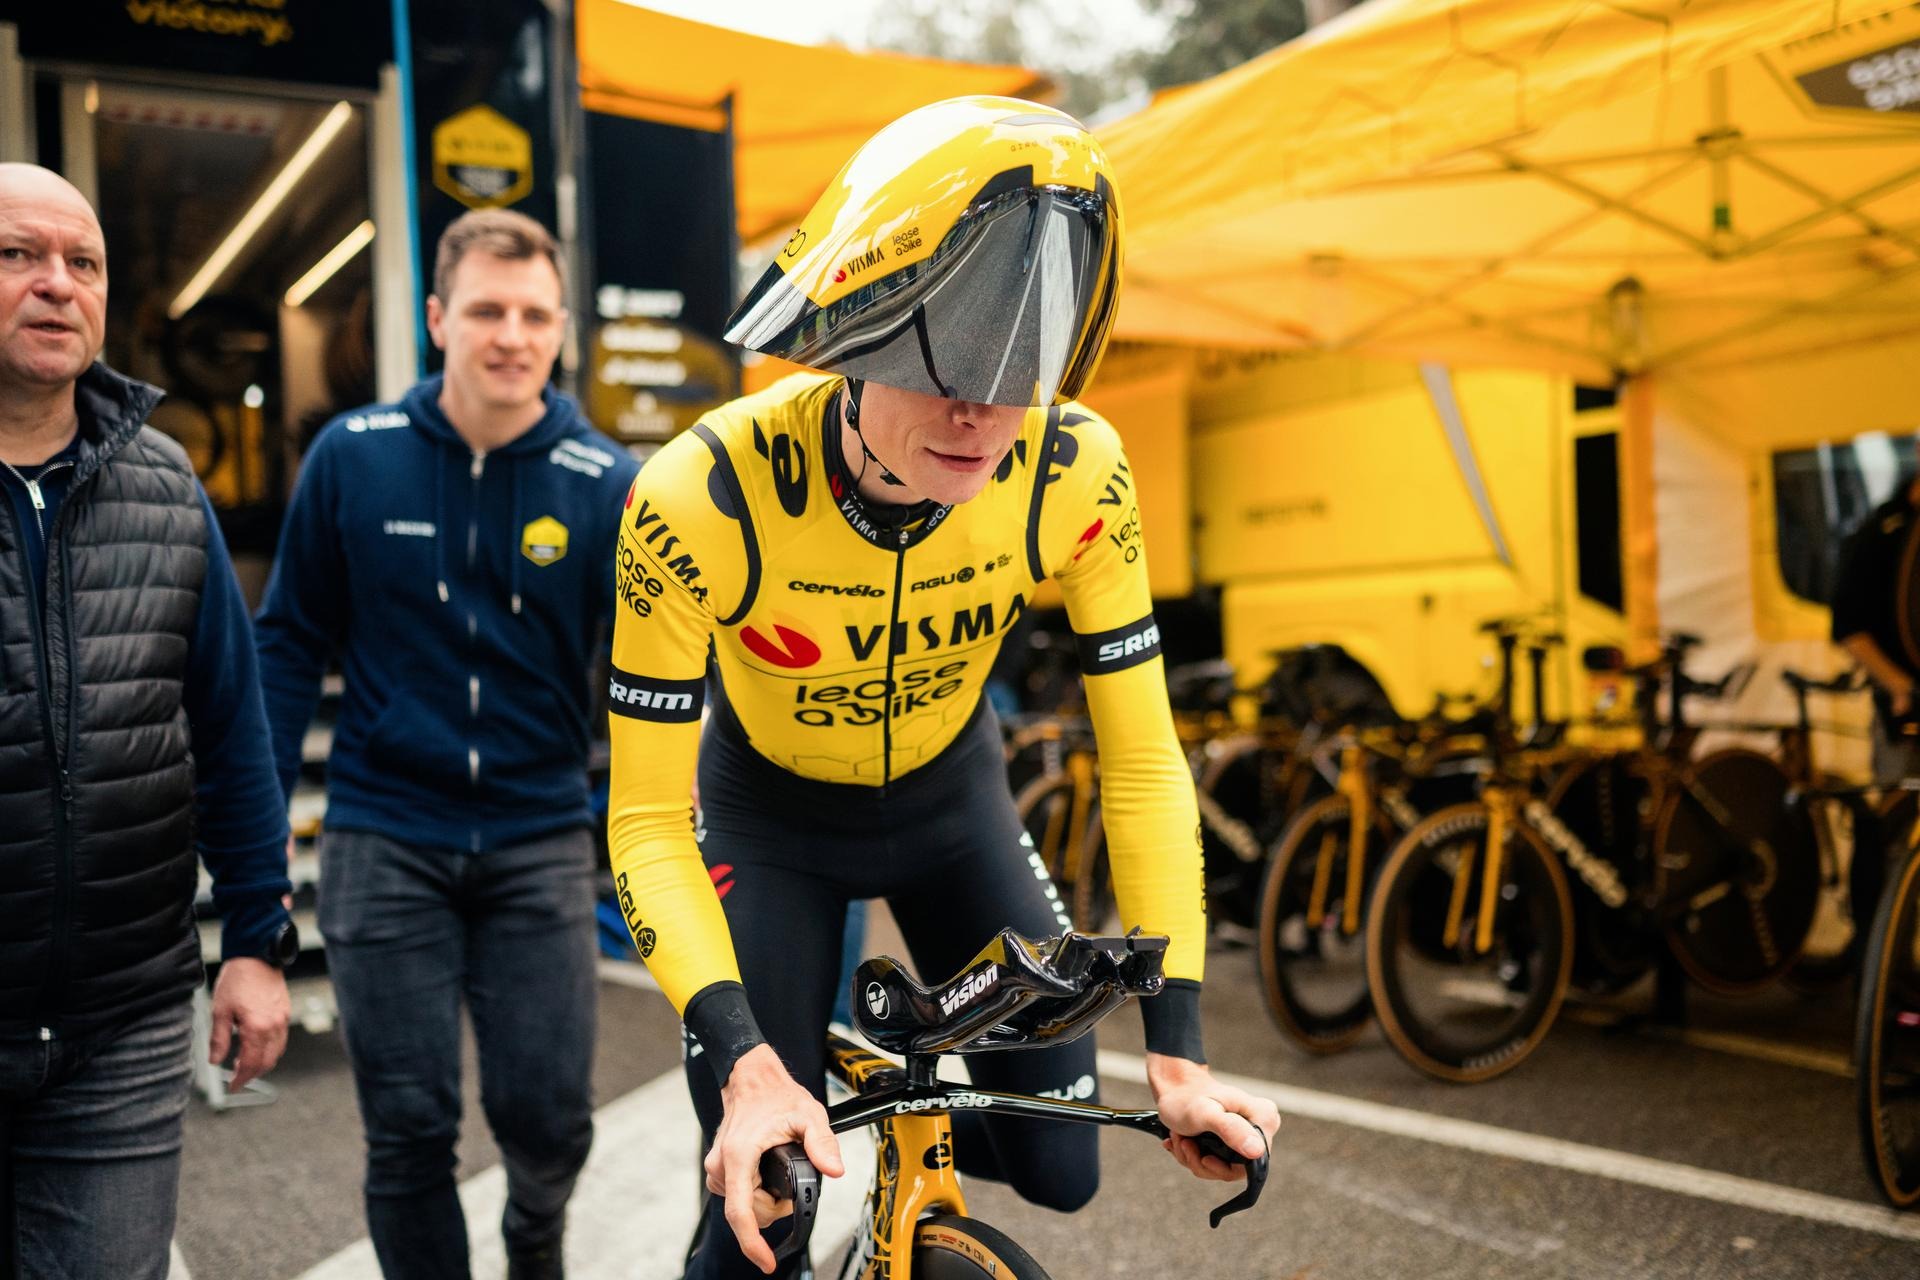
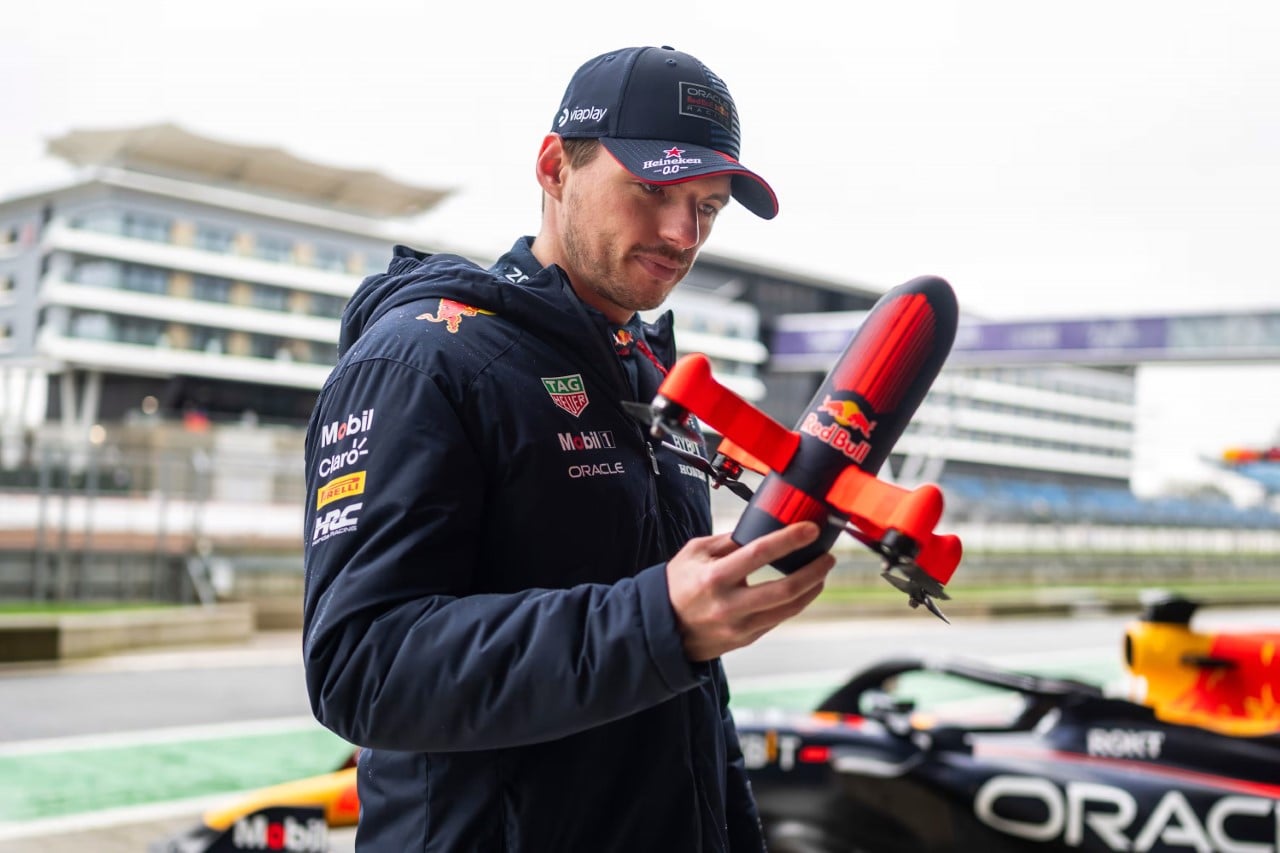
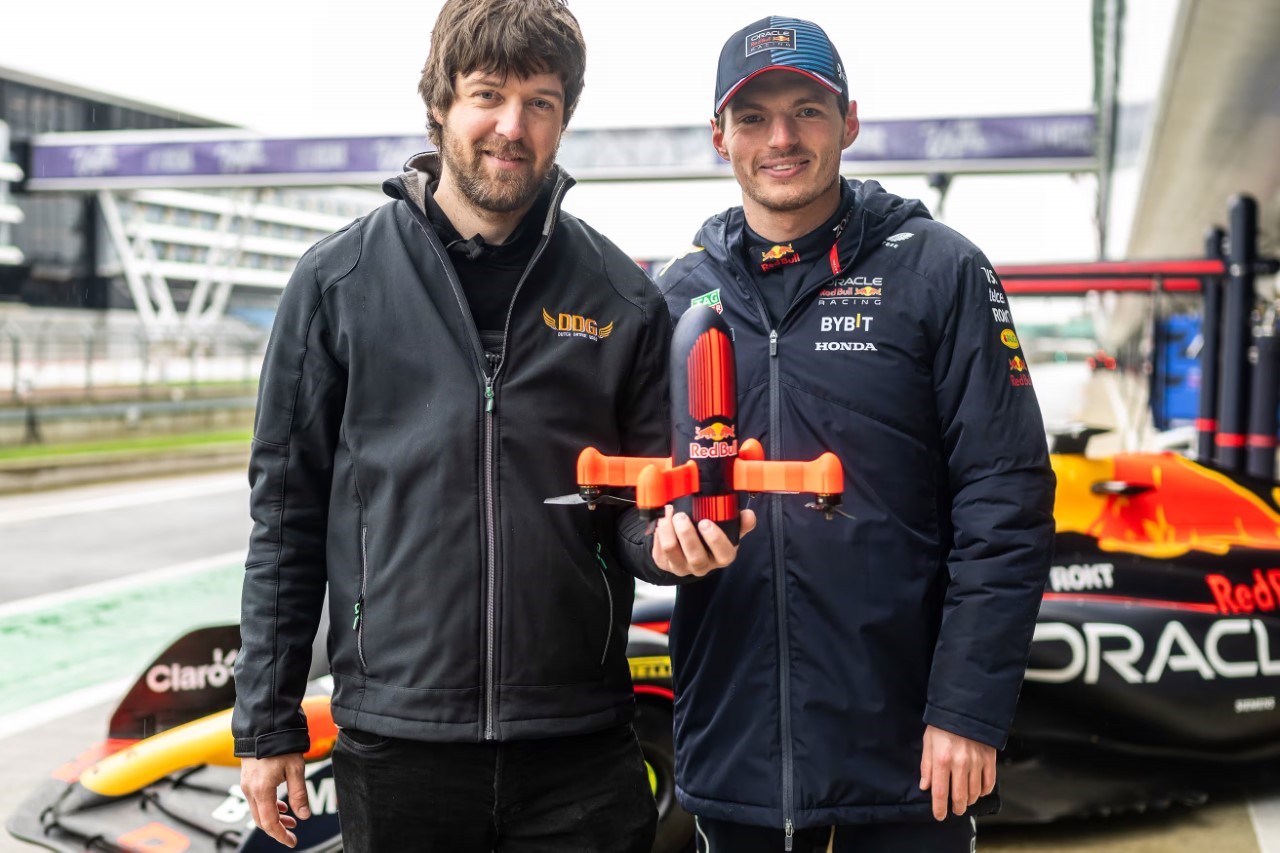
The Human Context

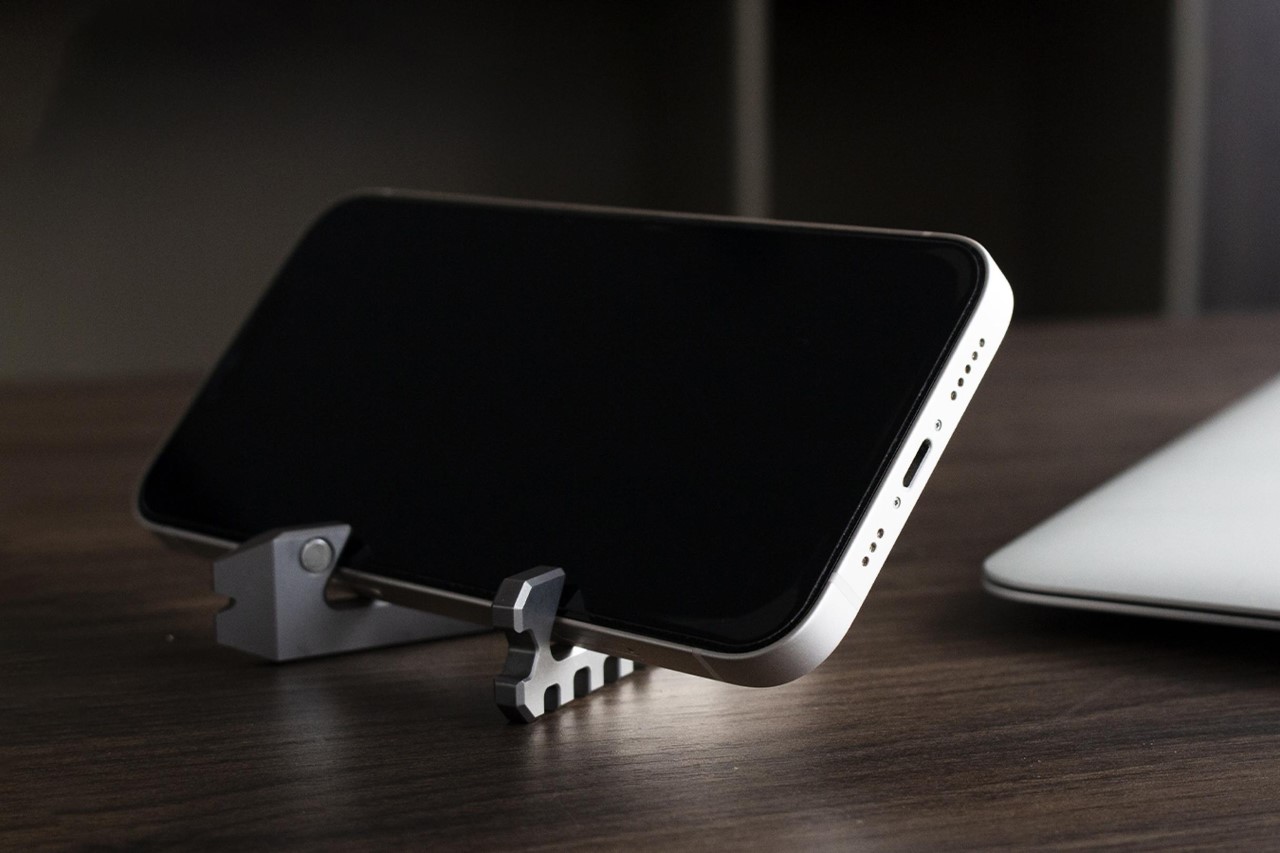
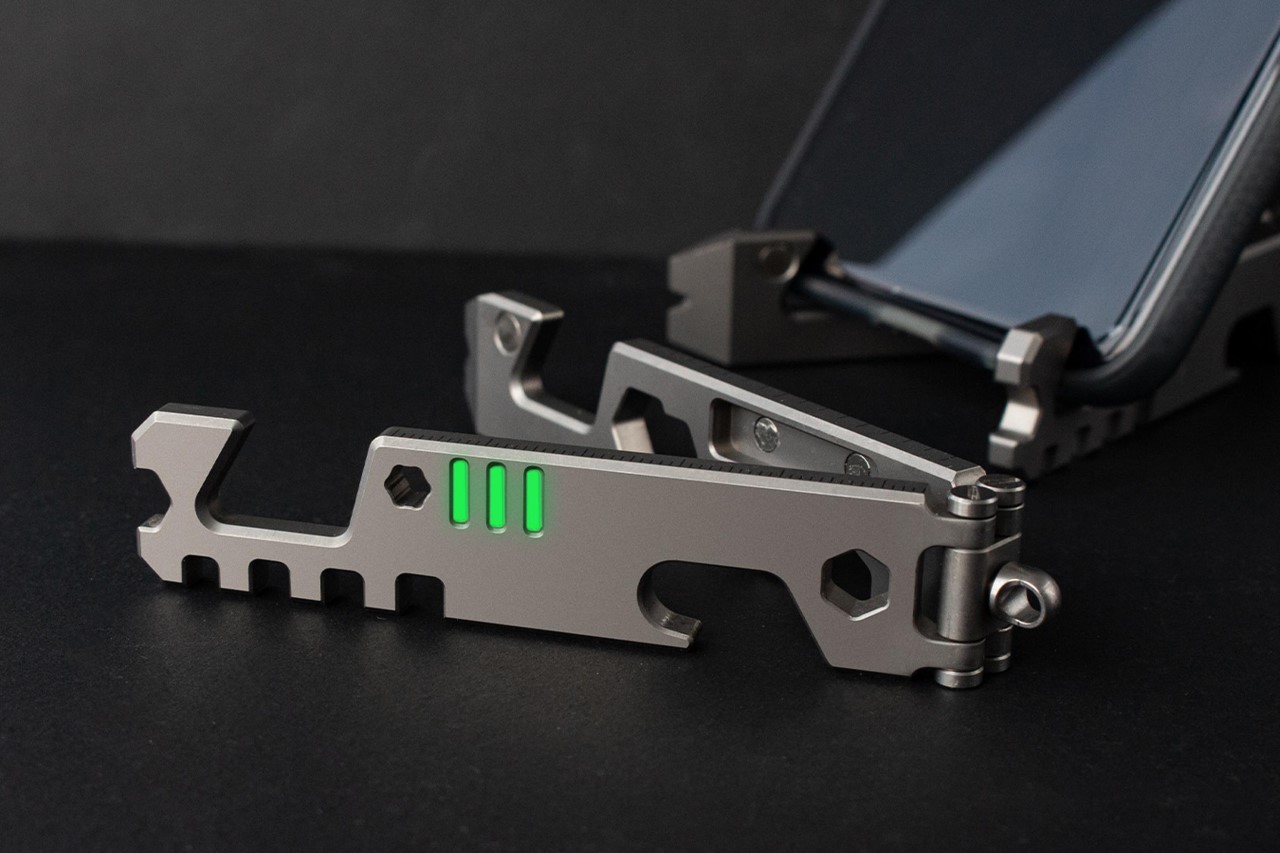
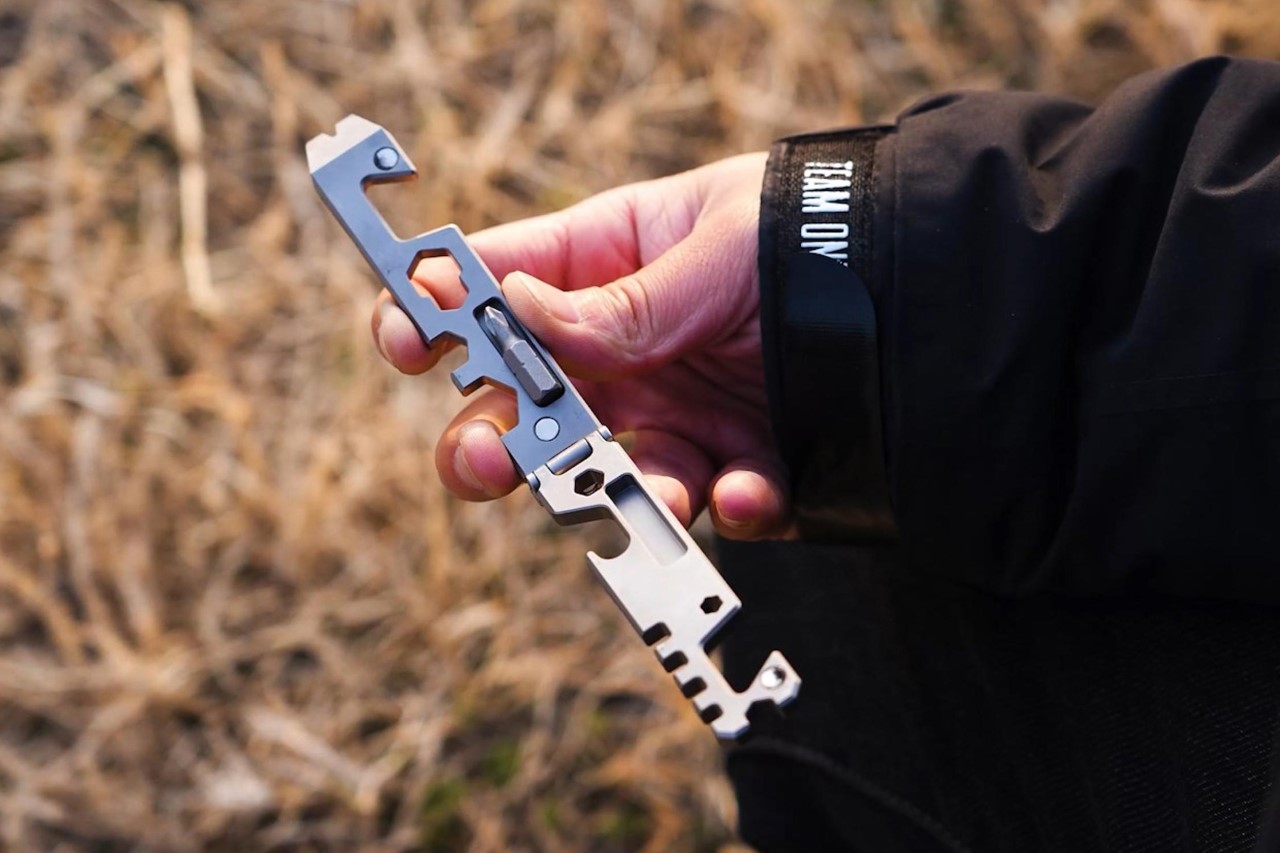
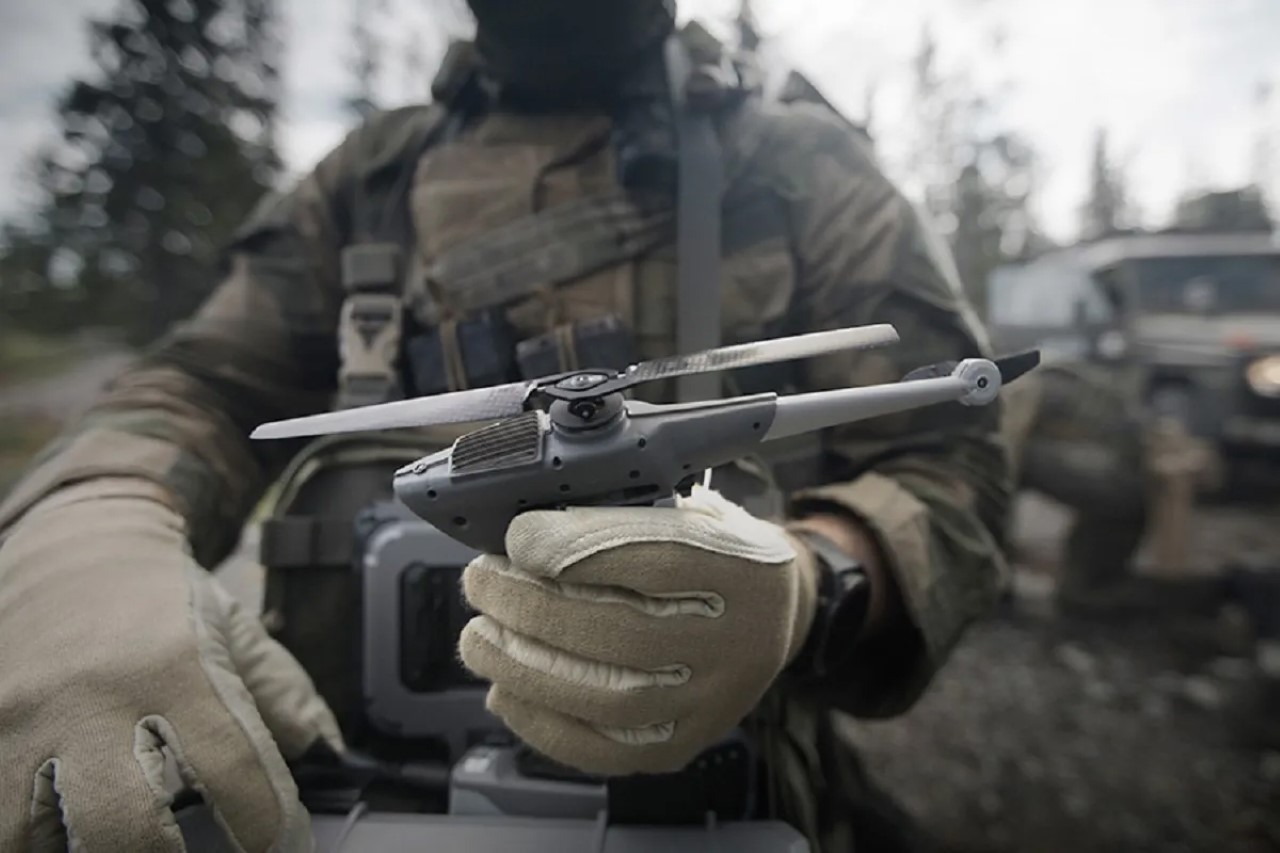
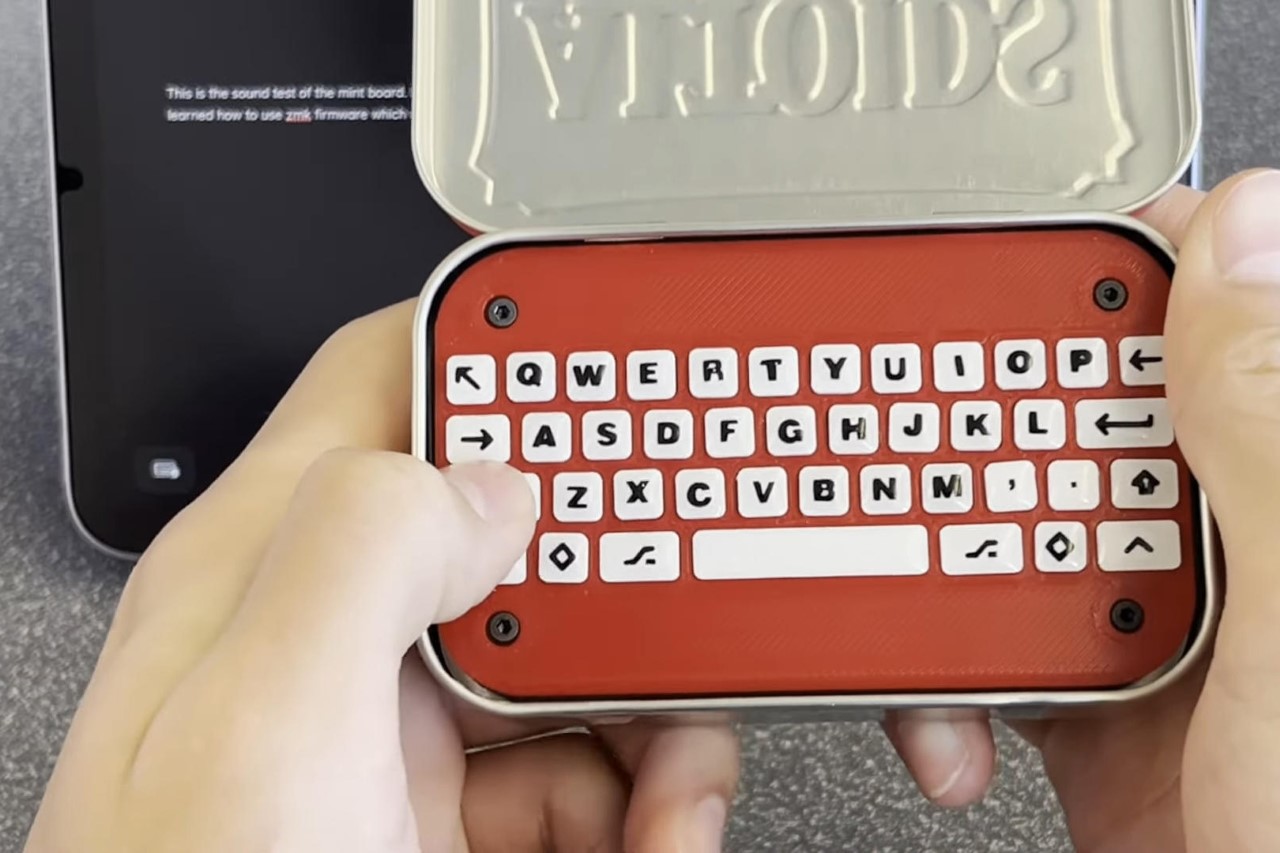
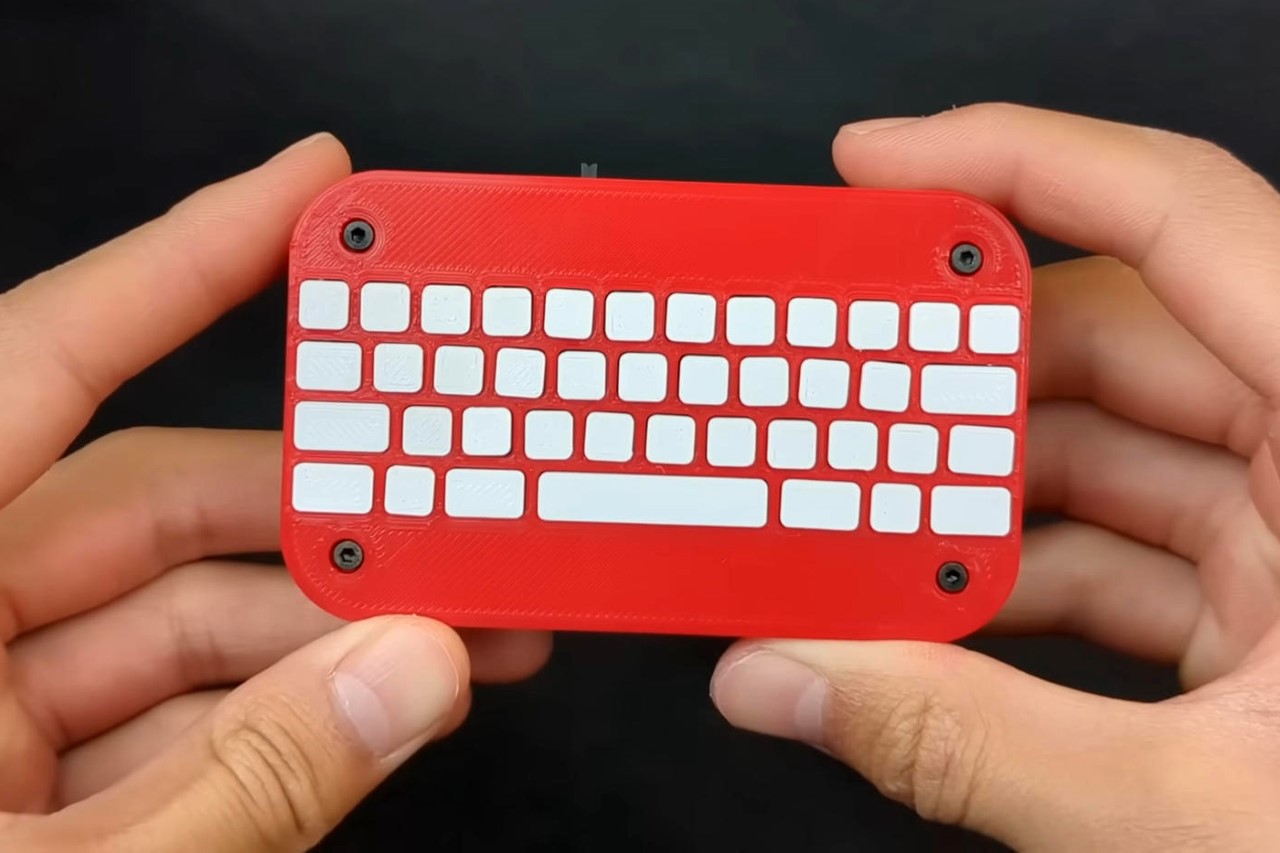
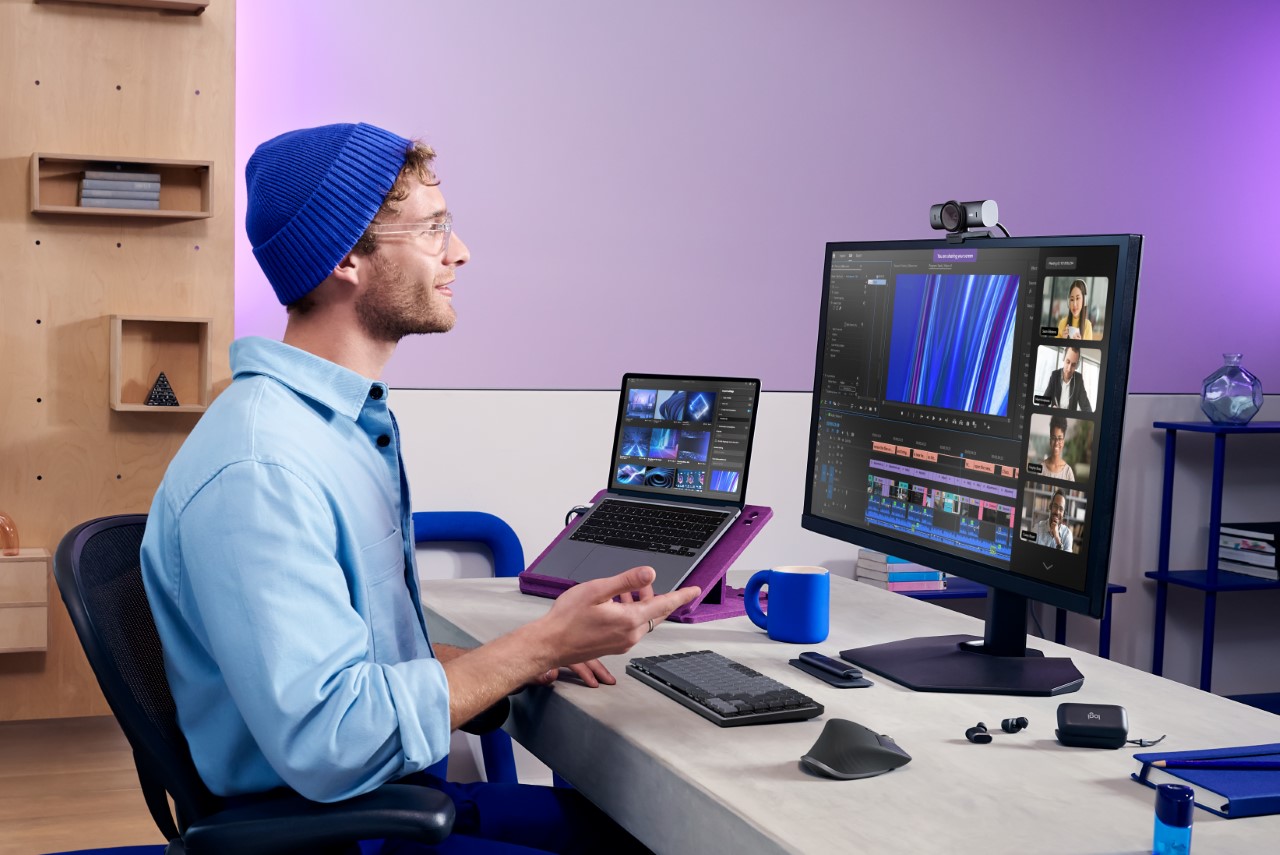
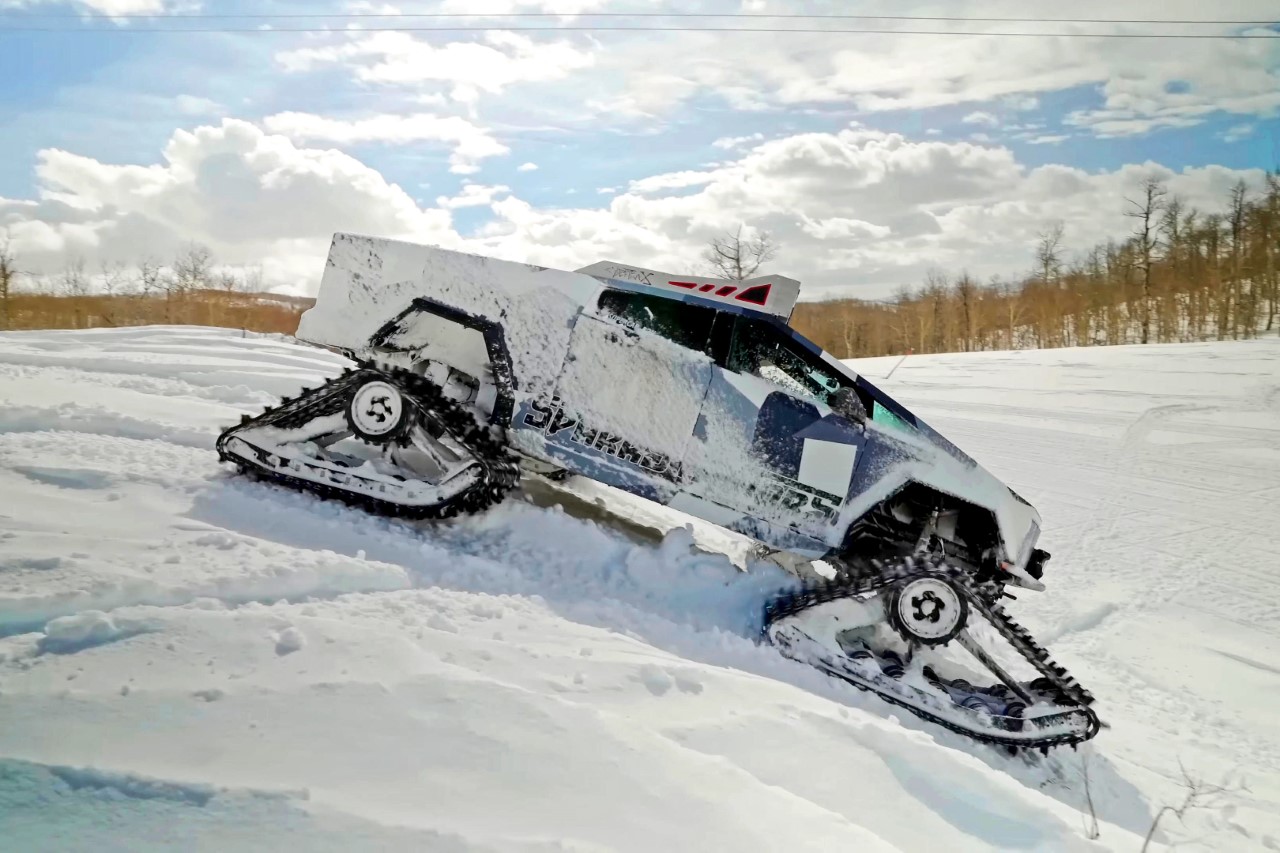
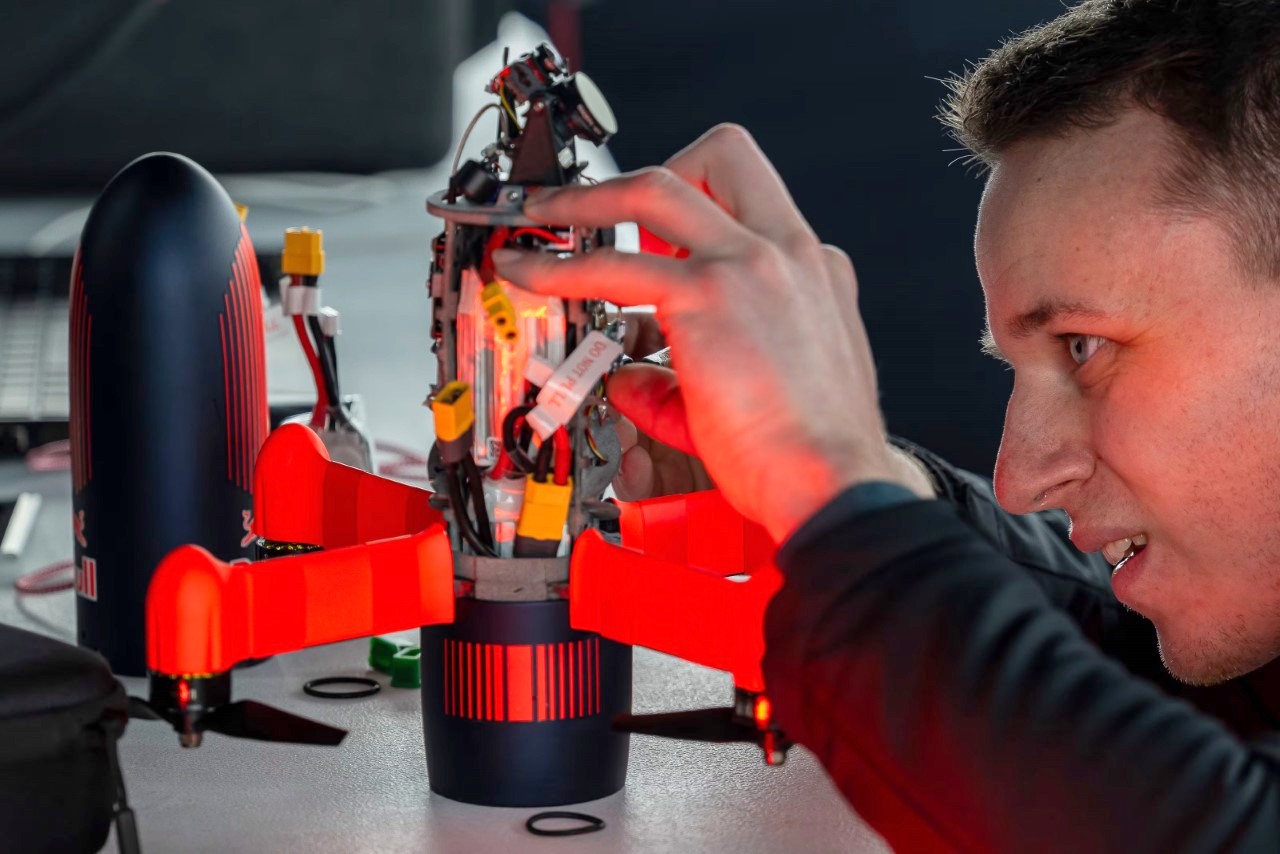
This may sound simple, but nothing makes a product more relatable/understood than actually showing it being used by a human. Flashy renders only go so far – if you’re designing for humans, you should show humans in your media too. An image or a video of a human using your product demonstrates a few things – it shows scale, so people know how big/small your product is, but it also acts as a proof of concept, showing that your product is real, and not a digital rendering.
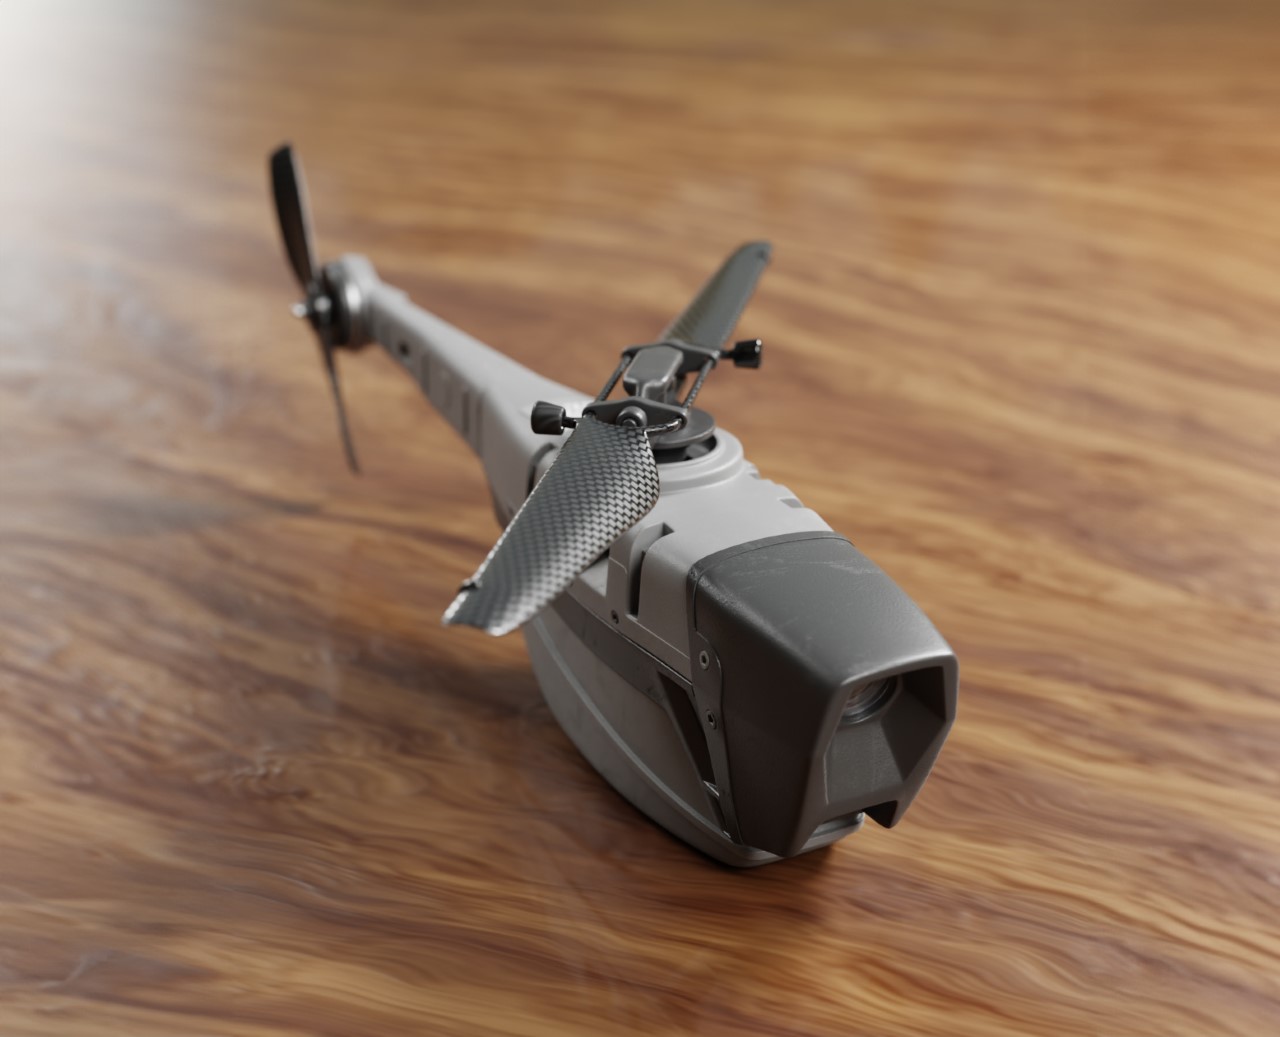
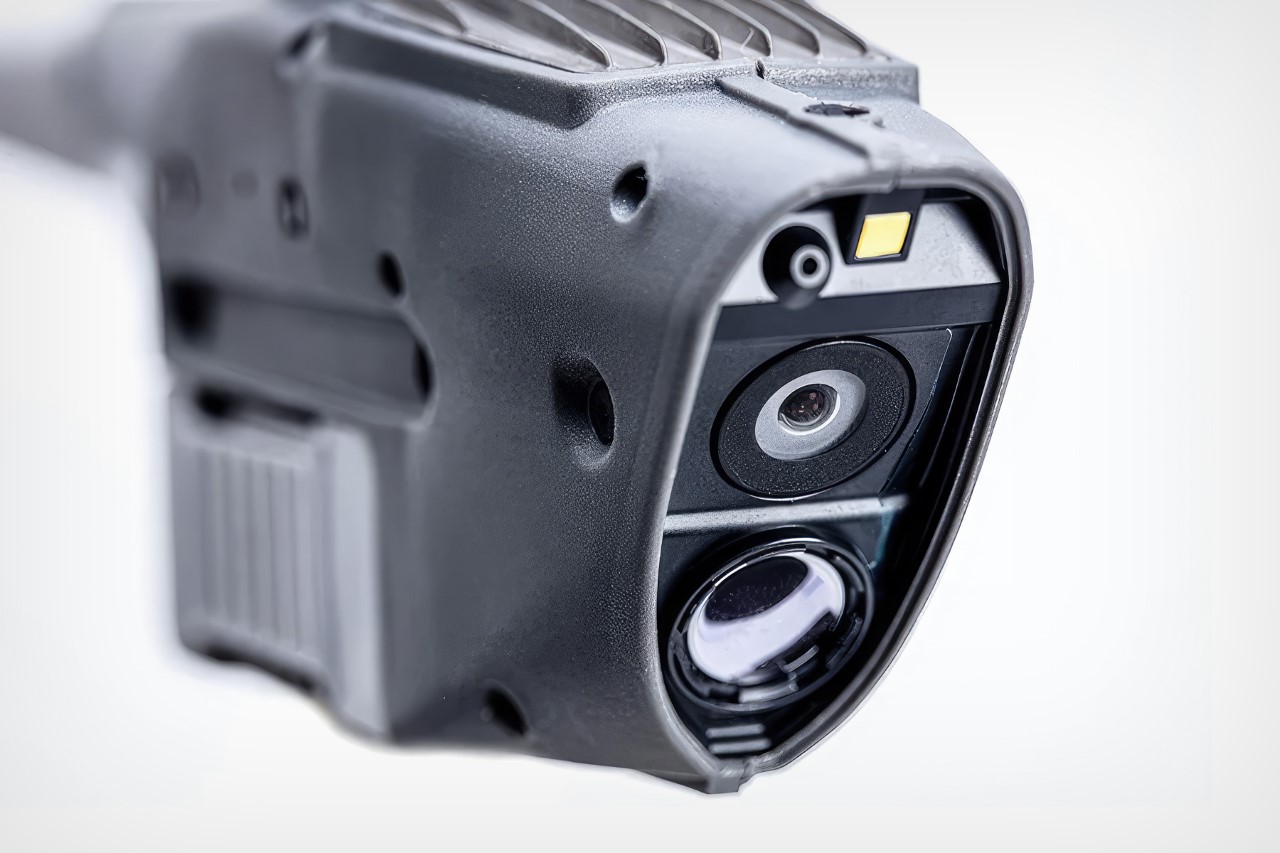
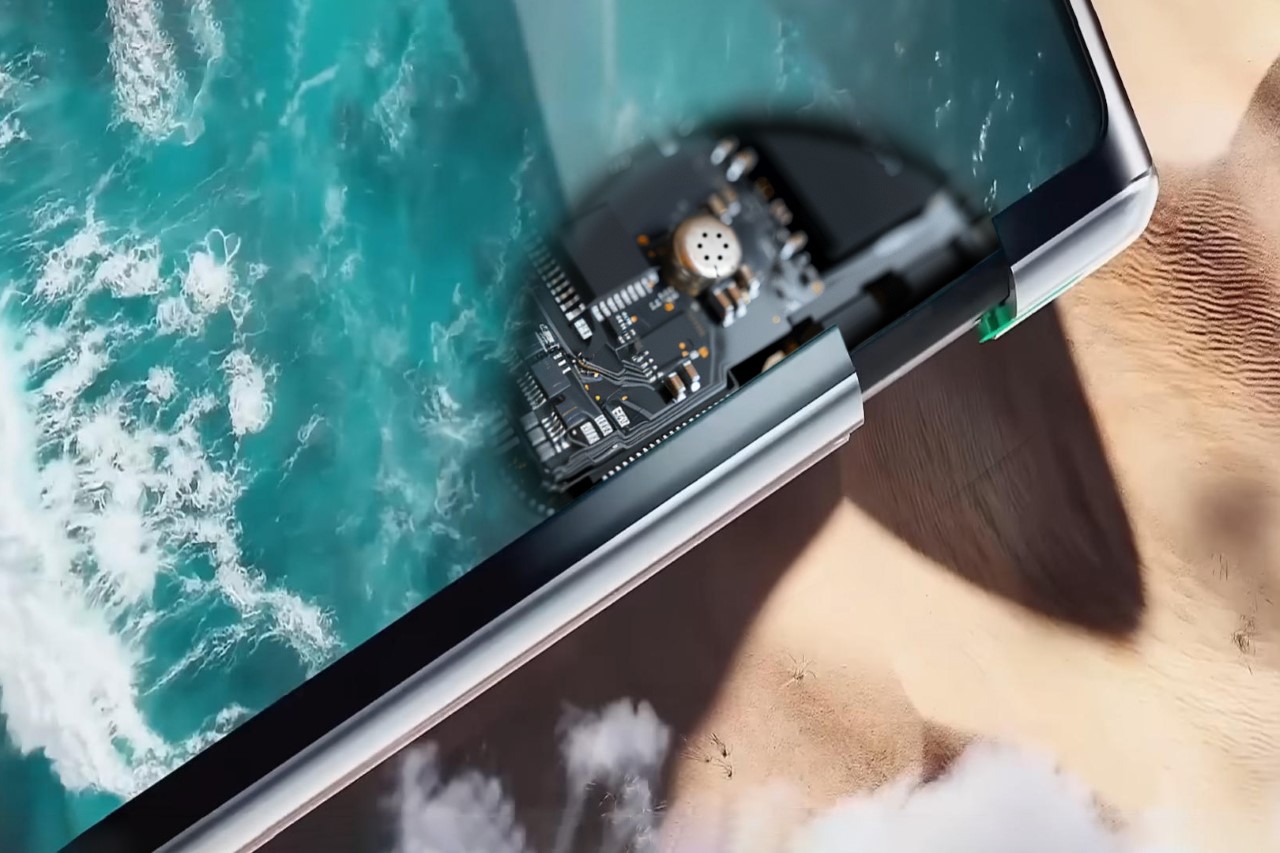
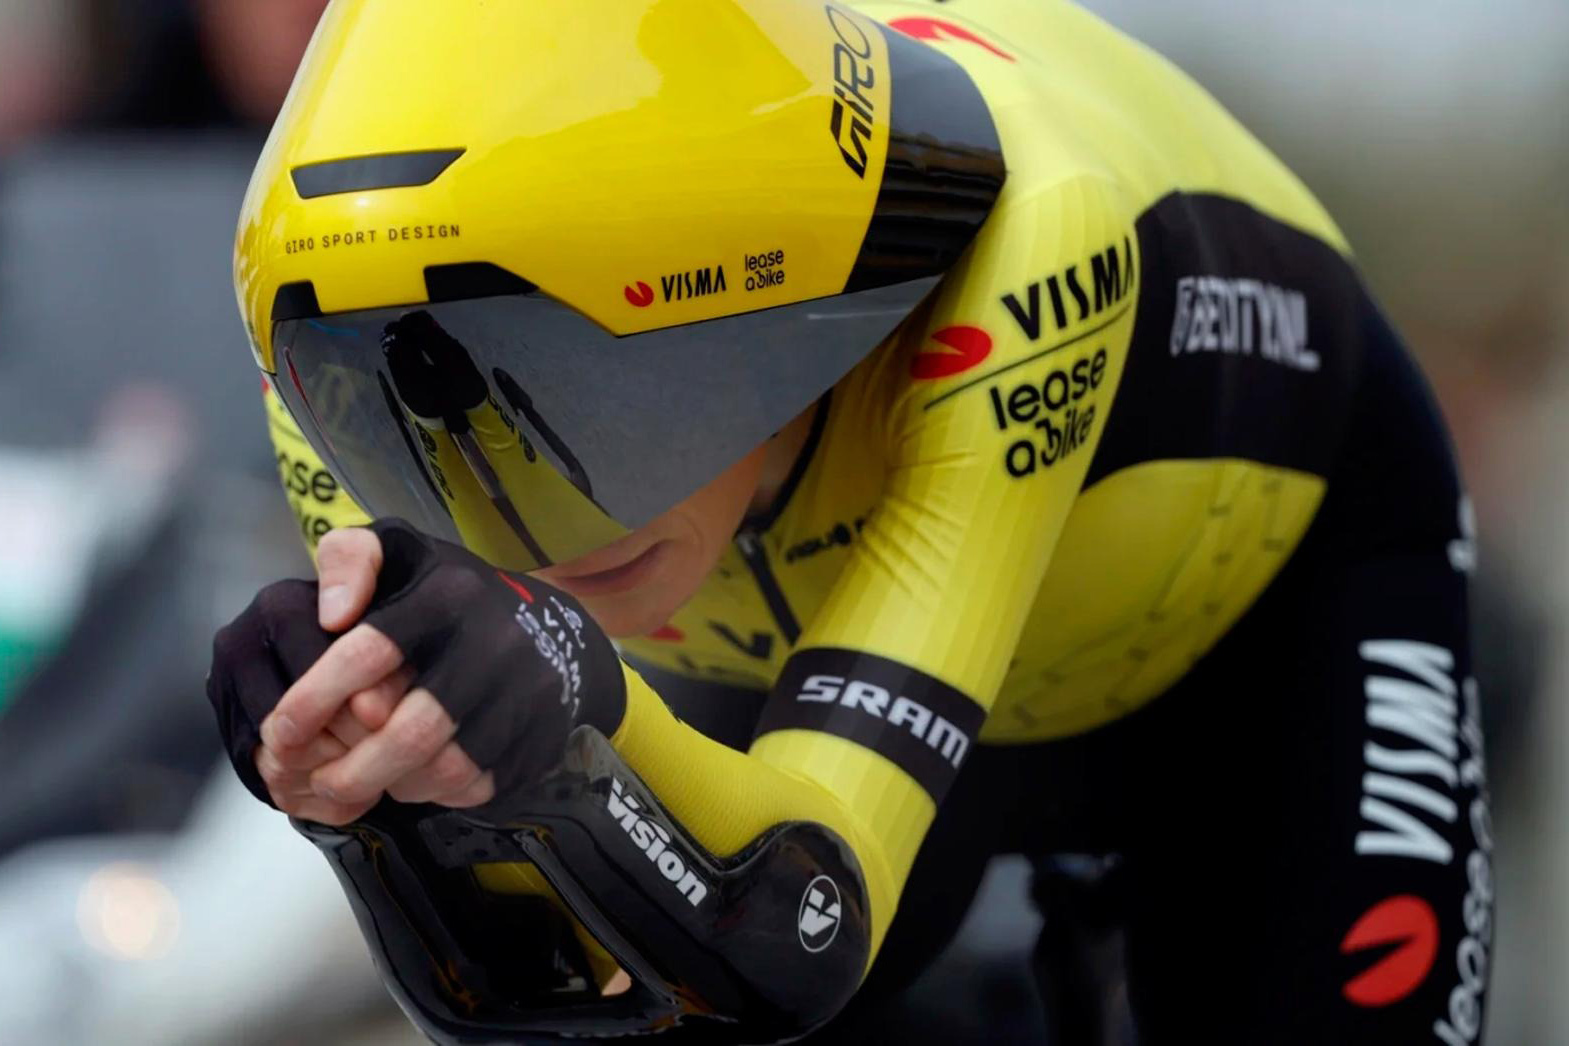
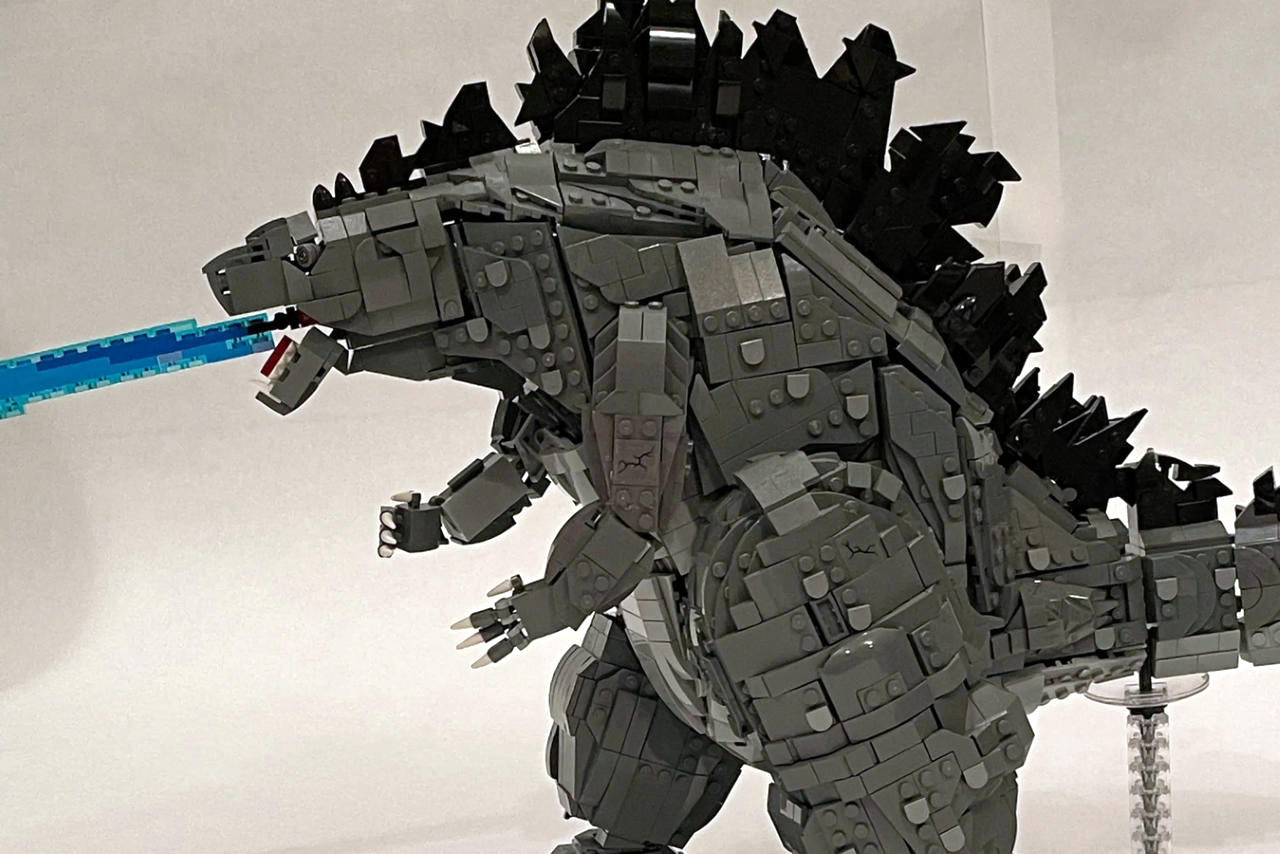
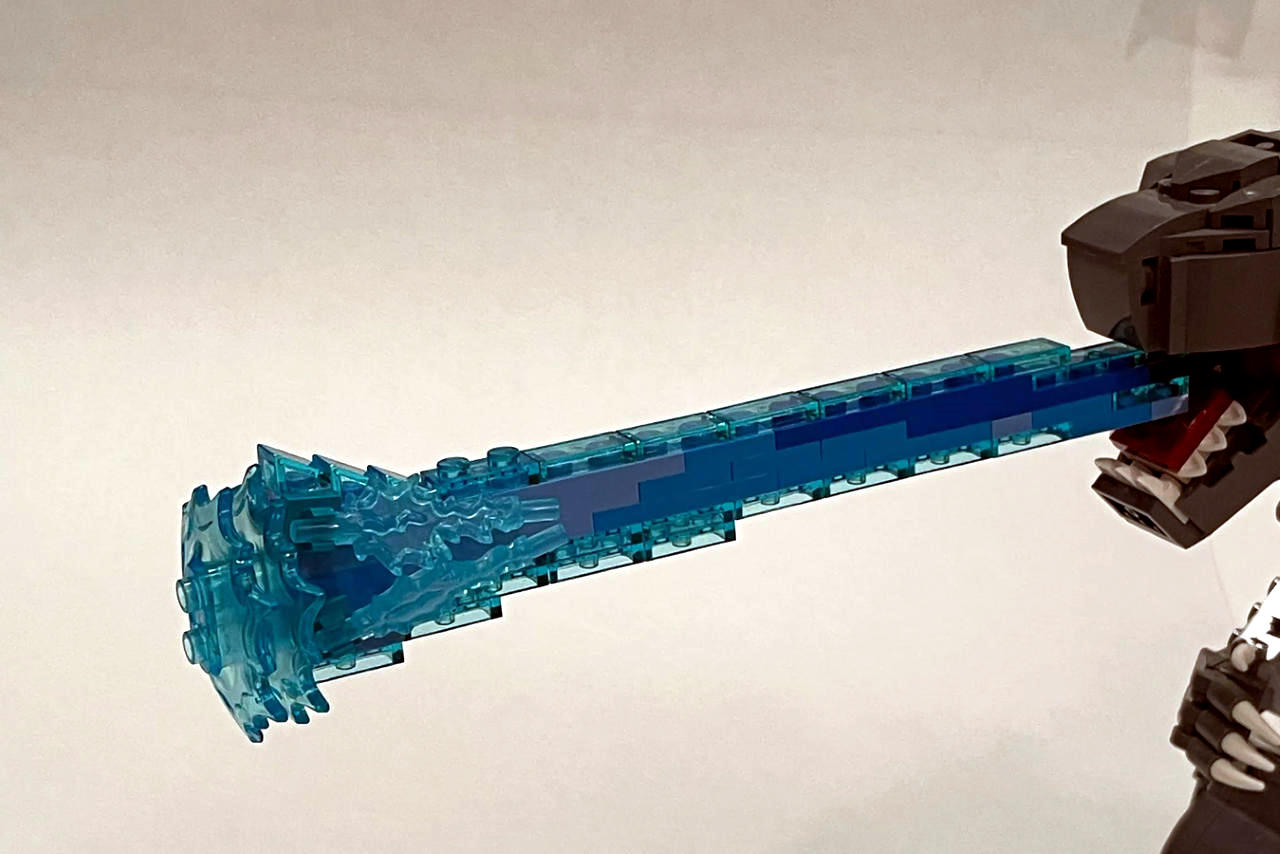
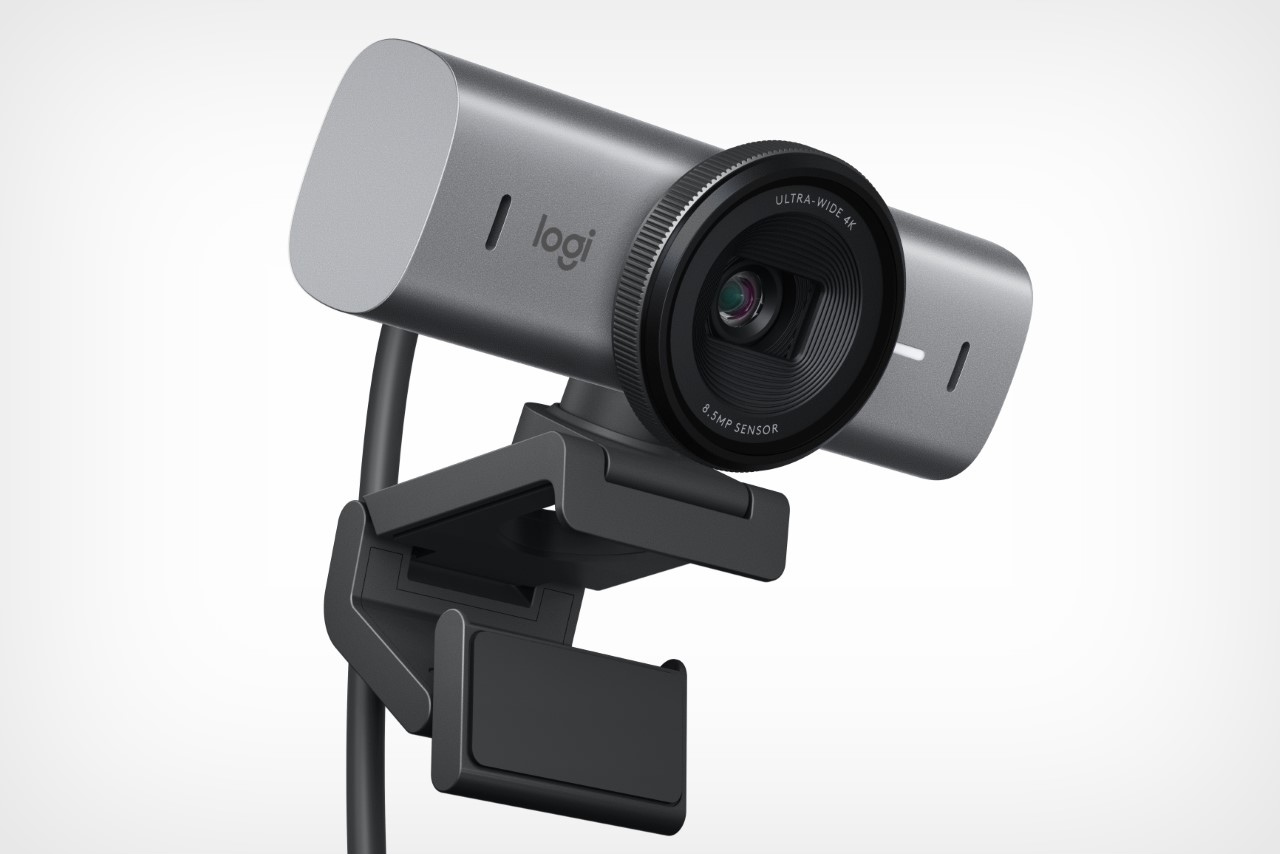
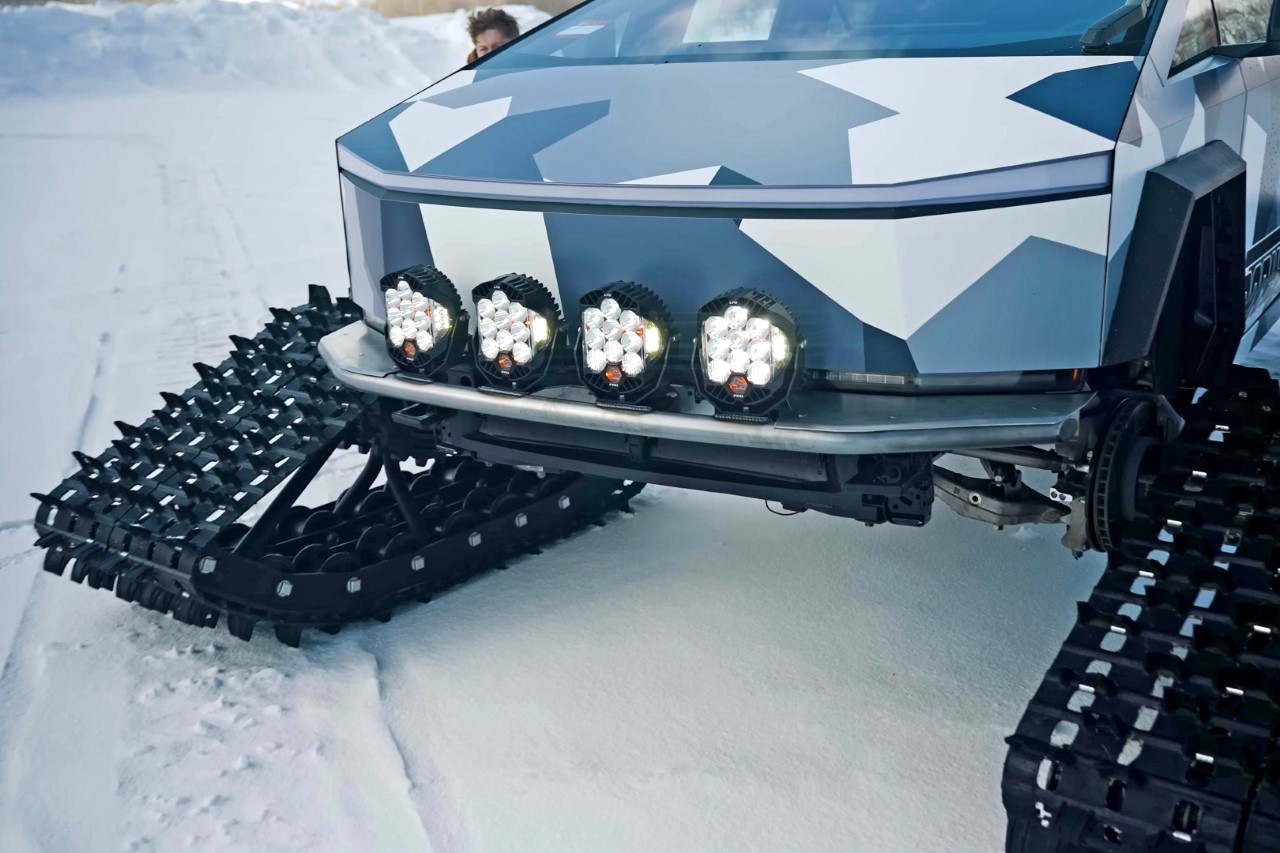
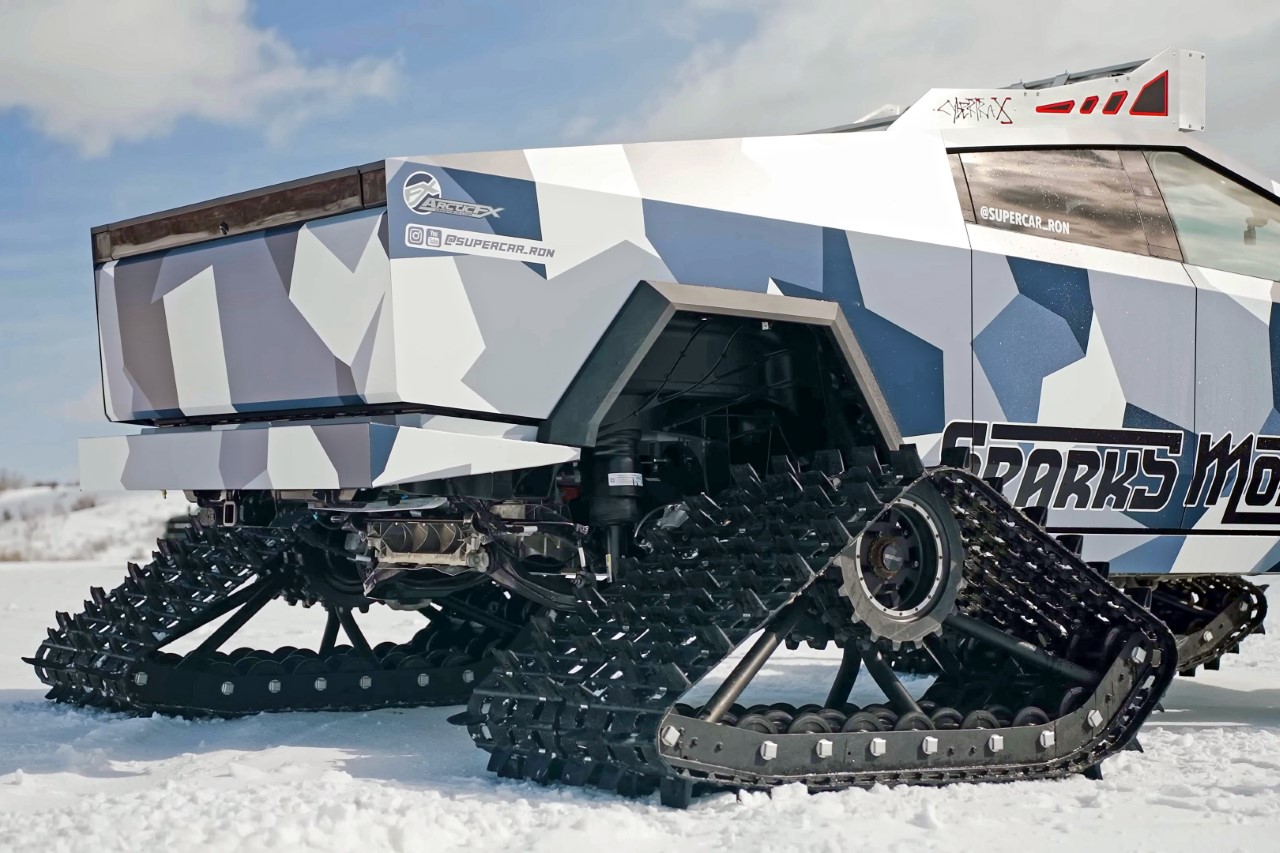
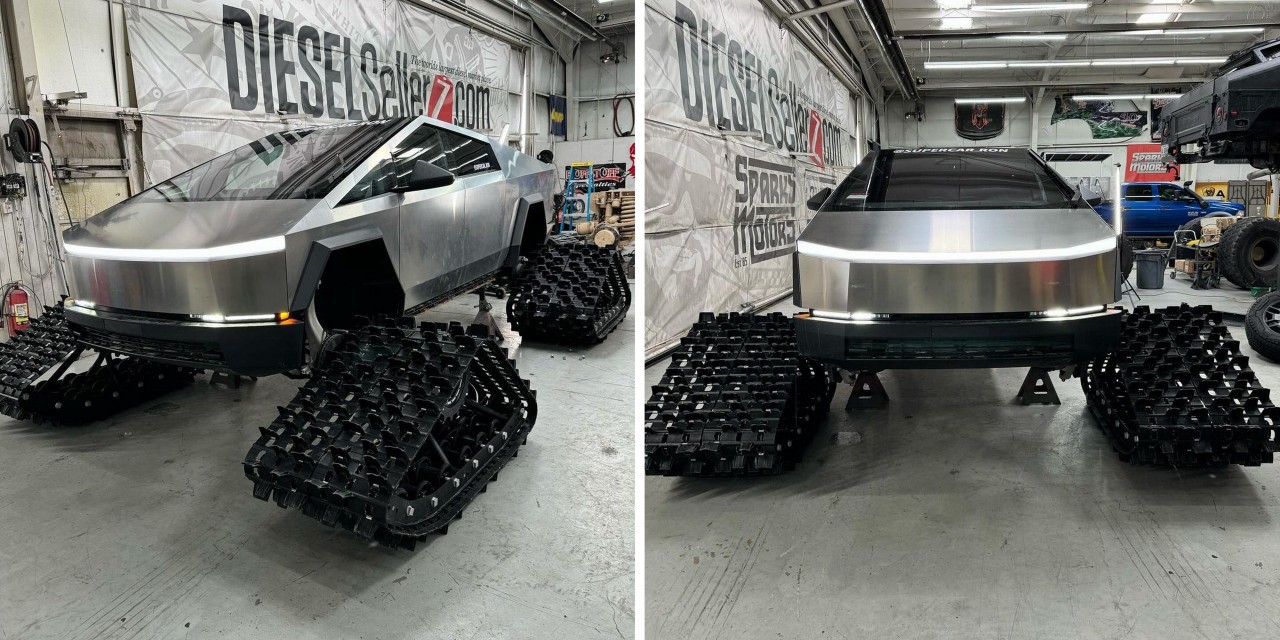
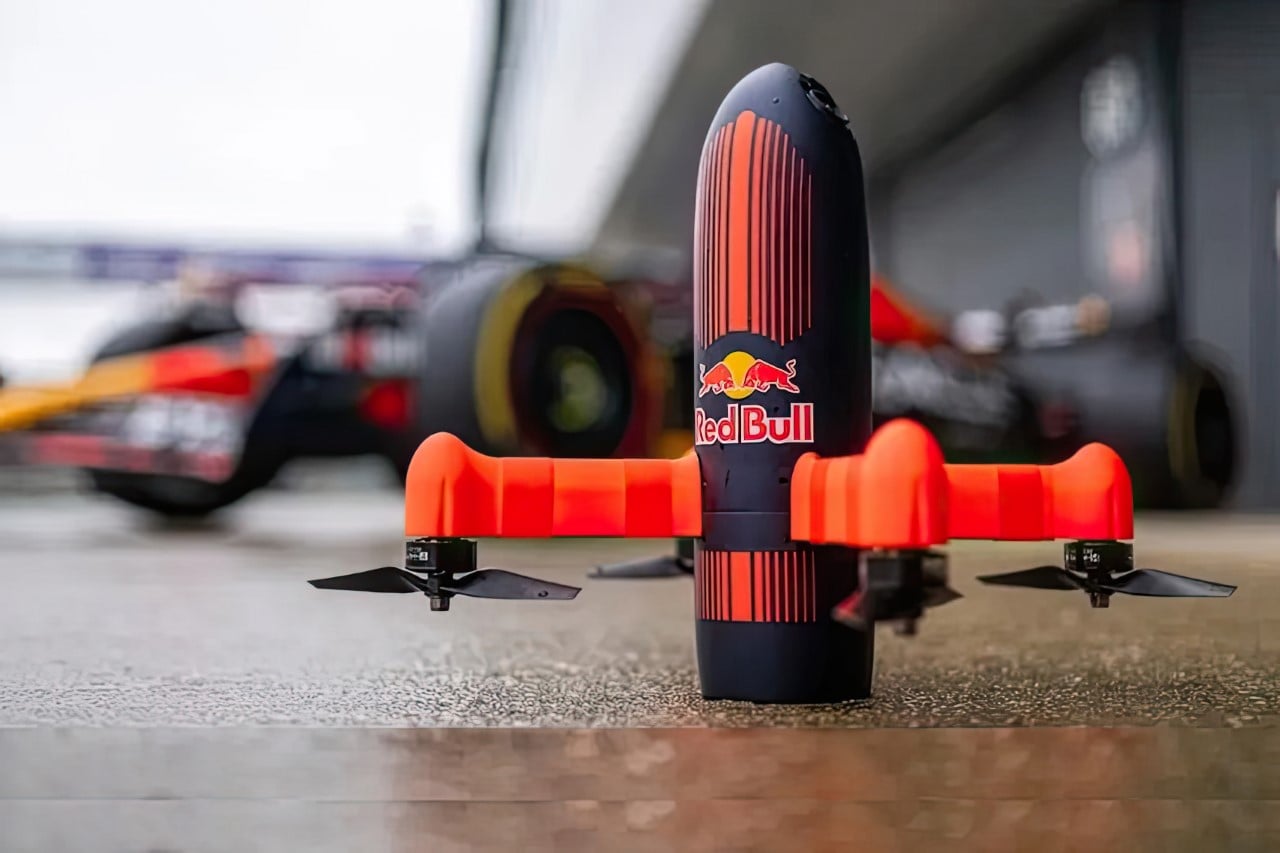
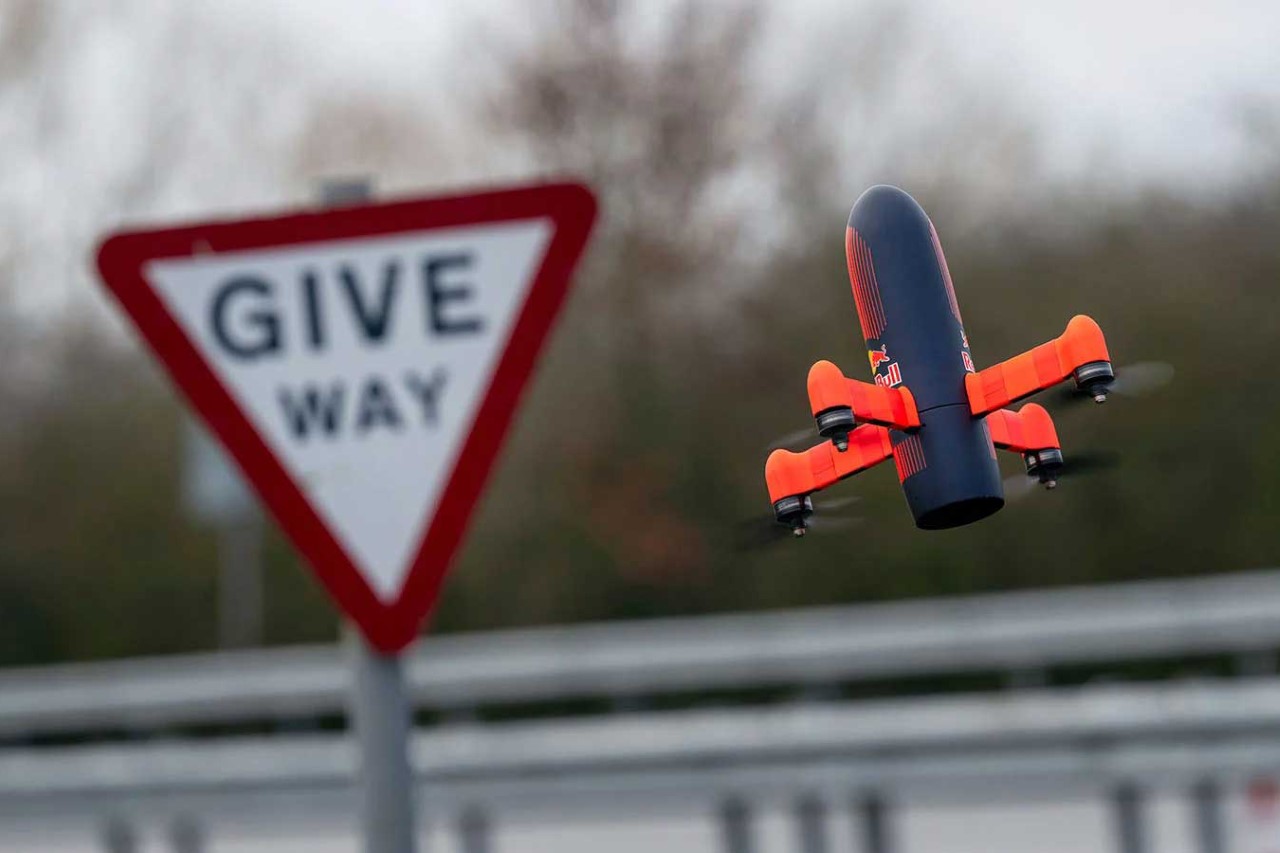
The ‘Hero’ Image

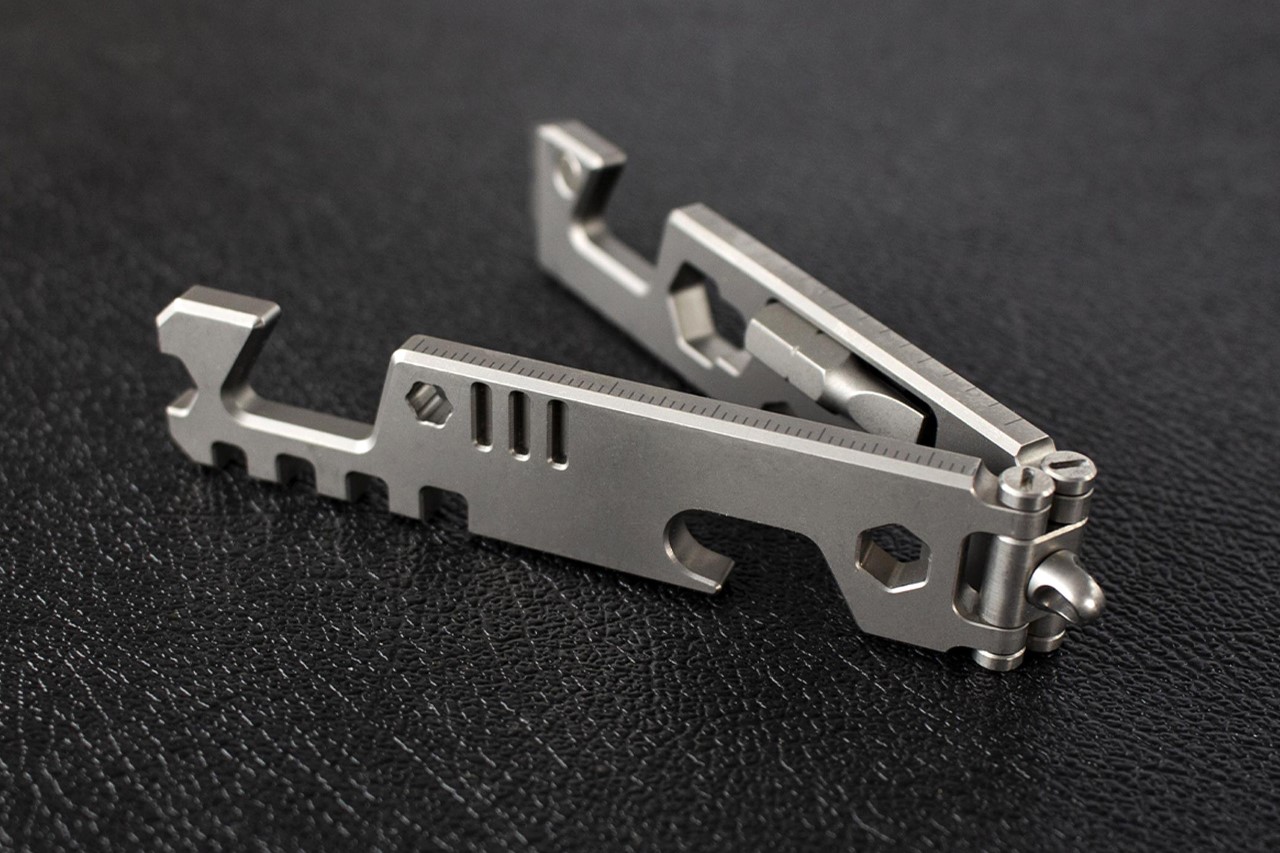
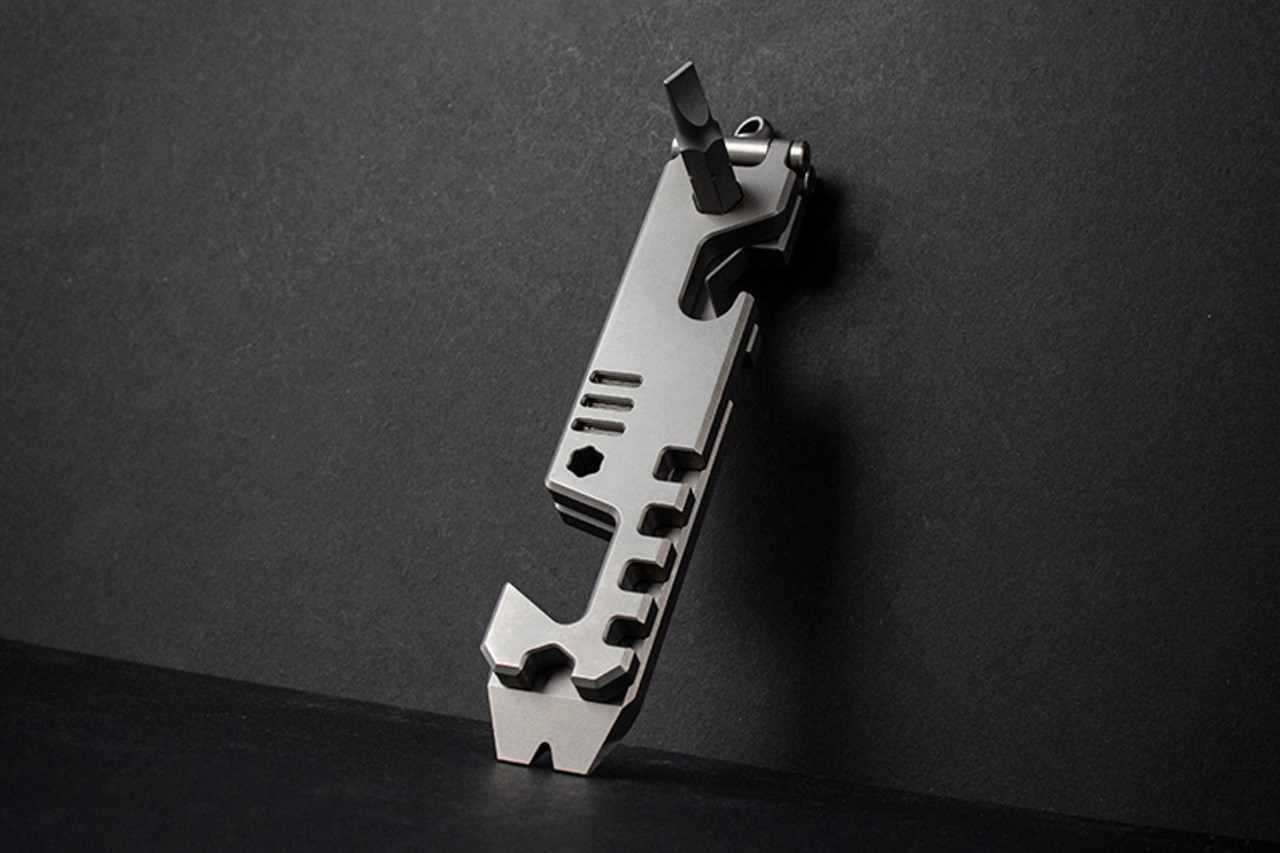
Books have covers, movies have posters, YouTube videos have thumbnails, and press kits have hero images. The hero image is an image that highlights your product while also creating curiosity or awe. It could be an image at a dramatic angle (especially for cars), showing your product in a dynamic view. Conversely, if your product is best demonstrated through actual usage, a photo of your product in use could be the hero image. It’s vital to make your product the most important subject of your image, so that it’s the first thing people see as they’re scrolling through the internet. Try to play with blurry backgrounds, vibrant images, or somewhat sensationalized imagery to help your hero image stand out. It’s important to remember, your hero image is about the hero – your product. Make your product big and visible, be clear, and try not to clutter your image with too much detail. Hint, if your product needs to be opened to show its functionality (like a folding knife), make sure you consider that too. This hero image will play a vital role for media organizations, allowing them to use it as cover photos, thumbnails, etc. A good hero image can sometimes completely transform your press kit, bringing more eyeballs to your work.

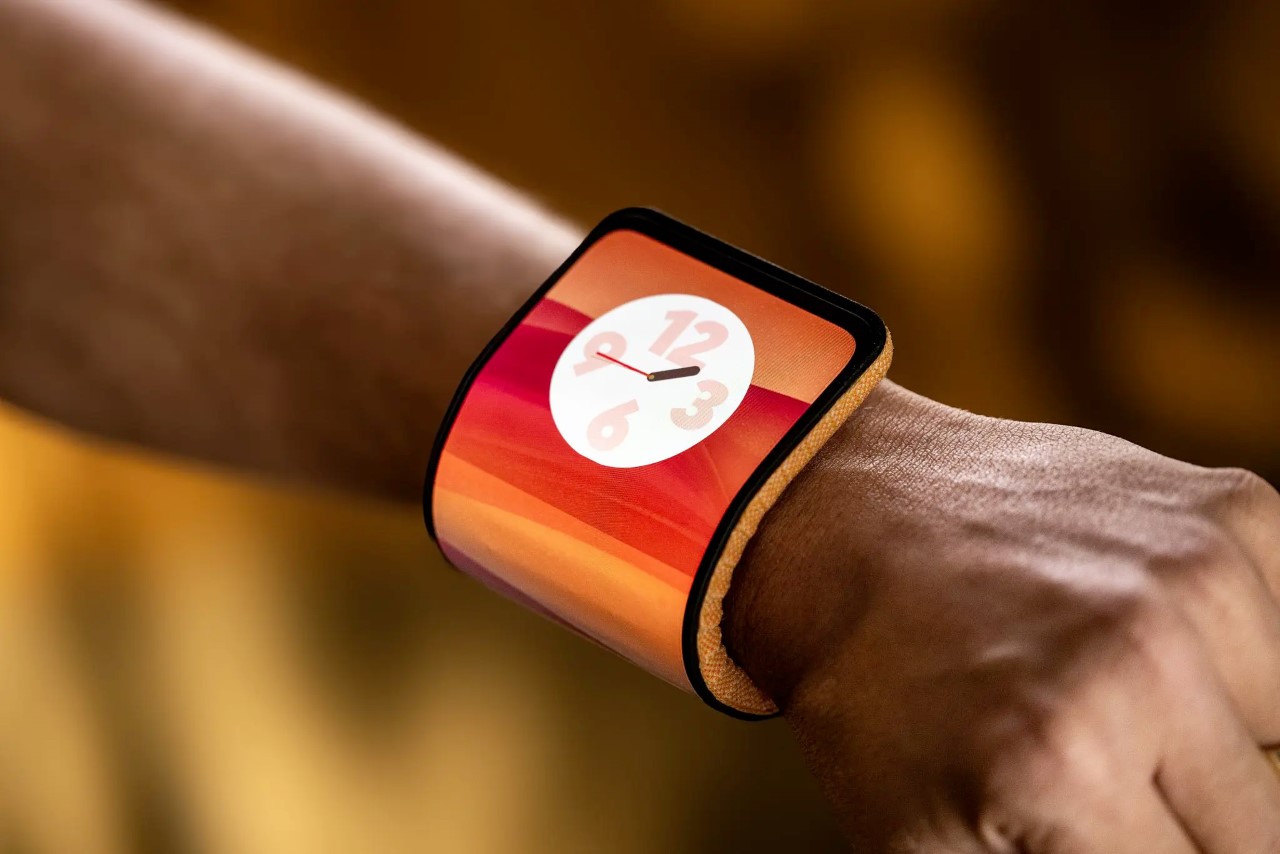
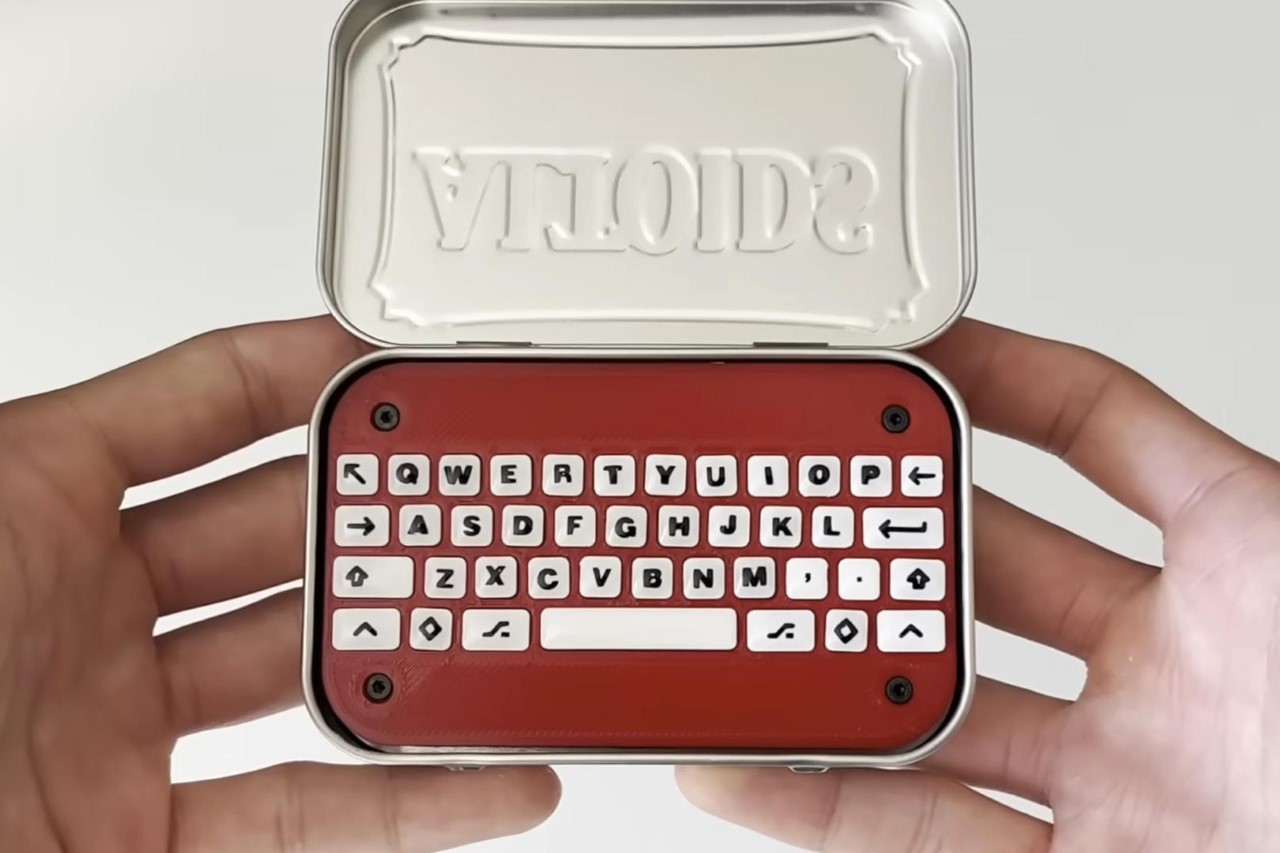
This photo of Motorola’s Bending Phone shows the power of ‘Human Context’ and ‘Hero Image’. It’s eye-catching yet explanatory, showing how the phone bends around your wrist.

The Text – More Is Always Better

Popular consensus will have you believe that with text, you have to be brief, to the point, and engaging. That’s true for almost all forms of writing, but not so much for press releases. Your press release is technically research material, so it NEEDS to be as detailed as possible. Include as much of your process in it, share all your findings (if a writer is viewing your press kit, chances are they’re definitely planning on writing about your project, so don’t worry about driving them away). Good writers love a lot of context because it gives them enough material to choose from. Pepper your release with interesting quotes that the writer can attribute to you as well, it helps get you visibility along with your work.

Get Yourself Visibility Along With Your Work

The press kit may be for your project, but ultimately, you want some of that spotlight on yourself too. Make sure the press release has an “About Me” section at the bottom. Add links to your website and social media that blogs/articles can use to tag/hyperlink you in their written material… and provide an email ID and phone number at the bottom to help writers get in touch with you just in case they want an interview. A press kit should elevate your design as well as your own profile so that people remember you when you launch your next project. Makes sense, right?

How To Distribute Your Press Kit?

Once you’re done building the press kit, this is honestly the easiest part. The press kit can be made available in a variety of ways – through emails. Most creators proactively share their work with people from the media, and personally, as a journalist, nothing feels better than to have good projects land right in my lap! You can reach out to prospective writers/reviewers/influencers via email or on social media with a .zip file or a link to DropBox, Google Drive, or any cloud storage. A great practice is to just have your press kit right at the bottom of your project page too, allowing journalists to quickly download the assets they need to write about your work. If you want to go a step further, embedding tracking into your outreach or your kits can help you understand how many people have viewed your message, checked the press kit, etc. Ideally, you also want to set up a Google alert with your or your project’s name on it so that you can find out when your work’s been shared online… and when that does happen, be sure to reach out to the author and thank them for sharing your work! It helps build a relationship because they’re sure to remember you when you reach out with your next project!

Remember, if nobody’s talking about your work, it’s failed its first step – creating an impact. A press kit makes it easy to generate that buzz so that people flock to your work and share it with others.

The post This Ridiculously Simple Trick Can Transform Your Good Designs Into Great Designs first appeared on Yanko Design.

World’s fastest FPV drone with a 350km/h Top Speed will radically change how we watch F1 Races

The fact that the world’s fastest FPV drone looks somewhat like a missile is simultaneously incredibly cool and incredibly scary. It might change how we watch F1 races, but it has the potential to change much more than just that.

This just seems like the kind of crazy thing Red Bull would pull off. The company decided to challenge multiple-time F1 champion Max Verstappen to a race – the catch, Verstappen would be behind the wheel of a Red Bull F1 car, while his opponent would be the world’s fastest FPV drone. The project was in collaboration with Dutch Drone Gods, a group of FPV drone makers and pilots known for holding the existing title of the world’s fastest FPV filming drone with a 150km/h top speed. The only problem – Verstappen’s F1 car is more than twice as fast.

Designers: Red Bull Advanced Technologies & Dutch Drone Gods

Drones aren’t new in the F1 circuit, given that the racing organization uses a combination of aerial filming methods to get their shots. Sustained footage is taken on helicopters that hover above the track, but for up-close shots, the F1 team relies on drones… the only problem is that these drones don’t follow the car around. They simply hover in the air, taking cinematic panning/dolly shots before the camera angle changes. Understandably, creating a drone that can follow an F1 car around like a third-person camera in a video game is just a tad bit short of impossible. Drones have a notoriously low flight time, outputting probably a maximum of 15-20 minutes of flight before their batteries get drained. Moreover, F1 cars can hit speeds of almost 400km/h and are designed to be highly responsive, making razor-sharp turns on the tarmac. The Dutch Drone Gods’ FPV maxes out at 150km/h, and can’t perform sharp maneuvers in mid-air. This meant redesigning the drone to hit higher speeds while being responsive, and perhaps most importantly, not melting or exploding in the air because of all the heat generated by hitting upwards of 300km/h speeds.

Pilot and Founder of DDG Ralph Hogenbirk and F1 World Champion Max Verstappen with the Red Bull PFV Drone

The process saw multiple iterations from the Dutch Drone Gods’ team, who took up the challenge of pushing their drone to be as fast as a Formula 1 racecar. The challenge, aside from speed, was also to make the drone maneuverable, and durable. Initial tests yielded a few pitfalls, wires would melt under extreme heat, parts would wear and tear or even explode, but more interestingly, the drone’s stability would take a beating just because of the wind turbulence created by the F1 car as it zoomed across the track. Two rounds of prototypes also showed that simple off-the-shelf components and 3D-printed outer shells couldn’t handle the task, so the DDG team decided to visit the Red Bull Advanced Technologies headquarters to partner with the team there to design the drone. The new drone had machined metal structures, speed-capable inner components, and an FRP composite outer shell that was lightweight but highly resilient.

The final drone prototype got one single chance to race against Verstappen in the latest RB20 car on the Silverstone track. It fared incredibly well against Verstappen, filming the car as it blitzed through the track. The goal wasn’t to go faster than Verstappen’s car, that would be a foolish mistake, but rather, to capture the racecar from a unique following PoV, giving the audience the effect of moving at the same speed as Verstappen. F1 race broadcasts are already pretty exciting to begin with, but imagine being able to follow a car with a camera, capturing the intense speed, adrenaline, and reflexes of the race in real-time…

The engineering of Red Bull’s FPV drone could potentially revolutionize the landscape of F1 filming. Instead of static camera shots or quick drone shots that just pan across a track, Red Bull has potentially unlocked the ability to now follow cars as they race, creating an even more thrilling broadcast that could practically reinvent how people enjoy the sport. Heck, I could totally conceive the creation of a drone racing championship as a result too. The implications for Hollywood are just as exciting too, with cinematic drones getting a whole lot faster thanks to the Red Bull FPV Drone’s unique shape.

However, a drone hitting speeds of 350km/h has its own pitfalls too. Reconnaissance, surveillance, or potentially even weapon-based payload delivery could somehow become even easier and more accessible to anyone with the right tools. Sure, the Red Bull FPV drone isn’t a ballistic missile, but it’s dangerously close to being unstoppable. Try stopping a drone cutting through a military zone or an airport at 350km/h. This new world is exciting, but just as scary too.

That doesn’t take away from how incredibly impressive Red Bull and Dutch Drone Gods’ demonstration was. The Red Bull FPV Drone currently holds the record for defeating its predecessor by a factor of nearly 200km/h. The new FPV drone also gets the bragging rights of being able to keep up with Verstappen, a feat that not even other F1 racers can hold claim to!

The post World’s fastest FPV drone with a 350km/h Top Speed will radically change how we watch F1 Races first appeared on Yanko Design.