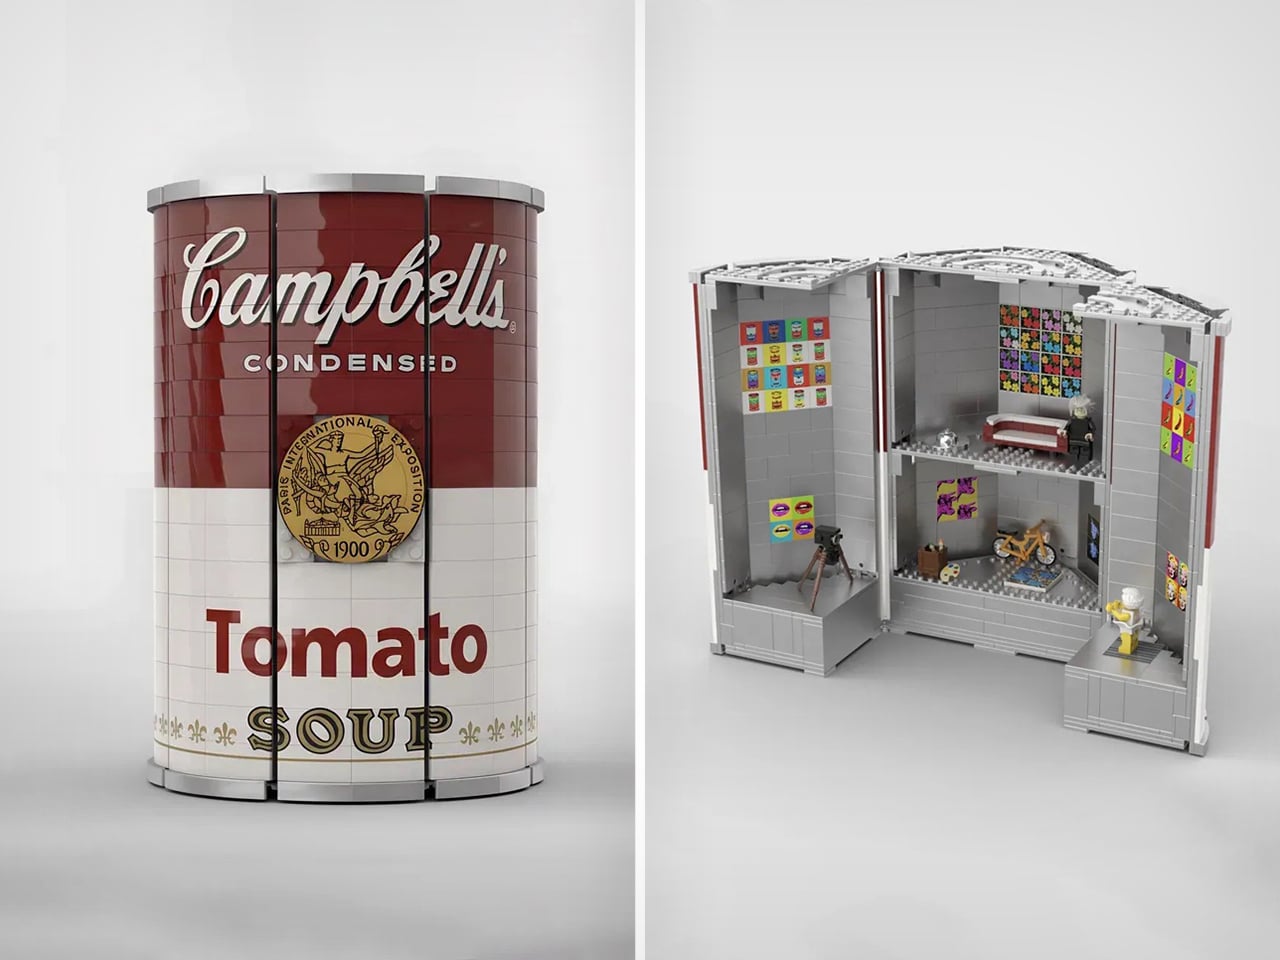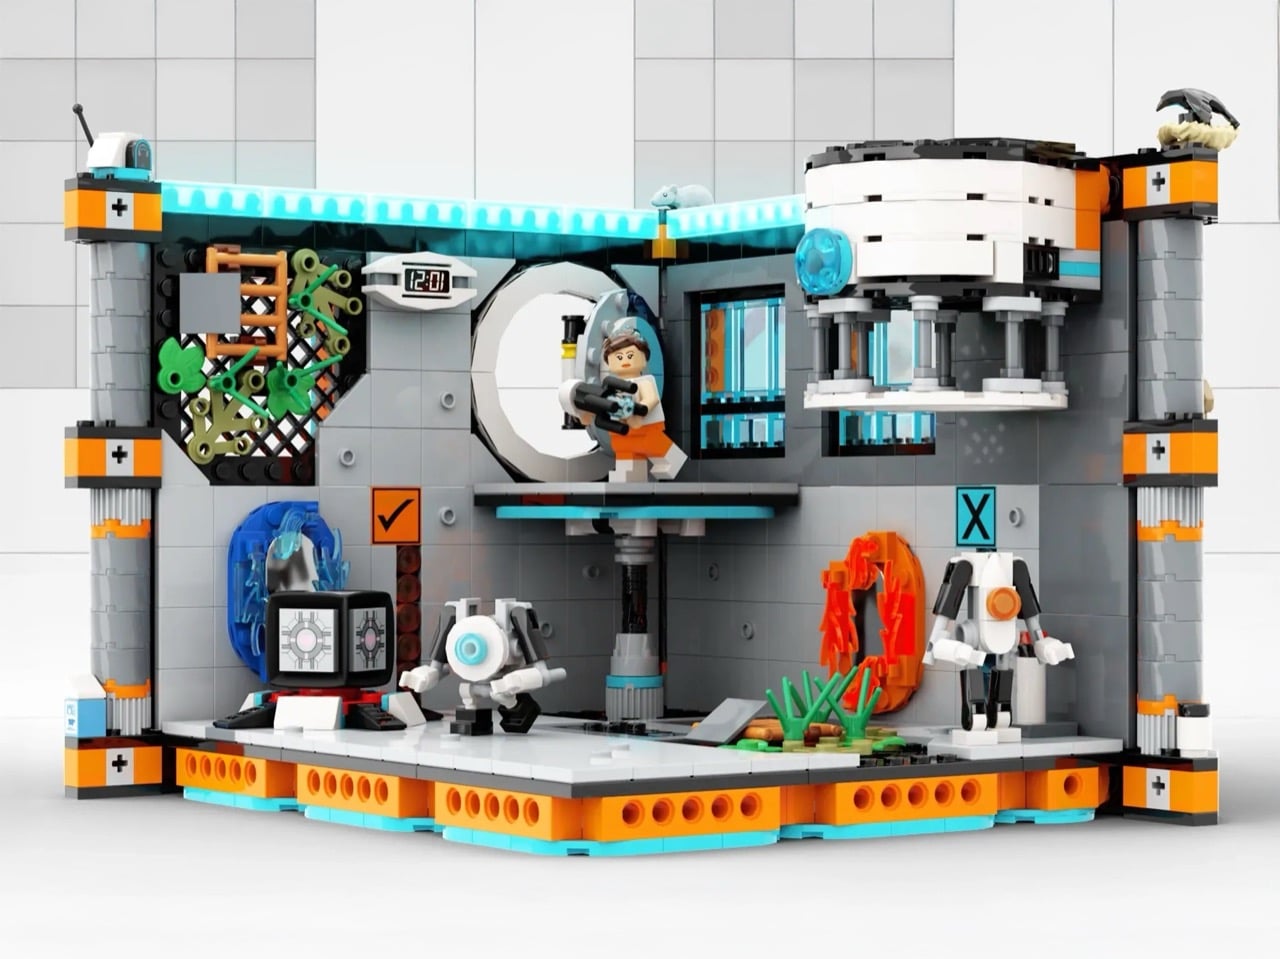
The Portal franchise has earned its place in gaming history through ingenious puzzle design, dark humor, and an aesthetic so iconic that a simple orange and blue color scheme instantly evokes the Aperture Science testing facility. Now, LEGO builder KaijuBuilds has translated that sterile-yet-sinister world into brick form with the Portal 2: Test Chamber Creator, a project currently seeking support on LEGO Ideas.
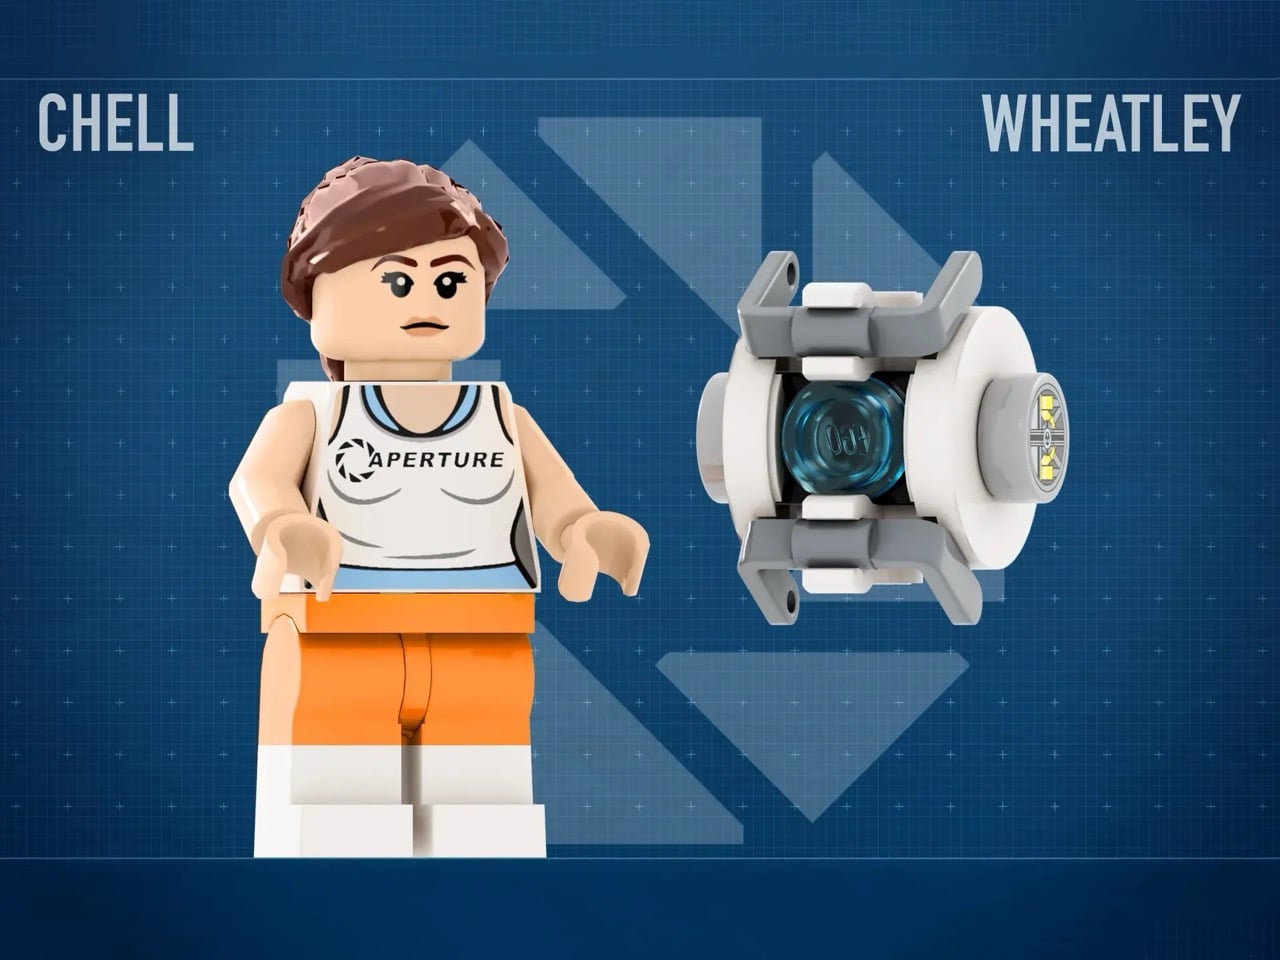
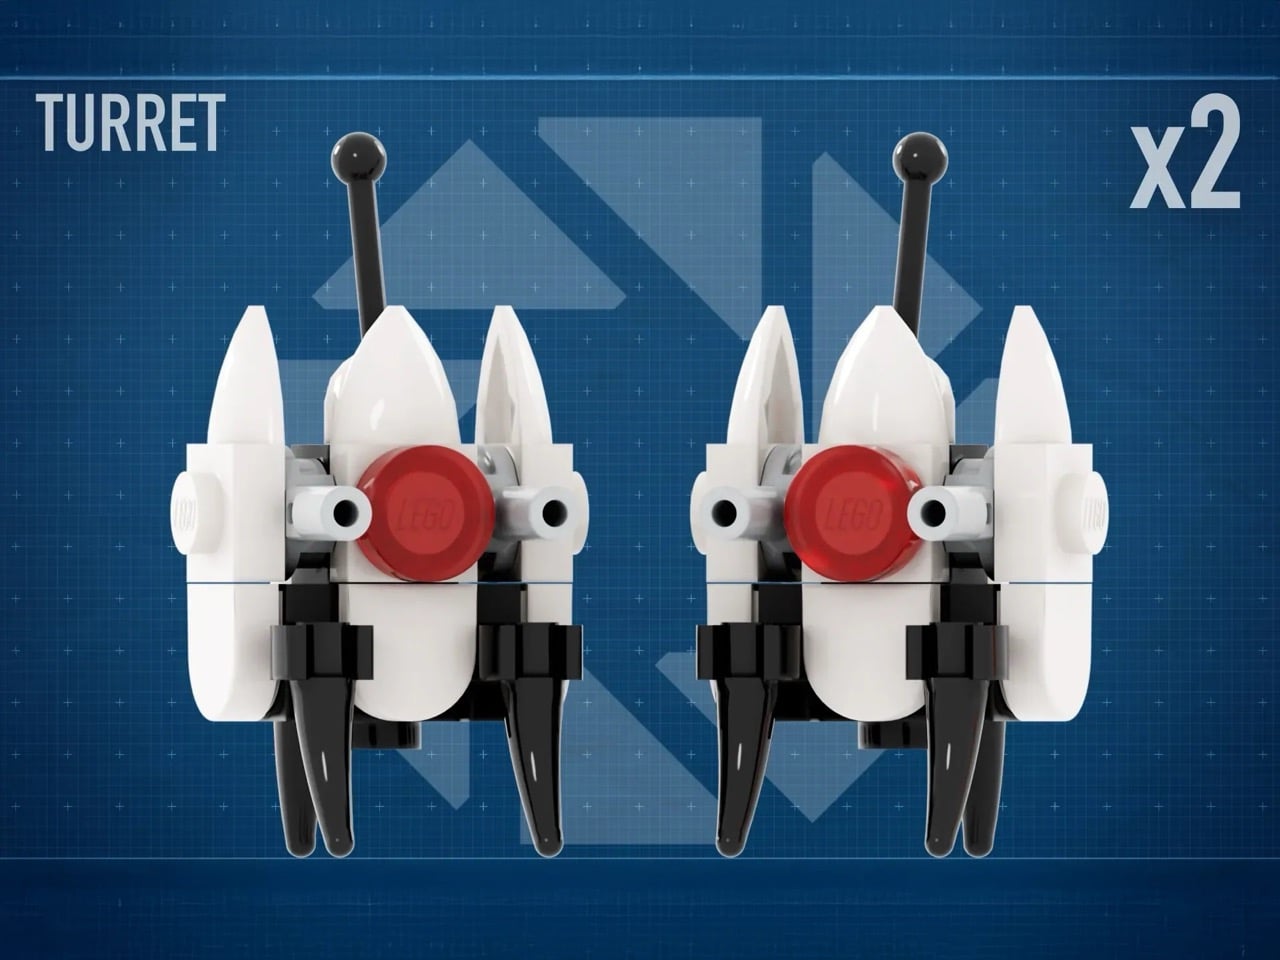
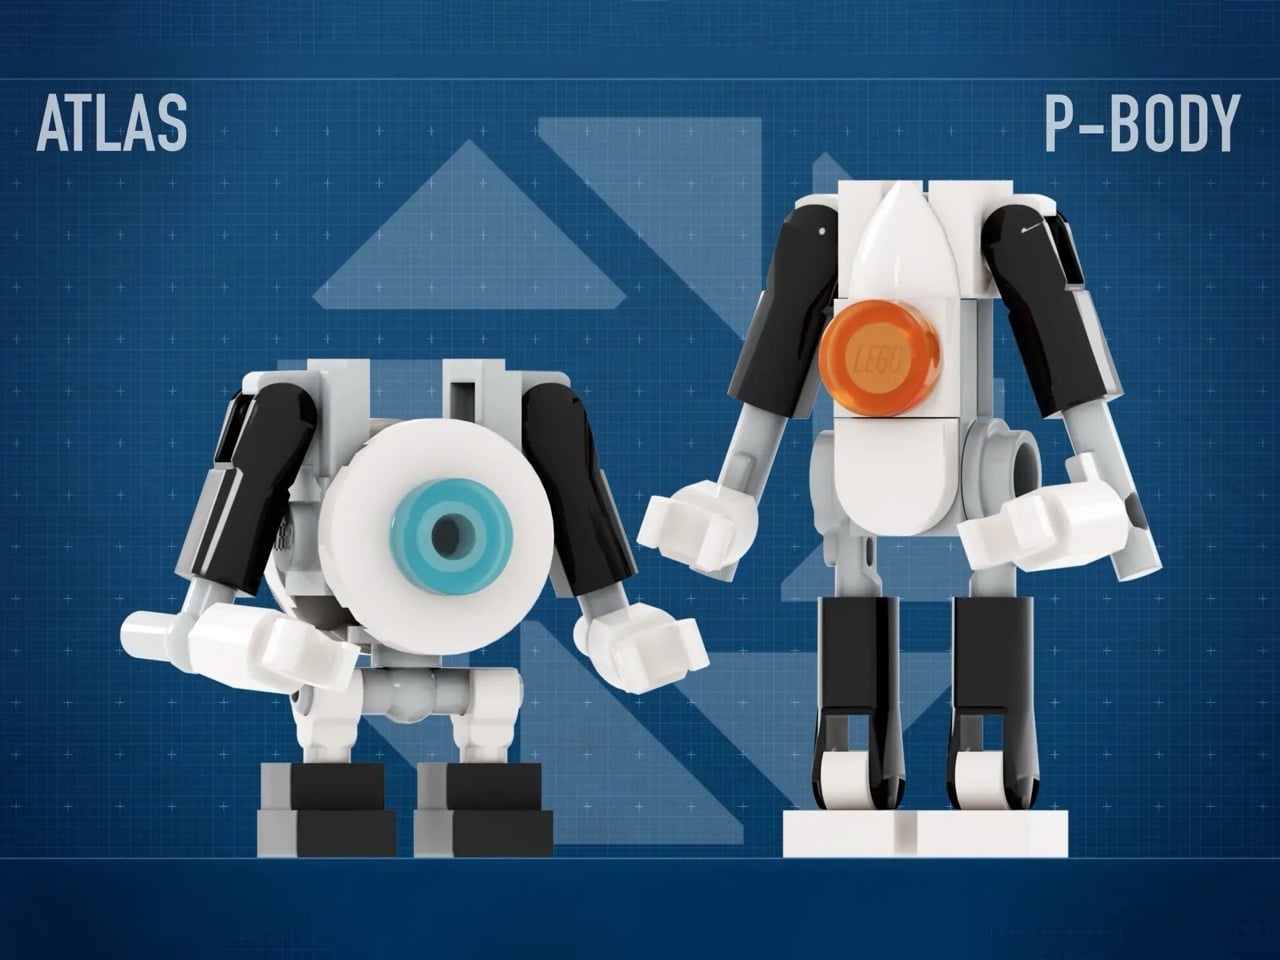
The set features a sophisticated modular tile system with 18 unique configurations across 29 total modules, allowing builders to reconstruct famous test chambers or design entirely new challenges. With around 1,280 pieces, the build includes Chell, Wheatley, Atlas, P-body, turrets, portals, a Companion Cube, and even that infamous cake. The attention to detail extends to overgrown tiles that reference Portal 2’s decayed facility sections, complete with a white rat as a nod to the mysterious Rattman. The modular approach mirrors the in-game test chamber editor, which means you can actually play with spatial configurations rather than building a single frozen scene.
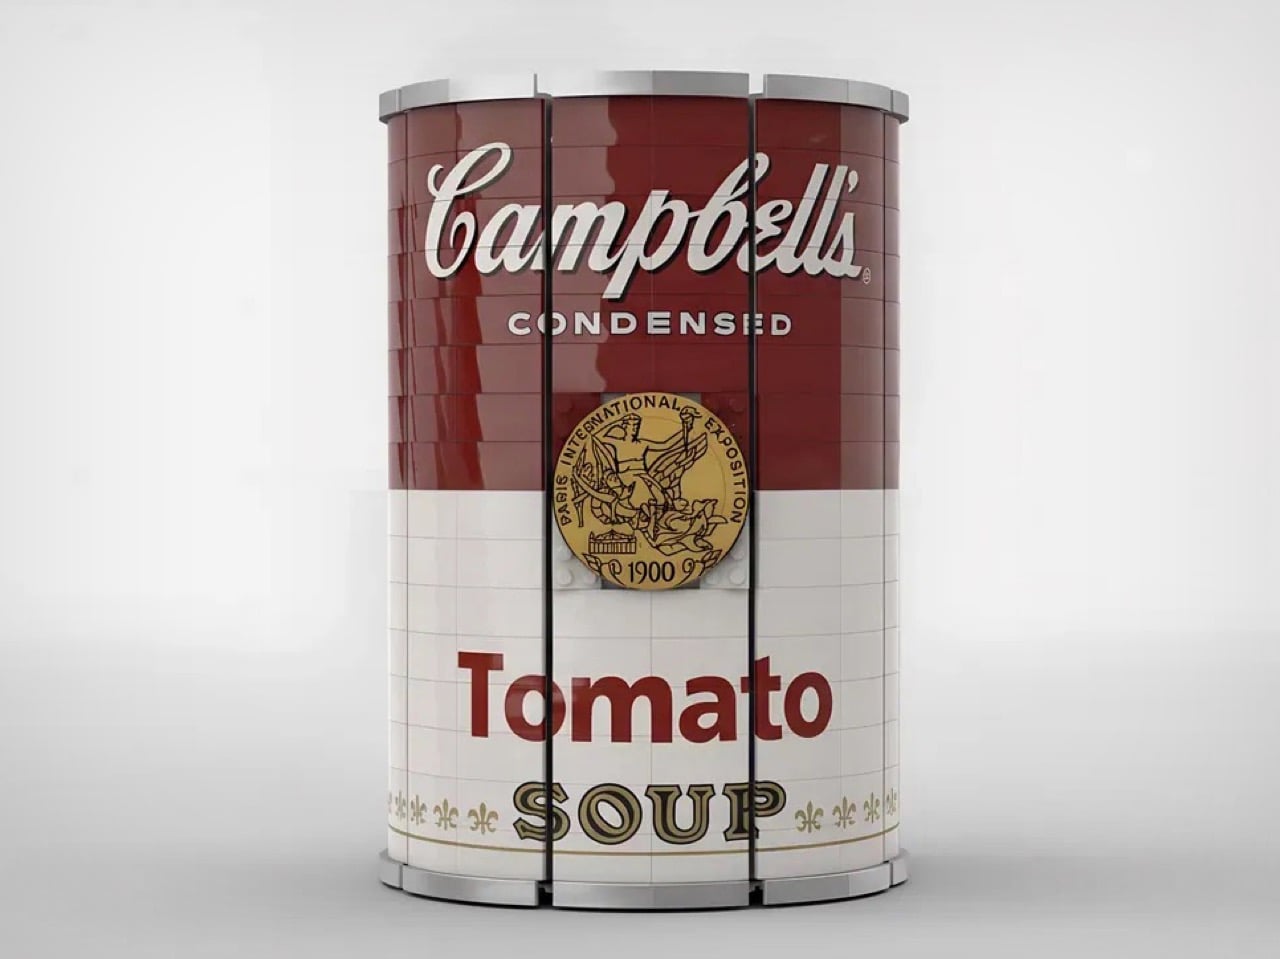
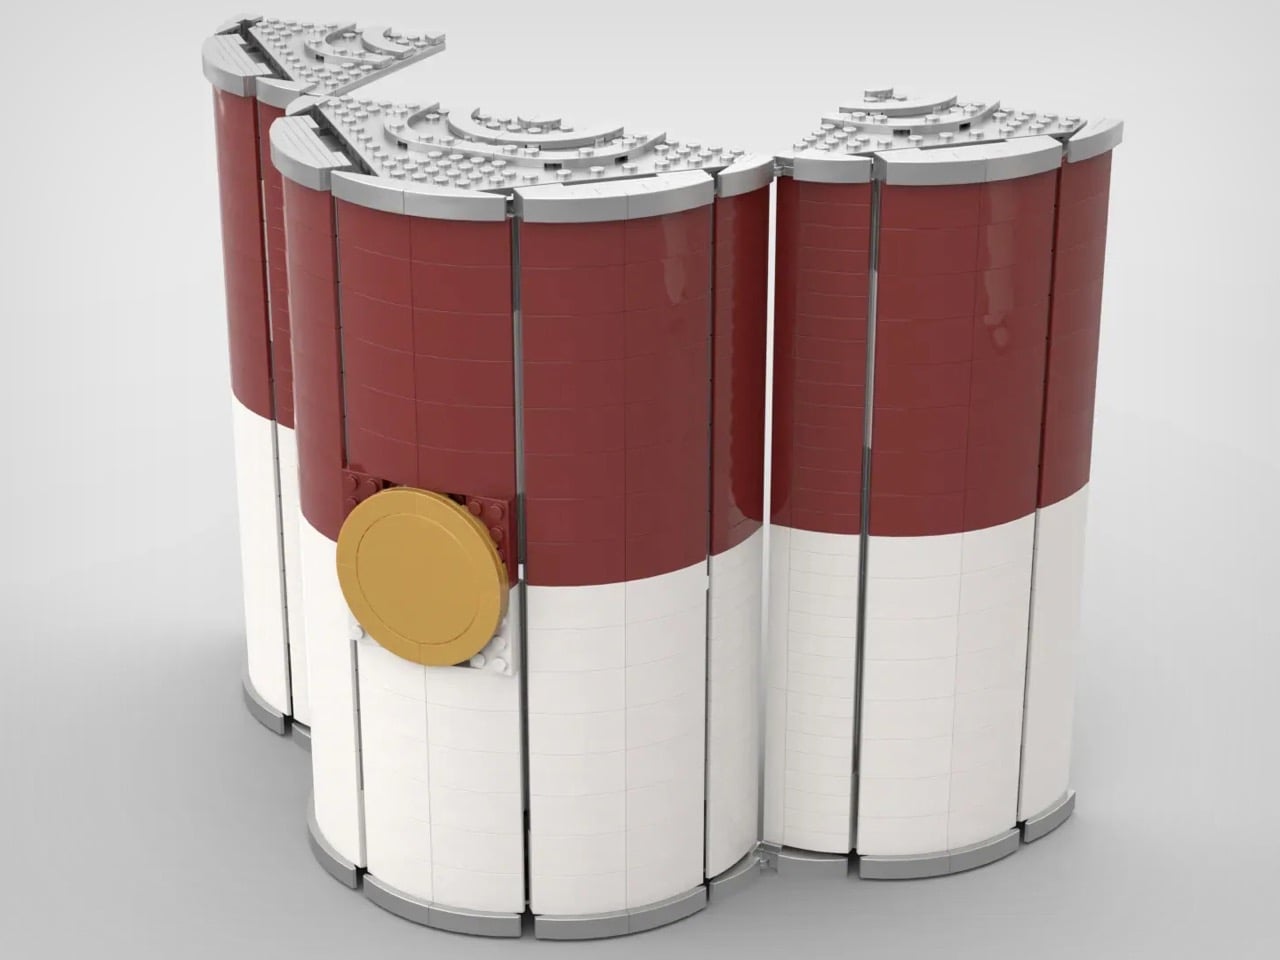
Designer: KaijuBuilds
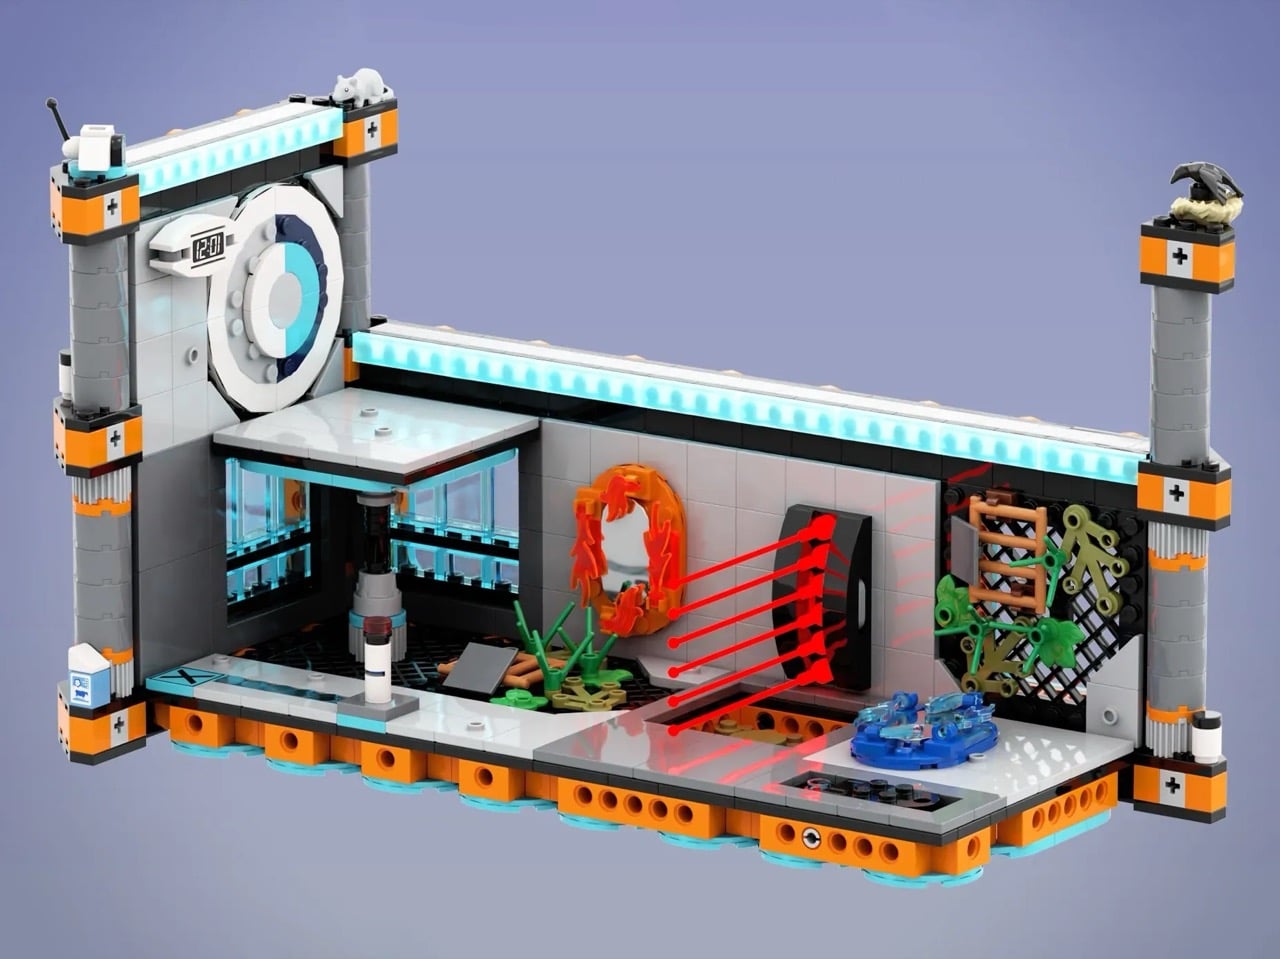
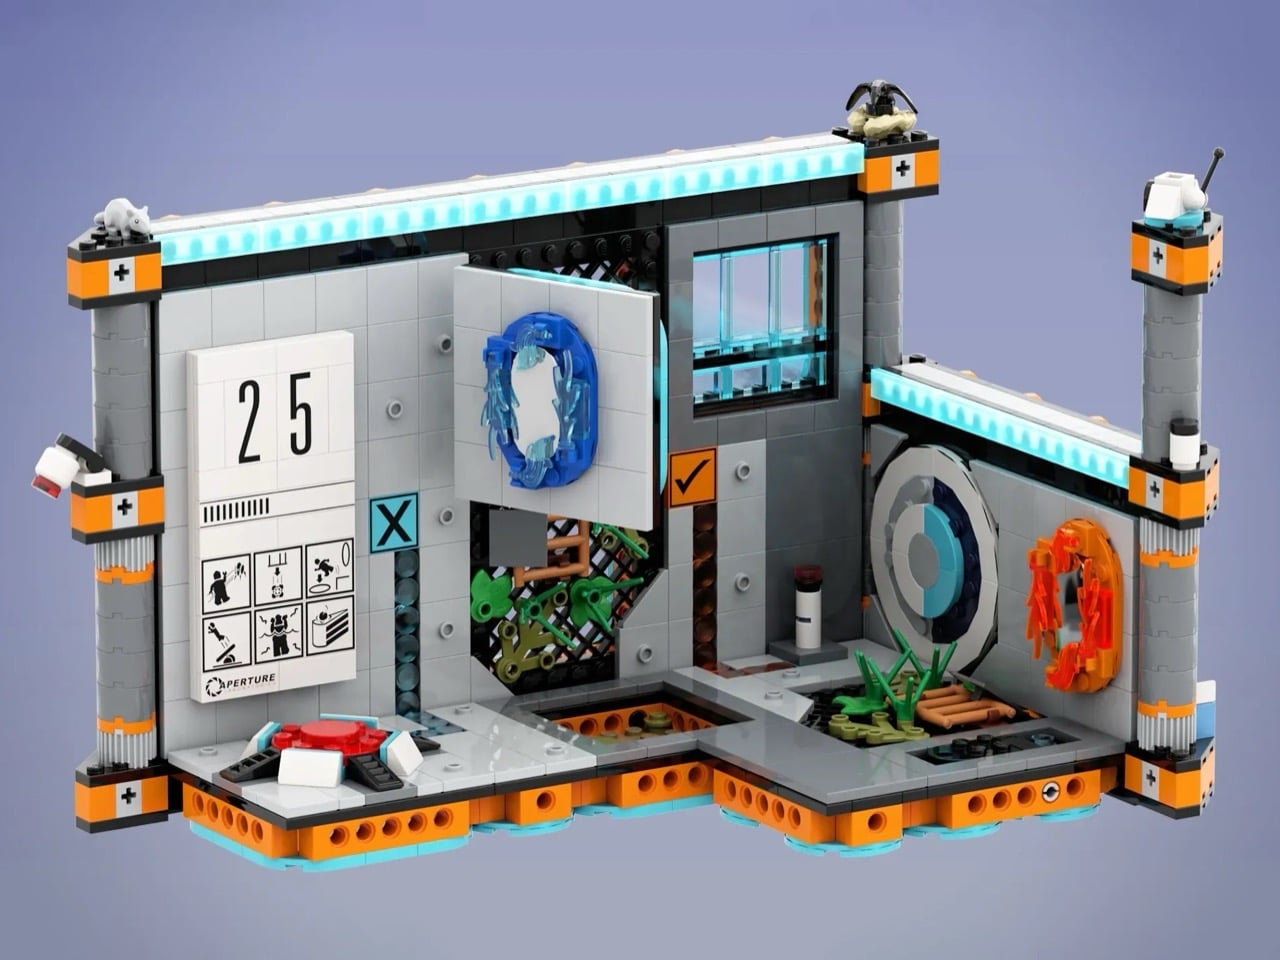
The Aperture Science facility aesthetic translates surprisingly well to LEGO’s design language because both share a love of modular systems and clean geometric forms. Portal works on minimalist white panels, colored power conduits, and spatial reasoning. This build captures that by making reconfigurability the core feature. Tiles come in different sizes (8×8, 4×4, 4×8) and snap onto an orange base with visible connection points. Some tiles show pristine testing surfaces while others feature vegetation breaking through panels, directly referencing Portal 2’s narrative about a facility decaying over decades. The observation windows sit where GLaDOS would watch test subjects fail, and those structural details do heavy lifting in establishing atmosphere.
The character roster features all the iconic beings and bots and whatnots. Chell appears in her orange jumpsuit with the Aperture Science tank top. Wheatley exists as a buildable personality core with his blue eye. Atlas and P-body (the co-op robots from Portal 2) demonstrate awareness that the franchise extends beyond Chell’s story. The turrets manage to look simultaneously adorable and threatening with their white chassis, red sensors, and antenna stems. Two portal pieces come in translucent orange and blue, likely using curved or printed elements to create those characteristic oval shapes. The portal gun sits in Chell’s hands, completing the loadout any fan would expect.
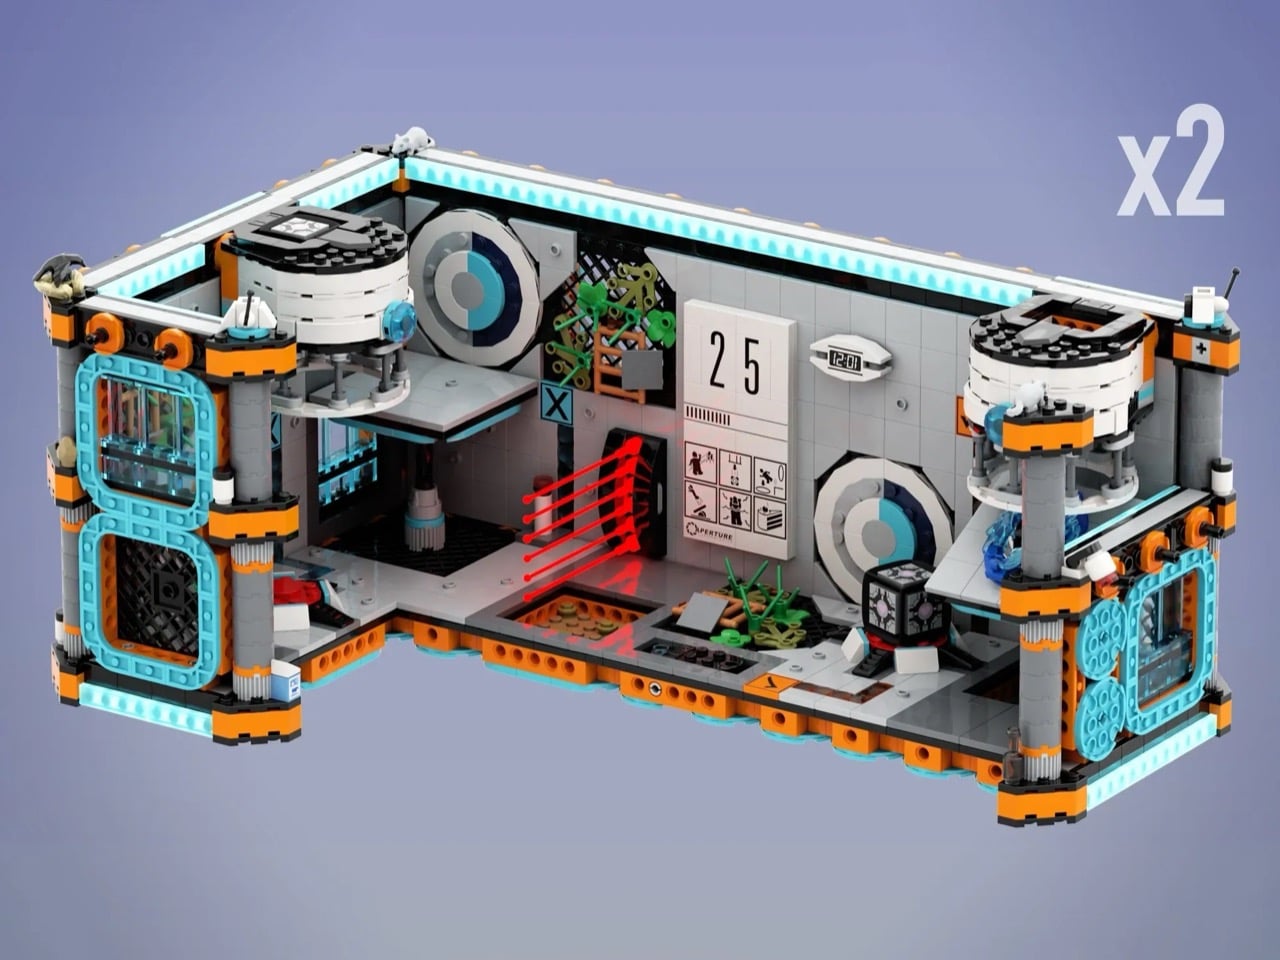

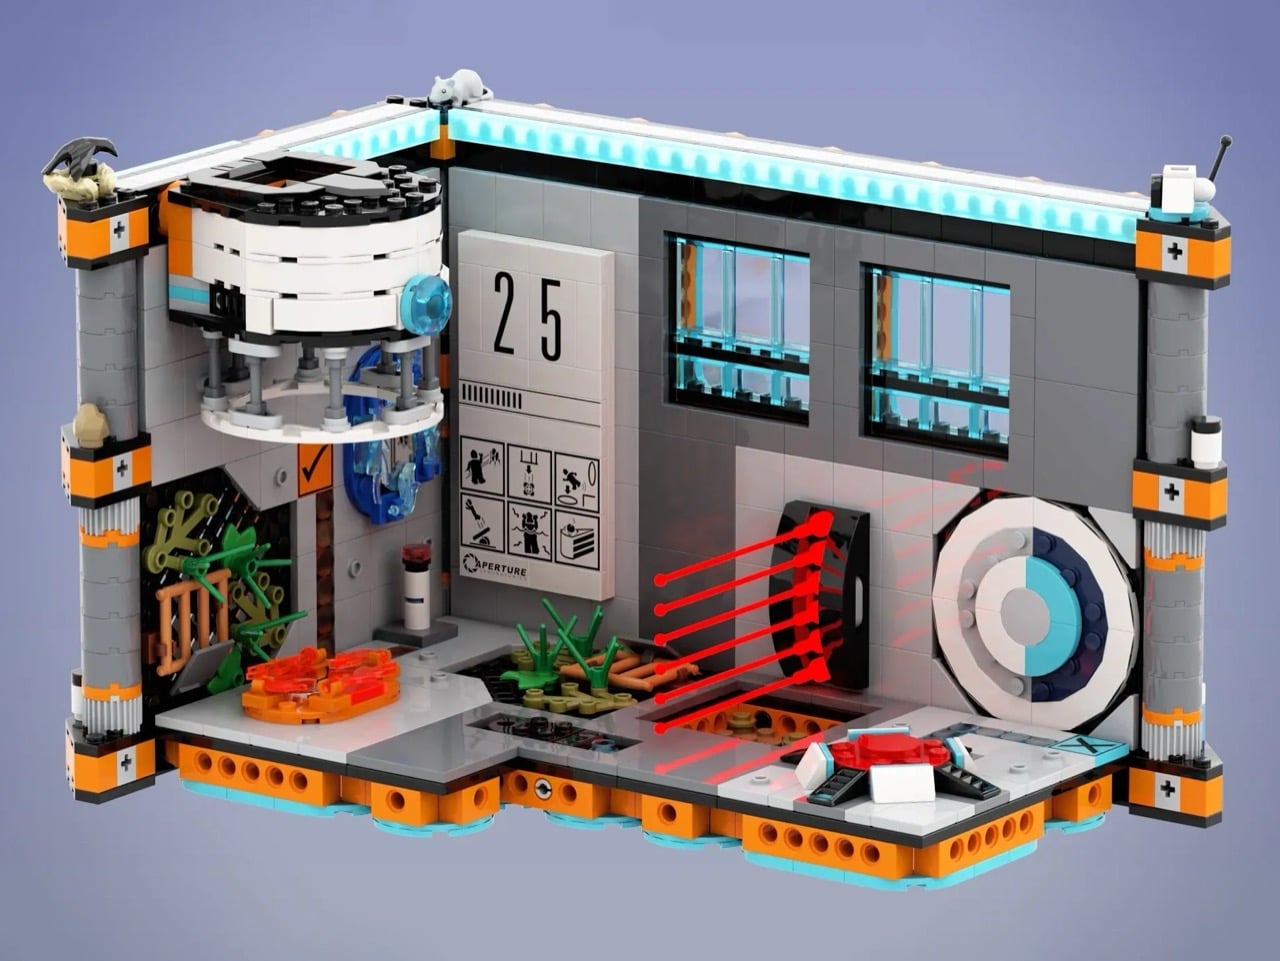
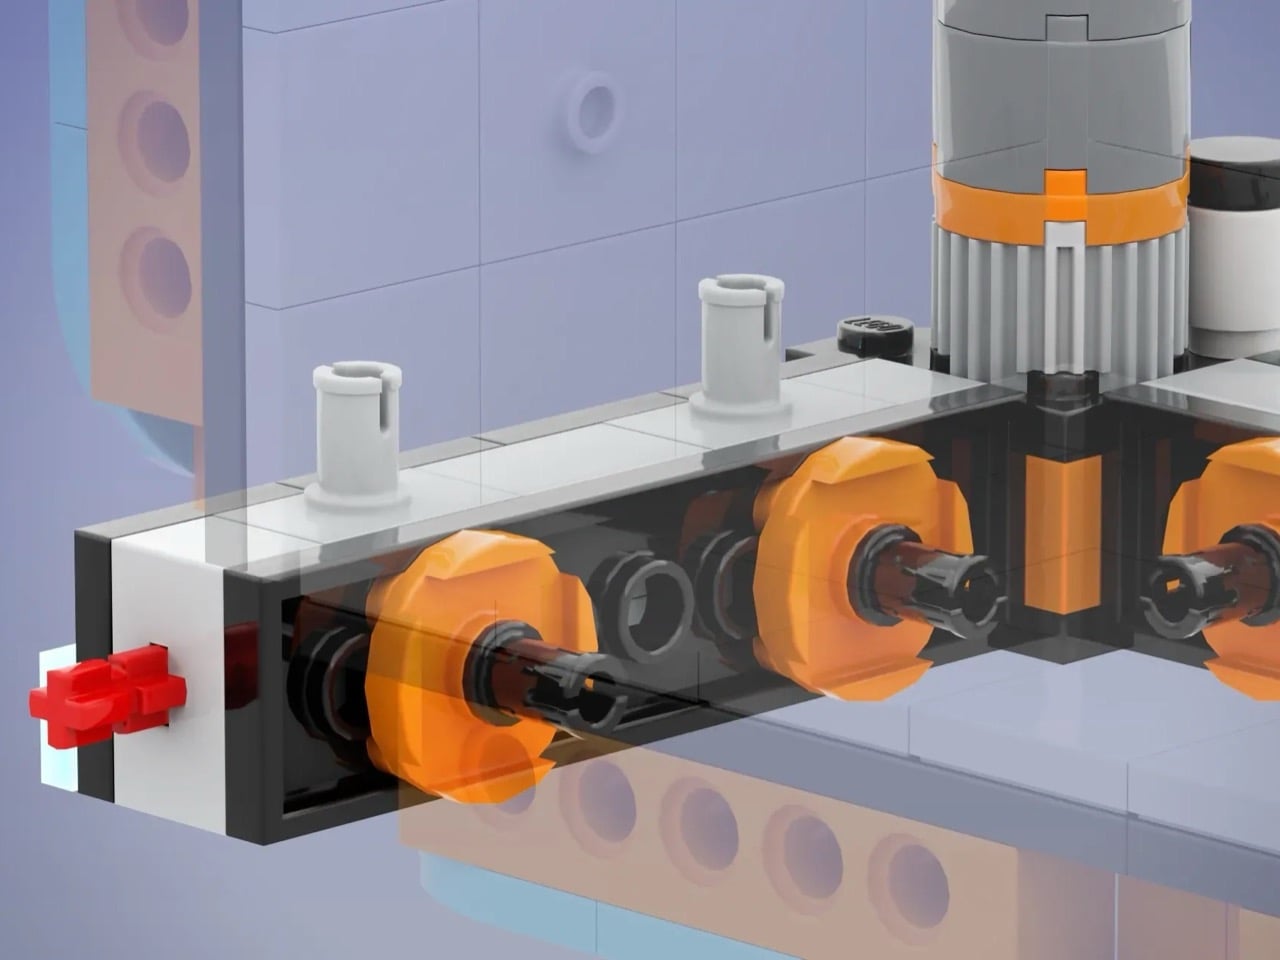
Those 18 unique tile types across 29 modules provide enough variety to build compact chambers or combine everything into larger, more complex puzzles. Some tiles feature orange and blue power line conduits that connect mechanisms in the actual game. Dark grey tiles break up monotonous white surfaces. Button tiles, overgrown sections, observation windows, and the Heavy Duty Super-Colliding Super Button all serve gameplay purposes Portal fans recognize immediately. The structure uses long and short connectors with technic pins and 2L axles to hold everything together, which should make reconfiguration reasonably straightforward without constant collapse during redesign sessions. The orange base with its studded connection points does the critical work of making the whole modular system functional rather than theoretical.
The functional elements push this past display territory into actual play value. The Companion Cube dropper holds and releases cubes, mimicking those ceiling-mounted dispensers from the game. The aerial faith plate triggers manually to launch minifigures upward. A tilting elevated platform angles in different directions for variable chamber layouts. The door swings open for chamber entrances and exits. These mechanisms aren’t revolutionary in LEGO terms, but they’re deployed strategically to recreate specific Portal gameplay moments. The laser grid uses red transparent pieces across a 3×6 area. It won’t vaporize minifigs, but it provides the visual language of hazards you’d design chambers around. The deadly goo gets two 8×8 tiles in translucent orange, which is the correct color unlike some fan builds that use green acid from generic video game conventions.
There’s even a cake hidden somewhere because at this point it’s mandatory for Portal merchandise. The cultural penetration of “the cake is a lie” has been both blessing and curse for the franchise, but you can’t release Portal LEGO without acknowledging it. The white rat perched on structural pillars references Doug Rattmann, the Aperture scientist who left cryptic murals throughout the facility. That’s a deeper cut than casual fans would catch. The test chamber sign displays “25” along with hazard pictograms, grounding the build in Aperture Science’s obsessive signage culture. The facility loved warning test subjects about dangers they couldn’t avoid. Small crows appear on the pillars too, adding those environmental details that make the difference between a good build and one that captures a world.
Portal maintains relevance fifteen years after its 2007 release through memorable writing, innovative mechanics, and an aesthetic that spawned endless memes. GLaDOS remains one of gaming’s most iconic antagonists. “Still Alive” transcended the game to become a cultural touchstone. The orange and blue portal color scheme is instantly recognizable across demographics. Portal 2 expanded the universe in 2011 with co-op gameplay, more complex puzzles, and deeper lore about Aperture Science’s history. The games influenced puzzle design across the industry and demonstrated that shorter, tightly designed experiences could compete with sprawling open-world titles. That legacy makes Portal a strong candidate for LEGO treatment, especially given LEGO’s existing relationship with video game properties and Valve’s general receptiveness to licensed products.
LEGO Ideas operates as a platform where fans submit designs for potential official sets. Projects reaching 10,000 supporters enter review, where LEGO evaluates production feasibility, licensing complexity, and market viability. The Portal 2: Test Chamber Creator sits at roughly 1,700 supporters with 543 days remaining. Voting requires a free LEGO Ideas account and takes about thirty seconds (you can cast your vote here). Reaching 10,000 votes doesn’t guarantee production since LEGO considers factors beyond popularity (licensing negotiations with Valve, manufacturing costs, retail strategy), but fan support gets projects in front of decision-makers. LEGO has produced gaming sets before, from Minecraft to various Nintendo properties. Portal’s enduring cultural presence and Valve’s track record with merchandise partnerships suggest this build has legitimate production potential if it clears the voting threshold.
The post This LEGO Portal 2 Set Lets You Design/Build Your Own Test Chambers With 1,280 Pieces first appeared on Yanko Design.