The Orion PDA Runs on Sunlight and Ignores the Internet by Design

The smartphone has become so dominant in daily life that it’s hard to remember what it felt like to carry a device that did only a handful of things. Every swipe, tap, and notification competes for your attention, turning what was once a communication tool into a cycle of endless distraction. The maker community, however, has quietly been building an alternative.

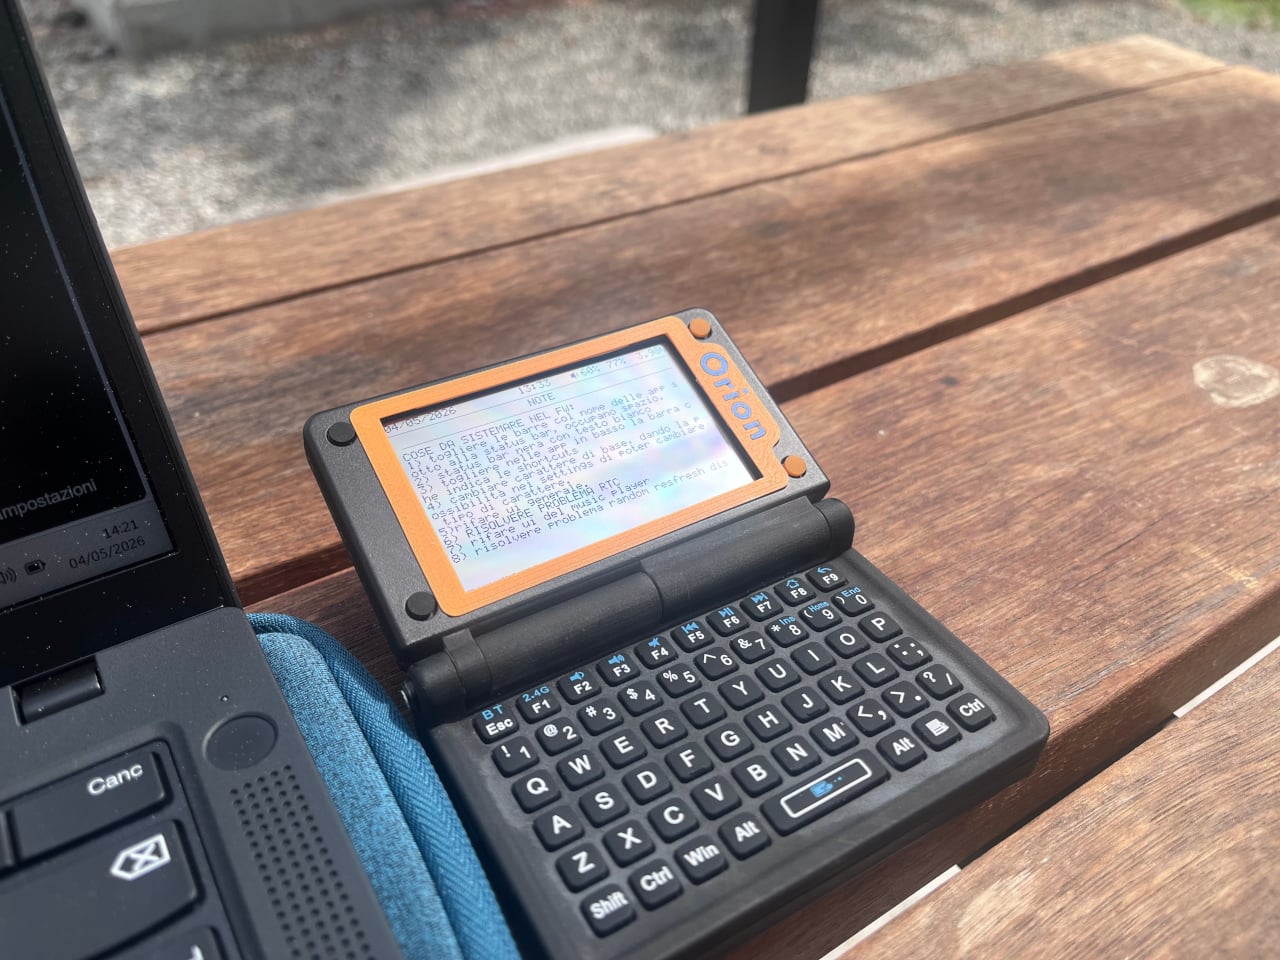
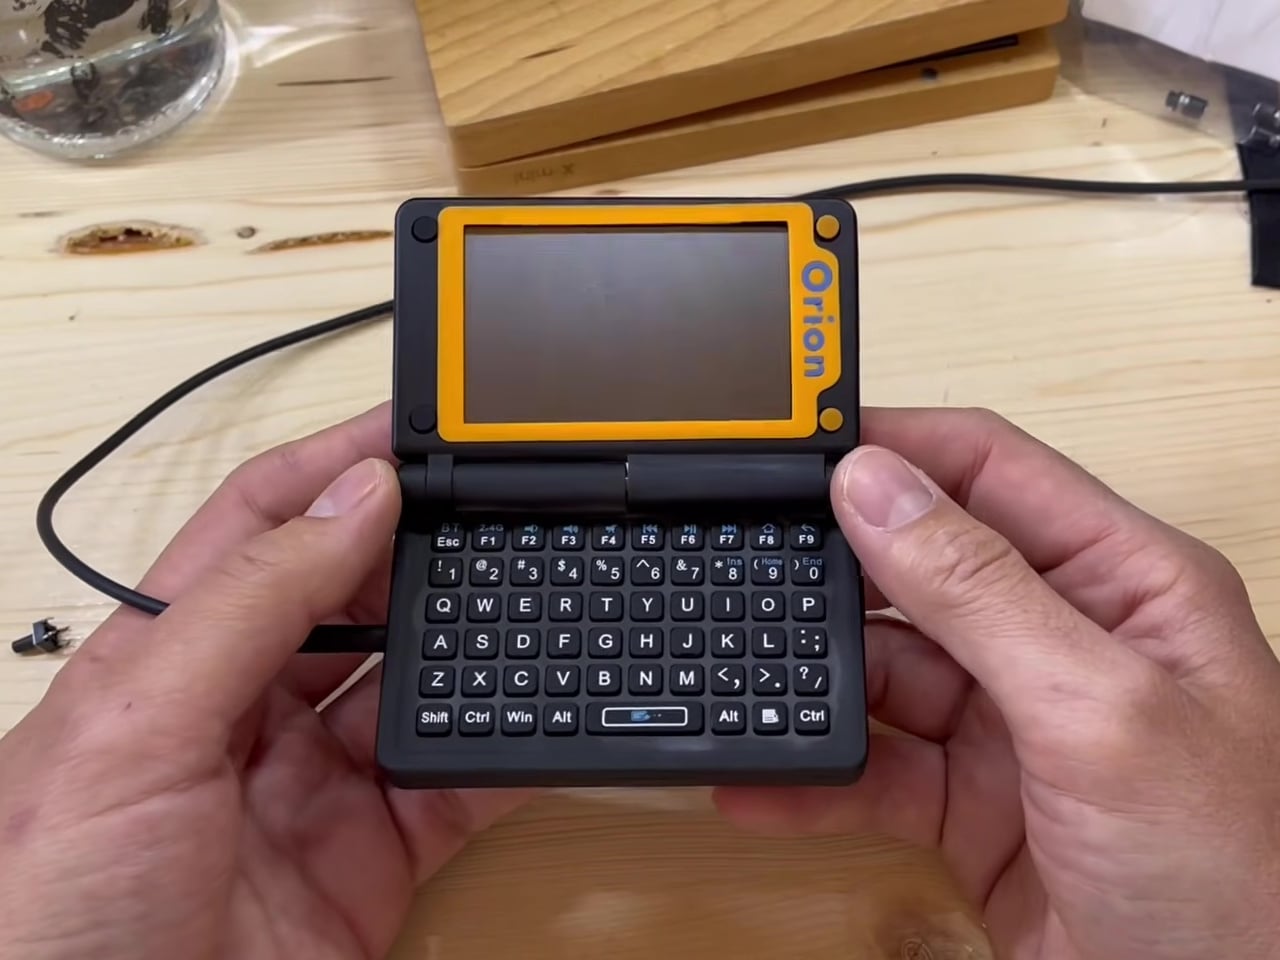
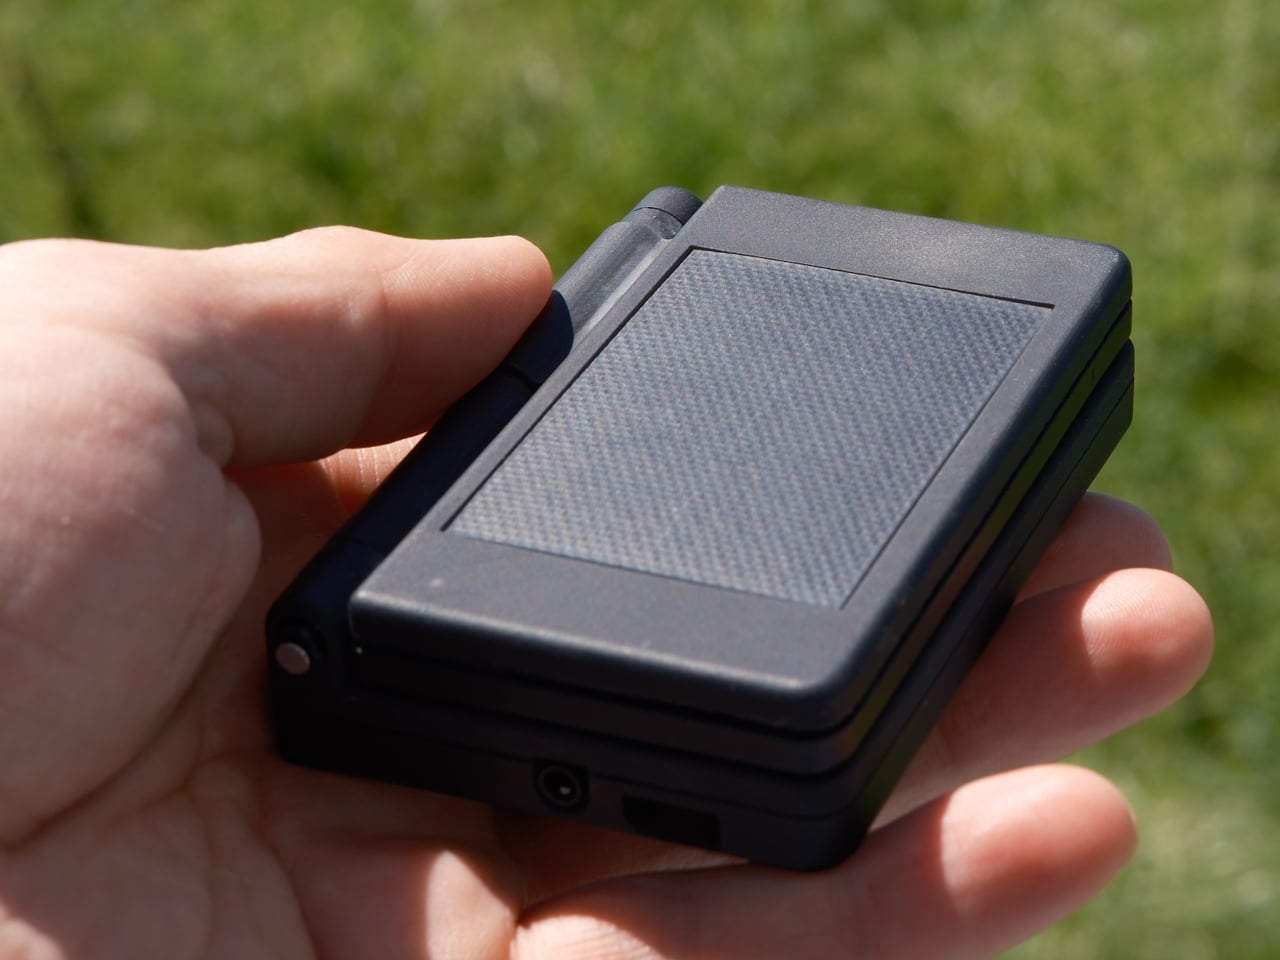
The Orion PDA is one of the more convincing results of that effort. Built by a YouTuber who goes by MVLab, it’s a compact clamshell computer designed specifically for people who’d rather write, listen, or record than scroll. There’s no internet connection out of the box, no cloud, no algorithms, and no push notifications. What it offers is a deliberately focused pocket machine that strips away the noise.

Designer: MVLab
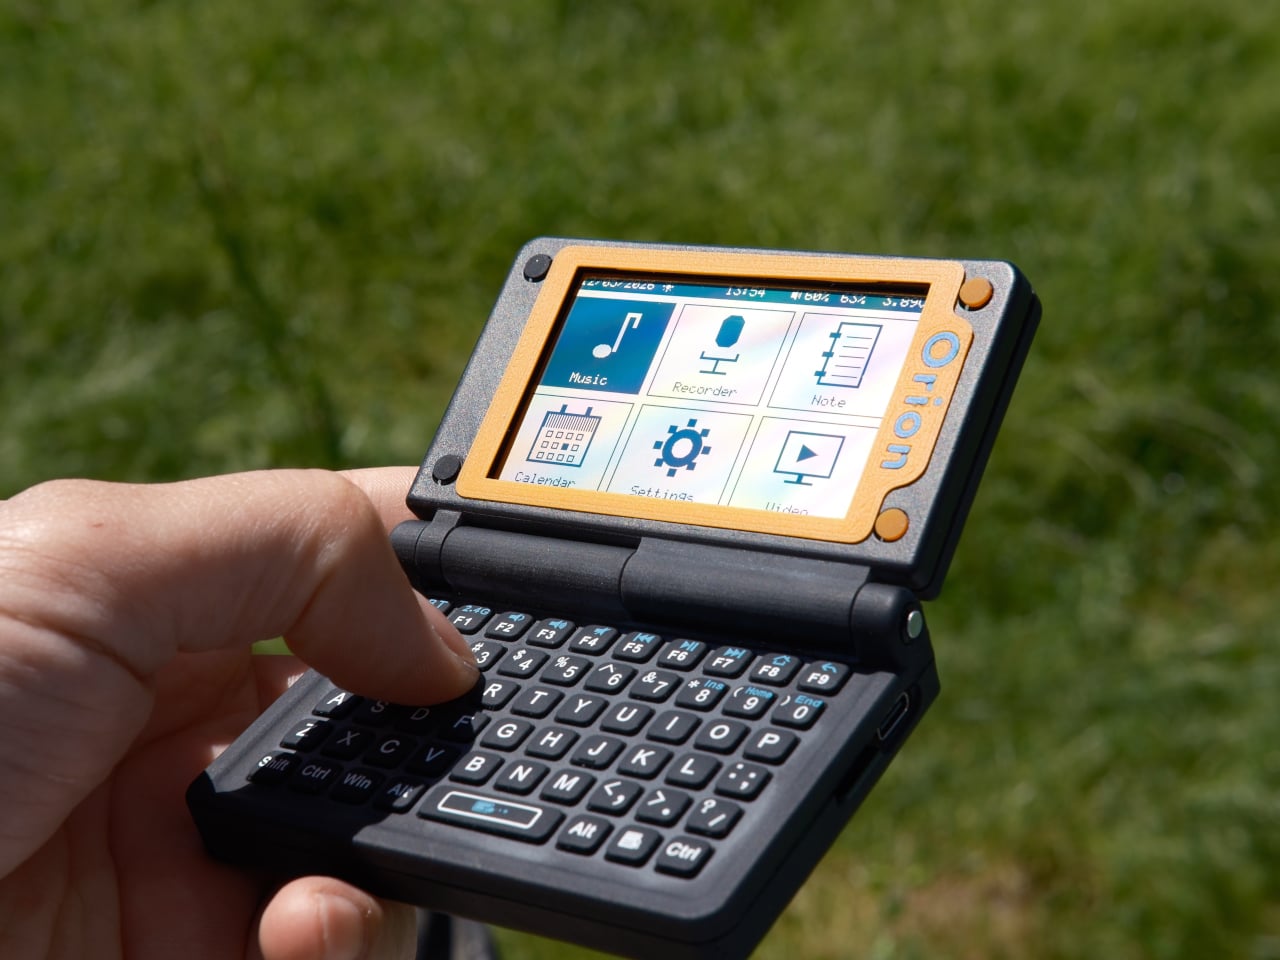
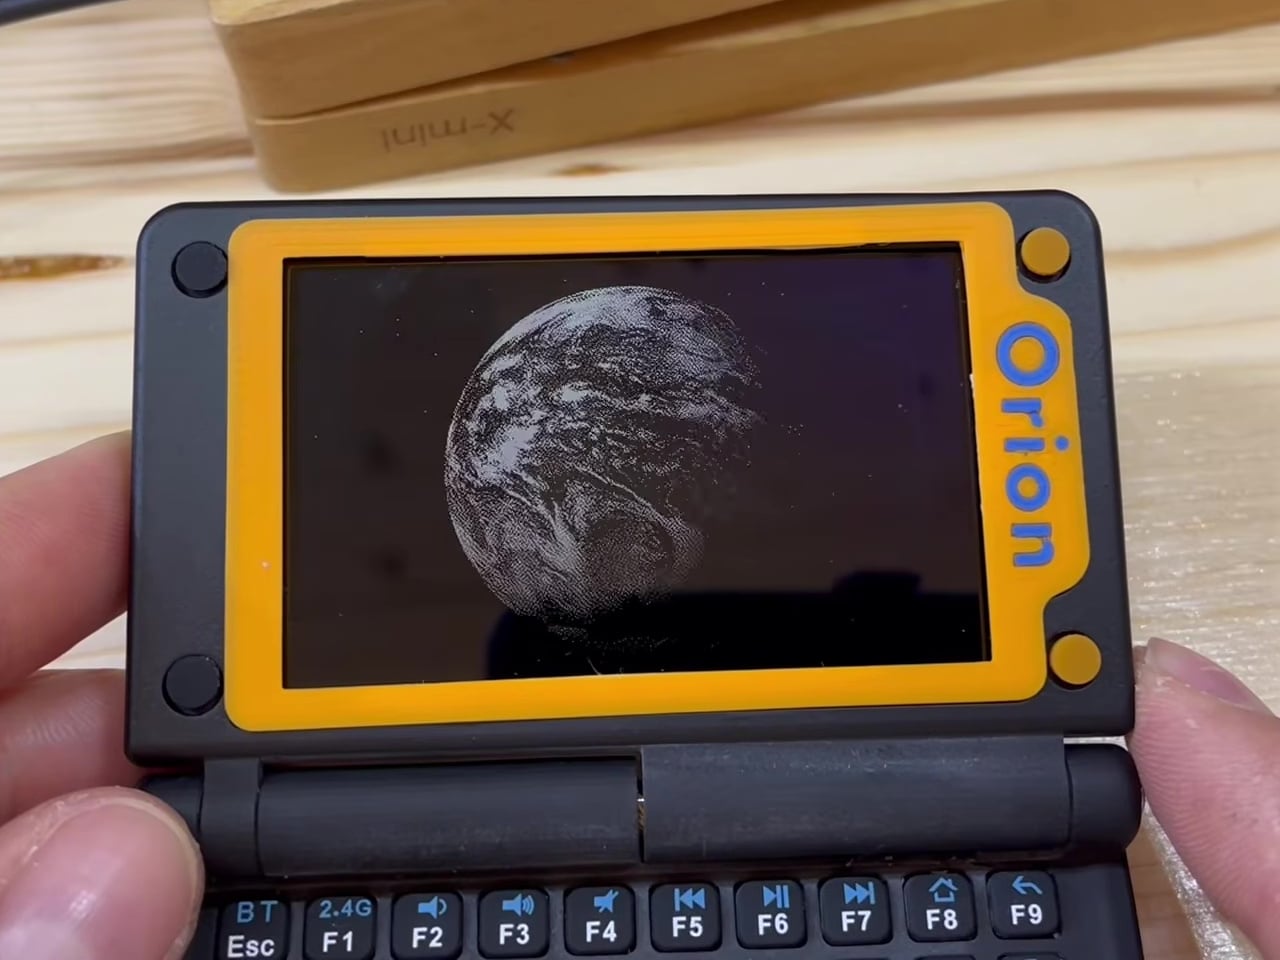
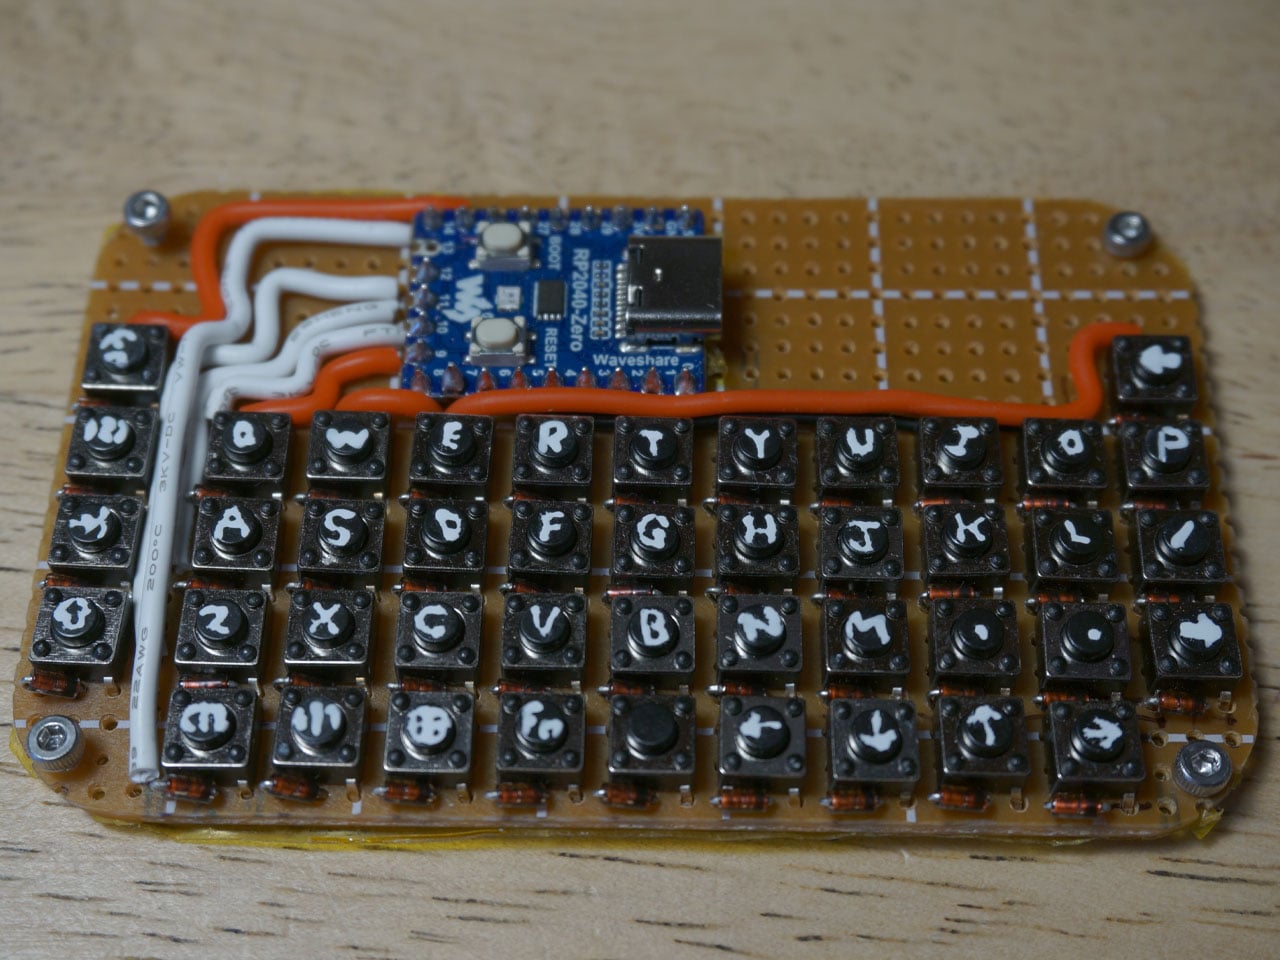
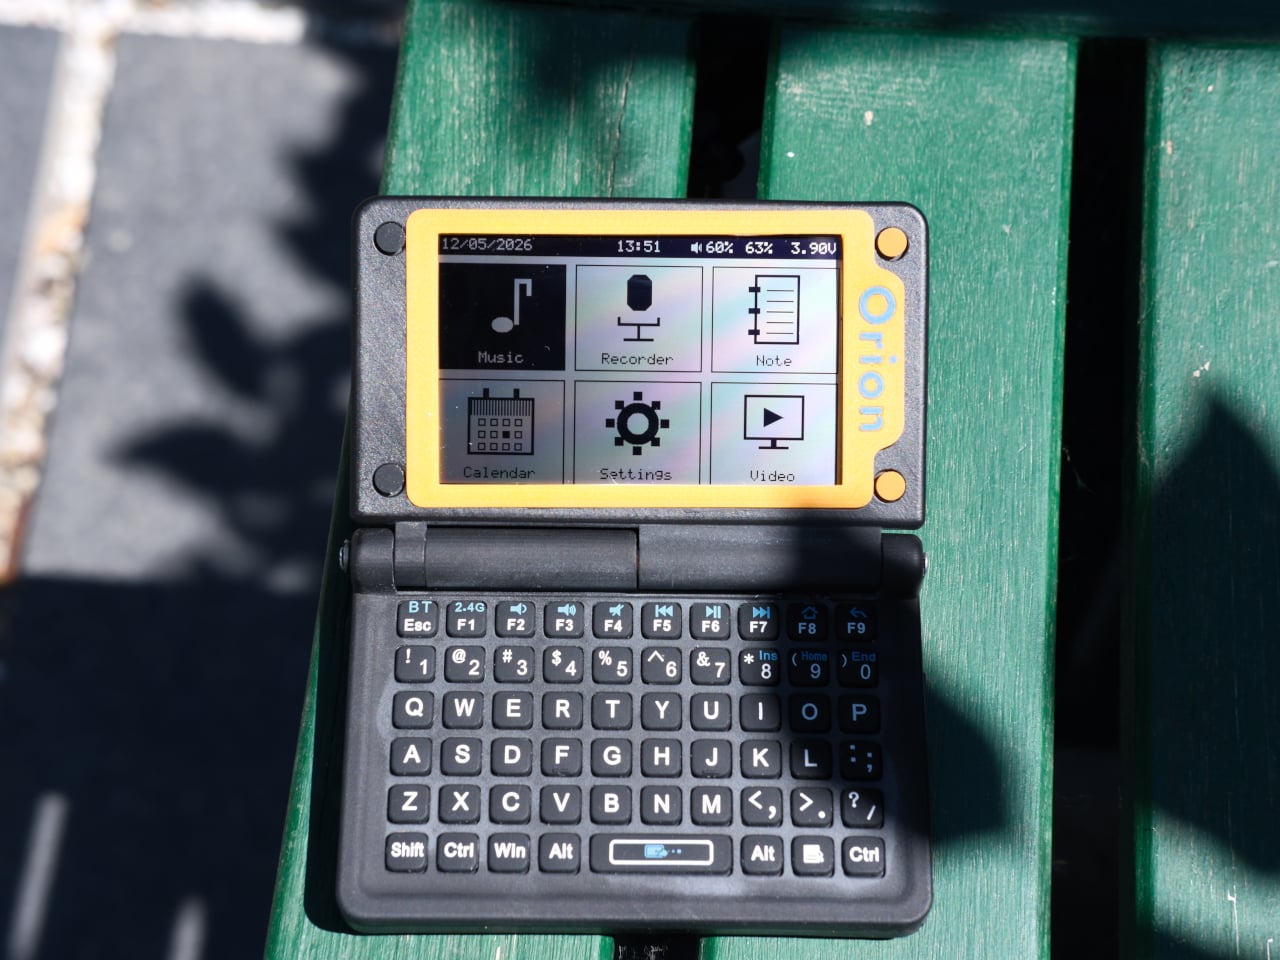
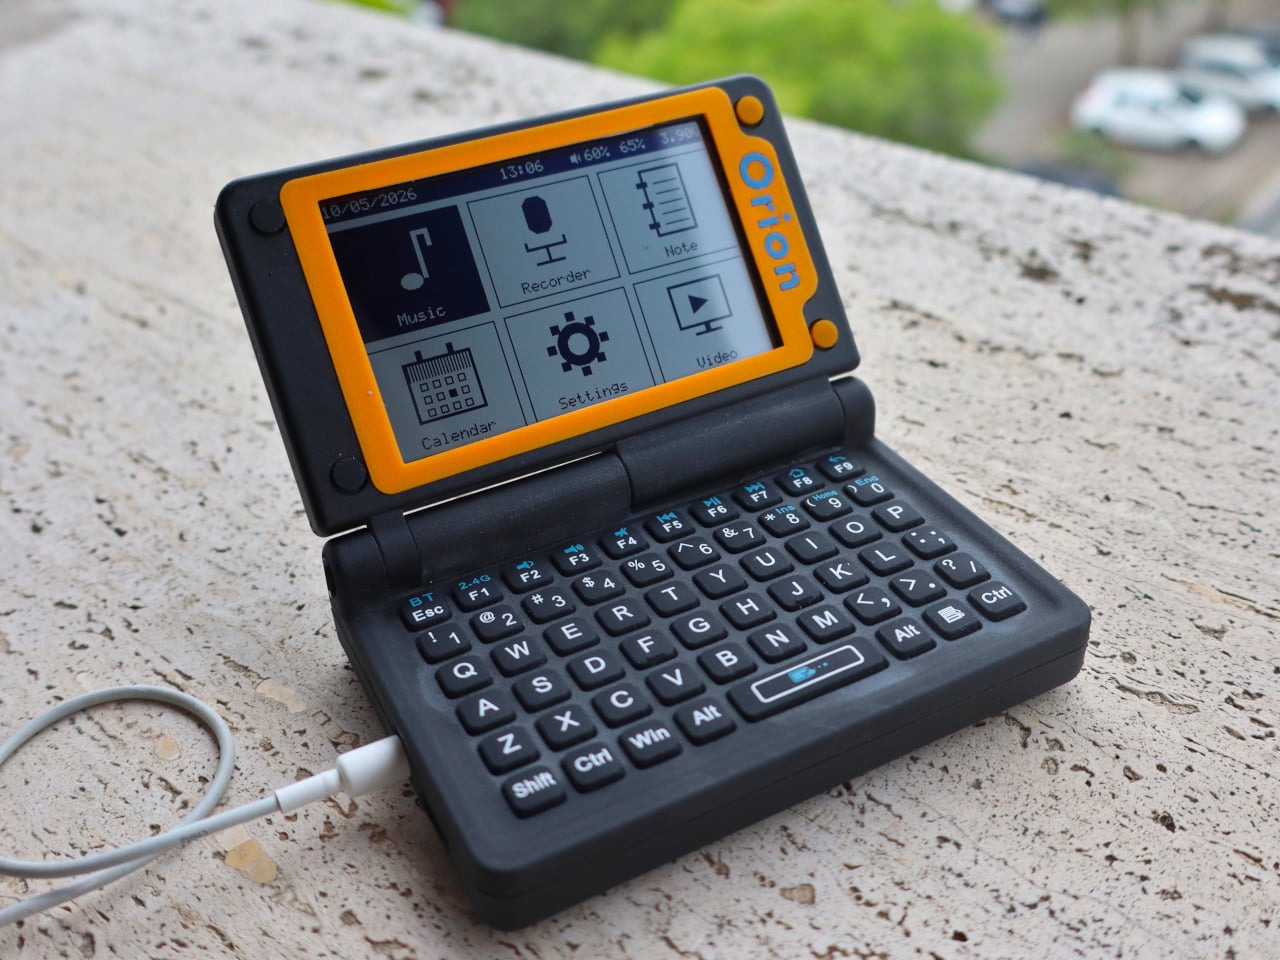
The design takes its cues from the Sharp Zaurus line of pocket computers popular in the early 2000s, and the resemblance is unmistakable. It folds open to reveal a small screen on top, and a full QWERTY keyboard with rubber dome switches below. Function keys run across the top row, letting you access common actions without digging through any menus. It’s compact enough to fit in a jacket pocket.
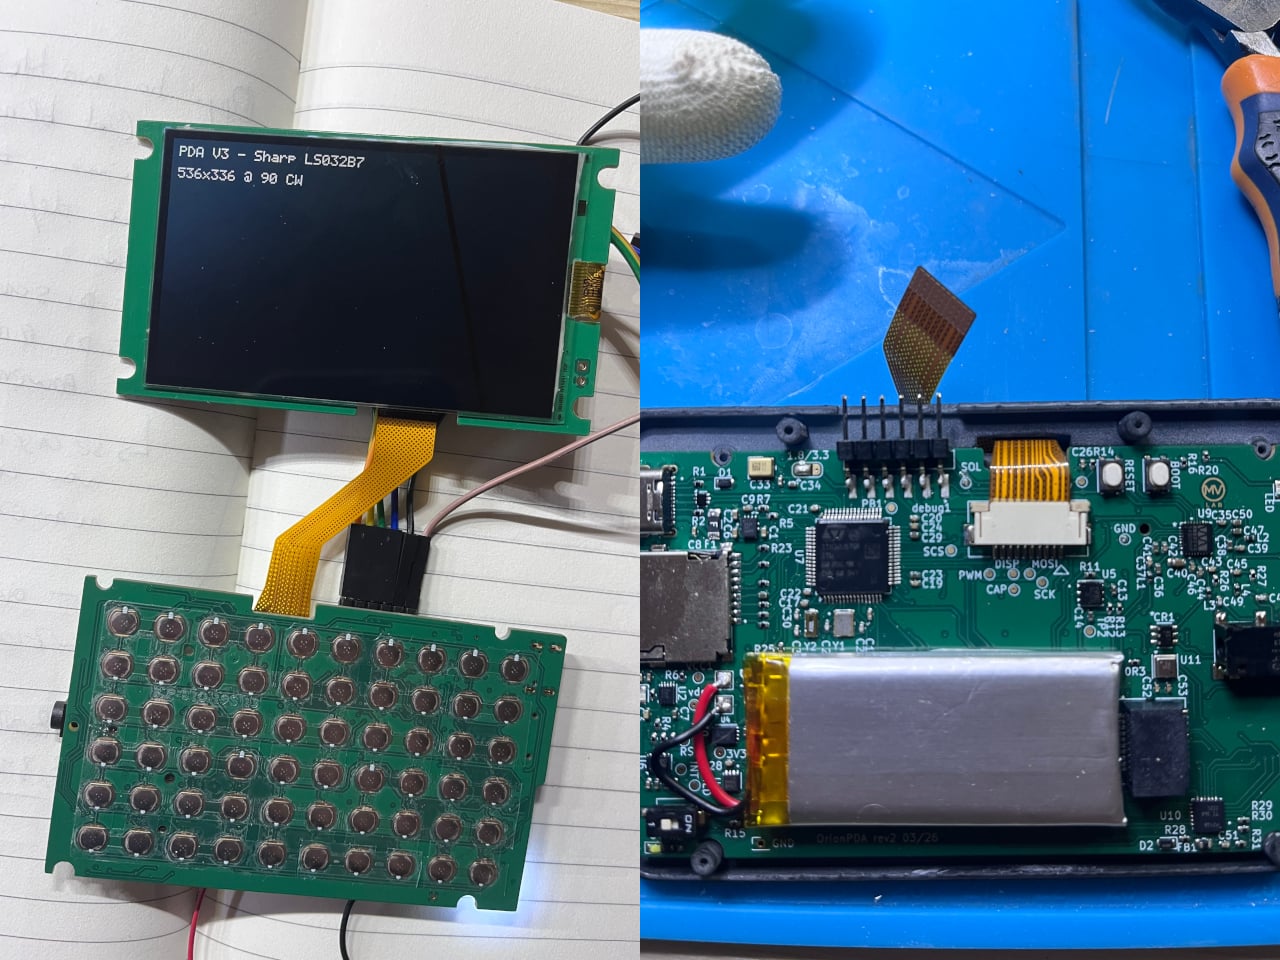
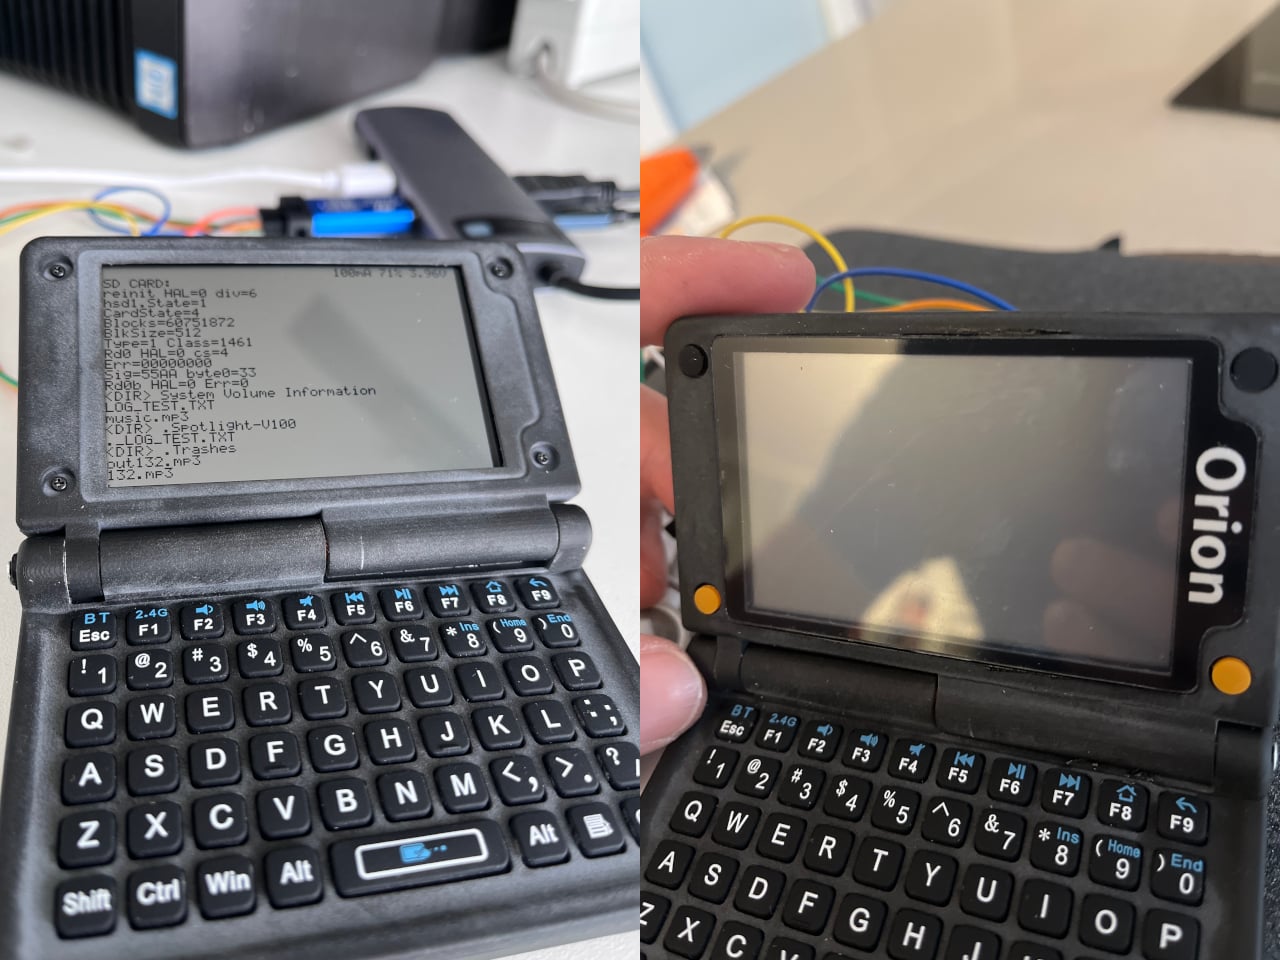
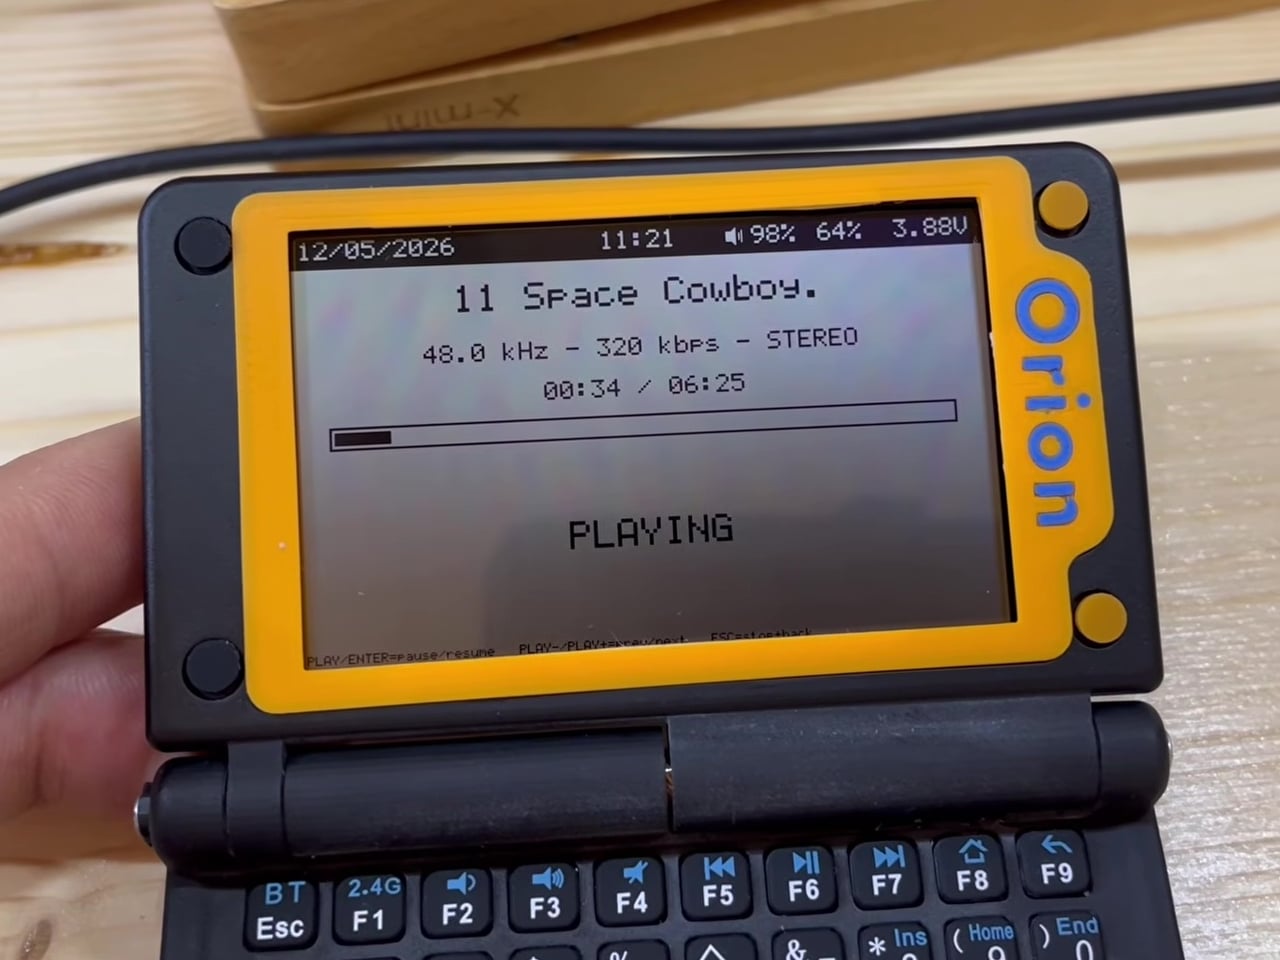
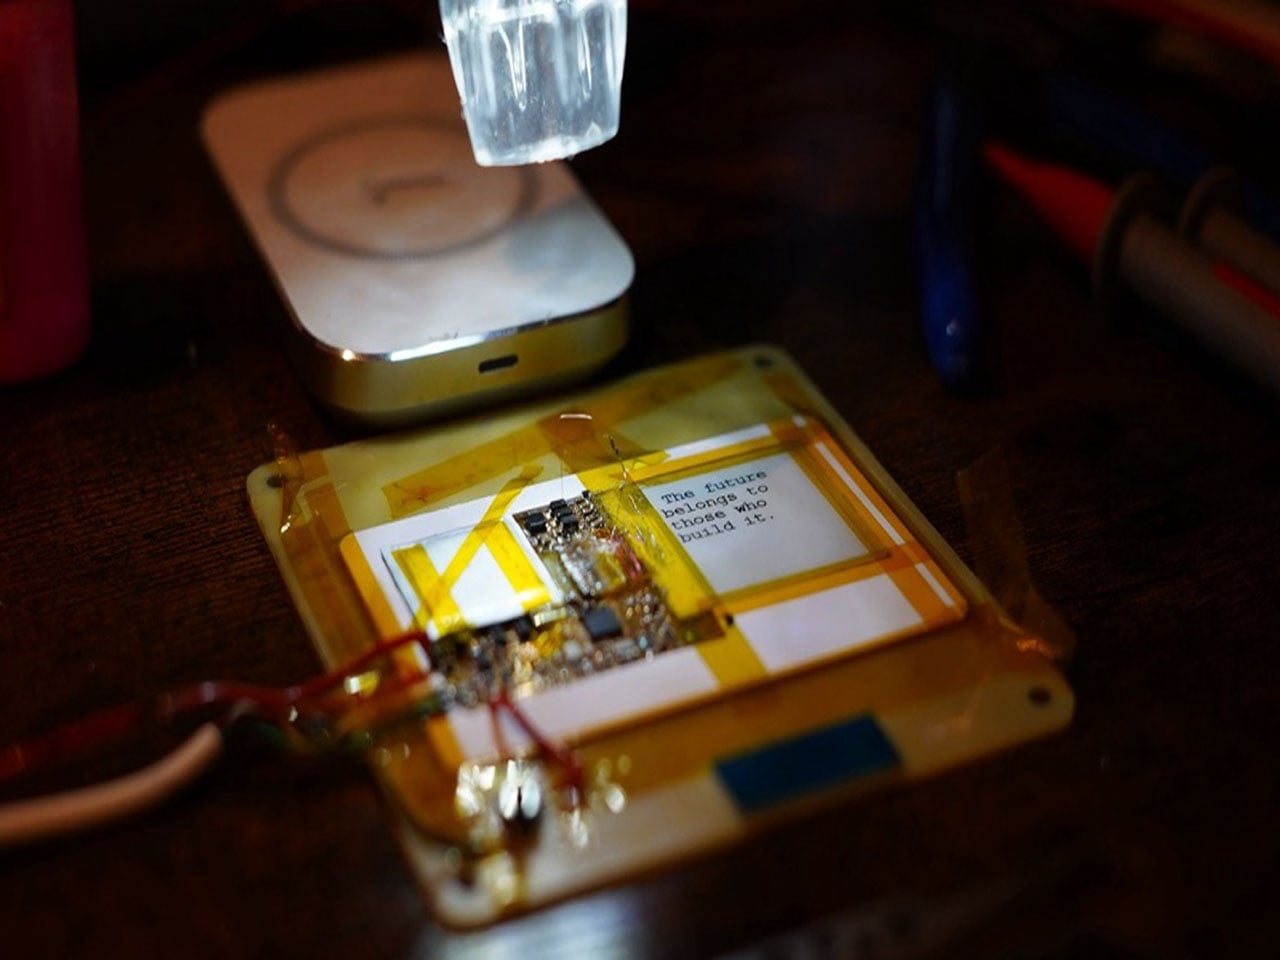
That screen is a 3.16-inch Sharp Memory LCD with a resolution of 536×336 pixels, rendered in 1-bit black and white. It might sound like a regression, but the display operates on the same basic principle as E Ink, drawing almost no power between refreshes and staying perfectly legible in direct sunlight. Take it out on a park bench or a café terrace, and it won’t let you down.
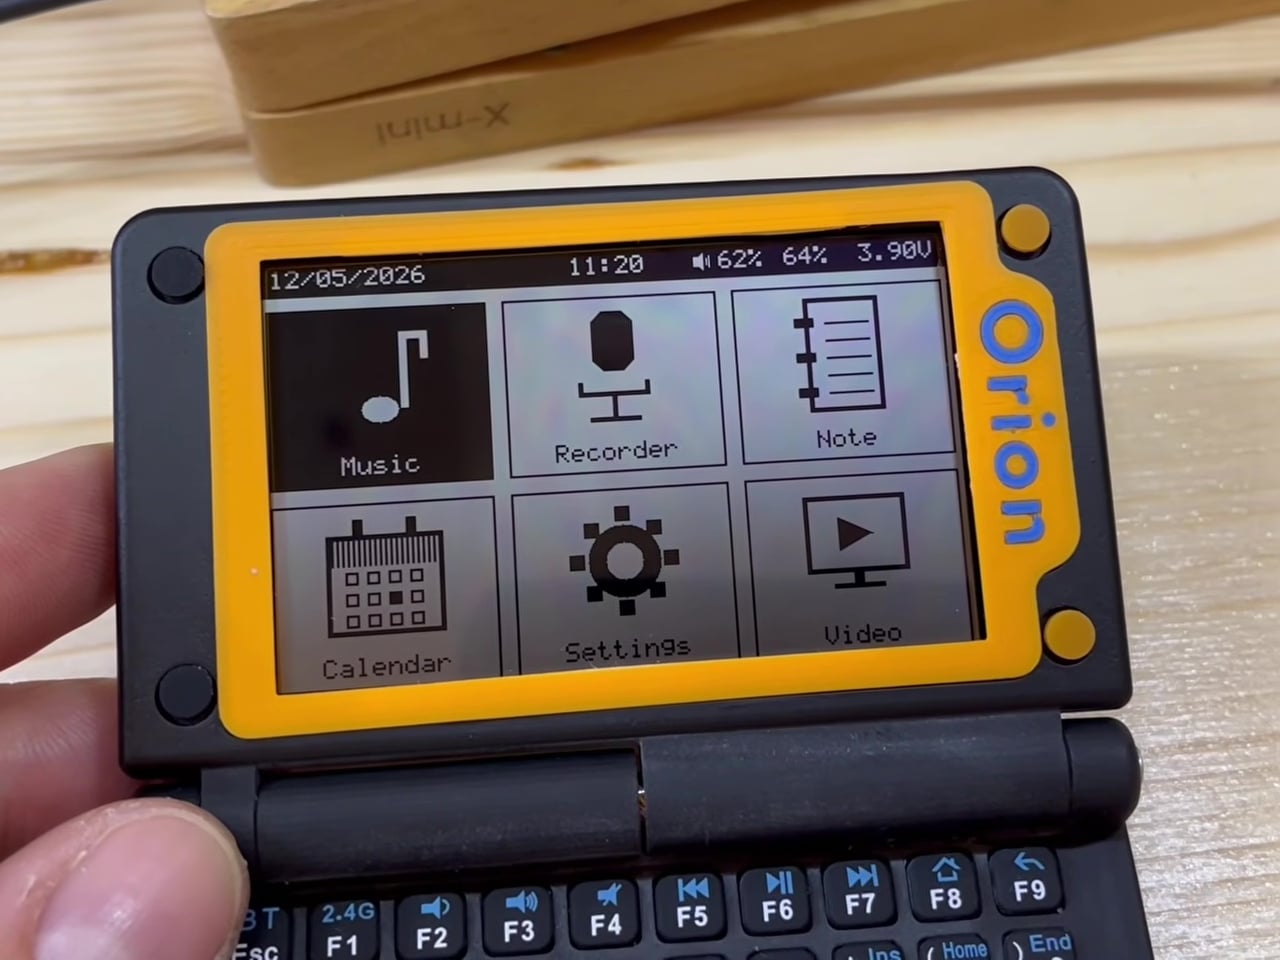
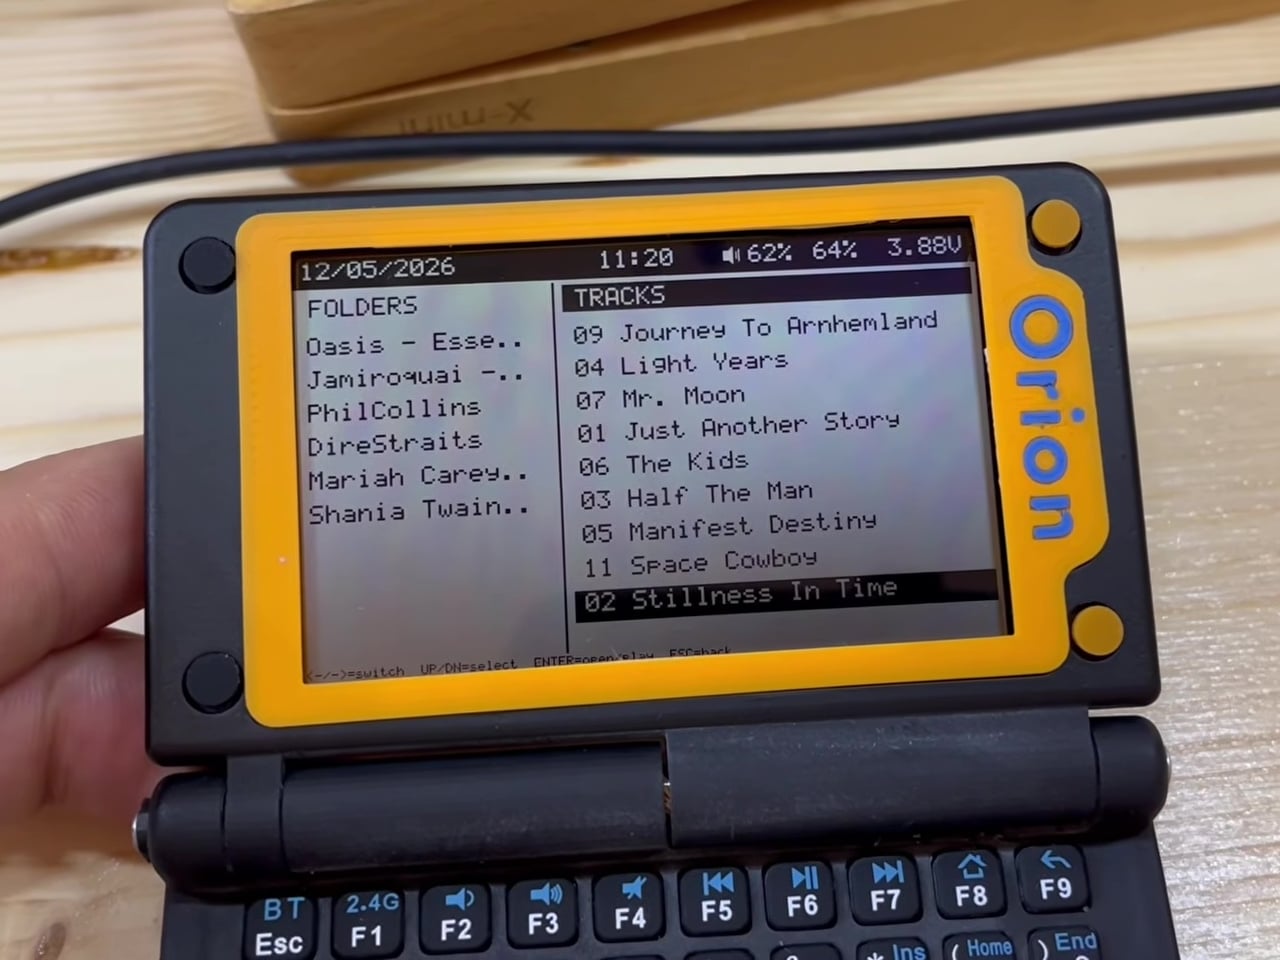
The custom operating system is built around doing a few things exceptionally well. You can pull up albums stored on an SD card, play them through an external speaker or headphones, and even record voice notes that go straight to removable storage. A lightweight calendar app handles basic scheduling. There’s also a text-scaling setting and a USB mass-storage mode for moving files to and from a desktop computer.
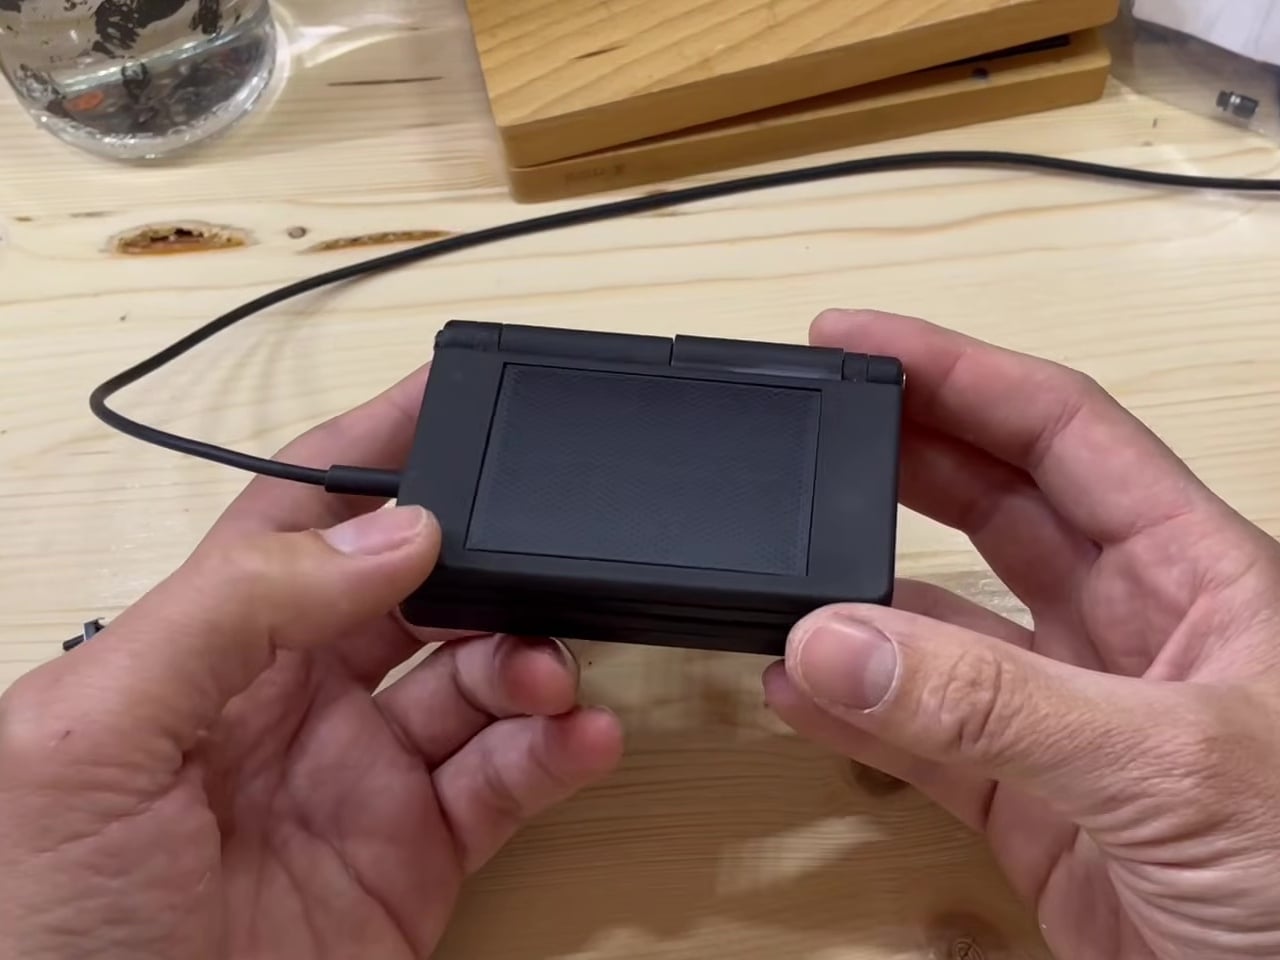
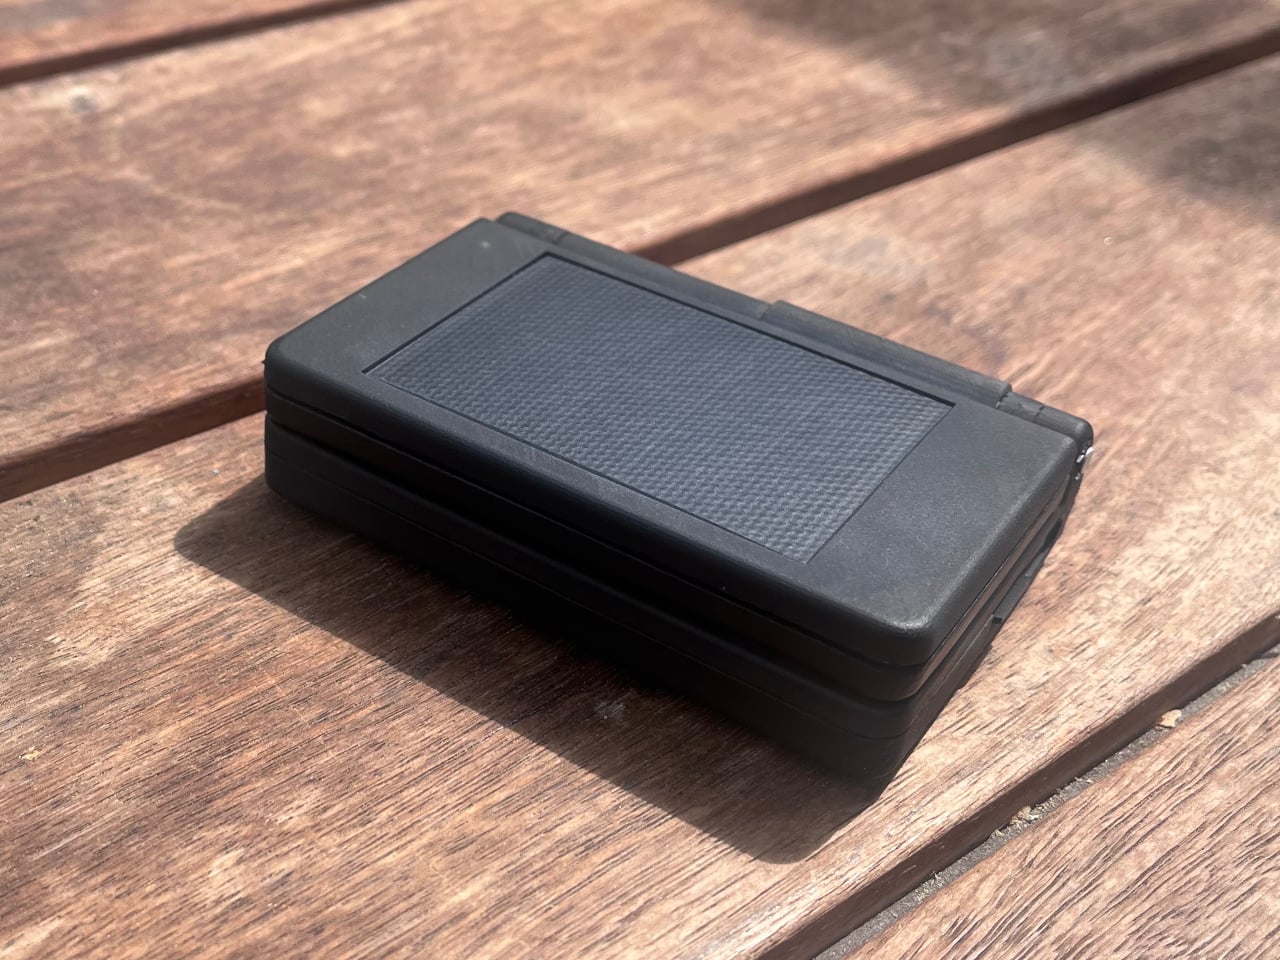
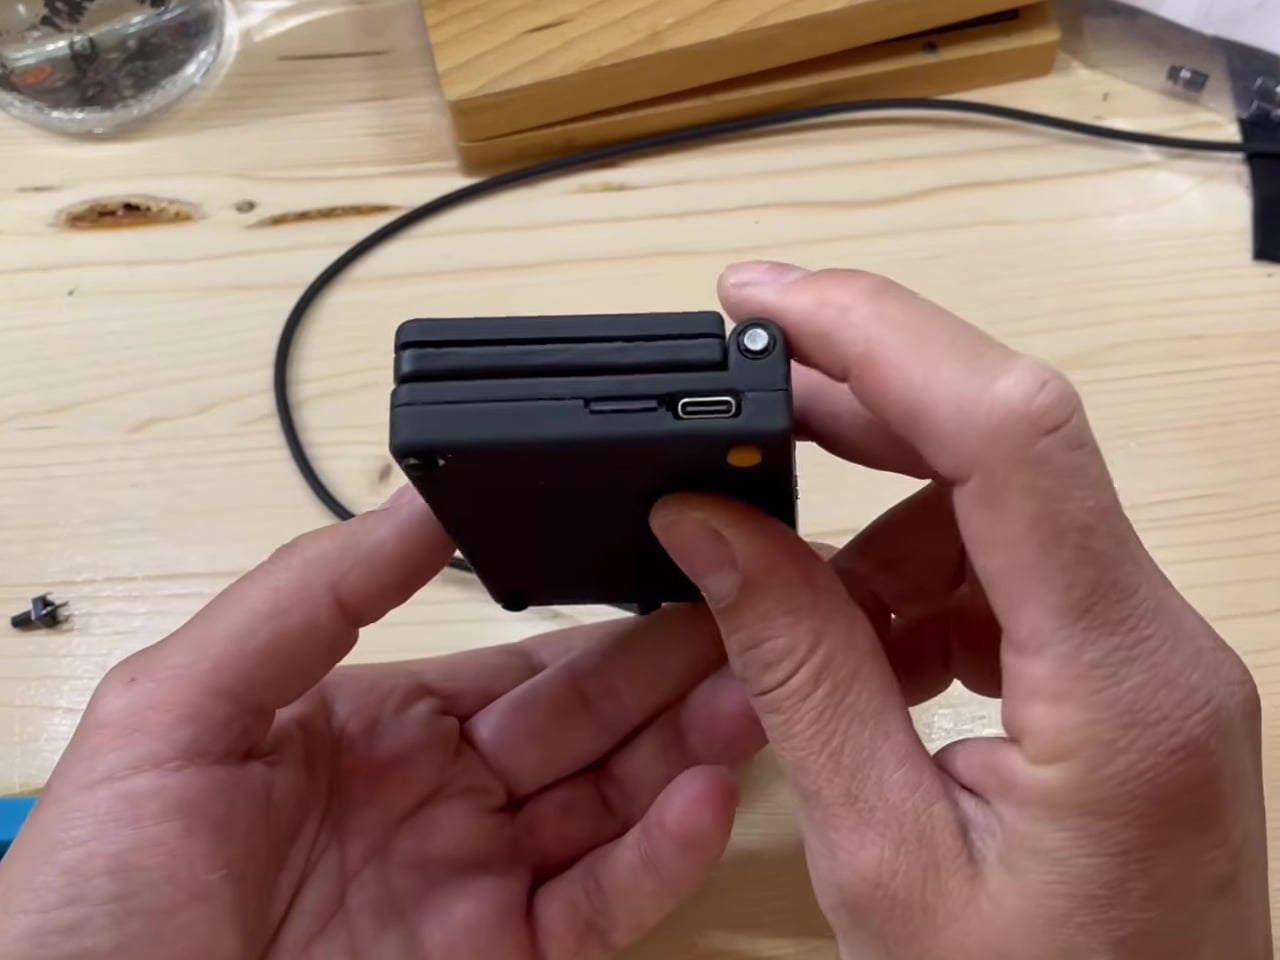
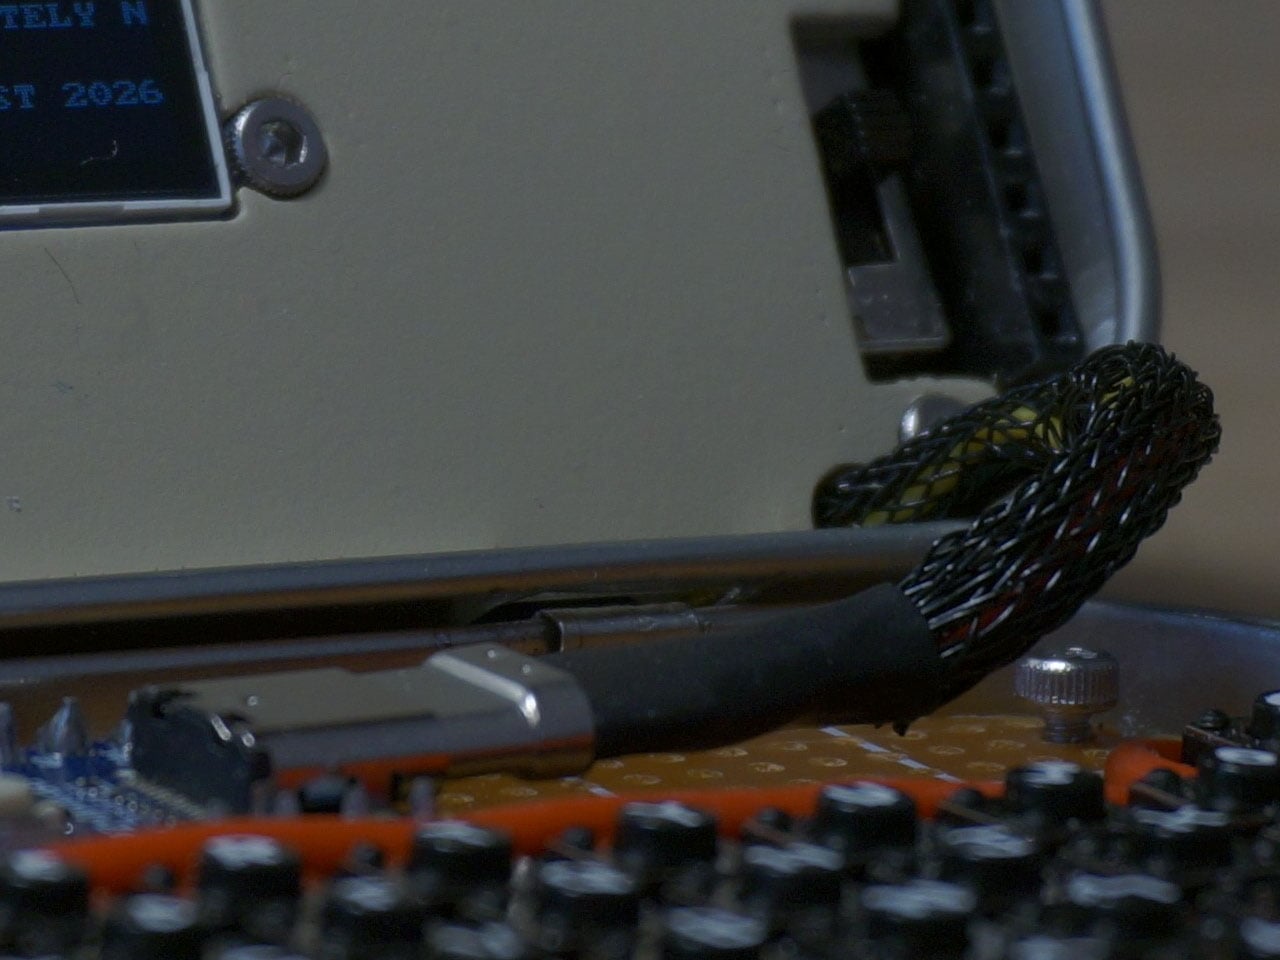
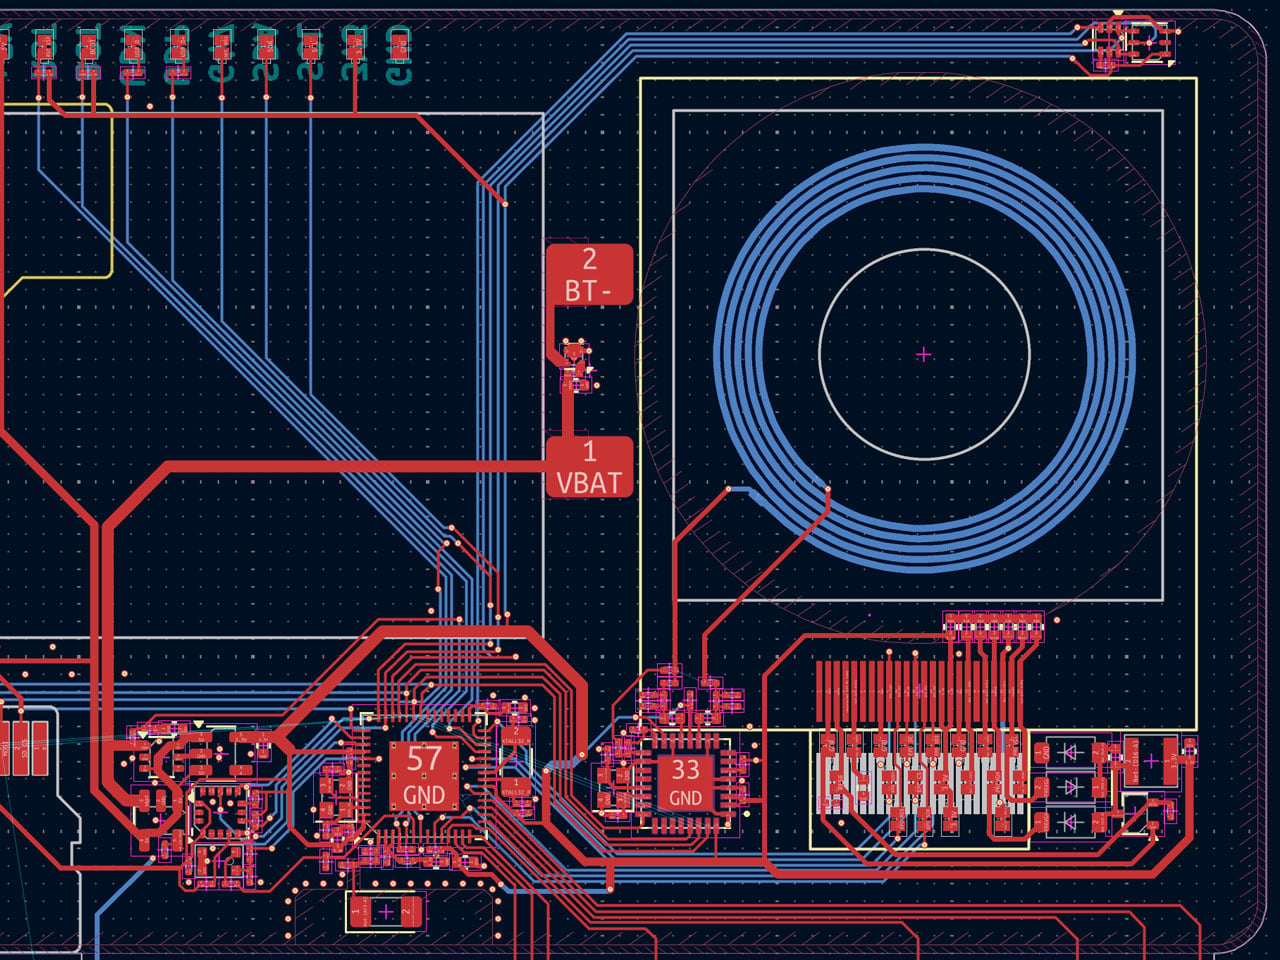
Powering everything is an STM32U575 microcontroller clocked at up to 160 MHz, an ultra-low-power chip that keeps the device running for long stretches between charges. The lid houses an integrated solar panel, which can supplement the battery enough to keep things topped up with occasional exposure to sunlight. A USB-C port also handles charging, firmware updates, and data transfers. An expansion port leaves room for future community-developed modules.
The Orion PDA also packs in a dedicated digital-to-analog converter for audio playback, putting it above the lo-fi output you’d expect from a device this small. A MEMS microphone handles voice recording with reasonable fidelity. It isn’t trying to replace your dedicated music player or studio recorder, but for capturing quick ideas or dictating notes on a long hike, it does what it needs to. For anyone tired of carrying a device that’s simultaneously a computer, a TV, a game console, and a social distraction, this one might be worth the wait.
The post The Orion PDA Runs on Sunlight and Ignores the Internet by Design first appeared on Yanko Design.
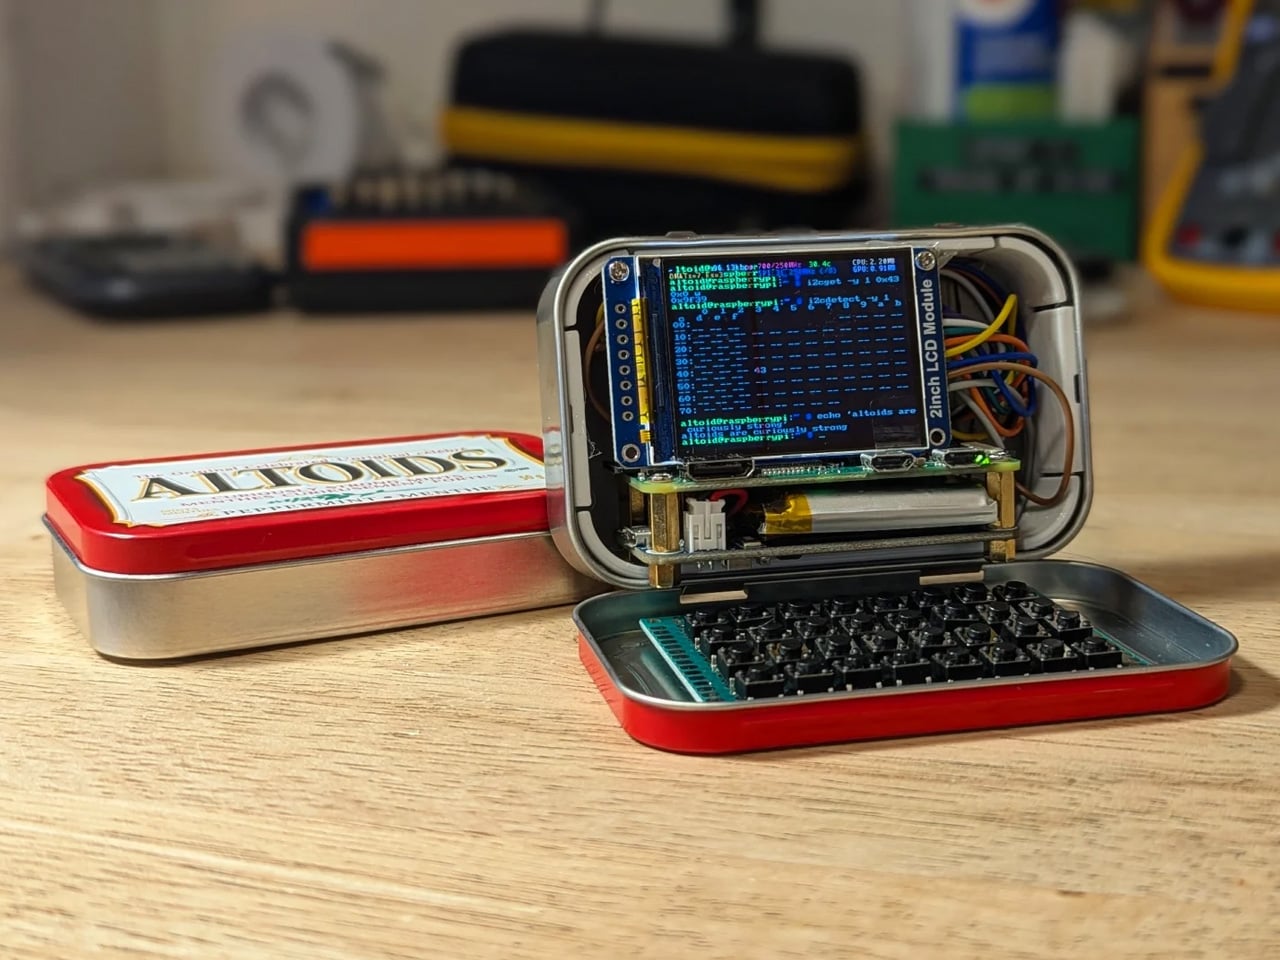
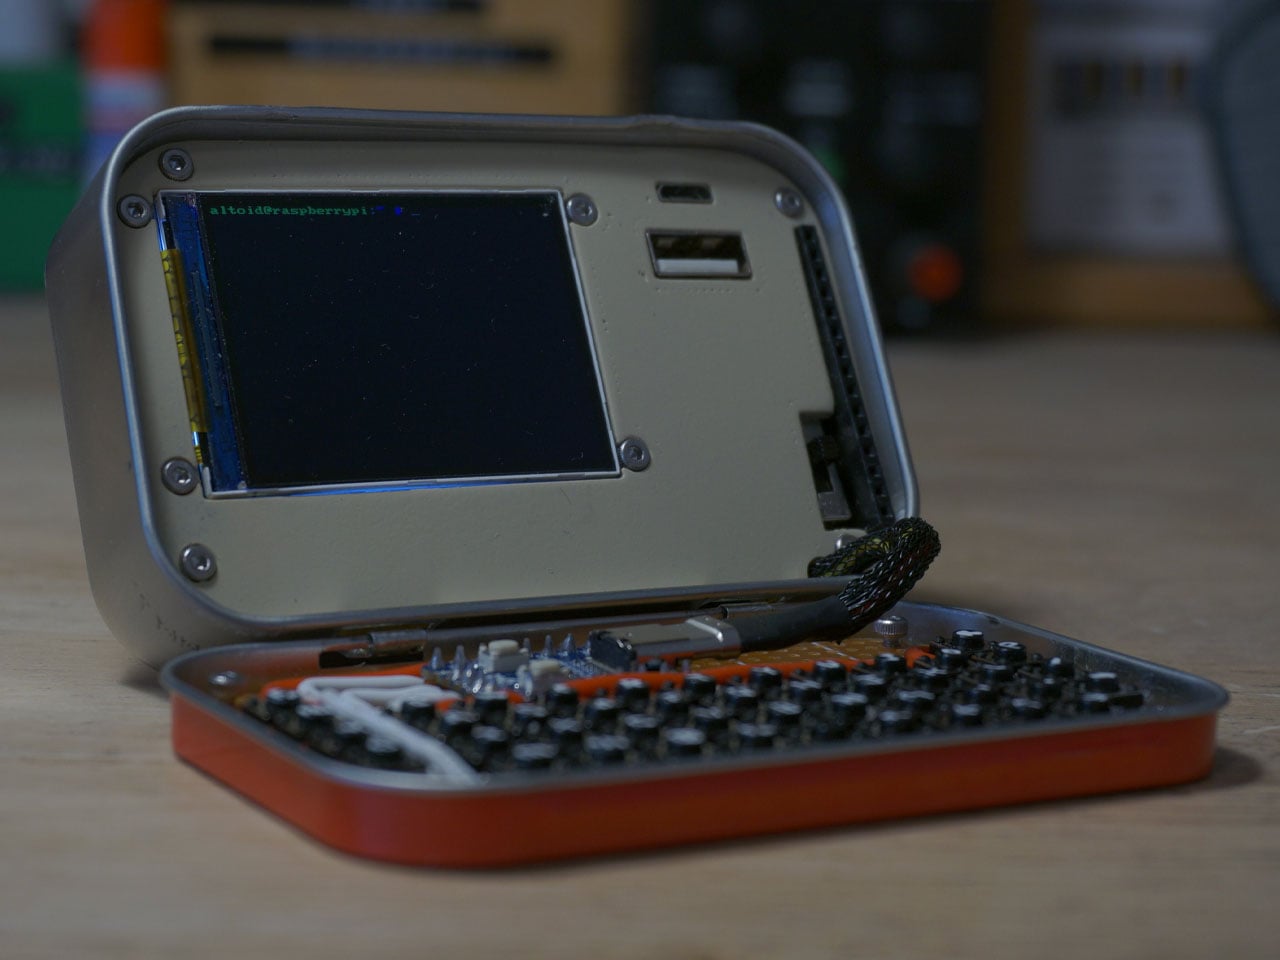
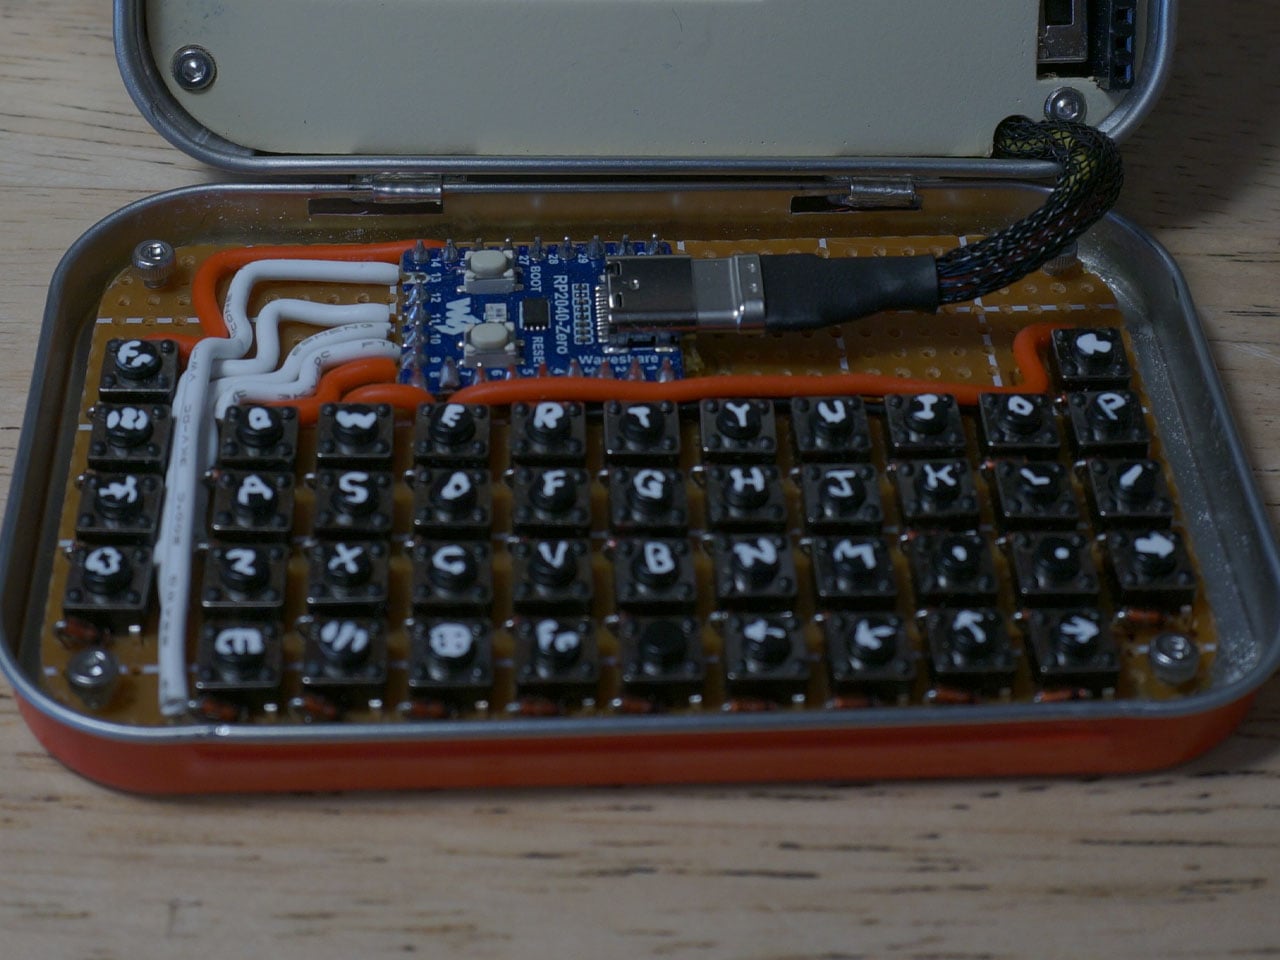
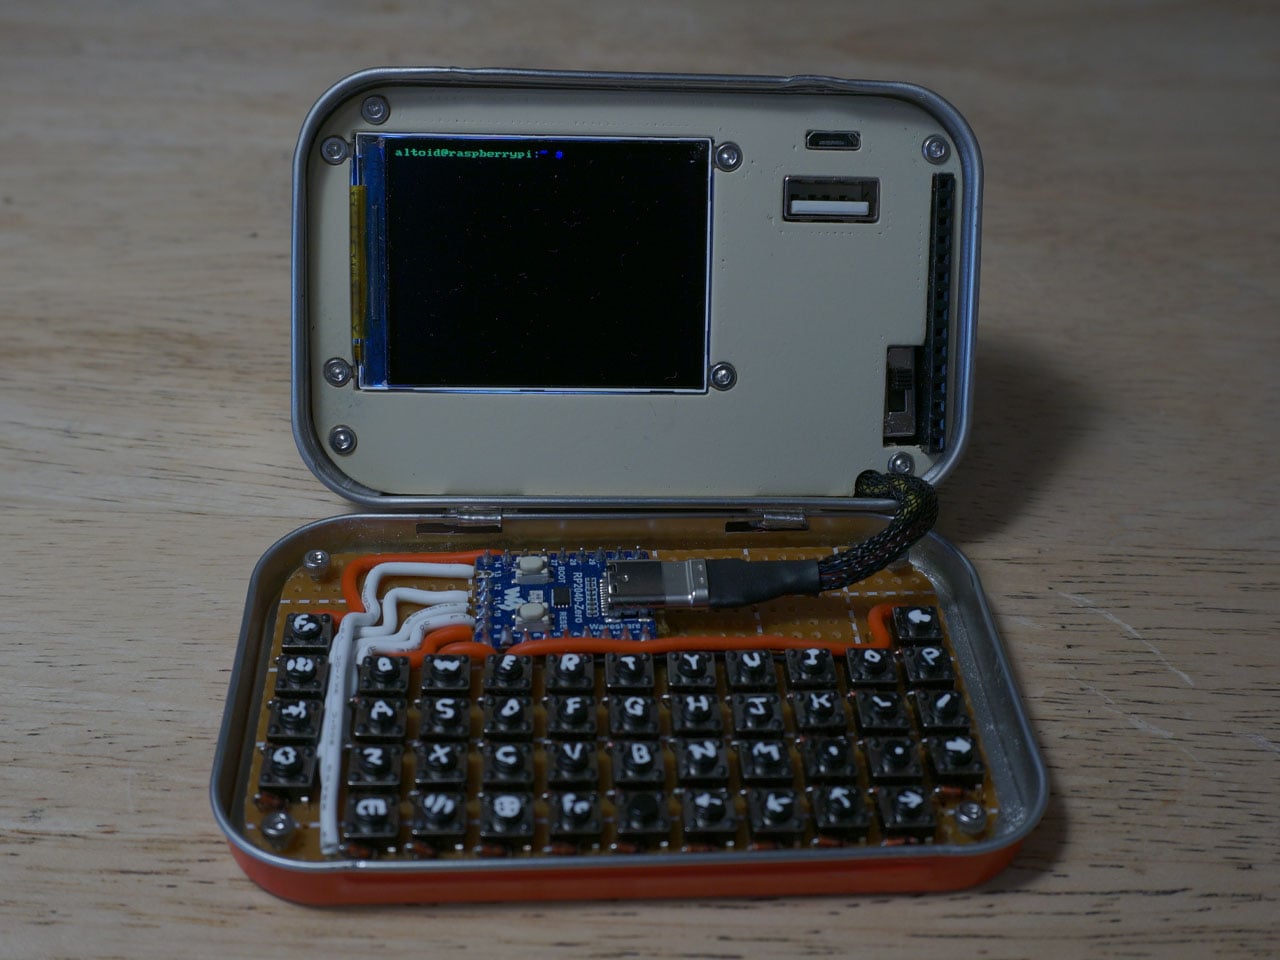
This pocket-sized cyberdesk built inside Altoids Tin is a portable workstation for geeks

What do you do with your Altoids tins after devouring the mints? Maybe for keeping your coins, hand it over to your mom for storing the sewing accessories, for keeping handy a first aid, or perhaps keep the watercolor paint for your little niece. DIYer “Exercising Ingenuity,” however, has a very unique use for the aluminium container.

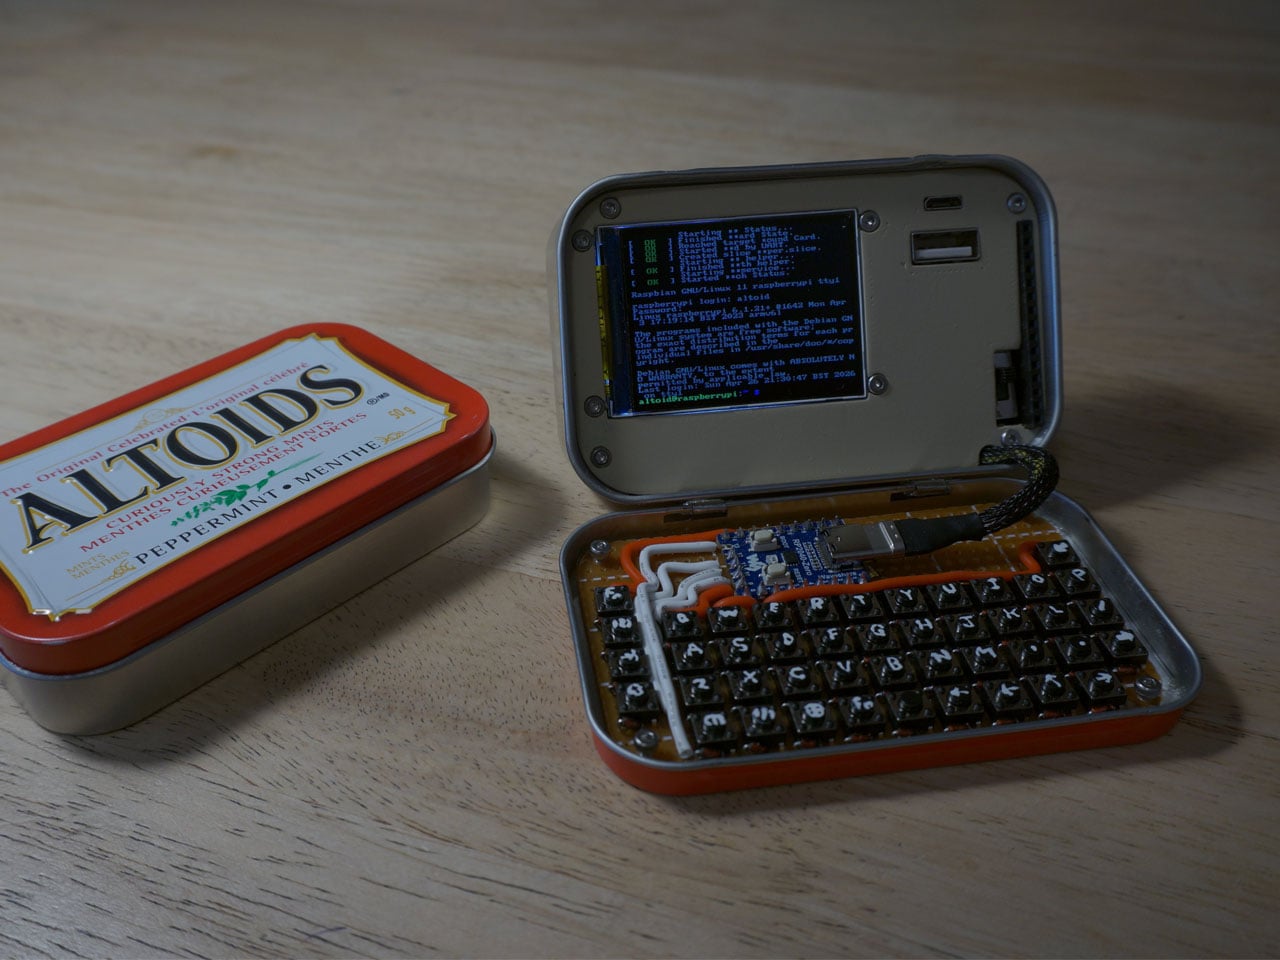
The inventive YouTuber wanted to build a fully functional Cyberdesk inside of the Altoids tin. Sounds bizarre? Surely it is, given the size of the thing. In his video, he asked himself, “That looks like a tiny computer?” It was clear from the outset that the assembly would require the utmost level of detail and sourcing all the hardware inside the tiny housing. While it might not be the most powerful machine you can own, it surely is ultra-portable and quite nice nonetheless.

Designer: Exercising Ingenuity

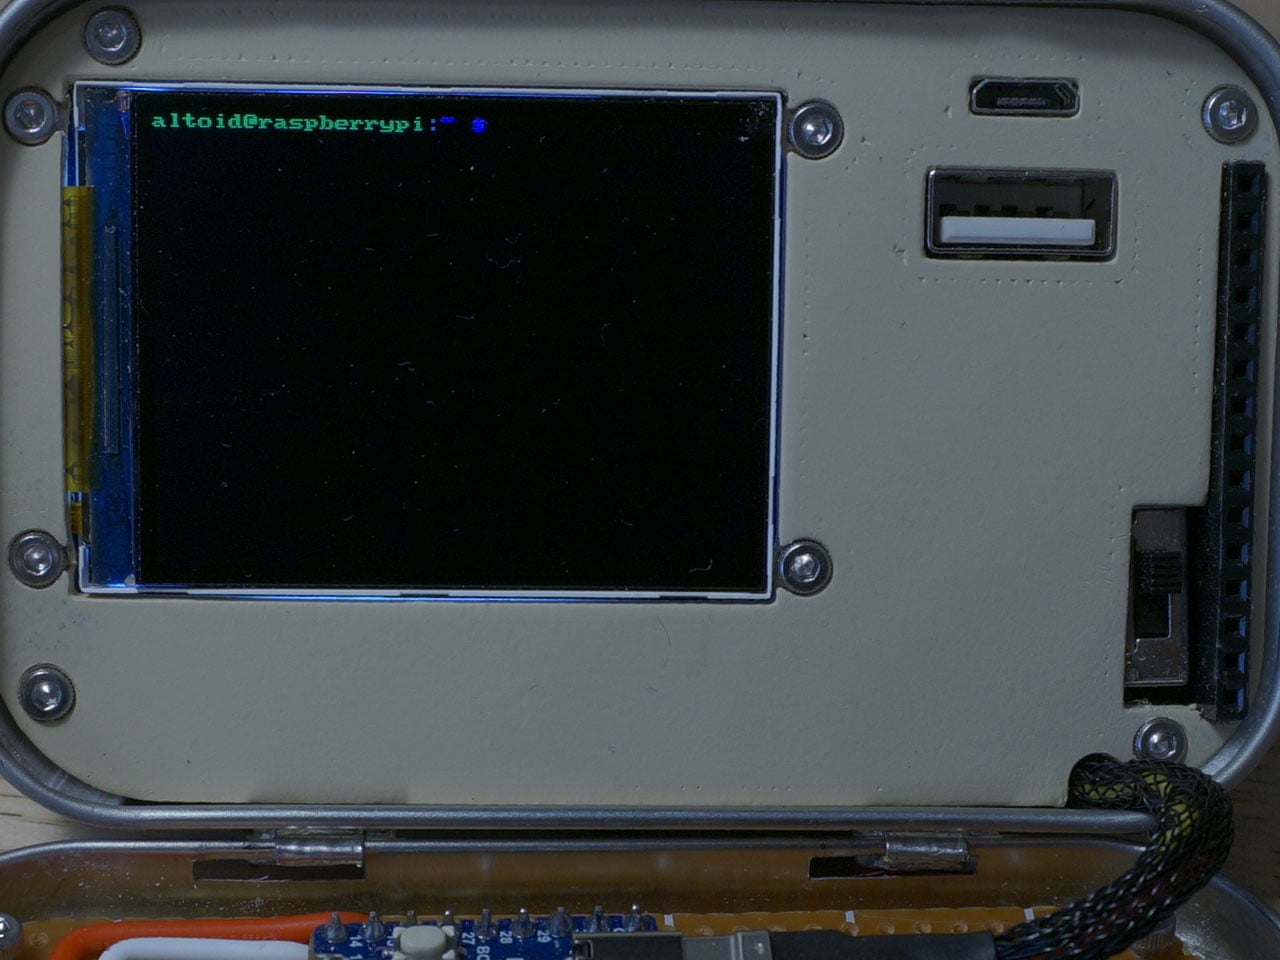
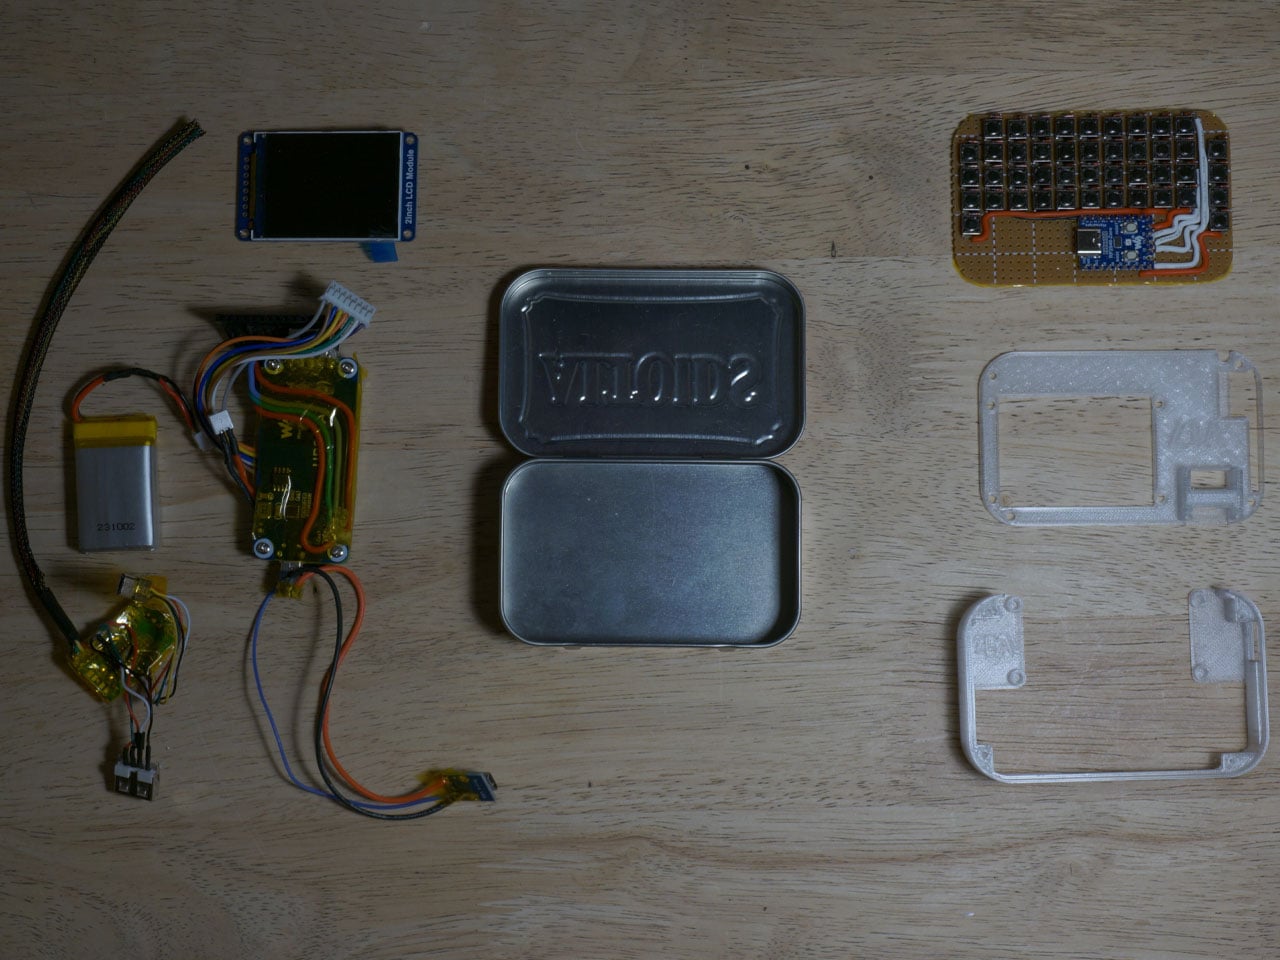
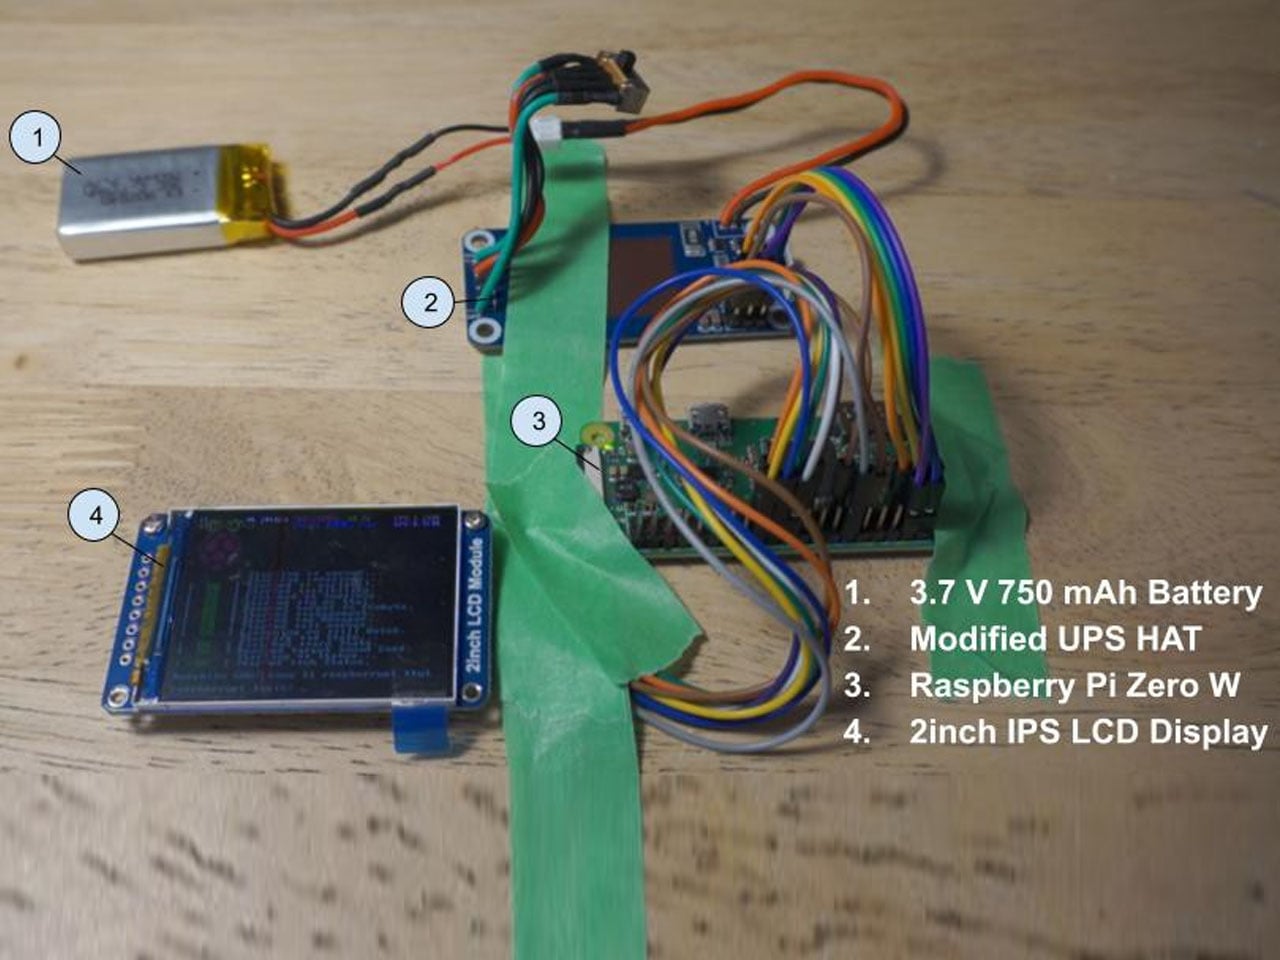
Normally, Cyberdesks are built inside ammo cans, rugged Pelican cases, or anything that has a boxy form factor. The machines piqued in popularity during the 1980s after the science fiction novel Neuromancer. Altoid tins have all these attributes, just the smaller size makes them a very odd proposition in the Cyberdesk world. That said, he set out anyway on putting together the hardware. For the CPU, he used the Raspberry Pi Zero W he had lying around, and a 2-inch LCD from another unfinished project. The power comes from a 750mAh lithium-ion polymer battery.

The real challenge was to find the tiny mechanical keyboard and fit it inside the small space. According to him, this was the most enjoyable part of the project, even though the video suggests it was a difficult one. It required learning how to construct the diode matrix for configuring the input, along with the assembling and soldering methodology of each of the keys. The final step here involved painting the keys with a white ink pen. Once this bit was taken care of, the DIY headed into the moderate level difficulty (at least for us). The next step was to create a 3D-printed frame to keep all the components inside the tin in place.

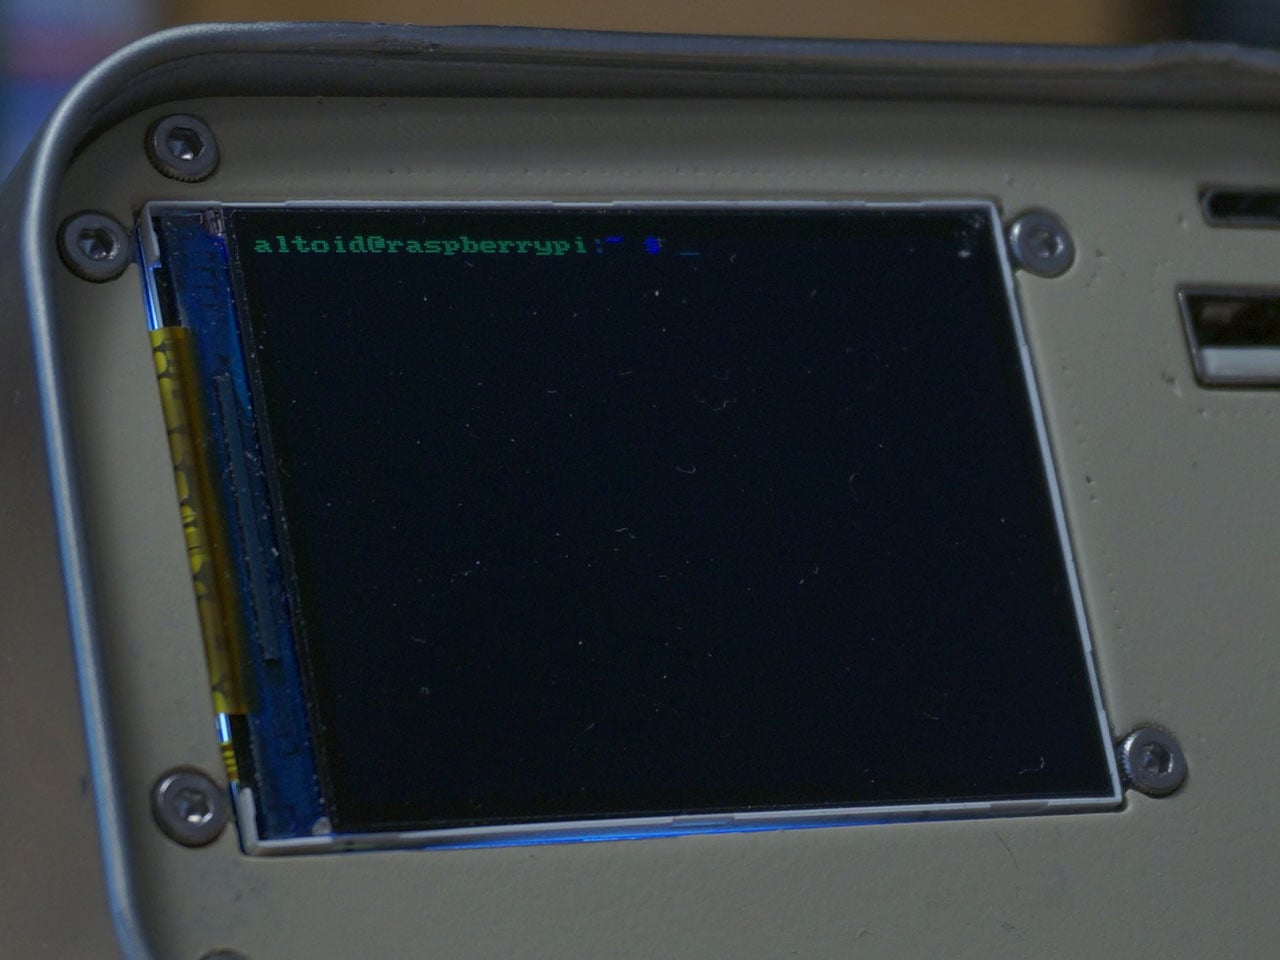
Wiring had to be kept to a minimum, and soldering of other components had to be done efficiently, as space was a premium. As a last step to make more room for components like the UPS HAT board and the display, the original hinge was extended with another Altoids tin hinge for a makeshift, slightly bigger replacement. Once all the hardware components were secured properly inside the tin, it was just a matter of running the system using the software. To make the thing look and feel like a vintage desktop computer, the DIYer painted the front panel beige.

The post This pocket-sized cyberdesk built inside Altoids Tin is a portable workstation for geeks first appeared on Yanko Design.
Fully working computer the size of a credit card is just 1mm thick

In the past few decades, we’ve moved from computers the size of a room to ones that sit pretty on your desk. Apple Mac mini takes all the praise for being a powerful machine without the bulk. The low-cost single-board Raspberry Pi can be categorized as a mini PC, but all the DIYers pretty well know it can do basic tasks for DIY projects.

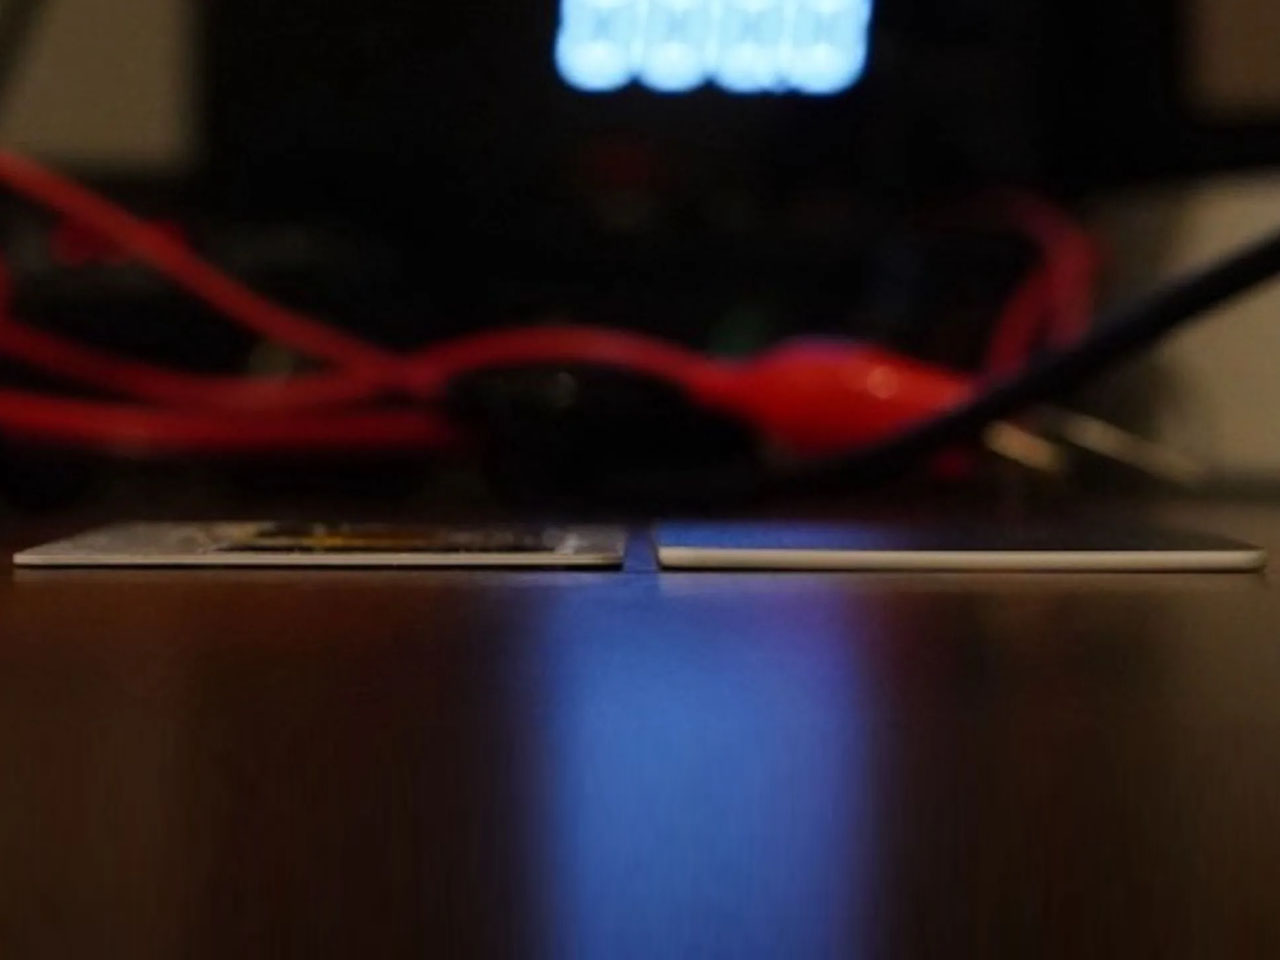
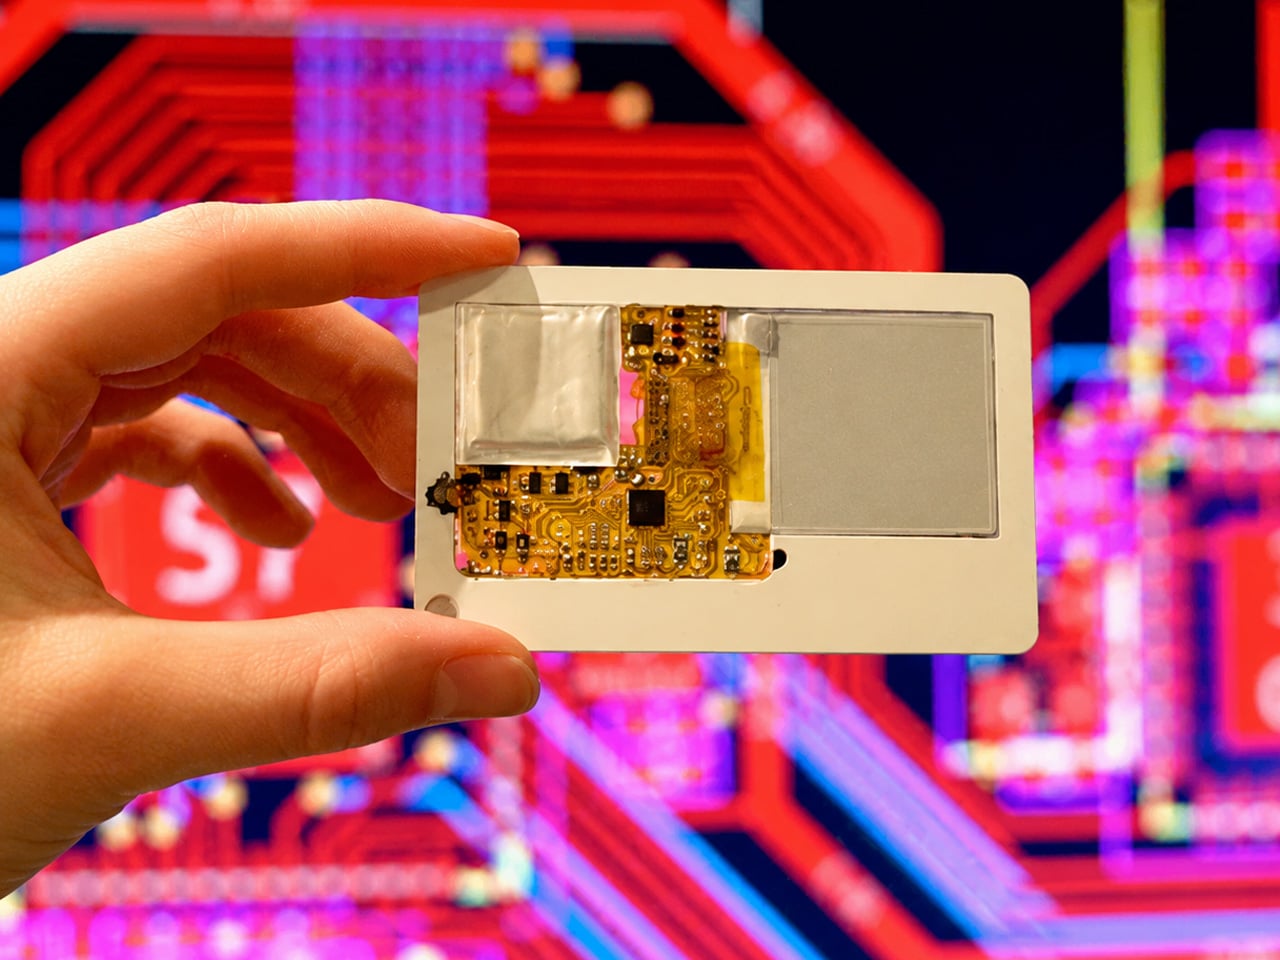
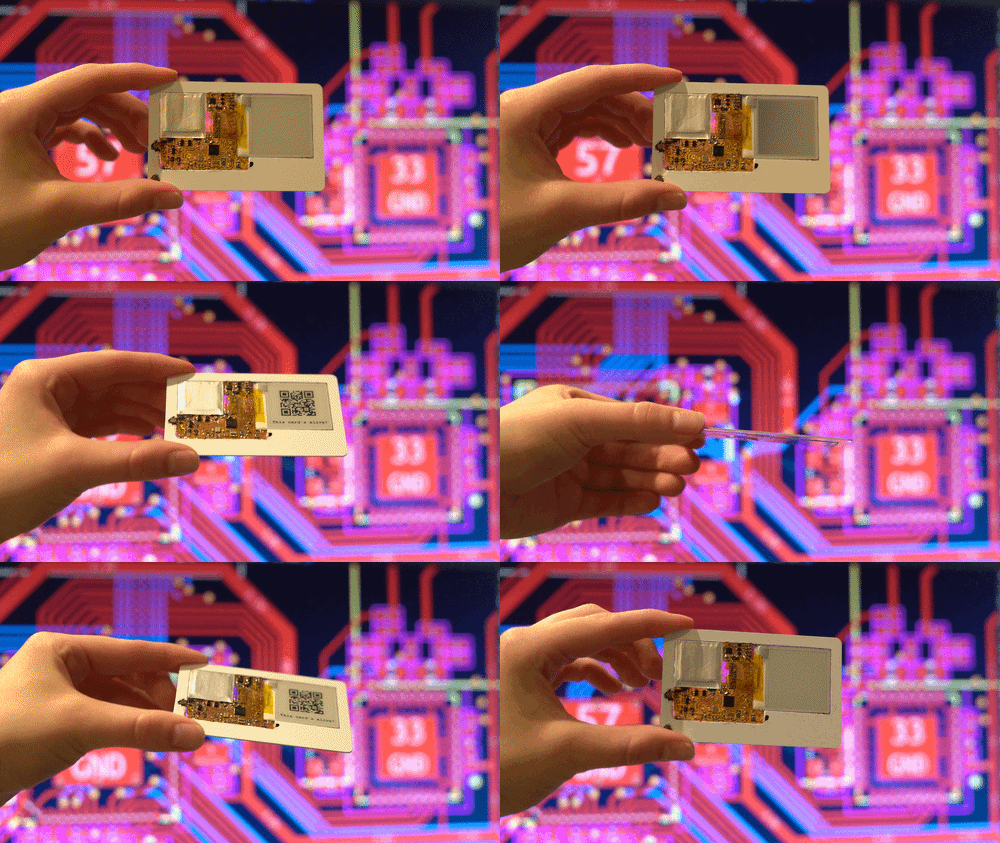
A developer wants to hit the sweet spot in the middle, having developed a mini PC the size of a credit card. Developed by GitHub user krauseler, the fully working computer dubbed Muxcard. Unlike other single-board computers, this one factors in the thickness as well, being just 1mm thick at any point on the whole make. For the chassis of this amazingly tiny CPU, the maker uses an old plastic NFC card. Understandably, the micro-computer (as I like to denote the build) is in the prototype stage, and the ultimate goal is to make it more durable and powerful.

Designer: krauseler

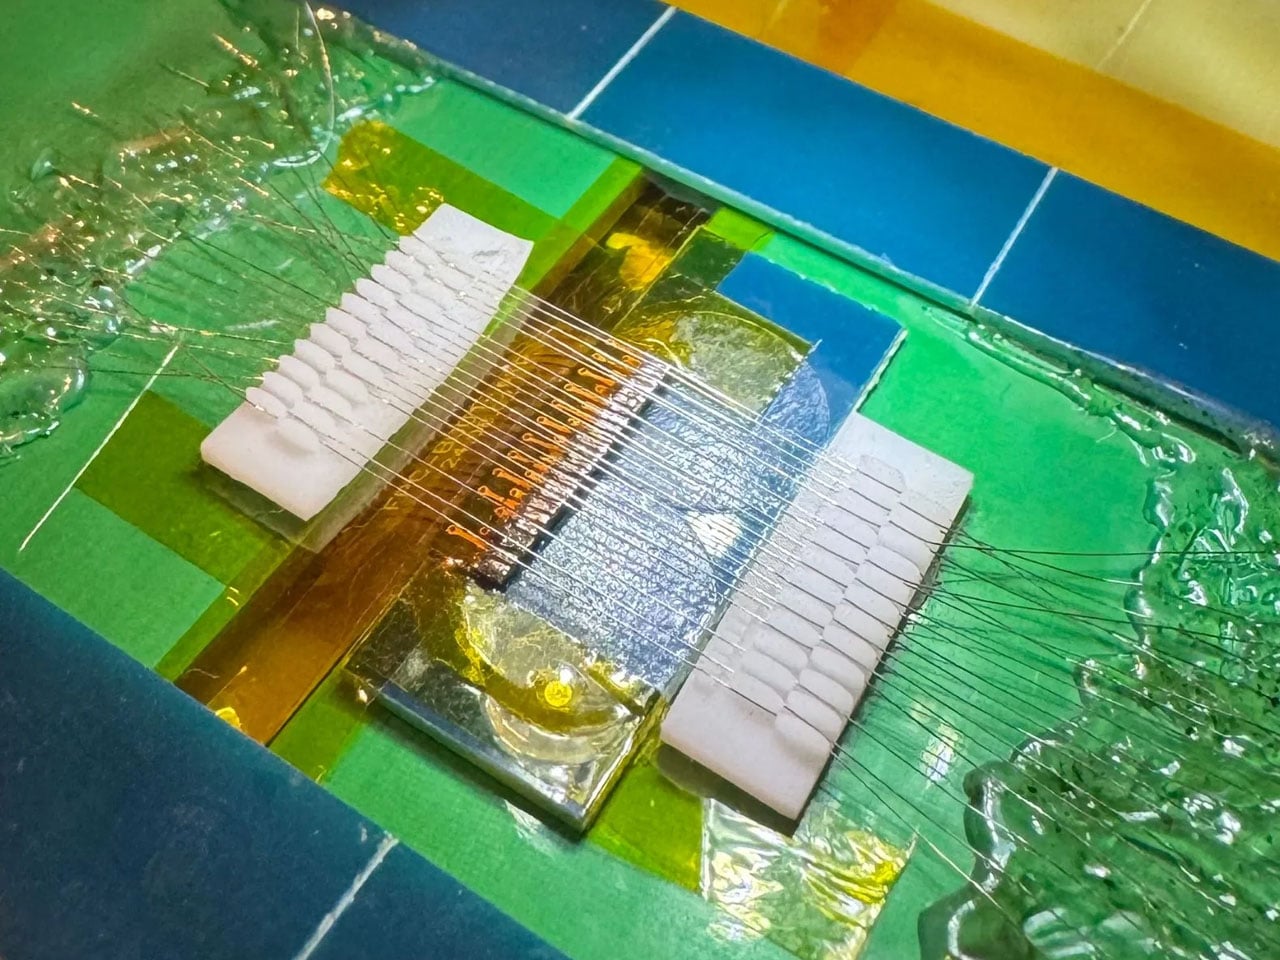
At the time of making, the credit card-sized computer packs a RISC-V CPU architecture, and a Wi-Fi-capable microcontroller with 320KB of usable SRAM and 384KB ROM. The next version of the mini PC could feature the ESP32‑S3 or nRF52/53, which are more powerful than the currently installed ESP32‑C3 CPU. The display on this thing is a 1.54-inch 200×200-pixel flex ePaper screen that consumes minimal power, which is vital. There’s an LIS2DW12 accelerometer for motion-sensing applications. The thing is powered by a 1mm thick 30mAh rechargeable LiPo battery, but krauseler plans to swap this one with an even slimmer battery cell in the future.

In the plans is the scope for touch button control configuration, a USB Type-C, and a microSD card slot. Since everything is so exposed right now, it’ll take quite an effort to reinforce Muxcard’s design to make it more practical, even if the DIY community has to consider using this for their projects. According to the maker, the prototype “still feels slightly absurd every time the display updates while holding what basically feels like a normal card.” Pondering over the possible applications that I can think of with the card-sized computer could be smart home controls, security systems, or a potent upgrade to the Raspberry Pi for more flexibility in use case scenarios.

The DIY is already an open source project as the hardware files and firmware are already online for non-commercial use. That means, if you are interested, the option to make further improvements is also there, keeping in mind the project cannot be commercially used without the maker’s consent.


The post Fully working computer the size of a credit card is just 1mm thick first appeared on Yanko Design.
6th-Gen iPod Nano powers triple-display workstation, and it actually works

Move away from the largest computer case mod for a moment and give the 6th-generation iPod Nano a moment of fame again. Before you start thinking what that even means, check out the video above, where a creator from the YouTube channel Will It Work has given the tiny MP3 player a new lease of life with a well-orchestrated triple-display workstation powered entirely by the iPod Nano.

I am writing this on a two-display setup installed on my workstation. But there is no denying the fact that three-display setups are really a craze these days. The setups are not reserved for PC and monitor combos. Even laptops with three screens are keeping up with the trend. This is exactly why the idea of hooking up a tiny iPod Nano to three separate screens really grabbed my attention.

Designer: Will It Work (YT)

The 6th-generation iPod Nano was released in 2010 with a capacitive multitouch screen. It was the last iPod device released by Steve Jobs and was really easy to carry around with its clip-on design. Instead of being carried in the pocket, the device could be clipped to your gear and go where you wanted it to go. Now, the interesting device is put to more use than just playing music.

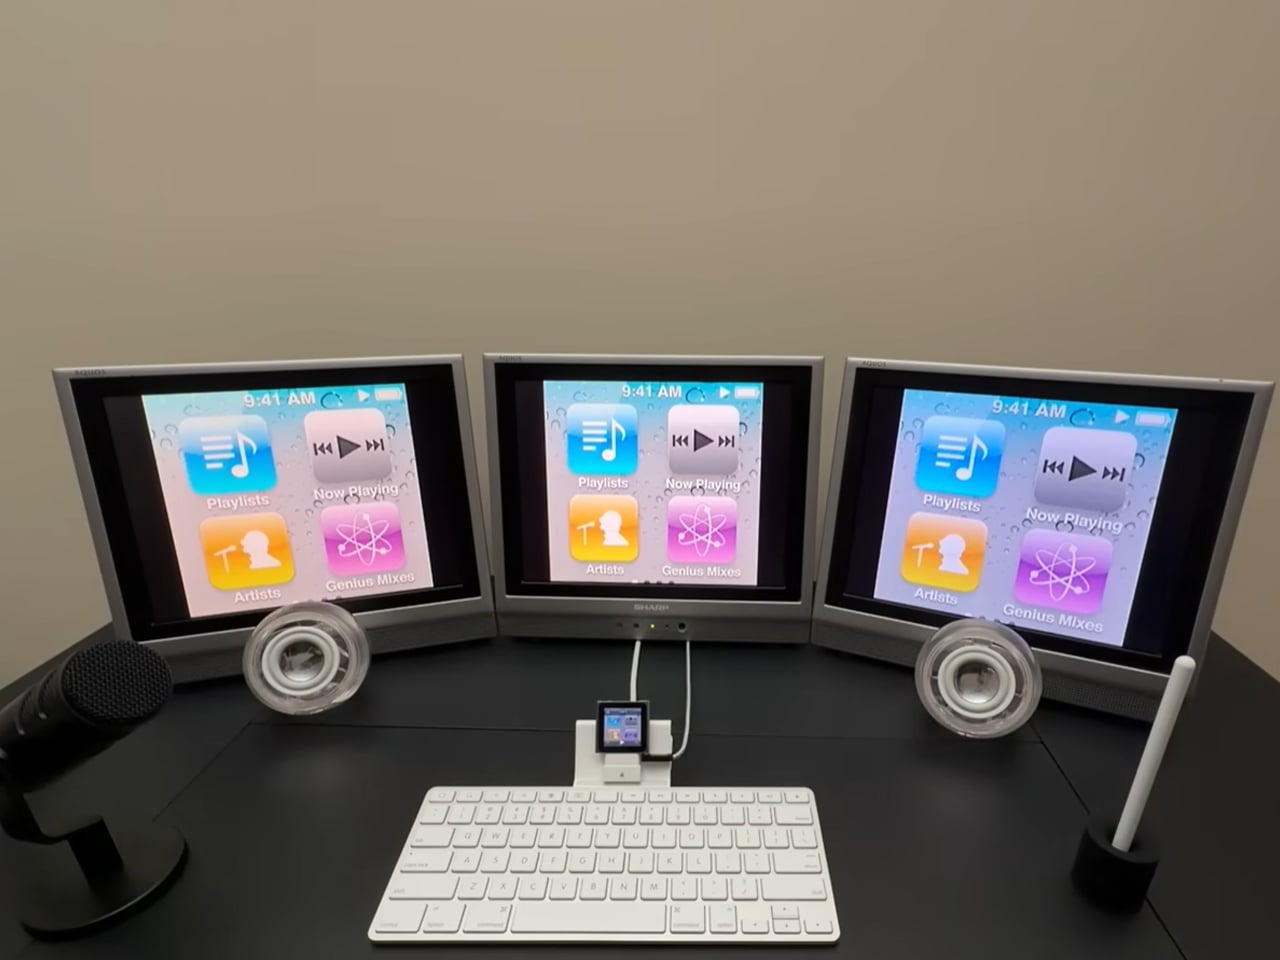
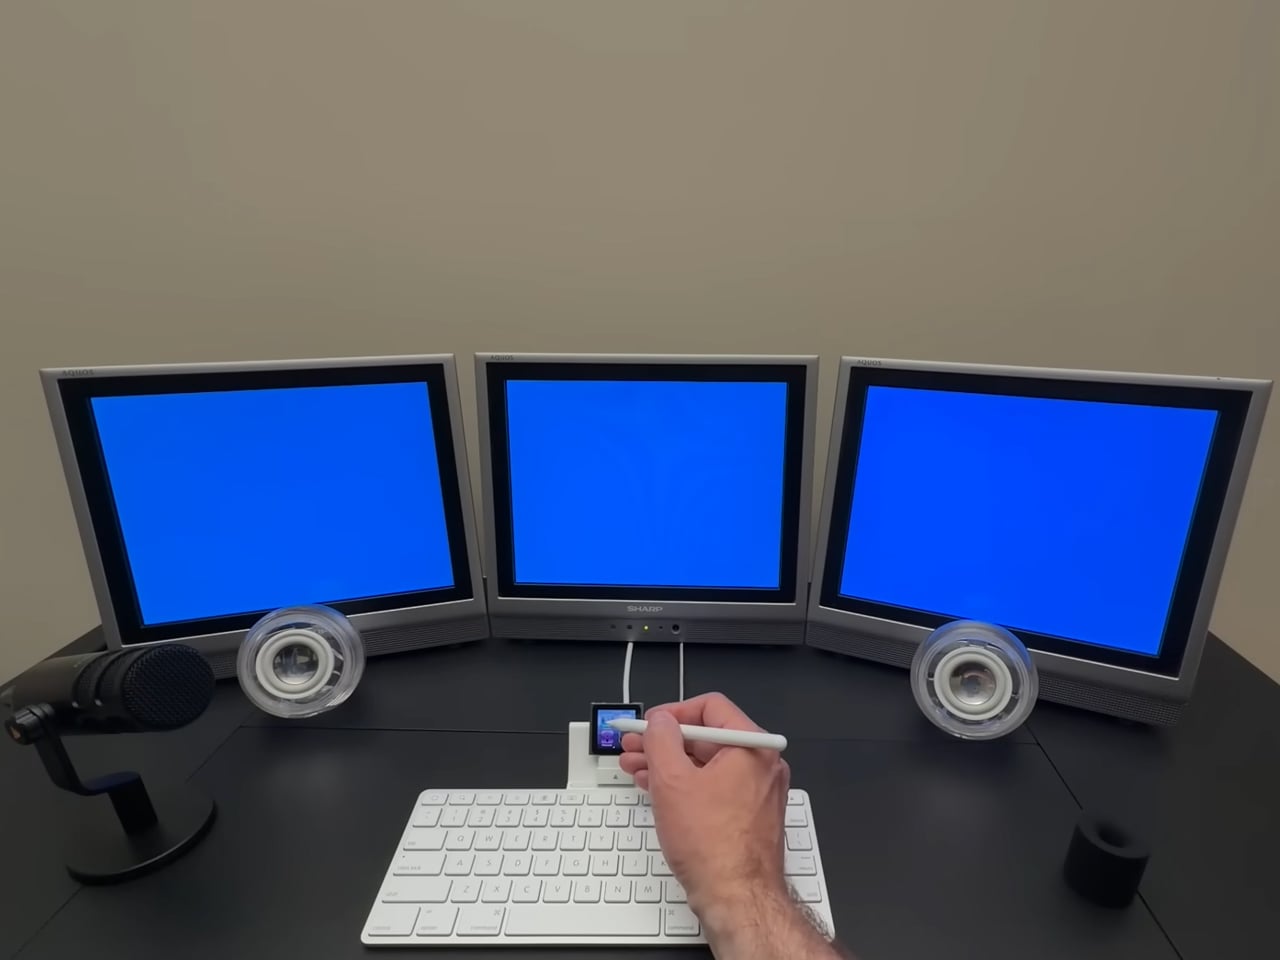
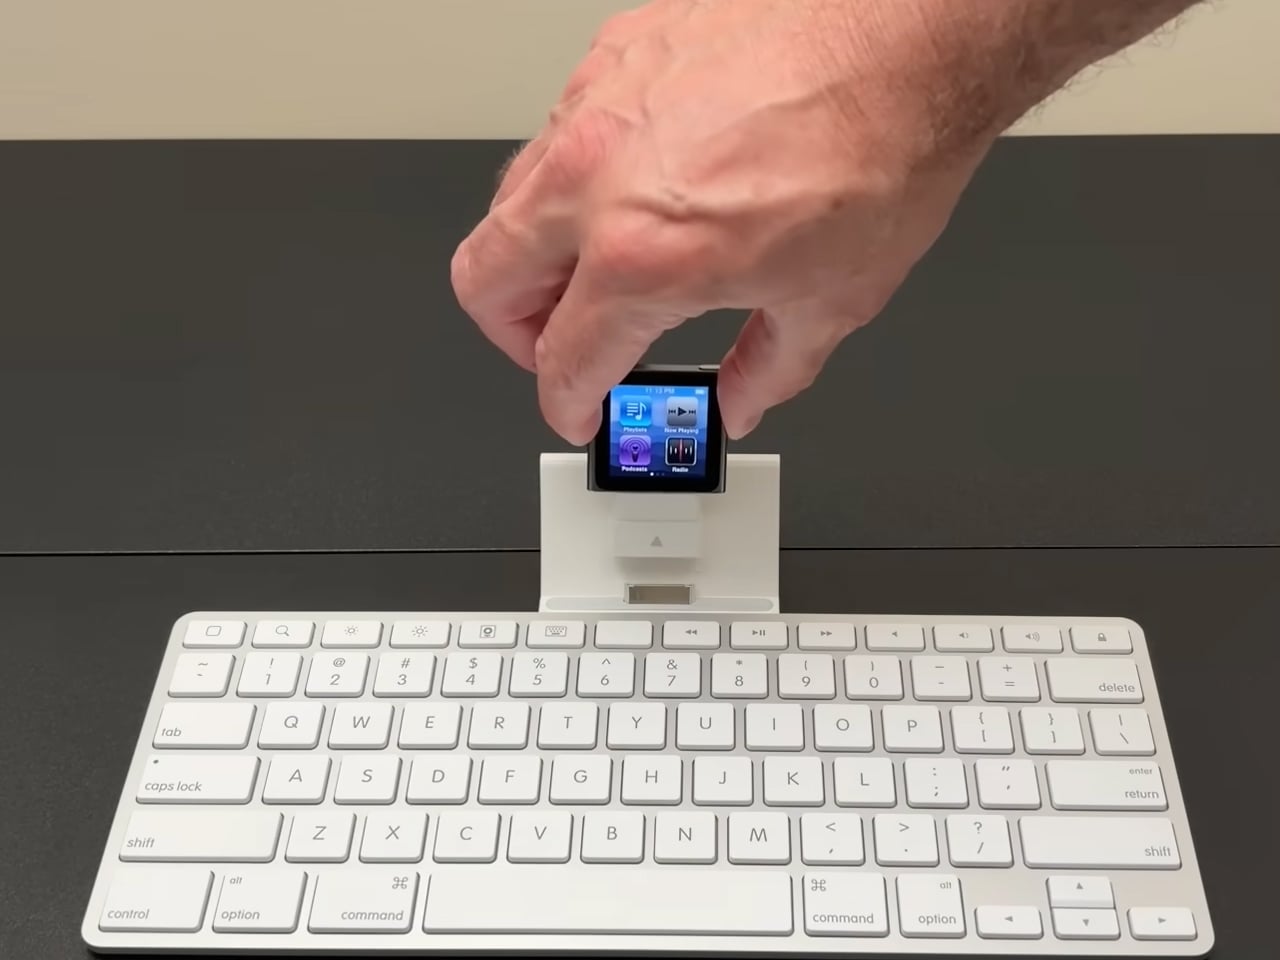
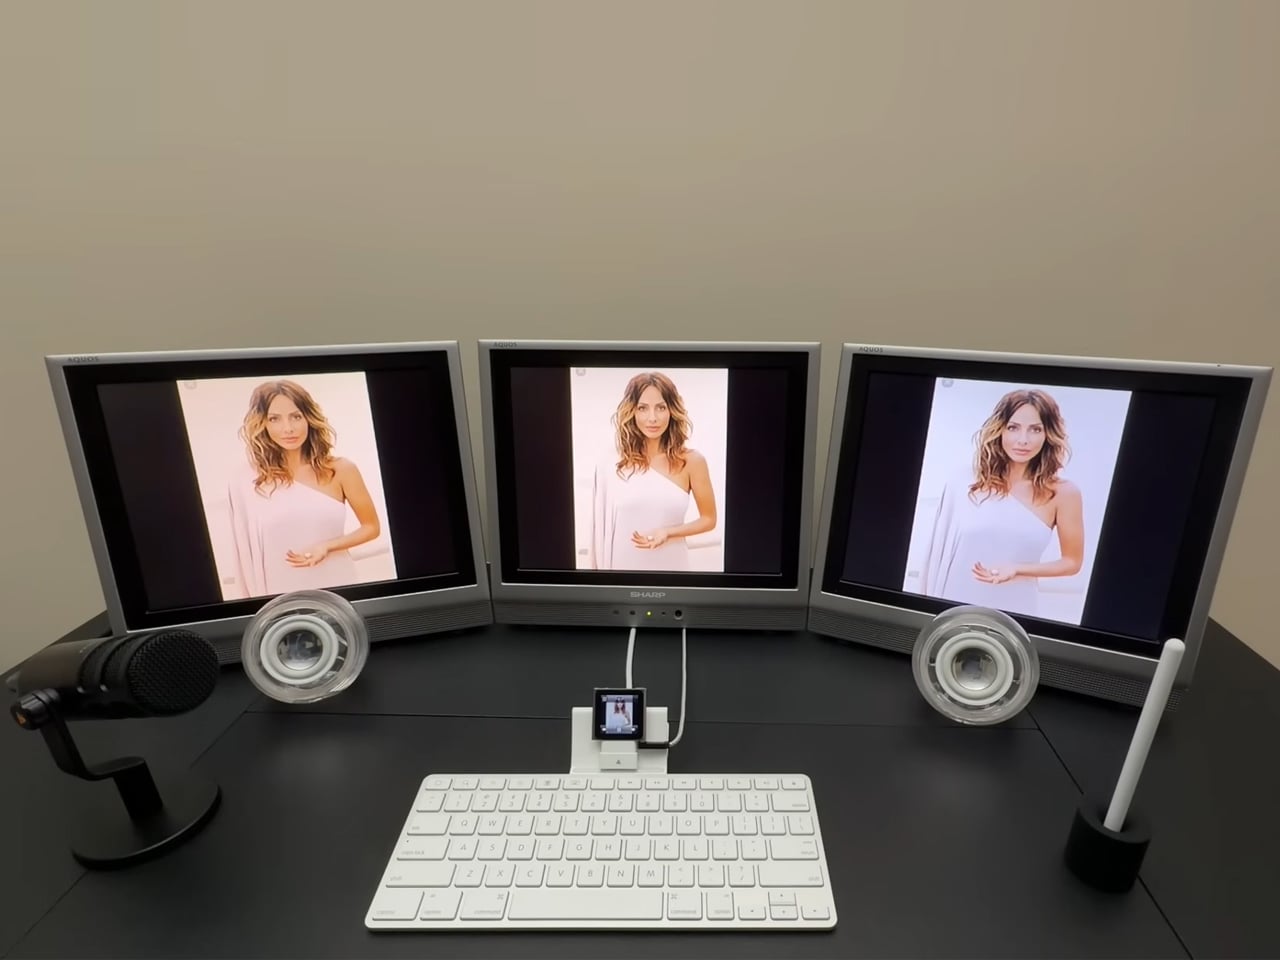
By connecting the iPod Nano to a 30-pin Apple Keyboard Dock, the DIYer was able to rely on composite video signals from the iPod to three connected Sharp flat screen monitors from the early 2000s. The Keyboard Dock was essentially made for the iPad, but the video shows that it has been tweaked to work with the iPad Nano using a 30-pin spacer adapter. In the video, the creator says he was hopeful that the media controls on the keyboard would be able to control the iPod, but eventually found out that no key on the keyboard actually works with his contraption. It just sits there to finish the workstation setup: the highlight of which of course, is the triple-display connected to the iPod Nano.

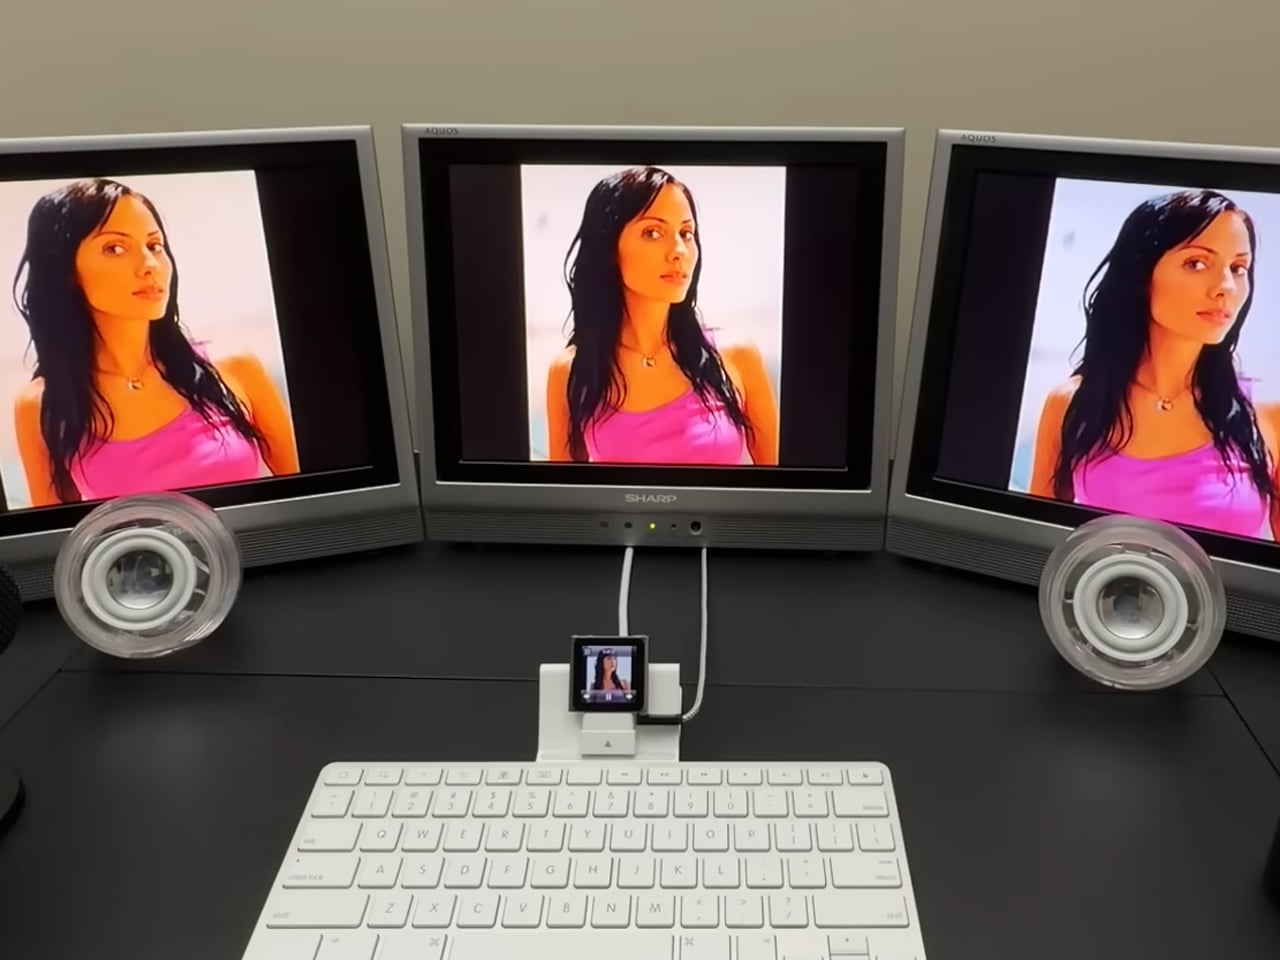
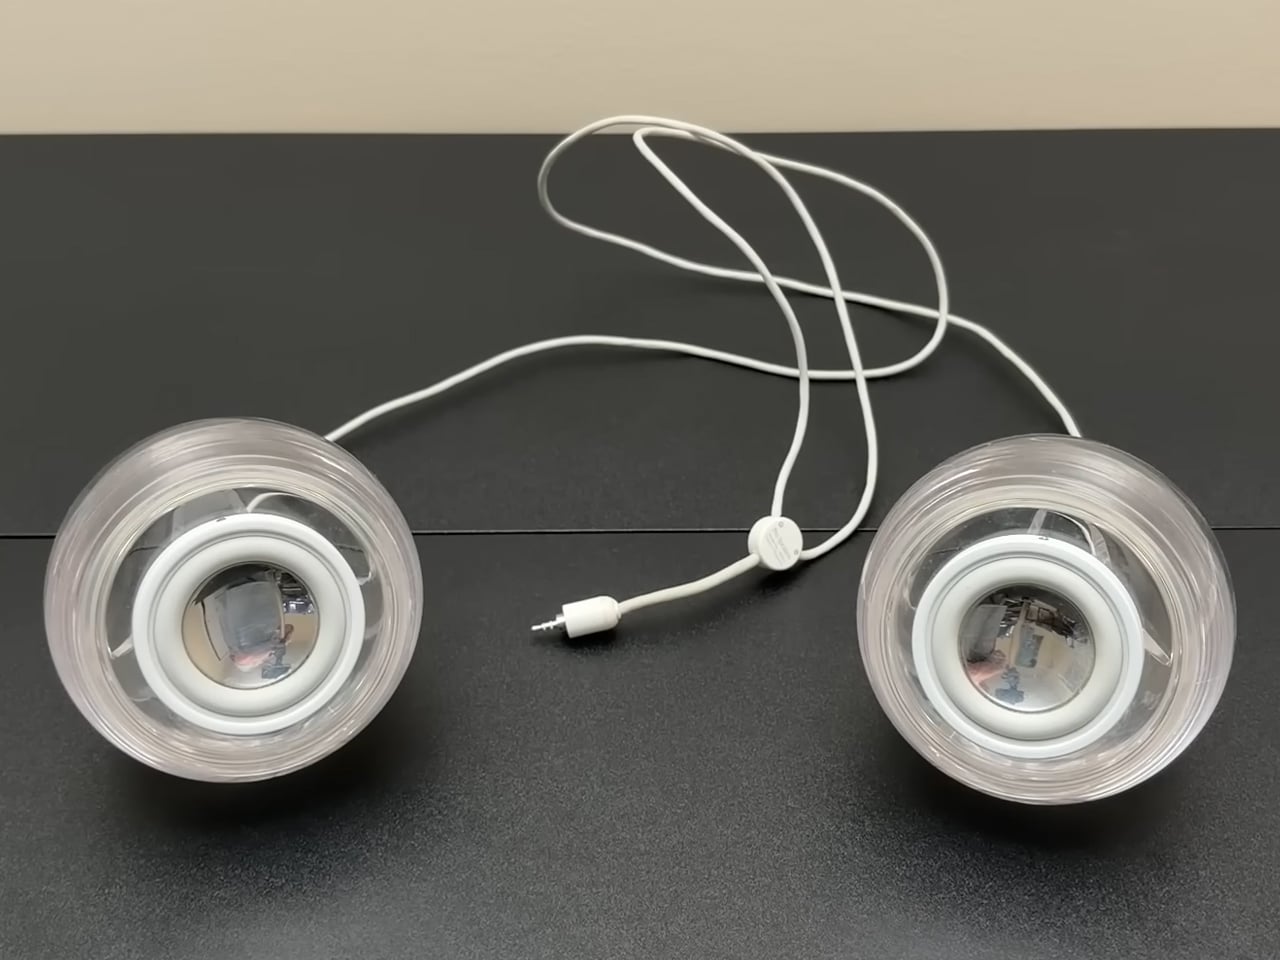
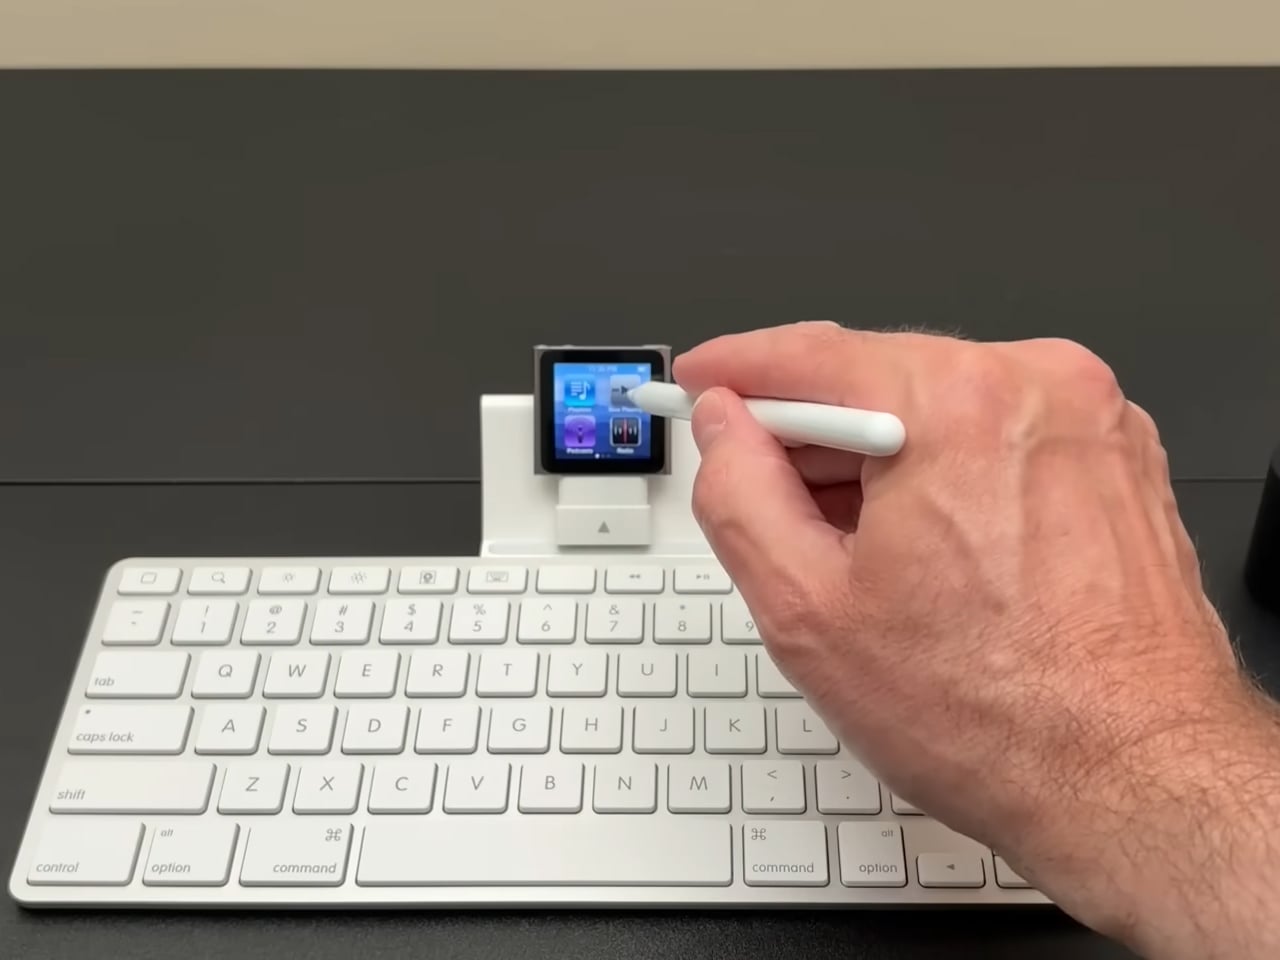
While the iPod Nano cannot connect output video and audio directly to the displays (or connected speakers), the creator has used a 3.5mm four-pole jack, which handles audio input and output. With some other adaptors and cables involved, the iPod is hooked to the three Sharp LCD models for visual display as well. A set of Apple Pro speakers has been used for audio output and a stylus interacts with the iPod. Both audio (the music) and video (a picture slideshow) can work simultaneously. Will It Work has been able to establish that in the video.

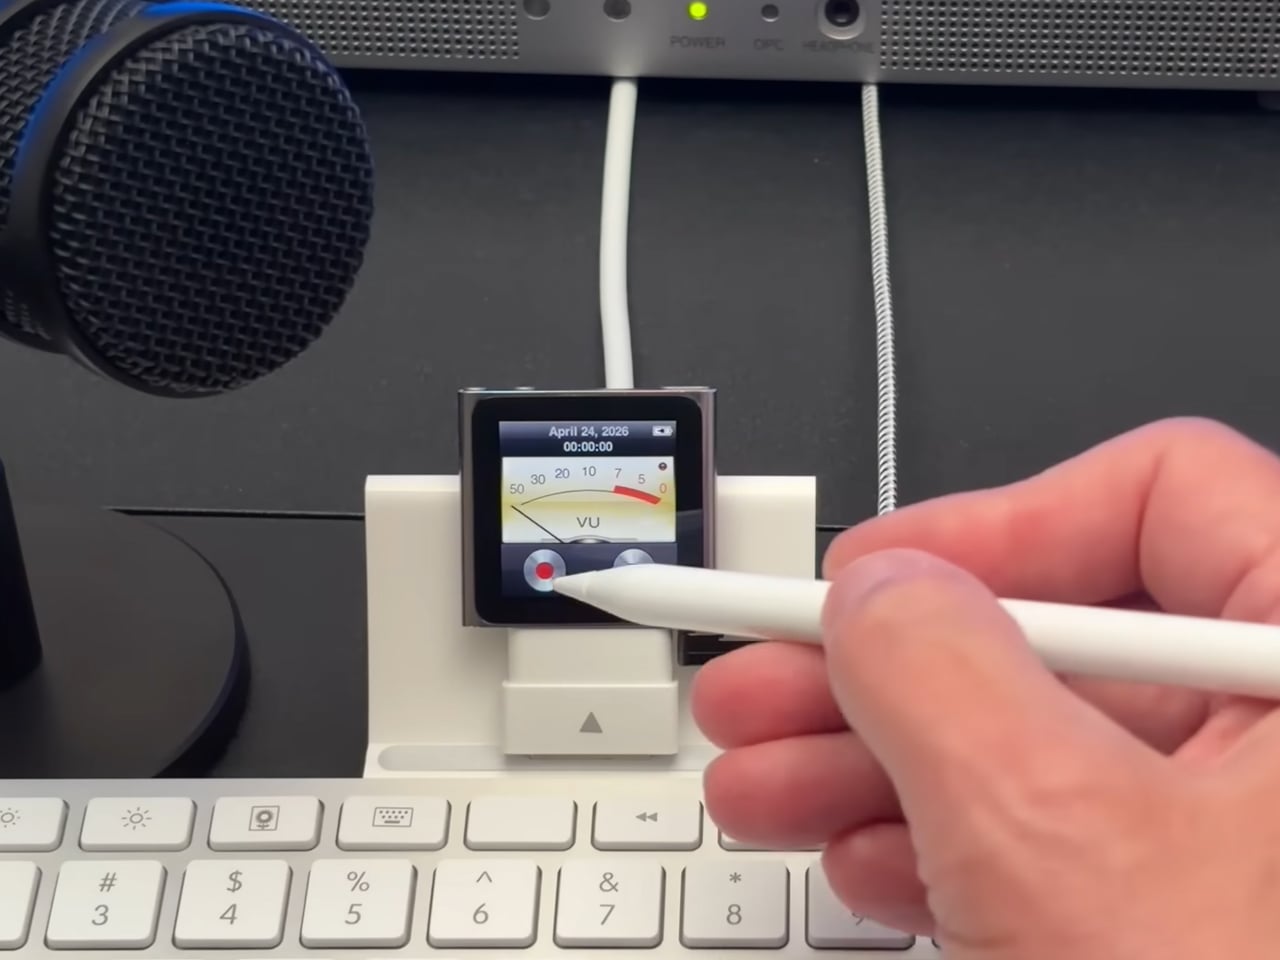
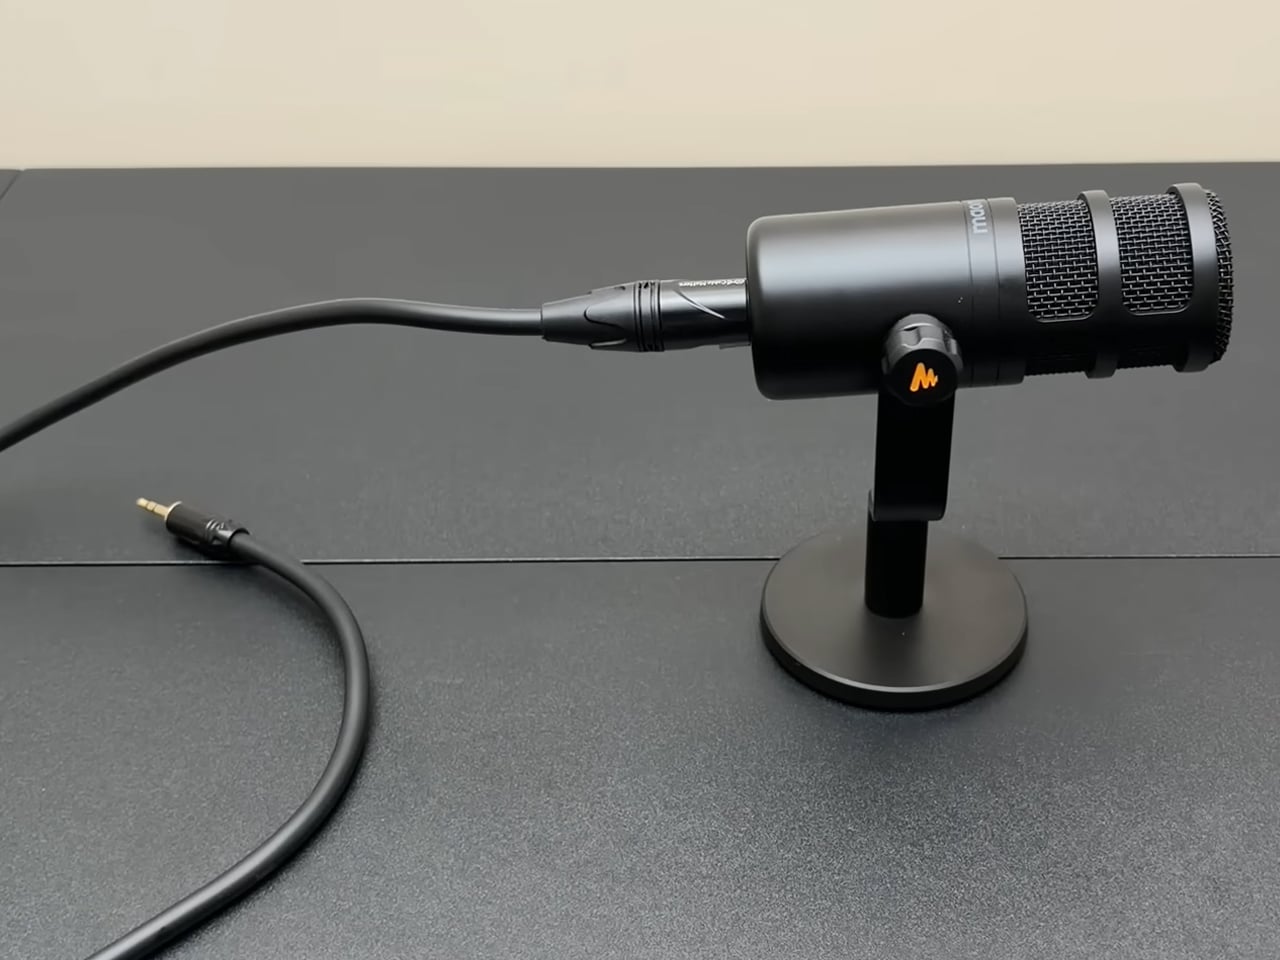
In addition to playing music and running a slideshow on the three connected LCDs, the iPod Nano-based triple-monitor workstation can also be used to record voice memos. To be able to record memos in podcast-level clarity, the DIYer has hooked up the iPod to a desktop microphone. In the video, he shows how efficiently it can record a voice note and how good the playback quality is.

The post 6th-Gen iPod Nano powers triple-display workstation, and it actually works first appeared on Yanko Design.
You Can Play Pokémon Gold on Your Wrist, Thanks to a 2-Year Build

Retro gaming handhelds have had a genuine second life in recent years. Original Nintendo hardware has been cloned, shrunken, and reimagined into increasingly unhinged form factors by modders who see the Game Boy lineup as the most suitable canvas for this kind of project. The builds have become their own subculture, where the unofficial requirement is always constructing something that makes everyone else feel like they aren’t trying hard enough.

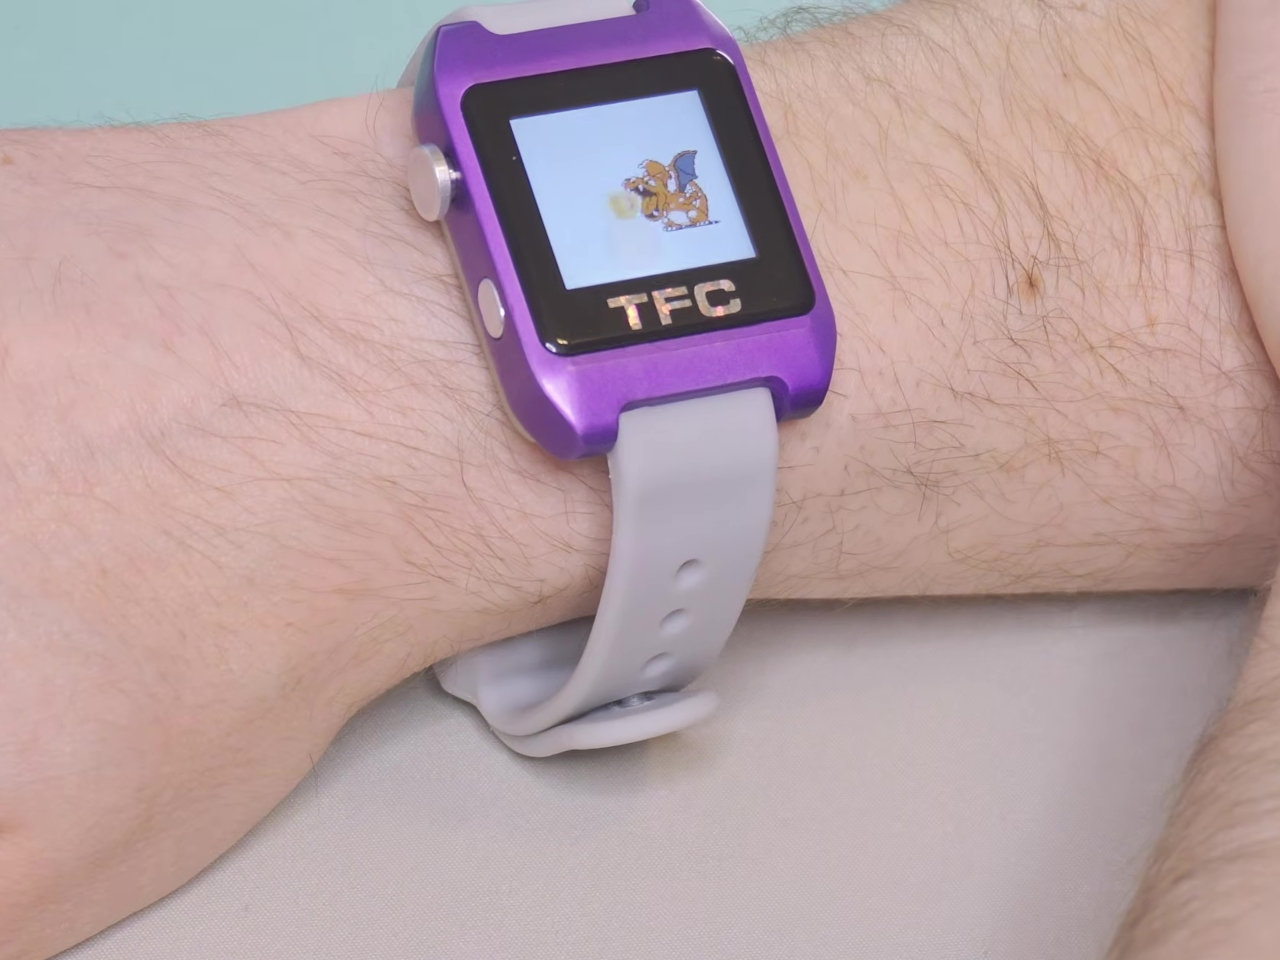
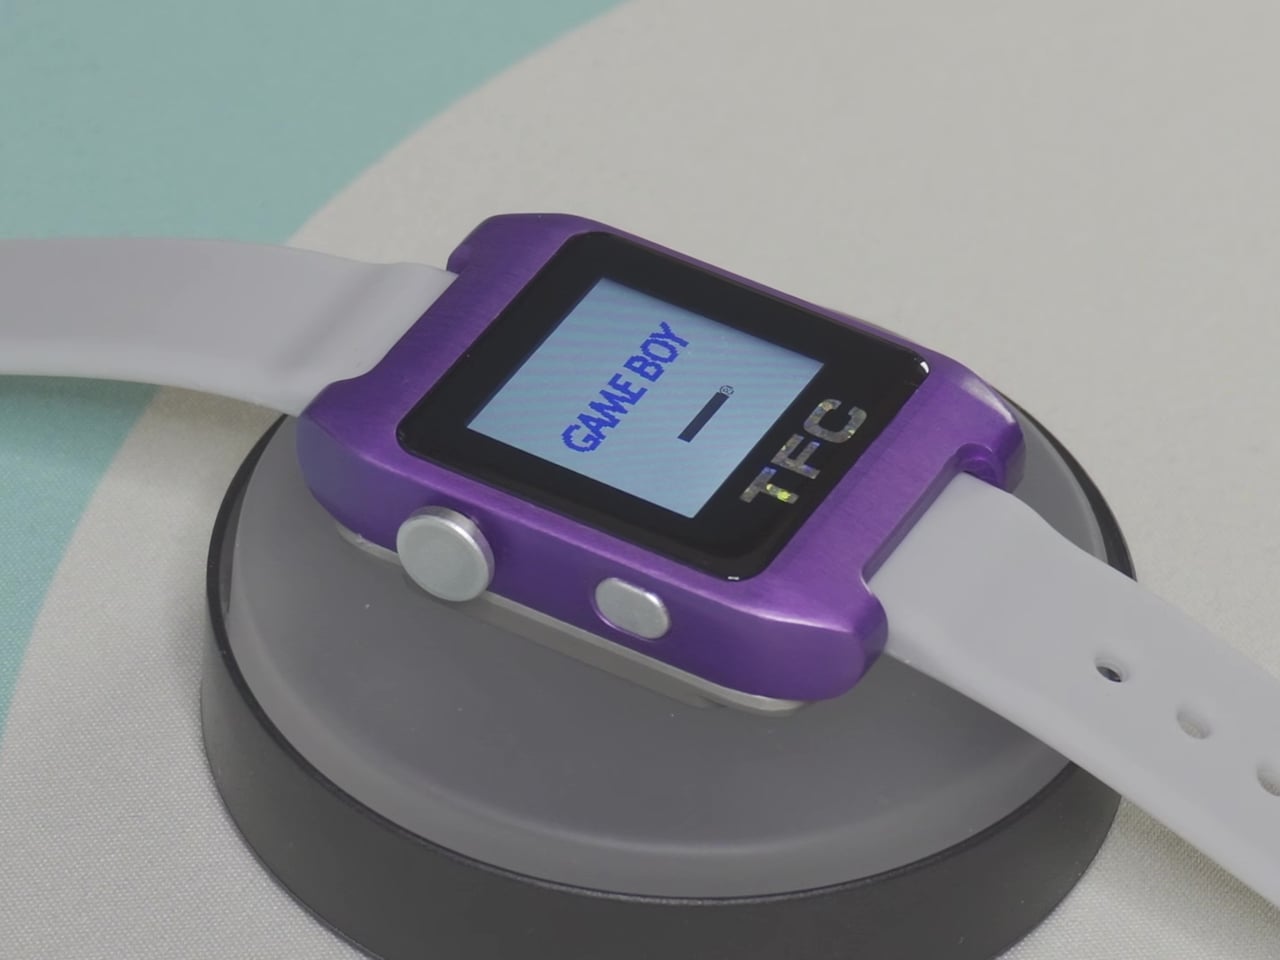
YouTube creator Chris Hackmann, known online as LeggoMyFroggo, took things further than most. He spent more than two years building the Time Frog Color, a Game Boy Color shrunk down to wrist-watch dimensions. From the start, he gave himself three non-negotiable rules: it had to use the original GBC CPU, it had to accept physical cartridges, and it had to keep time when turned off. No emulation, no shortcuts.

Designer: Chris Hackmann (LeggoMyFroggo)

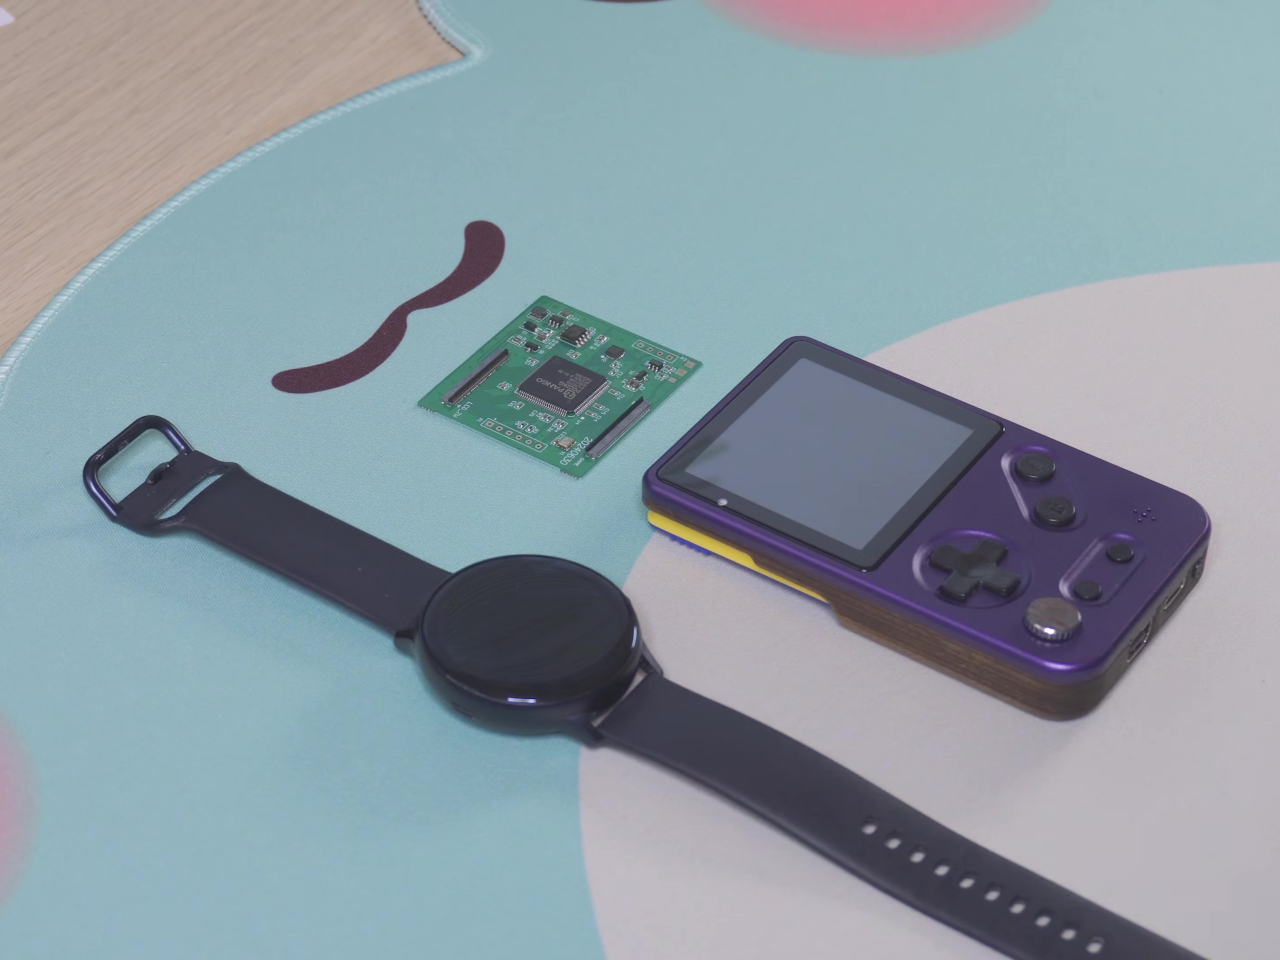
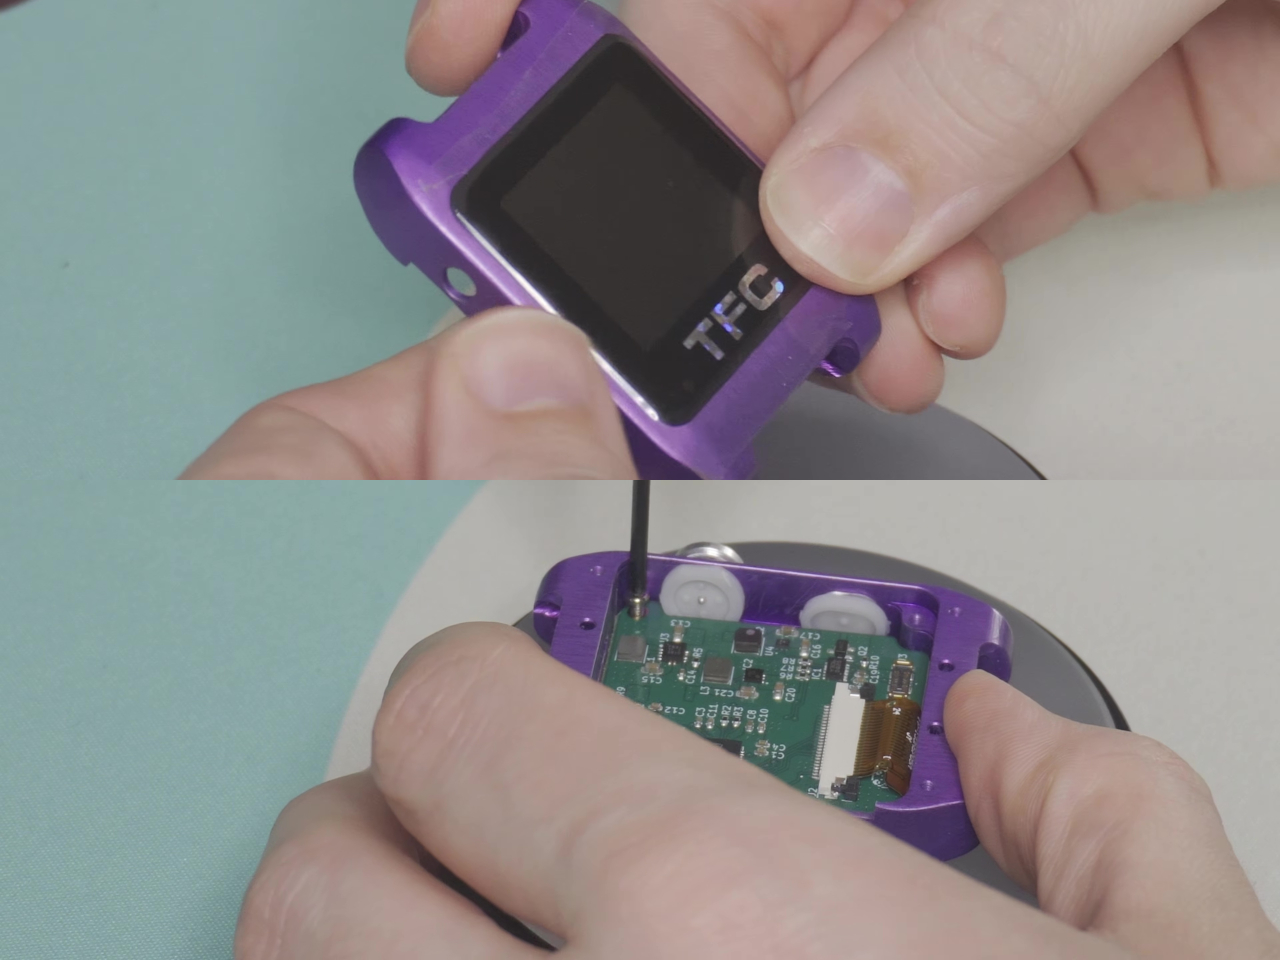
Those three constraints drove everything that followed. Standard GBC screens are too large, so the display was scaled down to a 1.12-inch LCD. That screen can’t read the GBC’s parallel RGB output natively, so an RP2040 microcontroller was added purely as a signal translator. This created the foundation for a stacked PCB arrangement, with an LCD driver board on the bottom and the CPU board sitting just above it.

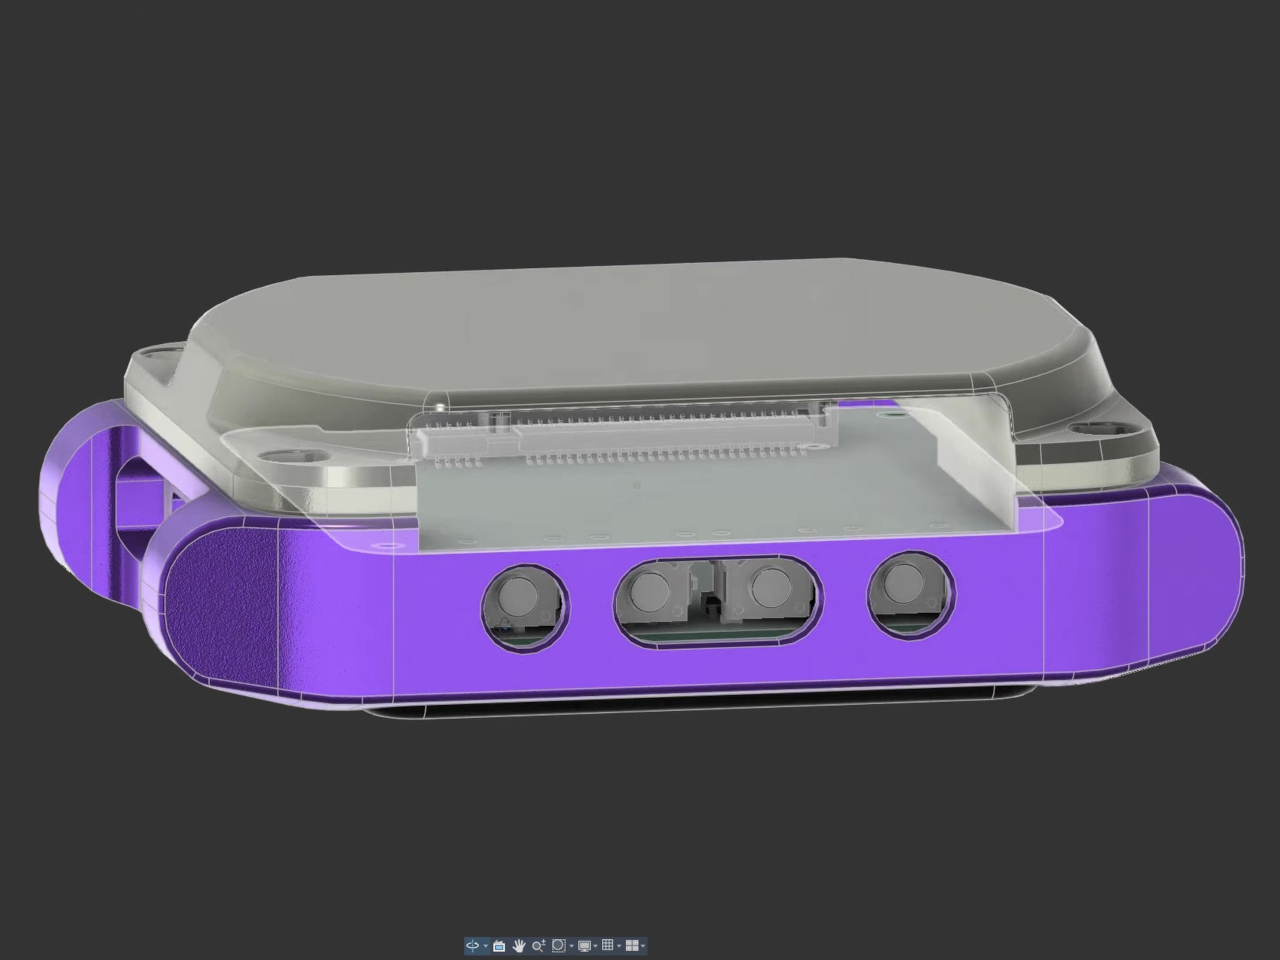
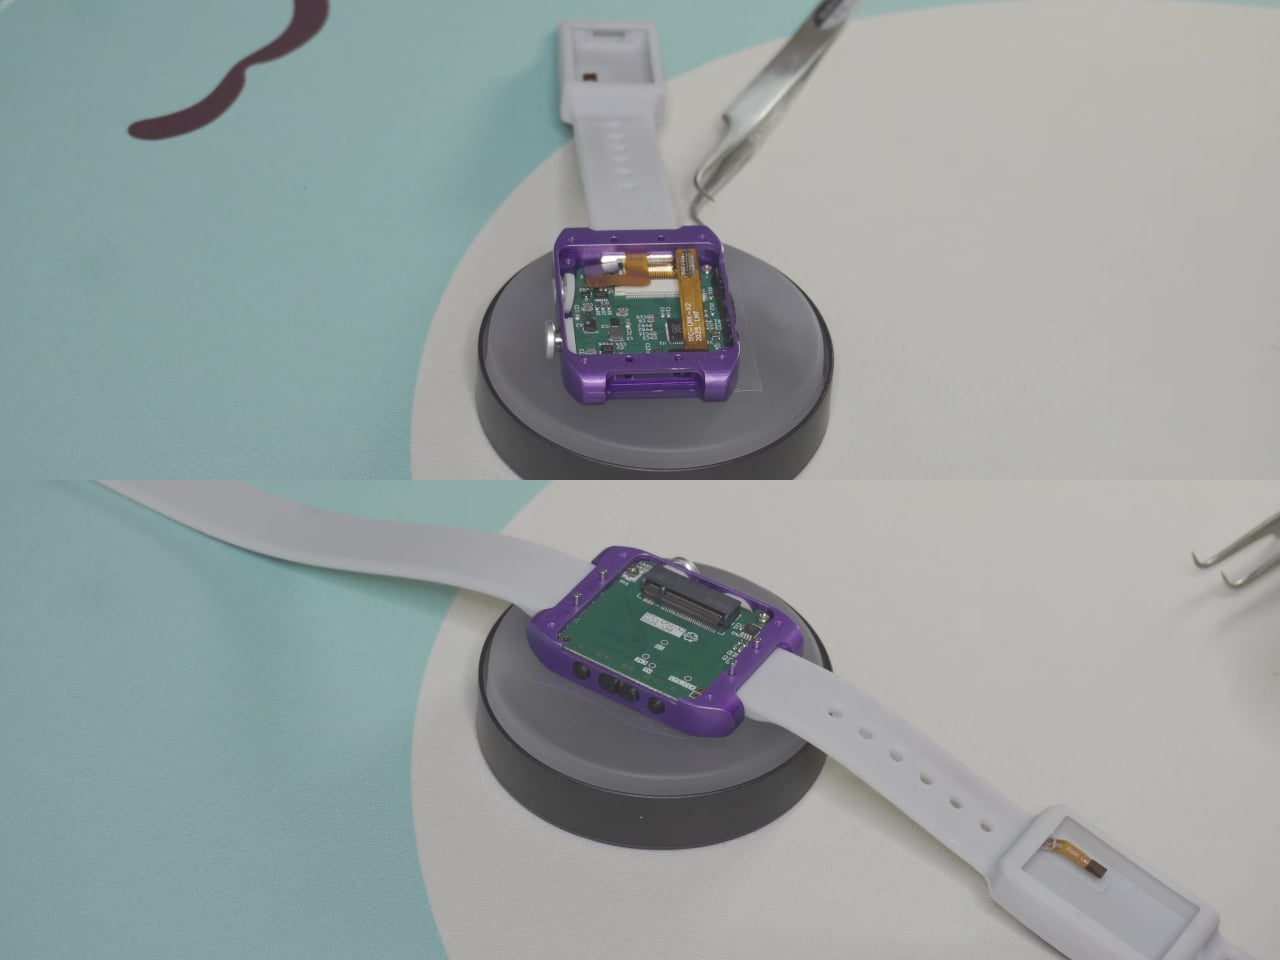
The cartridge requirement was its own puzzle. Standard Game Boy cartridge slots aren’t watch-sized, so Hackmann swapped the slot for an M.2 connector, the type normally found in NVMe computer drives. The custom cartridges that plug into it aren’t simple ROM cards; they’re full MBC3 flash builds with their own RAM, mapper chip, and a coin cell battery that keeps save files intact between sessions.

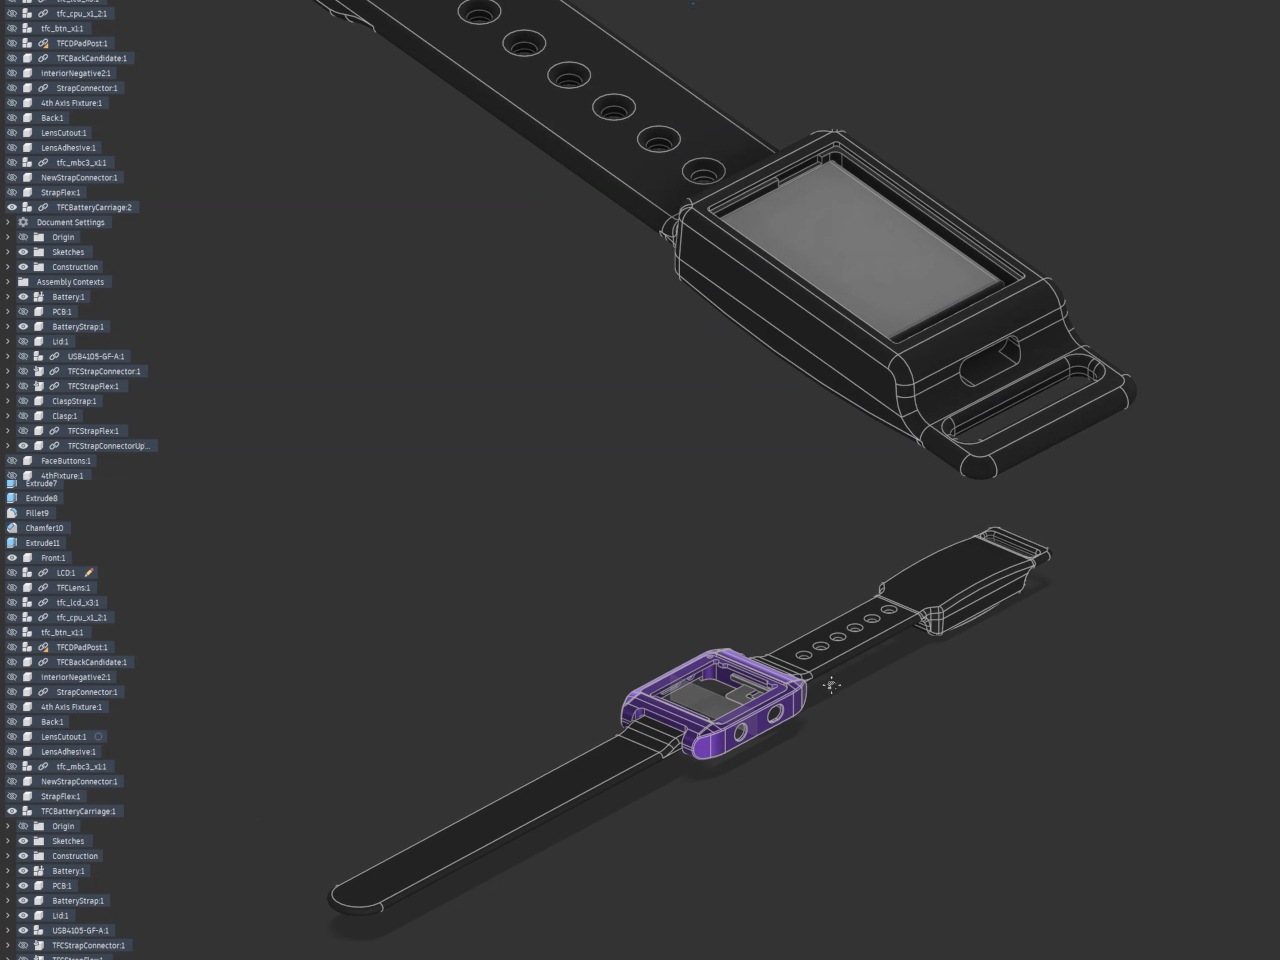
All of that stacking pushed the watch body to 15mm thick, noticeably chunkier than an Apple Watch at roughly 10 mm. There was no room for a battery inside, so it went into the silicone strap instead. A flexible PCB runs through nearly the entire band via overmolding, carrying power back into the main body. It’s a bizarre solution that also happens to be the only sensible one.

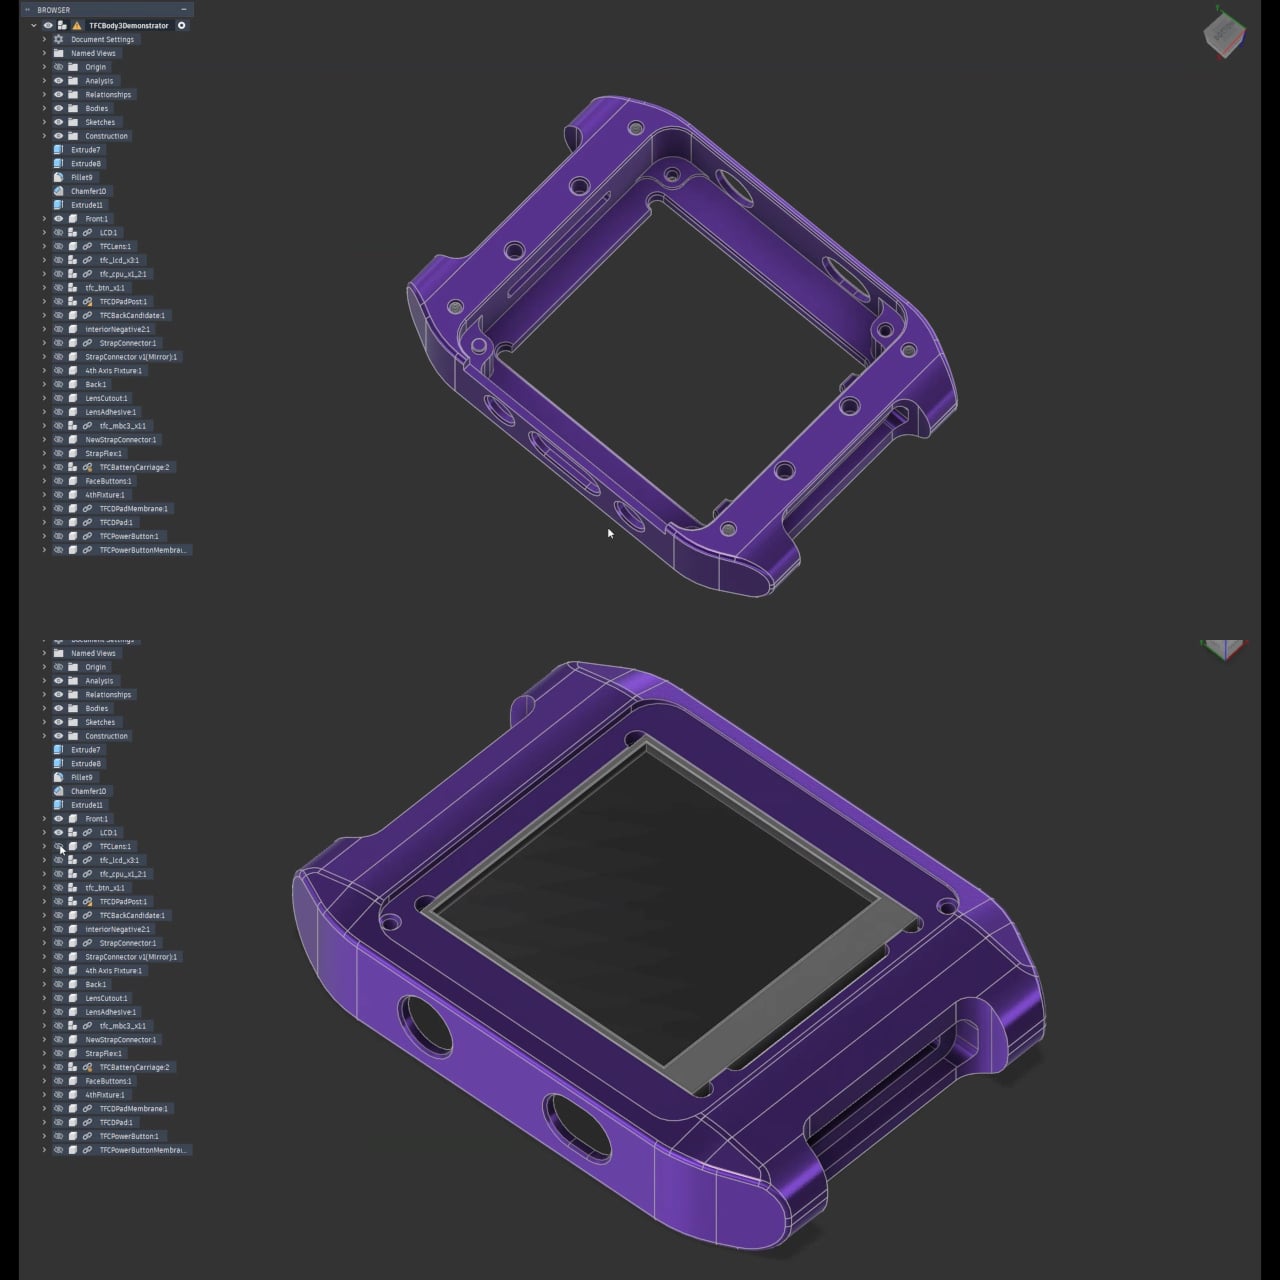
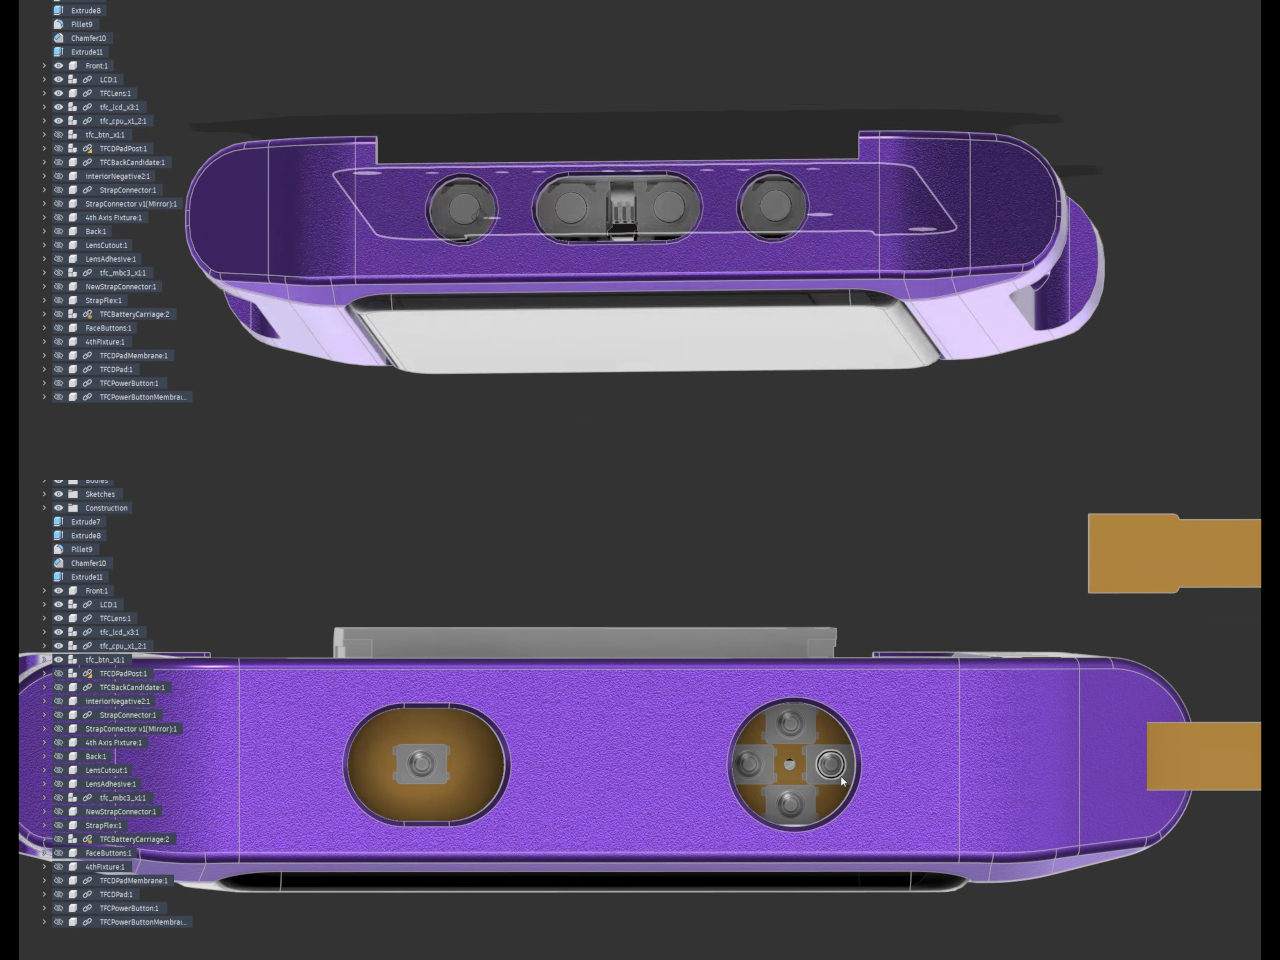
The watch body is CNC’d from 6061 aluminum and anodized purple, which reads as a direct nod to Nintendo’s color sensibilities. Controls are fitted into the sides of the housing, with four face buttons on one edge and a custom-machined rocker D-pad on the other, both backed by silicone membranes. The unit shown in the video doesn’t include a speaker, as the component missed the deadline.

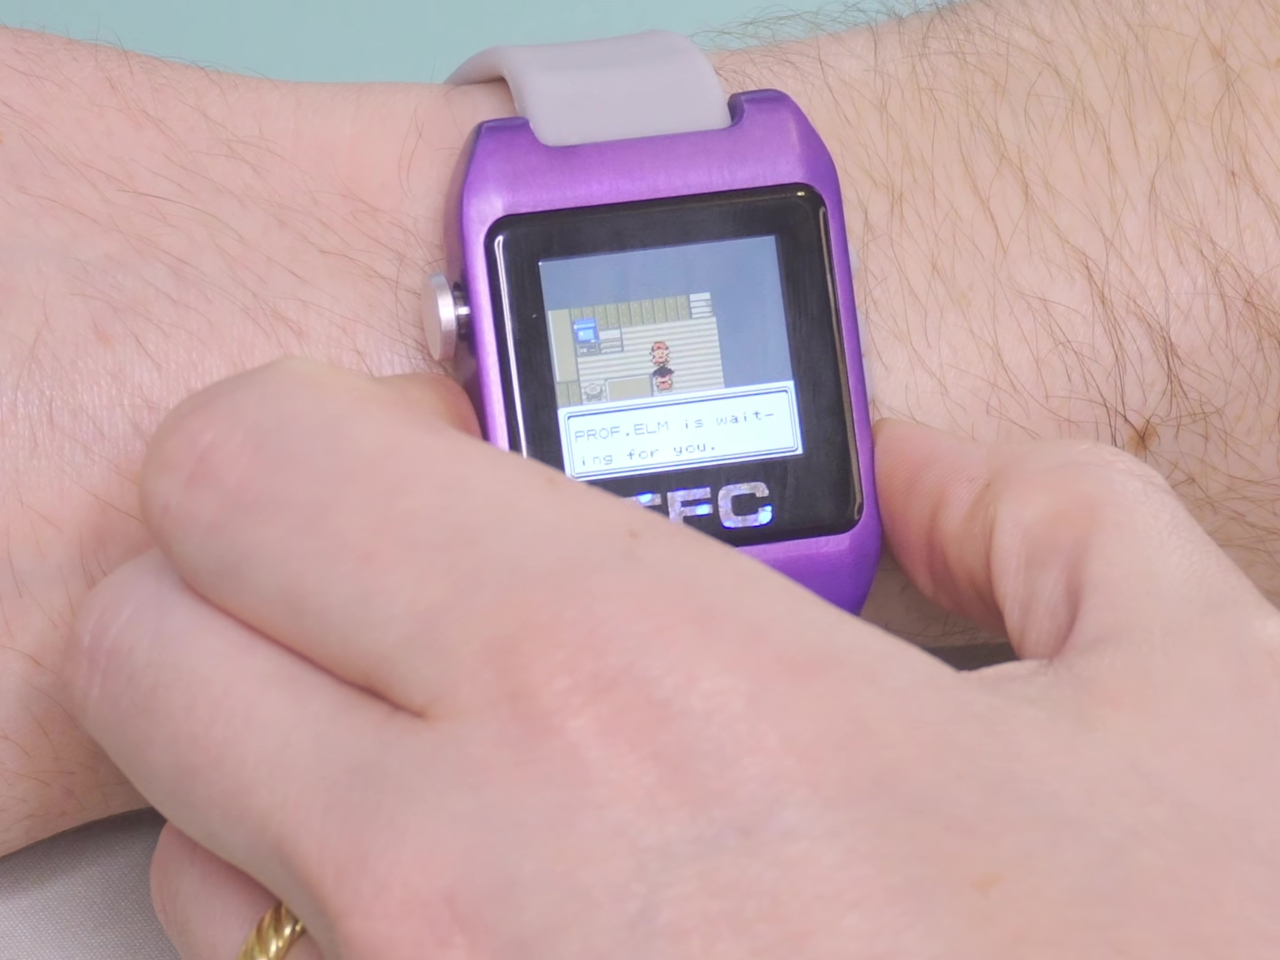
Hackmann is upfront about the trade-offs. The Time Frog Color offers a “less than optimal playing experience” by his own admission, with battery life that won’t compare favorably against most wearables. It’s a thick, quirky device with controls tucked into the edges and a cartridge protruding from the back. But you can load up Pokémon Gold and play it on your wrist, which isn’t something most projects can claim.

The post You Can Play Pokémon Gold on Your Wrist, Thanks to a 2-Year Build first appeared on Yanko Design.
A Burned-Out Xiaomi Phone Now Runs Gemini AI Inside a Retro TV Case

The smart home speaker market has settled into a familiar aesthetic. Smooth cylinders, matte finishes, and understated designs meant to disappear into a room are the default for most voice assistants. It’s a reasonable approach, but it also means most of them look exactly the same, and the hardware driving them tends to get replaced every couple of years, whether it actually needs to be or not.

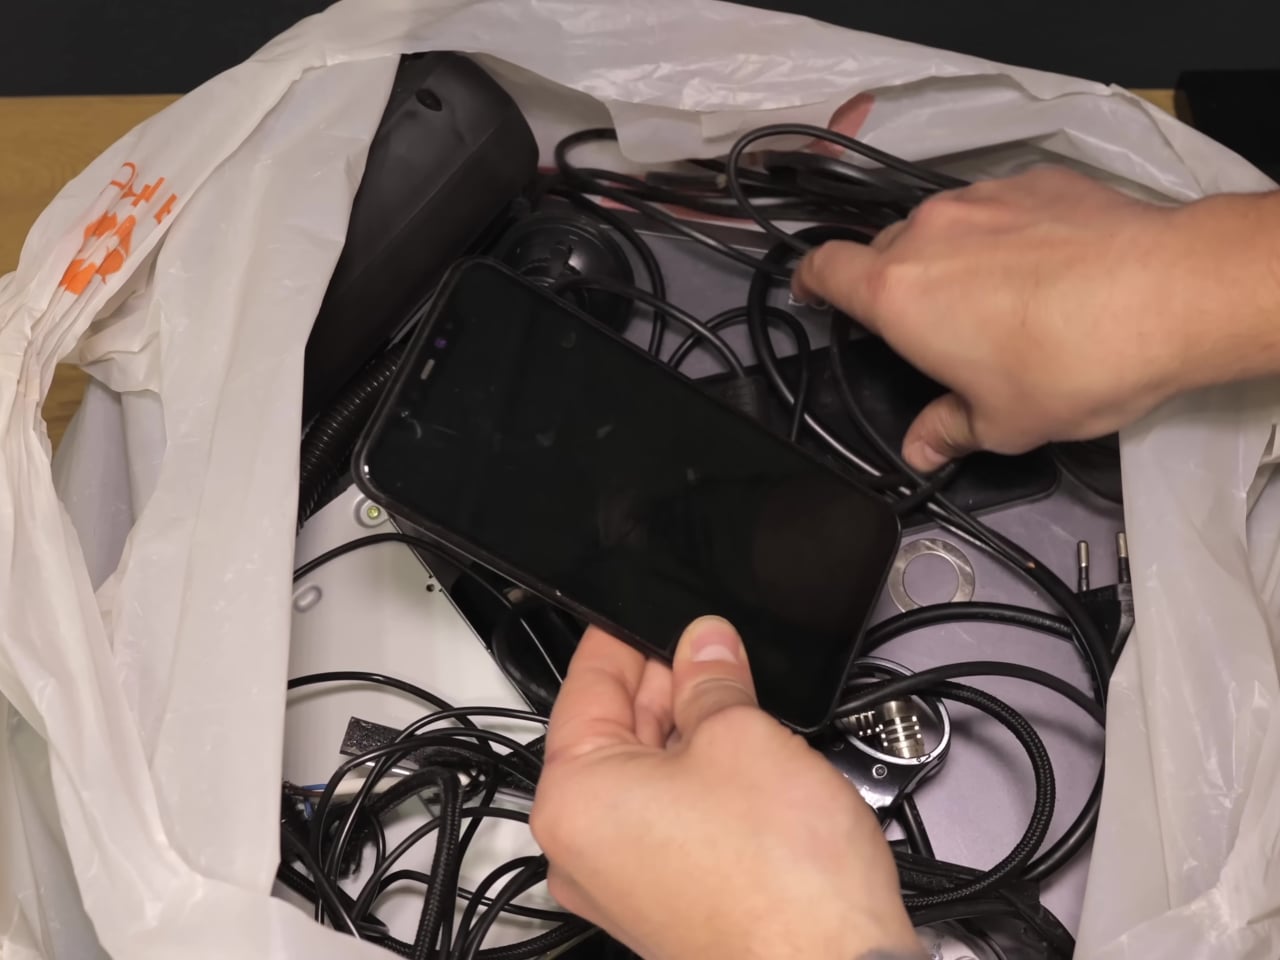
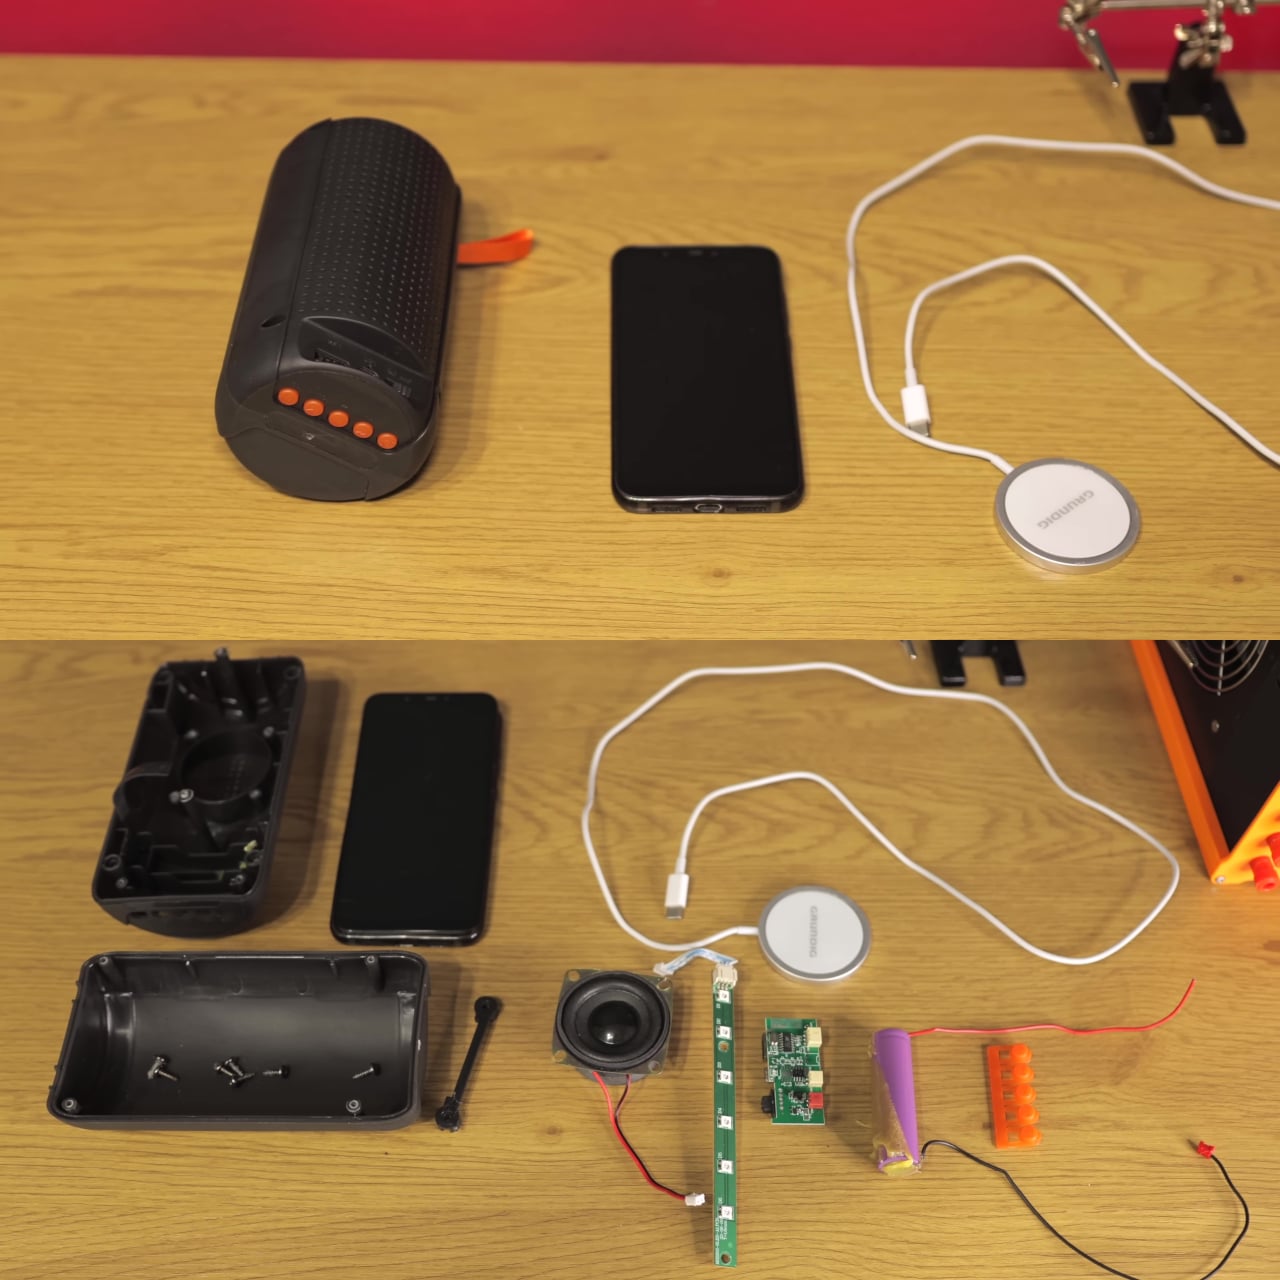
HANDMAX Workshop took a different approach entirely. Rather than buying new hardware, the build starts with a Xiaomi Mi 8 already well past its prime, complete with a burned-in display, degraded speakers, and a failing battery. The processor and software capabilities were still perfectly usable, though, and that turned out to be all this kind of project actually needs.

Designer: HANDMAX Workshop

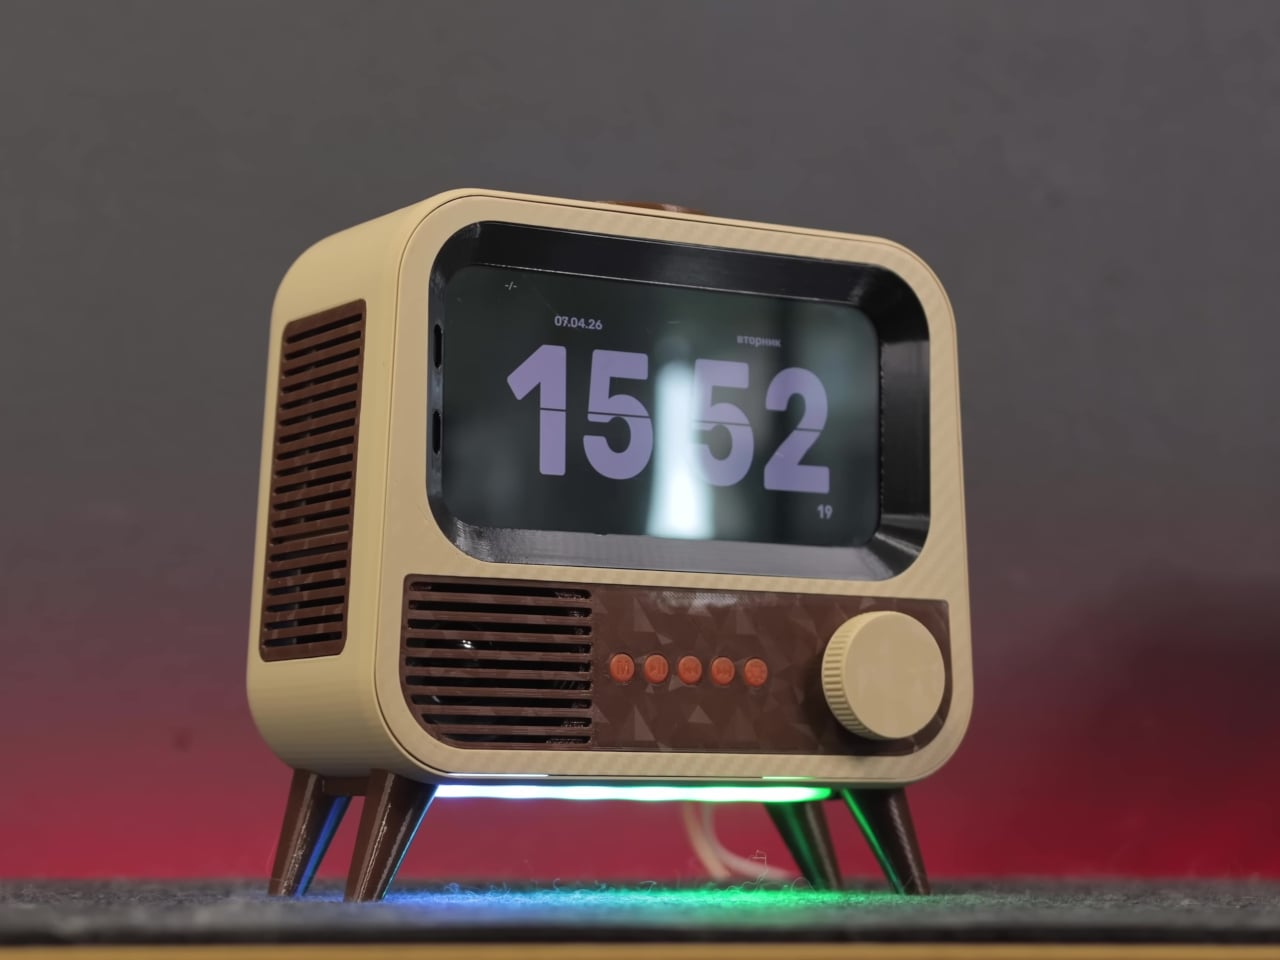
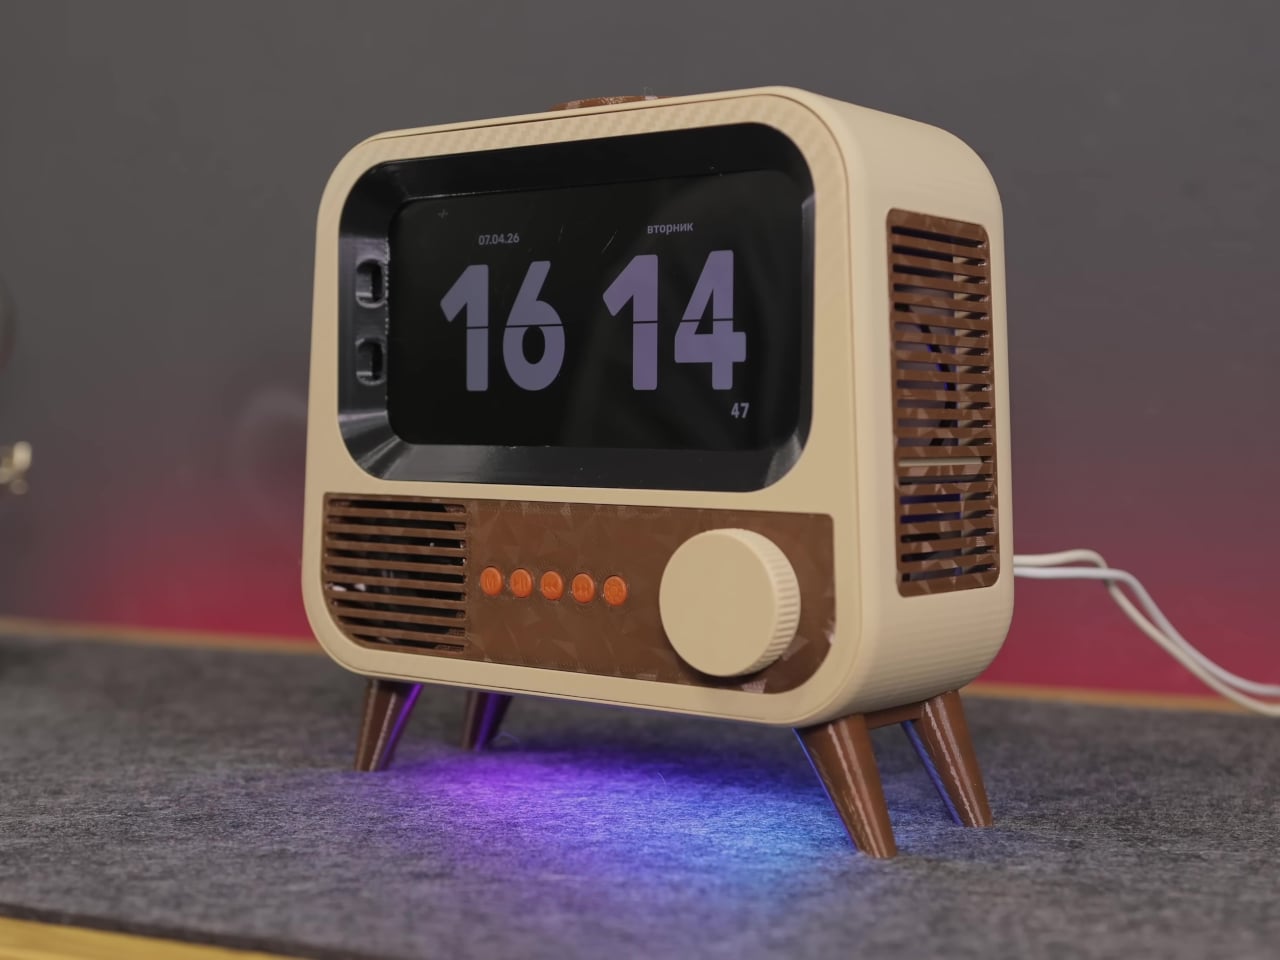
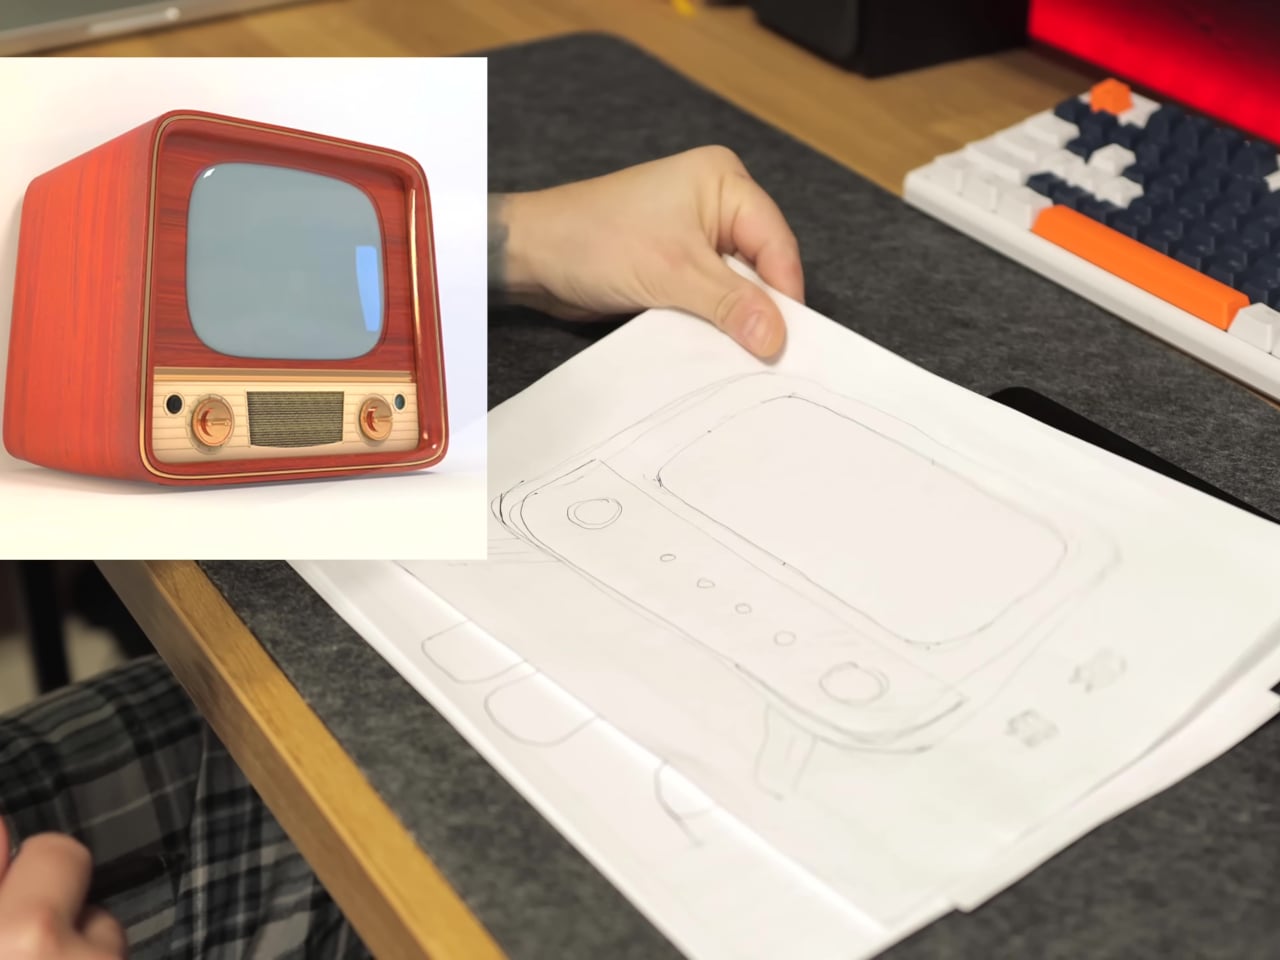
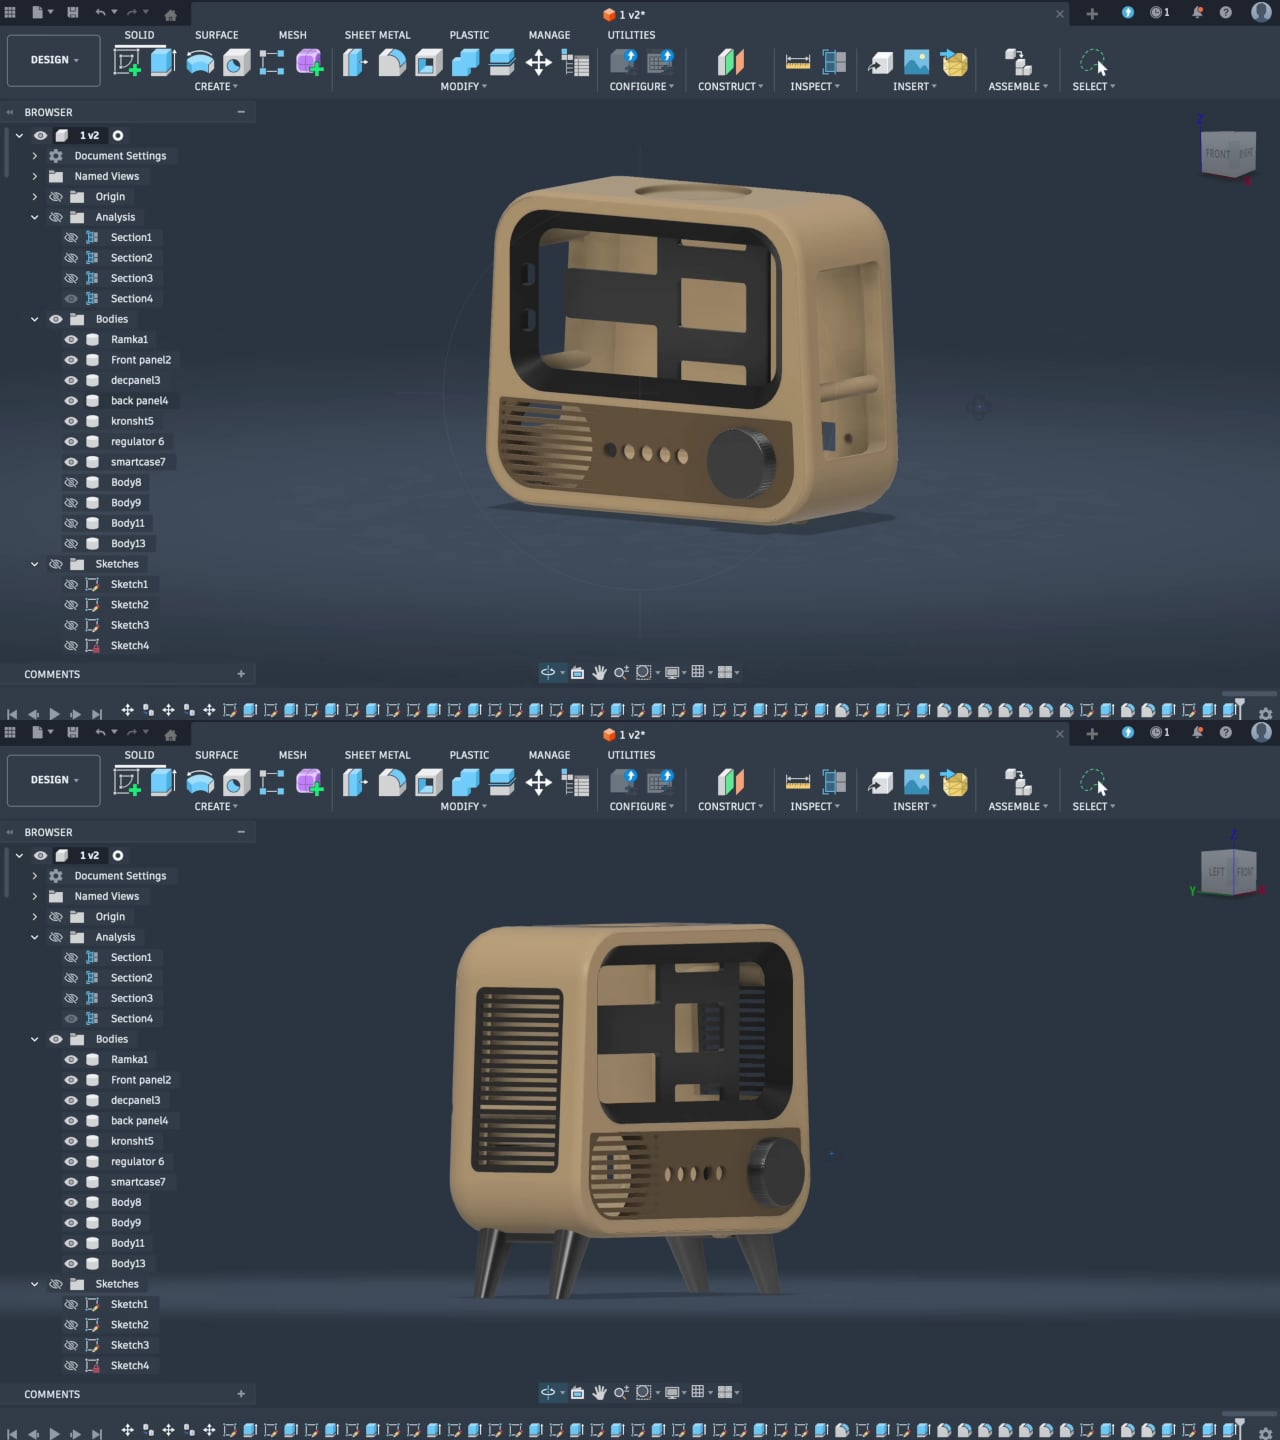
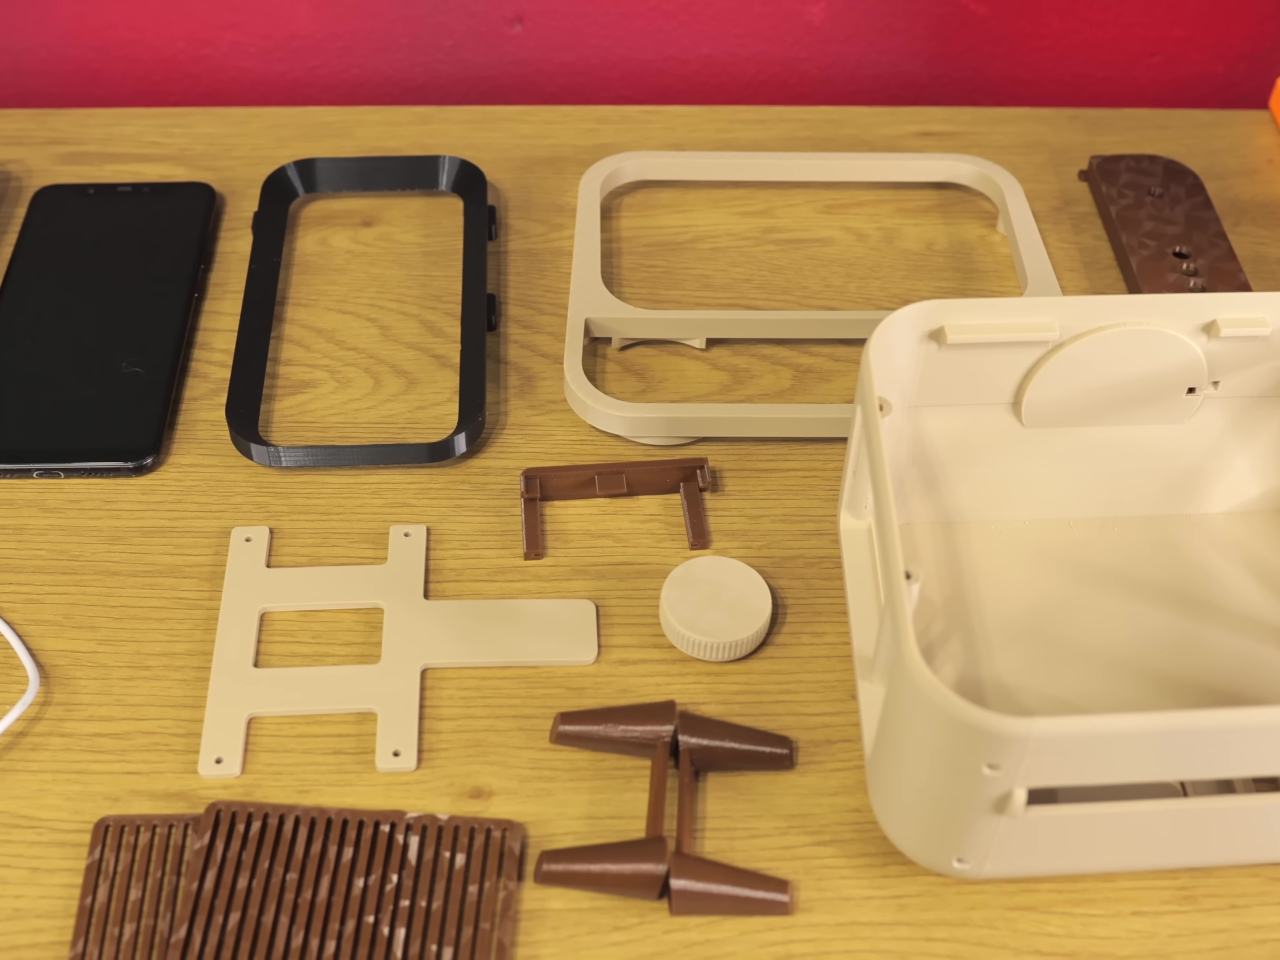
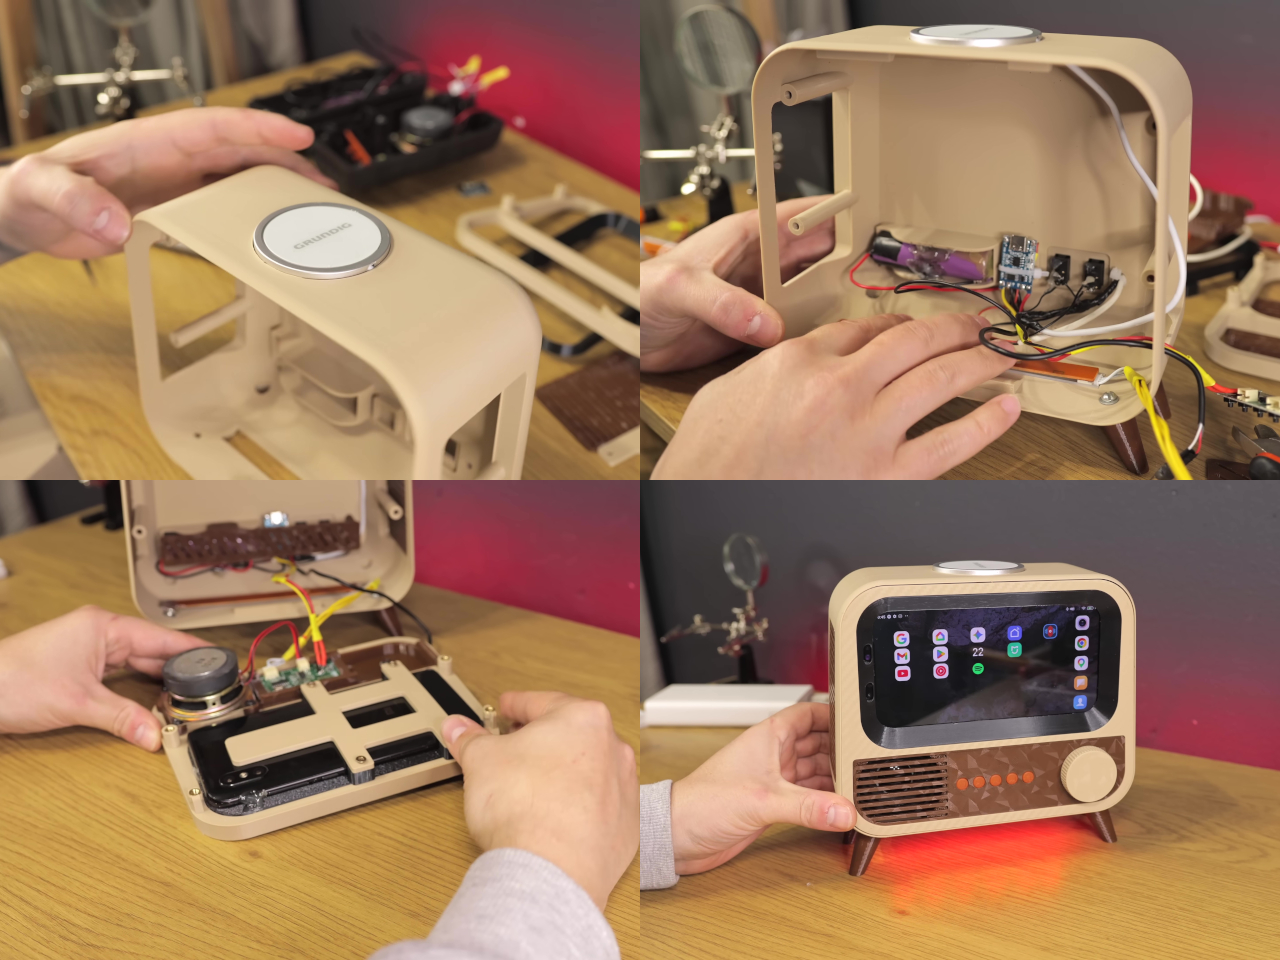
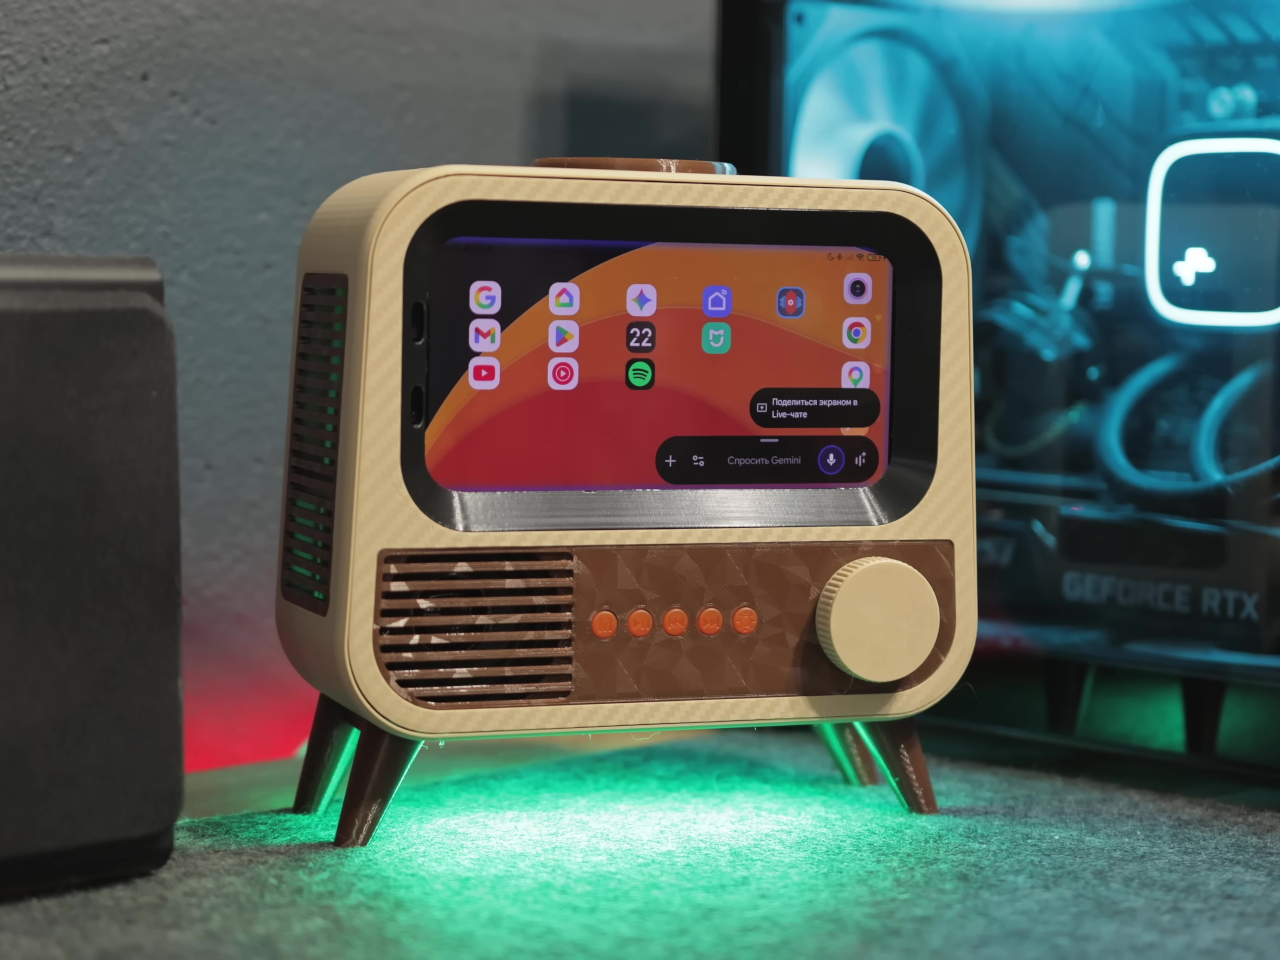
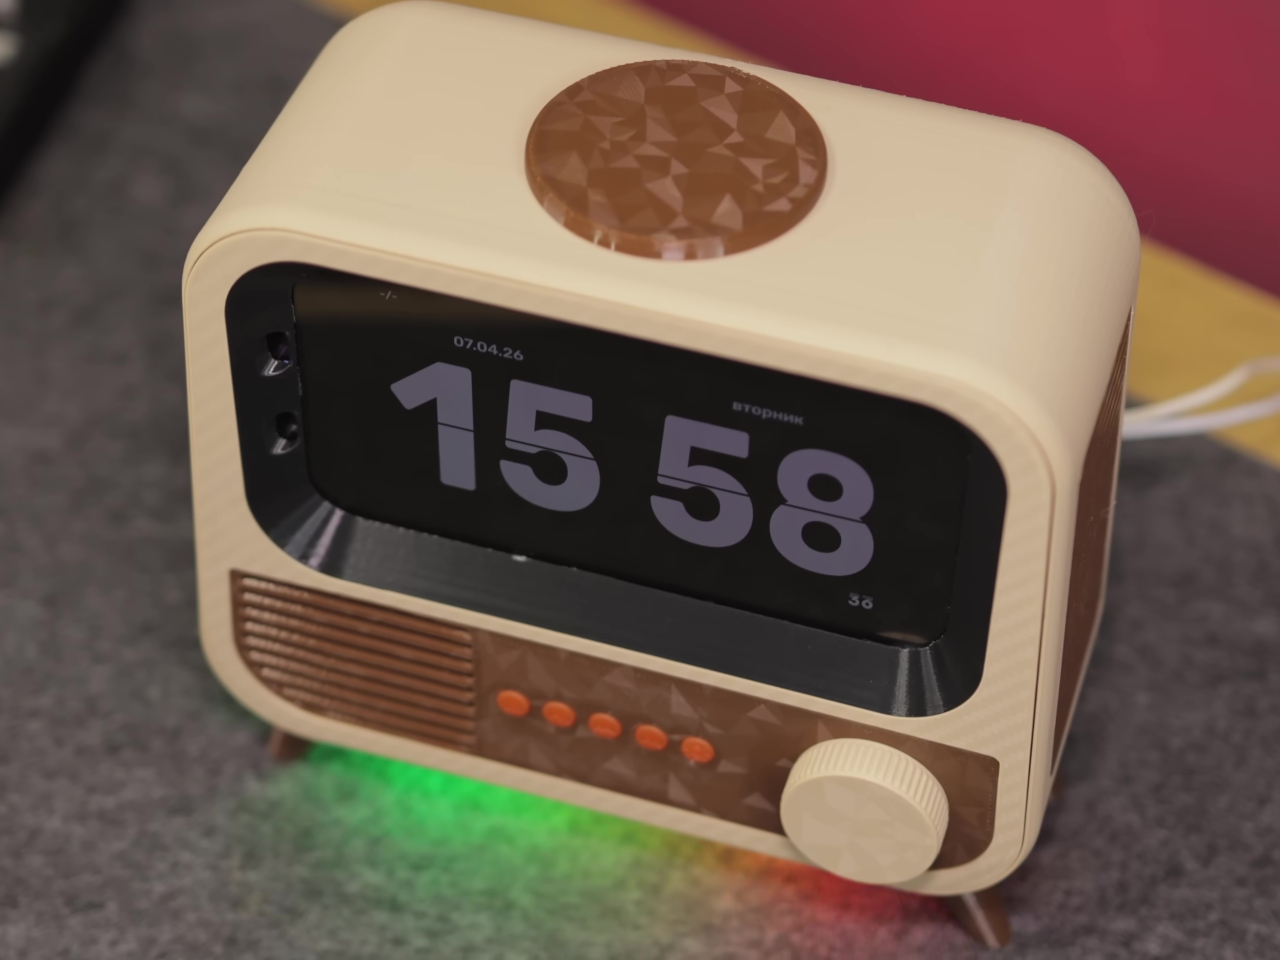
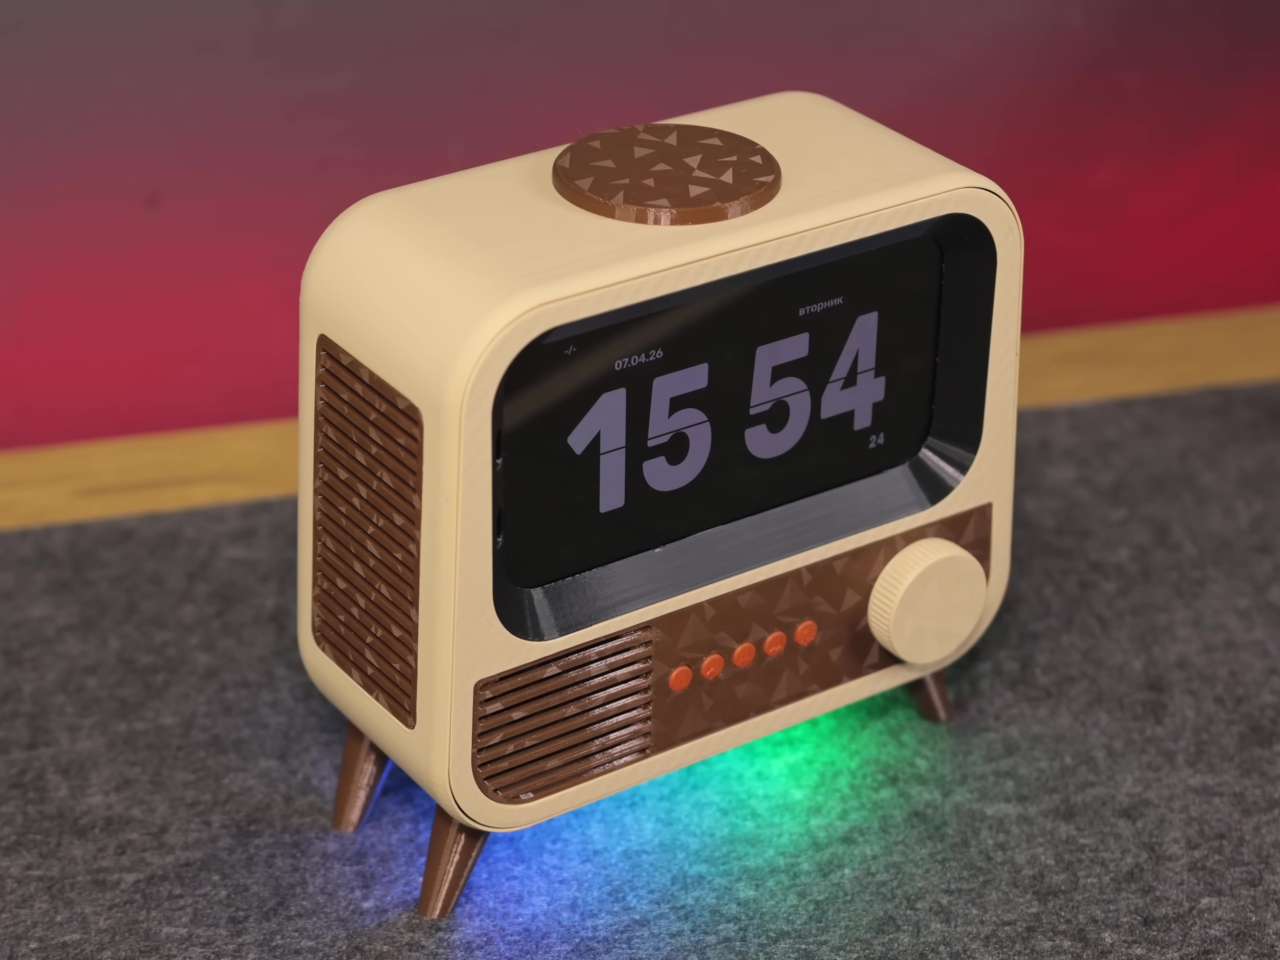
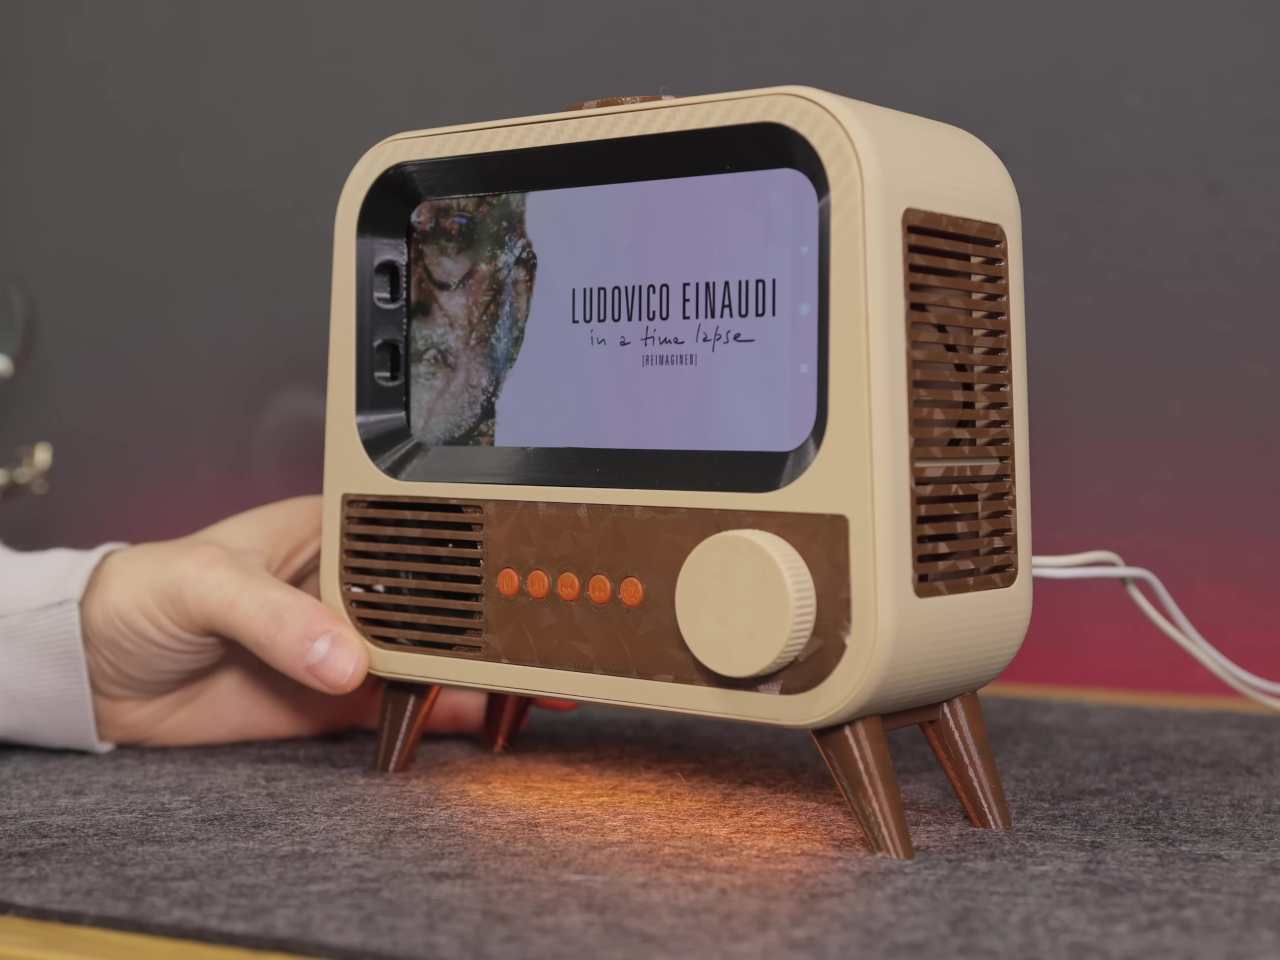
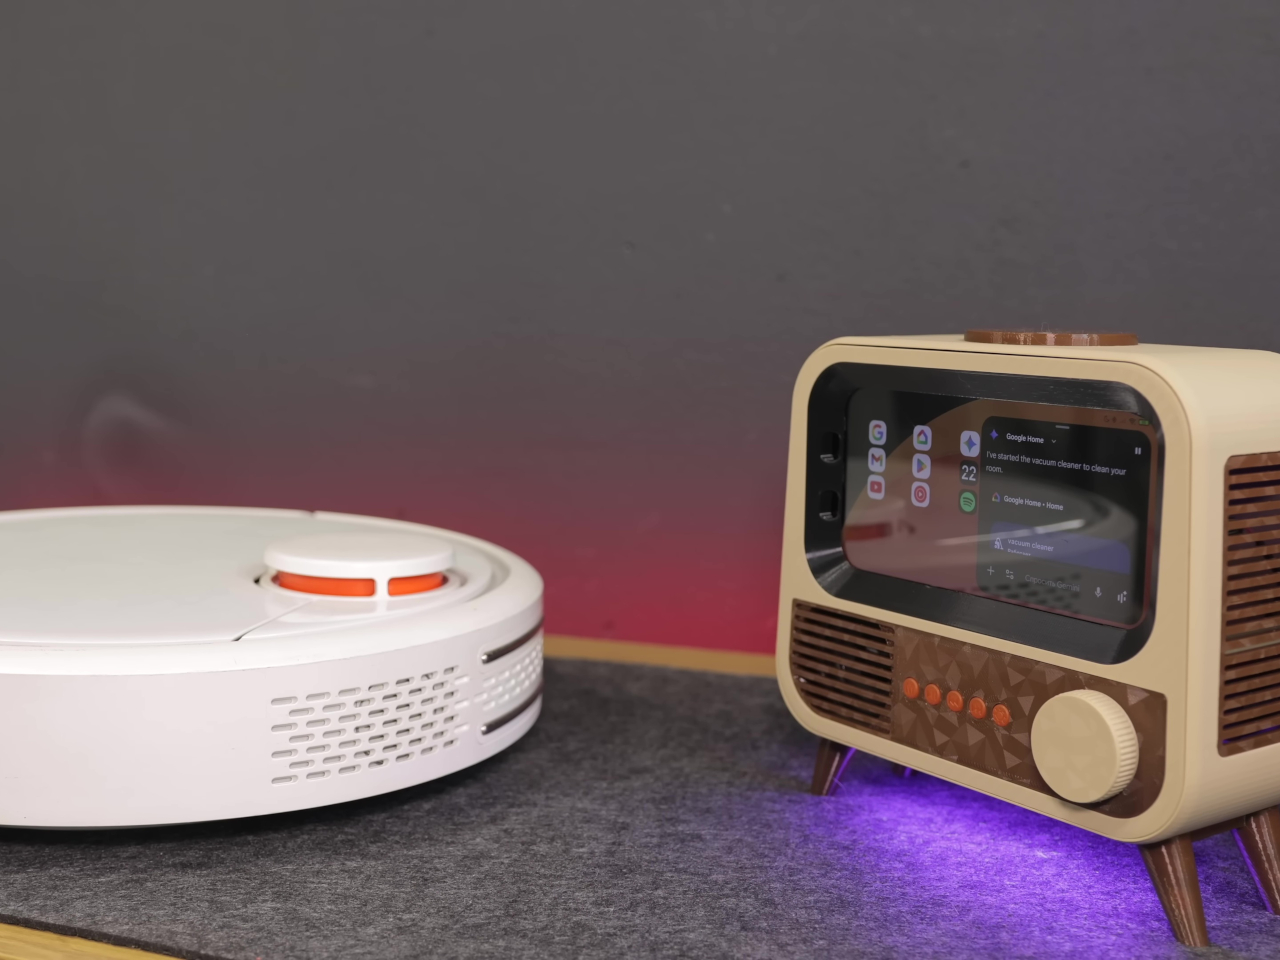
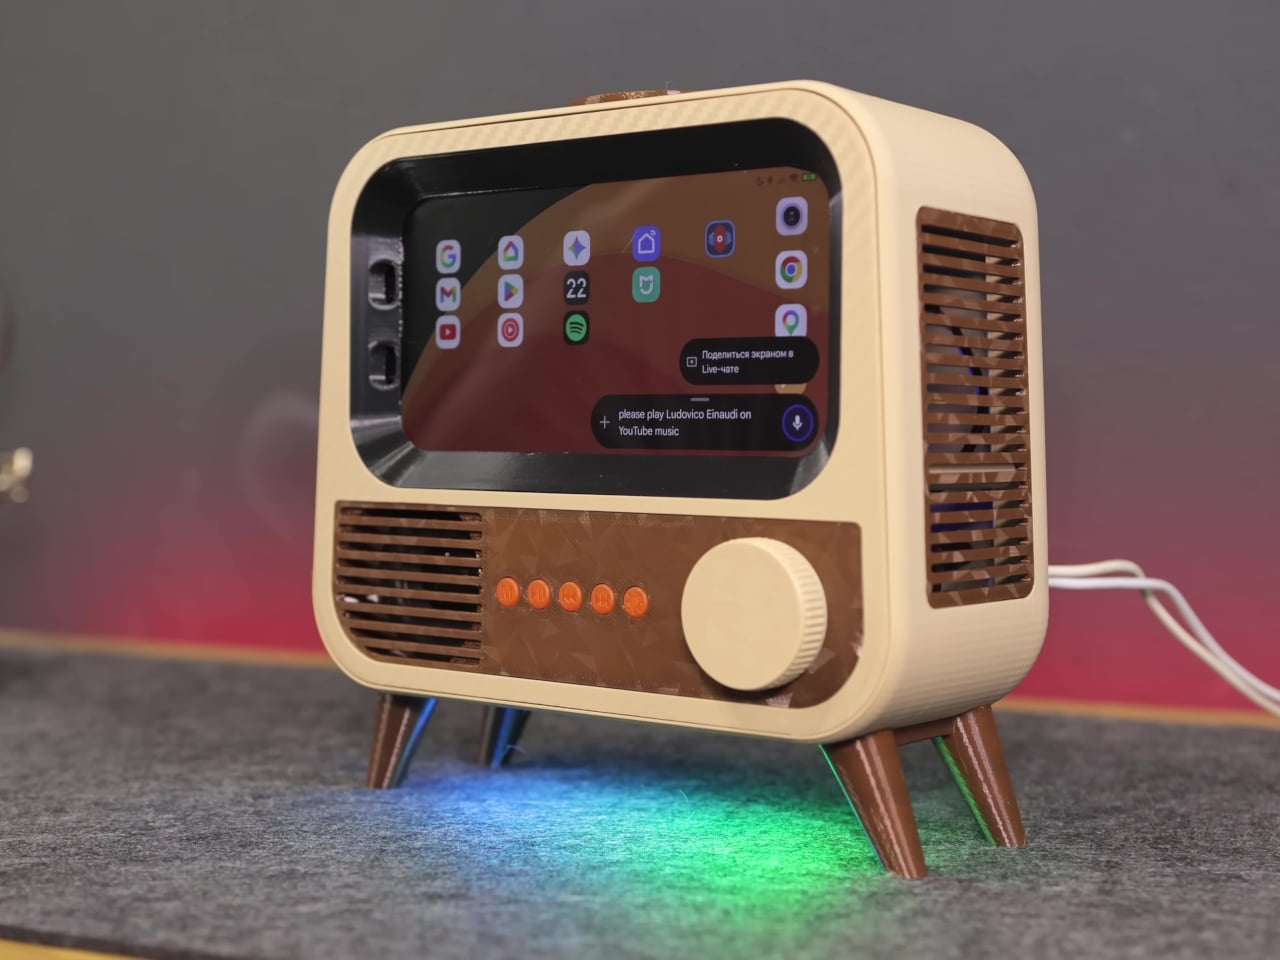
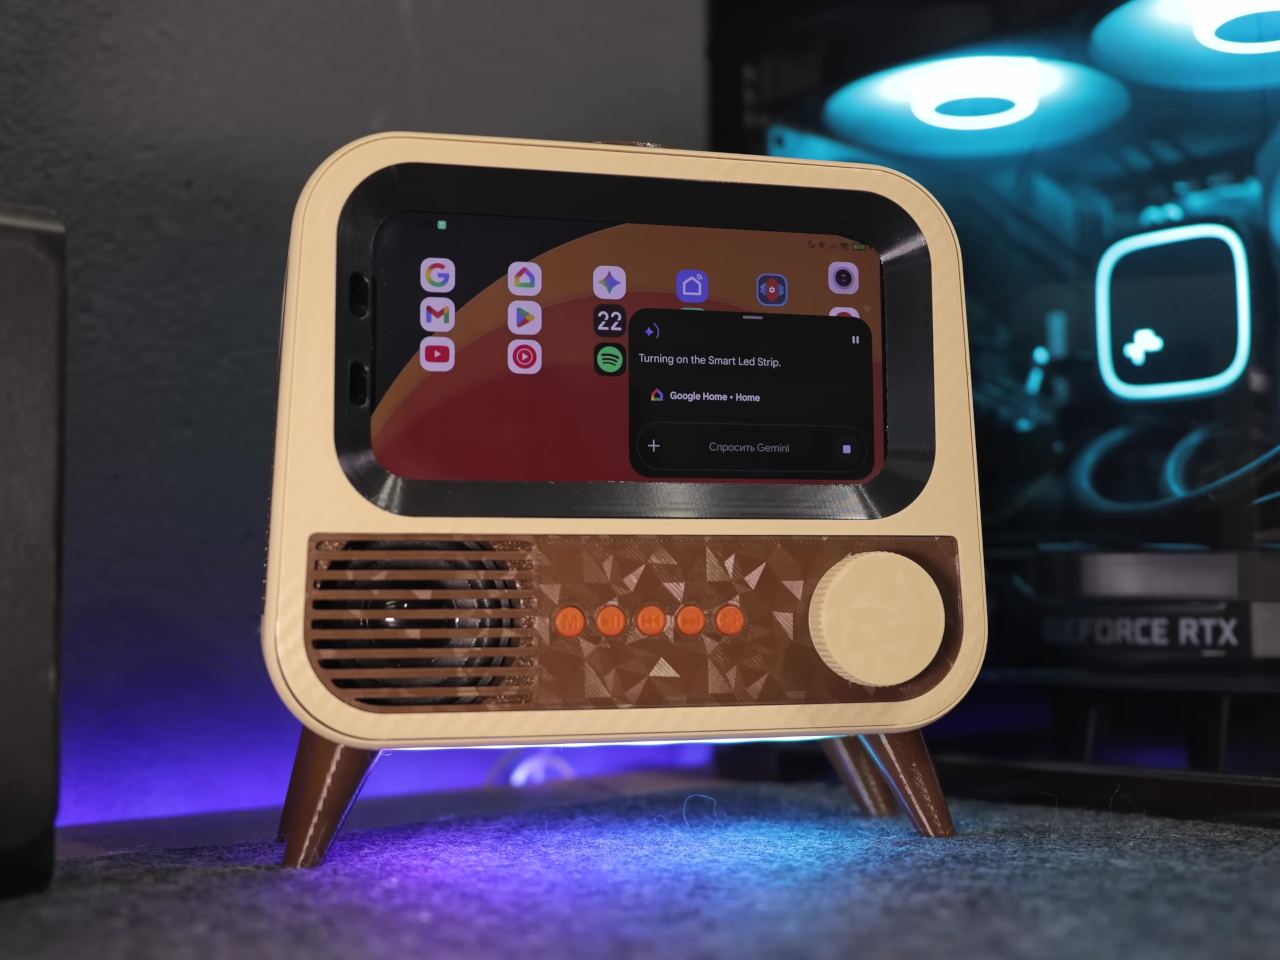
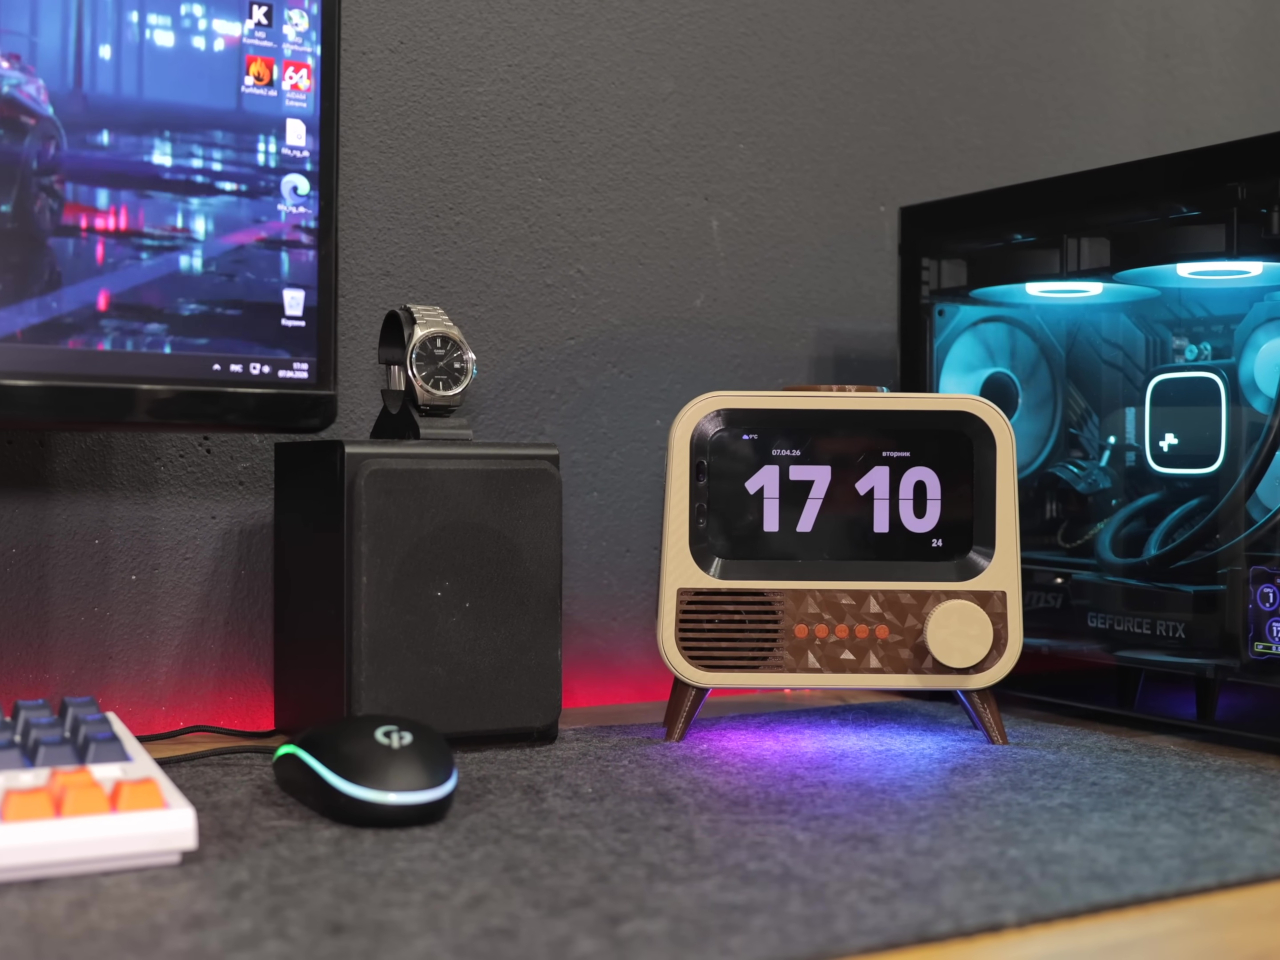
The case is where things get interesting. Instead of a sleek enclosure meant to blend in, the HANDMAX design goes full retro television, with a front grille, physical control buttons, and decorative legs completing the picture. Carefully modeled 3D-printed parts handle the practical side of things, accommodating the phone’s sensors and camera while keeping the vintage illusion intact from every angle you look at it.

Put it on a desk, and you have a smart speaker that looks like something rescued from a garage sale, in the best possible way. Ask it a question, and Google Gemini handles the conversational side, pulling in responses without needing a dedicated microprocessor or a new development board. It’s the same AI model powering higher-end commercial devices, running on hardware that would otherwise be sitting in a drawer.

The smart home integration is what makes it genuinely useful beyond being a conversation piece. Through Google Home, the device can control smart home accessories directly, and custom routines let voice commands trigger specific actions around the house. Turning lights on, adjusting a thermostat, or running a sequence of automations becomes a spoken instruction directed at what looks like a miniature television set.

Getting there wasn’t entirely straightforward. The phone’s Bluetooth module had a habit of shutting itself down after 20 minutes of silence, which would quietly cripple the whole setup. The fix was characteristically clever, though; an inaudible 6 Hz tone runs constantly in the background, imperceptible to human ears but enough to convince the firmware that the system is still in use and shouldn’t shut down.

Beyond voice interaction, the finished device also functions as a wireless charger and a desktop display, which means it earns its counter space even when no one is talking to it. The final hardware list doesn’t include a single new component, just old parts that most people would have discarded without a second thought. That’s the more interesting design challenge of the two.

There’s an argument to be made that the best AI hardware isn’t always the most expensive, and this project makes it quietly. Commercial smart speakers are bought, used for a few years, and eventually replaced. A device built from broken hardware doesn’t follow that lifecycle, and the retro TV case that holds it together makes sure it doesn’t look like it’s trying to.

The post A Burned-Out Xiaomi Phone Now Runs Gemini AI Inside a Retro TV Case first appeared on Yanko Design.
The Xbox Prototype That Cost $18K Now Takes Just a Spool of Filament

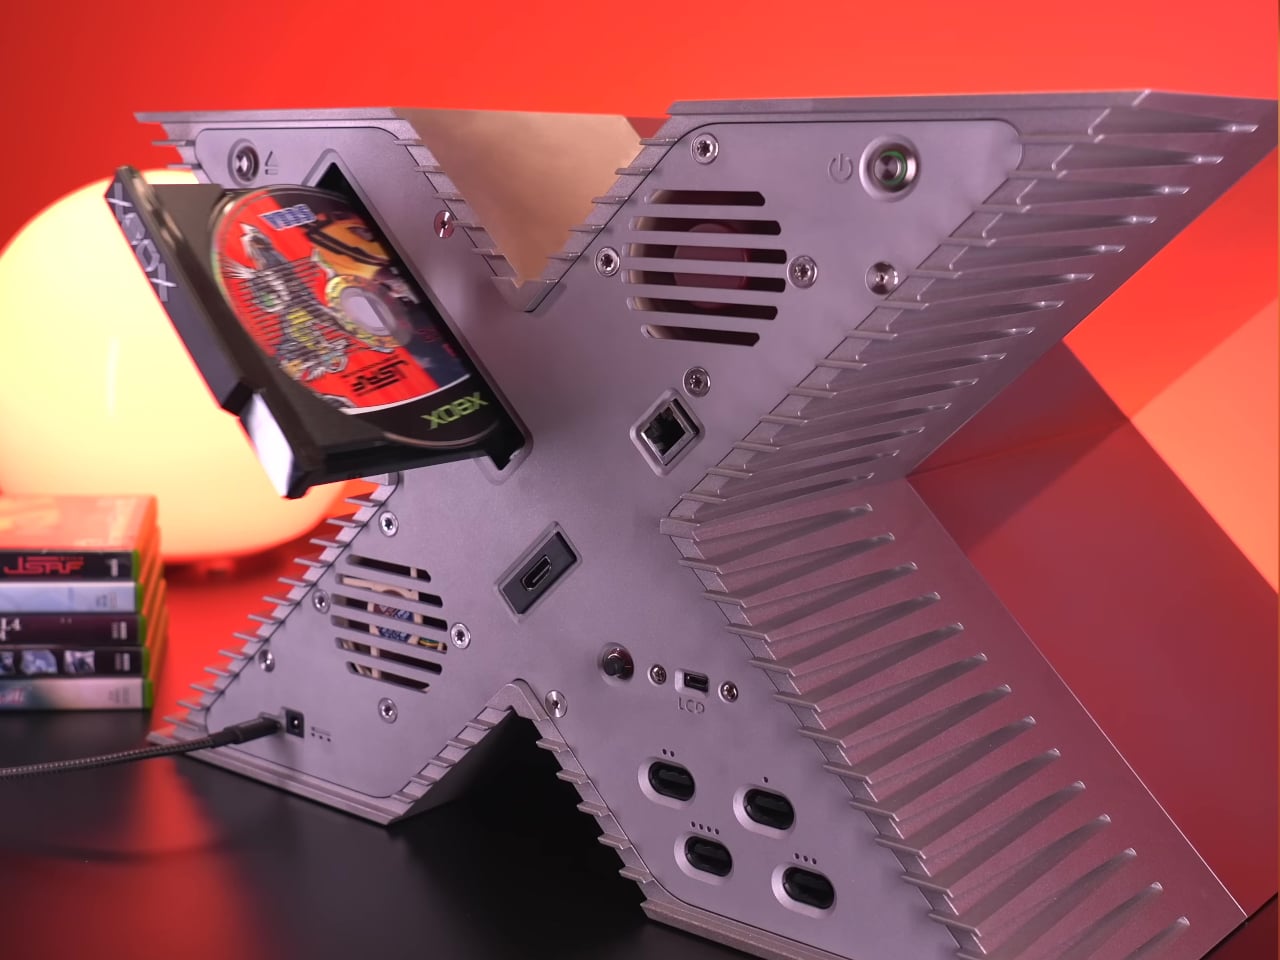
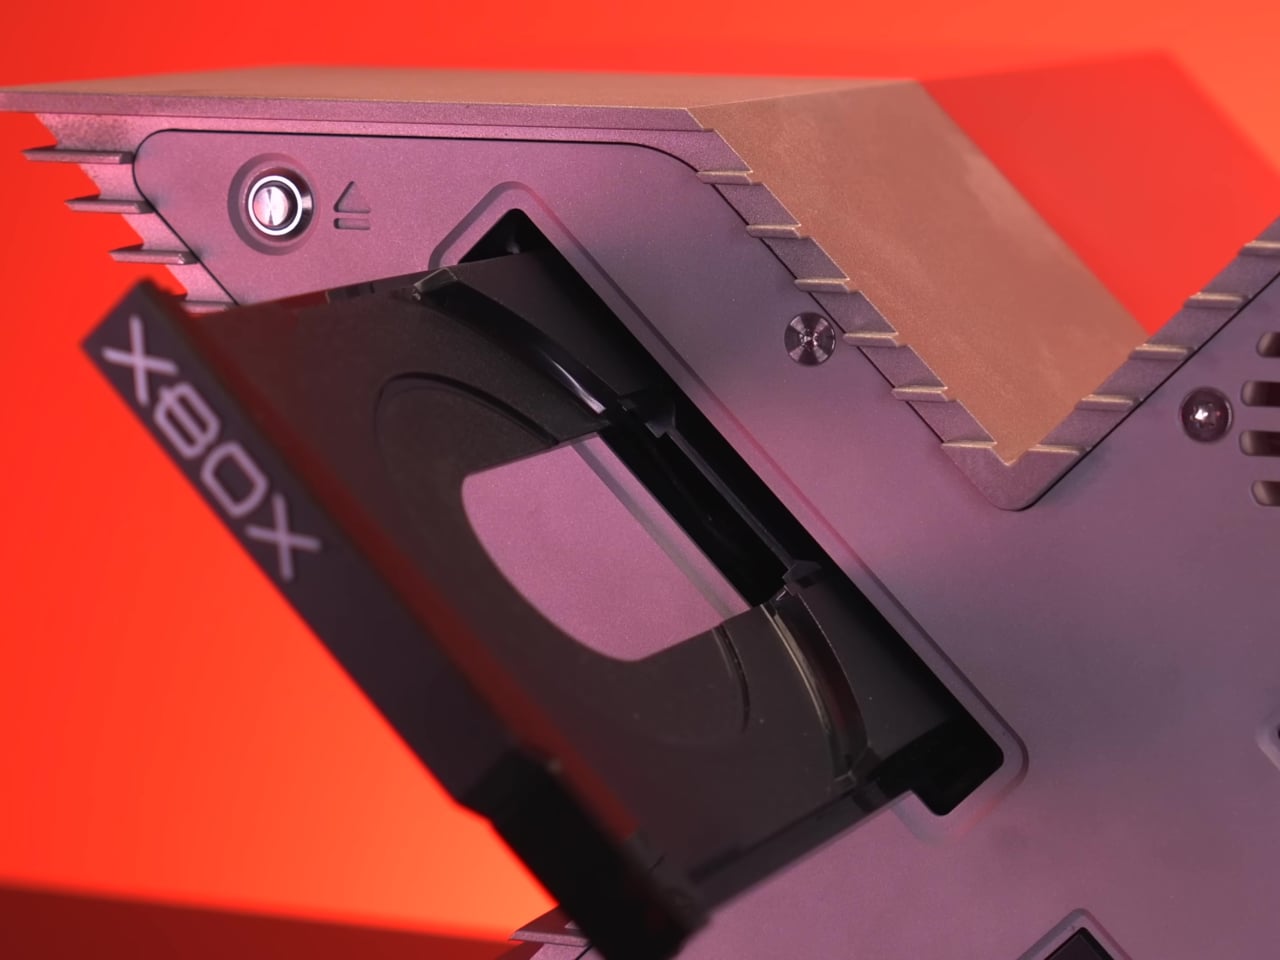
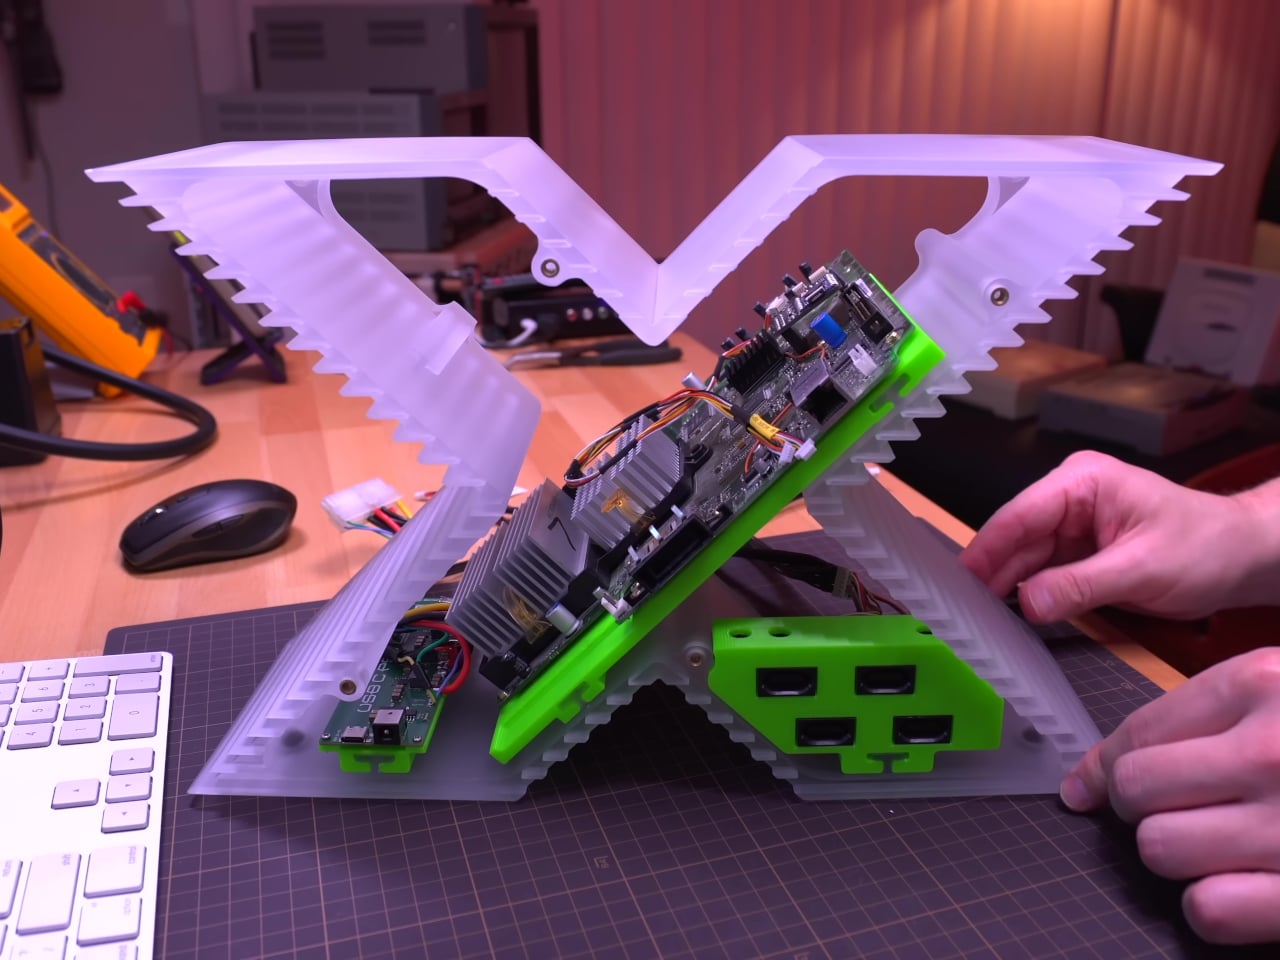
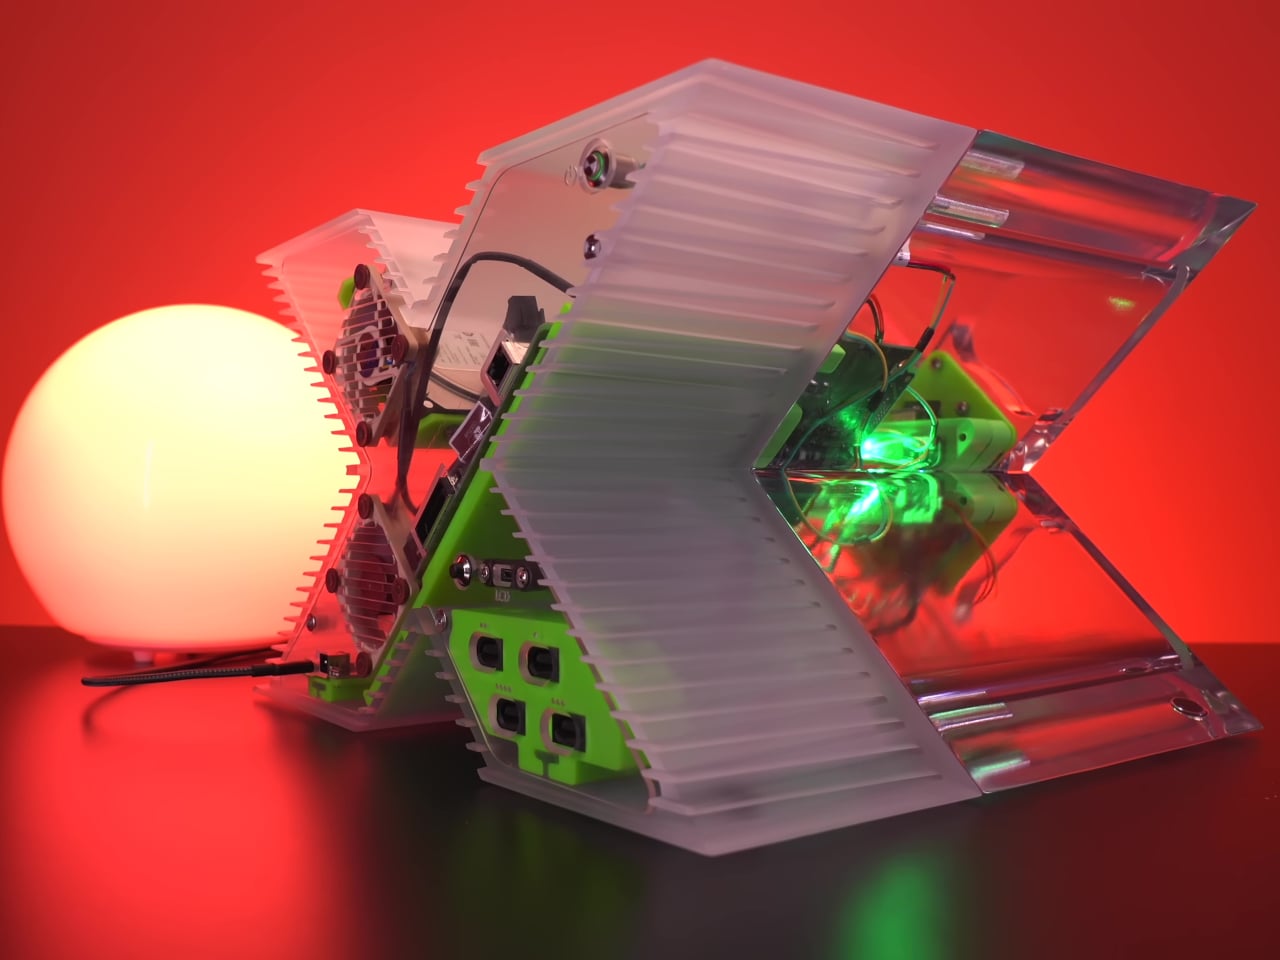
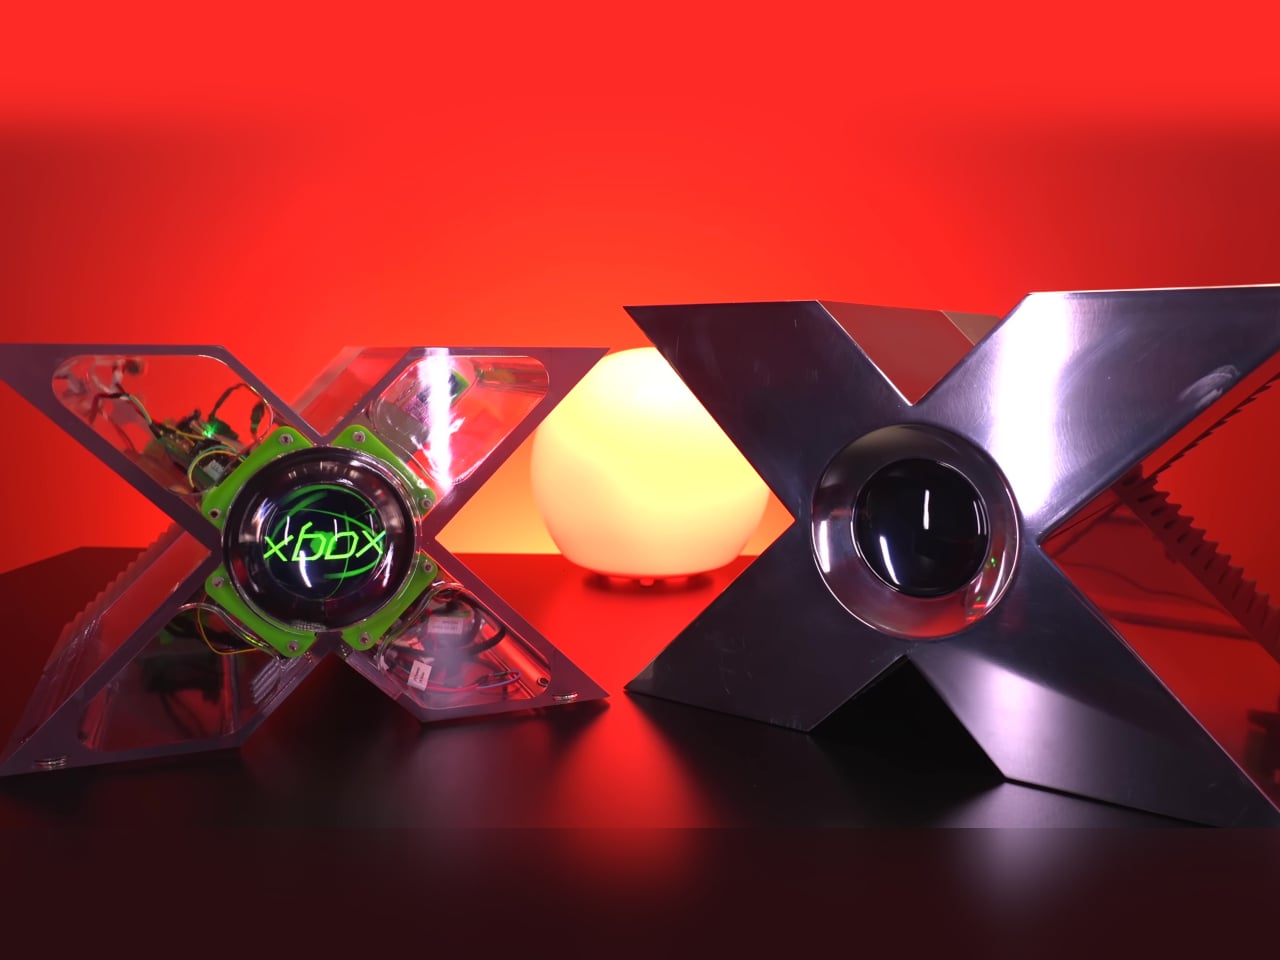
There are hardware designs from the early 2000s that still stop people cold, and the original Xbox prototype is near the top of that list. Revealed at GDC 2000 by Bill Gates and Seamus Blackley, it was a massive X carved from a single block of aluminum, reportedly costing around $18,000 per unit. It was a developer showcase piece that toured press conferences and wasn’t meant for production.

Tito of Macho Nacho Productions previously got as close as anyone has managed by building a functional aluminum replica, though the enclosure alone cost thousands of dollars in machining. It was impressive and historically faithful, but it wasn’t something you could attempt yourself. His new version takes the same idea and rebuilds it entirely around 3D printing, with accessibility as the primary goal.

Designer: Macho Nacho Productions/Nacho Engineering

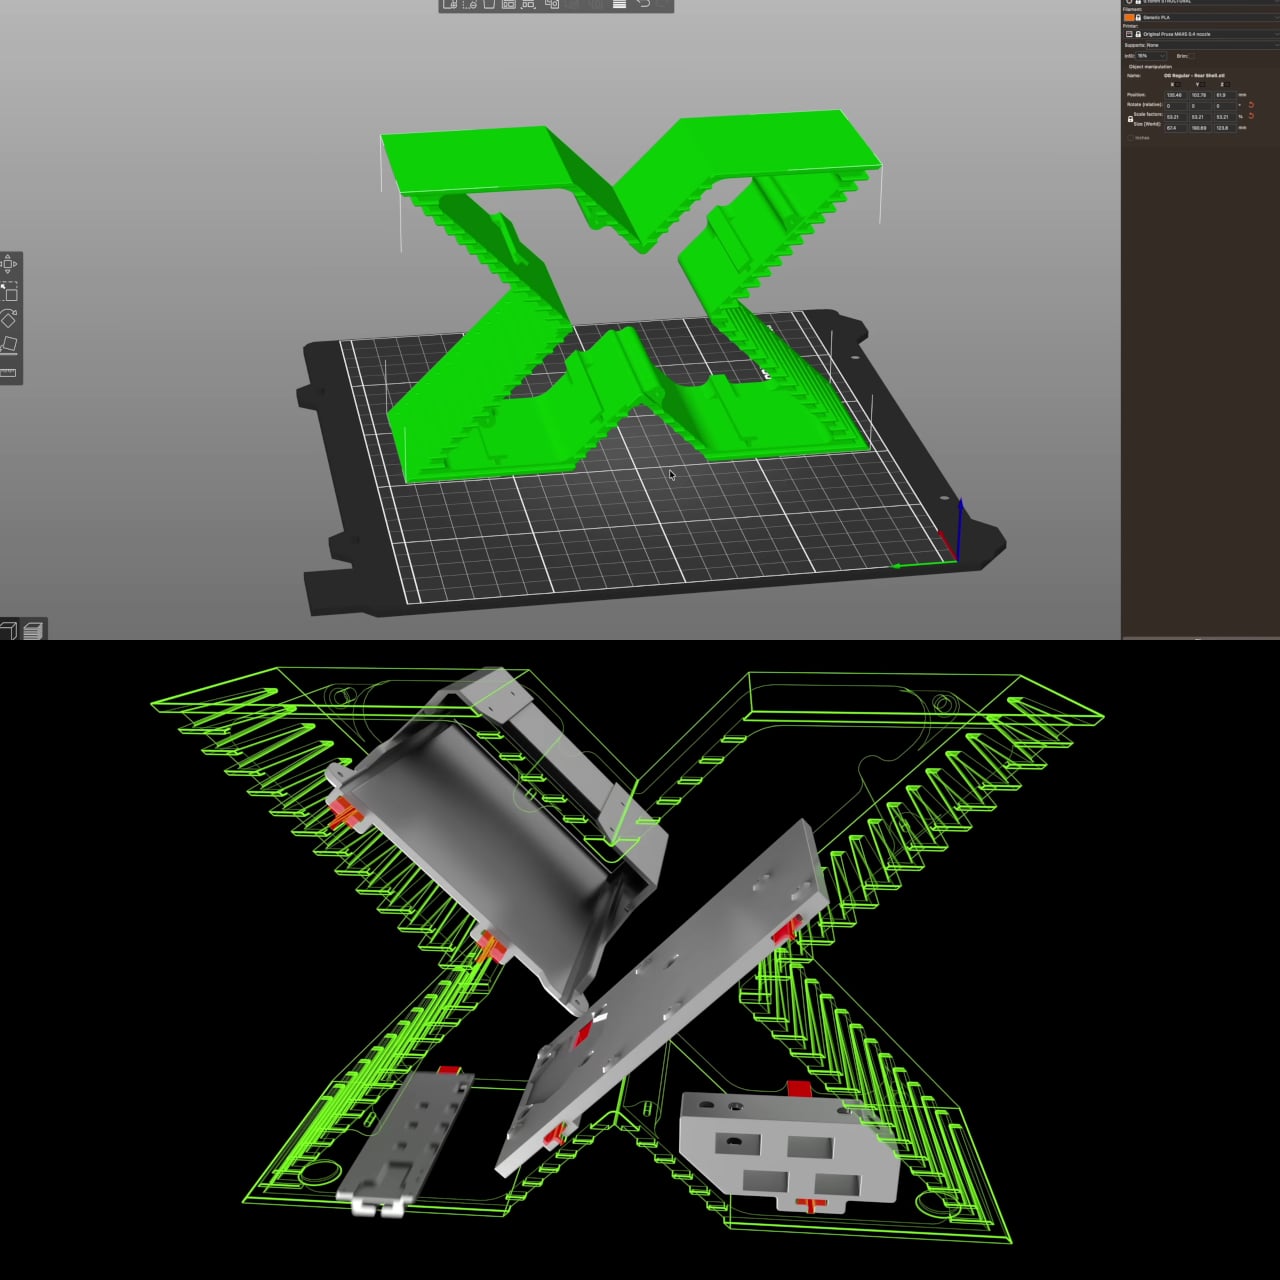
The digital files are available through his online store, and the enclosure can be printed at home if you have a large enough machine, or sent off to a 3D printing service. It’s not a complicated sourcing challenge; different configurations accommodate different build approaches, giving hobbyists some flexibility in how they put it together. Either way, the barrier to entry has dropped considerably, which is the entire point.

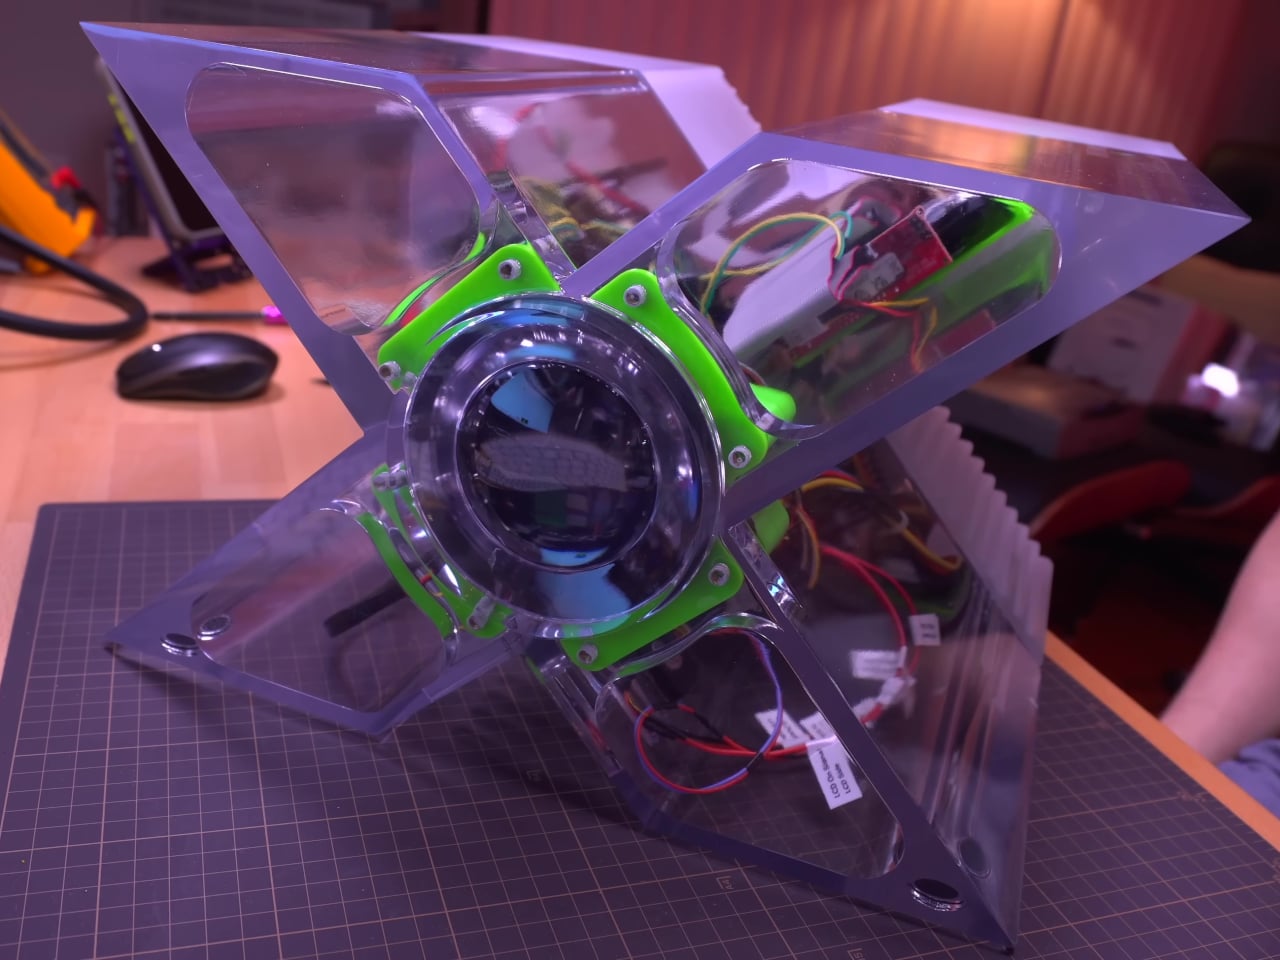
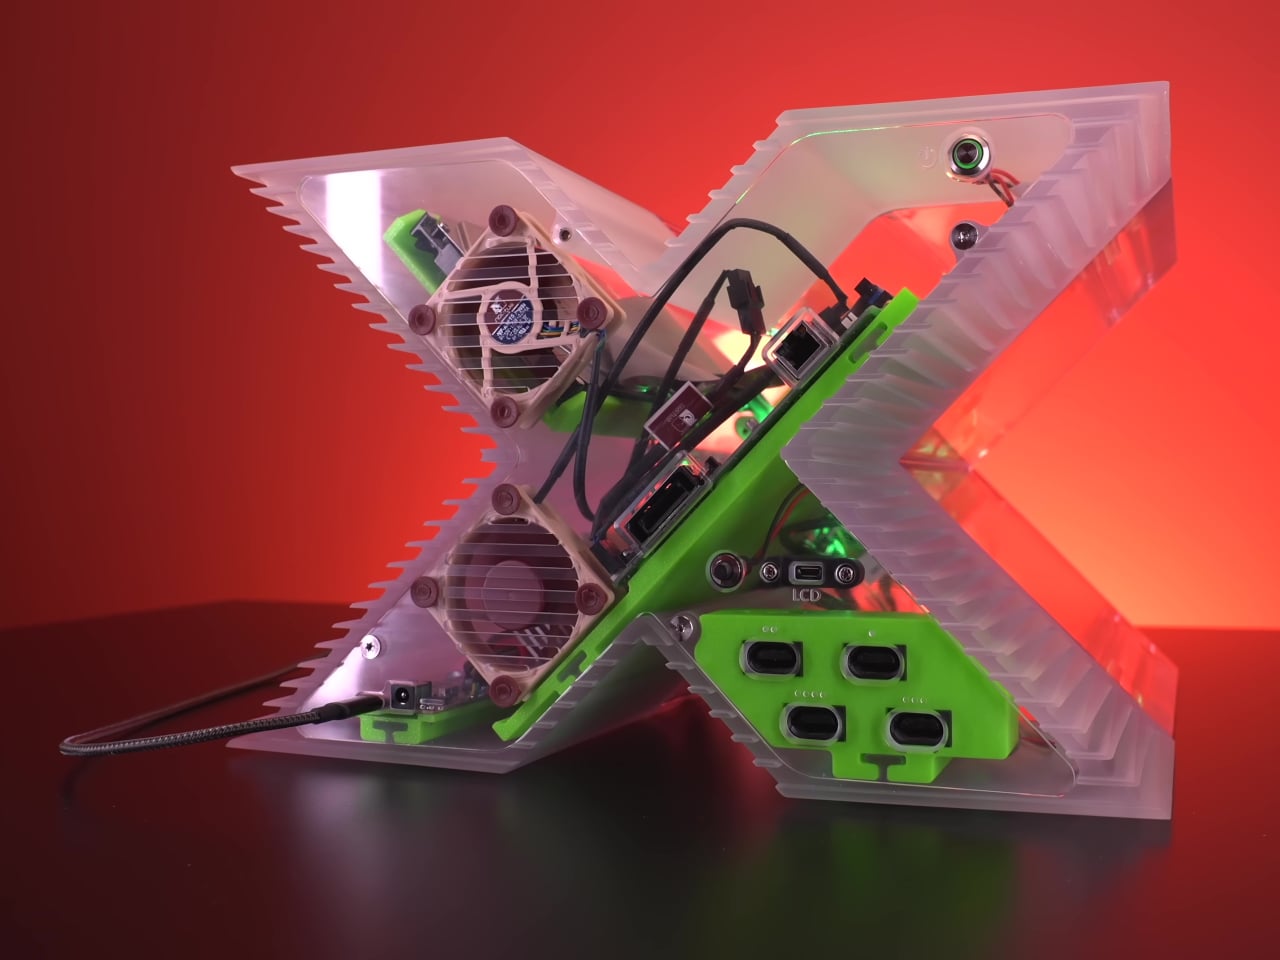
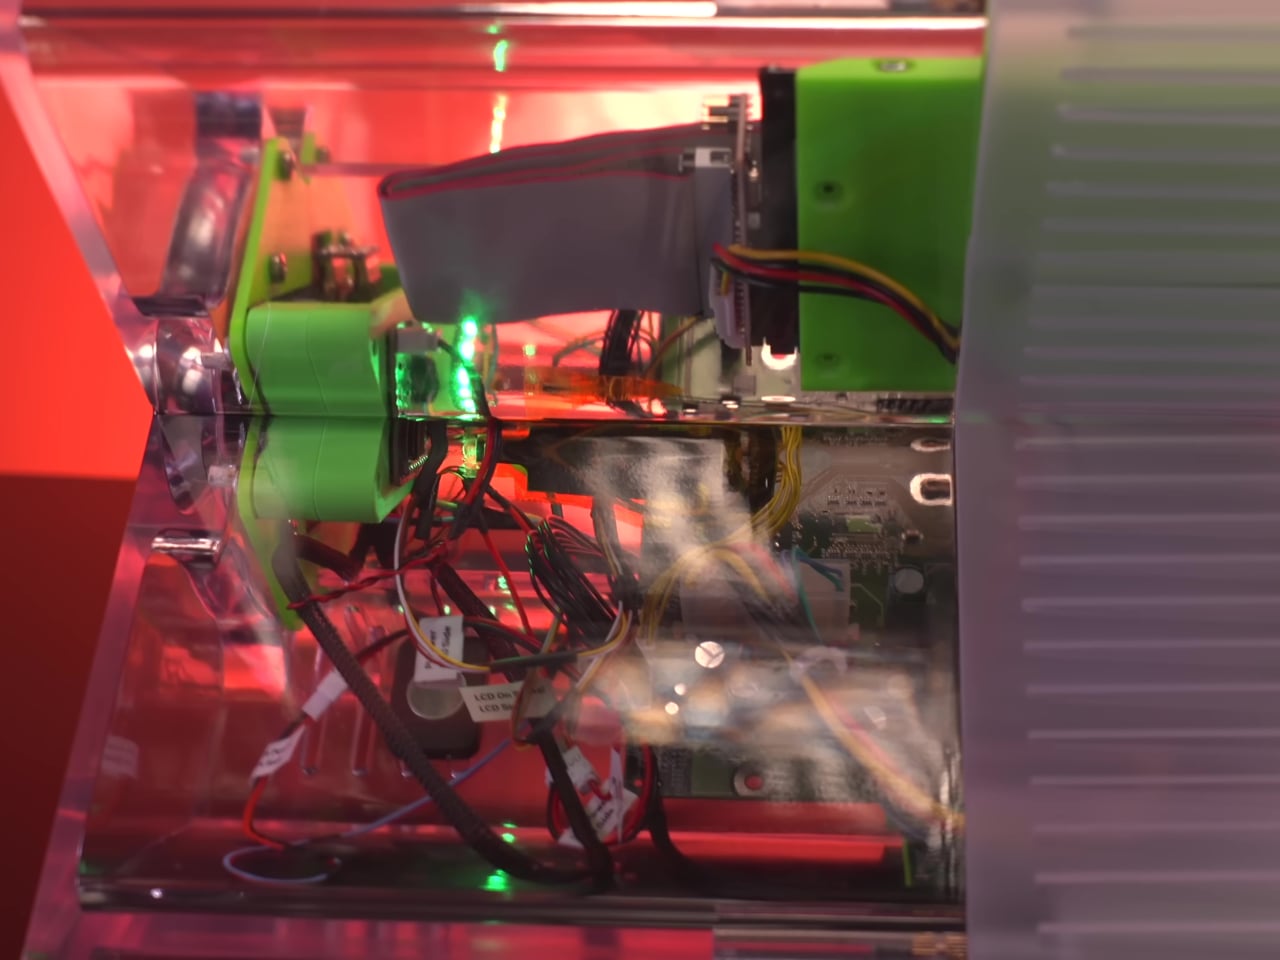
Getting the shell printed in clear resin produces a glass-like finish the aluminum build never had, and the transparency turns the internal components into part of the visual appeal. More significantly, this version finally matches the true dimensions of the original GDC prototype, a distinction the previous aluminum replica couldn’t make. For anyone interested in historical accuracy, that’s the more meaningful improvement of the two.

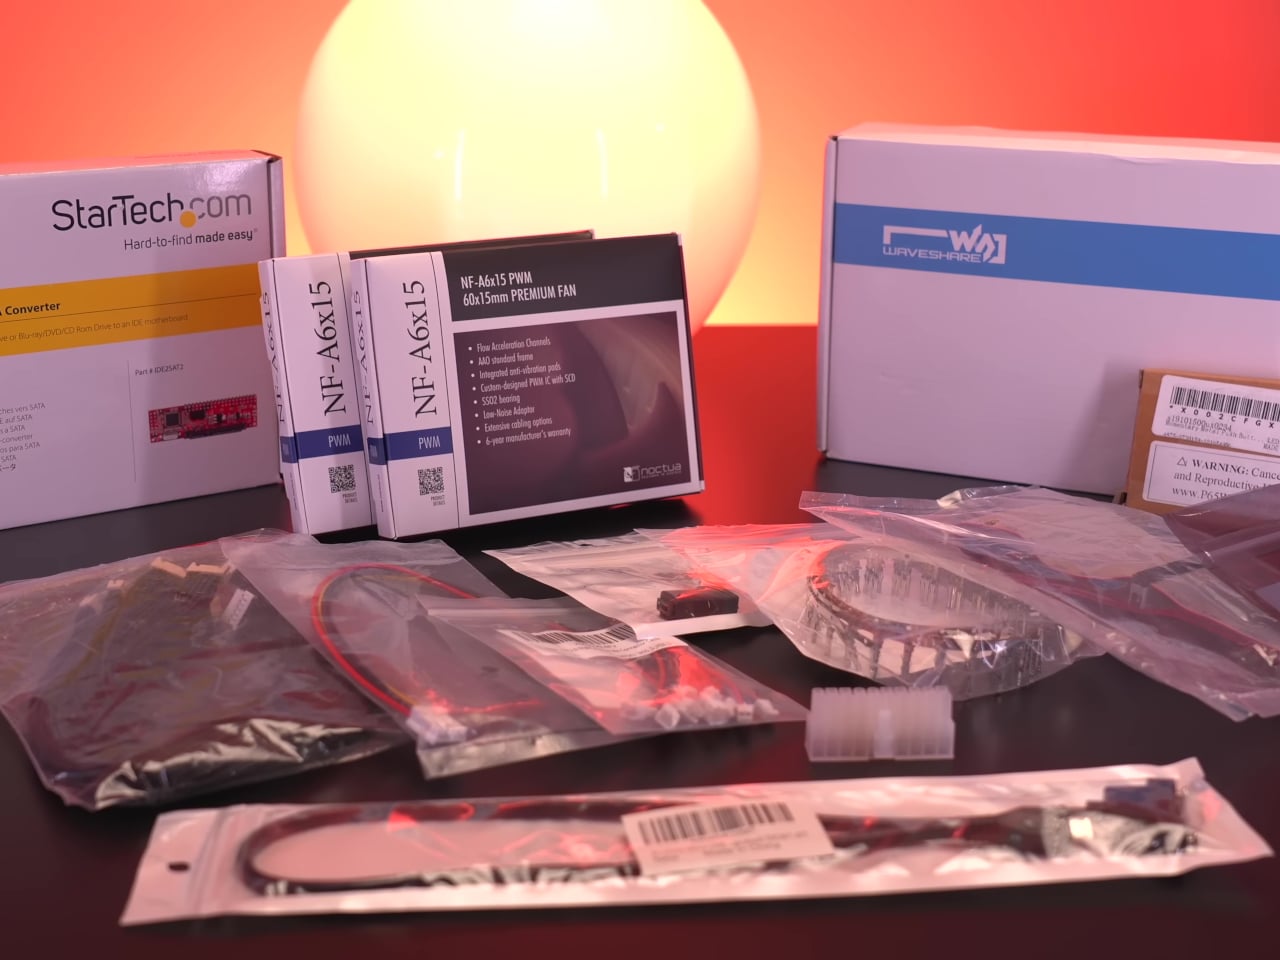
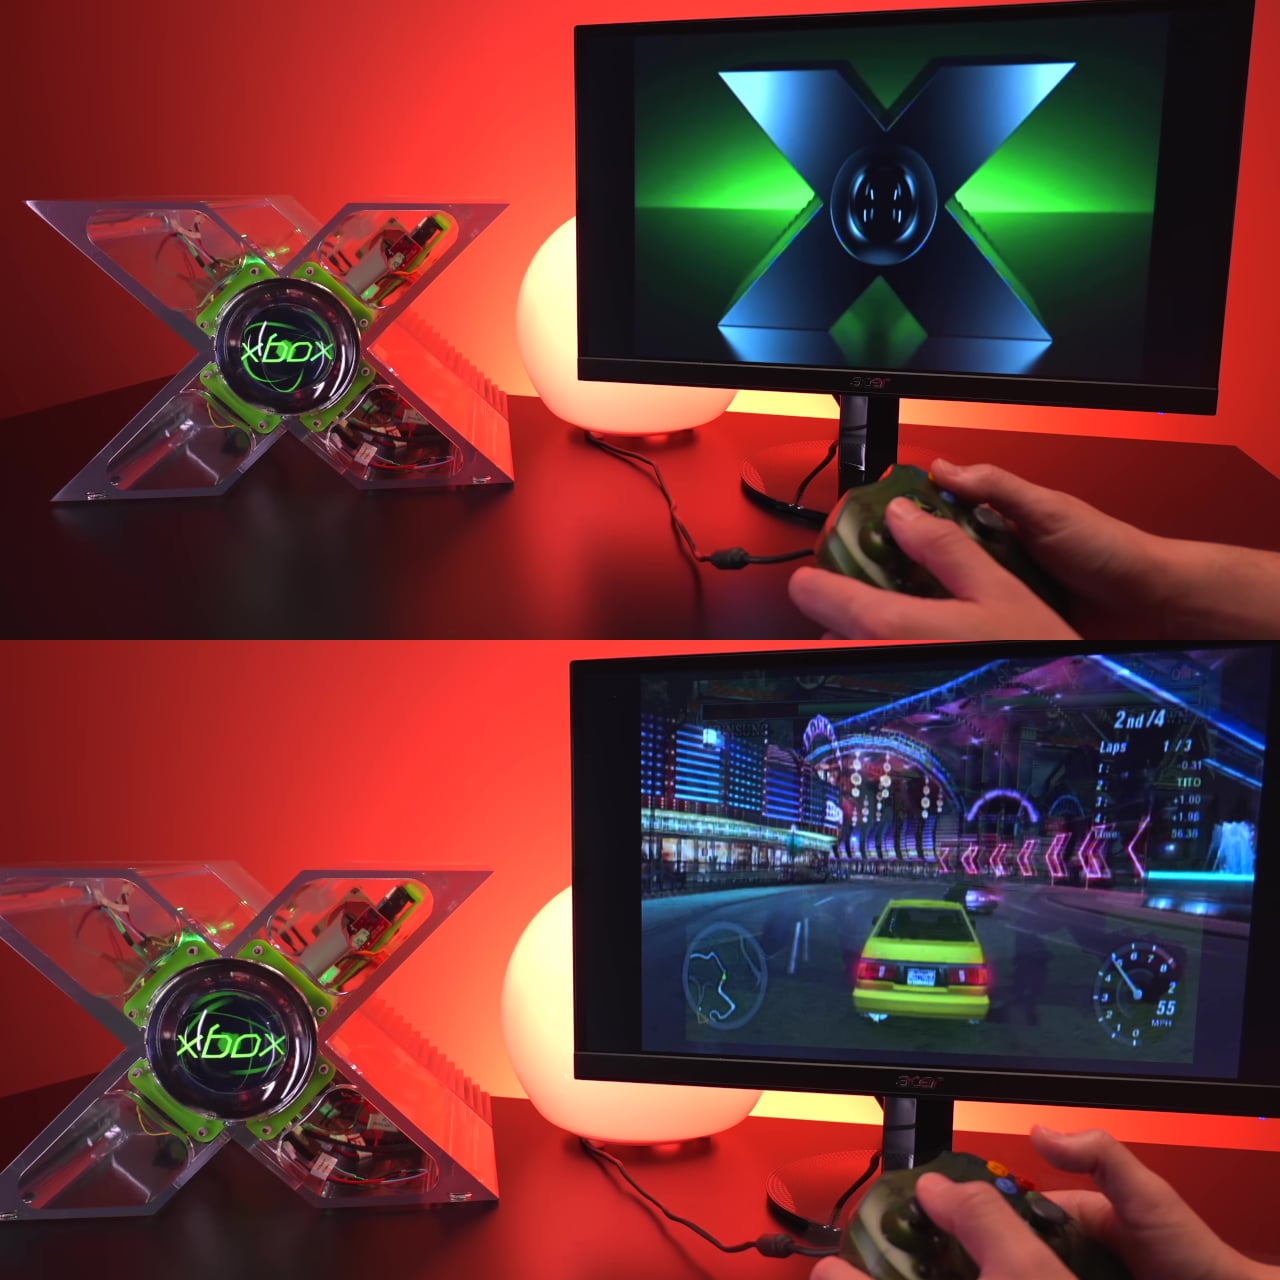
The original prototype didn’t have much at the center of its X besides a small green light. The replica replaces that with a round Waveshare LCD driven by a Raspberry Pi Pico 2 paired with a DVI sock. That combination lets the Pico push video to the round display without additional hardware, a compact solution that gives the build a much more animated presence than the original’s glow ever managed.

What makes this genuinely interesting beyond nostalgia is how deliberately it was rebuilt for the modding community rather than as a personal showcase. The print-friendly engineering turns what was previously a one-of-a-kind machined object into something with a shared community standard. Hobbyists don’t need access to a machine shop anymore to own one; they just need a printer, some patience, and a donor Xbox motherboard.

The build runs the original Xbox motherboard inside the new shell, keeping its gaming credentials intact. A modern USB-C power solution replaces the original Xbox’s notoriously oversized power brick, freeing up internal volume that the X-shaped enclosure genuinely needs. It’s a practical modernization that doesn’t ask you to give up the authenticity of running original hardware, which is exactly what this kind of replica demands.

The original X design was always more statement than product, a way of telling developers in 2000 that Microsoft was serious with hardware dramatic enough to make the point without words. The retail Xbox that followed looked nothing like it. Twenty-five years later, the modding community is effectively building the console Microsoft couldn’t, and making the files available to anyone willing to put in the work.

The post The Xbox Prototype That Cost $18K Now Takes Just a Spool of Filament first appeared on Yanko Design.
Two Makers Just Built the Pocket Linux PC Big Tech Refused To Make

The commercial laptop market has gotten good at making portable computers slim and powerful, but it hasn’t quite figured out what to do with people who want something truly pocketable. A growing number of DIY enthusiasts have taken matters into their own hands, building compact personal computers known as cyberdecks from scratch, and the results have been growing increasingly polished and impressive.

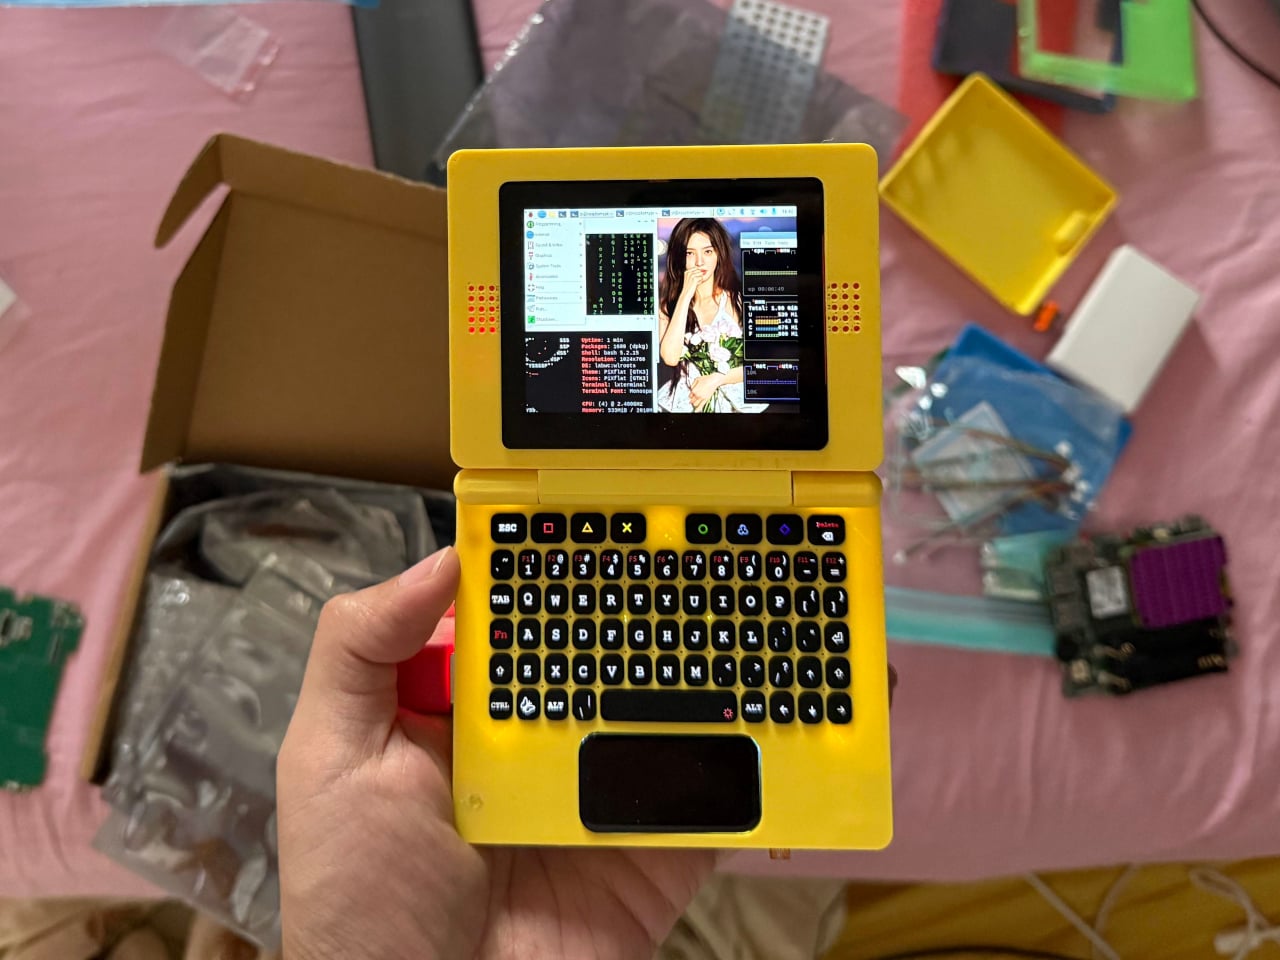
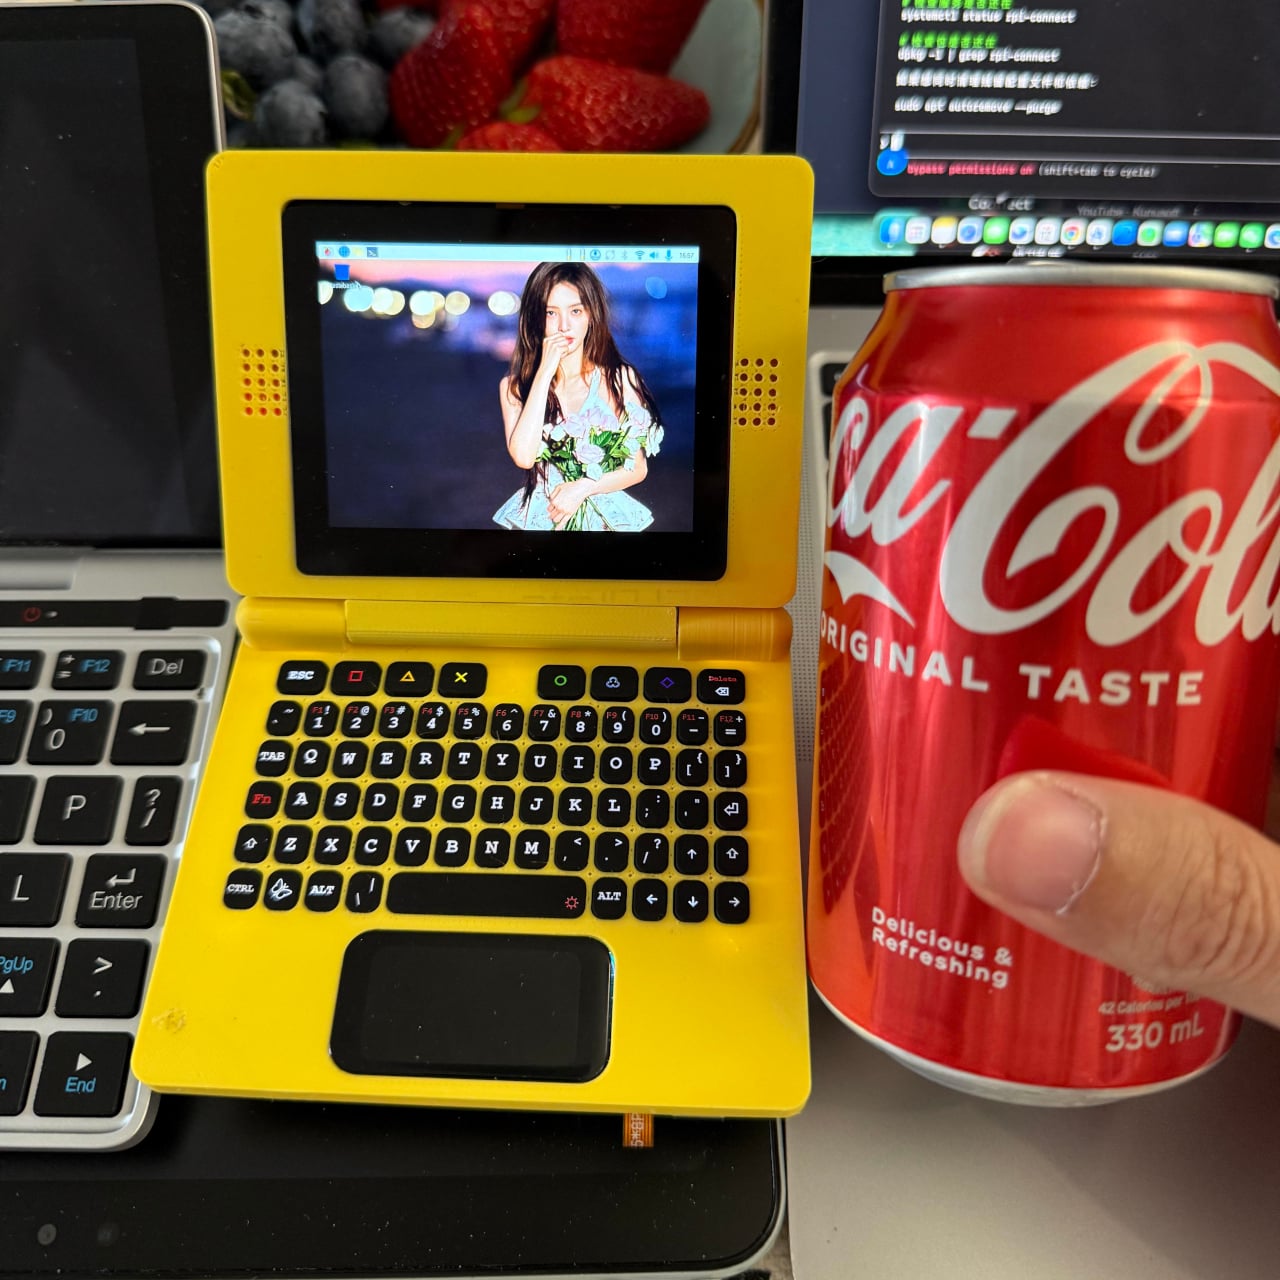
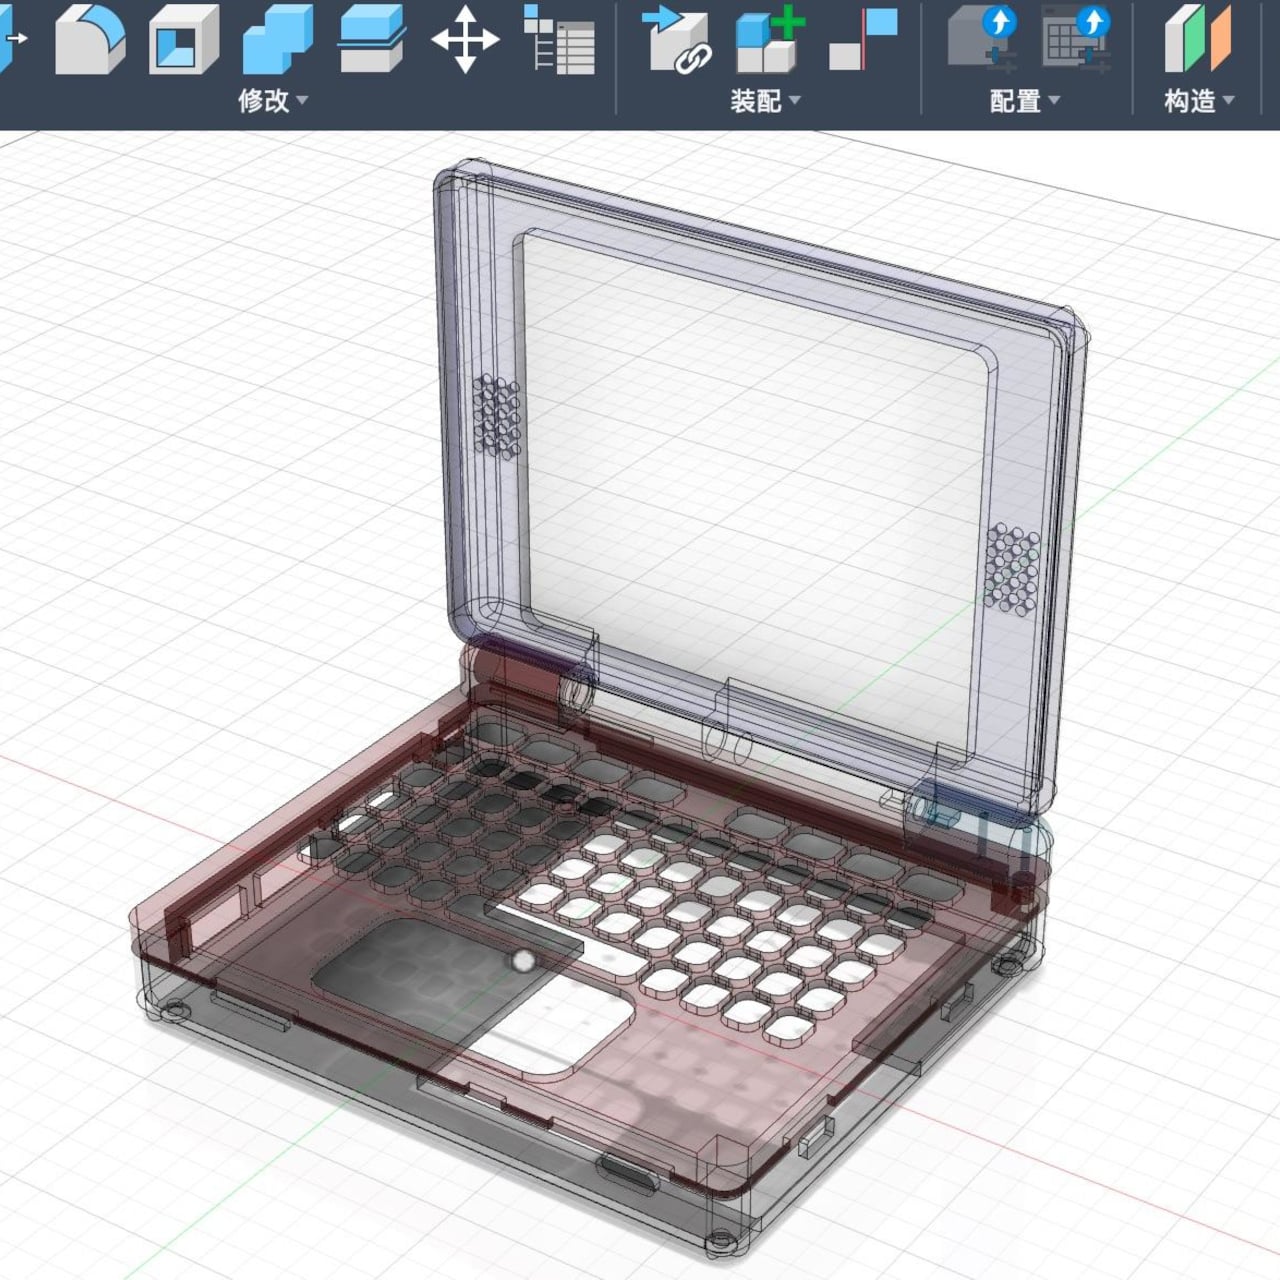
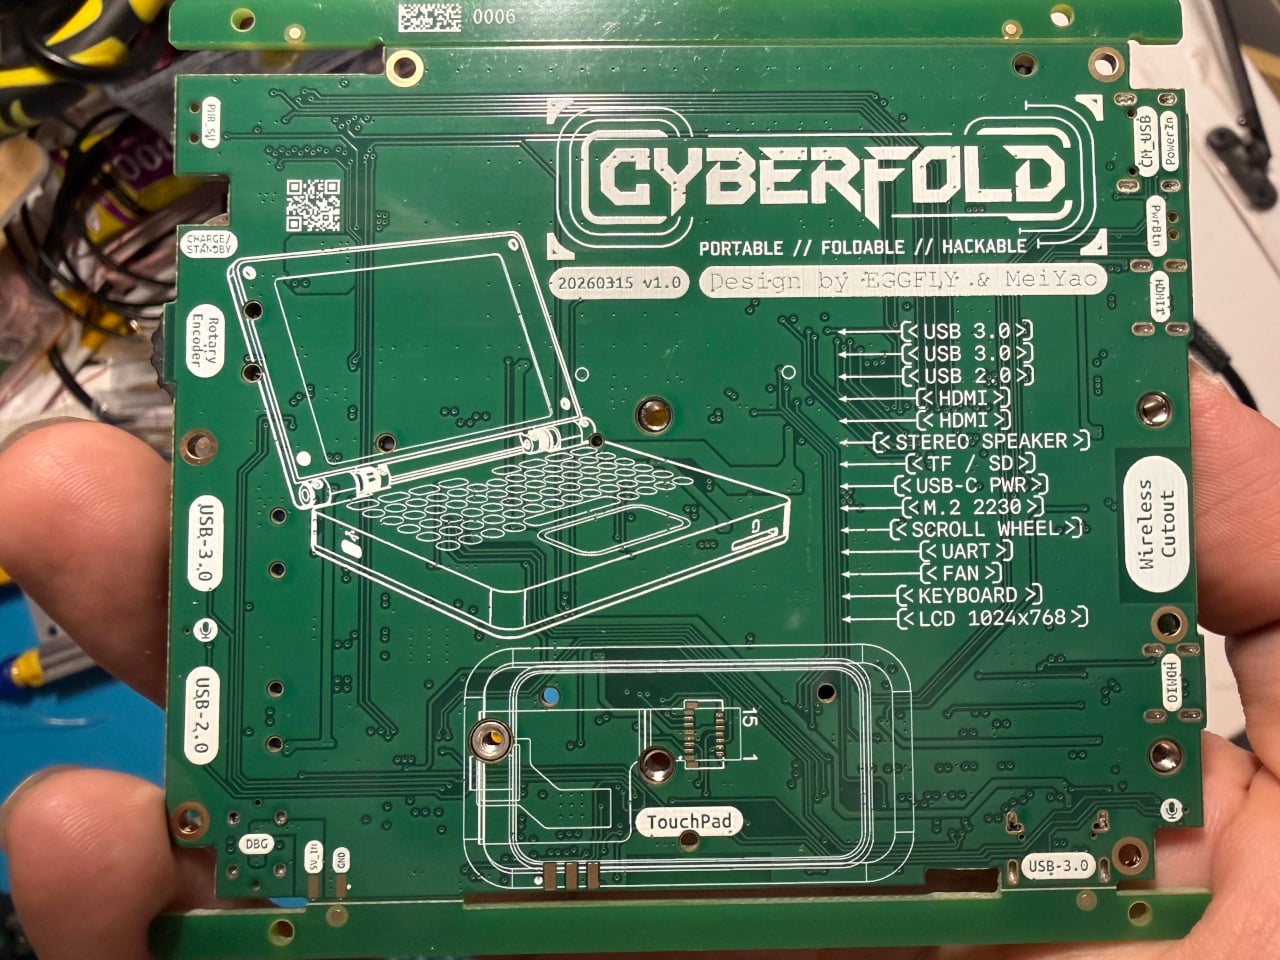
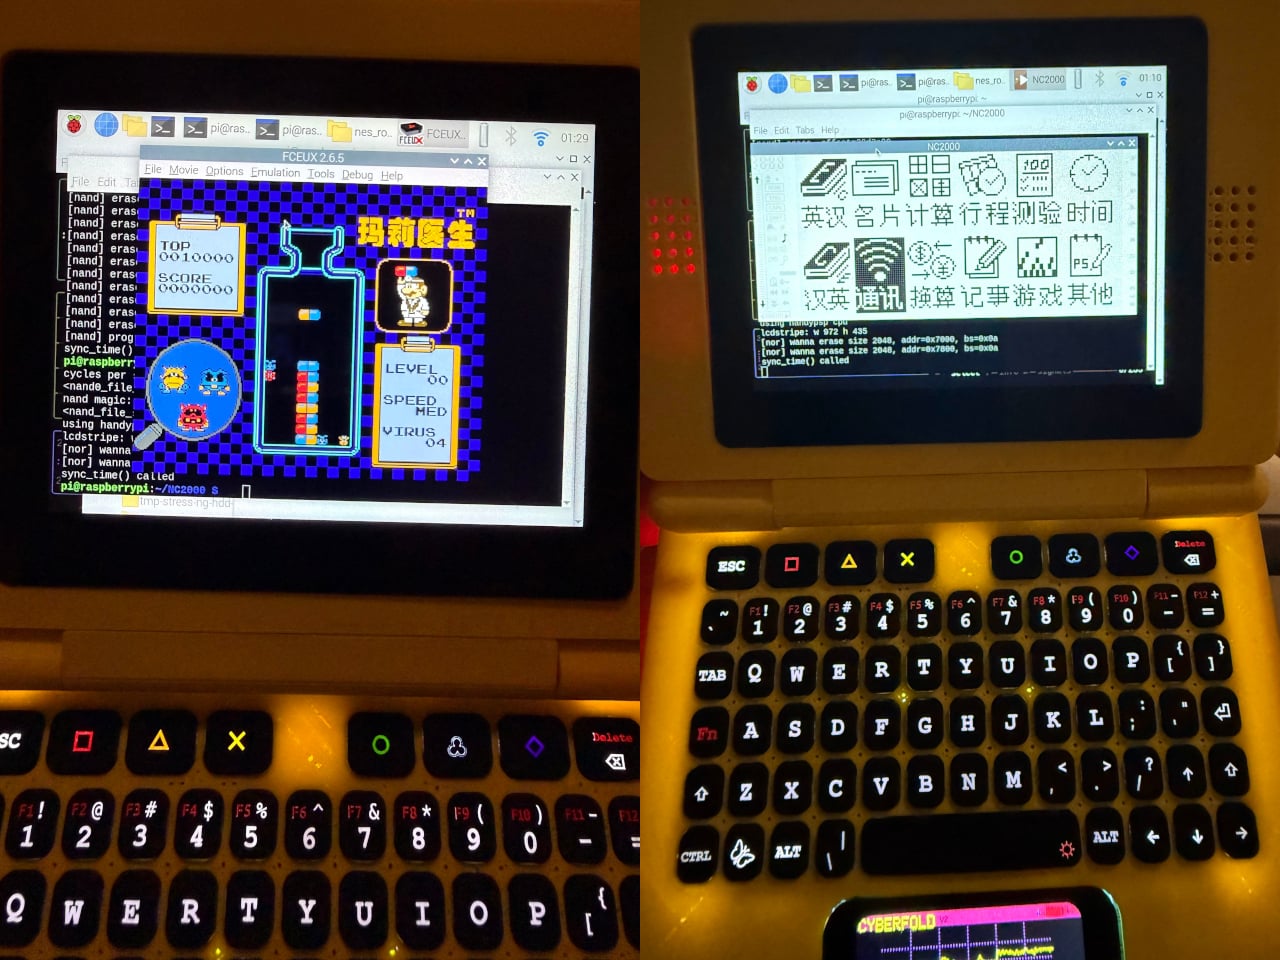
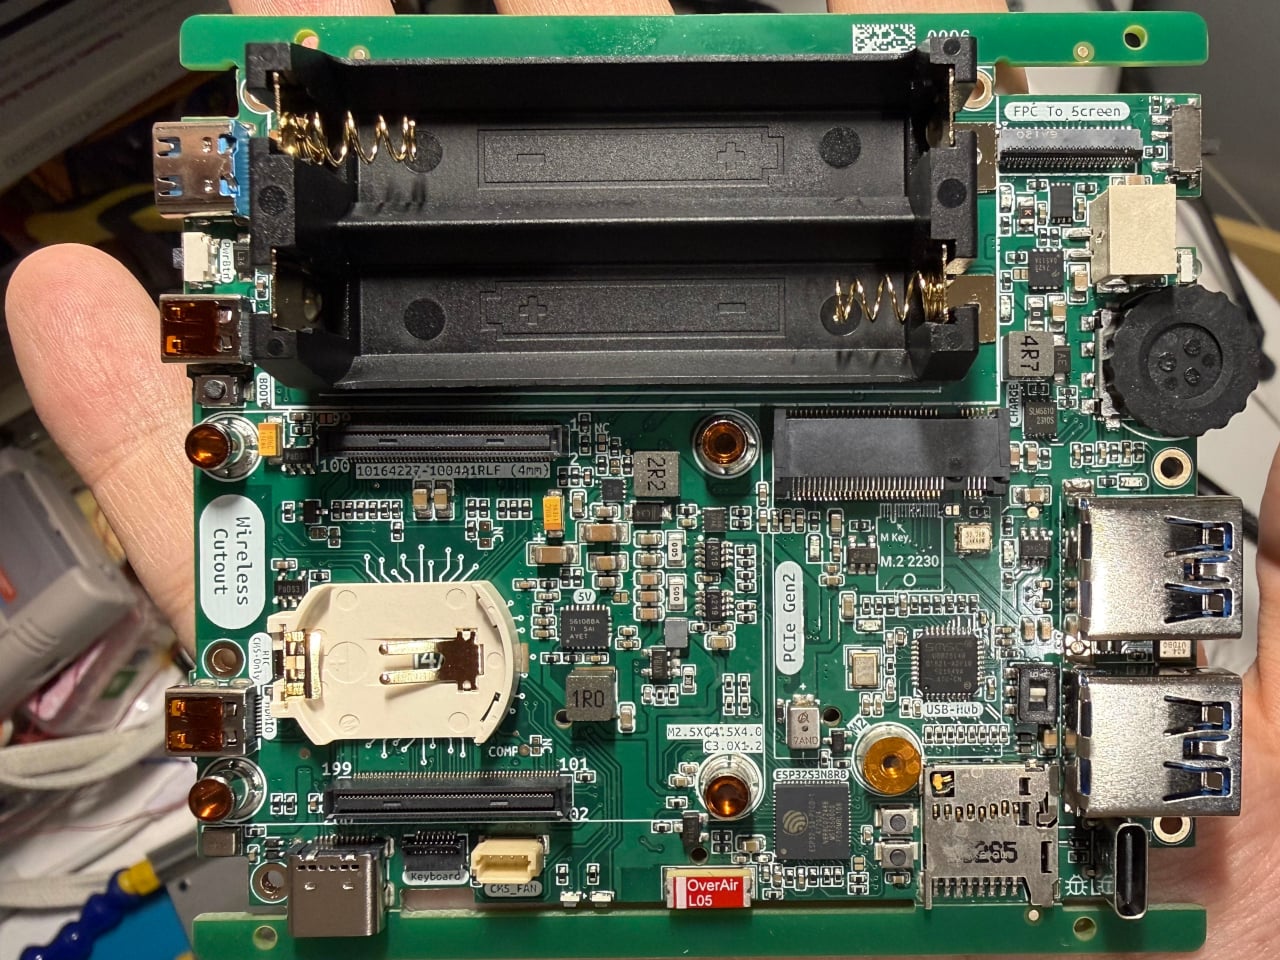
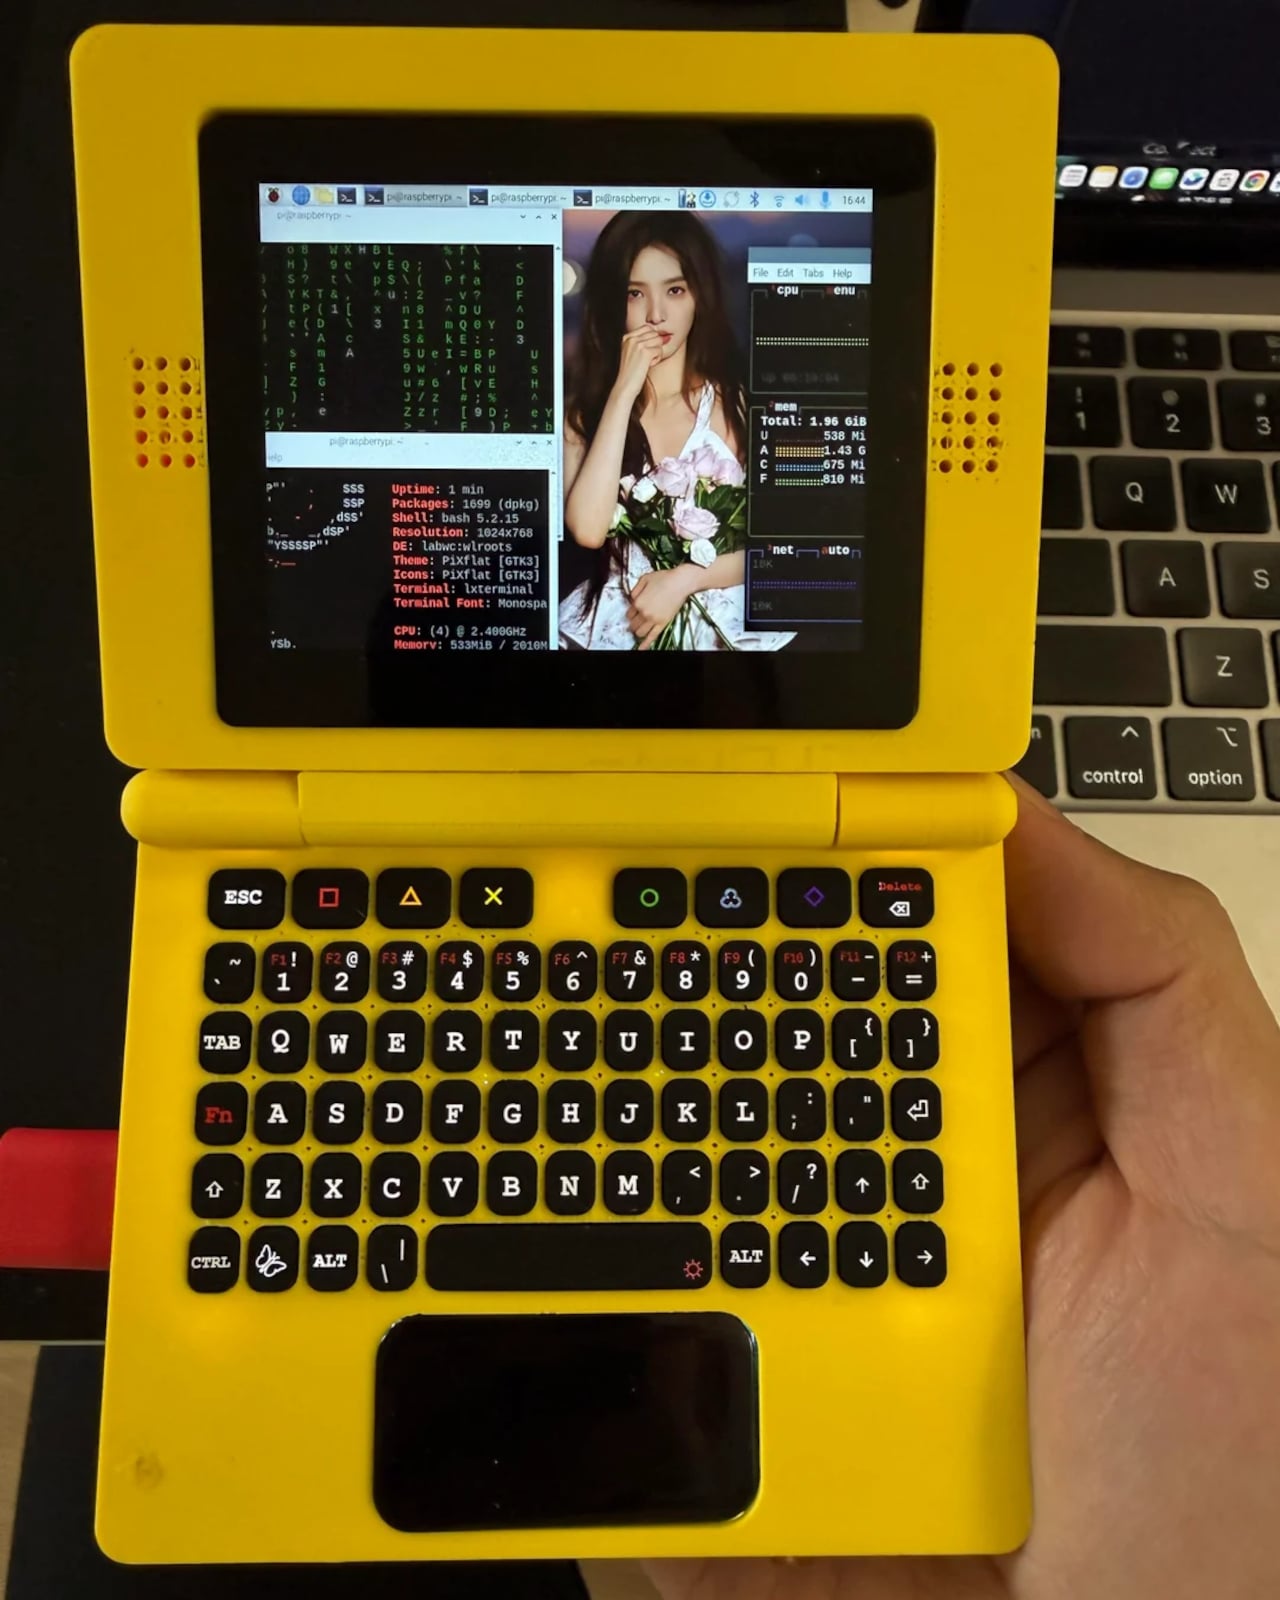
The CyberFold is a recent and remarkably polished example of just that. Made by a pseudonymous duo going by Eggfly and MeiYao, it’s a foldable clamshell cyberdeck that bears a striking resemblance to an oversized Nintendo Game Boy Advance SP. But flip it open, and what you’ll find inside is a surprisingly capable Linux computer, complete with a touchscreen, a full QWERTY keyboard, stereo speakers, and a proper port selection.

Designers: Eggfly, MeiYao

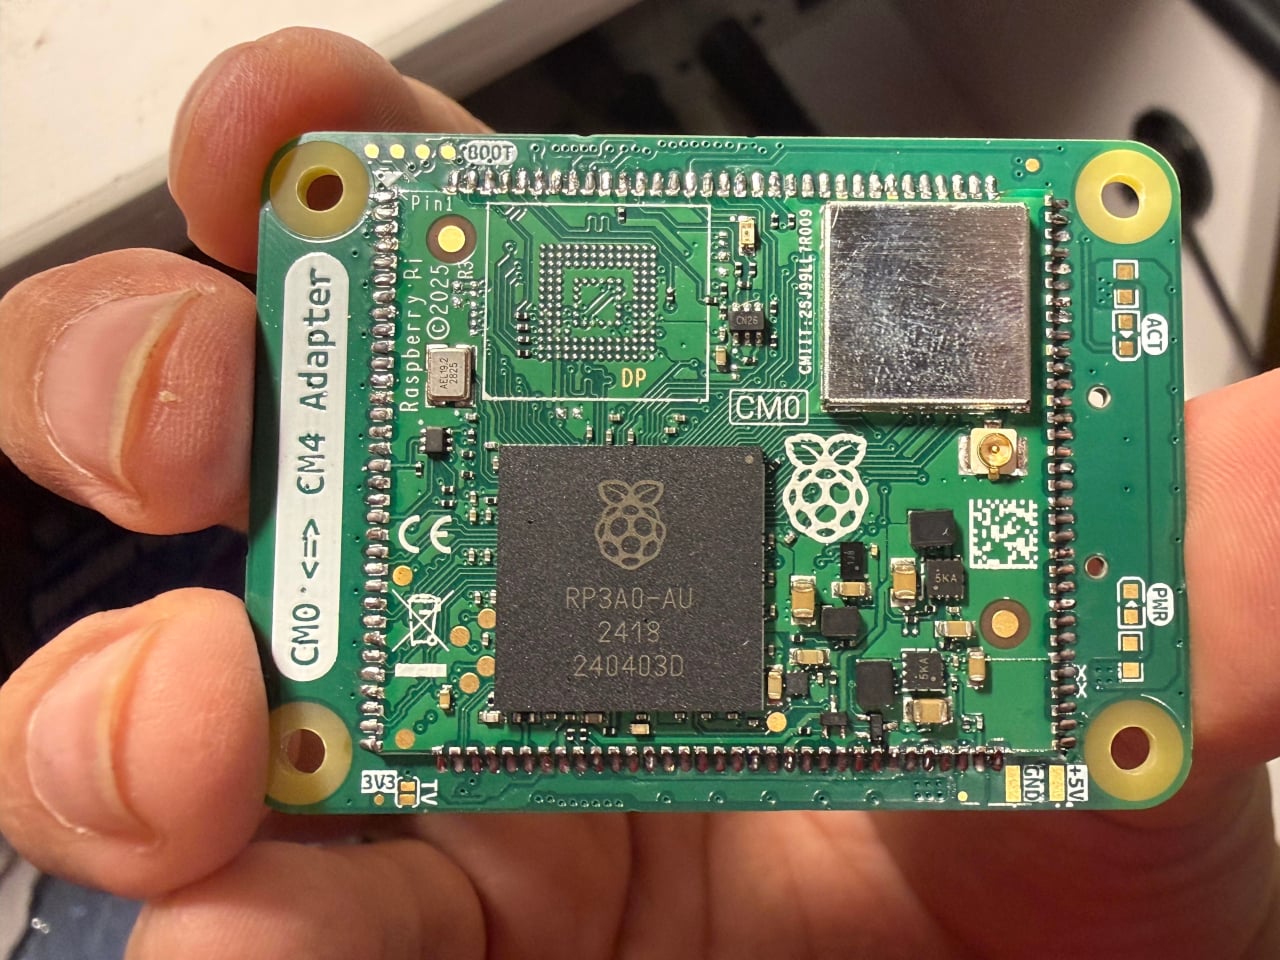
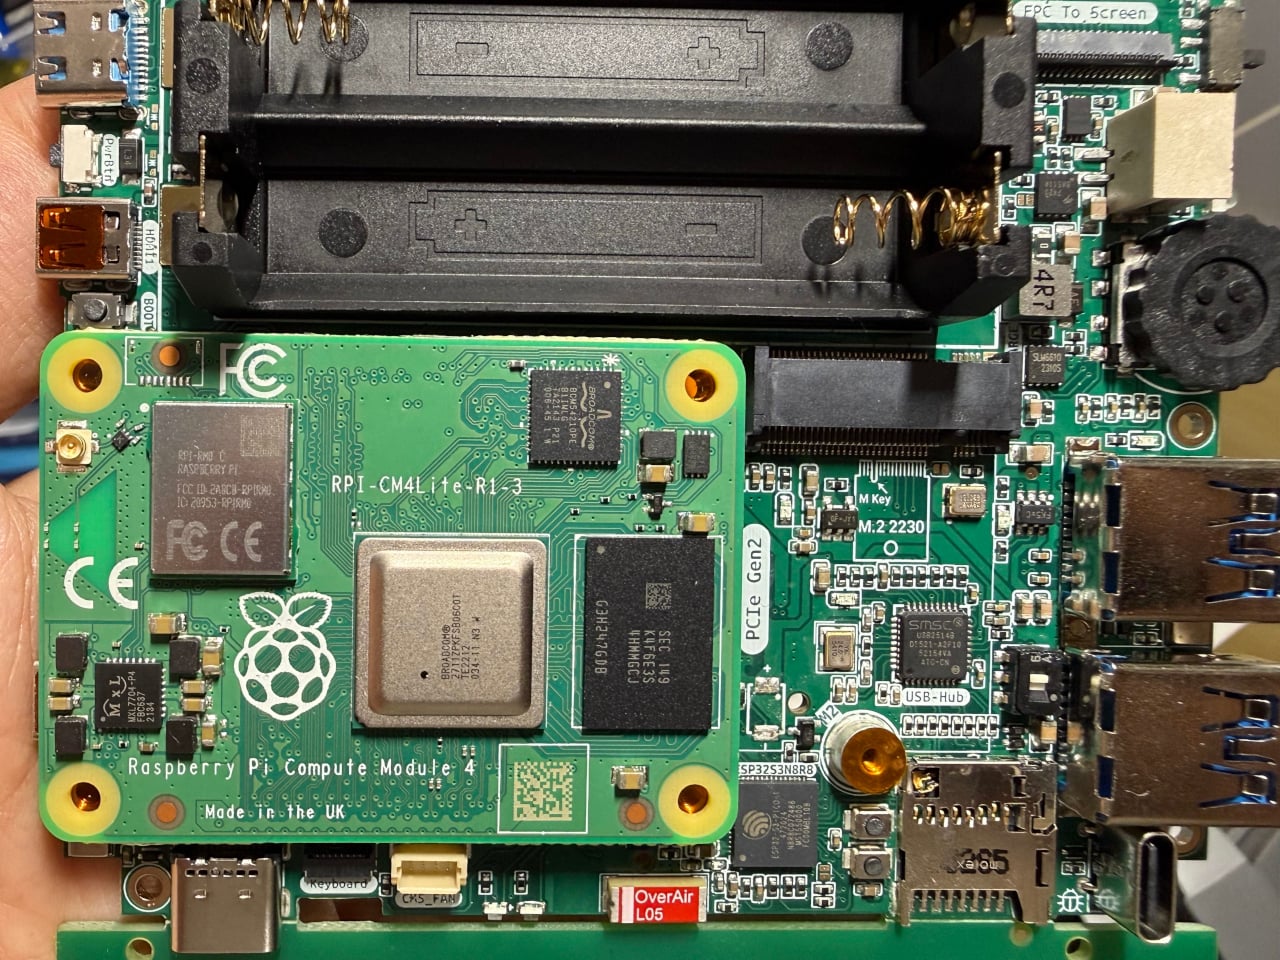
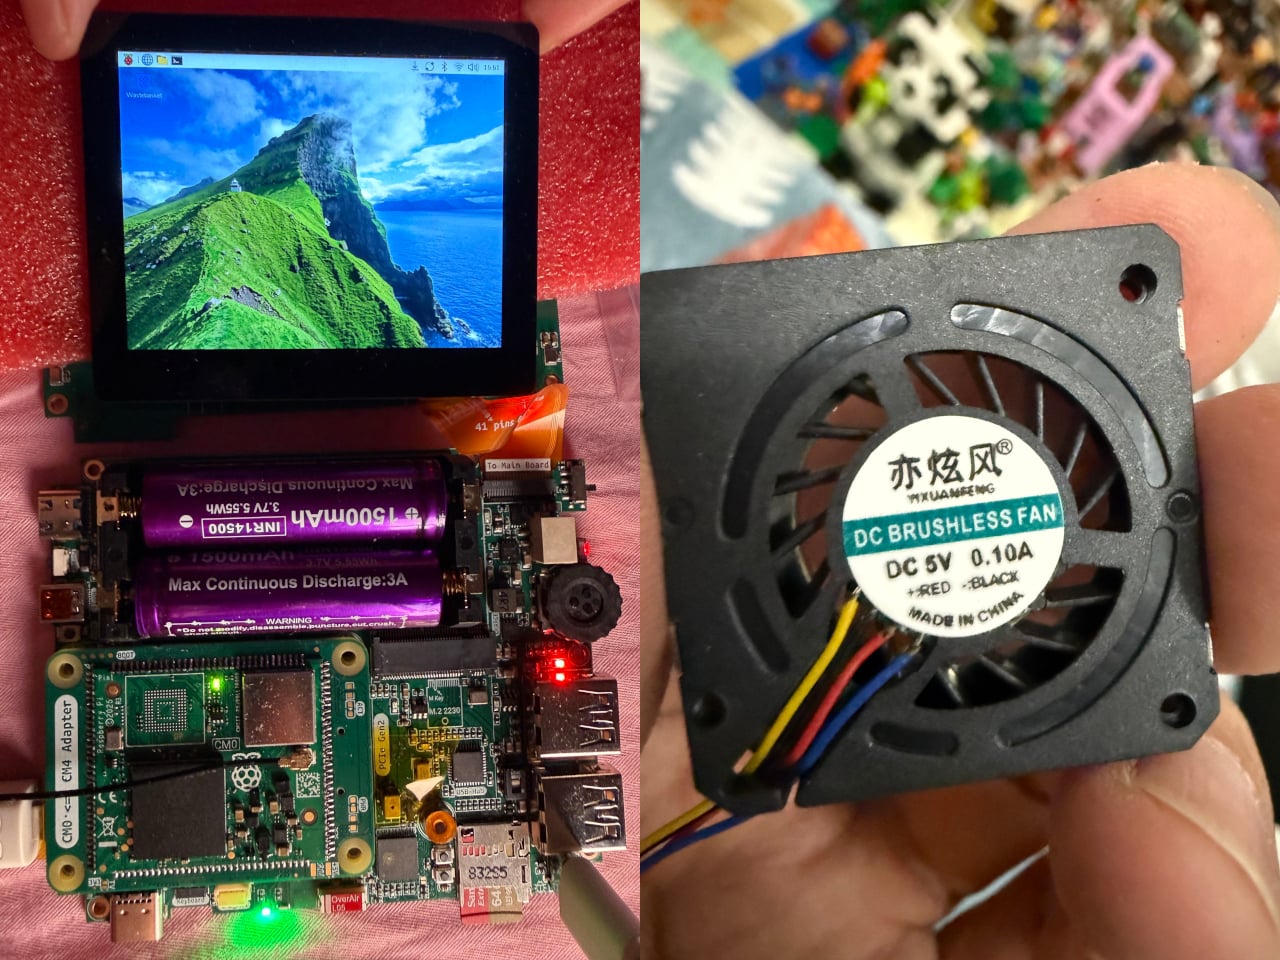
The computing heart of the CyberFold is a custom motherboard that accepts the Raspberry Pi Compute Module family, specifically the Compute Module 4, Compute Module 5, or the affordable Compute Module Zero. These are the embedded variants of the popular Raspberry Pi 4 and Raspberry Pi 5, shrunk to a compact form factor without sacrificing real processing power, making them a natural fit for a pocketable machine.

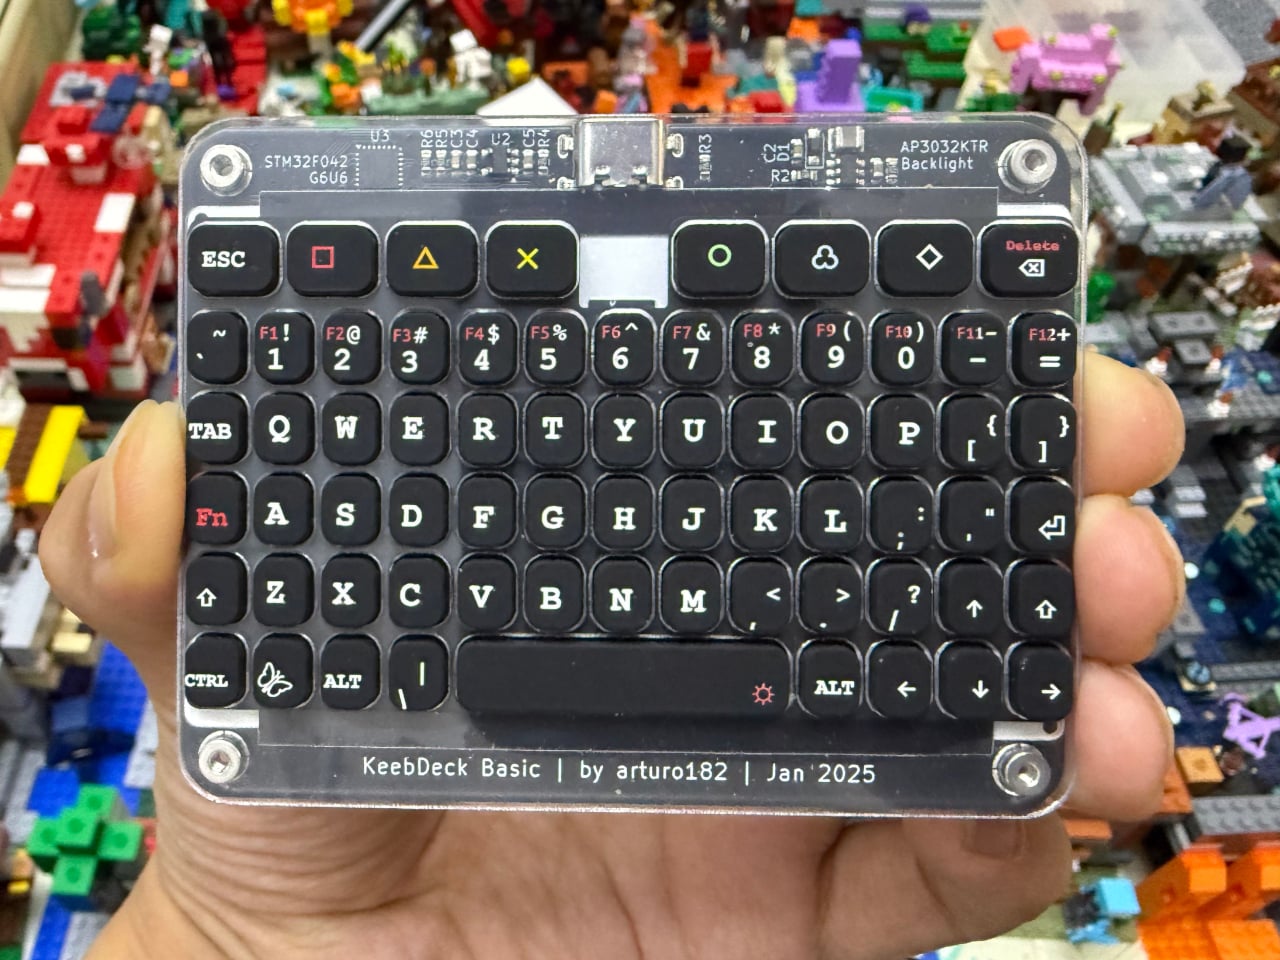
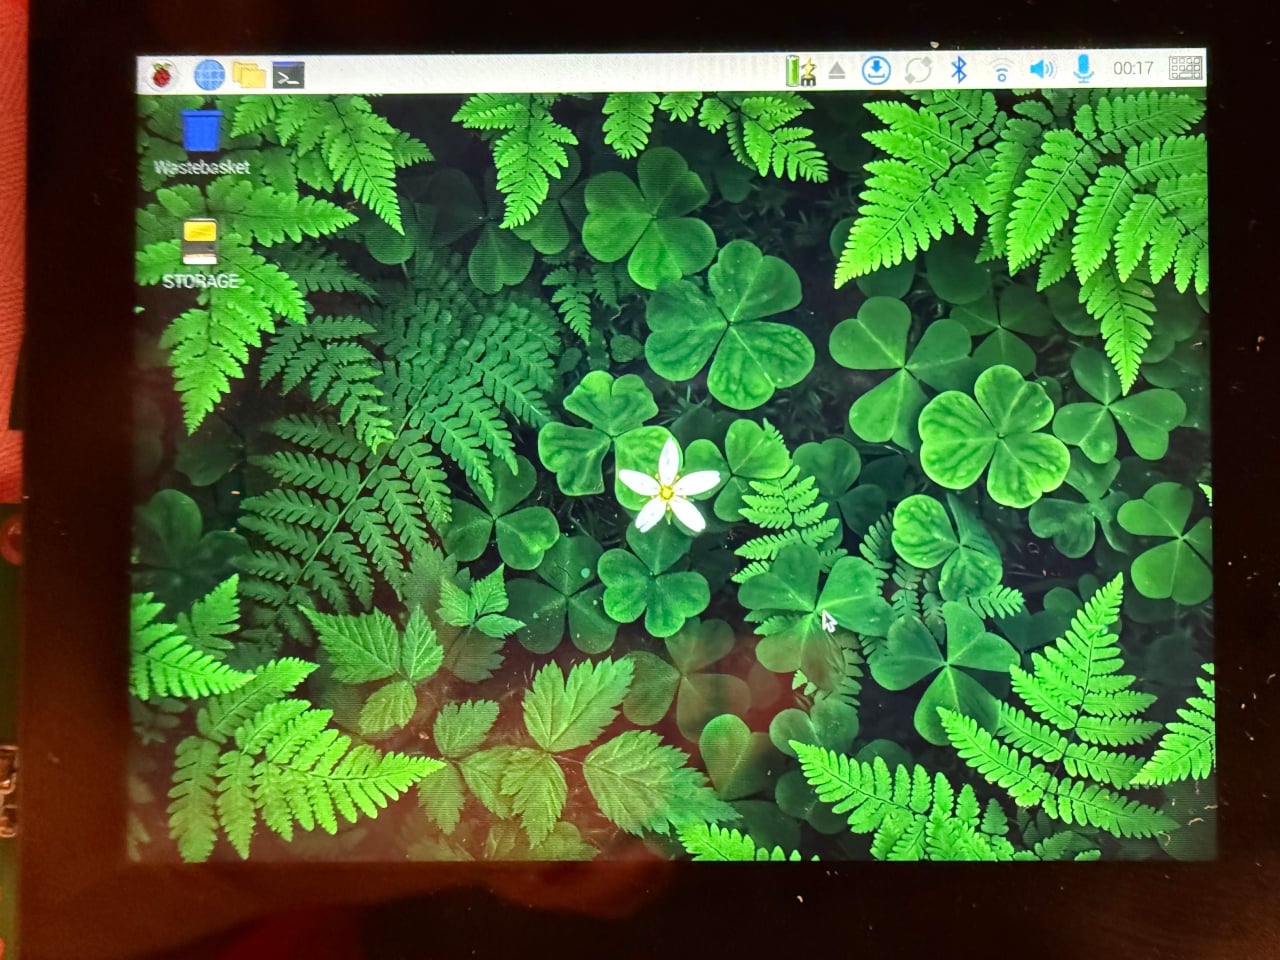
Open the CyberFold mid-commute or at a workbench, and you’re greeted by a 1024×768 capacitive multi-touch display, responsive enough for everyday computing and comfortable for touch-based navigation. Below it is a compact QWERTY silicone keyboard based on Solder Party’s open-source KeebDeck design, which Eggfly built from the original design files. It’s the kind of input that calls to mind old-school palmtop computers, but with a full operating system running underneath.

One of the more clever details on the CyberFold is the touchpad, which pulls double duty as a secondary display. Running on an Espressif ESP32-S3 microcontroller, it shows live battery percentage and power consumption data, independent of the main computer. It’s the kind of thoughtful feature you’d normally see on a commercial device that went through multiple rounds of product refinement, not something you’d expect from a maker’s personal project.

Connectivity isn’t something the CyberFold cuts corners on. Full-size USB 3.0 and USB 2.0 ports handle peripherals easily, while two HDMI outputs let you extend to a larger screen when needed. A microSD card slot, a debugging port, and stereo speakers flanking the display round things out, and a rotary encoder scroll wheel adds a satisfying tactile element to everyday navigation.

Power comes from a pair of batteries in an integrated holder with a built-in charging circuit, so you can top it off without cracking the device open. The clamshell form factor keeps the screen and keyboard protected when closed, making the whole thing practical enough to slip into any bag. Eggfly hasn’t released the design files publicly yet, but the maker community has already taken a keen interest.

There’s something appealing about the CyberFold that goes beyond its spec sheet. It represents a very specific kind of ambition: the desire to own a computer that fits in your jacket pocket, runs whatever software you choose, and was assembled by hand. Commercial products can maybe deliver two of those three things at best, and that gap is exactly what keeps the cyberdeck community building.

The post Two Makers Just Built the Pocket Linux PC Big Tech Refused To Make first appeared on Yanko Design.

This air-powered desk clock with stopwatch function is a work of genius

Something is intriguing about novelty clocks that refreshes the age-old timekeeping approach. The unique mechanism at the heart of these timepieces makes them desirable, especially for those who value time above all else. YouTuber soiboi soft from Germany loves working with pneumatic principles, creating some really interesting things never seen before.

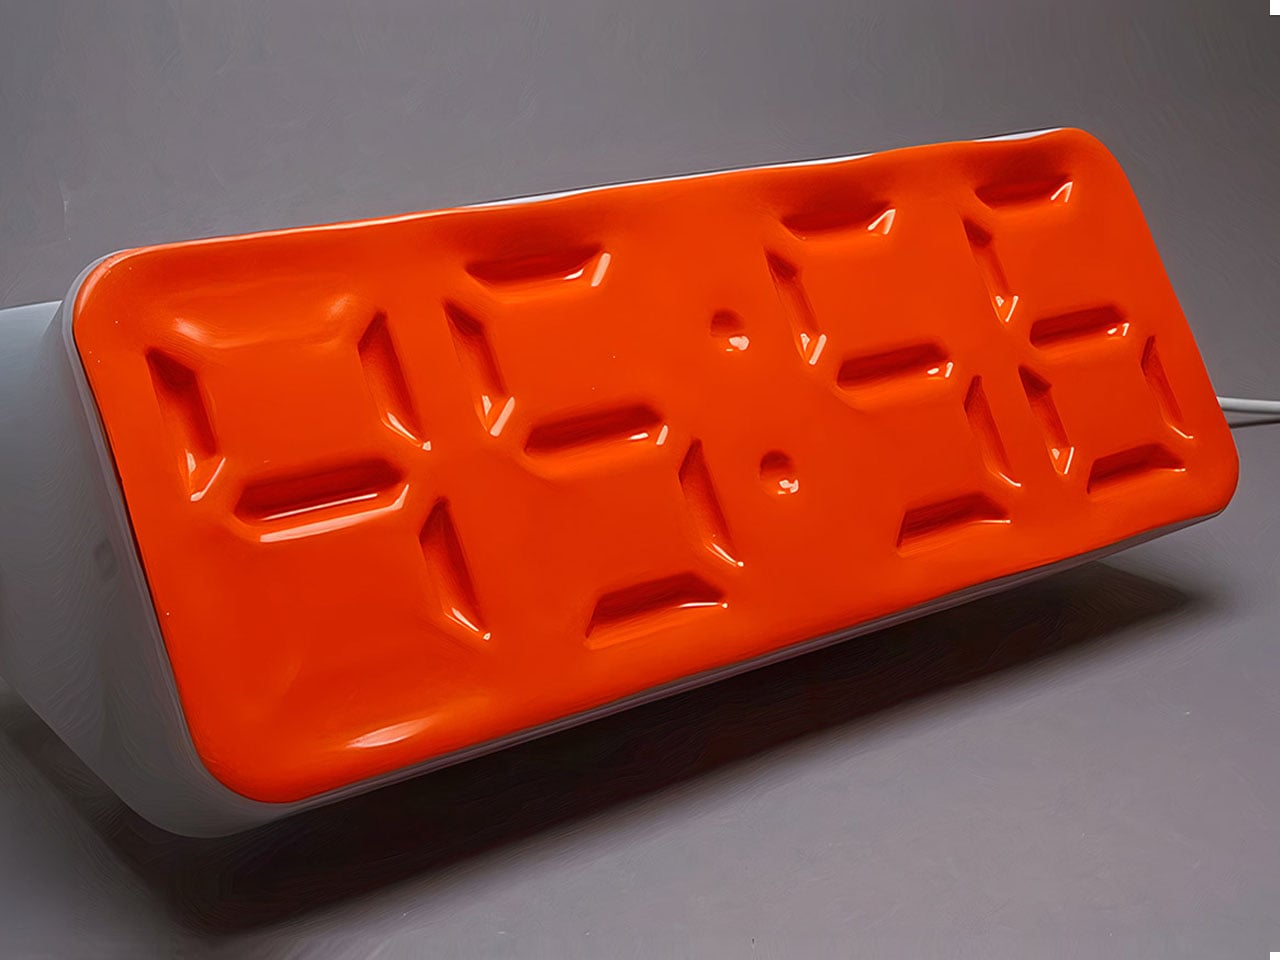
This time around, the ingenious inventor has crafted an air-powered desk clock that works on the same principles of compressing air to control the display membrane. While that might sound a little too technical for some, the idea is to change the appearance on the surface of the flexible clock membrane to display the current time. That is simply cool, and who wouldn’t want to have this desk clock grace their geeky setup?

Designer: soiboi soft

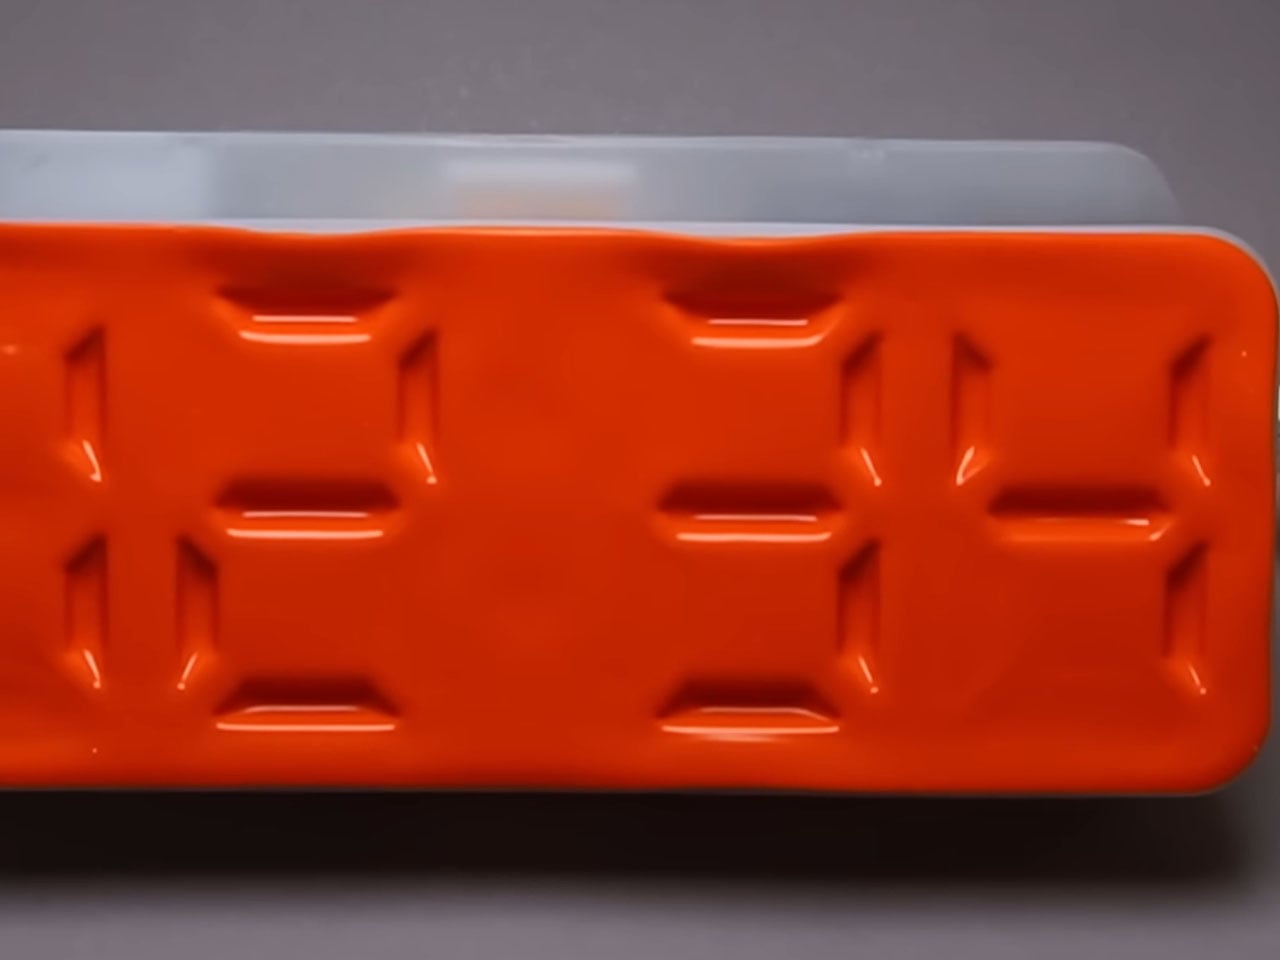
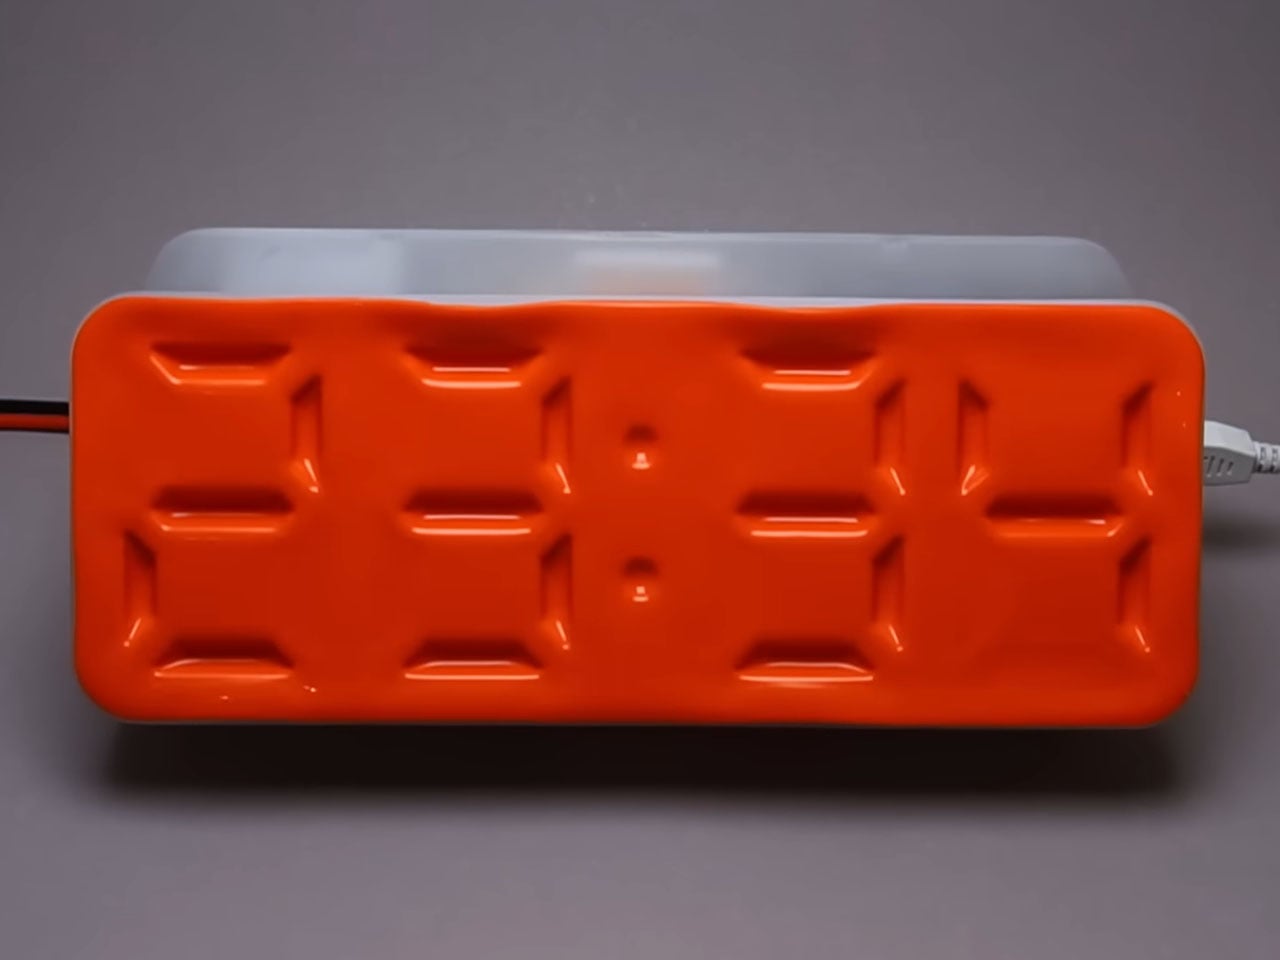
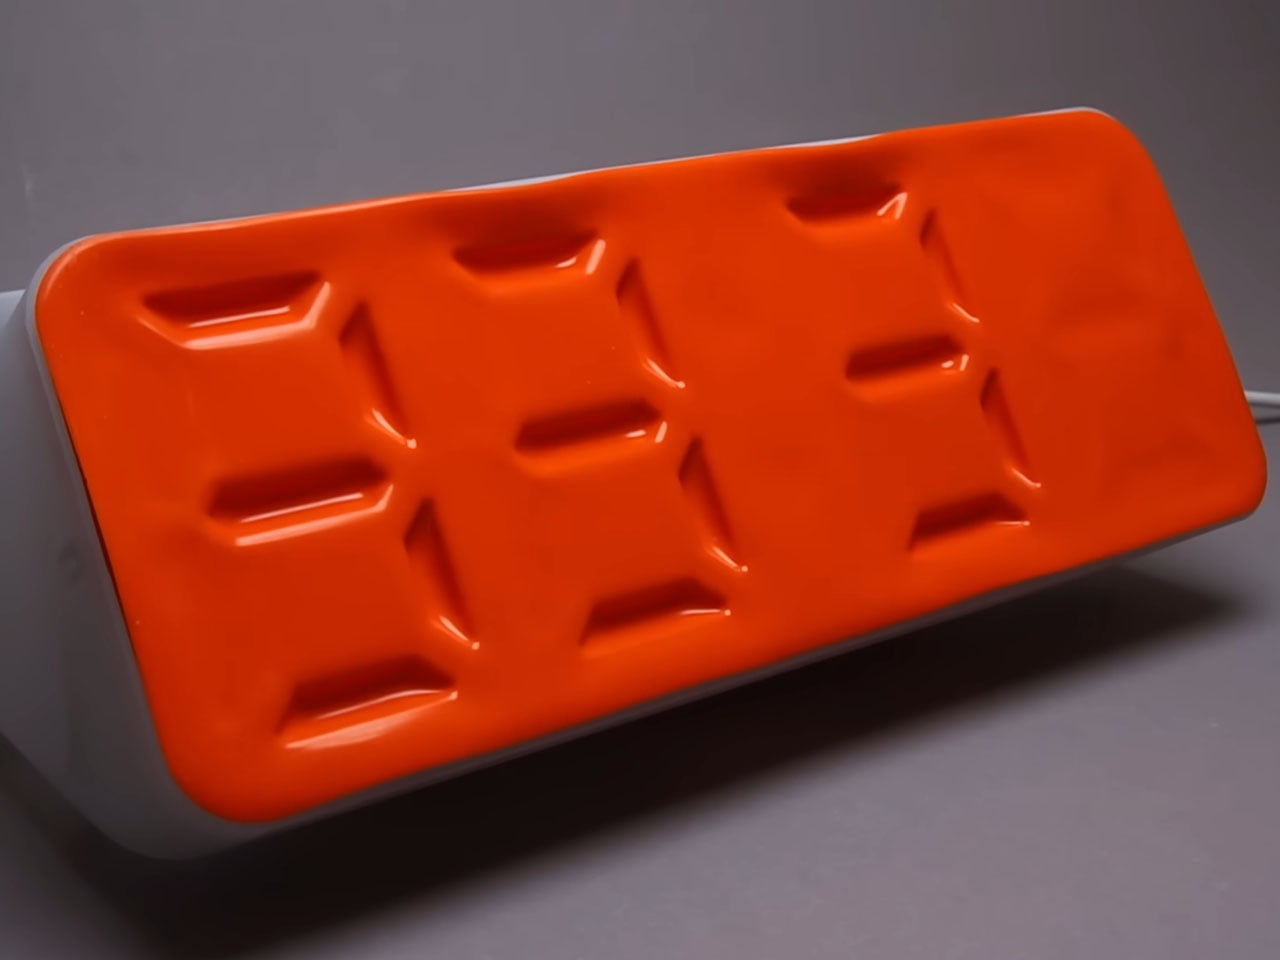
Building the four-digit display of the Air Powered Segment Clock begins by crafting the custom parts using 3D printing. The next task is to carefully connect the vacuum lines to the complex mechanism so that it can pull the flexible membrane to create the dent representing the luminous bars, just like a digital clock. Even when the signal is turned off from the backend, the shape holds still until the next command to turn it off is initiated. As soon as the command to release the vacuum pressure is initiated, the membrane returns to its flat position.

The combination of these seven memory cells (as he calls them) forms a single digit representation. Based on the digit to be displayed, the memory cells are in an on or off position, thereby displaying the whole digit. This whole display array is a combination of four such digits, and based on the microcontroller programming and the complex software input, they magically suck-in to create the digit on the membrane. Dots in the middle appear every time a number is changed to represent the seconds, minutes, and hours.

The basic architecture of the Air Powered Segment Clock is similar to how a RAM functions, storing values in specific locations courtesy of the data and address lines.  When the hardware and software trickery to display the time come into unison, the DIY desk clock comes alive. Going a step further, the DIYer adds a stopwatch function to the clock, because why not? Frankly, this is one of the best DIY creations I’ve seen in a long time. I bet every one of you out there is wishing this project turns into a buyable novelty clock someday. Imagine adding this to your workstation, gaming setup, or simply sporting on the living room shelf!

The post This air-powered desk clock with stopwatch function is a work of genius first appeared on Yanko Design.
This air-powered desk clock with stopwatch function is a work of genius

Something is intriguing about novelty clocks that refreshes the age-old timekeeping approach. The unique mechanism at the heart of these timepieces makes them desirable, especially for those who value time above all else. YouTuber soiboi soft from Germany loves working with pneumatic principles, creating some really interesting things never seen before.

This time around, the ingenious inventor has crafted an air-powered desk clock that works on the same principles of compressing air to control the display membrane. While that might sound a little too technical for some, the idea is to change the appearance on the surface of the flexible clock membrane to display the current time. That is simply cool, and who wouldn’t want to have this desk clock grace their geeky setup?

Designer: soiboi soft

Building the four-digit display of the Air Powered Segment Clock begins by crafting the custom parts using 3D printing. The next task is to carefully connect the vacuum lines to the complex mechanism so that it can pull the flexible membrane to create the dent representing the luminous bars, just like a digital clock. Even when the signal is turned off from the backend, the shape holds still until the next command to turn it off is initiated. As soon as the command to release the vacuum pressure is initiated, the membrane returns to its flat position.
The combination of these seven memory cells (as he calls them) forms a single digit representation. Based on the digit to be displayed, the memory cells are in an on or off position, thereby displaying the whole digit. This whole display array is a combination of four such digits, and based on the microcontroller programming and the complex software input, they magically suck-in to create the digit on the membrane. Dots in the middle appear every time a number is changed to represent the seconds, minutes, and hours.
The basic architecture of the Air Powered Segment Clock is similar to how a RAM functions, storing values in specific locations courtesy of the data and address lines.  When the hardware and software trickery to display the time come into unison, the DIY desk clock comes alive. Going a step further, the DIYer adds a stopwatch function to the clock, because why not? Frankly, this is one of the best DIY creations I’ve seen in a long time. I bet every one of you out there is wishing this project turns into a buyable novelty clock someday. Imagine adding this to your workstation, gaming setup, or simply sporting on the living room shelf!

The post This air-powered desk clock with stopwatch function is a work of genius first appeared on Yanko Design.