DIYer creates a retro-modern typewriter computer with moving screen on the slide

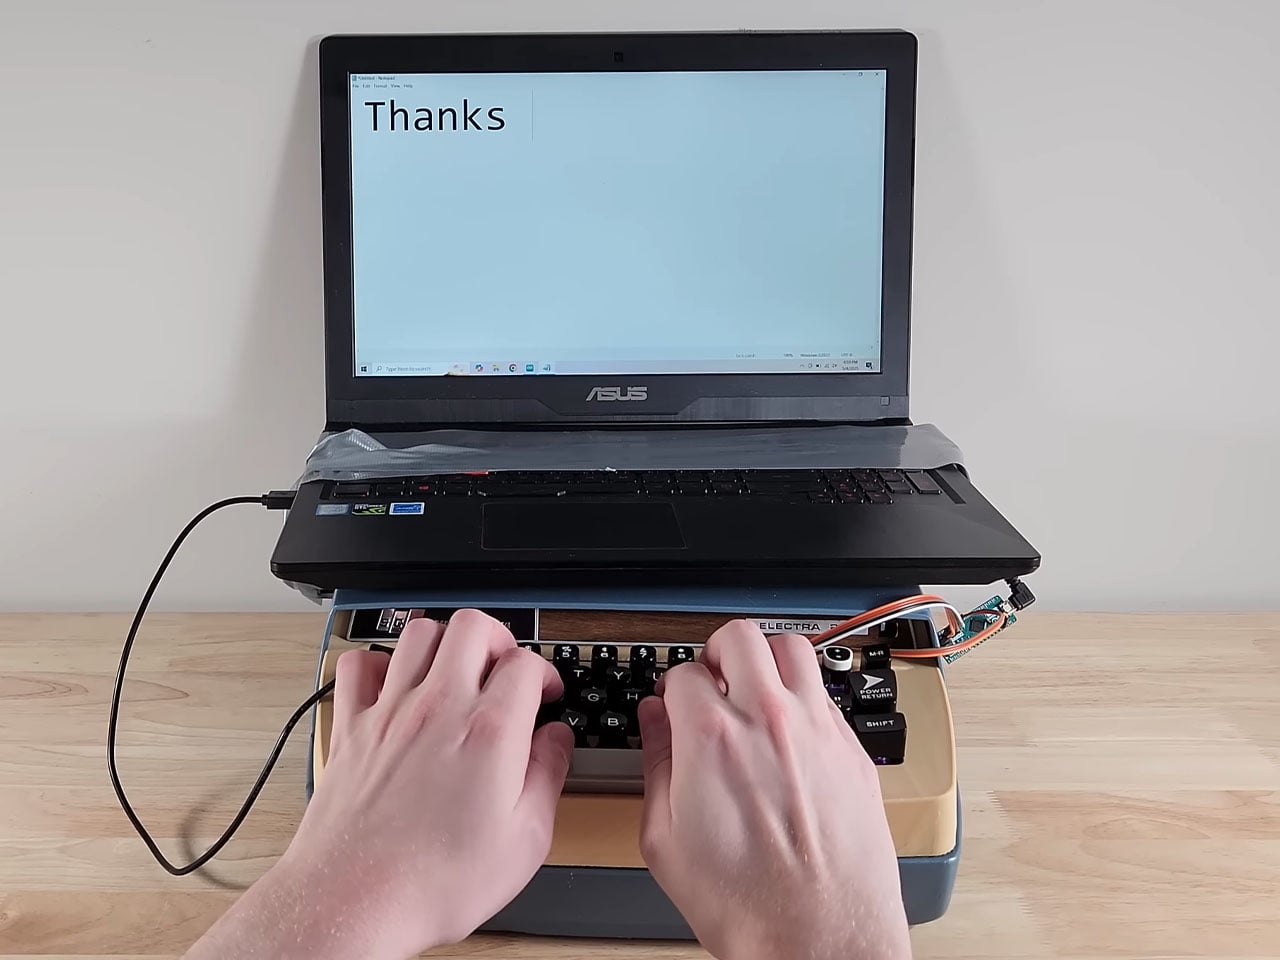
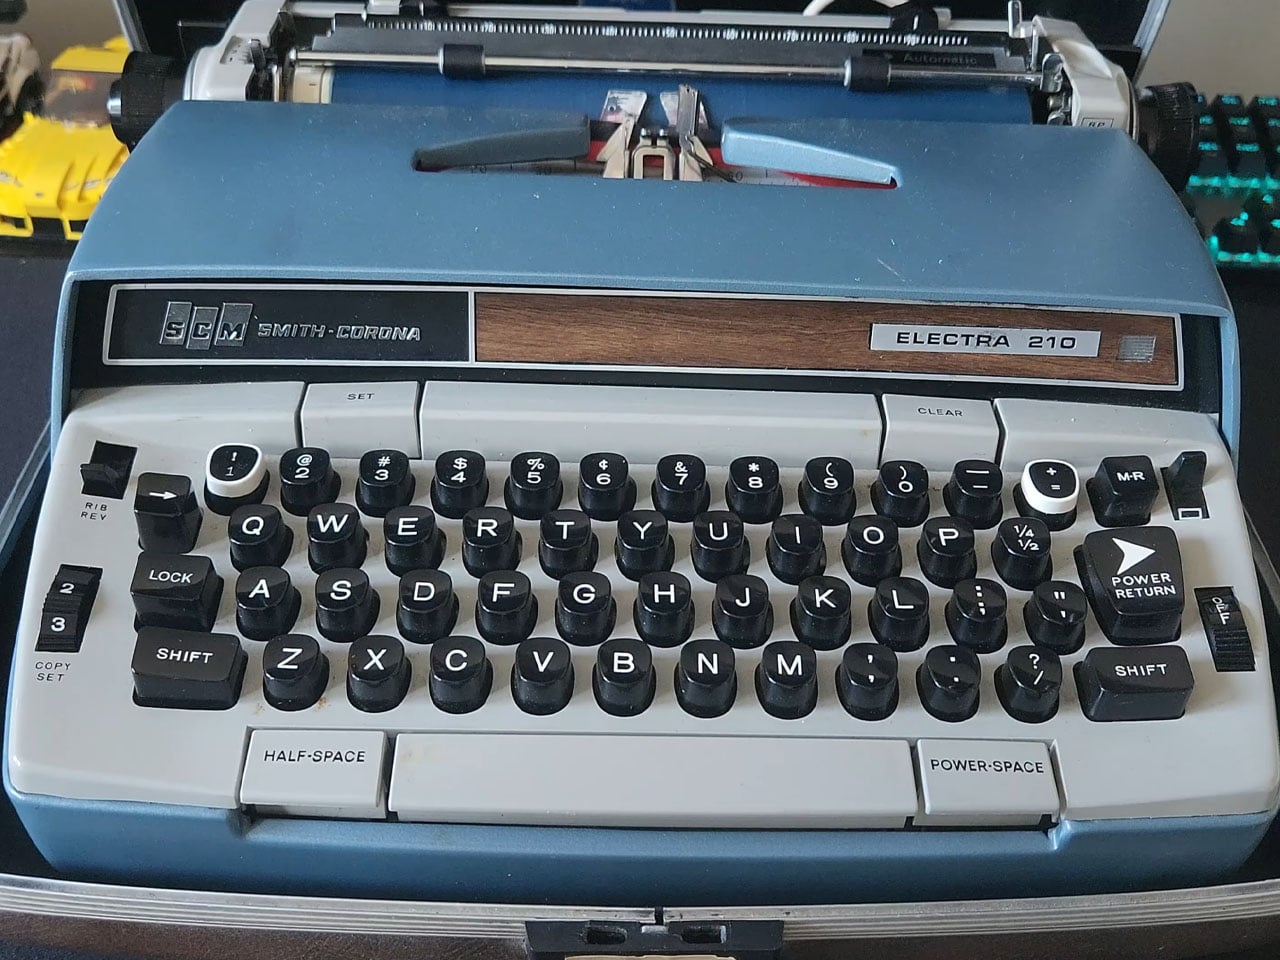
What’s the precursor of the computer? The typewriter, of course. Taking things the other way around, a DIYer has built a gaming PC inside an old typewriter for the sake of technology. First of its kind, this DIY is all about building everything from scratch to have a typewriter that works better than your average computer.

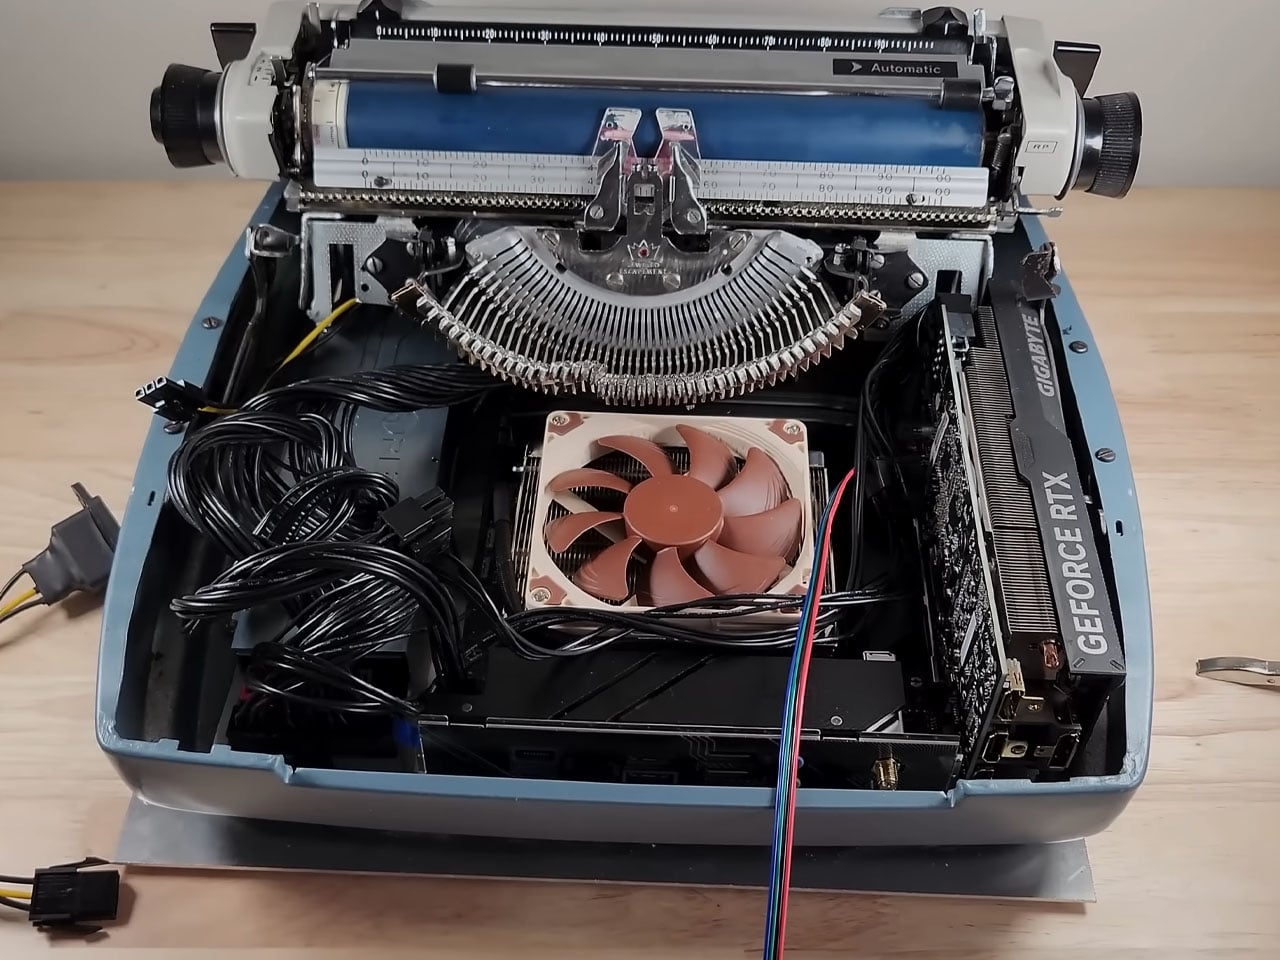
Fitting a computer inside a typewriter requires a lot of brainstorming about which components are useful and which can give way to the PC components. Sounds easy, doesn’t it? The art here is to be very careful when removing unwanted parts like the keyboard, motor, and side brackets, while still retaining the slide’s functionality via the hammers and the main movement.

Designer: Prototype
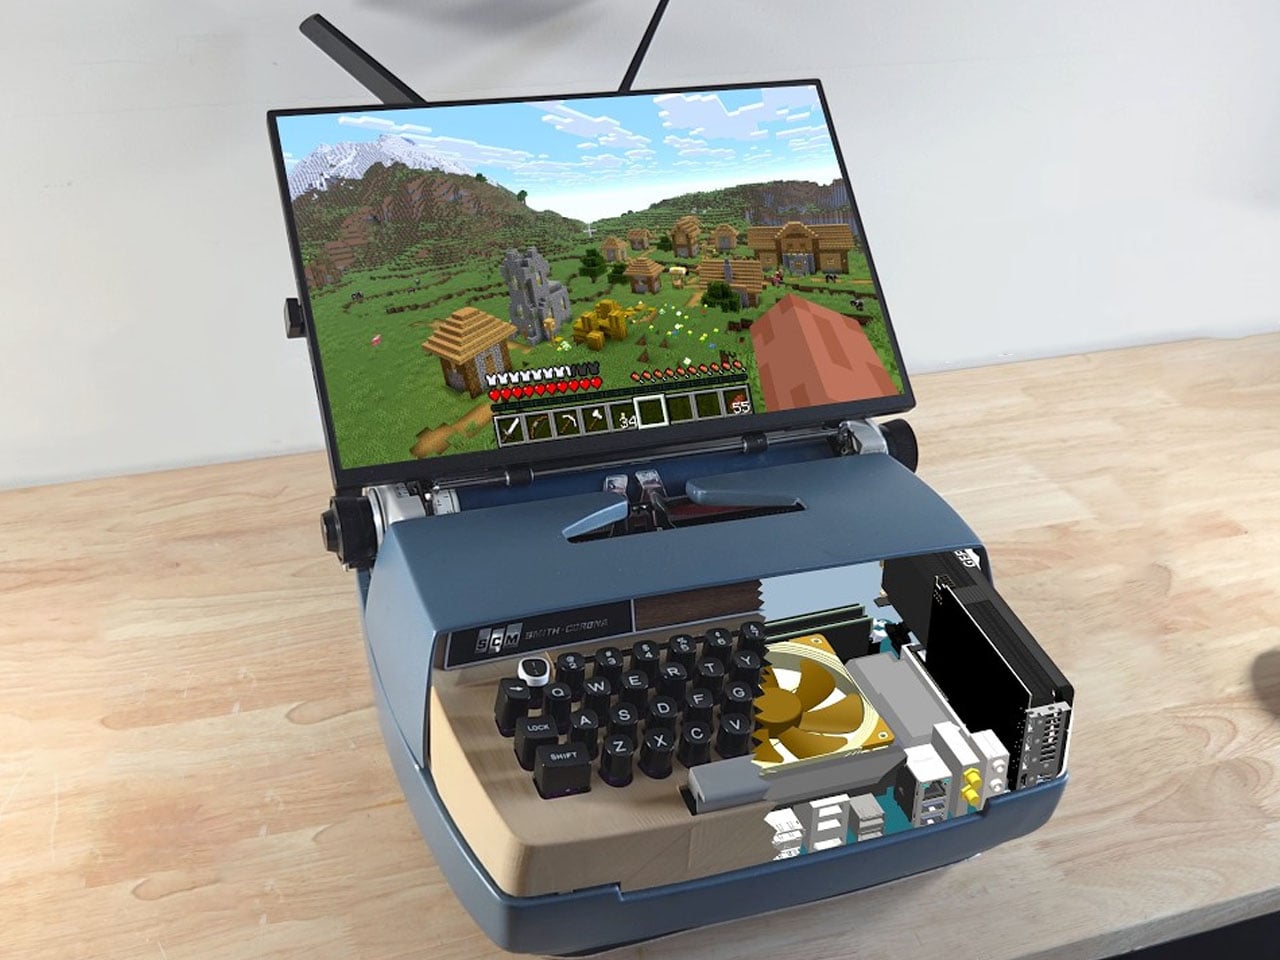
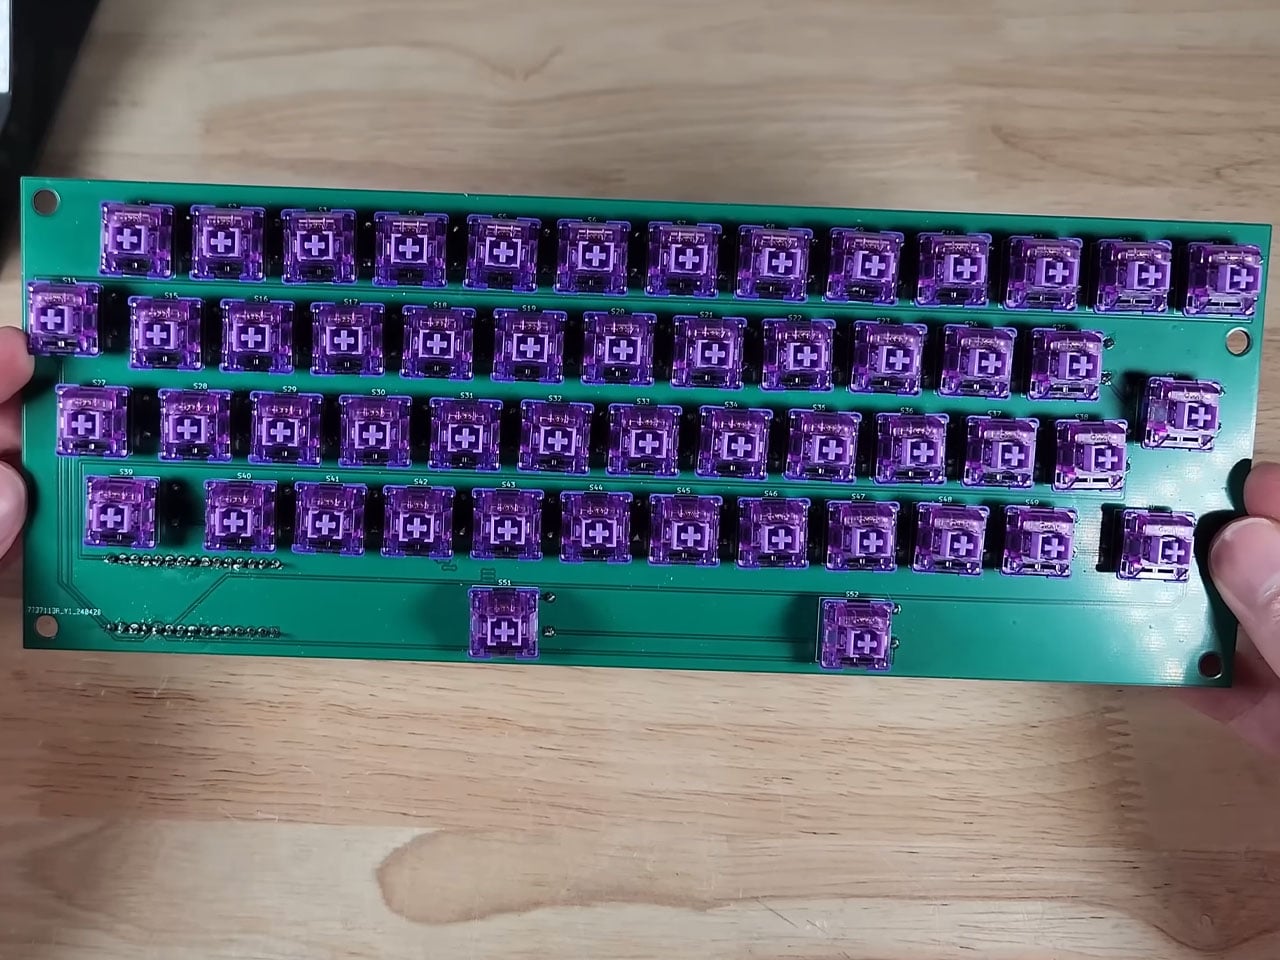
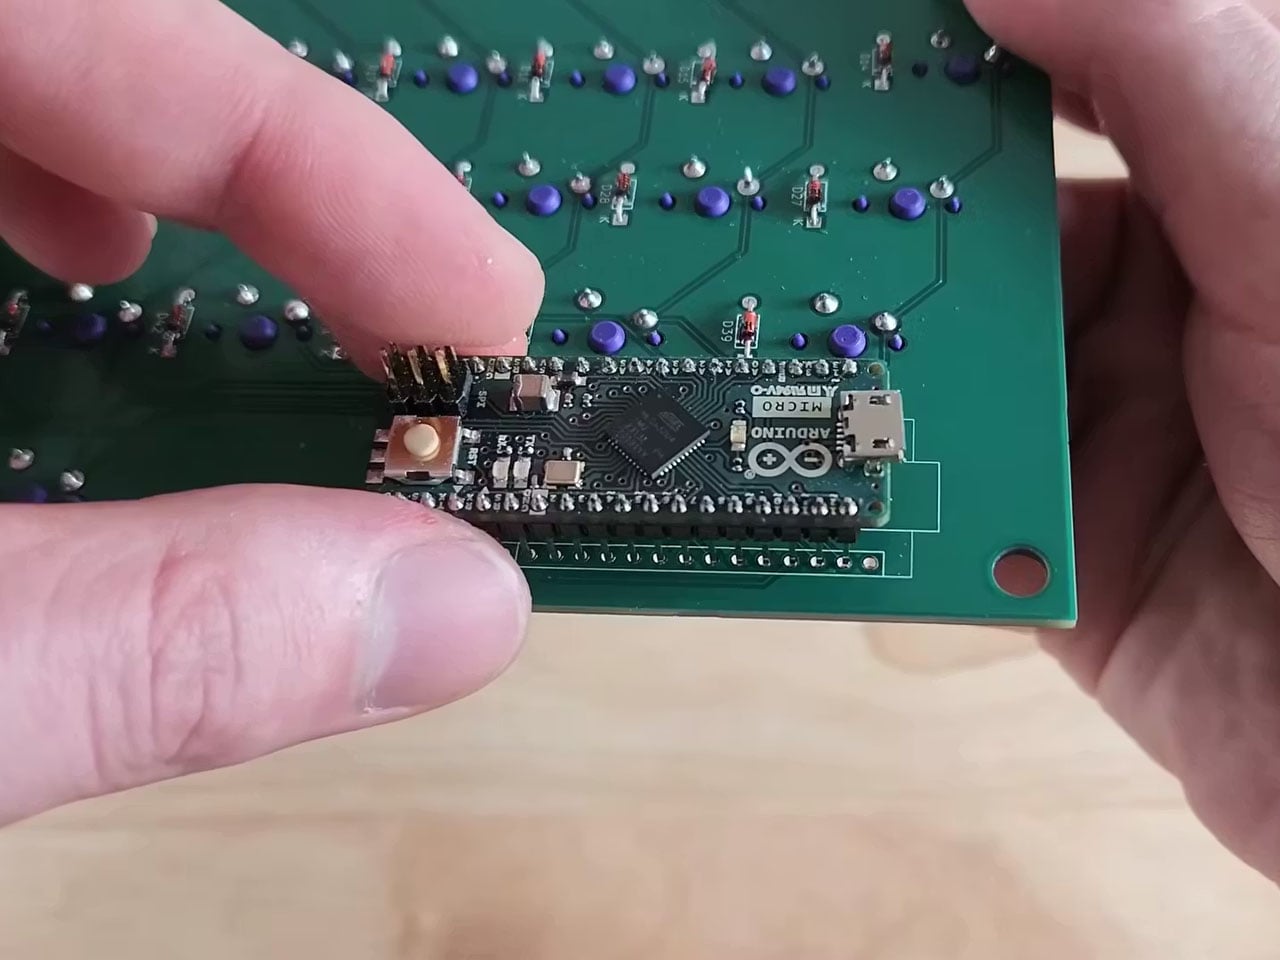
After removing the components, there is just enough space to fit in a motherboard, power supply, and a graphics card. Before sorting this bit of the DIY, the first step is to sort out the keyboard assembly by preplacing it with a modern keyboard that is made from scratch, using the keys of the keyboard to keep the theme alive. This is where 3D printing comes in by taking a 360-degree scan of the typewriter’s keyboard and modelling the desired keyboard case that has more height for fitting in all the PCB components of a modern keyboard. The hard part here is to make the PCB assembly that corresponds to the key input and send it over to a PCB manufacturer to make.
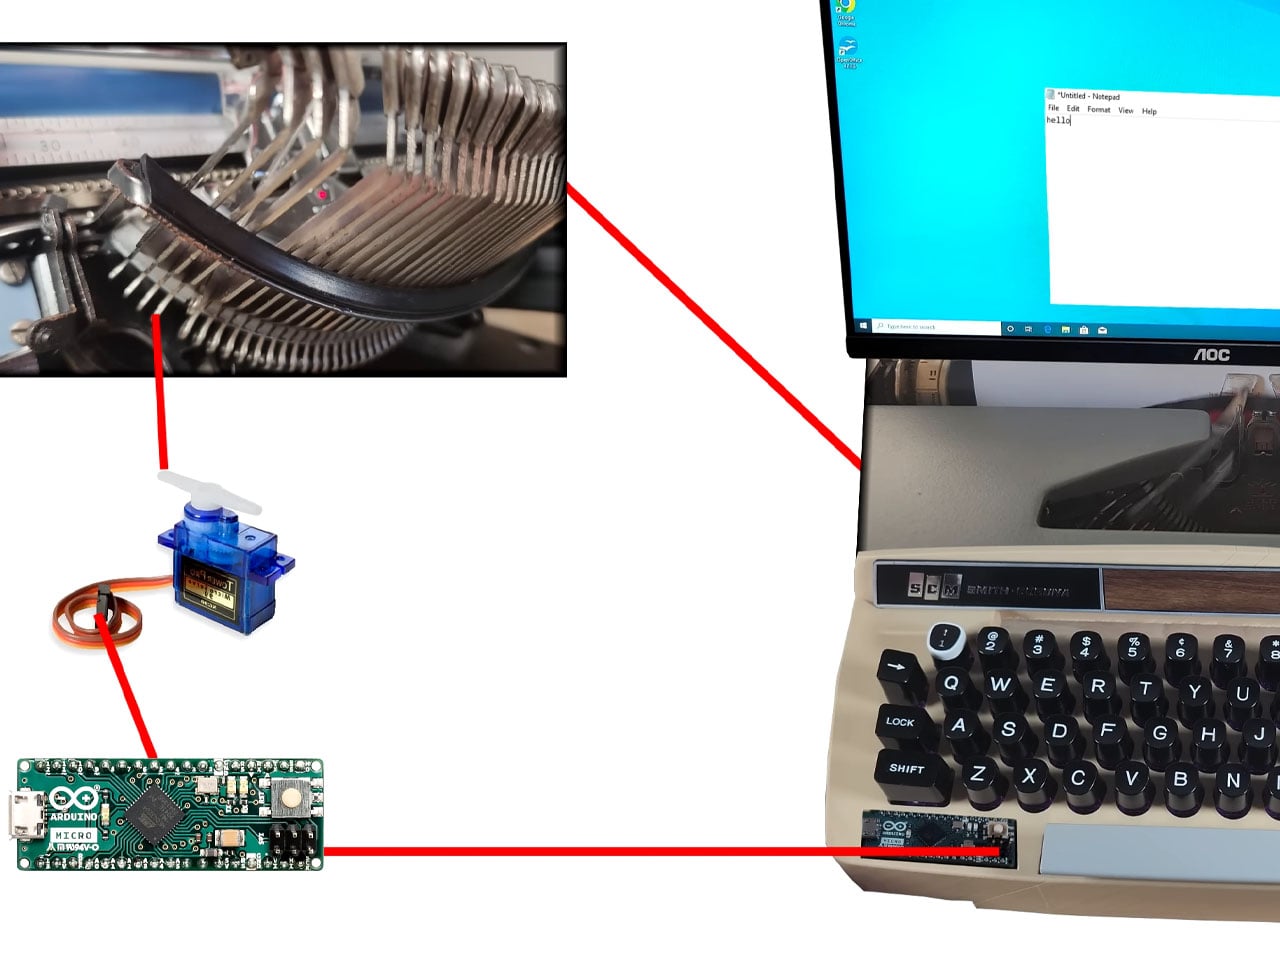
Next comes the easy bit, where the keycaps are 3D modelled and printed to test fit the adapters. Attaching them to the corresponding key strokes does the job. The backplate is a cakewalk, and the parts are done. Finally, all the parts are put together, and the keyboard for the typewriter is ready. Then it’s time to connect the keyboard to the complex working of the computer using a servo motor. To test the thing, the DIYer attaches it to his laptop, and it works all fine with the slide and the bell working perfectly.
The final part is to fit the PC mechanism and screen onto the typewriter assembly for the magic as the typing action moves the whole thing on the slide. Incredible, I must say. The final part of the build is yet to be released, but we know what to expect!
The post DIYer creates a retro-modern typewriter computer with moving screen on the slide first appeared on Yanko Design.
Morphable Shows How a Game Controller Could Adjust to Your Hands

Settling in for “just one more run” usually means your thumbs, wrists, or forearms start complaining long before the game is done. Most controllers are fixed objects that expect your body to adapt, which can lead to repetitive strain or numbness. You either push through the discomfort or take breaks that feel like interruptions, but rarely can you adjust the hardware itself to match how your hands actually feel in that moment.

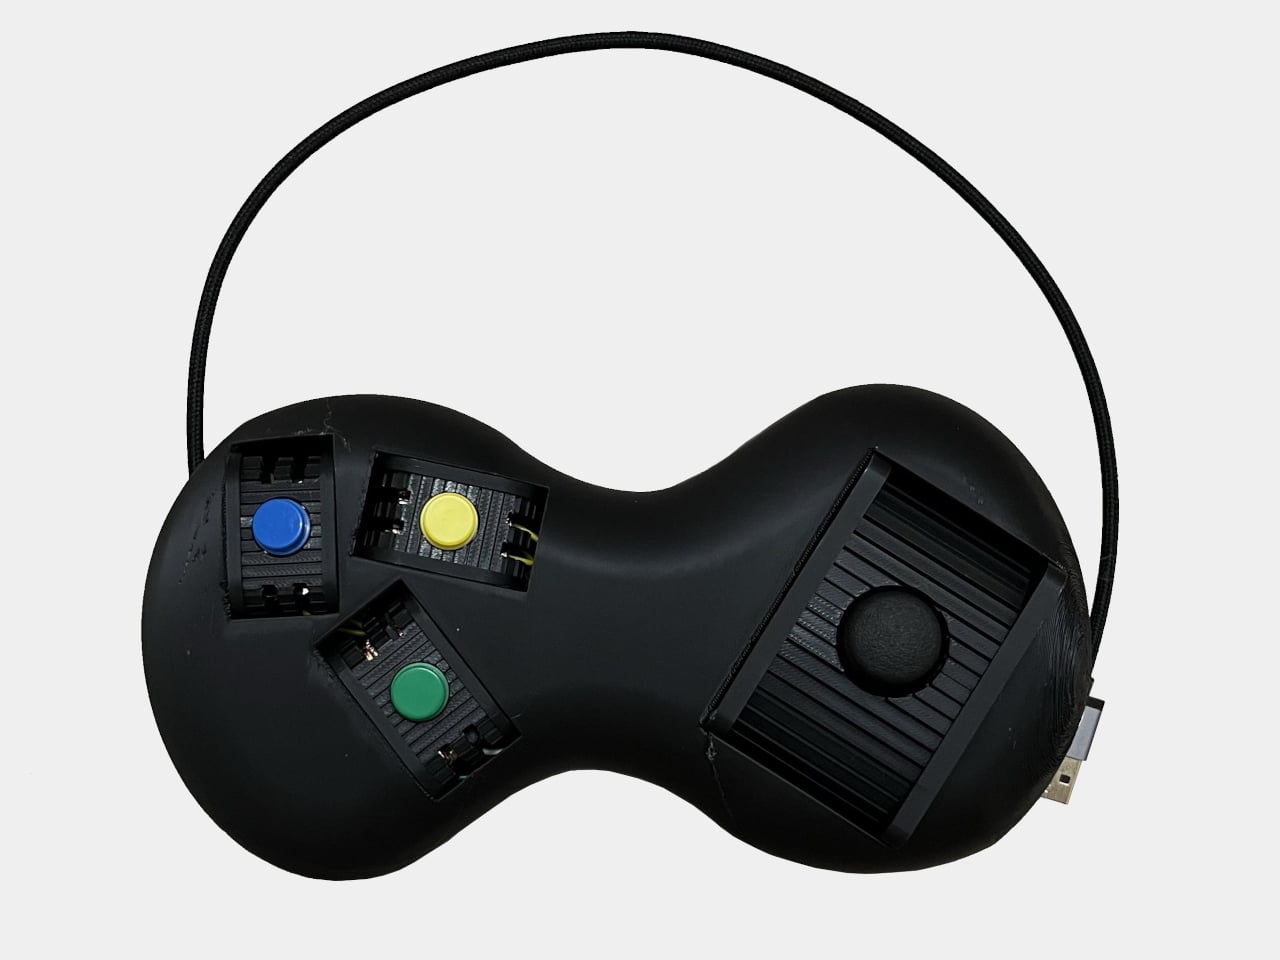
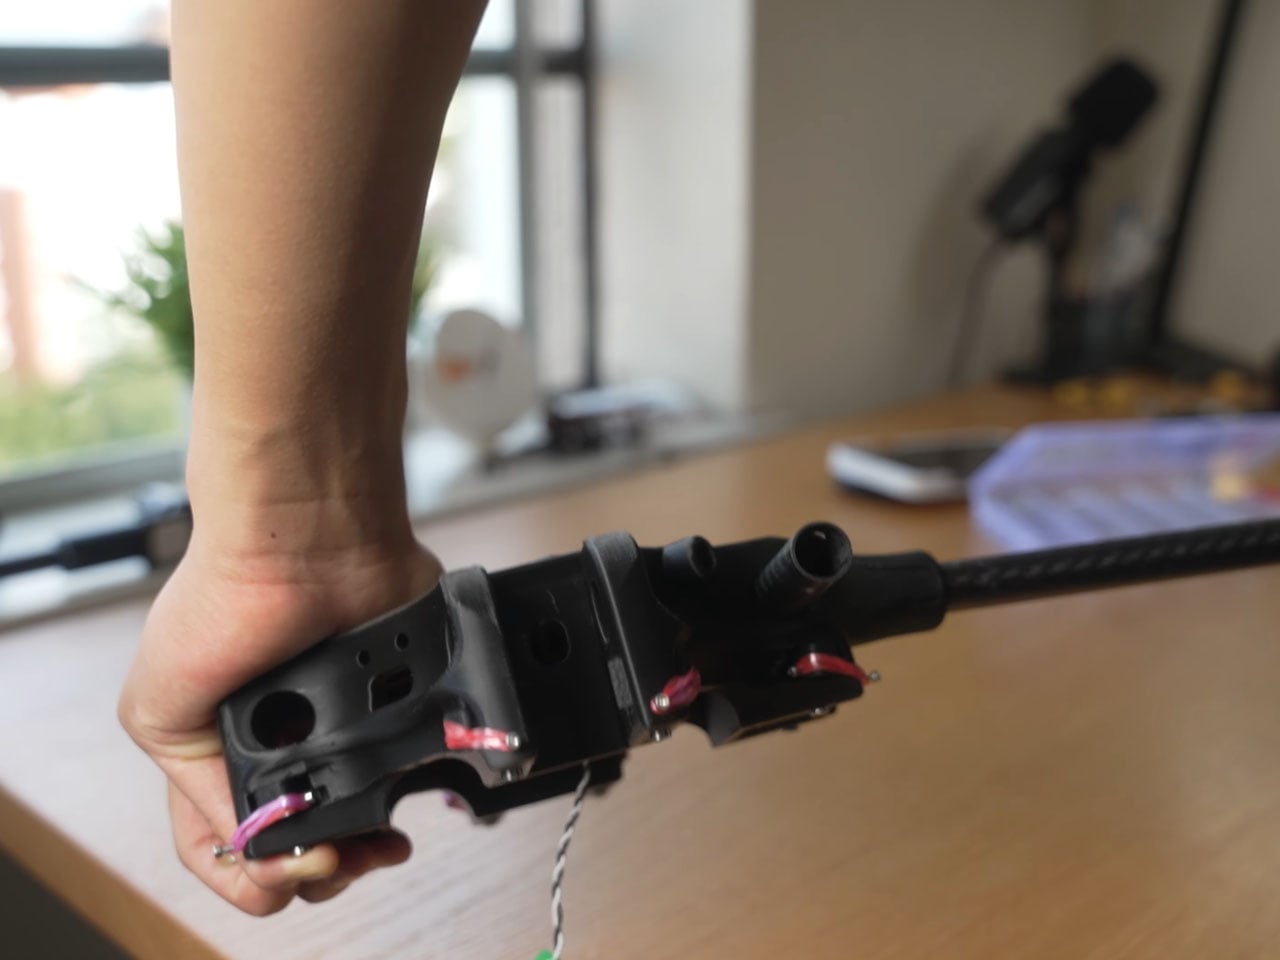
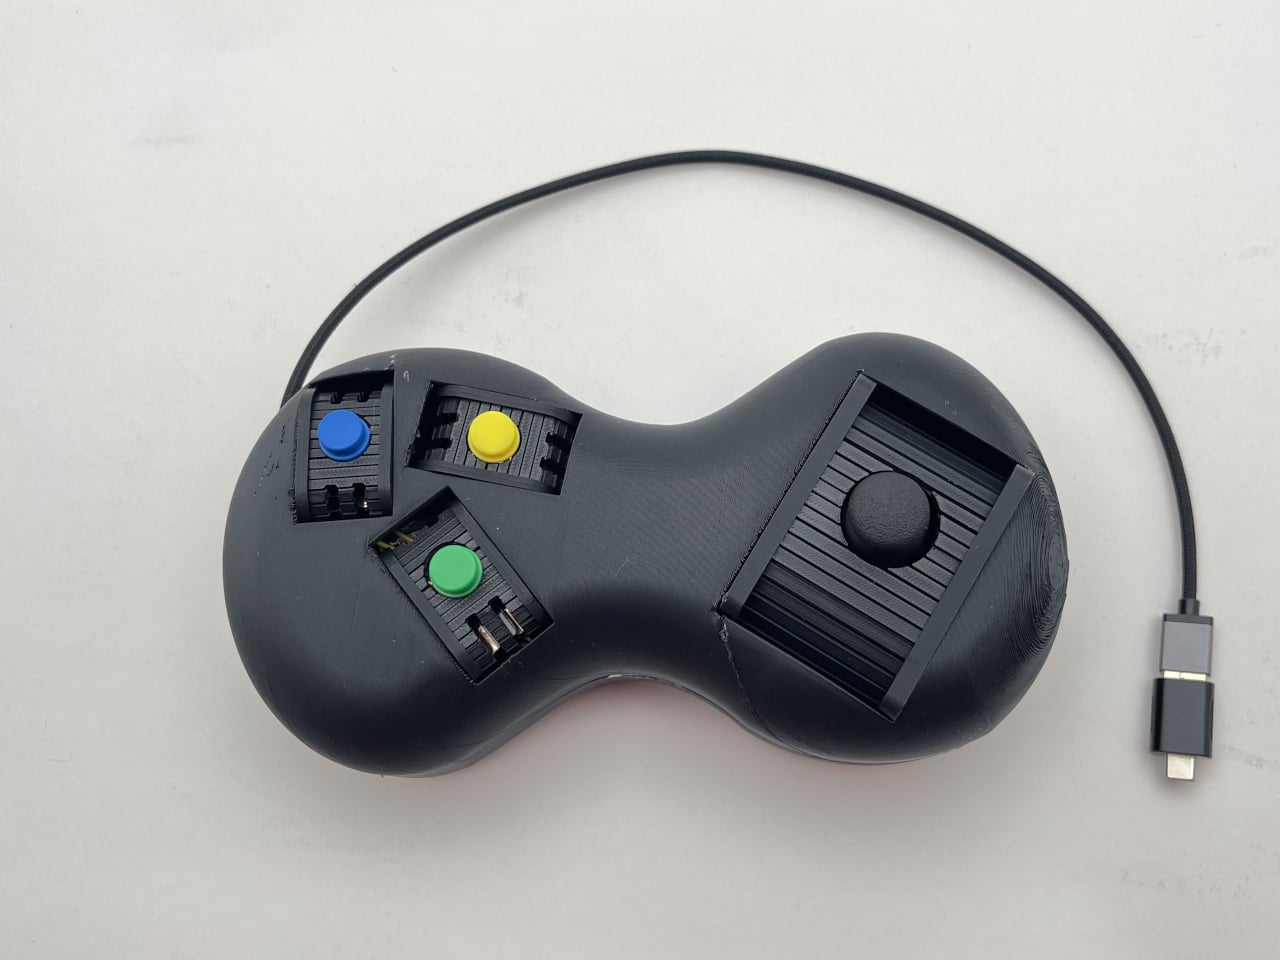
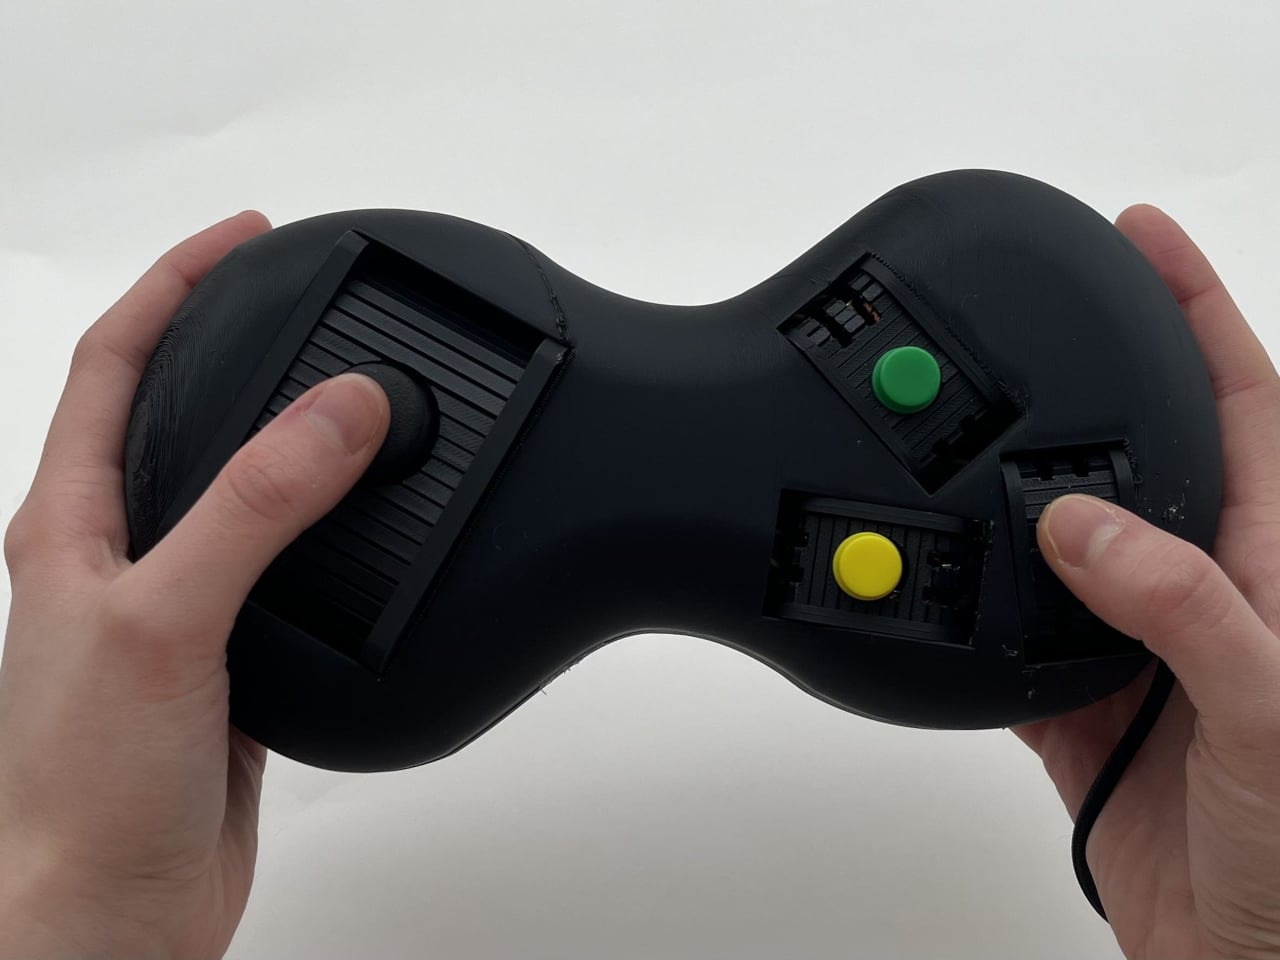
Morphable is a DIY adjustable gamepad built around a peanut-shaped shell and sliding modules for the joystick and buttons. It is designed to reduce strain by letting you reposition inputs to match your hands and play style, and if something starts to feel off mid-game, you can shift the layout instead of stopping. The whole thing is open-source and 3D-printable, built by someone who wanted their controller to adapt.

Designer: maggs_cas

Playing a demanding game for an hour or two, you might start with a familiar layout and then nudge a button rail closer to your thumb when your reach starts to feel tight. Maybe you slide the joystick slightly inward so your wrist can straighten, or move a frequently used button lower so another finger can take over. The controller encourages micro-adjustments that let different muscles share the work instead of overloading the same joints.

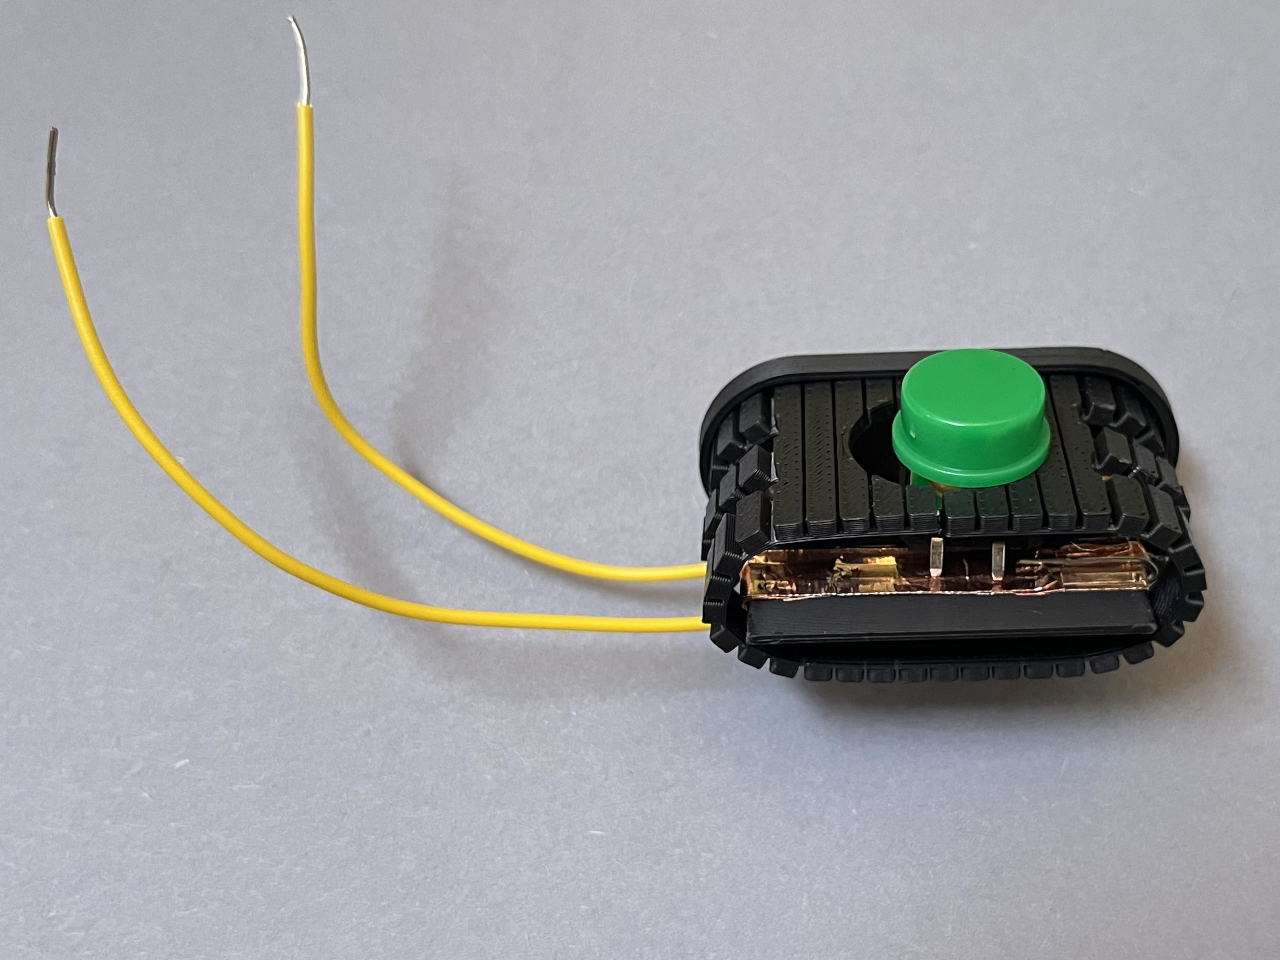
Each button sits on a small sled that rides on a rail, held in place by magnet tape. Underneath, copper tape runs along the base, and wires press against it to carry signals. The joystick uses a similar sled and rail. This setup means you can slide modules around freely while the Arduino inside still sees every press and movement, maintaining electrical contact as things shift without needing screws.

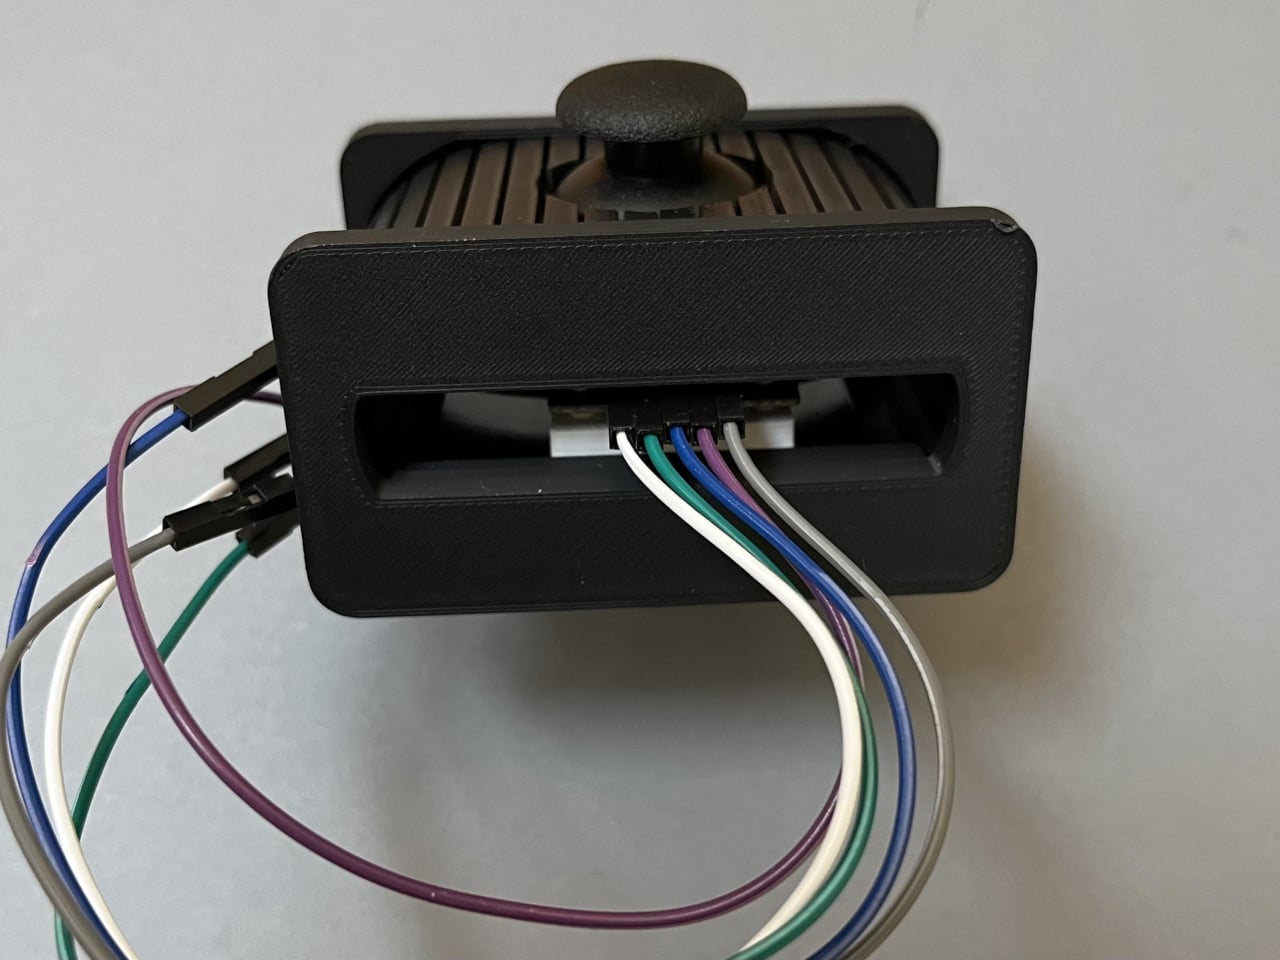
Morphable uses an Arduino Leonardo, which can pretend to be a USB keyboard. The three buttons and joystick axes are wired to specific pins, and the code maps them to keys like E, J, and K for games such as Hollow Knight. Because it shows up as a keyboard, you can remap controls in software and experiment with different layouts without being locked into a console’s default scheme.

The main body is a smooth, 3D-printed peanut shape that fills both palms and keeps wrists in a more neutral position than a flat gamepad. There are no sharp edges, and the weight is spread across the hands instead of concentrated under the thumbs. Combined with the movable modules, the shell lets you tune the controller to your posture instead of the other way around.

Morphable is less about one perfect layout and more about the idea that your ideal layout changes over a night, a week, or a year. Hardware does not have to be static; it can be something you keep adjusting as your body and habits shift. Fixed plastic shells dominate the market, but a controller that invites you to move things around to stay comfortable feels like a quietly radical prototype.

The post Morphable Shows How a Game Controller Could Adjust to Your Hands first appeared on Yanko Design.

Someone Built the PS4 Portable Sony Never Made with a 7-Inch OLED

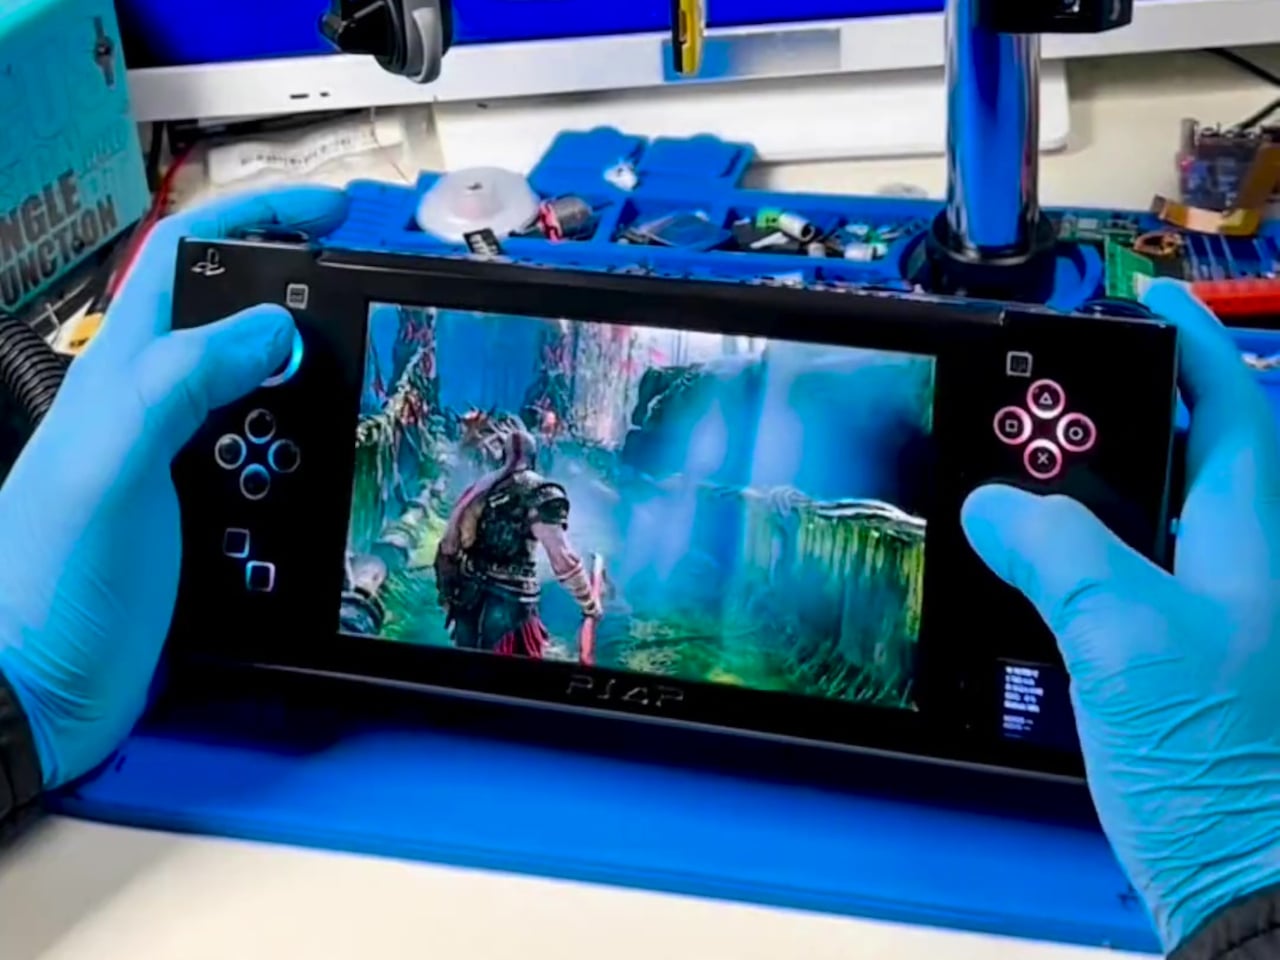
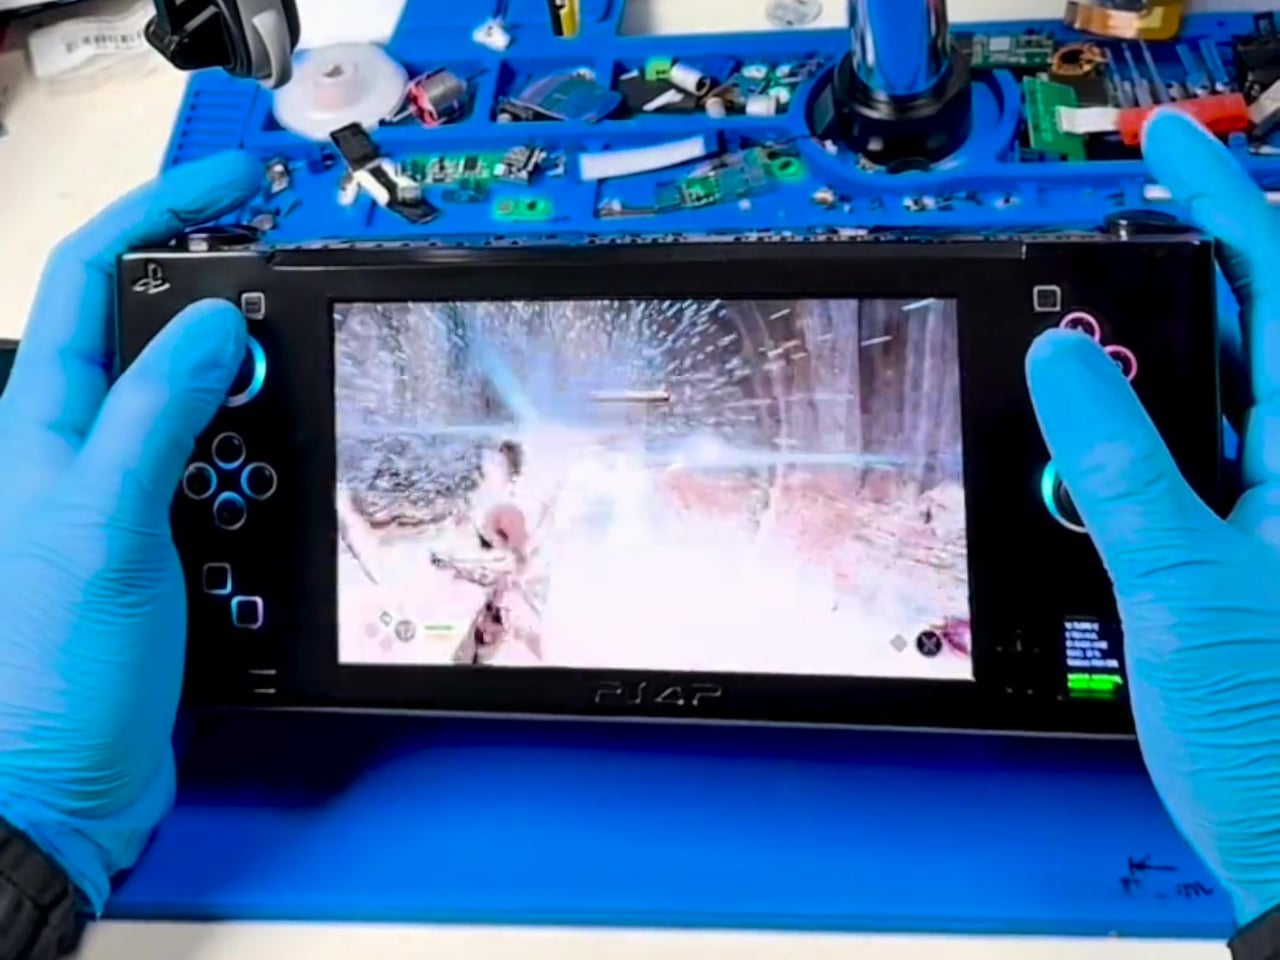
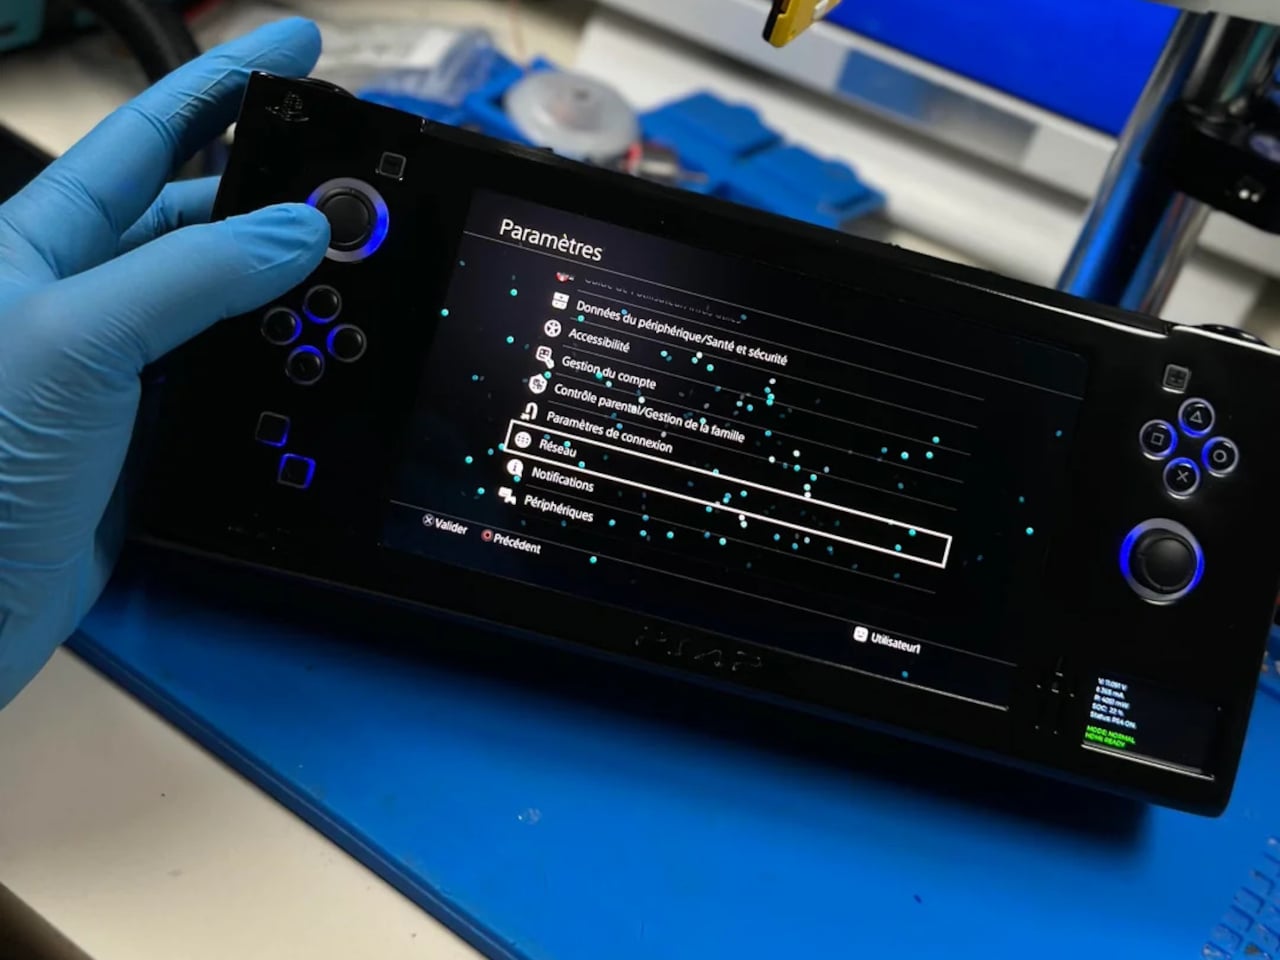
The PS4 era is over, but the library is still incredible, and the only way to enjoy it portably has been streaming or emulation with compromises in latency, compatibility, and control. The fantasy of a true PS4 handheld that runs games natively has floated around for years, but Sony never built one. Reddit user wewillmakeitnow decided to stop waiting and built it himself instead.

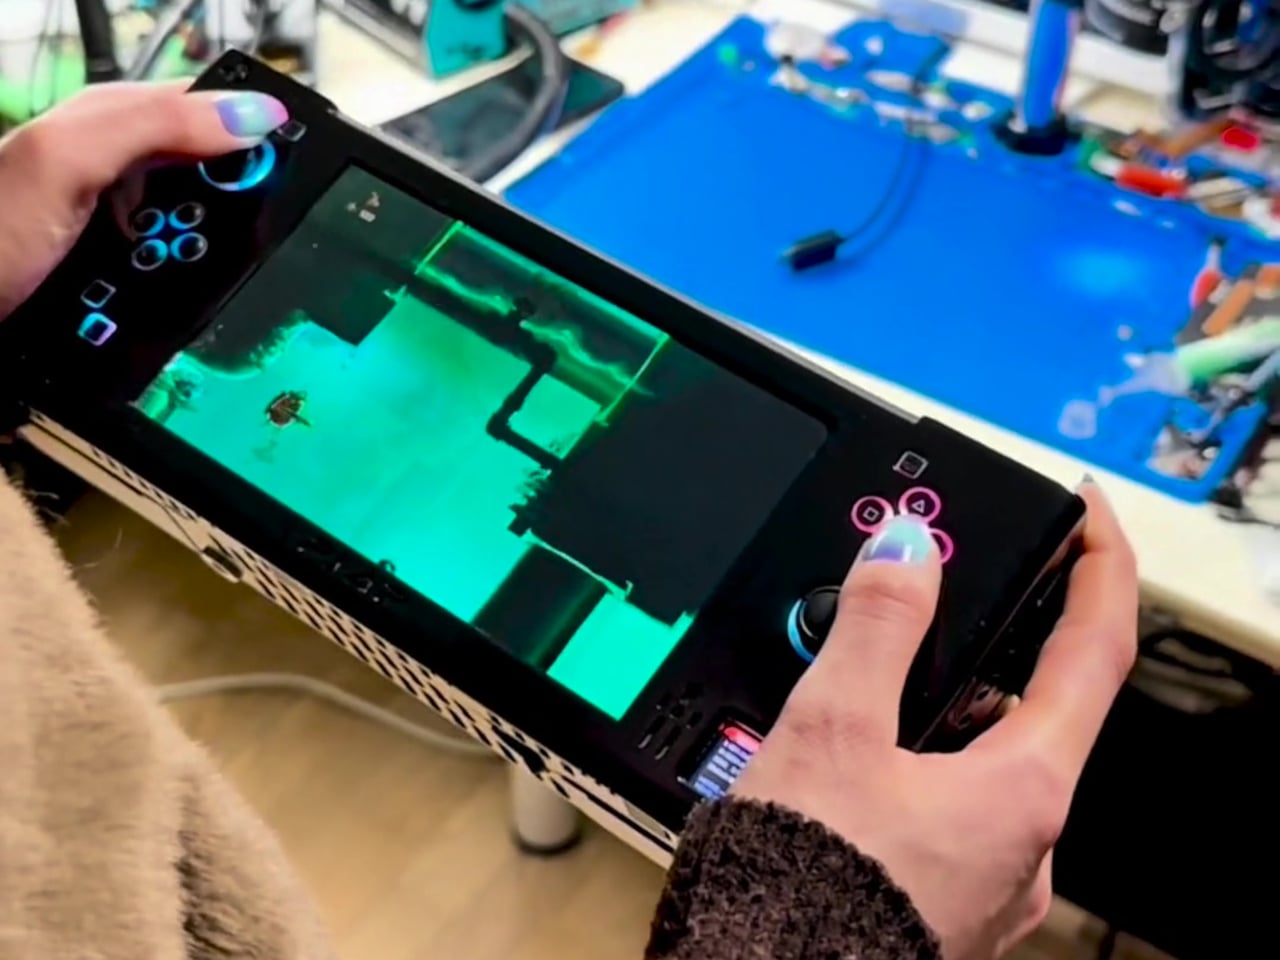
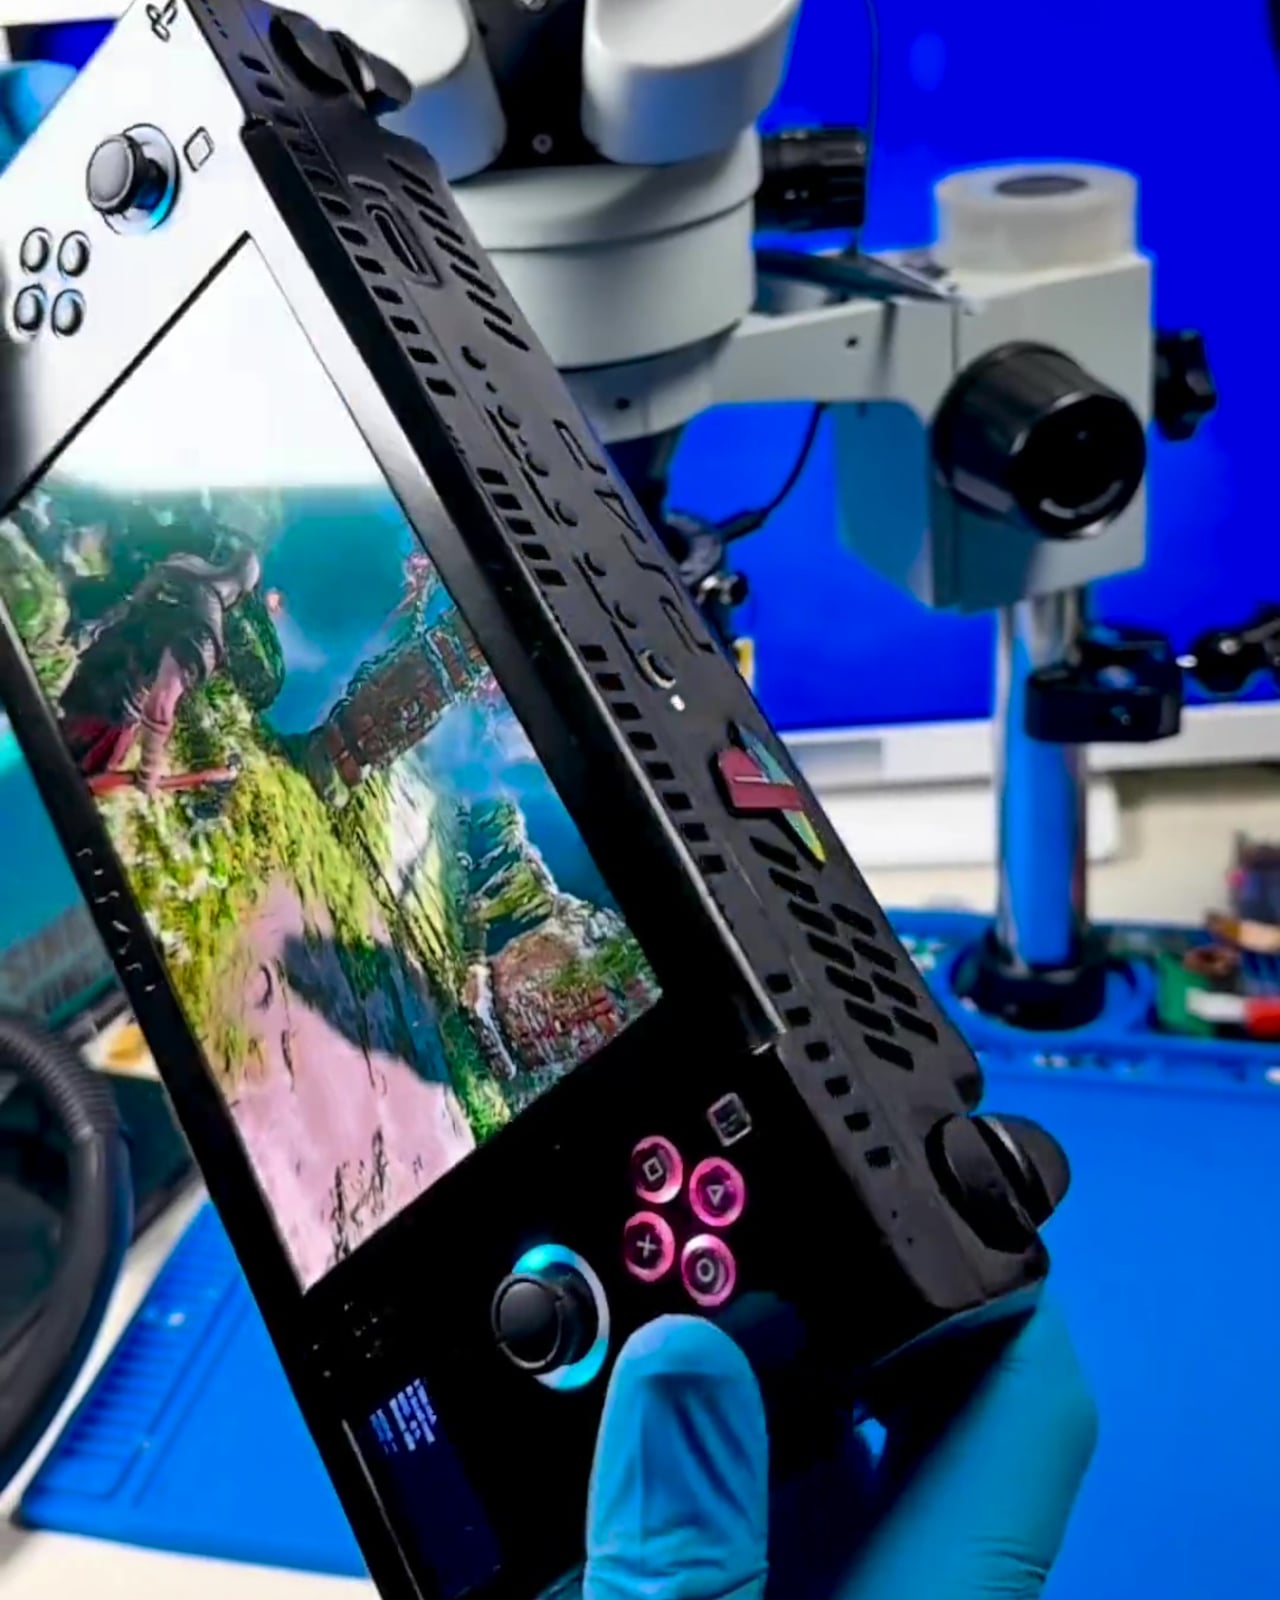
This is not a Raspberry Pi or a cloud device but a heavily modified PS4 Slim motherboard, cut and re-laid to be as compact as possible while keeping full functionality. The builder redesigned the layout for better power efficiency and thermals, then wrapped it in a custom ABS enclosure with full controls and a 7-inch 1080p OLED screen, turning a console into something that looks and plays like a handheld from an alternate timeline.

Designer: wewillmakeitnow

The cooling story is where most of the work lives. A new airflow path, custom heatsinks, and a large rear fan are managed by an onboard ESP32 microcontroller. The ESP32 runs custom firmware to watch temperatures in real time, enforce thermal thresholds, trigger emergency shutdowns, and supervise power draw and battery charging. It is the safety brain that makes running a console-class APU in your hands viable instead of a thermal disaster.

The power system uses six 21700 cells at 6,000 mAh each in a 3S2P configuration, roughly 130 Wh of energy. Under lighter loads, the system pulls around 44W for about three hours of play. In demanding games, it can draw close to 88W and land closer to an hour and a half before shutdown, at around 10V, which protects the pack. There is also a dedicated port for playing on AC.

The handheld still behaves like a PS4 when you want it to. There is HDMI out for plugging into a TV, multiple USB-C ports for charging, configuration, and connection to controllers or external drives, plus a USB 3.0 port for storage. In that mode, it stops being a handheld and becomes a very small PS4 Slim you can drop next to a hotel TV.

All of this comes at a cost. The enclosure is about 113mm x 270mm x 57mm, with sharp edges and no sculpted grips, and the weight is likely well north of a kilogram once you add the board, cooling, and batteries. The builder chose to let the shell hug the motherboard as tightly as possible, sacrificing rounded comfort to keep the footprint from ballooning further.

This one-off build shows both the promise and limits of turning a living-room console into a handheld. It proves that a native PS4 portable is technically possible if you accept thickness, weight, and fan noise. It also quietly asks what might happen if a company with Sony’s resources took the idea seriously. Until then, it stands as someone picking up their favorite console and refusing to put it down.

The post Someone Built the PS4 Portable Sony Never Made with a 7-Inch OLED first appeared on Yanko Design.

Spotify Record Player brings tactile experience of enjoying vinyls to the streaming world

Enjoying music is much more than just setting up your listening gear, putting on the headphones, and getting lost in a melodic world. Spotify is currently one of the most used streaming services to enjoy music, anywhere, anytime. However, some inventive DIYers go the extra mile to elevate the experience as no one has done before. The Prestodesk Spotify desk music player by AKZ Dev is a good example.

The software engineer is back with another creation to showcase his love for Spotify and, obviously, music. To bring the tactile experience of loading and playing records via Spotify is a totally new and exciting idea. AKZ explores this with his intuitive engineering skills to add the satisfying feeling of loading a vinyl record and then playing it via the Spotify service.

Designer: AKZ Dev

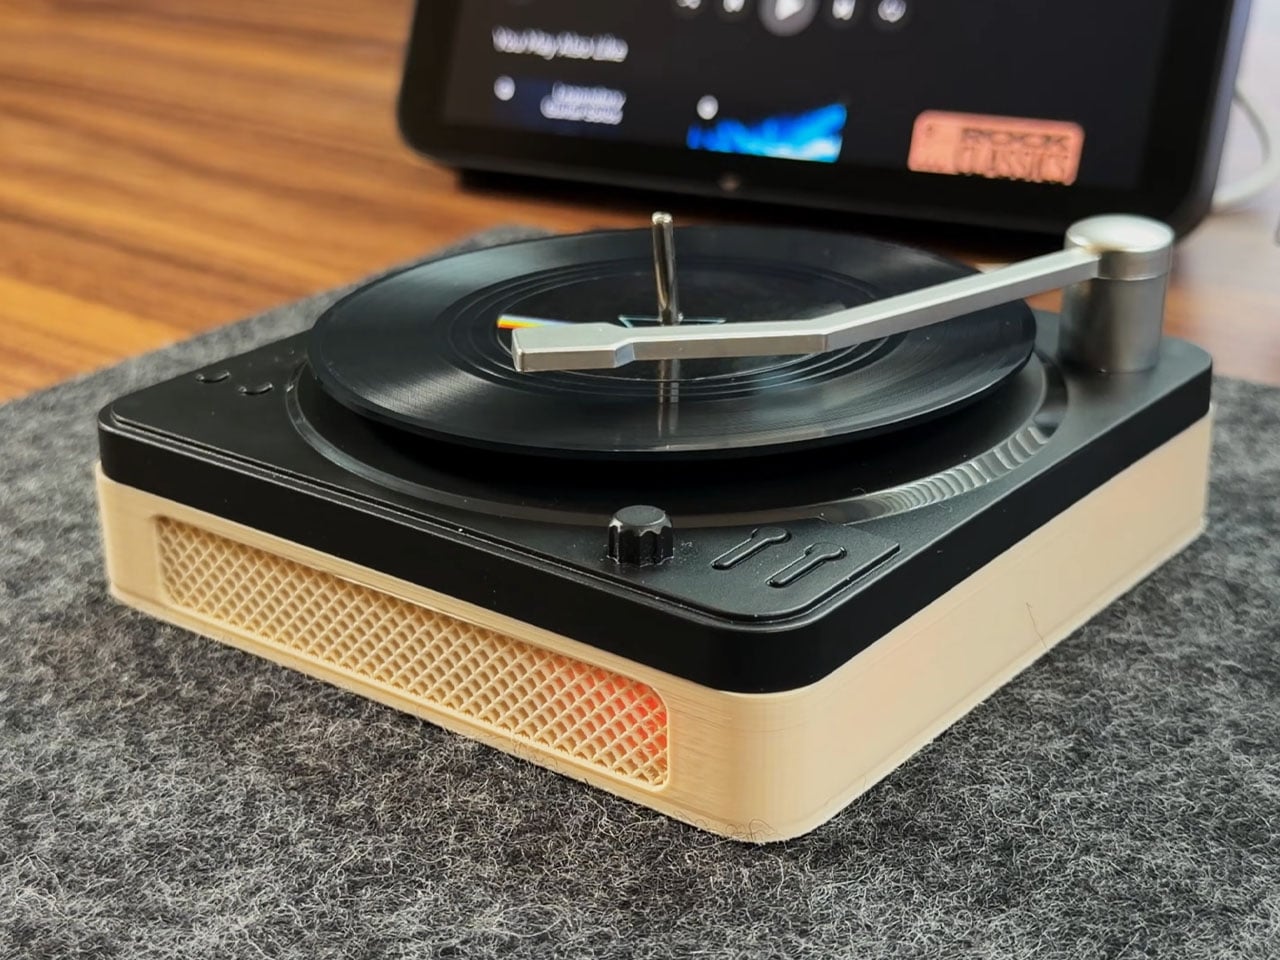
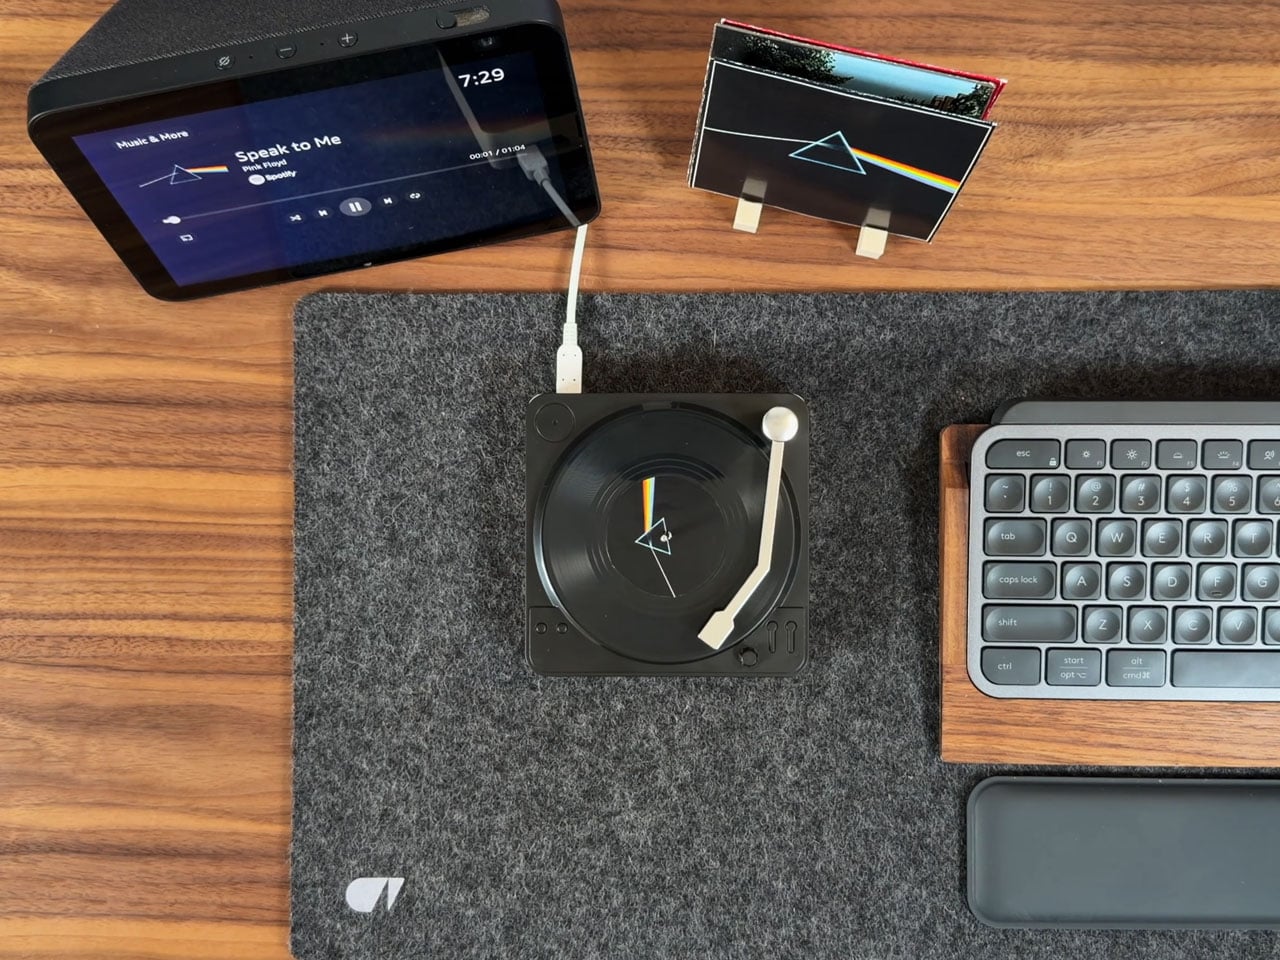
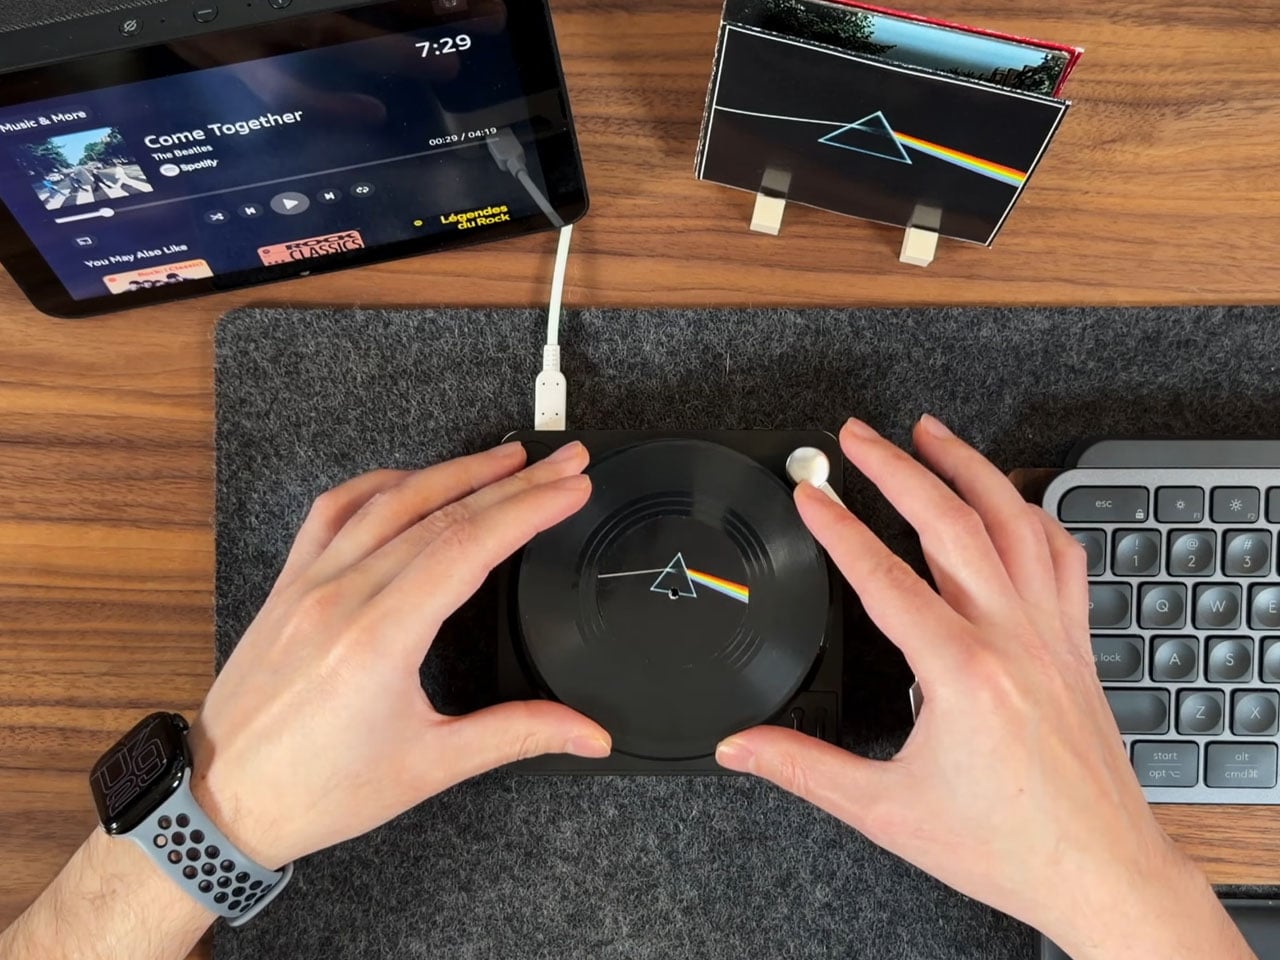
At the heart of this DIY record player is a Raspberry Pi that does all the complex handling and an RFID reader that turns a simple desk accessory into something interesting. The idea struck the DIY’er when he saw the gifted miniature vinyl record coasters lying on his desk, and he presumed they could do so much more than just hold a cup of coffee. The mini records move on the coaster base (which is modified to make space for the electronics) courtesy of the stepper motor, and to detect the tonearm position, he uses a hall effect sensor that’s found in most gaming controllers.

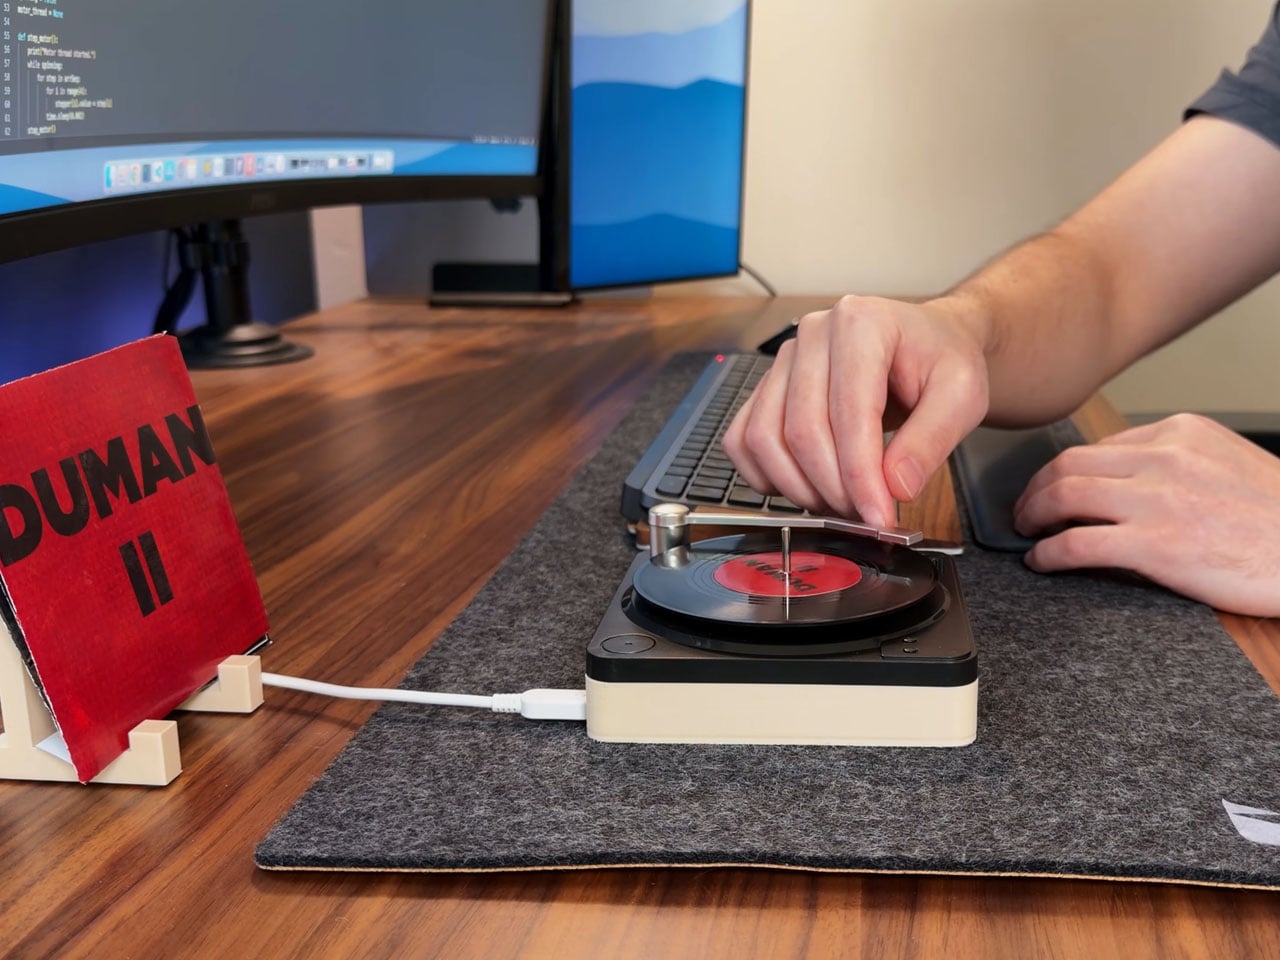
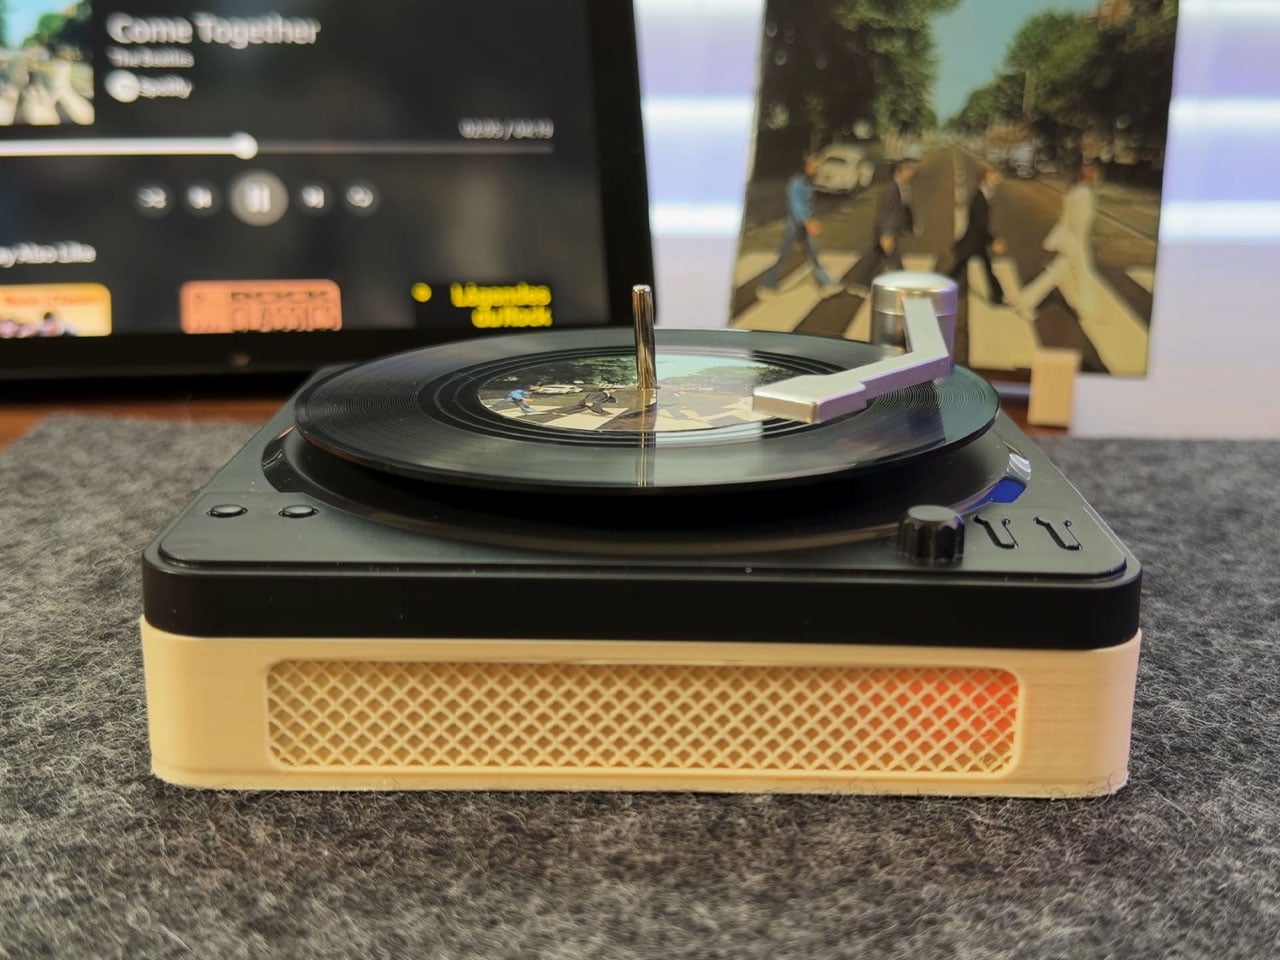
The enclosure below the coaster stand is 3D printed for a snug fit and gives the platter a genuine record player feel. After putting everything in place, the magnet is attached to the tone arm. The stepper motor lies beneath the spindle, so that the vinyl can spin seamlessly. The next step involves preparing the vinyl records for the musical nirvana. NFC stickers are placed behind the vinyl record, and custom labels are printed to make things feel authentic. AKZ also 3D printed a record stand to showcase the whole setup on the desk.

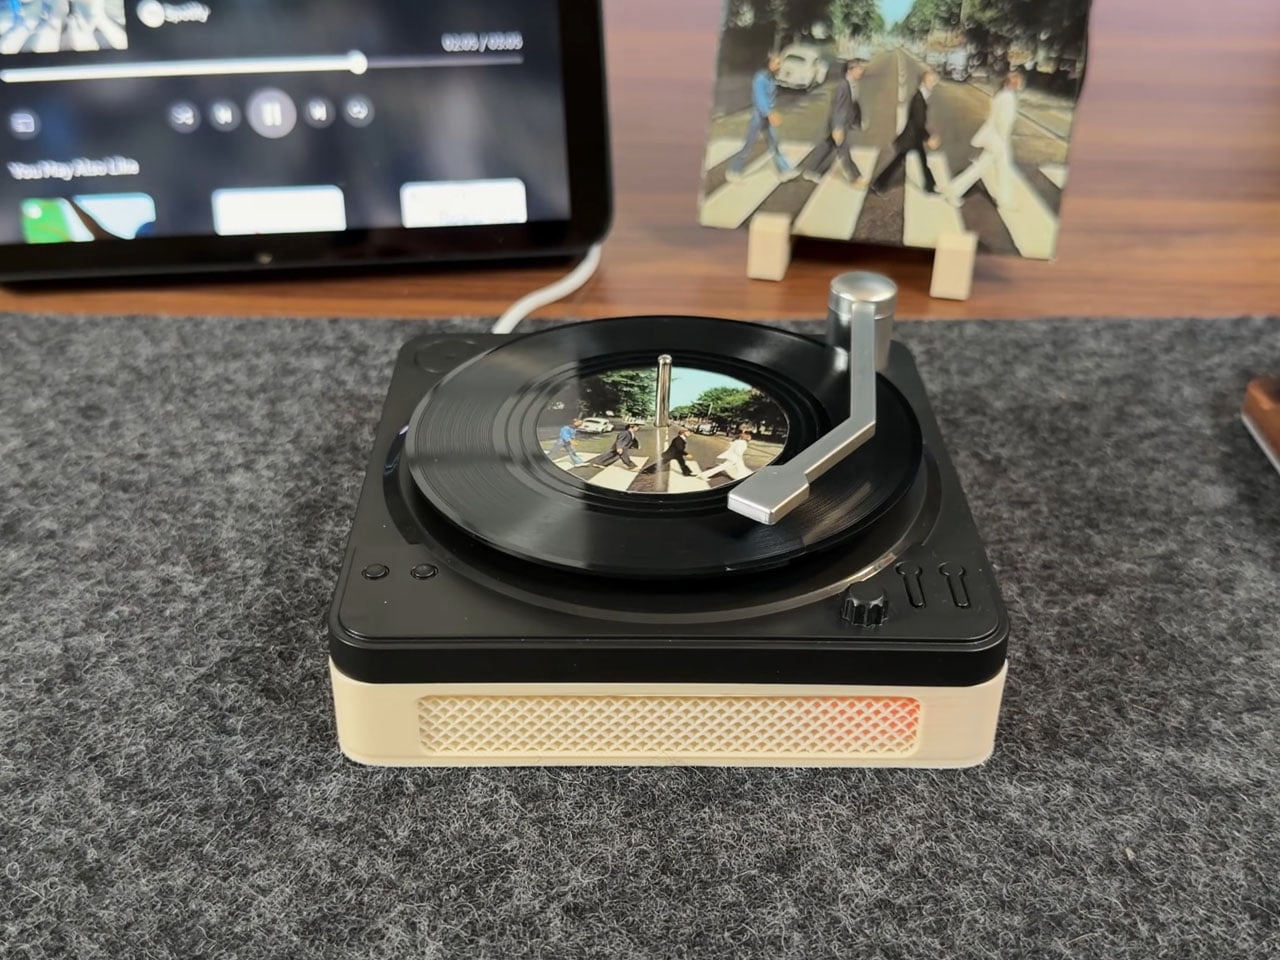
After doing a bit of tinkering with the Raspberry Pi software and connecting it to the Spotify API, the record player is ready to rock the desk. Basically, the music does not play off the record; the RFID tag on the mini vinyl record player is detected by the moving tonearm. This triggers the playback of the associated music from Spotify’s library. Pretty nifty, isn’t it? The DIYer is kind enough to share all the project files on GitHub, and tells that the record player can be improved further with volume controls, or by integrating the speaker unit inside the main enclosure.


The post Spotify Record Player brings tactile experience of enjoying vinyls to the streaming world first appeared on Yanko Design.

Someone Built a Tamagotchi-like Desk Toy That Gets Sad When You Ignore It

Modern desks overflow with timers, focus apps, and smart assistants that promise more productivity but mostly add more things to manage. There’s a calendar nudging you about meetings, a watch tracking movement, and browser tabs reminding you to hydrate. Not every object on your desk needs to optimize you, though, and sometimes you just want a small, harmless distraction that keeps you company without demanding anything serious in return.

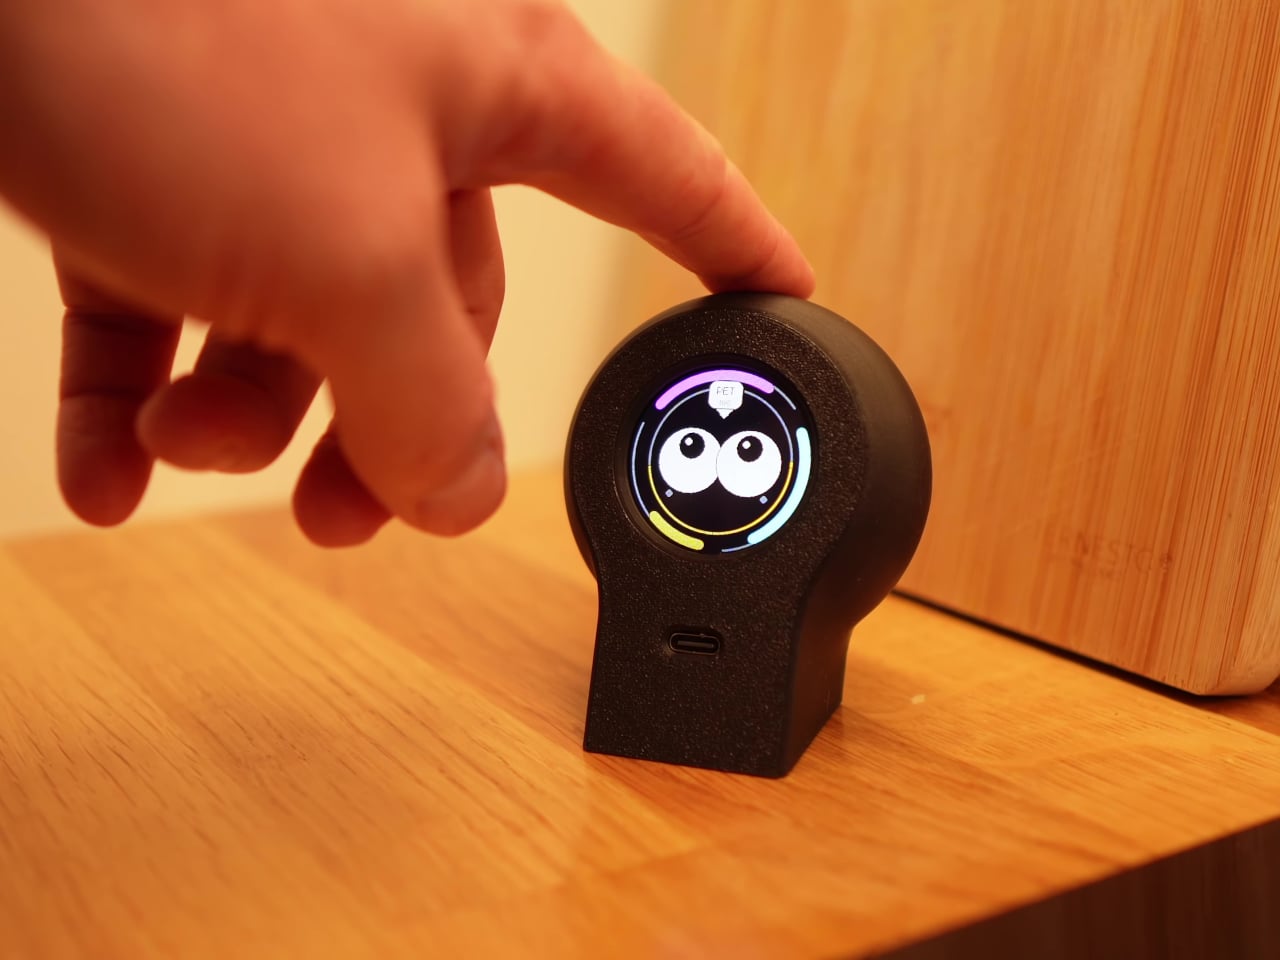
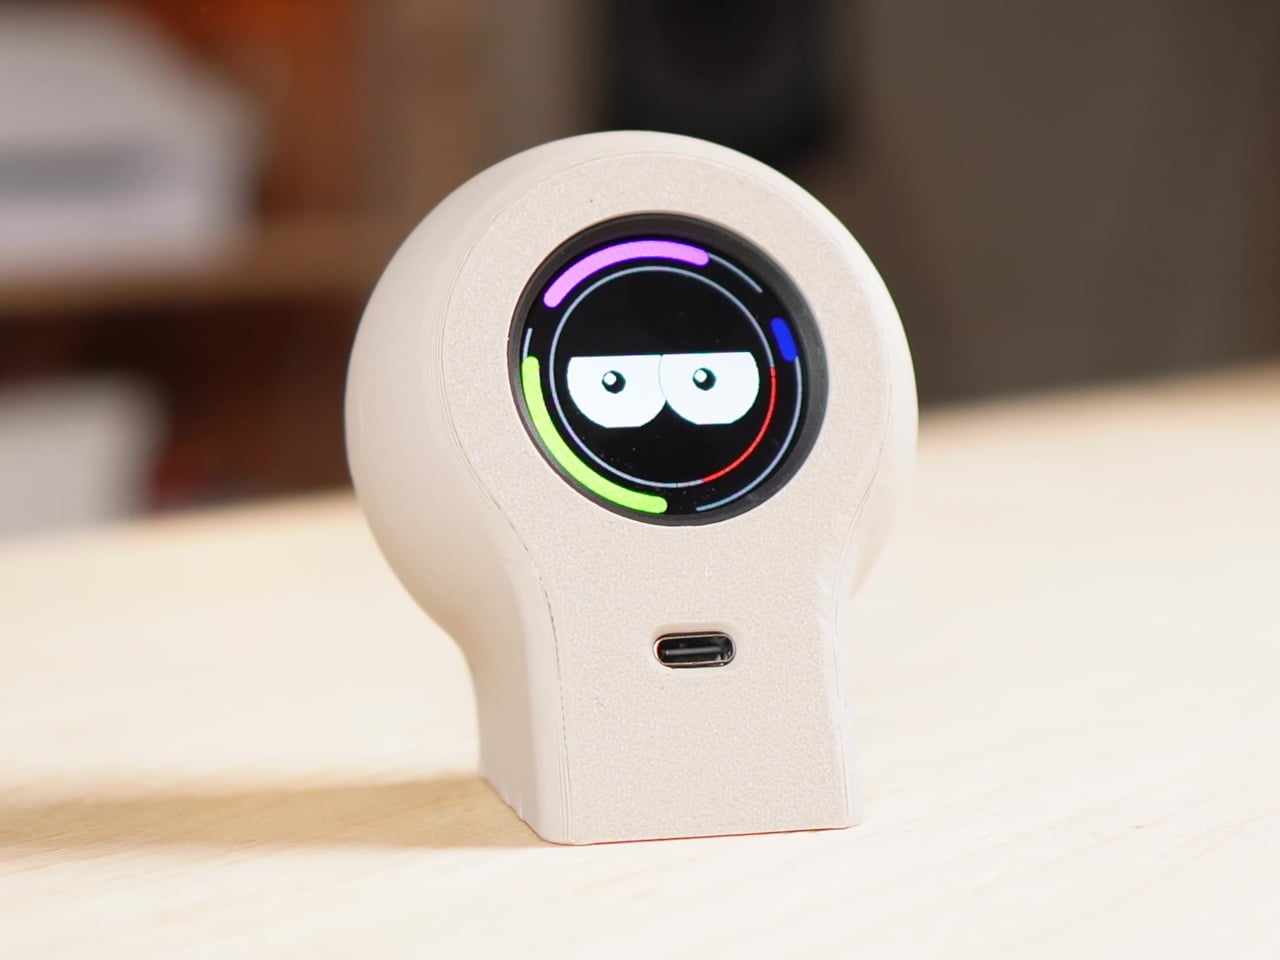
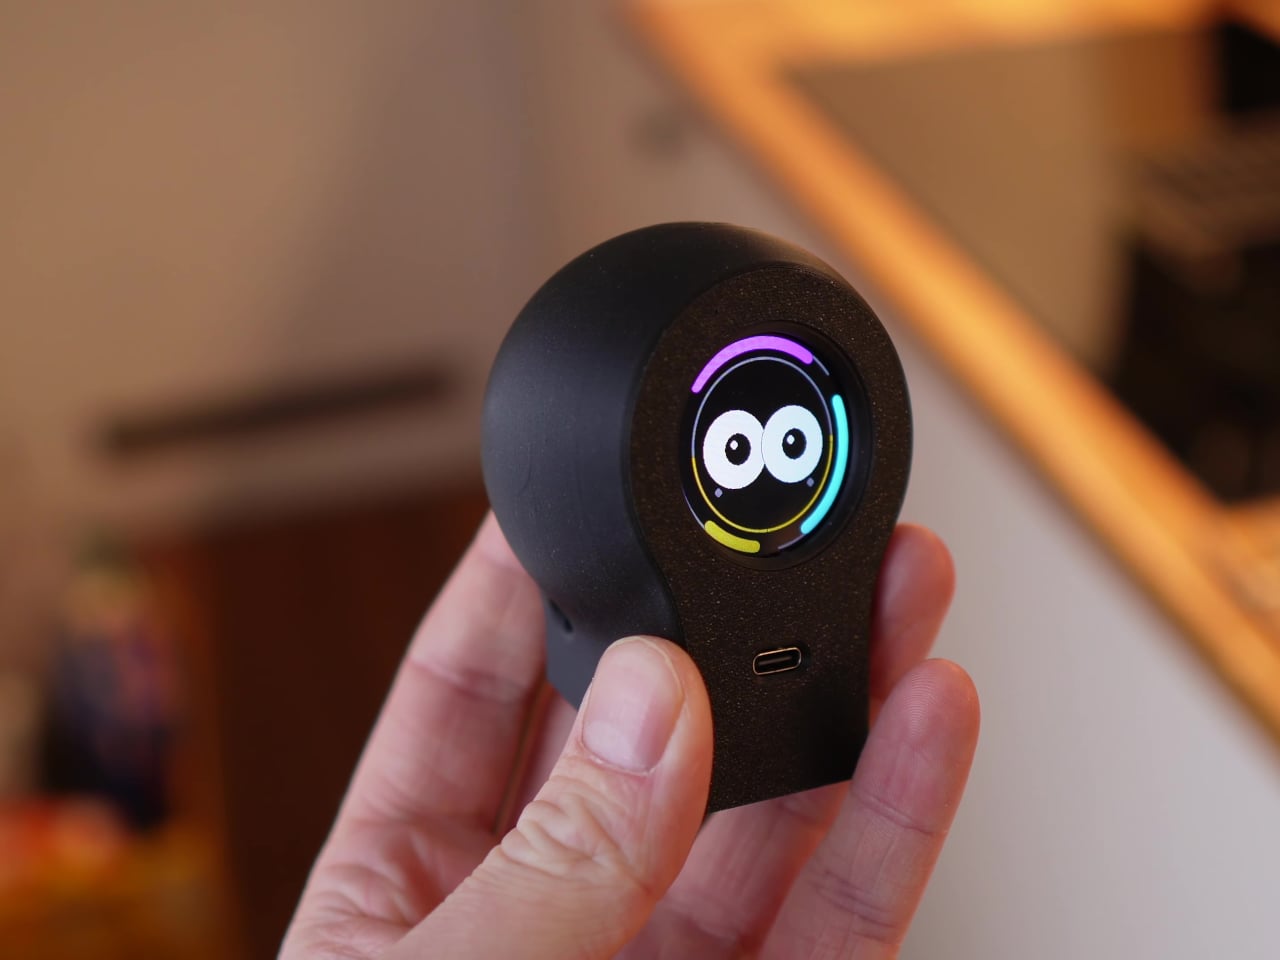
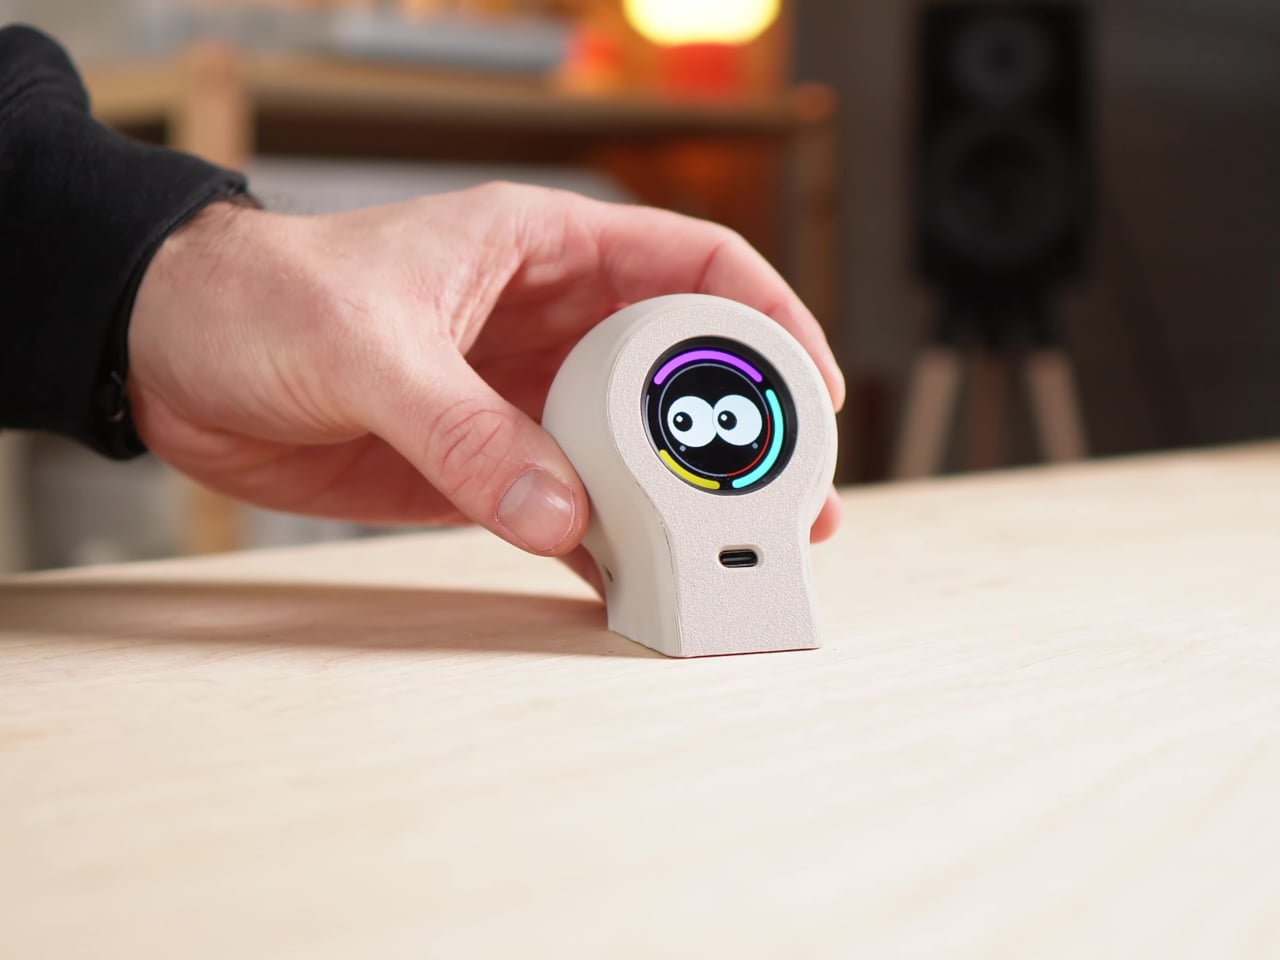
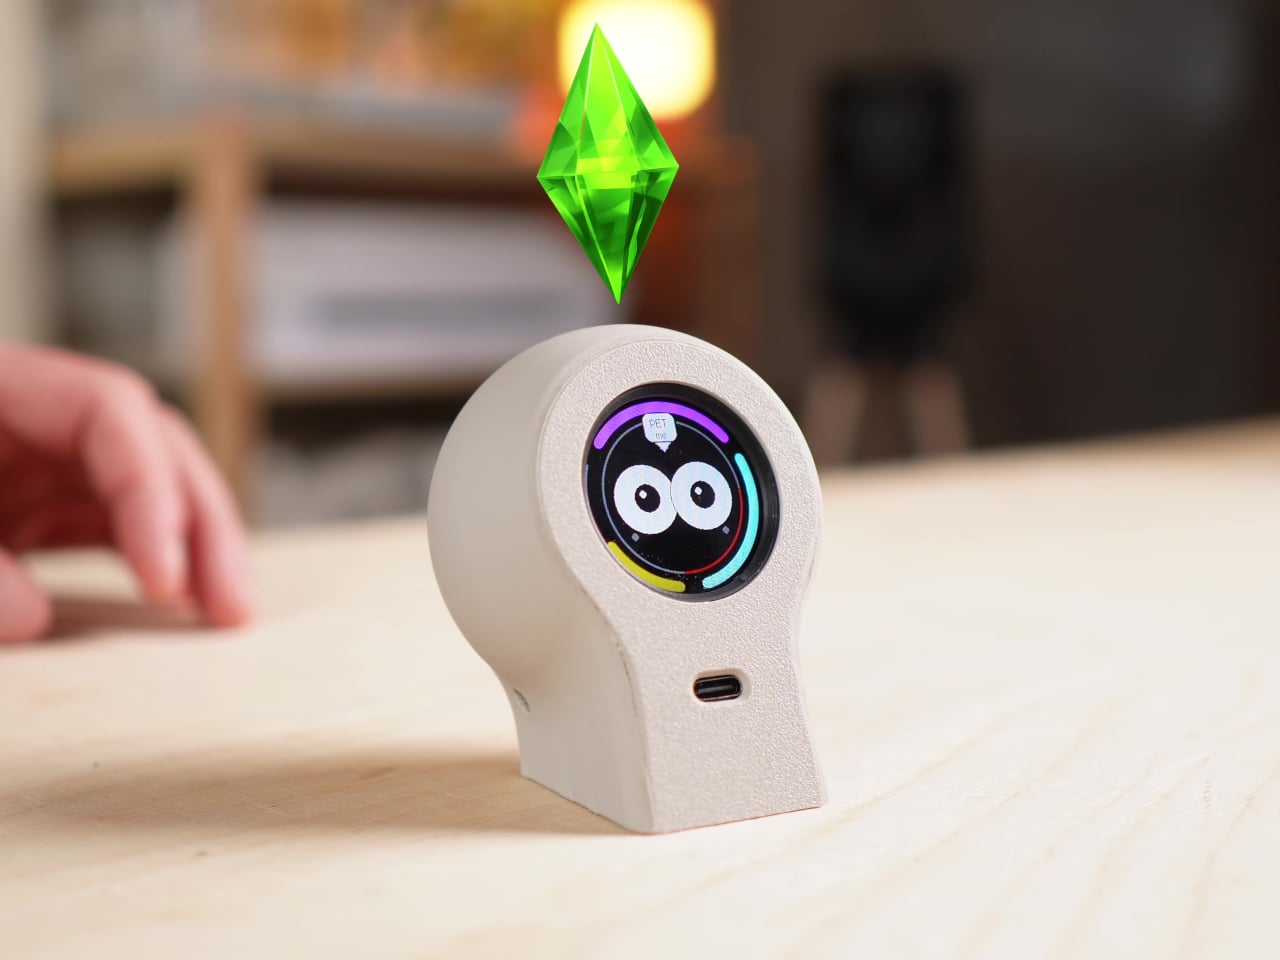
Paul Lagier’s DIY Desk Companion sits next to your laptop as a little creature that lives completely offline. It is not connected to Wi‑Fi, has no app, and never sends notifications. Instead, it runs its own tiny world on a circular screen, reacting to touch, light, and time with shifting eyes and moods. The whole thing exists as a playful break, closer to a desk toy than a productivity gadget.

Designer: Paul Lagier

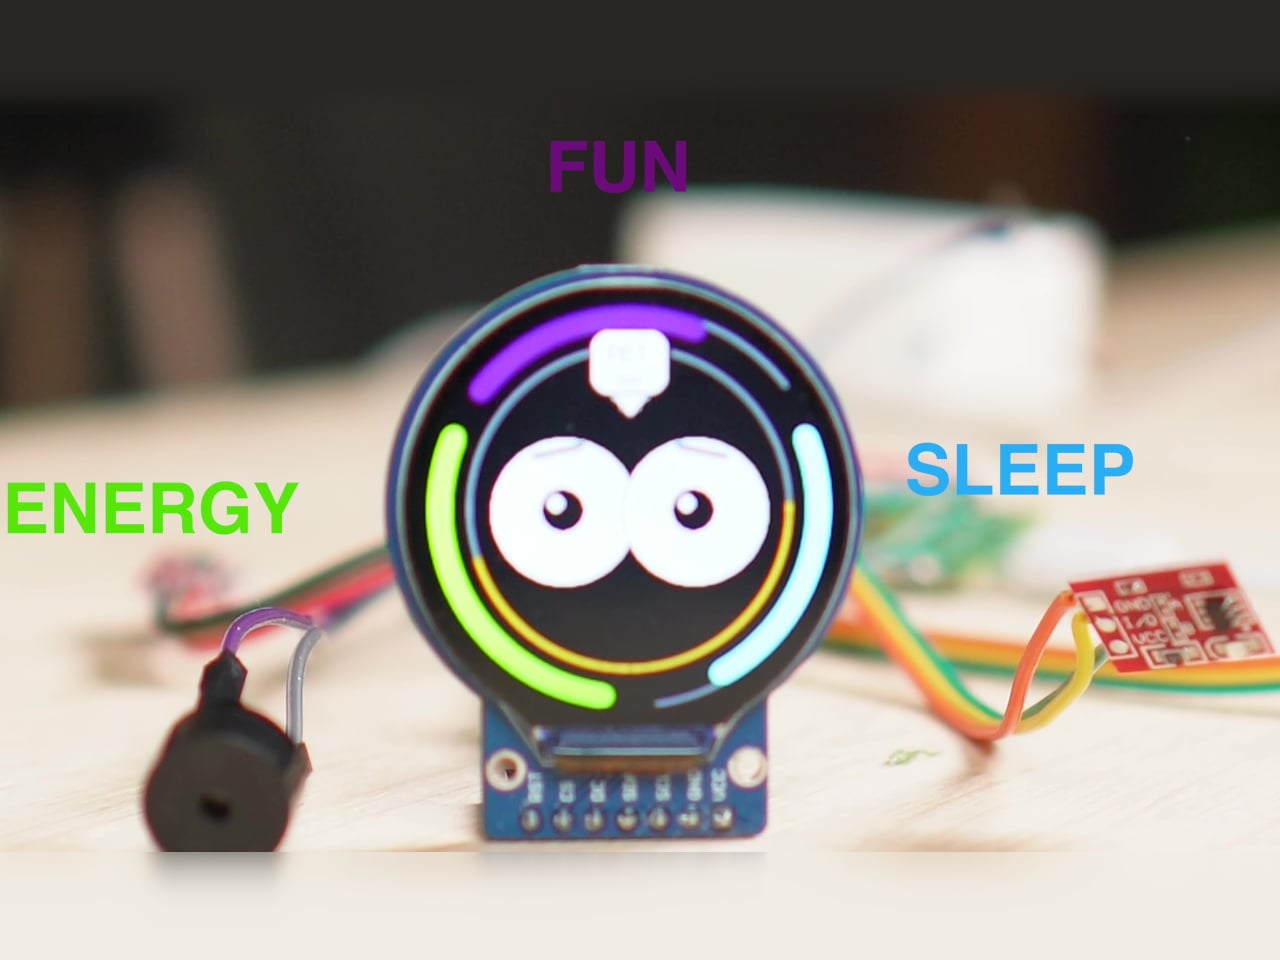
The companion’s life revolves around three needs, Energy, Fun, and Sleep, visualized as colored arcs around its animated eyes. Energy maps to battery and charging, Fun rises when you interact and falls when ignored, and Sleep depends on light levels, getting drowsy when the room gets dark. These simple meters quietly drive its moods, making it curious, bored, or sleepy depending on how you treat it over the day.

The moods shift over longer stretches, too. Regular interaction makes it age, becoming calmer and more expressive, while neglect can make it sulky or withdrawn. There’s no scoreboard or streak counter, just a sense that this tiny character remembers how you have been treating it. After a while, you catch yourself tapping it to cheer it up during a slump, which is the whole point of having a little desk creature.

A typical day means a few small moments. You tap it during a break, and it perks up, eyes widening. Late at night, when the room gets dark, it slowly drifts off to sleep without you doing anything. When you plug it in the next morning, its Energy bar fills, and its mood lifts. These are quick interactions, a tap or a glance, not mini-games that hijack your break.

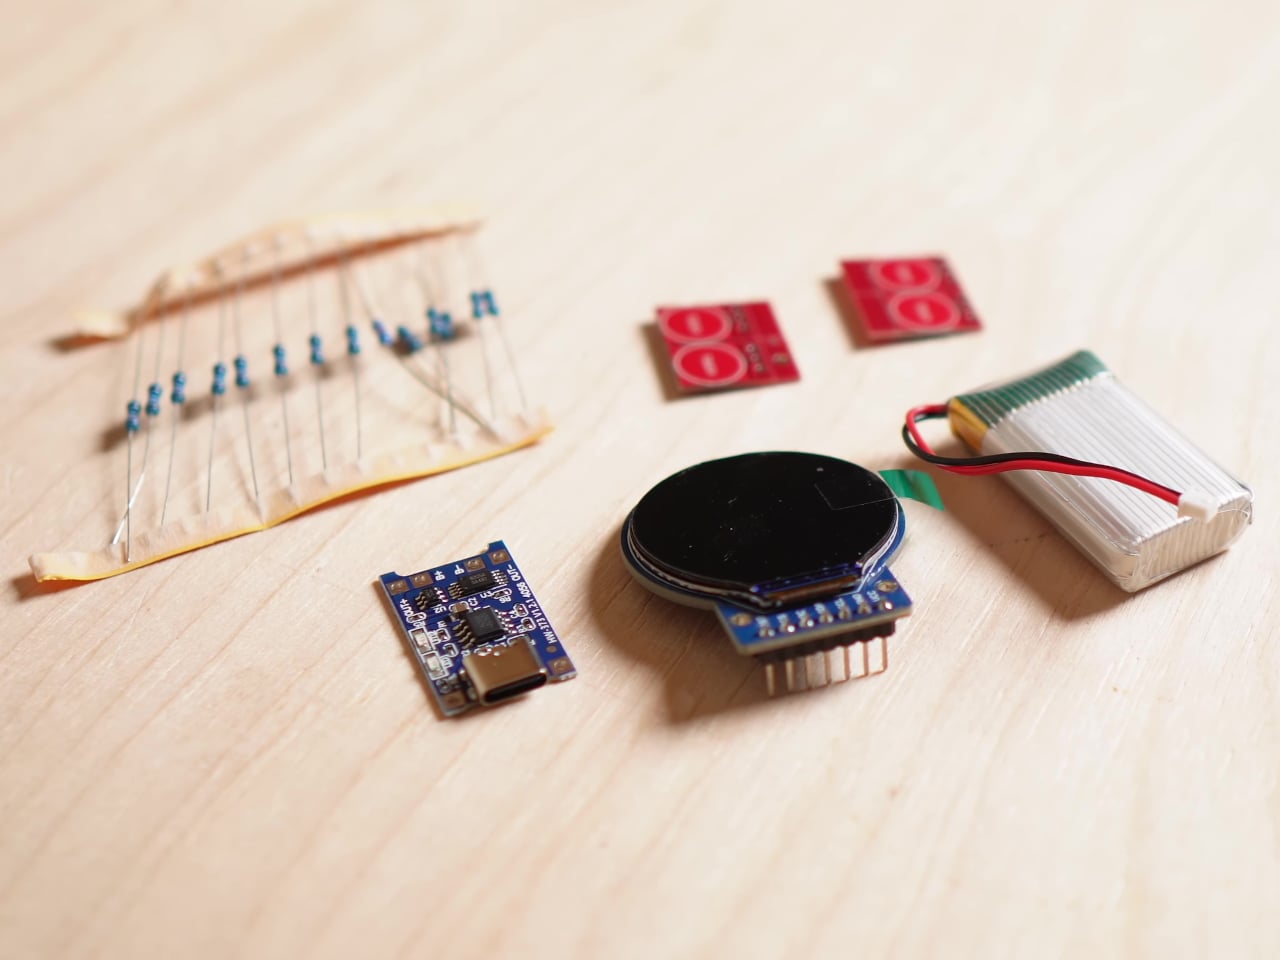
Under the shell is a tangle of wires, a microcontroller board, a round color display, touch sensors, a light sensor, and a small battery. Lagier calls it a working prototype rather than a polished product, which feels fitting. The design is simple and neutral, letting the animated face carry the personality while the hardware quietly does its job without needing custom circuitry to make the interaction feel real.

The DIY Desk Companion is proudly unnecessary in the best way. It does not track tasks or nag you about hydration. It just gives you a tiny, responsive presence that makes the space feel less mechanical. Devices around us keep trying to squeeze more output from every minute, so a little offline creature that only wants a tap now and then feels surprisingly refreshing.

The post Someone Built a Tamagotchi-like Desk Toy That Gets Sad When You Ignore It first appeared on Yanko Design.

Persistent DIYer creates autonomous flying umbrella despite years of struggle

Back in early 2024, John Tse designed a flying umbrella controlled by a remote, which seemed a completely out-of-the-box idea. However, some users pointed out that the umbrella should follow the person using it, to make it more practical, come rain or shine. The hands-free option of using a flying umbrella is far more exciting than maneuvering it while walking.

Months later, John set out to design an upgraded version of the project. The thing is essentially an autonomous drone shading you from wet or dry weather on demand. The vital addition to the rig is a tracking system loaded with a camera that comes from drone parts. That said, the build was not a cakewalk, and it took him a couple of years to achieve the intended version.

Designer: John Tse

Things started off by creating a custom frame with a central hub for the umbrella, the locking mechanism, and the hinges to have a solid structure for the camera and sensors to mount on. Most of the components are 3D printed, either made out of carbon fiber or nylon. Once the design materialized, an ordinary umbrella was mounted onto the frame, and the arms attached to the mechanism, just like a tripod. After figuring out the GPS, flight controller, Raspberry Pi function, and other electronics, it was time for the first test flight. After a few glitches with the rotational direction and the flight anomalies, the troubleshooting mode kicked on. The rig finally held stable in flight, and John attached the umbrella housing to the thing.

The next step was to align the camera, sensors, and GPS function to make the autonomous flight possible, so that the umbrella doesn’t bump into the person it’s hovering over, or other people on the street. With help from his buddy Hinsen, the idea of creating a 3D map of the people nearby, even in low light, using complex light reflection tech, came to life.  Somehow, the thing didn’t work after replacing all the old components with the new ones. Eventually, after a lot of tinkering and tuning, the flying umbrella finally moved from the initial stage to the concrete prototype stage. A project that was meant to be just a few weeks finally took more than a couple of years.

Finally, the day arrived when the project materialized, and the floating umbrella hovered over John. Even when the sun went down, the thing managed to hover over him. Thereafter, it was time for the rain to come down and test the flying umbrella in wet weather. In heavy rain, the umbrella had zero glitches, and the painstaking ritual of going through numerous roadblocks felt sweet for him. The design of the umbrella doesn’t feel like there’s something off; it just feels like an everyday object. Sure, the high-tech accessory is heavy due to all the components, still it manages to do what it was intended for. In the end, a shout out to John for his patience and persistence that ultimately materialized this project.

The post Persistent DIYer creates autonomous flying umbrella despite years of struggle first appeared on Yanko Design.

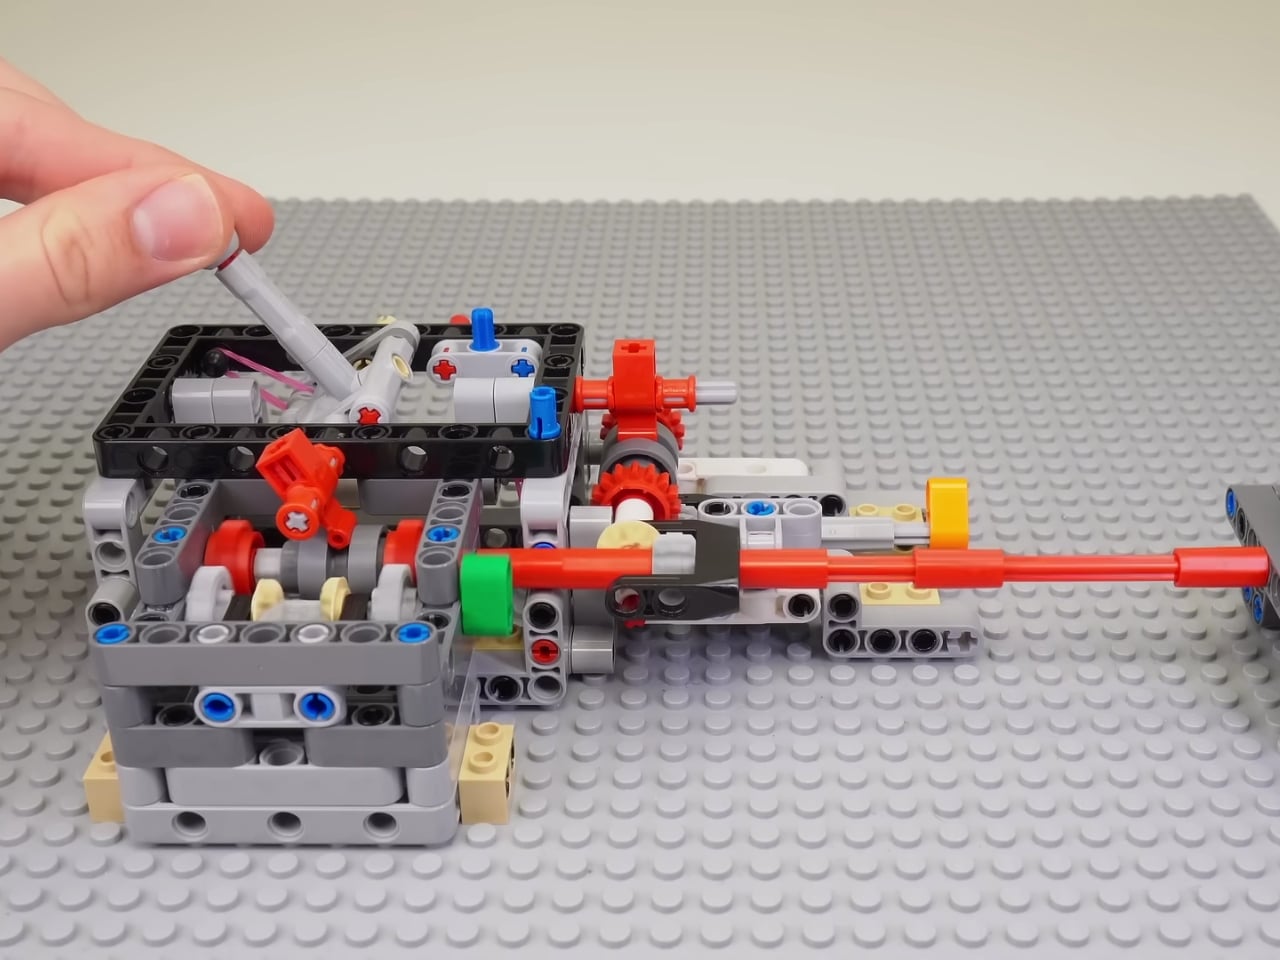
This LEGO Claw Machine Uses Just One Motor (And Lots of Genius)

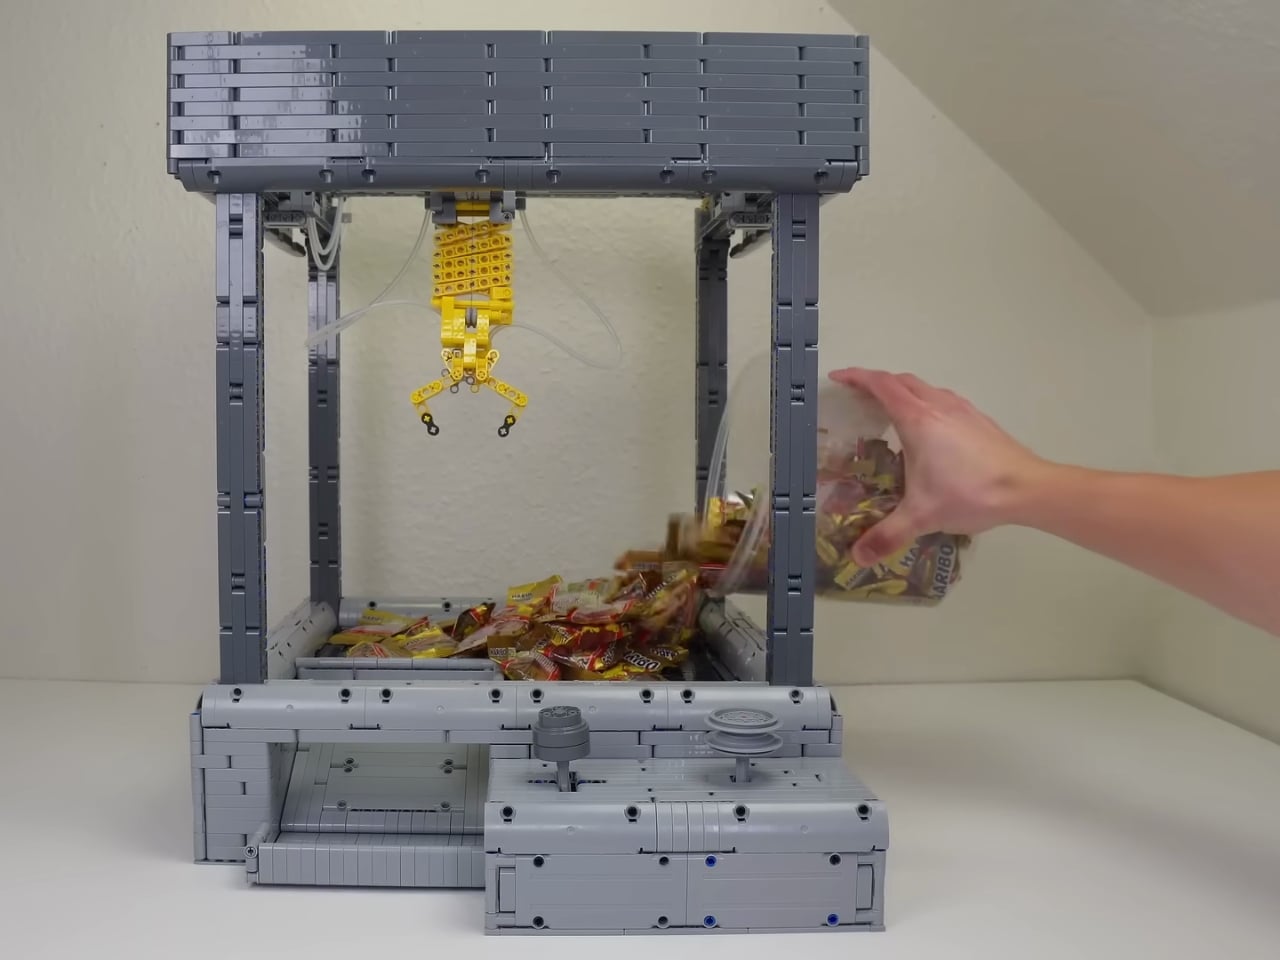
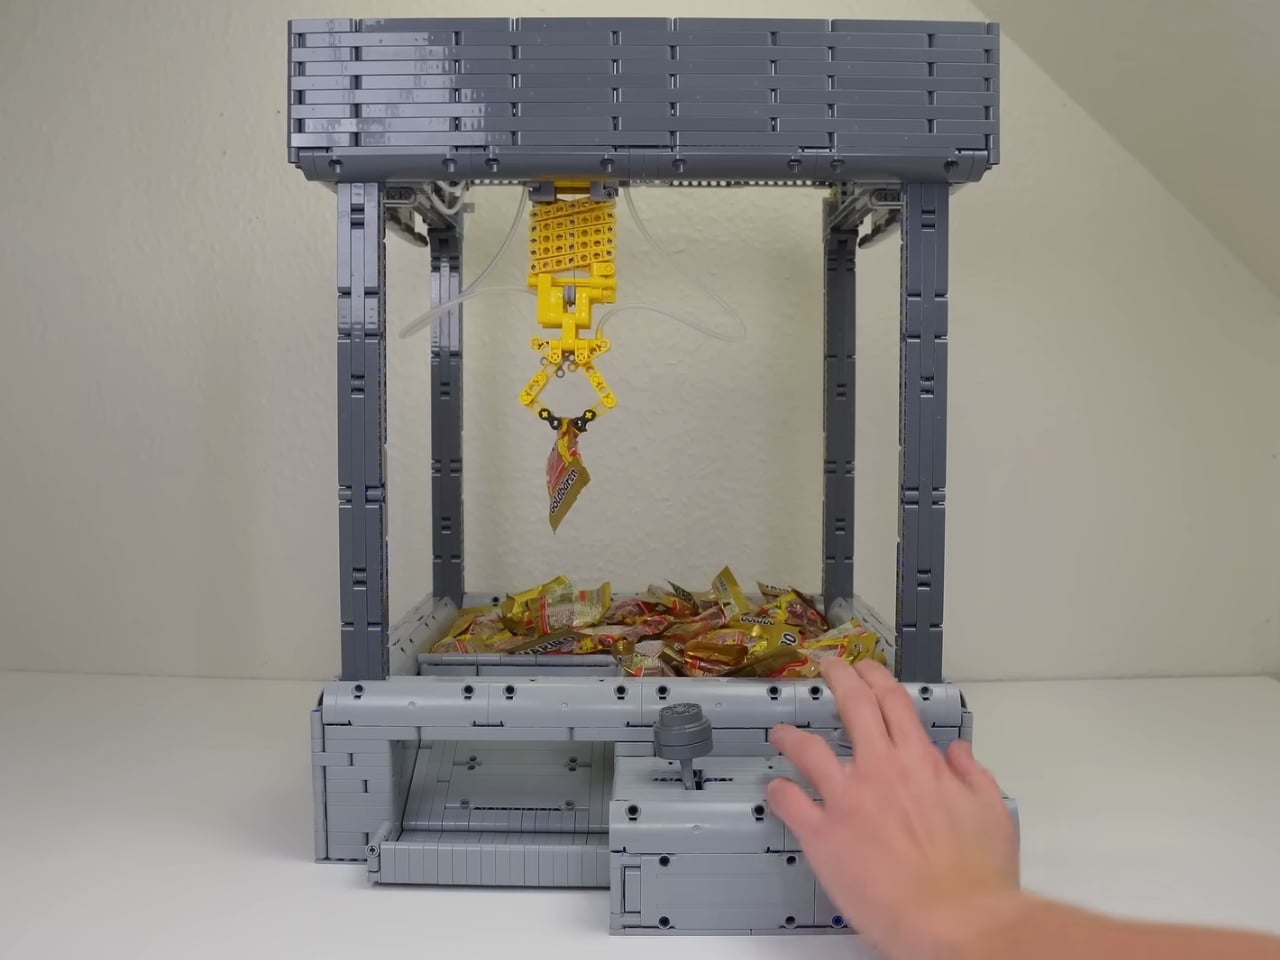
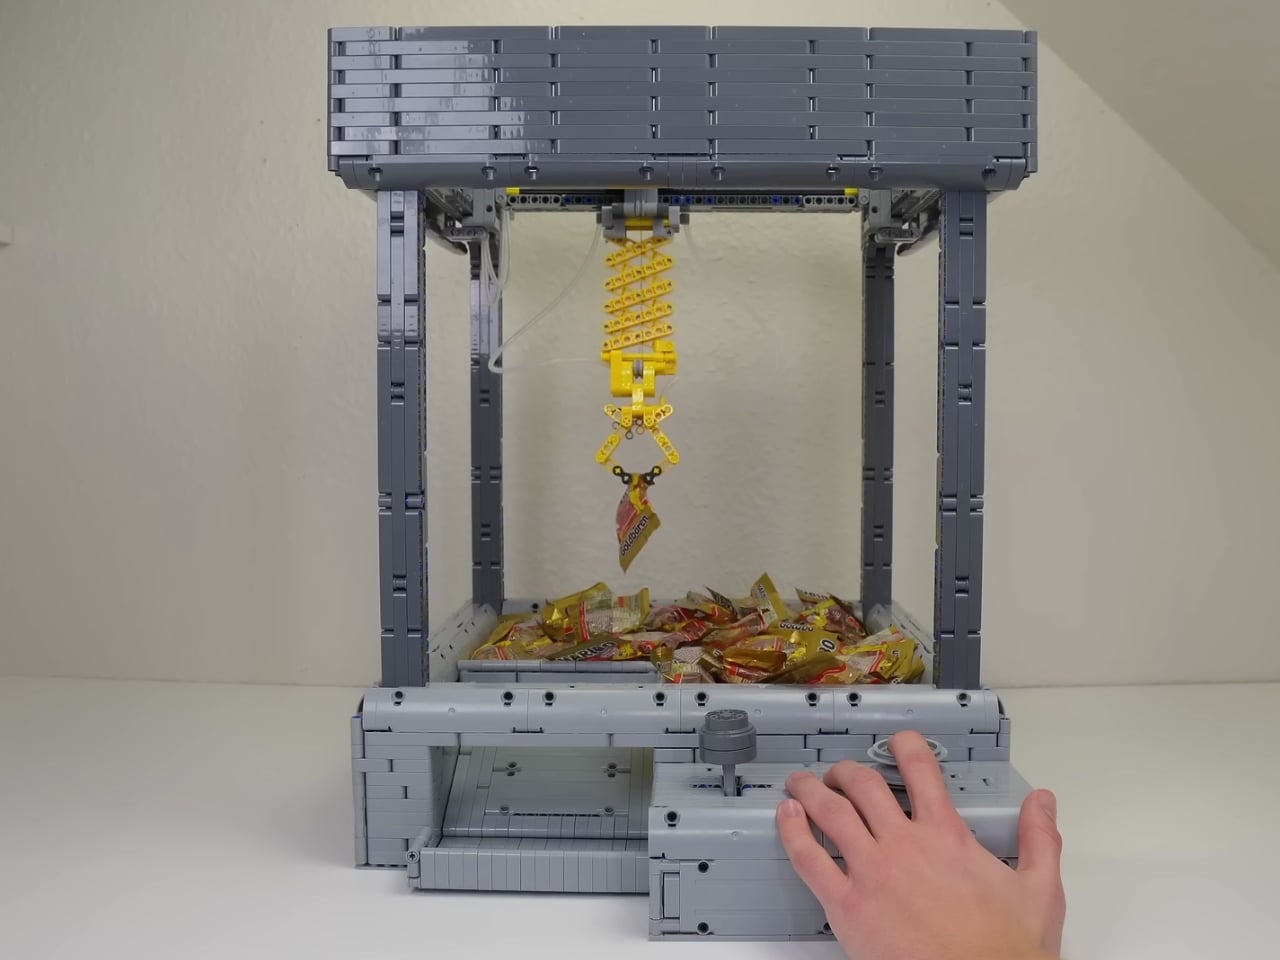
You know that feeling when you’re at an arcade, pumping quarters into a claw machine, convinced that this time you’ll finally snag that plush toy? Well, someone decided to recreate that delightful torture in LEGO form, and if I could, I would probably line up to buy this one.

Brick Builds, a YouTuber with a knack for mechanical marvels, recently shared their fully functional LEGO claw machine, and it’s the kind of project that makes you want to dump out your entire brick collection and start building immediately. Sure, plenty of LEGO enthusiasts have tackled claw machines before, but what sets this one apart is its elegant simplicity paired with surprisingly complex engineering.

Designer: Brick Builds

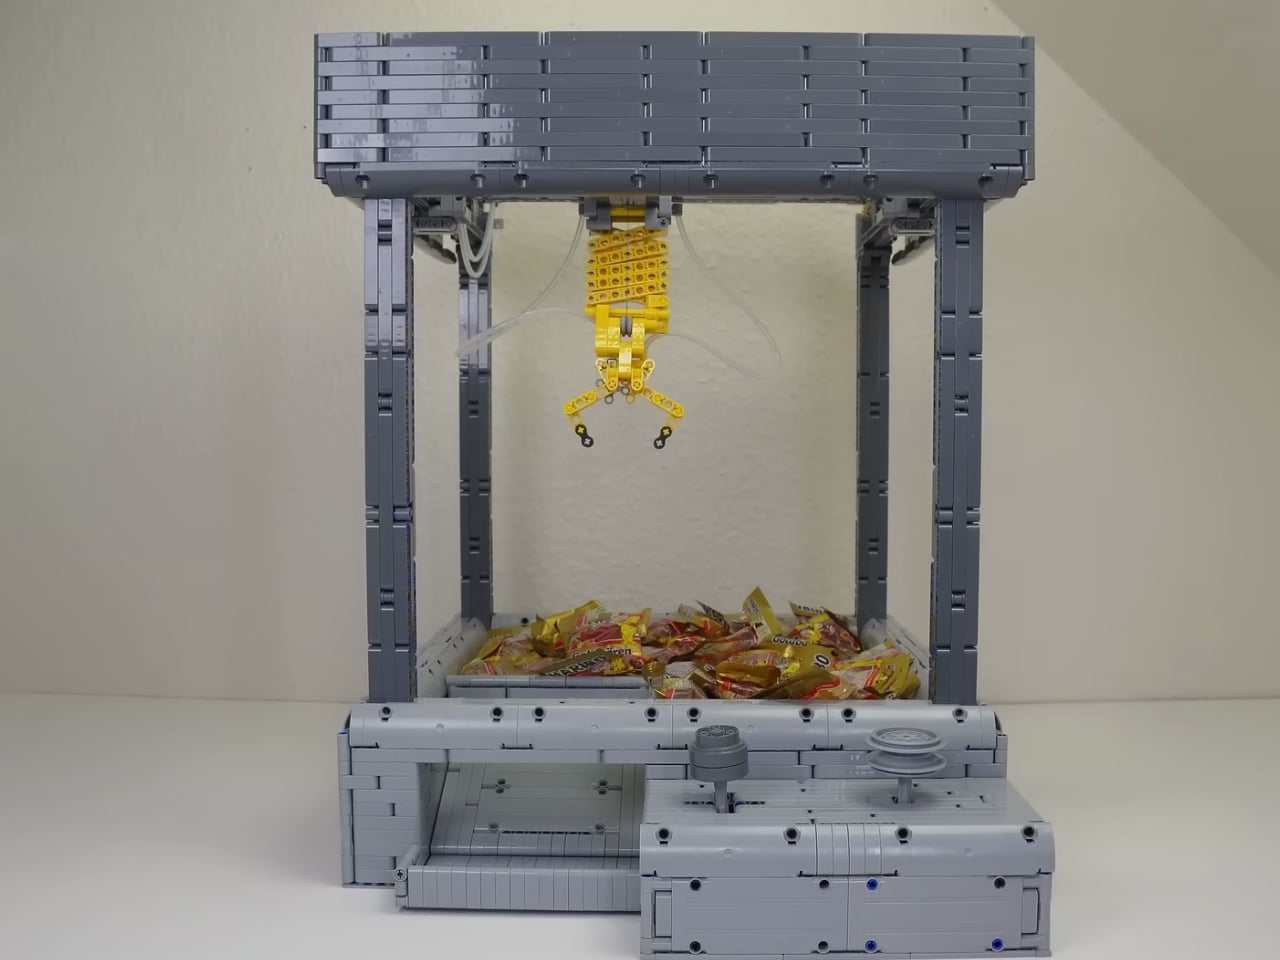
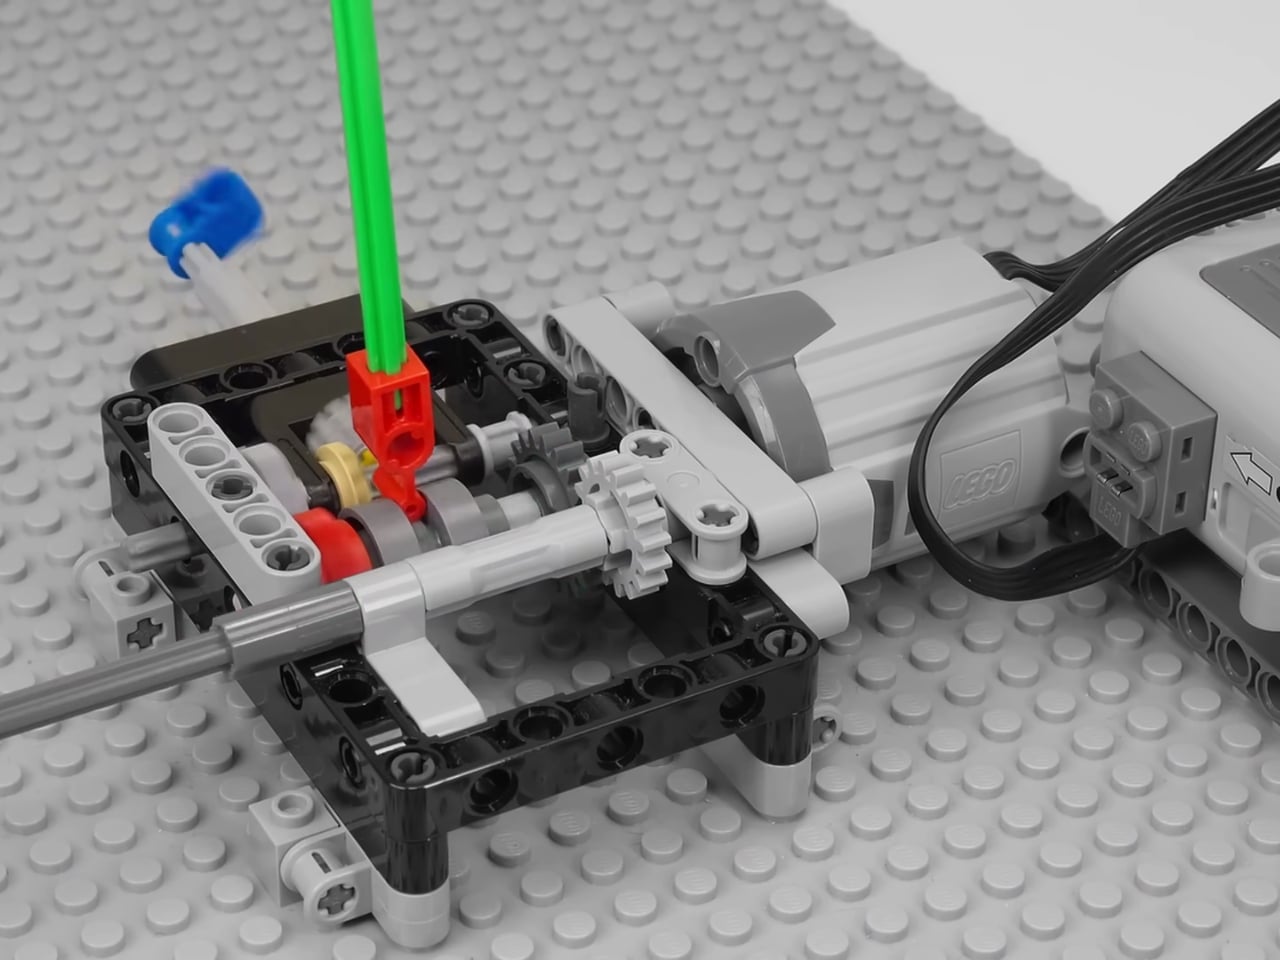
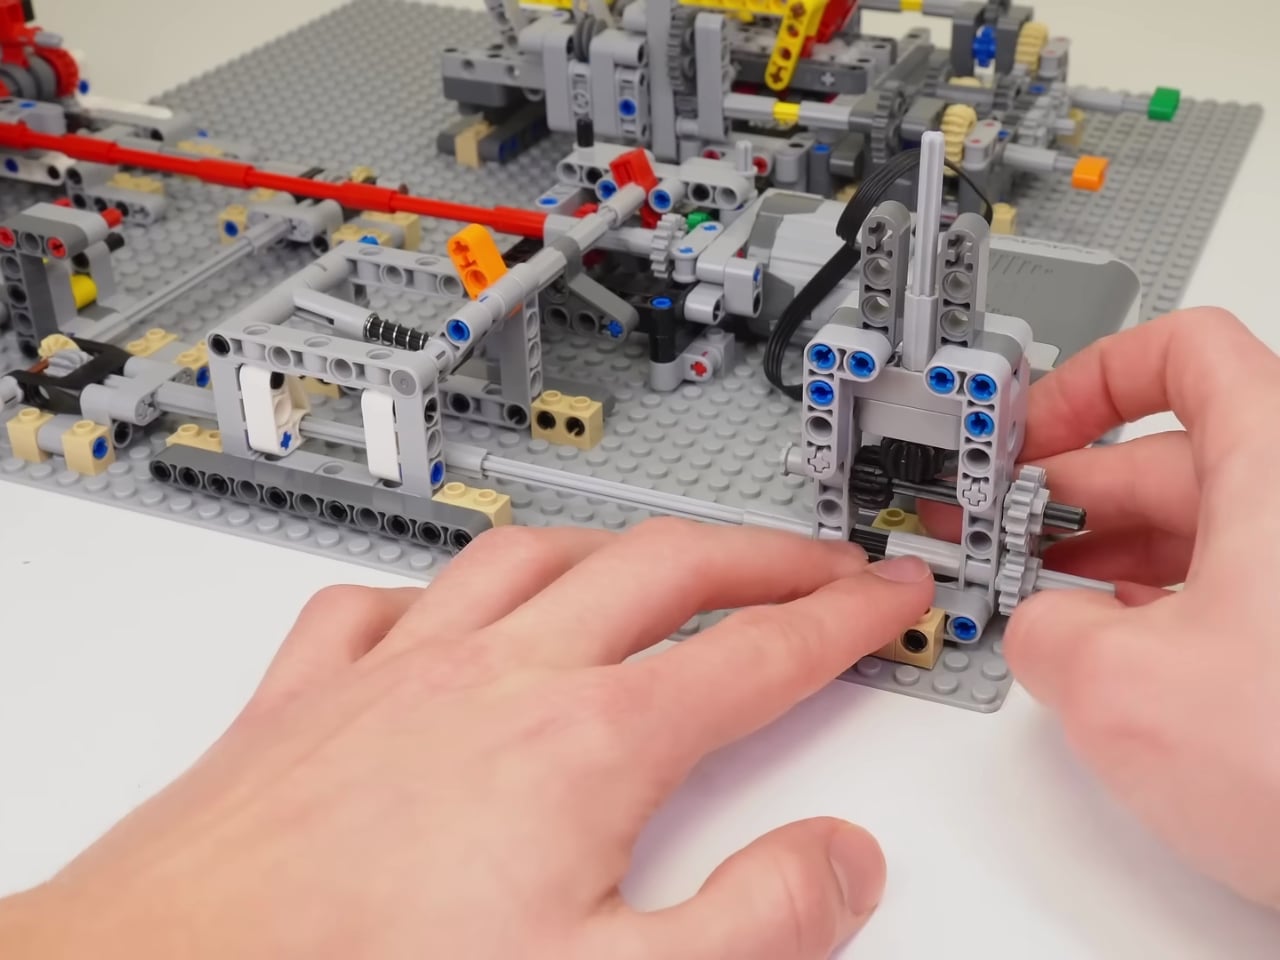
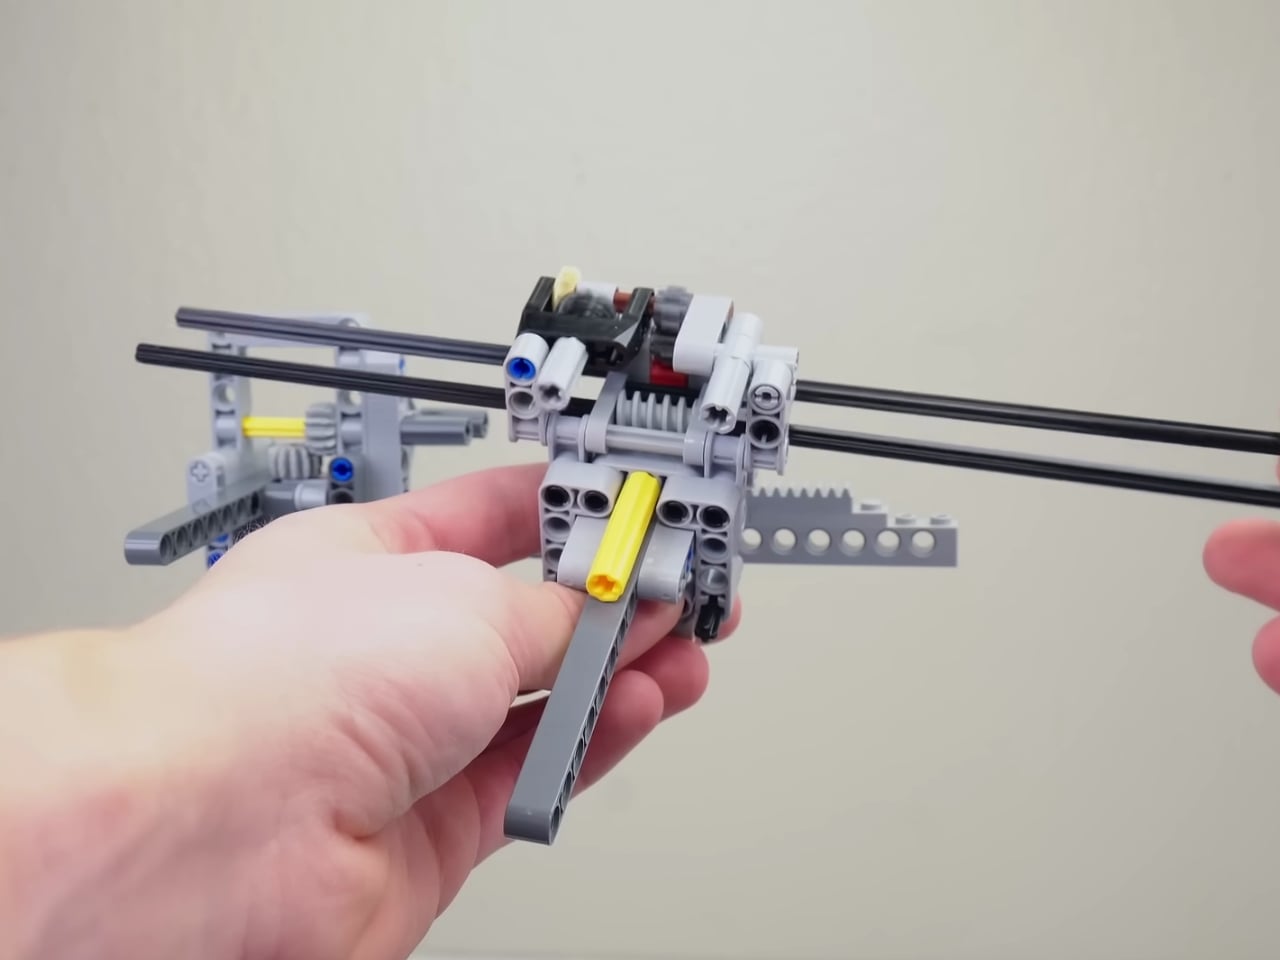
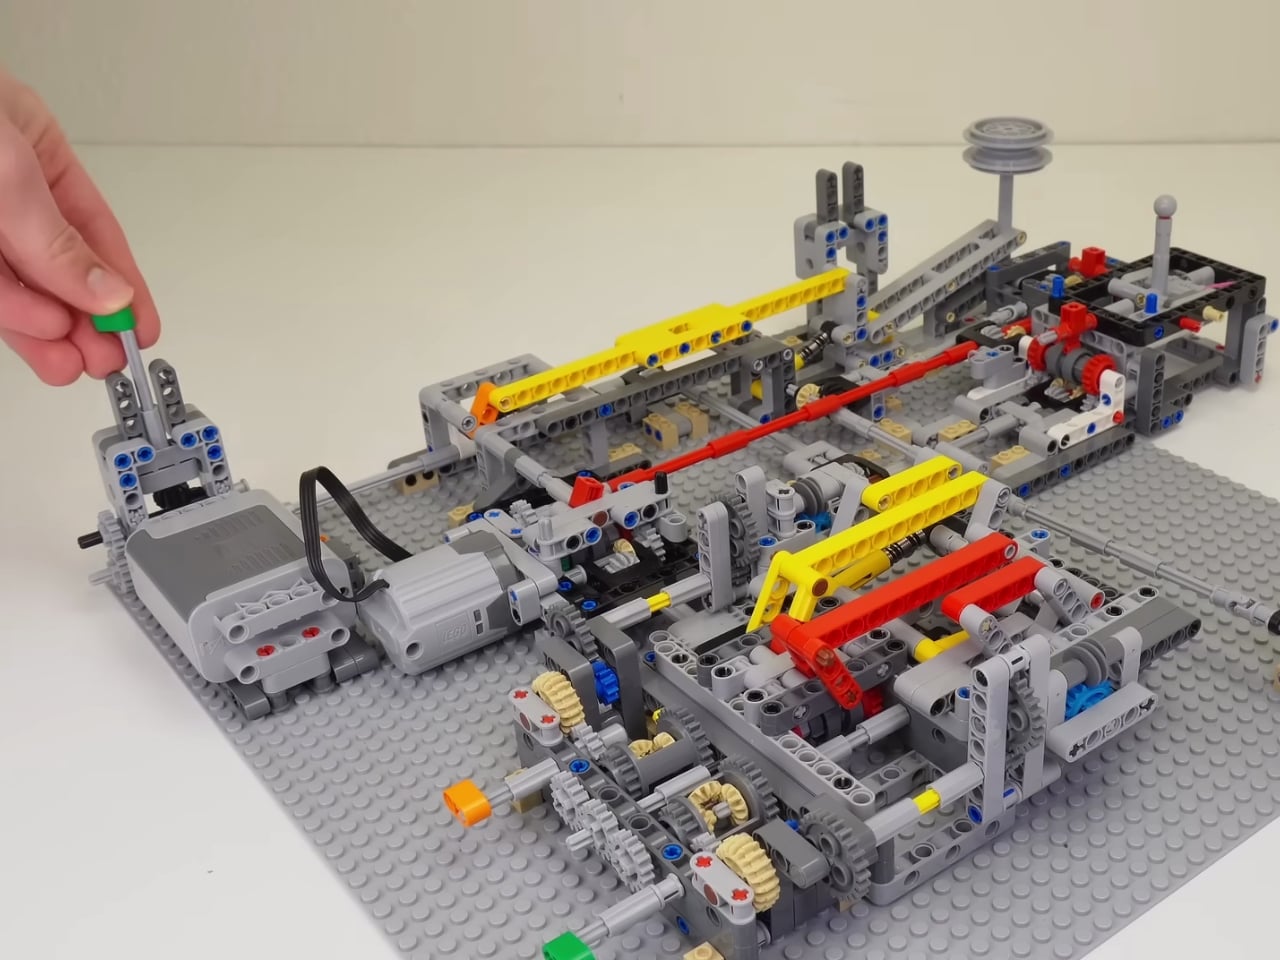
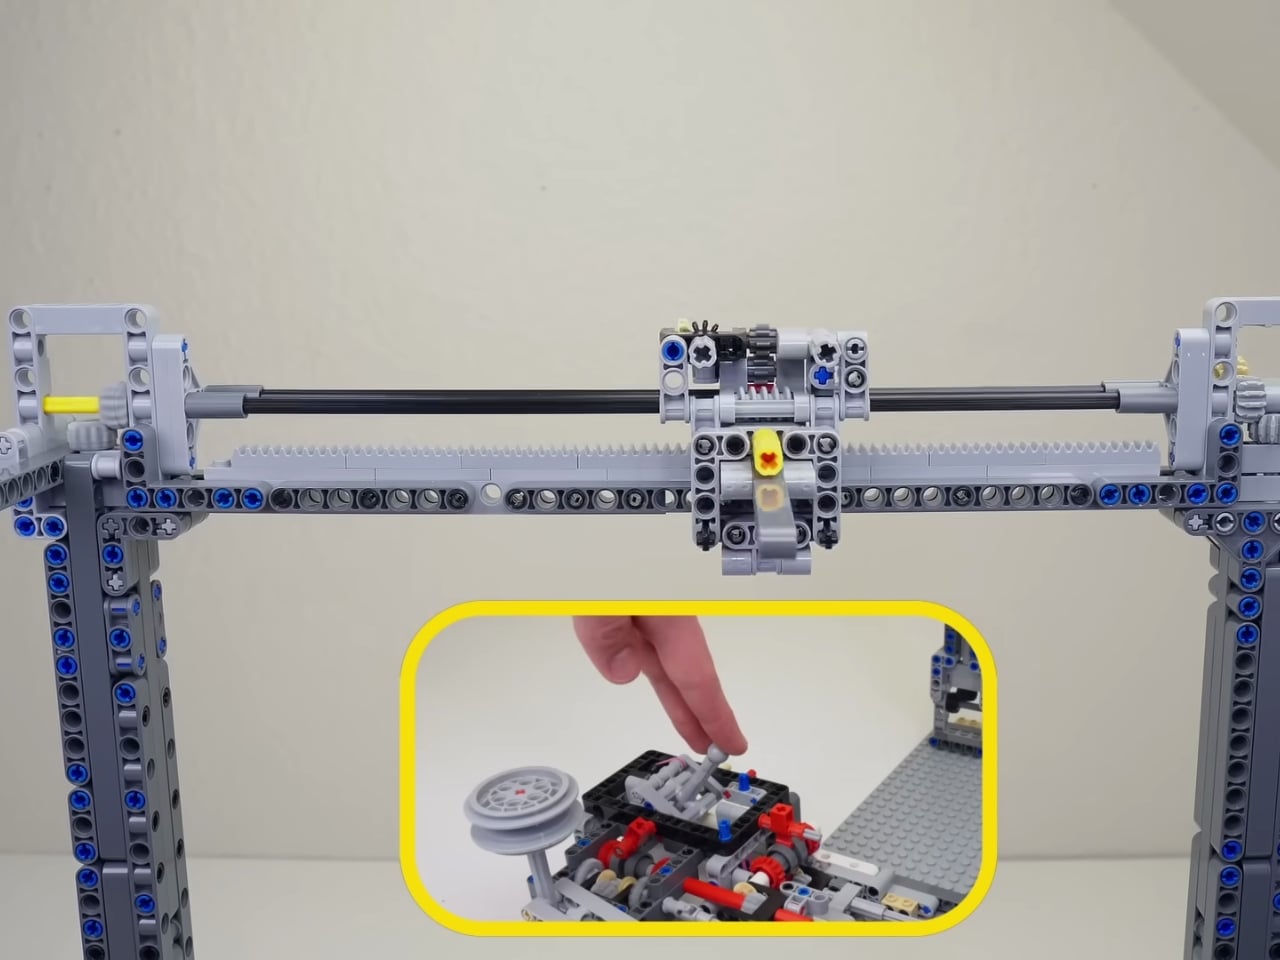
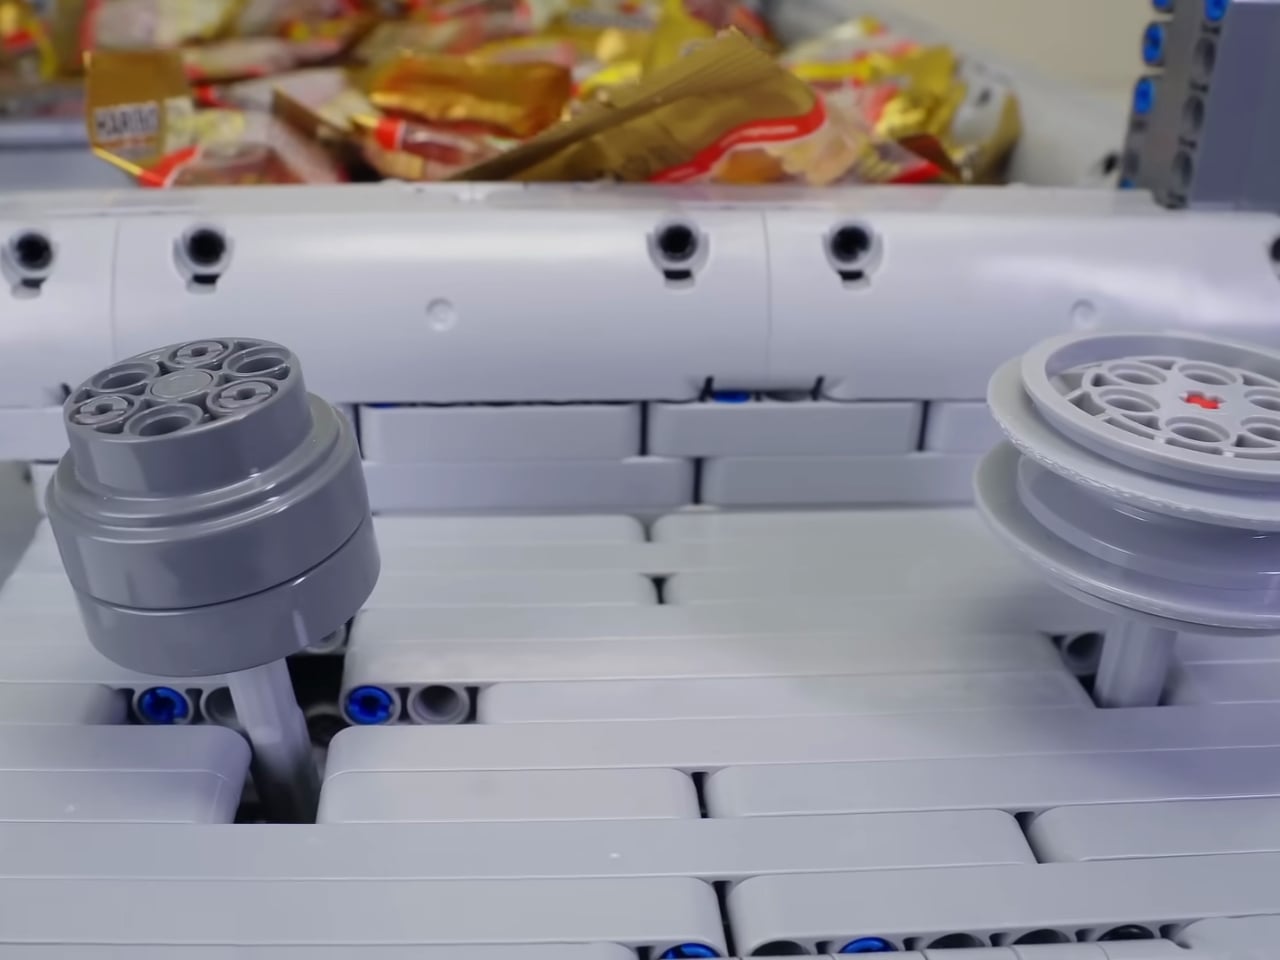
Here’s the kicker: the entire machine runs on just a single motor. No fancy Mindstorms robotics kits, no Power Functions overload, just one motor and an absolutely ingenious system of gearboxes doing all the heavy lifting. If you’ve ever tried building anything motorized with LEGO, you know how easy it is to throw motors at a problem until it works. But Brick Builds went the opposite direction, creating something that’s mechanically efficient and genuinely impressive to watch in action.

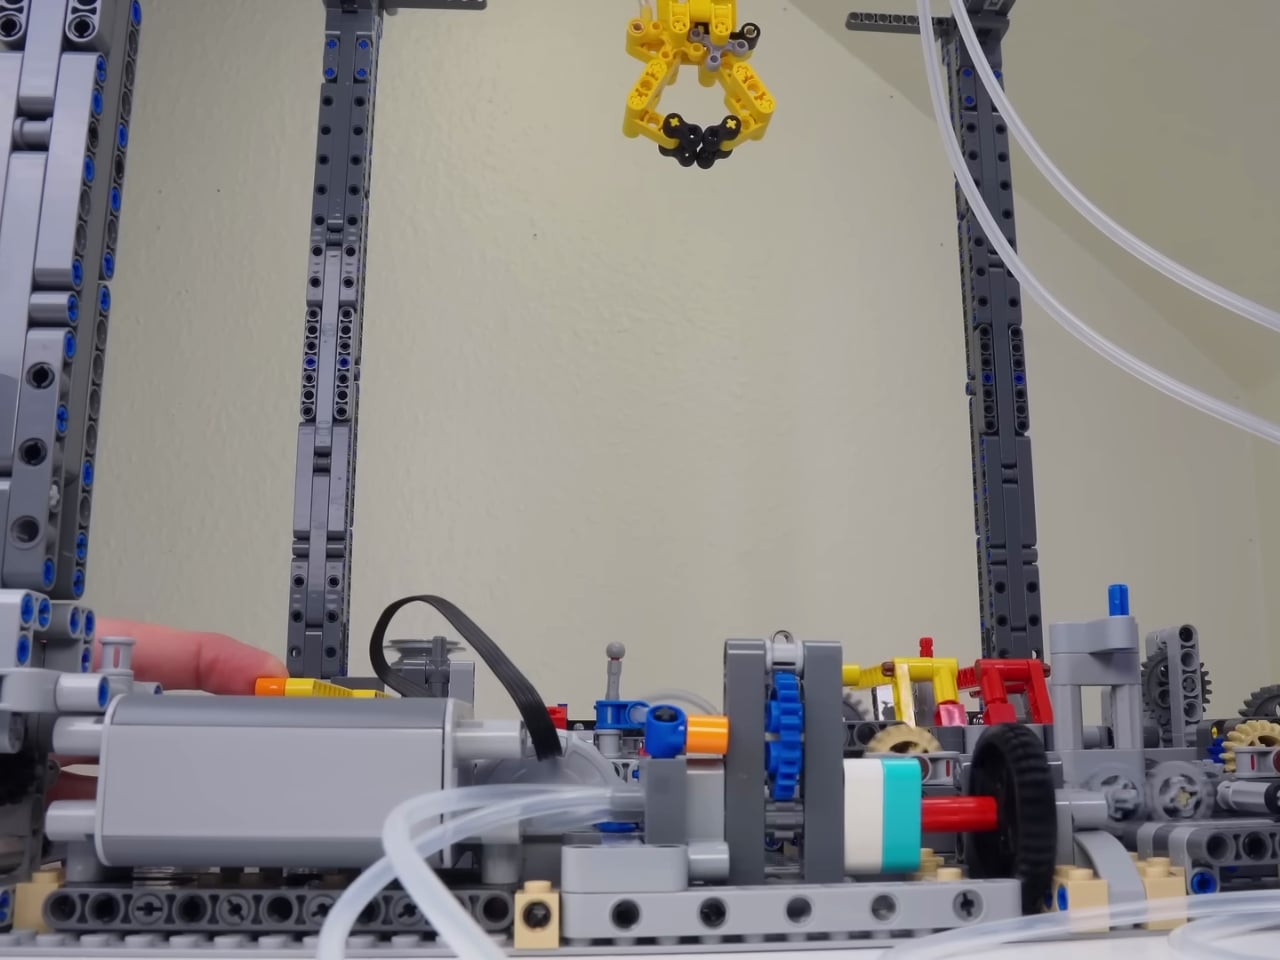
The magic happens through a series of clever gearboxes that control the claw’s movement in multiple directions. You’ve got your horizontal travel, your vertical drop, and of course, the all-important grip function. Getting one motor to orchestrate all of that? That’s the kind of problem-solving that separates casual builders from true LEGO engineers. The scissor mechanism used for the claw itself is particularly neat, giving it that satisfying open-and-close action we all recognize from the arcade versions that constantly disappoint us.

What I love about projects like this is how they blur the line between toy and genuine engineering exercise. LEGO has always been about more than just following instructions and building whatever’s on the box. It’s a creative medium that rewards experimentation and mechanical thinking. When you watch this claw machine in operation, you’re not just seeing plastic bricks move around. You’re witnessing someone who really understands concepts like gear ratios, mechanical advantage, and sequential motion control.

The build also serves as a reminder of why LEGO remains relevant in an age of sophisticated robotics kits and 3D printing. There’s something deeply satisfying about working within constraints. By limiting the design to a single motor and standard LEGO components, Brick Builds essentially gave themselves a puzzle to solve. How do you create complex motion from simple inputs? How do you translate rotational force into the precise movements needed for a claw machine? These aren’t trivial questions, and the answers are all visible in the finished product.

If you’re curious about the nitty-gritty details, Brick Builds included captions in their build video that break down the mechanical systems at play. It’s worth watching even if you’re not planning to build one yourself, because there’s genuine educational value in seeing how all those gears and axles work together. Plus, let’s be real, watching a LEGO claw machine successfully grab and transport a small object is oddly mesmerizing.

This kind of creation also speaks to the vibrant community of adult LEGO fans who’ve elevated brick building into legitimate artistic and engineering territory. MOCs, or “My Own Creations,” have become increasingly sophisticated over the years, with builders sharing techniques, competing in design challenges, and pushing the boundaries of what’s possible with those iconic interlocking bricks.

Whether you’re a longtime LEGO enthusiast, a design nerd who appreciates elegant mechanical solutions, or just someone who enjoys watching cool stuff work, this claw machine deserves your attention. It’s a perfect example of how creativity and technical skill can transform a childhood toy into something genuinely impressive. And unlike the arcade version, this one probably won’t eat your quarters and leave you empty-handed.

The post This LEGO Claw Machine Uses Just One Motor (And Lots of Genius) first appeared on Yanko Design.
This fingertip-sized flashlight pushes rechargeable EDC to its absolute limit

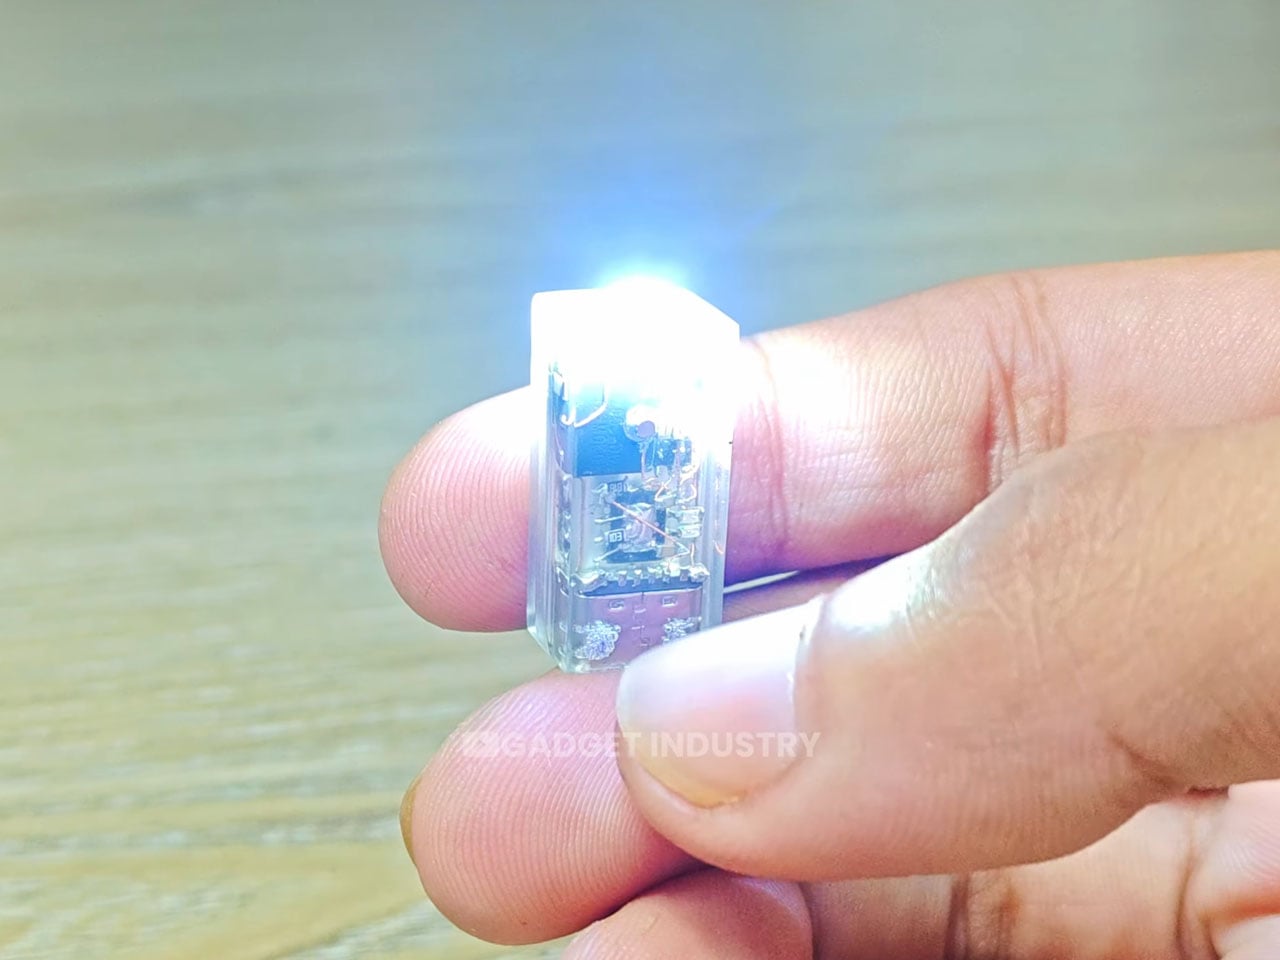
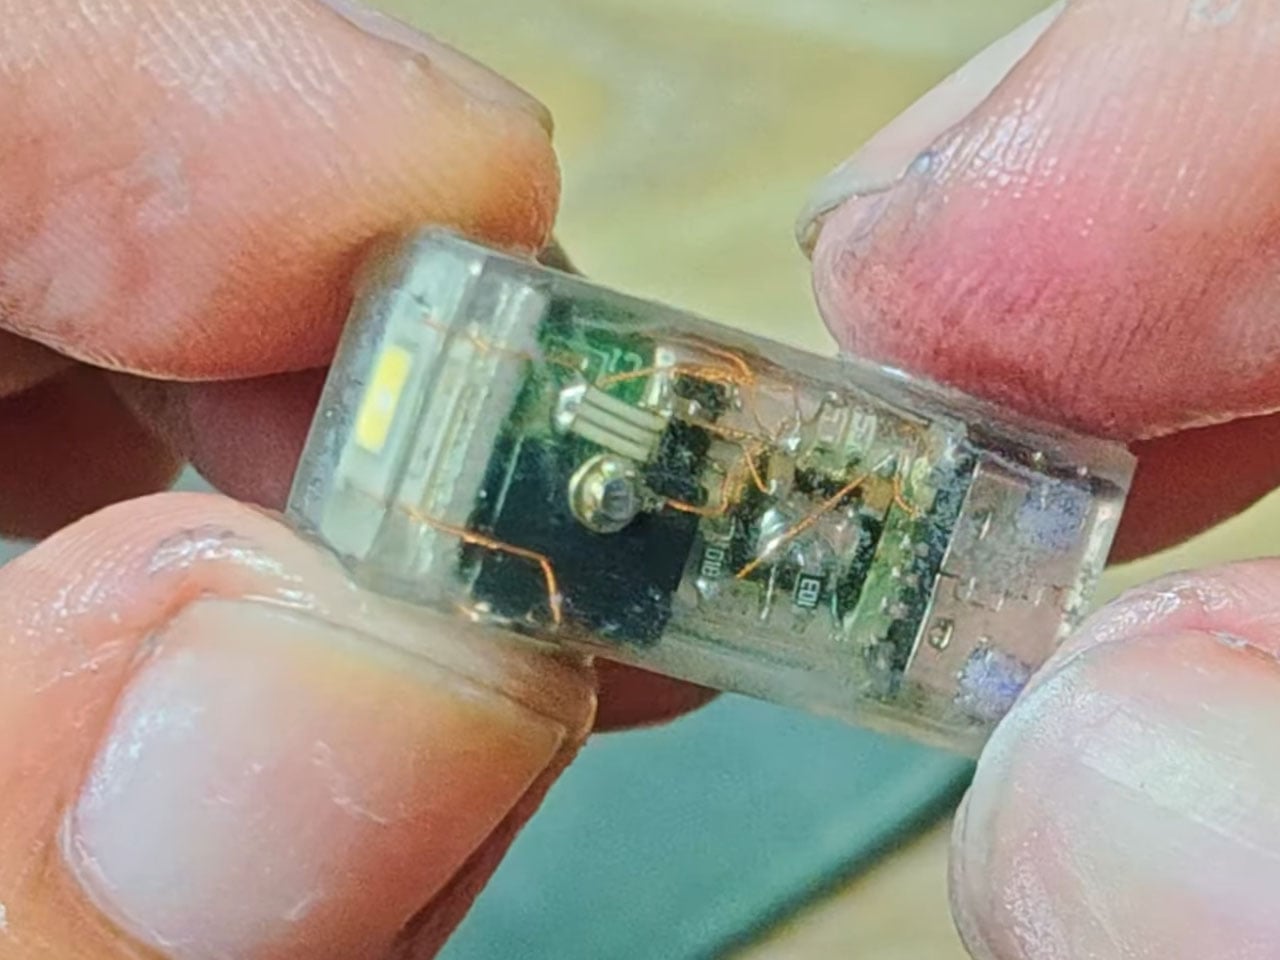
World’s smallest and world’s biggest are two phrases that never fail to grab attention, especially when they’re attached to something as utilitarian as a flashlight. This fingertip-sized rechargeable torch does exactly that, not by chasing gimmicks, but by pushing miniaturization to an almost obsessive extreme. Built as a DIY experiment by YouTube channel Gadget Industry, the flashlight shrinks a fully functional, rechargeable light source into a form factor so small it’s easy to forget it’s even there, until the moment you need it.

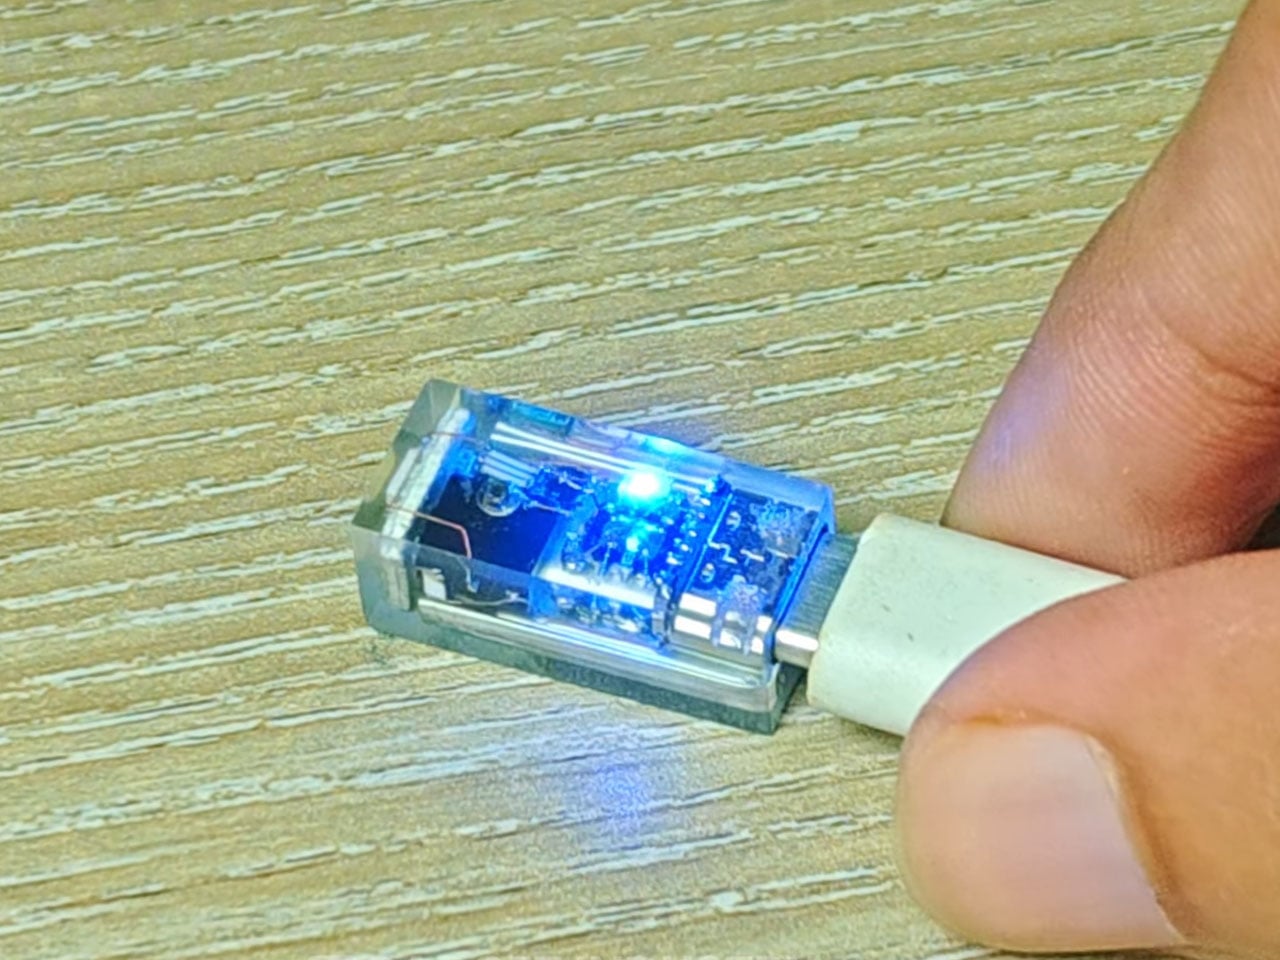
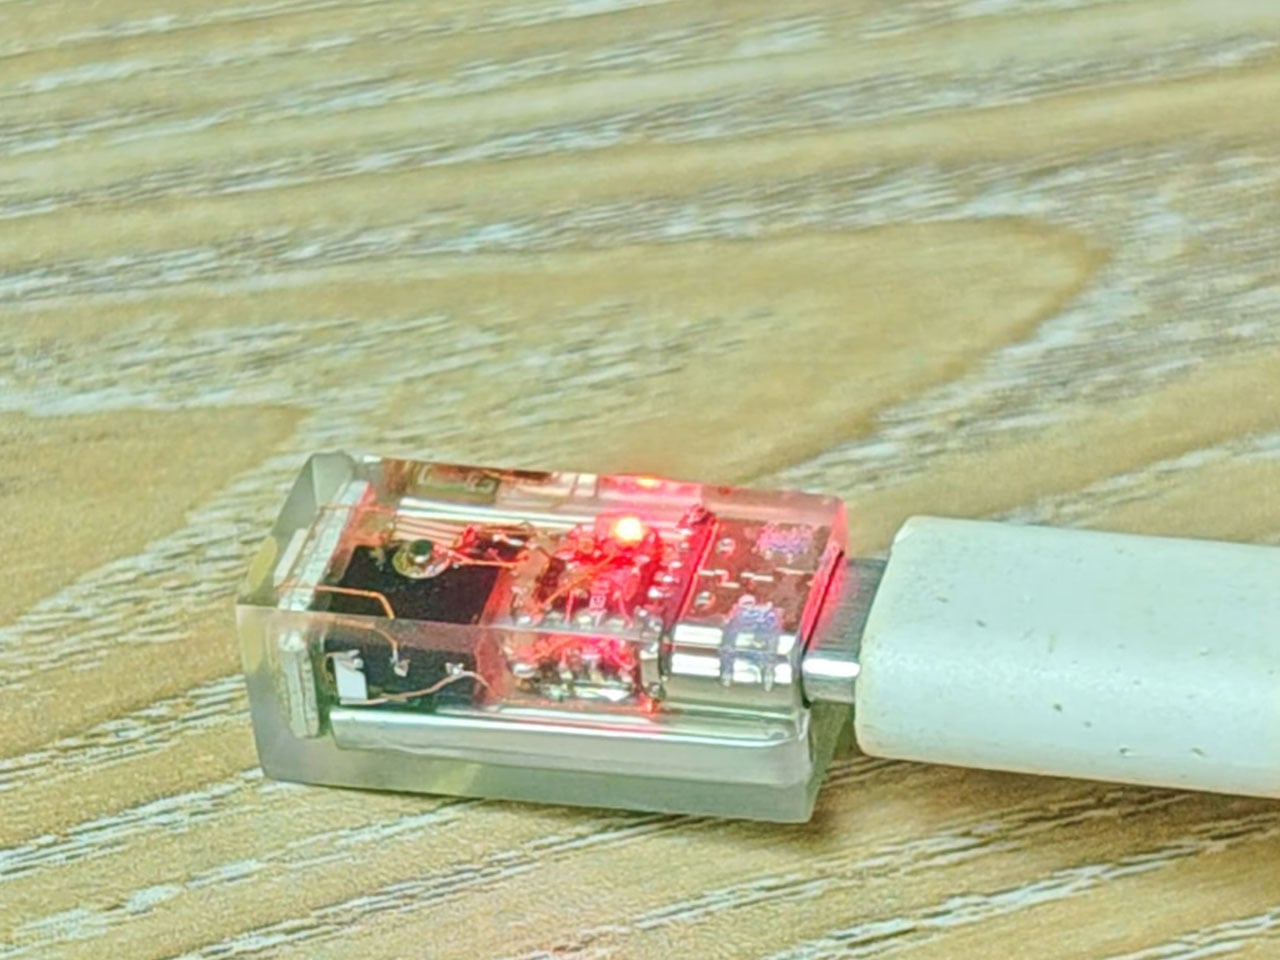
At first glance, the scale alone feels unreal. The flashlight can sit comfortably on the tip of a finger, yet it houses a lithium-polymer battery, a charging circuit, a touch-based control system, and a white LED, all sealed into a compact resin shell. It’s a reminder that innovation doesn’t always come from adding more features, but from stripping everything down to what’s essential. In a world crowded with bulky EDC gear promising extreme brightness and endless modes, this micro torch takes the opposite route, prioritizing presence and accessibility over raw power.

Designer: Gadget Industry

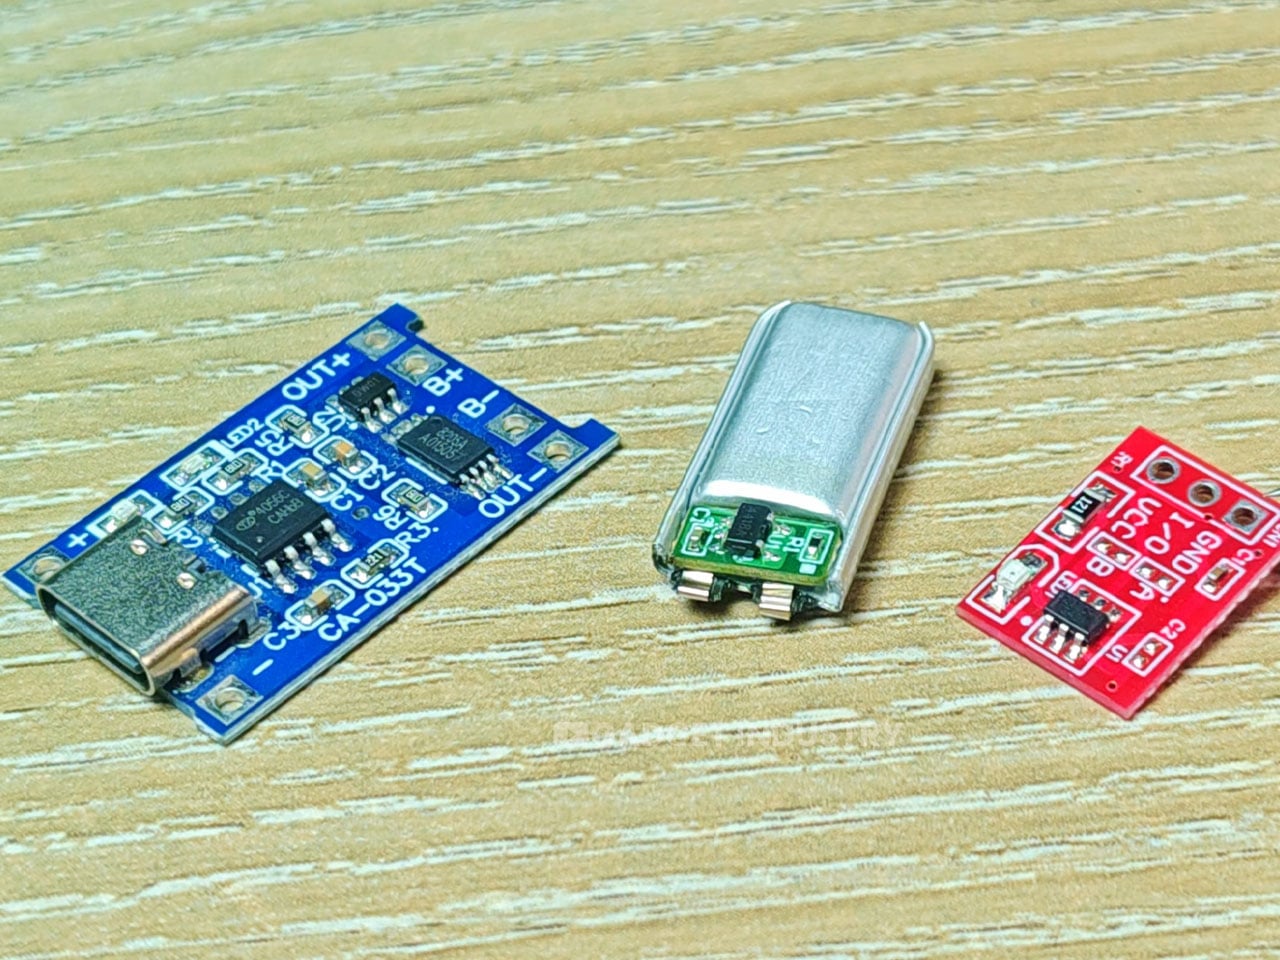
The build begins with a tiny 60mAh lithium-polymer battery, chosen specifically for its balance between capacity and size. To make charging possible without inflating the footprint, the maker disassembles a TP4056 USB-C charging board and integrates only the necessary components directly into the layout. A touch sensor replaces a traditional mechanical switch, working through an N-channel MOSFET to control the LED. The result is a simple, intuitive interaction: place your finger over the sensor and the light turns on, remove it and it shuts off. There’s no click, no resistance, and no moving parts to fail over time.

Encasing everything in resin serves both functional and aesthetic purposes. The hardened shell protects the delicate internals from scratches and minor impacts while allowing the flashlight to be shaped and sanded into an organic, pebble-like form. The USB-C port is carefully preserved during the casting process, making recharging as straightforward as plugging it into any modern cable. While the casing offers limited resistance to splashes, it’s clearly not designed for submersion or harsh outdoor abuse, this is a light meant for convenience, not combat.

Performance is modest but respectable given the scale. The LED provides enough illumination for close-range tasks like navigating dark hallways, peeking into tight corners, or serving as an emergency backup when nothing else is available. On a full charge, the flashlight runs for roughly half an hour, depending on the LED used, which feels surprisingly practical for something this small. Compared to commercially available keychain flashlights, there are obvious compromises in brightness and durability, but none of them detracts from the core achievement.

What makes this project compelling isn’t whether it officially qualifies as the world’s smallest rechargeable flashlight, it’s the mindset behind the craft. This build showcases the patience, precision, and restraint required to design at such a tiny scale, proving that even the most familiar objects can be reimagined when size becomes the primary constraint.

The post This fingertip-sized flashlight pushes rechargeable EDC to its absolute limit first appeared on Yanko Design.
This DIY Wooden Battery Charger Brings Dead AAs Back to Life

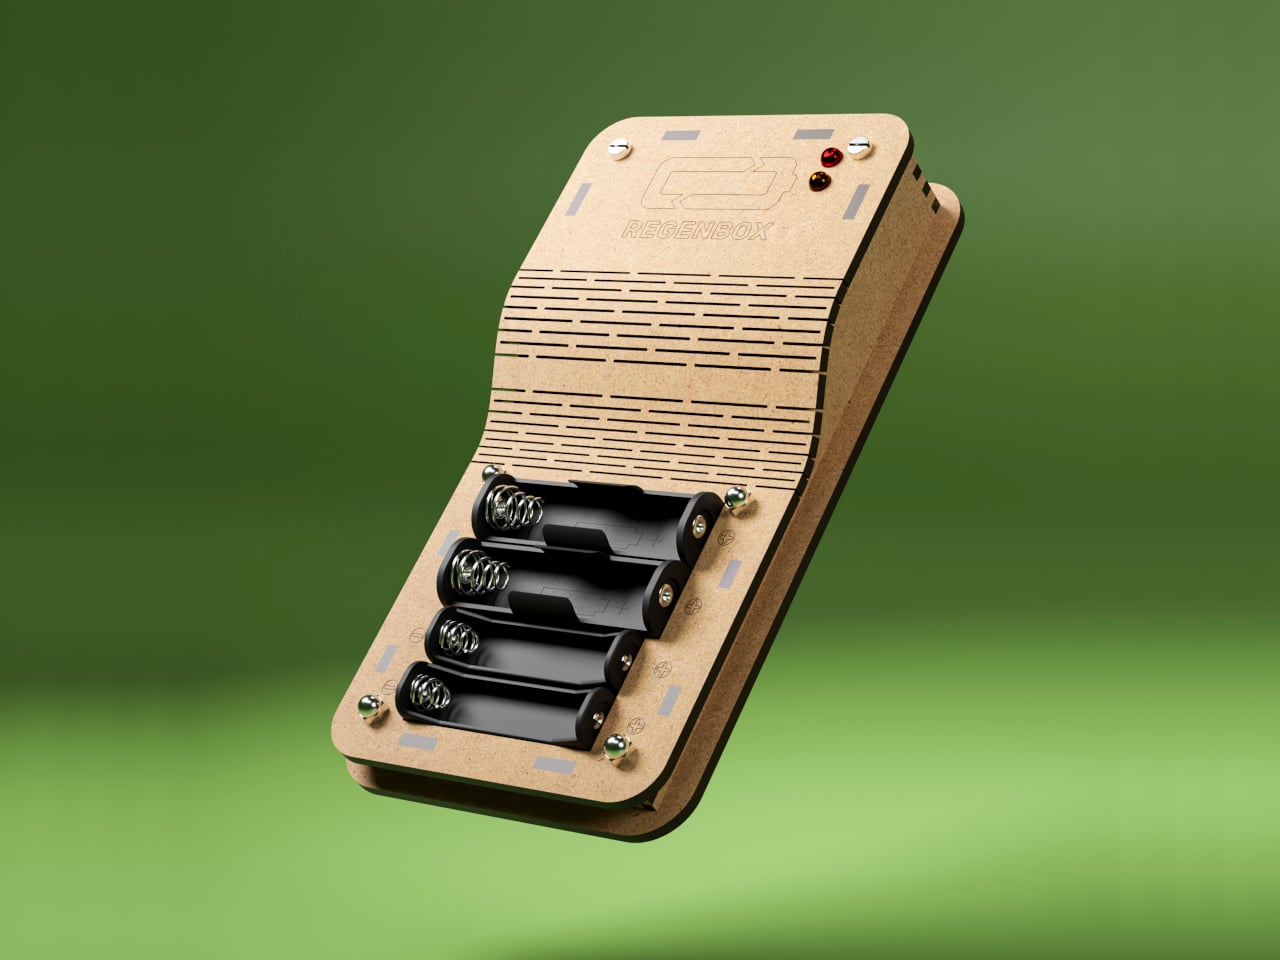
Most homes accumulate a drawer full of dead AA and AAA batteries, and the uneasy feeling of tossing heavy little cylinders into recycling or the trash. Alkaline cells are marketed as single-use, even though the chemistry can often be coaxed back to life with the right kind of intervention. RegenBox 1 is a small, hands-on challenge to that throwaway logic, turning battery regeneration into a bench-top ritual that requires patience, measurement, and a soldering iron.

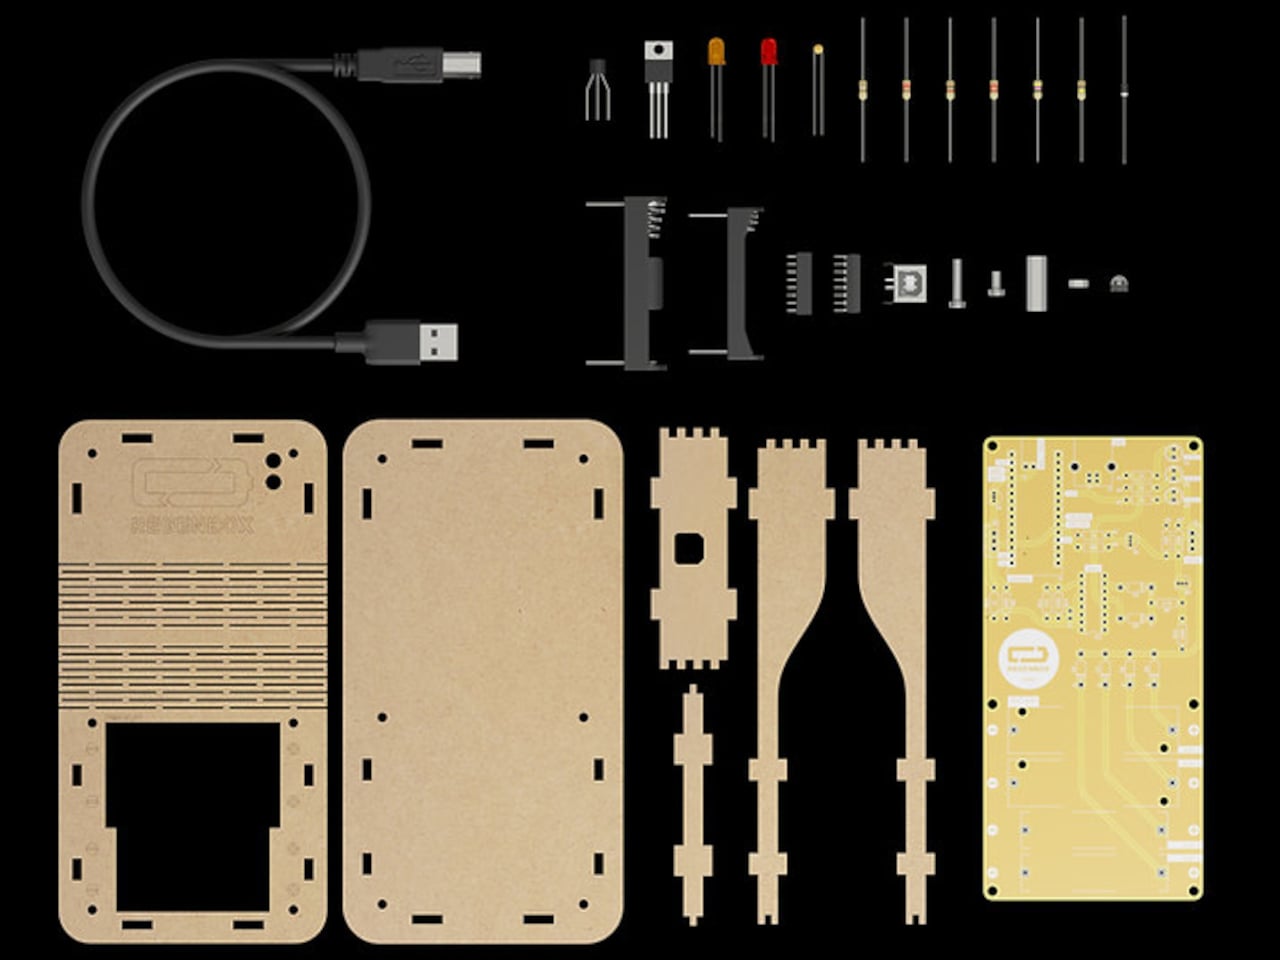
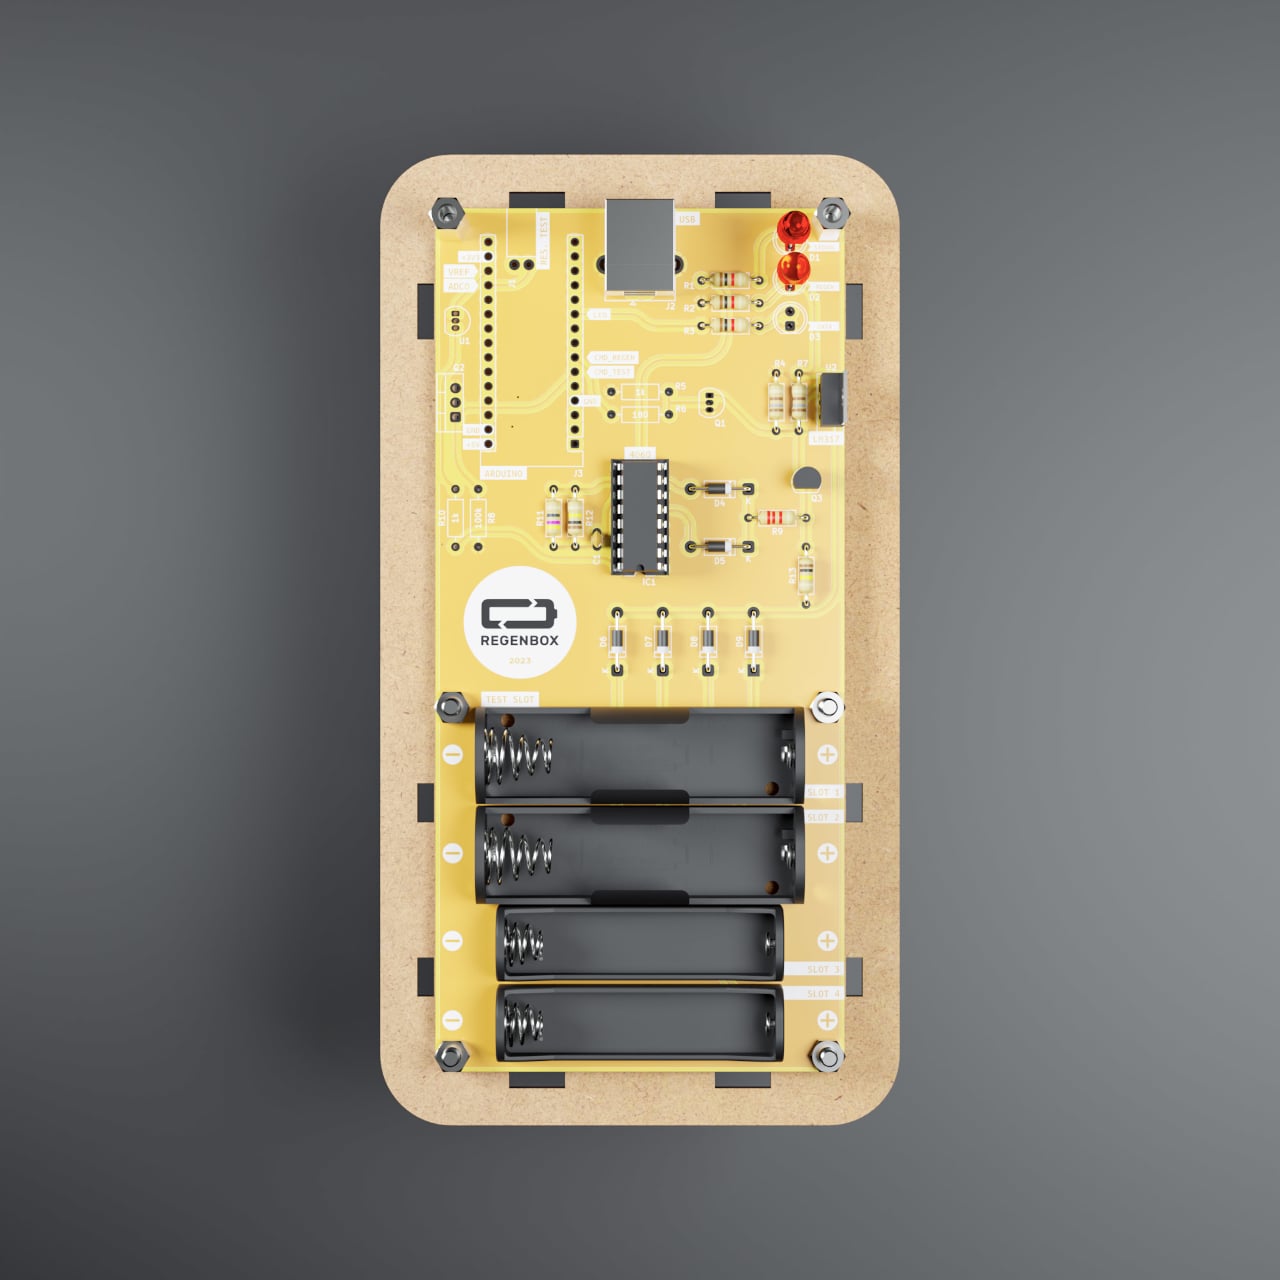
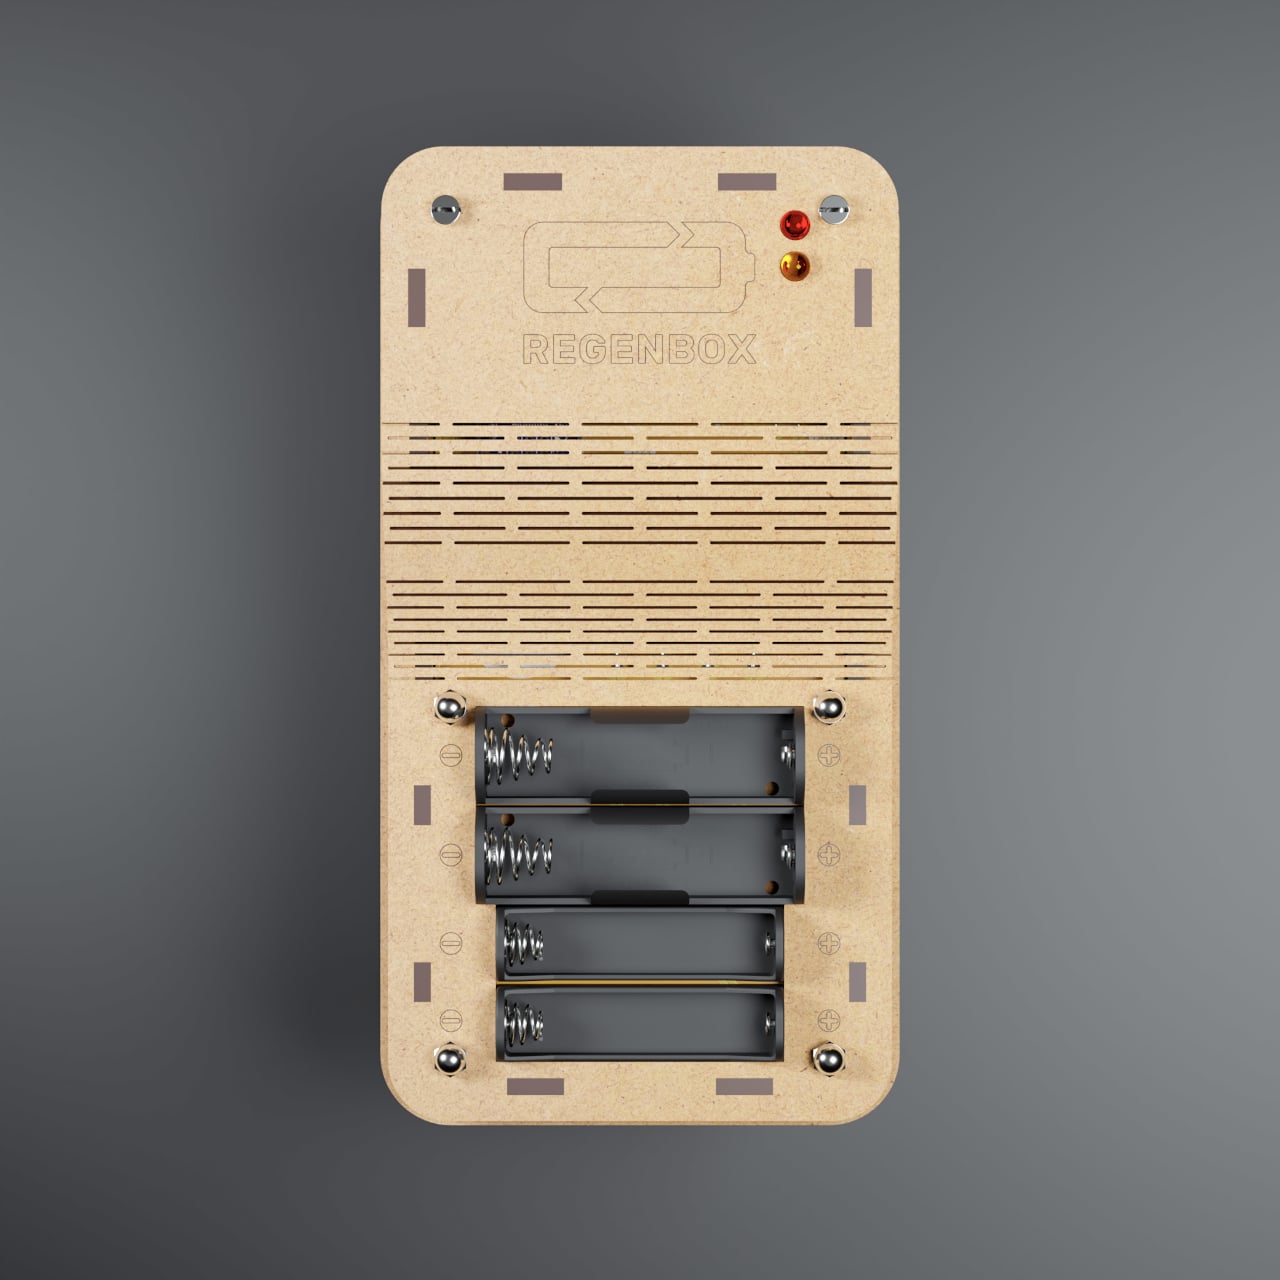
RegenBox 1 is a kit that arrives as a flat collection of components, a printed circuit board, electronic parts, and laser-cut wooden panels. Once assembled, it becomes a USB-powered regenerator for AA and AAA alkaline batteries, designed for electronics hobbyists rather than casual users. The wooden case and visible PCB make it feel more like a lab instrument or workshop project than a sealed plastic charger, and building it yourself is half the point.

Designer: Regenbox

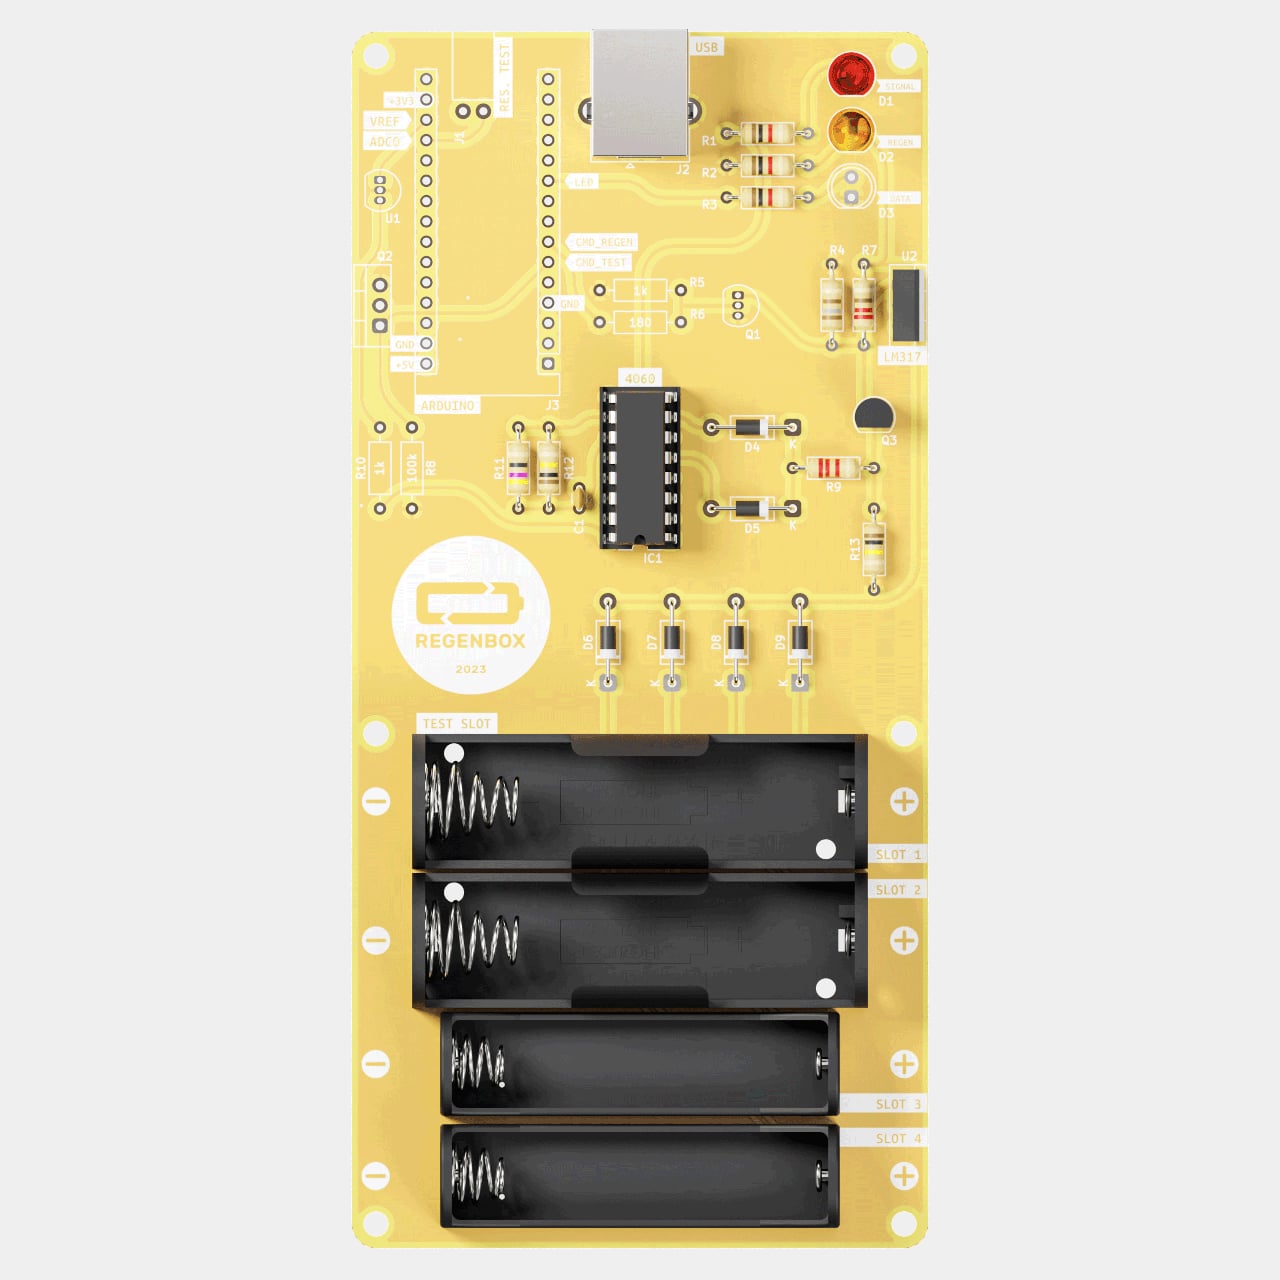
Assembly requires a soldering iron and solder, a voltmeter, flat-nose pliers, wire cutters, and a small screwdriver, plus some electronics confidence. The kit supplies the PCB, resistors, diodes, LEDs, IC, battery holders, USB cable, and the wooden enclosure. You are not just buying a gadget, you are learning how it works as you put it together, turning the components into a functional regenerator that can sit on your desk or workbench for years.

Using it starts with testing each alkaline cell with a voltmeter. Below 0.9 V goes to recycling, 0.9 V to 1.35 V is a candidate for regeneration, and 1.35 V to 1.5 V is already reusable. Once cells are slotted in and the USB 5 V input is connected, the circuit feeds very low current for 8 to 24 hours, slowly reversing part of the discharge without stressing the casing or causing leaks.

The boundaries are strict, alkaline only, no lithium, no damaged or leaking cells, correct polarity, and room-temperature use. The red and orange LEDs indicate current flow and help with diagnostics, but the real discipline is in measuring voltages before and after, and respecting the chemistry. It is not a fast charger; it is a patient tool that trades speed for safety and extended second lives.

Getting one or more extra cycles out of batteries that would otherwise be discarded adds up across a household or community. The open, repairable design invites modification and learning, turning energy use into something you can see and tweak. RegenBox 1 becomes a quiet protest against sealed, opaque devices, and a small workshop ally for anyone trying to reduce waste while gaining control over the objects they depend on.

RegenBox 1 changes the way you look at dead alkalines. Instead of being the end of the story, they become candidates for triage, measurement, and careful regeneration. The wooden box on the bench is a reminder that design can intervene not just at the point of purchase, but at the moment we usually give up on an object, asking whether it really needs to be thrown away yet or if a slow, gentle charge might bring it back for another round.

The post This DIY Wooden Battery Charger Brings Dead AAs Back to Life first appeared on Yanko Design.
Super Game Boy is a huge handheld that plays classic arcade games

LEGO released a 421-piece life-sized Game Boy replica with Game Pak cartridges but it could not play games. Then later a Aussie modder turned it into a fully functional handheld, and promised that there will be a $50 kit coming in future so that fans can turn theirs into a playable LEGO version. However, the LEGO version has a small screen and you are better off playing titles on the original handheld.


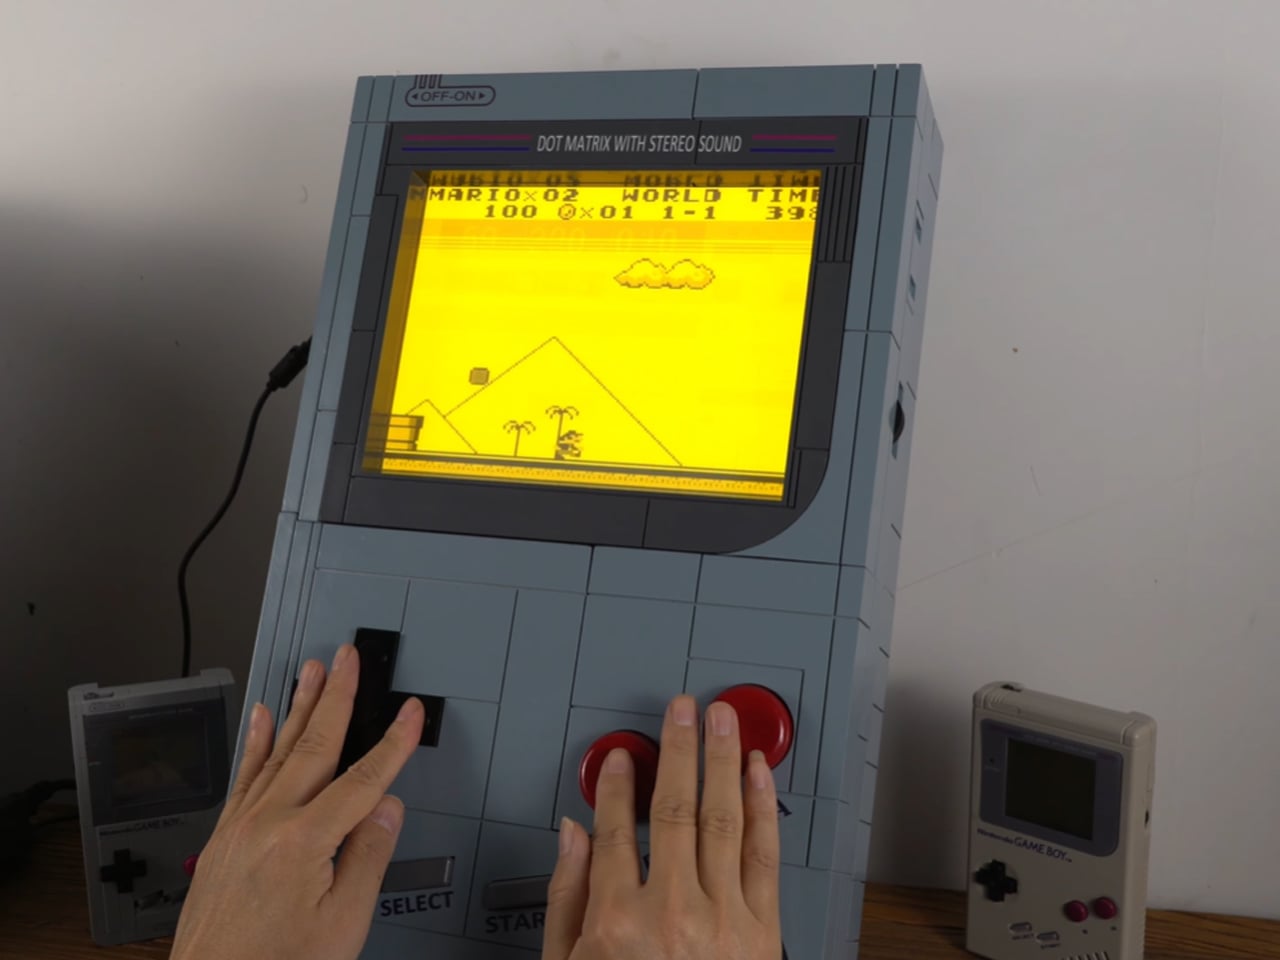
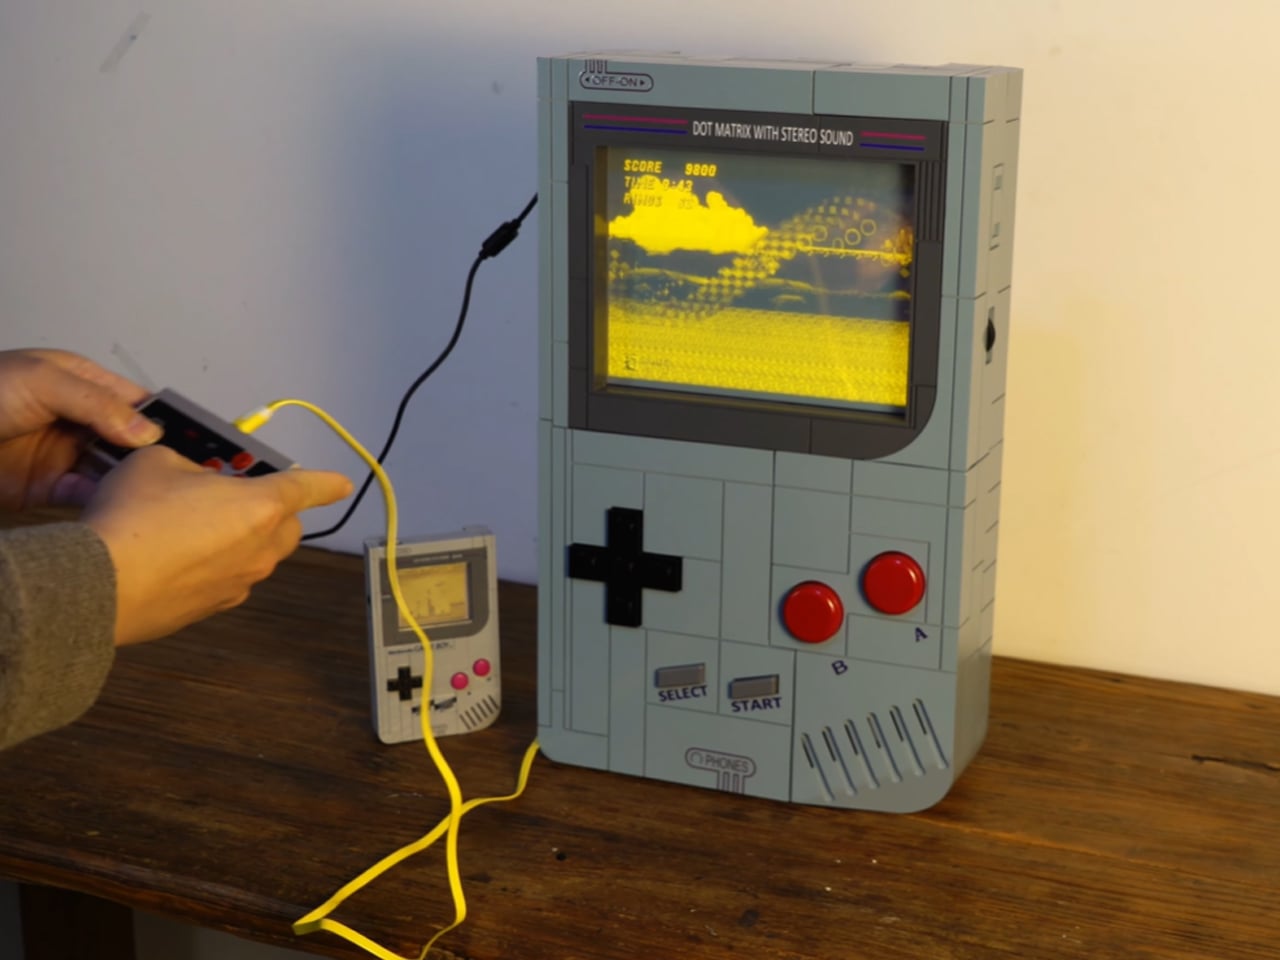
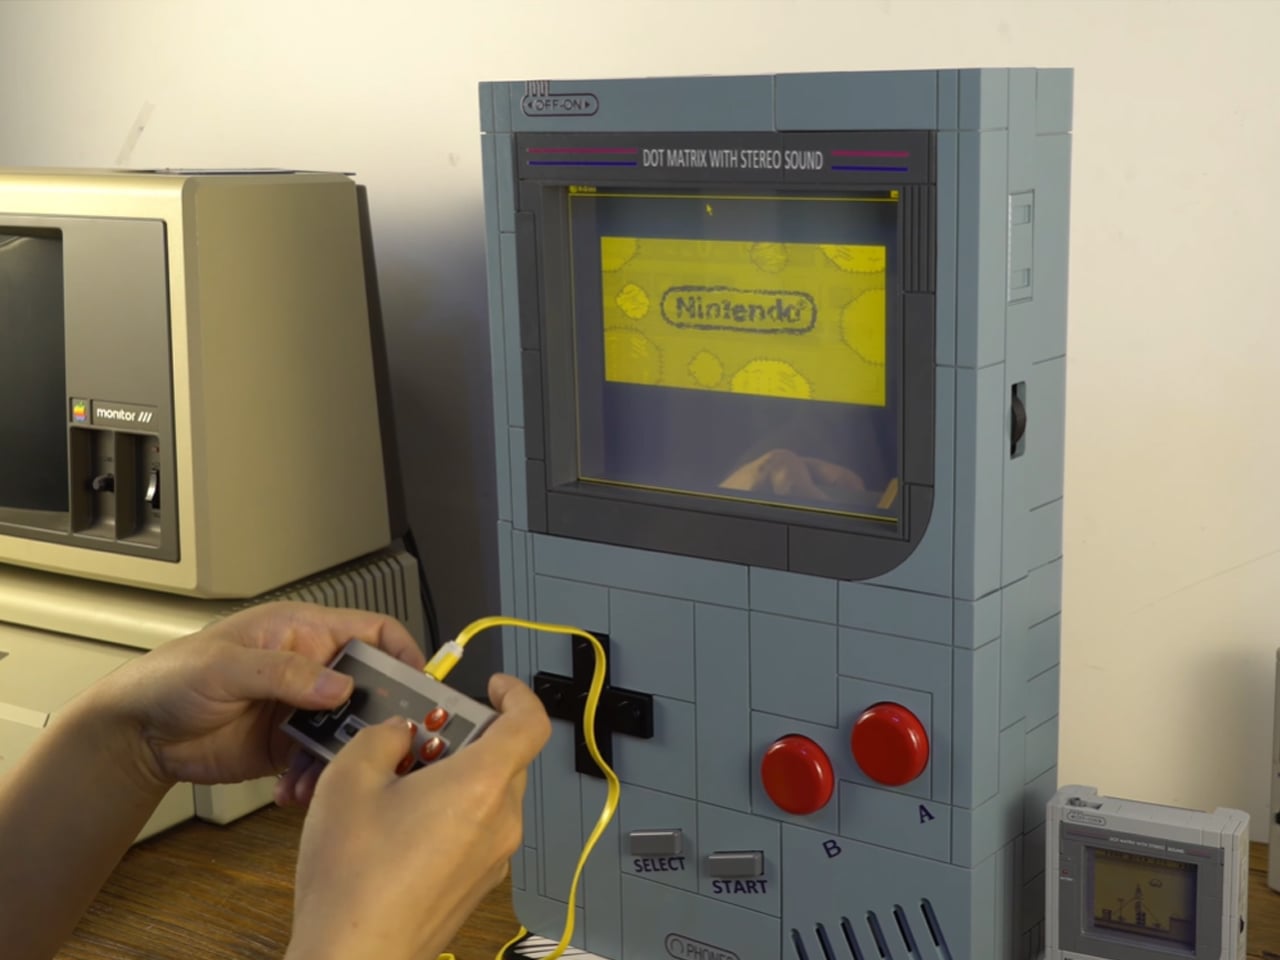
There’s so much craze around the classic Game Boy, you are bound to come across DIYs that spark the attention of arcade gaming community. Chinese YouTuber LCLDIY ventured out on creating his own interpretation of a Game Boy – only that it is much larger in scale. Best of all it plays games sans any glitches and can be carried around like a cool boombox.

Designer: LCLDIY

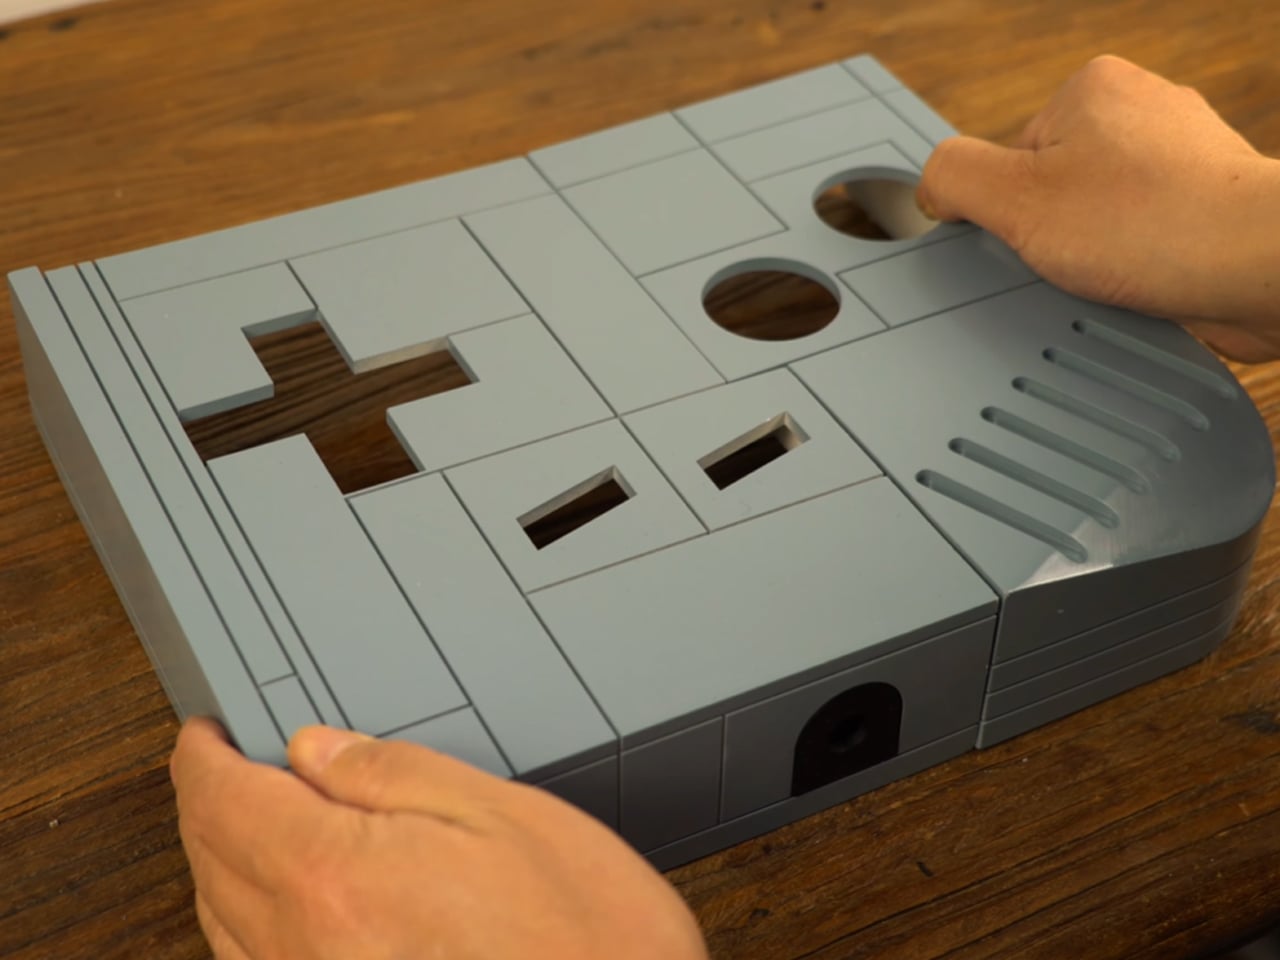
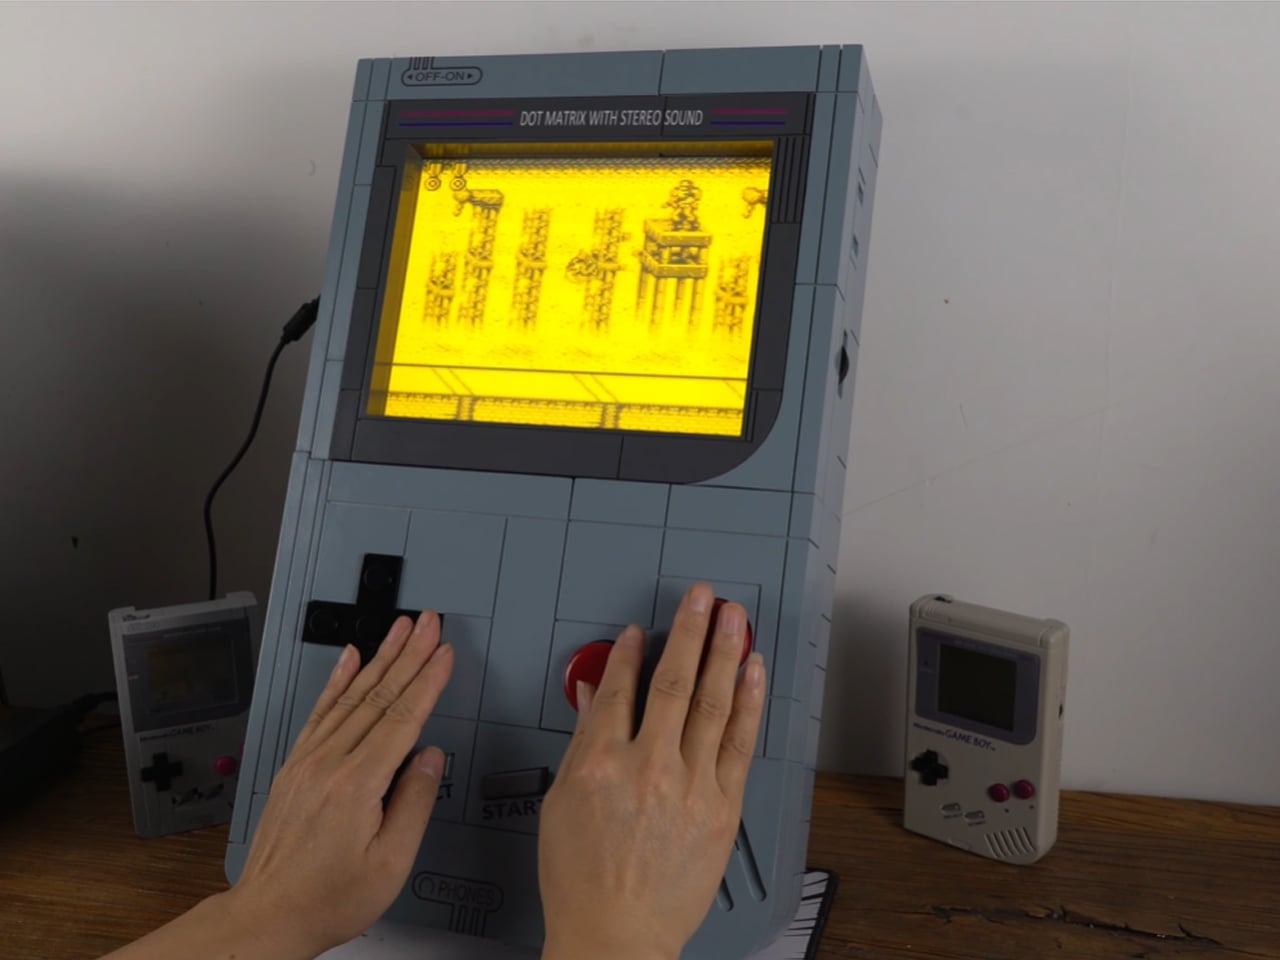
The DIY starts off by creating a 3D printed shell (using a light curing printer, printing for a week) that houses the 10-inches electroluminescent LCD TV that emulates the warm glow of the original Game Boy. The choice of the display makes sense as the soft glow illuminates the pixels that otherwise would look too harsh on the big display compared to small screen of the Game Boy. Getting the games to run on the rig was not an easy feat as he had to fit in an Intel 845 motherboard for driving the big display and also creating the interface for running the emulated software of the Game Boy handheld console. The classic processor is assisted by the 65540 Flat Panel VGA Controller chip to simplify the clock synchronization and data signals.

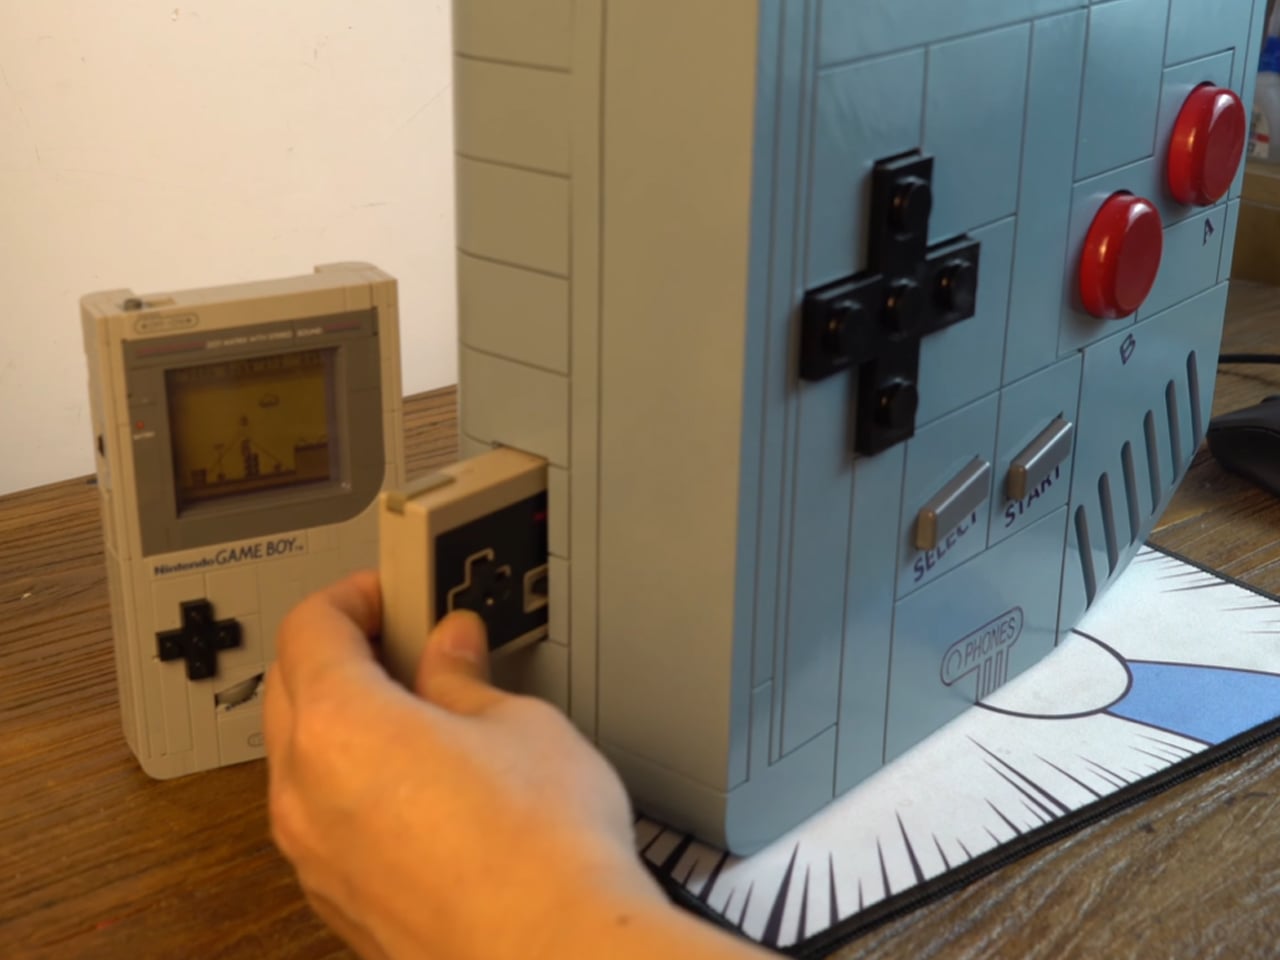
BIOS of the graphics card is modified to match the appropriate resolution of the display. The brick-built shell fits into pieces just like an assortment of LEGO pieces and the guts are flush with all the electronic components that make possible the magic. To complete the build, the maker spray paints the shell to replicate the look of the Game Boy. He also makes big tactile buttons and joystick to keep the arcade feel going, and the stickers for labels and the logos are put on the shell. The classic Nintendo gamepad is used to input the in-game actions for games (like Sonic, Yoshi’s Island and Comix) from other platforms like Sega. This is done as big buttons would be impractical and require even more tinkering around of the electronics.

The DIYer is kind enough to make the design files of the shell, PCB files and graphics card BIOS settings available for free for keen DIYers who love the idea of a Super Game Boy. Just seeing him play the classic titles like Contra and Super Mario using those chunky buttons and the joystick is pure joy.

The post Super Game Boy is a huge handheld that plays classic arcade games first appeared on Yanko Design.