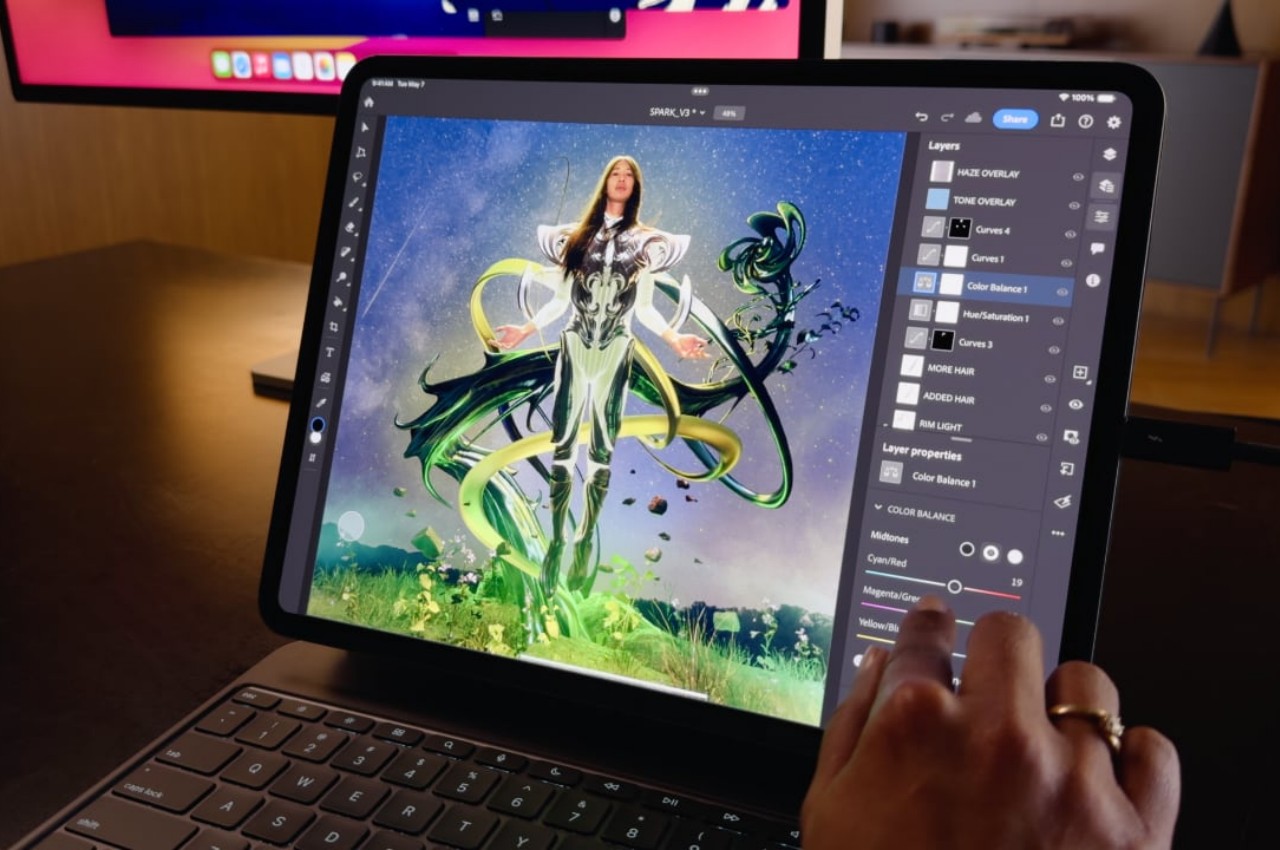
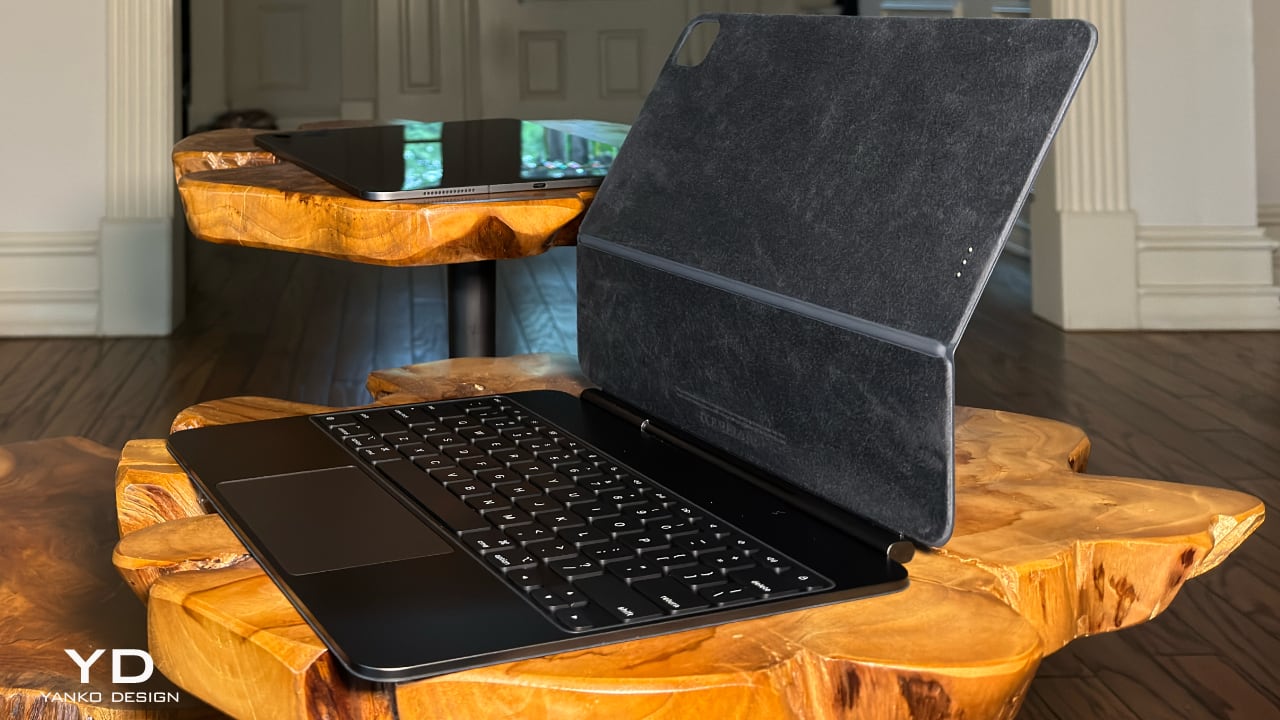
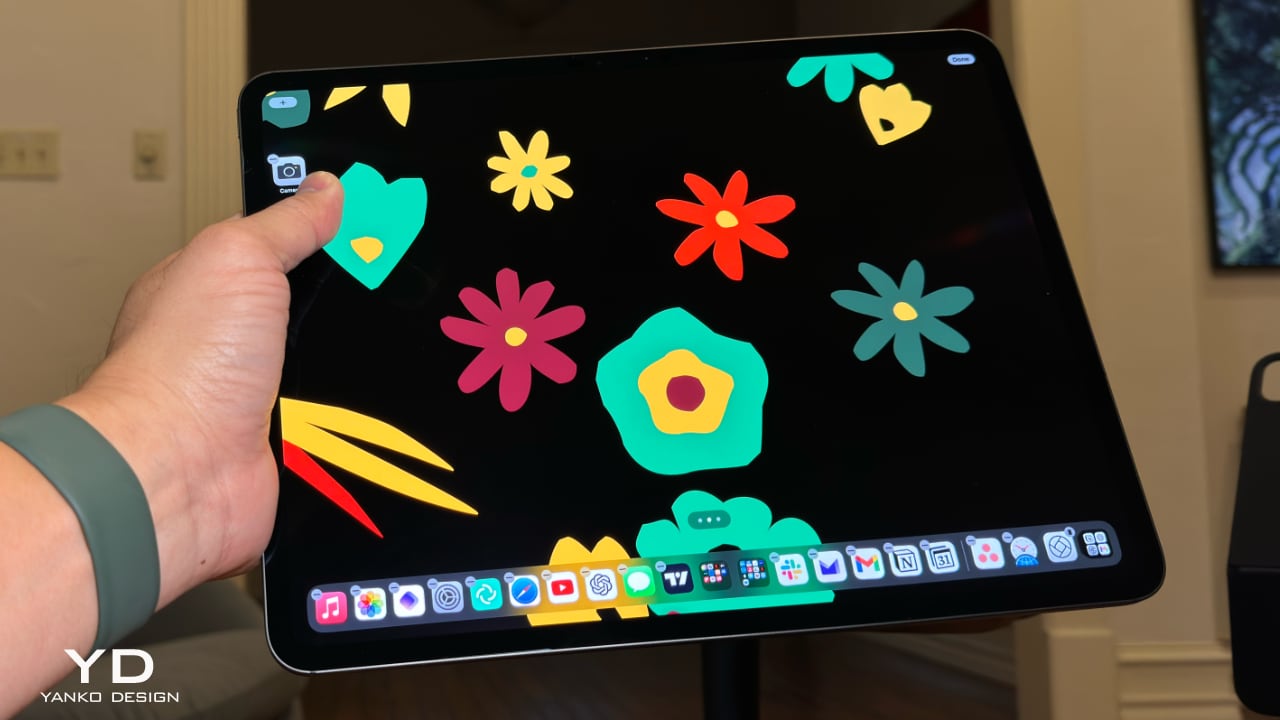
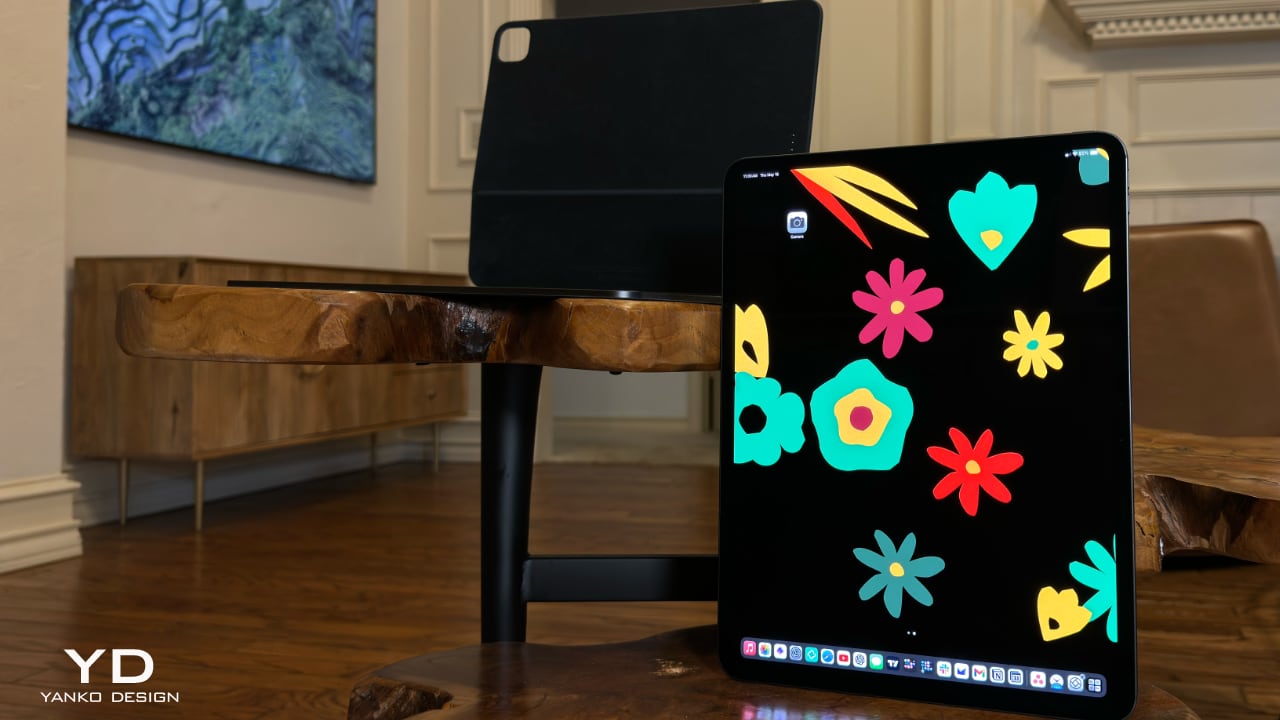
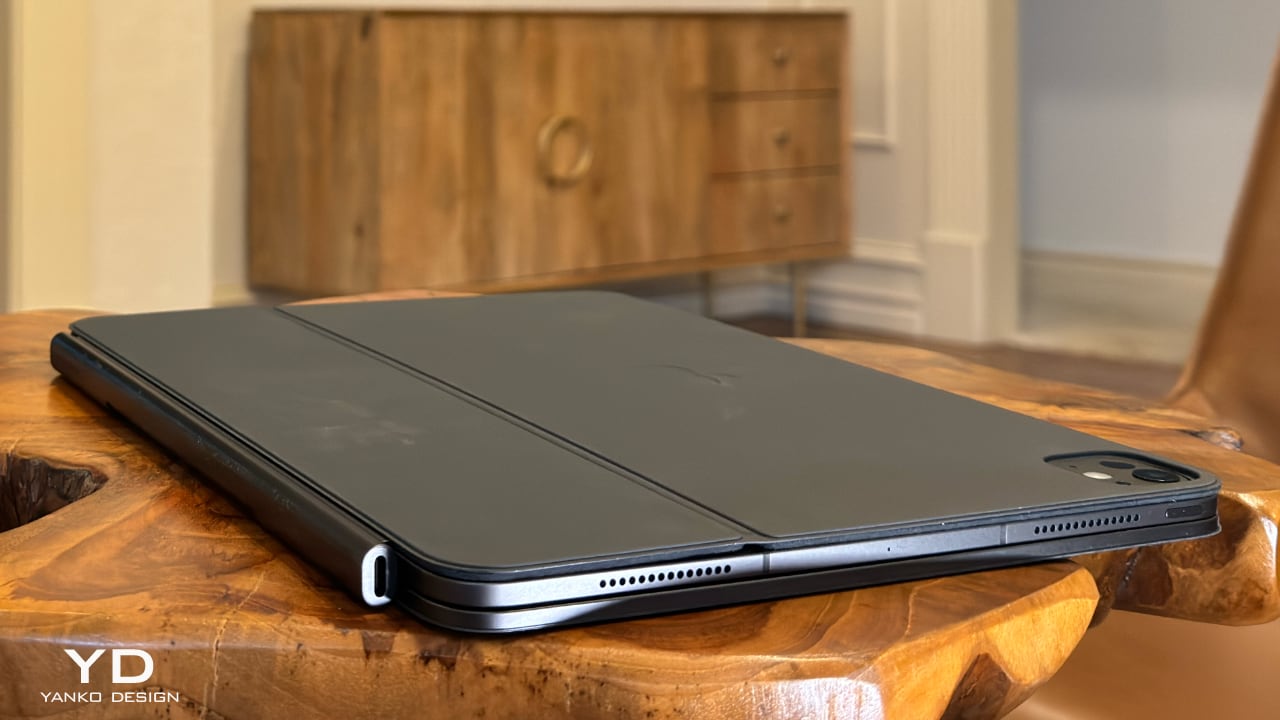
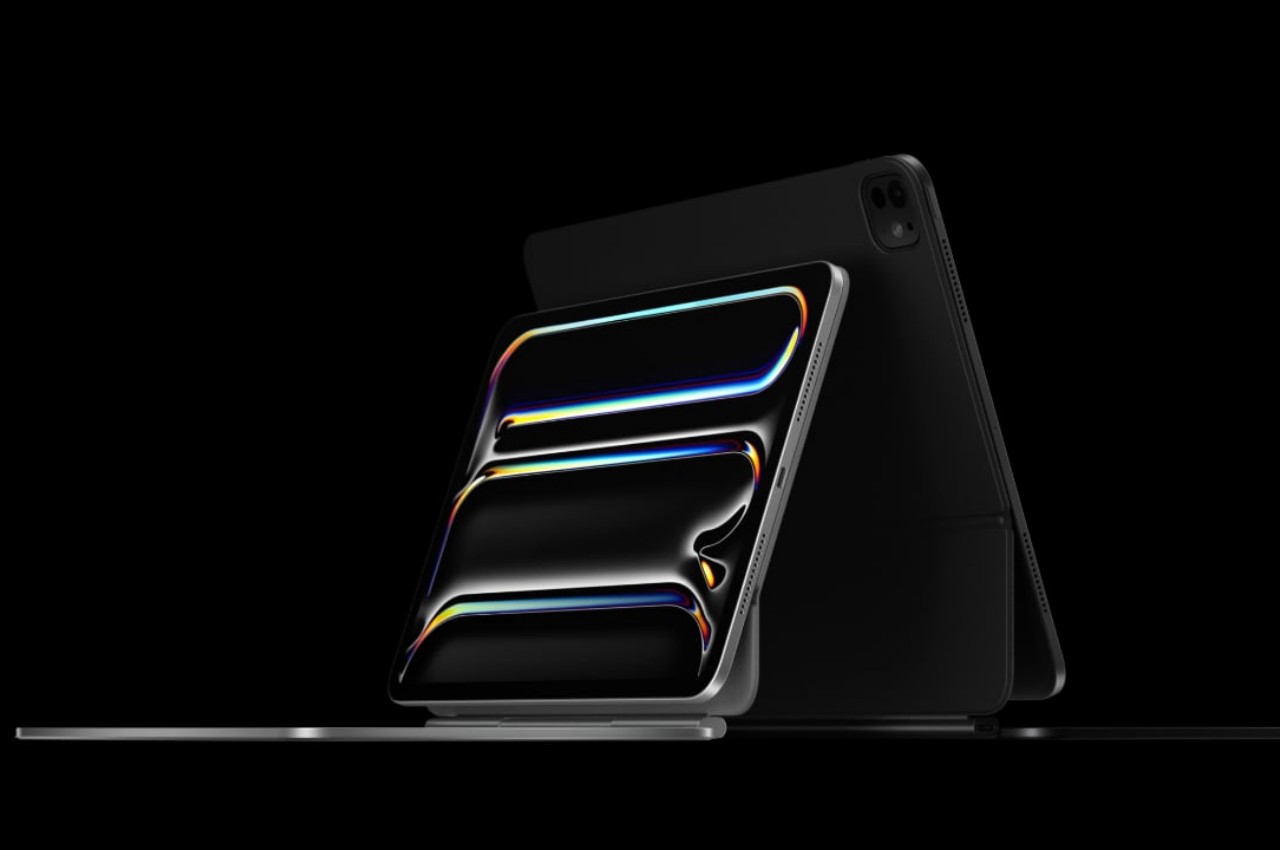
M4 iPad Pro is super thin but also super durable as proven by bend test

There is an almost irrational desire to have the lightest and the thinnest mobile devices. After all, we don’t want to carry the literal weight of just products if we can help it, and thin devices also look sleeker, take up less space in your bag, and, at least in theory, use less material during production. That thinness, however, doesn’t come without a price, at least in terms of durability. Thin sheets of wood break more easily (karate, anyone?) and it’s also easier to bend thin metal than thicker ones. That may be the concern some people will have about the new M4 iPad Pro, especially the larger 13-inch model, but a rather excruciating stress test fortunately proves that isn’t the case, with one important caveat.

Designer: Apple (via JerryRigEverything)

You might no longer hear about it, but there were times when Apple’s quest for thin designs backfired catastrophically. Its first large iPhones, the iPhone 6 and iPhone 6 Plus, were notoriously susceptible to bending when placed in back pockets that the term “bendgate” was coined in 2014. The first iPad Pro, though less dramatic, was also proven to be less than reliable if put under extreme pressure. Fortunately, those seem to be well in the past and Apple has figured out a new design to help prevent that sort of structural failure in its thinnest iPad yet.
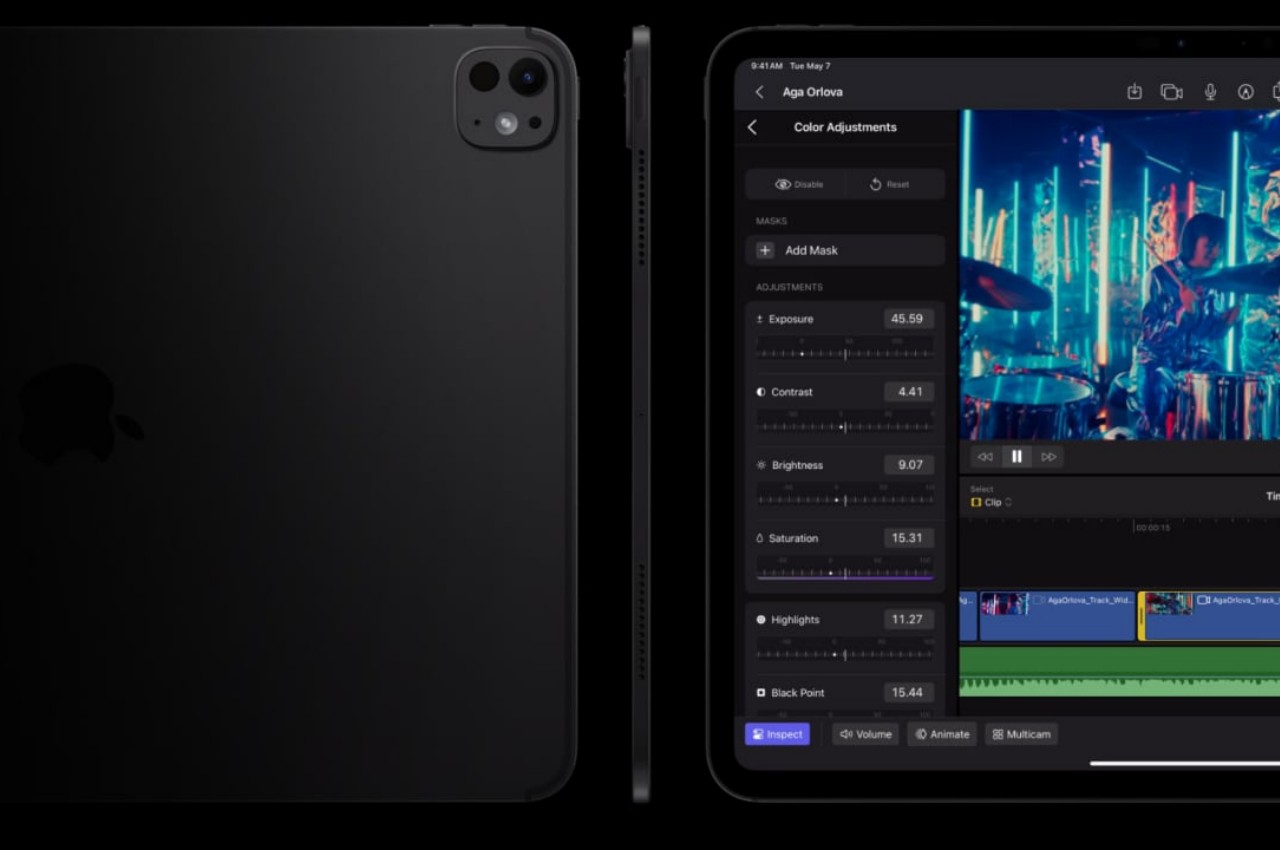
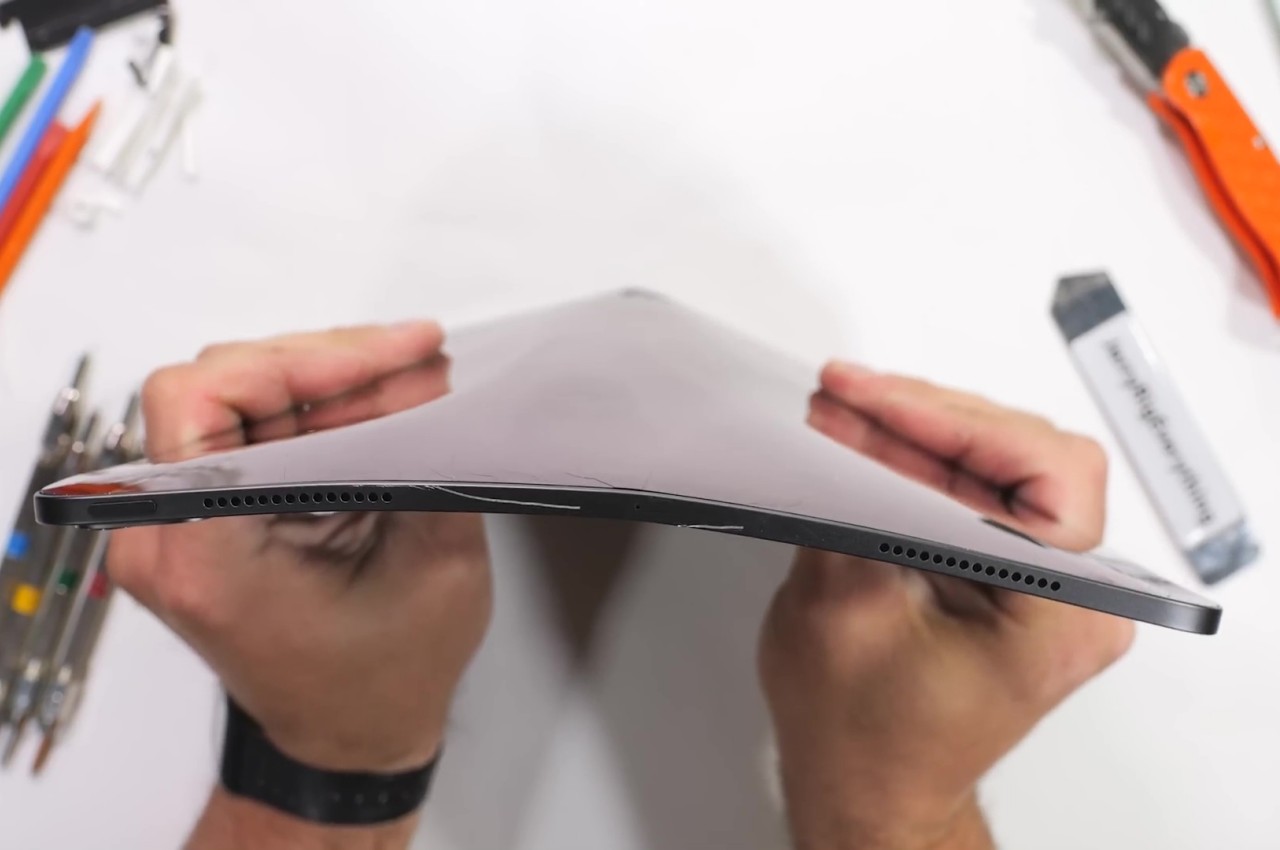
JerryRigEverything, the YouTuber whose claim to fame has been the unrelenting bend, scratch, and burn tests on phones and tablets proved that new solution to some extent. Apple apparently added a “cowling” or a spine inside the thin tablet that runs across its height, covering the new M4 chip in the center and splitting the two large battery packs. Thanks to this new structural support, bending the tablet across its long edge no longer breaks it in half. It does deform in a way that won’t return to its flat state but it at least remains usable.
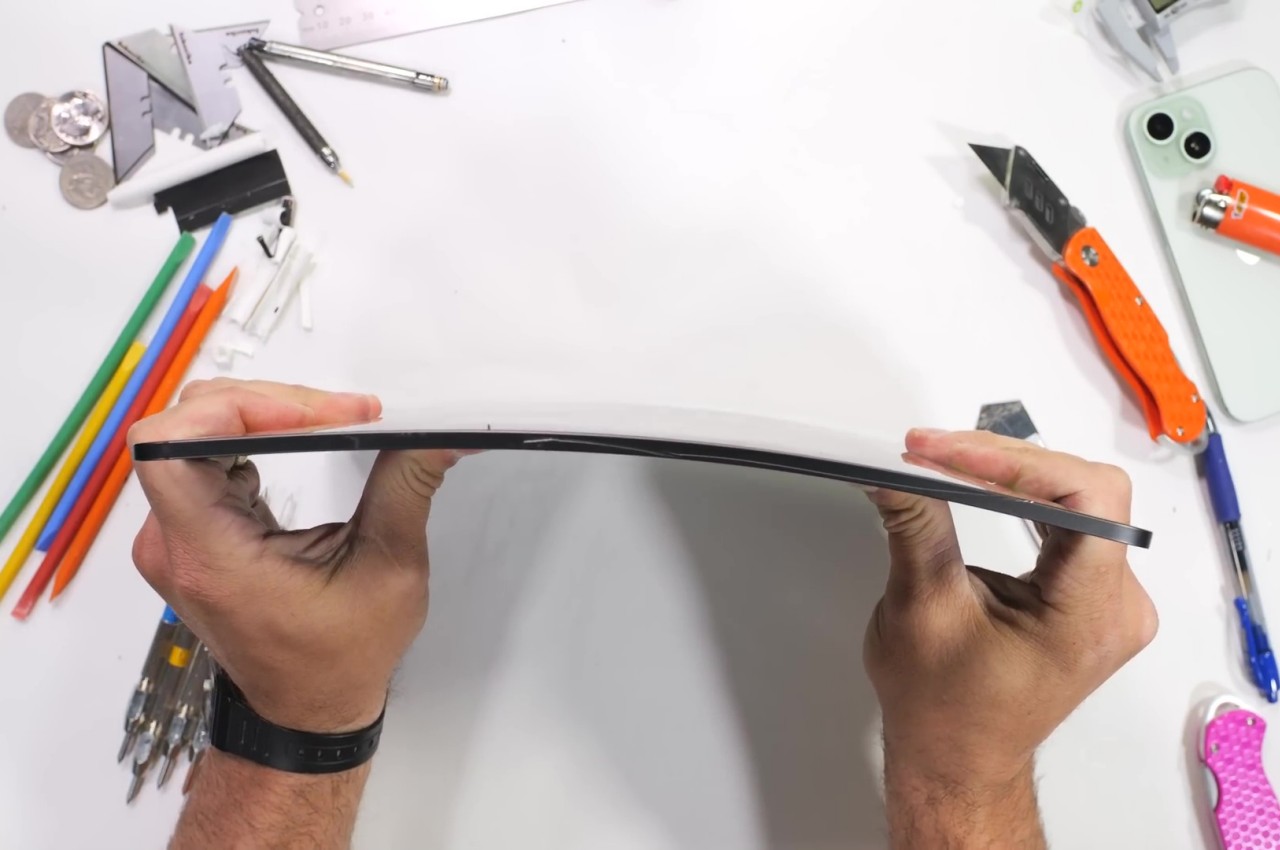
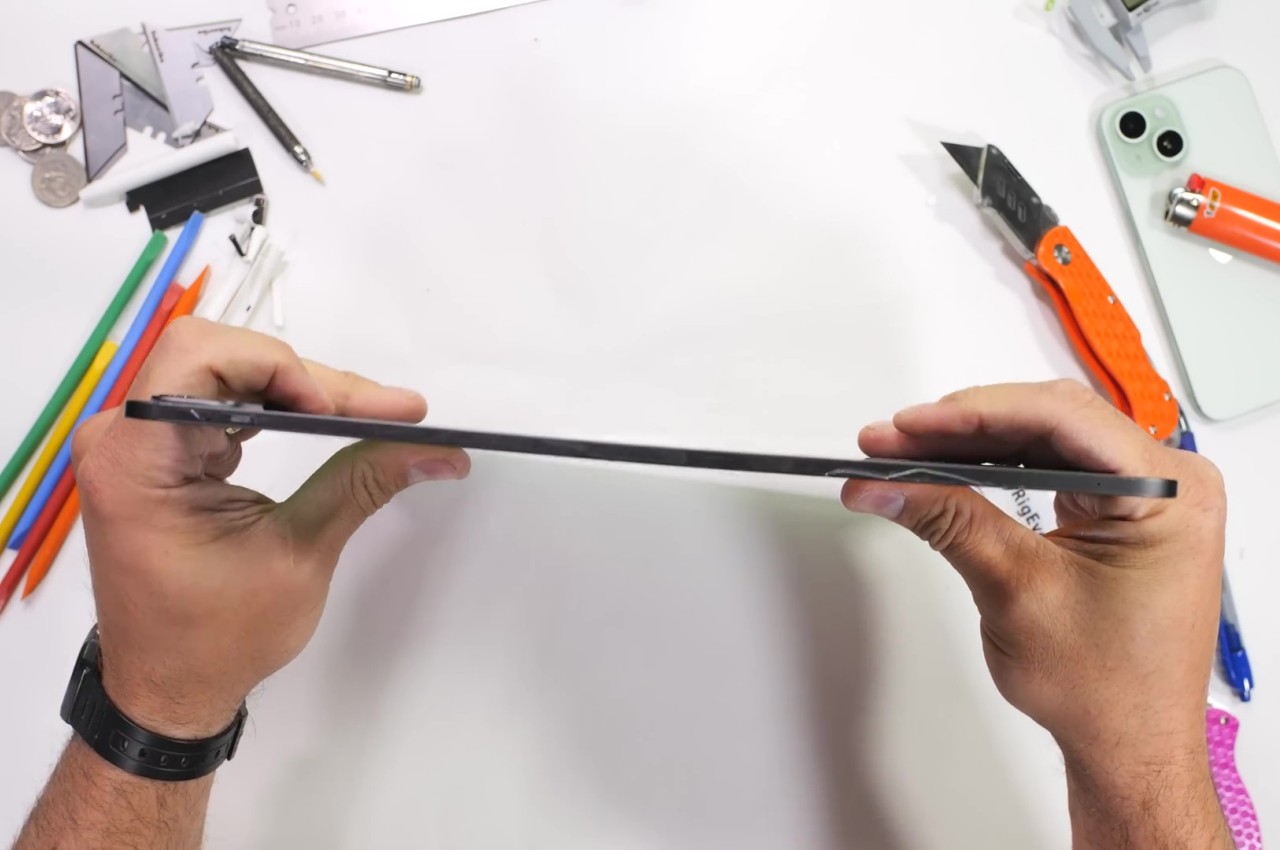
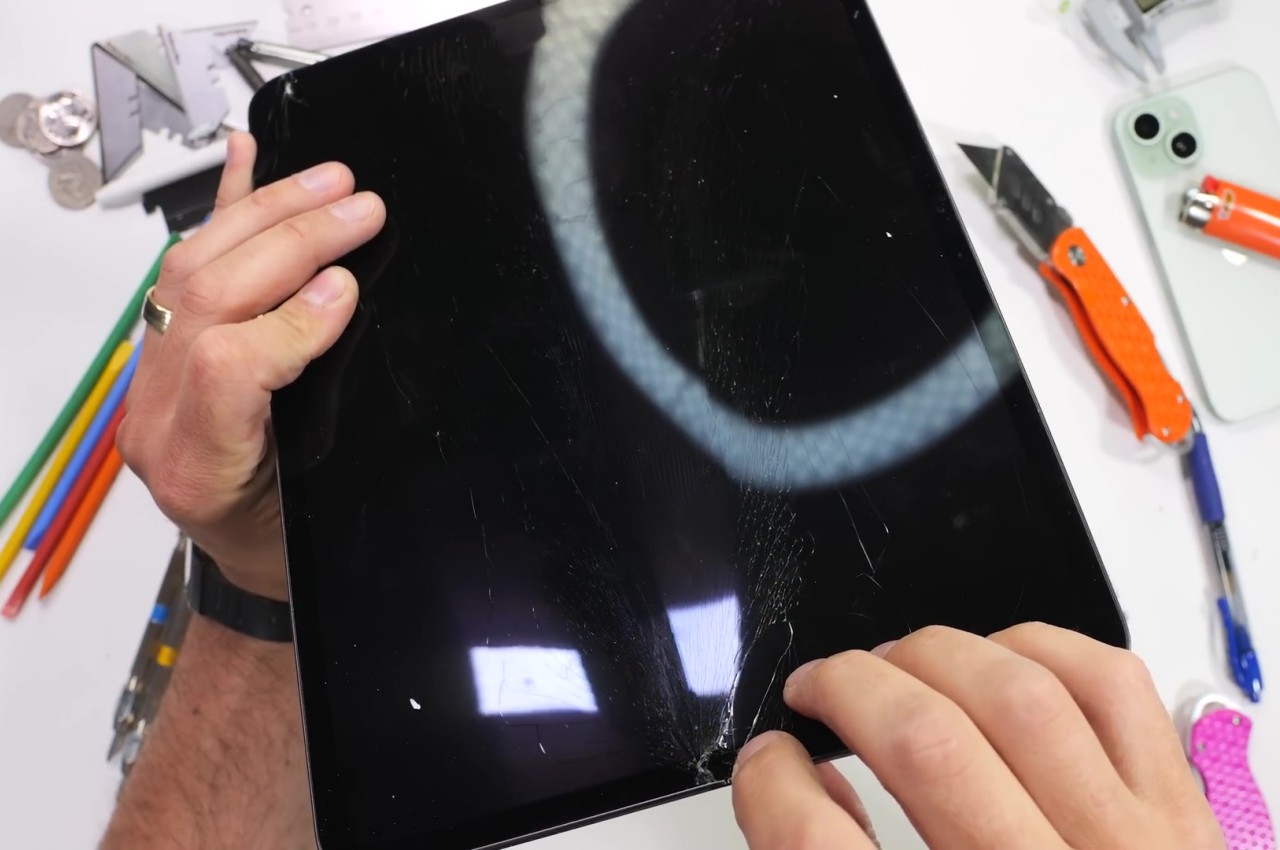
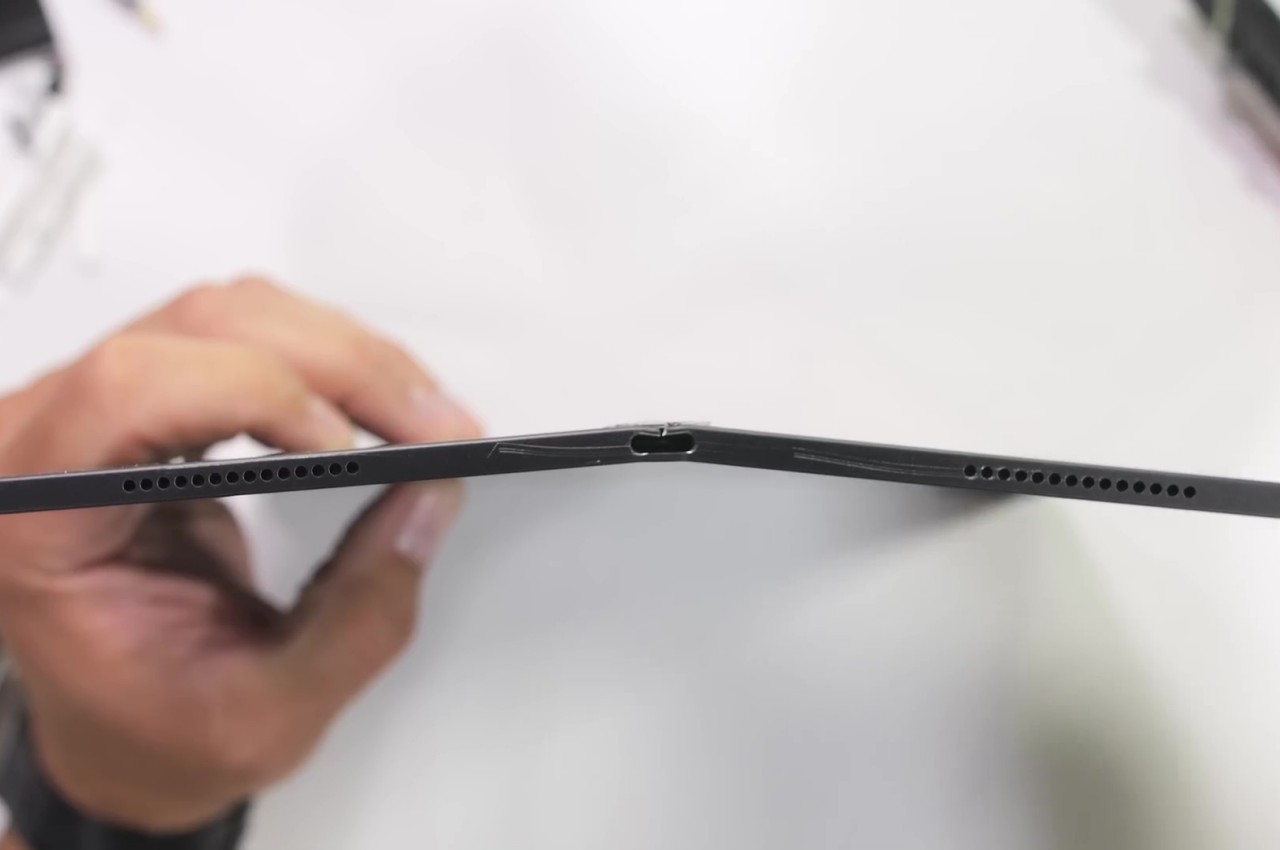
The catch, however, is that bending it in the opposite direction does actually destroy the iPad Pro. The flaw unsurprisingly lies in the thinnest part of the frame, the area around the USB-C port. With enough pressure, this bends sharply and pushes into the screen, cracking it and rendering it completely unusable. To be fair, the chances of that happening inside your backpack are extremely rare, but its existence should give owners caution. That said, most M4 iPad Pro owners will probably keep their ultra-thin tablets inside the new keyboard case when in transit anyway.
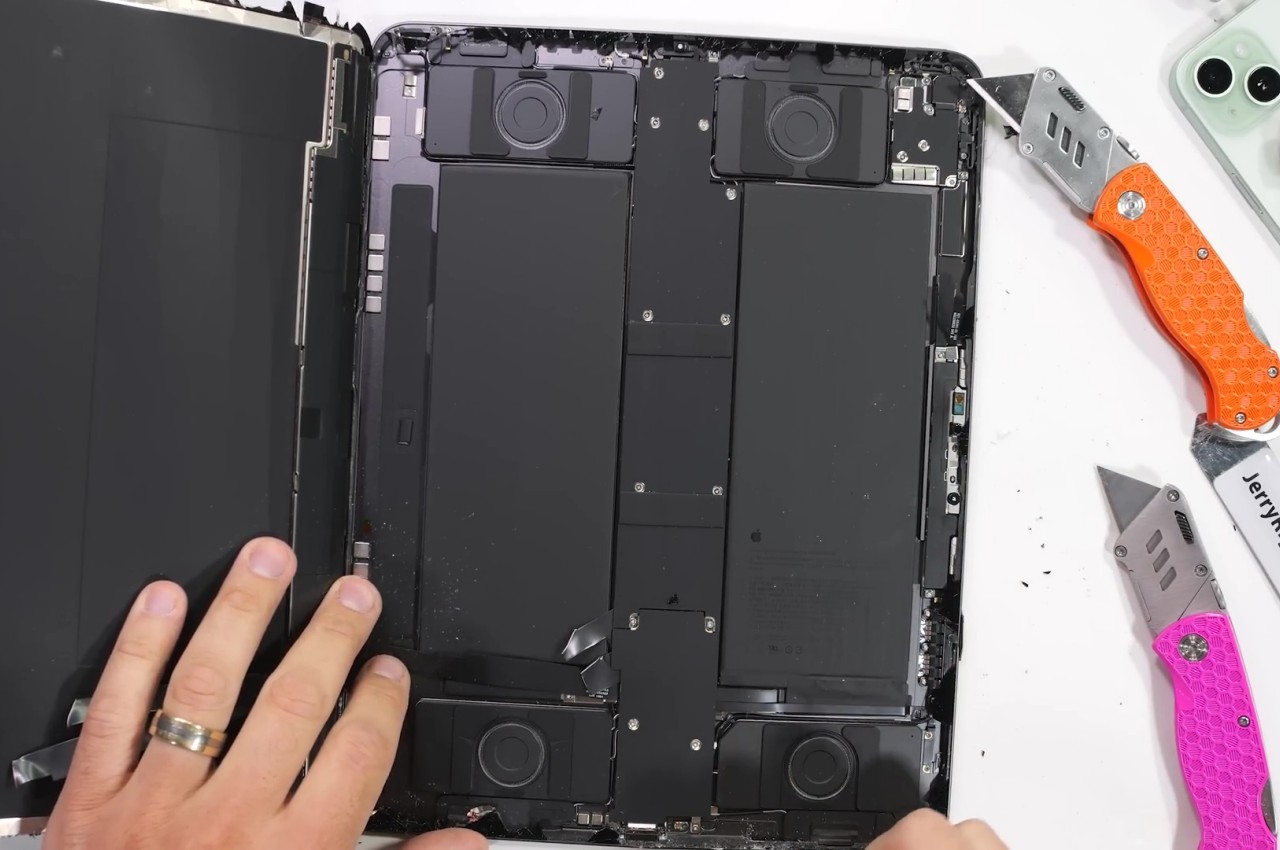
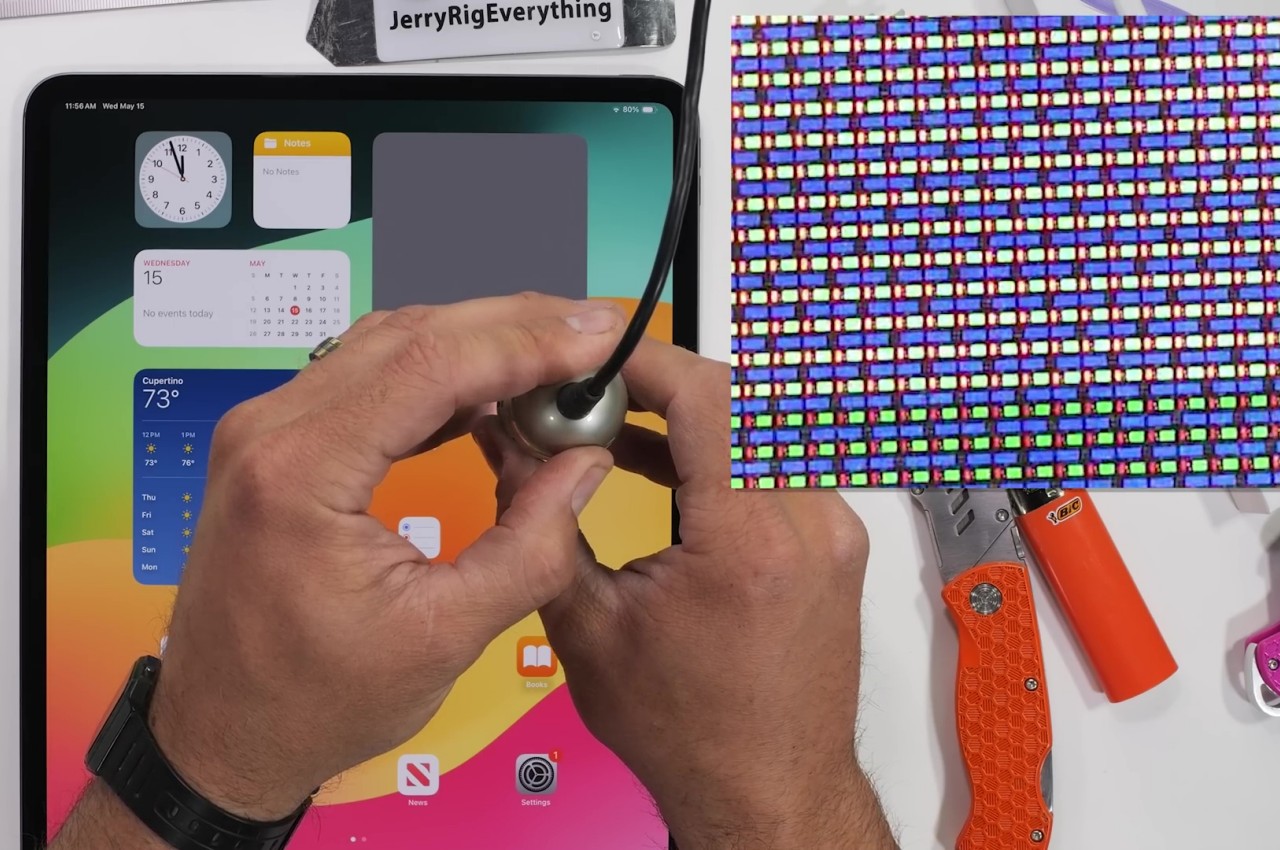
The stress test of the 2024 13-inch iPad Pro also shows some of the gems of this new design, like that aforementioned spine that was revealed after the shattered screen was peeled off. The YouTuber also provided a close-up of the Tandem OLED screen but, unfortunately, can’t show the second layer of OLED pixels underneath. All in all, the design of the M4 iPad Pro, both in terms of technology as well as product design, is quite impressive, but that isn’t an excuse not to take proper care of the device. Be sure to check out our hands-on of the new iPad Pro and keep a look out for our in-depth review coming soon!

The post M4 iPad Pro is super thin but also super durable as proven by bend test first appeared on Yanko Design.
Compact MagSafe Flashlight is perfect for everything from iPhone photography to outdoor adventures

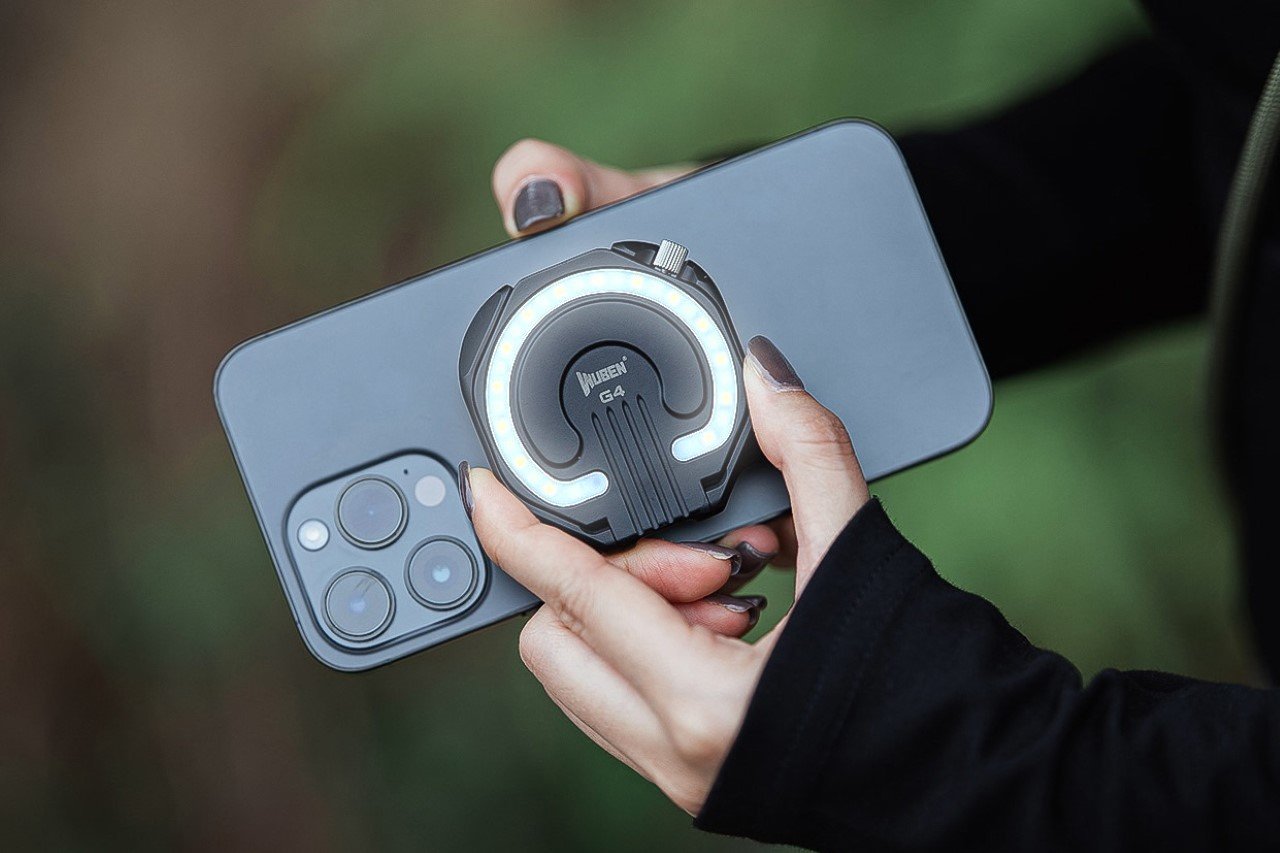
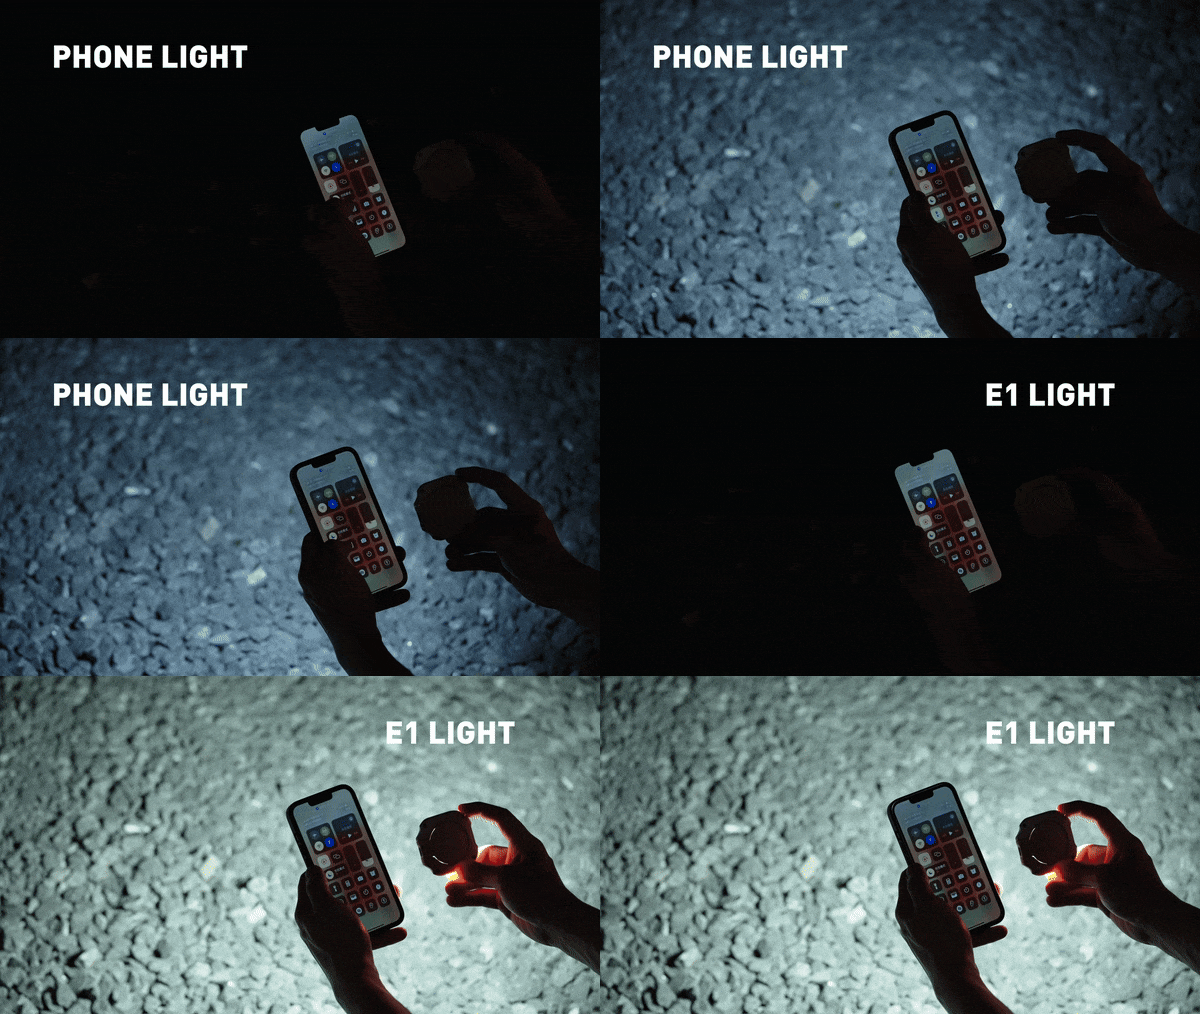
With a stunning 300 lumens of brightness, the WUBEN E1 is 6 times more powerful than your smartphone flashlight, making it perfect for selfies, vlogging, outdoor trips, emergencies, and even reading. The best part, it snaps right onto the back of your phone, giving you a compact ring-light on demand, so you don’t have to use your phone’s crummy excuse for a flashlight. And when you’re not using the light, you can use it as a stand to prop your phone up at any angle.

The WUBEN E1 is proof that MagSafe was an incredible idea. While Apple merely designed the feature to support chargers and attach wallets, MagSafe has spawned a whole host of third-party accessories, from finger grips to tripods, power banks, EDC, and now the E1 flashlight. A perfect example of an accessory that nobody knows they want but everyone definitely needs, the WUBEN E1 straps a powerful lighting device to the back of your phone. Much more effective than your smartphone’s native flashlight, the WUBEN E1 sports a ring of 28 LEDs that create a bright ring light that’s perfect for selfies or for exploring the outdoors. The light sits on a hinge that serves as a stand for your phone, while also letting you face the light forwards or backward, giving you the option of even using it for selfies. Plus, multiple brightness levels and three color temperature settings (warm, neutral, cool) give you way more freedom than your smartphone flashlight could even dream of.

Designer: WUBEN

Click Here to Buy Now: $39 $49 (20% off) Hurry, limited units at discounted price. Raised over $133,000.

For context, the iPhone 15’s flashlight maxes out at 50 lumens – ask any photographer and they’ll tell you that is far too little for effective flash photography. The WUBEN E1, however, overshoots the smartphone flashlight’s brightness by about 6x, giving you a light that’s much more effective in a variety of scenarios, whether it’s finding your keys in the dark or taking beautiful low-light selfies.

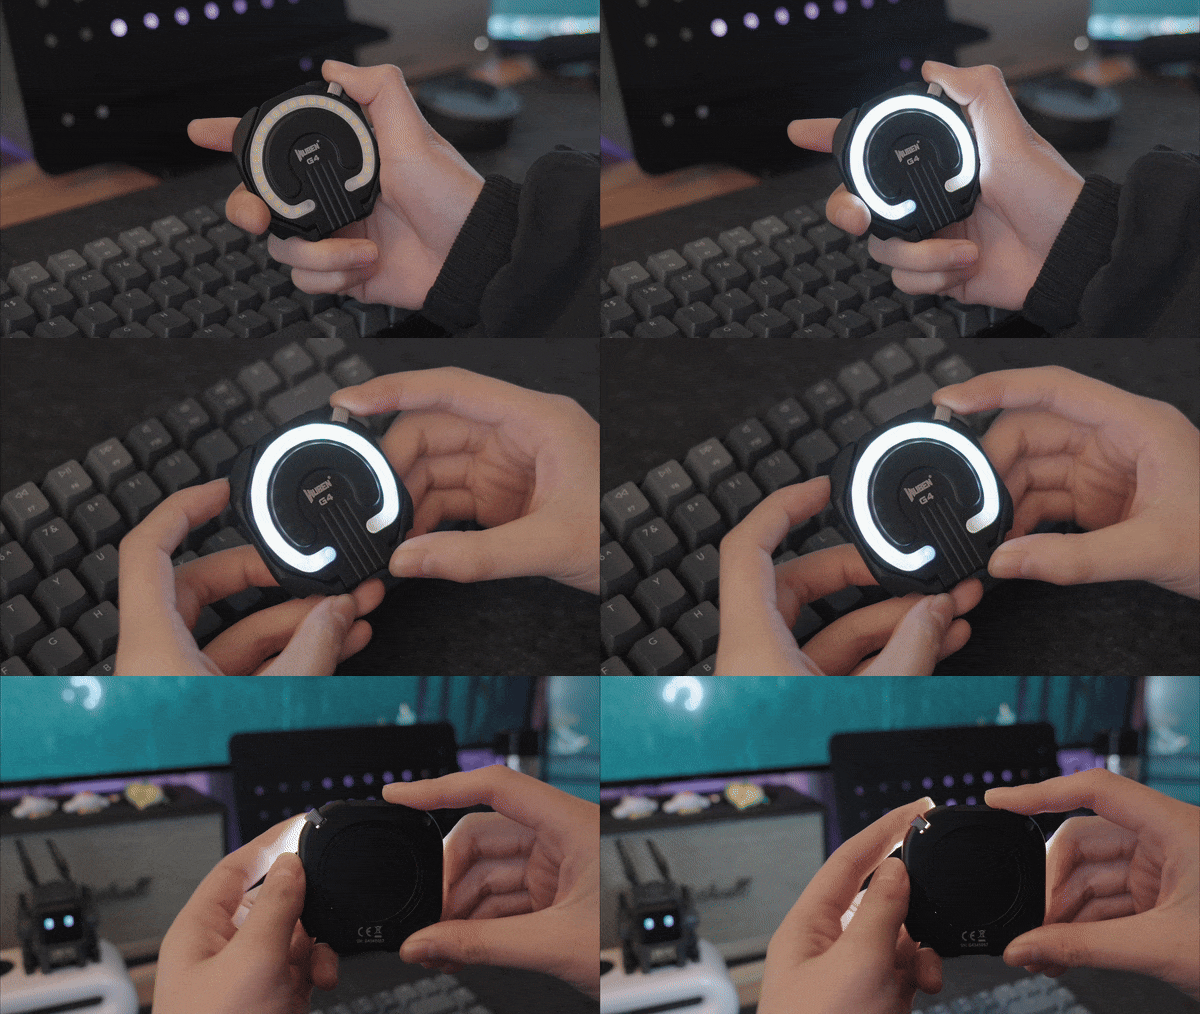
Slightly smaller than a hockey puck, the WUBEN E1 packs a series of 28 LEDs in its compact design, and can be used either independently or while securely snapped to the back of your MagSafe-compatible smartphone. On its own, the WUBEN E1 is a pretty handy little flashlight that can be held in your hand, attached to the hood of your car (or any metal surface), or even propped up on any flat-ish plane for instant lighting. Snap it onto the back of your smartphone, however, and you’ve got yourself a powerful tool for selfies, vlogging, or even outdoor adventures.

The WUBEN E1 operates entirely thanks to a crown located on the rim beside the LEDs. Similar to the ones found on a watch, the crown can be pushed to activate the light or cycle through temperature settings, and can be rotated to adjust the brightness. Keeping things gloriously simple, the E1 doesn’t come with an app or any settings that would complicate its use. It’s simply a great, intuitive, sleek EDC light that just so happens to attach to the back of your phone.

Attaching the WUBEN E1 to your phone gives you two distinct benefits. The light’s hinged arm lets you use the E1 as a stand for your phone, propping it up in pretty much any angle you choose. The second, more obvious benefit, is the fact that it replaces your phone’s flashlight with something far more versatile and powerful. The LED ring is 6x more powerful than your phone’s native flashlight, and the hinged arm lets you face the lights anywhere, creating a great makeshift camera light that’s just wonderful for low-light shots, vlogs, or even vanity selfies. Weirdly enough, the LED ring also makes your iPhone look somewhat like a Nothing Phone (1), which feels ironic and slightly hilarious. iPhone users get the last laugh, however, because the E1 is so much more capable than the Nothing Phone’s notification LEDs.

Each E1 comes made from lightweight Magnesium alloy, giving the EDC flashlight a weight of just 36 grams or 1.26 ounces. At just 6mm thin, the WUBEN E1 fits comfortably onto the back of your phone without really jutting out or obstructing regular phone usage. It’s also slim enough to slide directly into your pocket with or without your phone, reinforcing its portability. A 320mAh battery gives the flashlight anywhere between 30 minutes of usage (on its brightest setting) or 50 hours of on-time (on its lowest setting), while a USB-C port on the base of the light lets you charge your device.

The WUBEN E1 starts at $39, and for $69 you’ll get the E1 along with a metal tripod stand/selfie stick that sits between the flashlight and your phone, turning your cutting-edge phone into a comprehensive photo and videography device. The Wuben E1 ships globally starting July 2024.

Click Here to Buy Now: $39 $49 (20% off) Hurry, limited units at discounted price. Raised over $133,000.

The post Compact MagSafe Flashlight is perfect for everything from iPhone photography to outdoor adventures first appeared on Yanko Design.

This Camera Lens Cover comes with a secret compartment for SD cards or an AirTag

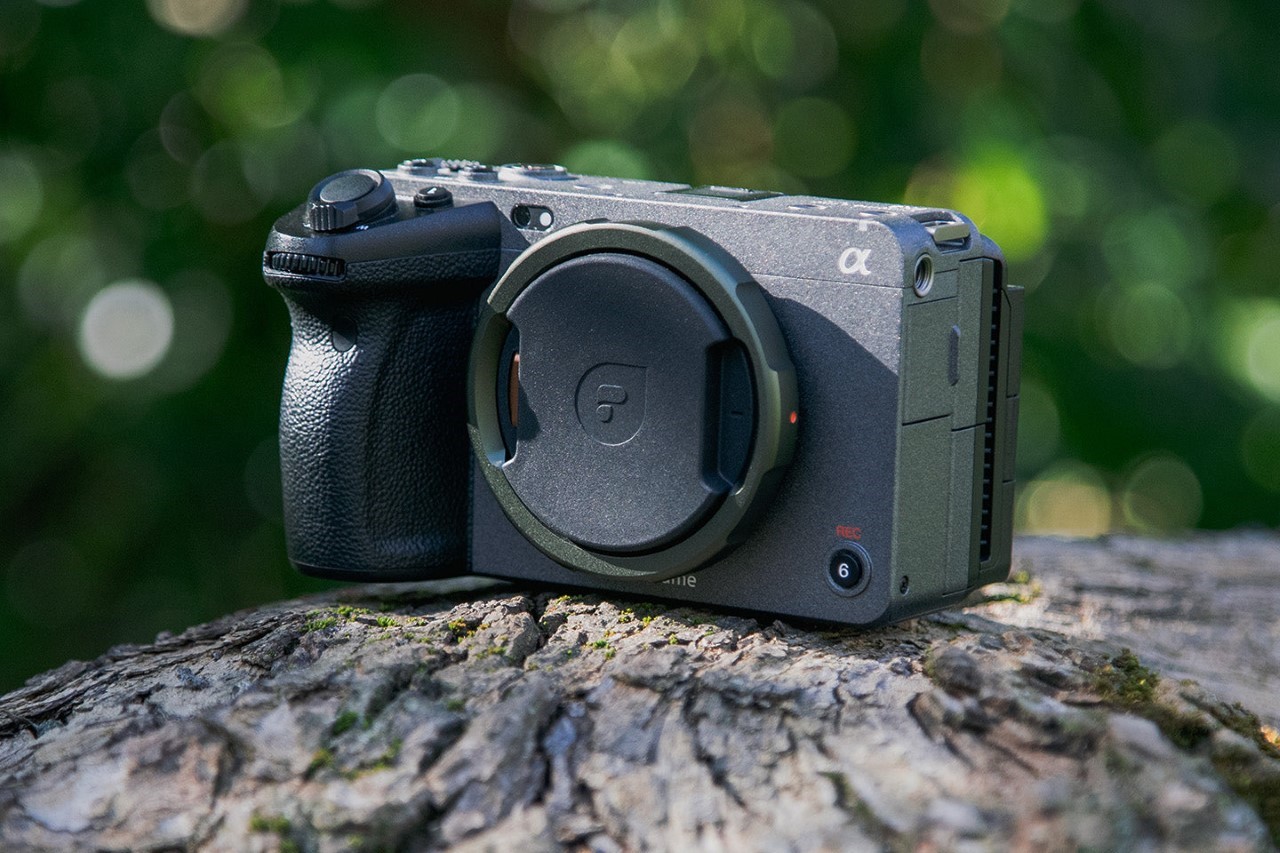
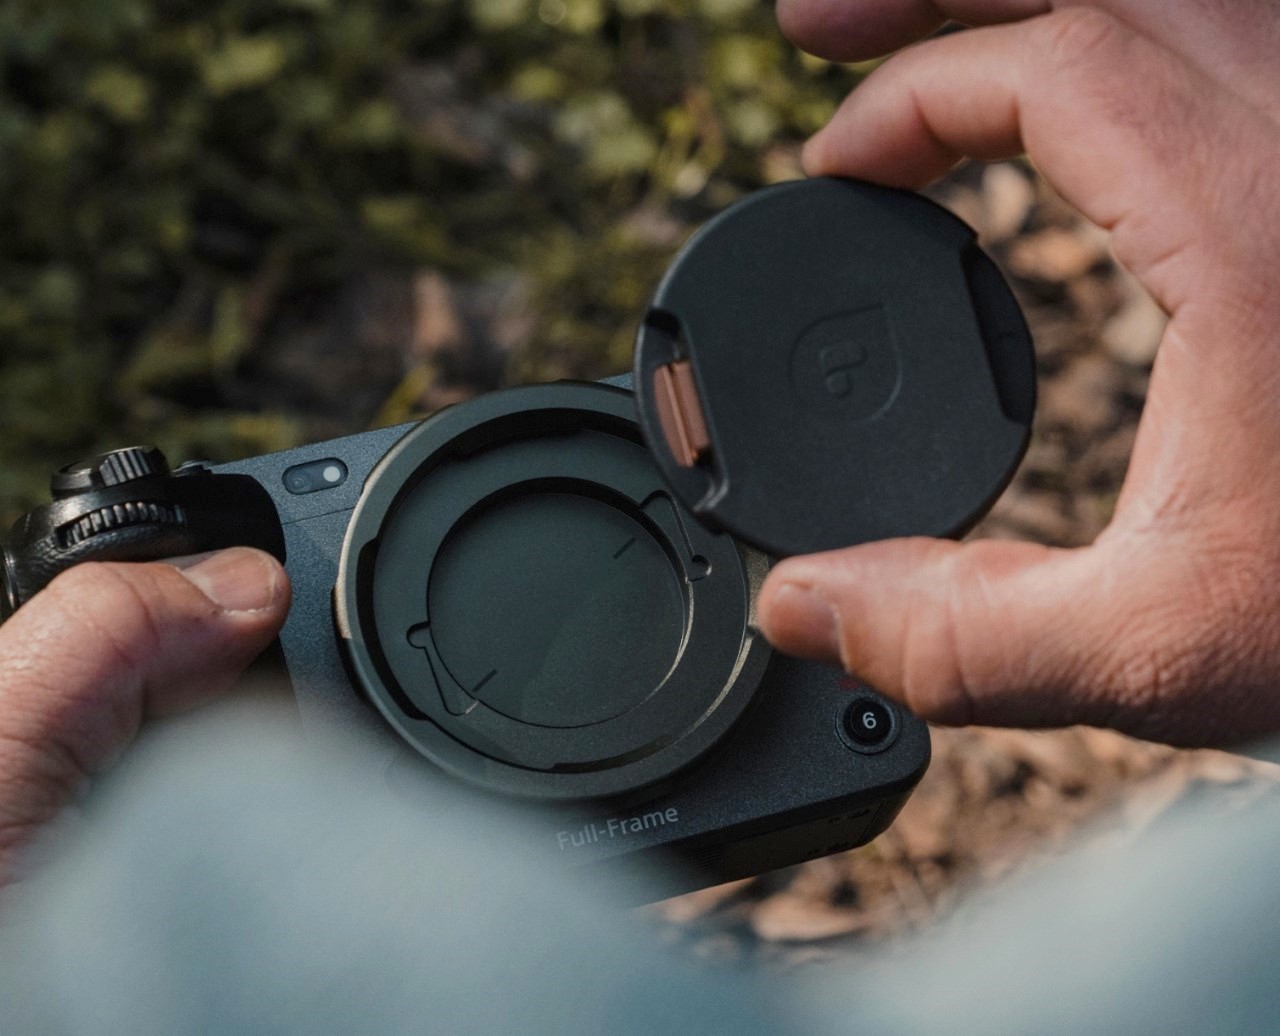
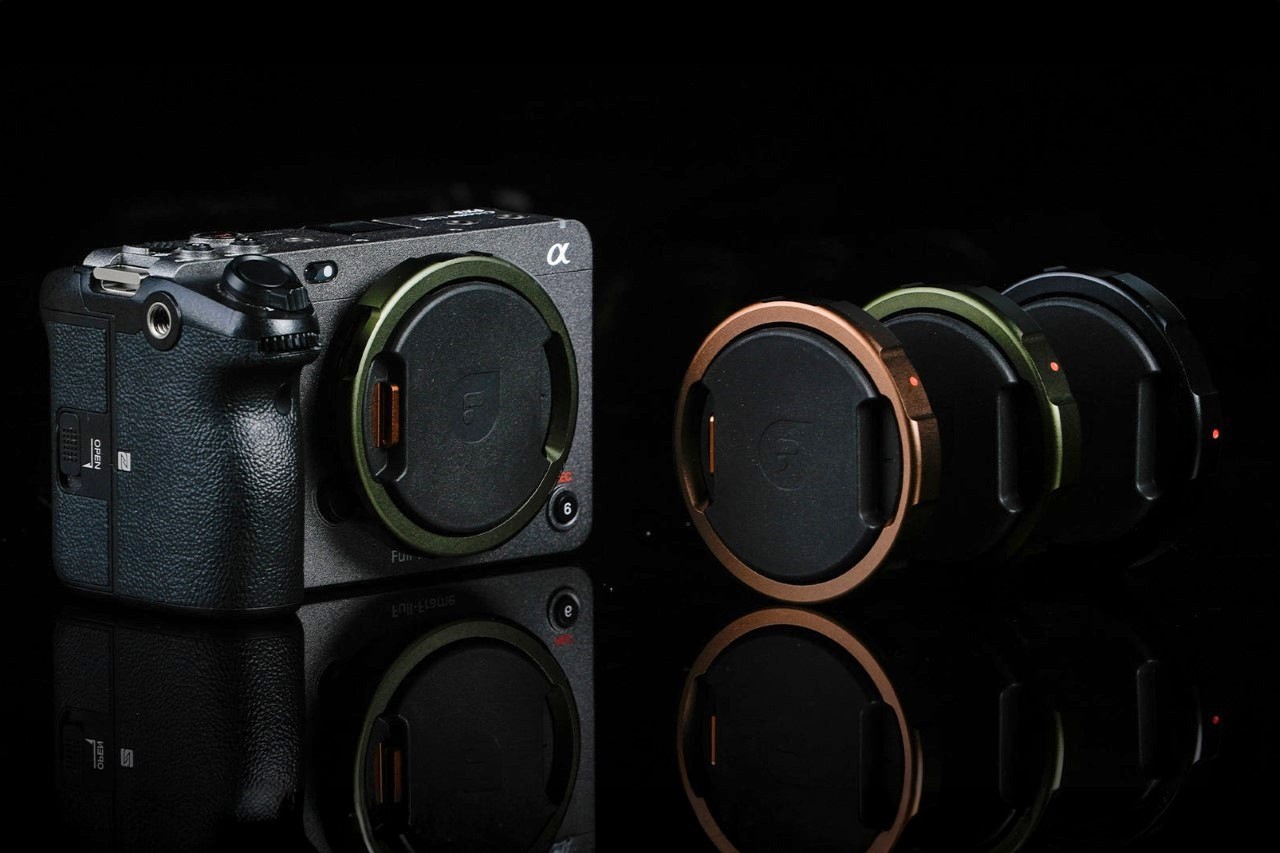
Your DSLR may not have Apple FindMy, but the folks at Polar Pro have a clever alternative. Meet the Defender, a camera body cap that fits directly over the lens rim, protecting the sensor inside from damage or exposure to outer elements. Designed to fit on a wide range of models, the Defender isn’t just a protective cover, it comes with a hollow design that lets you stow away essentials including SD cards or even an Apple AirTag. Pop the Defender onto your camera and now not only do you have memory cards available to you at the tip of your fingers, you’ve also got a camera that you can track on your iPhone or any other Apple device. Smart, eh?!

Designer: Polar Pro

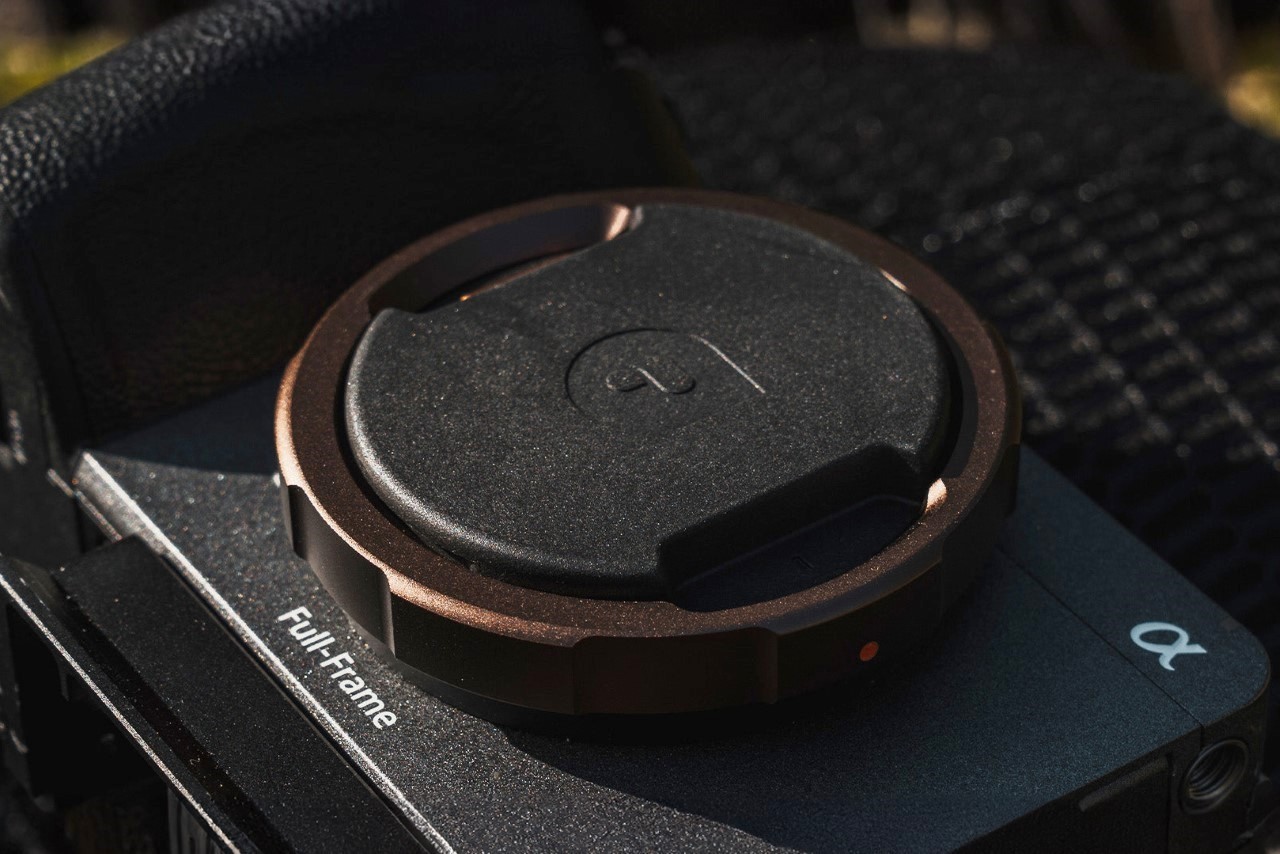
The Defender Body Cap comes with a 6061 aluminum outer body, eschewing the plastic construction found on most default camera body caps. The aluminum offers stronger protection, defending your camera from bumps, scratches, and offering much higher protection than flimsy plastic.

The Defender’s secret sauce, however, lies in its inserts that fit into the body cap, allowing you to store items inside the cap’s spacious form factor. Polar Pro offers 3 inserts to choose from – one that holds an AirTag, another that holds 1 SD and 2 MicroSD cards, and a third that holds a CFexpress A card. The caveat, however, is that you can only use 1 insert at a time, which means you can’t simultaneously store an AirTag with an SD card (which feels like a bit of a lost opportunity to be honest), but I’d probably pick an AirTag any day, given that SD cards can easily fit in a wallet.

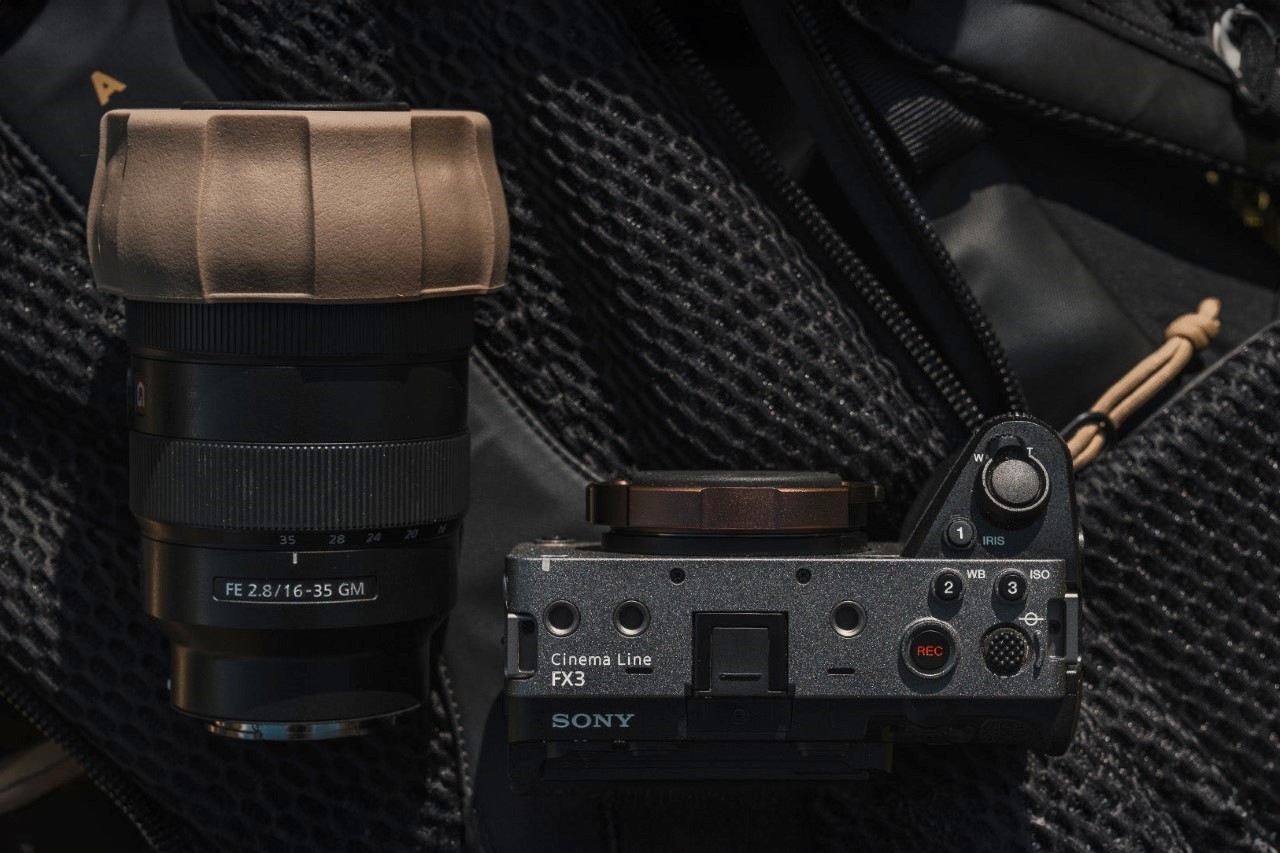
This nifty feature means your camera’s body cap now has a secondary purpose – hidden storage. The cap fits on Sony, Nikon, and Canon cameras, allowing you to pretty much attach the Defender onto DSLRs, SLRs, Mirrorless cameras, or even full-frame video cameras. Pop an AirTag in and your camera can easily be tracked on your FindMy app, so that if it ever gets misplaced or stolen, you’ll know exactly where it is. Chances are nobody will know the body cap has an AirTag concealed inside it, and anyone who values cameras will know better than to throw the body cap away.

The Polar Pro Defender comes in 3 colors – Black, Desert, and Forest, and ships with all 3 inserts, allowing you to choose what to tuck away in your body cap.

The post This Camera Lens Cover comes with a secret compartment for SD cards or an AirTag first appeared on Yanko Design.

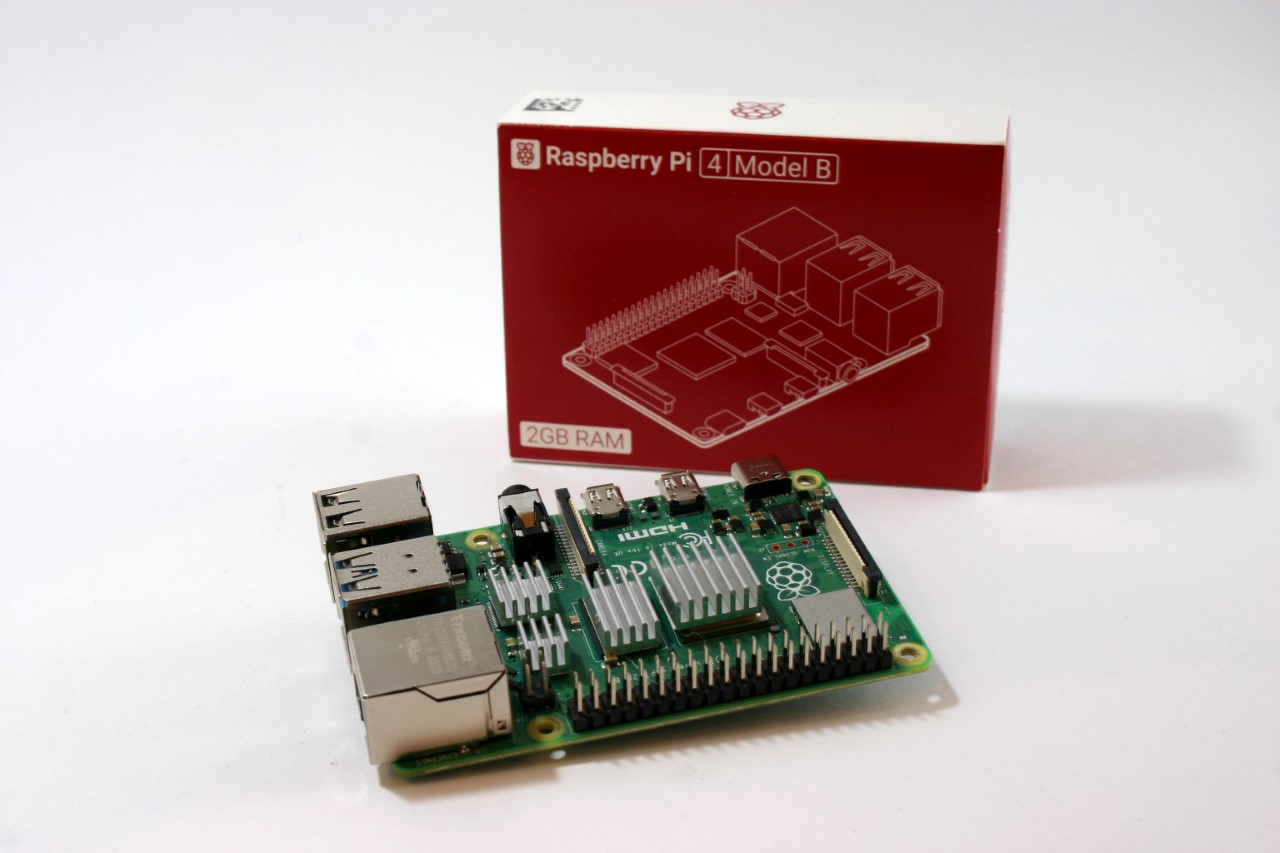
Build your own NAS Cloud Drive using a Raspberry Pi 4 and a 3D Printer

Why pay for iCloud when you’ve got your own personal iCloud at home?!

Subscriptions will be the death of our civilization. Imagine not being able to ‘own’ something because a company only allows you to rent it. You don’t own the movies you pay for on Netflix, you don’t own the music you pay for on Spotify, and you can’t own storage on the cloud because even though you’re buying 500GB worth of space, you’re merely renting the space on a cloud server somewhere. This strange arrangement has led to the rise of personal NAS (Network-Attached Storage) devices, with people choosing to simply BUILD their own cloud storage devices instead of paying Apple, Google, or Microsoft for them. The advantages of a NAS are many – you don’t need to pay monthly fees, your cloud-drive is private to you so you don’t have to worry about Google or Apple getting hacked and your data getting leaked, but most importantly, you can store and access files on your NAS from anywhere. Use it to take phone or laptop backups, to store/watch videos, or even build your own music/movie streaming library as the ultimate cord-cutting move!

Designer: Frank Bernhardt

If you’re looking to buy a NAS, there are quite a few out there, but if you want to try building your own, DIY-maker Frank Bernhardt managed to put together one using a Raspberry Pi 4 module, a few extra components, and a 3D-printed enclosure. His entire process is up on Instructables for anyone to see and make, although you’ll definitely require some technical knowledge to get the software up and running.

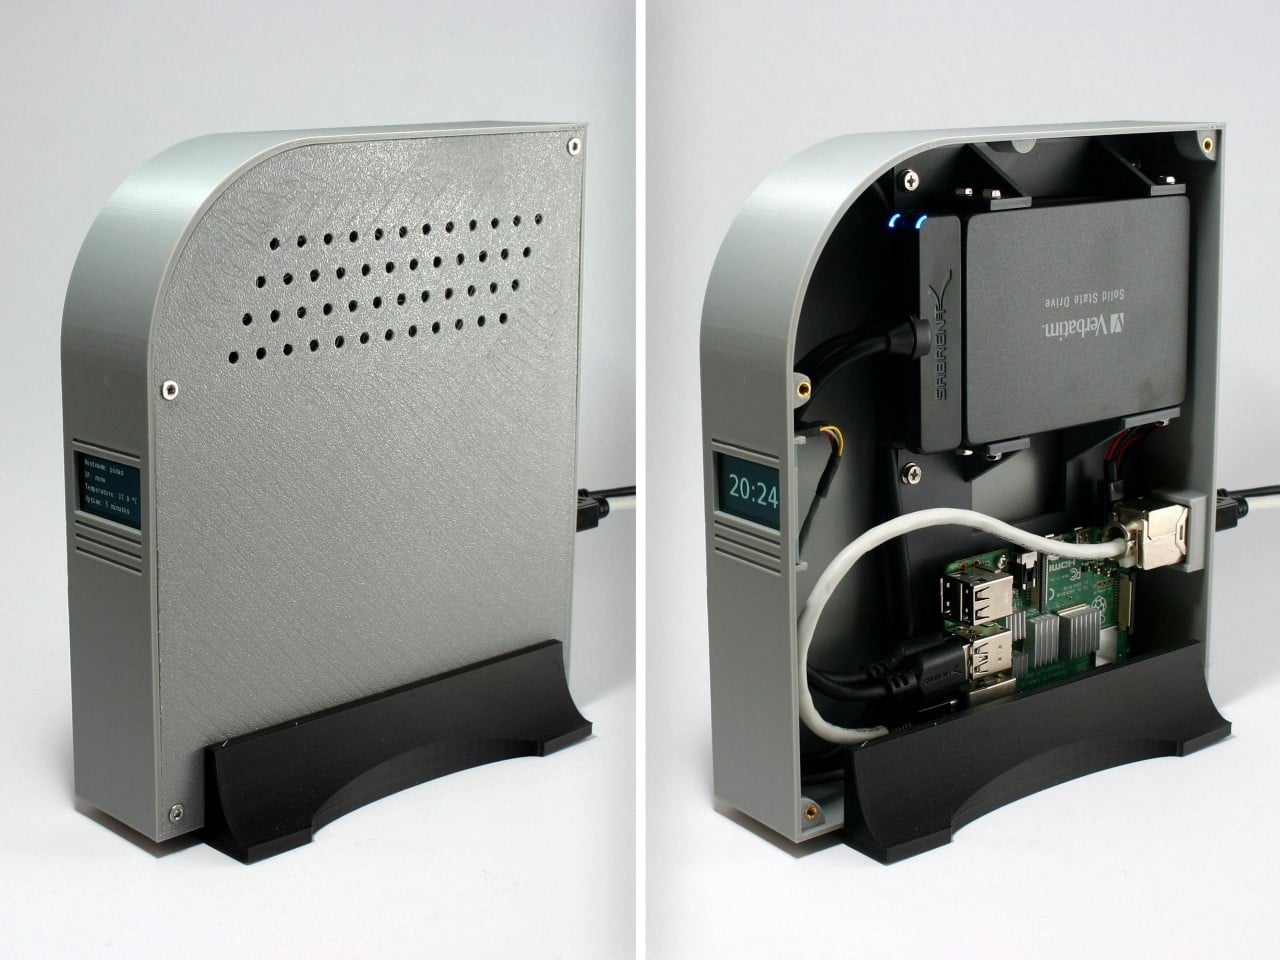
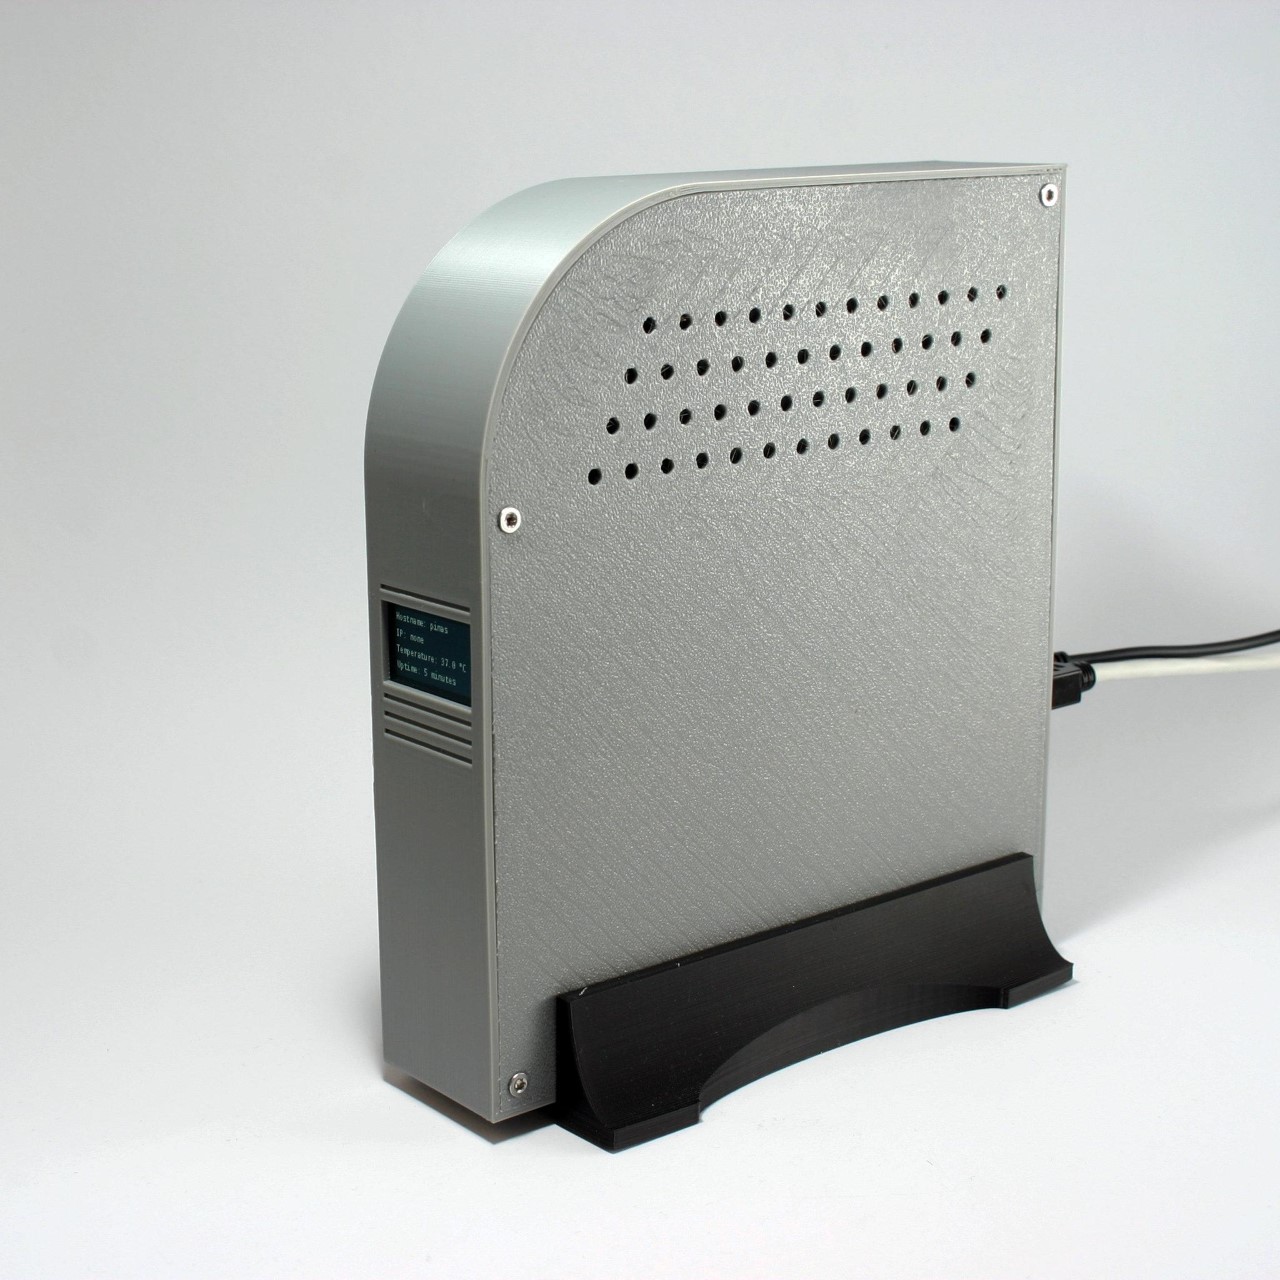
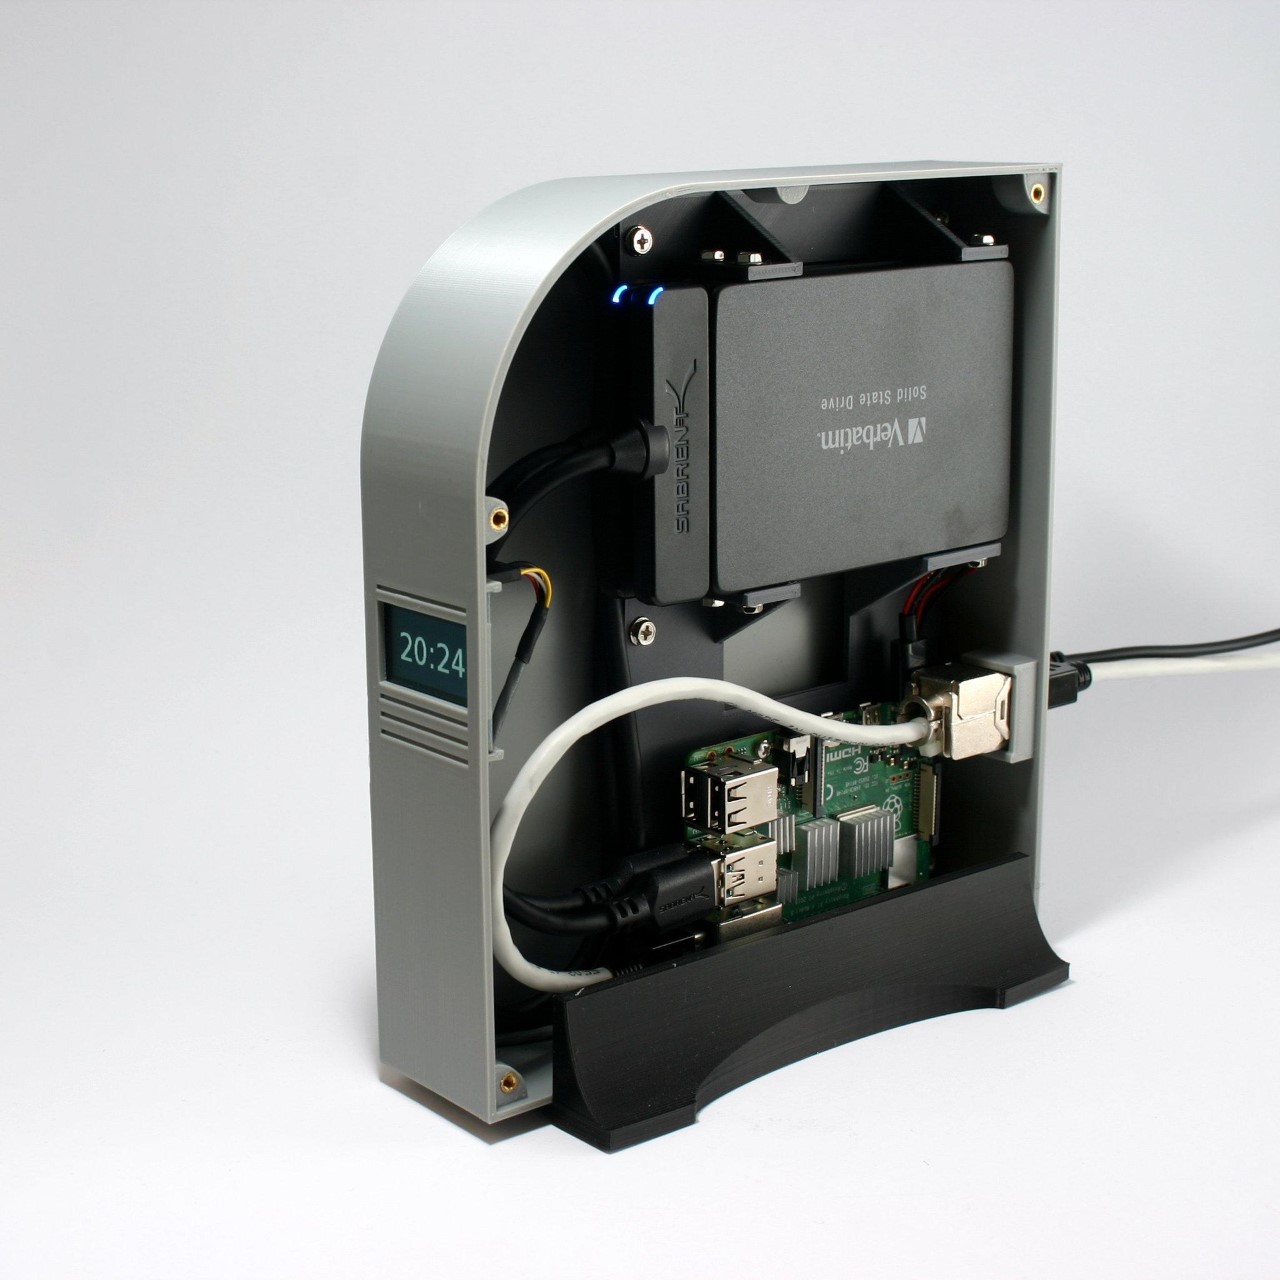
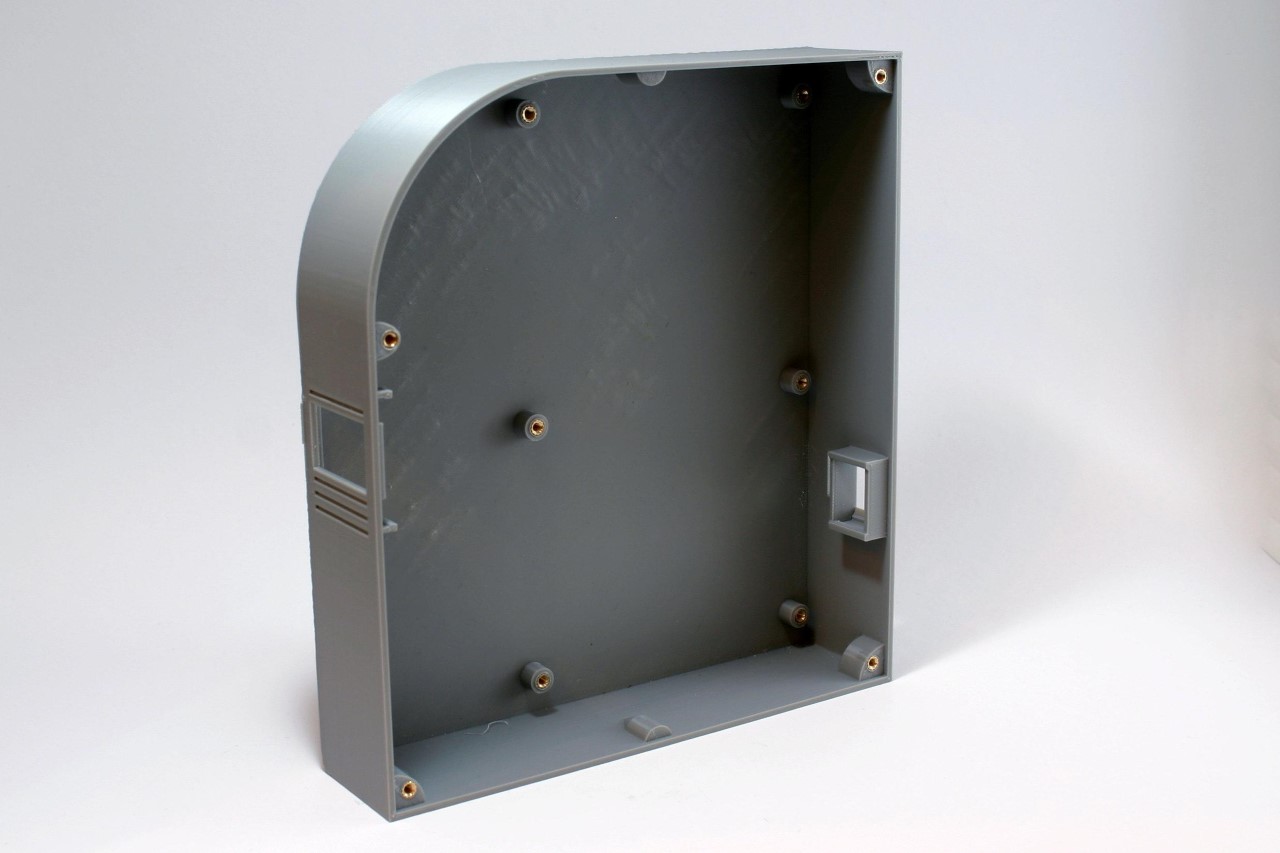
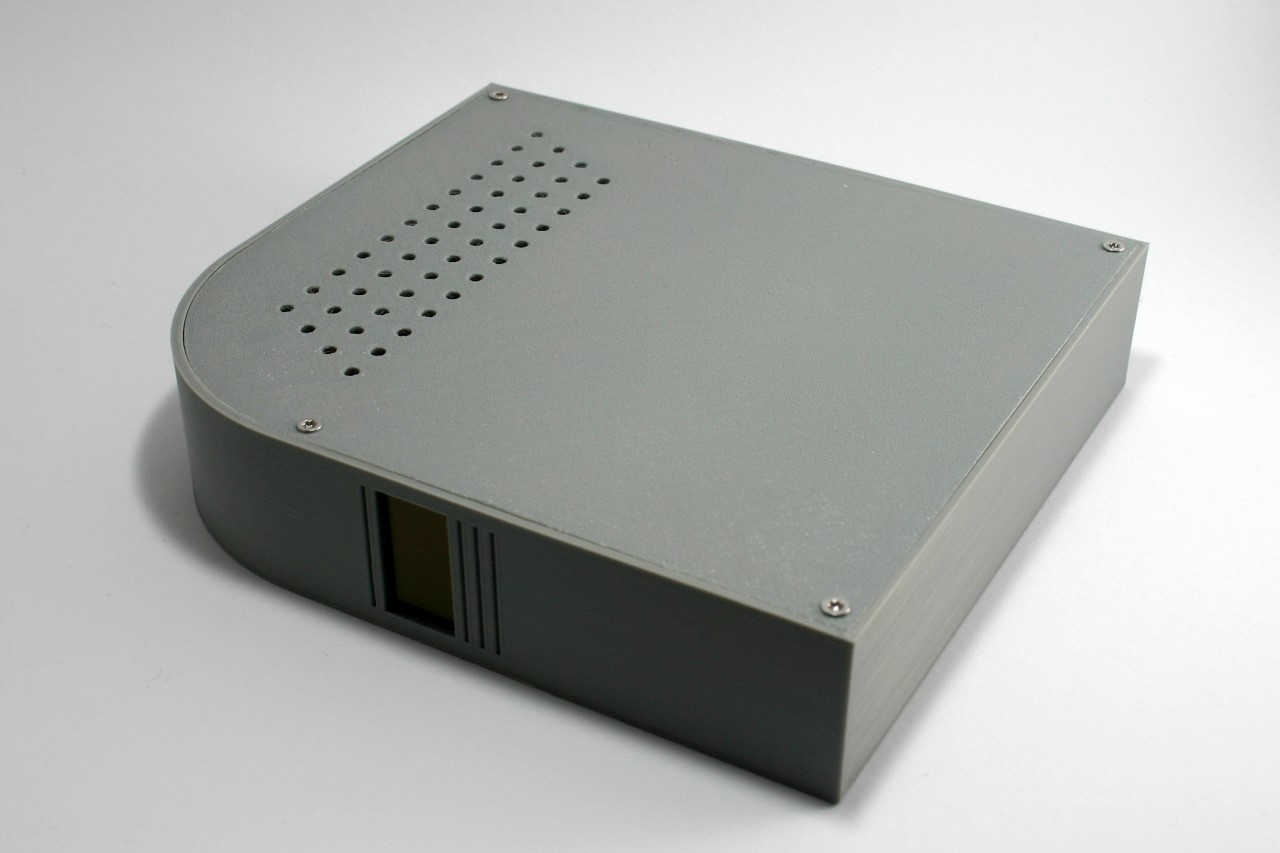
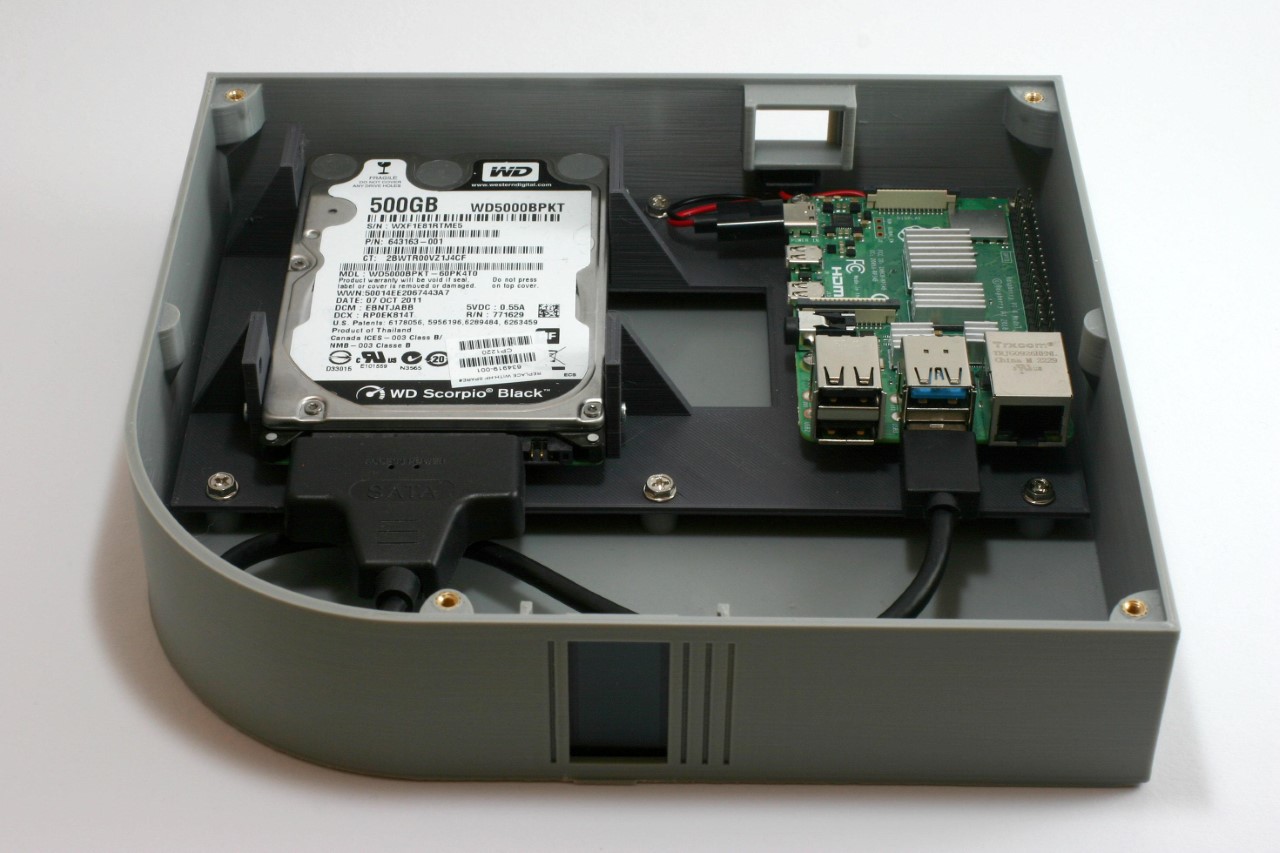
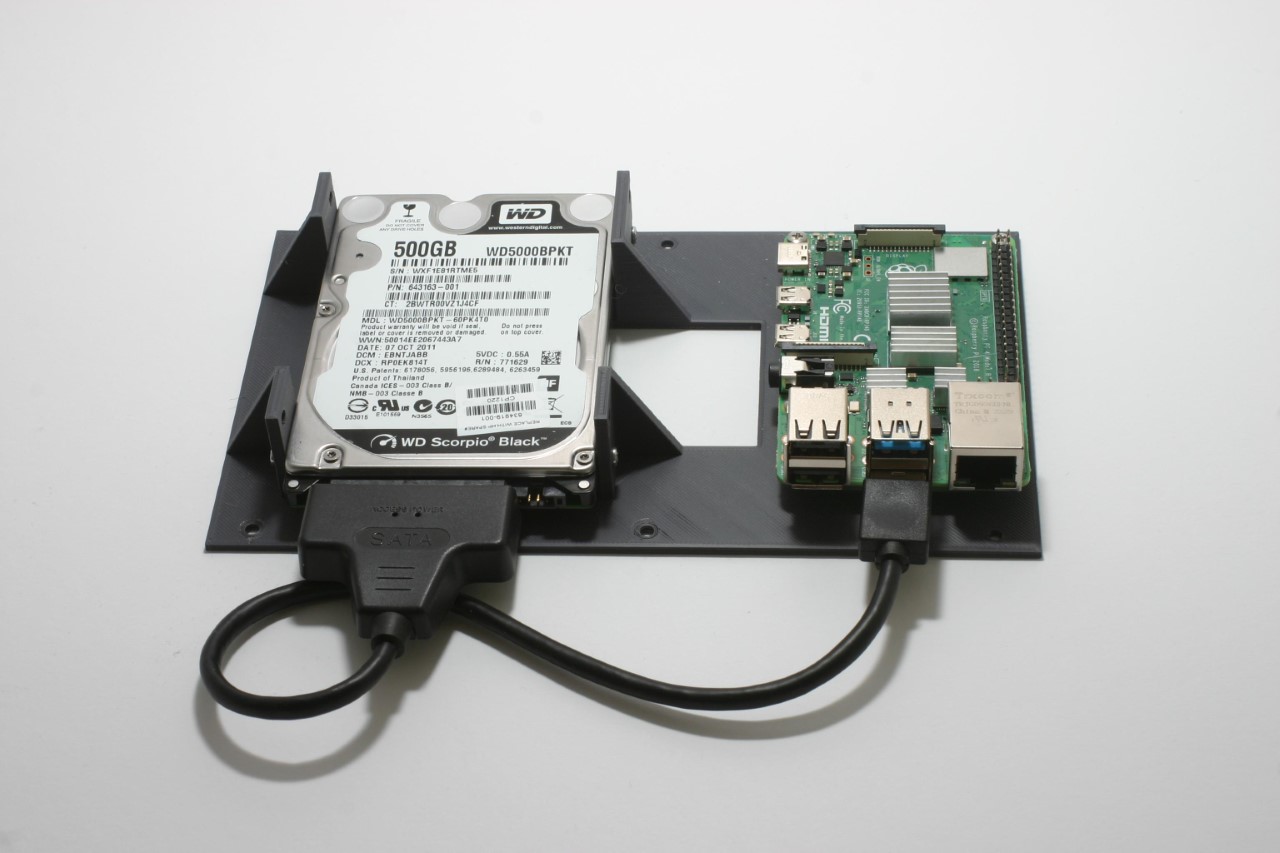
Bernhardt’s NAS runs on a Pi4 module, connected to an SSD. The entire enclosure’s printed out of plastic, with metal inserts to screw the NAS together. Instead of simple status LEDs, Bernhardt even put a functional screen on the front that displays messages and the time of day when sitting idle.

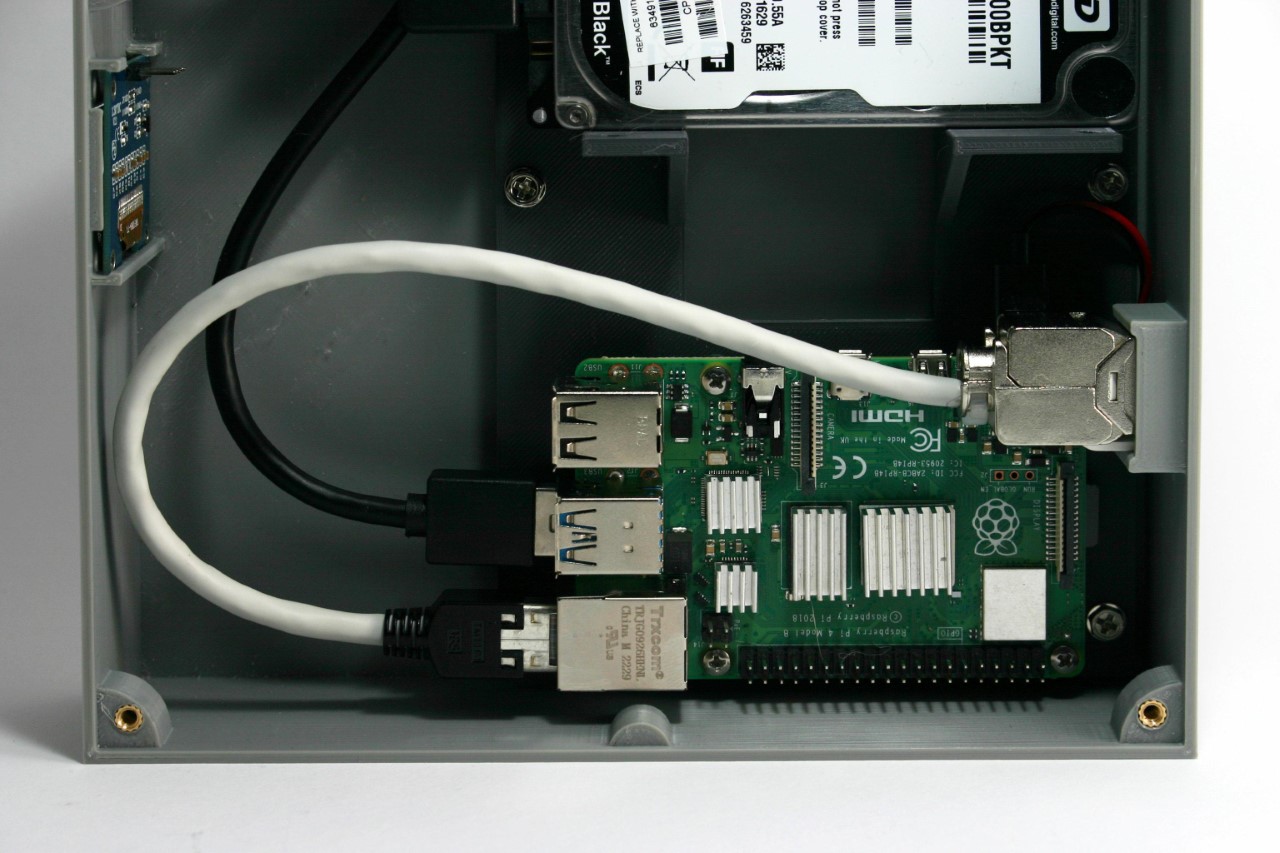
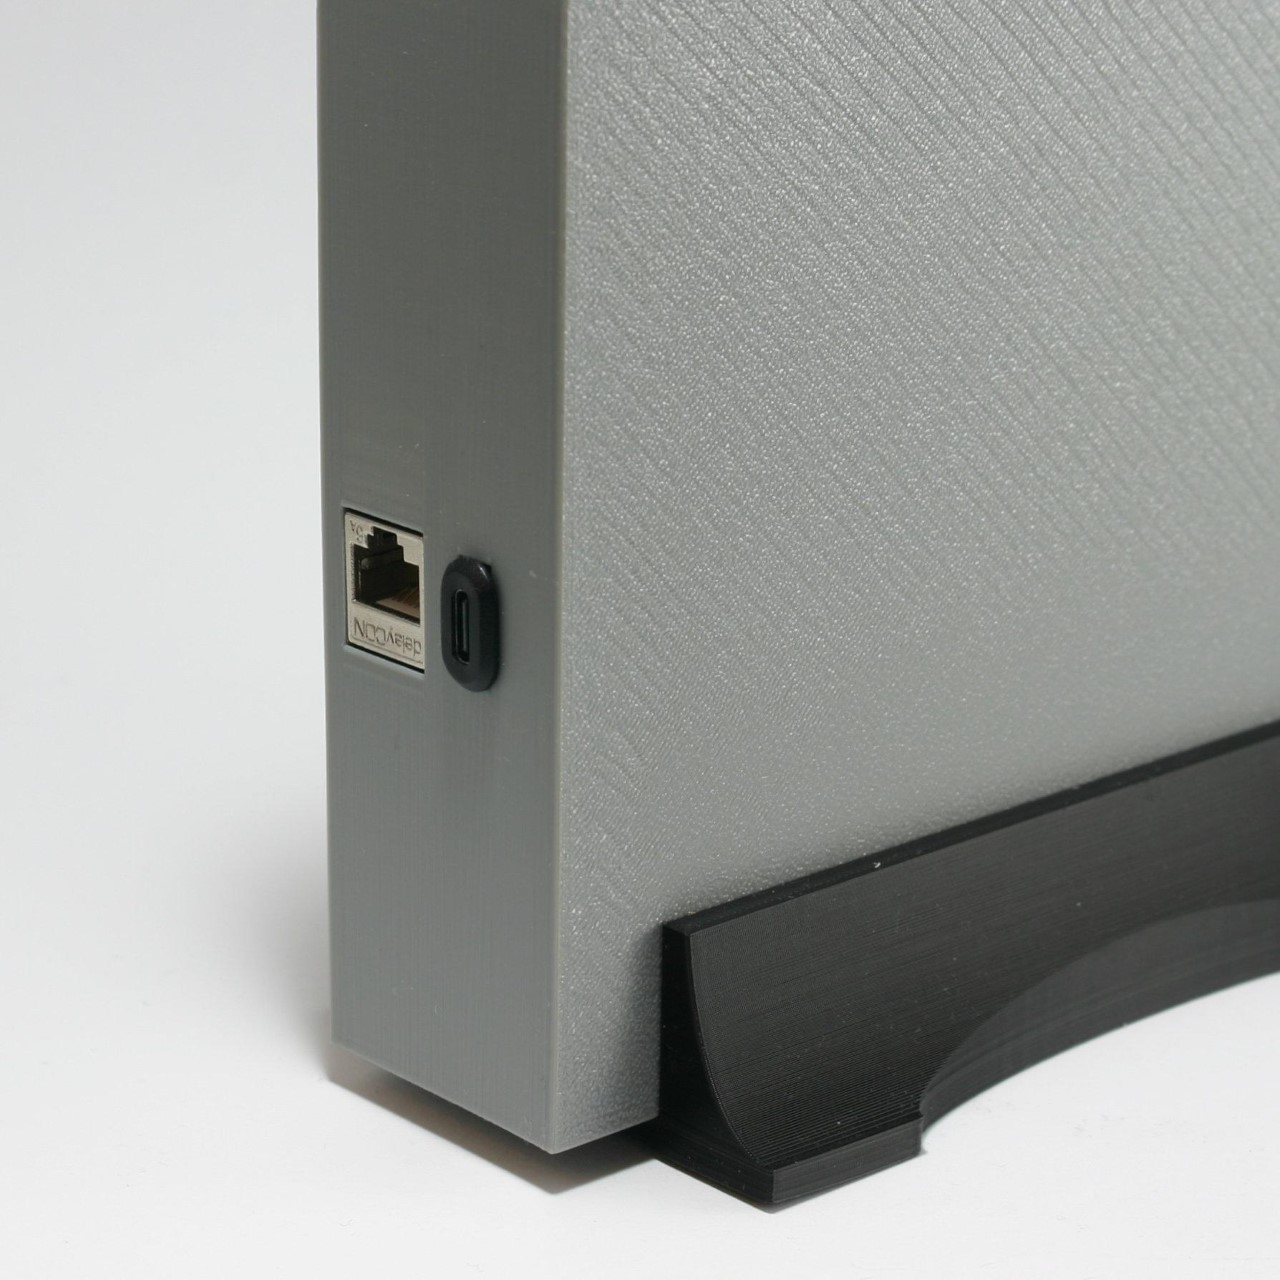
One of the primary considerations in this project is the design of the enclosure. The enclosure needed to meet several specifications: it should allow access to the power and network connectors from the rear while keeping the USB connectors inside for a clean aesthetic. The use of melt-in brass threaded inserts ensured durability, and the compact size made it printable on a standard 200 x 200 mm 3D printer bed. The design avoids the common 90-degree offset for connectors typical in Raspberry Pi cases, streamlining cable management. Moreover, the enclosure does not require active cooling, reducing noise and making it suitable for SSDs.

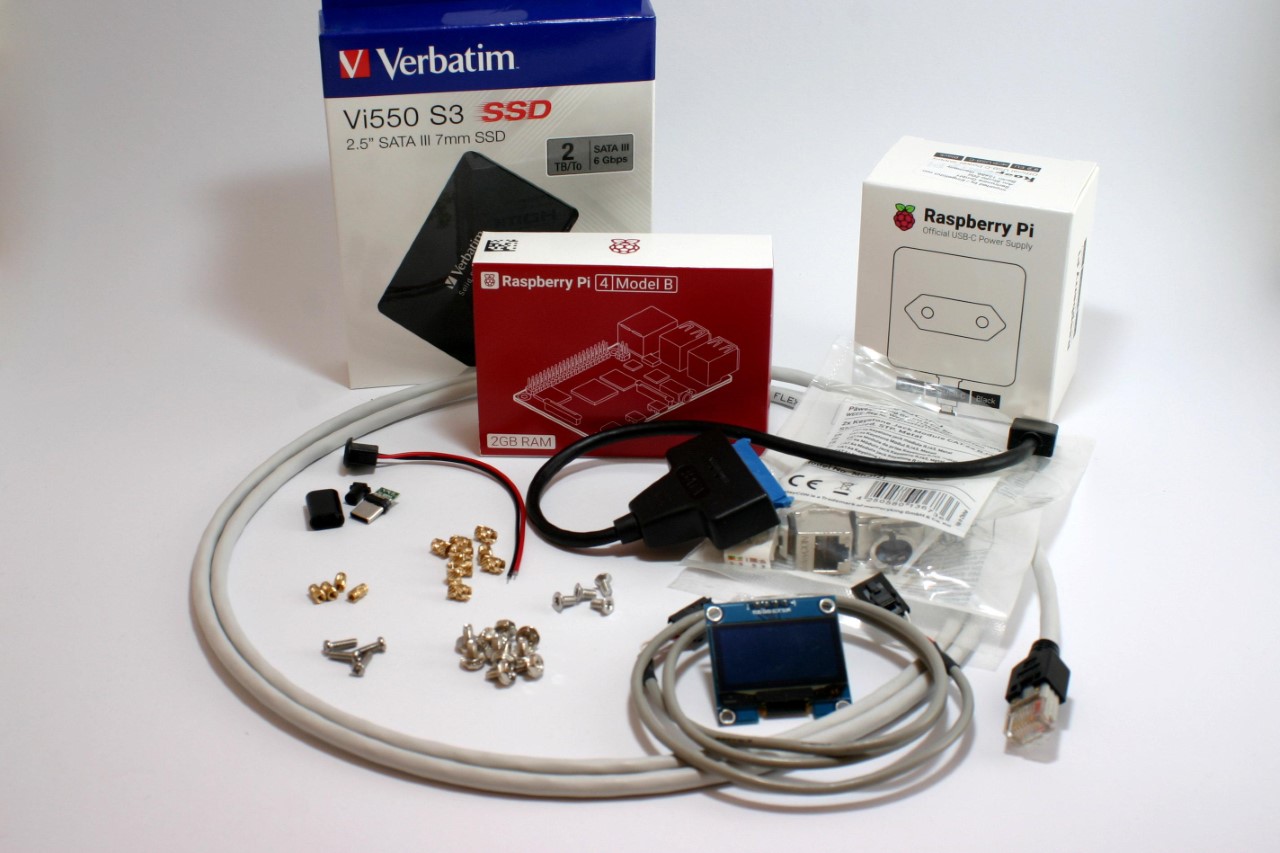
Here are the materials and components used in the entire build:
Devices for computing and storage

  • Raspberry Pi 4 or 5 with power supply, 2GB RAM is sufficient
  • 32 GB micro SD card, SanDisk Extreme PRO recommended
  • One or two 2.5″ SATA hard disk drives, SSD recommended
  • One or two USB 3.0 to SATA adapter(s), Sabrent adapter(s) recommended

Software

  • Raspberry Pi Operating System Image (Pi OS Lite, 64-bit no desktop)
  • NAS Software for Raspberry Pi OS, openmediavault recommended

Component parts

  • 10 x M3 brass threaded inserts
  • 10 x M3x5 screws (4 more for the second hard disk drive)
  • 4 x M2.5 brass threaded inserts
  • 4 x M2,5×6 screws
  • 4 x M3x6 countersunk head screws
  • 1 x Keystone module RJ45 Cat 6
  • 1 x RJ45 Cat 6 patch cable (length or color doesn’t matter)
  • 1 x USB type C male connector plug to solder
  • 1 x USB type C female connector jack 2 pin with wire
  • 1 x SH1106 1.3″ OLED module I2C 128X64 4 pin
  • 1 x 4-pin cable with Dupont female connectors, either self-made or ready-made
  • Some PLA filament for your printer with the colors you prefer.

Printing the enclosure involved creating four main parts: the tray, device rack, side lid, and an optional stand. The tray required support structures for the connector openings and display window, which can be generated using slicing software. The rack holds the Raspberry Pi and hard drives, ensuring that the components are securely mounted. The assembly of the rack with the Raspberry Pi and hard drives necessitated precision, particularly when melting the brass threaded inserts using a soldering iron.

The next phase involved setting up the Raspberry Pi OS and configuring the network. Using the Raspberry Pi Imager, Bernhardt installed Raspberry Pi OS Lite (64-bit) onto a micro SD card. Essential settings such as hostname, username, password, and SSH enablement were configured during this process. Assigning a static IP address to the NAS ensured consistent network access, either through the Raspberry Pi OS, openmediavault, or a DHCP server, with a provision for regular patches and security updates

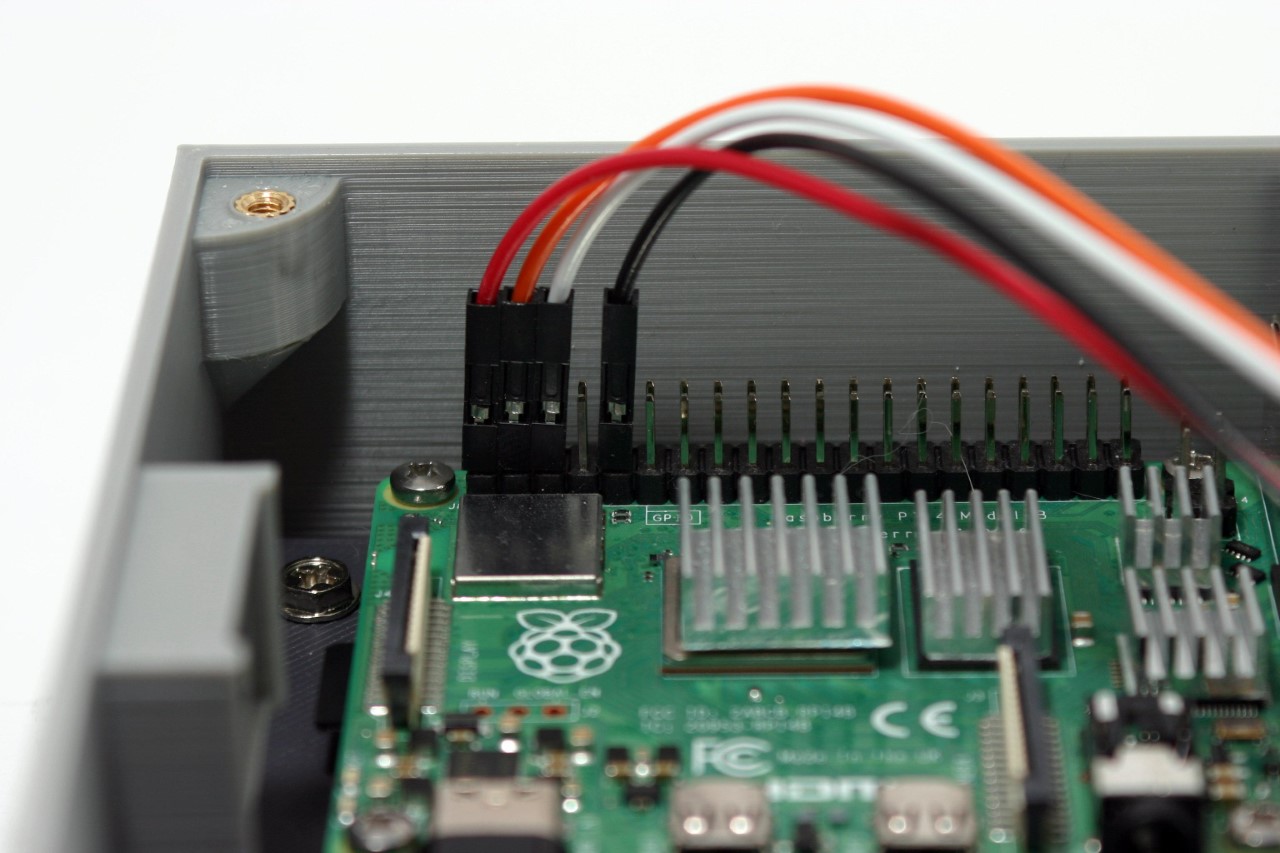
After the software setup, attention shifted back to hardware. The USB-C power connection and OLED display installation were critical steps. The USB-C socket was soldered inside the enclosure due to space constraints. The OLED display, used for status updates, was delicate and had to be installed without bending. Properly connecting the display to the GPIO pins of the Raspberry Pi was essential, ensuring to match the pin configurations correctly.

For the network connection, a keystone module simplified connectivity and future upgrades. By attaching a patch cable and keystone module inside the enclosure, the LAN port became easily accessible, accommodating both Raspberry Pi 4 and 5 models. This modular approach facilitates easy maintenance and upgrades, ensuring the longevity of the NAS setup.

Once the hardware assembly was complete, the OLED display software was installed. A Python script displays various system metrics on the OLED screen. The script runs at startup, continuously updating the display. Finally, the NAS software, openmediavault, was installed. This software provides a user-friendly web interface for managing the NAS, making it accessible and easy to configure. The installation was straightforward, and upon completion, the NAS was ready for use, with a commendable 500GB of storage.

Bernhardt’s Raspberry Pi NAS required a fair bit of technical expertise, but the process worked out MUCH cheaper than spending hundreds on a readymade NAS. If you’re looking for a nice summer project for yourself, you can build your own Raspberry Pi NAS too by following Bernhardt’s instructions here.

The post Build your own NAS Cloud Drive using a Raspberry Pi 4 and a 3D Printer first appeared on Yanko Design.
iPad Pro M4 hands-on first impressions: Lightweight, Thin, and Sexy

If I could review a tablet with one word, I’d pick the iPad Pro, and the word I’d use is perfect. You’d probably demand an explanation, right? Apple has achieved design perfection with the iPad Pro, both inside and out, as well as with the redesigned Magic Keyboard. Now, before you start asking, “What about iPadOS? It’s nowhere near perfect,” let me clarify: I’m specifically talking about the hardware here. We’ll have to wait until WWDC 2024 in June to see what Apple has in store for the operating system.

Over thirty-odd years ago, I enjoyed reading philosophy in my spare time, and one of my favorite philosophers is Plato. Okay, you caught me—rarely does anyone read Plato just for fun. But it’s true that Plato’s “perfect object theory” inspired me in my quest as a tech and automotive journalist to find the perfect [fill in the blank]. My search didn’t initially start with the iPad; I was hoping for a “MacBook touch.” I even bought the domain name MacBooktouch.com back in 2007 as proof that I foresaw Apple making a touch-screen MacBook.

macbooktouch.com domain name

Fast-forward to 2015, when we got the iPad Pro with a 12.9-inch display and the first Apple Pencil and Smart Keyboard. That hardware wasn’t close to a MacBook Touch. Nine years later, or 17 years since I registered macbooktouch.com, we finally have the closest thing to a MacBook touch.

The MacBook touch—er, 2024 iPad Pro—is powered by the M4 chip. In case you don’t know, it’s the only device with this new processor. The only things keeping this device from being a MacBook touch are 1) the iPad branding and 2) it’s not running macOS. Is it capable of running macOS? Absolutely. So, why isn’t it? I’ll leave that for you to ponder.

Before I move on, I won’t be revisiting whether you should upgrade to this year’s iPad Pro. If you’re asking if you should, read my analysis here. Okay, let’s dig in, and if anything I say in this article sounds familiar, you’re right—you’ve probably heard it from tech YouTubers or read it in reviews over the past week. Just think of what I’m sharing as confirmation.

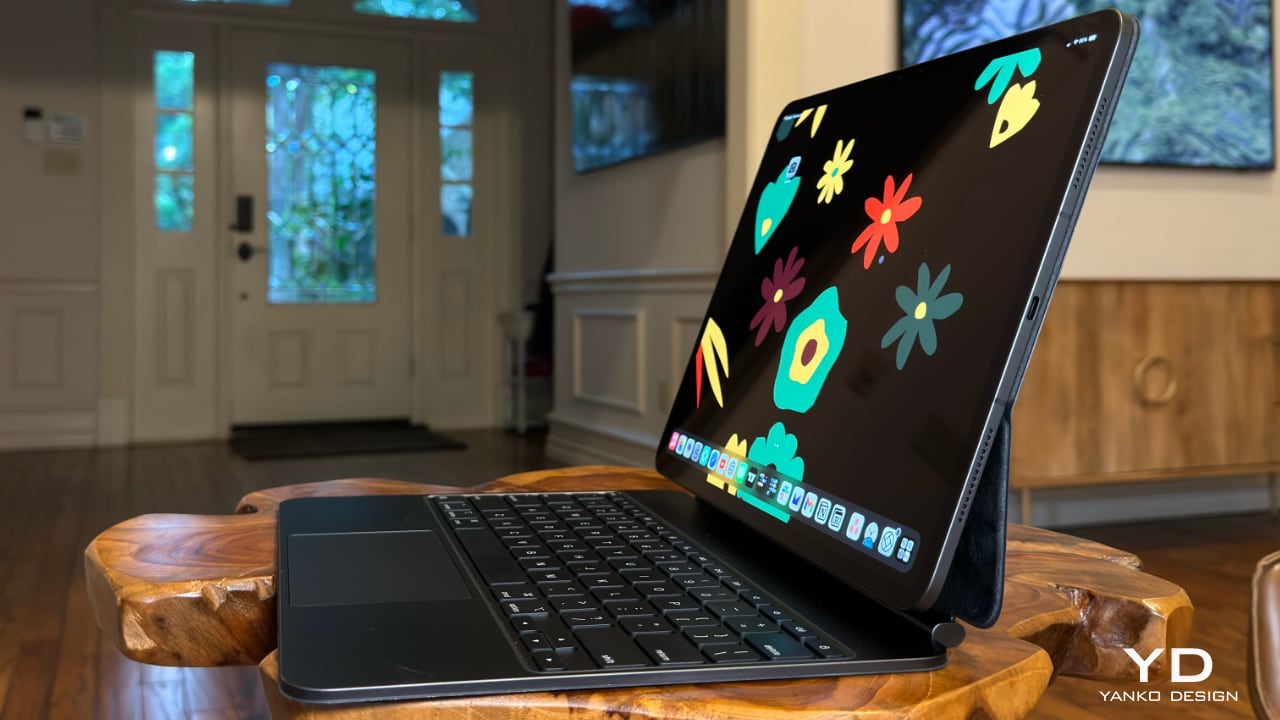
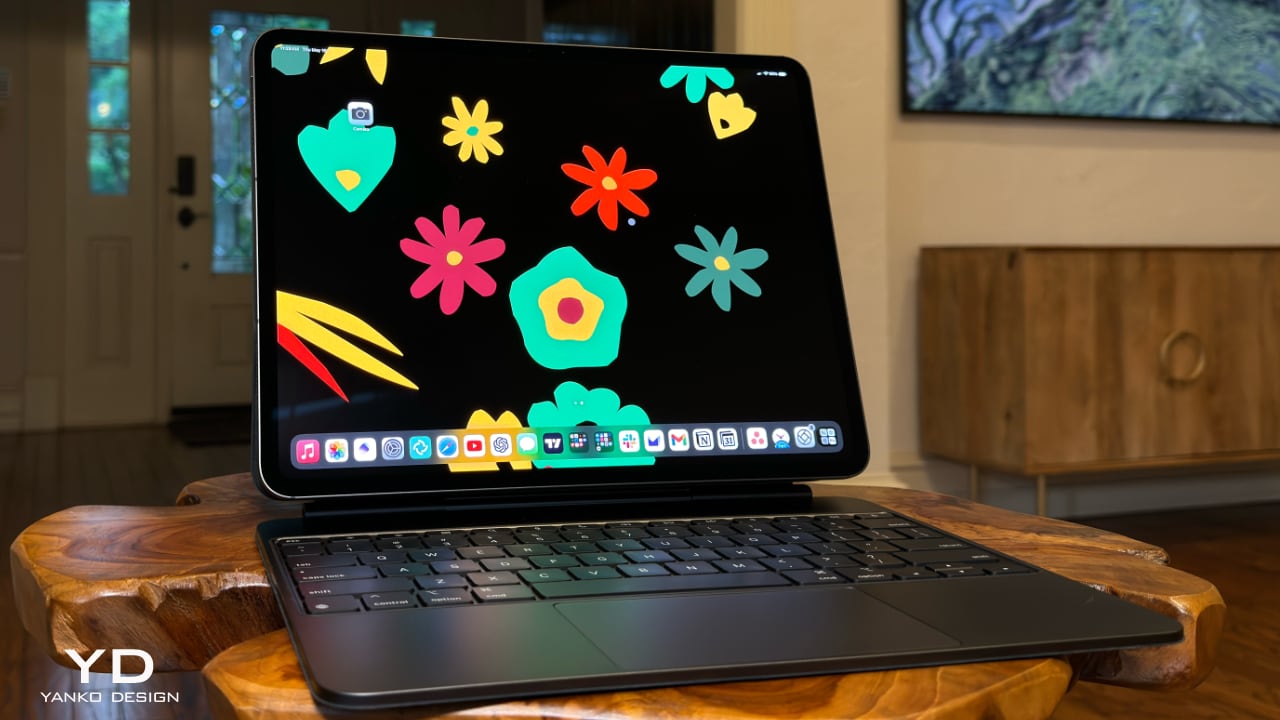
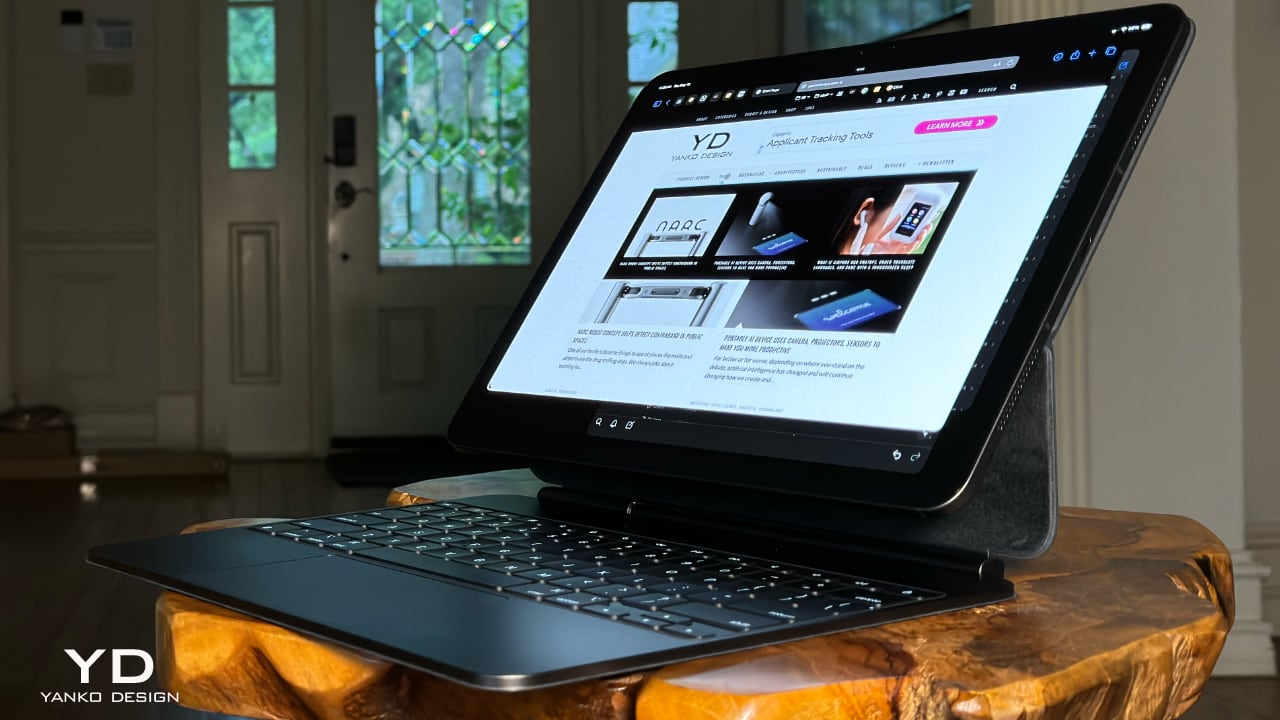
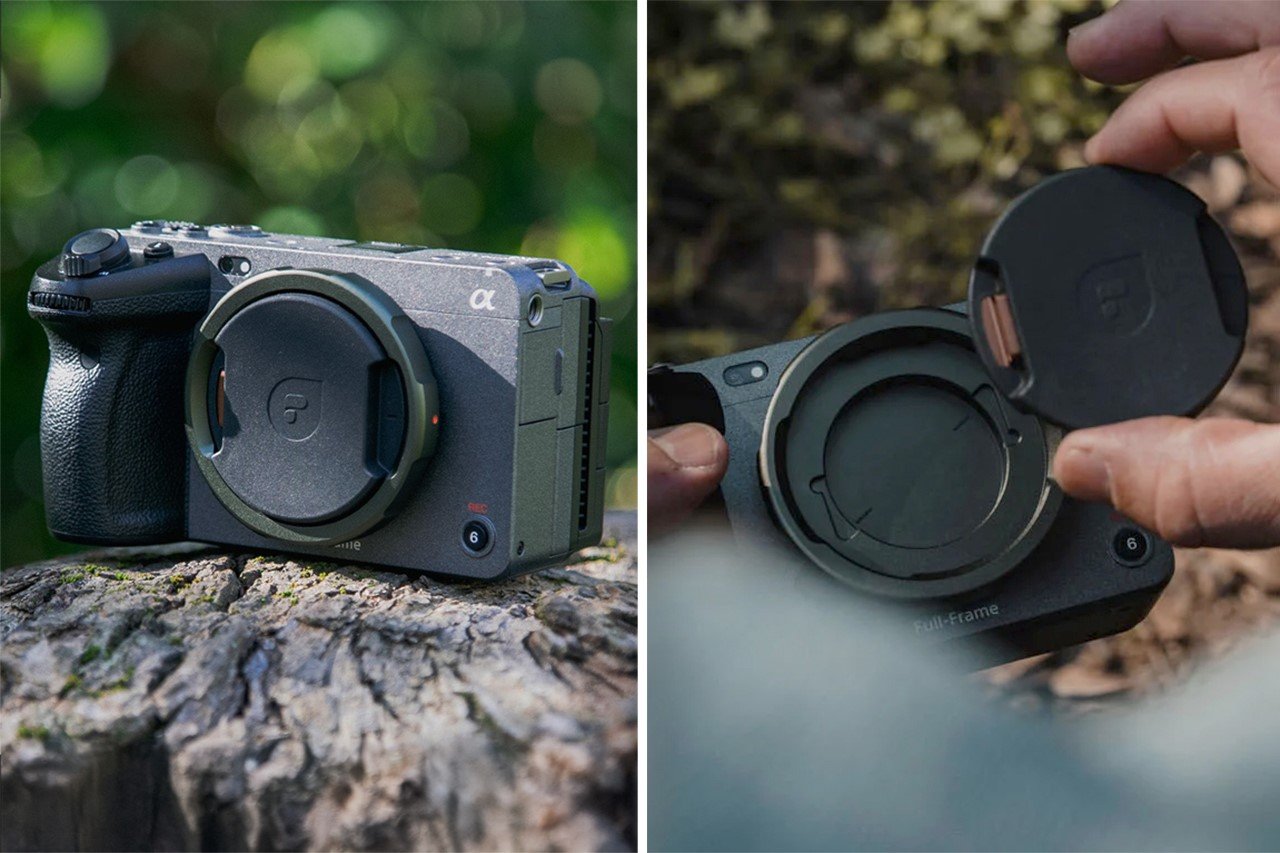
The iPad Pro is lightweight, thin, and sexy as hell. It exudes minimalist charm, practically begging, “Pick me up and use me right now!” The Magic Keyboard is what makes this iPad Pro a true MacBook replacement. It’s the key to unlocking the full potential of the iPad Pro, providing a MacBook Pro-like experience with a responsive trackpad, comfortable keys with the right amount of travel, and premium build quality.

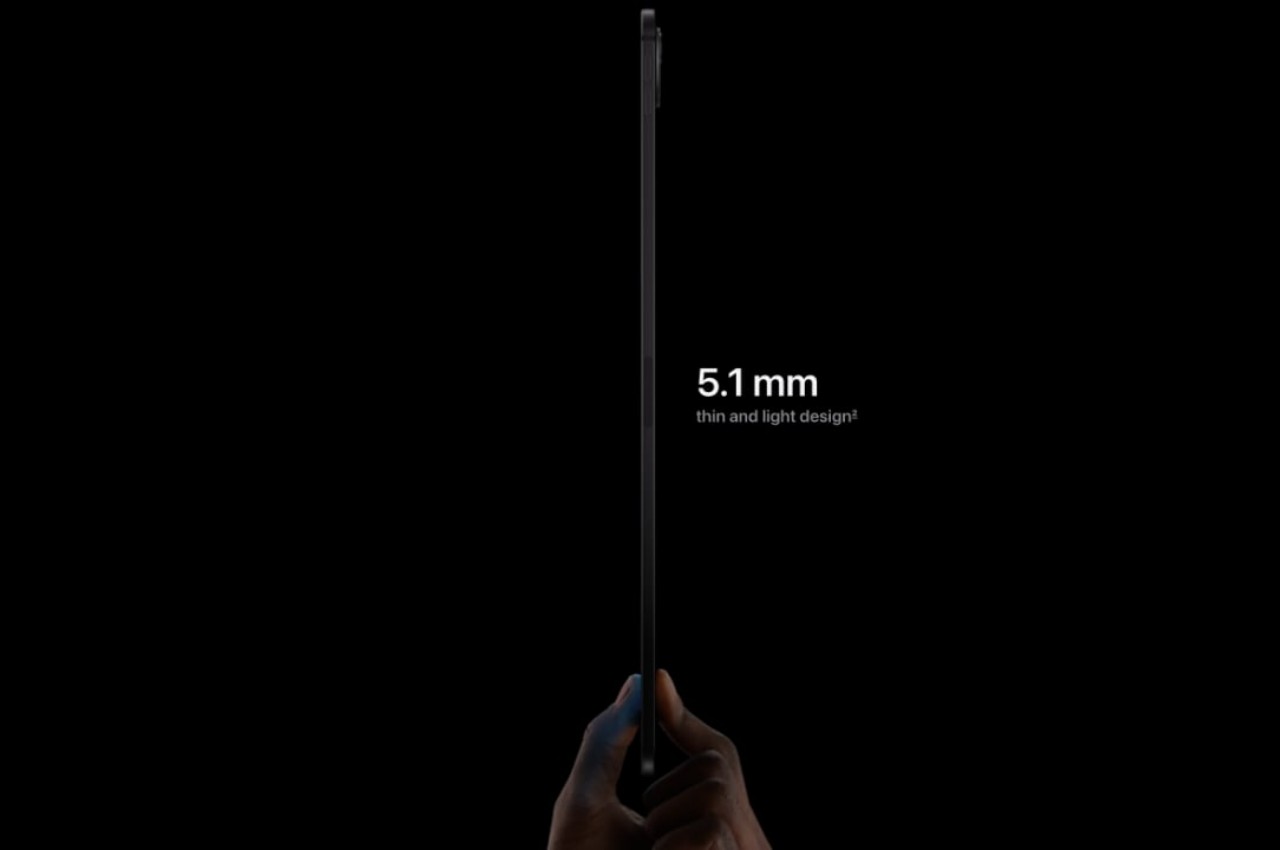
Comically, early reviewers seemed genuinely surprised that Apple managed to thin out the iPad Pro even more. One famous YouTuber even asked, “Who was asking for it?” Well, my friends, that “who” was yours truly. Apple delivered on almost everything I asked for, except for titanium—and yes, that was wishful thinking. I’m happily settling for aluminum for both the iPad and Magic Keyboard. I’m also thrilled that both devices have shed some weight, making the iPad, especially the 13-inch model, much more manageable to hold and use over longer periods. The 11-inch model is now just 5.3mm thick and weighs 444 grams, while the 13-inch model is 5.1mm thick and weighs 580 grams.

Briefly touching on the Magic Keyboard, I’ll save the full details for the review, but Apple addressed my issue where the lower portion of the iPad Pro would constantly get in the way of my typing. Thanks to a whole new redesigned hinge system, it’s possible to have a full-size keyboard with an entire row of function keys. For those developers out there yearning for an ESC key, you have it now. The way Apple designed the placement of the iPad, which is now pushed further back yet still articulates at the same or greater angles than the outgoing model, reminds me of how car designers suddenly got so much more room to play with when designing electric vehicles sans the motor. The wheels are pushed further to the edges, creating more internal room for leg space and whatever else they can dream up. I’m sure the new hinges were no small task, but wow—a full keyboard with a function row and a larger trackpad, a proper MacBook Pro-style trackpad with a haptic engine built in.

At the end of the day, I really don’t care what the iPad’s called; what matters most to me is what I’m able to do with it in real life. Whether consuming content or playing games (which I rarely do, but hey, I might start) without a bulky keyboard, or getting down to business and writing, like I am doing right now with this article and many others to come, I know this is the ultimate, ultra-portable device that ticks all my needs now and possibly over the next decade.

I’ve left out a lot in this initial impressions article, such as display quality, performance, battery life, the Apple Pencil Pro, and other features. I also haven’t compared it to my existing 12.9-inch iPad Pro with the M1 chip. But rest assured, I’ll cover all these aspects in my full review. I just need more time to test everything thoroughly.

The post iPad Pro M4 hands-on first impressions: Lightweight, Thin, and Sexy first appeared on Yanko Design.
This compact, detachable hot plate is designed for on the go convenience and ease of storage

Working overtime and getting home late almost every day to find your dinner cold and unsavory? I’m sure a family member or your spouse has to wait through the night and then serve you hot food. It’s still fine on hot summer days, but the long winter nights can really get tough for everyone; you cannot have a cold meal at all! Hot plates have been a solution to this culinary conundrum through the years. But traditional warming boards only add bulk to your kitchen and do not do much to your meal.

What if you could have piping hot dishes on your table without taking up extra space? Whether you’re working late or hosting friends, the idea of a hot, delicious meal awaiting you at the table is a sublime feeling for many, including the designer of this electrically powered, folding and detachable heating plate that would be your biggest help when you’re hosting family or friends at home, partying at the pool, or out camping with your pooch.

Designer: Wenhua Xu

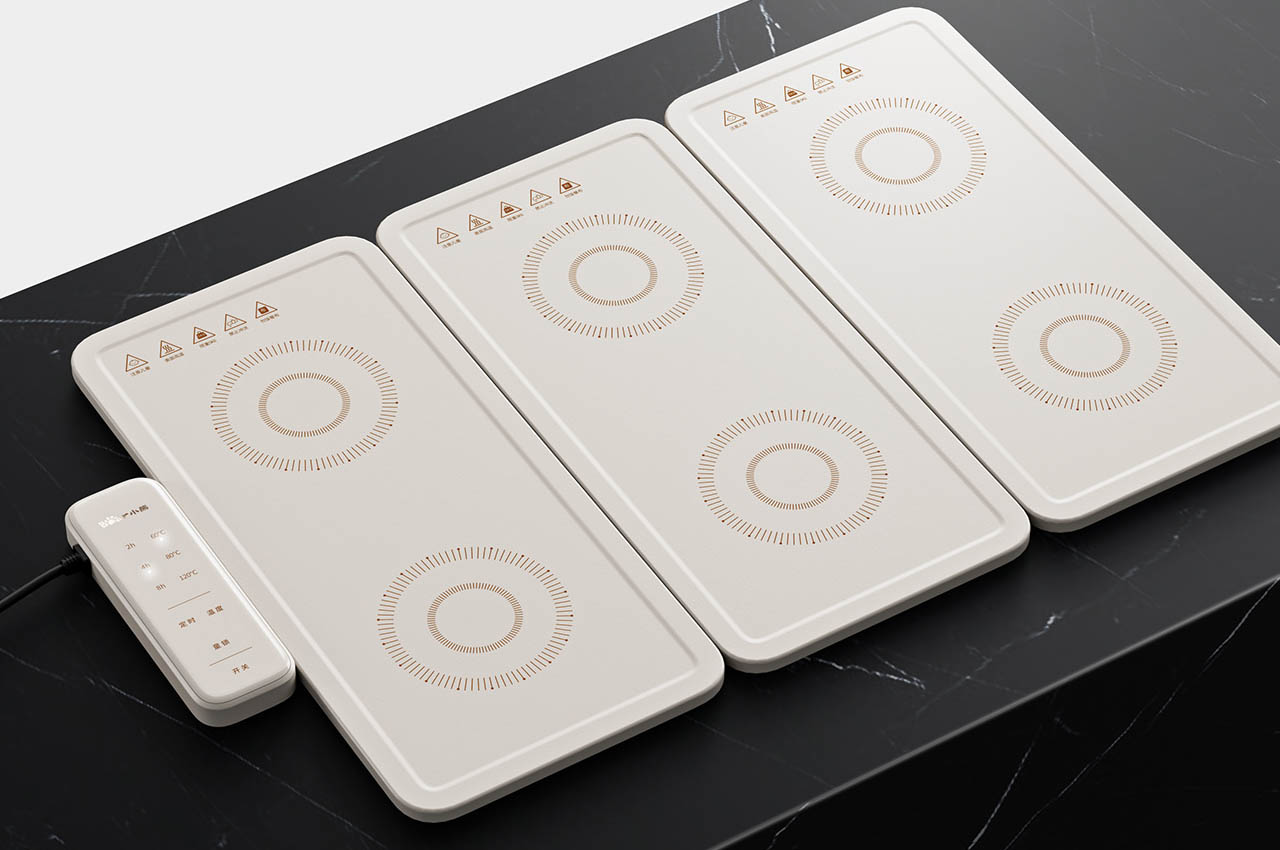
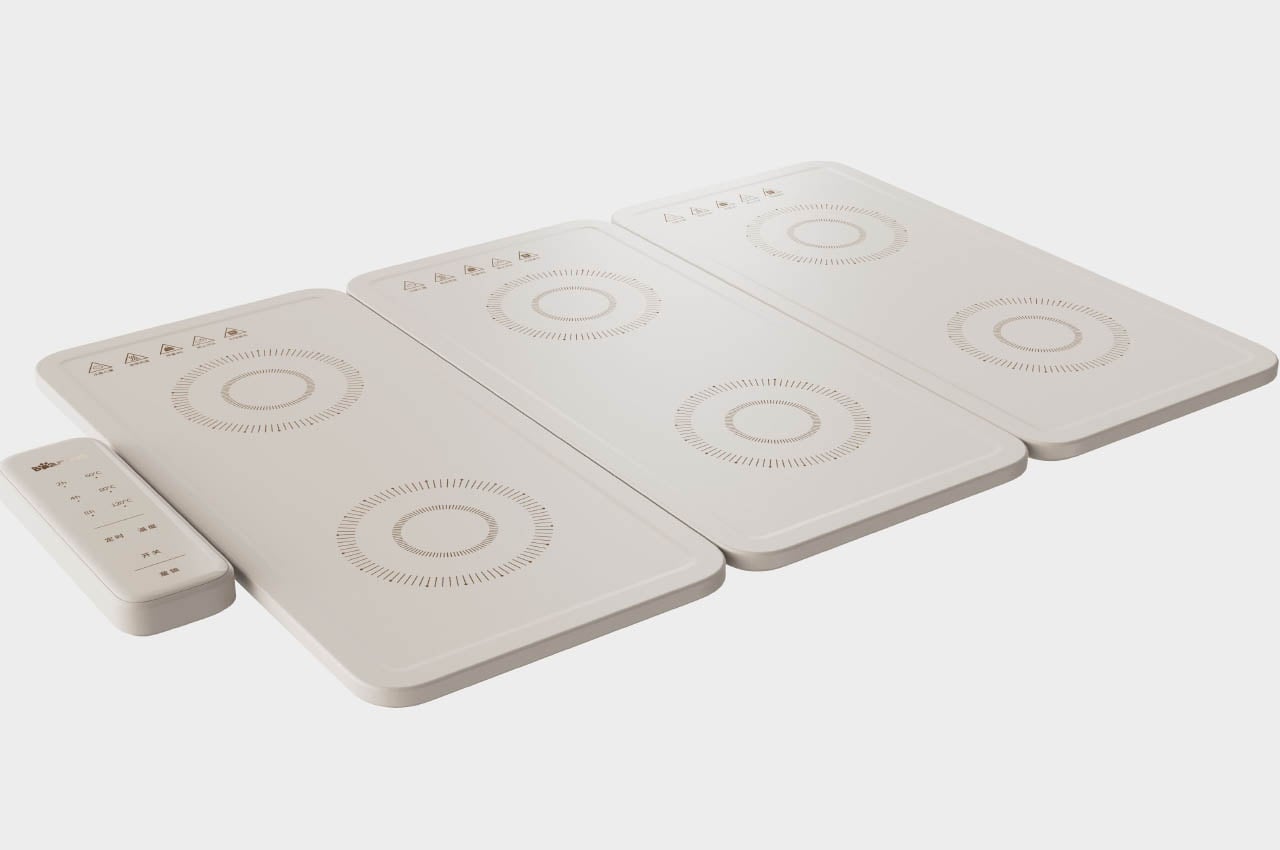
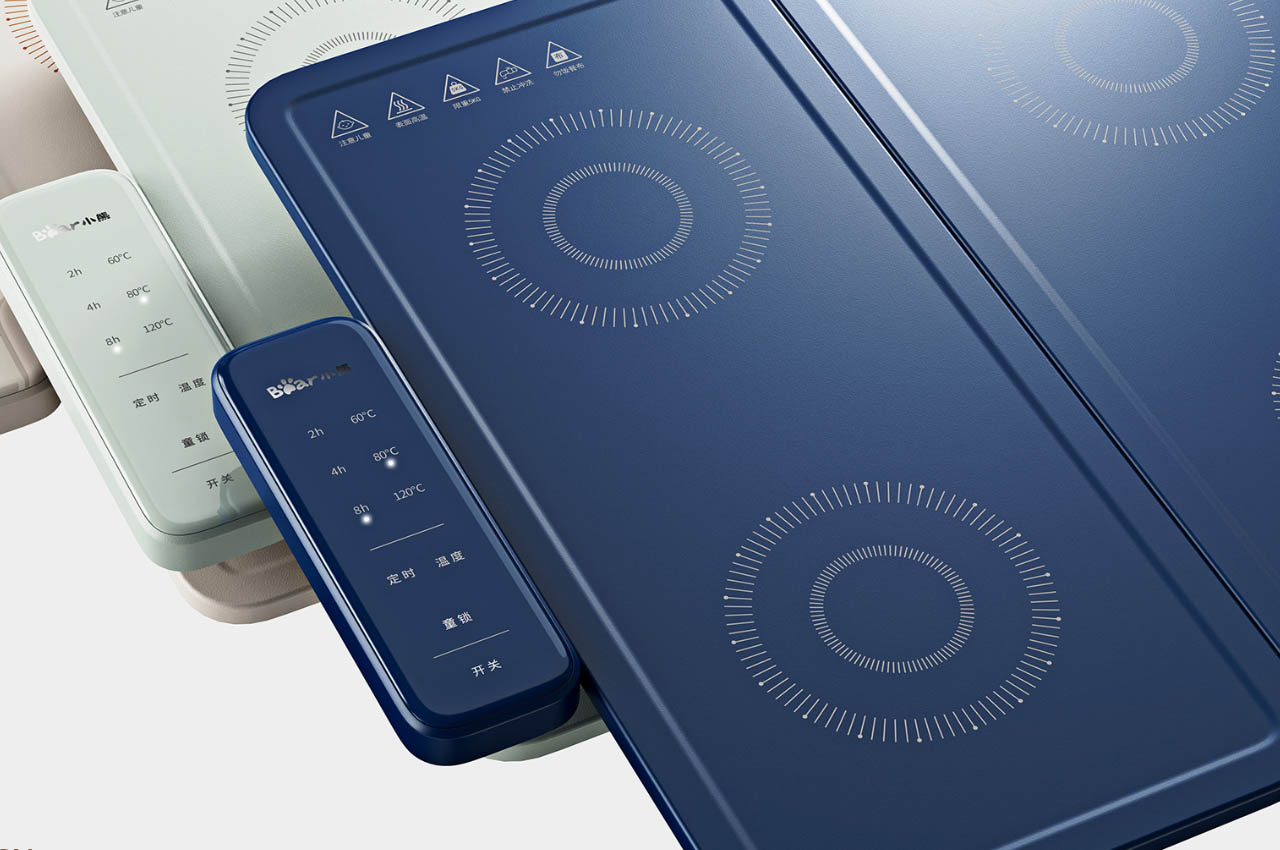
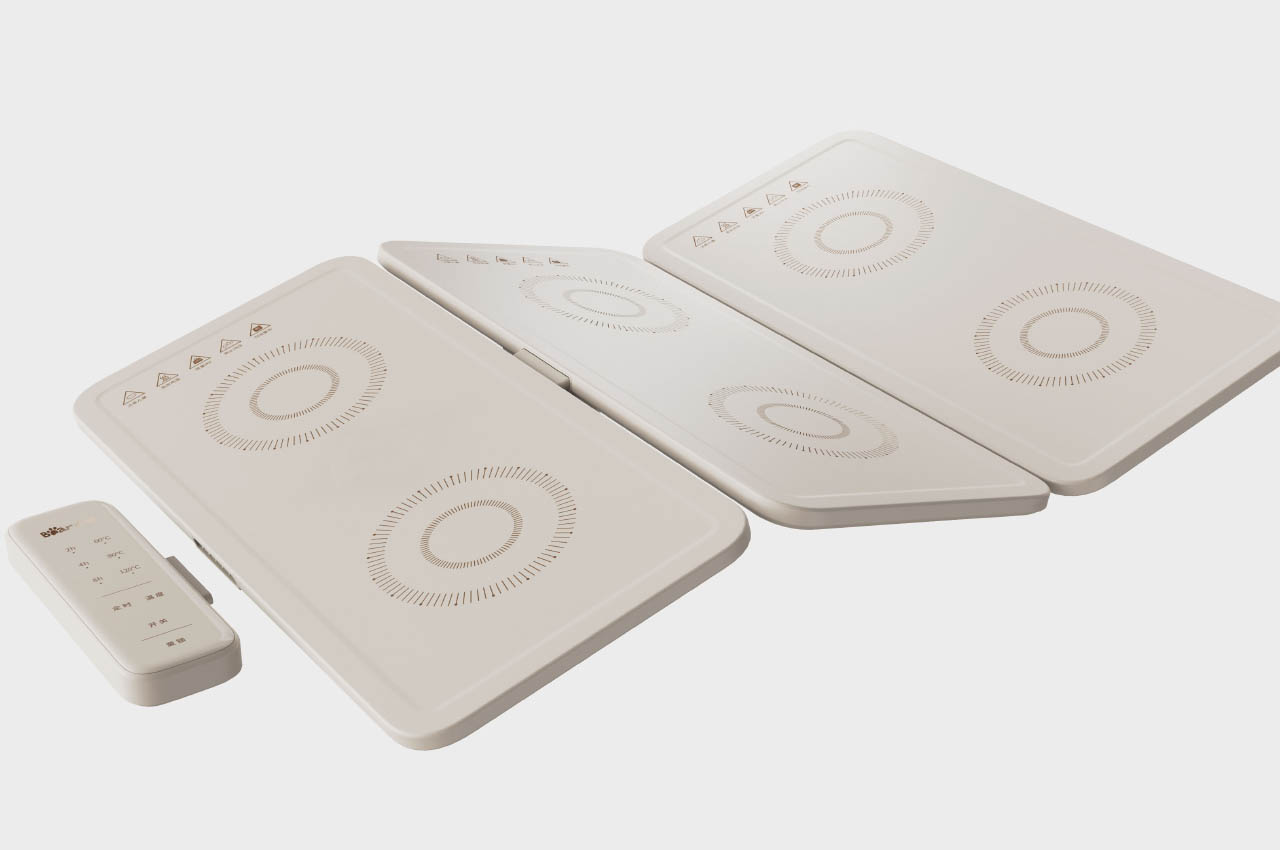
Conceptualized with the simple idea of ensuring a warm, delectable meal every time; this hot plate in pastel colors, functions on rapid heat transfer technology to ensure your food is at an ideal temperature, and it is constantly heated to maintain it as long as you want. The construction material of this heating board is anyone’s guess at the moment but from the images, it is easy to confirm that it is safe and easy to clean.

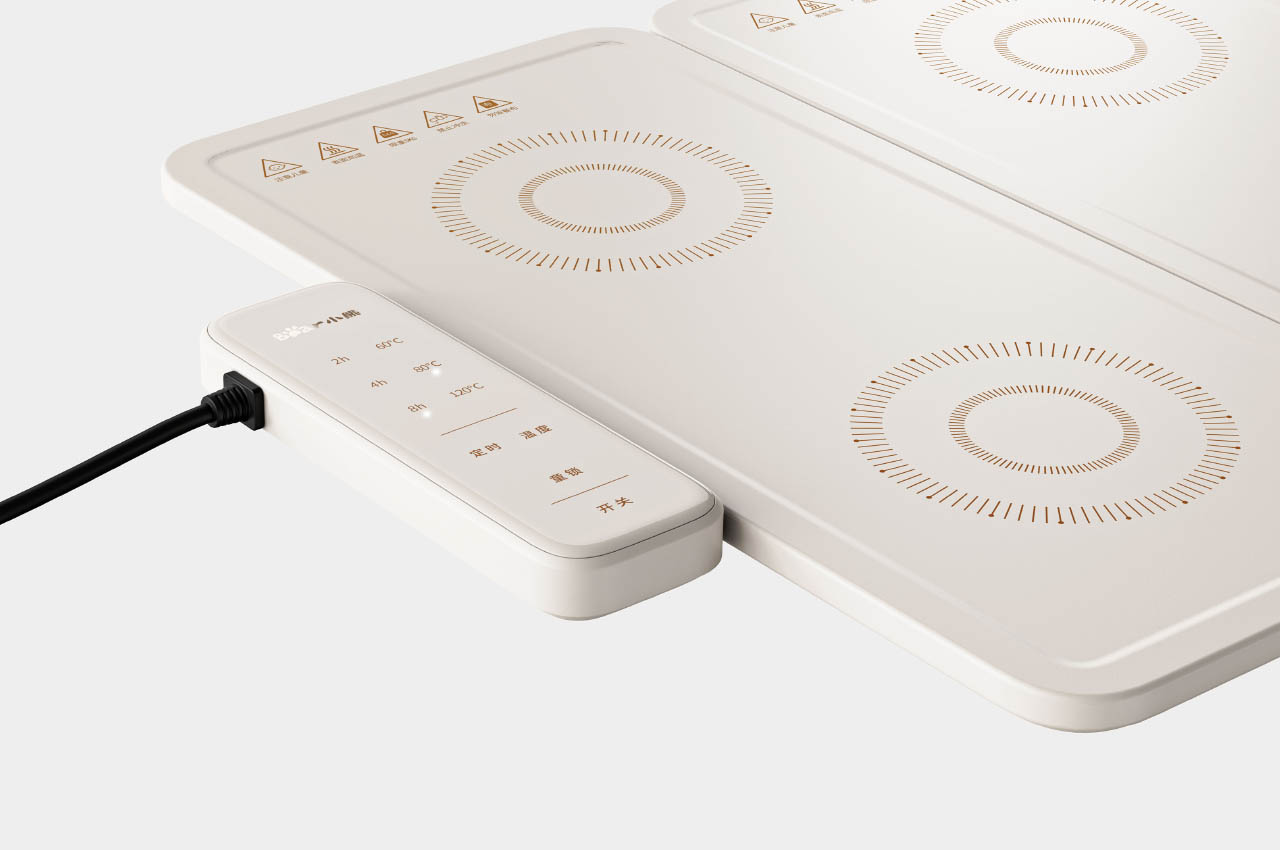
Besides, the overall concept – with an adjustable control panel – excels in heat retention. It helps preserve your food’s warmth and flavor with its three different temperature settings, keeping the heat maintained for almost eight hours. Interestingly, the warming board is ideal for heating dishes, milk, and drying food – all ensuring a delightful dining experience.

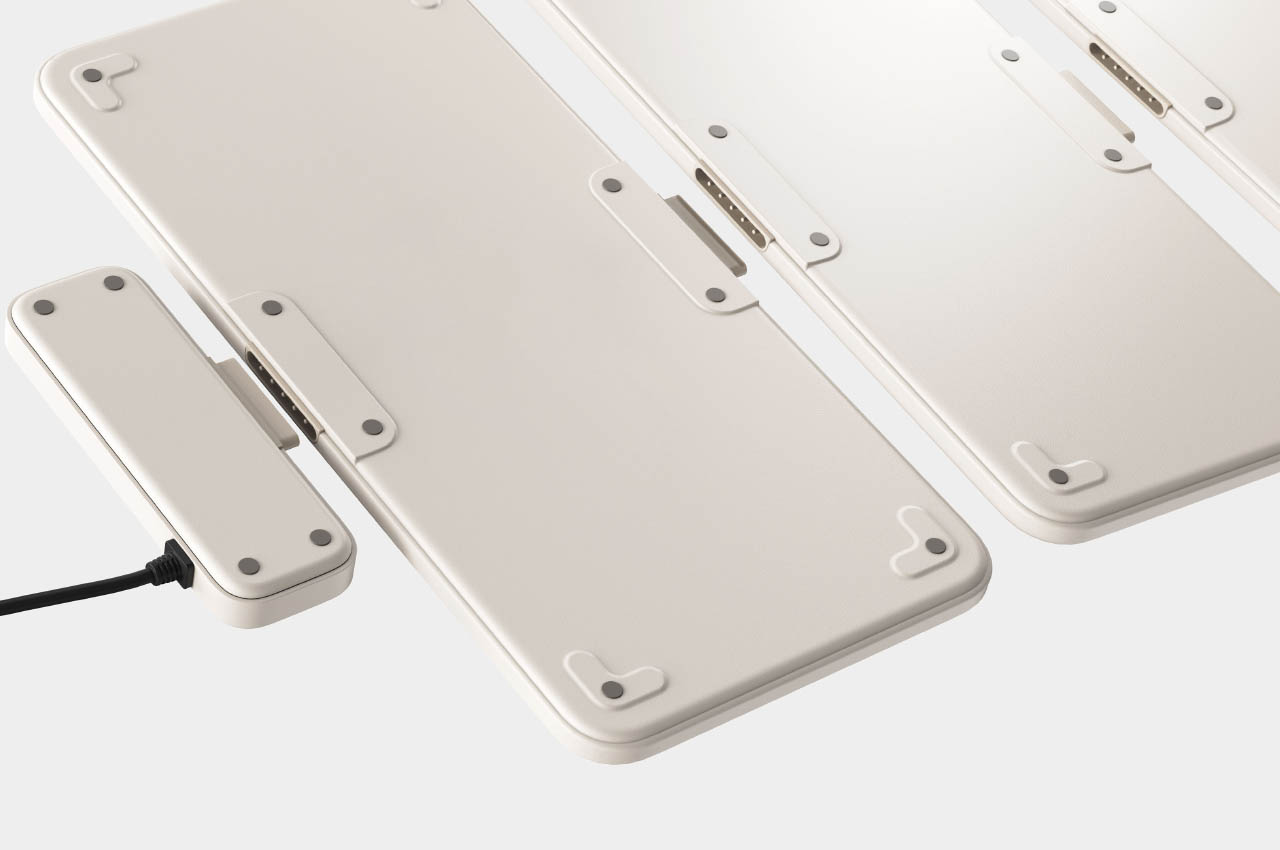
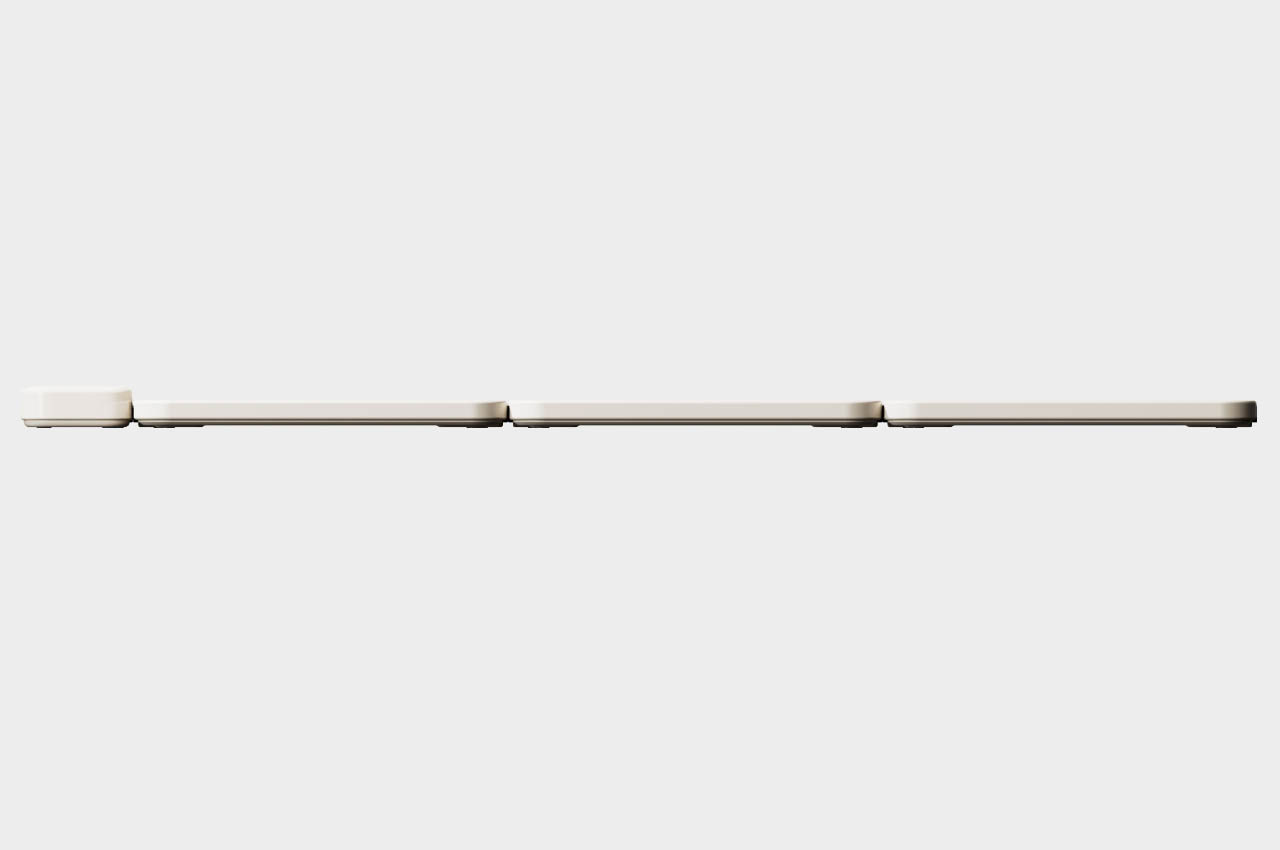
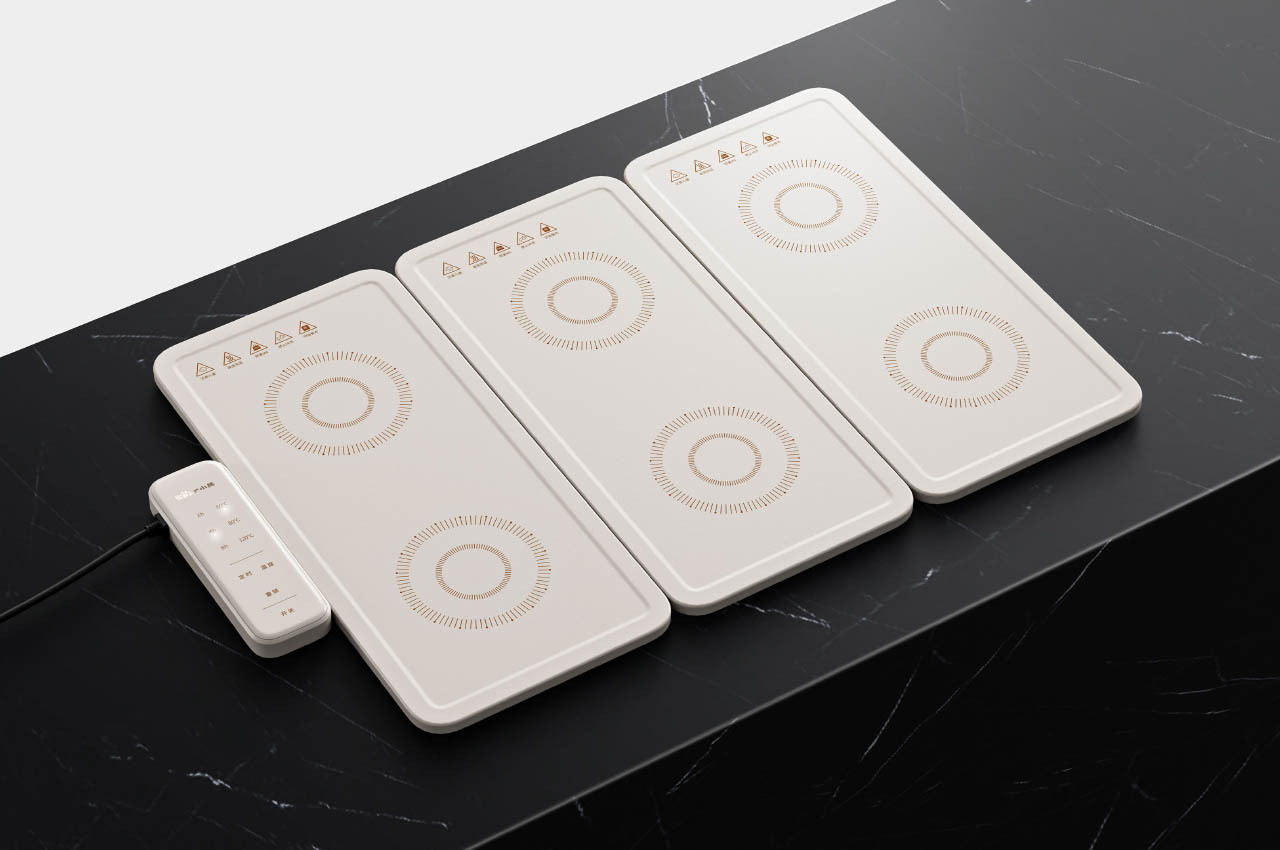
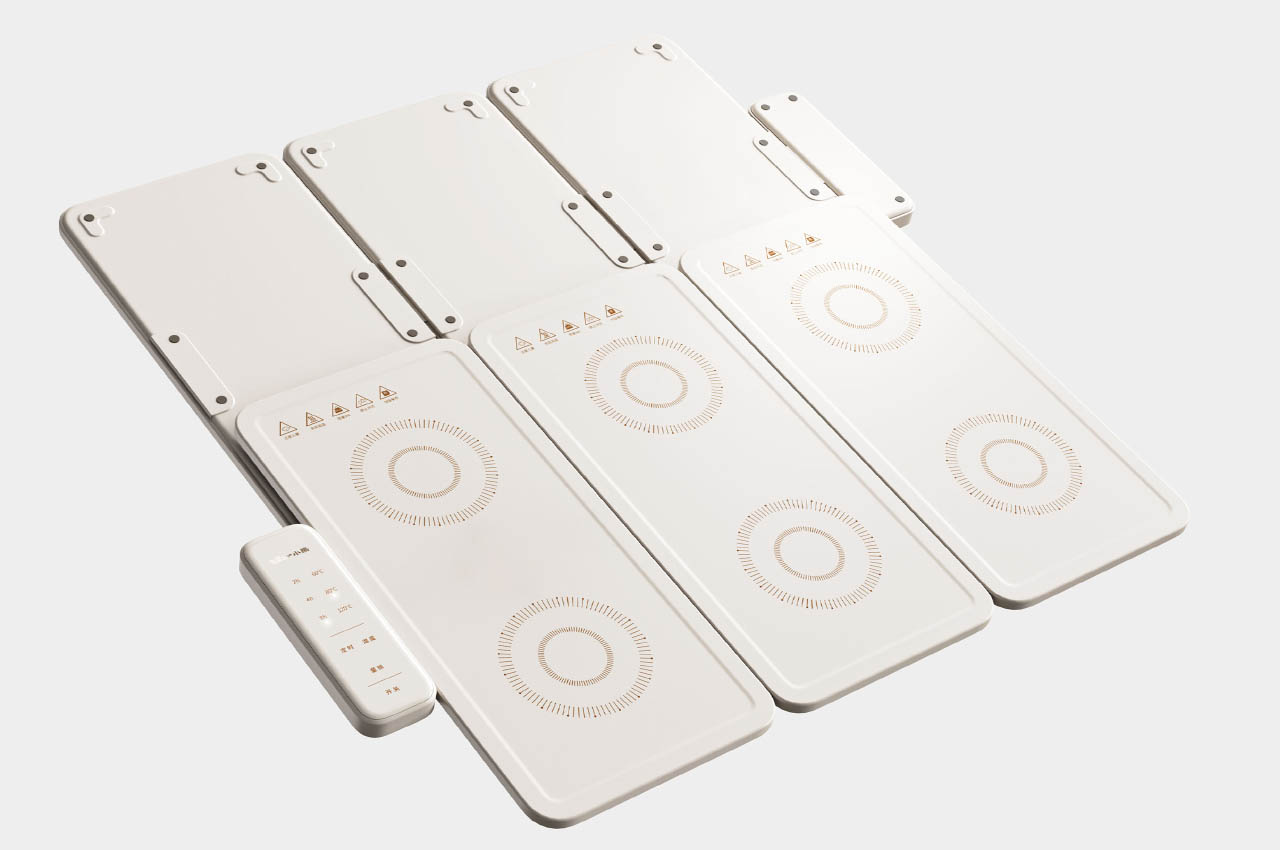
Add to that the convenience of detaching the three individual heating plates that comprise the entire unit. It can be used together or separately – thanks to the tri-folding design – to work with metal, ceramic, glass, or enamel utensils, serving bowls and other kitchenware. You can pack it in the bag for travel convenience, simultaneously warm up to six dishes, and keep the food warm and fresh every time. This portable and detachable marvel can be effortlessly stored to maximize space in your kitchen.

The post This compact, detachable hot plate is designed for on the go convenience and ease of storage first appeared on Yanko Design.
What if AirPods had ChatGPT, could translate languages, and came with a touchscreen case?

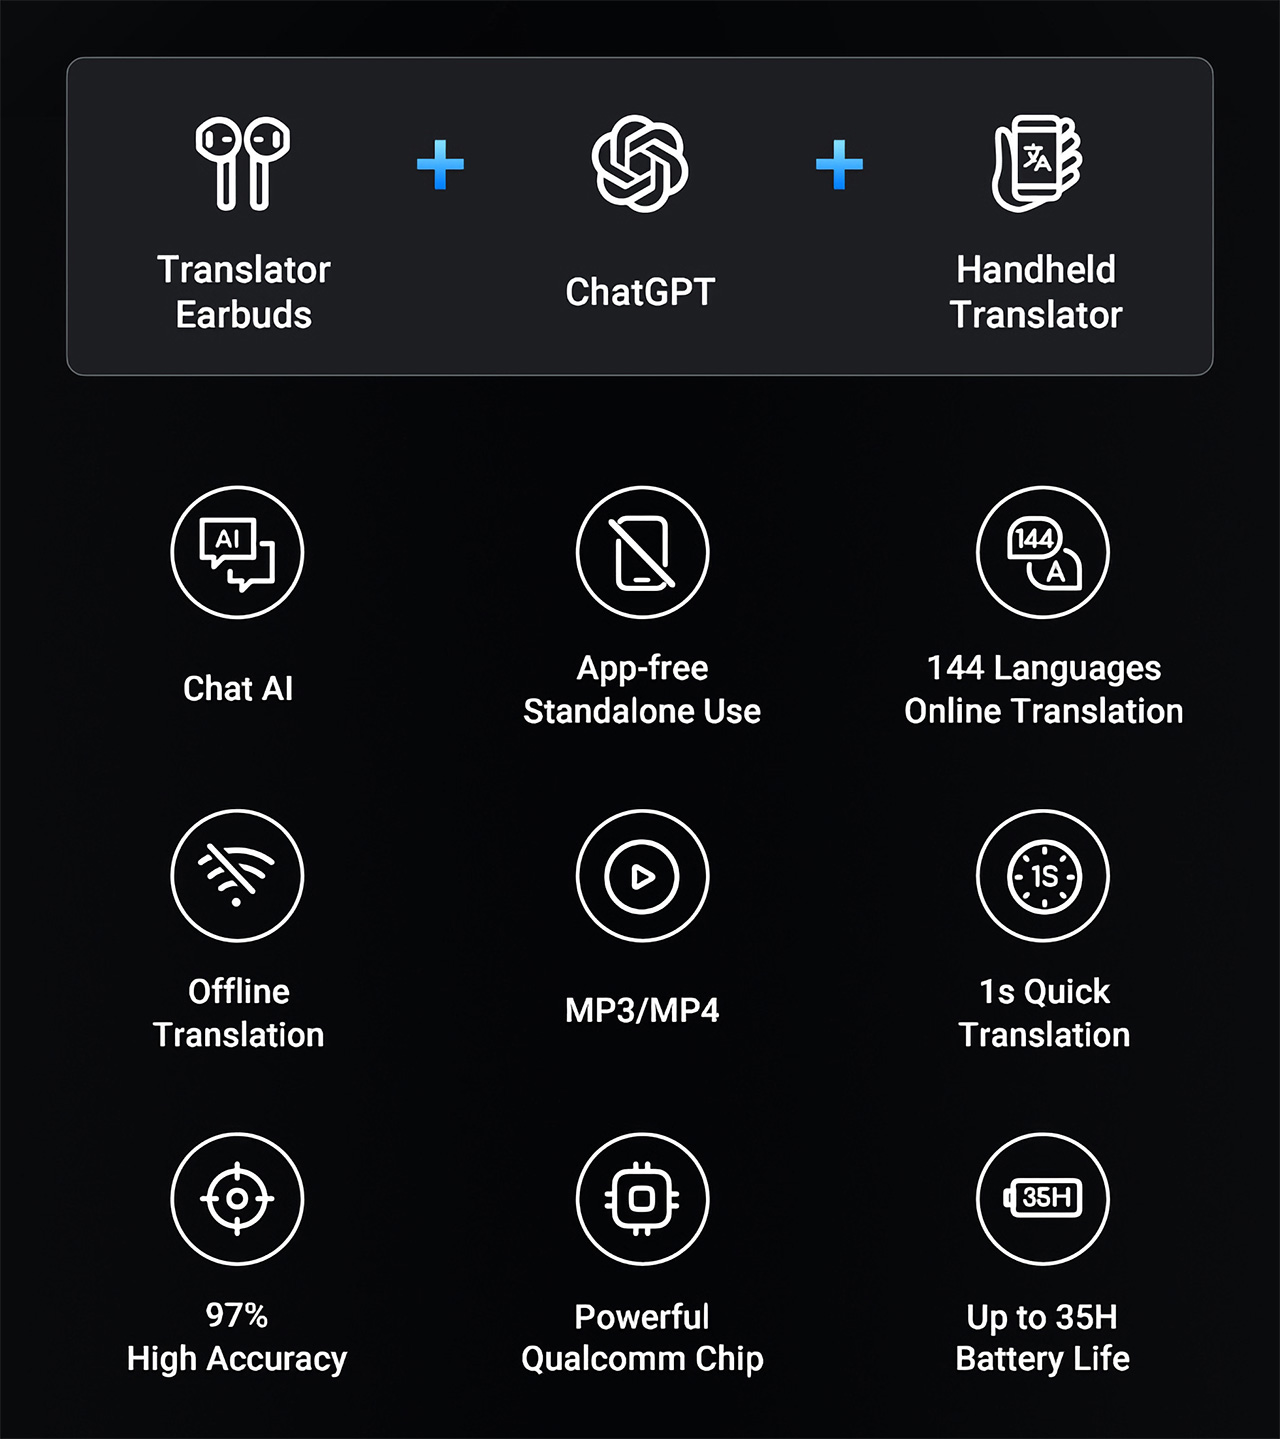
Meet the Wooask TransBuds A8 – a pair of TWS earbuds that are so unique you’ll want to ditch your AirPods for them. Built with ChatGPT integration in the earbuds themselves, these wearables put the power of AI in your ear, actively translating 147 languages and accents in real-time, without an app. What’s better, if you do need to navigate through the TransBuds A8’s functionalities, you don’t even need to look at your smartphone, the earbuds case comes with a nifty 2-inch screen for both online or offline translation, as well as the ability to simply chat with ChatGPT the way Iron Man chats with JARVIS. Oh, and you can listen to music too.

Designer: Wooask Technology

Click Here to Buy Now: $179 $299 (40% off). Hurry, only 63/200 left!

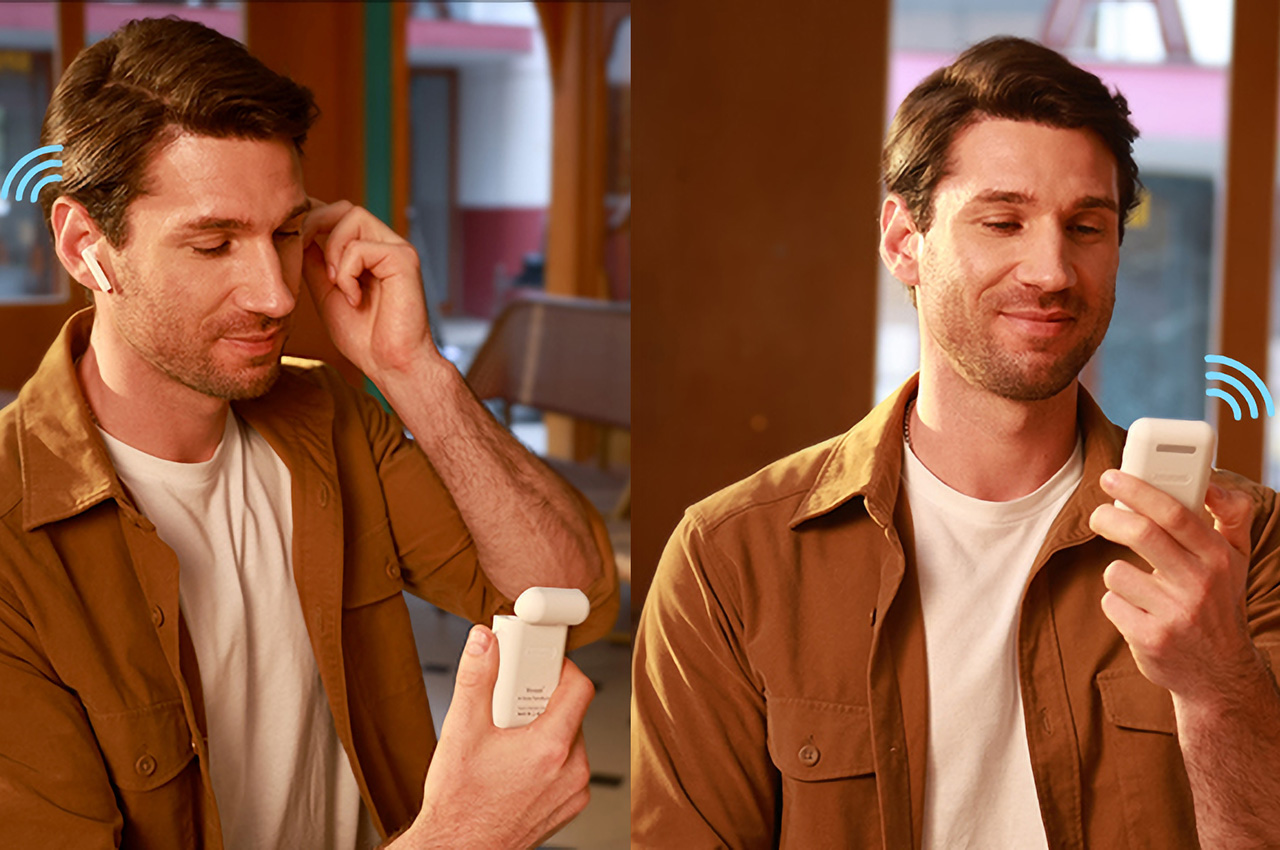
The A8 translation earbuds facilitate real-time bidirectional translation, allowing two people to wear one earbud each for instant simultaneous interpretation.

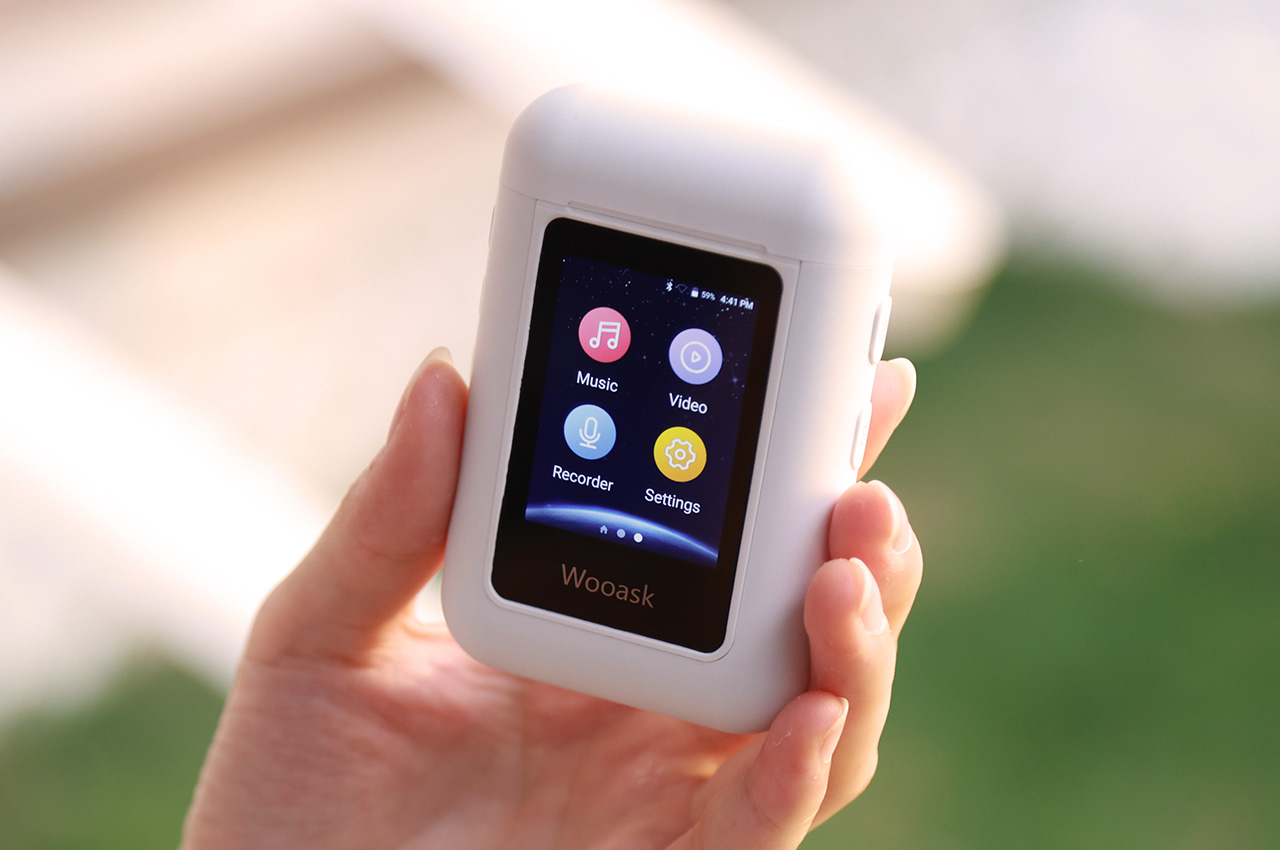
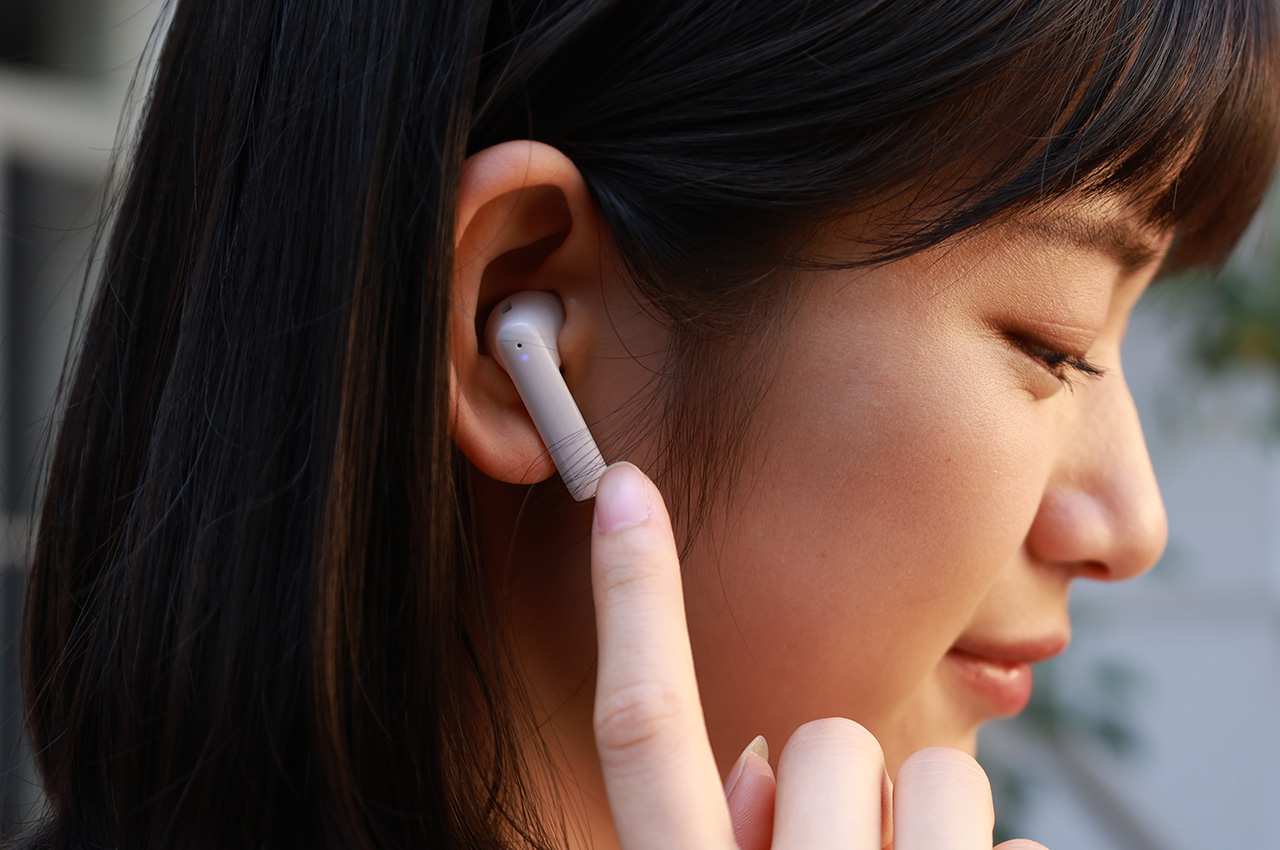
The TransBuds A8 has a familiar design, albeit with a few VERY clever upgrades. Sure, you’ve got the white case with a flip-top lid that reveals two white earbuds… but on both hardware and software fronts, the TransBuds A8 are much more advanced than any regular TWS earbuds you’ll find on the market. For starters, the entire wearable has ChatGPT integration, giving you a voice assistant that is far more advanced than Google, Siri, or Alexa. You can simply tap the earphones to talk to ChatGPT, or access the AI through the unique interface built into the case. The case with a touchscreen is a welcome feature too – it eliminates the need for an app, and gives you a perfect standalone device that works without draining your phone’s battery or piggy-backing off your phone’s cellular network.

By leveraging ChatGPT’s vast knowledge base and natural language processing capabilities, users can enjoy more than just translation assistance.

The presence of AI isn’t just a bandwagon feature, it helps aid the TransBuds A8’s core value proposition – the ability to actively translate 77 languages and 70 accents in real-time, giving you the ability to pretty much travel anywhere in the world without a language barrier. The interaction is swift and seamless, either share an earbud with someone and have bi-directional conversations in two separate languages, and the earbuds will actively translate both of them simultaneously, or use the earbuds and case together to have a conversation with a local. The earbud-sharing method is perfect for in-person meetings and other long conversations. Each person wears one earbud like a Bluetooth earpiece of sorts, and the TransBuds A8 listens to what the opposite person is saying, and translates it for you right in your ear. A transcript of your entire conversation gets captured as a text thread on the TransBuds A8’s screen, and can be saved for later, allowing you to quickly and easily transcribe an entire meeting using the power of AI.

Alternatively, the case itself comes with a microphone and powerful speakers, allowing you to use just the case as a translator device. Hold it up and speak into it, and the TransBuds A8 lets you have a conversation with a local or a stranger without needing to share an earpiece. A powerful mic and speaker system allow you to easily converse with people even around ambient noise, while the display on the case does a good job of allowing people to read the translated text if they can’t hear the translated audio.

The case, frankly, is more of a smartphone that houses earbuds than just your average charging case. It runs on a Qualcomm Quad-Core Processor and earbuds use a Qualcomm 3040 chipset that allows it to translate 147 languages and accents with a latency of 0.5 seconds and an impressive 98% accuracy. The 2-inch screen has an app drawer that lets you access the TransBuds A8’s different features, even letting you tap into the offline translation feature that works with 16 popular languages. Buttons on the side of the case let you increase or decrease the case’s volume, or even go back to the home screen while navigating the interface.

The earbuds are remarkable too, with an ergonomic design, and a dual-mic setup that powers the ENC (Environment Noise Cancelation) feature to help you speak and hear clearly even if you’re in a noisy environment. The earbuds have a translation time of 5 hours, and a regular battery life of 35 hours along with the case that doubles as a charging dock for the buds. 16 gigabytes of in-built memory means you can even load your favorite MP3 files right onto the case, turning it into a makeshift iPod Touch that plays music directly without a streaming app or pairing with your phone. You can, however, pair the earbuds with your phone to listen to music, watch movies, or take calls too.

Quite the all-round device, the TransBuds A8 are for any and everyone. They work independently without your phone, translating over a hundred languages, transcribing conversations, and giving you the power of ChatGPT right in your ears. They also work as your standard TWS buds when you’re looking for something traditional, pairing with your phone via Bluetooth for answering calls, watching TikTok, or listening to music and podcasts. The buds are ideal for avid travelers, students, digital nomads, expats, and people working in multicultural companies and teams. The TransBuds A8 starts at a discounted $179 (an absolute steal considering the features it packs), which also includes one year of free ChatGPT integration. Subsequently, you’ll either be required to pay $9.9 per month or $40 annually for the AI features – online and offline translation remains free forever.

Click Here to Buy Now: $179 $299 (40% off). Hurry, only 63/200 left!

The post What if AirPods had ChatGPT, could translate languages, and came with a touchscreen case? first appeared on Yanko Design.
3D Printed Chess Set pays respect to the Ukraine invasion with a poignant war-themed design

Unless you are Elon Musk and believe chess is “too simple to be useful in real life,” you know, chess is a strategic and competitive game. It requires meticulous planning and clear objectivity. If you don’t have an objective in mind, your moves will be directionless and you will end up wasting time thinking and moving without purpose. Through the gameplay, it instills cognitive thinking, benefits mental well-being, and can now be a source of thoughtful restoration in the war-torn Ukraine.

Cuibiono, a design-first not-for-profit, has been at the forefront of providing aid to the regions where geopolitical conflicts like war have damaged humanity. With the new chess set, it has conceived using recycled biomaterials (PLA) and 3D printing, the NGO is giving everyone a chance to jump onto their journey of creativity, sustainability, and giving back, helping make a difference and restore homes in Kharkiv, Ukraine.

Designer: Cuibiono

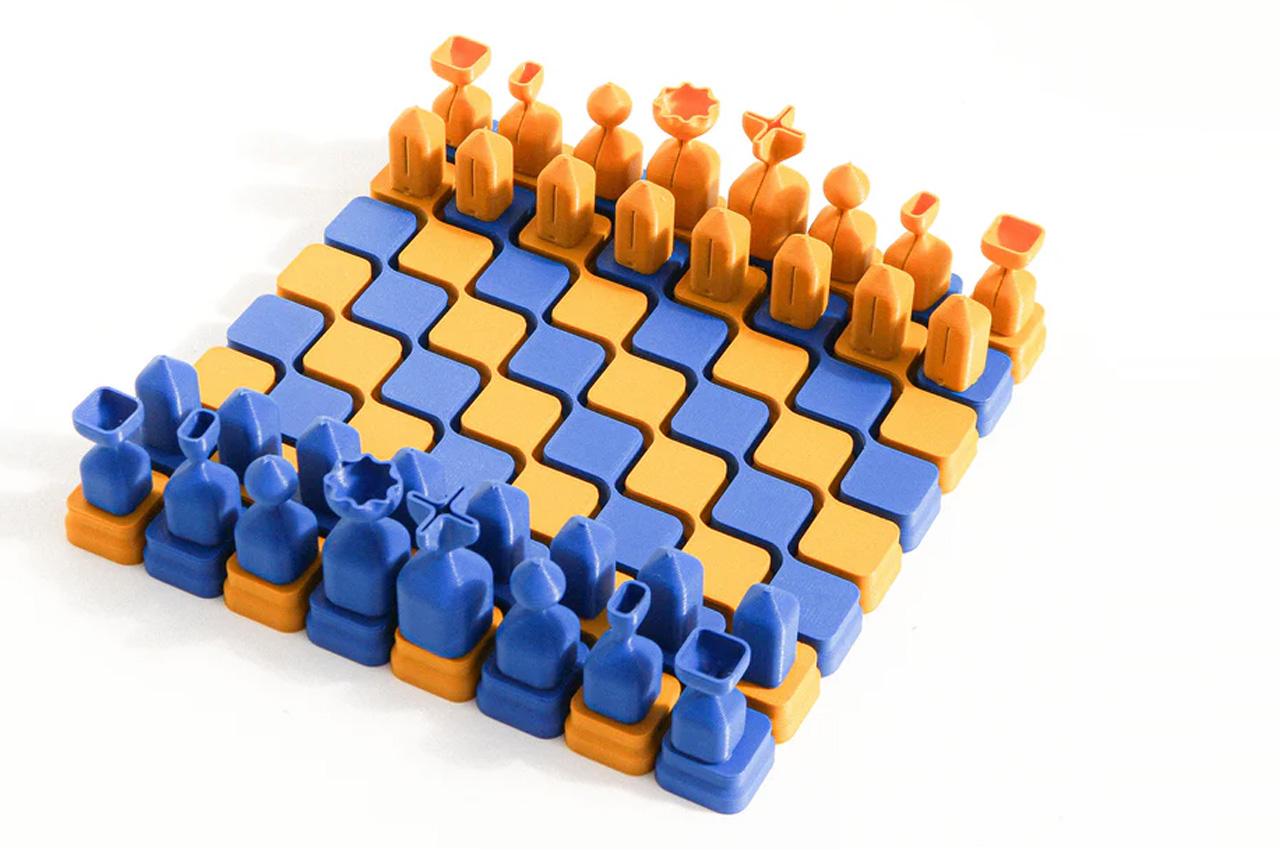
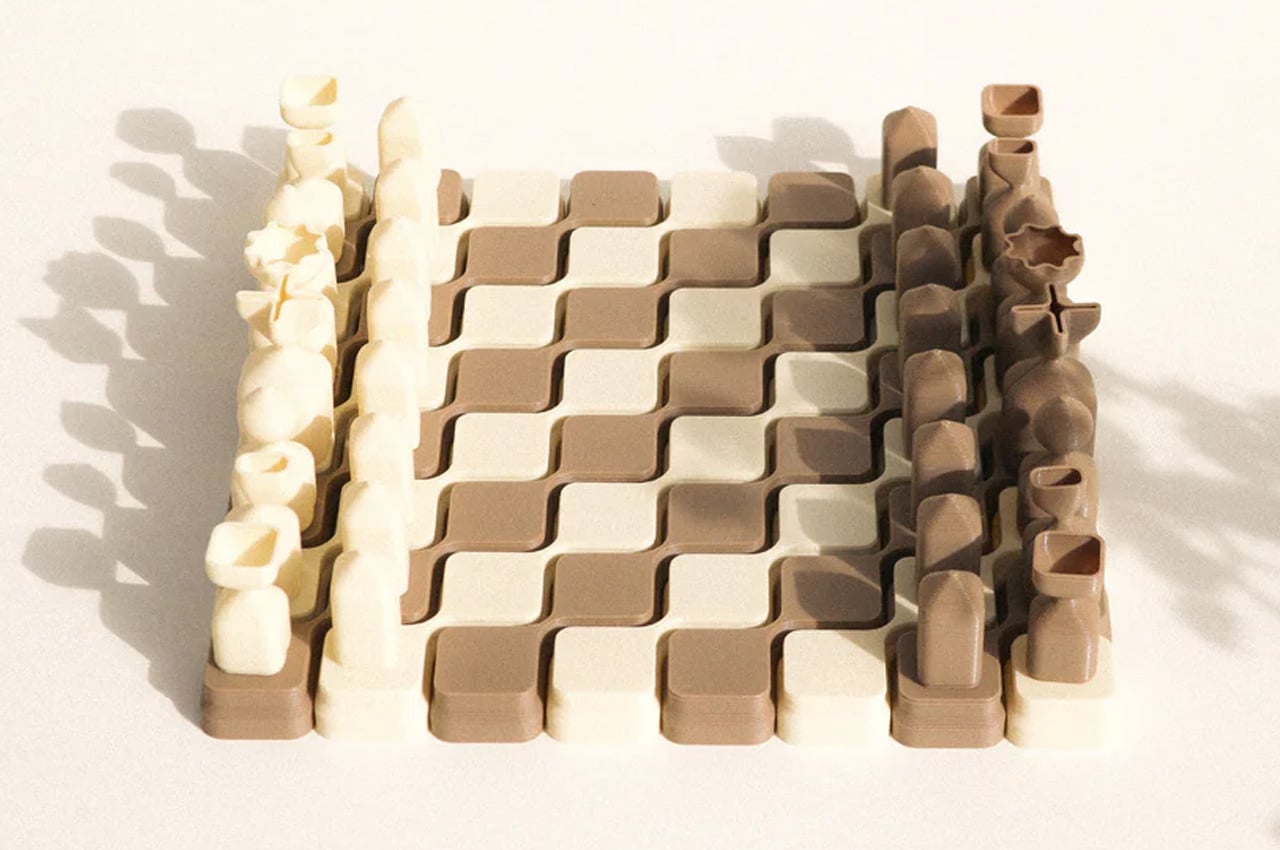
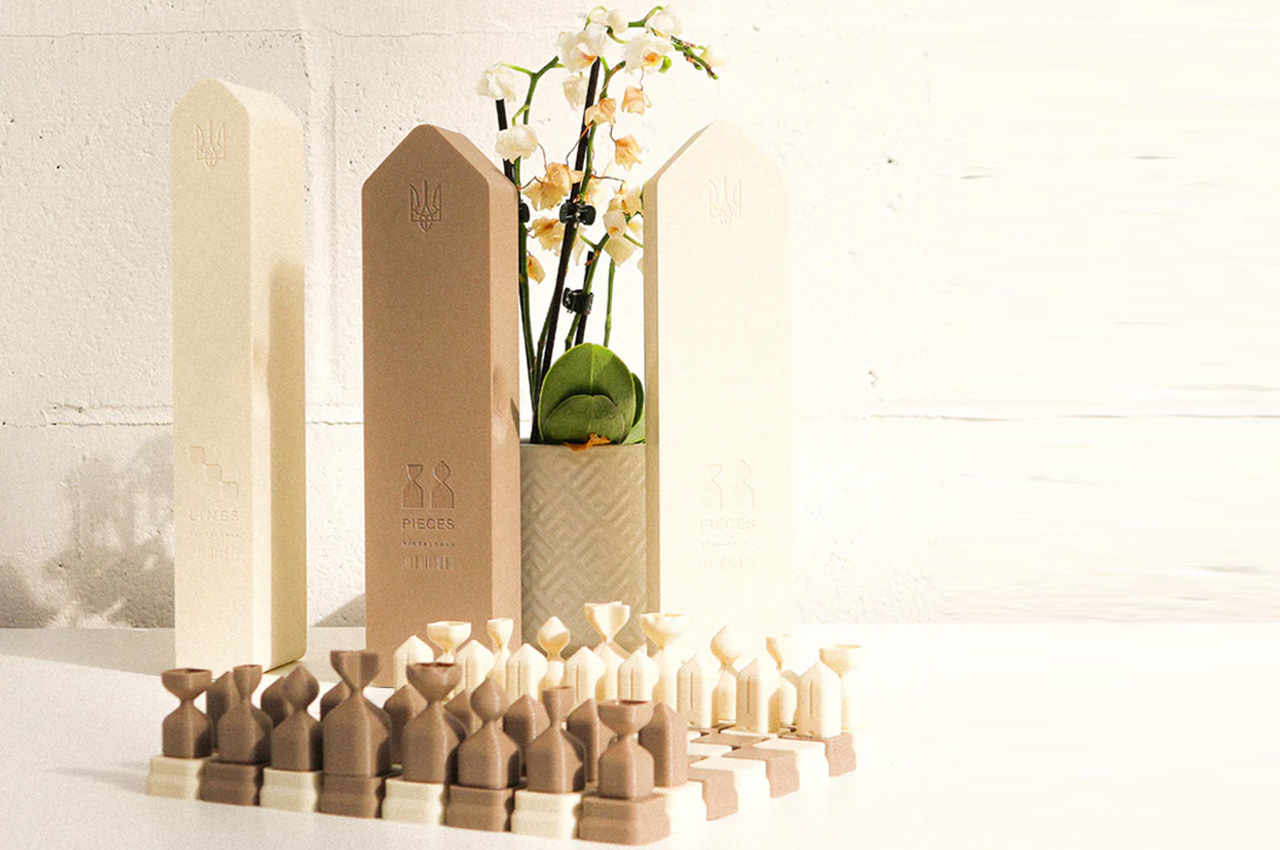
The stackable chess set is inspired by the war-torn and displaced Kharkiv, which has been on the receiving end of the Russian invasion. Called the Kindachess – S, this set 3D-printed from naturally degradable bioplastics – features a board segmented to depict the nation under war. It is designed as fractures on the earth’s crust. But when it’s stacked to be stored, the dividing lines on the board form the Ukrainian flag to depict unity and the satisfaction of returning home.

The idea of a chess set whose profit from sales proceeds would go into restoring homes in Kharkiv is the brainchild of designer Liam Hwang of Cuibiono. The compact, stackable chess set is 3D printed sustainably in Hackney, London. It measures 200mm x 200mm when laid out for playing and fits into a case measuring 290mm x 164mm after use.

This is not Cuibiono’s first such sustainably driven product with the idea of giving back. The NGO states, “we are committed to sustainability.” All the products designed in their facilities are crafted with eco-friendly materials (like recycled PLA in the case of the chess set). The chess set, selling in two color contrasts: wheat and sky, ivory and walnut, is now available at £200 (approximately $250). Buy now, and support the cause becoming a part of the community that cares.

The post 3D Printed Chess Set pays respect to the Ukraine invasion with a poignant war-themed design first appeared on Yanko Design.
Record-breaking Drone hit 510km/h speeds, dethroning Red Bull for the World’s Fastest Drone

Earlier this year, Dutch Drone Gods, in partnership with Red Bull, unveiled the World’s Fastest Drone that went head-to-head with Max Verstappen behind the wheel of an F1 car. With a top speed of 350km/h, that drone held the title for barely a few months before YouTuber Luke Maximo Bell decided to challenge it.

Taking on the entire design and R&D team of Red Bull Racing, Bell managed to 3D-print a drone that was nearly 50% faster, hitting high speeds of 500km/h (310mph) and setting a new record, verified by the team at Guinness Book of World Records. The video above captures Bell’s entire journey, from prototype to building to tuning, and finally FPV footage of the world’s fastest drone. To think that one YouTuber with a BambuLabs printer managed to outpace a drone built out of carbon fiber by the elites at Red Bull Racing known for manufacturing the world’s leading F1 cars…

Designer: Luke Maximo Bell

Bell’s design process was a reiteration of one of his older drones named Peregreen, which could hit speeds of up to 400km/h. If you look at the shape of the drone you’ll quickly realise how even Red Bull and DDG opted for a similar format. The drone isn’t your average quadcopter or even FPV racer. Instead, it has a missile-style design with propellers at the bottom that give it an eVTOL style ability to vertically take off, tilt forward to race ahead, and then land vertically too.

The backbone of Peregreen 2’s success lies in its meticulous design and the use of high-quality materials. The frame, constructed from carbon fiber, was chosen for its exceptional strength and wide availability. Custom frames were precision-cut using a CNC machine at Flying Robot in Cape Town. Despite initial setbacks with incorrect mounting hole dimensions, which required manual adjustments, the final product was a high-precision, robust frame capable of withstanding the rigors of high-speed flight. Building on data from the original Peregreen, Bell and his father (who helped build the original Peregreen) selected larger motors, propellers, and batteries. However, this brought a new set of challenges. The initial batteries overheated, reaching temperatures above 130°C, leading to failures. Additionally, the motor wires were not thick enough, causing them to overheat and even catch fire during bench tests. After extensive testing and adjustments, the team switched to thicker wires and sourced new batteries that maintained a stable temperature below 80°C. These changes were crucial in ensuring the drone could operate at high speeds without the risk of overheating or component failure.

A cheap reliable way to test aerodynamics, simply hold it outside a car’s window!

Aerodynamics played a pivotal role in the drone’s performance. Initial designs faced stability issues at high speeds, necessitating extensive experimentation with tail lengths and fin sizes. The goal was to achieve a stable flight profile with a low drag coefficient. By creating and testing various models (often by simply 3D printing them and holding them out of a car window at high speeds), the team eventually found a configuration that provided the necessary stability. This iterative process of refinement led to a design that not only looked sleek but also performed exceptionally well in high-speed conditions. The final aerodynamic model was a testament to the team’s dedication to optimizing every aspect of the drone’s performance.

Once a drone’s built, its performance needs to be tuned by programming all its components to work in sync so that there isn’t a malfunction in the sky. Despite several initial failures during test flights, the team sought the expertise of Chris Raser, a renowned FPV drone specialist. His insights and detailed tuning guides were instrumental in resolving stability issues and fine-tuning the drone’s flight characteristics. This collaborative approach underscored the importance of seeking specialized knowledge and continuously learning from each phase of the project. The resulting improvements were significant, allowing the drone to perform high-speed maneuvers with precision and reliability.

The testing phase was rigorous and demanding, marked by numerous iterations and rebuilds. The drone was 3D printed using the Bambu Lab X1 Carbon printer, which proved to be an excellent tool for creating precise and durable components. Through a series of high-speed runs, the Peregreen 2 eventually achieved speeds of 500 km/h, a milestone that underscored the success of the design and engineering efforts. This achievement was officially recognized by Guinness, solidifying the team’s place in the record books.

Beyond setting a world record, the Peregreen 2 project also focused on capturing stunning cinematic footage. By incorporating a new open canopy for the camera (shown below), the team was able to obtain clear, distortion-free shots. The Insta360 Go 3 camera, known for its small size and lightweight, was integral in capturing high-speed footage. The drone’s performance in endurance tests was equally impressive, managing a flight of 7.5 km at an average speed of 180 km/h. These accomplishments highlight the drone’s versatility and potential for various applications.

The post Record-breaking Drone hit 510km/h speeds, dethroning Red Bull for the World’s Fastest Drone first appeared on Yanko Design.
Barad-dur LEGO set brings Sauron’s sinister tower from Lord of the Rings to your work desk

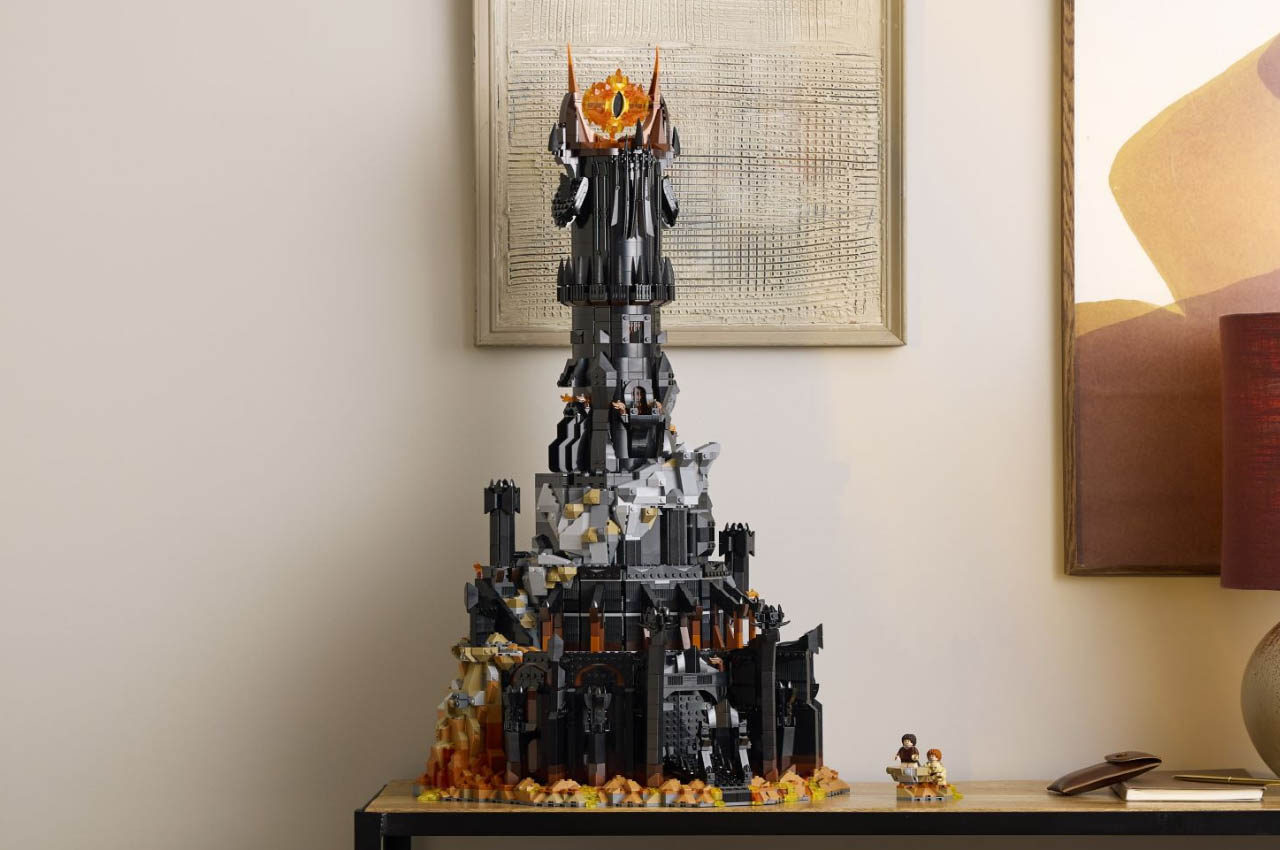
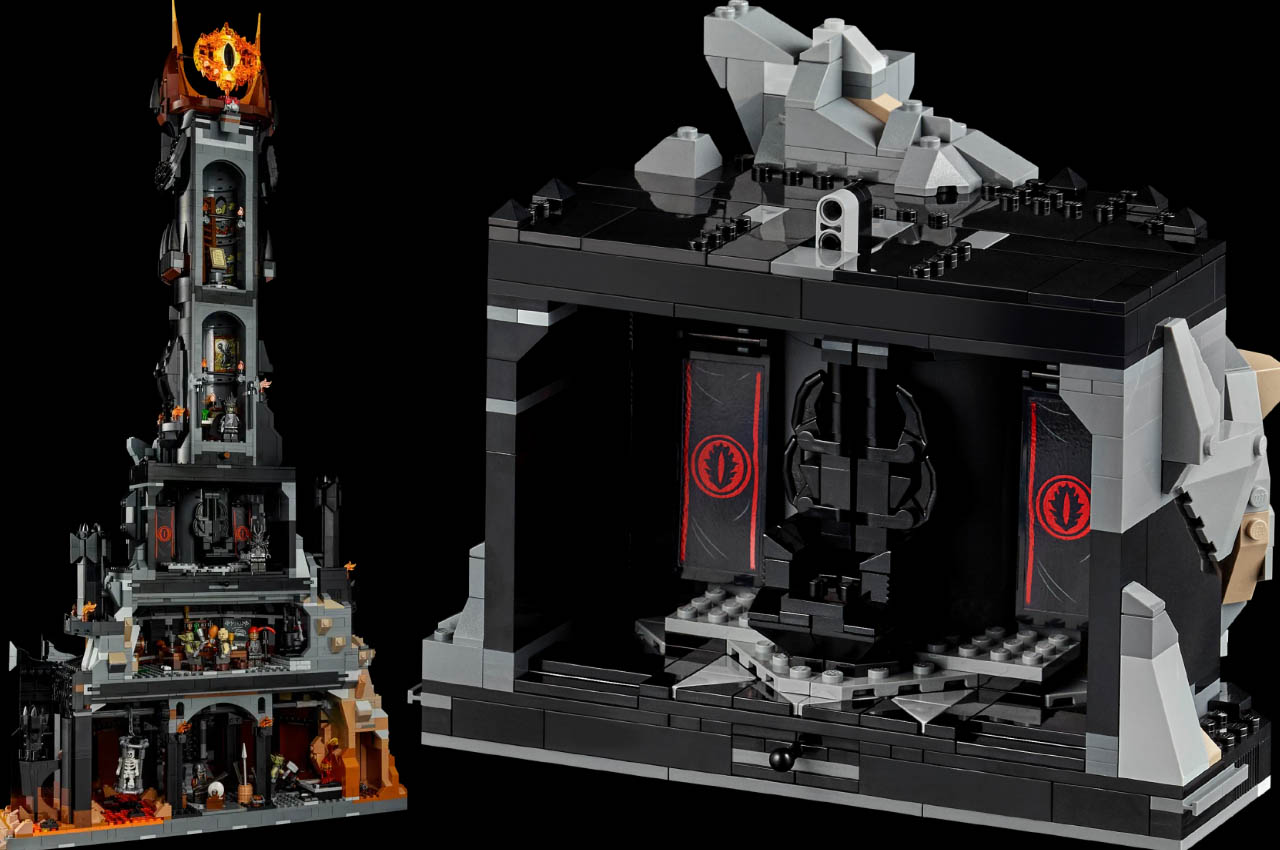
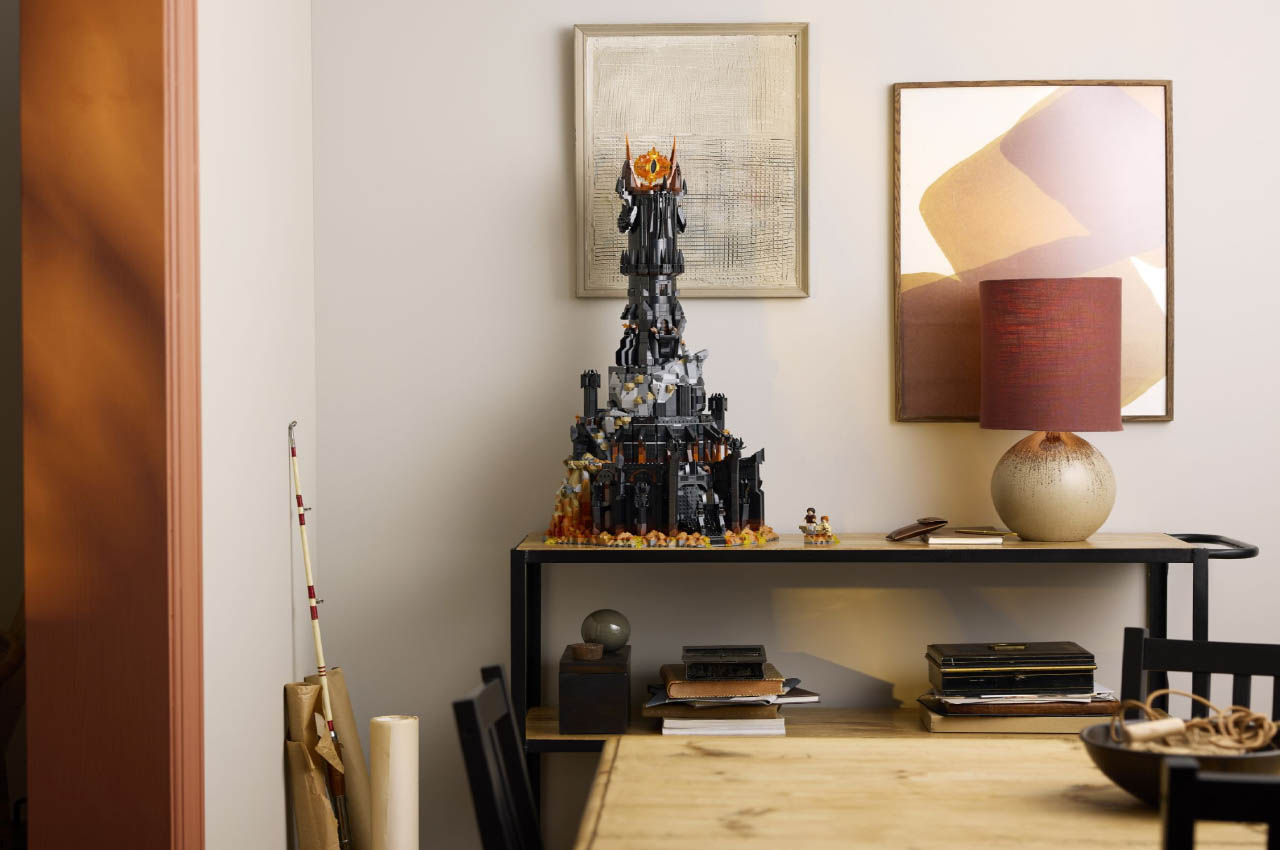
All Lord of the Rings fans should get excited about the new LEGO set themed on Barad-dûr, Sauron’s iconic stronghold. The 5,471-piece set features the sinister tower topped with the Eye of Sauron, the disembodied eye that overlooks his evil domain. Those who’ve watched the movie will instantly remember it as the “giant black tower with the flaming eye on top of it.”
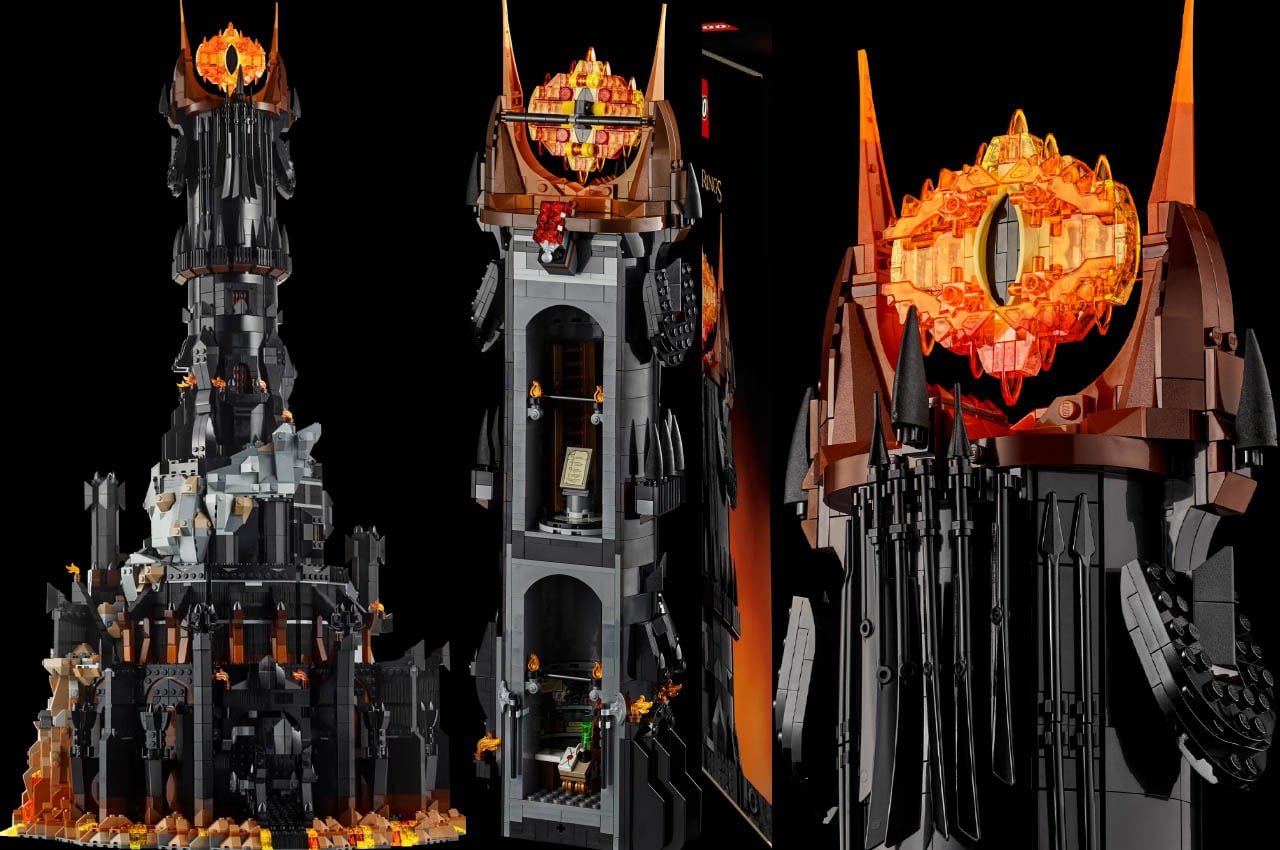
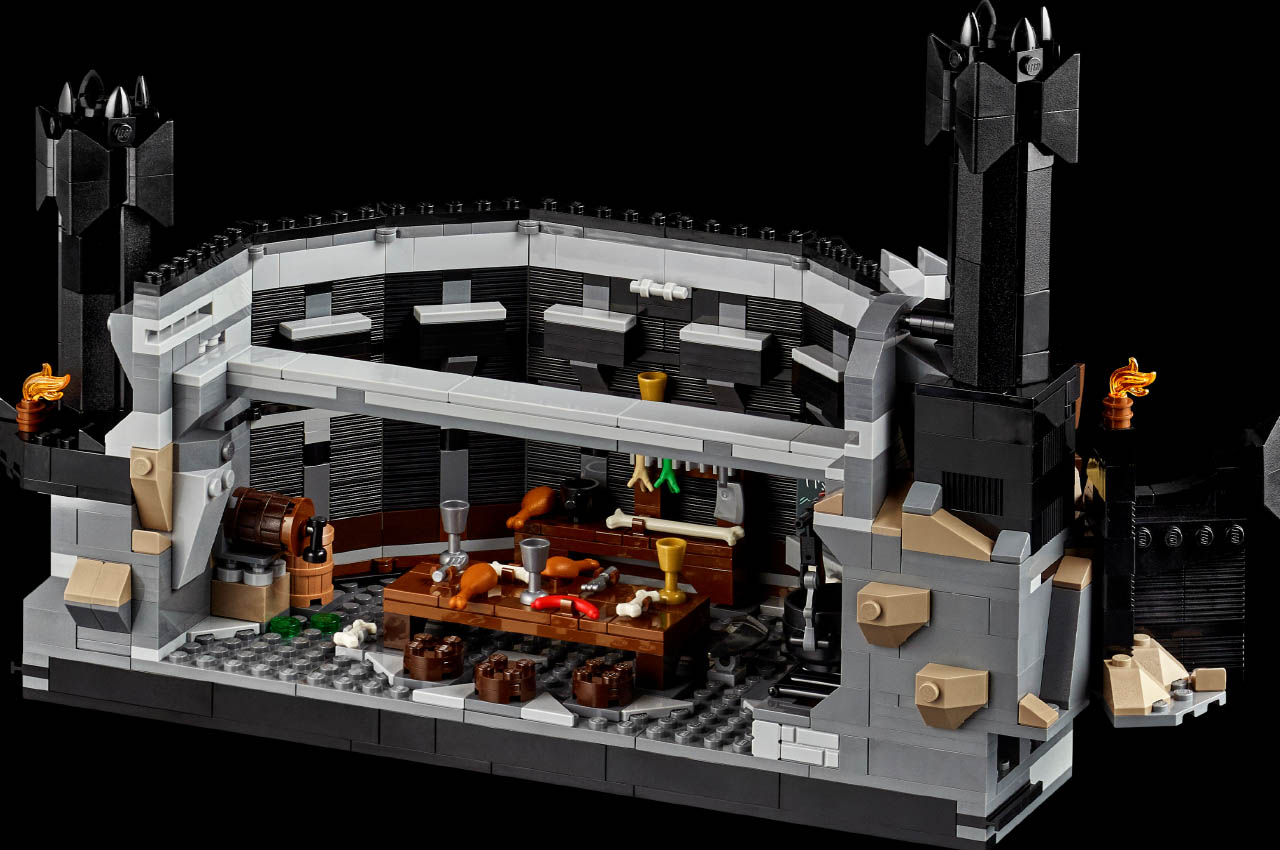
This set will come at a price tag of $500 with availability to commence from June 1 for LEGO Insiders and from June 4 onwards for other buyers. The Barad-dûr tower will have four main sections – a prison, armory, throne room and a kitchen. Those who’ll get their hands on the set on or before 7 also get the complementary 269-piece Fell beast set with posable wings for the intimidating flying creature and the Nazul minifigure.
Designer: LEGO Ideas

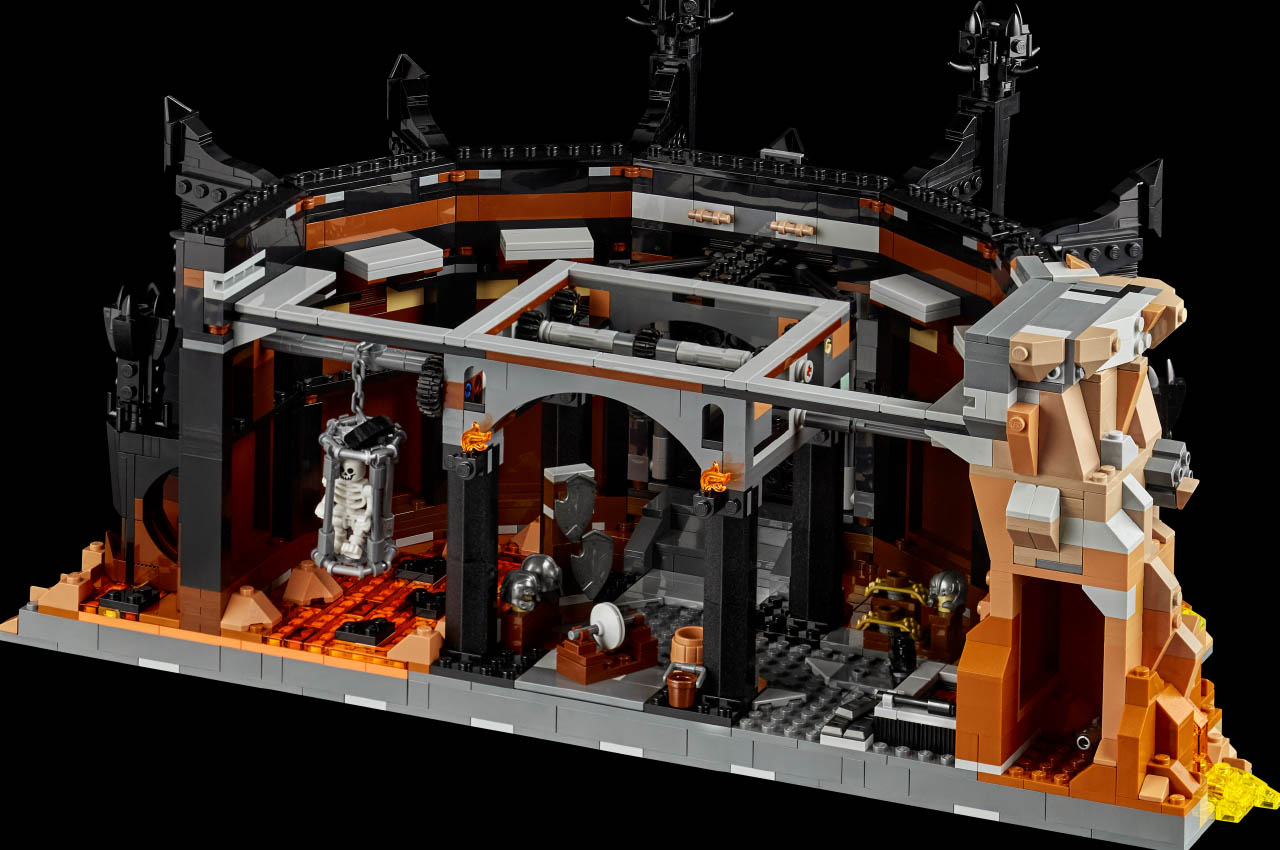
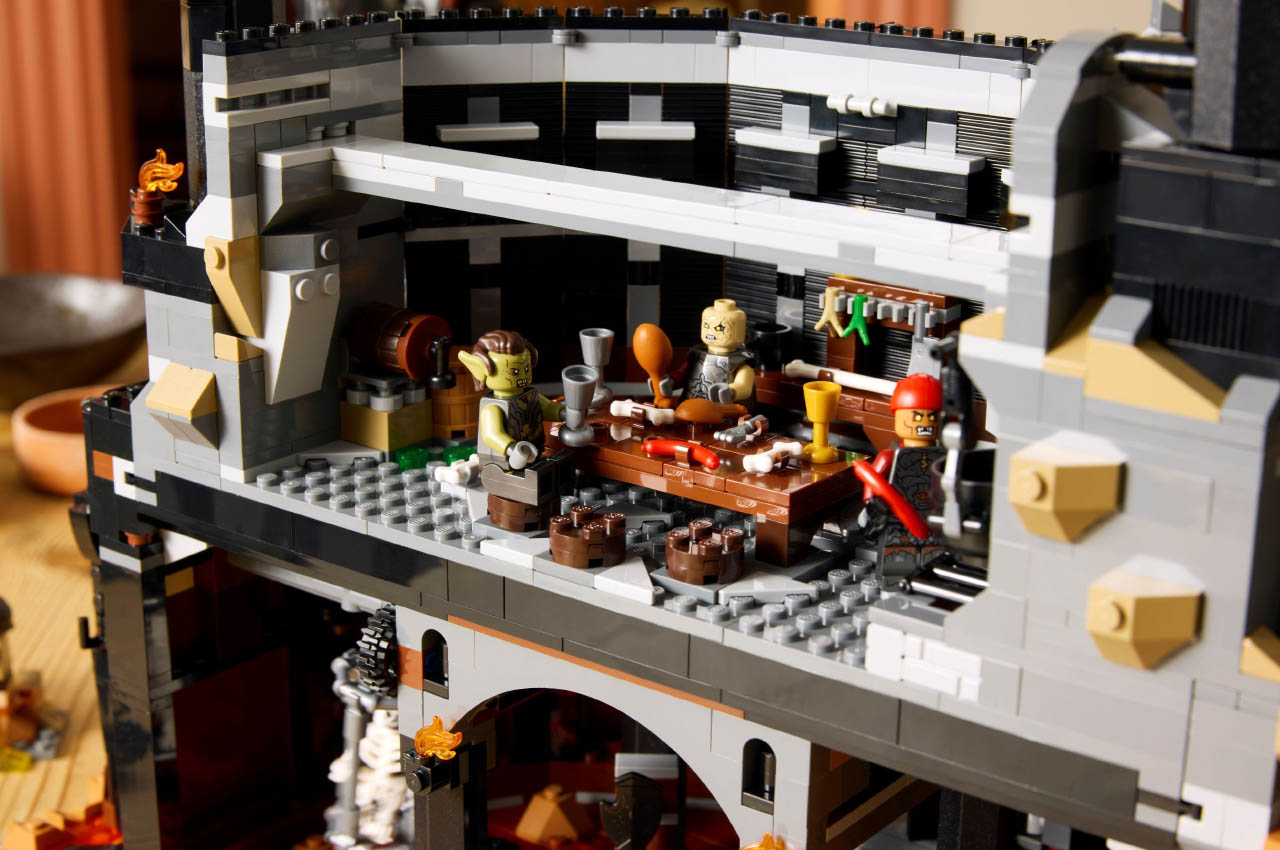
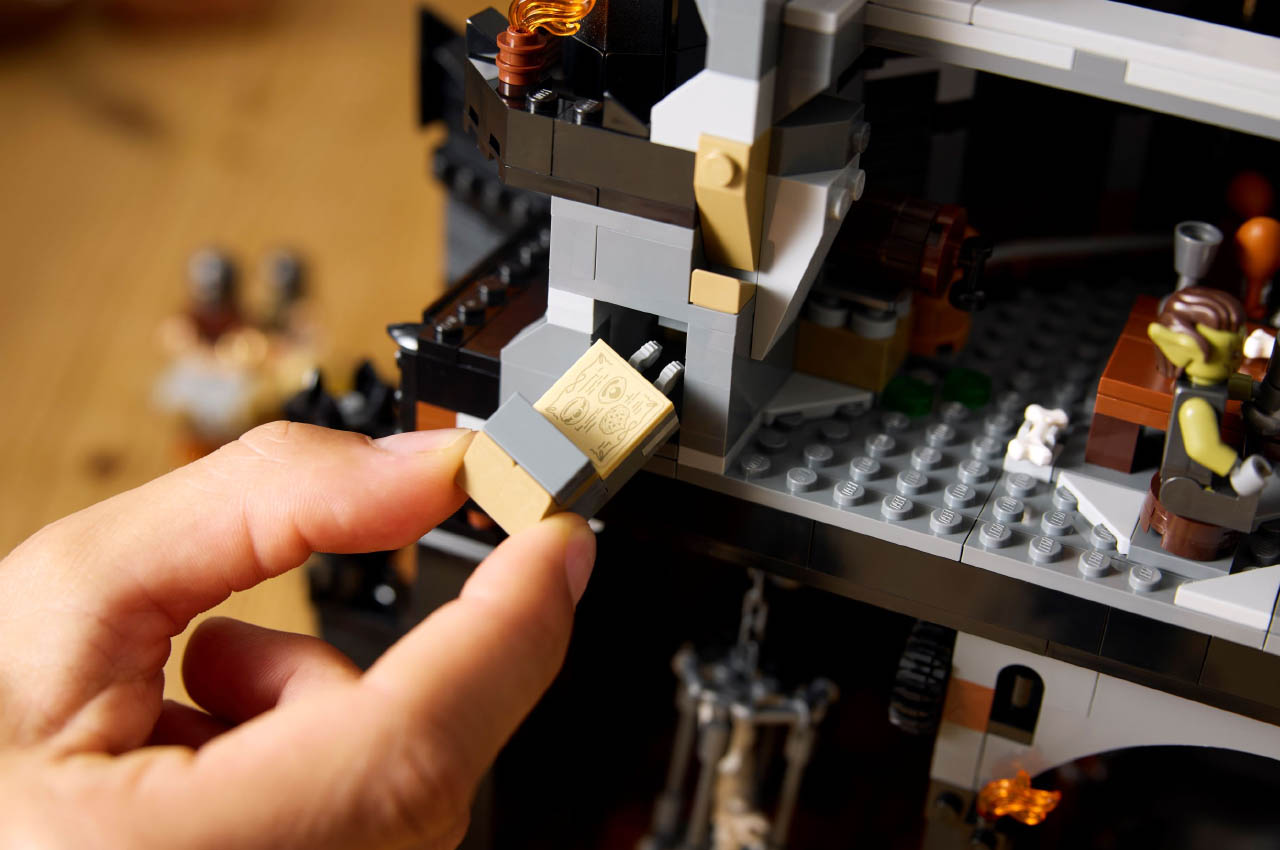
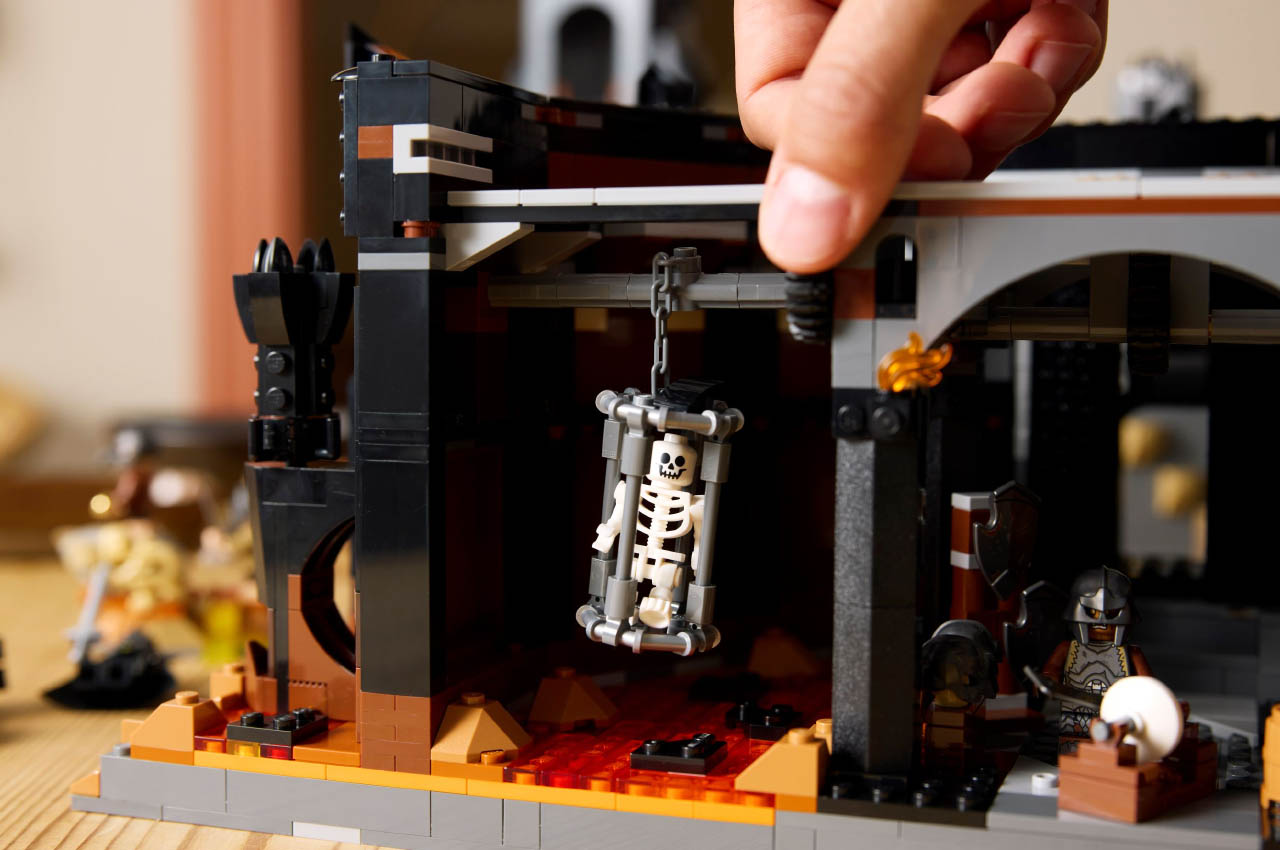
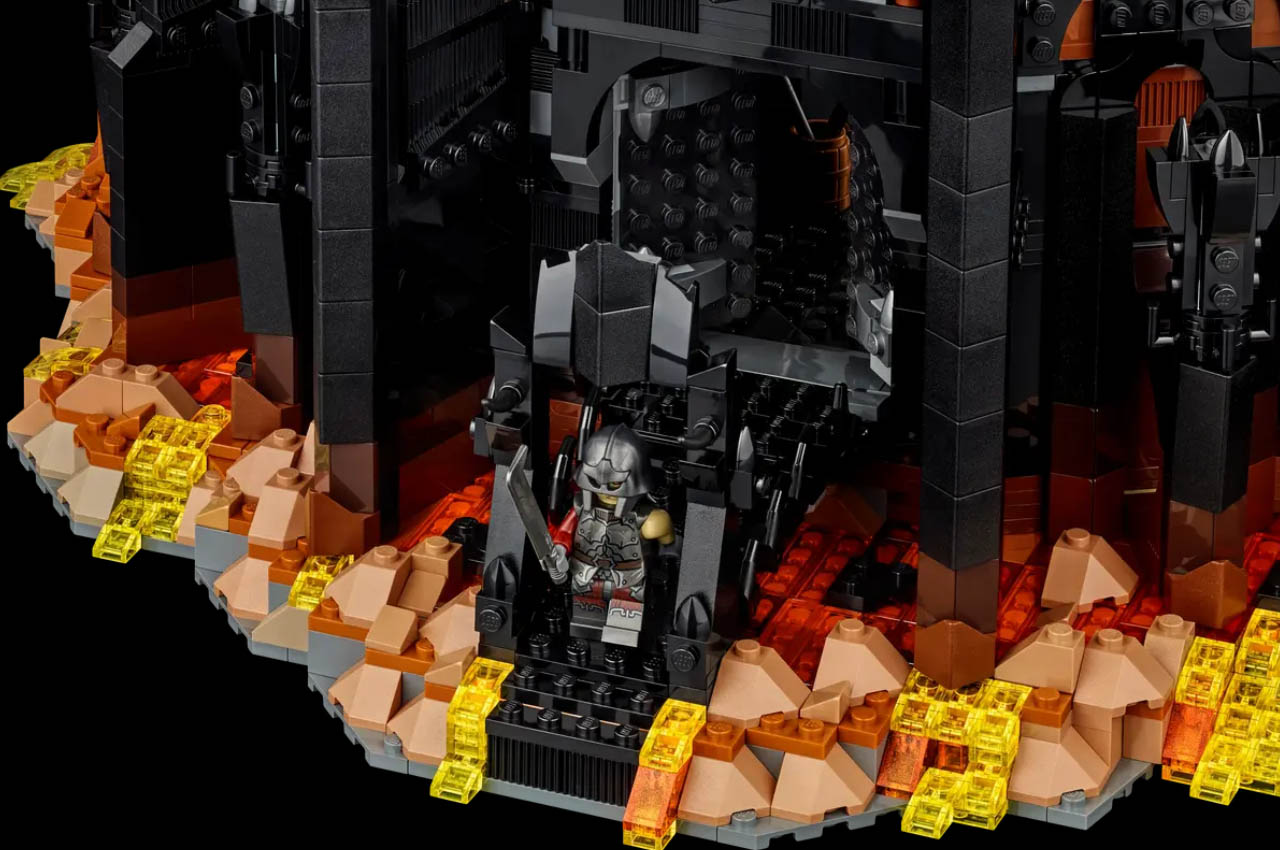
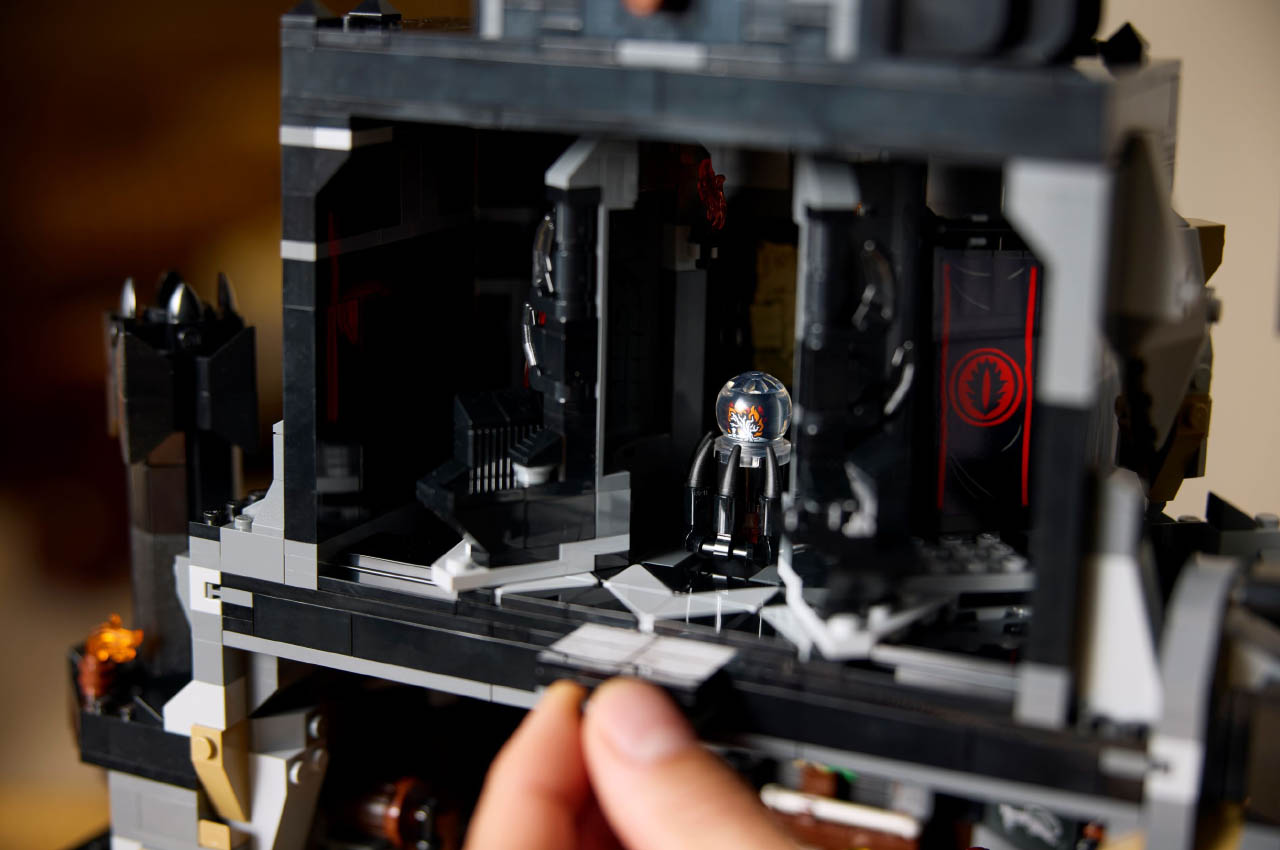
The 32.5-inch tall and 11 inches wide Barad-dûr set has references to the movie in the form of Easter Eggs filled inside the interiors. Minifigures including Sauron, Mouth of Sauron, Sam, Gothmog and Orc also grace the build. Sections of the set include a pair of mechanically operated front doors and a dark throne that hides the secret room of the Palantir. There’s a forger for sharpening the weapons of destruction, a lava pit with a suspended skeleton cage and feasting for orcs. The top of the tower opens to reveal the throne room with a hidden map and ladder to access the top floor. In the middle of the structure is the feast table and orc armory. At the bottom of the tower, there’s a working door.

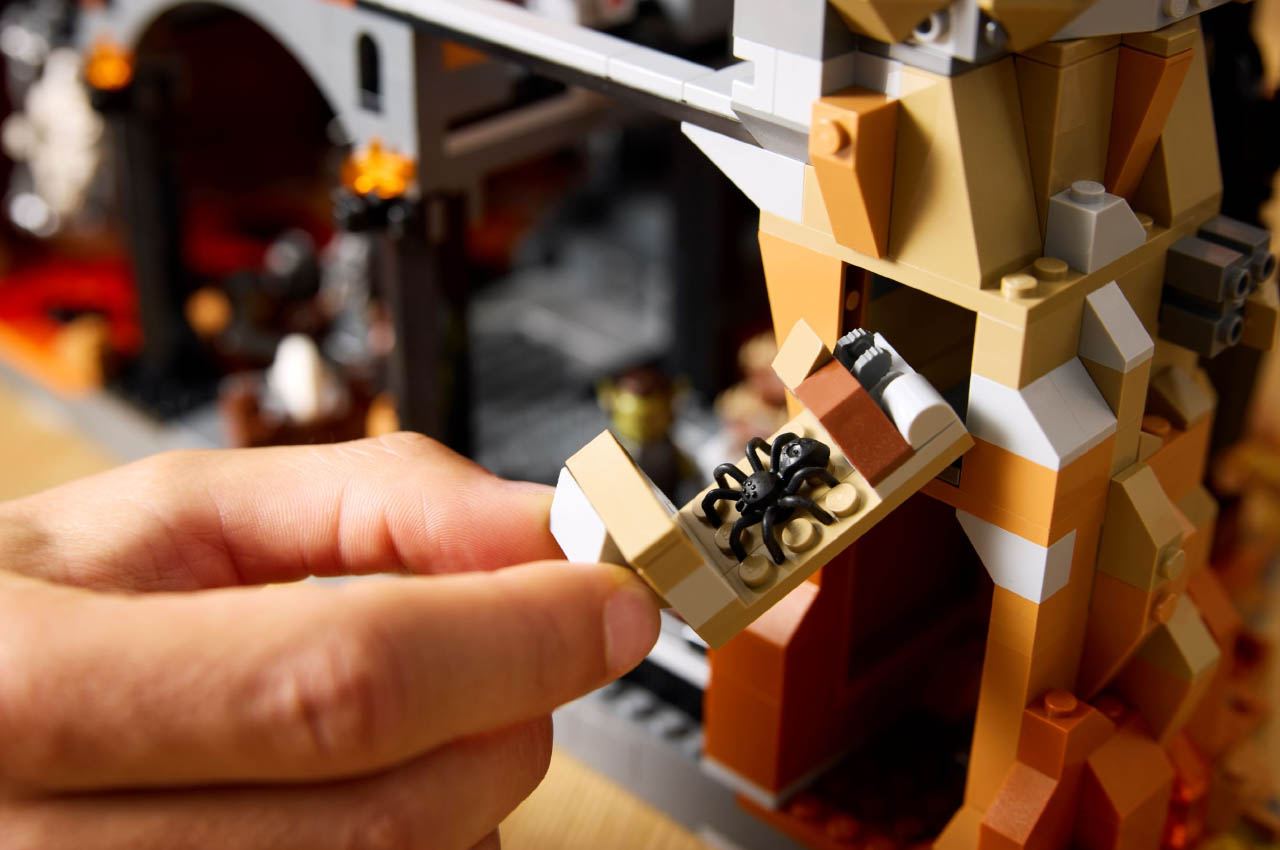
Frodo is not forgotten with the stolen Mithril coat and the hidden map, while Shelob has a tiny spider to complete the details. Interestingly the LEGO set can be stacked with more modular pieces to increase the height of the already towering structure that is even more impressive (and taller) than the Rivendell set which is the last official Lord of Rings set by LEGO. The tower is topped by a replica of the Eye of Sauron having a light-up brick to cast a subtle glow in your den.

The post Barad-dur LEGO set brings Sauron’s sinister tower from Lord of the Rings to your work desk first appeared on Yanko Design.