Future Smartphones could have backplates made from 3D displays, fiberglass, or even fragrant leather

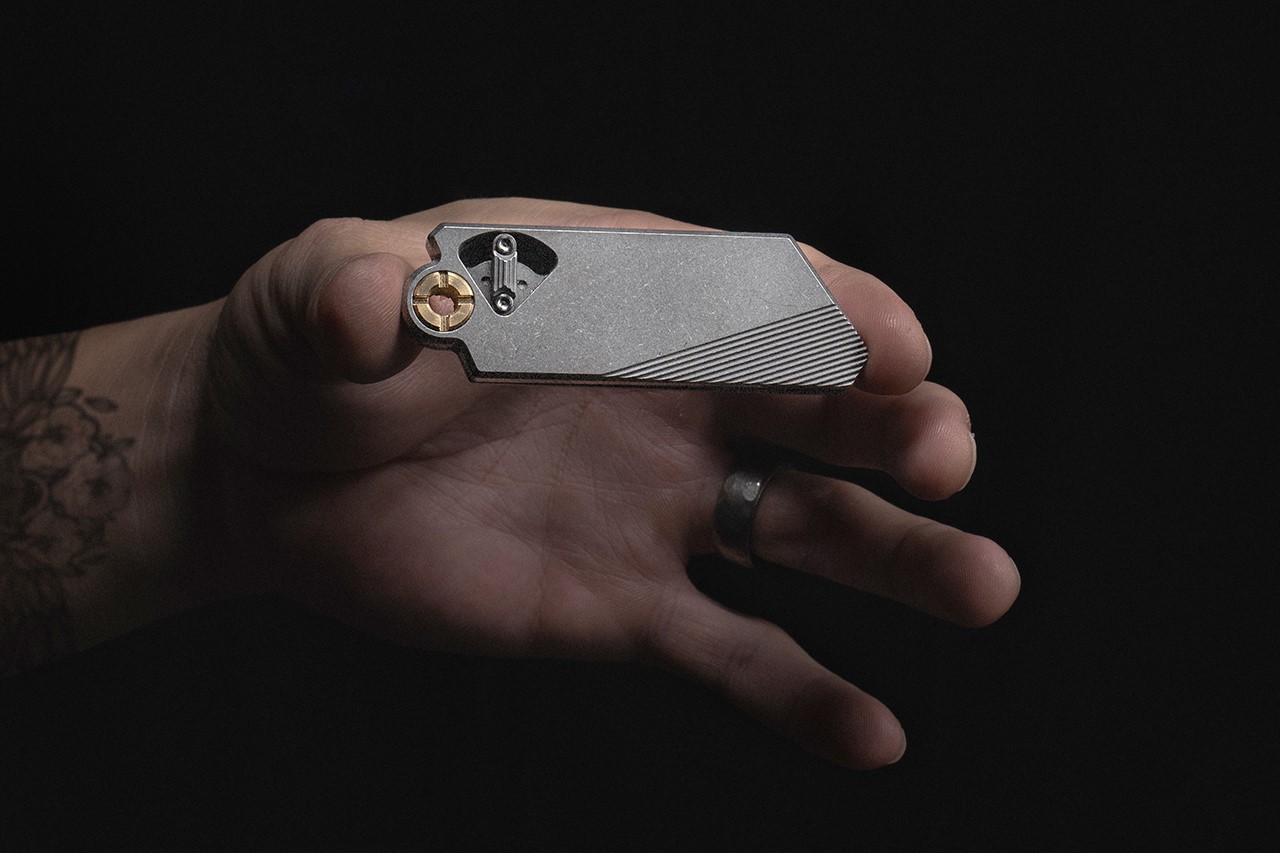
While most smartphone companies focus only on advancing the inner components of their devices, TECNO’s working on something even exciting – outer materials that enhance and elevate the smartphone’s design to new levels. The company gave us a sneak peek of what they’ve been working on, and let’s just say it goes above and beyond simple glass or metal assemblies. TECNO’s team have been researching color-changing materials, 3D stereoscopic displays (on the back of your phone), organic fabric leather, fiberglass, and even fragrant materials that can give your smartphone a unique aroma. Obviously, none of these materials are ready to deploy at the mass scale that TECNO produces its phones at… but it’s exciting to think of a future where phones won’t look the same, or even smell the same!

1. Chameleon Coloring Technology

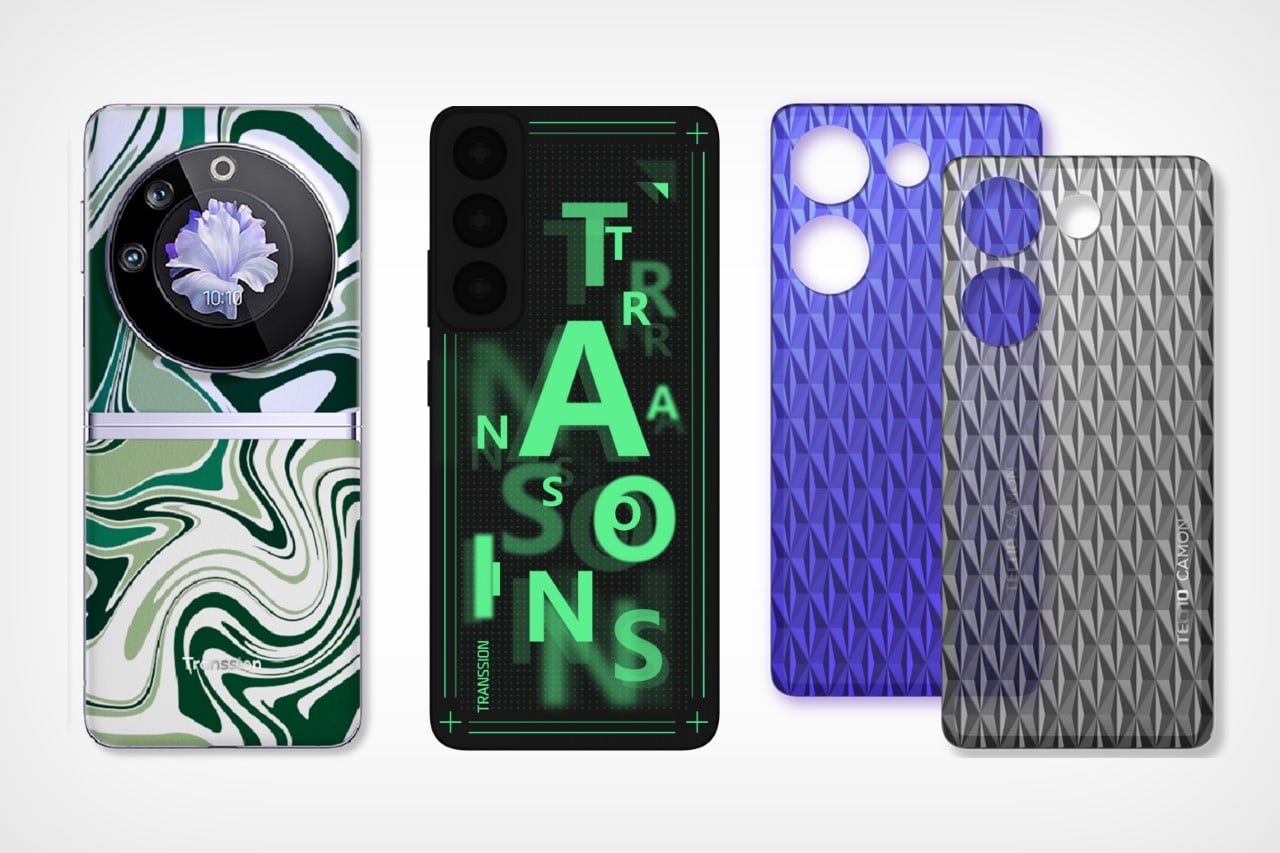
Perhaps the holy grail of smartphone design (aside from fully transparent phones) has been the idea of a phone that can change color… and TECNO seems to have developed a technology capable of this. Dubbed Chameleon Coloring Technology, the material stands out as the first in the industry to harness ultra-fine prisms for full-spectrum, polarization-free color shifting. This state-of-the-art technology operates through angular rotation induced by an electric field, enabling it to capture every color hue vividly. It boasts an ultra-fast reaction time that sets new industry benchmarks, achieving responsiveness in a mere 0.03 seconds. Alongside its rapid performance, it promises an extended lifespan and operates on minimal power, with consumption measured at the milliampere level. The technology also features versatile color adaptation capabilities, allowing for the independent customization of essential color functionalities and enabling selectable color absorption to suit a variety of needs.

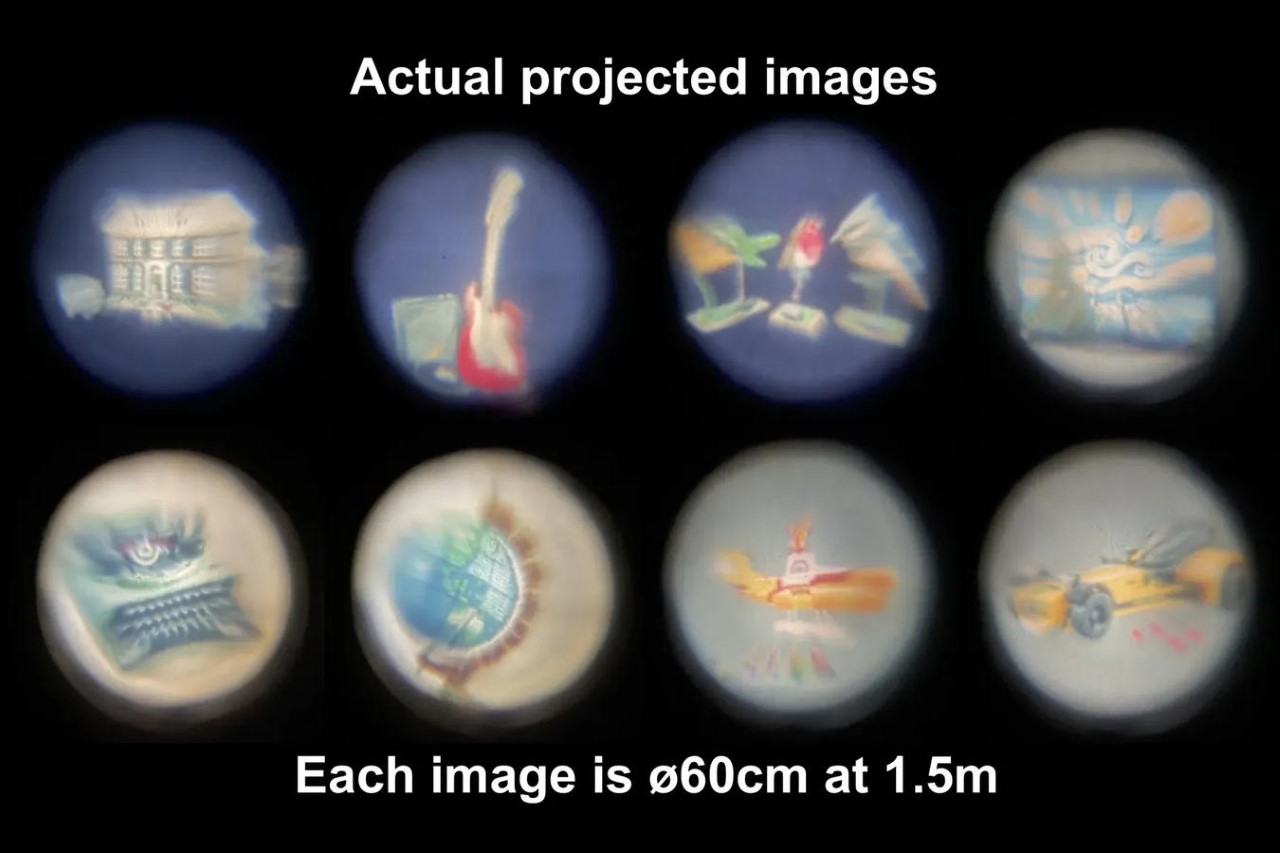
2. 3D Stereo Optical Grating

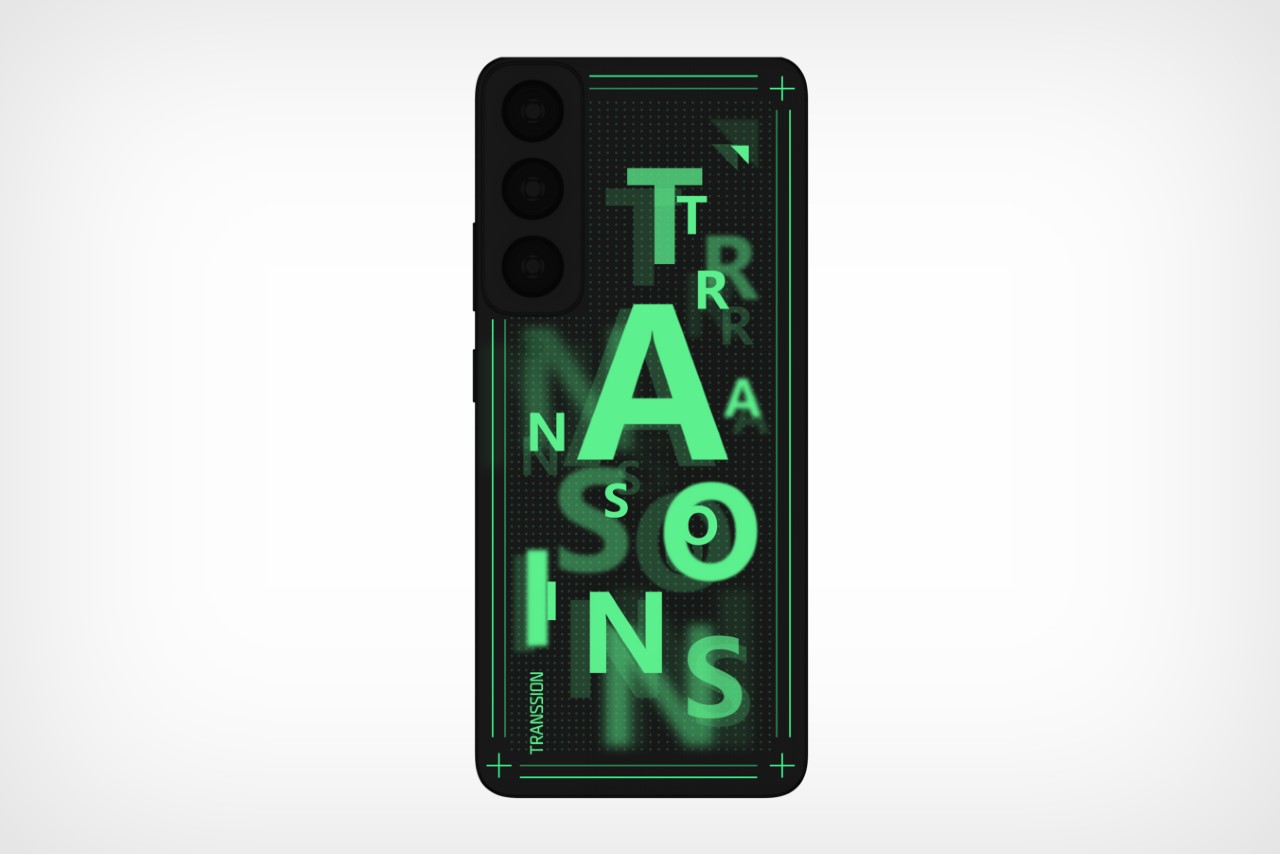
If you thought changing colors was exciting, what if the back of your phone had its own dedicated 3D display that showcased depth without requiring glasses?? The 3D Stereo Optical Grating is a cutting-edge technology that uses advanced materials and a special pattern to produce a 3D effect without the need for glasses. This technology can create a sense of depth and make images look like they’re floating right in front of you. It can also change the way colors and patterns appear. This method works by bending light in a specific way, which can be applied across an entire surface or just parts of it. It’s perfect for large-scale printing processes where vivid colors and detailed patterns are needed quickly and accurately. Plus, it’s capable of adding movement to images, making it a smart choice for creating lots of high-quality products in a factory setting.

3. Layered Fiberglass

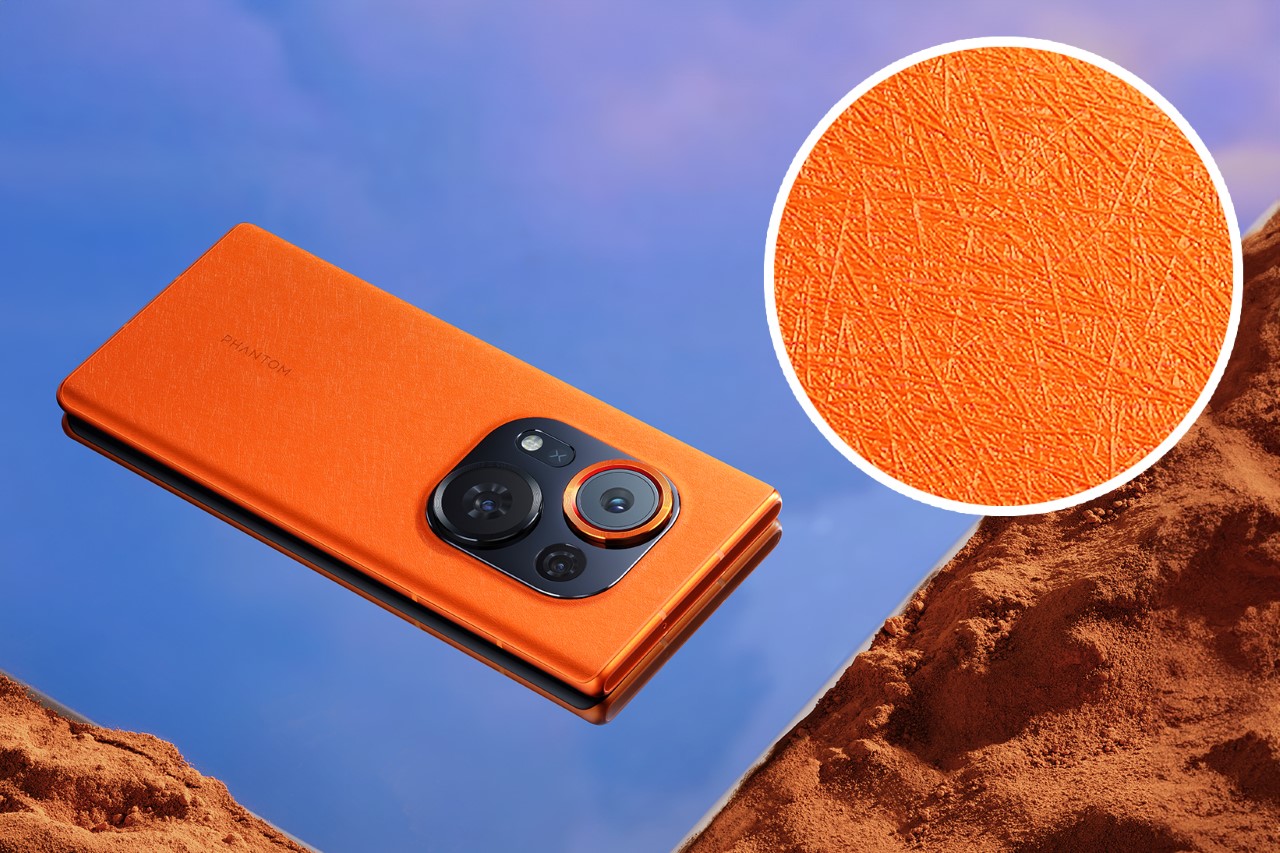
Layered fiberglass stands out from standard glass because it’s built to be much stronger and more flexible, even when it’s just as thin. This means it can take more bending and pressure without breaking. Plus, it’s surprisingly lightweight, making it a better option for things that need both durability and ease of handling. To give it a sleek, shiny finish that mimics the look of metal, a special coating technique is used. This isn’t like regular spray paint; it’s a high-tech process that leaves the fiberglass feeling smooth to the touch, almost luxurious. The texture is top-notch, and it has the added bonus of resisting smudges and fingerprints, so it stays looking clean and polished for longer. This makes layered fiberglass not just tough and good-looking, but also practical for everyday use where touch and cleanliness matter.

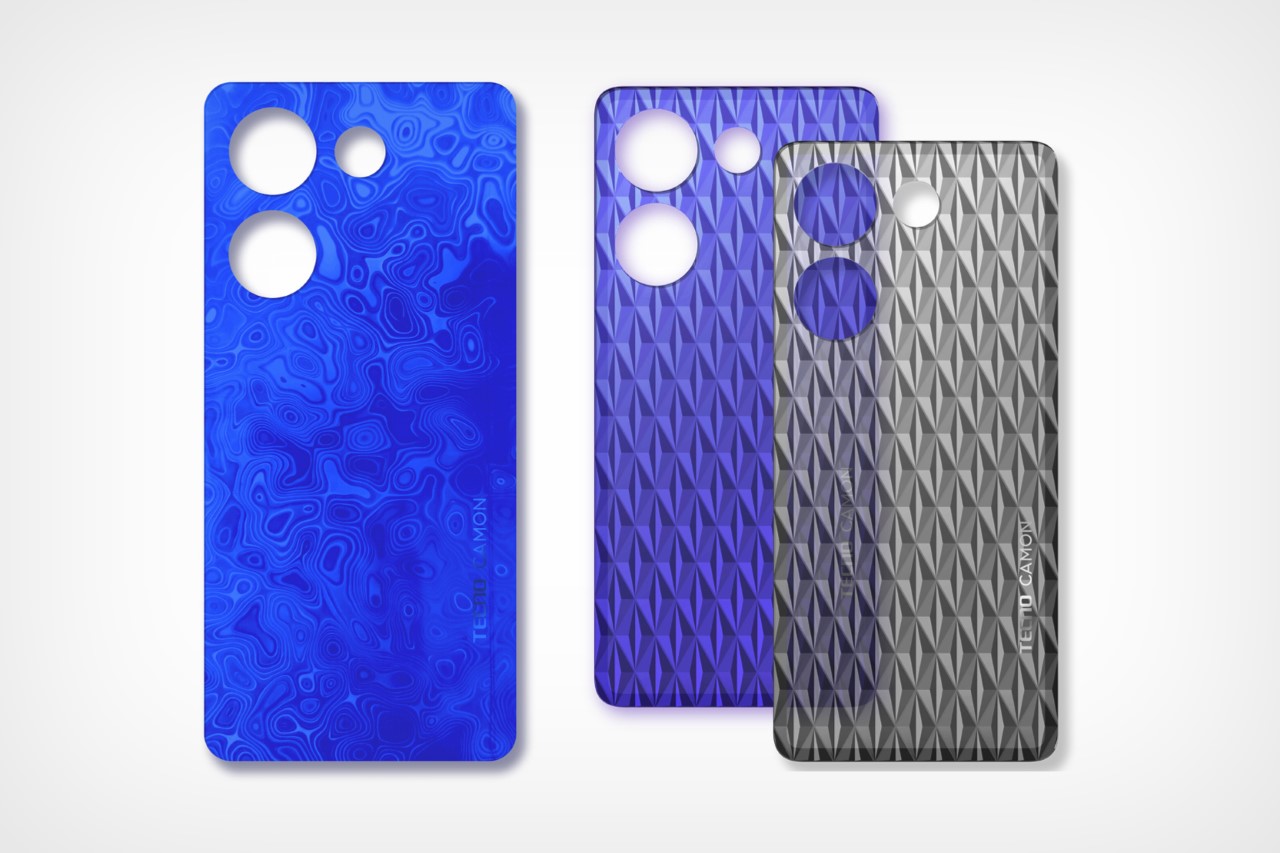
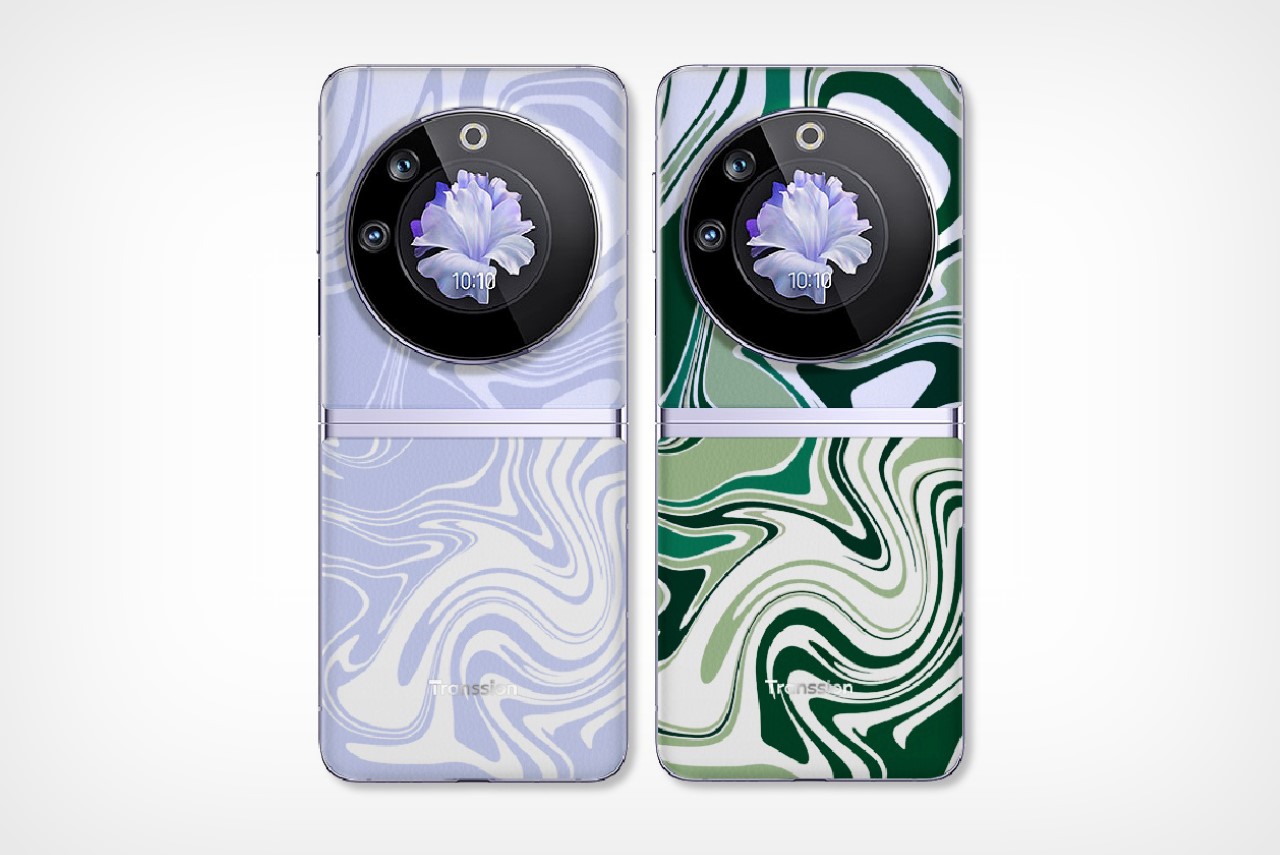
4. Colored Textured Glass

Colored textured glass is crafted by blending molten glass in various colors, like clear, shades of blue, and white. This mixture is stirred evenly in a special container using a precise method, resulting in beautifully textured glass. The color infuses throughout the glass, ensuring it remains vibrant and enduring over time. This glass can be tailored to personal preferences, offering a unique, almost magical hue that resembles the depths of precious stones. Additionally, it has the ability to mimic the appearance of fine ceramics, all while being thinner than actual ceramics.

5. Fragrant Leather

This might be the most bizarrely interesting piece of innovation yet. TECNO’s Fragrant Leather is an innovative material that infuses scent into vegan leather through a special process. Tiny capsules filled with scented oils are mixed into the PU resin of the leather, with the amount carefully adjusted to get the perfect strength of fragrance. This sensory-rich material combines durability with a pleasing aroma and practical use. It’s designed to retain its scent for a long time, and with normal use, away from harsh conditions like direct sunlight or extreme heat, the lovely smell can last for more than a year, and TECNO’s been formulating popular scents like cologne, ocean, and even rose.

6. Organosilicone Fabric Leather

While most synthetic leathers come with a polyurethane coating, TECNO’s working on a synthetic leather that uses an ‘organosilicone’ coating instead. This fabric is specially coated with a silicone polymer, which makes it particularly user-friendly because it’s simple to clean and doesn’t hold onto odors. Additionally, it’s an eco-friendly option with very low volatile organic compound (VOC) emissions, meaning it’s better for indoor air quality. The durability of organosilicone fabric leather stands up to various weather conditions, and it’s also recyclable, supporting a more sustainable lifecycle. What’s more, this material represents a leap forward in fabric technology by utilizing high-grade silicone coatings, reducing reliance on carbon-based materials and thus decreasing carbon emissions.

7. Renewable Fiber

We’ve seen fiberglass used everywhere, but have you seen it on the back of your phone?! TECNO’s developed a special brand of fiberglass that’s made from recycled plastics. The fibers themselves come from shredded plastic bottles that would otherwise end up as landfill or ocean waste. The result is a plastic that’s flexible, durable, gorgeous-looking, unique because the fibers are laid out differently on each phone, and innately fingerprint resistant given the fiberglass’ texture. There’s also the added bonus of it being sustainable because not only is it made from recycled plastic, but it can further be recycled too!

8. Color Blending Leather

Leather is currently a favored material for crafting deluxe smartphone back covers in the tech industry. However, the variety of leather colors on the market is quite restricted, typically offering only single or dual-tone options. TECNO has been working on a Color Blending Leather that incorporates color-changing patterns into leather, allowing it to shift hues through the day. This process allows for the merging of multiple hues, creating a seamless and vibrant artwork directly on the leather itself. The result is a multi-layered color effect with a distinct and refined texture that’s also practical, resisting dirt and wear. This innovative color blending technique is set to infuse a dash of fashion-forward flair and artistic expression into the realm of technology accessories.

9. Borderless Foldable Main Screen

While companies like Oppo, Huawei, and Samsung have truly been pushing the boundaries of folding phone technology, there’s always been one obstacle nobody could overcome – the bezel. TECNO, however, is proposing modifying the structure of the Ultra Thin Glass (UTG) to remove the bezels entirely. While we don’t have any physical or visual evidence of this, it seems like TECNO could potentially launch a folding concept soon with zero bezels.

10. Satellite Communication Technology

Finally, TECNO is also looking at ways to bring satellite communication to its own phones, just like Apple did with the iPhone 14 series. “When located in an environment with poor or no signal, the Satellite Communication Technology enables users to maintain contact with the outside world, ensuring safety when camping, hiking, and mountaineering,” says the company.

The post Future Smartphones could have backplates made from 3D displays, fiberglass, or even fragrant leather first appeared on Yanko Design.

What if the White Board and Sticky Note had a baby? Meet the Future of Creative Productivity

Back in 2020, the way we worked radically changed. No, I’m not talking about the shift to Working From Home (WFH) during the pandemic, I’m talking about the birth of the Mover Erase, a rather inventive little piece of stationery that took the best parts of a magnet, a whiteboard, and a Sticky Note and combined them all into one single universally appealing solution. The Mover Erase was just genius – it was portable, reusable, magnetic, and came in clusters that helped you move notes around instead of one large static surface. Moreover, it saved paper by replacing thousands of sticky notes that would eventually end up in the trash. Nearly 4 years later, the folks at Bravestorming are making the Mover Erase better than ever, with standardized sizes that let you mount sticky notes onto your individual MEU (Mover Erase Uni-size) plate, for people who prefer the texture of paper. The entire kit also comes with its own mounting accessories, along with an app that digitizes your hand-written notes, giving them a place to live forever even if you wipe them clean to reuse!

Designer: Bravestorming

Click Here to Buy Now: $44 $65 (33% off). Hurry, only 9/165 left!

Whiteboards are great because you can capture ideas, wipe them down, and start afresh. Sticky notes are great because you can put them anywhere, and arrange them to create brainstorming maps with repositionable boxes. So why not combine the two into a novel, clever solution? The Mover Erase Uni-size cleverly merges them into a singular product that really lends well to your creative process. The MEU’s whiteboard-like glossy silicon surface is great to write on with whiteboard markers, while the magnetic design lets you snap your notes easily onto surfaces for future reference. A patented release technique lets you dislodge notes too, quite like pulling a sticky note off a wall. The MEUs are color-coded, perfect for organizing your notes based on category or urgency, come in two standard sizes that match popular Sticky Note formats, and unlike paper which tends to curl up and become frail after days, stays looking as good as new forever.

6 Forms of MoveNote + Trifold

The beauty lies in the ability to use a cluster of MEUs together, brainstorming, organizing, reshuffling, and effectively mapping out ideas simply by moving individual MEUs around. Then, once you’re done with your sprint session, you can either keep the MEUs where they are, dislodge them to assign activities/roles to different teammates, or better still, take a photo through 3M’s Post-It app to digitize your notes effectively before wiping an MEU clean. Cleverly enough, the new MEUs are perfectly sized to fit your standard Post-It notes too, so just in case you love the texture of paper, you can stick your notes right on the MEU and use them… although what’s great about the new MEUs is the fact that the silicon surface on which you write can actually be removed from its plastic housing and stuck onto surfaces (given that silicon has an almost friction-like gripping tendency). However, there’s an understated beauty to the magnetic clear casing that the MEU has been perfecting since 2020.

Speaking of things being perfected since 2020, the Mover Erase Uni-Size comes with two new accessories in the form of an A3-compatible Movenote magnetic folder that gives your MEU notes and your paper documents a single place to coexist, and a shapeshifting Trifold that gives your notes a dynamic stand to display themselves on. The Movenote is a folio case that holds documents (A4/A3), acts as a daily planner (letting you stick your MEUs on the built-in charts), and even transforms into a tiny table! Its A3/A4 size compatibility means it holds tablets too, giving you a singular place for all your stationery and productivity tools. However, if you need something a little more compact just for your MEUs, that’s where you’ve got the Trifold.

The Trifold is a clever accessory that features three panels with dedicated charts on them for using alongside your MEUs. The magnetic surface lets you easily attach MEUs to the Trifold’s charts, but wait, they also fold into a prism shape, sitting on your desk either horizontally or vertically, allowing you to view and access your MEU notes on command. Open the Trifold flat, and it’s just the right size to fit into the Movenote folder, giving you a holistic kit that radically transforms how you think, take notes, and work.

The makers behind the Mover Erase began their journey by simply designing magnetic memo bricks that you could attach sticky notes to… but in doing so, they realized there was a lot more to the product. “Compared to the traditional sticky note thinking process, our Mover (Magnetic Memo Brick) significantly helped ADHD adults, Montessori educators, and many entrepreneurs in their thinking processes,” mentioned the creators at Bravestorming. Over the years, different iterations helped them build products that served different needs for different users. The magnetic memo brick still remains core to the product’s UX, but it now comes with a removable, washable, paper-like textured silicone writing surface… but more importantly, it’s standardized in size, still allowing people to mount Sticky Notes from popular brands like 3M onto it, just like the first generation.

Following 3 successful Kickstarter campaigns with over 15,000 happy customers, the folks at Bravestorming are finally turning a good idea into a great ecosystem. Four years later, the Mover Erase ‘universe’ is more functional and well-rounded than ever, allowing you to ideate, brainstorm, collaborate, and organize your work-life more efficiently and creatively. The Mover Erase Uni-size Starter Pack starts at a mere $33, consisting of just blank MEUs, but for $44 you can upgrade to color-coded MEUs, and for a little extra, you can add the Movenote and Trifold to your kit.

Click Here to Buy Now: $44 $65 (33% off). Hurry, only 9/165 left!

The post What if the White Board and Sticky Note had a baby? Meet the Future of Creative Productivity first appeared on Yanko Design.

This Compact Pizza Oven is the Secret to Unlocking Restaurant-Worthy Pizzas at Home

Compact enough to easily fit even in the tiniest of backyards, the Gozney Arc isn’t a pizza oven as much as it’s a portal straight to Naples. With a unique design that combines high-end material, immaculate engineering, and a series of game-changing innovations, the Gozney Arc sets a new standard for creating epic pizza at home.

Designer: Gozney

Click Here to Sign Up Now: $760

The Arc gets its name from the way its evolutionary lateral gas burner creates a yellow flame that rolls and arcs over the internal chamber of the oven, mimicking that of a wood fire seen in many traditional restaurant pizza ovens. The innovative burner design unlocks valuable floor space meaning the oven is compact on the outside but big on the inside whilst providing unparalleled heat consistency and precise control. This, creator and founder Tom Gozney mentions, makes it easier than ever to bake the perfect pizza no matter your skill level Just like a restaurant pizza oven, Arcs reaches temperatures upwards of 950°F (500°C), well beyond what your regular home oven is capable of so you can cook a pizza in as little as 60 seconds…. if you’ve tried baking a restaurant-style Neapolitan or even New York pizza in your home oven (with a pizza stone or steel), you know that it just doesn’t taste the same. The lower temperatures of home ovens mean the pizza dough takes longer to cook, and instead of charring on the surface, it dries out through and through, giving you a bread-like consistency, not the airy, charred crust you’d get in a restaurant.

Arc XL + Arc bring Gozney’s renowned design ethos into a sleek form that’s compact outside yet big on cooking space inside.

That’s where a device like the Arc comes in. Designed to distill the performance of a restaurant oven into something more accessible so you can churn out 14 or 16-inch pizzas that taste just like something you’d get at your favorite pizza place. It’s tricky scaling down all those thermals and design principles but that’s what the Arc’s engineering is all about. It has a 20mm stone floor and thick layers of insulation that provide unbeatable heat retention and consistency. This helps the pizza oven get hot and stay hot, allowing you to get a consistent bake, pizza after pizza. However, don’t just limit yourself to pizza with this oven, with the Arc you can create calzones, focaccias, grilled fish, roasted veggies, seared meats, and other dishes that benefit from high, searing, scaling down an hour’s worth of cooking to mere minutes.

With a revolutionary lateral gas burner, unbeatable heat retention, and precision temperature control – all for distributing high heat evenly and consistently – creating epic pizza has never been easier.

It isn’t just the fact that the Arc is smaller that makes it the perfect partner for your outdoor cooking adventures – it’s smarter too, with innovative features that make the entire process highly intuitive and easy for home cooks. Temperature control is key to achieving perfect results with any oven, and the Arc is no exception. With features like a digital temperature display that alerts you when the oven has hit the perfect stone floor temperature of your favorite pizza styles and an intuitive, precise temperature control the Arc lets home cooks make pizzas with more confidence and less trial-and-error.

The Arc is available in two sizes with the smaller oven having a base big enough for a medium 14″ pizza, and the Arc XL is able to make a large 16″ pizza for everyone to dig into. To ensure you have everything to need, Gozney has also designed a range of pioneering accessories from a handy outdoor stand for the pizza oven, with fold-out side tables and a dedicated spot for a propane tank underneath to a new range of peels so you can launch, rotate and serve your pizzas with ease.

With the Arc, you don’t need to be a professional pizza guru, have working knowledge of wood-fired ovens or stress about fluctuating temperatures or uneven cooking to make the restaurant-worthy pizzas at home. What’s not to love? Bring on the pizza parties.

Click Here to Sign Up Now: $760

The post This Compact Pizza Oven is the Secret to Unlocking Restaurant-Worthy Pizzas at Home first appeared on Yanko Design.

This Compact Titanium Pocket Knife Has a Replaceable Blade and a Rebellious Streak

A Grade-5 Titanium body, a magnetic opening mechanism, and a replaceable blade that lets you stay sharp at all times. The G9 Knife by PICHI isn’t ‘default’ in any way. Every little thing about it screams ‘different’ and ‘better than the rest’, with a design that strays away from tradition, but still retains functionality, durability, and tactile pleasure that’ll make this your favorite knife to carry on outdoor adventures.

Designer: PICHI DESIGN

Click Here to Buy Now: $89 $139 (37% Off) Hurry! Only 4 discounted units left!

Most knives have a rather simple blade deployment technique. Some require manual flipping out of the blade from within the handle, others have spring-loaded switches that cause the blade to swivel or shoot out (switchblades, as they’re called) – the PICHI G9, however, opts for something a little more fidgety-fun. The knife features a two-part handle that opens up to reveal the blade sandwiched on the inside. Deploying your blade requires a bit of thumb action, causing the handle to disengage, revealing the blade inside, which can then be slid out. Magnets help the handle snap back into position, creating an opening experience that’s uniquely appealing, has a nifty tactile quality to it, and can be faster than most manual knives with a fair amount of practice.

Measuring a mere 3.14 inches long, the PICHI G9 is finger-sized, giving it a compact form factor that’s just designed for your hands and for travel. The entire thing weighs a paltry 55 grams (1.94 oz) blade and all, and comes crafted from grade 5 titanium, known for its quality and sheer durability. The knife, for all intents and purposes, can practically last forever with sustained use – a feature made easy thanks to the fact that it has swappable blades on the inside that you can replace, sort of like your grandfather’s shaving razor that probably still works just as well today as it did in the 50s.

The stonewashed outer body of the knife doesn’t have much detail to begin with, which allows you to really appreciate that unique texture on the knife’s body. However, there is a 3-stage safety lock that prevents the blade from accidentally being deployed, and a hinge on top with a brass insert that’s hollow, allowing you to pass a carabiner or paracord through it for carrying your knife around.

As for the knife itself, the PICHI G9 doesn’t go down the traditional drop-point route. Instead, it relies on a standard SK2 blade, known for its robustness, sharpness, and ready availability. The cutter-esque blades have a sheepsfoot design, which makes them great for piercing and slicing, while the blades themselves are symmetric, which means you can just flip them over if one tip gets dull, using the other side before you need to replace the old blade with a new one.

SK2 HC Blade

The fact that you can replace blades makes the G9 knife perfect for beginners who don’t know how to sharpen their knives (or experts who don’t want to spend too much time on a whetstone maintaining their blades). The SK2 blades are designed for heavy-duty use, and can take an absolute beating, slicing through paper like butter but also piercing through wood very comfortably. The knife’s rather simple design makes it perfect to use anywhere, whether it’s at home or in the great outdoors.

The 3-Stage Locking Switch

For the outdoor enthusiast, each PICHI G9 pairs wonderfully with its own pure leather sheath that lets you (safely) carry your knife with you wherever you go. Sure, you could carabiner that baby onto your pant belt loop, but there’s something satisfying about the holster-like design of the leather holder. The holder also comes with a deep pocket clip, letting you attach it to your pant’s waistline for quick and easy access. The G9 with a single SK2 blade retails for $89, while the entire kit with the leather holder will cost you $116, with free global shipping.

Click Here to Buy Now: $89 $139 (37% Off) Hurry! Only 4 discounted units left!

Click Here to Buy Now: $89 $139 (37% Off) Hurry! Only 4 discounted units left!

The post This Compact Titanium Pocket Knife Has a Replaceable Blade and a Rebellious Streak first appeared on Yanko Design.

Sustainable canvas sneaker explores a unique design that lets you detach and repair your footwear

The Disassembly Lab is really one of those designs that doesn’t need much explaining. A lot of what makes this footwear great is clearly visible in its aesthetic itself, making it one of those shoes your eyes fall in love with LONG before your feet do. After all, isn’t that a hallmark of great design?!

What makes the Disassembly Lab footwear so great is its clever construction, featuring easy-to-disassemble parts that make the shoe simple to repair and even recycle. The shoe is characterized by two distinct halves, the upper body, and the outsole, with rivets/plugs that let you wind a piece of rubber band around. The rubber band holds the two halves together, also allowing for flexibility during movement. The result is a shoe that’s distinctly different, as the rubber band goes beyond being just a design feature – it becomes an iconic element of the Disassembly Lab’s design, turning sustainability into pretty much a visual motif!

Designer: Robin Luginbuhl

Chris Wawrousek, Innovation Studio Lead Designer at New Balance once said – “One day, laws are going to change, and brands will be responsible for the entire lifecycle of their products from beginning to end.” This phrase stuck with Robin as he designed the Disassembly Lab sneaker prototype. “Products can’t live on their own anymore; they have to be conditioned to a new system if they want to become more responsible,” Robin expanded. “Essentially, Disassembly extends the life of a shoe, making it repairable, restorable, replaceable, and recyclable.”

A major part of shoe assembly (and a major recyclability hassle) is the glue that’s used to hold components together. While fabric and leather elements can be stitched together, the upper half of a shoe is almost always glued to its outsole, giving it reliable durability during use, but becoming a big hassle when it comes to recycling because A. this glue can’t be ‘unglued’, and B. it’s almost always made of synthetic materials, so the shoes can’t be bio-degraded either. Robin’s alternative is simple, and frankly genius. Visually, it reminds me of the rubber bands used in braces, but technically, it’s an incredibly effective way to hold the shoe upper and sole together in a way that allows for flexibility without a hassle.

The result is a combination of iconic and genius. The shoes look great, with their patterned ‘belts’ that can be adjusted, customized, and even tightened or loosened depending on overall flexibility. The pegs on the upper and lower halves can be shaped in circular or rectangular designs, causing the rubber band to adopt different patterns, much like sound waves (sine, sawtooth, square, etc.) There’s even an experimental 3D-printed upper that has jigsaw-style pieces that plug into the sole (concept visible below).

“These shoes, with their TPU soles and 3D knitted upper, are reduced to the essentials, enabling simple, rapid production and assembly by hand, and easy recyclability,” Robin mentions in his project post on Instagram. The Disassembly Lab is currently just a concept, but even as a proof of concept, it’s rather remarkable. We could use a few wearability-test videos to really get a sense of the practicality of the design, but otherwise, both functionally and ecologically, we’re sold on the idea!

The post Sustainable canvas sneaker explores a unique design that lets you detach and repair your footwear first appeared on Yanko Design.

Ten Things They Don’t Tell You About Tiny Homes

Gawthorne’s Hut in New South Wales, Australia

Living in a tiny home is often romanticized as a minimalist and eco-friendly lifestyle, offering freedom from the burdens of excessive possessions and the financial strain of traditional homeownership. However, as someone who has journeyed down the tiny home path, I’ve come to realize there are many layers to this lifestyle choice that aren’t immediately apparent. Here’s an intimate look at ten things they don’t tell you about tiny homes, drawn from personal experiences and those of fellow tiny home dwellers.

Zen House in Hainburg an der Donau, Austria

1. Space Management Challenges

One of the first realities to hit was the constant battle with space. Every inch matters in a tiny home, requiring a level of organization and decluttering discipline I was unprepared for. Unlike traditional homes where you can have ‘junk drawers’ or closets filled with forgotten items, tiny living forces you to evaluate every possession for its utility and necessity. I’ve spent countless hours finding multifunctional furniture and devising storage solutions that keep my space functional yet not claustrophobic. It’s a never-ending puzzle that demands creativity and patience.

Elsa Prefab Home by Olive Nest

2. Zoning and Legal Hurdles

When I first entertained the idea of tiny home living, I was blissfully unaware of the zoning and legal hurdles that lay ahead. Finding a spot to park or build your tiny home can be a bureaucratic nightmare. Many regions have strict zoning laws that don’t accommodate tiny houses, especially if you’re looking to live off-grid or in a non-traditional community. Navigating these regulations required a lot of research, calls to local authorities, and sometimes, compromises on location and lifestyle that I hadn’t anticipated.

IMAGO-iter by BESS

3. Utility Connections Can Be Complicated

The vision of a quaint tiny home tucked away in nature often overlooks the practicalities of connecting to water, electricity, and sewage. In my case, securing a reliable power source was a challenge, leading me to explore solar panels and composting toilets as alternatives. These solutions, while sustainable, come with their own set of challenges and maintenance requirements. It’s a trade-off between the idyllic off-grid life and the convenience of modern utilities.

La Casa Nueva by Jag Studio

4. Weather Vulnerabilities

Tiny homes, particularly those on wheels, can be surprisingly vulnerable to extreme weather. I’ve weathered storms that left me questioning the stability of my tiny abode, as high winds rattled the windows and rain tested the waterproofing. It’s a stark reminder that what you gain in quaintness and mobility, you may sacrifice in security and protection against the elements. Ensuring your tiny home is built to withstand local weather conditions is crucial but can be an oversight during the planning phase.

Seroro by Smaller Architects

5. Limited Privacy

Living in such close quarters has tested my relationships in ways I didn’t expect. The lack of privacy means that every phone call, argument, and moment of frustration is shared space. It’s taught me the value of communication and setting boundaries, but it’s also a reminder that tiny living isn’t just a physical downsizing but an emotional adjustment to constant proximity with your housemates.

The DW by Modern Shed

6. Resale Value Uncertainties

The financial aspect of tiny home living can be misleading. While the initial investment is often lower than buying a traditional home, the resale market for tiny homes is still evolving. Unlike traditional homes, which typically appreciate over time, tiny homes can depreciate, much like vehicles. This realization made me reconsider tiny living as a long-term investment and more of a lifestyle choice with financial implications worth weighing.

Ohariu by First Light Studio & Build Tiny

7. Insurance and Financing Hurdles

Securing financing and insurance for a tiny home has been one of the more frustrating aspects of the process. Many financial institutions and insurance companies don’t know how to categorize tiny homes, leading to higher interest rates or insurance premiums, if you can find coverage at all. It’s a landscape that’s slowly changing as tiny homes gain popularity, but it’s a consideration that can significantly impact your budget and peace of mind.

Lola by Mariah Hoffman

8. Customization Costs

The allure of customizing a tiny home to perfectly suit your needs is strong, but so is the price tag that often comes with it. Specialized compact appliances, custom-built furniture, and the need to maximize every square inch can add up. My tiny home, which started as a budget-friendly project, quickly escalated in cost as I sought to make the space livable and reflective of my personality. It’s a cautionary tale of how ‘small’ doesn’t always mean ‘cheap.’

Kvivik Igloo by Ole Vanggaard and Kári Thomsen

9. Isolation

One of the more subtle aspects of tiny home living that caught me off guard was the sense of isolation. This wasn’t just about physical space but also the emotional distance it can create. Living in a tiny home often means positioning yourself away from conventional neighborhoods and, by extension, the daily interactions that come with community living. I found myself missing the casual conversations with neighbors, the spontaneous visits from friends, and the sense of being part of a larger community. This isolation isn’t always a downside, as it offers a peaceful retreat from the hustle and bustle of everyday life. However, it also requires a concerted effort to maintain social connections and seek out community engagement. The tiny home lifestyle has pushed me to be more intentional about my social life, planning gatherings in communal spaces and participating in local events whenever possible. It’s a reminder that while our homes might be small, our need for connection and community is as vast as ever.

Mina by Baluchon

10. Lifestyle Limitations

Finally, the most profound realization has been acknowledging the lifestyle limitations that come with tiny home living. Hosting dinner parties, indulging in large-scale hobbies, or simply having a separate workspace within your home requires creativity and compromise. It’s a lifestyle that demands minimalism not just in your possessions but in your expectations and social habits.

Natura by The Tiny Housing Co.

Tiny home living is not just a choice of housing but a commitment to a lifestyle that challenges conventional norms and personal comfort zones. It’s a journey filled with surprises, some delightful and others daunting. Yet, for all its challenges, tiny-living has taught me the value of simplicity, the beauty of sustainability, and the importance of community. It’s not a lifestyle for everyone, but for those willing to navigate its complexities, it offers a unique path to redefining what ‘home’ means.

Reflecting on my tiny home adventure, it’s clear that the journey is as much about internal discovery as it is about external simplification. It’s a lifestyle choice that demands resilience, flexibility, and frankly, even a sense of humor. After all, when you’re living in a space no bigger than some people’s closets, you learn not to take life too seriously. Whether you’re contemplating a tiny home or simply curious about the lifestyle, remember that the biggest challenges often come in the smallest packages… but also, the smallest homes sometimes have the biggest hearts.

Nido by Robin Falck

The post Ten Things They Don’t Tell You About Tiny Homes first appeared on Yanko Design.

This Might Be The MOST Advanced PC Flight Simulation Game Controller You Could Legally Buy

Any more advanced and the FBI would probably put you on a watch-list for purchasing it…

If the idea of recreating scenes from Top Gun in your flight simulator program excite you, you’re aware that a keyboard or gaming controller probably won’t cut it. Meet the VelocityOne Flightdeck from Turtle Beach, a HOTAS (Hands On Throttle-And-Stick) controller that gives you the most lifelike flight control experience money can buy. Aside from simulating G-force during flight, this bad-boy is capable of putting you front and center of the action. Maybe pair it with a VR headset and you’re golden!

Designer: Turtle Beach

Designed as a comprehensive control system, the VelocityOne Flightdeck ushers in the future of flight and space combat simulation on Windows 10 and 11 PCs. While it’s unfortunate that it doesn’t extend to Xbox consoles like its predecessor, the VelocityOne Flight, PC gamers will rejoice at the prospect of diving into their favorite flight simulation titles with this true-to-life setup.

Featuring 15 axes and a staggering 139 programmable functions, the VelocityOne Flightdeck offers a level of customization that caters to the diverse needs of virtual pilots. Whether you’re soaring through the skies in X-Plane, navigating the intricacies of Microsoft Flight Simulator, or exploring the vastness of space in Elite Dangerous, this HOTAS setup has you covered.

Central to the Flightdeck’s appeal is the innovative Flight Touch Display, a first-of-its-kind feature that combines real-time simulation status with advanced customization capabilities. This allows users to configure up to 39 extra button functions, enhancing the HOTAS experience across major combat simulation titles. The device boasts 139 programmable functions, offering an unmatched level of customization.

The VelocityOne Flightdeck is engineered for precision and durability. It utilizes non-contact Hall effect sensors for the main movement controls on both the stick and throttle, ensuring long-lasting accuracy and performance. This technological choice is crucial for maintaining consistent, precise control over time, setting the Flightdeck apart from competitors.

Beyond its core functionalities, the Flightdeck enhances user experience through additional features like adjustable RGB lighting and Turtle Beach’s signature audio advantages. Users can connect any 3.5mm headset to the system, enjoying functionalities such as Superhuman Hearing®, audio EQ modes, mic monitoring, and game and chat volume balance. The adjustable RGB lighting allows users to customize the ambiance of their gaming setup, further immersing themselves in the virtual skies.

The Flight Hangar companion app is a significant value add, enabling deep customization and performance tuning. Available for Windows PCs, it allows pilots to create and transfer comprehensive configuration profiles directly to the Flightdeck. This feature ensures that the system not only meets the immediate needs of users but is also future-proofed through easy firmware updates.

The Turtle Beach VelocityOne Flightdeck commands a premium price tag of $399.99. While this may seem steep, the investment is justified by the device’s unparalleled performance and feature set. Pre-orders are currently open, with the HOTAS setup set to hit store shelves on February 23, 2024. The VelocityOne Flightdeck is also part of a broader ecosystem that includes headsets, controllers, and other gaming peripherals, all designed to enhance the gaming experience.

The post This Might Be The MOST Advanced PC Flight Simulation Game Controller You Could Legally Buy first appeared on Yanko Design.

How to make a Domino Chain Reaction in KeyShot using the new ‘Physics Simulation’ feature

Last year, a global survey crowned KeyShot as the “Best Rendering Software,” with 88% of designers overwhelmingly picking it for its incredibly photorealistic rendering capabilities. Now, with KeyShot’s newly unveiled Physics Simulation and Camera Keyframe features, the software is growing even more powerful, bringing real-world physics and camera effects to make your renders pop even more.

Click Here to Participate in the 2024 KeyShot Animation Challenge. Hurry! Challenge ends March 10th, 2024.

I put KeyShot’s Physics Simulation feature to the ultimate test by rendering a dramatic domino chain reaction scene. Setting up the simulation took hardly any time, with incredibly easy controls that took mere minutes to get the hang of. The results were jaw-dropping if I say so myself. In this article, I’ll show you how I managed to pull off one of my most exciting KeyShot rendering experiences ever. I’ll walk you through how I set the domino scene up, what parameters I input into the Physics Simulation window, and how you can recreate this scene, too. I’ll also share tips and tricks that can help you create some incredibly real simulations with objects falling, bouncing, and colliding with each other, absolutely enhancing your KeyShot rendering experience to a level like never before.

The entire scene was modeled in Rhino 7, starting by building one single domino, creating a spiral curve, and arraying multiple dominoes along the curve. The dominos were spaced at roughly 2 centimeters apart, ensuring the chain reaction would go smoothly from start to finish. The entire scene has a whopping 1182 dominoes in total; a little ambitious considering I was going to render the simulation on a 2022 gaming laptop.

Tilt the first domino to help kickstart the physics cycle

To use the simulation feature, import your scene into the latest version of KeyShot (2023-24) (get a free trial here), set the scale, add the materials, and pick the right environment. Before you use the physics feature, however, you need to prime your scene – in this case, it meant tilting the first domino forward so gravity would kick in during the simulation. The Physics Simulation feature can be found in the ‘Tools’ section on top. Clicking on it opens a separate window with a preview viewport, a bunch of settings, and an animation timeline on the bottom.

The Physics Simulation feature can be found in the Tools window

To begin with, pick the parts you want to apply physics to (these are the parts that will be influenced by gravity, so don’t pick stuff that remains stationary, like ground objects). The parts you don’t select will still influence your physics because moving objects will still collide with them. Once you’ve chosen what parts you want to move (aka the dominoes), select the ‘Shaded’ option so you can see them clearly in the viewport.

The settings on the left are rather basic but extremely powerful. You start by first setting the maximum simulation time (short animations require short simulations; considering mine was a long chain reaction, I chose 200 seconds), followed by Keyframes Per Second – This basically tells KeyShot to make your animation more detailed or choppy (think FPS, but for simulation). I prefer selecting 25 keyframes per second since I’m rendering my animation at 25fps (just to keep the simulation light), but you can bump things up to 60 keyframes per second, which gives your simulation smoother detail. You can then bump up your animation FPS to render high frame-rate videos that can then be slowed down for dramatic slow motion. Simulation quality dictates how well KeyShot factors the physics in – it’s at a default of 0.1, although if you feel like your simulation looks off, bump it up to a higher value.

The Physics Simulation Window

The remaining settings pertain to gravity and material properties. The gravity is set at Earth’s default of 9.81 m/s² – increasing it makes items heavier (and fall faster), and decreasing it makes objects float around for longer before descending. I set mine at 11 m/s² just to make sure the dominoes fall confidently. Friction determines the amount of drag caused by two colliding objects – setting a higher friction causes more surface interference, like dropping a cube on a ramp made of rubber, and reducing the friction enables smooth sliding, like the same cube on a polished metal ramp. To ensure that the dominos don’t stick to each other like they were made of rubber, I reduced my friction setting to 0.4. Finally, a Bounciness feature lets you determine how two objects collide – the lower this setting, the less bounce-back, the higher the setting, the more the rebound. Given that I didn’t want my dominos bouncing off each other, I set this at a low of 0.01. Once you’re done, hit the Begin Simulation button to watch the magic unfold.

If you aren’t happy with your simulation, you can stop it mid-way and troubleshoot. Usually, tinkering with the settings helps achieve the right simulation, but here’s something I learned, too – bigger objects fall slower than smaller objects, so playing around with the size and scale of your model can really affect the simulation. If, however, you’re happy with your simulation (you can run through it in the video timeline below), just hit the blue ‘OK’ button, and you’ve successfully rendered your first physics simulation!

The simulation then becomes a part of KeyShot’s Animation timeline, and you can then play around with camera angles and movements to capture your entire scene just the way you visualized it. I created multiple clips of my incredibly long domino chain reaction (in small manageable chunks because my laptop crashed at least 8 times during this) and stitched them together in a video editing app.

Comparing KeyShot and Blender’s Physics Control Panels

The Physics Simulation feature in KeyShot 2023-24 is incredibly impressive. For starters, it’s a LOT easier than other software like Blender, which can feel a little daunting with the hundreds of settings it has you choose from. Figuring out physics simulation in KeyShot takes just a few minutes (although the actual simulation can take a while if you’re running something complex), making an already powerful rendering software feel even more limitless!

That being said, there’s some room for growth. Previous experiments with the simulation tool saw some strange results – falling objects sometimes ended up choosing their own direction, making the simulation feel odd (I made a watch fall down and the entire thing disassembled and scattered in mid-air instead of falling together and breaking apart on impact). Secondly, sometimes objects can go through each other instead of colliding, so make sure you tinker with quality settings to get the perfect result. Thirdly, you can’t choose different bounciness values for different objects in the same simulation just yet, although I’m sure KeyShot is working on it. Finally, it would be absolutely amazing if there were a ‘slow-motion’ feature. The current way to do this is to bump up the keyframe rate and bring down the gravity, but that can sometimes cause objects to drift away after colliding instead of falling downwards in slow motion.

So there you have it! You can use this tutorial to animate your own domino sequence, too, or better still, create a new simulation based on your own ideas! If you do, make sure to participate in the 2024 KeyShot Animation Challenge to stand a chance to win some exciting prizes. Hurry! The competition ends on March 10th, 2024!

The post How to make a Domino Chain Reaction in KeyShot using the new ‘Physics Simulation’ feature first appeared on Yanko Design.

Retro LEGO Projector Can ACTUALLY Project Images Onto Any Wall

Think of it as a ViewMaster, but instead of a small viewfinder that lets you see images up close, the LEGO Magic Lantern can cast blurry yet discernible images onto your wall, making it an incredibly engaging and entertaining build for you and your curious child.

In the time before TV, before movies, and even before bright stage lights, a Dutch scientist developed a machine that could make pictures move right in front of you. People were amazed by it, and they called it the Magic Lantern. Jump ahead 400 years and we’ve got the LEGO version! However, the LEGO Magic Lantern by Norders doesn’t use candles or gas or quicklime as its light source – it uses something much more modern that everyone has in their pocket: the flashlight from your phone!

Designer: Norders

Inspired by the original Lanterna Magica from the 17th century (around the time when the greatest minds were devoting their time towards exploring optics and lenses), Norders’ LEGO creation is a tiny tabletop device with steampunk-retro-esque details. Styled like a lantern, the contraption has a lens on the front that shoots images out onto any wall, using the light from your smartphone. Given its fixed focal length, the projector does need to be adjusted to ensure the image on the wall isn’t blurry or washed out. At the right distance, you’re left with a clear, bright image with a little vignetting around the sides, giving it an incredibly vintage appeal. Imagine how advanced this must have been during the 17th century!

The way the projector works is by putting a translucent slide into its mounting slot, causing light passing through the projector to cast the image on a wall. The slides are removable and replaceable, letting you play out a literal slide show by changing the individual images every few seconds! In fact, the 17th-century magic lantern is where we get the word ‘slide show’ from!

By LEGO-build standards, Norders’ Magic Lantern takes a few unconventional liberties. It uses parts that aren’t found in the LEGO catalog, like lenses, mirrors, and printed images. The lenses play a rather integral role in shaping the beam of light, which travels upwards from your smartphone to a 45° mirror, which then channels it forward towards the front of the projector. The printed image is mounted on a transparent LEGO brick, and light passing through it hits a final lens before going through a shadow mask to help create that final circular image. In LEGO parlance, these techniques are ‘illegal’ because of the use of non-LEGO components. However, we can chalk it down to ‘creative liberty’.

Keeping the Magic Lantern 150cm (59 inches) far from the wall results in an image 60cm (23.5 inches) in diameter

The Magic Lantern’s schematic features an adjustable mirror because the flashlight isn’t located at exactly the same place for every smartphone

The Magic Lantern is made from 513 LEGO bricks, making it much easier than some other detailed LEGO construction kits. Each additional slide requires 7 bricks, allowing you to expand on your slide collection to display through the lantern (you’ll still have to print your images on transparent sheets). Norder’s creation is a part of the LEGO Ideas forum, where independent creators can submit their ideas for LEGO builds and have the global LEGO community vote to select their favorite. As of writing this, the LEGO Magic Lantern has a staggering 8,355 votes, putting it just inches behind the 10,000-vote finish line. You can help by voting for it on the LEGO Ideas forum and with luck, help turn it into a buyable set!

The post Retro LEGO Projector Can ACTUALLY Project Images Onto Any Wall first appeared on Yanko Design.

No More Scratchy Tags! This genius device removes care labels from clothes and digitizes them

I hate the fact that I get an entire booklet attached to my clothes every time I buy something. Especially with global brands, those care labels can be multiple pages long, covering as many as 5-7 languages. Nobody I know has ever read any of those tags, and let’s face it, they’re an absolute liability. They cause itches, and sometimes pop out from the back, making for a rather embarrassing moment when someone else has to point out to you that your shirt’s tag is sticking out. Sure, it’s not the biggest problem in the world (or even in the fashion industry), but that doesn’t mean it’s a problem not worth solving. Meet LUKE, the world’s first device that easily removes care labels. It slices them off right at the hem, leaving no residual label at all… but more importantly, it comes with an app that digitizes the care label for you, allowing you to refer to the instructions if you ever want to wash/dry/care for them exactly how the manufacture intended. LUKE obviously isn’t for everyone, but for people with sensitive skin, with expensive/delicate clothes, or with good fashion that doesn’t benefit in any way from those godawful tags… LUKE is a perfect tool to have sitting in your wardrobe!

Designer: Stefan Pabst

Click Here to Buy Now: $36 $43 (15% off).

Designed to be a rather compact, intuitive, and incredibly safe gadget, LUKE is no larger than a chunky stapler. It runs on 3 AA batteries that power the heated wire which comfortably slices through up to 4 labels at a time (for those pesky multi-label clothes). To use LUKE, simply slide it onto your garment’s care tag, placing one edge of it right near the hem (or the stitching). Hit a button to activate LUKE, and it simultaneously cuts the label off and seals the seam too, removing the tags without any evidence while ensuring your clothes don’t get damaged in the process. Take it from Stefan Pabst, who designed the product in Switzerland, and engineered/manufactured it in Germany.

The LUKE app creates a digital twin of one’s wardrobe and the data is available for a number of applications with just one “click”.

However, removing the tag is just half the process, since LUKE helps you digitize the tag too, just in case you want to refer to it for proper care instructions. The app takes a photo of the tag, scanning it for all the instructions, as well as a photo of your outfit, creating a digital wardrobe with all the information you need. You can access the tag through the app for laundry tips, helping you take good care of your clothes (and helping them last longer), but additionally, the LUKE app also lets you re-order clothes you’ve tagged, and also helps curate outfits based on your digital wardrobe, becoming your fashion assistant in the process.

As impressive as the tag-removing device’s underlying tech is, the app really uplifts the experience, adding a layer of meaningful AI insights to help you organize your wardrobe better, take sustainable care of your garments, and honestly, mix and match your clothes to look like a million bucks. You’ll feel like a million bucks too, now that you don’t have those annoyingly scratchy tags ruining your outfit and your comfort! LUKE starts at €33 (roughly $36 USD), comes with a free app, and ships globally.

Click Here to Buy Now: $36 $43 (15% off).

The post No More Scratchy Tags! This genius device removes care labels from clothes and digitizes them first appeared on Yanko Design.