Tekto F2 Bravo EDC Folding Knife Review: Sharp, Stylish, Satisfying

PROS:


  • Handsome design exudes both style and strength

  • Black D2 steel blade is gorgeous and sharp

  • Ceramic ball bearings deliver smooth and satisfying deployment

CONS:


  • Pocket clip can't be moved for ambidextrous use

  • Straight handle might feel too slim for a solid grip

RATINGS:

AESTHETICS
ERGONOMICS
PERFORMANCE
SUSTAINABILITY / REPAIRABILITY
VALUE FOR MONEY

EDITOR'S QUOTE:

With its handsome looks, a sharp blade, and a satisfying deployment mechanism, the Tekto F2 Bravo easily carves a place for itself in any EDC.

The EDC or Everyday Carry trend has been around for quite a while and there’s no sign of it slowing down anytime soon. Just like with paper notebooks and organizers, each collection of items and tools uniquely reflects the characters that own them. Some have simple packs filled with analog writing tools while others go fully digital with the latest gadgets and accessories. Still, some have an EDC that’s ready to face any task or problem, which sometimes involves cutting or slicing things. There might be a few who are hesitant to add a knife to their kit because most of the designs that can fit in an EDC often look like they’re geared for battle. Tekto has been making a few “tactical” knives designed to cater to this market, so we give the Forged Carbon version of its F2 Bravo folding knife a few flips to see if it makes the cut.

Designer: Tekto

Click Here to Buy Now: $127.50 $149.99 (15% off with coupon code “YANKO”). Hurry, deal ends in 48-hours! Fedex 2 day shipping to all USA orders for free.

Aesthetics

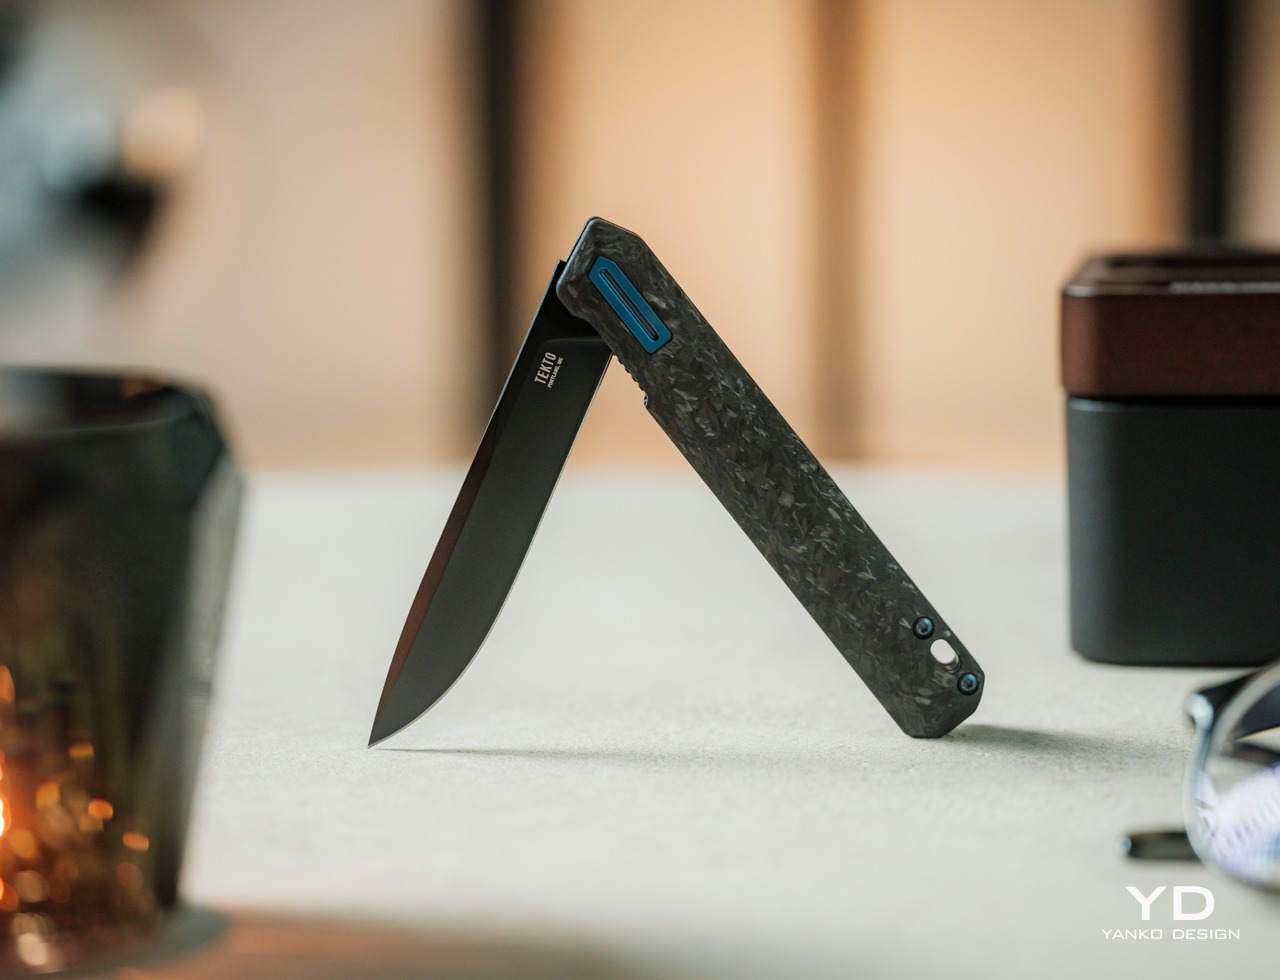
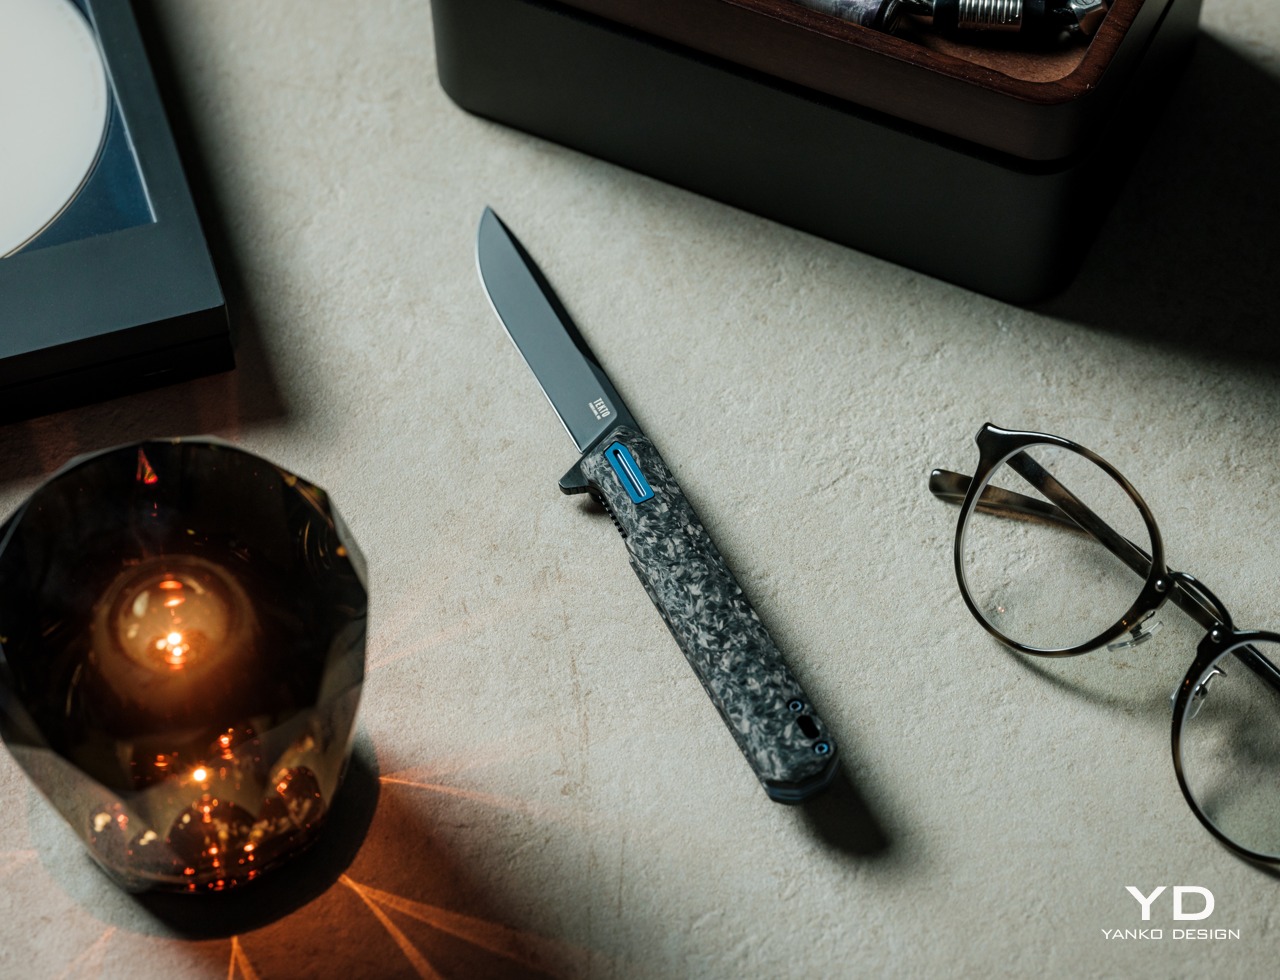
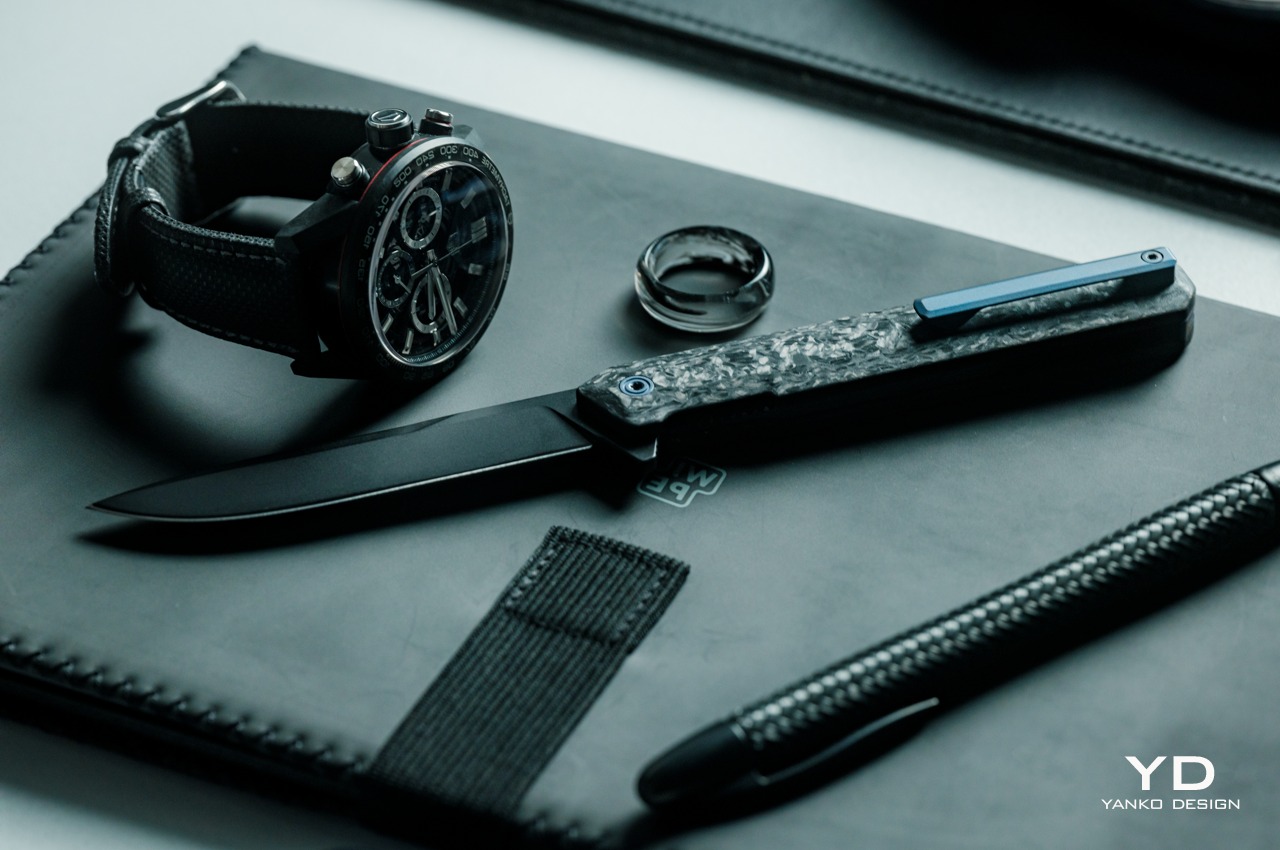
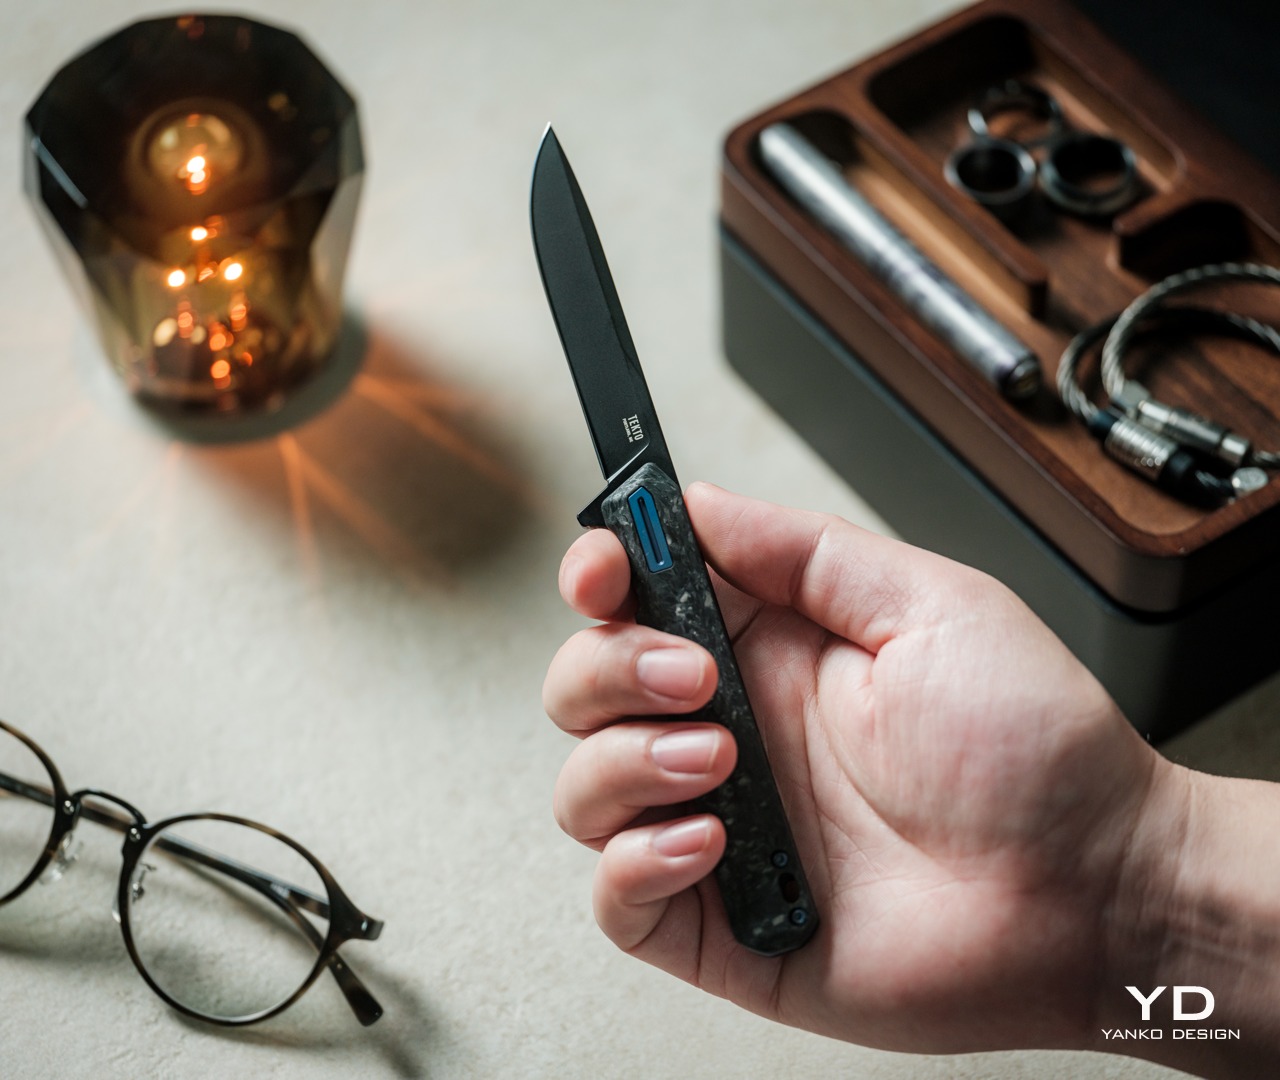
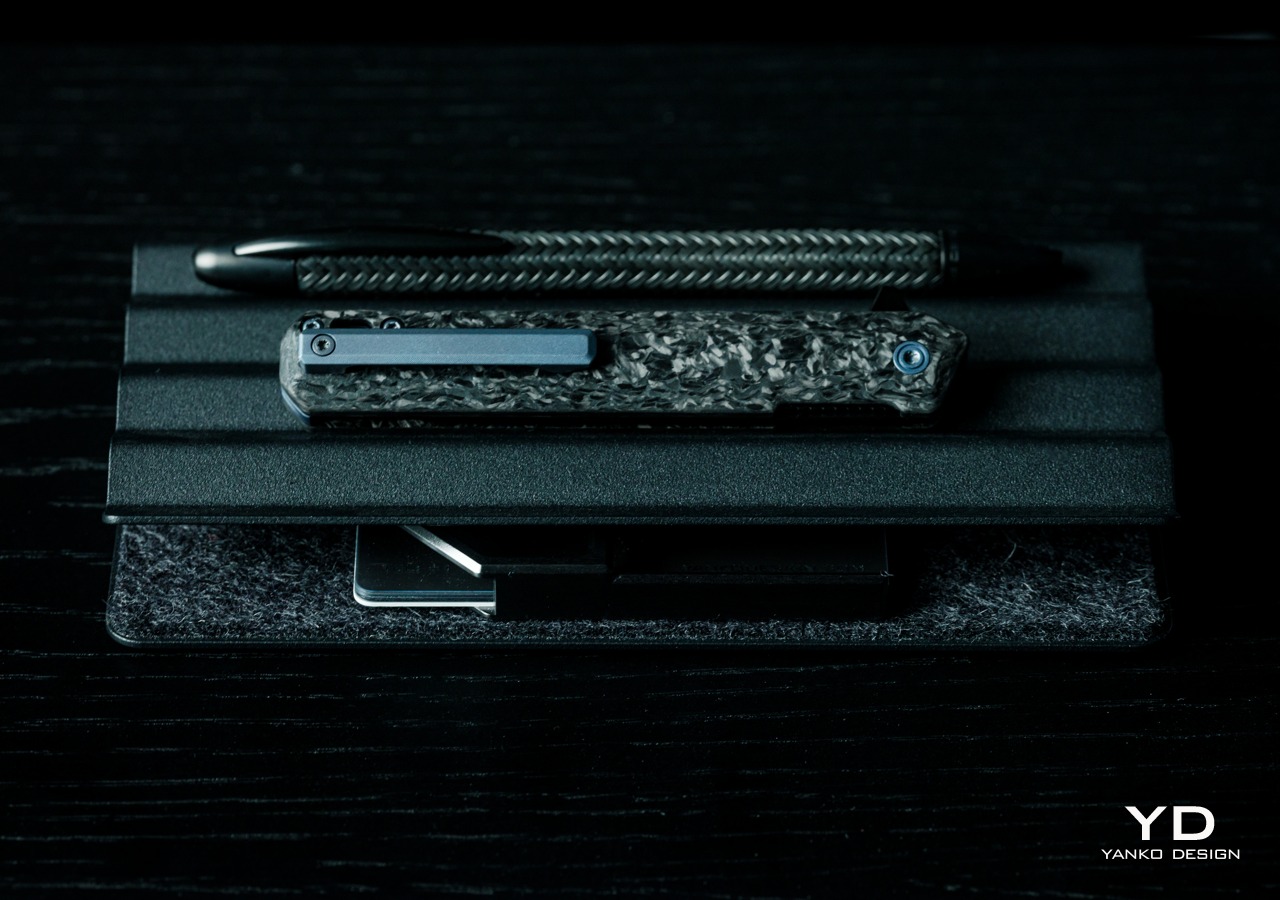
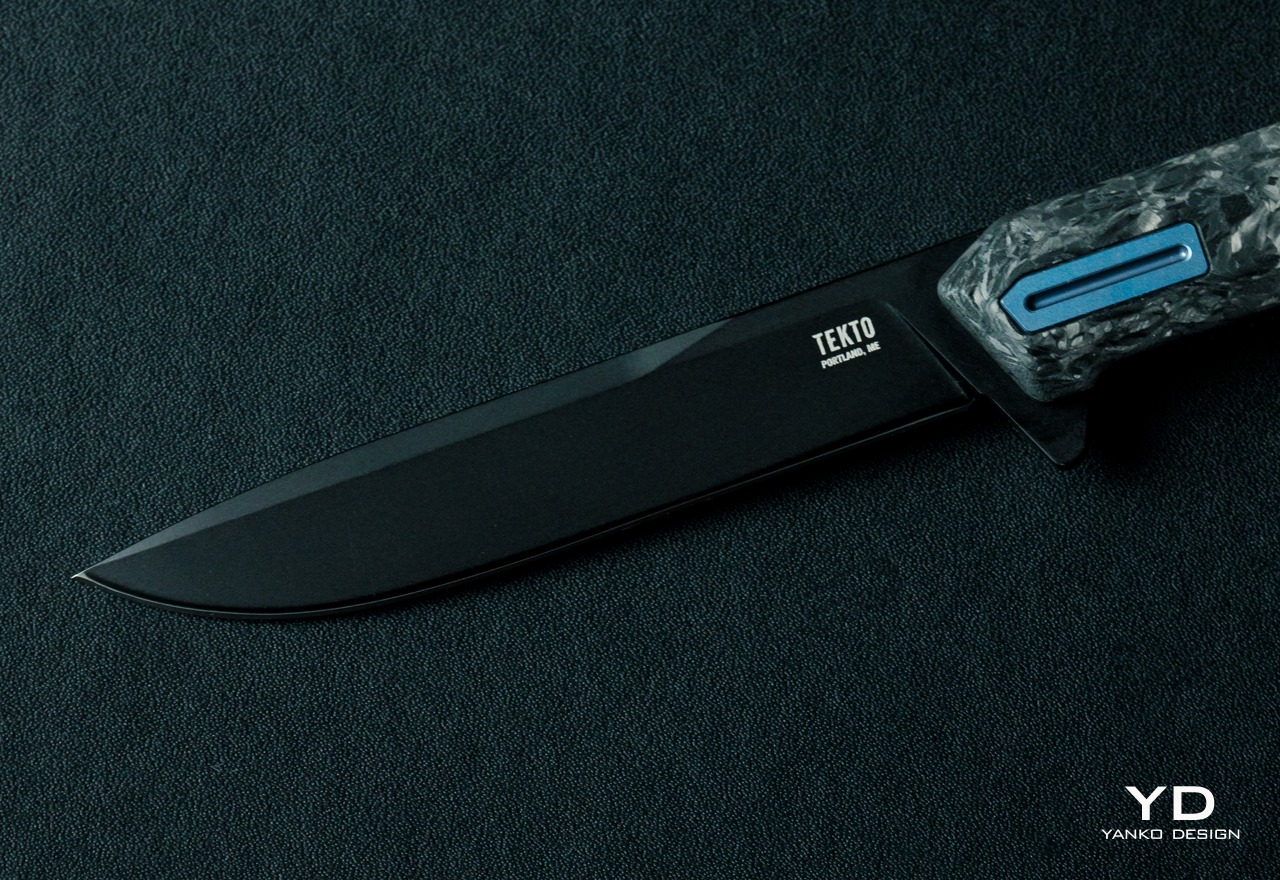
Calling the Tekto F2 Bravo a tactical knife might be a little bit confusing, though depending on the exact variant you’re going for, it does fit the bill in terms of looks. The Forged Carbon with Blue Accents that we have for this review does have that camo-like appearance to the handle, but that’s pretty much the extent of the association with tactical gear. Because at the end of the day, the F2 Bravo is a handsome tool that carries both finesse as well as strength in its appearance alone.

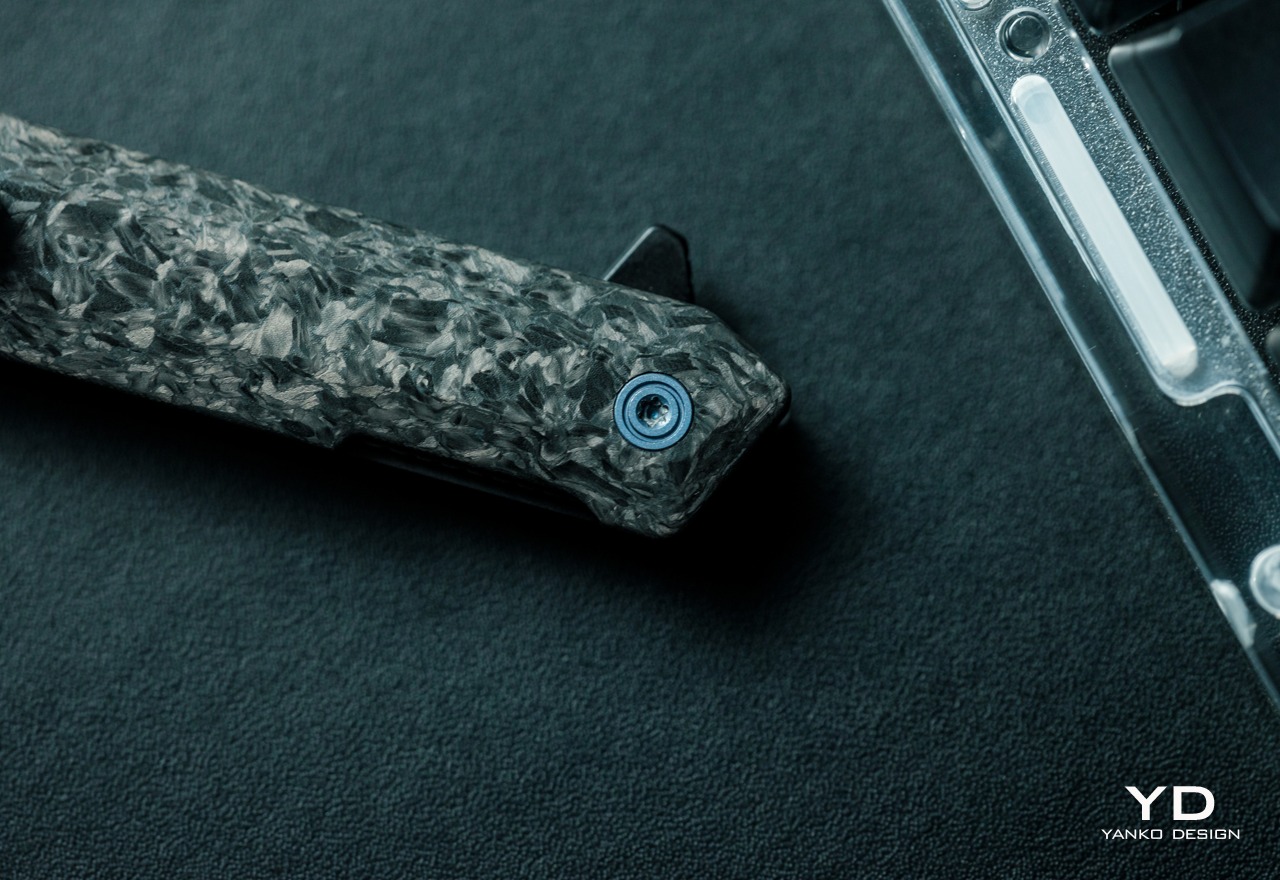
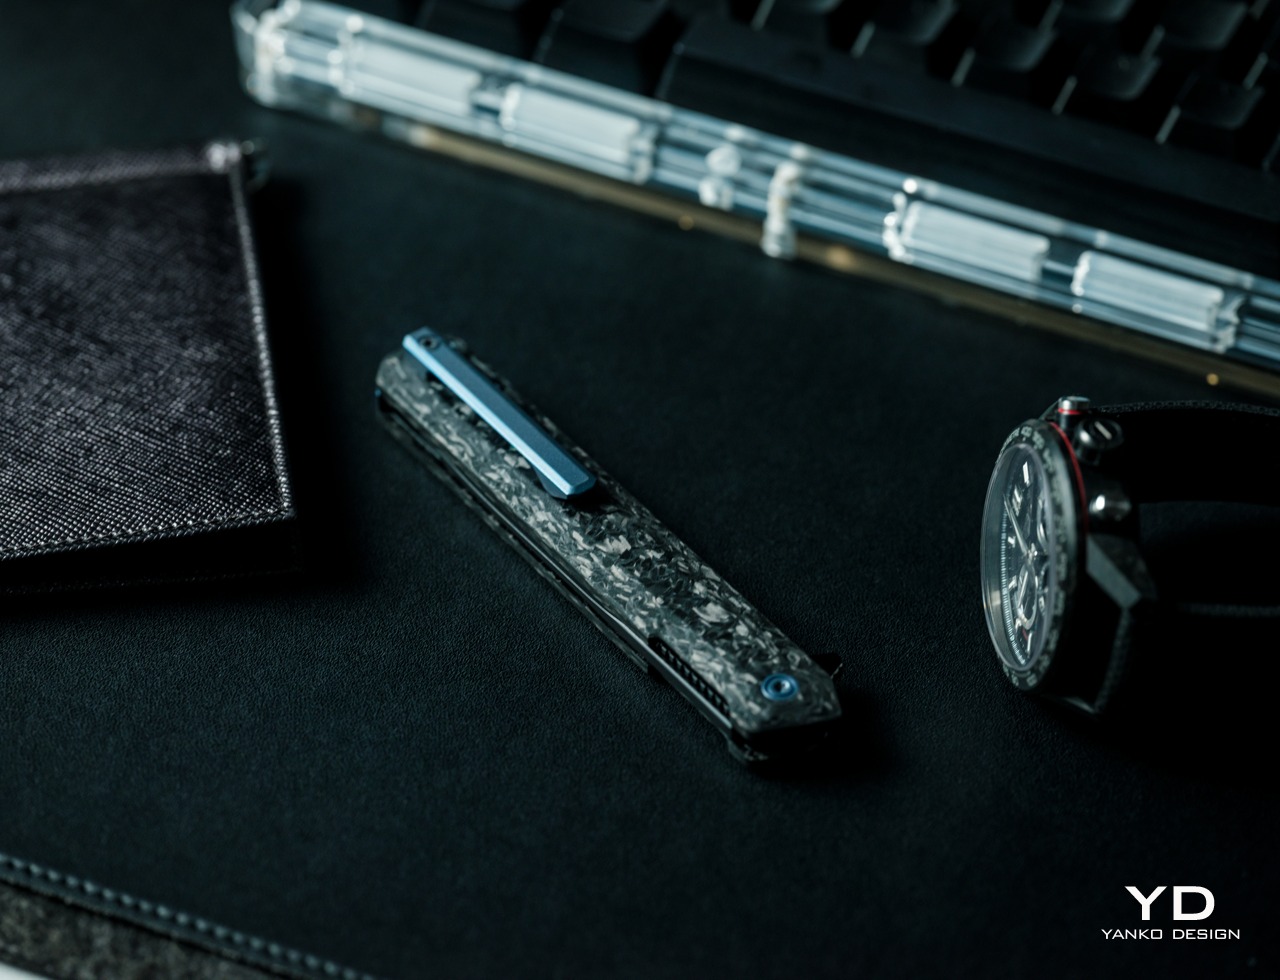
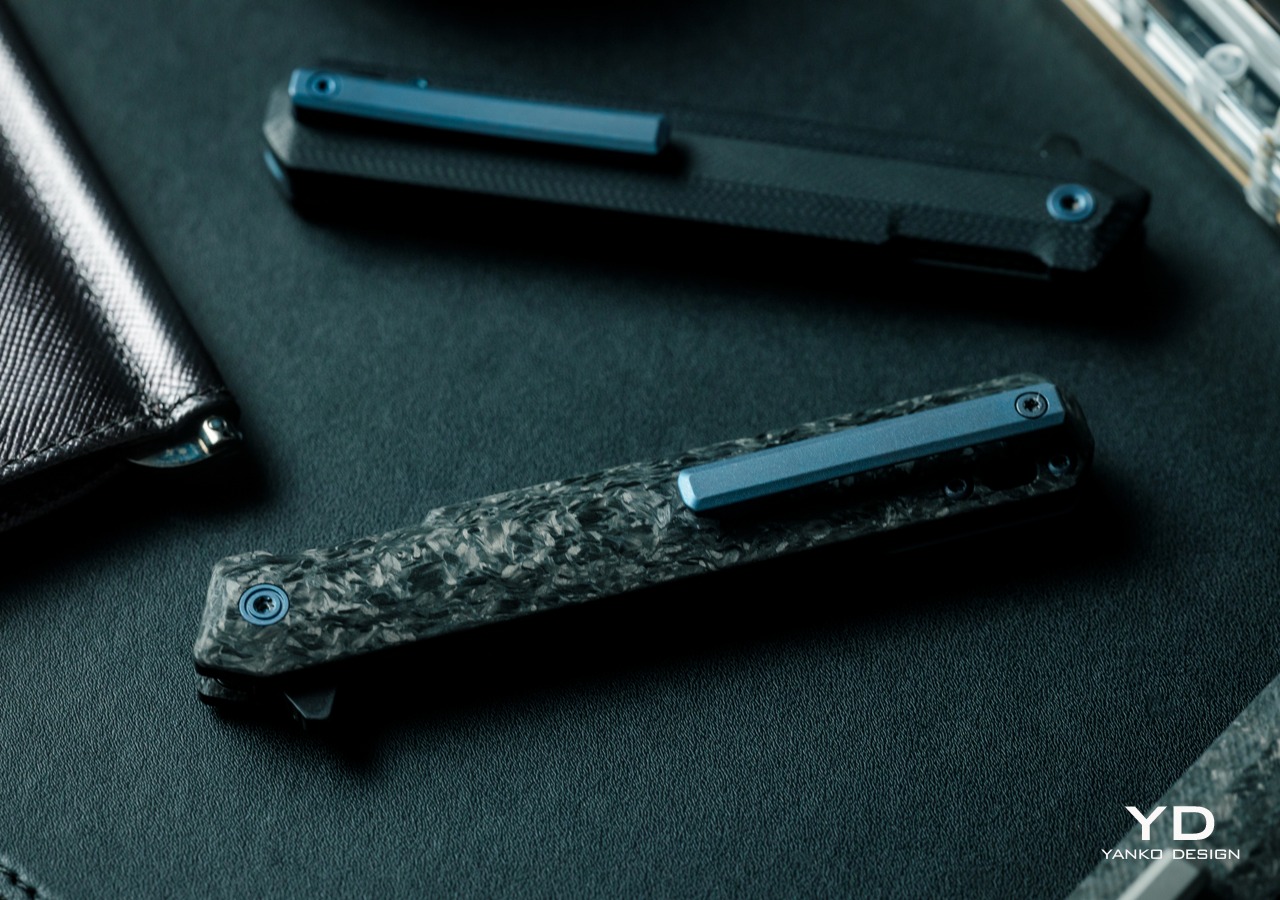
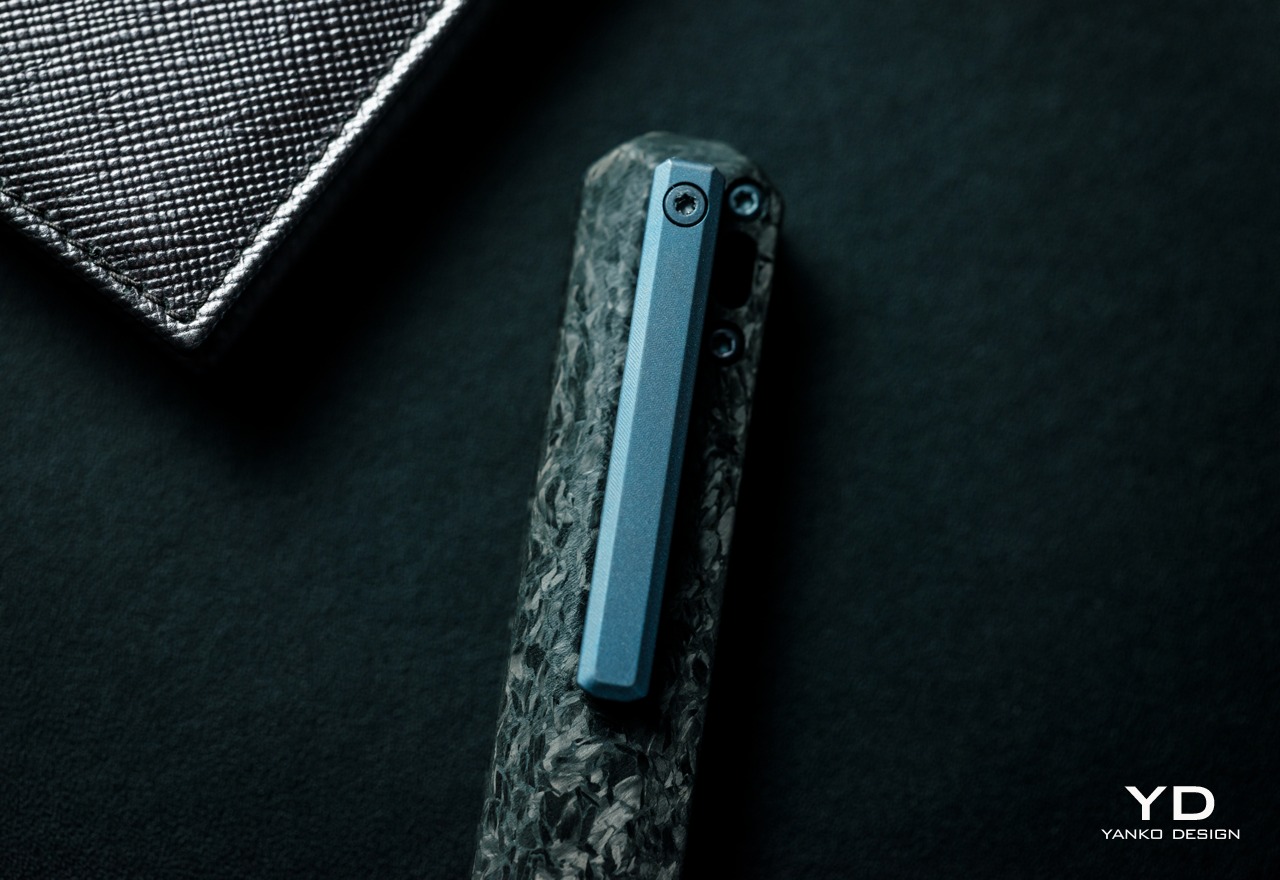
Unlike what you might think of tactical knives or folding pocket knives in general, the Tekto F2 Bravo uses straight, clean lines to portray an image of sharpness and simplicity. The handle itself has a simple and straight structure that avoids excessive curves and embellishments that only get in the way of the knife’s utility. Titanium accents used for the custom pivot, machined clip, and milled spacer add a premium quality to the knife, again an unexpected trait for something labeled as a tactical tool.

Even the blade, made from durable D2 steel, is a cut above the rest, pun intended. While most EDC knives prefer to show off their flashy blades with shiny silver, the F2 Bravo prefers a dark, black titanium coating. It gives the knife a distinctive appearance that is cold yet also precise, perfectly complementing whatever color the handle has. While it does catch your attention, it doesn’t distract you from the task at hand without a shiny surface to reflect light or the surface of what you’re cutting through.

With its slim profile, simple geometrical shape, and handsome looks, the Tekto F2 Bravo definitely stands above other EDC knives. It’s neither flashy nor flimsy, perfectly balancing aesthetics and a solid feel that we’ll get to in a bit.

Ergonomics

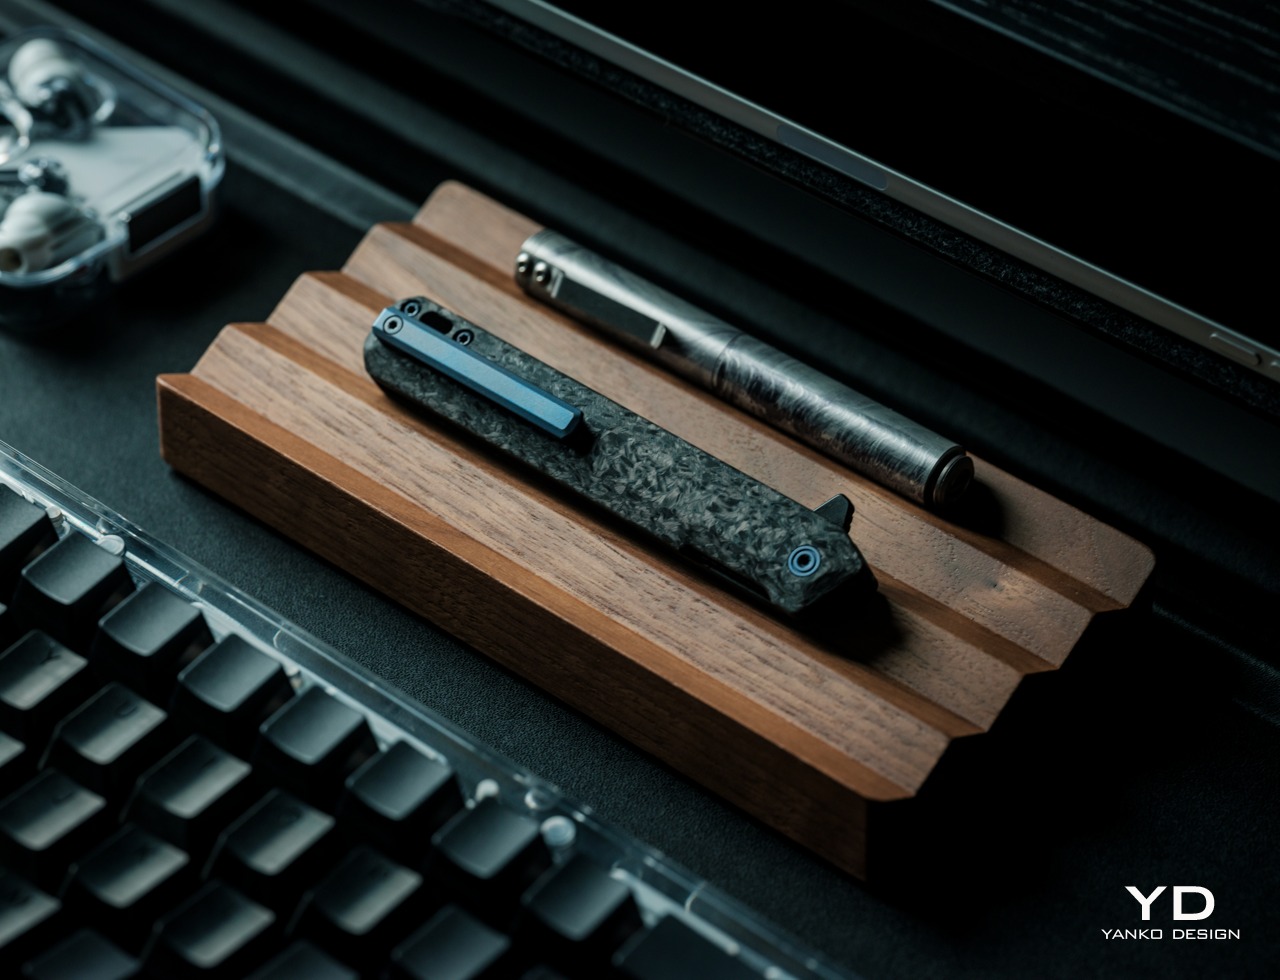
Just like its comparatively small size, the F2 Bravo is also surprisingly lightweight at only 2.04oz (68g). That’s not an insignificant number, considering this knife will take up space in small EDC bags or even pockets. For the latter, there’s a deep-carry titanium clip that makes it easy to secure in pants or shirts. That clip, unfortunately, is also one of the very few flaws in this knife’s design. You can’t remove the clip to switch it to the other side, unlike Tekto’s other ambidextrous clips. It’s not a deal-breaker definitely, but it’s something that buyers might want to consider when it comes to their comfort.

Despite its lightweight body, the knife still feels solid in your hand, especially when you deploy and close the blade. The one thing you might want to take note of is the size and shape of the handle. Unlike some of those more rugged knives, the F2 Bravo’s body doesn’t have specialized nooks and crannies to rest your fingers, except for the front guard for your index finger and jimping for the thumb. Some larger hands might even find the handle too small for a secure hold, and they might find themselves gripping it more forcefully and experiencing strain over time.

In most cases, however, the Tekto F2 Bravo offers a design that gives you confidence every time you grip the handle and deploy the blade. Exactly what you need for a sharp, cutting tool

Performance

The F2 Bravo’s fine edge drop point blade is quite a beast. It easily cuts through paper, cardboard, fabric, ropes, and other materials you might meet in your day-to-day travels. Given its size and purpose, it’s not fit for heavy-duty work, especially if you need some tooth to saw through harder materials. Then again, it’s an EDC knife more than an actual outdoor “tactical” blade, an aspect that might cause some confusion due to the name chosen by Tekto’s marketing.

Ceramic Ball Bearings – Enables quick and smooth blade deployment.

A sharp blade, however, is pointless if you can’t get it out of its hiding place fast enough and with little difficulty, and this is where the F2 Bravo really shines the brightest. It uses a ceramic ball bearing mechanism to rapidly and smoothly deploy the blade, and it definitely works as advertised. The action is smooth and the trigger is easy, giving you a satisfying feeling each and every time you make the blade spring into action. It might sound like a simple thing, but you shouldn’t underestimate the feeling of fulfillment from using a tool that not only works well but also gives you joy.

In addition to its rapid deployment, the F2 Bravo also delivers much-needed safety so that you can confidently slip it in your EDC bag or even your pocket. The discreet liner lock gives all the assurance you need that the sharp blade won’t just accidentally deploy or fold at the slightest pressure. At the same time, the strategically placed jimping makes it just as stable to close the blade when you’re done with your task. More than just its handsome looks, every part of the Tekto F2 Bravo is designed to provide maximum comfort without sacrificing its cutting performance.

Sustainability

For a tool that will most likely be used for rough purposes, it’s only reasonable to expect the Tekto F2 Bravo to be made to last. It uses plenty of durable materials, primarily Forged Carbon and D2 steel, that provide longevity while also making the folding knife lightweight and comfortable to hold. And thanks to its premium design, it uses very little plastic materials, making the knife inherently sustainable.

Sooner or later, however, the knife will meet some mishap that can’t be solved simply by sharpening the blade. Unfortunately, the F2 Bravo isn’t made to be easily repairable, at least not by untrained hands. The good news is that for most damages, Tekto accepts repairs or refurbishing, though you’ll have to ship the knife back to them. That said, you can replace lost screws on your own, but you’ll have to contact Tekto to get official replacement parts. Given that Tekto has a very responsive in-house customer service center, which responds within hours and usually ships parts on the same day, getting a replacement part should be a relatively quick and painless process.

Value

There are many pocket knives presenting themselves as EDC-friendly, but most of them fall under two categories. There are larger knives that are clearly made for outdoor use, and there are smaller knives that feel like they’ll break even before you finish cutting. The Tekto F2 Bravo proudly stands somewhere in the middle, with a tactical guise that speaks to its durability and performance, all while keeping a stylish and elegant design. It’s almost the perfect EDC knife, but there are a few things you’ll want to consider before committing to buying one.

The first is that it’s not a “one size fits all” affair and larger hands might find the knife a bit uncomfortable to hold for long periods of time. It’s also not the most affordable option of its kind, give or take around $140, depending on sales or discounts. That said, you do get a quality product that looks handsome in any EDC toolbox, so if you’re the type that needs to cut or slice a lot, the Tekto F2 Bravo definitely pays for itself in the long run.

Verdict

Something billed as a “tactical” knife is probably something you’d never consider for your EDC collection. It conjures up images of rugged or militaristic tools, probably more than you’ll ever want or need for everyday use. Fortunately, that’s really just a marketing strategy, because the Tekto F2 Bravo is anything but bulky and menacing.

It has a simple yet elegant design that belies the power it hides within, literally. Its lightweight yet durable Forged Carbon body makes it a pleasure to hold, while the black titanium-coated D2 steel blade looks as cool and sharp as it really is. Ceramic ball bearings make deployment swift and smooth, while the liner lock provides the confidence you need in every cut. With its handsome looks, a sharp blade, and a satisfying deployment mechanism, the Tekto F2 Bravo easily carves a place for itself in any EDC.

Click Here to Buy Now: $127.50 $149.99 (15% off with coupon code “YANKO”). Hurry, deal ends in 48-hours! Fedex 2 day shipping to all USA orders for free.

The post Tekto F2 Bravo EDC Folding Knife Review: Sharp, Stylish, Satisfying first appeared on Yanko Design.
10 Things To Consider Before Planning To Study Design Abroad

We’re finally at a point where design as an occupation holds the same mental weight as medicine, engineering, or law. The past two decades have seen a rapid rise in ‘design’ and ‘design thinking’ becoming permanent parts of the professional vocabulary, and with that, there’s a steady rise in the demand for designers. The educational setup, however, is still taking time to catch up to the industry’s need for designers, which is why even today there are still just a handful of institutions that command the design education space. A lot of them are in the global west, undoubtedly, but the global east is picking up pace too, offering young designers and aspirants the ability to travel to a whole variety of countries to study and specialize in design. If you’re reading this, chances are that you’re either thinking of studying design abroad, or you’ve already studied design abroad… or you’re just design-curious.

The allure of studying design abroad is undeniable—new experiences, exposure to international design perspectives, and the promise of personal growth. However, before your dreams take flight across borders, there are critical considerations that can make or break your educational journey. From cultural nuances and the constant evolution of design requirements to financial planning and accreditation standards, venturing into foreign territories for a design education requires meticulous preparation. My objective here is not just to guide you through practical steps but also to present you with a wealth of options when it comes to planning your career trajectory.

1. Evaluate the Worth of Studying Design Abroad

The decision to study design abroad is more than a question of education; it’s an exploration into cultural diversity and global perspectives. Exposure to different design philosophies, techniques, and cultural aesthetics can significantly enrich a designer’s creative arsenal. International programs often boast cutting-edge technology and facilities, alongside faculty who are leaders in their fields. However, this comes at a cost, both financially and emotionally, as you step away from the familiar comforts of home. It’s essential to balance these factors against your personal and professional goals. Does the international exposure align with your career aspirations? Can the unique experiences and skills acquired abroad offer you a distinctive edge in the competitive design industry? These are questions only you can answer, making this initial evaluation a cornerstone of your decision-making process.

2. Choose the Right College or Program

Choosing the right institution is a multifaceted decision encompassing several critical factors. Reputation is often the first consideration, but digging deeper into the curriculum offered, faculty expertise, and the strength of the alumni network can provide greater insight into the program’s value. The program’s location can also significantly influence your learning experience, offering unique cultural and design opportunities. Accreditation ensures that the education you receive meets global standards, essential for your future employability. Lastly, consider the program’s connections to the design industry, including internship and employment opportunities post-graduation. Each of these factors plays a crucial role in not just shaping your educational experience but also in laying a solid foundation for your future career in design.

3. Future-Proof Your Education: Choose Programs with Potential

The design industry is continually evolving, driven by advances in technology and shifts in societal needs. Future-proofing your education means choosing programs that not only provide a solid foundation in traditional design principles but also incorporate emerging fields such as UX/UI design, sustainable design, or digital media. Programs that emphasize adaptability, critical thinking, and innovation prepare students to navigate the rapidly changing landscape of the design industry. Look for curriculums that blend theoretical knowledge with practical application, offering opportunities to work on real-world projects and collaborate with industry professionals. This approach not only enhances learning but also ensures that students graduate with a portfolio that showcases their skills in addressing contemporary design challenges.

4. The Merits of Studying Design in Your Own Country

While international study offers unique advantages, considering the merits of studying in your own country is equally important. Cultural relevance in design can be a significant factor, especially if you intend to work within your local market post-graduation. Studying domestically can also be more cost-effective, reducing the need for international travel and living expenses. Moreover, local education systems are often well-aligned with the country’s specific design industry needs, providing relevant networking opportunities and internships. However, this doesn’t preclude international opportunities; many domestic programs offer exchange or study abroad options, allowing students to gain international exposure without committing to a full degree program overseas.

5. Job Opportunities: Local vs. Global Market Readiness

The design job market is incredibly diverse – design itself doesn’t have a standalone industry, it instead builds on the capabilities of other industries, whether it’s medical, consumer-goods, architecture, city planning, etc. Understanding the demand for specific design skills in your target market—whether local or international—is crucial. Programs that offer robust internship and placement services can significantly enhance your employability by providing practical experience and industry contacts. Networking, both in-person and online, can open doors to job opportunities not advertised publicly. However, international students should also consider a few things before planning on studying abroad. Aside from mere market readiness or a burgeoning need for your skill-sets, it’s important to evaluate the future from a social, economical, and even political lens. Looming sociopolitical unrest could lead to disruptions in your studies/work, low-skill work could be replaced by AI, a weak economy could easily affect job availability.

6. The Financial Aspect: Weigh Costs Against Benefits

The financial implications of studying design abroad are a major consideration. Tuition fees for international students can be substantial, and when combined with the cost of living, travel, and materials, the total expense can be daunting. Exploring scholarship opportunities, financial aid, and part-time work options can help mitigate these costs. It’s essential to conduct a cost-benefit analysis, considering the potential return on investment in terms of career opportunities and salary prospects. Ask yourself – “Will my salary grow proportionate to how much I’m investing in my career?” While the initial financial outlay may be significant, the long-term benefits of an international design education can outweigh the costs for many students.

7. Learning Vs. Earning – Upskilling Amidst Work

The debate between pursuing further studies and entering the workforce directly presents a compelling consideration: the possibility of learning while earning. This approach champions the idea of upskilling within the context of a job, where theoretical knowledge meets practical application. It’s a strategy that not only keeps the financial wheels turning but also enriches a designer’s skill set and experience in real-world settings. It allows aspiring designers to avoid the substantial financial and time investments typically associated with studying abroad, without sacrificing the advancement of their skills and careers. You build a skill set while building your savings – it’s a win-win.

8. Legal Considerations and Work Rights for International Students

Understanding the legal framework of your host country is essential for international students. This includes visa requirements, work rights during and after your studies, and potential pathways to permanent residency or employment. Regulations vary widely between countries, so it’s important to research thoroughly and plan accordingly. Many countries offer post-study work visas that allow graduates to remain in the country and gain valuable work experience, enhancing their career prospects.

9. Building a Global Network: Long-Term Career Advantages

One of the most significant benefits of studying design abroad is the opportunity to build a global network. Connections with fellow students, faculty, and industry professionals can provide invaluable support and opportunities throughout your career. These relationships can lead to collaborative projects, job offers, and partnerships. Actively engaging in your institution’s alumni network, attending industry events, and participating in design competitions can help you build and maintain these critical connections.

10. Reflection: Is Further Studies in Design Worthwhile?

Finally, reflecting on the value of further studies in design is crucial. While formal education can provide a strong foundation, the design industry also values experience, portfolio strength, and creativity. Consider whether your career goals are best served by further academic study or by gaining practical experience through internships, freelance projects, or starting your own design venture. For many, a combination of both education and practical experience offers the best path to a successful career in design.

The post 10 Things To Consider Before Planning To Study Design Abroad first appeared on Yanko Design.
Govee RGBIC Neon Rope Light 2 Review: Helping Your Creativity Really Shine

PROS:


  • Highly flexible material for creating any shape or pattern

  • Minimalist design with black or white options to match your decor

  • Impressive lighting options and AI-generated effects

  • Easy customization with new Shape Mapping function

CONS:


  • Very difficult to reposition or modify after it's installed

  • Wi-Fi connection only supports 2.4GHz network band

RATINGS:

AESTHETICS
ERGONOMICS
PERFORMANCE
SUSTAINABILITY / REPAIRABILITY
VALUE FOR MONEY

EDITOR'S QUOTE:

With a more flexible design and powerful customization options, the Govee RGBIC Neon Rope Light 2 offers a powerful tool for everyone to express their designs in dazzling colorful lights.

Smart lighting is one of the easiest ways to get into smart homes. Often you simply have to screw bulbs or plug lamps in, connect them to your phone, and you’re instantly able to control them remotely or through automated schedules. That kind of smart light is practical and convenient but not exactly impressive, nor does it let you easily create the lighting atmosphere that you want without investing heavily in multiple expensive products. If you really want to jazz up your space and dazzle your guests or viewers, you’ll want something like programmable string or rope lights to leave a lasting positive impression. Govee just launched its latest product in that category, the RGBIC Neon Rope Light 2, promising better build quality, more extensive customization, and more intelligent smart features, so we put this second-gen smart rope light to the test if it can really become our kaleidoscopic paintbrush to brighten up the room with our creativity.

Designer: Govee

Click here to Buy Now: $99.99

Aesthetics

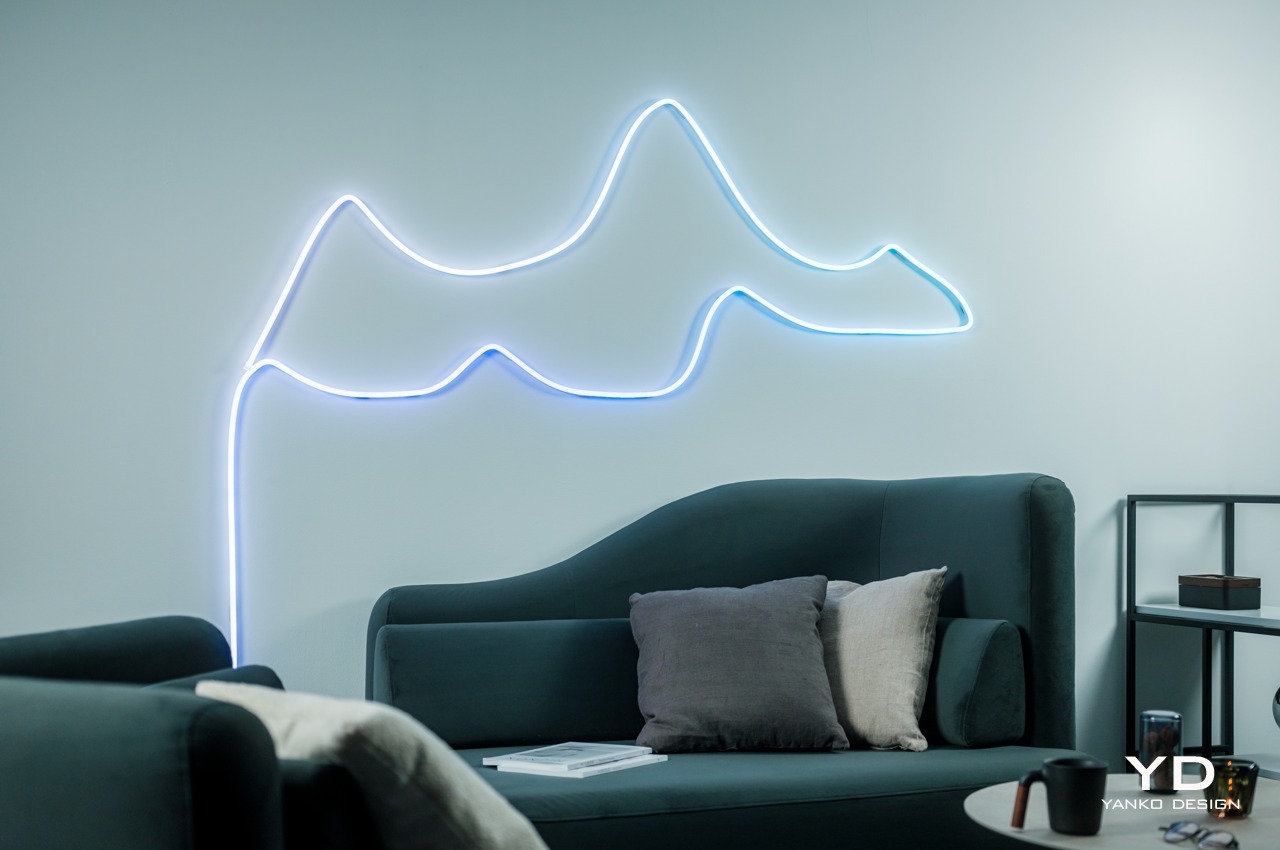
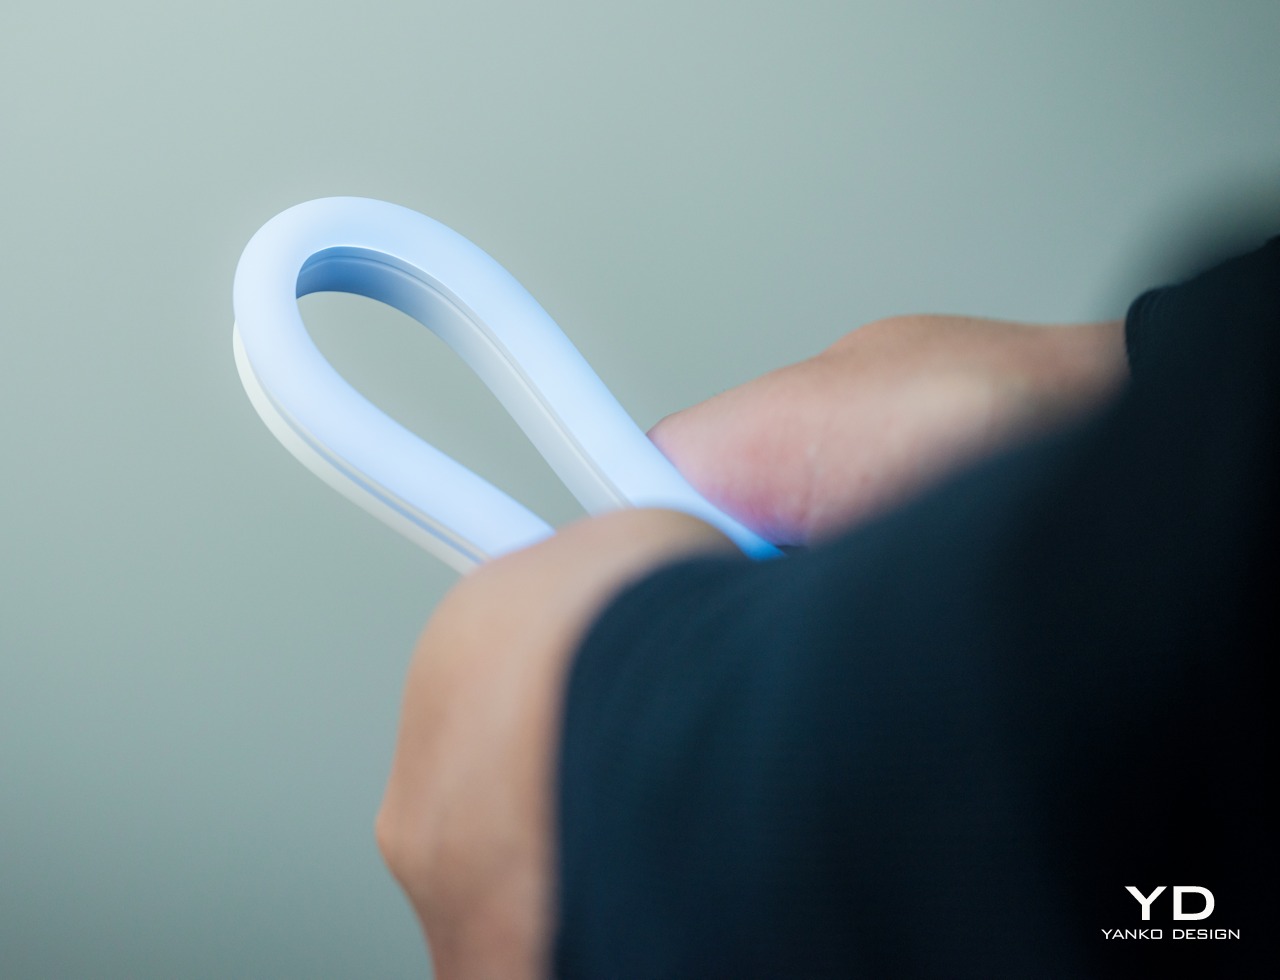
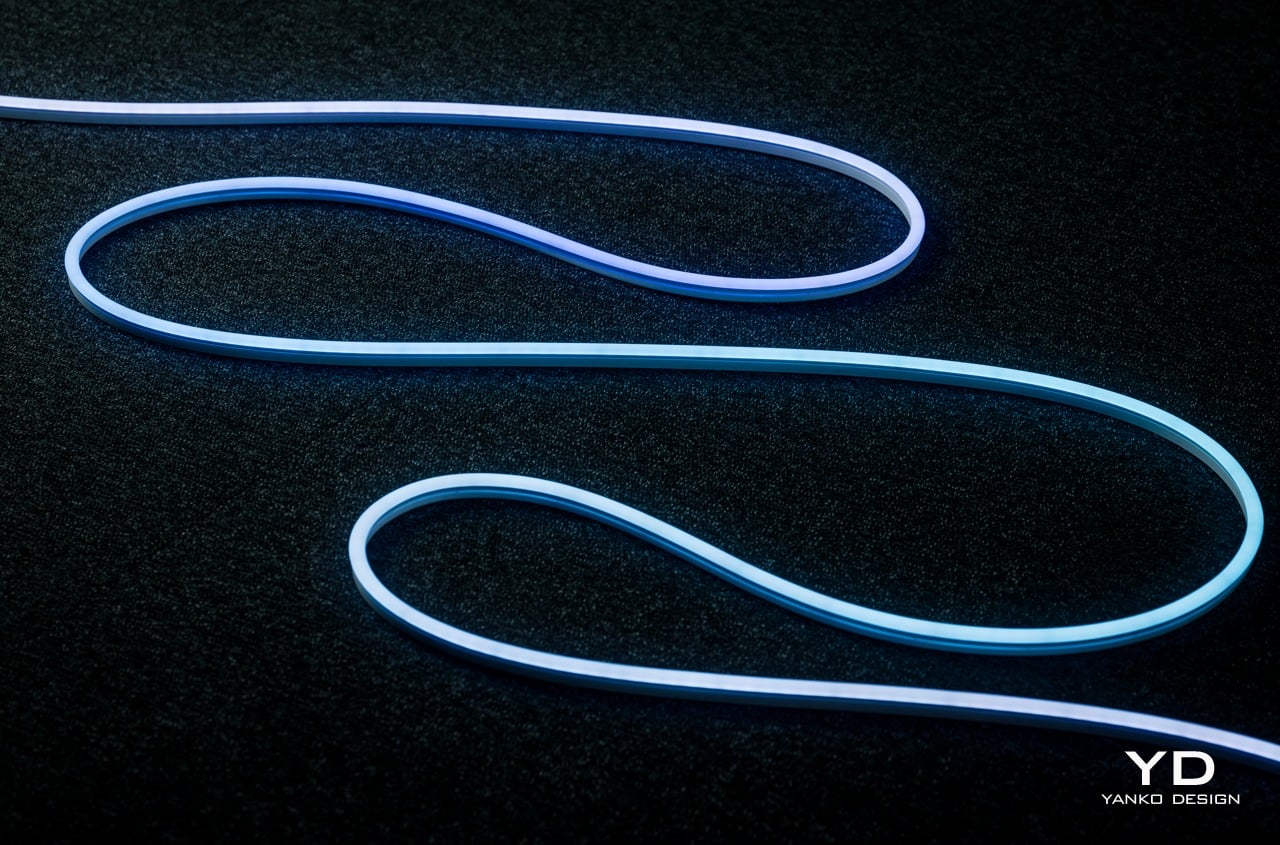
Right out of the box, you can already tell that the Govee RGBIC Neon Rope Light 2 is a class above your typical string light. You don’t see any braided cords or LED “bulbs.” Instead, you have a roll of tubing that looks clean, simple, and very bendable. It has a minimalist aesthetic that looks appealing even when the lights are turned off. Even better, Govee now offers black and white color options so that the rope can match whatever motif you have going. Of course, the actual area where light shines through is a translucent white surface, so you’ll still have to take that into account when designing around walls and furniture.

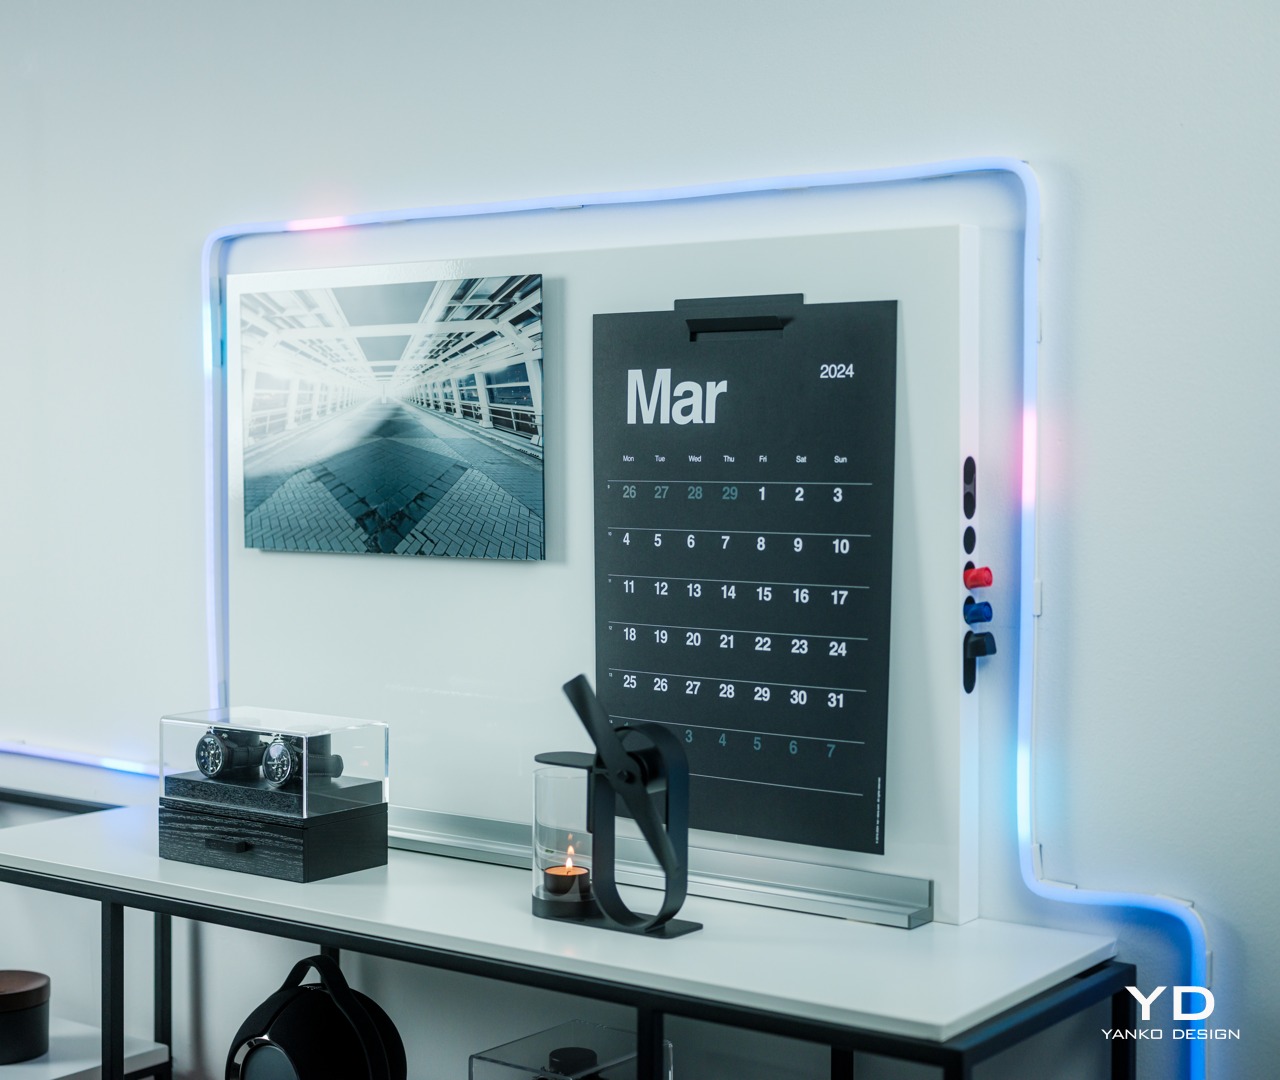
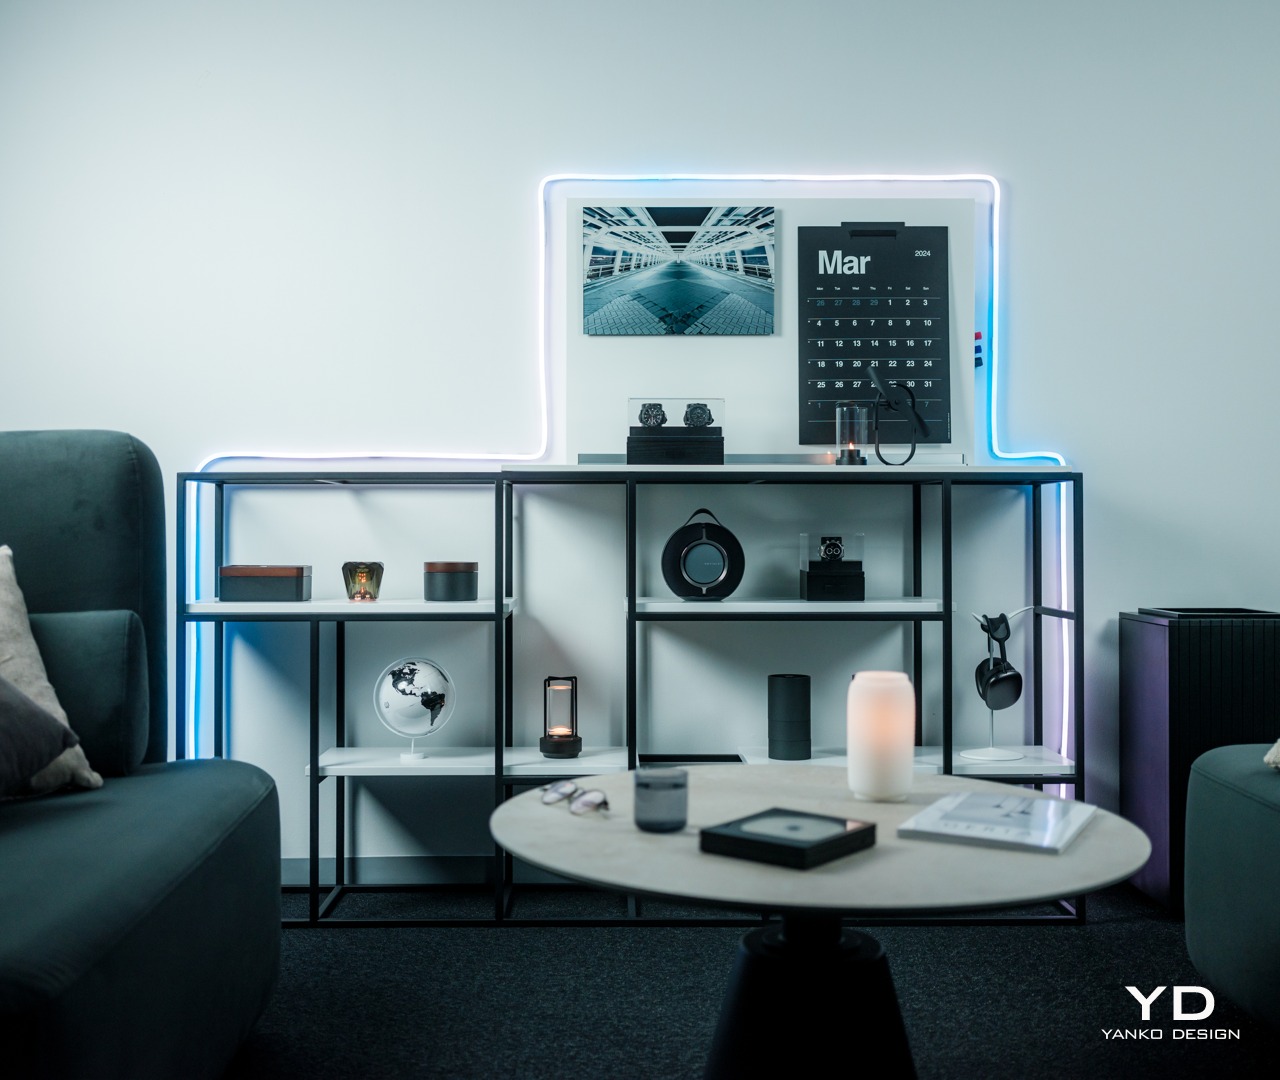
When the lights do turn on, the Govee Neon Rope Light 2 becomes a dazzling array of colors. With an astounding 420 of these RGBIC LEDs split into 42 zones, there is not a single inch that can’t be painted in a hue of your choosing. The lights are bright, not bright enough for being the main light source but perfect for setting the mood or adding accents to a room. And the sheer amount of effects you can use will never grow old.

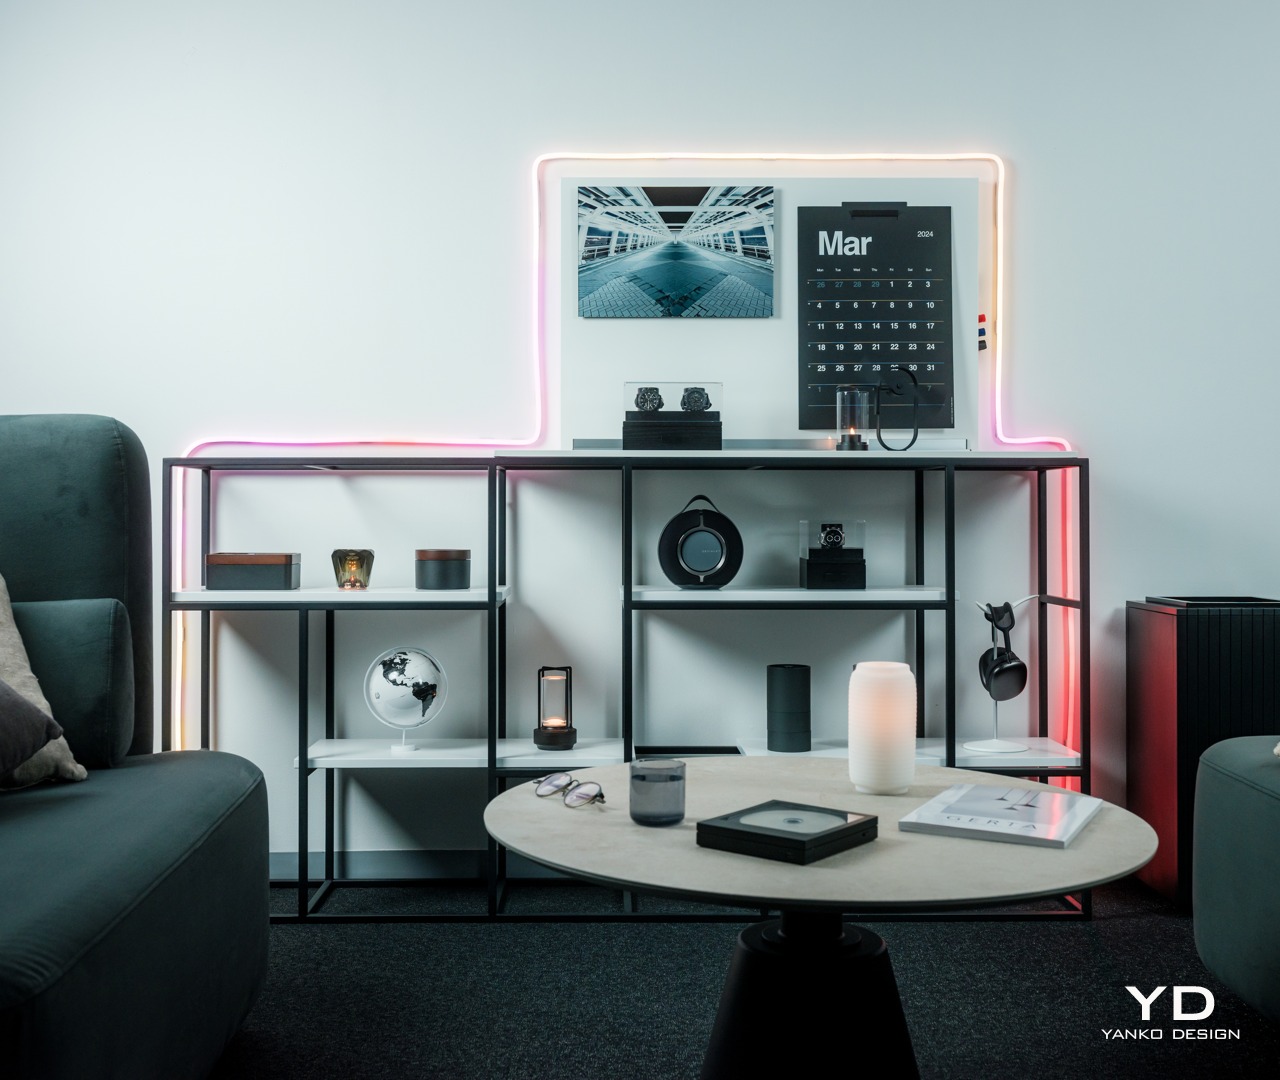
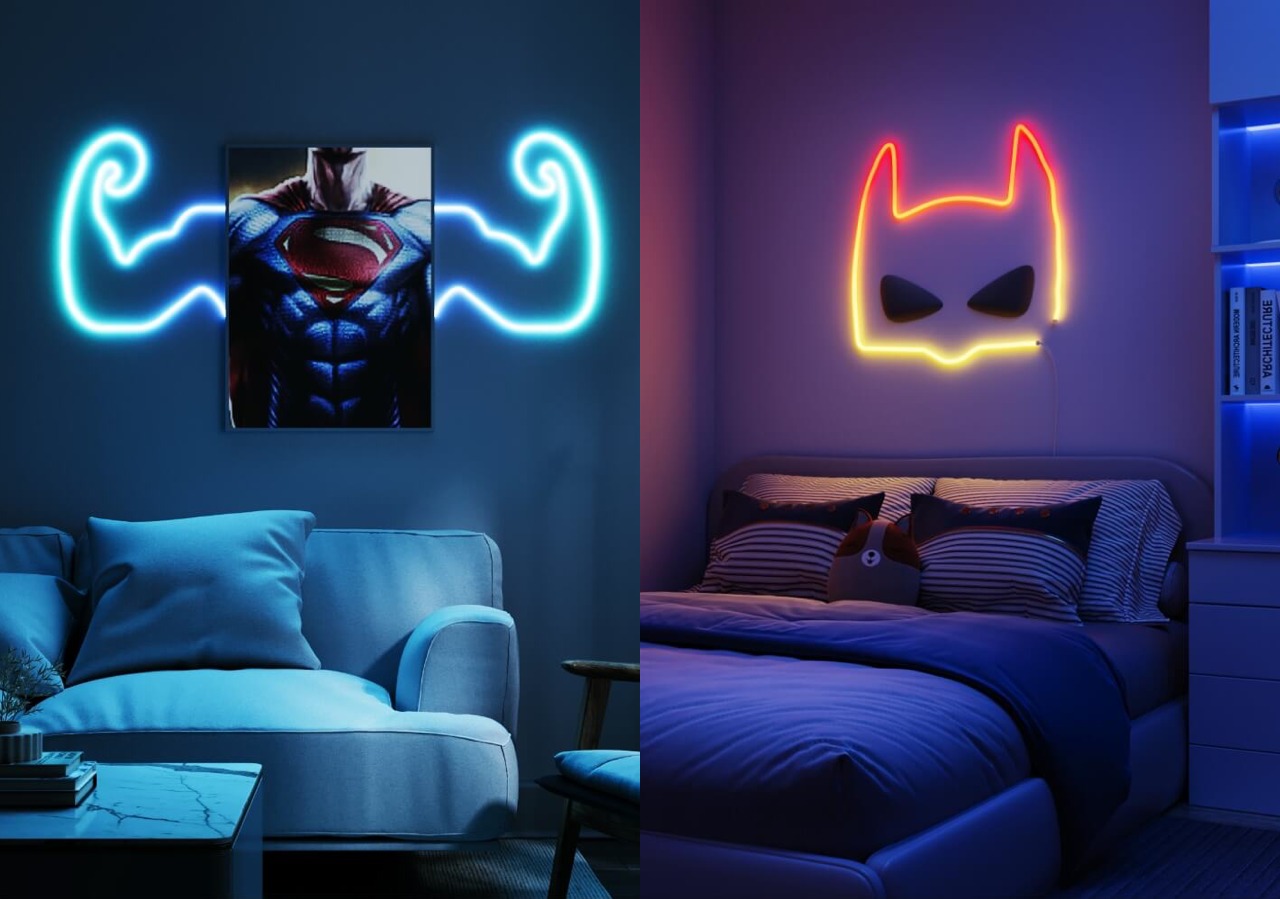
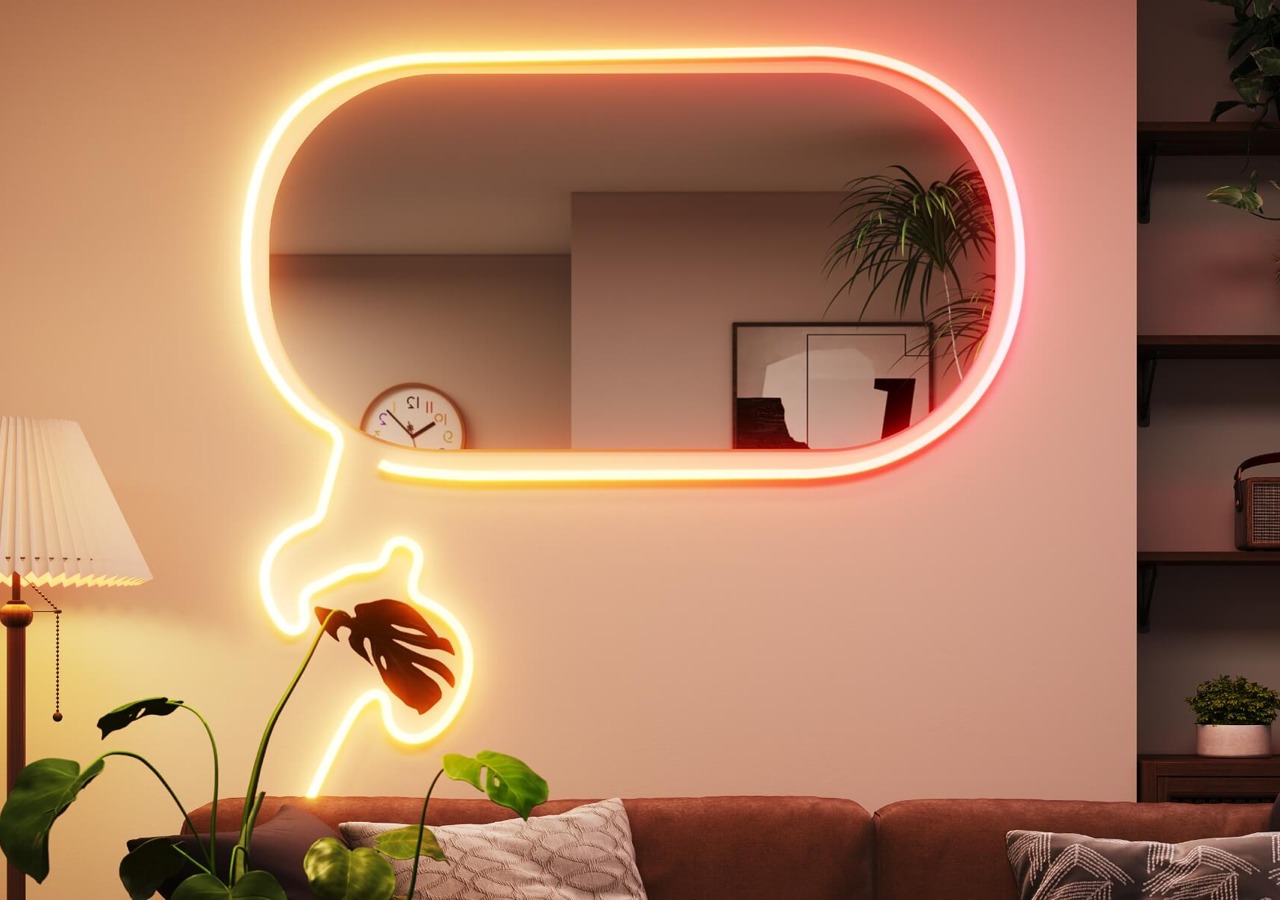
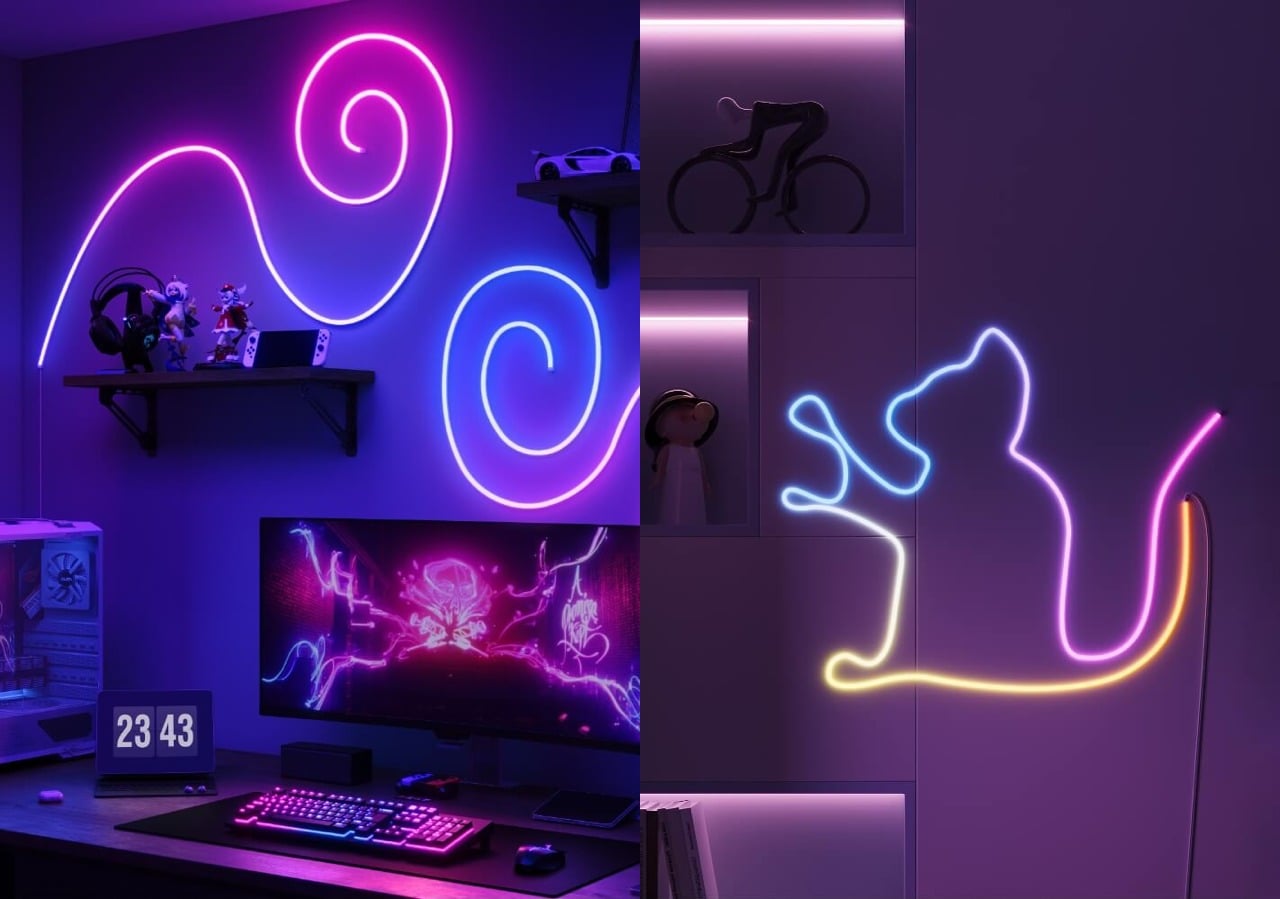
The most impressive part about the RGBIC Neon Rope Light 2’s appearance, however, is not the product itself but what you can make out of it. Thanks to an even more flexible material, you can easily design almost anything you want with the rope, from seemingly random patterns to carefully planned outlines of objects. This kind of flexibility, literally and figuratively, can inspire the artist in you, turning your wall into a canvas and the rope light into a brush paint of hundreds of colors.

Ergonomics

You won’t be holding the Govee RGBIC Neon Rope Light 2 whenever you use it, but you will naturally need to handle it when you’re installing it in the first place. It’s important for that process to be as easy and painless as possible, and Govee has thankfully ensured that it will be the case. Compared to its predecessor, this second-gen rope light is 14% more flexible and 14% lighter, key traits for something you’ll be bending a lot to your desired shape.

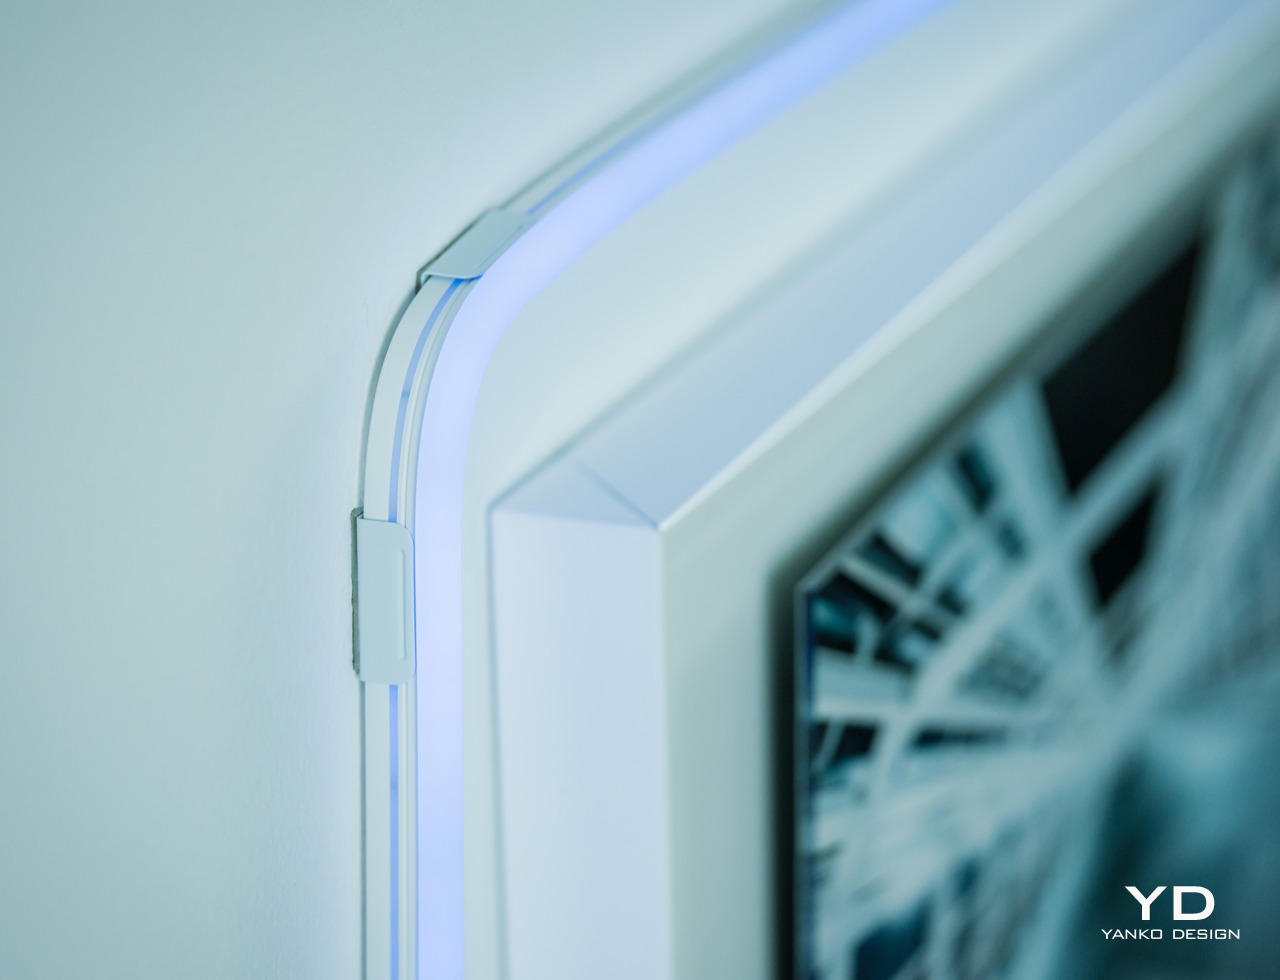
What all these mean is that you have more freedom to let your creativity loose in turning the rope light where you want it to go. Yes, you still have to mind the proper way to bend the rope light, but it’s pretty much common sense: you only bend it so the light is actually facing outward. The included bend clips that help the rope retain its shape have the same “outward bending” design, though neither the clips nor the rope actually stop you from bending it the wrong way, much to your own peril.

Despite its flexibility, the rope light won’t stay in that curved shape for long, so you’ll need to stick it with the built-in adhesives on its back. The good news is that these adhesives are extremely strong so you won’t have to worry about the rope going out of shape. The bad news is that they’re so strong that you won’t be able to easily remove them if you need to make changes. This means you have to be extra sure and careful that you have the final design you really want before you start sticking it to a surface. Hopefully, Govee will be able to come up with a more flexible solution someday that will let you reposition and reshape the light more easily.

Performance

Govee’s RGBIC LED technology has been impressive from what we’ve seen in previous reviews, and the Neon Rope Light 2 is thankfully no different. There are two variants of the rope, one in 10ft/3m length and another in 16.4ft/5m, which is our review unit, with 42 and 70 segments of light, respectively. For the 5-meter rope, there are an impressive 420 LEDs running its length, with as many as 84 LEDs per meter. As with any Govee RGBIC product, you can control each of those segments separately, though you’ll most likely be doing it through lighting effects and scenes anyway.

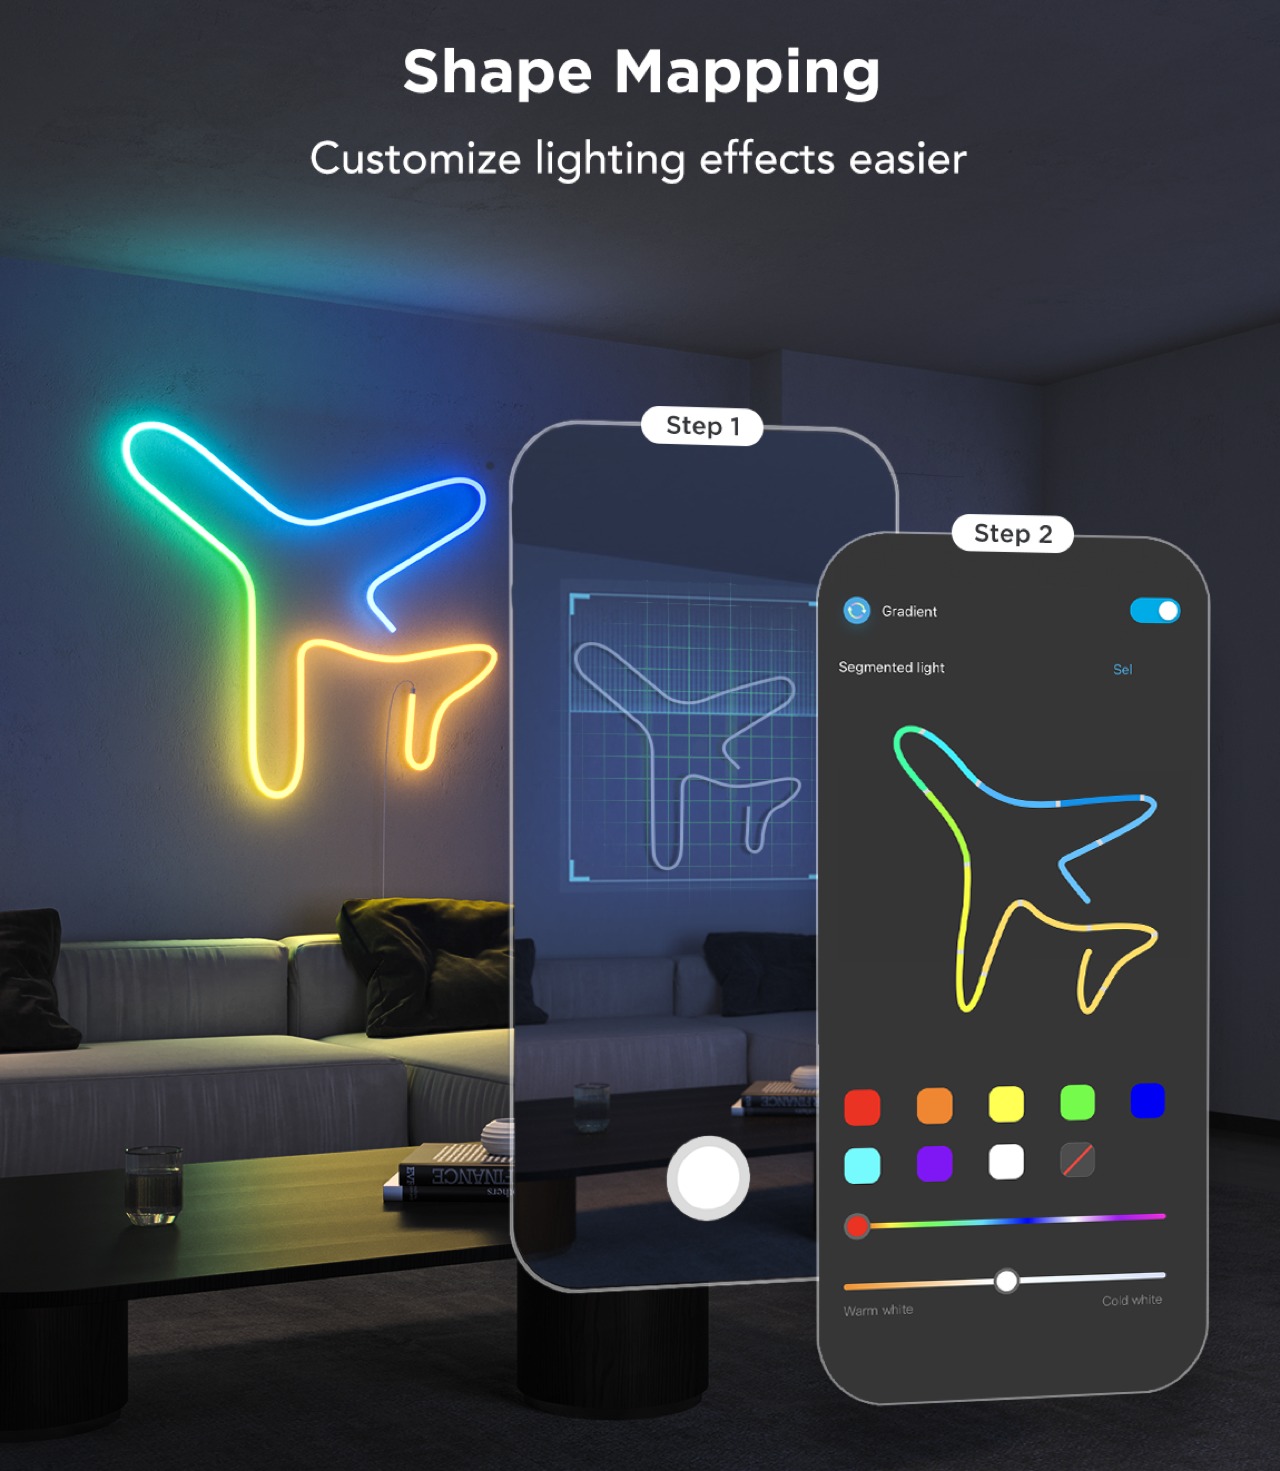
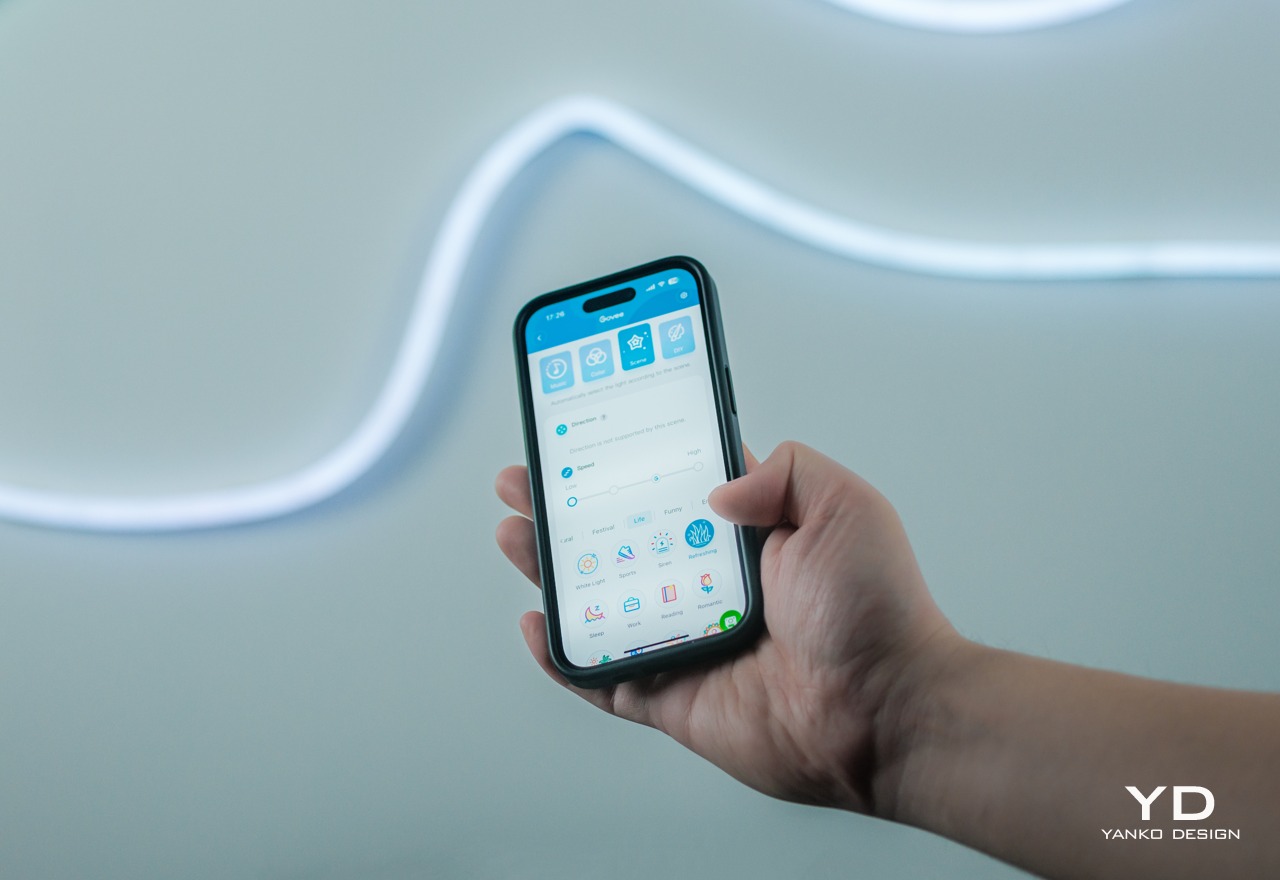
If you want to do things a bit more manually, Govee also has a nifty feature that makes the process a lot easier. With the app’s Shape Mapping mode, you can take a picture of your rope light design with your phone’s camera and then select which color goes to which segment, giving you full control of the composition without having to guess which part of the rope corresponds to which part of your design. Whether you’re going the full automated route with AI or exercising complete control over every LED, the Govee RGBIC Neon Rope Light 2 gives you the tools you need to express your design in a burst of color.

As mentioned earlier, the lights are pretty bright, though not blindingly so. The gamut of colors each LED supports is more than enough to cover every hue your eyes can detect, although it does lack the ability to display pure white without a dedicated white LED. Govee has a newer RGBICW that solves that problem, but that’s not available here on the RGBIC Neon Rope Light 2. You’ll have to make do with off-white blended from the combination of red, blue, and green, though that probably won’t be a problem for most use cases anyway.

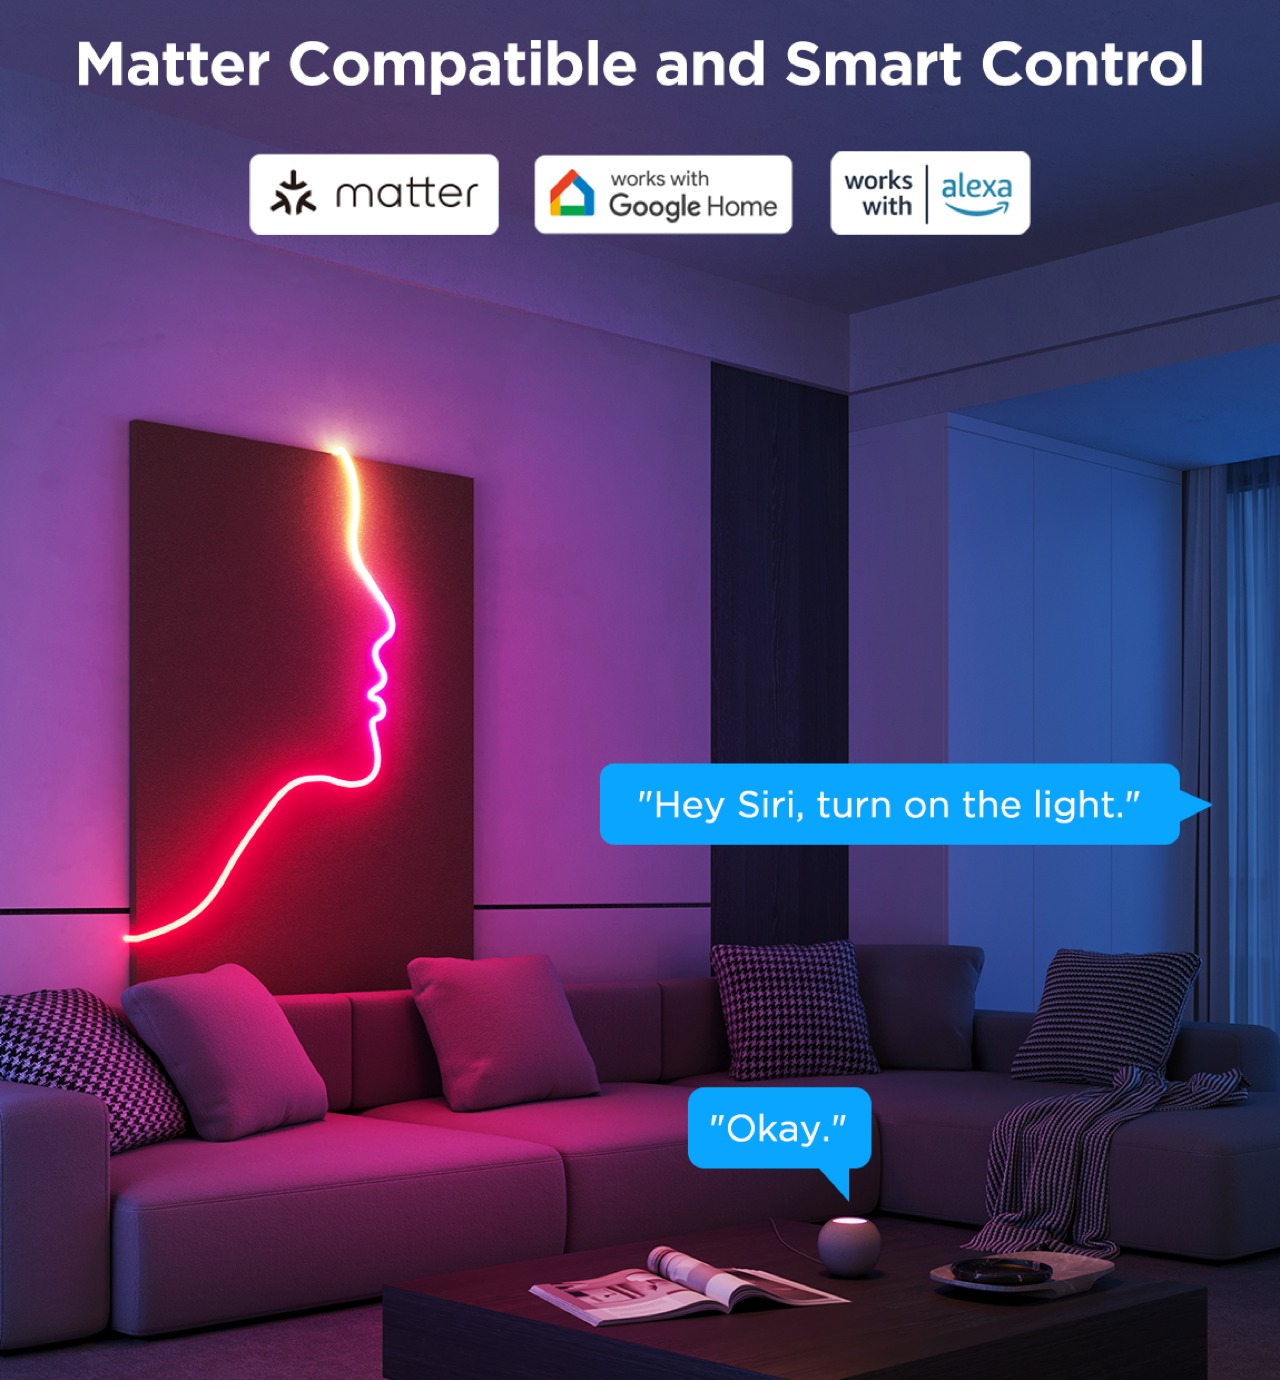
The rope light’s real strength, aside from its flexibility, can be found in the Govee Home App which is home (pun intended) to all the settings and customization options you can ever want. Connecting the rope light to your phone is easy peasy and is done over Bluetooth, after which you can remotely control the lights without breaking a sweat. If you do want to connect it to smart home platforms, particularly through the new Matter support, you’ll have to do it over Wi-Fi. It should be noted that, like many smart home devices so far, it requires a 2.5GHz Wi-Fi network so 5GHz-only routers will have difficulty making that connection.

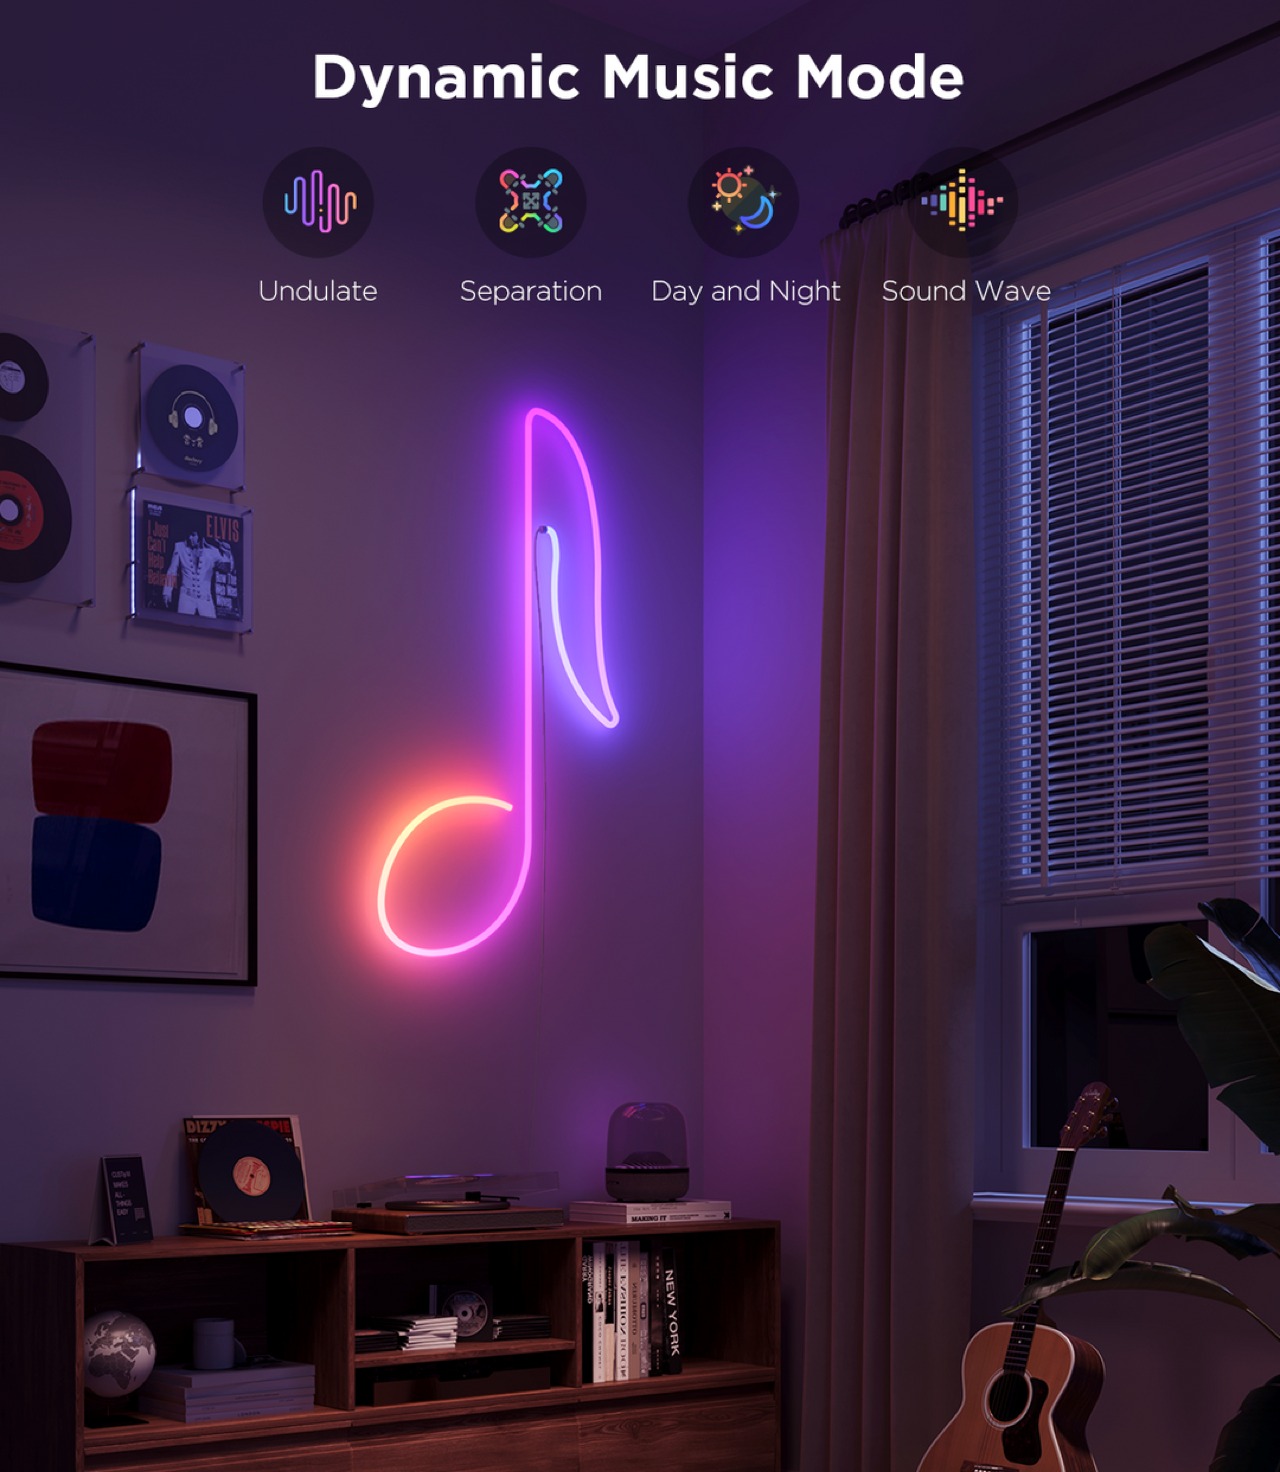
Govee provides a huge library of effects for the Neon Rope Light 2, including 12 Music Modes that can sync to the beat of music, and 64 Scene Modes with preset settings to cover a wide variety of occasions, seasons, and moods. Things get really interesting with the arrival of the AI Lighting Bot this March, which will let you harness the power of generative AI to create new effects not included in Govee’s catalog. Simply give it a prompt with specific elements, situations, and even brands and it will scour the Internet and its database to come up with the (hopefully) perfect combination that delivers what you asked for.

Sustainability

Like with string lights, the Neon Rope Light 2 suffers from the problem of becoming significantly less usable once LEDs start failing. Yes, you can probably live with one or two blank spots, but they’re there forever with no option to replace them individually. In fact, one of the Neon Rope Light 2’s greatest strengths, its clean and simple tubing, is also its greatest weakness in this regard. You can’t easily access the LED’s inside anyway, let alone repair or replace them. Your only recourse, in the final analysis, is to ship them for repairs or, worse, buy a new rope. Either way, that involves removing the rope light from its installation, which can be a laborious process.

As for the materials used for the RGBIC Neon Rope Light 2, we can perhaps presume that Govee is using standard synthetic materials like silicone. Yes, the material is lighter and more flexible now, but it’s not more sustainable. As Govee grows, we hope to see more efforts from the brand toward this aspect, especially since its products will be filling the market and homes.

Value

String lights try to offer a way to illuminate a path or shape, but they can only do so much in actually forming that shape. Worse, because of their inherent design, they’re often better off hidden from view so that their presence only becomes known once the lights turn on. While there will always be uses for string lights, the Govee RGBIC Neon Rope Light 2 delivers something new, different, and mind-blowing. It gives you the creative freedom to design your own lighting masterpiece without too much effort.

The more flexible and lighter material of this 2nd-gen rope light enables owners to really bend the light to the shape they want, and the impressive performance of Govee’s RGBIC LED technology really outshines the competition. Best of all, the Neon Rope Light 2 has a mind-blowing assortment of effects, from the upcoming AI-generated Lighting Bot to the easy-to-use Shape Mapping feature. All of these for an equally impressive price tag that makes the experience accessible to everyone.

Verdict

RGB lighting was once considered the domain of gamers who prefer dark corners just to show off their neon-lit equipment, but everyone has now grown to appreciate what a splash of color can do not just to brighten up a space but also to create a mood, amaze, and entertain. Many RGB lamps exist for that purpose, but the majority of them force owners to design around the lamps instead of having the products cater to their needs. Fortunately, Govee has the perfect solution to fix that problem.

The Govee RGBIC Neon Rope Light 2’s upgraded flexibility allows you to “draw” on a wall or around furniture, giving you complete freedom to create the design that you want. An impressive library of effects from the Govee Home app lets you create the light show of your dreams, whether with the upcoming AI Lighting Bot’s assistance or with full control using the Shape Mapping tool. We wished it was just as easy to remove the rope light and create a different design as it was to install it the first time, but it’s a minor consideration that could happen in future versions of the product. All in all, the Govee RGBIC Neon Rope Light 2 delivers a very powerful tool for letting your creativity shine, literally.

Click here to Buy Now: $99.99

The post Govee RGBIC Neon Rope Light 2 Review: Helping Your Creativity Really Shine first appeared on Yanko Design.
Govee TV Backlight 3 Lite with Dune-themed Packaging Review: Elevating Your Home Theater Experience

PROS:


  • Bright and vibrant colors thanks to RGBICW LED technology

  • Superb color-matching using a future-proof camera system

  • Incredible value for its price

CONS:


  • Camera design is a bit awkward and might not fit thicker TVs

  • Wi-Fi connectivity is compatible with 2.4GHz networks only

RATINGS:

AESTHETICS
ERGONOMICS
PERFORMANCE
SUSTAINABILITY / REPAIRABILITY
VALUE FOR MONEY

EDITOR'S QUOTE:

With rich colors, fast color-matching, and unbeatable price value, the Govee TV Backlight 3 Lite with Dune-themed packaging helps fully immerse viewers in the content they're watching.

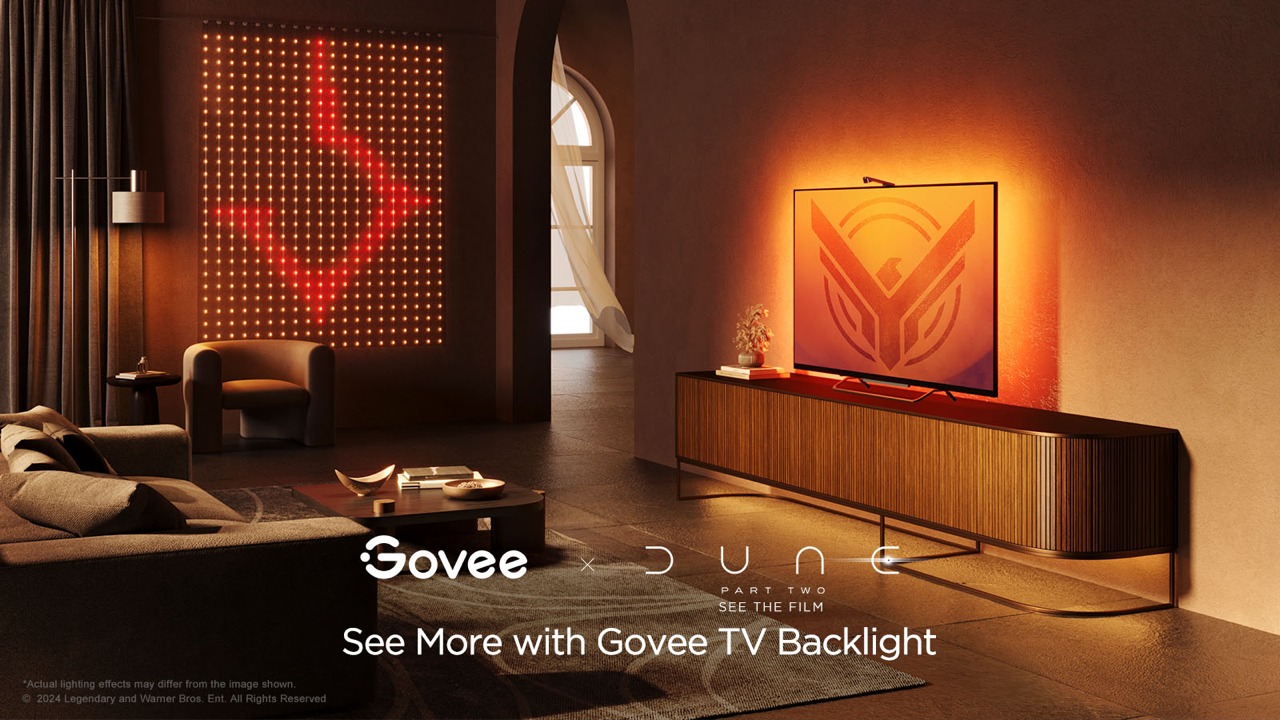
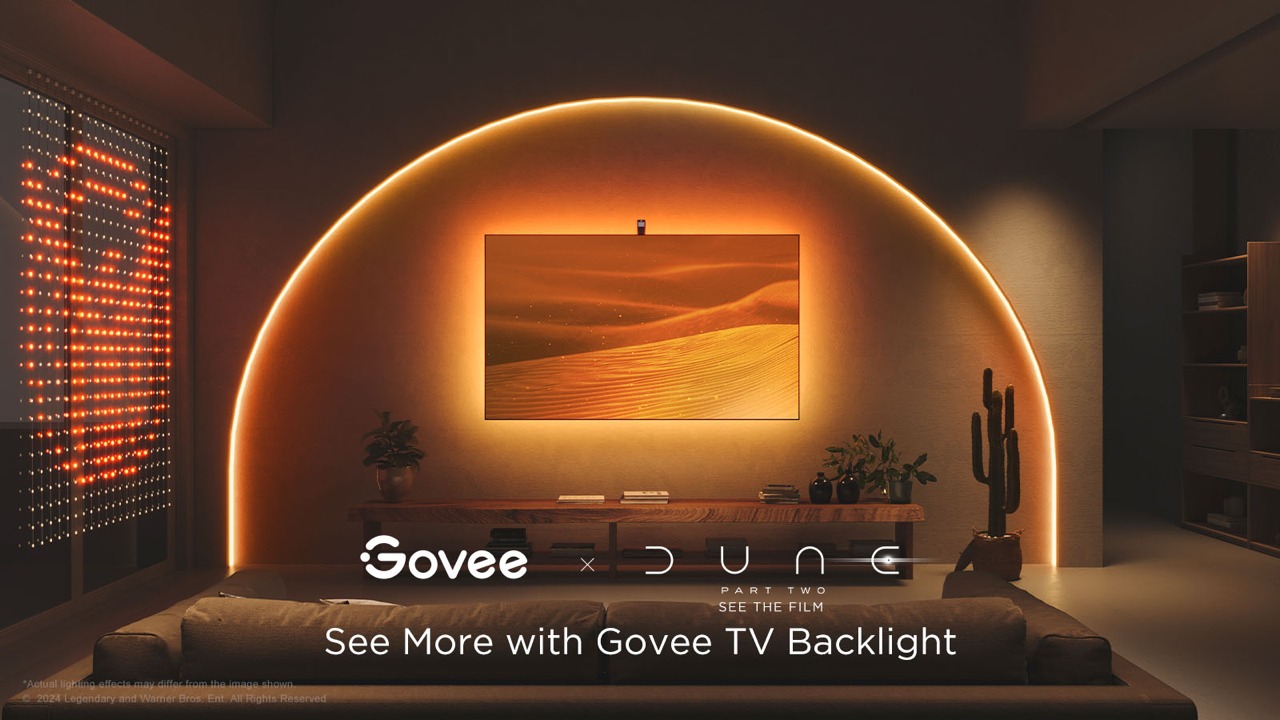
TVs today are more than just large boxes that show moving pictures. They have also become pieces of decoration that add to the ambiance of a space, whether they’re turned on or not. The lush and vibrant colors that a TV can display can definitely light up a dark room, but that glow stops at the TV’s frame. Yes, the TV’s light can bounce off nearby walls, depending on where it’s placed, but you have absolutely no control over what happens. TV backlights were made to help better immerse you in the show or movie you’re watching by making sure that the light behind and around your TV reflects the content that’s on screen. Smart lighting expert Govee recently launched its latest contender in that category and even partnered with Warner Bros to tie in with the studio’s latest new science fiction film, Dune: Part Two. It’s the perfect time, then, to take a close look at the Govee TV Backlight 3 Lite, particularly with this Dune-themed packaging, to see what value it adds to your viewing experience and if it’s tempting price tag sounds too good to be true.

Designer: Govee

Click Here to Buy Now: $74.99 $89.99 (16% off).

Aesthetics

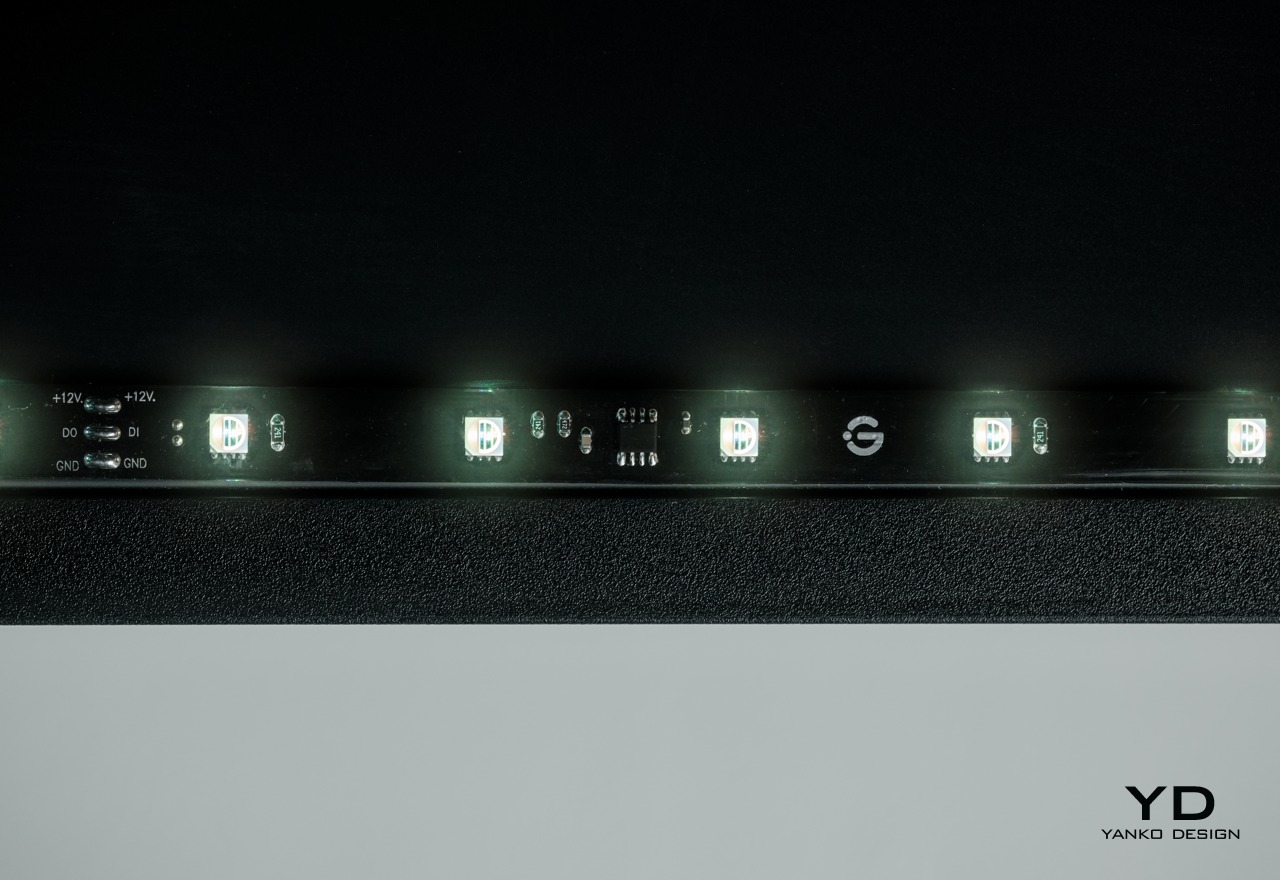
For something you will never see again after you’ve installed it, the Govee TV Backlight 3 Lite has quite an interesting appearance. Of course, it’s just a flat strip of LEDS grouped into four segments that need to go around your large TV, but the transparent material that covers the LEDs and some of the circuitry that controls allows you to see some of the secrets behind the magic. It’s not unlike that trend in consumer electronics where transparent cases showed off the parts that actually made the product work. It’s not as sophisticated as those, but it still adds a bit of flavor to the design.

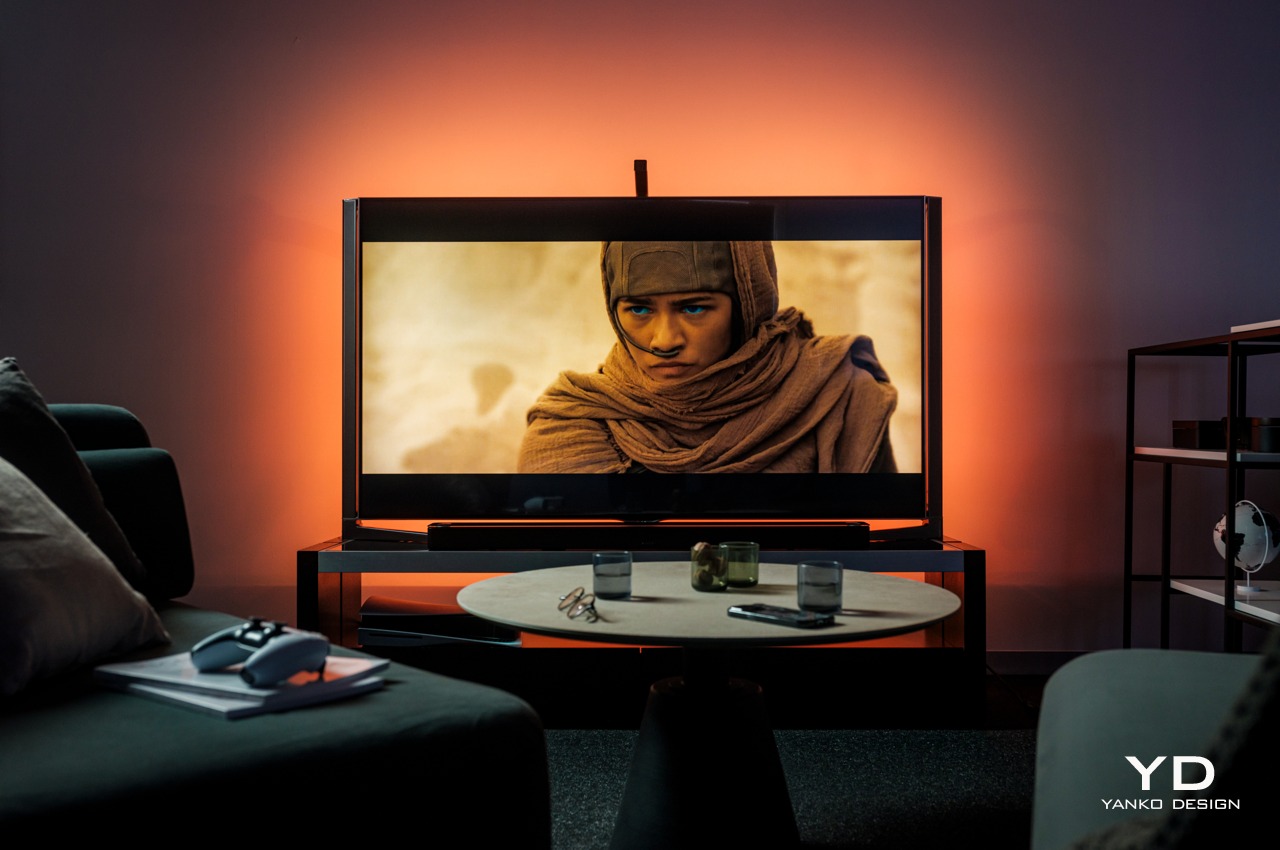
Of course, the Govee TV Backlight 3 Lite’s beauty really shines, literally, it has been installed and enabled, and boy does it shine! The light the strips produce is quite bright, especially in a dim room, and the colors are rich and vibrant. The way those colors shift almost instantly to match what’s on the screen is also magical, making it look like the TV actually goes beyond its frame. We’ll get to the technical details that make that possible in a bit, but suffice it to say, the backlight definitely delivers an enriching experience when watching any kind of content on TV.

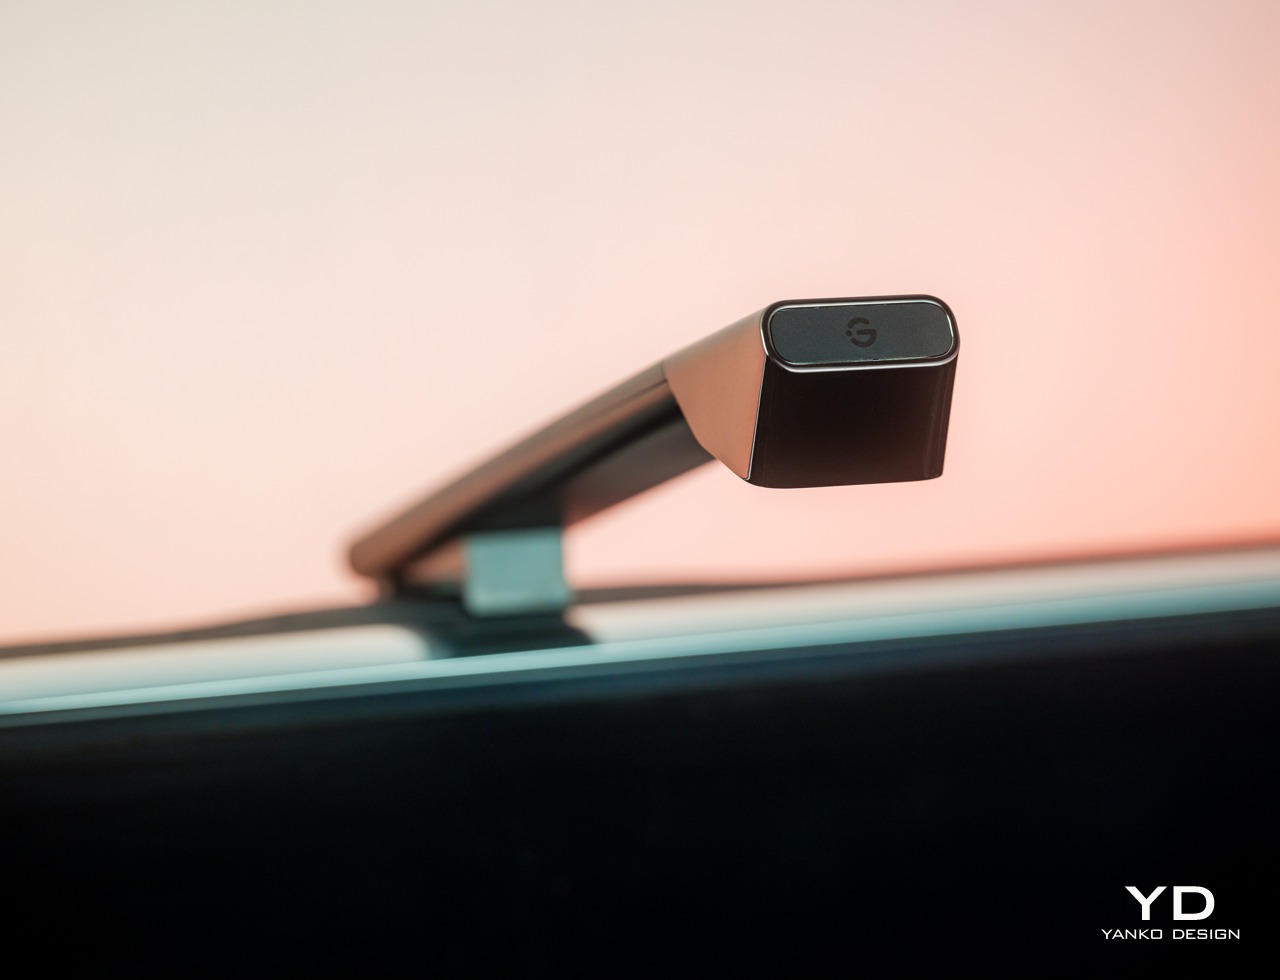
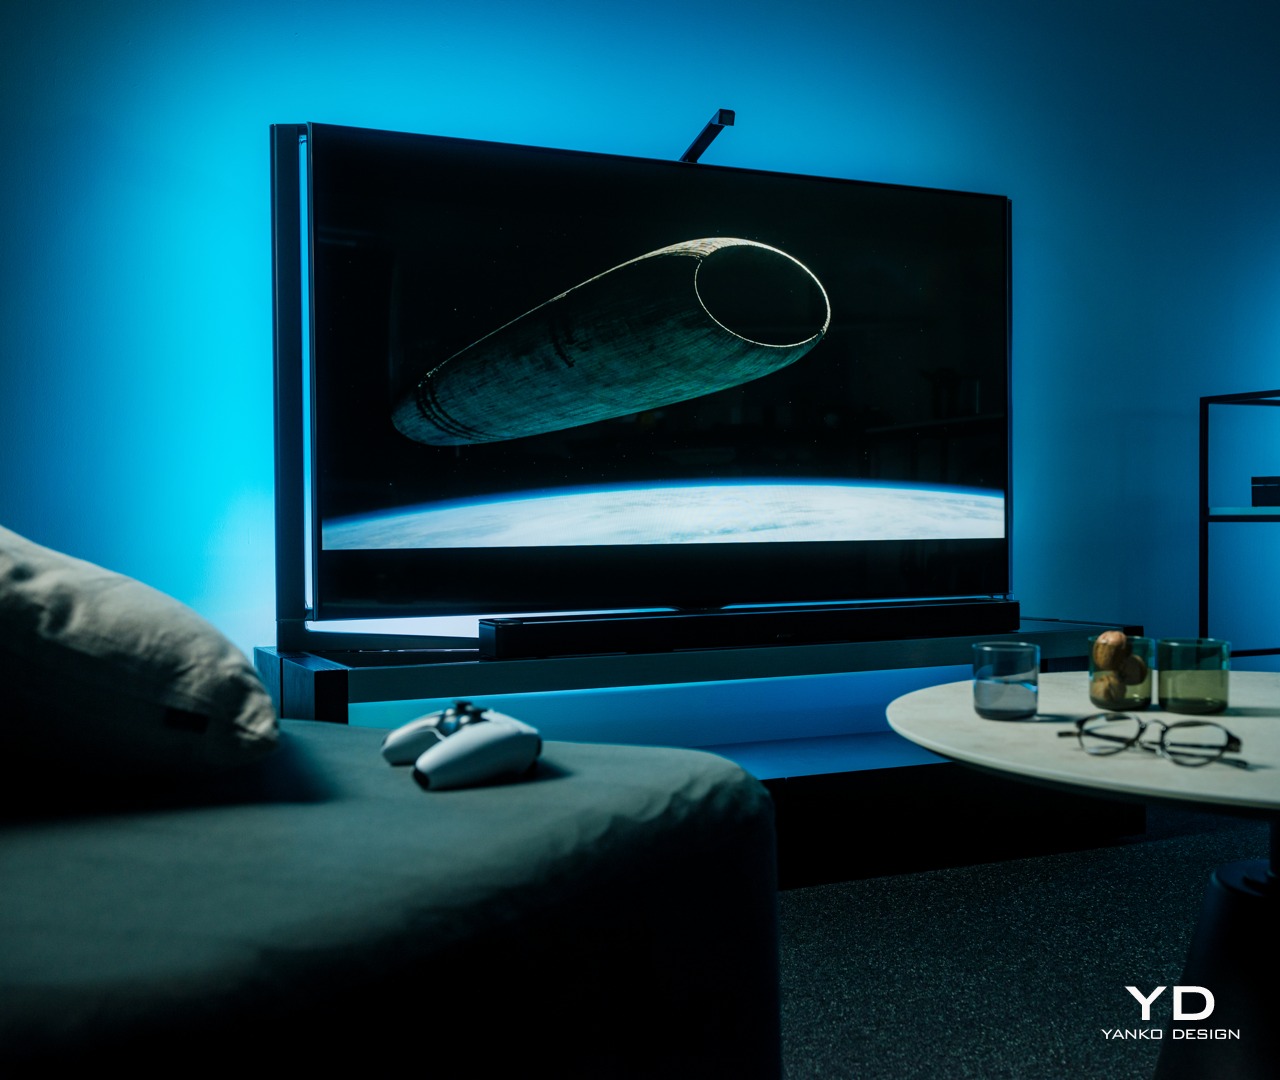
While the backlight itself is something you won’t see, there is one part of the system that is actually always visible and, depending on your setup, always in your face. Given how the Govee TV Backlight 3 Lite works, it’s necessary to have that camera hanging from the top of the TV, extending a bit forward from the frame. Depending on the design of the TV itself, this black cantilever-like part may or may not easily stand out, and it will definitely add a little blemish to more artful TV designs. Unfortunately, there is no other way to implement this kind of dynamic color-matching system, so it’s a cost that owners will have to live with. Fortunately, it might actually be the biggest cost after all.

Ergonomics

Since the Govee TV Backlight 3 Lite is not something you’ll be using in your hand every time, its ergonomics mostly apply to the installation process as well as the hands-free control of the lights. In that regard, Govee’s light strip is not really unlike others in this market, which isn’t completely a good thing either. Installing the lights on the TV is a very involved process, which will be even more difficult if your TV is mounted on a wall.

In a nutshell, you attach the four segments of the strip on the four edges of the TV’s back. The exact placement of the strips will depend on the shape of that rear, with curved ones being the trickiest. The strips are attached using 3M adhesive, which will worry some owners about the permanence of the installation and the marks it will leave behind when removed. Special care must also be taken to hide the loose cables at the corners so that they don’t peek out of the frame or cast shadows when the lights are turned on.

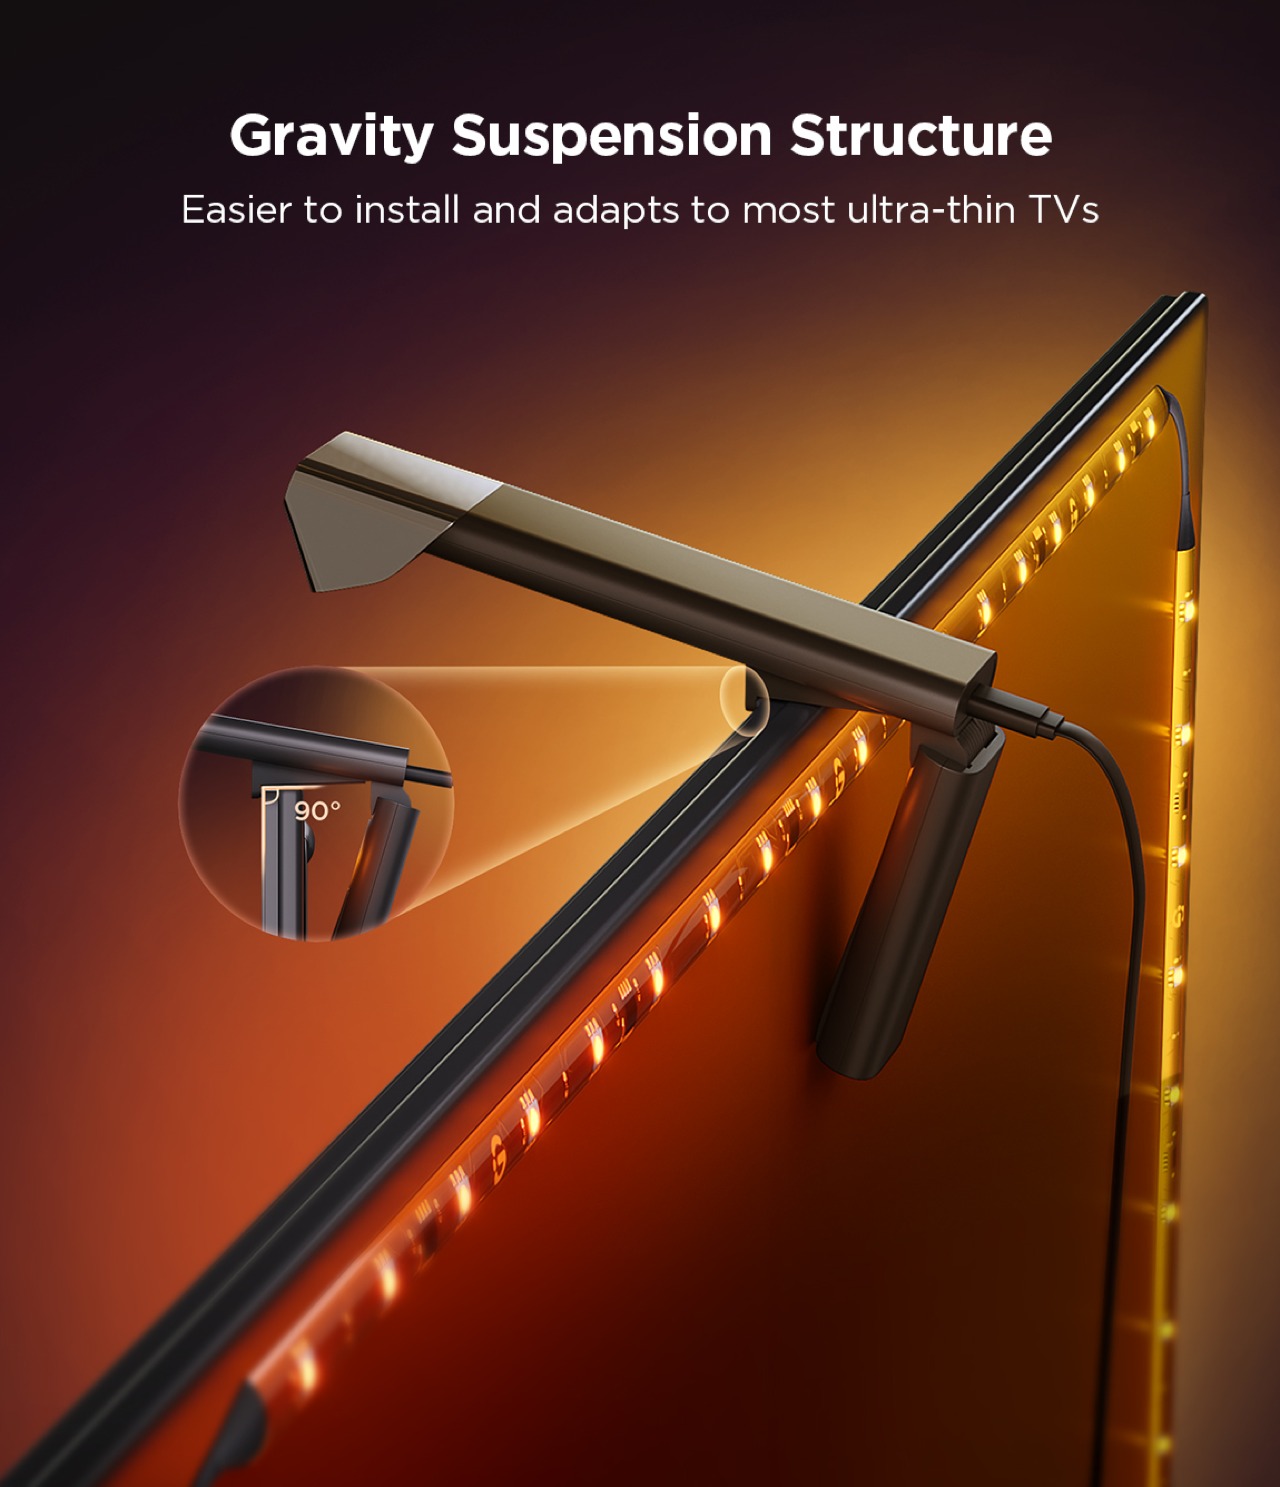
Compared to its previous two TV backlights, Govee changed the design of the camera bracket significantly. It no longer uses an adhesive and instead relies on gravity and the weighted bracket to attach the camera to the top of the TV without sticking it with an adhesive. In theory, it works and won’t wobble too much (unless you’re constantly moving the TV), but some might worry enough to actually use the included adhesive anyway. The bigger problem, however, is that this design also limits the bracket to certain TVs, particularly thinner ones. It’s certainly possible to attach it to other TVs, but not without putting in a lot more effort as well.

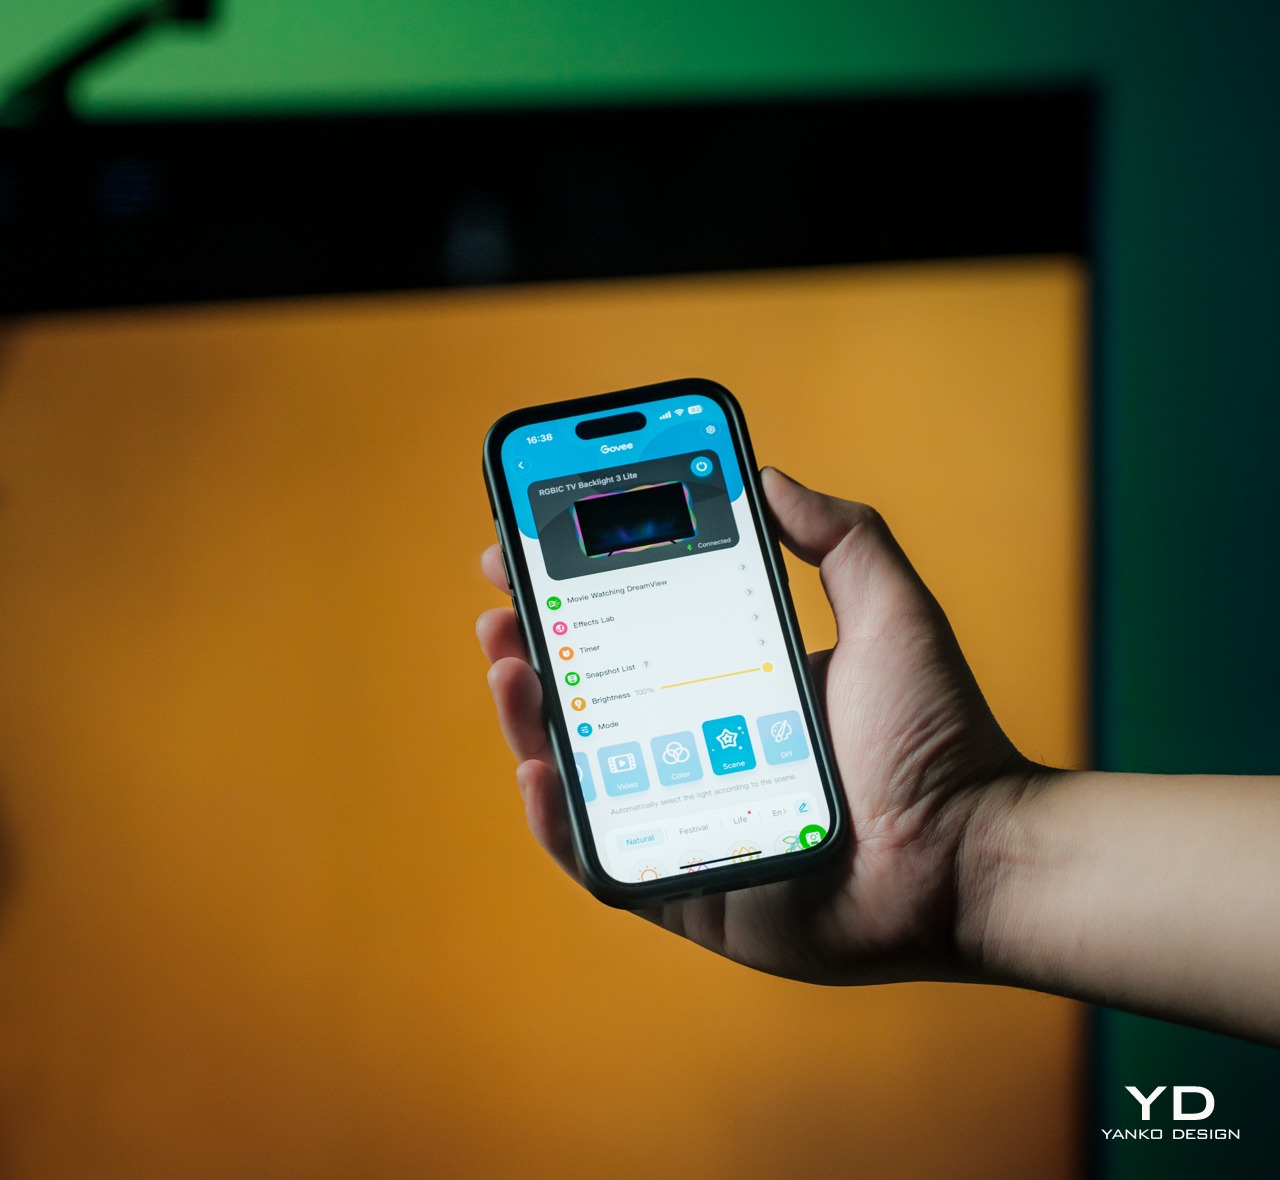
Once that hard work is done, however, the rest of the setup is easy as pie. You only need to turn the control box on, connect it to the Govee app on your phone, and go through the initialization process. That will include calibrating the camera by placing removable orange markers on the front edges of the TV, and that’s pretty much it. The mobile app has tons of settings and modes you can play with, but even leaving it at the default color-matching mode is more than enough to enhance your watching experience. You don’t even need that app if you connect it to your Wi-Fi so that you can control it by voice using smart home platforms, though like any Govee product, it requires 2.4GHz Wi-Fi, so 5GHz-only routers will be incompatible.

Performance

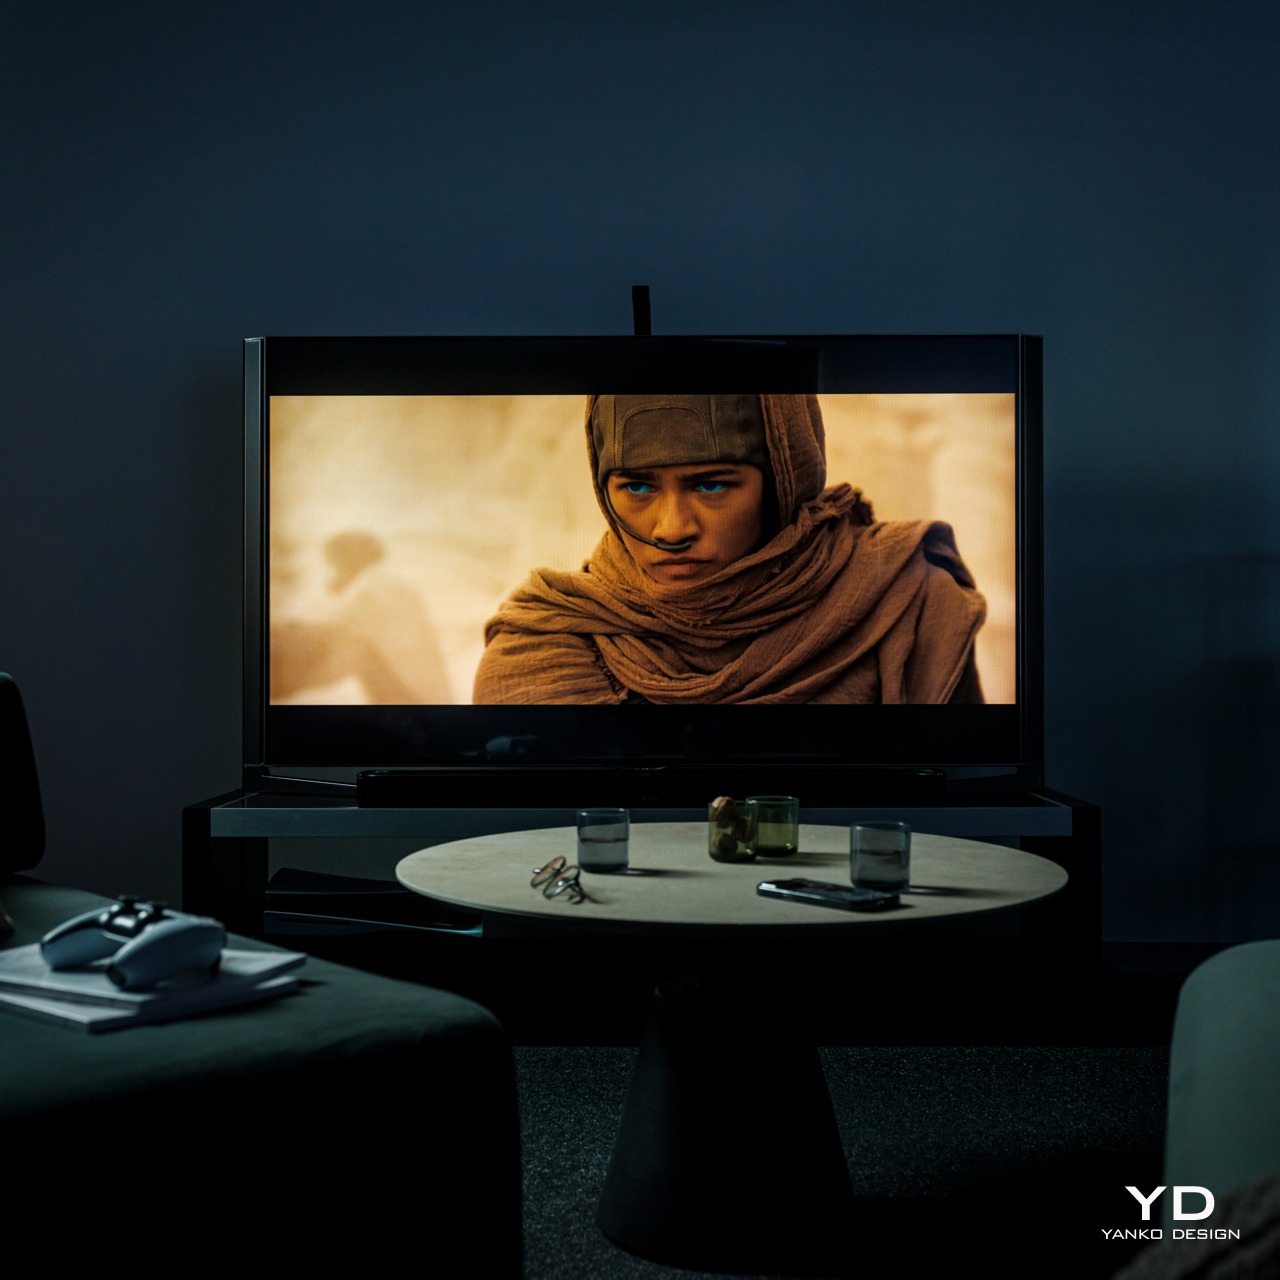
Without the Govee TV Backlight 3 Lite

Although TV backlights are not uncommon, dynamic color-matching ones are still hard to come by, especially at the price point that the Govee TV Backlight 3 Lite with Dune-themed packaging comes with. It’s even harder to find one that works so well, which is why this Govee product is actually impressive and a dream come true for TV owners who want to take their cinematic experience to the next level.

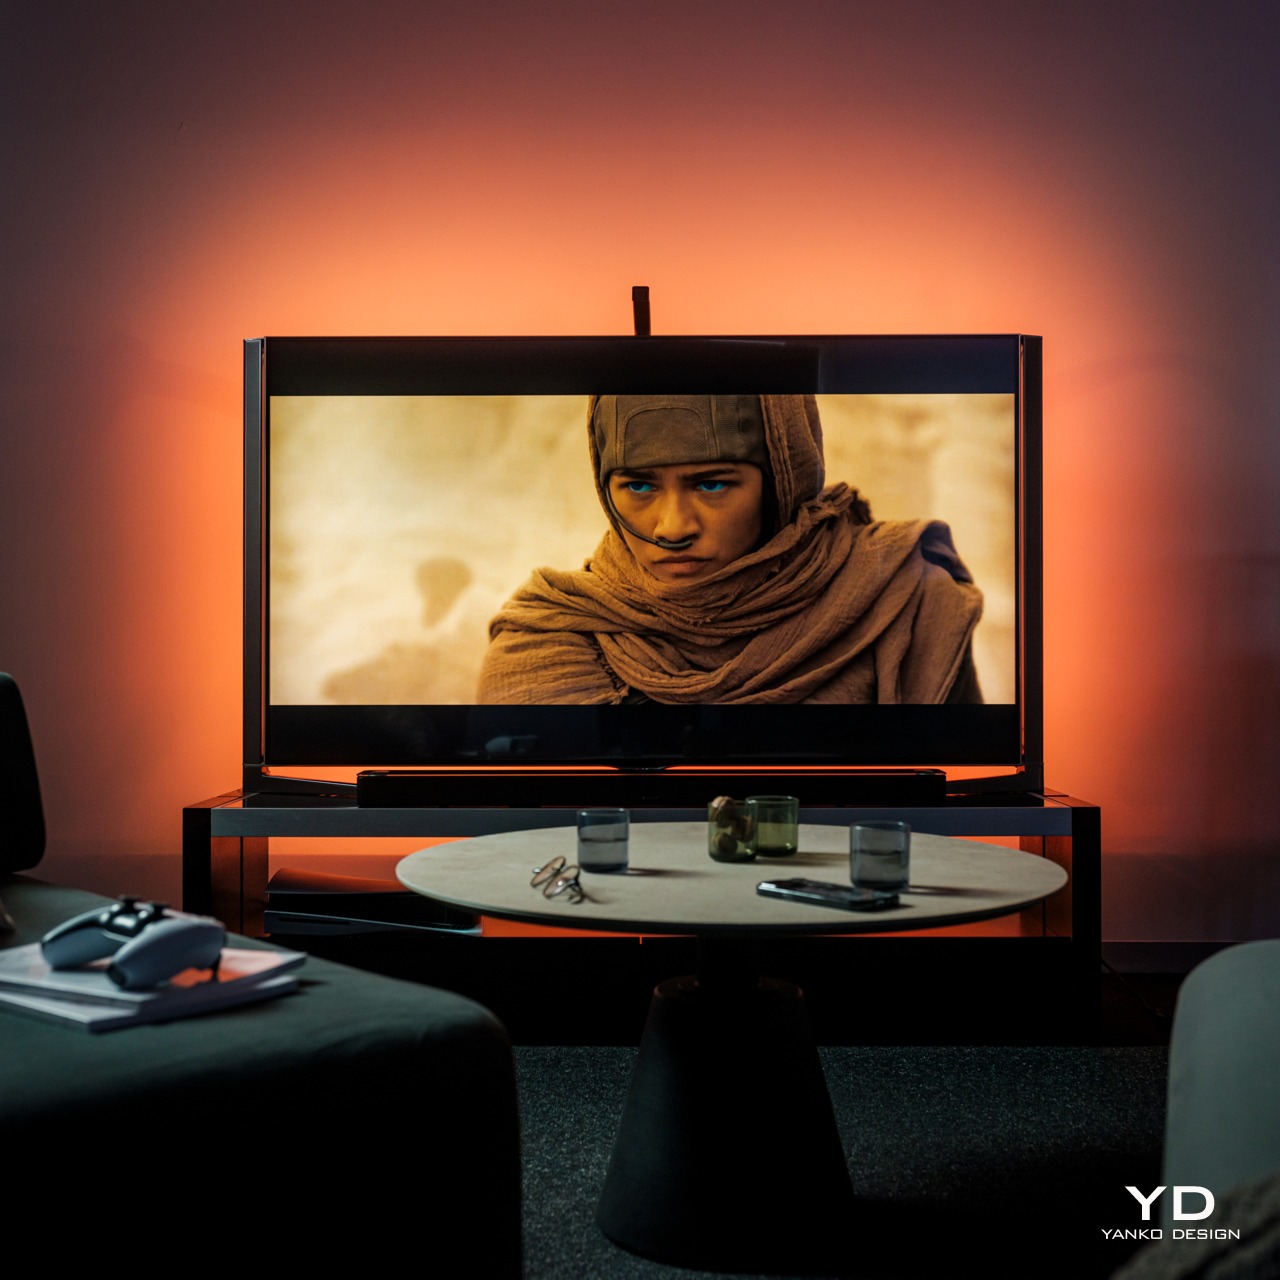
With the Govee TV Backlight 3 Lite

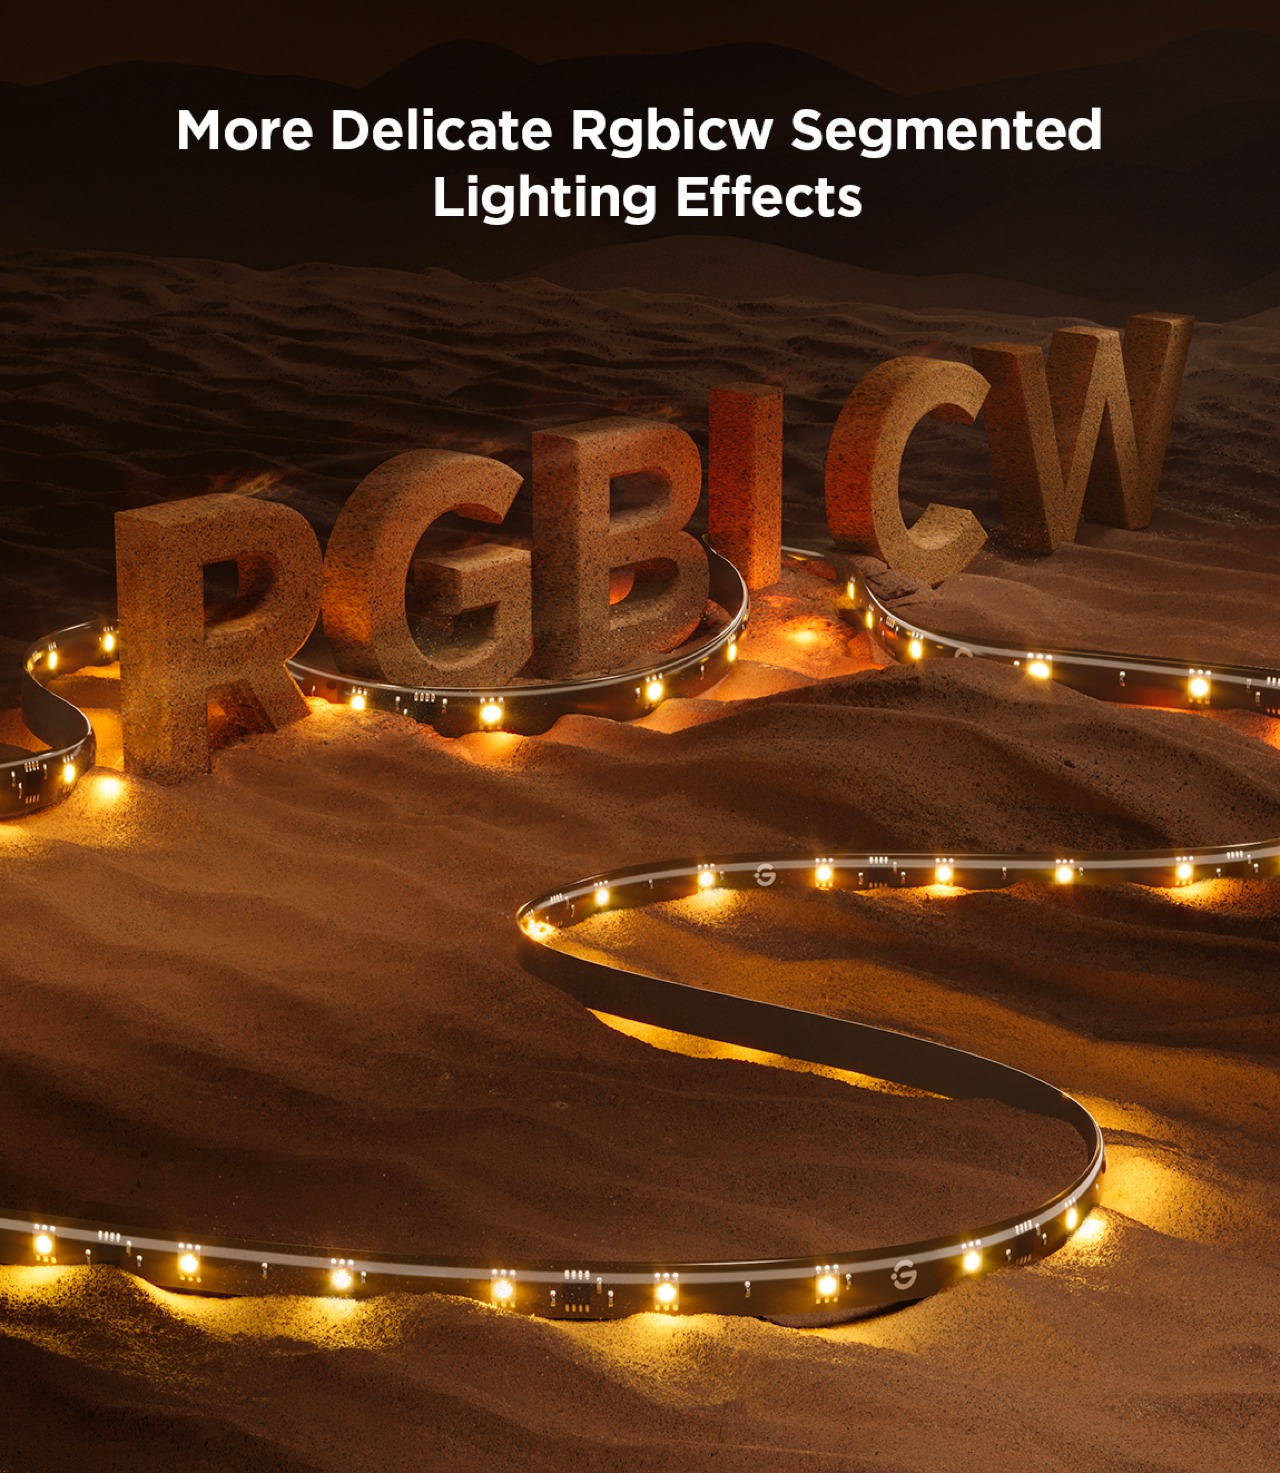
Govee upgrades the backlight from its usual RGBIC LEDs to a new RGBICW tech which adds a fourth color to the combination. With a dedicated white LED, the lights can cover even more colors as well as different white temperatures. The lights become more expressive and more vibrant, able to better match the colors being displayed on the screen in front.

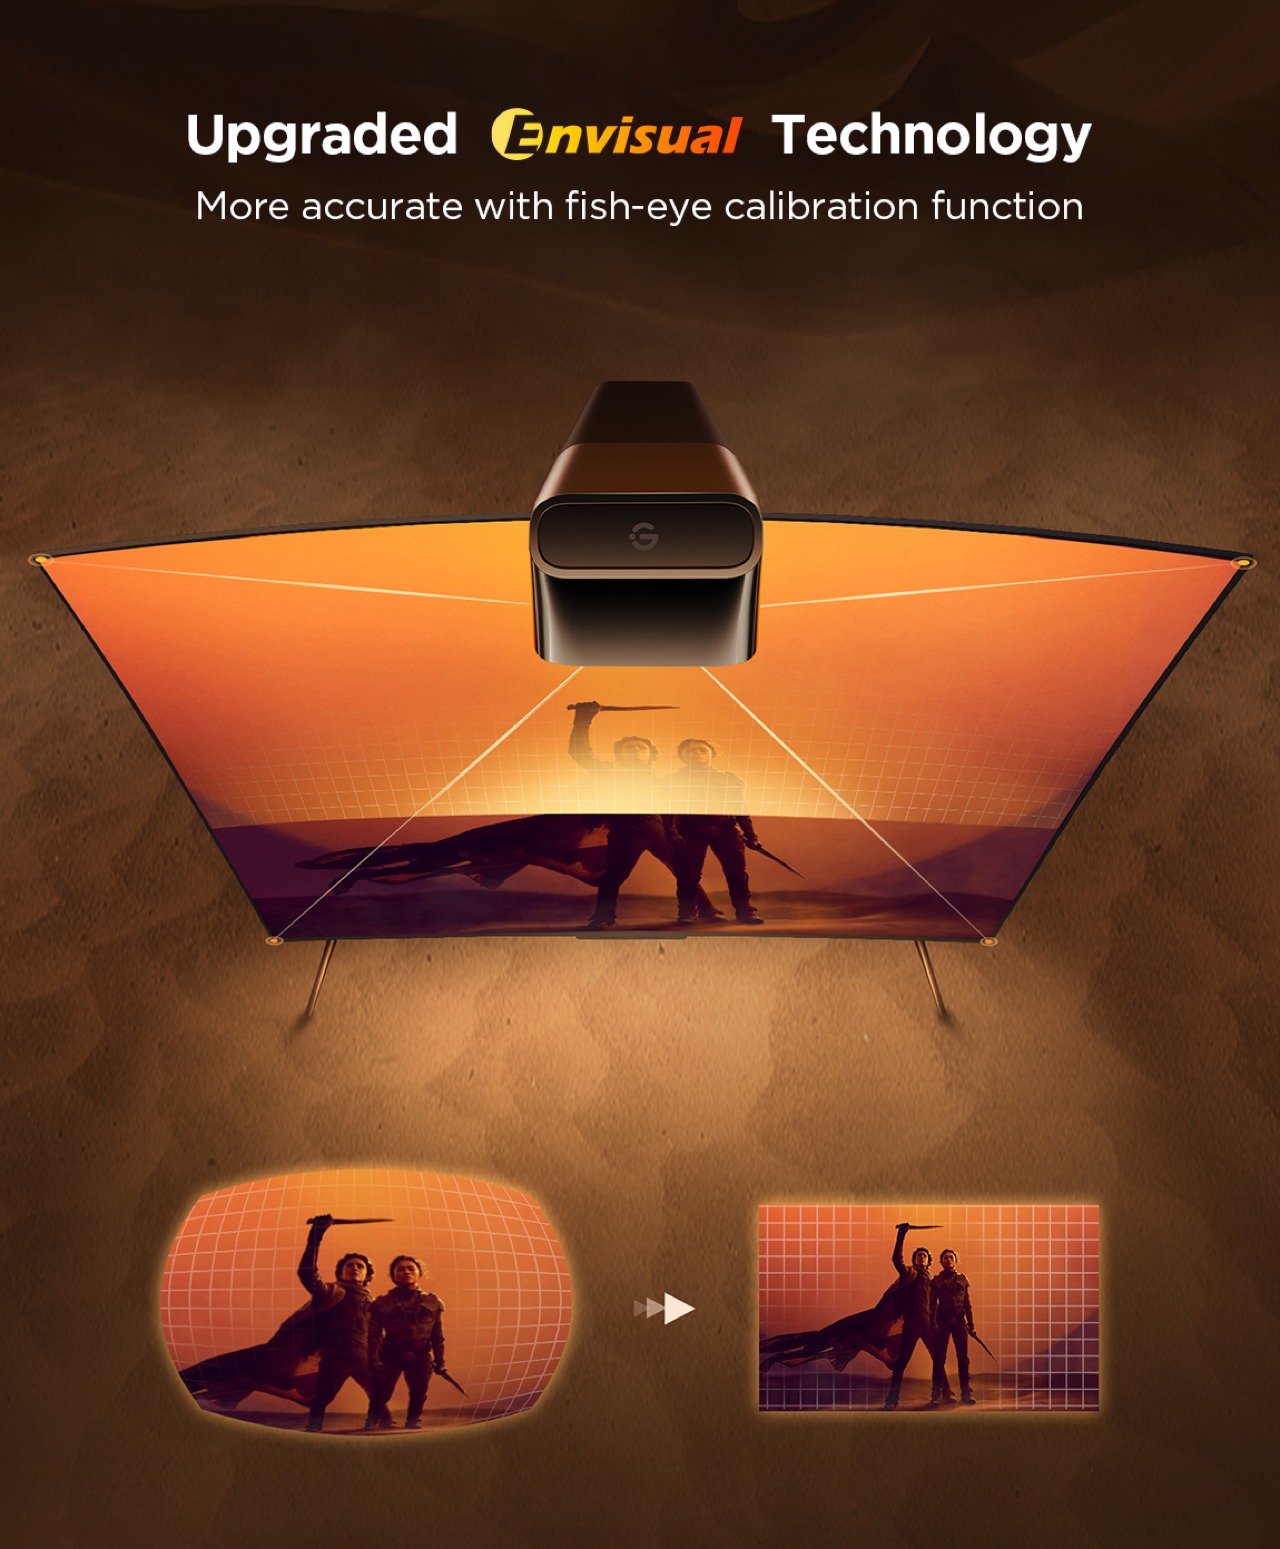
Of course, that color-matching doesn’t happen by magic, which is where that odd protruding comes in. With improved Envisual technology and upgraded processors, the Govee TV Backlight 3 Lite is able to identify colors on the screen faster and adjust the lights accordingly. The new fish-eye correction also makes sure that the 180-degree field of view camera sees the edges correctly as well. Admittedly, there’s still about a split-second delay between what happens on the screen and the backlight changing, but it’s almost negligible, to say the least. An HDMI control box would have made things faster but that would only work for content coming through HDMI sources and might not support future versions of the HDMI standard. This camera-based system is, therefore, more flexible and more future-proof, making that milliseconds delay a small price to pay.

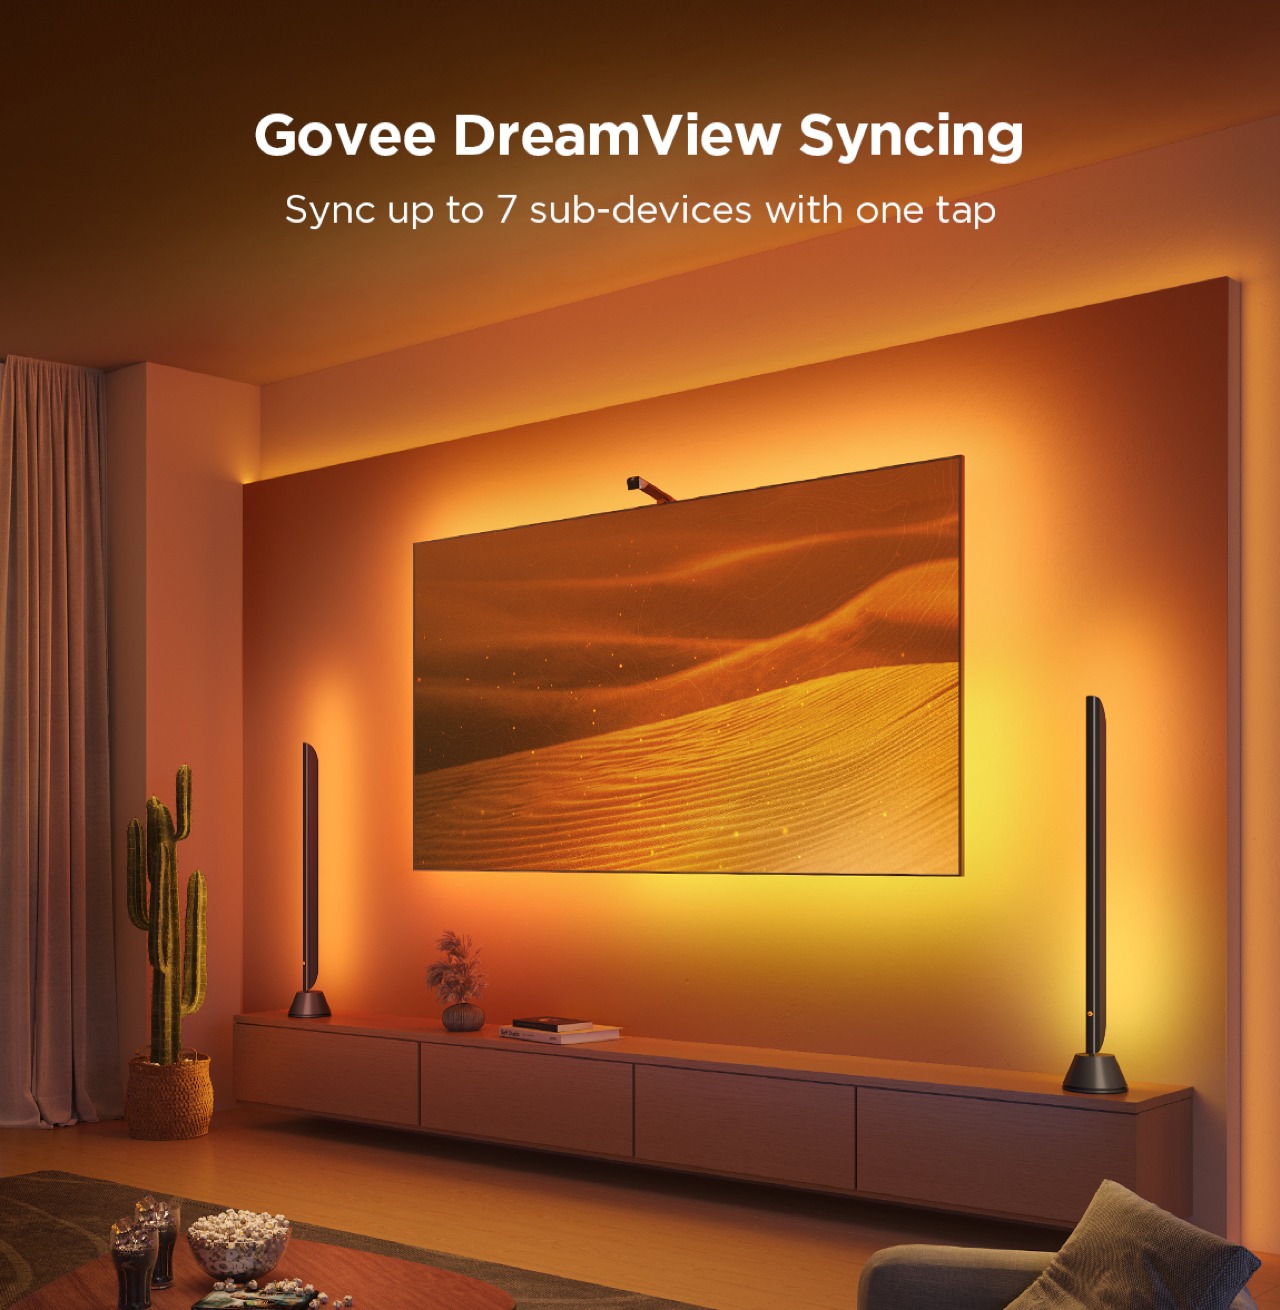
Although the color-matching feature is already incredible, the Govee app still has a lot in store for those who want to customize every detail. That includes different modes for what lights to play, even if that means not matching what goes on screen. This is where the collaboration with Warner Bros. comes in, turning the Govee TV Backlight 3 Lite into a portal into the world of Dune: Part Two. There are two new lighting effects, namely Arrakis and Spice, that will make you feel like you’re actually in that fictional world. Even the app itself gets a Dune theme to match. But if you really want to be transported to Arrakis, Govee’s DreamView technology allows you to sync with other Govee lights in the room, bathing you in the warm orange glow of the planet’s environment.

From its fast responsive color-matching to its bright, vibrant colors, the Govee TV Backlight 3 Lite definitely delivers on its promises. It’s not a perfect solution, of course, at least not yet, but the company seems to be heading in the right direction. And with tons of customizable options, including those from the Dune: Part Two collab, the design definitely has a lot to offer, especially if you have other Govee lights in the room.

Sustainability

Sustainability in lighting can be a difficult goal to chase after. Many of the materials needed to make such electronics work are sadly not sustainable by nature. One can only do so much to offset their negative effects, like using recycled materials for packaging or using more power-efficient lights like LEDs, but those can only go so far. Making matters worse is that the Govee TV Backlight 3 Lite, like any other TV backlight, isn’t exactly repairable by design. Once an LED gets busted or a part of the strip stops working, there’s no recourse possible. The whole thing becomes unusable and you either have to replace it or ship the whole thing for repairs. Either way, that means you have to pull it off the TV’s back, which will be tricky with that much adhesive used, and then go through the installation process again with the new strip.

Value

Compared to other TV backlights, the Govee TV Backlight 3 Lite with Dune-themed packaging is quite a steal at $74.99 for 55-65 inches with this sweet deal for Yanko Design readers, especially when considering all you’re getting for that price. You have bright and vibrant RGBICW LEDs that can display almost any hue and color-matching capabilities that can quickly follow the action on the screen. You also have plenty of customization options for modes and effects, including immersing yourself in the desert world of Arrakis if you want to.

The camera will probably be the most contentious part of its design, but it’s a flexible solution that is guaranteed to work regardless of TV and display technologies of the future. Hopefully, Govee will be able to create a better design for the camera in future iterations, but TV owners will just have to live with something hanging at the top of their TV in exchange for a more cinematic viewing experience.

Verdict

It’s actually astounding how a little change of light can affect the atmosphere in a room, even more so when you have a dazzling burst of color to match a mood. TV backlights are one of those things you never knew you needed until you actually try it out and realize how “dead” even the most colorful TV can be without colorful lights shining behind and around it. Some TVs these days come with their own ambient backlighting system, but those come at added cost and no upgrade path for the future.

The Govee TV Backlight 3 Lite with Dune-themed packaging brings that flood of light and color in a package that almost anyone can afford. Its upgraded Envisual color-matching technology is simply mind-blowing in its ability to keep up with the fast-paced action on the screen, and the gamut of colors provided by new RGBICW LEDs helps make the content pop out even more. The variety of customization options, including Arrakis and Spice lighting effects inspired by the Dune: Part Two makes sure that no viewing experience will be plain and boring ever again.

Click Here to Buy Now: $74.99 $89.99 (16% off).

The post Govee TV Backlight 3 Lite with Dune-themed Packaging Review: Elevating Your Home Theater Experience first appeared on Yanko Design.
This Ridiculously Simple Trick Can Transform Your Good Designs Into Great Designs

“A great design can’t be great if it doesn’t end up reaching its audience”

If people aren’t sharing/talking about your design, then it’s failed its first basic step: creating an impact. Most designers are so enamored (in a good way, obviously) with the idea of creation that they forget the next logical step – ensuring that the design reaches as many people as it can. The one secret you need to know, whether you’re a designer, a creator, a maker, a studio, or even a company looking to get eyeballs on your work… is to make your design project easy to share with others. The way you do it is simple – create a Press Kit.

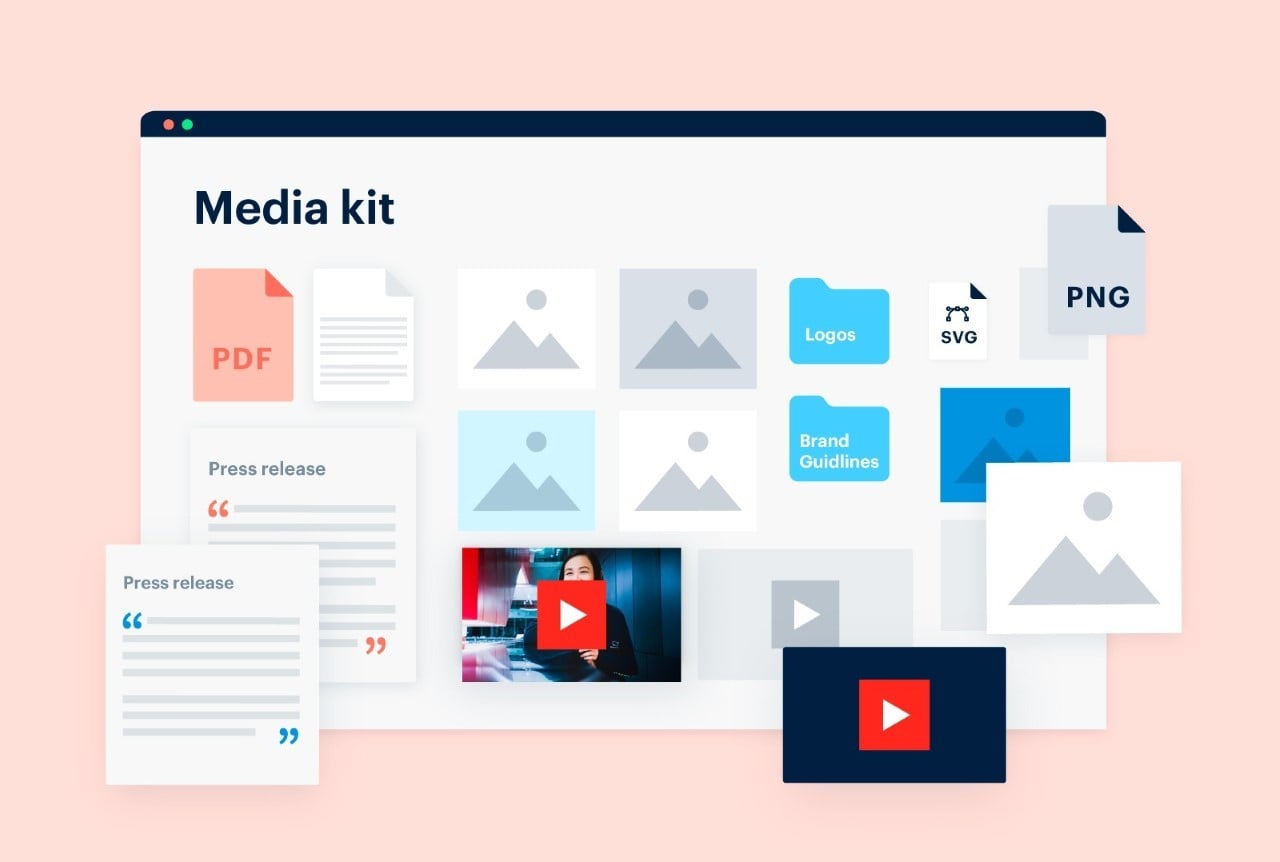
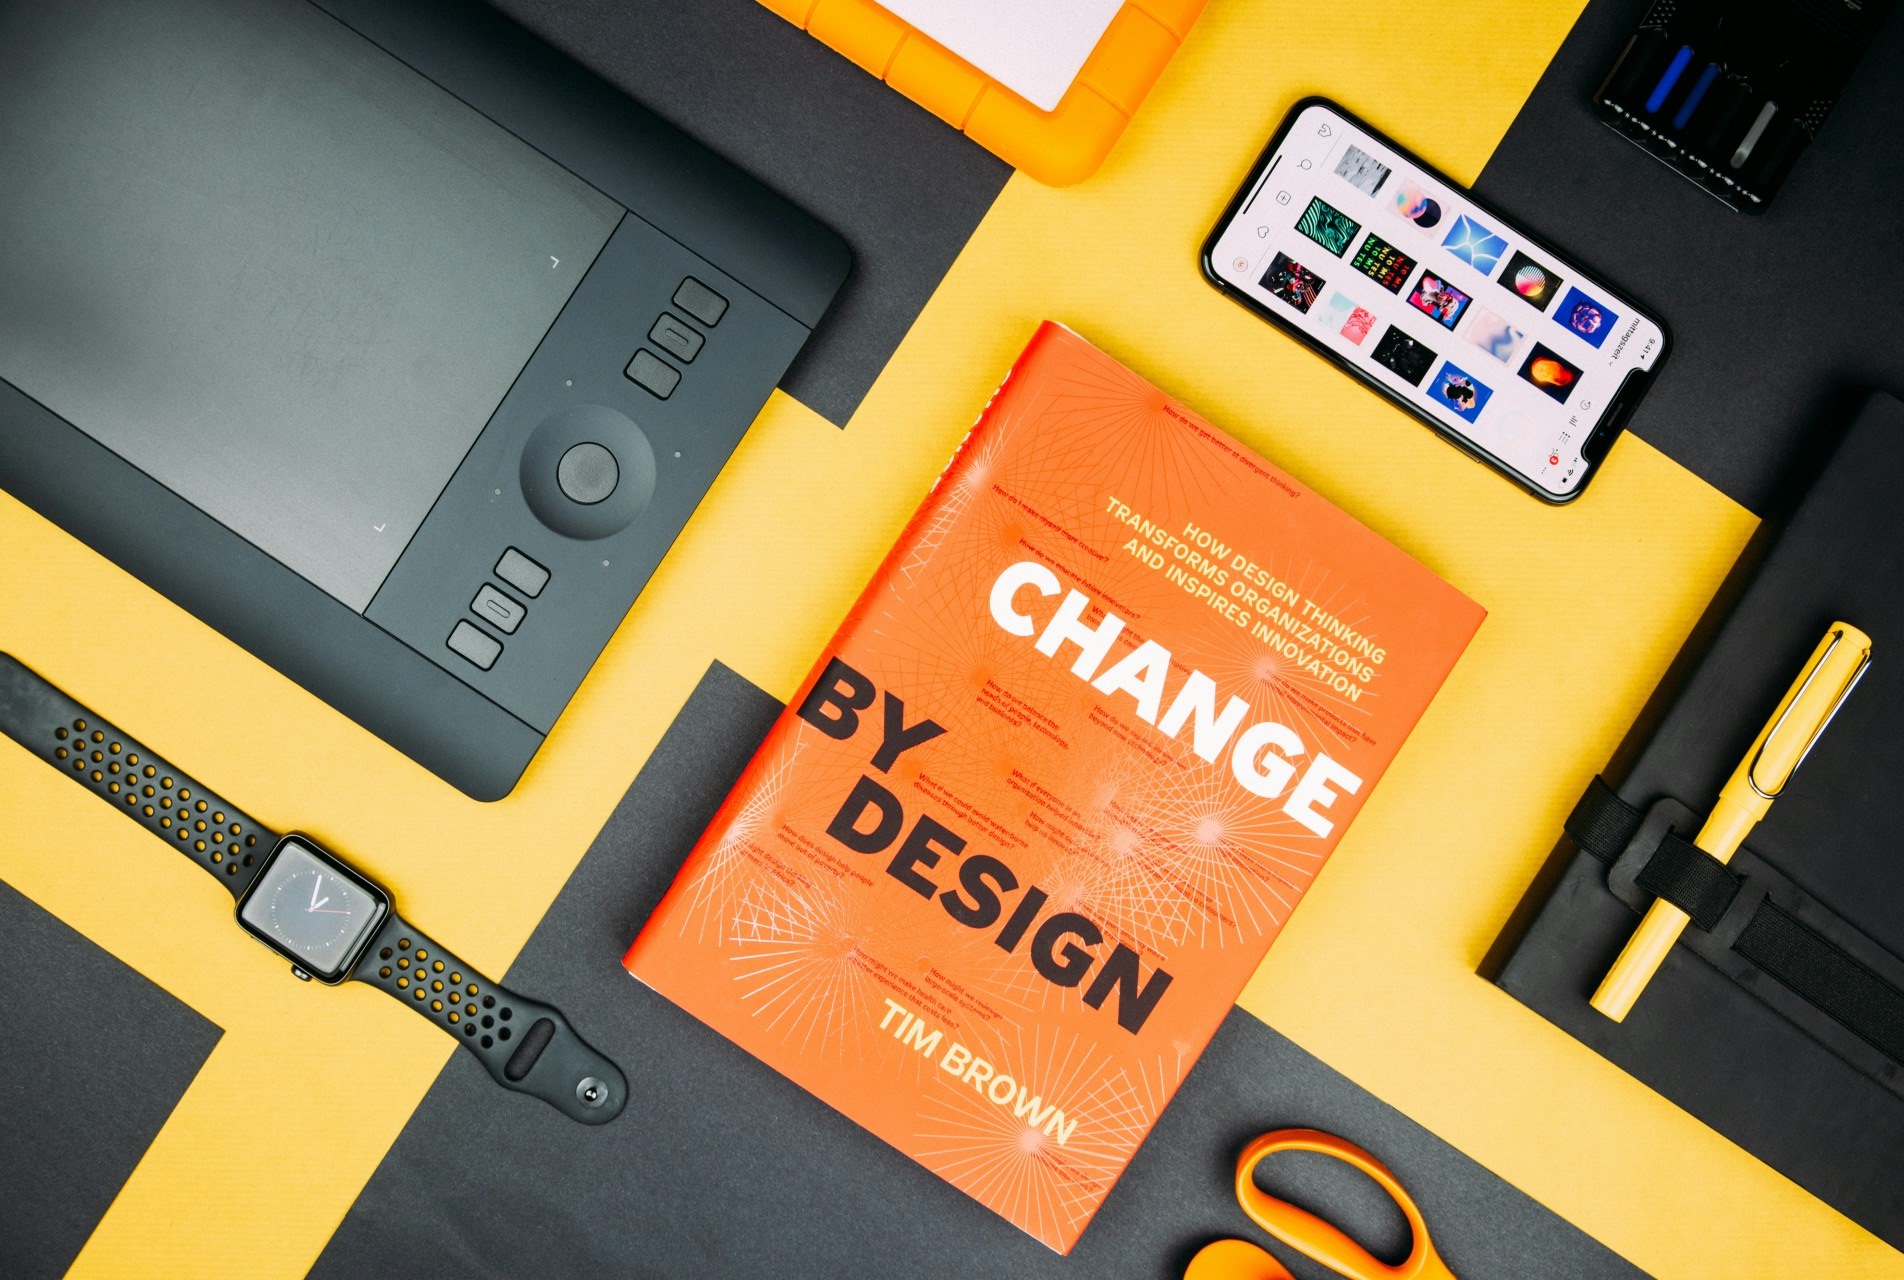
A Press Kit or a Media Kit is basically a kit/page/folder that contains high-resolution images, videos, GIFs of your design, and a written document describing your project in detail. It’s the basic raw material for journalists, bloggers, PR teams, marketers, and content creators to help them promote and broadcast your work. When people talk about your work, people notice your work. It’s that simple.

How To Make A Press Kit?

You know how a picture’s worth a thousand words? The press kit is quite literally those thousand words. Instead of leaving your work up to everyone’s interpretation, a Press Kit helps people understand your work so that they can then share it with others. It’s pretty much routine in the media world to have a press kit before writing about any project – the press kit (also known as the media kit) has three important aspects to it: Words, Images, and Videos. Every article you read online (or even offline), every social media post, every reel or TikTok is made up of these three things – Words, Images, and Videos. These three aspects are firmly within your control when you’re the creator, whether it’s a piece of furniture, an app, an electric vehicle, or any product/service/experience. Building a press kit to go with your creation is a great way of helping shape that narrative.

So how do you build a press kit? Simply collect all the information related to your project and present it in text form. On the side, also give people the option to view/download/share high-resolution images and videos regarding your project. You could compile all of these into a compressed folder (a .zip attachment in your email), or make them available via cloud storage or even directly on your website. The latter is a great way to track how many people access the press kit, giving you a unique metric to measure reach.

What To Include In Your Press Kit?

There are three aspects to a press kit – Words, Images, and Videos. The quantity and the emphasis on these three mediums is entirely up to you, but it’s essential to include a combination of all three aspects in your kit. The ‘Words’ element of the press kit is referred to as a press release, it contains all the information people need to know about your project. Hypothetically, you explain the background, the process/intent, the end result, the features, the human context, and other details like pricing and availability. Press releases also end with a note on the creator, giving media personnel a background on you so that they can use it to craft their narrative.

The words or text form the backbone of your press release, but arguably, the images and videos are what grab the attention of people in the first place. Your press kit needs to have great, high-resolution images to attract viewers, and preferably even a video to help people see your product in action, or get a sense of your product’s usage/features/background. The images need to be high-resolution for a variety of reasons – for starters, it just makes sense to not have blurry images in your press kit. Media outlets hate publishing bad-quality images because it reflects directly on their brand. Besides, sometimes a journalist/writer will crop a part of your image to focus on an element, so having good-quality images definitely goes a long way. Besides, search engines prioritize articles with great-quality media, so you want to make the best of that algorithm.

Tips And Tricks For Improving Your Existing Press Kit

As an ex-designer who’s been in the design+tech blogging world for nearly a decade, I think it’s time I share a few tips and tricks to help you build a stellar press kit.

Aspect Ratios – The Not-So-Secret Way To Easily Improve Your Kit

Ten years ago, this wouldn’t have mattered so much, but we’re now in an age of multiple aspect ratios. For years, landscape images and videos were the gold standard, but given the dawn of social media, a lot has changed. Landscape images and videos are still an absolute necessity, but they’re now a form of ‘legacy’ media. Portrait or vertical images and videos dominate apps like TikTok, Instagram, and YouTube Shorts, which people spend most of their time on, and if you want to play it safe, the Square image reigns supreme, working well everywhere, from print to online use, and even on platforms like Facebook, LinkedIn, Twitter (X), Pinterest, and Instagram. Make sure your press kit contains images of all aspect ratios, making it easy for everyone from journalists to influencers to broadcast and share.

Always consider multiple aspect ratios for your press kit so that your work can be viewed on multiple devices

The Human Context

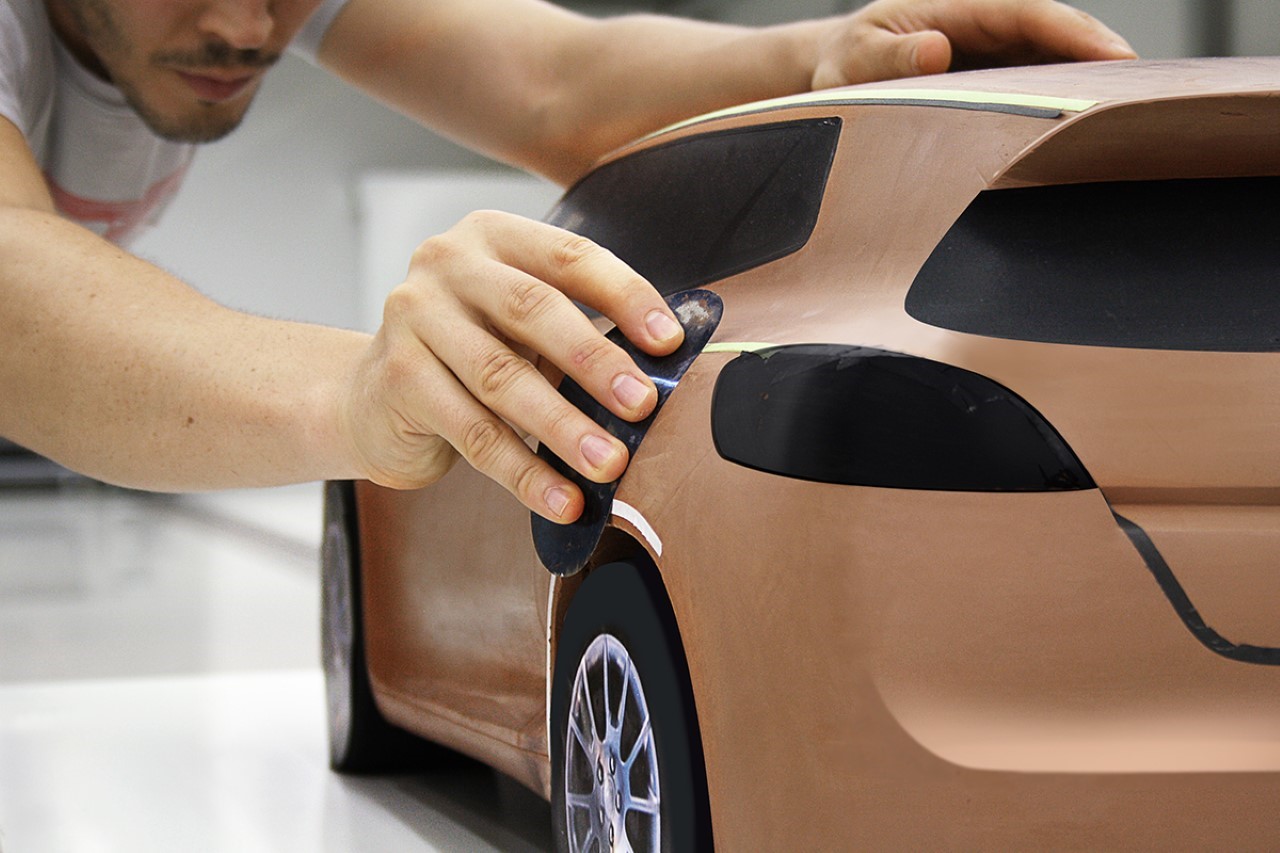
This may sound simple, but nothing makes a product more relatable/understood than actually showing it being used by a human. Flashy renders only go so far – if you’re designing for humans, you should show humans in your media too. An image or a video of a human using your product demonstrates a few things – it shows scale, so people know how big/small your product is, but it also acts as a proof of concept, showing that your product is real, and not a digital rendering.

The ‘Hero’ Image

Books have covers, movies have posters, YouTube videos have thumbnails, and press kits have hero images. The hero image is an image that highlights your product while also creating curiosity or awe. It could be an image at a dramatic angle (especially for cars), showing your product in a dynamic view. Conversely, if your product is best demonstrated through actual usage, a photo of your product in use could be the hero image. It’s vital to make your product the most important subject of your image, so that it’s the first thing people see as they’re scrolling through the internet. Try to play with blurry backgrounds, vibrant images, or somewhat sensationalized imagery to help your hero image stand out. It’s important to remember, your hero image is about the hero – your product. Make your product big and visible, be clear, and try not to clutter your image with too much detail. Hint, if your product needs to be opened to show its functionality (like a folding knife), make sure you consider that too. This hero image will play a vital role for media organizations, allowing them to use it as cover photos, thumbnails, etc. A good hero image can sometimes completely transform your press kit, bringing more eyeballs to your work.

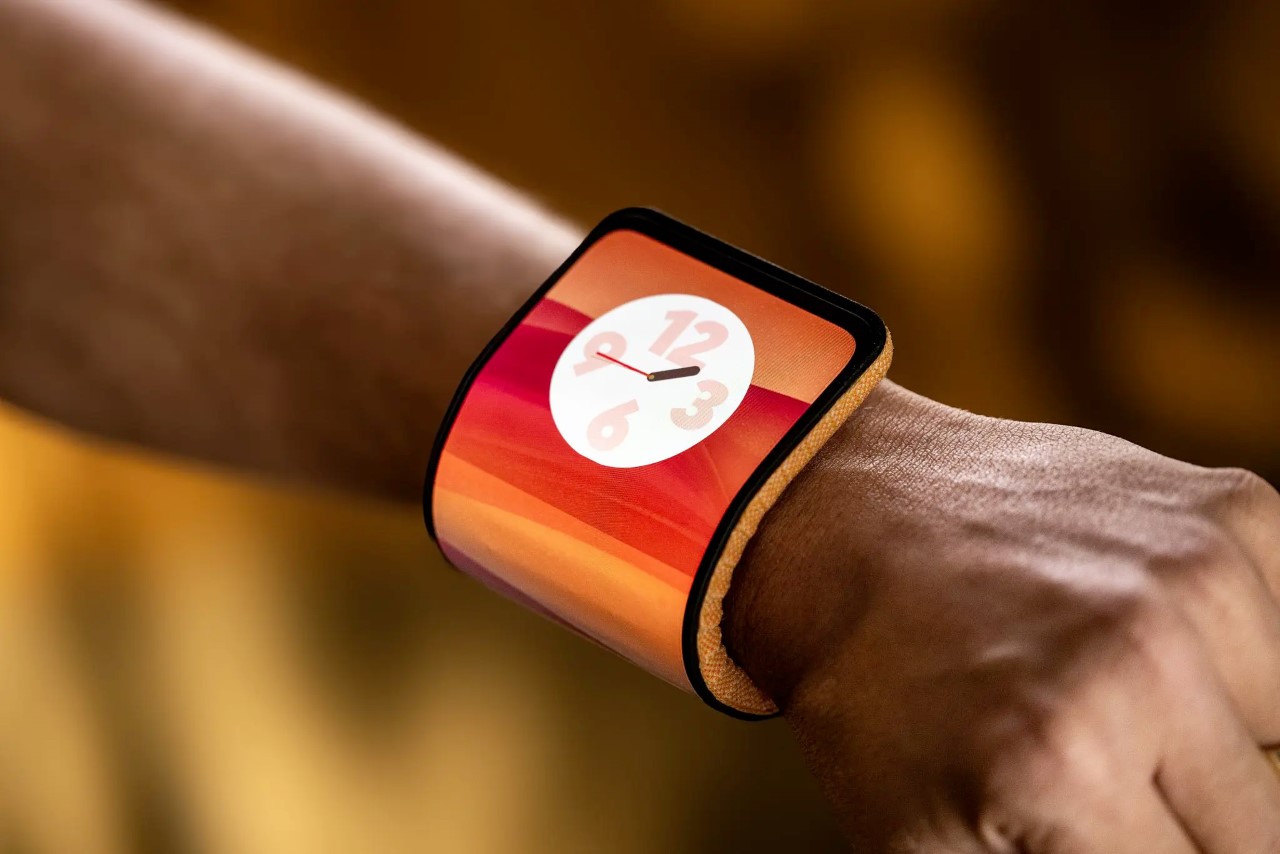
This photo of Motorola’s Bending Phone shows the power of ‘Human Context’ and ‘Hero Image’. It’s eye-catching yet explanatory, showing how the phone bends around your wrist.

The Text – More Is Always Better

Popular consensus will have you believe that with text, you have to be brief, to the point, and engaging. That’s true for almost all forms of writing, but not so much for press releases. Your press release is technically research material, so it NEEDS to be as detailed as possible. Include as much of your process in it, share all your findings (if a writer is viewing your press kit, chances are they’re definitely planning on writing about your project, so don’t worry about driving them away). Good writers love a lot of context because it gives them enough material to choose from. Pepper your release with interesting quotes that the writer can attribute to you as well, it helps get you visibility along with your work.

Get Yourself Visibility Along With Your Work

The press kit may be for your project, but ultimately, you want some of that spotlight on yourself too. Make sure the press release has an “About Me” section at the bottom. Add links to your website and social media that blogs/articles can use to tag/hyperlink you in their written material… and provide an email ID and phone number at the bottom to help writers get in touch with you just in case they want an interview. A press kit should elevate your design as well as your own profile so that people remember you when you launch your next project. Makes sense, right?

How To Distribute Your Press Kit?

Once you’re done building the press kit, this is honestly the easiest part. The press kit can be made available in a variety of ways – through emails. Most creators proactively share their work with people from the media, and personally, as a journalist, nothing feels better than to have good projects land right in my lap! You can reach out to prospective writers/reviewers/influencers via email or on social media with a .zip file or a link to DropBox, Google Drive, or any cloud storage. A great practice is to just have your press kit right at the bottom of your project page too, allowing journalists to quickly download the assets they need to write about your work. If you want to go a step further, embedding tracking into your outreach or your kits can help you understand how many people have viewed your message, checked the press kit, etc. Ideally, you also want to set up a Google alert with your or your project’s name on it so that you can find out when your work’s been shared online… and when that does happen, be sure to reach out to the author and thank them for sharing your work! It helps build a relationship because they’re sure to remember you when you reach out with your next project!

Remember, if nobody’s talking about your work, it’s failed its first step – creating an impact. A press kit makes it easy to generate that buzz so that people flock to your work and share it with others.

The post This Ridiculously Simple Trick Can Transform Your Good Designs Into Great Designs first appeared on Yanko Design.
How to make a Domino Chain Reaction in KeyShot using the new ‘Physics Simulation’ feature

Last year, a global survey crowned KeyShot as the “Best Rendering Software,” with 88% of designers overwhelmingly picking it for its incredibly photorealistic rendering capabilities. Now, with KeyShot’s newly unveiled Physics Simulation and Camera Keyframe features, the software is growing even more powerful, bringing real-world physics and camera effects to make your renders pop even more.

Click Here to Participate in the 2024 KeyShot Animation Challenge. Hurry! Challenge ends March 10th, 2024.

I put KeyShot’s Physics Simulation feature to the ultimate test by rendering a dramatic domino chain reaction scene. Setting up the simulation took hardly any time, with incredibly easy controls that took mere minutes to get the hang of. The results were jaw-dropping if I say so myself. In this article, I’ll show you how I managed to pull off one of my most exciting KeyShot rendering experiences ever. I’ll walk you through how I set the domino scene up, what parameters I input into the Physics Simulation window, and how you can recreate this scene, too. I’ll also share tips and tricks that can help you create some incredibly real simulations with objects falling, bouncing, and colliding with each other, absolutely enhancing your KeyShot rendering experience to a level like never before.

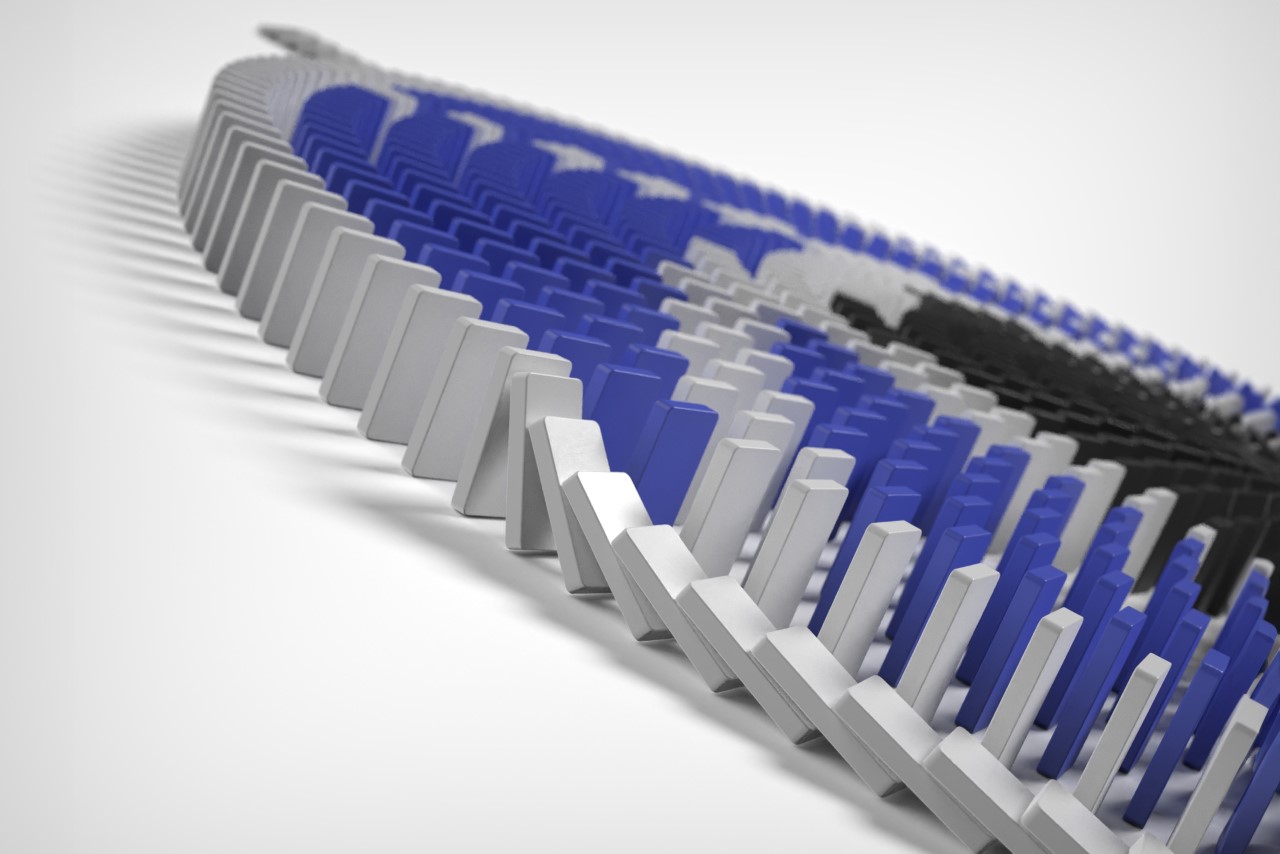
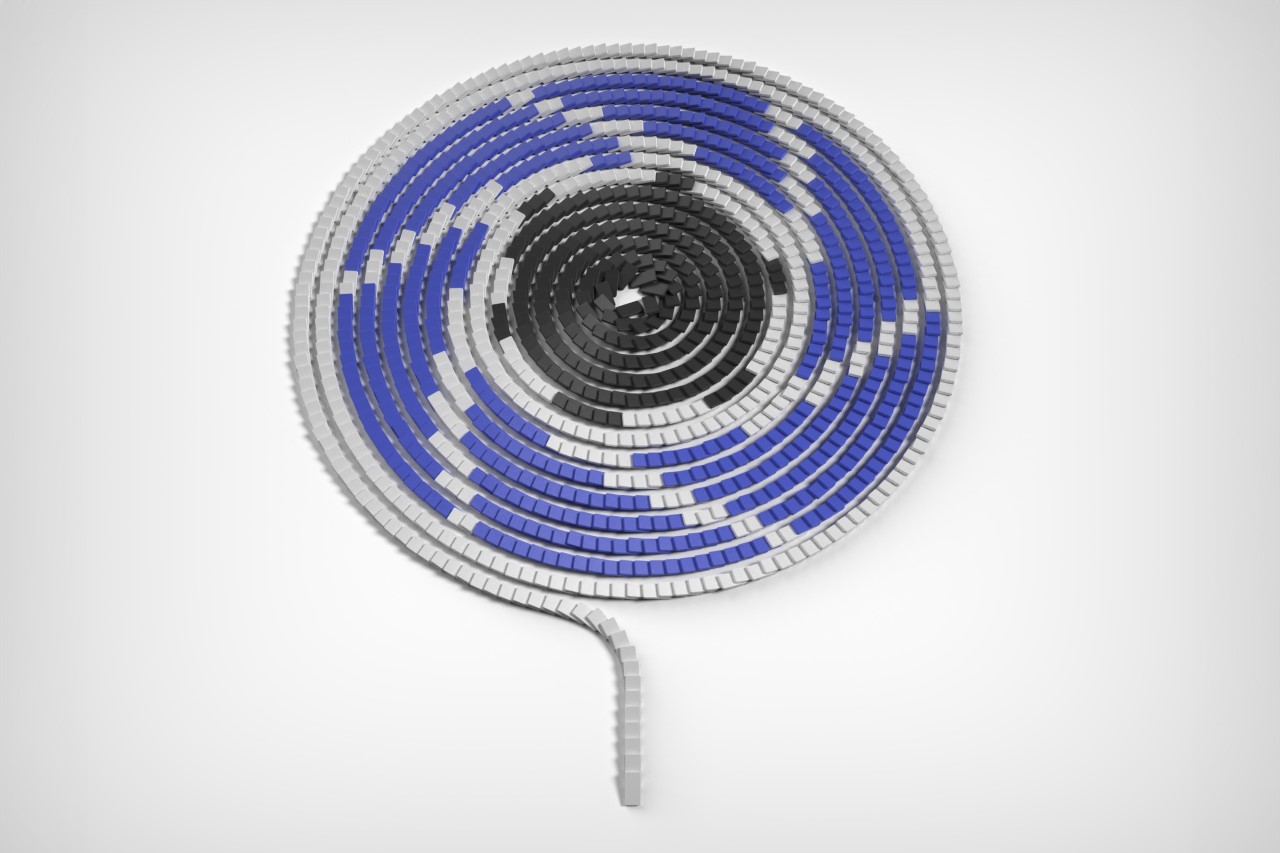
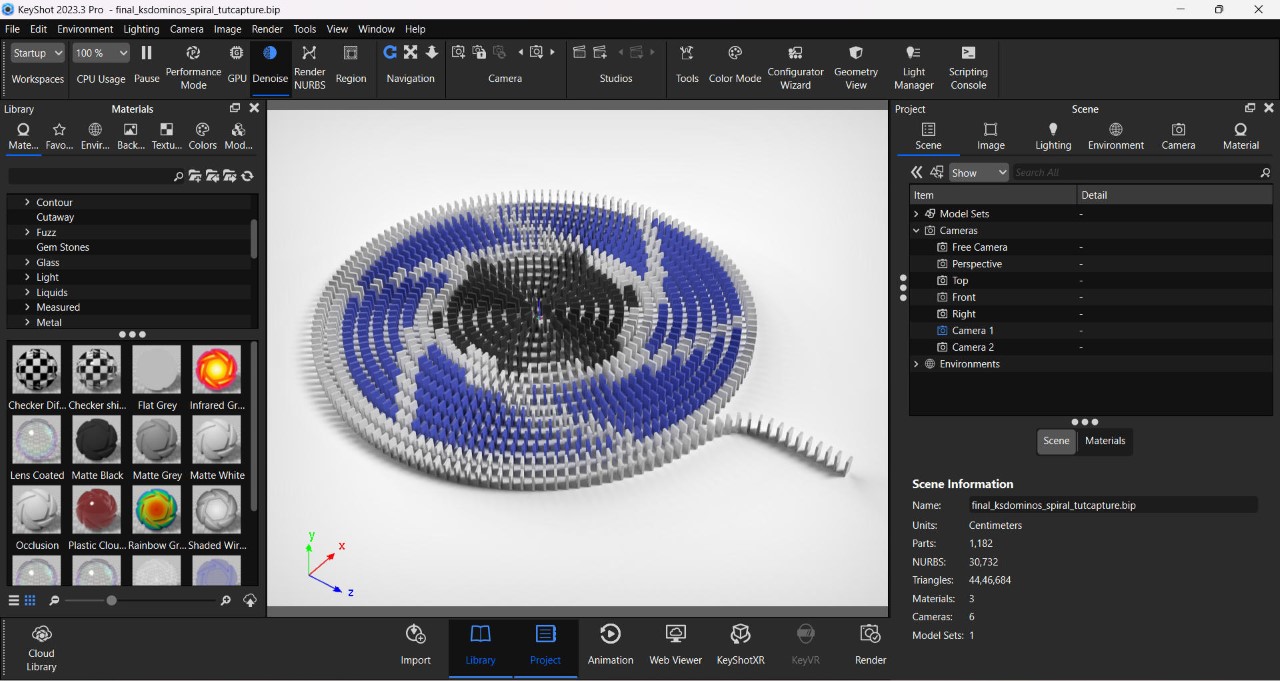
The entire scene was modeled in Rhino 7, starting by building one single domino, creating a spiral curve, and arraying multiple dominoes along the curve. The dominos were spaced at roughly 2 centimeters apart, ensuring the chain reaction would go smoothly from start to finish. The entire scene has a whopping 1182 dominoes in total; a little ambitious considering I was going to render the simulation on a 2022 gaming laptop.

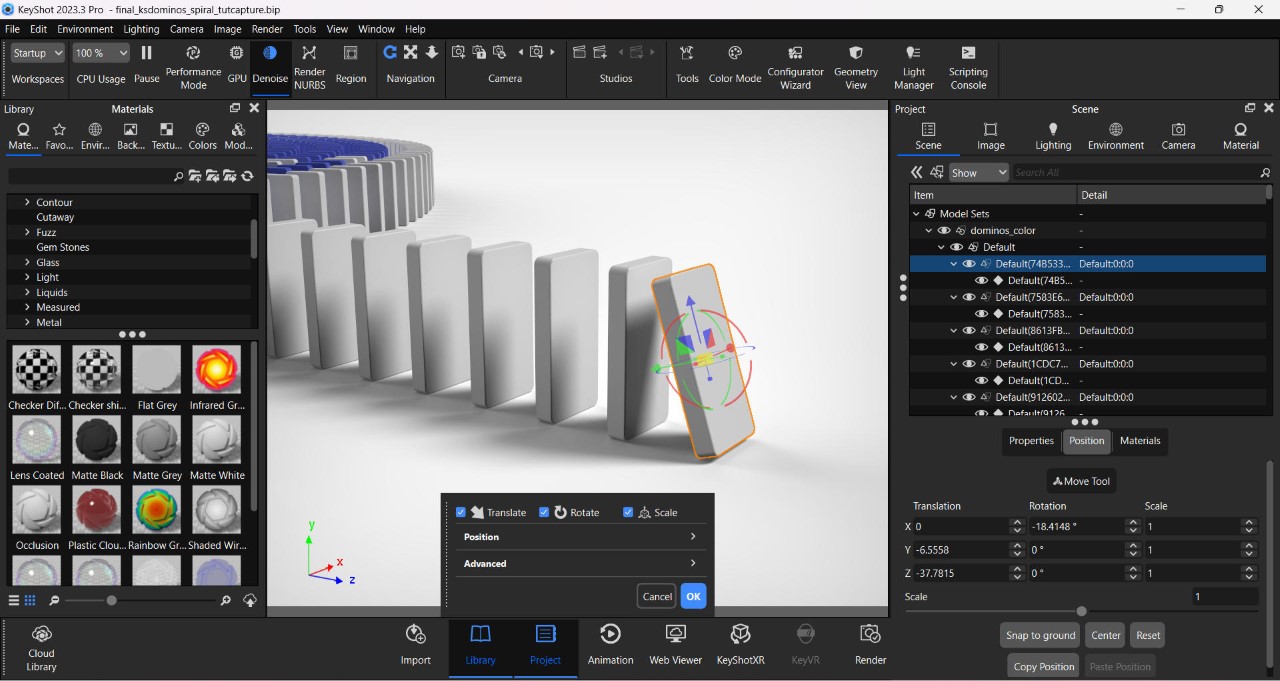
Tilt the first domino to help kickstart the physics cycle

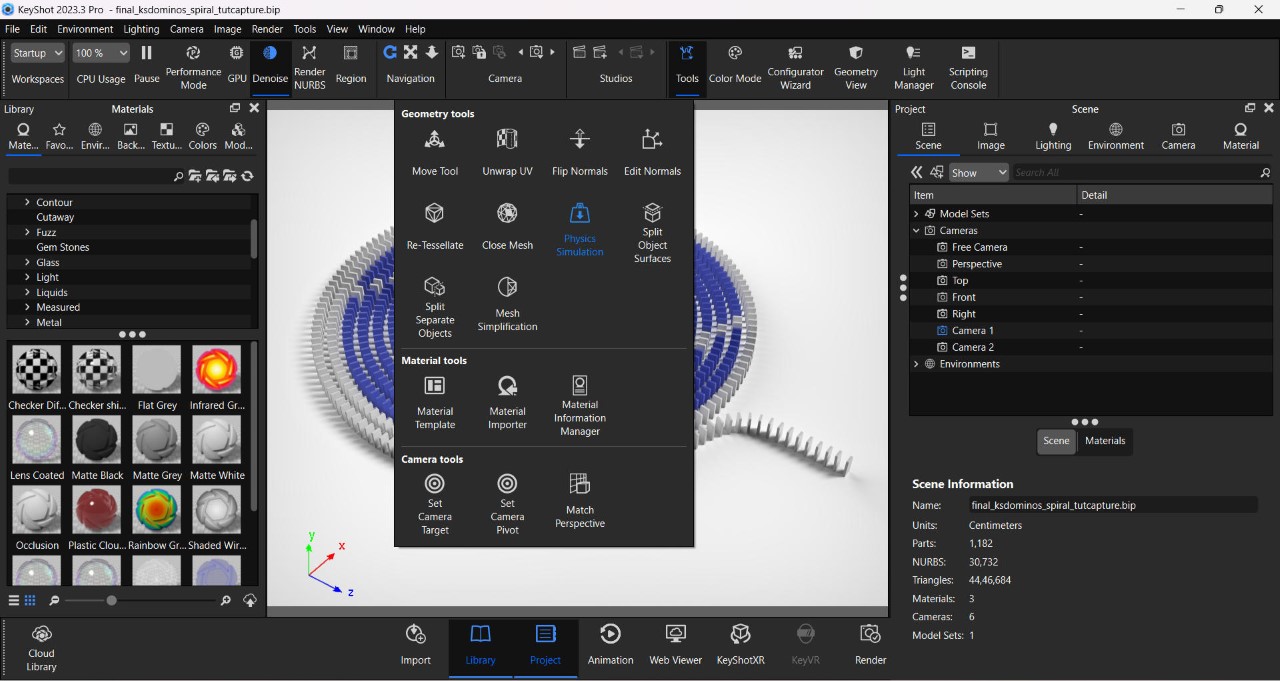
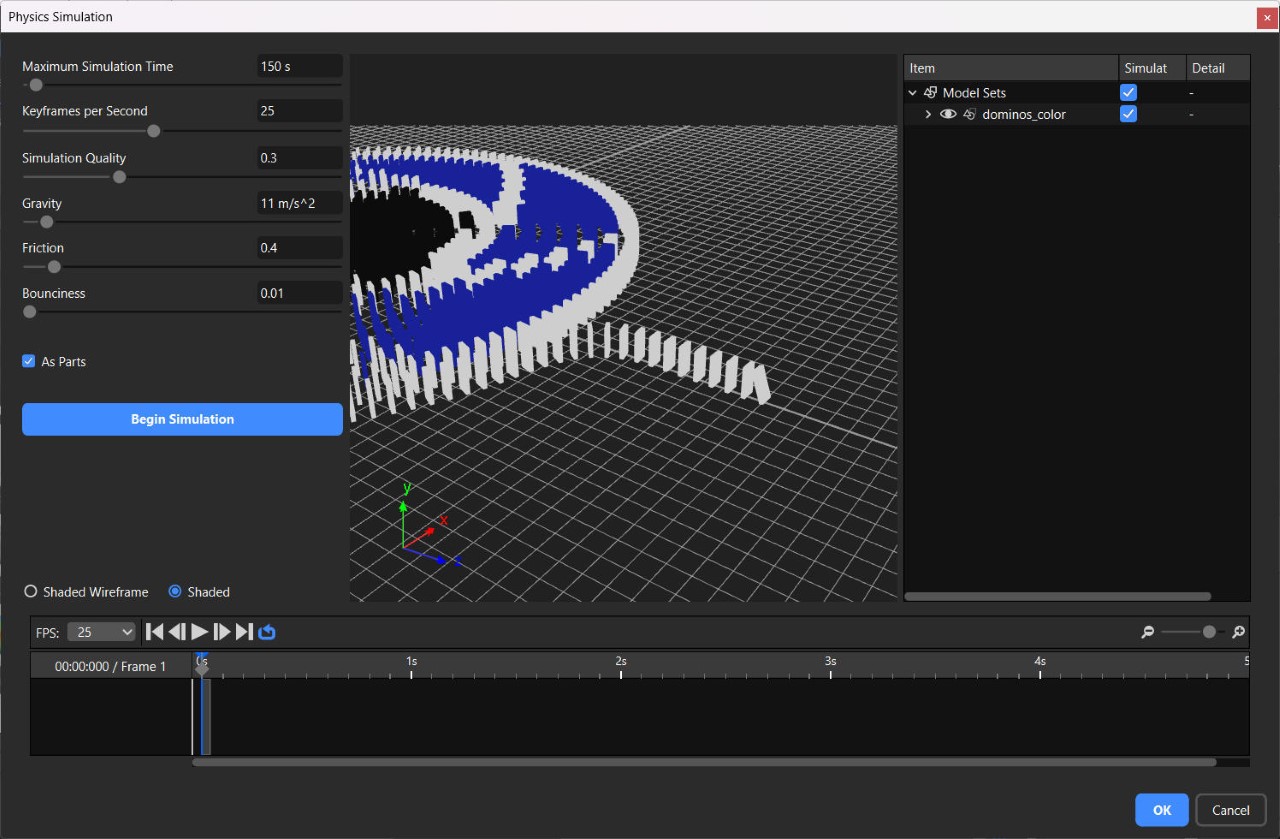
To use the simulation feature, import your scene into the latest version of KeyShot (2023-24) (get a free trial here), set the scale, add the materials, and pick the right environment. Before you use the physics feature, however, you need to prime your scene – in this case, it meant tilting the first domino forward so gravity would kick in during the simulation. The Physics Simulation feature can be found in the ‘Tools’ section on top. Clicking on it opens a separate window with a preview viewport, a bunch of settings, and an animation timeline on the bottom.

The Physics Simulation feature can be found in the Tools window

To begin with, pick the parts you want to apply physics to (these are the parts that will be influenced by gravity, so don’t pick stuff that remains stationary, like ground objects). The parts you don’t select will still influence your physics because moving objects will still collide with them. Once you’ve chosen what parts you want to move (aka the dominoes), select the ‘Shaded’ option so you can see them clearly in the viewport.

The settings on the left are rather basic but extremely powerful. You start by first setting the maximum simulation time (short animations require short simulations; considering mine was a long chain reaction, I chose 200 seconds), followed by Keyframes Per Second – This basically tells KeyShot to make your animation more detailed or choppy (think FPS, but for simulation). I prefer selecting 25 keyframes per second since I’m rendering my animation at 25fps (just to keep the simulation light), but you can bump things up to 60 keyframes per second, which gives your simulation smoother detail. You can then bump up your animation FPS to render high frame-rate videos that can then be slowed down for dramatic slow motion. Simulation quality dictates how well KeyShot factors the physics in – it’s at a default of 0.1, although if you feel like your simulation looks off, bump it up to a higher value.

The Physics Simulation Window

The remaining settings pertain to gravity and material properties. The gravity is set at Earth’s default of 9.81 m/s² – increasing it makes items heavier (and fall faster), and decreasing it makes objects float around for longer before descending. I set mine at 11 m/s² just to make sure the dominoes fall confidently. Friction determines the amount of drag caused by two colliding objects – setting a higher friction causes more surface interference, like dropping a cube on a ramp made of rubber, and reducing the friction enables smooth sliding, like the same cube on a polished metal ramp. To ensure that the dominos don’t stick to each other like they were made of rubber, I reduced my friction setting to 0.4. Finally, a Bounciness feature lets you determine how two objects collide – the lower this setting, the less bounce-back, the higher the setting, the more the rebound. Given that I didn’t want my dominos bouncing off each other, I set this at a low of 0.01. Once you’re done, hit the Begin Simulation button to watch the magic unfold.

If you aren’t happy with your simulation, you can stop it mid-way and troubleshoot. Usually, tinkering with the settings helps achieve the right simulation, but here’s something I learned, too – bigger objects fall slower than smaller objects, so playing around with the size and scale of your model can really affect the simulation. If, however, you’re happy with your simulation (you can run through it in the video timeline below), just hit the blue ‘OK’ button, and you’ve successfully rendered your first physics simulation!

The simulation then becomes a part of KeyShot’s Animation timeline, and you can then play around with camera angles and movements to capture your entire scene just the way you visualized it. I created multiple clips of my incredibly long domino chain reaction (in small manageable chunks because my laptop crashed at least 8 times during this) and stitched them together in a video editing app.

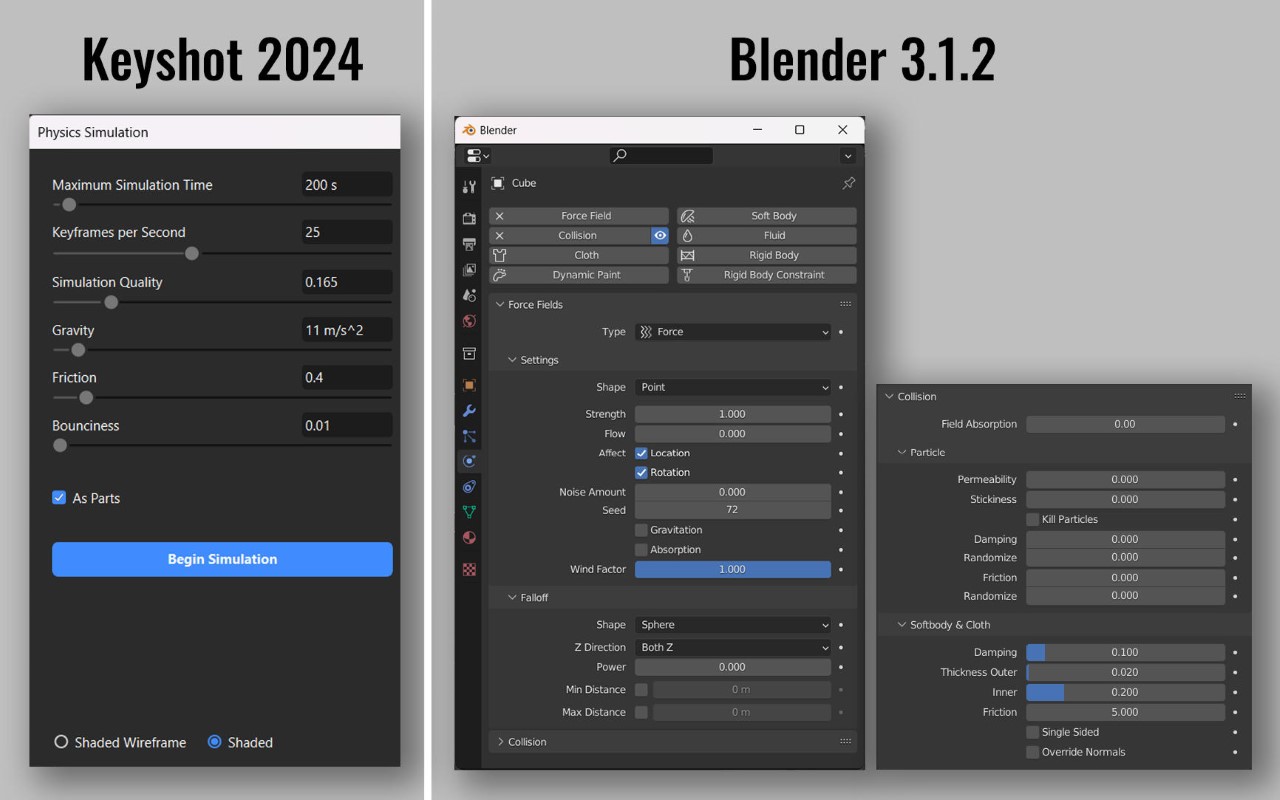
Comparing KeyShot and Blender’s Physics Control Panels

The Physics Simulation feature in KeyShot 2023-24 is incredibly impressive. For starters, it’s a LOT easier than other software like Blender, which can feel a little daunting with the hundreds of settings it has you choose from. Figuring out physics simulation in KeyShot takes just a few minutes (although the actual simulation can take a while if you’re running something complex), making an already powerful rendering software feel even more limitless!

That being said, there’s some room for growth. Previous experiments with the simulation tool saw some strange results – falling objects sometimes ended up choosing their own direction, making the simulation feel odd (I made a watch fall down and the entire thing disassembled and scattered in mid-air instead of falling together and breaking apart on impact). Secondly, sometimes objects can go through each other instead of colliding, so make sure you tinker with quality settings to get the perfect result. Thirdly, you can’t choose different bounciness values for different objects in the same simulation just yet, although I’m sure KeyShot is working on it. Finally, it would be absolutely amazing if there were a ‘slow-motion’ feature. The current way to do this is to bump up the keyframe rate and bring down the gravity, but that can sometimes cause objects to drift away after colliding instead of falling downwards in slow motion.

So there you have it! You can use this tutorial to animate your own domino sequence, too, or better still, create a new simulation based on your own ideas! If you do, make sure to participate in the 2024 KeyShot Animation Challenge to stand a chance to win some exciting prizes. Hurry! The competition ends on March 10th, 2024!

The post How to make a Domino Chain Reaction in KeyShot using the new ‘Physics Simulation’ feature first appeared on Yanko Design.
The 2024 KeyShot Animation Challenge encourages Designers to push the limit with new Physics and Camera effects

Even Instagram pivoted from photo to video content… and so should your renders! Sure, a JPG or PNG can be worth a thousand words, but think of how impactful product videos can be. KeyShot has always been at the forefront of the rendering industry, but with these new features, it aims to make video/animation just as easy as rendering images. The 2024 KeyShot Animation Challenge invites designers to explore KeyShot’s two most powerful animation tools – the Physics Simulation feature, and the Camera Keyframes feature.

These two tools unlock a vast array of possibilities – the Physics Simulation helps bring realism to your renders, letting you create falling/bouncing objects, colliding elements, and impactful scenes. Meanwhile, the Camera Keyframes tool allows you to go beyond the traditional zoom, pan, revolve movements and build a more unique and detailed camera path simply by adding keyframes and allowing the camera to glide between them. You can use either one or both tools in your submission to the challenge, which should be a video of 30 seconds maximum. The more imaginative the better.

Click Here to Participate in the 2024 KeyShot Animation Challenge. Hurry! Challenge ends March 10th, 2024.

How to participate:

  1. Download and Install KeyShot and use the trial code KSANIMATE24 to get free access
  2. Create a 30-second (max) rendered video exploring the Physics Simulation and/or the Camera Keyframe tools.
  3. Render your file in 1080p resolution
  4. Submit your entry by uploading and sharing your visuals on Instagram. Use the hashtag #KeyShotAnimation

Important Note: Finalists will be required to send their .ksp file, so be sure to save that in a safe place!

Timelines:

Challenge begins: February 8, 2024
Challenge ends: March 10, 2024

Prizes:

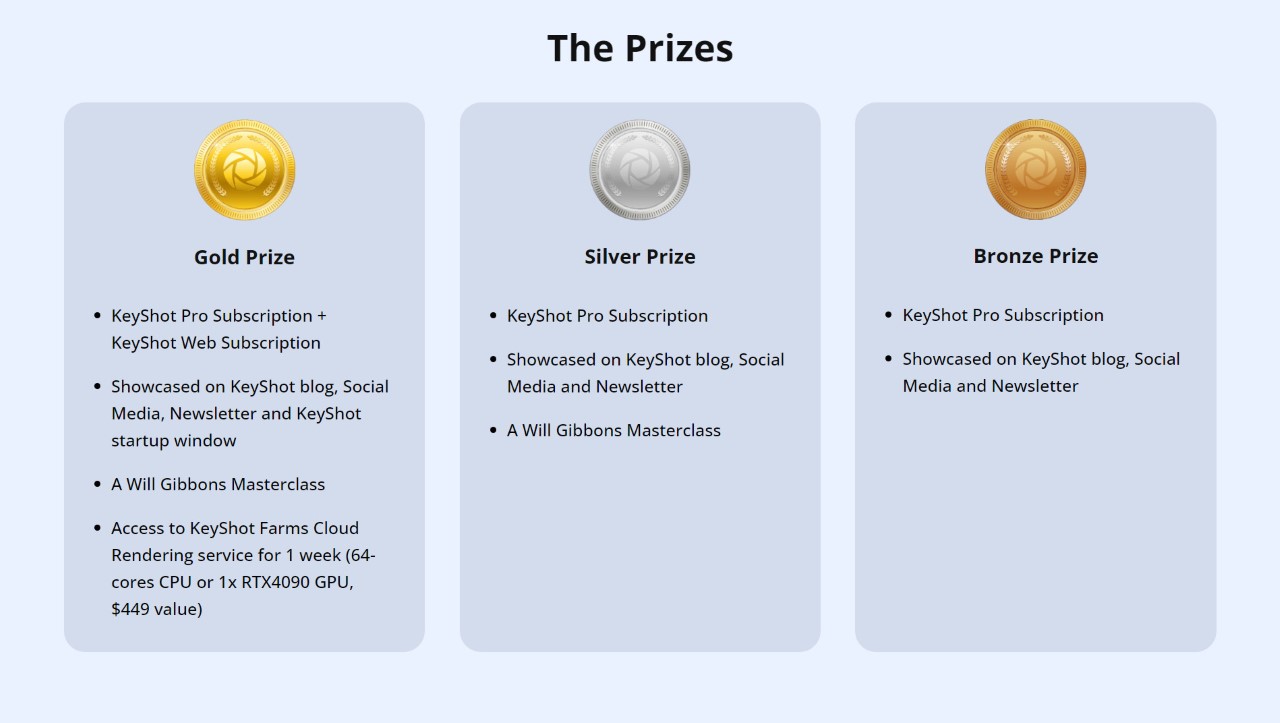
Gold Prize: KeyShot Pro Subscription + KeyShotWeb Subscription + Render showcased on KeyShot blog, Social Media, Newsletter and KeyShot startup window + A Will Gibbons Masterclass + Access to KeyShot Farms cloud rendering service for 1 week. (64-cores CPU or 1x RTX4090 GPU, value of $449.)
Silver Prize: KeyShot Pro Subscription + Render showcased on KeyShot blog, Social Media, Newsletter and KeyShot startup window + A Will Gibbons Masterclass
Bronze Prize: KeyShot Pro Subscription + Render showcased on KeyShot blog, Social Media, Newsletter and KeyShot startup window

Jury:

Karim Merchant – Senior Industrial Design and Creative Specialist, KeyShot
Reza Tari – Marketing Design Manager, KeyShot
Jordan Doane – Creative Support Specialist, KeyShot

Helpful Tips:

Learn about Physics Simulation and Camera Keyframes on the KeyShot YouTube channel. You can also dig into Animation in the KeyShot manual.

Need a model? Choose from thousands of models in the KeyShot Cloud Library.

Click Here to Participate in the 2024 KeyShot Animation Challenge. Hurry! Challenge ends March 10th, 2024.

The post The 2024 KeyShot Animation Challenge encourages Designers to push the limit with new Physics and Camera effects first appeared on Yanko Design.

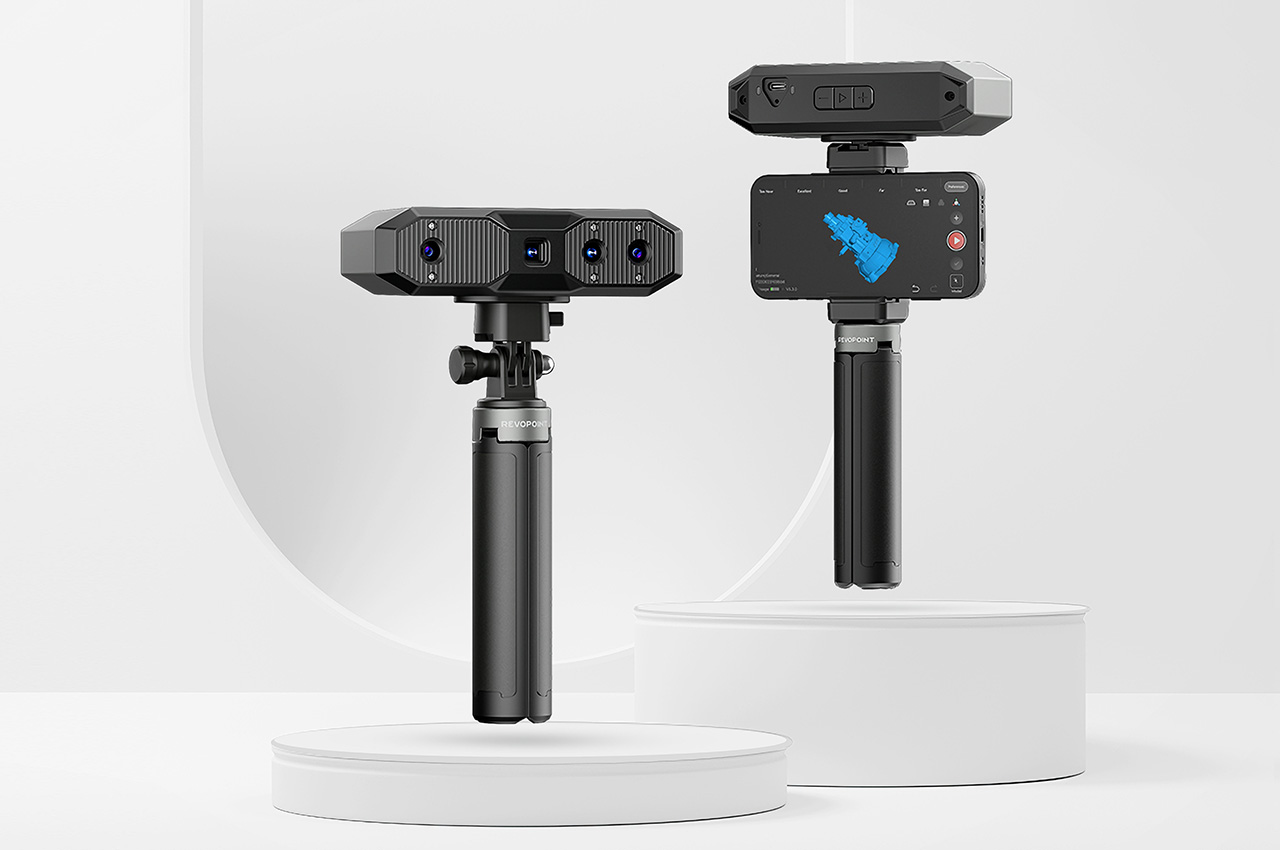
Revopoint MINI 2 3D scanner brings precision and innovation to your projects

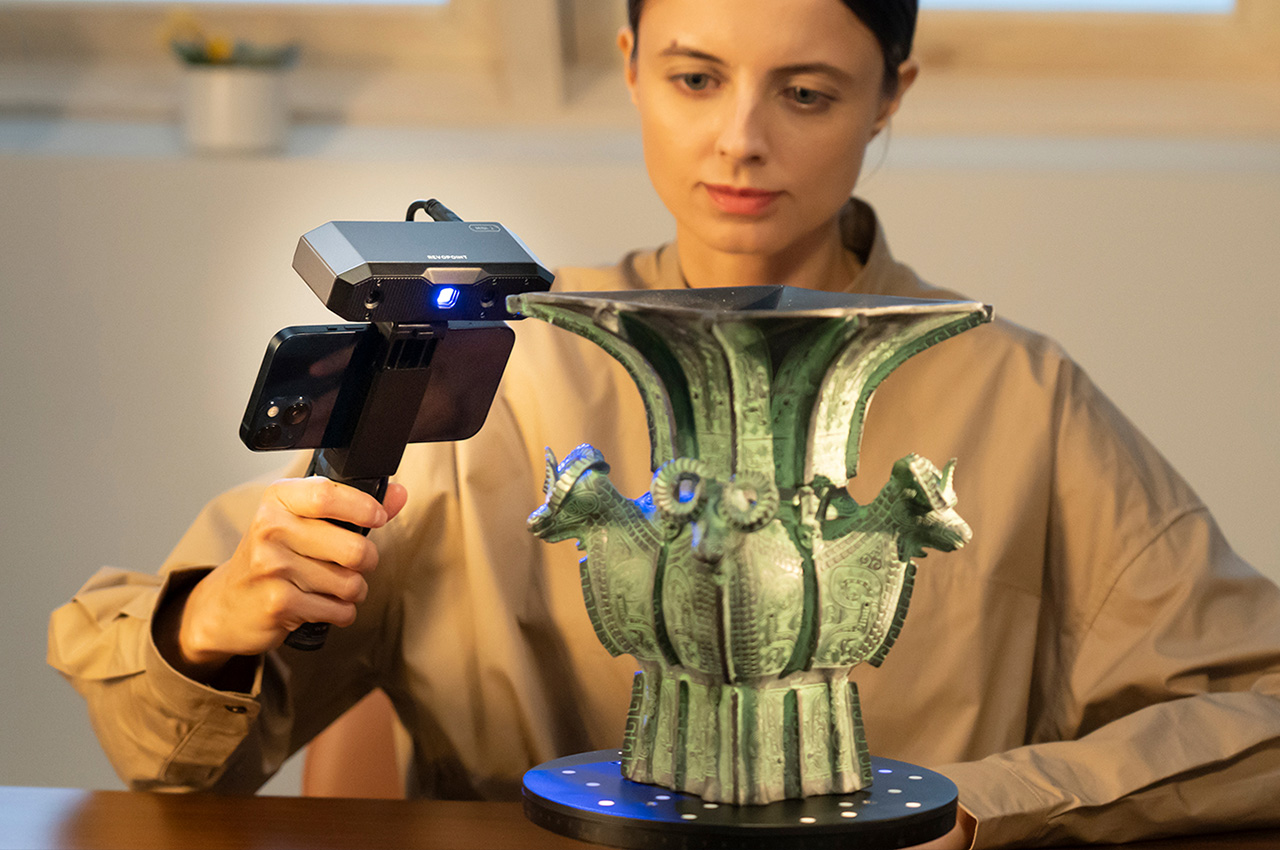
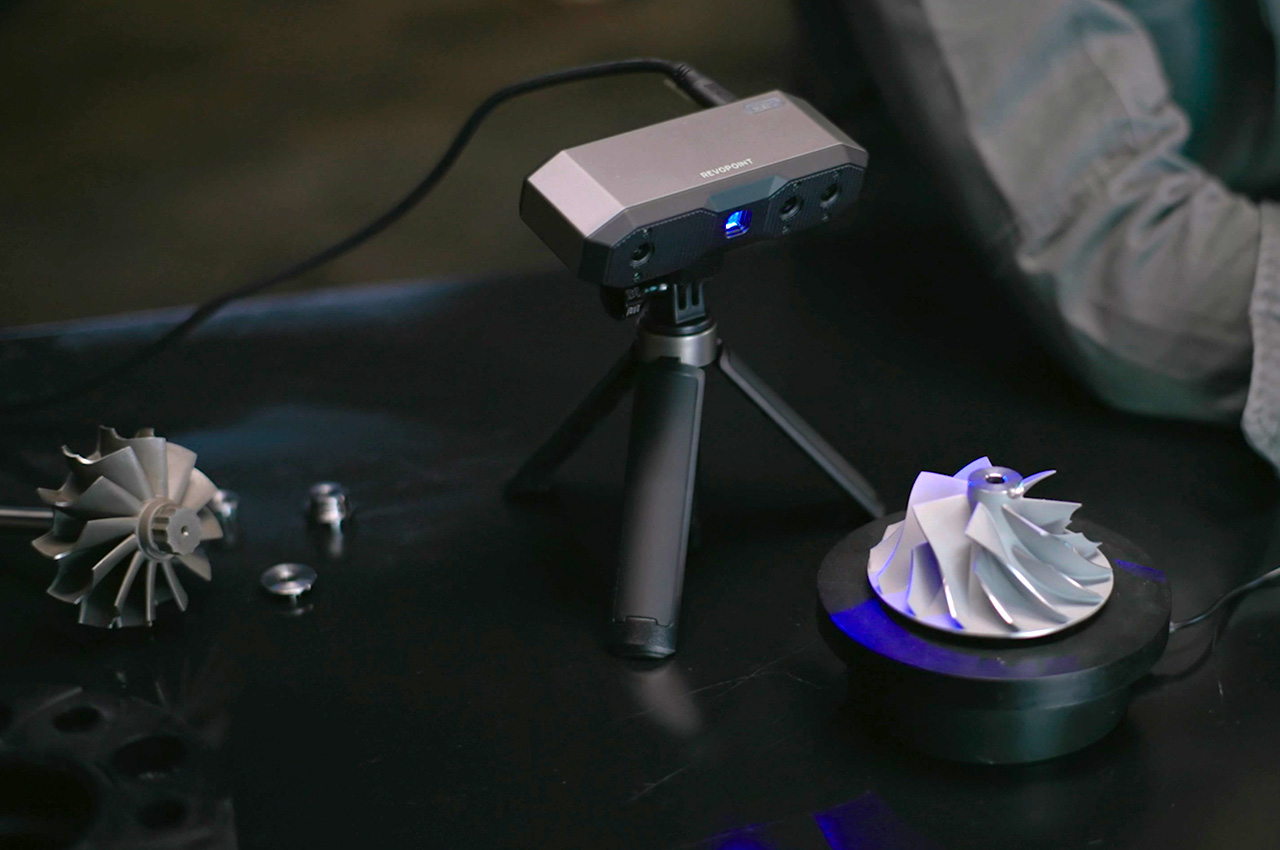
Have you ever wished to put your knickknacks and small treasured mementos in your personal Metaverse room? Or maybe you need a replacement part for a toy or machine that has long gone out of production. You can try modeling these real-world objects using sophisticated 3D software, but not only is it a painstaking process, the end result might not be as accurate and precise as the real thing. What you need is a simple yet powerful tool to digitize physical objects, and that’s what Revopoint’s upgraded MINI 2 handheld 3D scanner offers, providing designers, makers, and all kinds of creatives the power they need to scan small objects not only with speed but, more importantly, with accuracy and precision as well.

Designer: Revopoint

Click Here to Buy Now: $821 $912 ($91 off). Hurry, deal ends in 48-hours!

3D scanning was once confined to large machines inside professional studios, but thanks to advancements in technology, you can now hold such a scanner in your hand that offers a high level of accuracy and an accessible price tag. You might think that a handheld, portable device would have to sacrifice features just for the sake of size, but the Revopoint MINI 2 3D scanner breaks from the mold and surpasses expectations. With its blue light-powered single-frame precision of up to 0.02 mm and an accuracy reaching up to 0.05 mm, it makes short work of any small object you throw at it, quickly turning real-world three-dimensional objects into their virtual 3D counterparts.

Single Capture Range @ Nearest Distance 52 x 64 @ 120 mm

Single Capture Range @ Furthest Distance 168 x 132 @ 250 mm

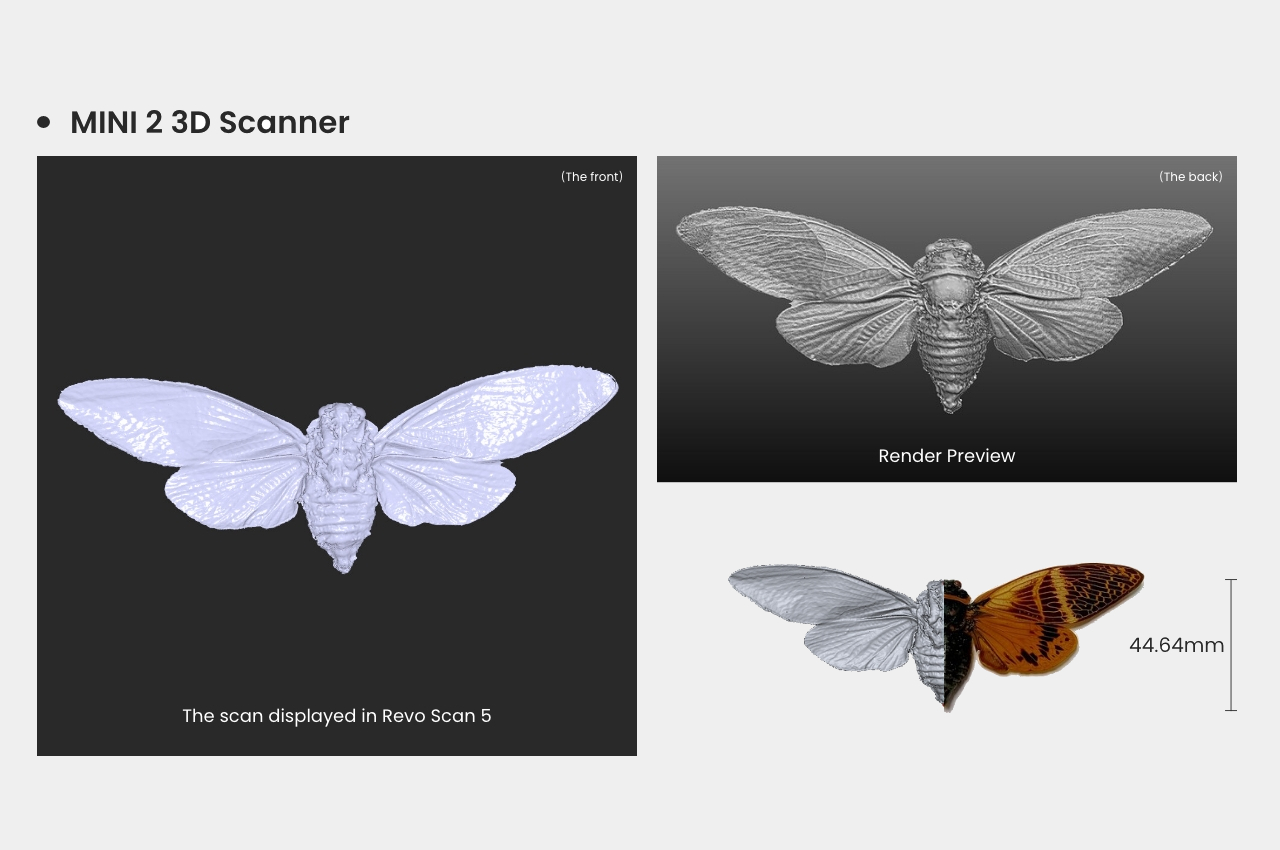
An insect scanned by Revopoint MINI 2. Credit: PUTV

The Revopoint MINI 2 presents a significant upgrade from its predecessor across the board. Its single-frame scanning range now reaches 168 mm x 132 mm at a distance of 250 mm, and the scanning speed is now faster at 16 fps. The RGB camera doubles its pixel count and even comes with a larger aperture that lets more light in, allowing it to capture more intricate color details than before. And with a new flash LED system that removes shadows from the object, you can get more uniform colors as well.

Up to 16 fps Scanning Speeds – Create ready-to-use models in seconds.

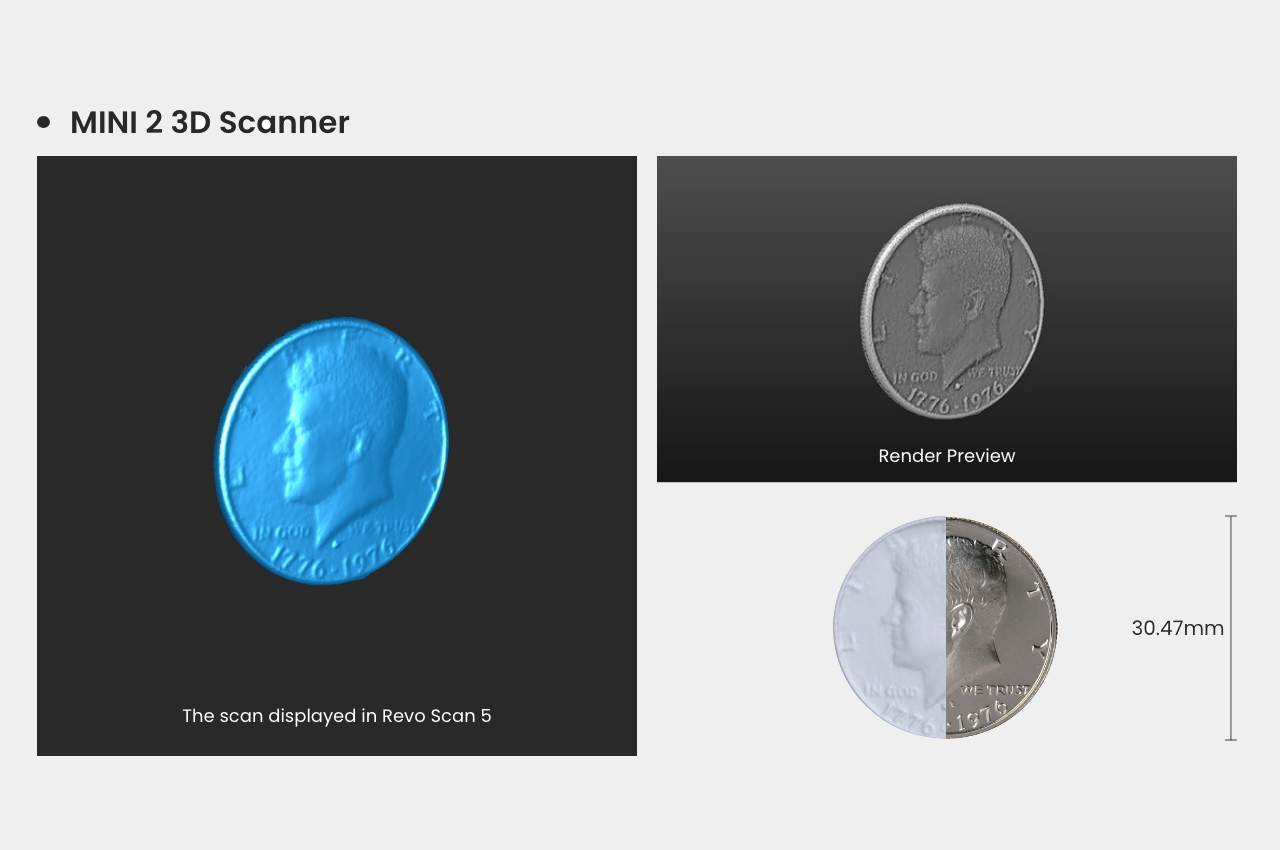
A 50-cent coin scanned by Revopoint MINI 2. Credit: PUTV.

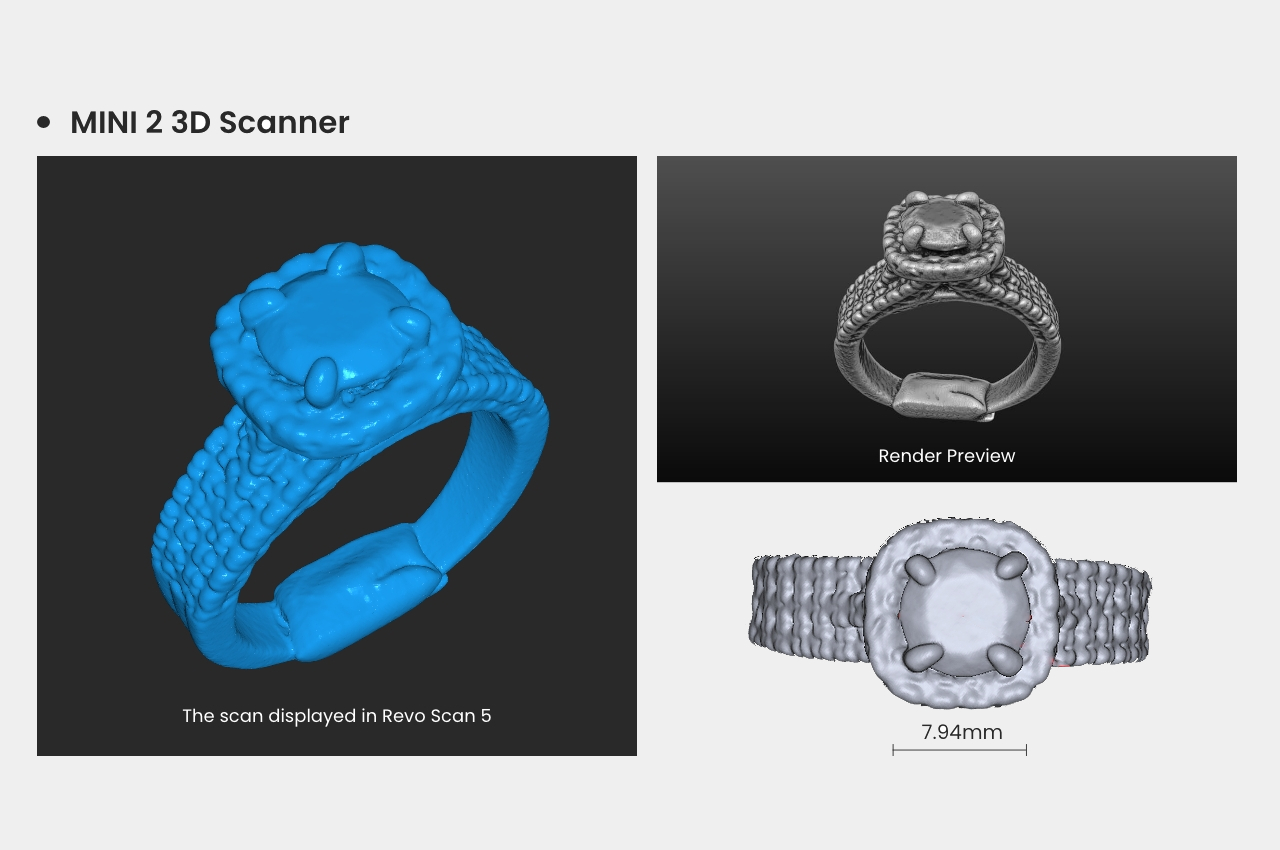
A ring scanned by Revopoint MINI 2. Credit: PUTV

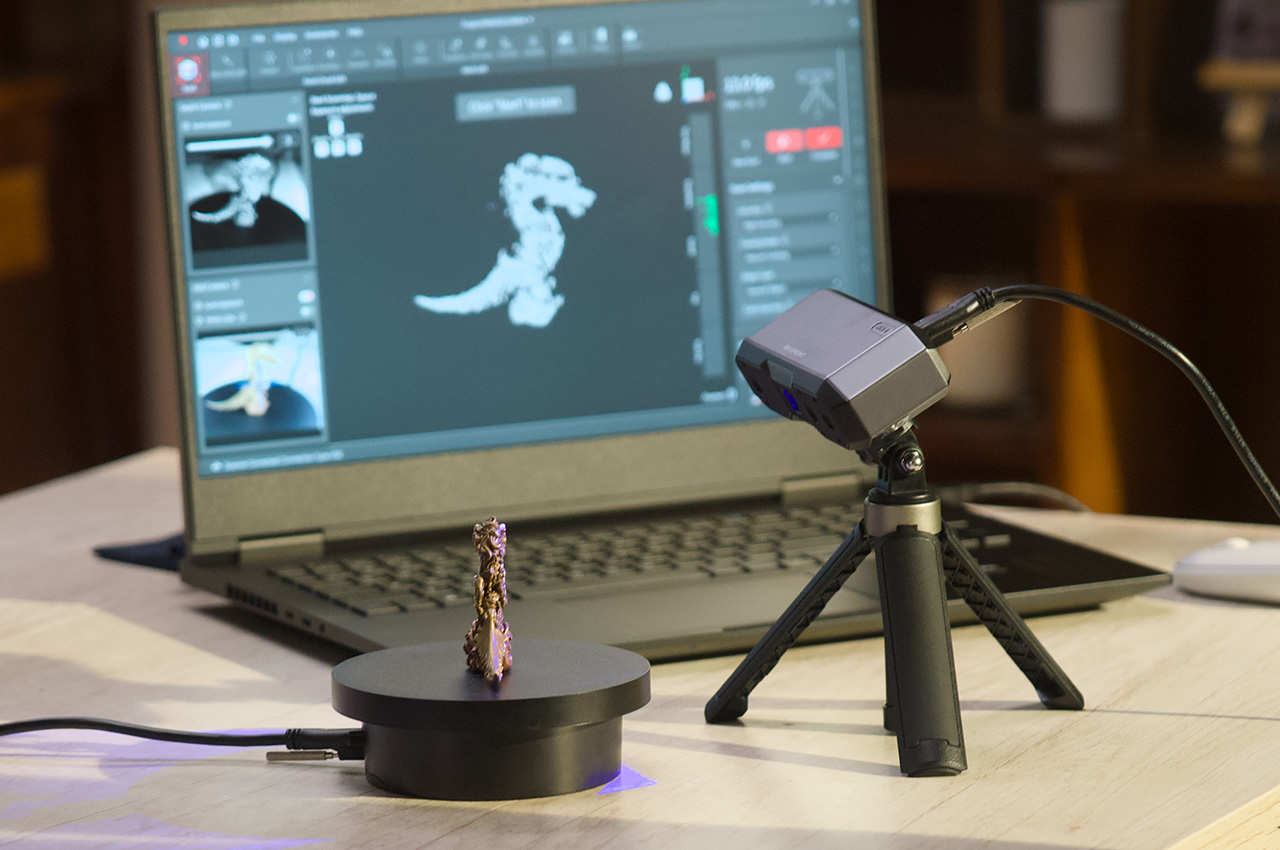
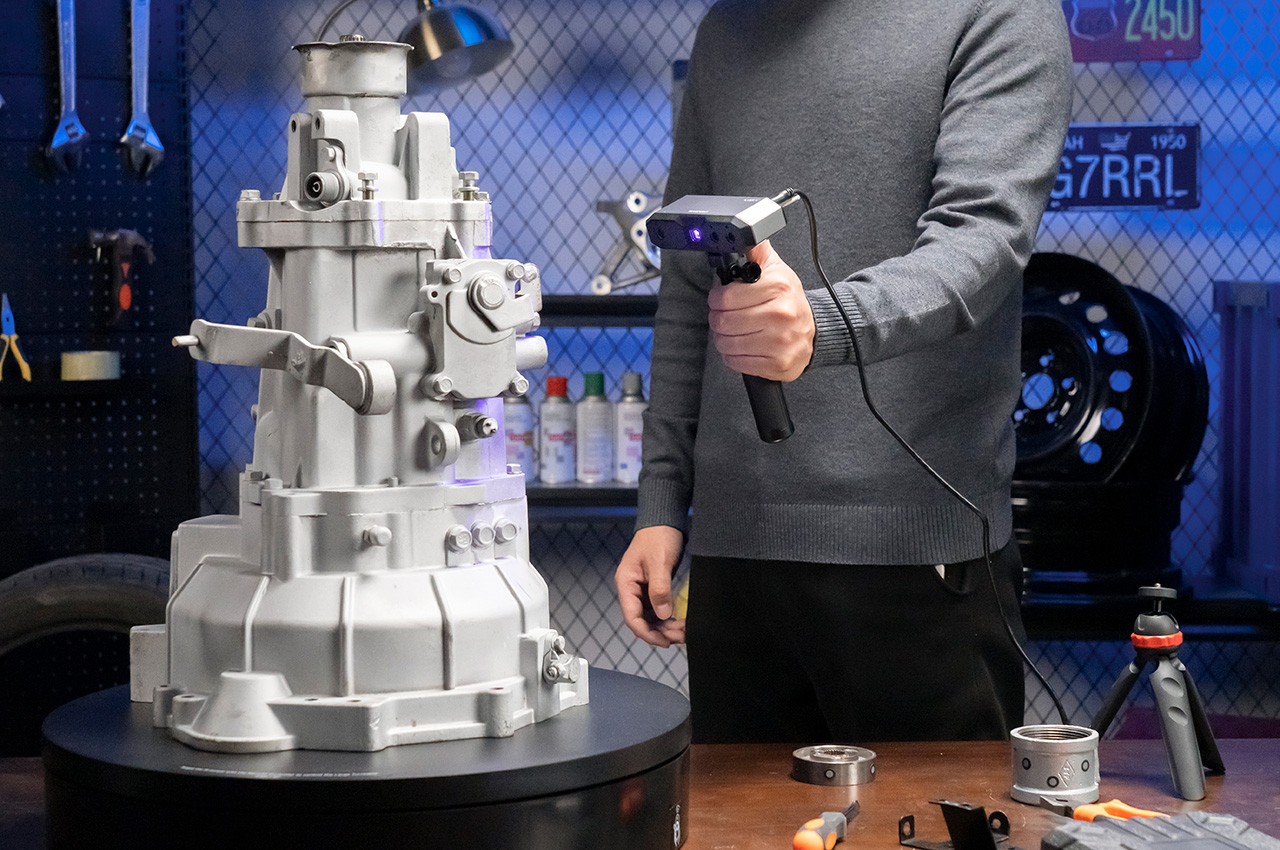
The MINI 2 isn’t just a leap in power, it is also easier to use as well. A 9-axis IMU (inertial measurement unit) makes sure you still get properly aligned frames, even with shaky hands or fast movement. Revopoint also added tactile buttons directly on the device to make it easier to start or pause the scan and adjust the depth camera’s exposure right then and there, saving you from having to fumble for the right buttons to tap on a phone or a computer. And to make sure the scanned data is also transmitted quickly, the new MINI 2 gets a new USB-C port and support for Wi-Fi 6 for wired and wireless connectivity options.

Up to 2 Megapixels Depth/RGB Cameras Resolution

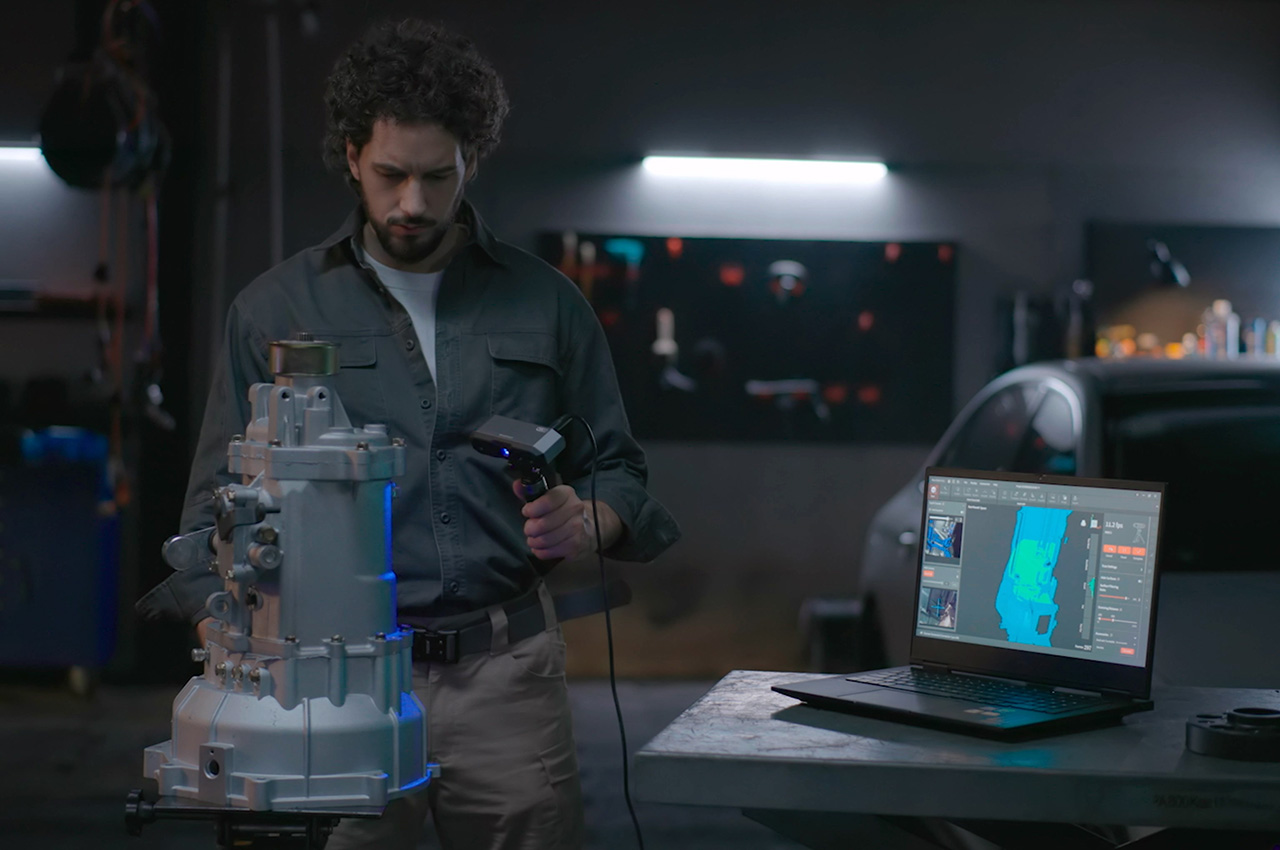
With more powerful features in a compact and portable package, the Revopoint MINI 2 creates a world of possibilities when scanning small objects quickly and accurately. Scan a part of a toy or a machine to 3D print a replacement when parts are no longer available. Scan pieces of art or historical artifacts to preserve mankind’s legacy for future generations. Or scan designs, prototypes, and other physical items to integrate these objects into your creative workflow. Whether you’re 3D printing gears for replacements, scanning body parts for non-invasive medical analysis, or designing for realistic virtual worlds, the Revopoint MINI 2 3D scanner delivers the precision and power you need to get the job done right at a shockingly cost-effective price point.

Click Here to Buy Now: $821 $912 ($91 off). Hurry, deal ends in 48-hours!

The post Revopoint MINI 2 3D scanner brings precision and innovation to your projects first appeared on Yanko Design.
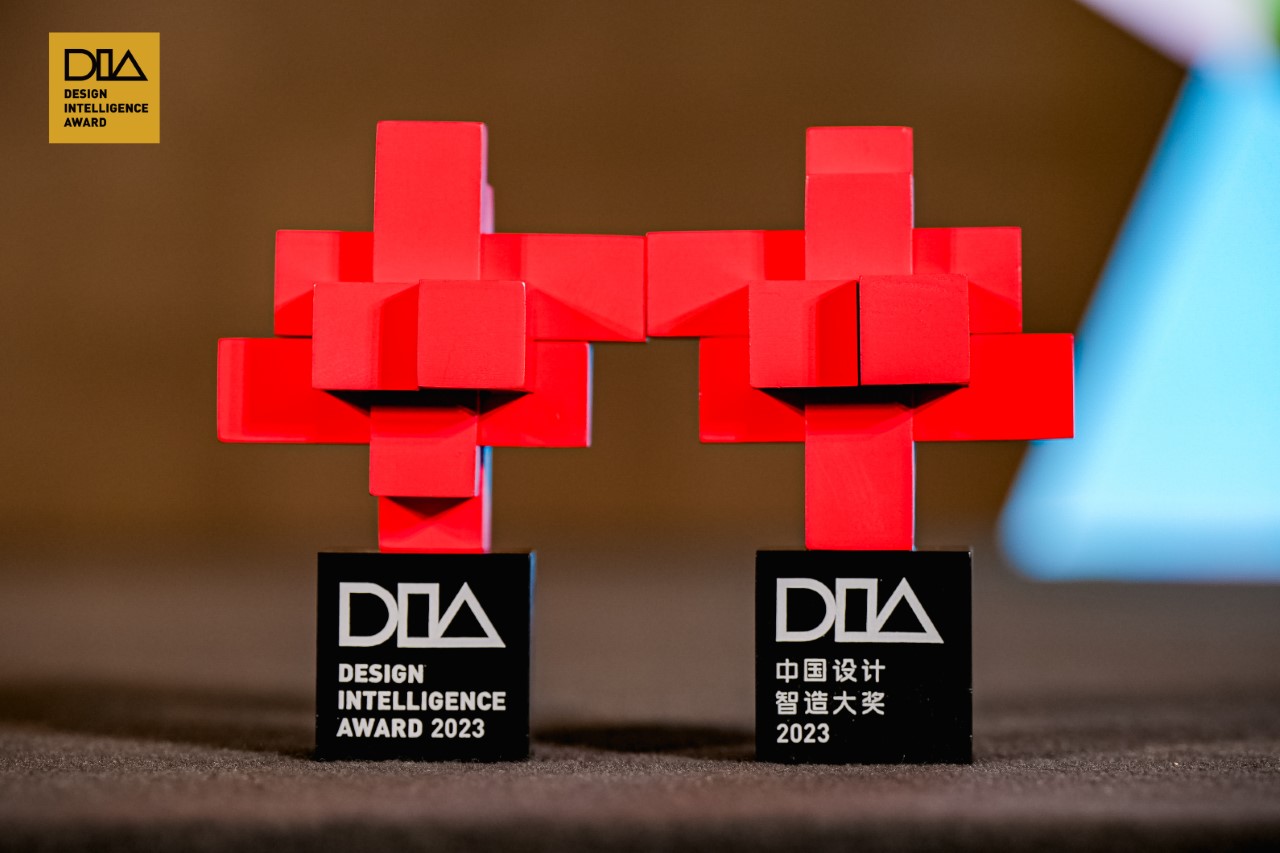
Robots, Prosthetics, EVs stand out as next BIG trends at the Design Intelligence Awards 2023

It seems almost perfect that with the year 2023 coming to a close, the Design Intelligence Award unveiled its winners for the year and the competition gone by. The Design Intelligence Award (DIA), conceived by the China Academy of Art in 2015, stands as a beacon of creativity and entrepreneurial zest in the design world. More than just a ceremony to honor outstanding design, the DIA aims to be a dynamic incubator, fostering groundbreaking products that aim to make a tangible difference in people’s lives. This initiative, open to all without an entry fee, unfolds through a meticulous three-phase evaluation, spotlighting designs that promise significant benefits to humanity. The DIA’s mission extends to boosting global trade and enhancing connections, thereby fortifying the Global East’s presence in the predominantly West-centric design industry. Recognizing that the true power of design lies in its widespread impact, the DIA has established a substantial prize fund of ¥5 million RMB (around $704,600 USD), dedicated to transforming exceptional ideas into extraordinary designs.

Bringing together an esteemed jury panel comprising experts from 37 countries, the DIA meticulously selects 30 groundbreaking projects that exemplify innovation and positive societal impact. Winners receive a share of the ¥5 million RMB prize fund, with the top project awarded ¥1 million RMB. These visionaries are also invited to the prestigious DIA Award Ceremony, offering unparalleled networking opportunities with global leaders from various sectors, including design, academia, and media. Additionally, winners have the chance to attend the D-WILL expert lectures, aimed at fostering innovation and connectivity. This exposure, coupled with a coordinated PR campaign, further elevates their work to a wider audience. With the 2023 edition of the award program having come to a close, a look at some of the top winners reveals a few interesting trends. The personal robots are resurging, as are prosthetics and EVs. Luxury designs continue to hold their clout, whereas self-driving technology seems to have gone on the decline. Here is a look at some of our top winners of the 2023 Design Intelligent Award.

Click here to view all the Winners of the 2023 Design Intelligence Award

2023 Design Intelligence Award – Winners and Honorable Mentions

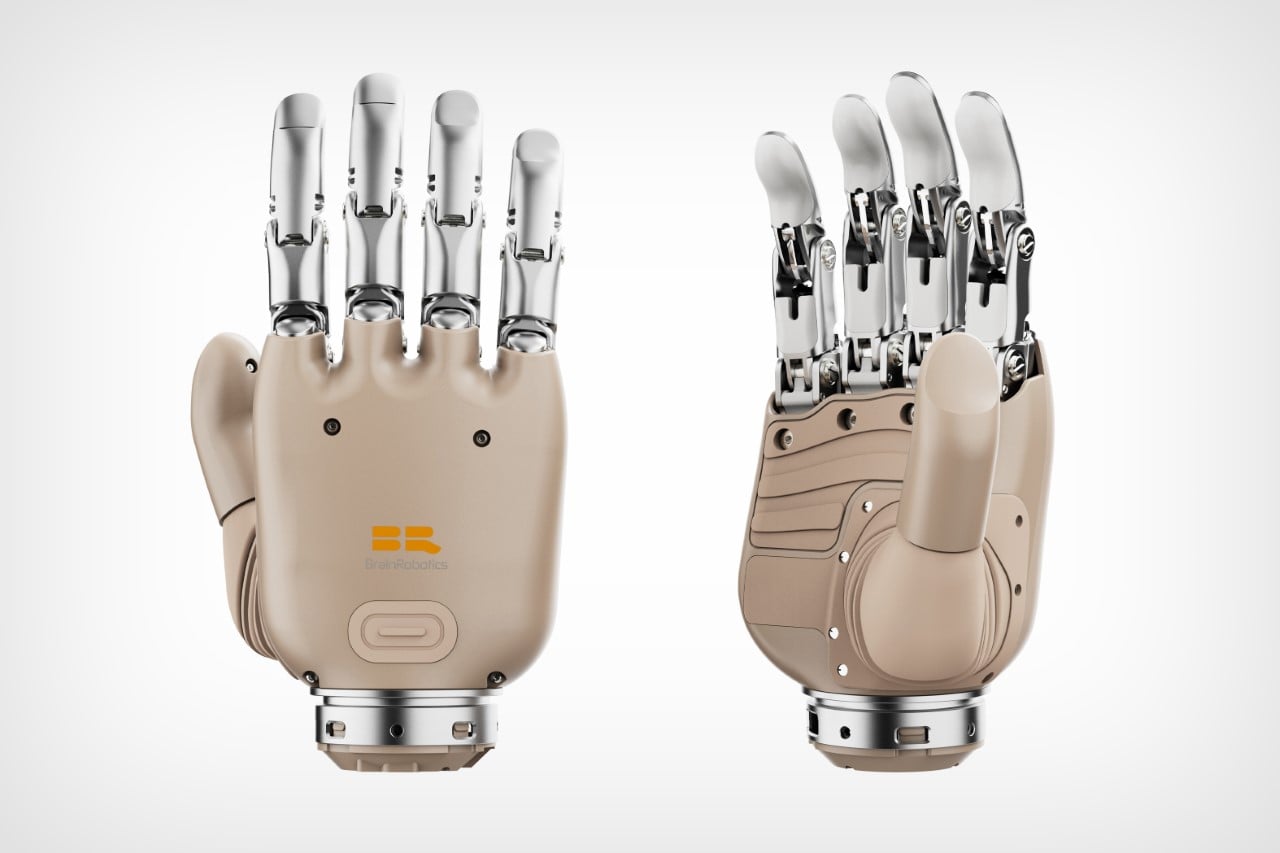
BrainRobotics Hini Hand by Zhejiang Qiangnao Technology Co., Ltd.

A Gold Award Winner at the DIA this year, the BrainRobotics Mini Hand, honored at the Design Intelligence Award, revolutionizes the field of prosthetics by weaving artificial intelligence into the product for a much more natural, intuitive experience for the wearer. This effectively eliminates the need for physical buttons or joysticks, relying instead on electromyography sensors to interpret muscle signals from the residual limb. These sensors are adept at translating these signals into precise and lifelike hand movements. This innovative design empowers amputees to perform a variety of actions effortlessly, closely mimicking the natural function of a human hand. The BrainRobotics Mini Hand represents not just a technological achievement but a leap forward in enhancing the daily lives of individuals with limb loss, providing a new level of independence and improved quality of life.

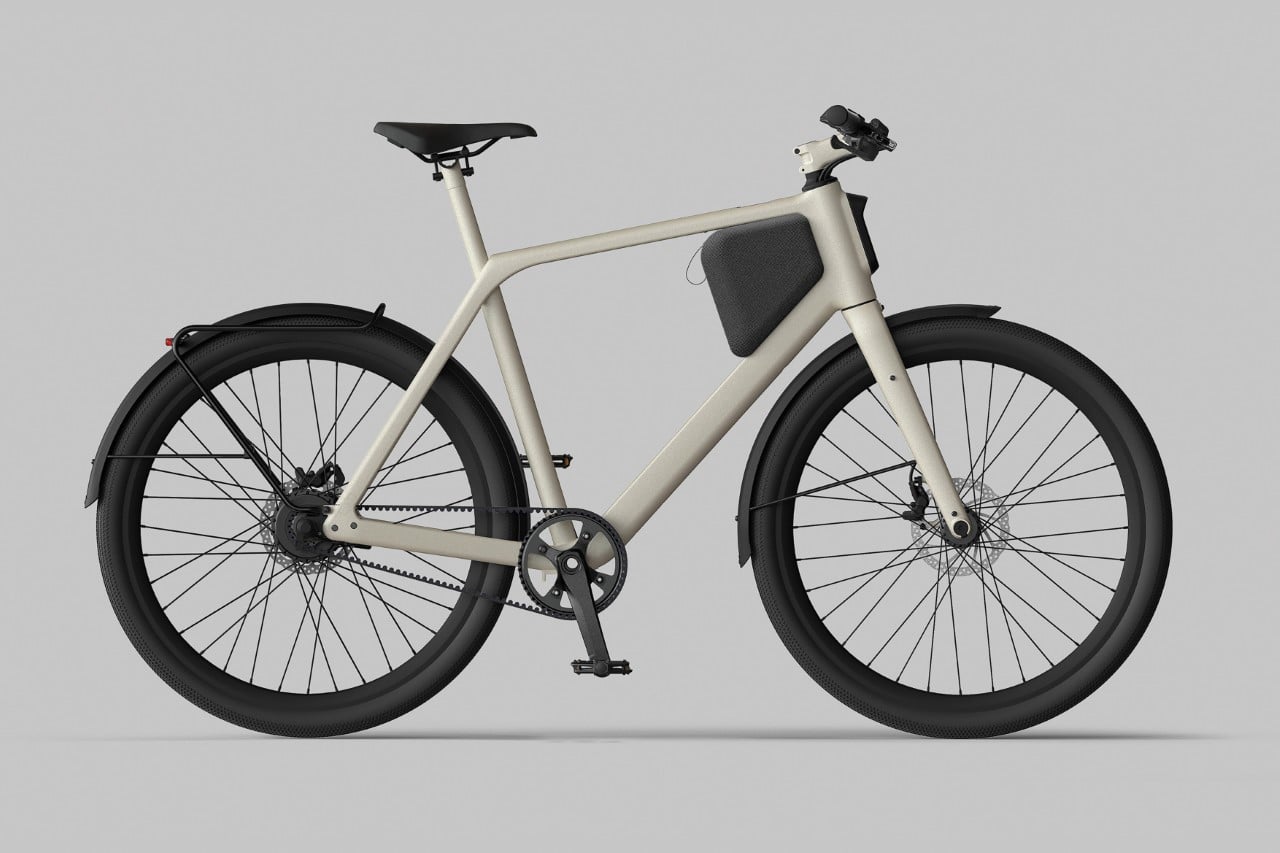
LEMMO One E-Bike by Springtime Design for Hypaths Gmbh

With its unique detachable battery that fits snugly within the bicycle’s frame, the LEMMO one distinctly separates its mechanical and technological elements in a way that gives its riders the best of both worlds. Crafted by Hypaths Gmbh and Springtime Design, this electric bike is a fusion of practicality and style, perfect for both the bustling streets and leisurely paths. The innovative design of the LEMMO One lies in its clever, detachable battery pack that you can remove, carry around, and charge independently. This unique feature allows it to effortlessly switch roles – from a robust e-bike for daily commutes to a sporty pedal bike for recreational rides. This adaptability isn’t just about versatility; it also simplifies upgrades and maintenance of electronic parts, significantly enhancing the bike’s longevity.

nubia Pad 3D by ZTE Corporation

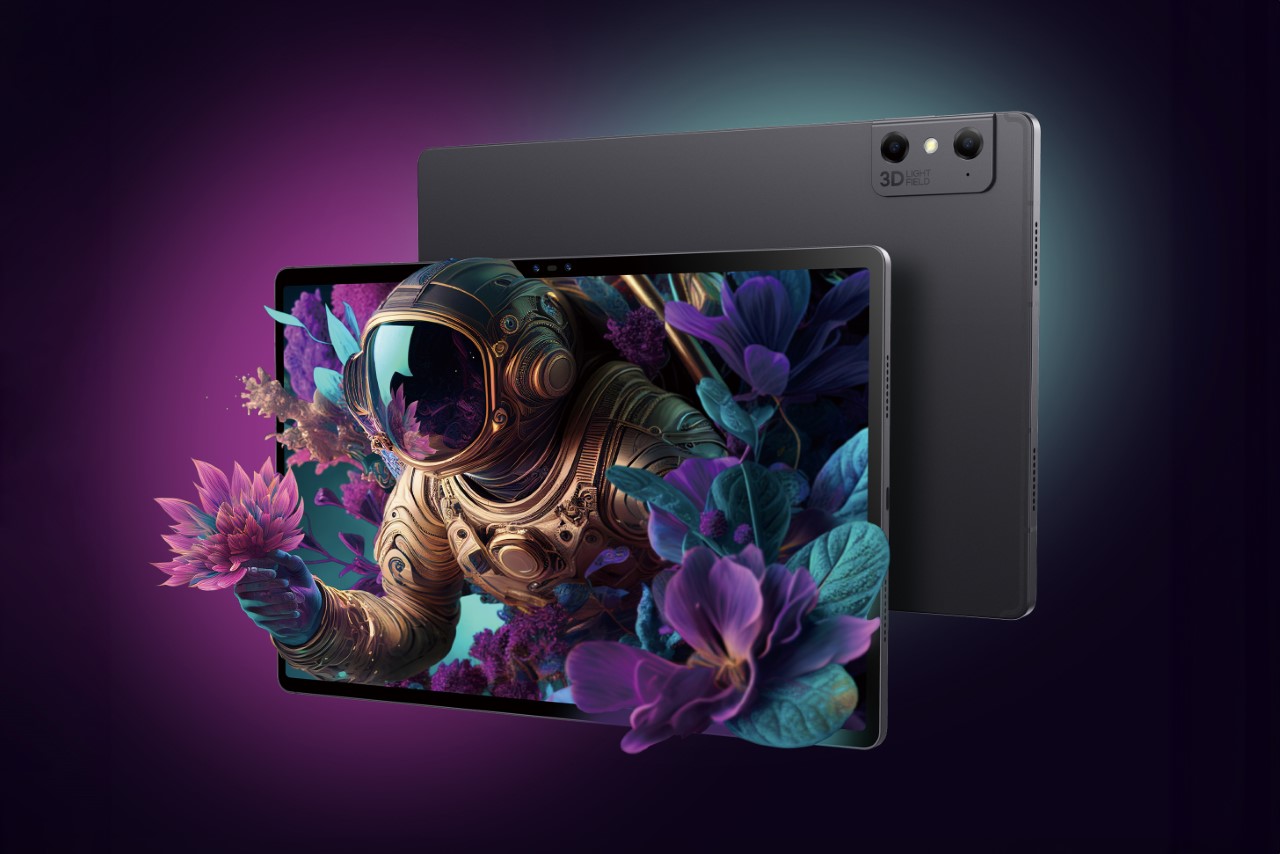
Crafted by ZTE Corporation, the nubia Pad 3D holds the distinction of being the world’s first AI-powered glasses-free 3D tablet, pushing the boundaries of digital interaction. This tablet boasts a sleek unibody design, combining an aerospace-grade anodized alloy body with a sandblasting oxidation process, resulting in a design that’s both elegant and durable. But it’s the inside that truly dazzles: the nubia Pad 3D is equipped with two sets of AI engines and super bionic cameras, both front and back. Its most remarkable feature is the unique 3D light field display technology. This allows for real-time conversion from 2D to 3D across various scenarios, without the need for special glasses. Enhanced by AI real-time face tracking and eight types of field of view adjustments, it offers an adaptable and immersive viewing experience.
Living Coffin by Loop Biotech

The Loop Living Cocoon is a biodegradable coffin that can turn a decomposing body into nutrients for plants. The coffin is made from mycelium, the root structure of mushrooms, and upcycled hemp fibers. It biodegrades in about 45 days. The coffin is designed to be a sustainable burial option that can improve the quality of the surrounding soil. The mycelium neutralizes toxins in the soil and body, and it also speeds up the decomposition process. The base of the coffin is even lined with a bed of moss, which, apart from providing a nice surface to rest the body on, also helps with the decomposition process.

yangwang U8 EV by BYD Company Limited

The yangwang U8, BYD Company Limited’s foray into luxury off-road vehicles, is turning heads with its blend of high performance and elegance. As the flagship model of the YANGWANG brand, the U8 is designed for those who crave both the thrill of the rugged trails and the comfort of a luxury car. The vehicle stands out for its fusion of top-tier safety features, performance capabilities, and comfort, although it has some rather impressive features that definitely are deserving of the award. The U8 boasts impressive off-road capabilities, including the ability to float on water for 30 minutes and execute a 360° tank turn. The award-winning EV sports a four-wheel drive, but also packs a 2.0-liter turbocharged four-cylinder engine (and a 75-liter fuel tank) that helps boost its range to a whopping 1,000 km (620 mi).

OBSBOT Tiny 2 Webcam by REMO TECH Co., Ltd.

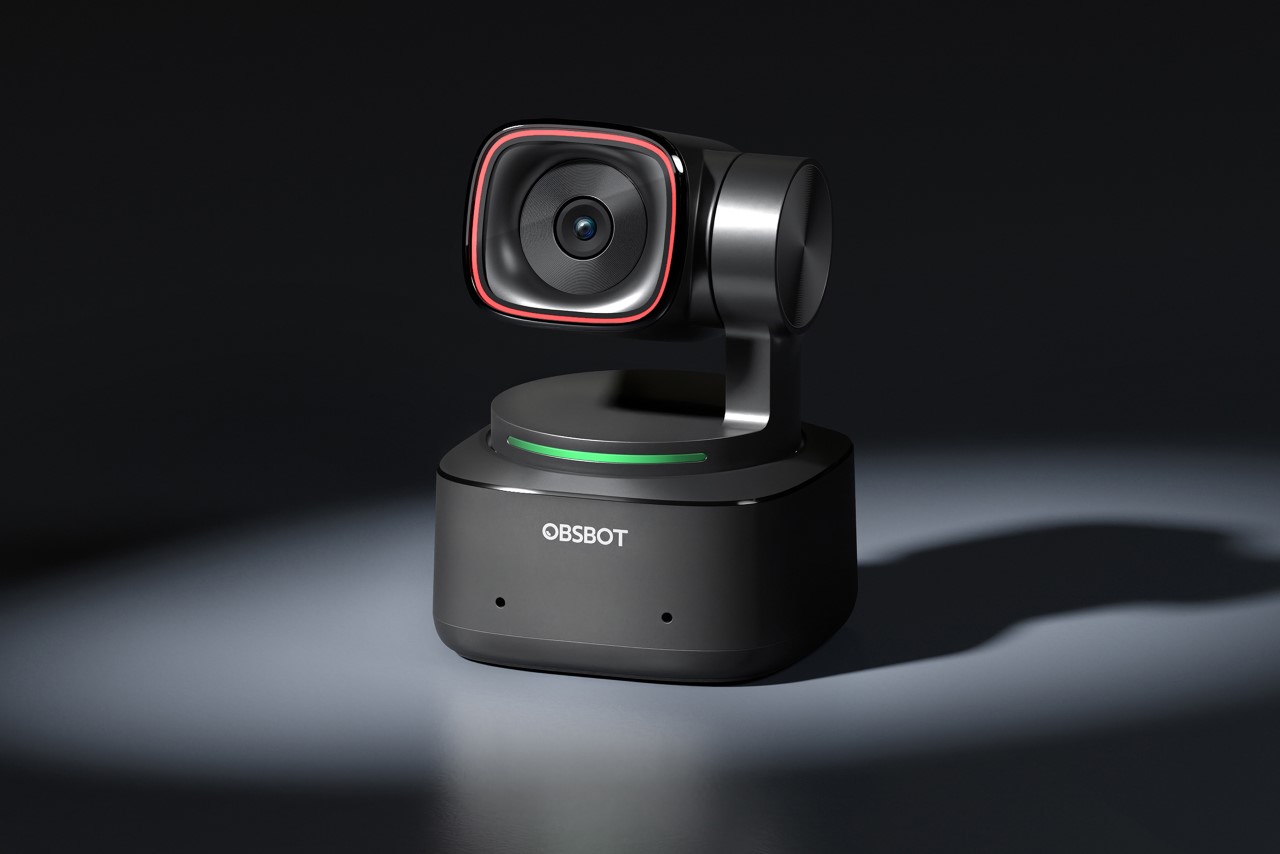
The OBSBOT Tiny 2 isn’t your average webcam. Aside from boasting 4K output, it also leverages AI abilities to elevate your video experience, whether for live streaming, video meetings, or online classes. The OBSBOT Tiny 2 packs an exceptional 1/1.5″ sensor, ensuring vivid video quality in any lighting condition, but what really sets it apart is the 3-axis gimbal it sits on, allowing it to detect subjects and follow them around intelligently and with a great deal of flexibility and range. Its compact and exquisite design makes it an attractive addition to any setup, blending functionality with aesthetics. But it’s the innovative AI technology that truly defines the OBSBOT Tiny 2. This feature not only enhances video quality but also introduces new possibilities in user interaction and engagement. Whether you’re an educator, a professional, or a content creator, the OBSBOT Tiny 2 is designed to adapt to a variety of usage scenarios, making it a versatile tool in the evolving landscape of digital communication.

Freeze into Fragments of Time Lipstick by Carslan

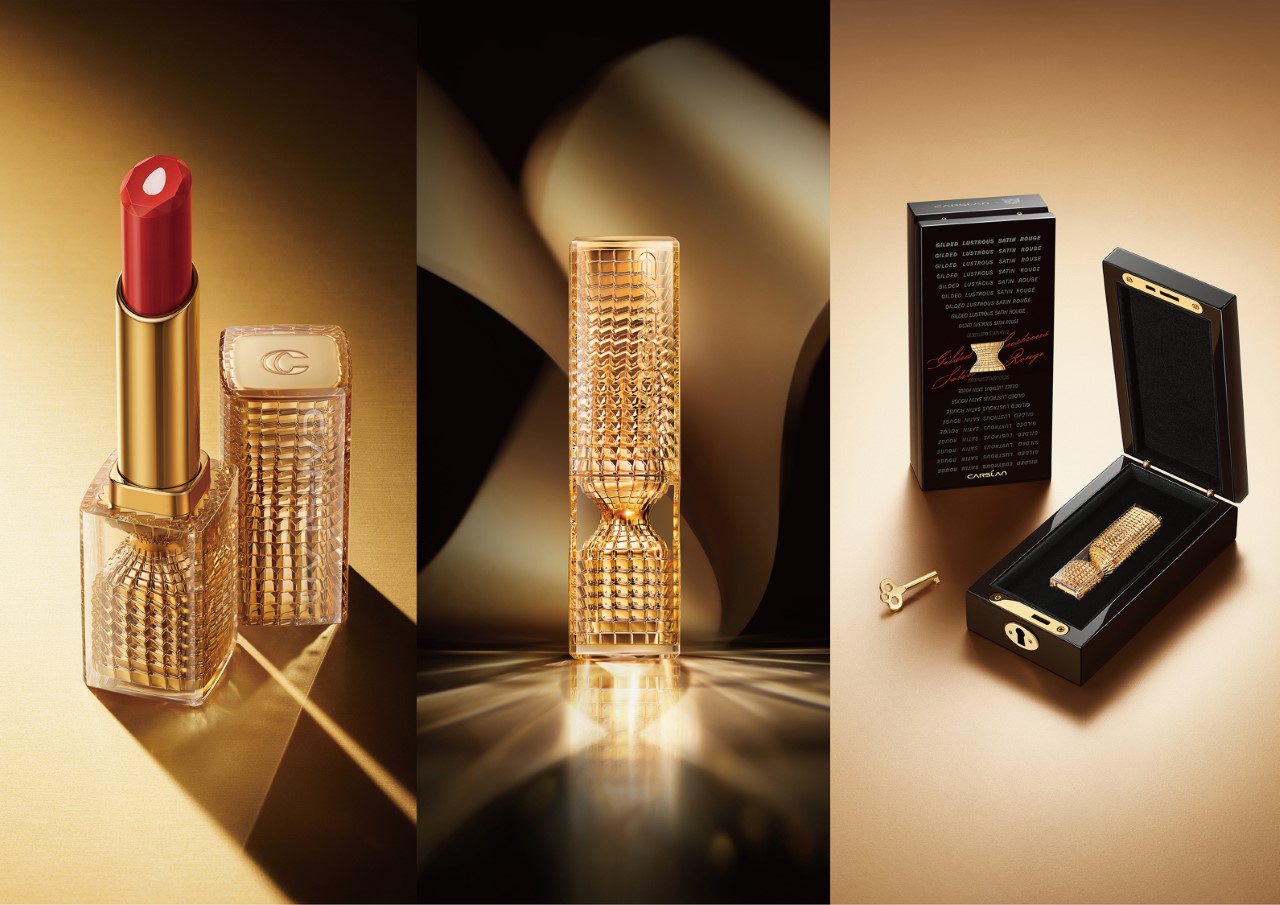
Inspired by the hourglass, this series of lipsticks looks less like cosmetics and more like jewelry. The inspiration for the lipstick’s body comes from the ‘Sands of Time’, with a gorgeously faceted body comprising multitudes of intersecting cubes, trapped in a transparent outer housing. The result is a lipstick that looks positively precious with its shimmering appeal and how every single corner of every square reflects light to make the tiny lip-tinter look like a gorgeous piece of glittering pyrite!

Seiko Metronome Watch by Seiko Watch Corporation

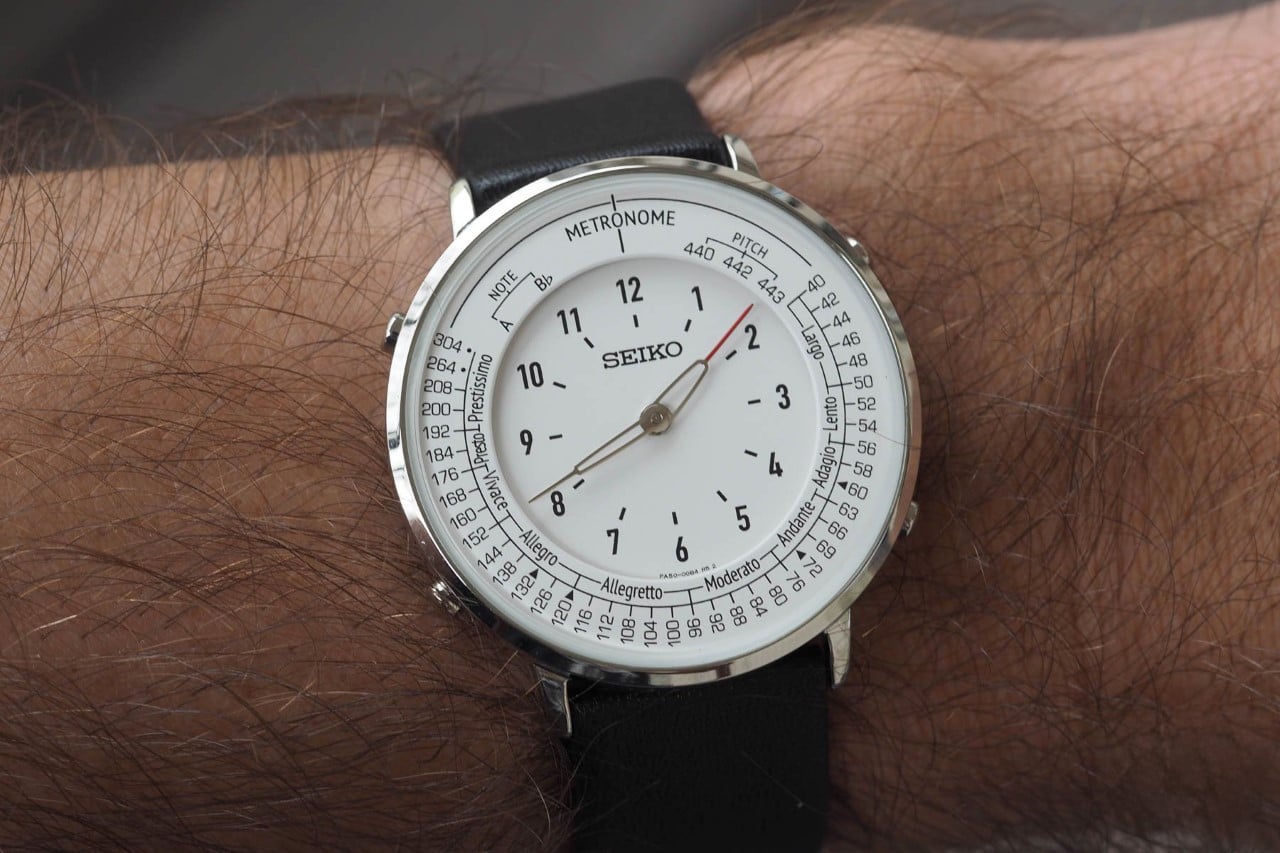
The Seiko Metronome Watch SMW series, developed by Seiko Watch Corporation, is an inventive blend of traditional timekeeping and musical functionality. Designed by Hitoshi Ando, with Kiyomi Tanemura on the team, this analog metronome watch is a unique offering for musicians. It combines the practicality of a watch with essential features for checking tempo and tone, making it a perfect accessory for musical performances. Arguably the most notable feature of the watch (as its name suggests) is its metronome mode. Here, the watch hands mimic the motion of a classic mechanical metronome, faithfully reproducing the pendulum rod’s natural movement. This functionality is achieved through a specialized module controlling the hands’ motion, creating a harmonious blend of precision and artistry. The watch’s design thoughtfully combines this feature with traditional timekeeping. The display sits within an inner circle, with musical functions distinctly marked along the outer edge plate at different heights. The hands are dual-purpose – their bulging base makes time reading easy, while the tipped end serves for performance indication. This compact, gender-neutral design makes the Seiko Metronome Watch appealing not just to professional musicians but also to students and casual wearers.

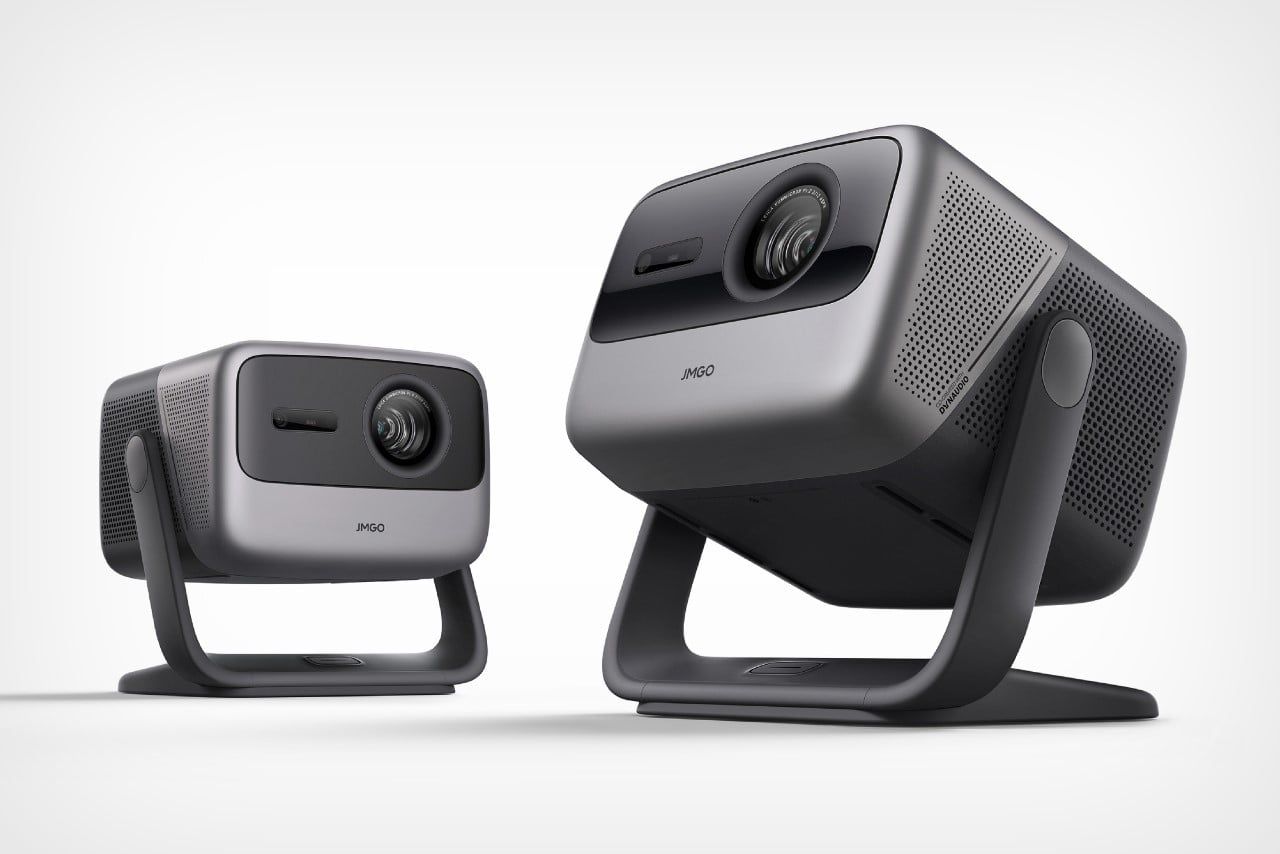
JMGO N1 Ultra by Shenzhen Holatak Co., Ltd.

The JMGO N1 Ultra reimagines the traditional projector, presenting a leap forward in home entertainment technology. This innovative device isn’t just about projecting images; it’s an embodiment of how technology can harmoniously blend into our living spaces. Central to the N1 Ultra’s design is its emphasis on user experience. It breaks free from the constraints of typical projectors, offering a seamless integration of devices, content, and environments. The projector features a fashionable, compact, and minimalist design, which allows it to effortlessly integrate into various home settings. One of its key innovations is an integrated gimbal combined with environmental sensing and real-time calibration. This feature enables the N1 Ultra to adapt to different spaces and scenes, offering unprecedented flexibility and environmental adaptability. Whether it’s for an immersive movie night, a vibrant gaming session, or a dynamic home workout, this projector adjusts to suit your needs.

SenseRobot Go Robot by Sensetime

The SenseRobot artfully blends the age-old game of Go with the cutting-edge realm of artificial intelligence. This device represents a significant leap in bringing a traditional board game into the digital world with flair and innovation. Featuring advanced AI vision and robotic arms, the SenseRobot offers a tangible Go-playing experience that caters to various skill levels. It’s equipped with multiple game modes and power levels, appealing to everyone from novices to Go masters. Notably, it even boasts a difficulty level that surpasses human skills, presenting an unprecedented challenge for top-tier players. A standout feature is its compatibility with popular online Go platforms, enabling players to participate in remote matches. This not only keeps the essence of the game alive but also offers a healthier alternative to the prolonged screen time of electronic devices.

Click here to view all the Winners of the 2023 Design Intelligence Award

The post Robots, Prosthetics, EVs stand out as next BIG trends at the Design Intelligence Awards 2023 first appeared on Yanko Design.